1. Clear-Cast Photo Block
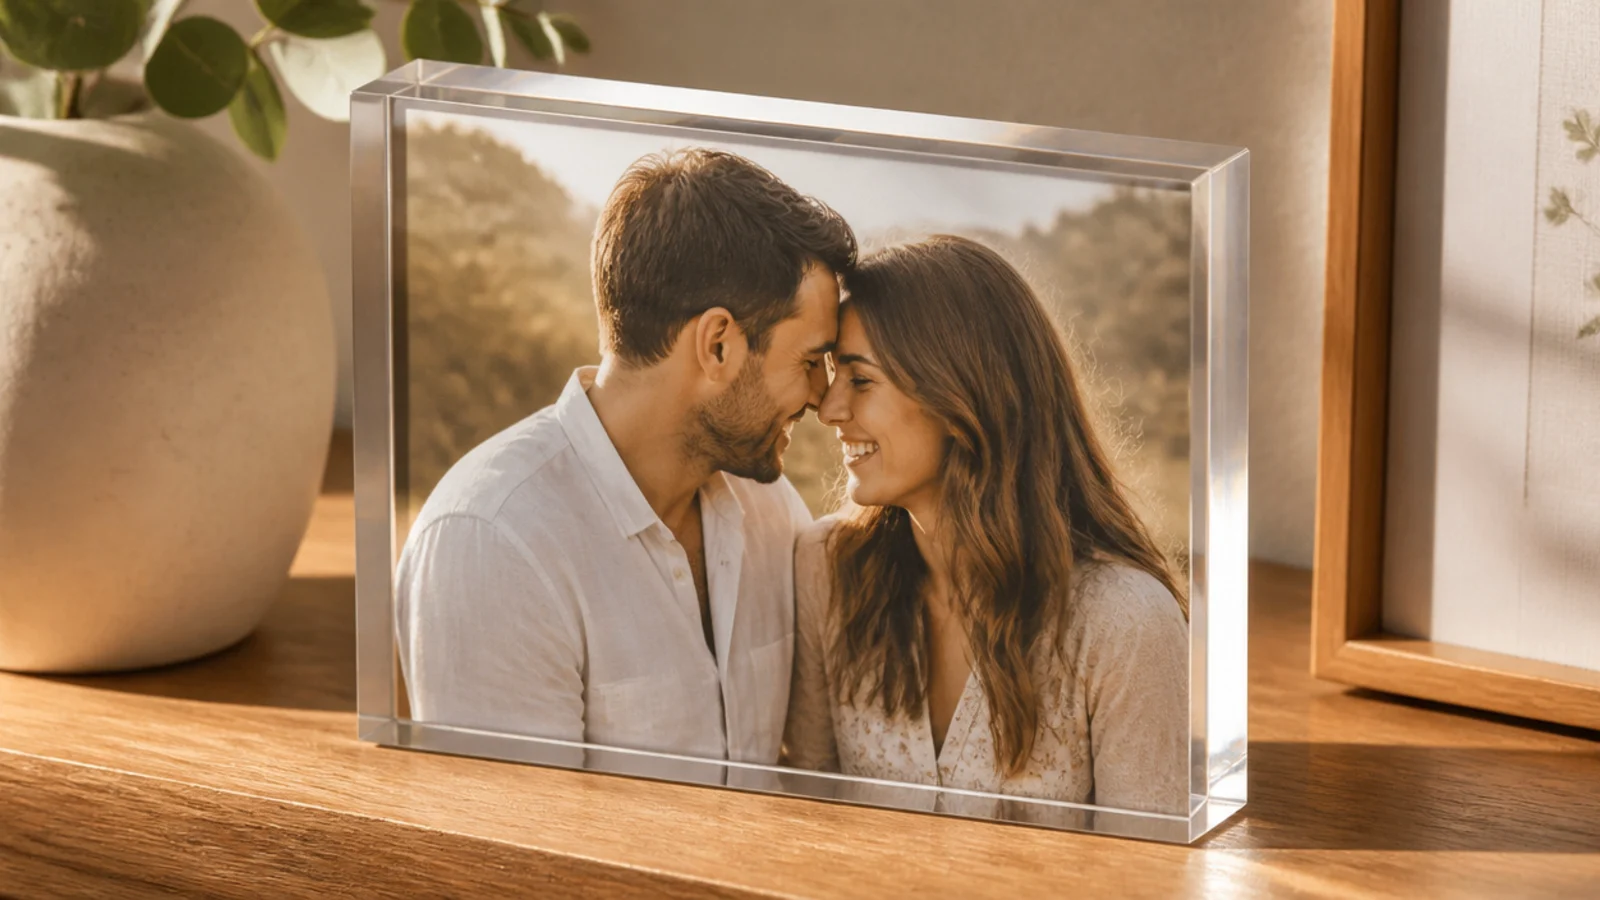
Seal the photo with two coats of spray sealer. Pour a thin base layer of 1:1 epoxy into a rectangular silicone mold and let it gel slightly. Set the photo face-up, then pour clear resin to cover, torching out bubbles. Cure fully on a level surface for 48 to 72 hours, then demold. Sand and polish any dull edges.
A photo cast inside a clear resin block is the best first project — simple, forgiving, and impressive. It suits beginners learning to measure and cure. A single sealed photo in a crystal-clear block teaches every core skill with nothing fancy to go wrong.
Skip thisDon’t pour the whole block in one deep layer; thick single pours overheat, cloud, and can crack as they cure.
Editor's notePour a shallow base layer first and let it become tacky before setting the photo, so the photo doesn’t float or tilt.
2. Pressed-Flower Resin Frame

Real pressed flowers suspended in a clear resin border make a frame that looks like fine craft. It suits keepsake and wedding photos. Flowers frozen in glossy resin around the picture read expensive and deeply personal.
Fully dry and press the flowers first. Use a frame mold with a photo opening. Pour a thin resin base, arrange flowers face-down in the border, and let it set slightly to hold them. Pour a covering layer, torching bubbles. Cure fully. Mount the sealed photo behind the resin opening once demolded.
Place flowers face-down against the mold bottom so their best side shows through the glossy front face.
Don’t use fresh or damp flowers; trapped moisture clouds the resin and the blooms rot and brown inside it.
3. Gold-Leaf Border Frame

Use a frame mold. Pour a thin clear base layer and let it gel. Sprinkle imitation gold-leaf flakes into the border area, then pour a covering clear layer to lock them in, torching bubbles. Cure fully. Keep the flakes concentrated at the edges and sparse near the photo opening for a graded, intentional look.
Gold-leaf flakes suspended in the resin border give a luxe, shimmering edge. It suits modern, glam decor. Irregular gold flakes catching light through clear resin look high-end without any painting skill.
Skip thisDon’t overload the border with gold; a few well-spaced flakes look luxe, a solid gold border looks cheap and busy.
Editor's noteAdd the gold flakes onto a tacky base layer so they stay suspended rather than all sinking to the bottom.
4. Ocean-Wave Resin Frame
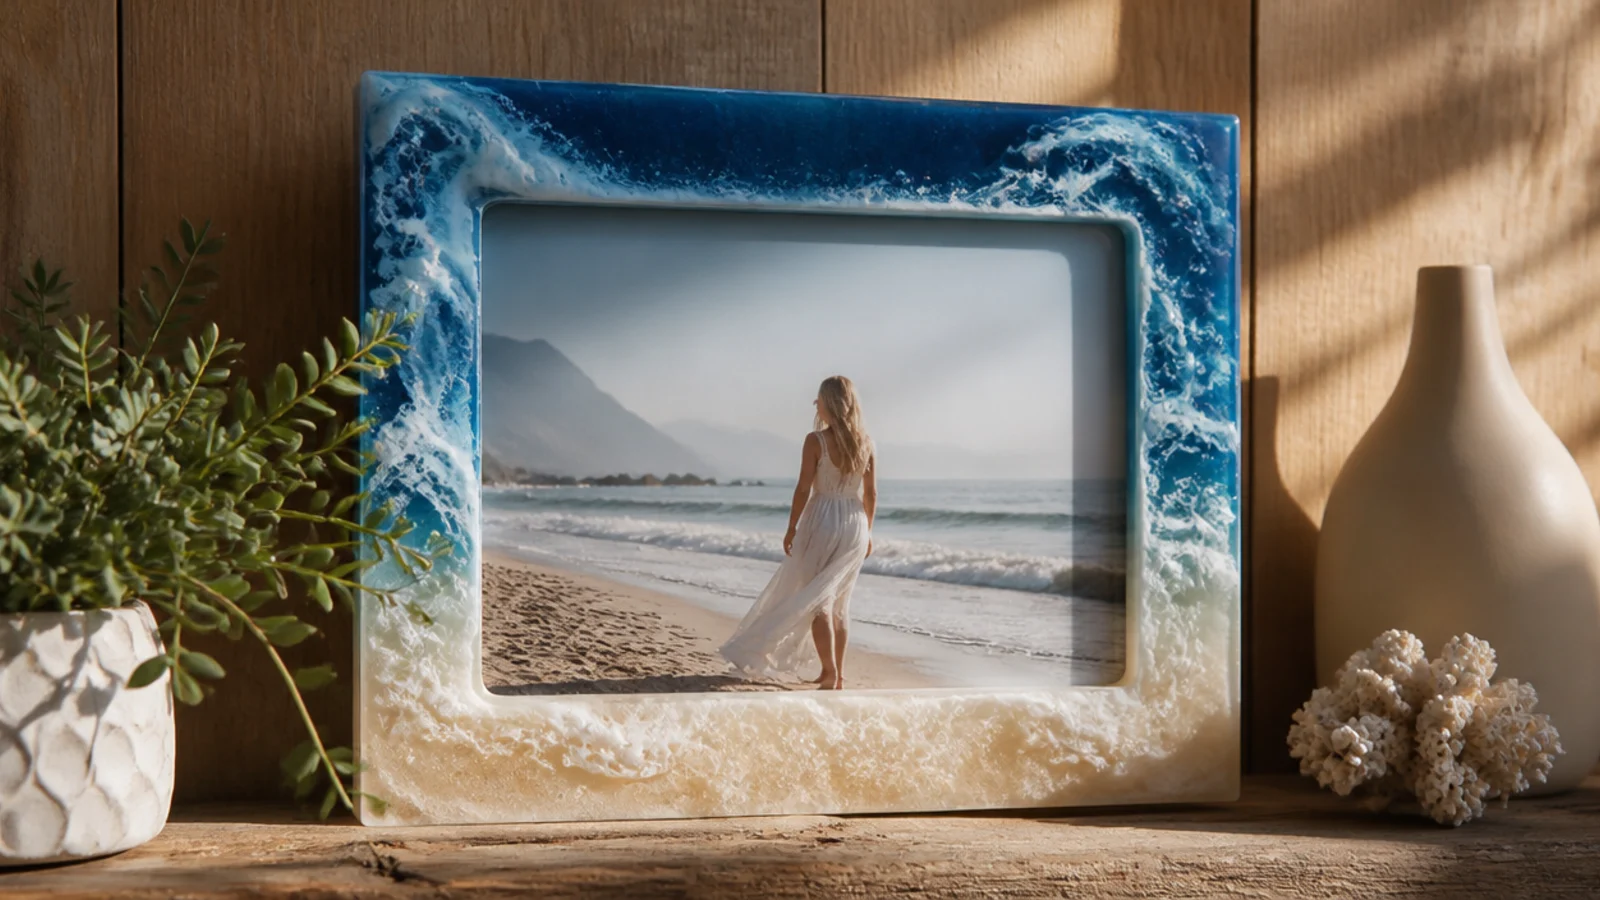
Tint small batches of resin — clear blue, teal, and white. Pour them into the border of a frame mold in bands, then drag a stick or use a heat gun to feather the white into wispy foam lines. Work quickly before it sets. Cure fully, then mount the sealed beach photo behind the opening.
A blue-and-white ocean effect in the border makes a stunning frame for beach photos. It suits coastal decor. The tinted resin waves with white foam edges look like real surf frozen around the picture.
Skip thisDon’t overmix the blue and white together; they should stay distinct as waves and foam, not blend into flat gray.
Editor's noteMove the heat gun in short bursts along the white line to create realistic lacy foam — too much heat blows it into blobs.
5. Tinted Color-Block Frame
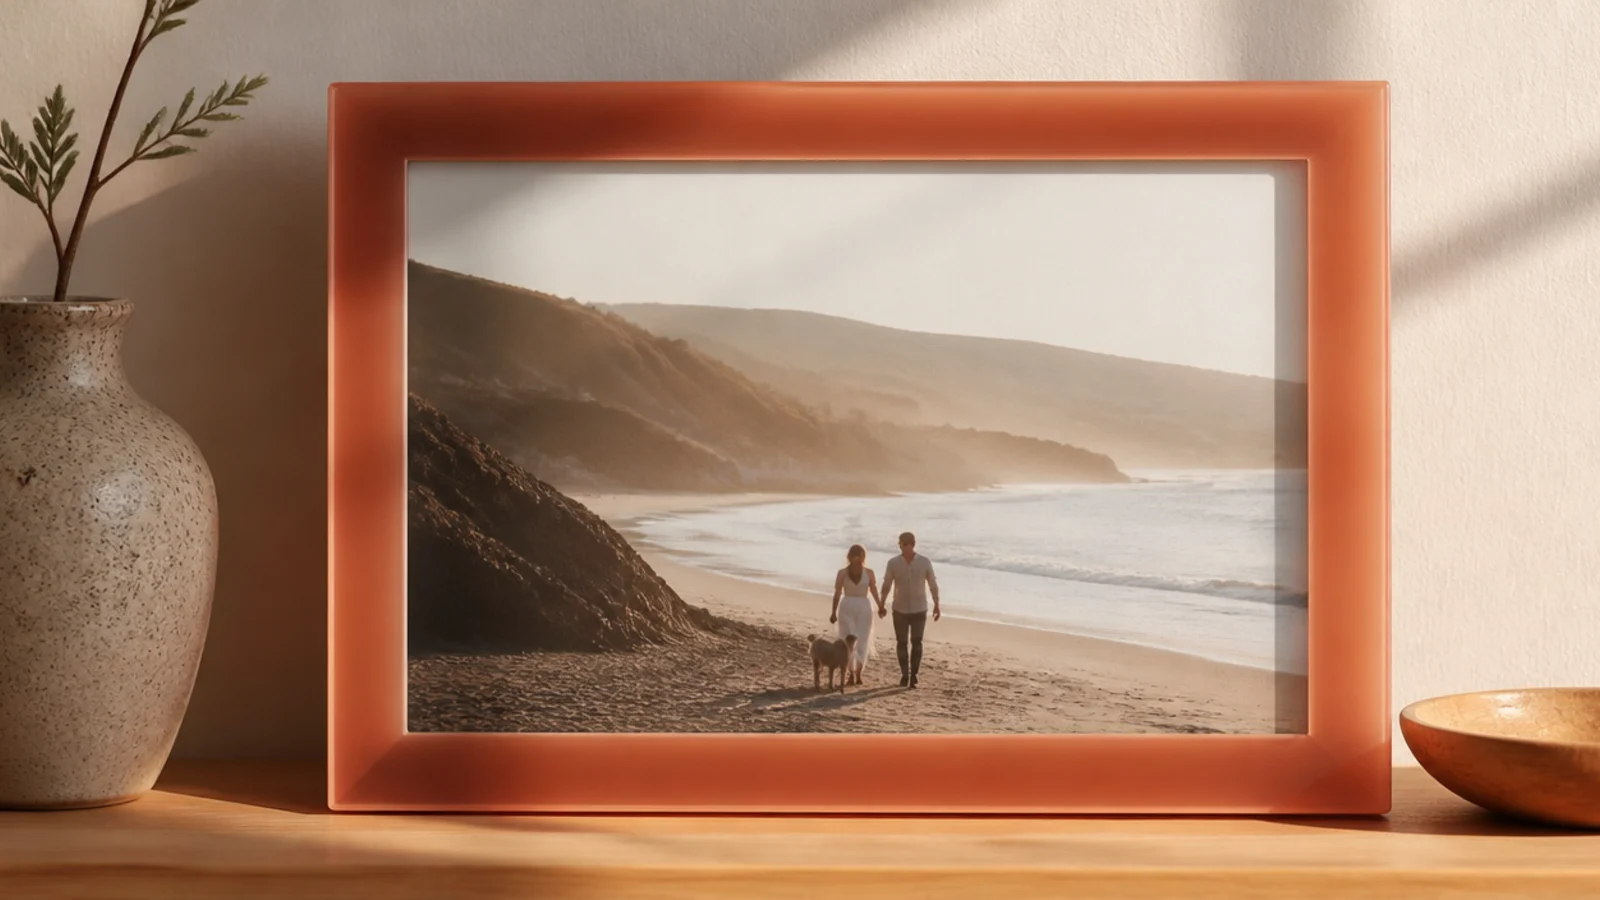
A solid color-tinted border gives a clean, modern resin frame in any shade you want. It suits contemporary rooms. One translucent color — terracotta, sage, amber — poured evenly looks like a designer acrylic frame.
Add a few drops of resin tint or mica to your mixed epoxy and stir until even. Pour it into the border of a frame mold in one smooth layer, torching bubbles. Keep the tint light enough to stay translucent. Cure fully, demold, and mount the sealed photo behind the opening. Polish the faces for shine.
Add tint one drop at a time — a translucent, glowing color reads far more expensive than an opaque, over-pigmented one.
Don’t add too much pigment; heavy tint goes opaque and flat, losing the glassy translucent glow that makes resin special.
6. Geode Agate Frame
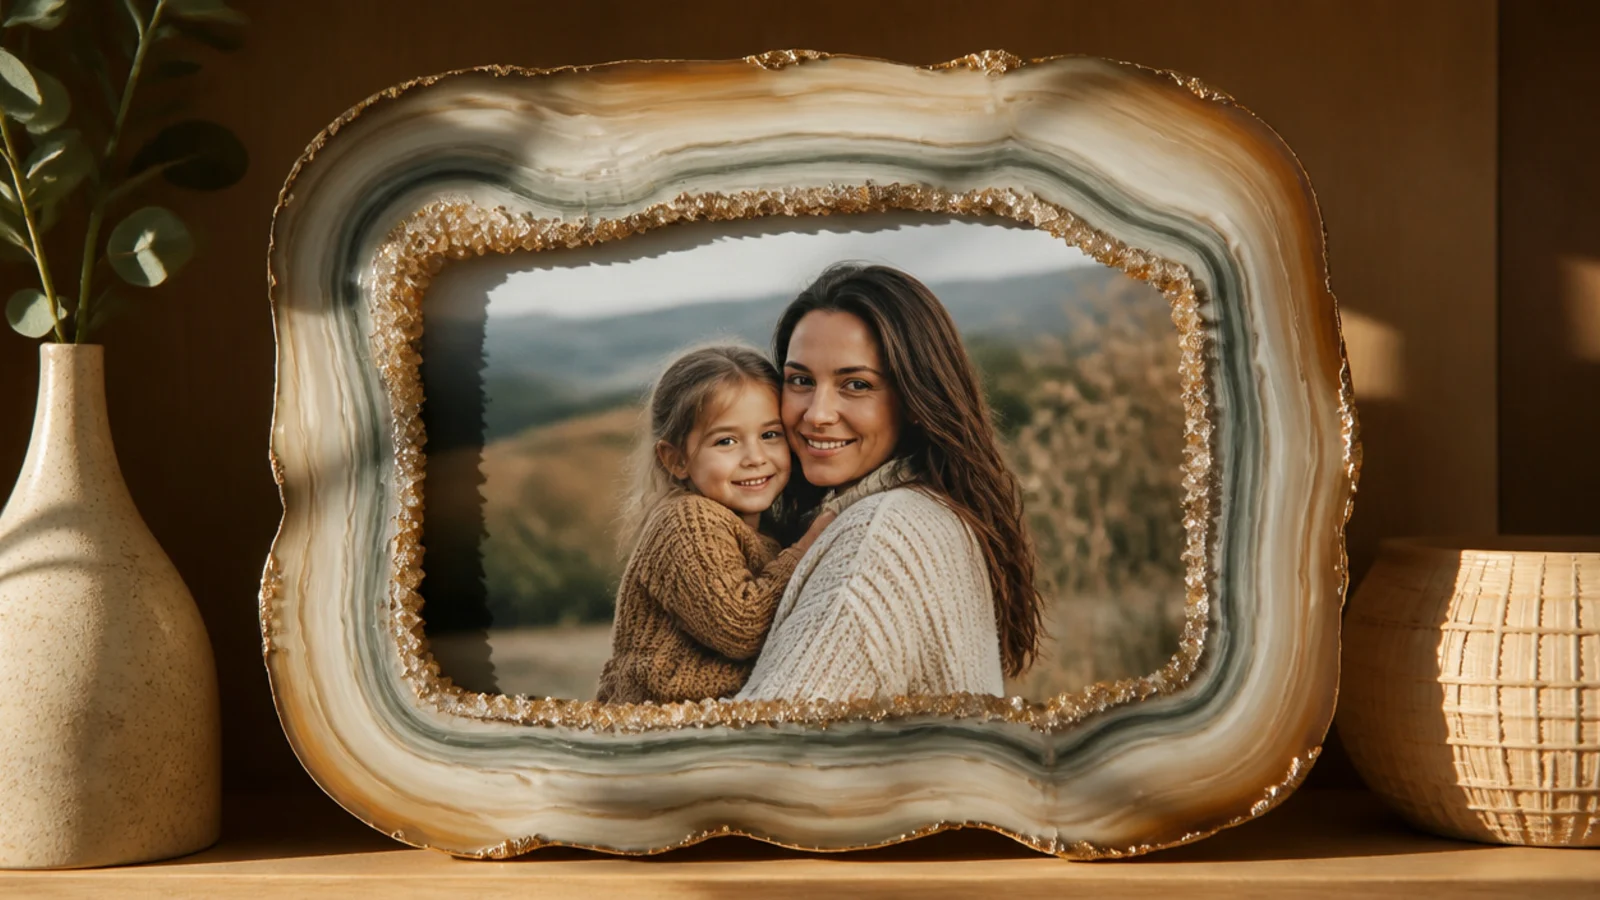
Mix several tints from a base color, light to dark. Pour them into the border in concentric bands following the frame edge, nudging with a stick to make wavy agate rings. Line the innermost ring with fine glitter or crushed glass before a final clear pour. Cure fully and mount the sealed photo.
A resin border styled like a sliced agate makes a dramatic, gem-like frame. It suits statement decor. Concentric tinted rings with a sparkly inner edge mimic a real geode around the photo.
Skip thisDon’t make the rings too uniform; real agate rings are irregular and wavy, so slight imperfection looks more authentic.
Editor's noteWork from the outer edge inward with your darkest tint outside and lightest inside to mimic a real agate slice.
7. Standing Resin Photo Coaster

Seal a circular-cropped photo. Pour a thin base into a round silicone mold, set the photo face-up when tacky, and pour a clear covering layer, torching bubbles. Cure fully and demold. Add a small wooden or acrylic stand, or cast a slot into the base, so the disc stands upright as a frame.
A round resin disc with a photo inside, set on a little stand, is a charming desk frame. It suits small gifts and desks. The glossy circular puck with a photo sealed in looks polished and modern on any surface.
Skip thisDon’t skip sealing the round photo edges; exposed paper edges wick resin and cloud the rim of the disc.
Editor's noteCut the photo slightly smaller than the mold so resin wraps the edges and fully seals the print inside.
8. Glitter Galaxy Frame

A deep, glittery galaxy border makes a magical frame, especially for kids' rooms. It suits playful spaces. Navy and purple tints with fine glitter stars suspended in the resin look like a night sky around the picture.
Tint resin deep navy and purple in separate cups and add fine cosmetic-grade glitter. Pour into the border in swirls, then add tiny dots of white and silver glitter as stars. Feather gently with a stick. Torch bubbles and cure fully. Mount the sealed photo behind the opening once demolded.
Suspend glitter by adding it to partly gelled resin so the stars stay scattered through the depth instead of sinking.
Don’t use large chunky glitter; fine cosmetic glitter stays suspended and reads as stars, while big flakes just sink.
9. Wood-and-Resin River Frame
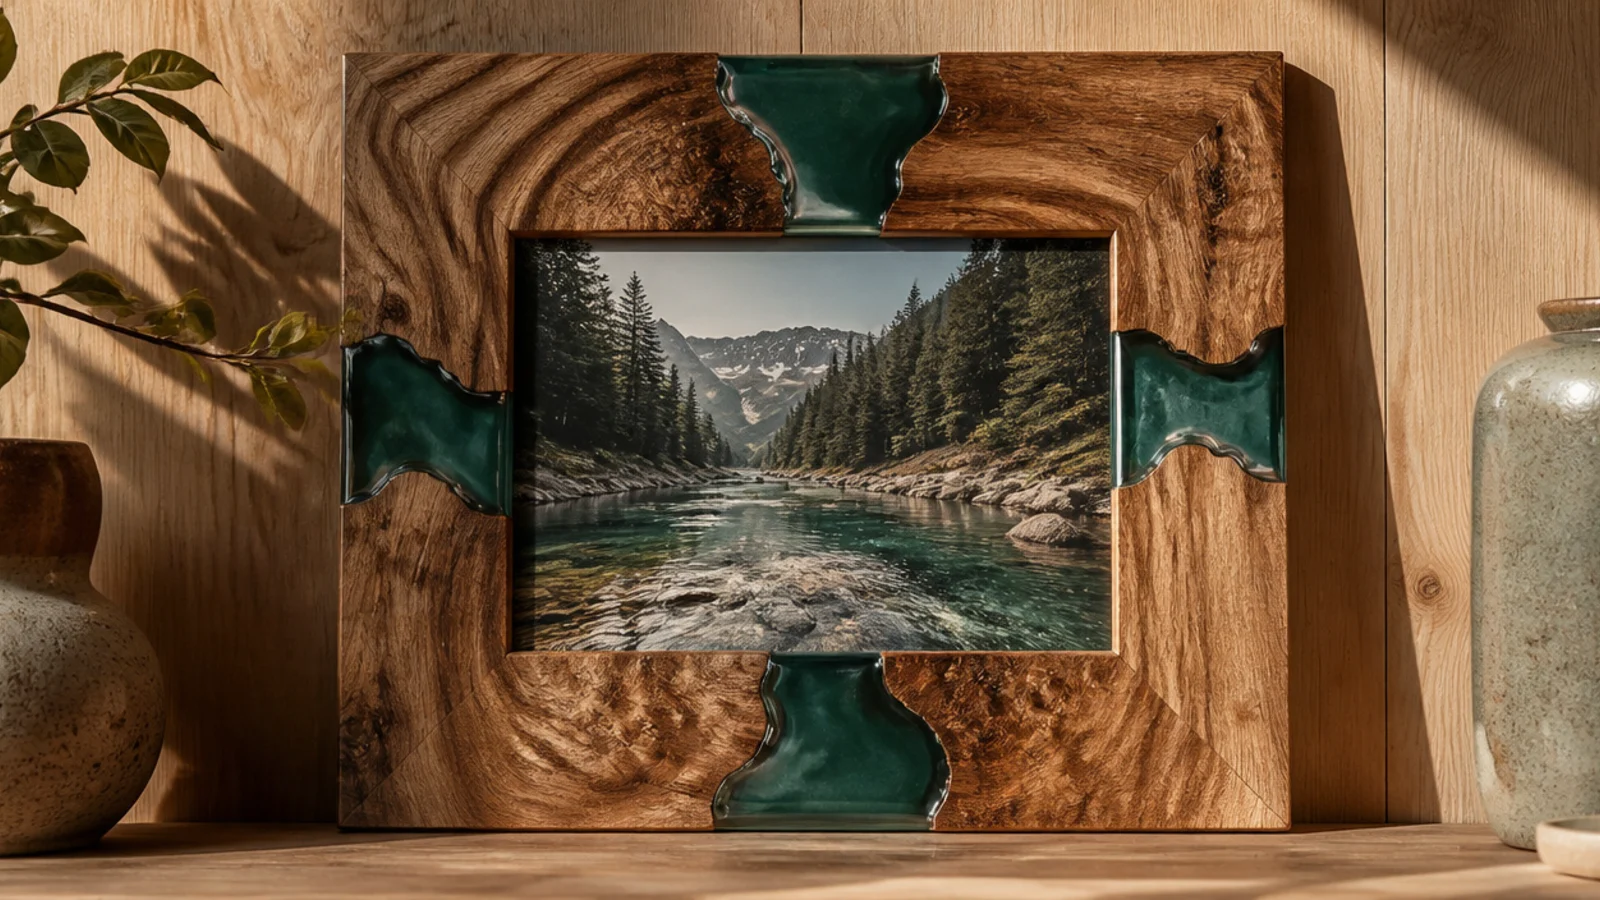
Take two wood strips per side with a gap between them, set in a mold or dammed with tape. Pour tinted resin into the gap to form a river, letting it seep to the wood edge. Torch bubbles and cure. Sand the whole face flush and seal. Assemble the four sides into a frame and mount the photo.
A wood frame with a resin river running through it echoes trendy river tables in miniature. It suits natural, modern decor. The contrast of raw wood grain and a glossy teal resin channel looks like fine woodworking.
Skip thisDon’t overfill the river channel; resin needs room and a dam, or it floods over the wood and ruins the clean line.
Editor's noteSeal the raw wood edges with a thin brush of clear resin first so the pour doesn’t soak in and leave bubbles.
10. Silicone Mold Shaped Frame

Choose a frame-shaped silicone mold with a photo recess. Pour 1:1 resin to the fill line, torching bubbles, and cure fully before demolding gently. If the mold has no recess, cast solid and mount the sealed photo to the back or in a cut opening. Sand and polish the demolded edges for shine.
Casting the whole frame in a shaped silicone mold — a heart, arch, or hexagon — gives a clean designer shape. It suits gifts and themed decor. A crisply molded shape in clear resin looks professionally manufactured.
Skip thisDon’t demold before full cure; a soft cast distorts and dents, losing the crisp shape the mold gave it.
Editor's noteFlex the silicone mold gently from all sides to release the cured piece cleanly instead of pulling on the resin.
11. Layered Depth Frame
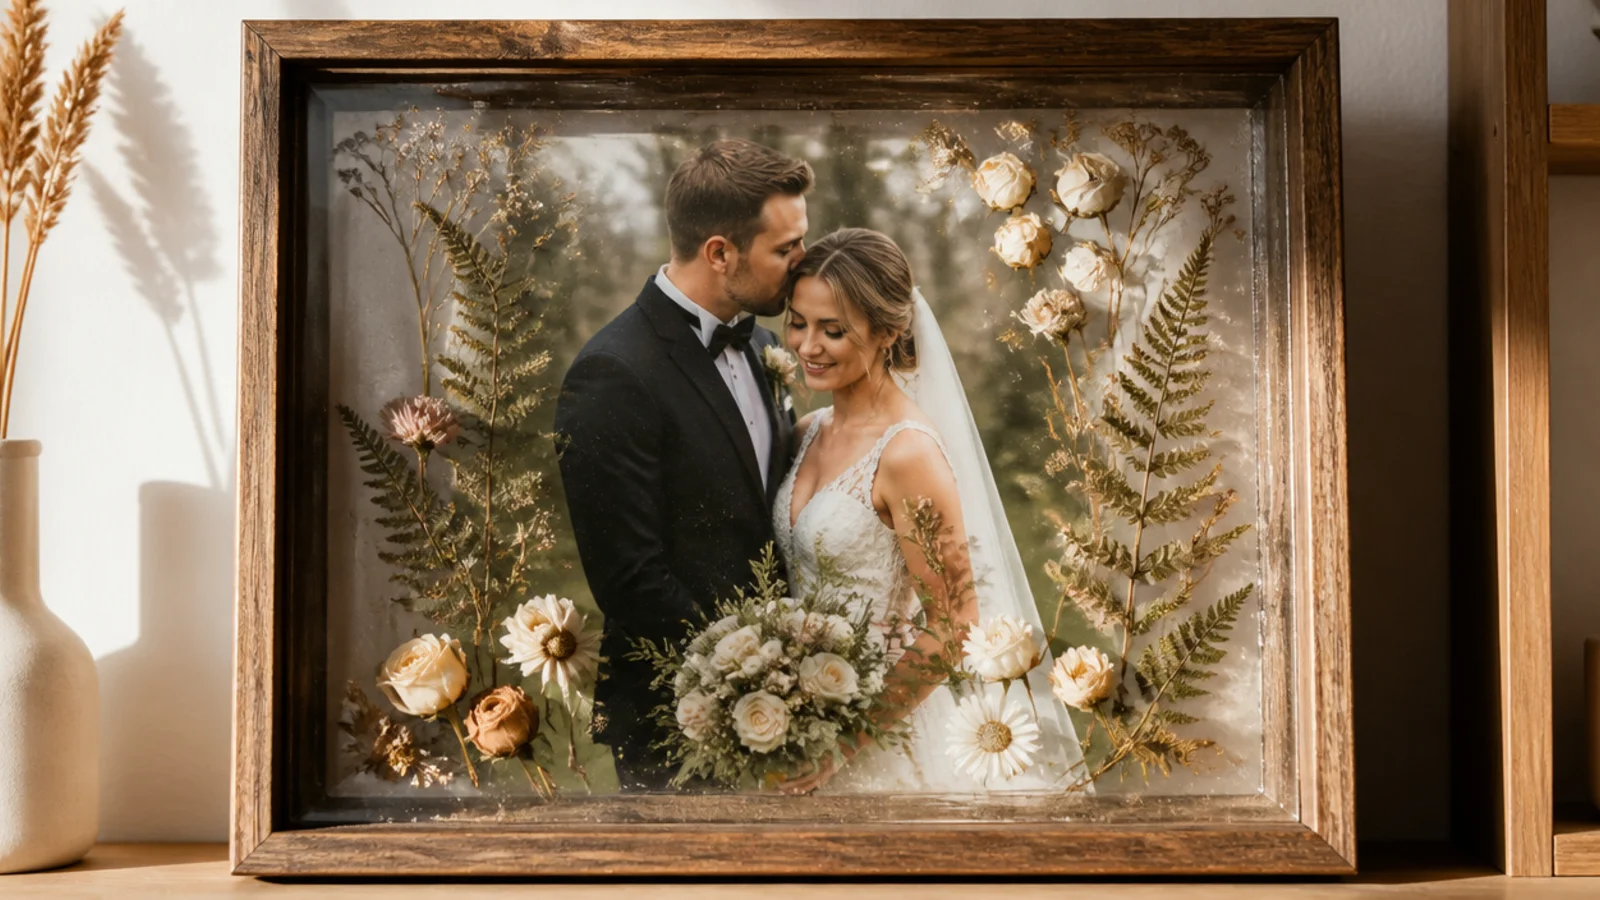
Pouring in layers with objects at different depths gives a striking 3D floating effect. It suits show-piece frames. Elements suspended at various depths in clear resin look like they’re floating around the photo.
Pour a thin clear layer and let it partially cure. Add your first objects, then pour another layer and let it set. Add more objects higher up and pour again. Repeat for depth, curing between layers. This keeps objects suspended at different heights. Torch each layer and do a final clear pour, then cure fully.
Let each layer reach a firm gel before adding the next objects so they stay put at their intended depth.
Don’t add all objects in one pour hoping they’ll suspend; without layering they all sink to the bottom together.
12. Marble Swirl Frame

A marbled resin border looks like real stone and suits elegant, classic rooms. White and gray with fine veins give a luxe marble effect around the picture. It pairs beautifully with black-and-white photos.
Tint resin white and a little gray or black in separate cups. Pour white into the border, then drizzle thin lines of gray and swirl gently with a stick to make veins — don’t overmix. Add a whisper of gold for luxe veining if you like. Torch bubbles, cure fully, and mount the sealed photo.
Drag the swirl stick in a few long, confident strokes; real marble veins are sparse and flowing, not scribbled.
Don’t over-swirl the veins; too much stirring blends everything into muddy gray instead of crisp marble.
13. Beach Inclusion Frame
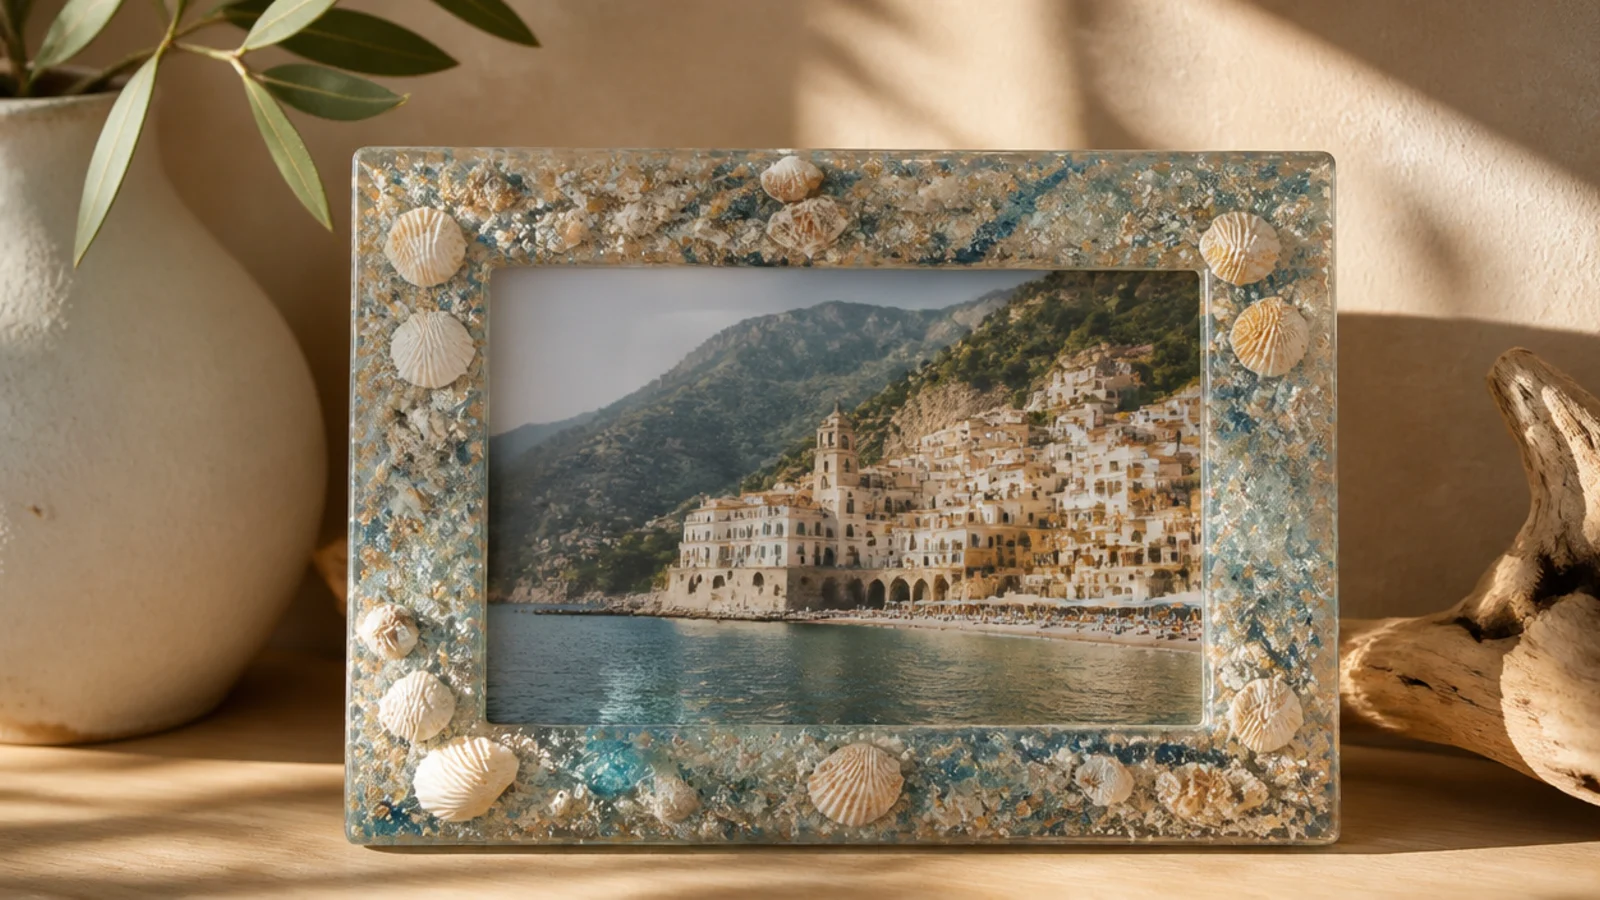
Dry the sand and shells thoroughly. Pour a thin clear base into the border, sprinkle a line of sand and place small shells, then pour a covering clear layer with a hint of blue tint near the inner edge for water. Torch bubbles and cure. Mount the sealed vacation photo behind the opening.
Embedding real sand and tiny shells in the border makes a literal vacation keepsake. It suits beach-trip photos. Actual sand and shells from the trip sealed in clear resin make the frame a true memento.
Skip thisDon’t embed wet or salty beach sand straight from the bag; moisture clouds the resin and salt can weep out later.
Editor's noteBake collected sand and shells briefly to drive out moisture before embedding so the resin stays crystal clear.
14. Neon Pigment Accent Frame
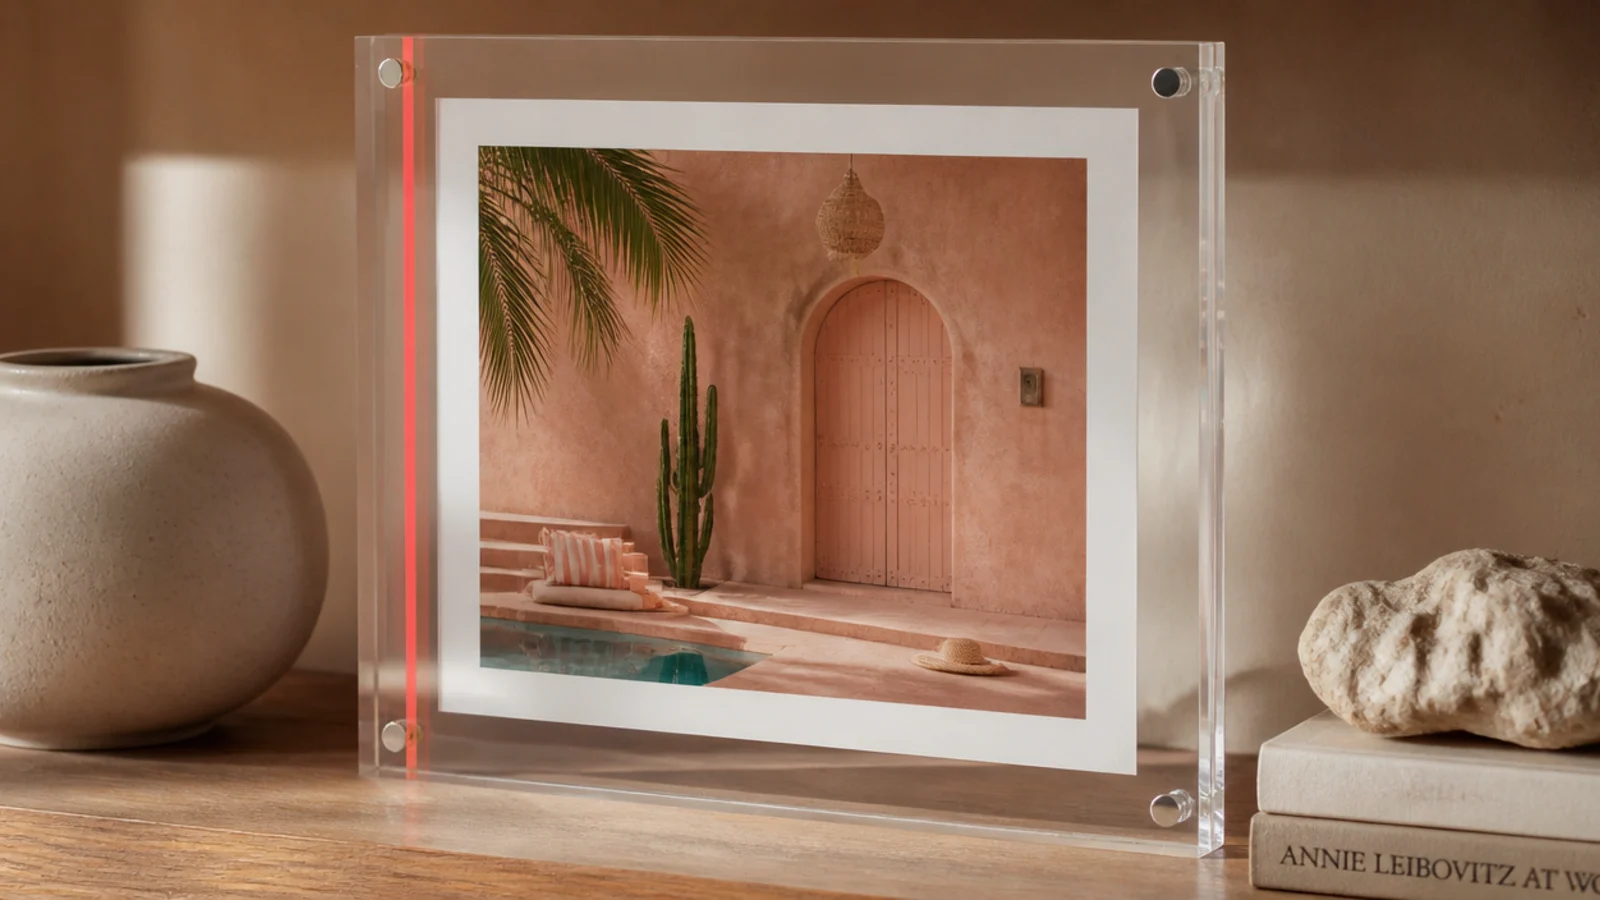
A single bold pigment stripe through an otherwise clear border adds a modern pop. It suits contemporary and kids' spaces. One confident line of color in clear resin looks like an intentional design accent, not chaos.
Pour a clear base into the border and let it gel. Mix a small batch with a bright pigment and pour it as a single stripe along one side or corner. Nudge the edge with a stick for a clean line. Pour a final clear layer over the top, torch bubbles, and cure fully. Mount the sealed photo.
Confine the color to one stripe or corner against clear resin — restraint is what makes a bold color read as design.
Don’t tint the whole border a loud neon; a solid bright frame overpowers the photo, while one stripe accents it.
15. Botanical Full-Cast Frame
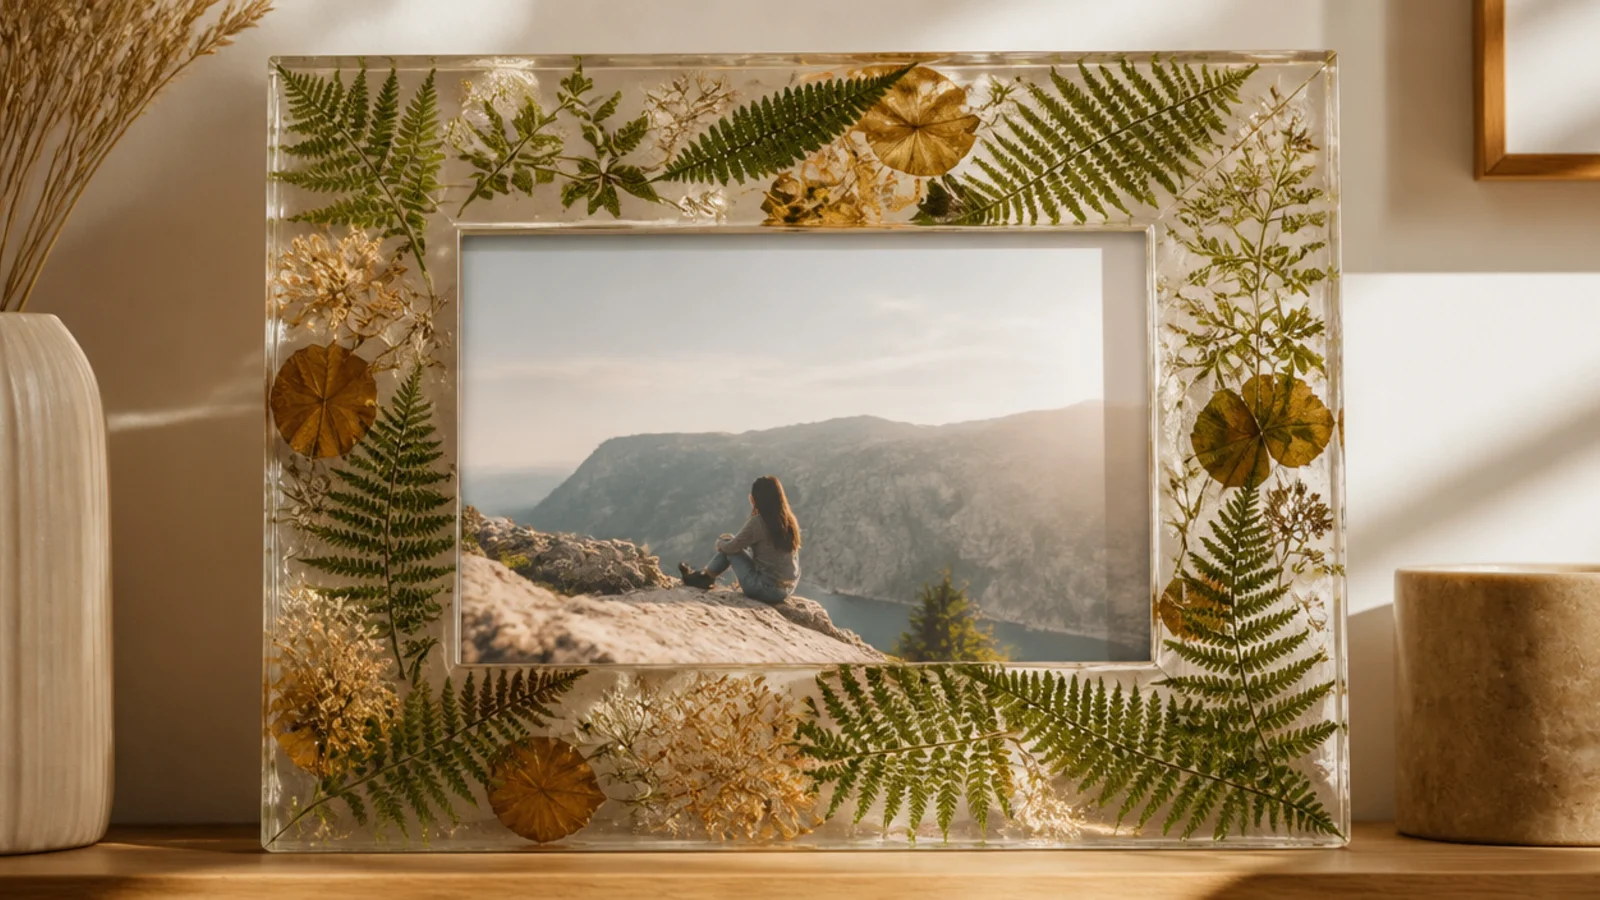
Dry and press ferns and small leaves flat. Pour a thin clear base in the border, lay the botanicals in an overlapping arrangement, and let it gel to hold them. Pour a covering clear layer, torching bubbles, and cure fully. Keep the arrangement flowing around the frame. Mount the sealed nature photo behind the opening.
A border packed with embedded ferns and leaves makes a lush botanical frame. It suits plant lovers and nature photos. Greenery suspended all through the clear border looks like a pressed-plant specimen in glass.
Skip thisDon’t use thick, fleshy leaves; only well-pressed, dried, flat botanicals stay clear and won’t rot inside the resin.
Editor's noteOverlap the ferns in one flowing direction around the border so the botanicals look arranged, not randomly dropped.