
1. Map Pin Mug with Soft-Touch Coordinates
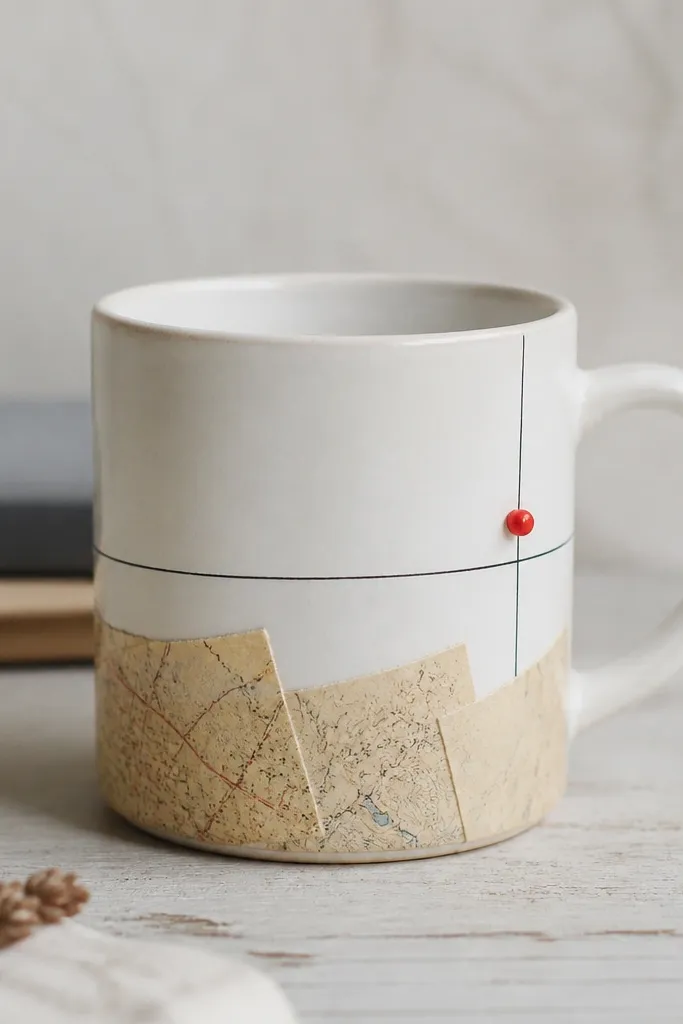
This one looks like a travel souvenir without the tourist clutter. You're using torn paper strips in beige and tan, then sealing them so they don't turn fuzzy with washing. The red dot near the handle draws your eye every time you lift the mug. I like the contrast of matte paper against the mug's glossy finish.
Tear a strip of old atlas paper into uneven pieces about 1/2 to 3/4 inch wide, then place them around the bottom third of the mug. Use a matte decoupage medium or mod podge style glue, but keep it thin - thick glue creates ridges. Seal with 2 coats of clear water-resistant varnish, letting each coat dry 2-3 hours.
Pro tipWrite the coordinates in pencil first, then trace with a fine black paint marker after the paper is sealed.
AvoidDon't let decoupage medium hit the rim - it peels first.
2. Tea Bag Collage Mug in Warm Sepia
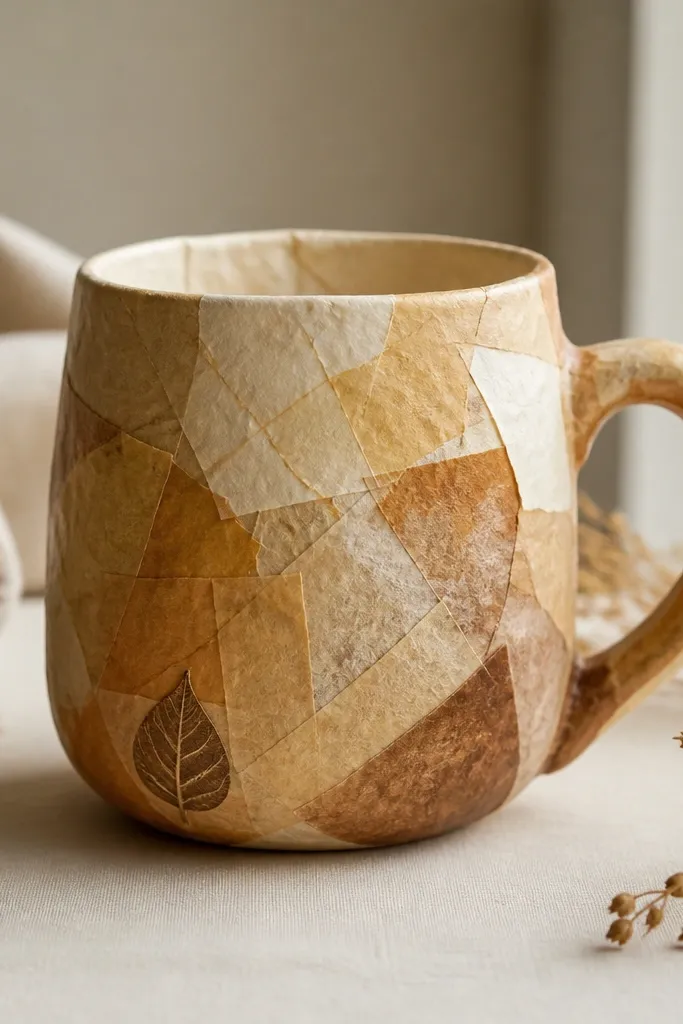
Tea bag paper is thin and already has staining, so it creates natural sepia texture fast. When you layer it, you get depth without buying special paper. The mug looks cozy even if the design is simple because the paper grain shows through. I've made this for friends who hate glitter and loud colors.
Cut tea bag paper after steeping and drying flat, then tear into small rectangles. Use a foam brush to apply a thin layer of decoupage medium, press pieces down, and smooth from the center outward. Seal with 2-3 coats of clear gloss or satin sealant; satin hides tiny brush marks.
Pro tipAdd one stamp or drawn leaf only - too many elements makes it look messy.
AvoidSkip thick glue layers - they make the surface feel bumpy.
3. Ribbon Wrap Mug with Bookbinding Tie
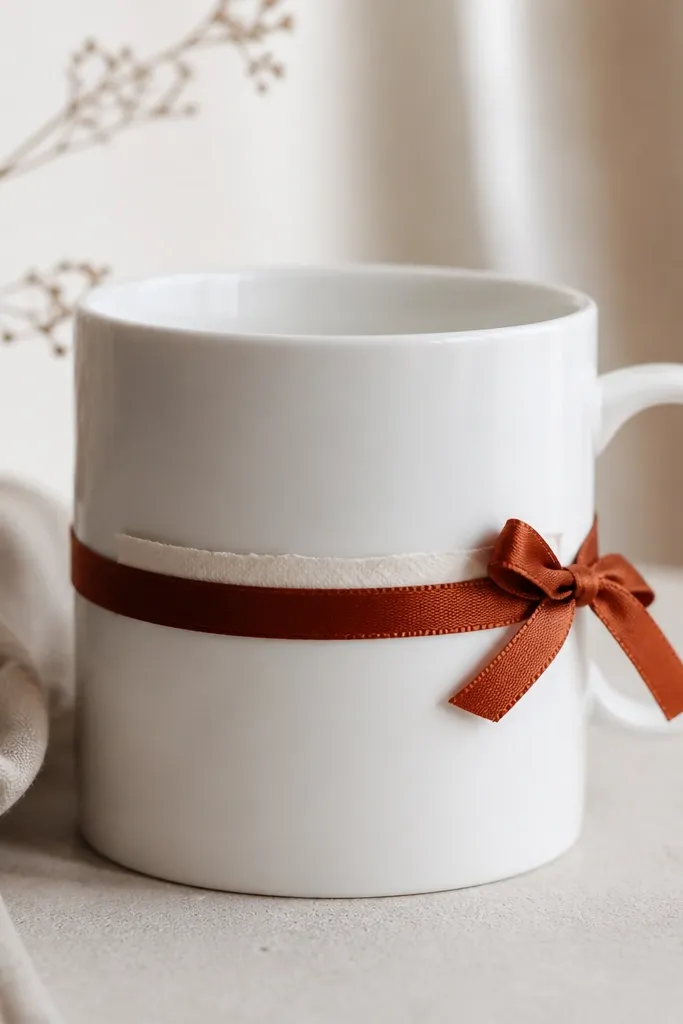
This is the cleanest "no drying time" style because ribbon hides messy edges. Satin catches light, and the narrow width makes it look intentional instead of craft-store. The peek-under paper strip gives it that handmade book feel. It's also great if you don't want to paint on the mug at all.
Wrap 1/2-inch ribbon around the mug and mark where it meets. Cut so it overlaps by 1/4 inch, then glue with a strong fabric glue or hot glue at the overlap only. Add a thin strip of cardstock under the ribbon edge - about 1/8 inch visible - and seal the top edge with a clear glue dab.
Pro tipUse a ribbon color that matches a warm undertone in your kitchen (rust, olive, or cream) so it looks natural.
AvoidDon't glue ribbon all the way around - it wrinkles and lifts when the mug heats.
4. Fabric Scraps Mug with Heat-Set Transfer Look
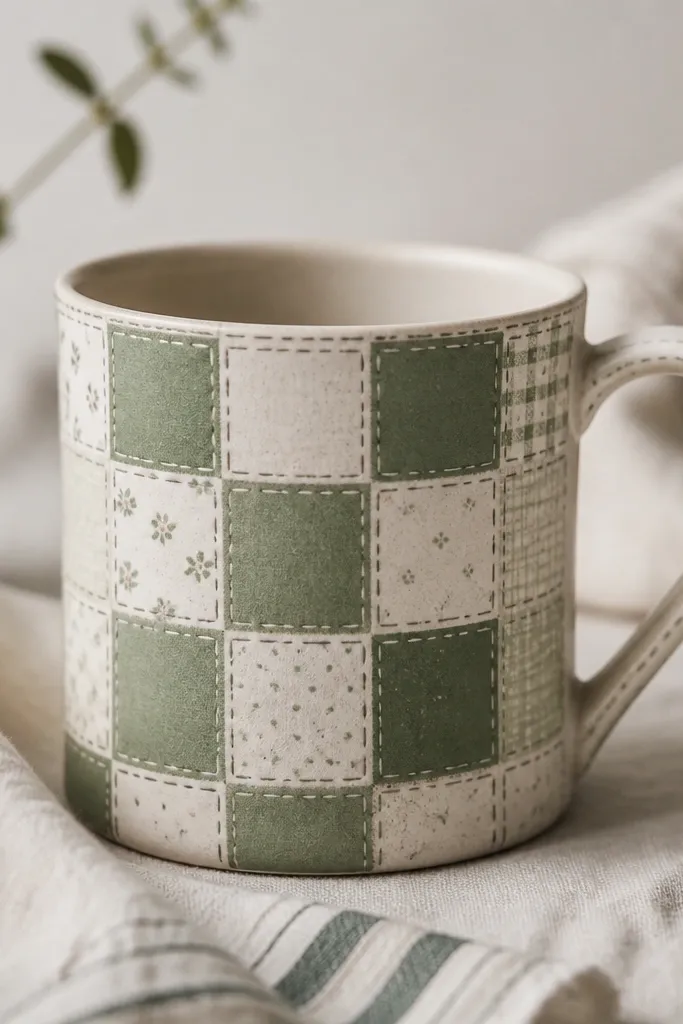
Fabric scraps create a quilted look that feels soft even on a ceramic mug. The secret is using small pieces and keeping the glue layer thin so the mug doesn't feel lumpy. You get a handmade vibe without the mess of embroidery. I like it for winter mornings because the colors look warm when paired with coffee.
Cut fabric squares about 1 to 1.5 inches wide. If your fabric frays, trim it clean and use a thin fabric glue to seal edges before applying. Brush a thin decoupage medium onto the mug and press fabric pieces down, then seal over the fabric with 2 coats of clear sealant.
Pro tipDraw a single dashed "stitch" line around one patch using a fine fabric paint pen.
AvoidDon't use thick upholstery fabric - it warps and creates bumps.
5. Pressed Leaf Vein Mug with Glossy Seal
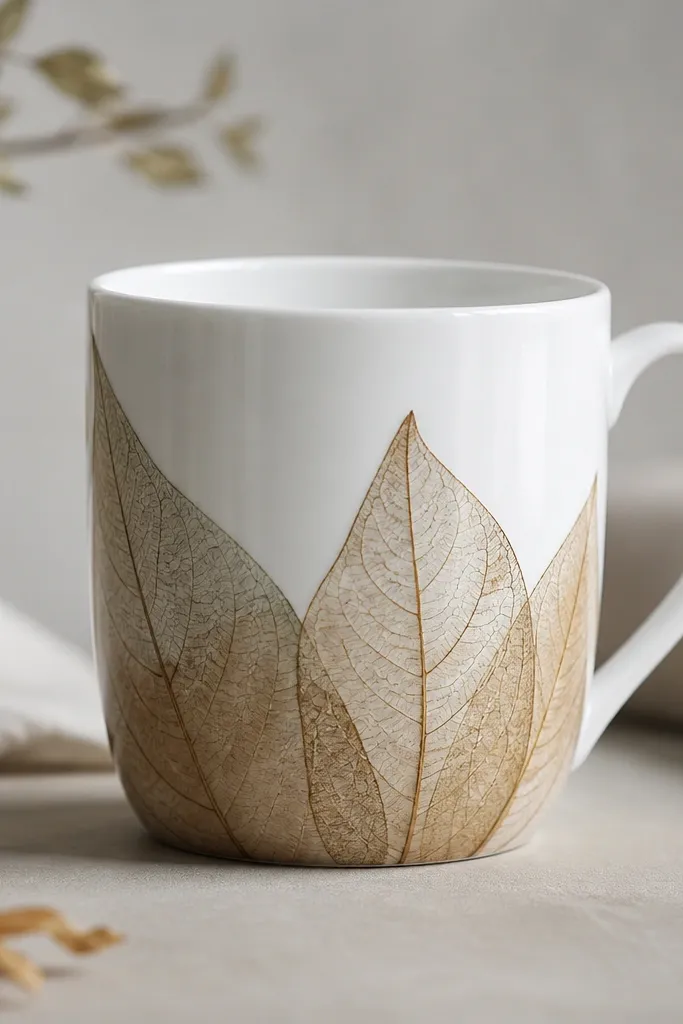
Pressed leaves look delicate, but the finish is what makes them last. You're transferring the leaf shape onto the mug and then sealing it under clear coats so it doesn't lift. The veins show up best when the leaf is flat and thin. It looks like a botanical print, not a craft project.
Place a dried leaf on parchment and apply a thin layer of decoupage medium on the mug area only. Press the leaf in place, smoothing gently, then brush over the leaf with more medium. After drying, seal with 2-3 coats of clear varnish, keeping coats thin so details stay sharp.
Pro tipChoose leaves with strong veins like small eucalyptus or thin garden leaves for clearer lines.
AvoidDon't use fresh leaves - they brown and bubble under sealant.
6. Cottage Stripe Mug from Painter's Tape
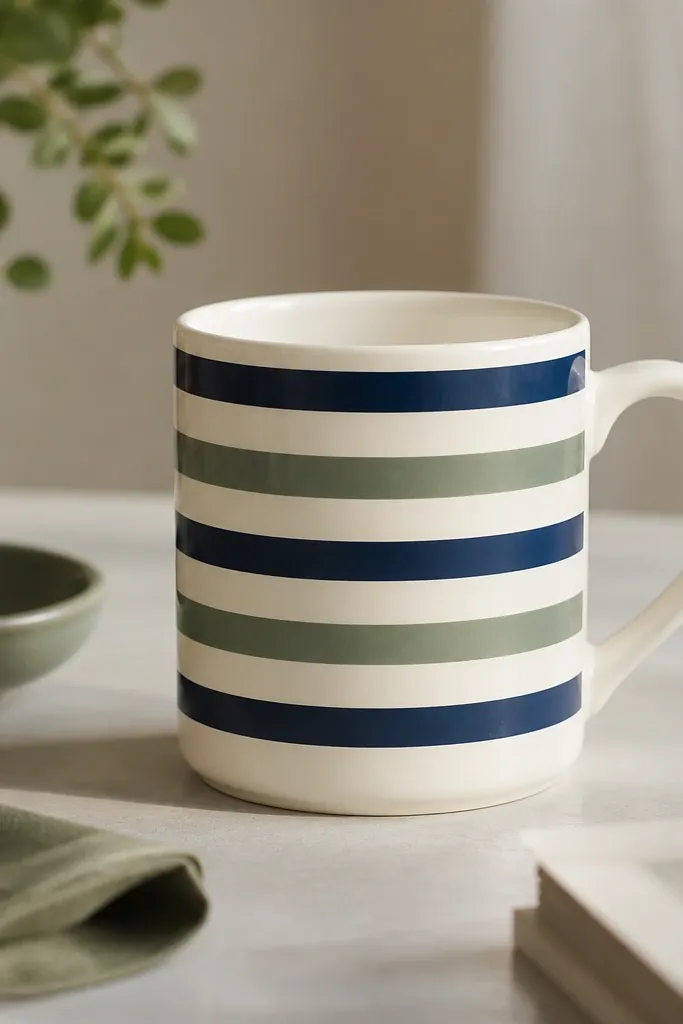
Painter's tape gives you straight lines without the shaky freehand look. This design makes the mug look store-bought because the edges are sharp. The color combo matters: sage and navy reads cozy, not loud. I've done this with chalky ceramic paint and it still looks clean after multiple washes.
Clean the mug with rubbing alcohol. Tape off stripe bands spaced about 1/4 inch apart, then paint inside the bands with ceramic acrylic. Use 2 light coats instead of one thick coat, then remove tape while the paint is still slightly tacky. Bake if your paint brand requires it - check the label.
Pro tipWipe tape edges with a damp cloth before painting to prevent seepage.
AvoidDon't paint over greasy fingerprints - tape won't seal and color will bleed.
7. Kintsugi-Style Gold Crack Lines on White
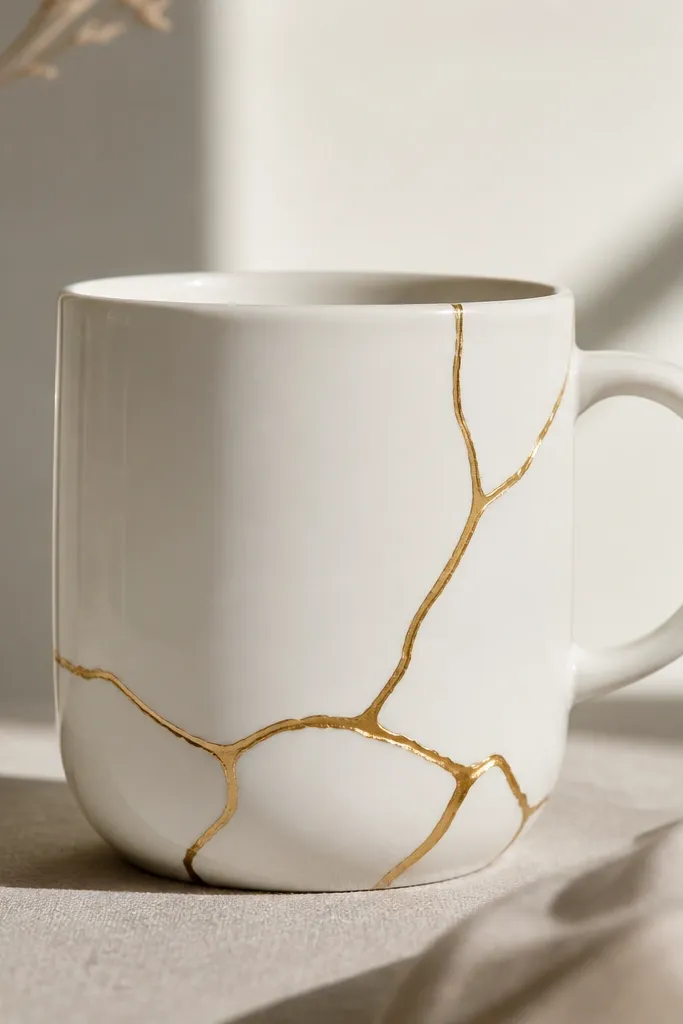
This gives you that repaired pottery look without needing ceramic glue repair kits. You draw "cracks" with a gold paint pen and then add a tiny clear gel to make them look like filled seams. It turns a plain mug into something dramatic. The design looks best when it stays sparse - a few lines on the lower half.
Use a metallic gold paint pen for the crack lines. Add gold acrylic paint only where lines need thickness, then dot small clear gel medium along the lines to create a raised fill. Let it dry fully, then bake if your gold medium requires heat. Seal with a clear ceramic topcoat for extra scratch resistance.
Pro tipStart with pencil marks for crack direction, then go over with the pen so the "cracks" feel natural.
AvoidDon't cover the whole mug - dense lines look like a mistake.
8. Blackboard Mug with Chalk Marker Labels
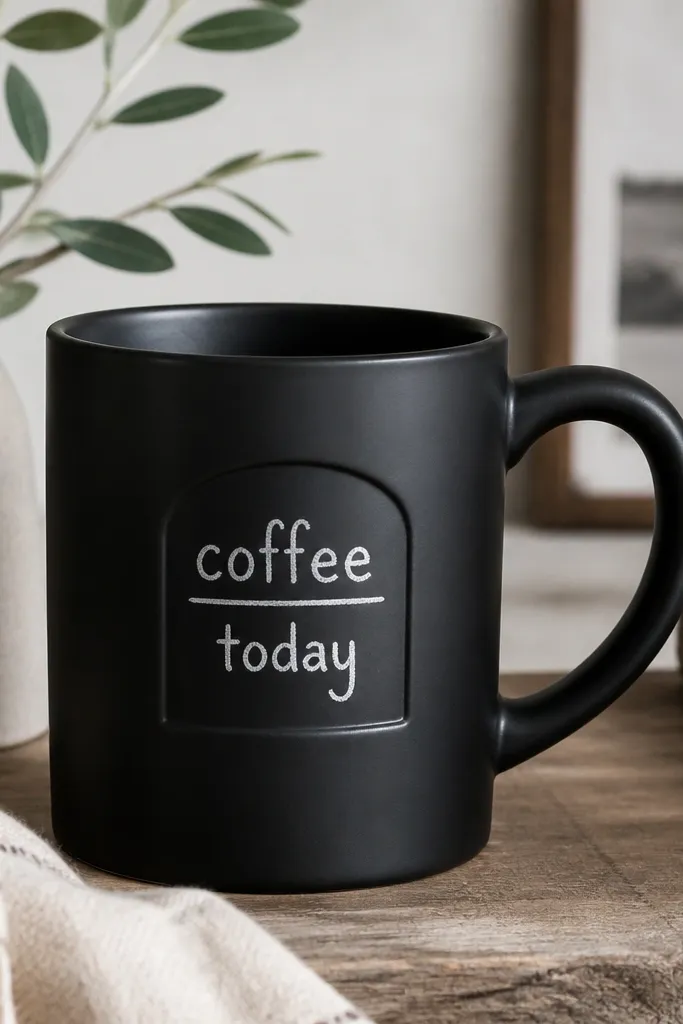
A blackboard mug is interactive and keeps looking fresh because you can change the writing. The matte black makes white chalk marker pop hard. I like using it on days when I want my mug to match my mood. It's also forgiving if your lettering isn't perfect.
Use matte black paint made for ceramics or a high-adhesion craft paint, then apply 2 thin coats. Let cure fully, then bake if the label says to. Once cooled, write with chalk markers or chalk pens and wipe with a damp cloth after each use.
Pro tipUse a stencil for one word like "coffee" so the layout stays clean.
AvoidDon't use glossy black paint - chalk markers look dull on it.
9. Upcycled Crochet Lace Edge Mug
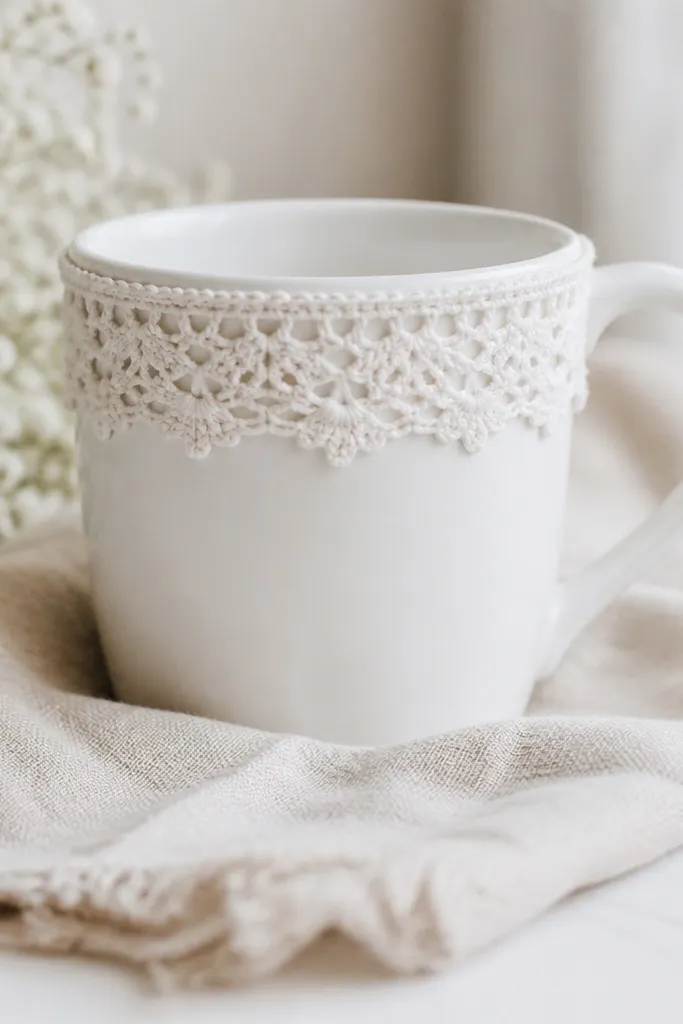
Crochet lace makes a plain mug look like it came from a vintage tea shop. The key is placing it at the rim line or just below, so you get the decorative effect without covering too much surface. Lace also hides minor imperfections because the pattern breaks up visual gaps. It's a great option when you don't want to paint.
Cut a lace strip that wraps the mug with a 1/4-inch overlap. Glue the overlap first, then glue the rest in sections so it stays flat. Seal the lace with a thin clear sealant where it meets the mug - one coat on top of lace, one coat over the seam.
Pro tipTrim lace ends with pinking shears so the frayed edges don't spread.
AvoidDon't soak lace in thick glue - it turns stiff and curls.
10. Vinyl Monogram Mug with Clear Gloss Topcoat
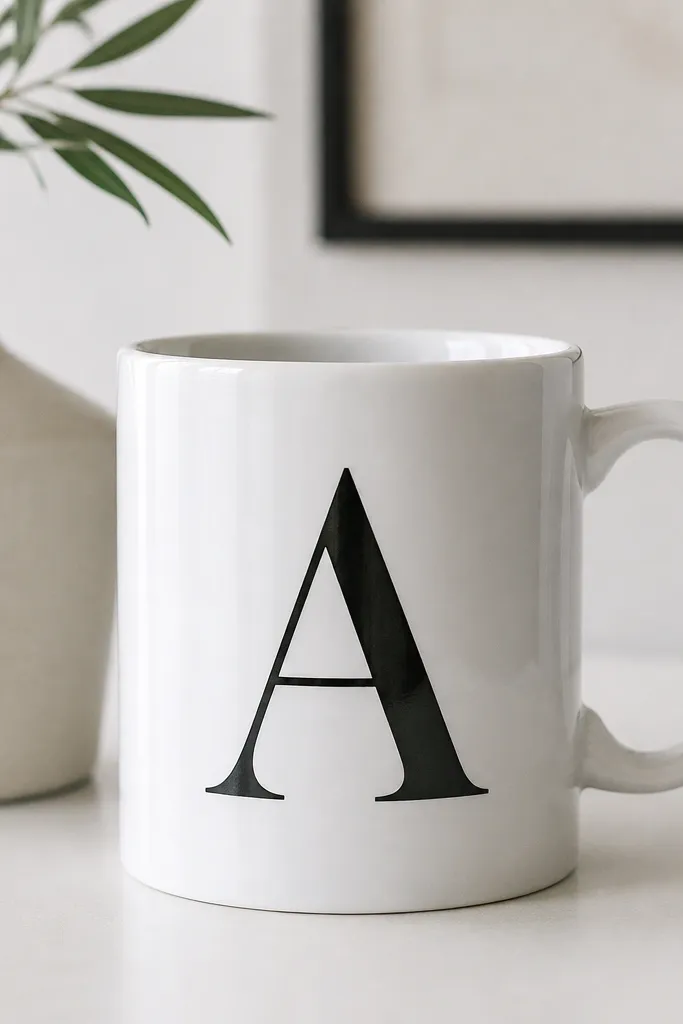
Vinyl looks sharp fast because the edges are perfect. Matte black on white reads modern, but it still feels cozy. Clear topcoat over the vinyl is what keeps it from snagging and peeling around the rim. I use this when I'm making gifts and need them to look consistent.
Clean the mug with alcohol and let dry. Apply vinyl cut letters or monograms centered about 2 inches above the base. Press with a scraper firmly, then seal with 2 thin coats of clear ceramic topcoat. Let it cure fully before first wash.
Pro tipKeep the vinyl away from where your fingers grip the mug - that's where wear starts.
AvoidDon't skip cleaning - vinyl peels from dust and skin oils.
11. Photo Transfer Mug from Laser Printer
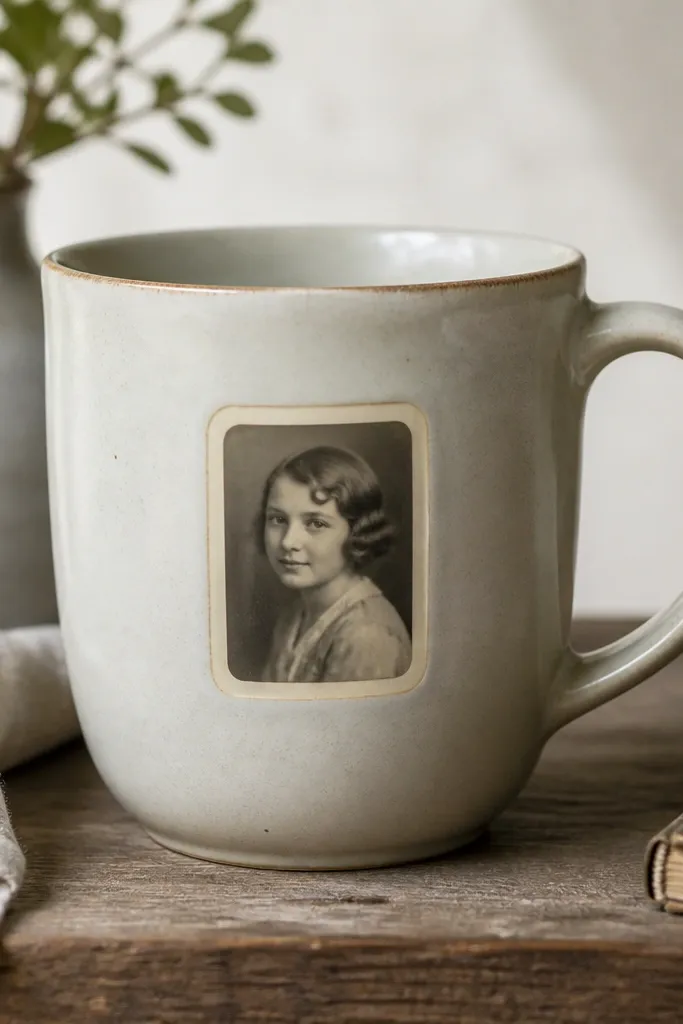
A photo transfer feels personal without looking like a sticker. Laser printer toner tends to transfer more cleanly than inkjet for this method. When sealed well, the image looks like it's part of the mug instead of pasted onto it. I've made these for grandparents using thrifted old family photos.
Print the image in grayscale on laser paper, then cut close to the design. Coat the printed side with transfer medium or follow your kit instructions, press onto the mug, and rub until the paper releases. Seal with 2-3 coats of clear topcoat, and let it cure overnight.
Pro tipUse a simple photo with high contrast - faces and silhouettes transfer cleaner than busy scenes.
AvoidDon't use glossy photo paper - it slips and smears during transfer.
12. Spoon-Fork Charm Mug from Hardware Bits
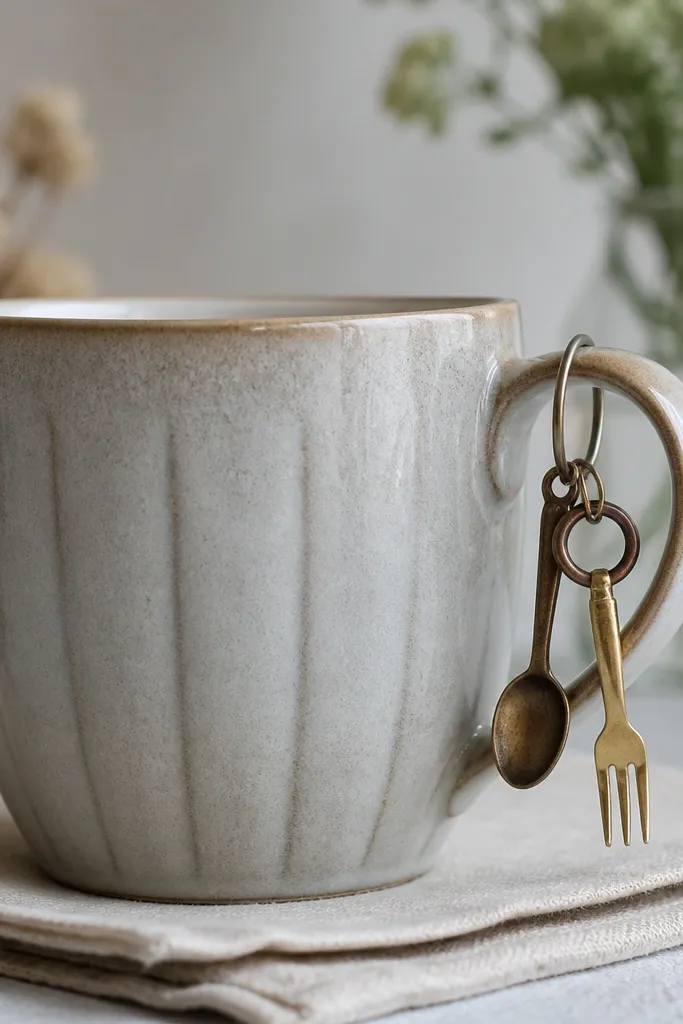
Hardware charms turn a mug into a desk object, not just a drink container. The metal catches light and makes your mug feel intentional. I like using small bits because they don't interfere with drinking. This idea also works when you have no painting skills and just want cute details.
Find a small charm loop that can attach to the handle without drilling, like a key ring. Attach tiny metal charms with jump rings, then add a dab of clear epoxy to secure the hinge points. Paint or rub the metal with metallic paint, and seal with clear coat.
Pro tipKeep charms on the handle side, not the front - it protects the design from daily splashes.
AvoidDon't use heavy charms that swing and hit the mug - chips happen fast.
13. Stenciled Constellation Mug with Soft Metallic Stars
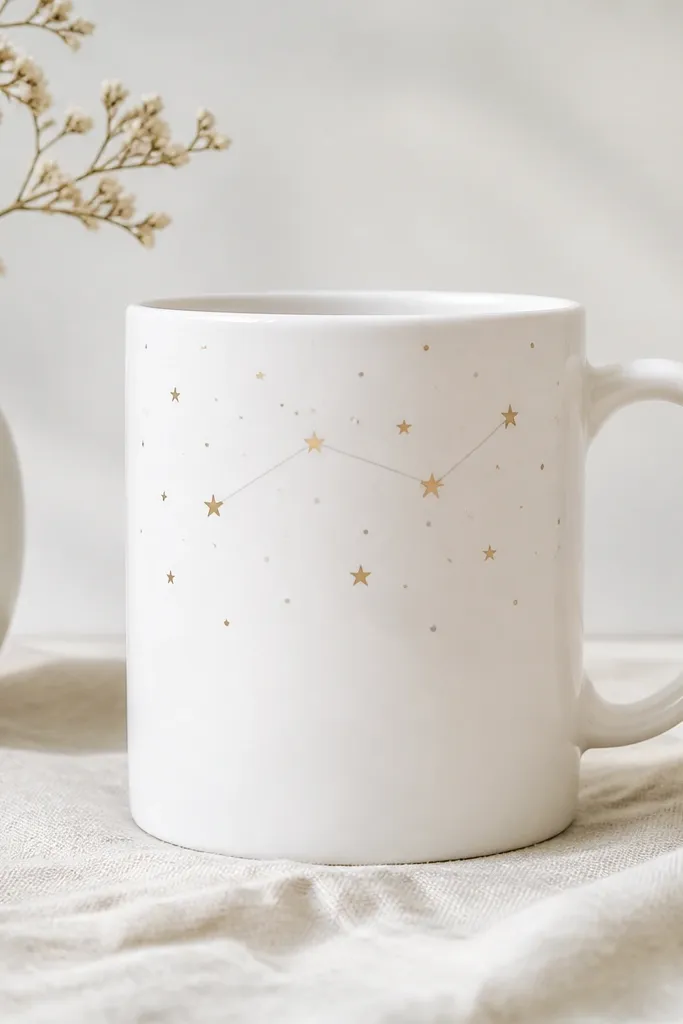
Stencils make tiny details look crisp. Pale gold and silver dots look like light reflecting off the night sky, but the mug stays understated. This one works great for people who don't want big graphic designs. I've done it with a small star stencil and it always looks tidy.
Tape a star stencil to the mug using painter's tape at the edges. Dab metallic paint with a sponge brush - don't brush hard or it smears under stencil edges. Let dry, then add the connecting lines with a fine liner brush. Bake if your metallic paint requires it.
Pro tipDo one constellation only, and keep the densest cluster near the handle for balance.
AvoidDon't load the sponge too wet - it causes paint bleed.
14. Salt-Dyed Ombre Mug Using Acrylic + Sea Salt Texture
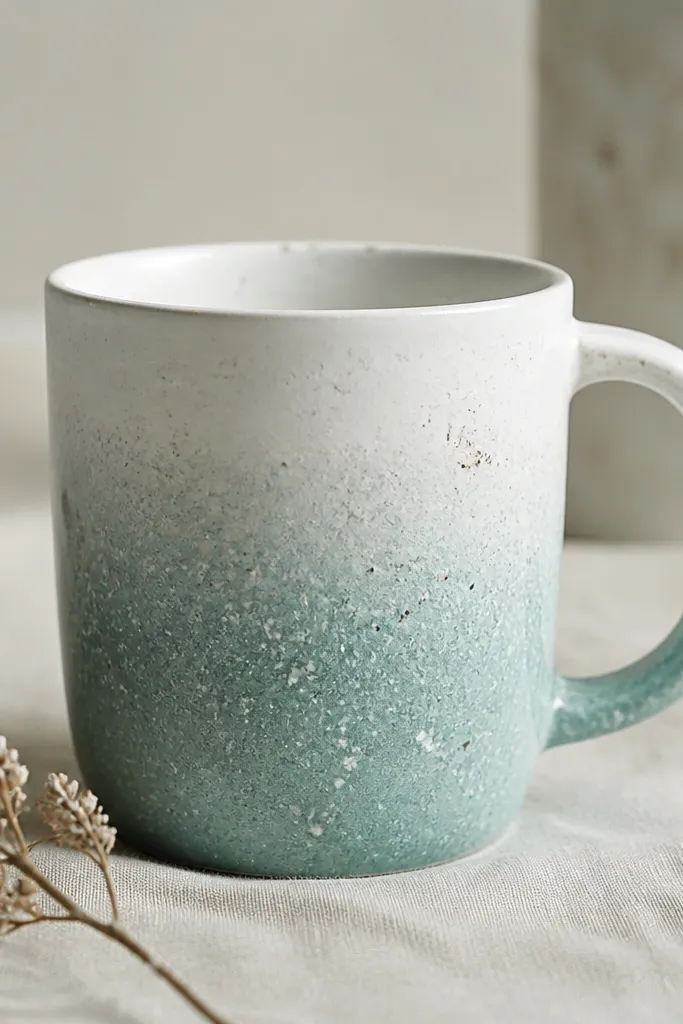
Sea salt changes the surface texture so the ombre looks organic instead of flat. It's the kind of effect you can't fake with plain paint blending. I like dusty teal into cream because it feels like cold morning air. The mug looks handmade even from a few feet away.
Paint the bottom third with ceramic acrylic in your teal tone, then sprinkle coarse sea salt lightly where you want texture. Let it dry until the salt crust lifts easily. Brush off salt, then seal with clear topcoat; bake if your paint label says to. Keep the ombre edge soft by blending with a damp sponge before it fully sets.
Pro tipSprinkle salt in fewer spots than you think - heavy salt makes the mug look rough.
AvoidDon't skip sealing - the texture will catch grime.
15. Acrylic Pour Swirl Mug in One Color Family
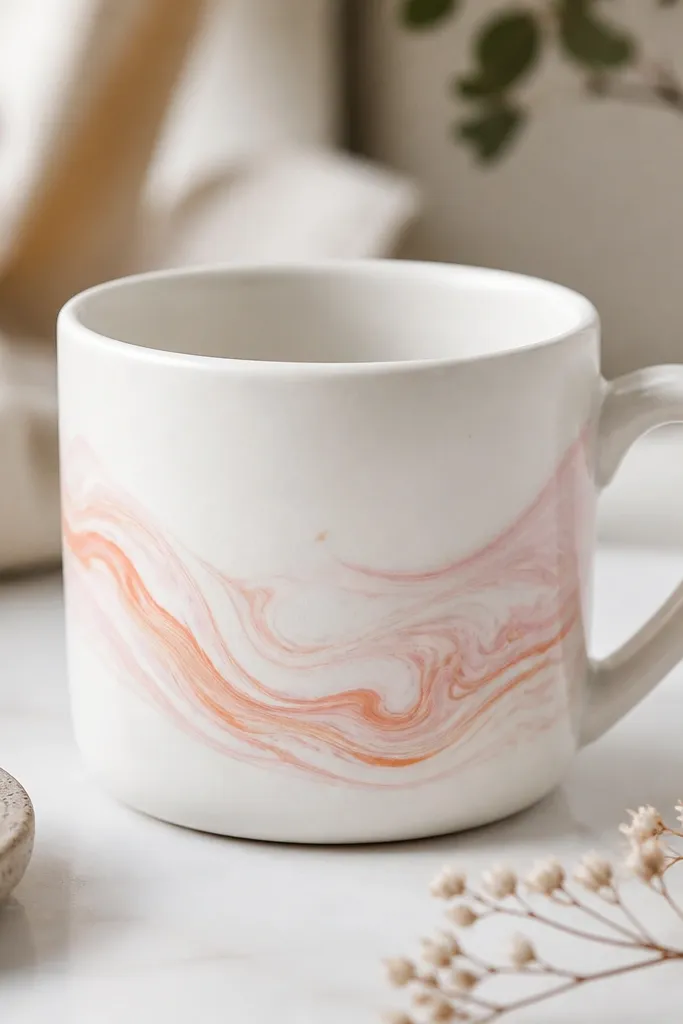
Pouring acrylic onto a mug gives you movement without drawing. Keeping the palette to one family (pink-peach-coral) makes it look cohesive instead of chaotic. The swirl edges look glossy when you finish with clear coat. This is one of my favorite "I want it to look artsy fast" projects.
Use a disposable cup to mix acrylic pour medium with acrylic paint until it flows like heavy cream. Pour a thin line on the mug side, then tilt slowly so it spreads in a ribbon. Let it set, then seal with 2-3 clear coats. If you want stronger adhesion, use a primer made for ceramics first.
Pro tipDo a test pour on a scrap plate so you learn the thickness before committing.
AvoidDon't pour too thick - it cracks when baked.
16. Sharpie Resist Pattern Mug with Clear Bake Seal
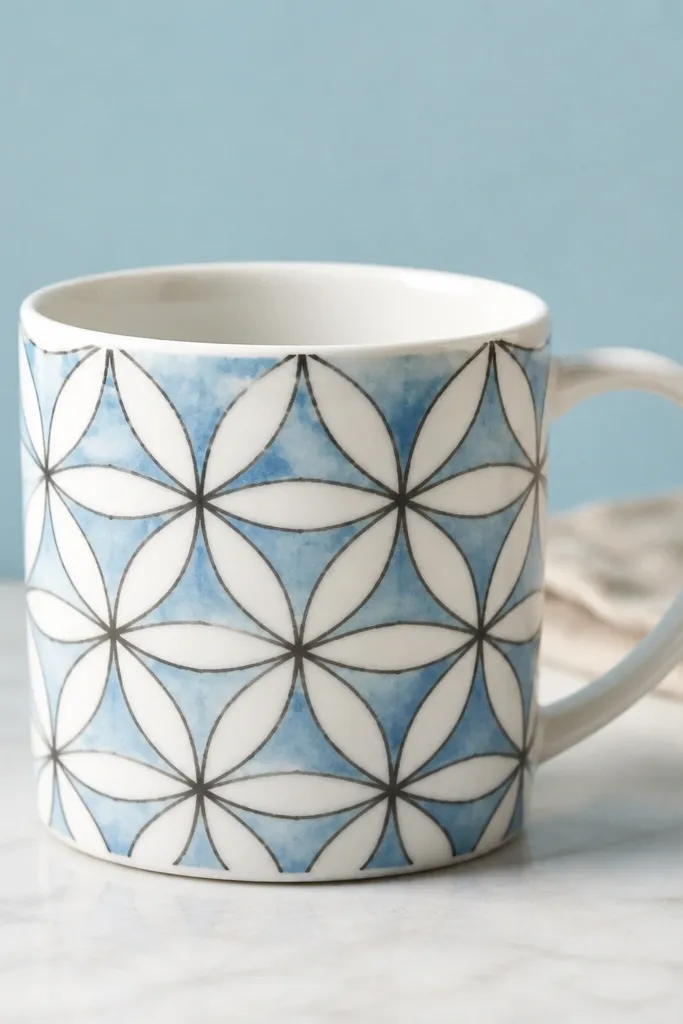
Marker resist is a fun way to get graphic shapes without stencils. You draw with permanent marker on the mug, then paint or sponge over it so the marker lines stay white. It looks sharp and intentional when you keep the pattern simple. I've used this for holiday mugs because the shapes look clean in photos.
Draw your pattern using permanent marker - I use fine-tip so lines stay crisp. Sponge over with ceramic acrylic in a light color like powder blue. Let dry completely, then bake if your paint requires it. Seal with clear topcoat to protect the marker lines.
Pro tipUse a ruler to keep your geometry straight - even a 1/8-inch drift shows up.
AvoidDon't use water-based markers - they smear under paint.
17. Thrift Mug Gold Rim Dot Revival
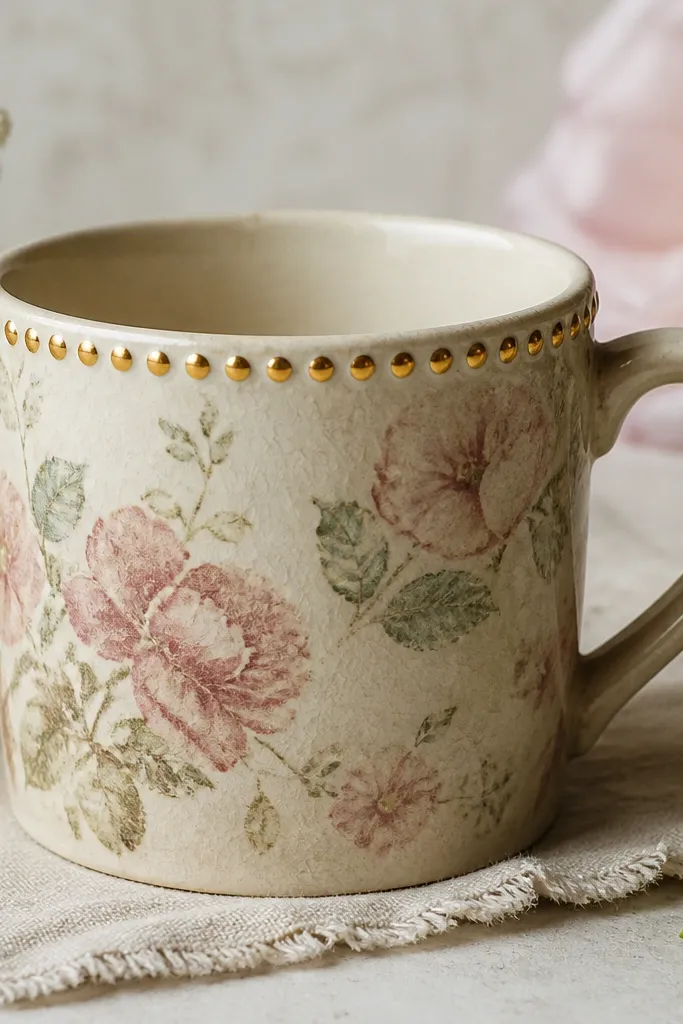
This is how you save a mug that already has a pattern but looks tired. A single gold dot ring makes the rim look finished and hides minor chips. The rest stays understated so the floral doesn't fight your new design. It's also fast enough for last-minute gifts.
Clean the rim with alcohol and dry it well. Use a gold paint pen made for glass or ceramics and dot around the rim in a single line. Start at the handle and count dots so spacing stays even. Let dry, then bake if the pen label says to. Seal with clear topcoat for scratch resistance.
Pro tipMark the dot positions lightly with pencil first, then paint over them.
AvoidDon't paint too close to where the mug touches lips - it can wear off.
18. Dried Orange Slice Citrus Mug with Decoupage Seal
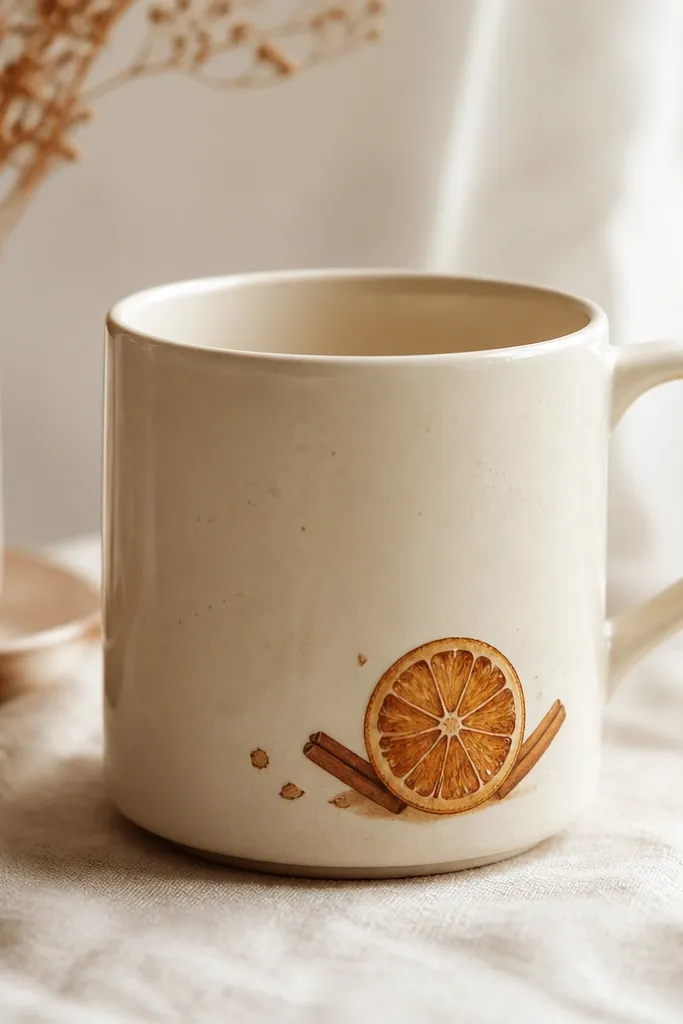
Citrus slices give you that holiday-coffee smell vibe visually, even without scent. Dried elements look best in small doses because the texture is already busy. When you seal them flat, the details don't lift. This mug looks amazing next to a small jar of cinnamon sticks on your counter.
Find thin orange slice paper or dry citrus slices, then cut to fit a 2x3 inch area. If you're using real dried slices, press them flat between paper and a book for a day. Decoupage them onto the mug with thin glue, then seal with 2-3 clear coats. Keep the design away from the handle so it doesn't get snagged.
Pro tipPair with a tiny hand-drawn cinnamon line under the slice for a finished look.
AvoidDon't place textured pieces near the rim - they chip when you scrub.
19. Washed Denim Pocket Mug for The Tea Station
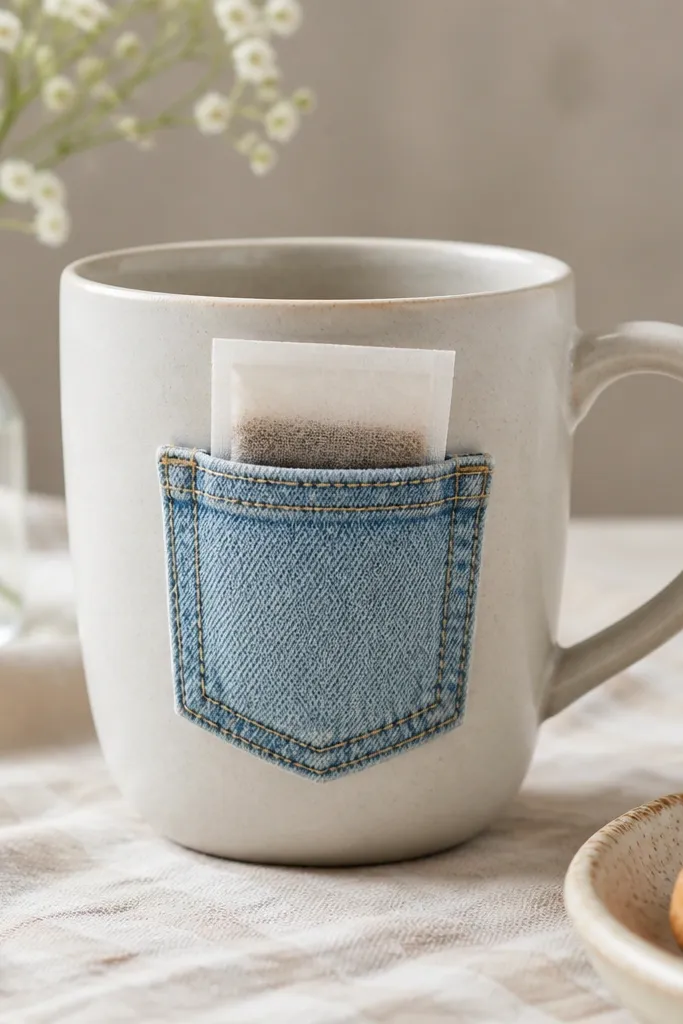
A pocket turns your mug into a mini station for tea bags or sweeteners. Denim has a natural texture that looks cozy and hides tiny glue lines. The pocket also protects your tea bag from getting wet drips on the counter. I've made this for my own desk and it keeps everything in one place.
Cut a denim scrap pocket shape with a folded top edge about 2 inches tall and 2.5-3 inches wide. Stitch the sides if needed, then glue the pocket to the mug front using fabric glue. Seal the edges with clear sealant so the pocket doesn't soak up water. Let cure fully before adding tea bags.
Pro tipUse a pocket opening that faces slightly upward so tea bags slide in easily.
AvoidDon't use stretchy knit fabric - it warps as the mug warms.
20. Ceramic Paint Dot Grid Mug in Monochrome
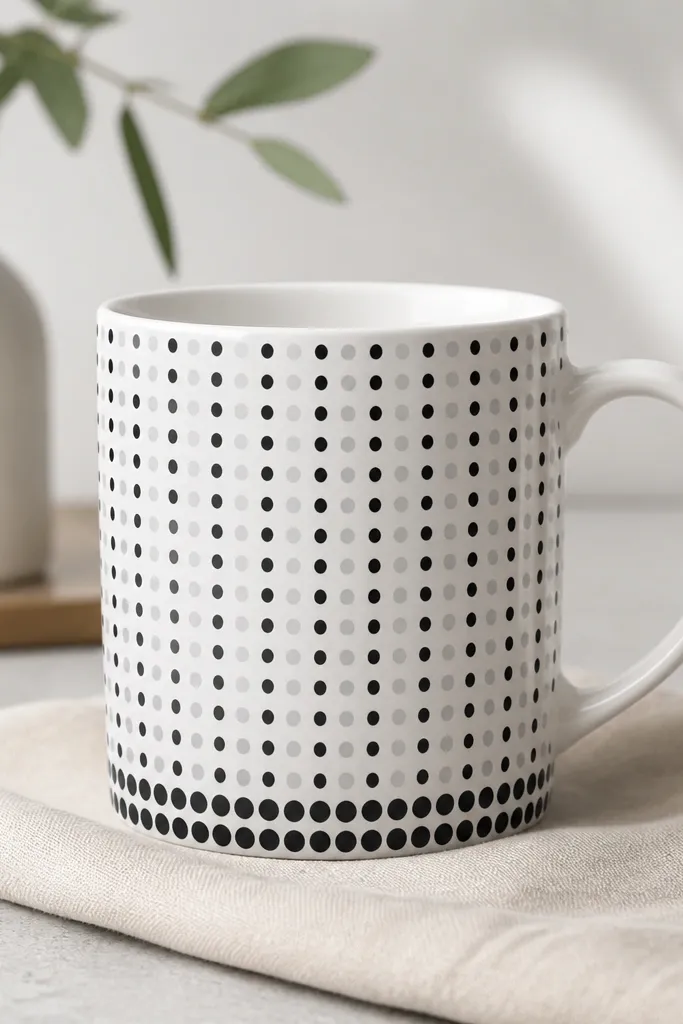
Dot grids look calm and modern, and they hide small hand imperfections. When you use two grays and one black, the dots create depth without going loud. This style also photographs well because the pattern is high-contrast. I like making these for coworkers because they look clean and not too personal.
Use a dotting tool or the eraser end of a pencil wrapped in tape to control dot size. Mark a grid with light pencil lines spaced about 1 inch apart. Paint dots with ceramic acrylic, let dry, then bake. Add a thicker dot border near the base for a grounded look.
Pro tipMake the biggest dots at the bottom row so the mug feels weighted.
AvoidDon't rush dot placement - uneven spacing reads like a mistake.