

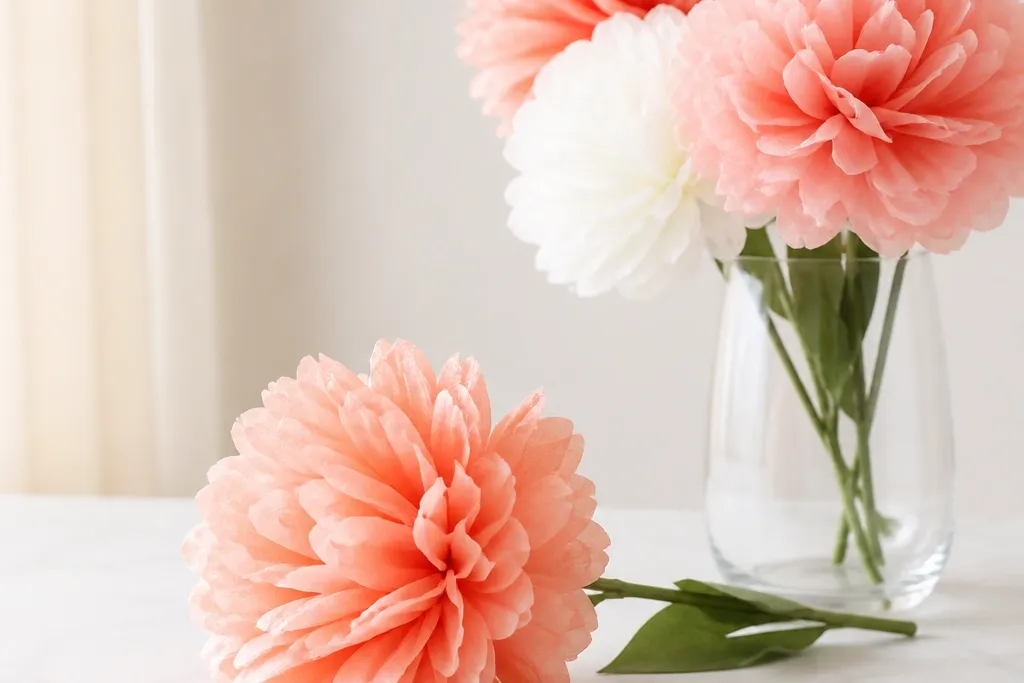

1. Classic Pom-Pom Rose (No-Fringe Cut)
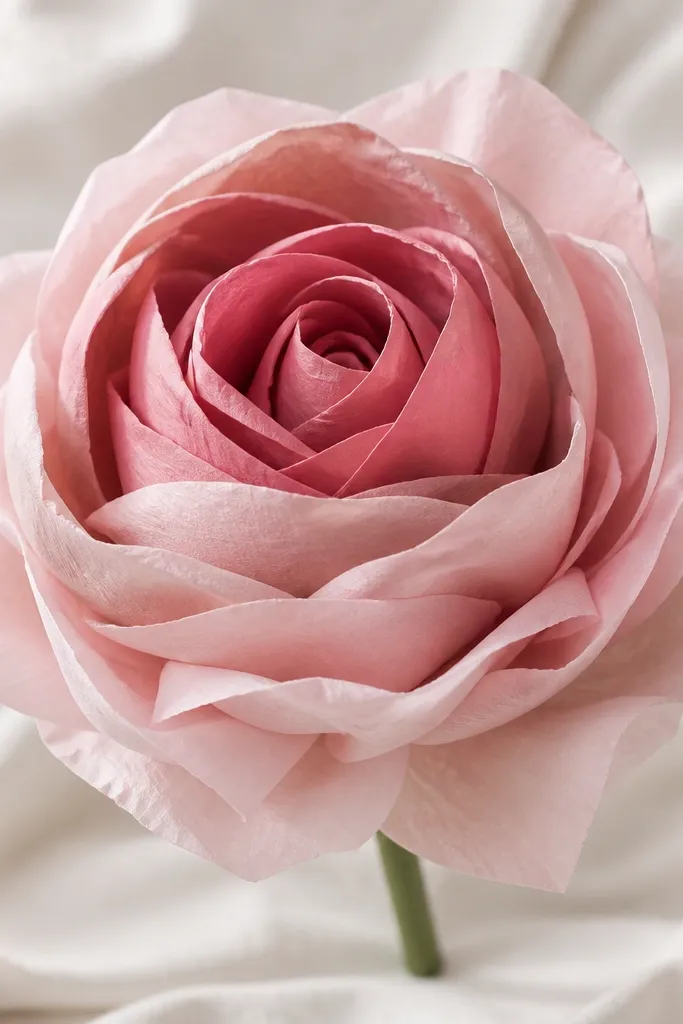
This one gives you a rose-like head without the stress of cutting fringe. I use two shades of tissue — one for the outer petals (blush) and a slightly deeper tone for the inner layer (dusty rose). The folded look makes the petals catch light and makes the flower read “soft” on camera, even from a few feet away. It’s flattering for most color palettes because rose shades blend with beige, cream, and warm wood tones. If you’re making decor for photos, this head shape fills space without needing a big stem base.
Start by stacking 6 sheets total: 4 in blush and 2 in dusty rose, each cut to 10 x 20 inches. Fold the stack accordion-style into 1-inch pleats, then pinch the middle. Wrap the pinch point tightly with a 6-inch strip of tissue or a small piece of florist tape. Fluff one fold at a time, pulling the outer blush layers outward first, then the deeper inner layers. Finish by trimming any uneven petal edges with scissors so the outer rim looks round.
Mist the tissue lightly with water (just a quick spritz) before fluffing if your tissue is dry and won’t hold shape.
Avoid pulling every fold up at once — you’ll crush the center and end up with a flat ball.
2. Sunburst Daisy with Sharp Petal Cuts
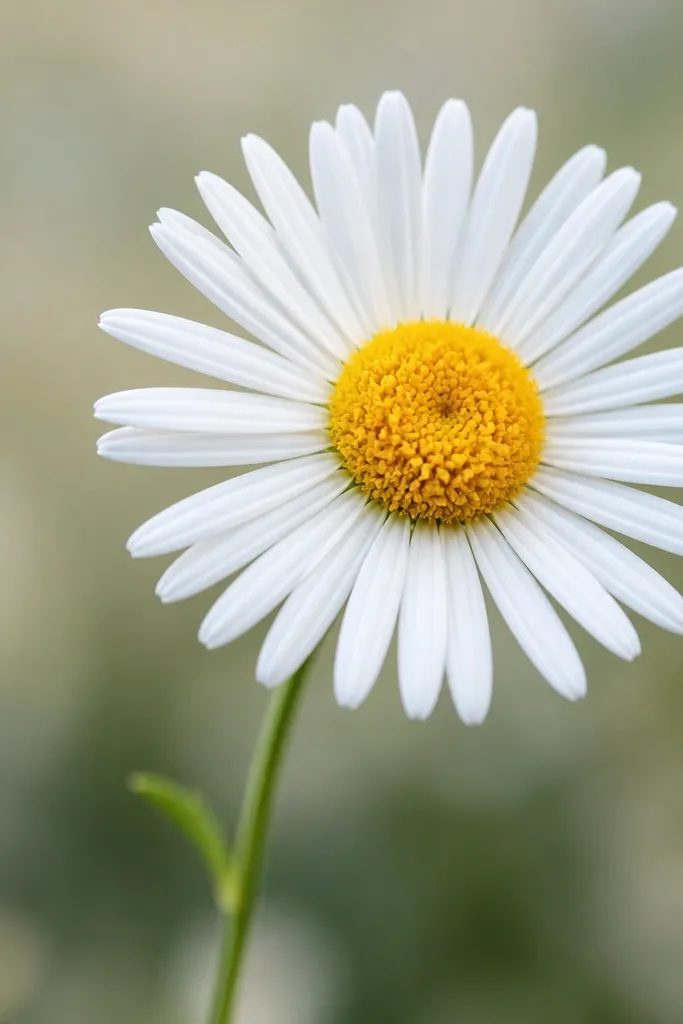
This daisy looks crisp because the petals are narrow and cut with a consistent width. I’ve used it for birthday banners where people stand close to the wall and the petals still look neat. White tissue makes the whole flower pop against dark backdrops, and the yellow center adds warmth. It flatters most skin tones in photos because it brings bright contrast without looking harsh. If you want a flower that reads “clean” instead of “fuzzy,” this is the one.
Editor's noteUse a ruler and mark petal widths with pencil on the folded stack before cutting.
Cut 5 tissue sheets into 6 x 20 inch strips. Stack them and fold accordion-style into 1-inch pleats. Cut the folded edge into narrow V-shaped points so you get sharp petals; leave the center uncut for the wrap. Pinch the middle and wrap tightly with a yellow tissue strip or a small piece of tape. Fluff outward, then separate petals by lifting alternate folds so the sunburst spacing shows.
Skip thisSkip tearing the petals; uneven tears make the flower look handmade in a messy way.
3. Tissue Peony with Layered Squares
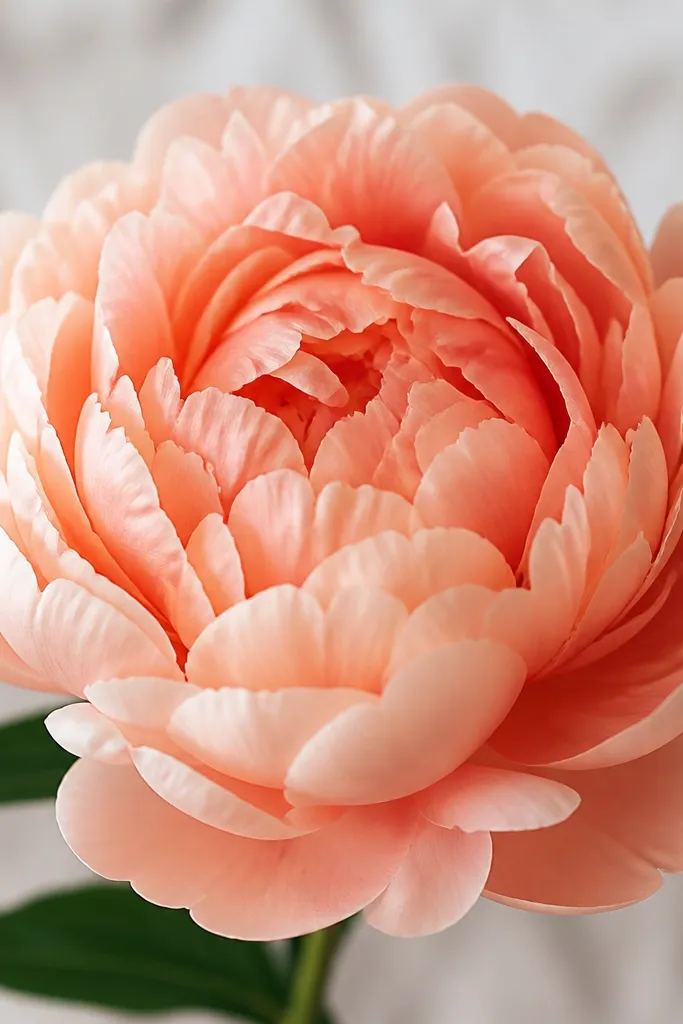
Peonies look expensive because they have lots of rounded layers, not because they’re hard. I make this by using layered squares that puff into petals, so you get that plush “bloom” shape. Coral and peach tissue blends well with gold accents and cream walls, and it reads romantic without going too pink. It flatters warm undertones in photos and looks great with neutral outfits. If you like a big, dramatic centerpiece, this is the style.
Editor's noteUse a slightly deeper coral for the inner 10 squares; it makes the center look natural and not flat.
Cut 18 squares from tissue: 4 squares at 6 x 6 in (small), 8 squares at 7 x 7 in (medium), and 6 squares at 8 x 8 in (large). Layer two colors: put 10 coral squares on the inside and 8 peach squares on the outside. Stack the squares, pinch the center, and wrap with florist tape at the bottom. Separate each square and pull it outward slightly — small ones first, then medium, then large. When you’re done, rotate the flower and fluff any gaps so the dome stays even.
Skip thisDon’t overstuff the center so tightly that the petals can’t open — you’ll lose the dome.
4. Paper Lantern Bloom (Hanging Flower Globe)
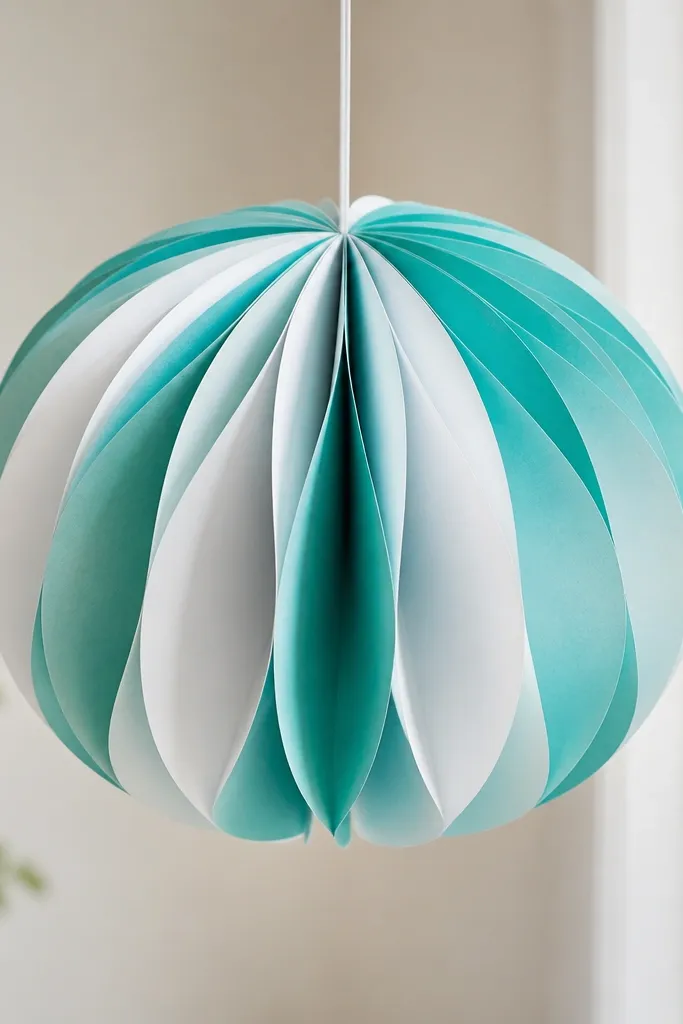
This is for when you need movement. Hanging blooms catch air and look different every time someone walks by, which makes the setup feel alive. Teal and white looks clean and modern, and the lantern shape keeps the flower from collapsing. I’ve used this for baby showers and it reads sweet without looking childish. The structure also makes it forgiving for beginners because the center holds everything upright.
Editor's noteCut a tiny V notch on the free ends before unfolding for more defined petal tips.
Cut 12 tissue sheets into 10 x 20 inch rectangles. Stack them, fold in half lengthwise, then accordion-fold into 1-inch pleats. Tie the pleated stack in the middle with string, leaving two long ends. Unfold the pleats into a fan shape and separate layers so the petals fill the globe. Hang it from a fishing line or twine and adjust by pulling layers until the dome looks even on all sides.
Skip thisDon’t skip separating layers; a tight stack looks like a flat pom instead of a globe.
5. Layered Tissue Butterfly Flower (Pinwheel Mix)
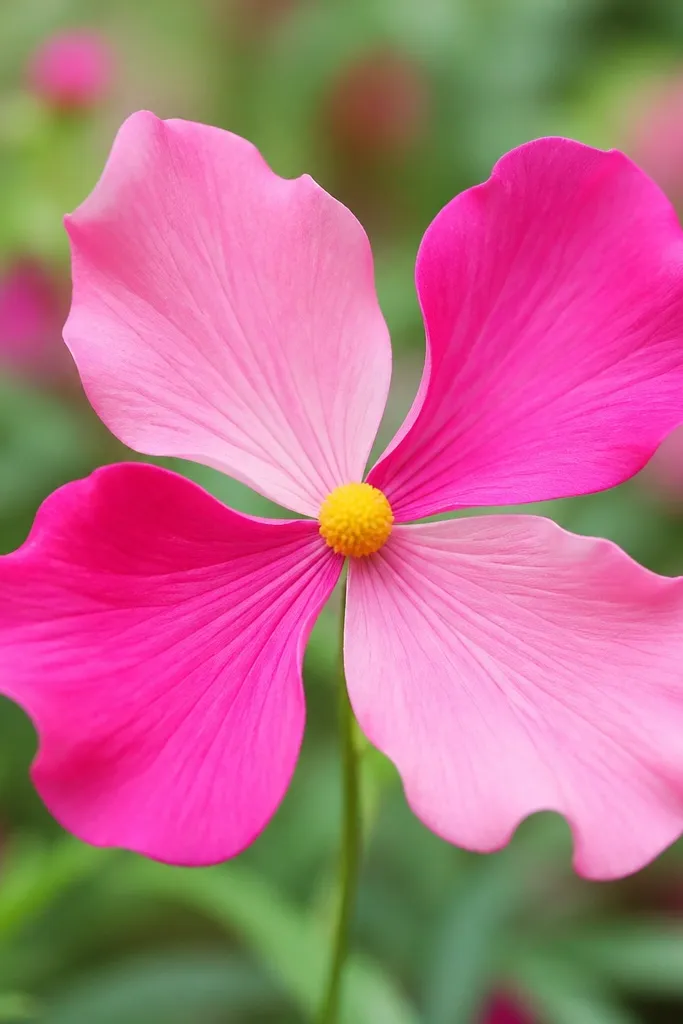
This one looks like a butterfly made into a flower, and it’s a fun change from the usual round blooms. The alternating colors make it look intentional, not random. I made these for a spring table and they looked great even when the flowers were small. The wing shape flatters a busy background because it has clear sections and doesn’t blend into the wall. It also works well as a hair clip accessory since the head is flat enough to tuck.
Editor's noteUse thinner, more flexible tissue for the wing curl — it holds the shape better.
Stack 4 tissue sheets and cut into 8 x 10 inch squares. Cut each square into a teardrop-ish wing shape by rounding one side and tapering the other. Layer two colors by placing pink wings underneath magenta wings. Pinch the bottom centers together and wrap with a short piece of tape. Fan the wings outward and twist the center wrap slightly so the petals curve upward.
Skip thisAvoid making the wings identical sizes; tiny differences make the flower look handmade in a good way.
6. Crepe-Style Fringe Flower (Quick Cut Spiral)
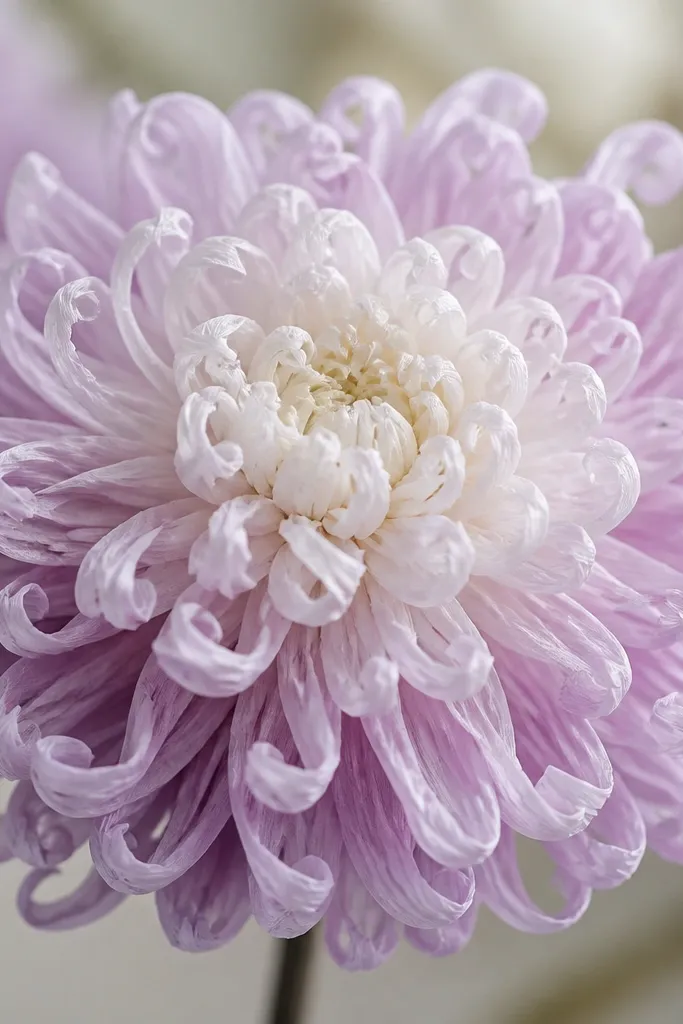
This style gives you the “crepe paper” look without buying crepe. When you roll the fringed strip around a center, the curls create texture that looks great close up. I like making it in gradients because the fringe catches light and looks dimensional. Lilac-to-white reads gentle and works for weddings, but it’s also cute for kids' parties. It flatters any color scheme because you can match the gradient to your theme.
Editor's noteIf your fringe curls don’t pop, gently run the fringe over the edge of scissors to curl it tighter.
Cut 3 strips of tissue, each 4 inches wide and about 20 inches long. Stack them and cut fringe along one long edge: snip 1/4 inch apart, stopping 1 inch from the non-fringed edge. Roll the non-fringed edge into a tight coil, then wrap tape around the bottom. Continue rolling until the fringed curls fan outward naturally. Fluff the outer fringe with your fingers to widen the bloom.
Skip thisDon’t cut fringe too deep; if you cut all the way to the base, the flower collapses.
7. Tissue Snapdragon (Tall Spikes Flower)
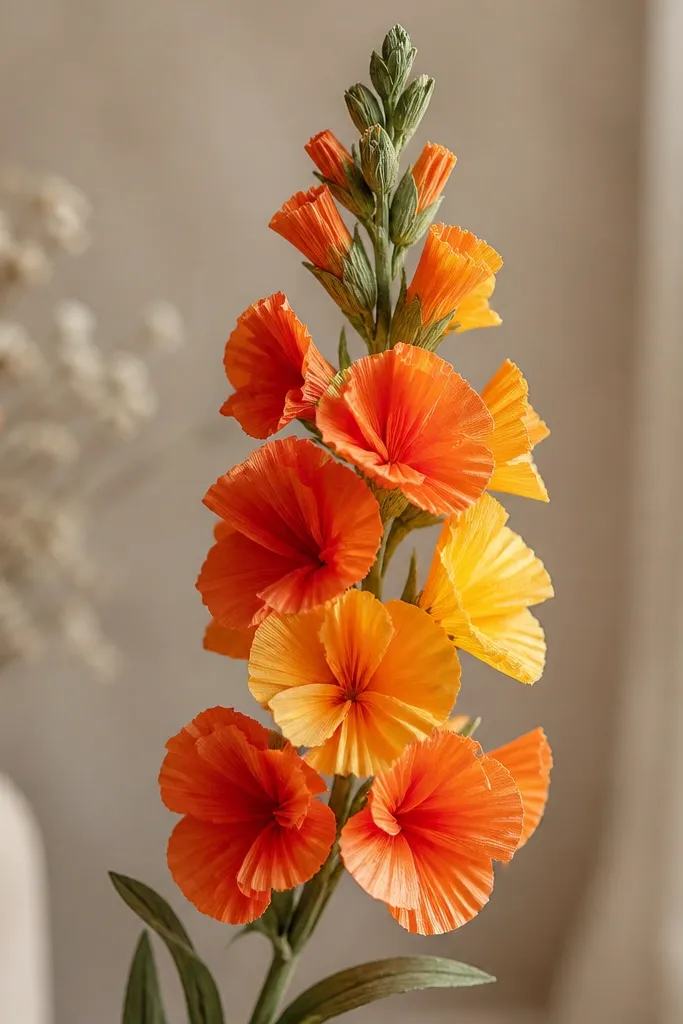
This is a different look: vertical and spiky, like a snapdragon cluster. It’s perfect when you need height without extra bulk, like behind a shorter centerpiece. Orange and yellow blend well with warm decor, and the tall shape makes photos look styled even if the rest of the table is simple. I like it for mantel decor because it stands out against flat surfaces. It’s also beginner-friendly because the individual “spike” units are small and forgiving.
Editor's noteUse slightly darker orange for the bottom spikes and lighter yellow for the top to mimic natural gradients.
Cut tissue strips 3 x 8 inches. For each spike, fold the strip in half, then accordion-fold the top half into 1/2-inch pleats. Pinch the pleats and tape them to a 10-inch floral wire stem. Repeat 6-10 spikes around the stem, layering them like scales up the wire. Finish by trimming uneven tips so the cluster looks symmetrical from the front.
Skip thisAvoid making all spikes the same height; the uneven heights make it look real.
8. Giant Tissue Chrysanthemum (Balloon-Ready)
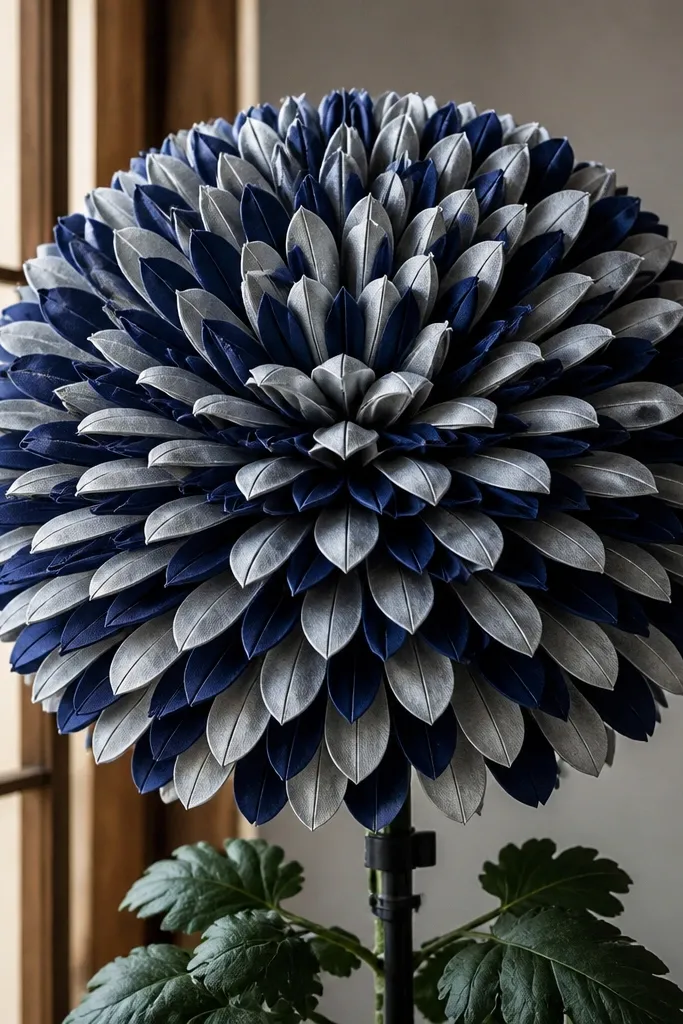
This is the “wow from across the room” flower, and it’s simpler than it looks. Fan-folding creates that dense petal look, and the round shape stays structured. Navy and silver gives you a party-ready vibe that still looks classy in photos. I’ve used it for graduation and it photographs well because the petals frame faces without hiding them. If you want a centerpiece that holds its shape for hours, this is it.
Editor's noteUse a thick wire base or a weighted stand; a light stem makes the whole bloom droop.
Stack 16 tissue sheets and cut them to 12 x 20 inches. Accordion-fold the stack into 1-inch pleats. Tie the folded stack in the center with string, then cut the ends into rounded shapes. Separate layers slowly, pulling one pleat at a time to build the sphere. Attach to a sturdy stand or a thick wire stem using tape around the center knot.
Skip thisDon’t rush the layer separation; rushing makes gaps that show through the tissue.
9. Mini Tissue Flowers for Gift Bags (4-Petal Lift)
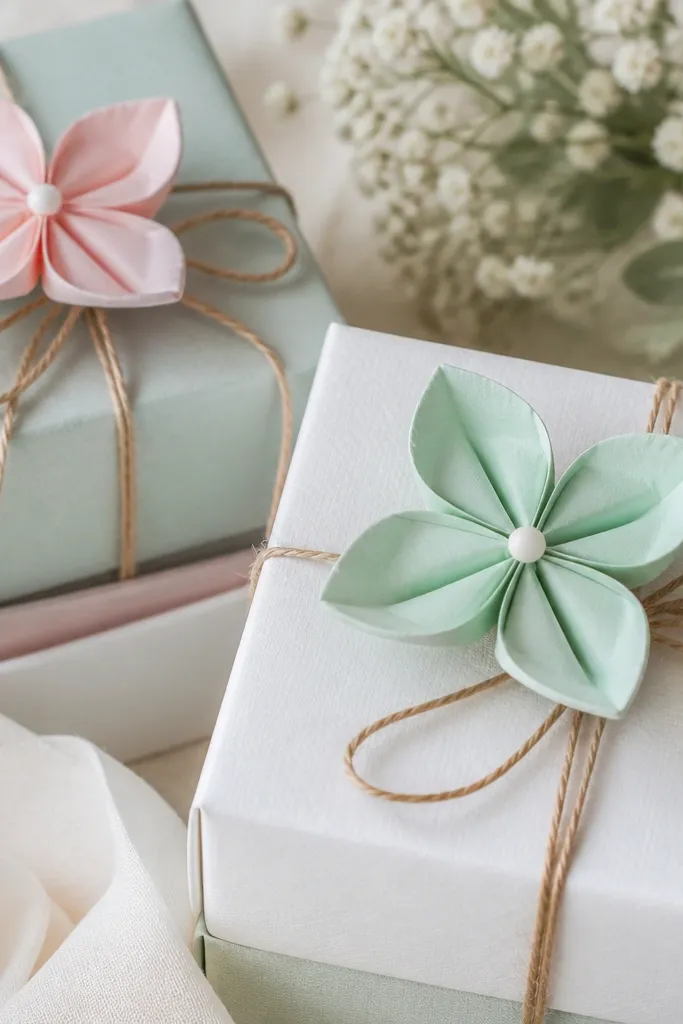
These mini blooms are quick and they make gift bags look finished. I use them when I’m wrapping for a group and I need everything to look consistent. Mint and pale pink is a calm combo that looks clean against kraft paper. The four-petal shape is easy to see from above, so they work even for small bags and flat wrapping. It’s also a good practice project because you learn how tissue behaves without committing to a large bloom.
Editor's noteAdd a 1/4 inch circle of yellow tissue at the center for instant “flower” realism.
Cut tissue squares at 5 x 5 inches (make 10). Stack two squares and fold into quarters. Snip the folded edge into a rounded petal shape, leaving a small center. Unfold carefully, then pinch the center and wrap with a tiny strip of tape. Repeat for each flower and attach with a glue dot to the bag handle or twine.
Skip thisAvoid using thick glue; it seeps through tissue and leaves glossy spots.
10. Tissue Flower Rosette (Crisp Fold Fan)
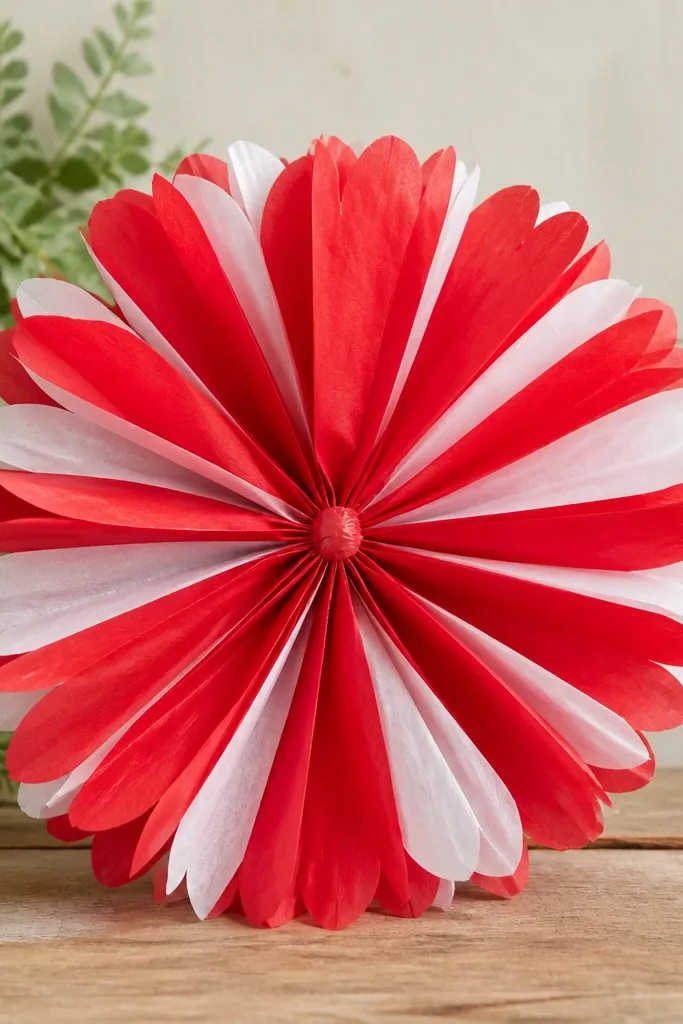
Rosettes look sharp because the petals are folded and stay a bit flatter than pom-poms. This makes the flower look clean on gift boxes and signage. Red with white tissue gives strong contrast and looks striking in daylight. It flatters frames and corners because it doesn’t sprawl. If you want a flower that looks “designed” even when it’s small, rosette styles deliver.
Editor's noteUse a bone folder or the back of a spoon to press pleats flat before wrapping.
Cut 8 tissue strips at 4 x 10 inches. Fold each strip lengthwise, then accordion-fold into 1/2-inch pleats. Stack pleats in a circle and pinch the center. Wrap the center tightly with tape and trim ends into points. Fluff each rosette layer outward in small lifts, alternating directions so the folds show.
Skip thisDon’t leave pleats loose; soft pleats make the rosette look wrinkled.
11. Layered Tissue Hydrangea (Cluster of Small Blooms)
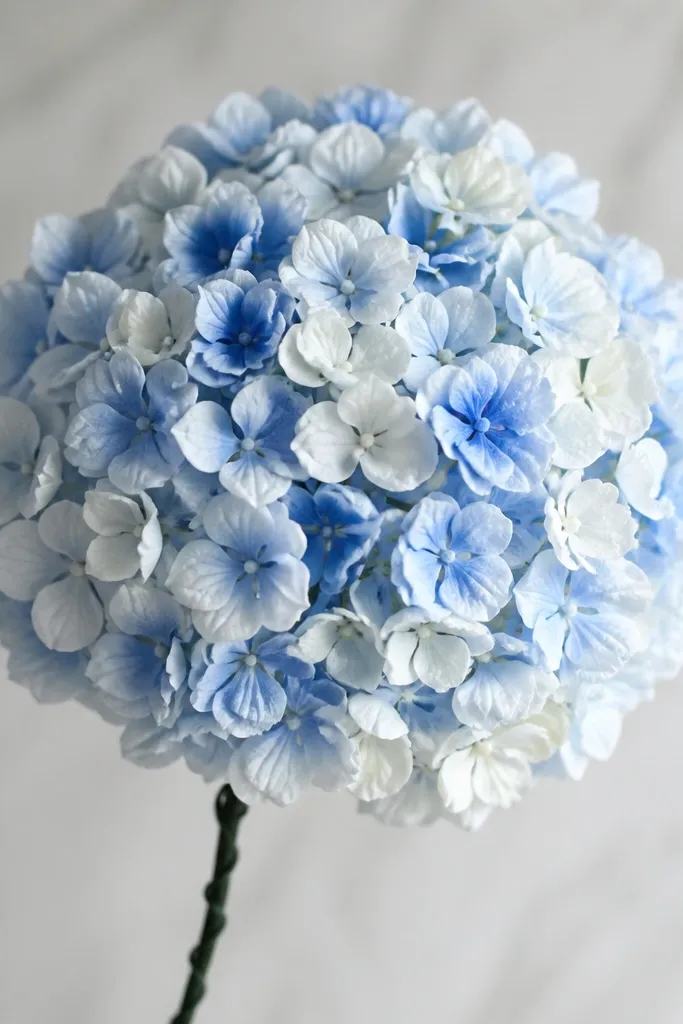
Hydrangea looks full because it has many tiny flowers packed together. This style is perfect when you want something lush but don’t want to make one huge bloom. Light blue and white looks airy and works with winter weddings and baby showers. It flatters neutral outfits because it adds color without harshness. The best part is that it hides small imperfections — if one mini bloom is slightly off, the cluster still looks believable.
Make 20 mini pom-poms using 3 sheets per mini bloom, each cut to 6 x 10 inches. Pleat each stack into 1-inch folds, pinch the center, and wrap with a small tape circle. Attach each mini to a 12-inch wire stem with hot glue or tape. Space them tightly so you don’t see wire between them. Finish by trimming stray petals so the overall cluster stays rounded.
Use a few deeper blue mini blooms as “anchors” in the center so it looks layered, not flat.
Avoid leaving long wire gaps; gaps show through and make it look thin.
12. Tissue Orchid (V-Cut Petal Wings)
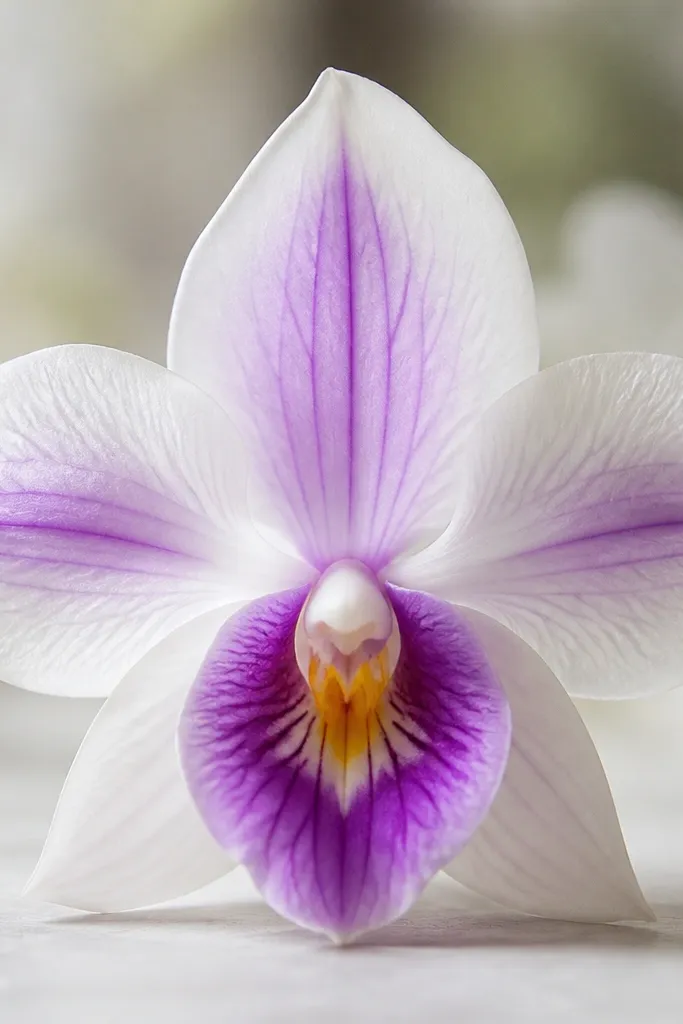
Orchids look fancy because of the wing shapes, not because you need special tools. I use V-cuts to create two upright petals and a center lip that curves forward. White with purple accents looks realistic and photographs well against dark backgrounds. It flatters anyone’s event decor because it adds a “boutique” look without the cost of real orchids. This one also works as a single statement flower in a vase or on a gift box.
Editor's notePress the purple accents with your finger so they don’t lift off and curl during fluffing.
Cut 3 tissue sheets into petal shapes: two side petals at 6 x 8 inches with a V-notch on one edge, and one center lip at 5 x 6 inches rounded at the top. Layer white petals with a small purple tissue patch on the lower half of each side petal. Pinch the base of each petal and wrap the bottoms together with tape. Add a tiny yellow circle in the center for the lip dot. Bend the center lip forward slightly so it looks like it’s “pointing” at the viewer.
Skip thisSkip making the center lip too big — it overwhelms the wing petals and looks like a blob.
13. Tissue Flower Crown (Headband Bloom Set)
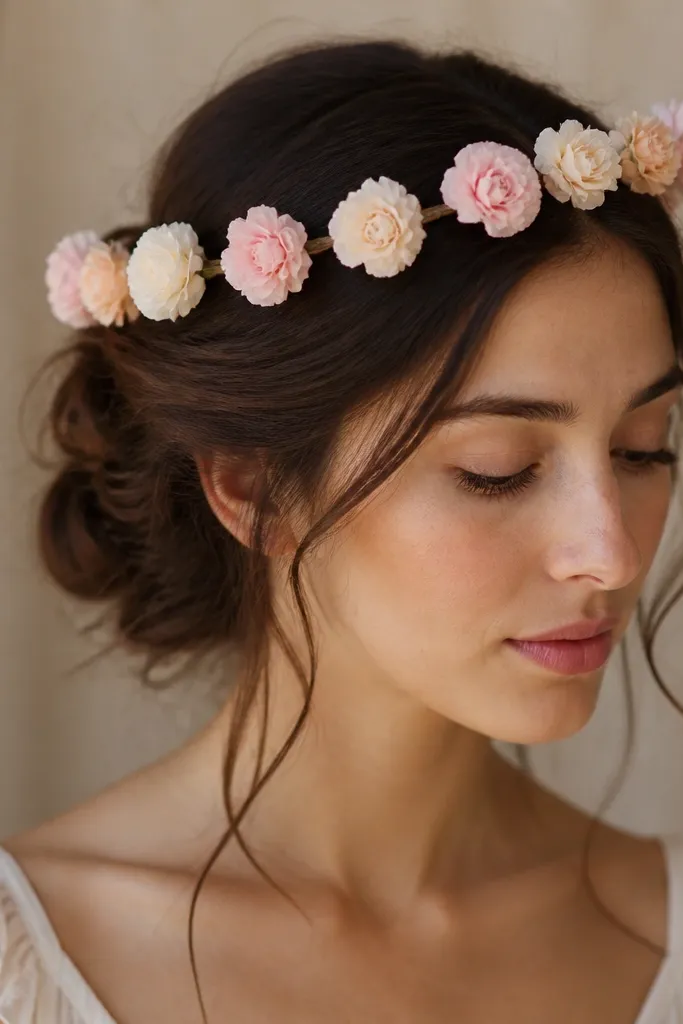
This is how you get tissue flowers to look wearable, not just decorative. The trick is using small bloom heads and keeping the stem short so it sits flat against a headband. Pink, cream, and peach is flattering on most skin tones and looks good in outdoor photos. I’ve worn these for garden parties and they stay comfortable because the attachment points are small. If you’re making something for kids, the crown format is easier than building big stems.
Use a thin headband and wrap it with floral tape if it’s metal. Make 9 small blooms with 6 sheets each, cut to 5 x 8 inches, using the accordion-pinch method. Trim each flower base so you get a 1-inch tail for attaching. Glue the tails onto the headband with hot glue, spacing them every 1 inch. Angle alternating blooms slightly left and right so the crown looks full from the front.
Add a strip of felt under the glue points if the headband edges are sharp.
Avoid large blooms on a headband; they pull away and look heavy.
14. Ombre Tissue Flower (Gradient Petals)
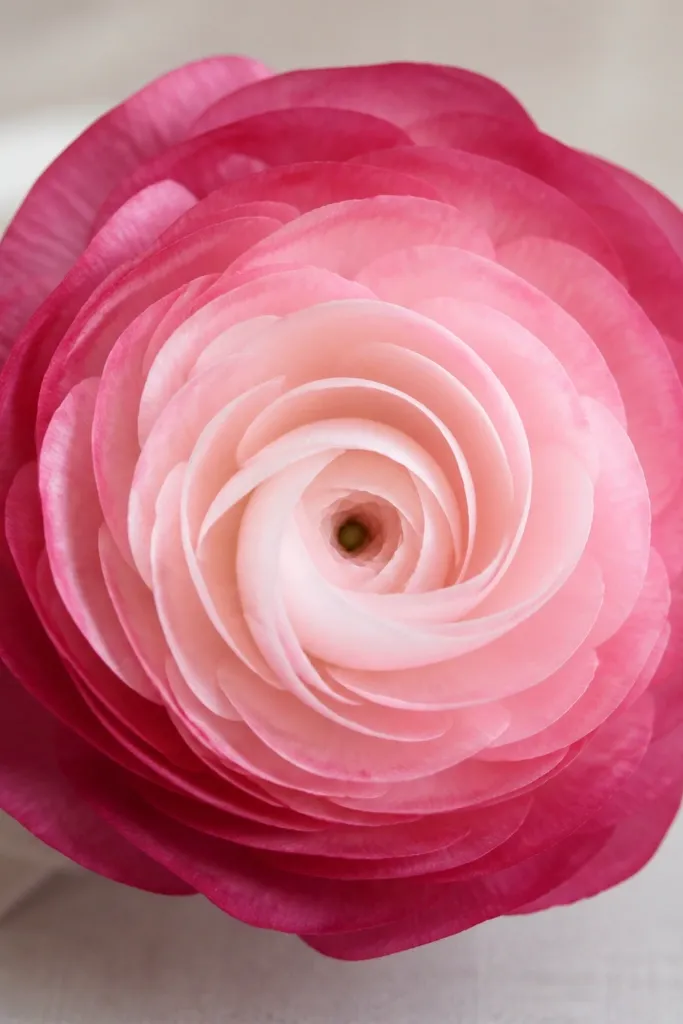
Ombre tissue flowers look expensive because the gradient reads like depth. I do this by layering tissue sheets in 3-4 shades, not by painting. Dark-to-light works best: the darker outer layer frames the bloom and the pale center looks airy. This style is great for weddings because it matches many color schemes without needing exact fabric matching. It also looks good for portraits because the gradient draws the eye to the center.
Editor's noteIf you have only two shades, use one shade twice and cut the second shade slightly smaller for a better gradient.
Cut 4 tissue layers into 10 x 20 inch rectangles. Stack them in order: darkest on the bottom, lightest on top. Accordion-fold into 1-inch pleats, then pinch and wrap the center tightly. Separate layers from outer to inner, pulling the darkest petals outward first. Trim the top edges into rounded points so the gradient shows as a rim effect.
Skip thisDon’t use too many shades with random cuts; the gradient turns muddy instead of smooth.
15. Tissue Flower Sunflower (Thick Center Seeds)
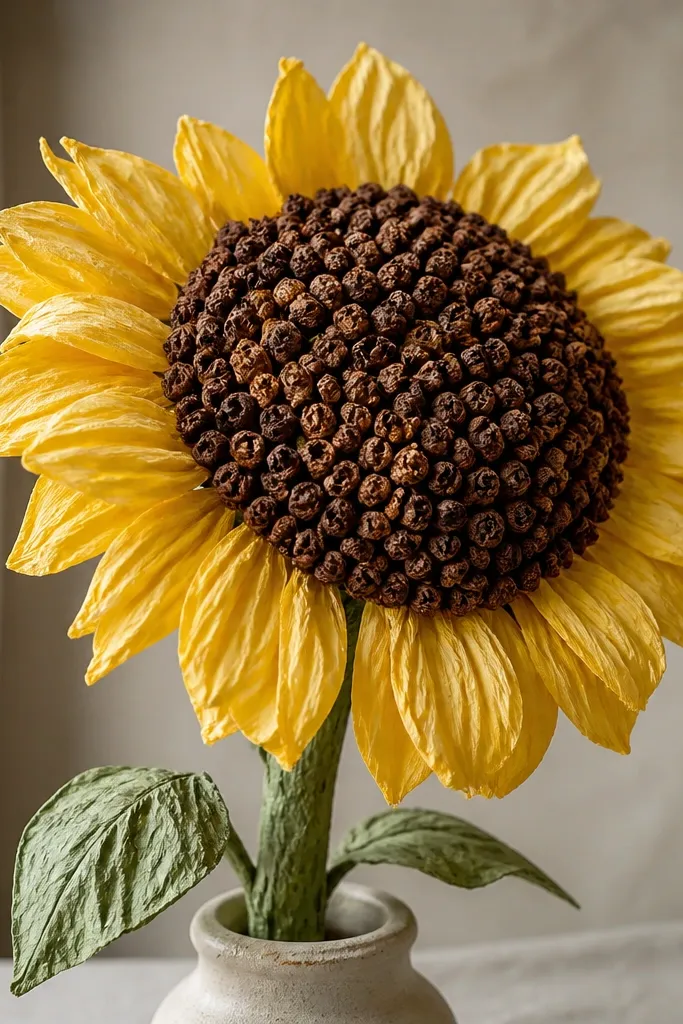
Sunflowers look real when the center is textured, not flat. I build the center with small rolled bits so it looks like seeds, and that texture makes the petals look brighter by comparison. Yellow tissue is forgiving — even if your petals aren’t perfect, the center detail pulls focus. This style is great for fall parties and also works for bright spring decor. The thick center sits nicely on a table because it doesn’t flop like lighter blooms.
Cut yellow tissue into 8 x 10 inch strips and cut narrow fringe along one edge to make petals; leave 2 inches uncut. Roll the fringe strip around a small circle of brown tissue to form a petal base, then tape at the bottom. For the center, roll 30 tiny brown tissue bits into balls and glue them onto a 2-inch circle. Arrange petals around the circle and press lightly so they sit evenly. Add a green stem and wrap with tape so it looks finished.
Roll center pieces with your fingers, not scissors — finger rolls keep them uniform.
Avoid a flat brown circle; it makes the whole flower read like a craft template.
16. Tissue Flower Starburst (Two-Tone Triangles)
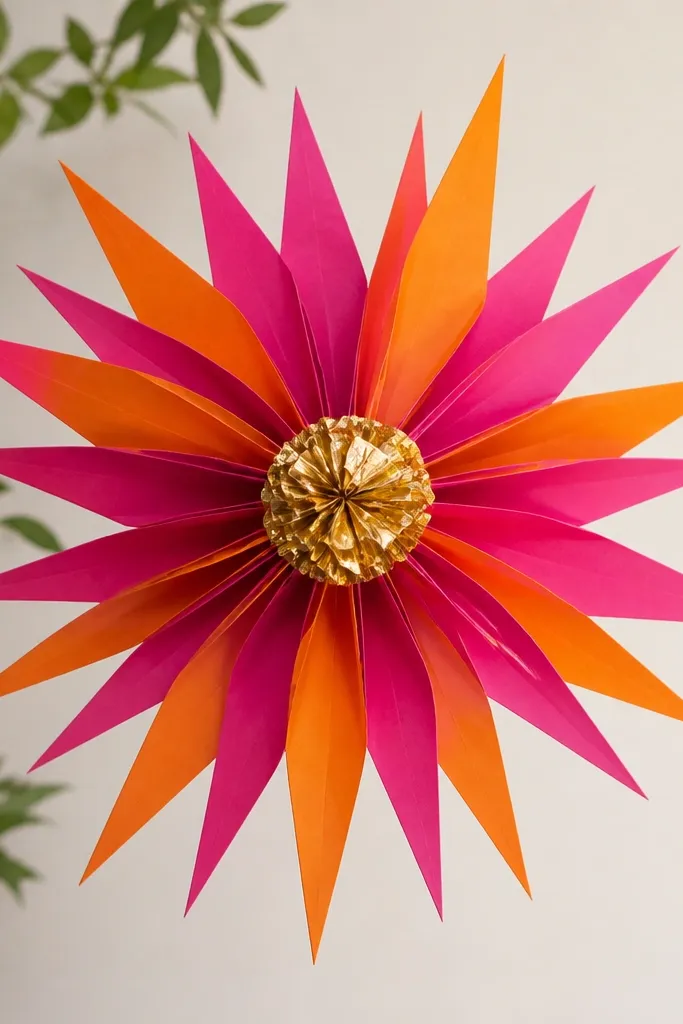
Starburst flowers look bold because the petals are pointed and evenly spaced. Two-tone triangles make the shape pop without needing extra decorations. I use gold or bright yellow at the center because it reflects light and makes the points look sharper. This style is fantastic for backdrops because the petals read clearly from a distance. It also flatters dark walls since the contrast is strong.
Editor's noteUse a cardboard center circle as a base; it keeps spacing consistent while you build.
Cut 24 triangles from two tissue colors: 3-inch base triangles, 5 inches tall. Stack triangles in pairs with opposite colors facing out. Fold each triangle slightly at the base and tape the folded base to a 2-inch center circle. Build in rings: first ring uses 8 pairs, second ring uses 8 pairs, third ring uses remaining pairs. Wrap the center circle with a short gold strip and trim any edges that stick out.
Skip thisDon’t eyeball triangle spacing — uneven spacing makes it look lopsided.
17. Tissue Flower in a Vase Look (Stemless Bouquet)
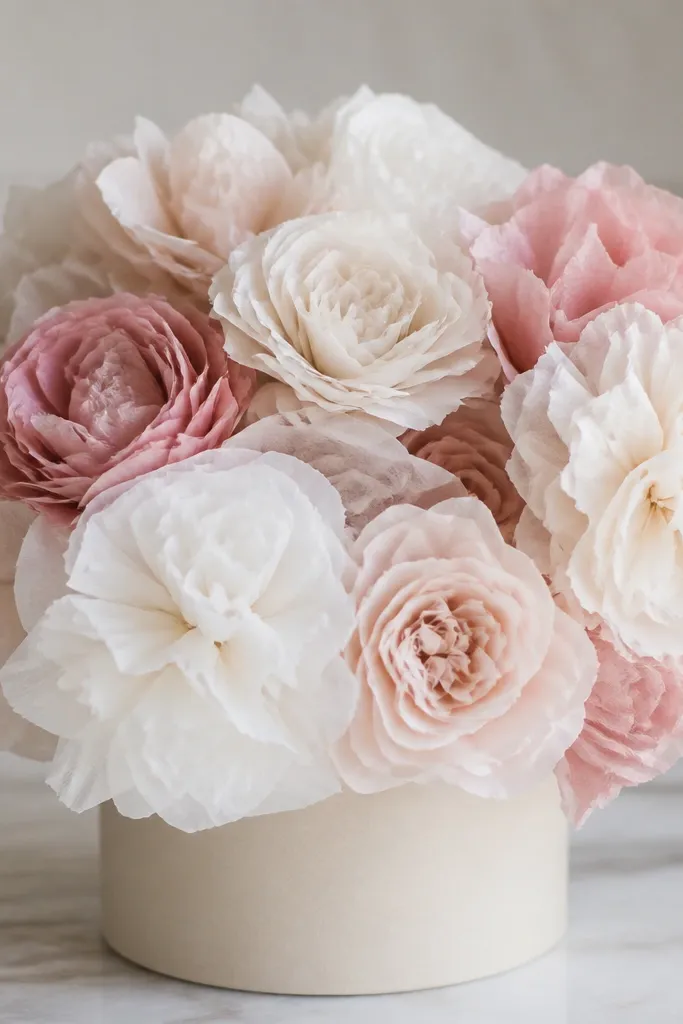
Sometimes you don’t want stems. Stemless tissue flowers look clean in a vase because you can hide the support completely. I do this with a shallow foam disk and short tape tails so the heads sit at the right height. White and blush looks classy in almost any room, and it’s great for quick home decor. The cluster style also covers any unevenness from making individual blooms. It’s a beginner-friendly way to get a polished result fast.
Editor's noteTrim the foam slightly lower than the vase rim so tissue doesn’t poke out.
Buy or cut a foam disk about 3 inches wide and 1 inch thick. Make 6 flowers using any style in this list, but keep a 1-inch tail at the bottom. Wrap each tail with tape so it sticks to foam without falling out. Push the tails into the foam disk at slightly different angles so the heads layer naturally. Put the foam into a small vase or container and cover the top with a circle of tissue or greenery paper.
Skip thisAvoid leaving long tails; they bend the bloom heads and ruin the height.
18. Tissue Dahlia with Rounded Fan Petals
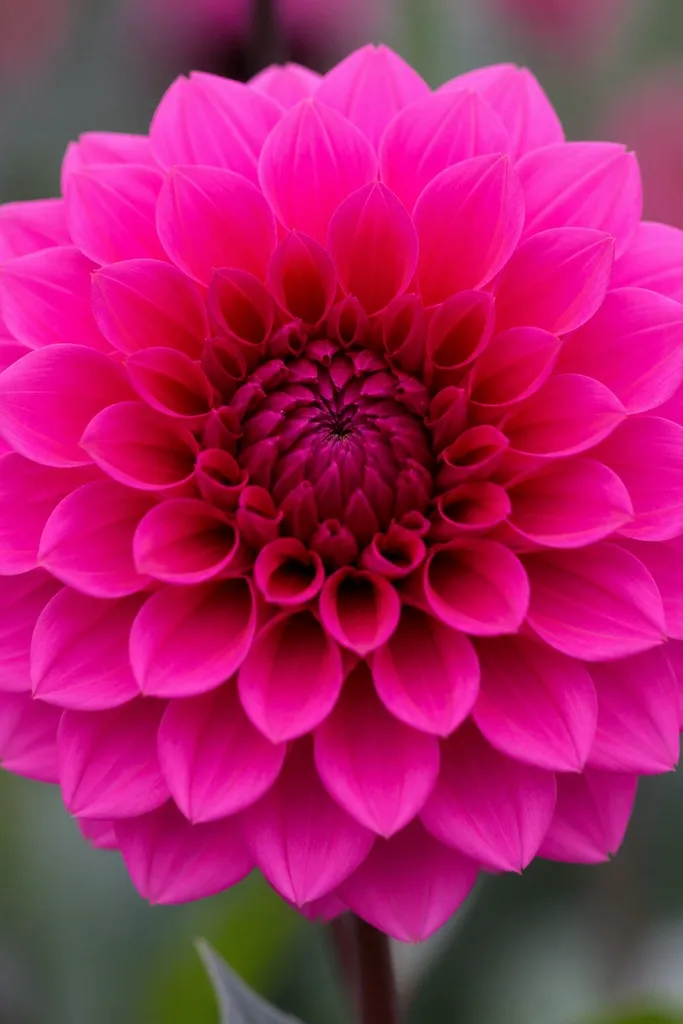
Dahlias look full and fancy, but you can build them with simple fan folds. The rounded petal edges create that “dense flower” look that holds up in photos. Fuchsia with a magenta center reads bold without needing extra embellishments. This one is flattering for parties because it brings color to neutral rooms. If you want something that looks like a real garden flower, dahlia shapes get you closest with tissue.
Editor's noteRound the ends more than you think; tissue looks crisp when the petal edges are smooth.
Cut 10 tissue sheets into 8 x 20 inch rectangles. Stack and accordion-fold into 1-inch pleats. Tie the folded stack with string at the center, then cut the outer ends into rounded arcs. Separate layers and fluff gently into a circle shape. Build concentric rings by pulling some folds inward for the center and others outward for the outer rim. Wrap the center with a 1-inch strip of darker magenta tissue to hide the knot.
Skip thisDon’t make the pleats too thick; bulky pleats create lumpy petals.
19. Tissue Flower with Ruffled Edge (Wave Cut)
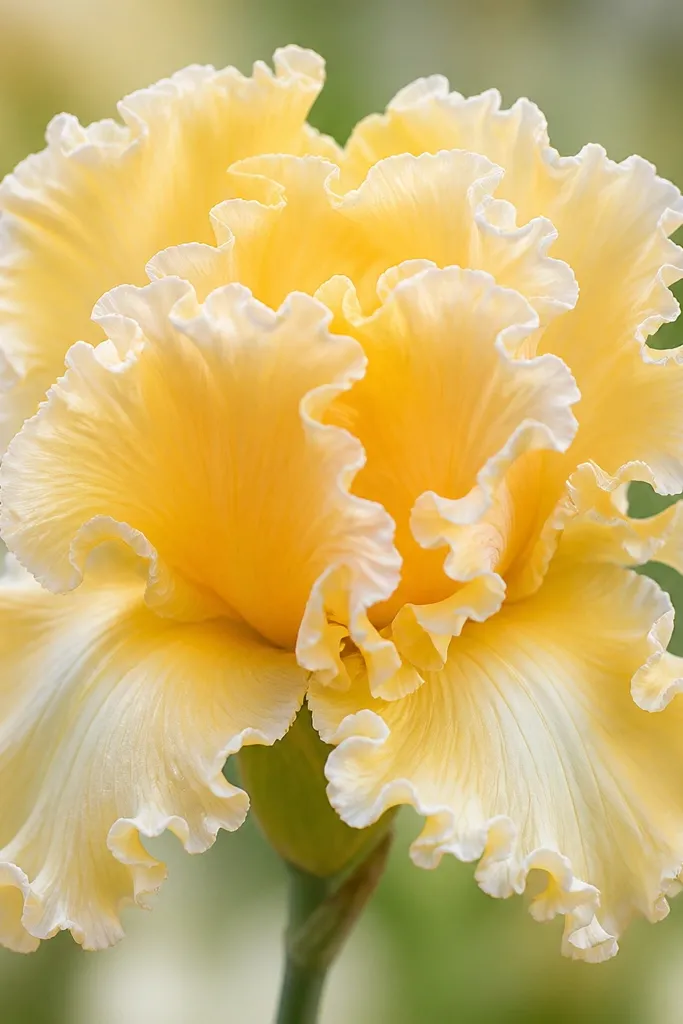
Wave-cut tissue makes petals look airy and light, like they flutter. I like this style for spring tables because it doesn’t feel heavy. Pastel yellow with white edges gives a soft glow that looks good near windows. It’s also great for people who want a flower that looks delicate without being fragile. The ruffled edge adds realism even if your folds aren’t perfect.
Cut tissue sheets into 10 x 20 inch rectangles and stack 5 sheets. Accordion-fold into 1-inch pleats and tie the middle. Cut the outer edges into a wavy shape using small scissors snips. Separate layers and fluff outward, then trim the very outer ring to keep it even. Wrap the center with a thin strip of white tissue so the center looks finished.
Practice the wave cut on scrap tissue first; the rhythm matters for a clean edge.
Avoid cutting waves too deep — you’ll weaken the petals and they tear when fluffed.
20. Tissue Tulip Bloom (Rolled Petal Heart)
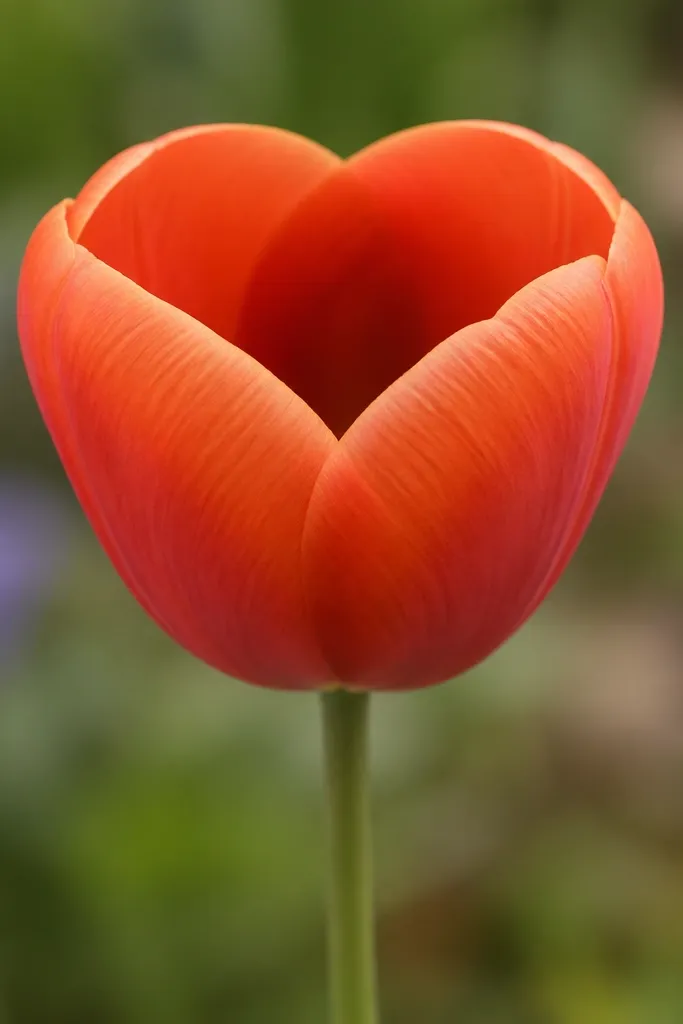
Tulips are all about the opening. This style makes a closed, tulip-like heart by rolling petals around a center base, so it looks like a real bud. Orange-red is a great choice because it looks warm and alive, and it pops against green leaves. It flatters people’s photos because it’s upright and doesn’t cover faces. If you’re decorating a small corner or using one flower per place setting, tulips look intentional and not bulky.
Cut 3 tissue sheets into 6 x 12 inch rectangles. Roll each rectangle lengthwise loosely, then fold the roll in half to create a petal shape. Wrap one darker tissue strip around a small ball of tape at the base, then place the petal shapes around it. Tape the bottoms together and twist lightly so the opening faces up. Add two small green leaf strips to the stem and wrap with floral tape.
Use slightly thicker tissue for tulips; it holds the bud shape better.
Avoid fluffing tulips wide; tulips look wrong when they turn into open pom-poms.
21. Tissue Camellia with Tight Center Spiral
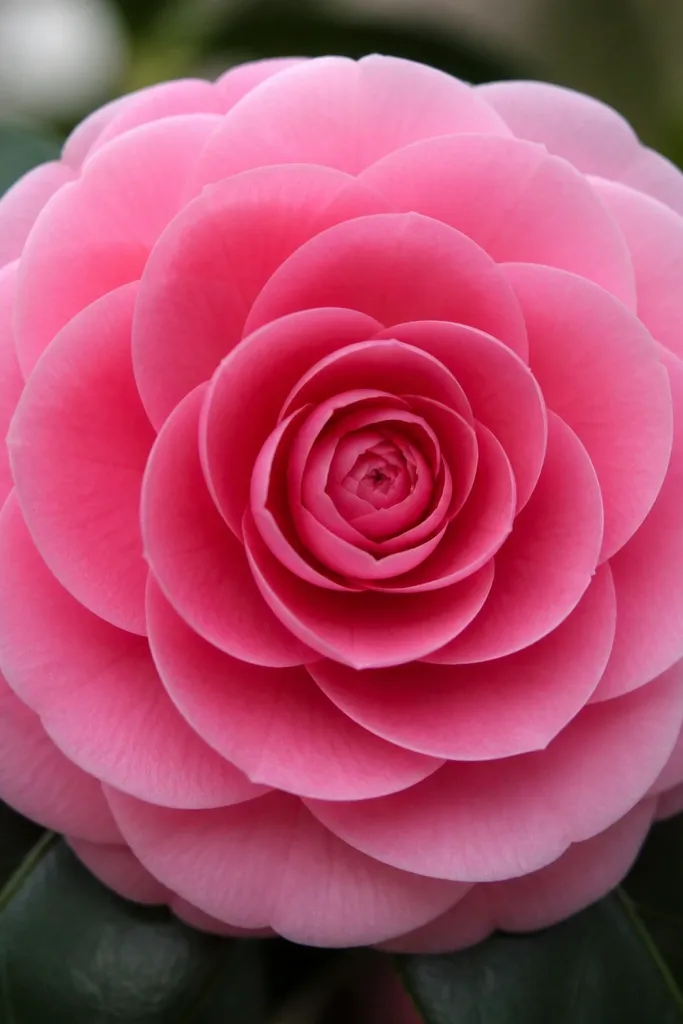
Camellias have a structured center, and this spiral center is what makes the flower feel realistic. I use a tight spiral strip to build the middle, then layer wider petals around it. Deep pink with lighter pink edges looks lush and reads well in both daylight and evening. It flatters warm and cool skin tones because pink sits in the middle of most palettes. This is a good pick if you want something that looks like a “real” flower head, not just a decorative ball.
Editor's noteKeep the spiral tight; a loose spiral makes the camellia look flat.
Cut a 2-inch wide tissue strip and fringe it lightly every 1/8 inch along one long edge without cutting through the base. Roll the strip tightly into a spiral and tape the bottom. Cut 12 petal pieces from tissue squares: 4 x 6 inches rounded at the top, pinched at the base. Place petals around the spiral, overlapping slightly, and tape each base to the center. Finish by adding a final ring of lighter pink petals to create an outer halo.
Skip thisDon’t skip the light fringe on the center strip; it gives the center texture.
22. Tissue Flower with Twisted Center (Ribbon Rose)
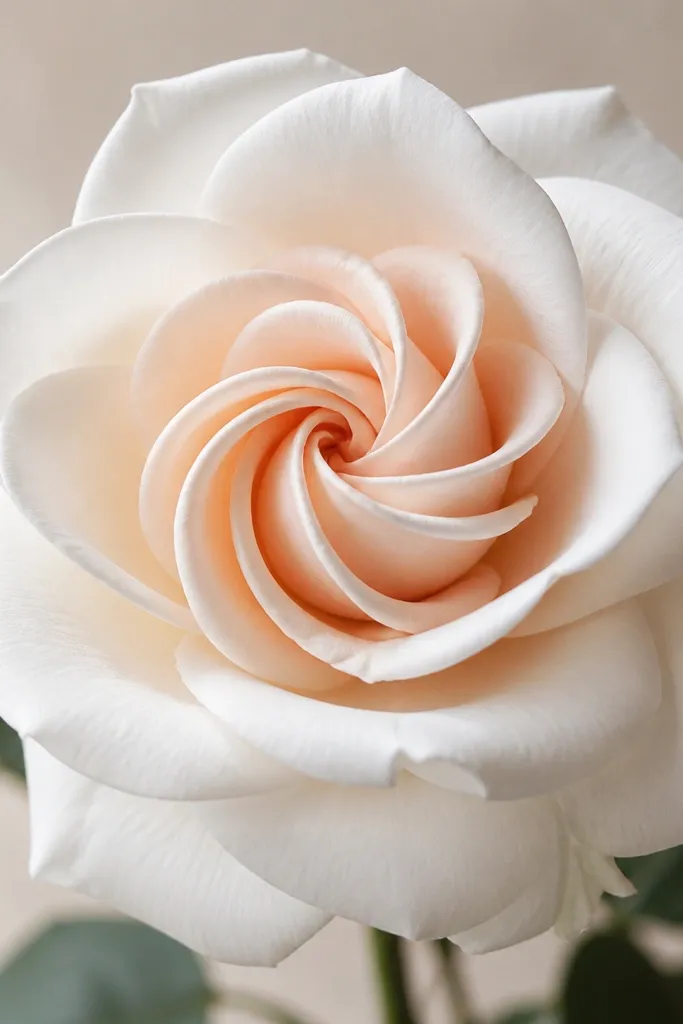
This is my go-to when I want a rose look with extra detail. The twisted center makes the bloom look like it has “folded petals,” not just stacked tissue. White outer petals keep it bright and clean, while pale peach in the center adds warmth. It flatters neutral decor and looks great on wedding tables with linen. The bloom also holds its shape better than fully fluffed styles because the center is anchored by the twist.
Editor's noteTwist the center strip with tension — if it feels loose, it won’t look ribbon-like.
Cut two sets of tissue rectangles. For the center, cut pale peach into 2 x 10 inch strips and twist tightly like a ribbon. For the outer petals, cut white into 6 x 8 inch squares, then round the top edge. Tape the twisted ribbon into a small coil and attach the outer petal pieces around it using tape at the base. Pull each outer petal outward slightly and press so the layers sit evenly. Wrap the base with green floral tape to hide the attachments.
Skip thisAvoid using too much tape on the petal bases; it creates visible bumps.
23. Tissue Cherry Blossom (Branch-Friendly Bloom)
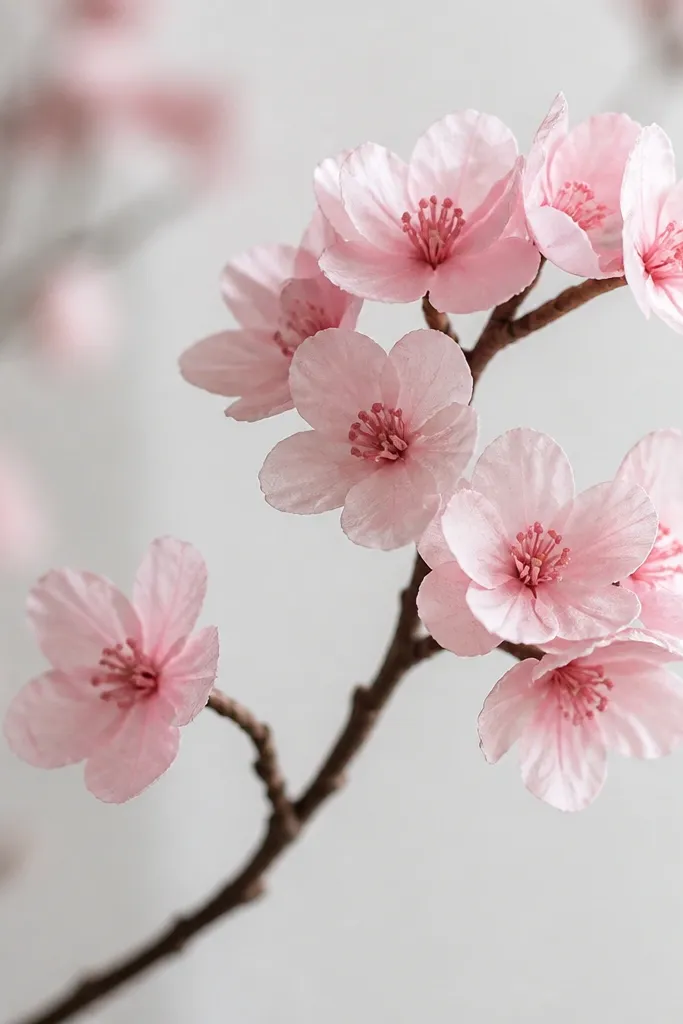
Cherry blossoms look right when they’re small and clustered. This style is branch-friendly, so it works for centerpieces, wall branches, and even wreaths. Pale pink tissue feels soft and flattering, and the darker centers add realism without making it look messy. I’ve used it for spring mantel decor and it looks good even when you only have a few branch pieces. The size also makes it beginner-friendly because you’re not wrestling with a giant flower head.
Editor's noteUse a toothpick to poke the center slightly upward so the blooms look more like blossoms than flat flowers.
Cut tissue into 4 x 4 inch squares. Fold each square in half, then fold again into quarters. Snip a tiny rounded petal shape at the open edge, leaving the folded center intact. Unfold to reveal four petals, pinch the center, and wrap with a tiny strip of tape. Make 12-18 blossoms total, then glue them onto a wire branch wrapped with brown paper tape, spacing them along the branch like clusters.
Skip thisAvoid making each blossom identical; slight size variation looks natural.
24. Tissue Flower Envelope Topper (Flat Layered Bloom)
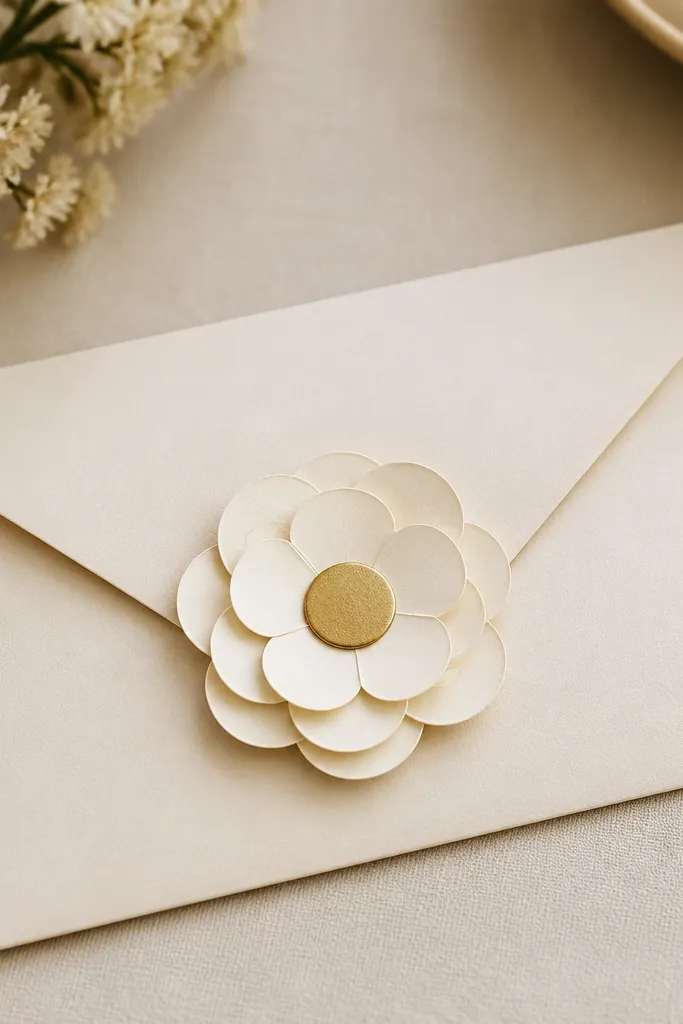
This one is made for paper crafts, not hanging decor. Keeping the flower flat means it won’t crush your envelope or gift card. Cream petals with a gold center looks fancy without needing glitter glue. It flatters minimal desk setups because it’s clean and doesn’t take up much space. If you’re sending thank-you notes or small gifts, this style makes your card look styled in one step.
Editor's noteUse cardboard backing so the center doesn’t sag and the petals stay crisp.
Cut tissue circles from squares: make 2 layers of petals from 6 x 6 inch tissue by folding into quarters and rounding the edges before unfolding. Layer the circles so the top layer is slightly smaller. Pinch the center and tape it to a 1-inch gold tissue circle. Add a thin foam or cardboard backing behind the gold circle so it stays flat on the envelope. Press the whole flower onto the envelope with a glue dot at the center only.
Skip thisAvoid hot glue blobs near the edges; they warp tissue and show through.
25. Tissue Flower Bouquet with Color Blocking (Side-by-Side Bloom Mix)
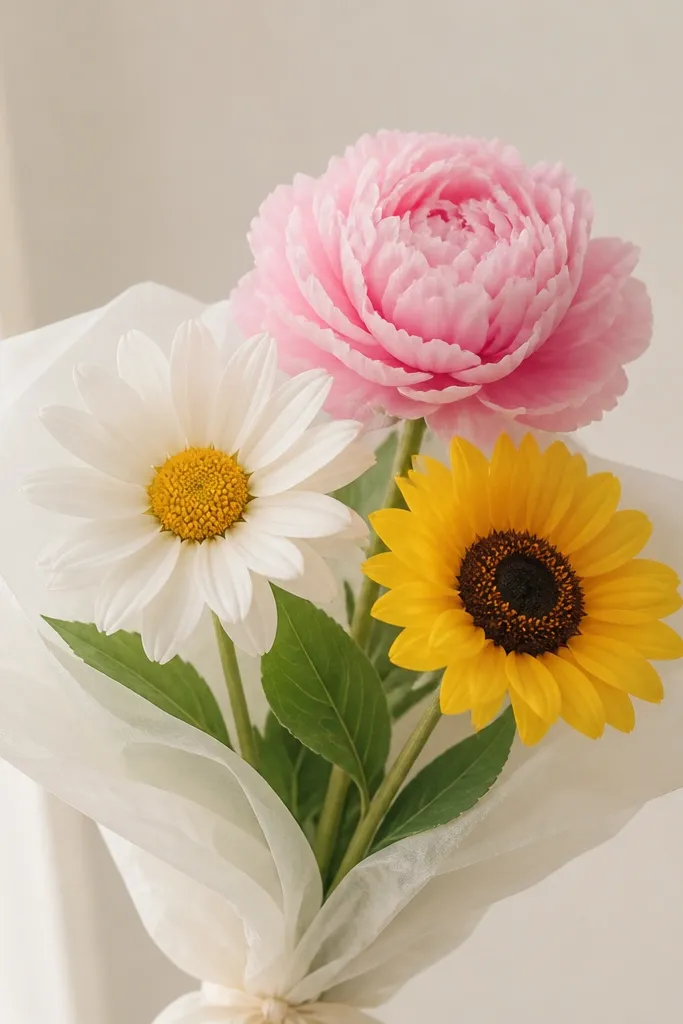
Color-blocked bouquets look good because each bloom has breathing room. I learned this after making a full set and seeing it all blend into one fuzzy mass. By spacing different flower types apart, you keep each shape readable. White, pink, and yellow is the easiest combo because it balances warm and cool tones without fighting. This style flatters any table because it looks intentional even with simple wrapping paper or plain vases. It also helps beginners because you can mix styles without worrying about exact matching.
Editor's noteChoose one dominant color and let the other two act like accents; it keeps the bouquet from looking busy.
Make three flowers using different looks: one daisy with sharp petals, one peony domed head, and one sunflower with a textured center. Trim stems so the tallest head sits about 7 inches above the vase rim. Arrange them with one bloom facing forward and the others angled 30-45 degrees outward. Secure stems with floral tape around a small bundle of wire. Add filler greenery made from tissue strips curled into thin loops and tuck between heads to hide tape.
Skip thisAvoid stuffing all blooms into one tight clump; you lose the shape difference.



