


1. Stamped Fabric Key Fob with Tiny Name Tag
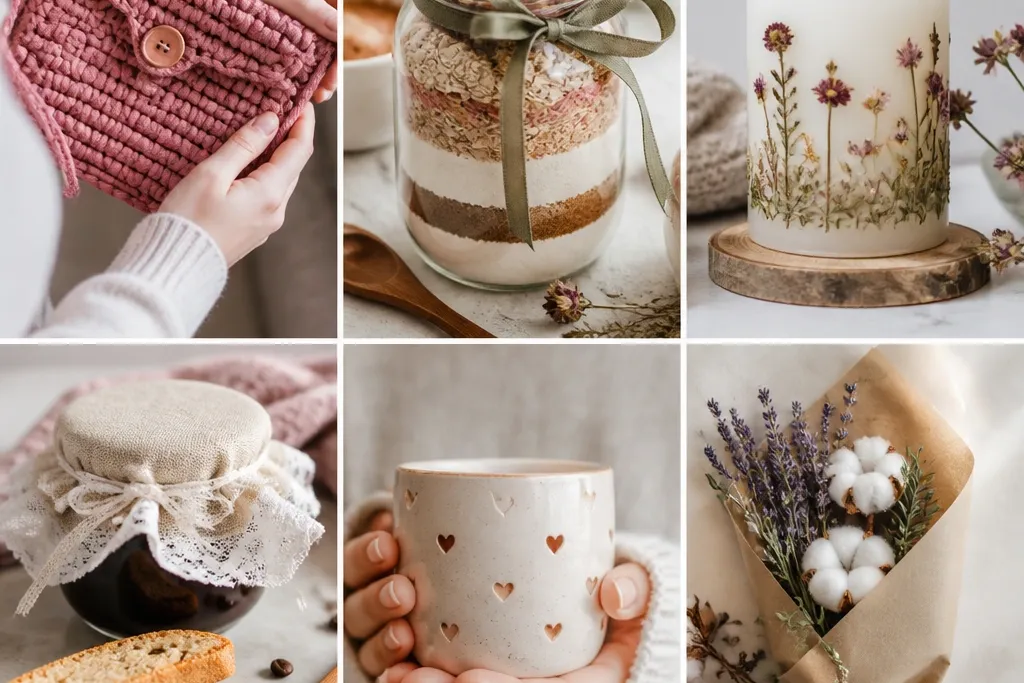
This key fob is the kind of gift your friend uses immediately, which is why it always wins for easy handmade gift ideas for best friend. I use thick cotton canvas or a sturdy linen blend so it holds shape when it’s hanging from a key ring. The stamped heart (or initial) looks “designed” even if you’re not an artist, and the small tag gives it a personal hit. It flatters practically everyone because it’s slim, not bulky, and the neutral base works with car keys, house keys, and tote keys alike. If your friend wears gold jewelry, pair the stamp with warm rust and a brass-toned ring.
Start by cutting a strip of fabric about 3.5 inches wide and 8 inches long. Fold it lengthwise wrong sides together, press with a warm iron, then sew along the long edge using a straight stitch or fabric glue if you want no-sew. Stamp the front piece before you assemble the fold — I press the stamp for 10-15 seconds with a textile ink pad. Finally, fold the finished fob into a loop, stitch across the end, and attach a small metal jump ring plus a 1-inch name tag charm.
Write the date on the back of the name tag with a fine paint marker so it ages like a keepsake.
Avoid thin quilting cotton — it collapses and makes the fob look cheap fast.
2. Photo Transfer Coaster Set from Old Book Pages
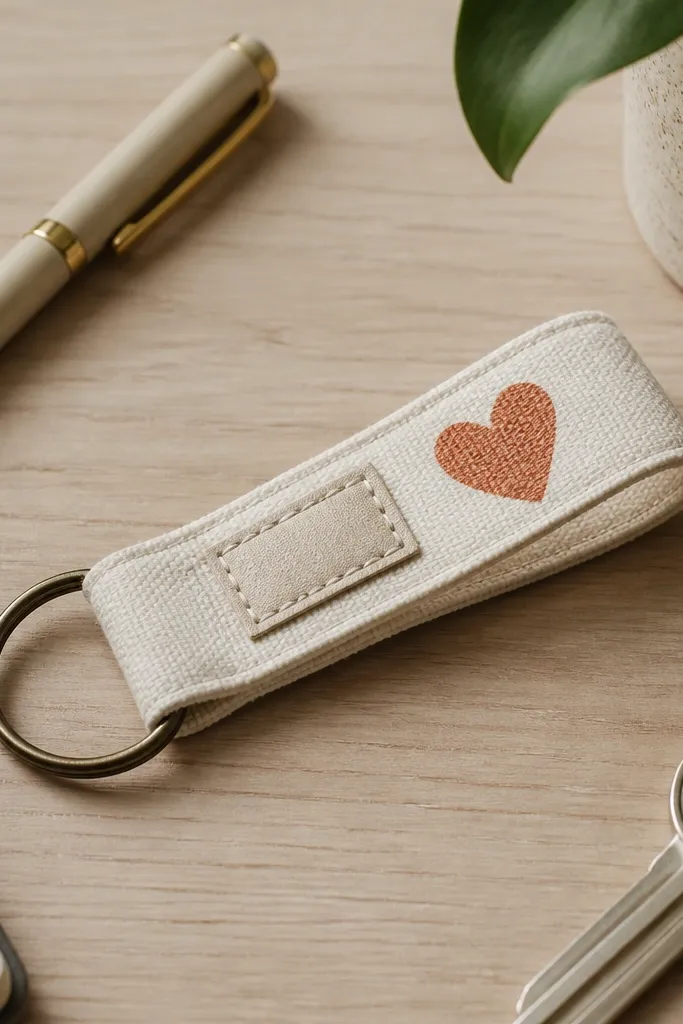
If your friend loves photos but hates clutter, coasters are a sweet middle ground. I use a pair of photos with strong contrast — black-and-white faces or simple objects — because transfer looks crisp when the image is bold. The warm book-page background makes the final set feel vintage without looking messy. It’s a great match for friends who host, study, or work from home since coasters get used daily. For styling, choose a neutral photo set that works with both light and dark mugs.
Editor's noteSeal the edges too — that’s where water spots start.
Start with four cork coasters or foam-backed tiles about 4 x 4 inches. Cut printed photo images to fit with a 1/8-inch margin, then apply a thin layer of gel medium or Mod Podge to the coaster top. Press the photo face-down onto the glue, smooth out bubbles with a plastic card, and let it dry fully. After drying, rub off the paper top layer with damp fingers or a soft cloth, then seal with two more coats of clear Mod Podge, letting each coat dry 30-60 minutes.
Skip thisDon’t use low-contrast photos; they turn gray and blurry under transfer.
3. No-Sew Pom-Pom Bookmark in School Colors
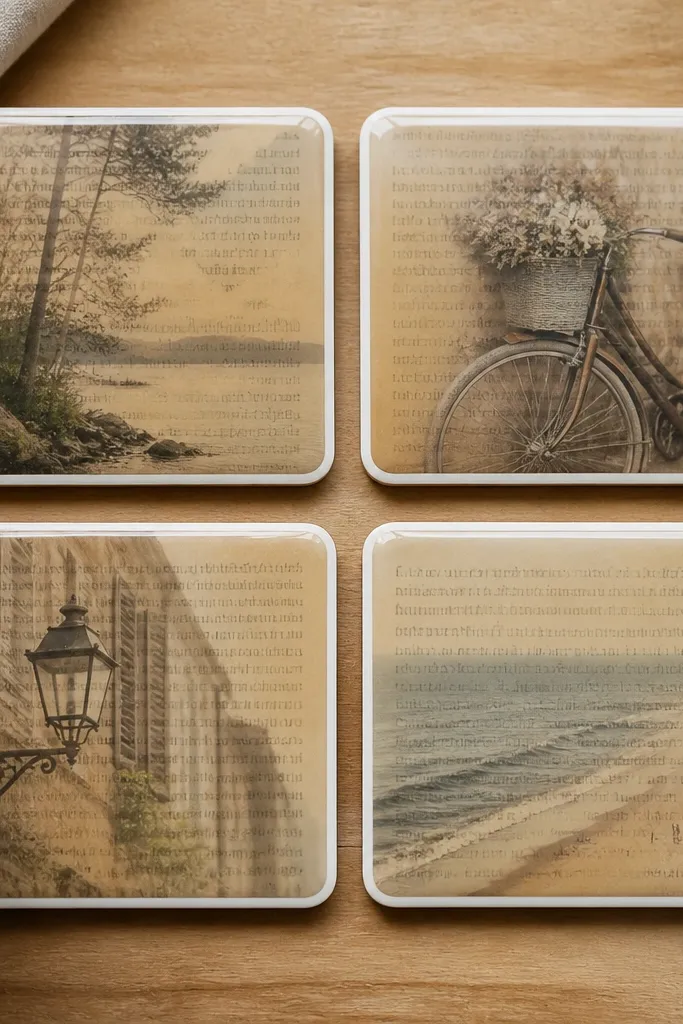
This is one of my favorite easy handmade gift ideas for best friend because it takes minutes to make and still feels fun. I like yarn pom-poms made from medium-weight acrylic because they’re springy and don’t shed as badly as thin yarn. Choose two colors that your friend already wears — like teal and navy, or blush and cream. The bookmark works for anyone who reads, keeps cookbooks open, or annotates notes. The pom-pom also adds a tactile detail that looks adorable in photos.
Editor's noteTrim the pom-pom after tying — you’ll get a clean circle instead of lopsided fluff.
Start by making a pom-pom using a pom-pom maker or by wrapping yarn around two cardboard circles until you like the fullness. Tie the center tightly with a matching yarn and trim into a rounded shape. Cut a 6-8 inch strand of yarn for the tassel, fold it in half, and knot it under the pom-pom. Finally, attach a small ribbon loop or a strip of felt near the top so it slides onto the page without snagging.
Skip thisAvoid polyester yarn that tangles while you cut — it frays and looks messy.
4. Heat-Set Vinyl Mug Wrap with Inside Joke
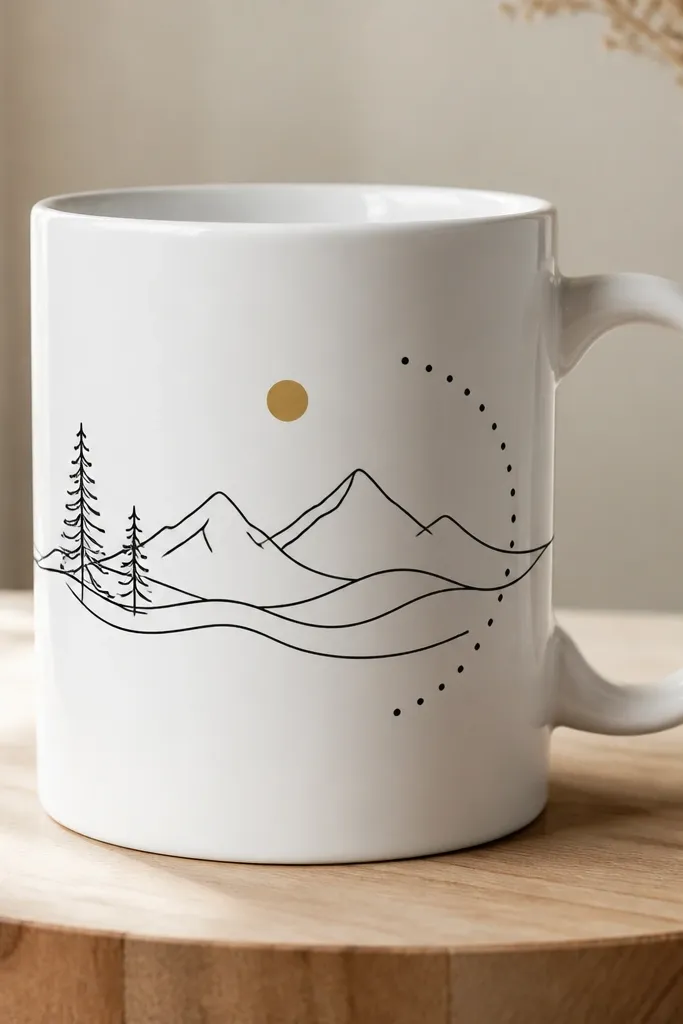
A mug wrap is a clean-looking gift that still feels personal because of the text. I’ve made these for friends who drink coffee daily, and the vinyl holds up better than paint if you use heat-set vinyl. Pick a single line drawing and one short phrase — keep it under 12 characters if you want it to look tidy. It flatters most kitchens because white mugs match everything, and black vinyl with a tiny gold accent looks sharp. If your friend likes minimal style, this is the safest bet.
Editor's noteHand-wash only for the first week — it helps the vinyl fully bond.
Start by cleaning the mug with rubbing alcohol so the surface isn’t oily. Cut your vinyl using a craft cutter or buy pre-made heat-set vinyl letters. Place the vinyl on the mug and use a heat press or a household iron with parchment paper — press for about 30-60 seconds, then let it cool. Wrap the extra vinyl edge around the mug slightly so the design doesn’t peel at the seam.
Skip thisDon’t use regular craft vinyl that isn’t heat-set — it lifts after a few washes.
5. Fabric Scrap Flower Hair Clip Set
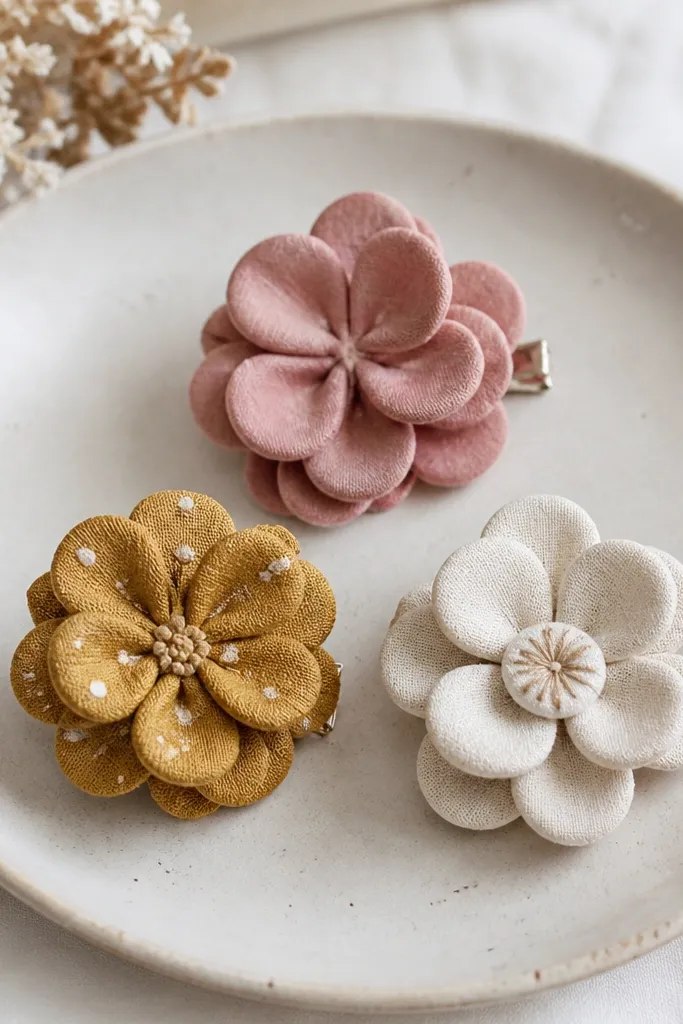
These clips are an easy win because they look curated even when you’re using scrap fabric. I make them from cotton scraps, felt, or even old T-shirts with a light interfacing layer so the petals hold shape. The layered petals give a soft, flattering look on hair — especially for friends with bangs or shoulder-length hair. Choose one “main” color and one accent fabric so the set looks intentional, not random. The center button or pearl is what makes it feel gift-worthy.
Editor's noteAdd a tiny felt circle under the petals to hide raw edges.
Start by cutting petal shapes in three sizes — about 2 inches, 1.5 inches, and 1 inch wide for a small clip. Layer them from largest to smallest and stitch or glue at the base so the petals fold slightly upward. Add a button or small bead in the center using strong thread or hot glue. Attach the finished flower to an alligator clip with fabric glue, then make two more flowers in matching colors for a set.
Skip thisDon’t skip interfacing — unstructured fabric collapses and looks flat.
6. Salt Dough Charm Keychain with Paint Pen
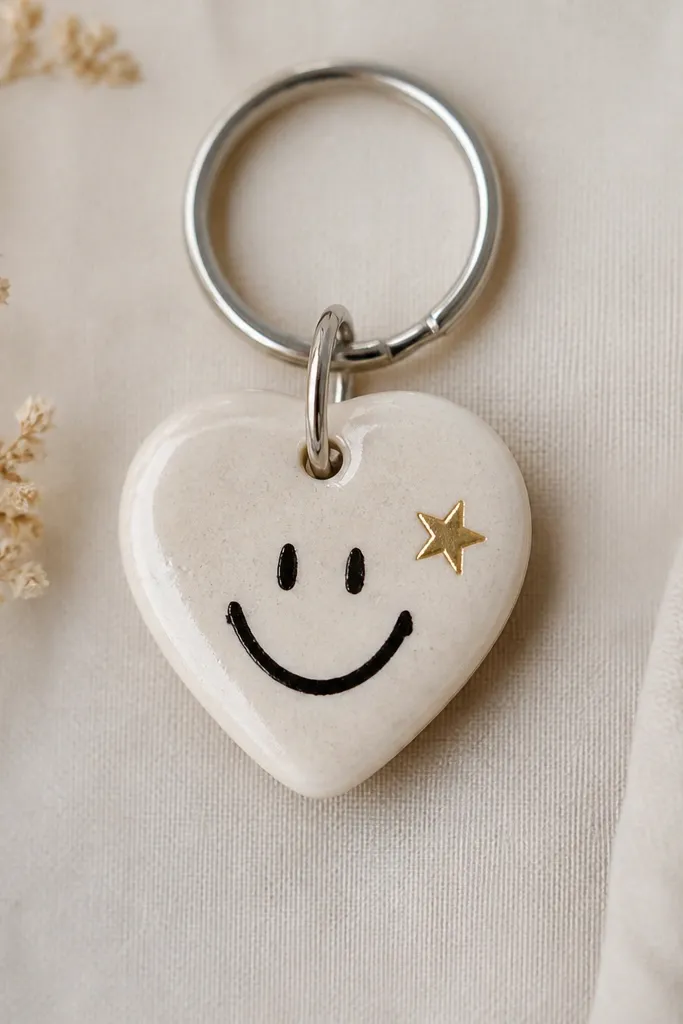
Salt dough charms look sweet and personal, and they’re honestly one of the cheapest easy handmade gift ideas for best friend. I like to make hearts, stars, or tiny tags because they’re simple to paint and easy to seal. The paint pen gives you clean lines without needing a steady hand like acrylic brushes. This works well for friends who like charm bracelets, bags, or lanyards. If your friend has a warm undertone, use peach or terracotta paint for extra flattering color.
Editor's notePunch the hole before baking so you don’t crack the charm later.
Start by mixing salt dough — 1 cup flour, 1/2 cup salt, 1/2 cup water — until it forms a smooth ball. Roll to about 1/4 inch thick and cut shapes with cookie cutters. Place on parchment and bake at 250°F (120°C) for 1-1.5 hours, flipping once halfway. Let cool completely, then paint details with paint pens and seal with matte or gloss clear acrylic spray before attaching a key ring.
Skip thisDon’t bake too hot; it can brown the edges and look uneven.
7. Ombré Ombre Candle Jar with Tissue Paper Stencil
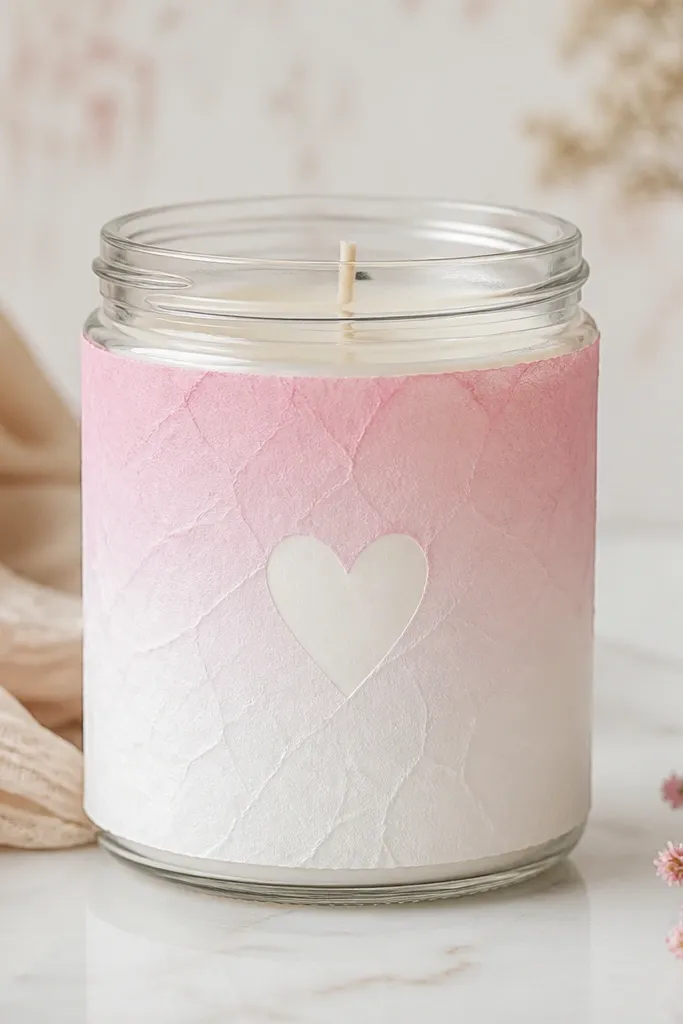
This gift looks like you bought it from a boutique because the label effect looks layered and soft. I use tissue paper and Mod Podge on the outside of a jar to create a gentle ombré fade — light pink down to white is my favorite. The stencil word keeps it from looking random, and the glass jar makes it feel clean and modern. It’s a good fit for friends who like cozy nights, desk candles, or small home decor. Warm light through the tissue gives a flattering glow in photos.
Editor's noteUse a foam brush for the Mod Podge — it leaves fewer streaks.
Start by cleaning the jar glass with rubbing alcohol. Tear tissue paper into strips and overlap them from bottom to top so the colors fade upward. Brush Mod Podge on the glass, press tissue in place, then seal over the top with another thin coat. Add a stencil design (like their initial) using acrylic paint and let it dry fully. Finish with ribbon around the lid and a small label card taped to the side.
Skip thisAvoid thick tissue glued in one chunk; it bubbles and looks blotchy.
8. Braided Friendship Bracelet Keychain (Two-Color)
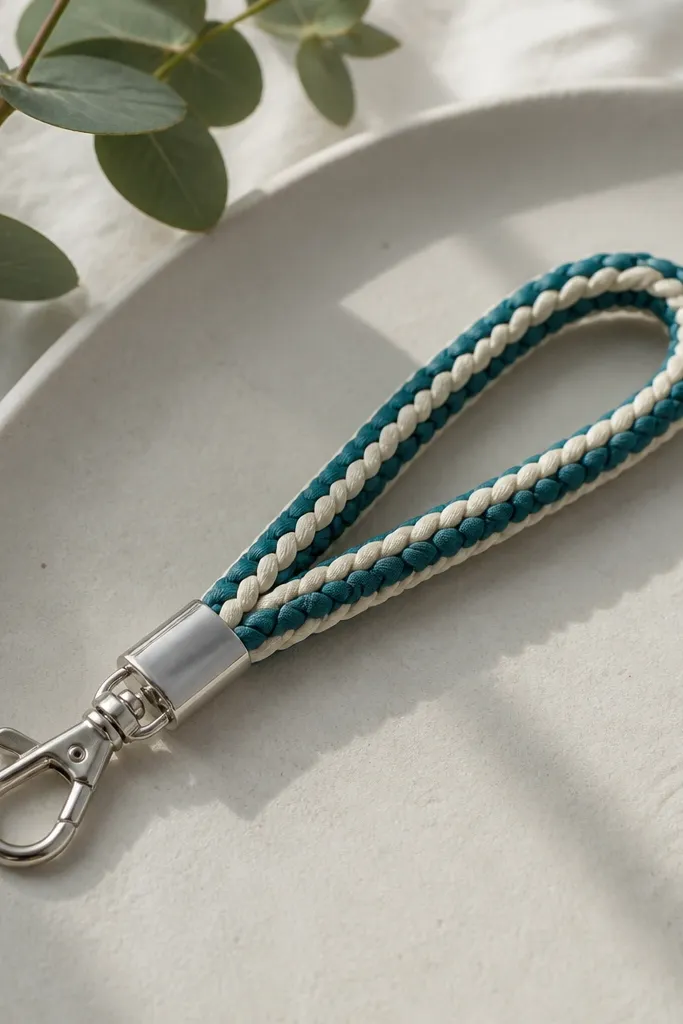
This is a wearable gift that also attaches to keys, bags, or a backpack zipper. I use two-color braids because they look clean and readable — three colors can get tangled fast for beginners. The bracelet style flatters small wrists and works for anyone because it’s adjustable with a sliding knot. If your friend likes practical accessories, the keychain clip makes it instantly useful. Choose colors that show up in their wardrobe: teal for denim, cream for neutrals, or black for a monochrome vibe.
Editor's noteTape the knot end to your desk while braiding so your braid stays tight.
Start by cutting two lengths of embroidery floss or waxed cord about 24 inches each and knotting them at one end. Braid using the classic three-strand pattern by splitting each color into a strand group, then keep tension even. When you reach about 3 inches from the end, tie a tight knot and trim. Attach a small lobster clasp or key ring to the end with a jump ring, then tie a second loop so it can hang.
Skip thisDon’t braid too loose — loose cords look frayed even when they’re new.
9. Linen-Look Felt Desk Coasters with Iron-On Label
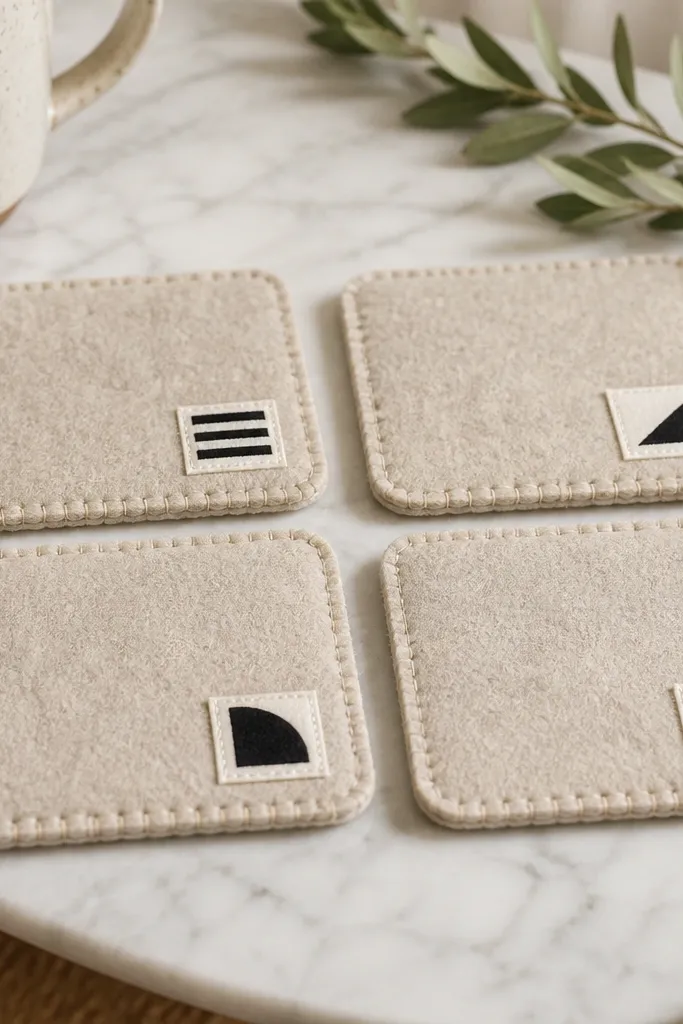
Felt coasters are one of the easiest ways to make a gift look thoughtful without fuss. I use oatmeal or taupe felt for that linen-look vibe, and then I add a small iron-on label so it feels branded in a cute way. These work for friends who keep coffee, tea, or water on their desk and hate rings. The set also looks good in photos because the neutral base doesn’t fight with anything. If your friend has a minimalist room, this fits their style without trying too hard.
Editor's noteRound your felt edges with scissors so they don’t look jagged after trimming.
Start by cutting circles from felt — 4 inches diameter for a standard cup coaster. Cut a thin strip of matching felt for the edge if you want a layered look, then glue or stitch it around the perimeter. Place a small iron-on label in the center and press with a hot iron using a pressing cloth for 20-30 seconds. Finally, make a set of four, and add one extra label as a backup detail inside the gift bag.
Skip thisAvoid glossy felt; it catches light in a way that makes it look plasticky.
10. Painted Pinecone Mini Planter with Succulent Cutout Card
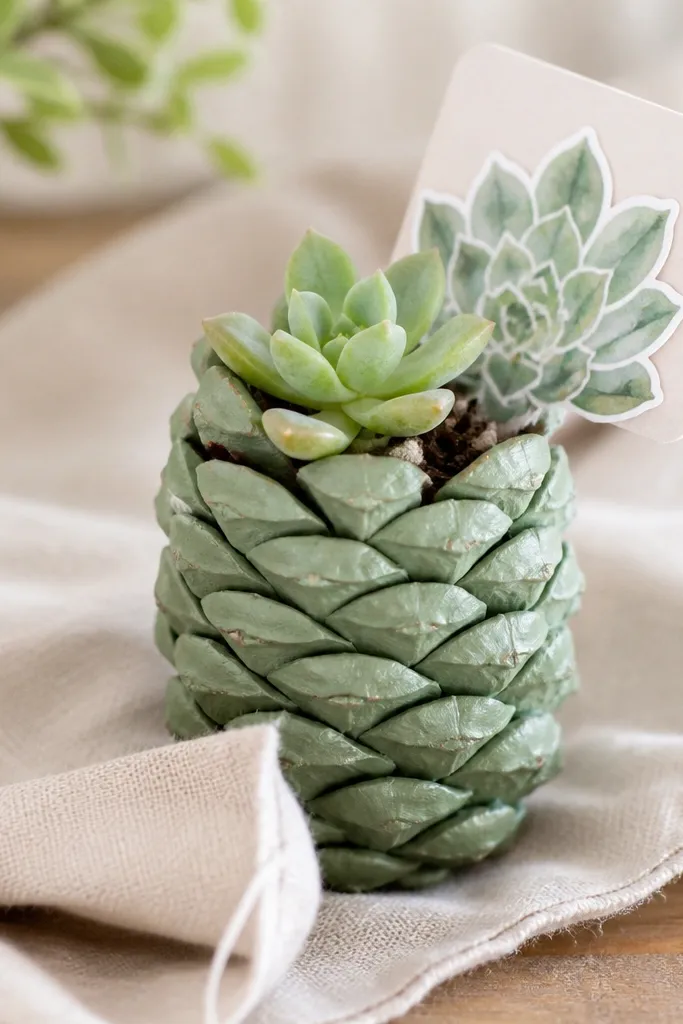
This is a decor-style gift that still feels personal because it’s tied to a life moment — a new apartment, finals week, or a birthday. I paint pinecones matte sage, terracotta, or deep navy, then plant tiny succulents that tolerate neglect. The painted color makes the pinecone look intentional instead of random. It flatters friends who love plants but don’t want a full planter project. The gift also photographs well because the textures — pine scales and succulent leaves — show up clearly.
Start by cleaning pinecones and drying them completely. Paint using matte craft acrylic in thin coats so the scales don’t get gummy. For planting, fill a small inner cavity with potting mix and press the succulent in gently. Water lightly once, then let it sit in bright indirect light. Add a card with a paper succulent cutout and a short care note: water every 2-3 weeks and keep out of direct afternoon sun.
Use a spray seal on the pinecone after it dries to reduce dust transfer.
Don’t overwater the first week — succulents hate soggy soil.
11. Personalized Water Bottle Sleeve from Old Jeans
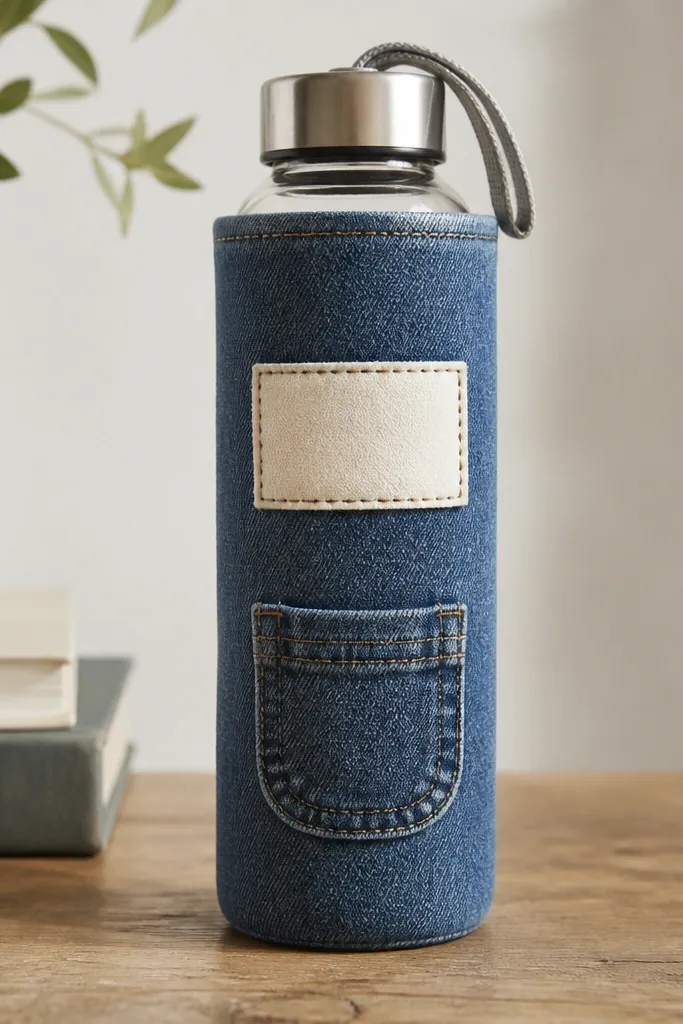
This gift hits because it’s both practical and style-forward. I use old jeans for the fabric because it’s thick, holds its shape, and looks better the more it wears. Add a stitched letter patch or a small embroidered initial so it feels like your friend’s own gear. It’s especially flattering for active friends — hikers, gym regulars, runners — because denim hides scuffs and looks rugged without being messy. Choose a sleeve length that covers the bottle body but leaves the cap easy to grab.
Editor's noteUse a zipper foot or edge-stitching to make the seams look intentional.
Start by cutting denim to wrap around your bottle circumference plus 1 inch for seam allowance. Sew the side seam with a strong straight stitch, then test-fit and trim if it’s too loose. Add a front pocket by sewing a rectangular denim piece about 5 x 6 inches to the outer panel, then stitch along the top edge. Finish with a stitched name patch or an iron-on patch sealed with a few extra stitches around the edges. Add a small elastic loop near the top so it stays put when the bottle slides in a bag.
Skip thisAvoid super-stretch denim — it twists and makes the sleeve look uneven.
12. Beaded Letter Keychain with Color-Blocked Initial
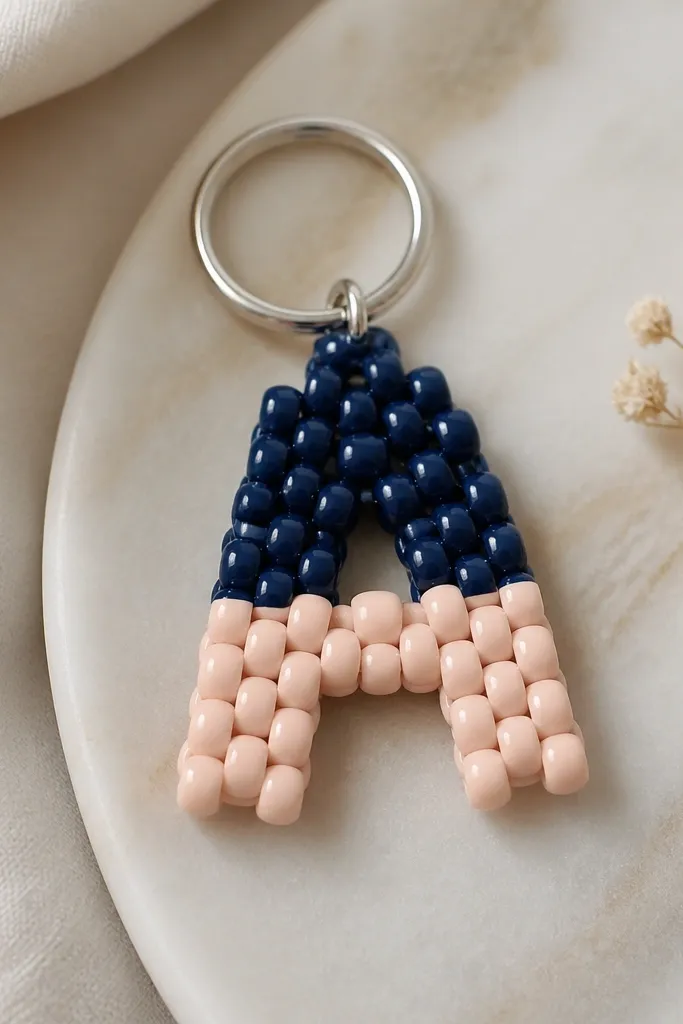
Color-blocked letter keychains look bold and cute, and they’re surprisingly beginner-friendly if you use a bead letter grid. I make the initial large so it reads from across a table, and I keep bead colors to two so it looks clean. This is a great gift for friends who carry keys daily and like matching accessories. It also flatters anyone’s style because it can match school colors, their phone case, or their bag. If you choose a matte bead finish, it won’t glare in photos like shiny beads.
Start by choosing a bead letter pattern for your friend’s initial and lay a grid on a flat surface. Use pony beads and string them through the grid lines to build the letter shape. When you finish the letter, tie a secure knot and weave ends back through 2-3 beads. Add a jump ring to the top and attach a small clasp. Seal the knots if you want extra durability using a tiny dab of clear nail polish on the knot area.
Keep your string taut while building so the letter stays flat, not wavy.
Don’t mix too many bead sizes — it makes the letter look uneven.
13. Handwritten Recipe Card Set with Photo Corner Pockets
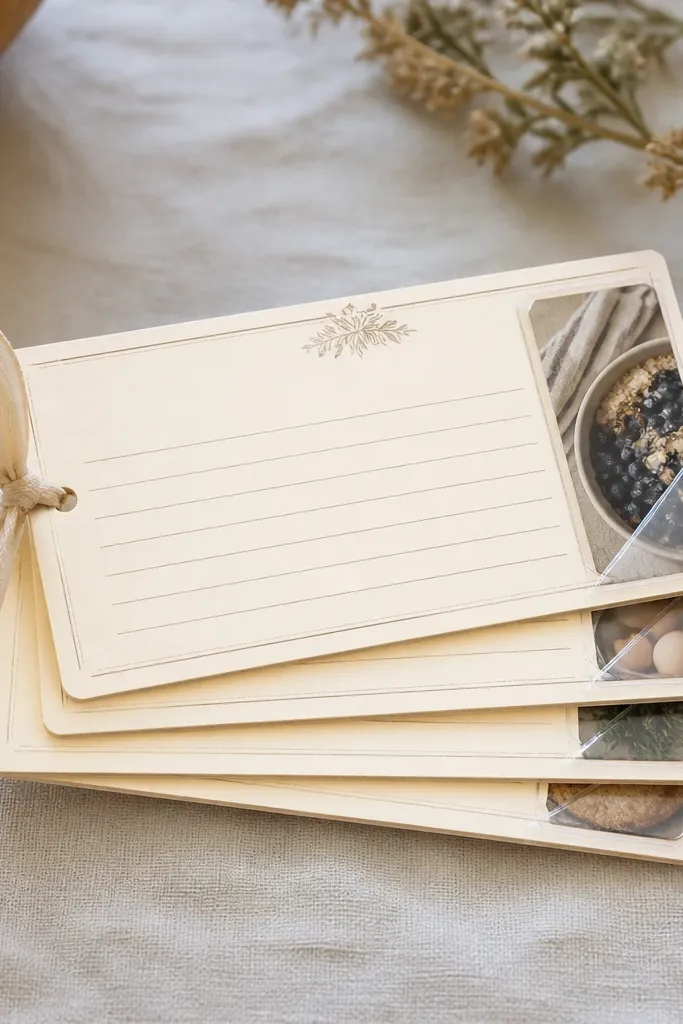
Recipe card sets feel intimate because you’re giving time, not stuff. I use cream cardstock and write recipes in my normal hand — no fancy calligraphy needed, just consistent spacing. Add a corner pocket to each card using clear plastic photo protectors so your friend can slide a photo of the dish or their own note. It’s a great fit for friends who cook a little, host, or want a 'recipe library' that looks pretty. The cards also look good in a binder and don’t take up much shelf space.
Editor's noteUse a black gel pen for handwriting — it doesn’t smear as easily as felt-tip markers.
Start by cutting four cards to 5 x 7 inches and punching a hole for a binder ring. Write each recipe title at the top and leave wide margins on the sides so it’s readable. Cut clear plastic sheets into small corner pockets and glue only the edges using double-sided tape or glue stick so the center stays clear. Add a small ribbon tie around the binder ring for a gift look. Finally, include a mini sticker sheet or a single index tab for each card so they can organize by meal type.
Skip thisSkip glossy card stock — ink can smear when you handle the set.
14. Fabric Garland Banner with Hand-Cut Letters
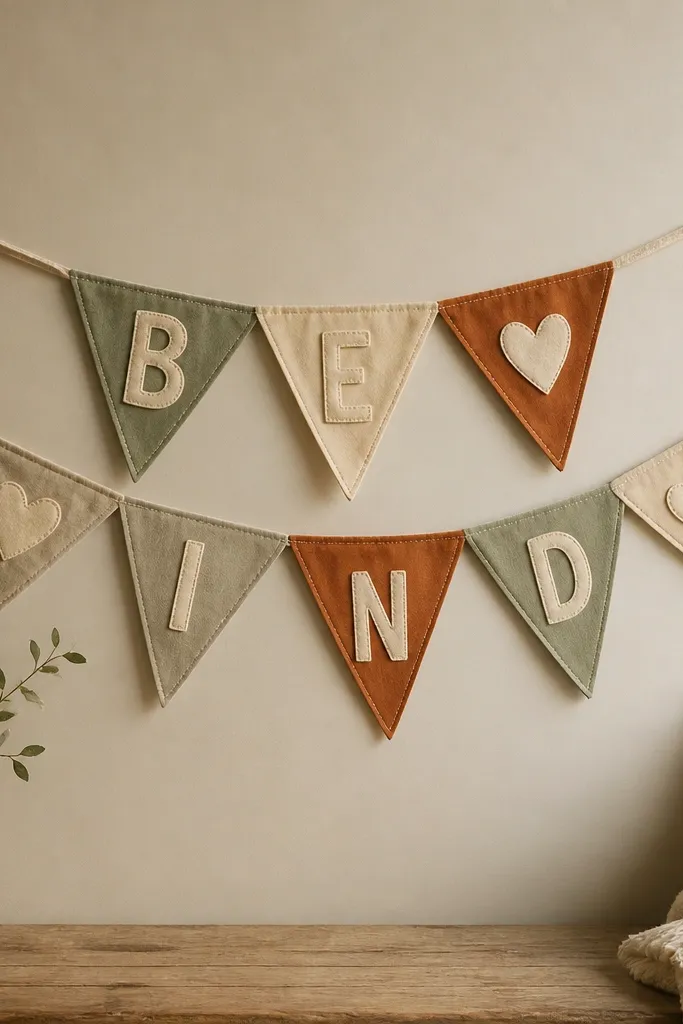
Garland banners are a fun gift for birthdays, dorm rooms, and “just because” moments. I make them from felt or cotton scraps because they don’t fray much, and I hand-cut letters so the message feels made by you. The triangle layout looks balanced even when the letters aren’t perfect. This works for friends who like decorating their space — desk corners, shelves, or above a headboard. Keep your message short — 3-5 words — so it stays readable when viewed from a distance.
Start by cutting triangles about 5 inches wide and 3.5 inches tall from two or three fabrics. Cut letter shapes from felt using a stencil for clean edges, then pin them to each triangle and stitch around the letters. Lay triangles on a long string or twine, then sew each triangle at the top edge. Space them evenly, roughly 1.5 inches apart. Finish by tying the banner ends with extra twine so it hangs without sagging.
Use a contrasting thread color — it makes the letters pop from across the room.
Don’t use stretchy knit fabric — triangles curl and look messy.
15. Resin Photo Pendant on a Thin Necklace Chain
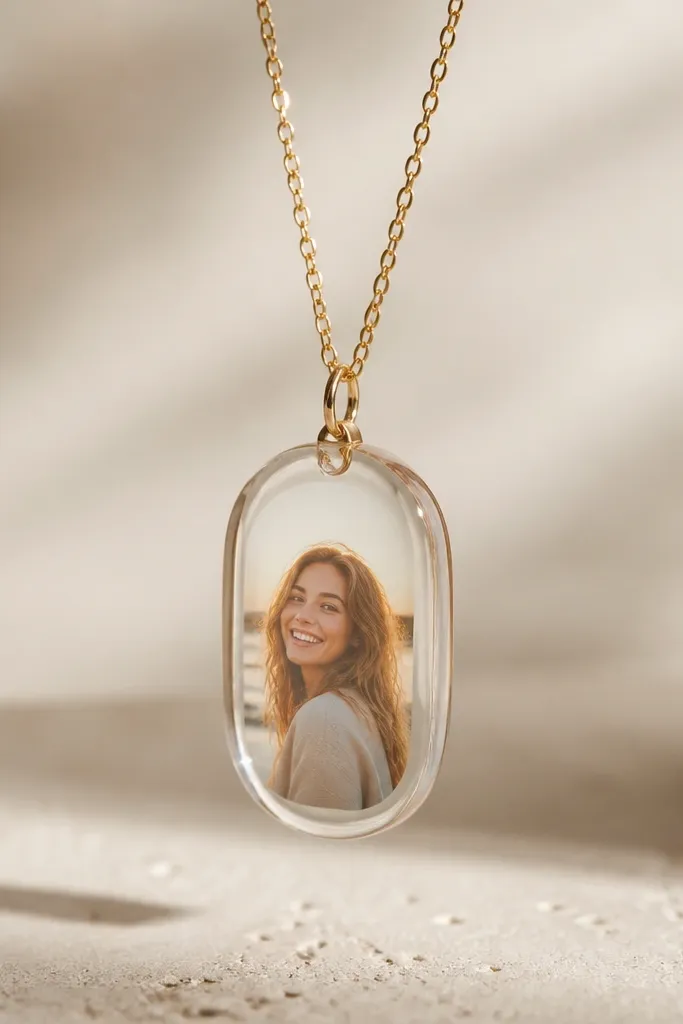
If your friend wears jewelry, a photo pendant feels personal in a way that photos in a phone never do. I keep the pendant small — around 1 inch — so it sits nicely at the collarbone without looking bulky. Resin makes the image look glossy and protected, and the clear border gives it that finished look. This gift flatters most skin tones because the chain is thin and the pendant catches light softly. Choose a warm photo with good contrast so the details don’t disappear under resin.
Editor's noteSeal the photo edges with a tiny dab of clear tape before resin so fibers don’t lift.
Start by selecting a resin pendant mold and cutting a photo piece slightly smaller than the mold cavity. Mix resin carefully in small batches to avoid bubbles. Add a thin coat to the mold, place the photo, then pour more resin to fill to the top. Pop bubbles with a toothpick and let cure fully — usually 24-48 hours depending on brand. Remove from the mold, sand the edges if needed, then attach to a thin chain using the pendant’s bail.
Skip thisAvoid rushing cure time — soft resin scratches when you remove it.
16. Cricut-Free Stenciled Wall Art on Wood Scrap
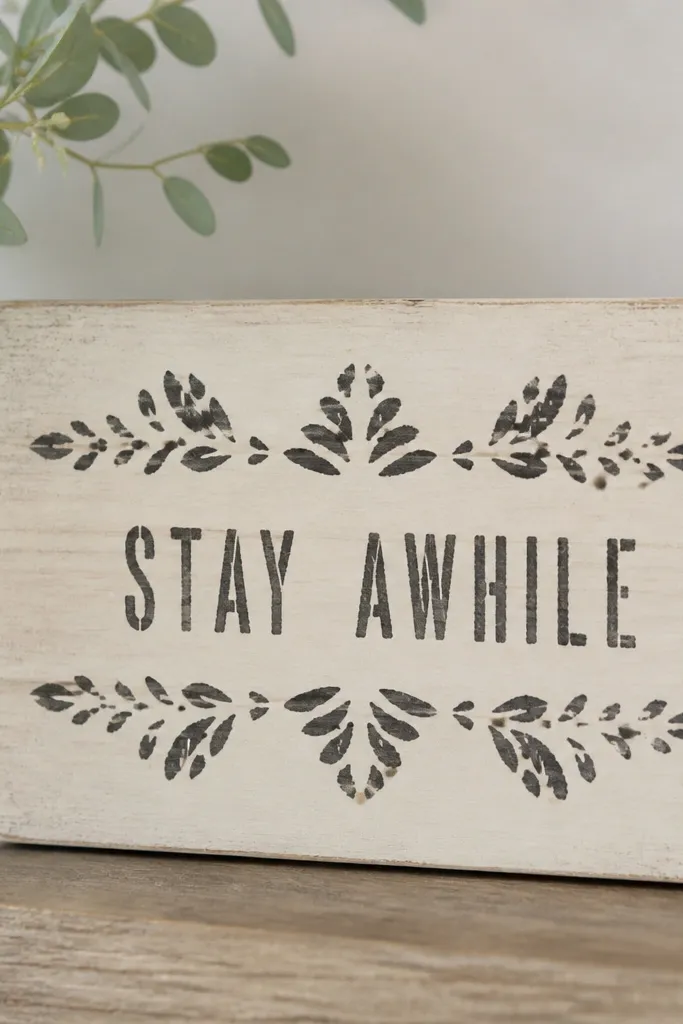
This is a decor gift that looks expensive because wood makes everything feel solid. I use a small scrap board about 8 x 10 inches, paint it in matte off-white, and then stencil a short phrase or symbol in black. The stencil keeps the letters crisp even if your handwriting isn’t perfect. It’s perfect for friends who like clean wall decor, minimal shelves, or a desk backdrop. For styling, I like adding a single accent color in the symbol — like mustard dot or terracotta line — so it doesn’t look flat.
Editor's noteUse painter’s tape to mask the edges — clean borders make it look professional.
Start by sanding the wood lightly and wiping dust off with a damp cloth. Paint one or two coats of matte off-white and let dry. Tape a stencil to the board and dab paint using a sponge brush so you don’t get drips. Remove stencil carefully after 5-10 minutes, then let everything dry fully. Add a clear top coat if you want durability, and attach a sawtooth hanger on the back.
Skip thisDon’t flood the stencil with paint; it seeps under and blurs the edges.
17. Mini Macramé Key Basket from Cotton Rope
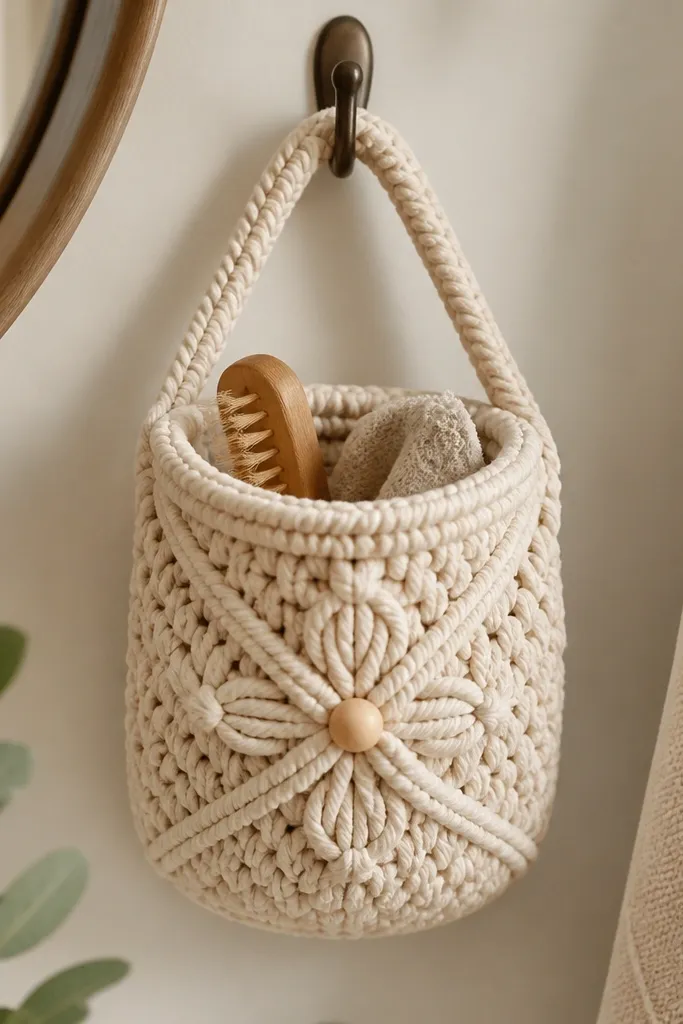
When your friend is always losing keys, a tiny macramé basket makes their entry spot look intentional. I use thick cotton rope so the basket holds its shape without sagging. The natural color works with almost any decor, and the knot texture looks good even from close up. This is an easy handmade gift idea for best friend that also solves a real problem — keys end up in one place. It’s flattering for both boho and modern rooms because the rope texture is the only “pattern.”
Editor's noteUse a ruler or tape marks on your table to keep knot spacing consistent.
Start by cutting 8-10 rope strands about 20 inches each and tying them into a bundle with a knot loop for hanging or a base knot for a stand. Create a simple gathering knot pattern for the sides using square knots — work in pairs and keep tension even. Form the basket by tightening the knots as you go, then finish with a final row of knots to close the bottom. Add a wooden bead or small tassel at the center for a finished look. Let it hang and reshape while damp so it dries into the right curve.
Skip thisAvoid slippery rope — cotton grips better and keeps the basket from loosening.
18. Sew-Quick Sock Snowman with Button Face
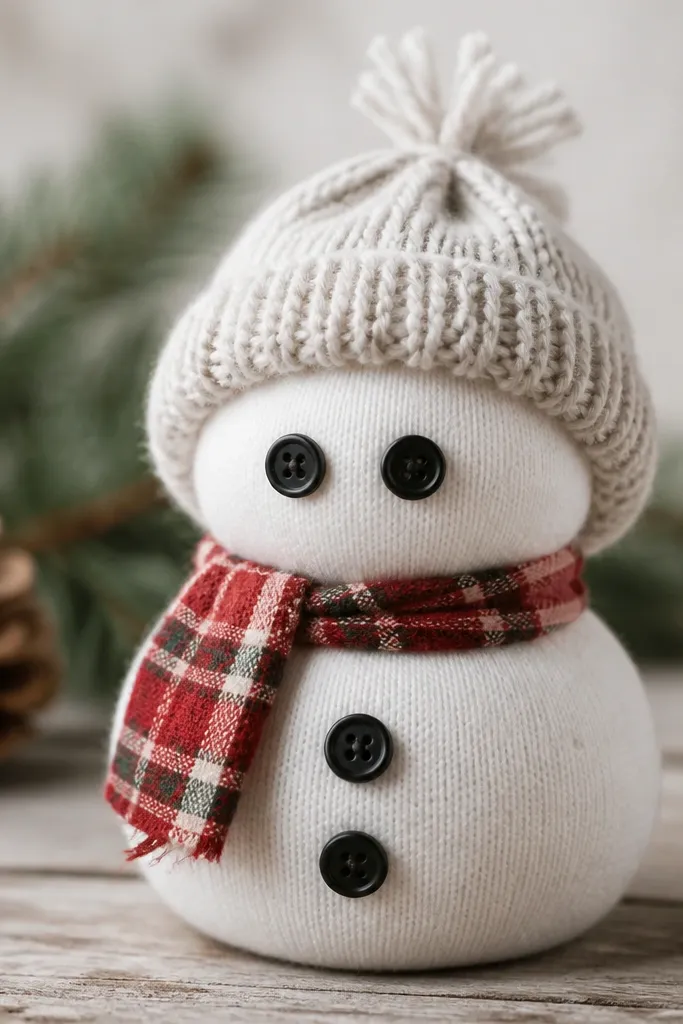
Sock snowmen are classic for a reason, but this one is built for speed and clean results. I use white crew socks and stuff them with polyester fiberfill, then stitch simple seams so the body stays round. The button face gives a cute, friendly look that’s hard to mess up. This fits friends who like seasonal decor and also people who love cozy crafts. Pick scarf colors that match their winter coat or home theme — red plaid always reads warm in photos.
Editor's noteUse black thread for the mouth so it looks like a clean line, not a smudge.
Start by filling the sock with fiberfill and tying a rubber band where you want the neck. Stitch across the neck area to secure, then shape the body by pulling the fabric tight and smoothing. For the head, add a second rubber band or stitch line if you want a more defined top. Create a scarf by cutting a strip of plaid fabric and wrapping it around the neck, then stitch or tie it. Add a small yarn hat by tying yarn into a cap shape and sewing it onto the top, then attach buttons for eyes and a stitched mouth.
Skip thisDon’t overstuff; it makes seams pucker and the snowman looks lumpy.
19. Wallet-Sized Felt Sunglasses Case for Their Bag
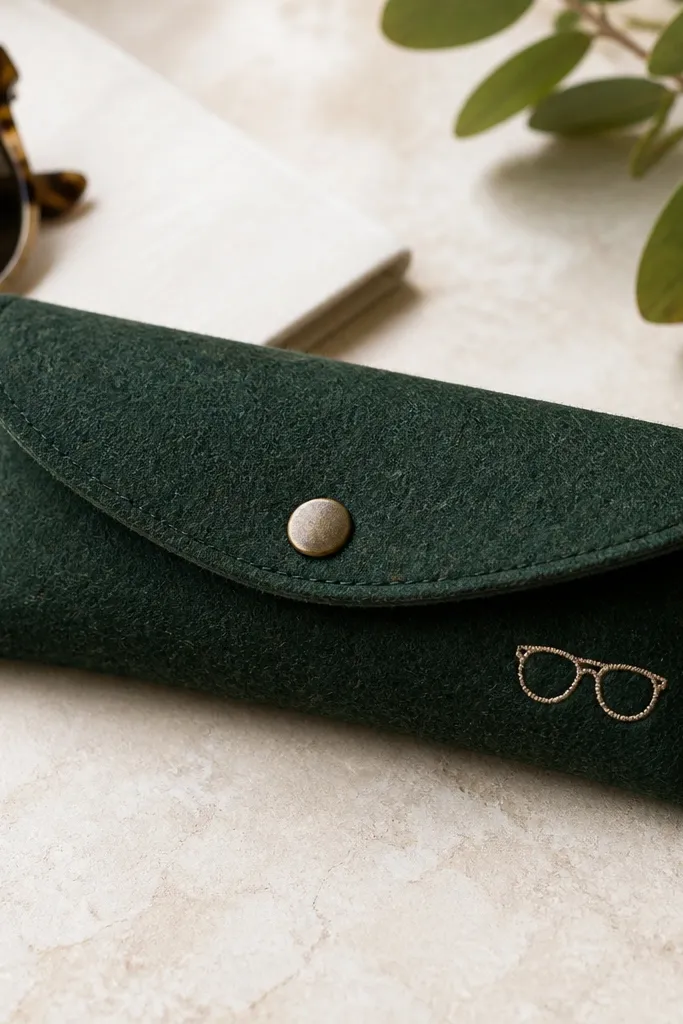
A sunglasses case is the kind of practical gift friends quietly use every day. I use thick felt so it protects lenses without needing a hard shell, and the flap keeps it from opening in a tote. The wallet-sized shape fits inside most bags and doesn’t add bulk. Add a stitched icon or small initial so it looks personalized, not store-bought. This works for friends who wear glasses, sunglasses, or even shop for skincare with a “small pouch” habit.
Editor's noteRound the corners with scissors before stitching; it makes the case look softer.
Start by cutting felt rectangles about 7 x 4 inches for a small case, then cut a flap piece about 6 x 3 inches. Fold the main piece in half so the felt covers the lenses area, and stitch along the sides using a simple running stitch. Position the flap on top and sew along the sides only, leaving the opening free. Add a snap button with a snap tool or sew-on button snap. Finish with a stitched sunglasses icon using contrasting thread.
Skip thisAvoid thin craft felt; it won’t protect lenses and feels flimsy.
20. Embroidery Hoop Mini Frame with Fabric Backing
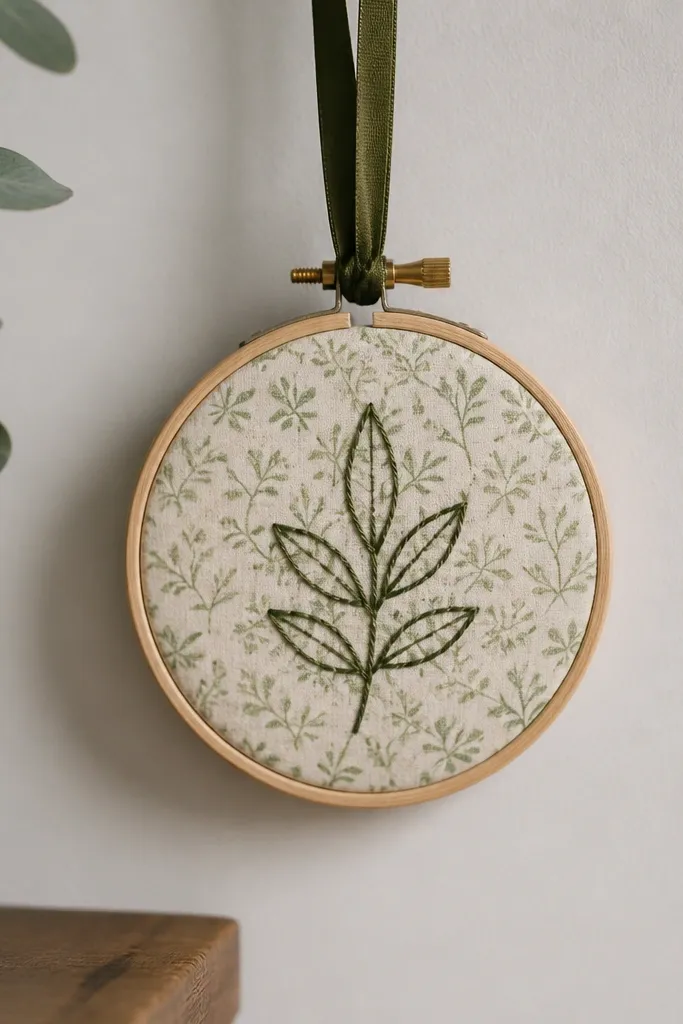
Mini embroidery hoop frames make a friend gift that looks artsy without being a huge project. I keep the design small — one leaf, a tiny mountain line, or a single star — because it’s more readable in a hoop. Fabric backing makes the piece look finished and hides any messy edges from stitching. It flatters friends who like wall art but don’t want something bulky. Also, the hoop itself looks good even before you stitch anything — it’s a built-in frame.
Start by choosing a hoop size, like 6 inches, and remove the inner ring. Cut fabric to fit with a 1-inch margin and press it flat. Stitch a simple outline with embroidery floss — I use a backstitch or running stitch for clean lines. Place fabric in hoop, tighten the screw, and trim extra fabric. Add a ribbon hanger to the top loop so it’s ready to hang.
Use one floss color and one metallic thread for highlights if you want a luxe look.
Don’t stretch fabric too tight; it can distort and make stitches look warped.
21. Hand-Painted Tote Bag with Fabric Markers and Heat Set
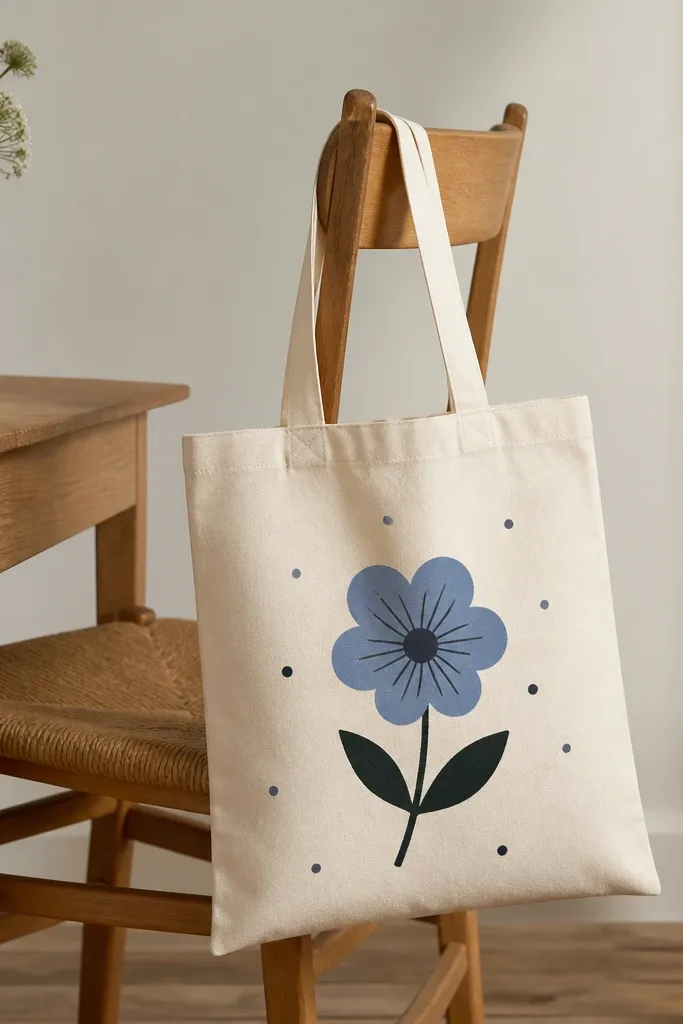
A painted tote is one of the most practical easy handmade gift ideas for best friend because it becomes a daily uniform. I use fabric markers on light canvas, then heat-set the design so it holds up. Keep the design centered and under 8 inches wide, so it doesn’t fight with the bag shape. This looks flattering on everyone because totes hang naturally and the design doesn’t depend on body fit. Choose a flower or symbol that matches your friend’s vibe — daisies for bright energy, single-line roses for calm style.
Editor's noteUse a fine-tip marker for outlines and a thicker tip only for fills.
Start by washing and drying the tote so the fabric isn’t treated. Sketch the design lightly with a pencil, then trace with fabric markers. Put cardboard inside the bag so marker doesn’t bleed through to the back. Let the ink dry 24 hours if the marker brand recommends it, then heat-set with an iron according to instructions. Finish by hand-stitching a small patch pocket if you want extra personalization.
Skip thisDon’t skip cardboard inside; it transfers ink and ruins the back.
22. Mini Bath Bomb Gift Bag with Custom Label Tags
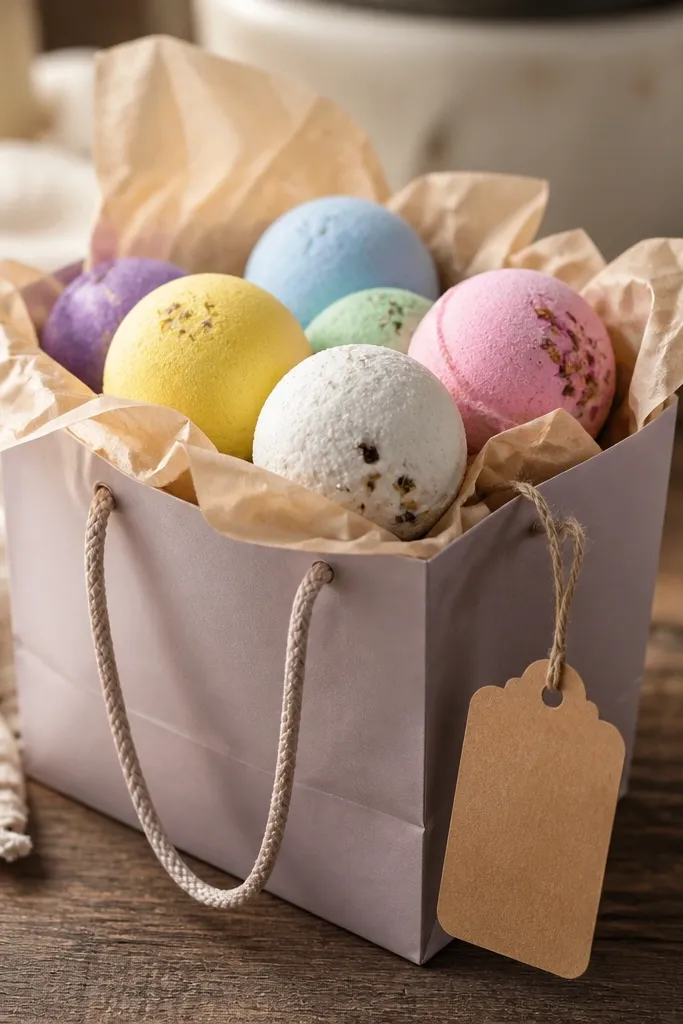
Bath bombs feel like a treat, but mini sizes make it practical and giftable. I like making or buying mini bath bombs because they fit in a small bag and look cute in a photo. Custom label tags make the gift feel handmade even if the bombs came from a kit. This works for friends who are stressed, into self-care, or just love a good smell in their bathroom. Choose scents your friend actually uses — vanilla, eucalyptus, or citrus — and keep colors in one family for a clean look.
Start by picking three mini bath bombs in matching color tones, like lavender, lilac, and pale pink. Place them in tissue and tuck them into a kraft gift bag. Print or write a label tag with the scent name and a short note like “Drop in and breathe.” Tie the bag with ribbon and add a second small tag on the back with care instructions: keep dry, store sealed. If you’re making them, mold mini bombs firmly and let them cure 24 hours before bagging.
Spray the inside of the bag lightly with the same scent after you tie it for a stronger first impression.
Avoid mixing strong scents; it smells like a candle aisle and feels chaotic.
23. Paper Pinwheel Desk Decor with Photo Caption
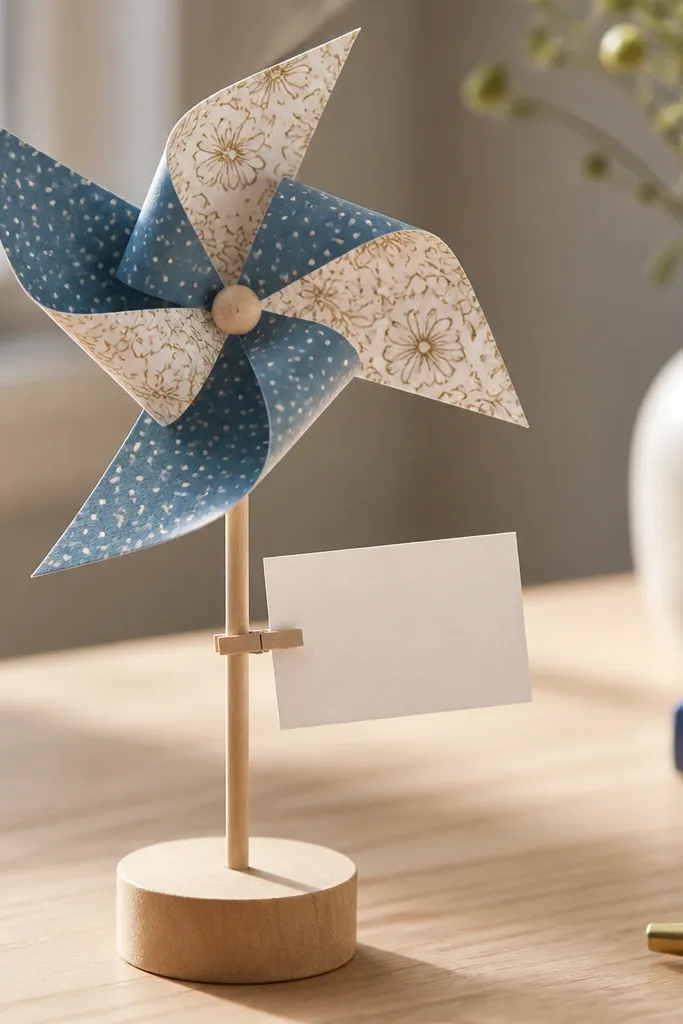
This gift is small, cheap, and looks adorable on a desk. I use patterned paper like polka dots or subtle stripes because pinwheels show pattern clearly when they spin. The photo caption card adds personality fast — one picture of a memory and a short date. It’s perfect for friends who work from home, study, or keep plants and stationery on their desk. The pinwheel also flatters their space because it adds movement without taking up shelf area.
Start by cutting pinwheel squares about 6 inches wide and folding each corner to the center point. Punch a small hole in the center, then stack layers and insert a brad or paper fastener. Attach the pinwheel to a thin wooden stick or a skewer. Make a small caption card by cutting cardstock into a 2 x 4 inch rectangle and writing the memory date on it. Tape the card to the stick below the pinwheel so it looks attached, not loose.
Use a matte clear spray on the paper if you live in a humid area so it doesn’t warp.
Don’t use thick cardstock without testing; it can make the pinwheel too stiff to spin.
24. Charm Bracelet from Old Chain Links and Fabric Scraps
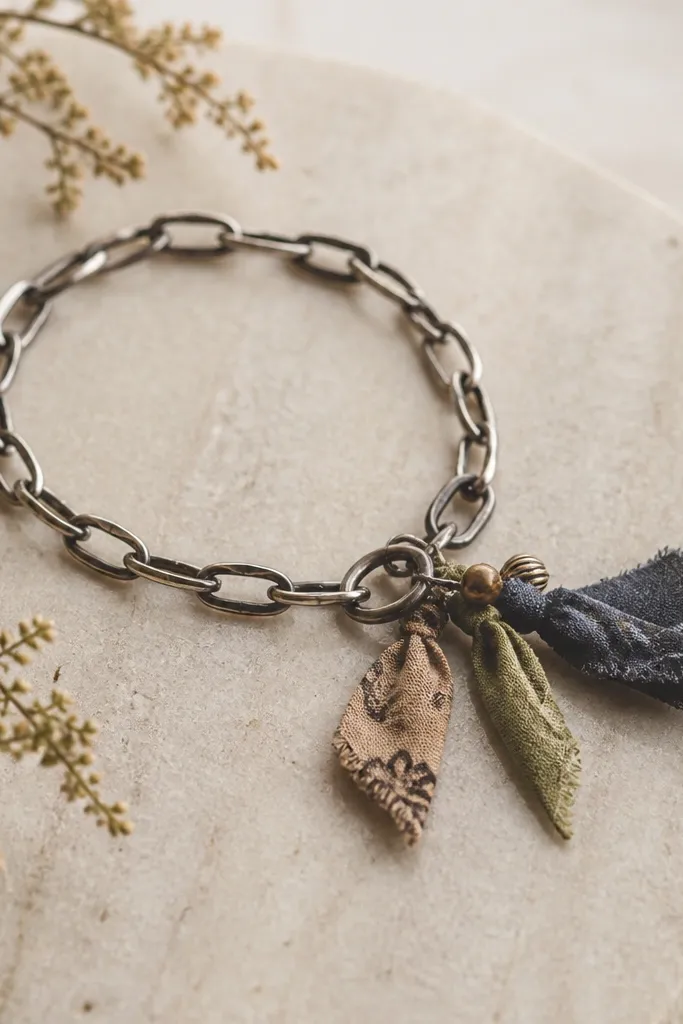
If you want an easy handmade gift idea for best friend that looks like you hunted for charms, this one does that. I’ve used old chain pieces from thrift jewelry and added fabric scrap knots for a soft, personal texture. It flatters most wrists because the fabric knots are lightweight and the bracelet lies flat. This works especially well for friends who like mixed textures — metal plus cloth — and who wear bracelets often. Stick to two fabric colors so the bracelet looks styled instead of patchwork chaos.
Editor's noteUse silk ribbon or satin scraps for fabric charms — they look glossy and high-end.
Start by measuring your friend’s wrist and cutting chain to fit with 1 inch extra for the clasp. If you’re reusing chain, check for sharp edges and smooth them with a file. Cut fabric strips about 1/2 inch wide and 2.5 inches long, then tie them into small knots and add a tiny bead to keep the knot from slipping. Attach charms to the chain using jump rings or small split rings. Finish by adding a lobster clasp and adjusting length with one extra link.
Skip thisAvoid bulky fabric strips; they twist and make the bracelet uncomfortable.
25. Painted Pegboard Mini Organizer for Desk Supplies
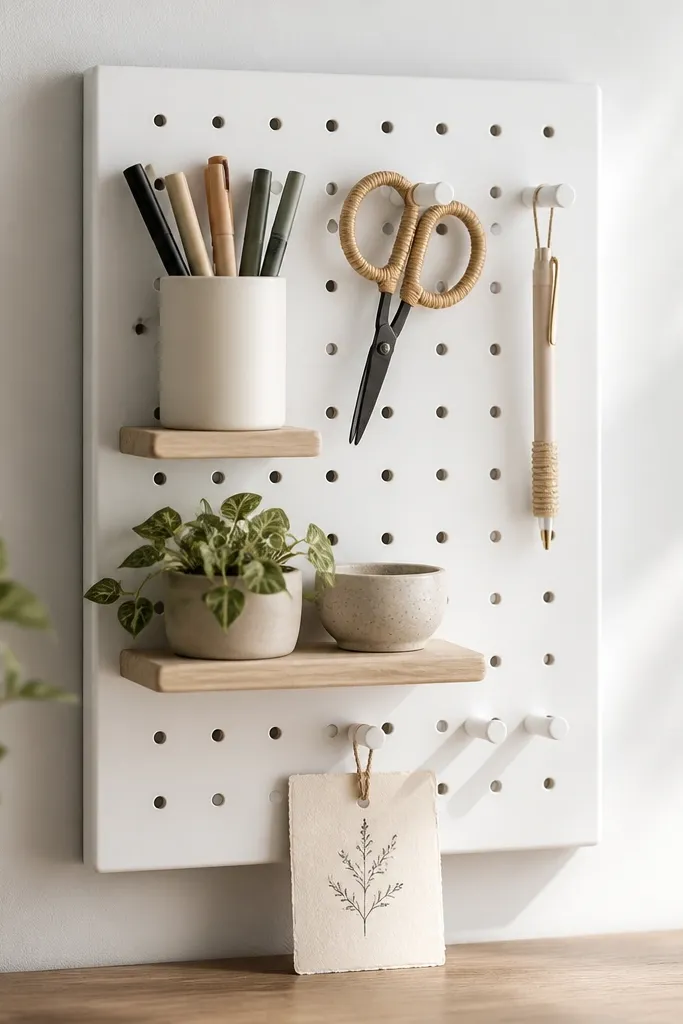
A mini pegboard is the kind of gift that changes how a desk feels without being complicated. I paint the pegboard matte to hide any raw texture and then add a few hooks — just enough for pens, keys, or a small pouch. The gift flatters friends who like tidy spaces because it gives everything a home. It also photographs well because the structure looks clean and intentional. If your friend keeps losing chargers or stationery, this is a practical fix disguised as decor.
Editor's noteUse one strong accent color for the label only, like black or deep teal.
Start by grabbing a small pegboard panel about 9 x 12 inches and sanding lightly. Paint two coats of matte acrylic and let dry overnight. Mark where hooks and shelves will go, then pre-drill holes so you don’t crack the board. Install metal hooks for pens and clips, then screw in a mini shelf for sticky notes or a small plant pot. Finish with a handwritten label at the bottom using a paint pen or vinyl sticker.
Skip thisDon’t hang too many items at once during the first day; screws can loosen if you overload.



