


1. Framed Map Coaster Set with Tiny Compass Pin
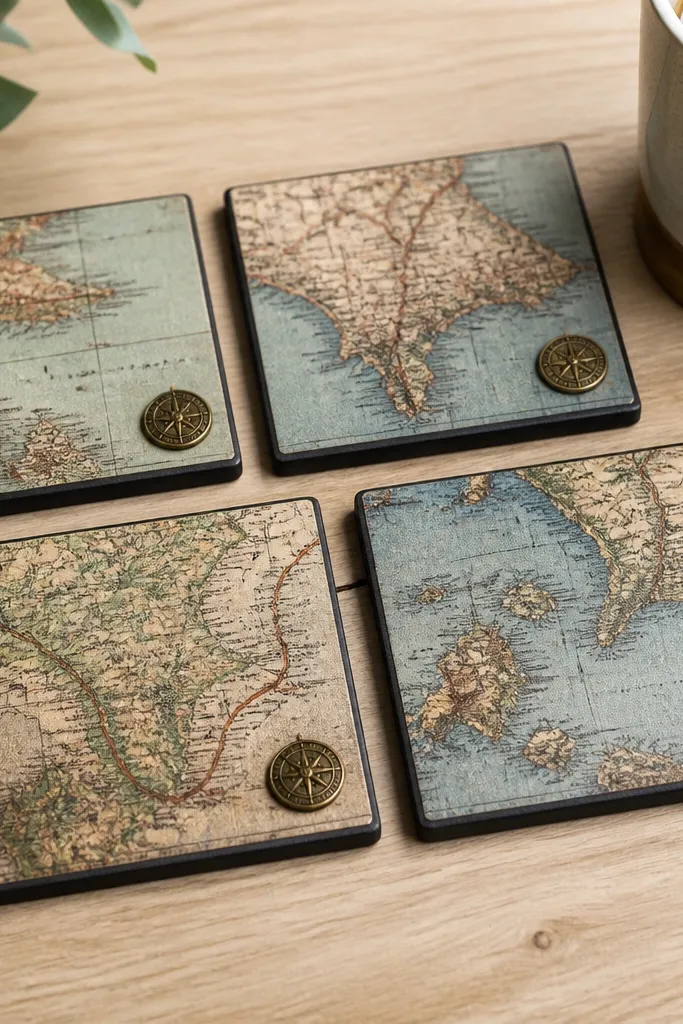
These coasters look like something you’d buy at a boutique, but they’re beginner-friendly because you’re working with flat layers. Use a map print that matches his vibe — old paper tones for a warm look or a teal-and-navy nautical map for a cooler one. The black frame edge gives a crisp outline that makes the map look more “designed” than “printed.” This works great for anyone who hosts, drinks coffee, or has a desk setup because it protects surfaces and looks tidy. The compass pin adds a small focal point without making the whole set busy.
Cut four squares of cork or thick felt at 4 x 4 inches. Trim four matching map squares at 3.75 x 3.75 inches so the map sits slightly inside the base. Glue the map to the center of each base with a thin layer of decoupage glue, then press under a book for 10 minutes. Cut thin strips of craft foam or cardstock to frame each coaster, then glue the strips around the edges. Finish by sealing the top with two light coats of clear matte Mod Podge, letting each coat dry to the touch.
Editor's noteSeal the map with matte instead of glossy so it doesn’t look like a sticker when it catches light.
Skip thisSkip super thick glue blobs — they create bubbles that show through the map print.
2. Leather-Look Key Fob with Stamped Coordinates
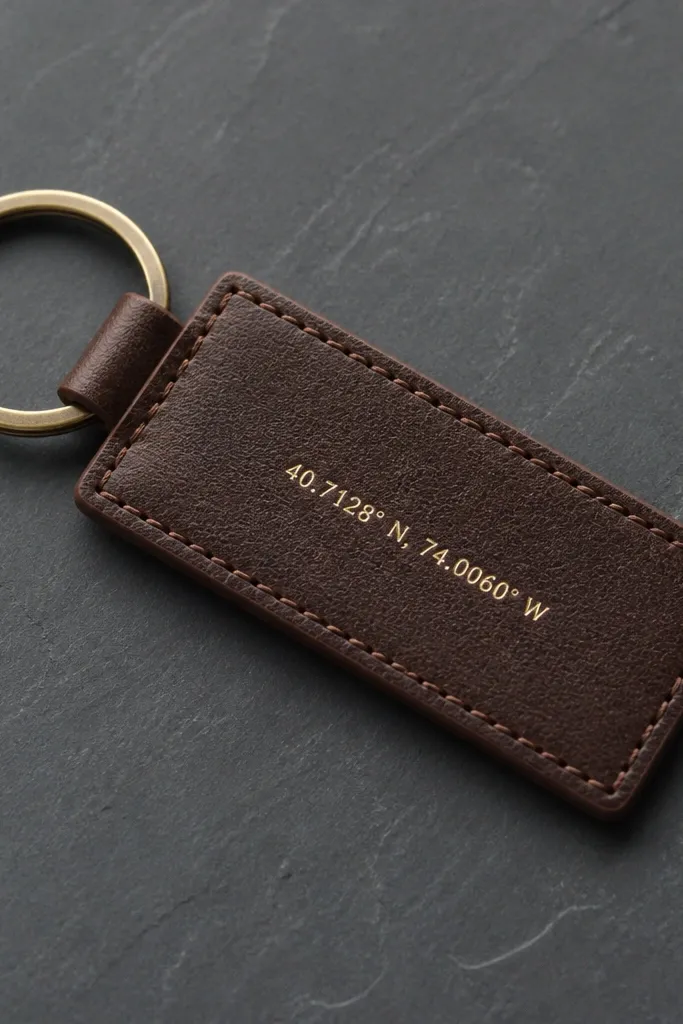
A key fob is the kind of gift he uses daily, and the stamped coordinates make it feel personal fast. Faux leather is easier than real leather and still looks sharp if you keep the edges clean. Choose dark brown or black for a classic look; gold stamping looks best against warm tones. This works for anyone who loves travel, cities, or “our story” gifts because you’re literally marking a place. Keep the stamping small and centered so it looks intentional instead of like a label.
Cut a rectangle of faux leather or vegan leather at 3.5 x 5 inches. Fold it in half at 2.5 inches, crease hard, and then punch a hole near the top fold for the keyring. Use a leather hole punch for clean holes so it doesn’t fray. If you have a stamping kit, stamp coordinates or a short date into the center once it’s folded open flat again. Stitch with a waxed thread by hand around the edges using a simple running stitch, then tie off inside the fold.
Editor's noteUse a scrap piece of cardboard under the leather while stamping so your stamp hits cleanly.
Skip thisDon’t stamp while the piece is already folded — the letters distort and look crooked.
3. No-Sew T-Shirt Yarn Bracelet Keychain
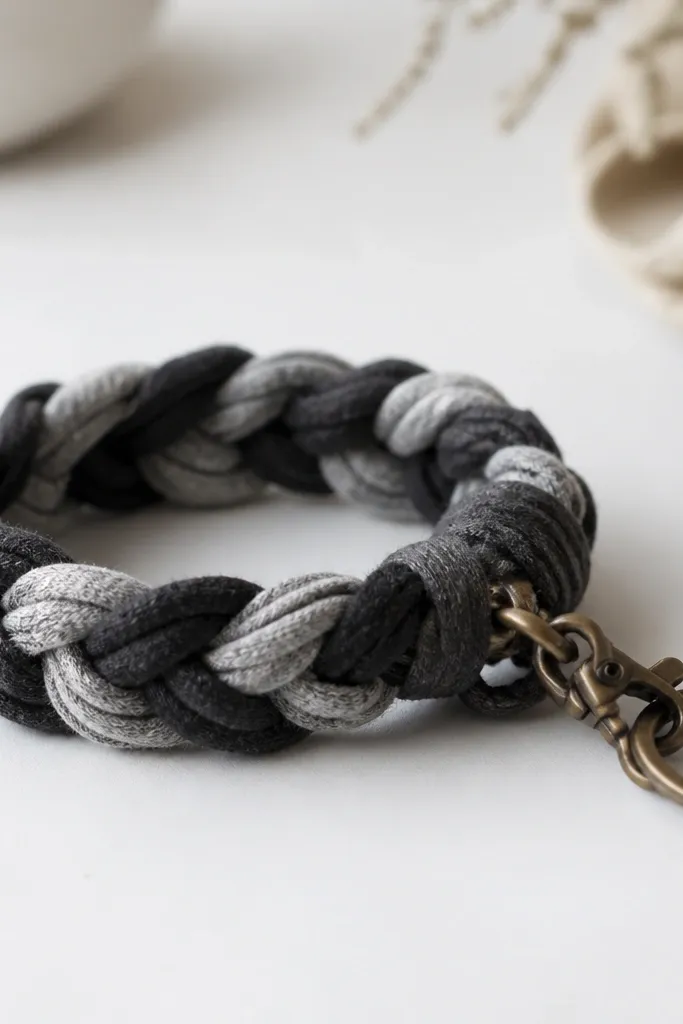
This is one of my favorite "no tools" gifts because it looks handmade on purpose. The braided T-shirt yarn gives a soft, casual texture that suits everyday keys and backpacks. Pick two T-shirt colors that match what he wears — black with charcoal, or navy with gray. It looks best when the braid is tight and the ends are neatly finished with a clasp. This suits guys who like streetwear or who carry a lot of small items, because it’s comfortable to grip and easy to find.
Cut an old T-shirt into long strips about 1 inch wide, then stretch each strip slightly so it curls and braids easier. Tie three strips together at one end, and braid until you reach about 6 inches. Trim the ends so they’re even, then melt the cut ends carefully with a lighter only if your fabric doesn’t have plastic print. Attach a small metal lobster clasp at one end and a keyring at the other using jump rings. Wrap the ends with a few tight stitches using matching thread so the braid doesn’t loosen.
Editor's noteStretch the strips before braiding — it makes the braid look tighter and more uniform.
Skip thisSkip cutting strips too thin; under 3/4 inch makes the braid look stringy.
4. Desk Photo Strip with Clip-on Mini Pegs
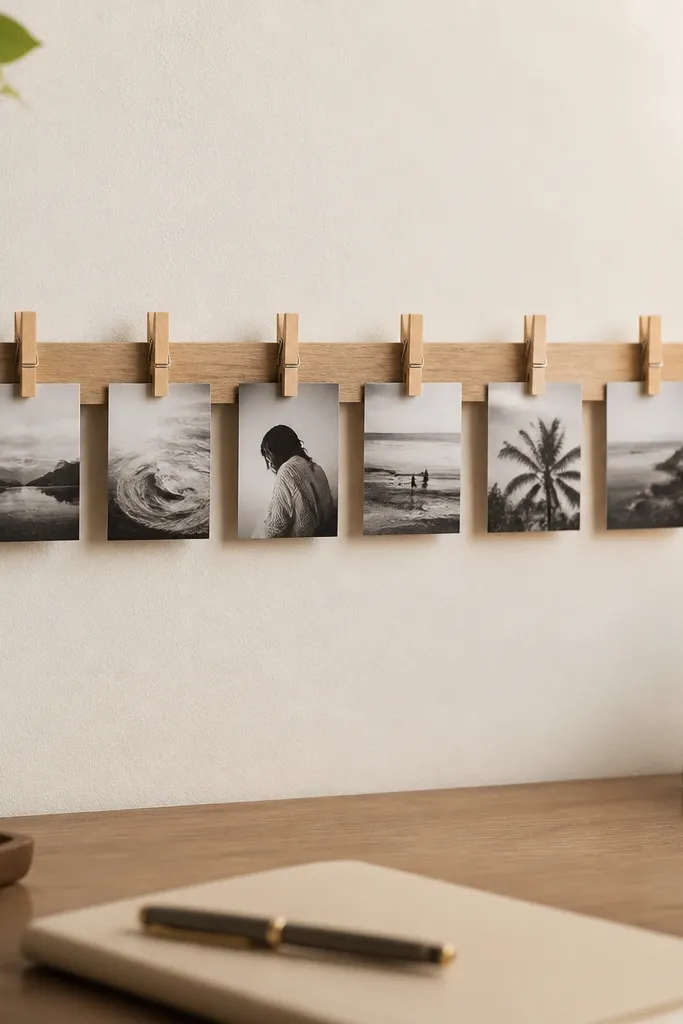
Instead of a single photo frame, a photo strip lets you rotate memories without breaking anything. It also looks clean on a desk because everything sits in one line. Use black-and-white photos for a modern look or add one color photo to break up the palette. This works well for boyfriends who love nostalgia but don’t want a bulky frame on the shelf. The mini pegs give a tiny rustic vibe without turning into farmhouse clutter.
Cut a base strip from pine or basswood at about 12 x 2 inches. Sand it lightly and stain it with a warm walnut stain, then seal with a matte clear coat. Mark six peg positions evenly spaced, then screw in small mini peg holders or glue them if they’re lightweight. Clip in photos printed at 4 x 3 inches trimmed to fit. Add a hanging hook to the back if you want it wall-ready, and keep the top edge flush so it doesn’t snag.
Editor's noteUse photo corners or thin cardstock backing behind each photo so the clips grip evenly.
Skip thisDon’t use glossy photos; they glare under desk lamps and look washed out.
5. Painted Mason Jar Pen Holder with Concrete-Look Speckles
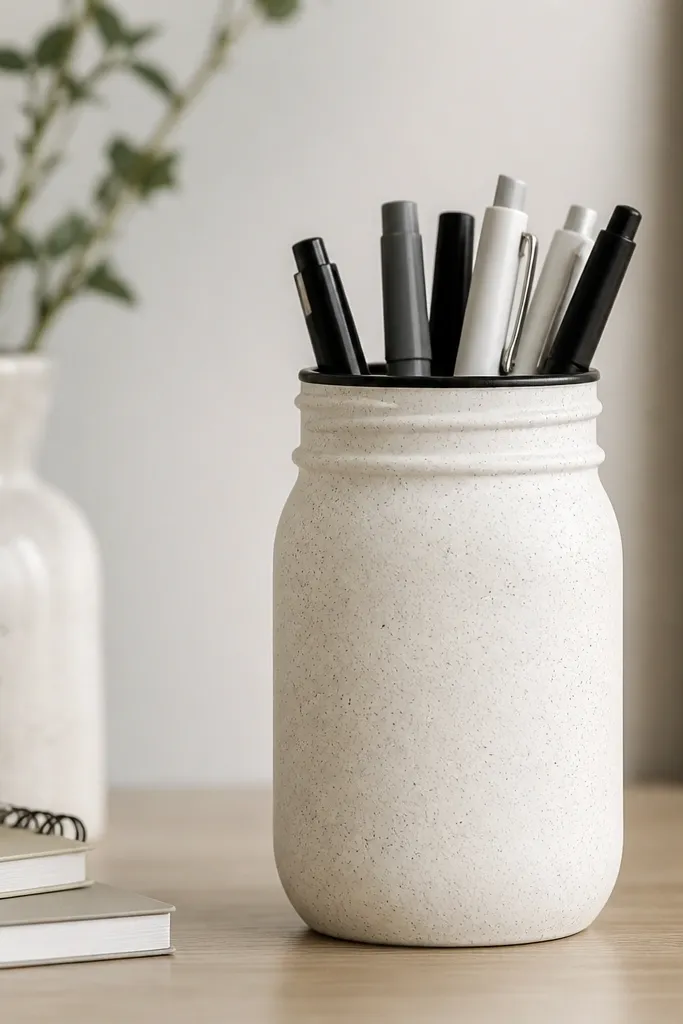
A pen holder is small, useful, and it upgrades his desk instantly. The concrete-look speckles hide tiny mistakes because the pattern is forgiving. Off-white with gray speckles looks clean in any room, and it photographs well. This works best for guys who keep a messy desk — it gives you a place to put pens, markers, or tools. The jar shape also means you’re not fighting complex angles.
Wash and dry a mason jar completely, then scuff it lightly with fine sandpaper so paint sticks. Paint the jar with two coats of matte acrylic primer or craft paint in off-white, letting it cure between coats. Dip a toothbrush into gray paint, then tap over the jar for speckle texture — keep the speckles concentrated in the lower half. Add a thin black line near the top rim using a small craft brush. Let everything dry 24 hours before adding pens so the finish doesn’t scuff.
Warm the jar slightly with a hair dryer before painting to reduce condensation spots.
Don’t skip scuffing — smooth glass paint peels fast.
6. Hot Glue and Twine Wall Word in His Favorite Initial
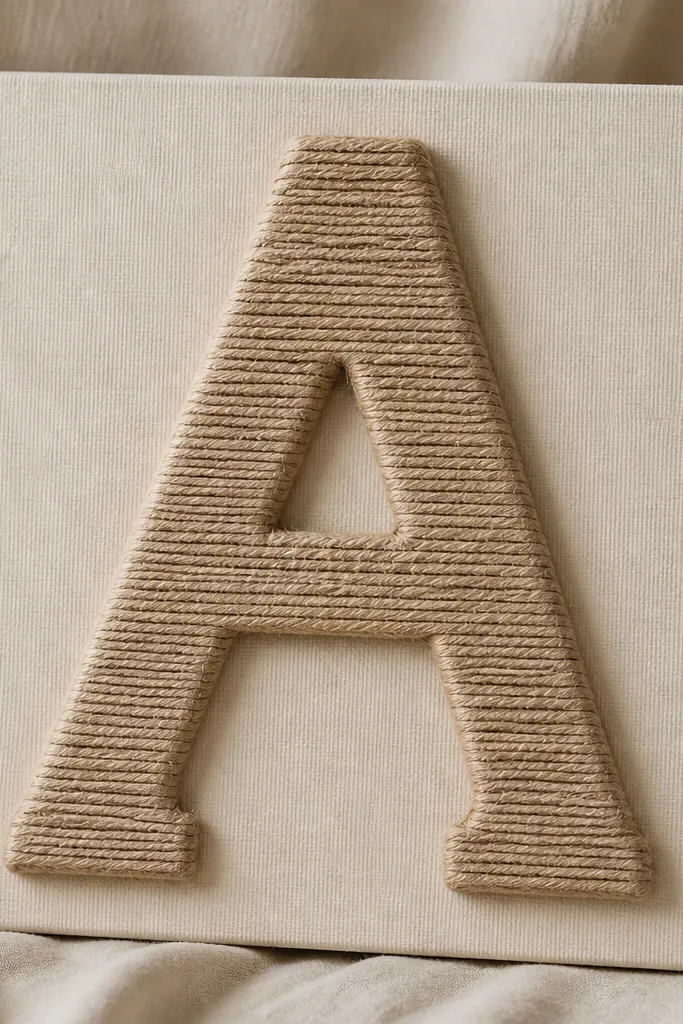
This looks artsy without needing a Cricut. The hot glue lines create a raised guide, and the twine makes it tactile. Choose a single letter, like his first initial, for a clean look that doesn’t become clutter. Tan twine on beige or black twine on off-white both work, depending on his style. This suits guys who like minimalist decor, because the design stays simple but still interesting. It also makes a great gift because it’s one statement piece he can hang right away.
Trace a big initial on a piece of canvas board or thick cardboard, using stencil letters. Outline the letter with hot glue, then fill the interior with a second layer so the twine has something to grip. Press twine along the glue lines, wrapping tightly and tucking the ends behind the board. Leave the background plain or cover it with a thin layer of canvas fabric using spray adhesive. Finish by trimming stray fibers with sharp scissors and hanging it with a simple sawtooth hook.
Editor's noteWrap twine in the same direction for the interior so it looks smooth instead of messy.
Skip thisAvoid overfilling with glue; thick glue ridges make the twine slide and look uneven.
7. Candle Sleeve Gift with His Photo Cutout and Date
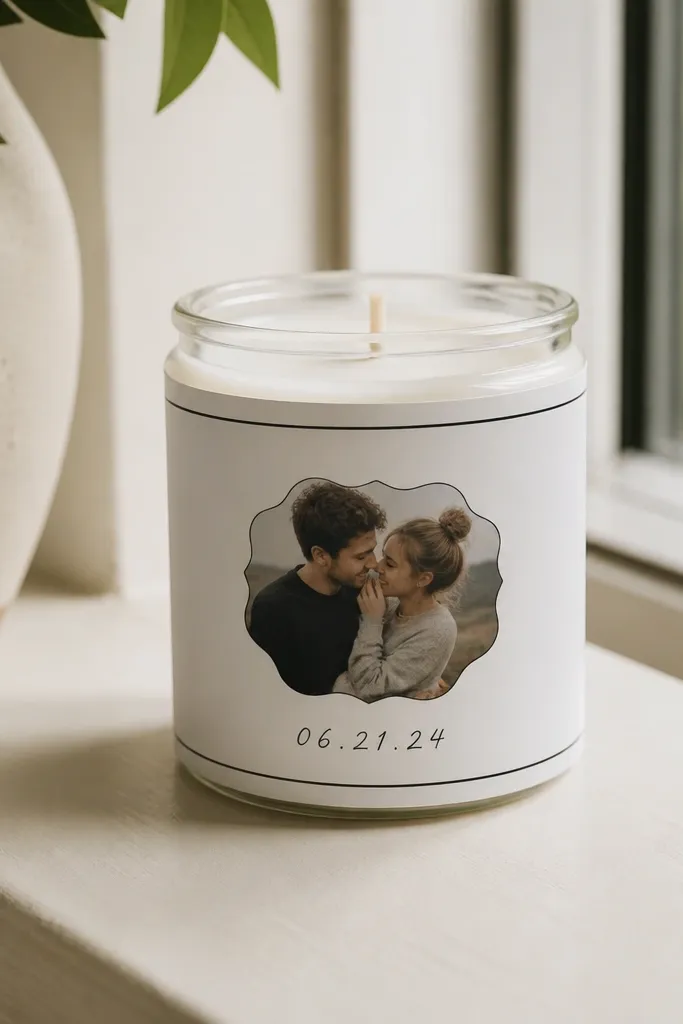
Candle gifts are common, but the sleeve turns it into a personal object you made. The trick is the cutout photo — it peeks through like a mini window, so the whole thing looks designed. Use a white or kraft sleeve, then add a black border for a clean, modern frame. This works for boyfriends who like cozy evenings or who keep candles in the living room. The date makes it feel like a keepsake instead of a random purchase.
Measure the candle jar height and circumference, then cut a sleeve from cardstock with a 1-inch overlap. Cut a window in the front panel and back it with clear acetate so it looks tidy. Glue your printed photo behind the window, then add a black border using a thin marker or tape line. Wrap the sleeve around the jar and secure with double-sided tape. Write the date on a small label strip and attach it near the bottom with glue dots.
Editor's noteUse matte cardstock so the sleeve doesn’t glare and look shiny in photos.
Skip thisDon’t use flimsy paper — it will wrinkle against the jar.
8. Wood Slice Coaster with Burned Quote and Clear Top Coat
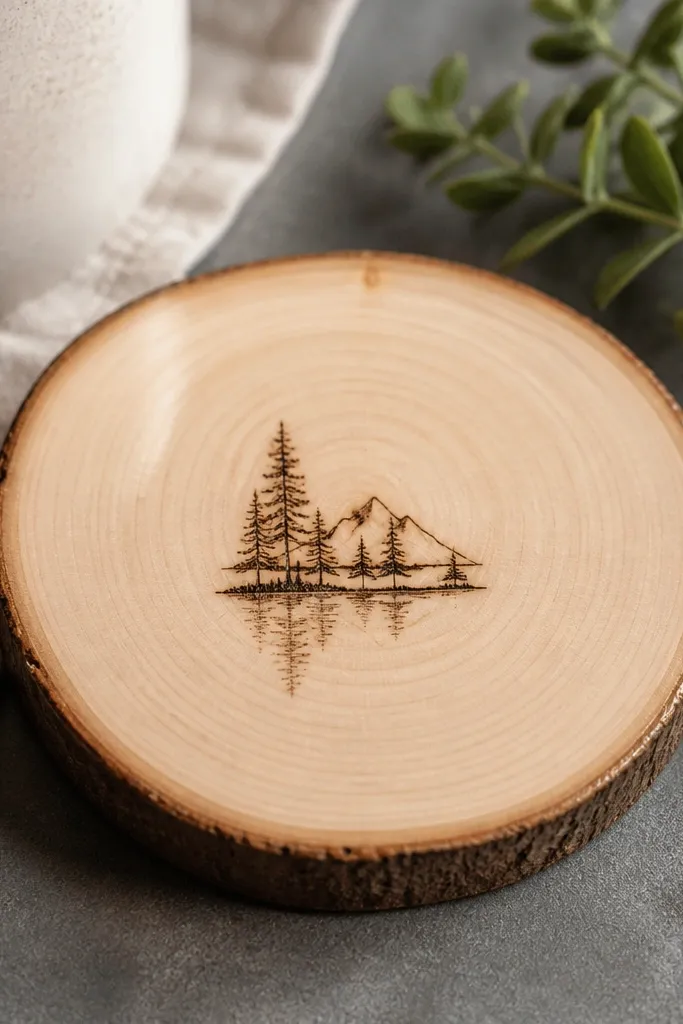
Wood slice coasters look expensive because the material does half the work. Burning a short quote or his initials makes it personal without needing full lettering skills. Choose a single-line quote like “Stay” or his initials for best results. This suits guys who like rustic decor or who keep a coffee table that needs a little protection. The clear top coat makes the burned lines pop and keeps drinks from soaking into the wood.
Buy or cut wood slices around 4 inches wide and sand the top surface smooth. Use a wood-burning pen to burn a small quote centered — keep it under 3 words so it looks clean. Wipe off dust with a dry cloth. Apply a thin layer of clear polyurethane or clear epoxy resin, following label directions, then let it cure fully. If you want extra protection, apply a second thin coat after the first dries.
Practice the burn on scrap wood first so you get the right heat and line darkness.
Skip thick coats right away — they pool and create uneven shiny spots.
9. Fabric Scrap Wall Banner with Stitched Pennant Flag
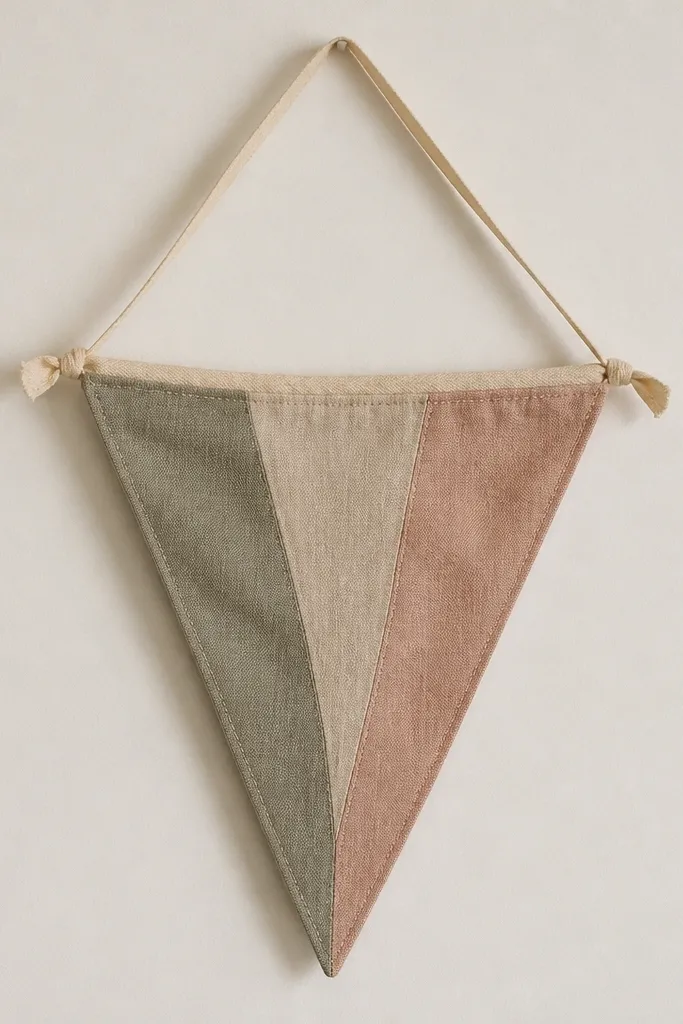
A pennant banner is a sweet gift when you want something decorative but still handmade. The triangle shape reads as “designed,” even if you’re using fabric scraps. Muted colors like olive, cream, and charcoal look mature and don’t scream “craft project.” This works for boyfriends with a hobby room, home office, or sports fandom vibe. Stitching the edges makes it look intentional and keeps the fabric from fraying.
Cut a pennant triangle template about 8 inches tall and 6 inches wide at the base. Pick two or three fabric scraps, then cut matching shapes and layer them so one fabric forms the top and another forms the bottom. Sew along the edges with a straight stitch, or glue with fabric glue if you truly don’t want to sew. Add a ribbon at the top as a hanger, then tie it so the pennant hangs flat. Trim any uneven edges with pinking shears or a zigzag cut to reduce fraying.
Editor's noteUse iron-on interfacing behind thin fabrics so the pennant stays crisp.
Skip thisAvoid stretchy knits — they curl and make the triangle look warped.
10. Navy and Tan Rope Coasters with Heat-Sealed Ends
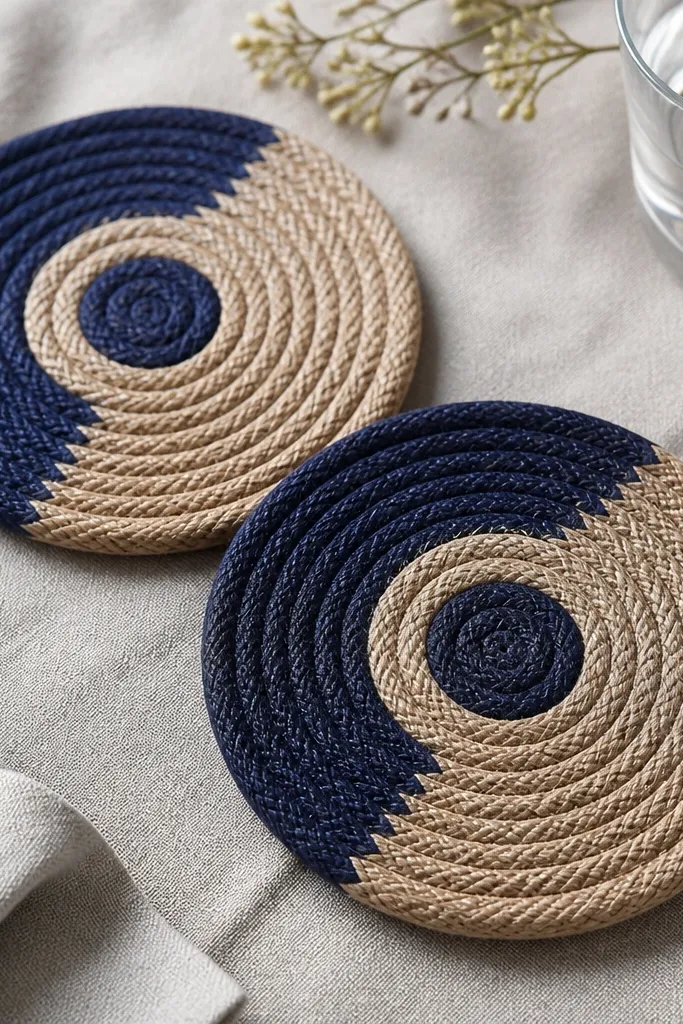
Rope coasters feel like summer without looking childish. The coil pattern is forgiving, and the color blocking makes it look intentional even if your loop isn’t perfect. Navy and tan is a combo that works in most homes because it reads like nautical and natural at the same time. This suits guys who like beachy decor, fishing cabins, or just anything textured. If he has a coffee table, these also protect it from condensation and heat rings.
Cut rope into lengths and decide your color order — for example, start with tan for the outer ring and navy for the inner ring. Form a tight coil and glue the first loop in place with hot glue or strong craft glue. Continue coiling, pressing each loop flat and keeping the coil diameter consistent around 4 inches. When you switch colors, overlap the rope ends by about 1 inch and glue. Seal the rope ends with a quick pass of heat (careful) or a small dab of glue so fibers don’t unravel.
Editor's noteUse hot glue for fast set time, but keep it thin so it doesn’t squeeze out between rope fibers.
Skip thisDon’t leave gaps between coils — gaps make it look sloppy and uneven.
11. Corkboard Key Holder with Painted Grid and Tiny Hooks
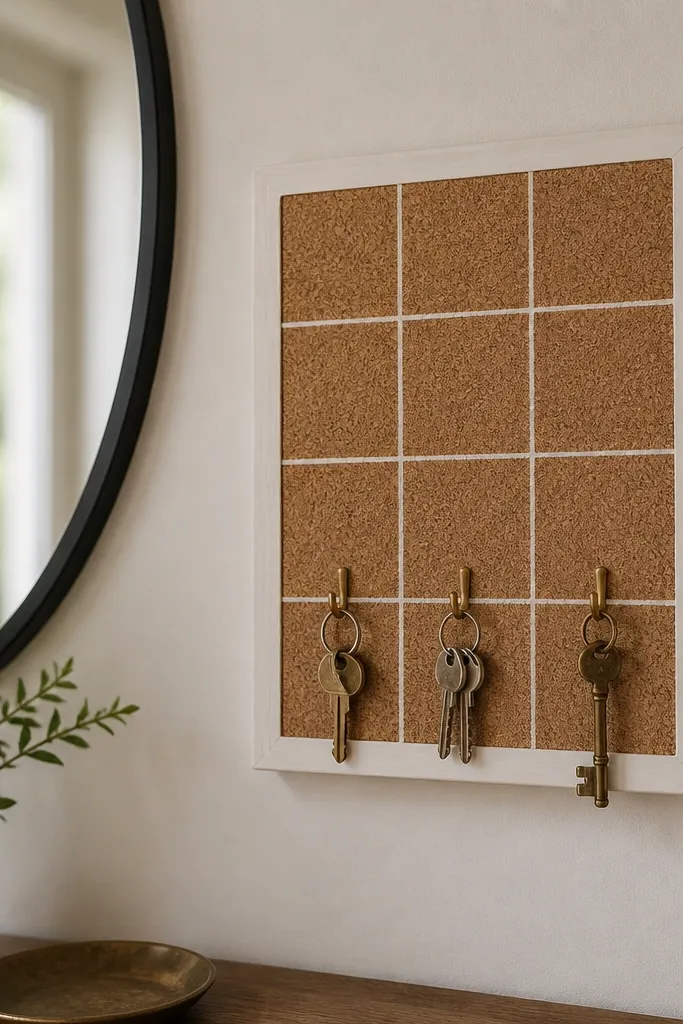
A key holder is one of those gifts that gets used immediately, and it also fixes the “keys on the counter” mess. Cork is easy because it grips pushpins and holds lightweight items without screws everywhere. A painted grid gives structure and makes the cork look more like decor than a craft board. This works well for boyfriends who are always losing keys or who keep a small entry table. The brass hooks add a warm metal detail that looks better than plastic.
Cut a cork sheet to about 8 x 10 inches and sand the edges lightly. Frame it with thin wood trim or wrap the edges with kraft paper and glue if you want it softer. Paint a simple grid with acrylic paint: 3 vertical lines and 3 horizontal lines spaced evenly. Mark hook positions and screw in tiny brass hooks so they can hold weight. Mount the corkboard with picture hangers, then use a small label strip for “Keys” or his initials.
Use painter’s tape as a guide for the grid so the lines stay straight.
Skip super cheap hooks — they bend and keys fall off.
12. Personalized Beer Coaster Bottle Opener Combo
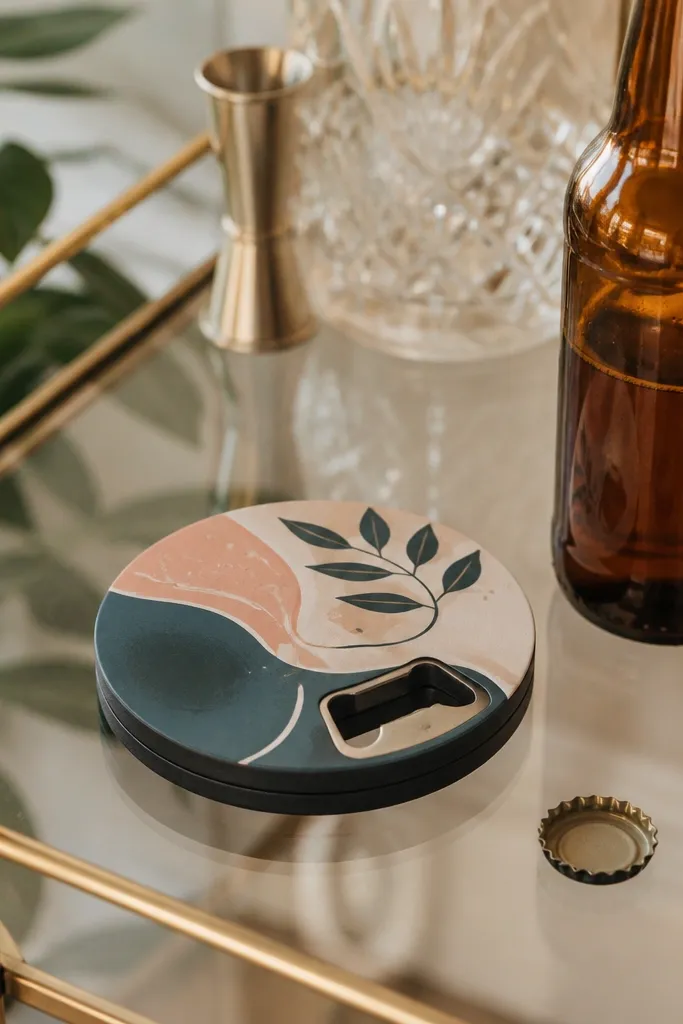
If he drinks beer or soda bottles, this is a gift that gets used instantly. The coaster keeps it looking tidy, while the opener means it doesn’t feel like just a decoration. Print a small label with his nickname or a photo, then seal it so it survives condensation. This works for guys who like bar carts or who host casually. The metal opener piece adds a satisfying, practical element.
Start with a round bottle opener coaster base or make your own by attaching a metal bottle opener to a thick cork or wood circle. Print your design on photo paper and size it to fit the top of the coaster. Glue the print down using decoupage glue, then seal with two coats of clear waterproof sealant. Let it cure overnight so it doesn’t stick to bottles or get tacky. Add a small felt pad underneath if it scrapes surfaces.
Editor's noteUse a waterproof sealant labeled for drinks or outdoor use so it handles wet rings.
Skip thisDon’t skip sealing — unsealed paper swells and wrinkles.
13. Custom Socks Bookmarks with Mini Clips
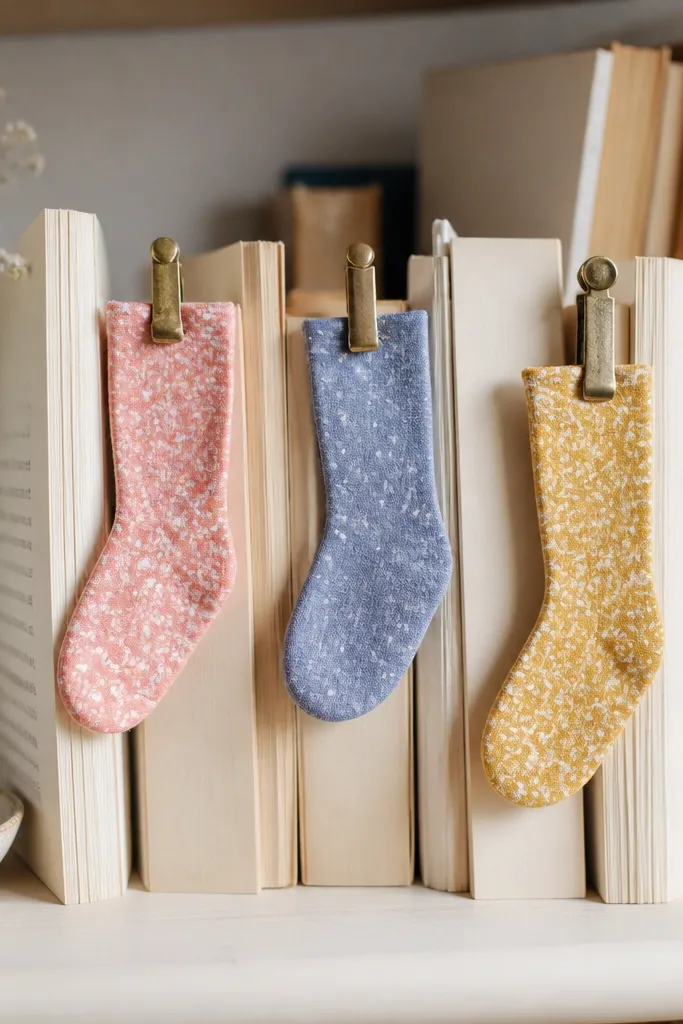
Bookmarks that look like tiny socks are a playful gift that still feels thoughtful. The fabric shape makes it cute, but the mini clip keeps it functional, so it doesn’t slide out of the page. Choose fabrics that match his wardrobe — black-and-white stripes, denim blue, or a favorite team color. This works for book lovers and also for guys who read recipes or manuals. It’s a good option when you want something small that doesn’t take hours.
Cut three sock shapes from felt or woven fabric, about 6 inches long each. Sew or glue around the edges, then add a cuff band in a contrasting color. Attach a small binder clip or spring clip to the top inside so it grips the page. If you want extra detail, add a tiny embroidered line for the toe seam. Keep the fabric stiff by backing it with thin interfacing.
Editor's noteUse felt for the outer layer if you want the edges to stay neat without hemming.
Skip thisDon’t use thin knit without interfacing — it flops and looks unfinished.
14. Glow-in-the-Dark Constellation Keychain on Black Acrylic
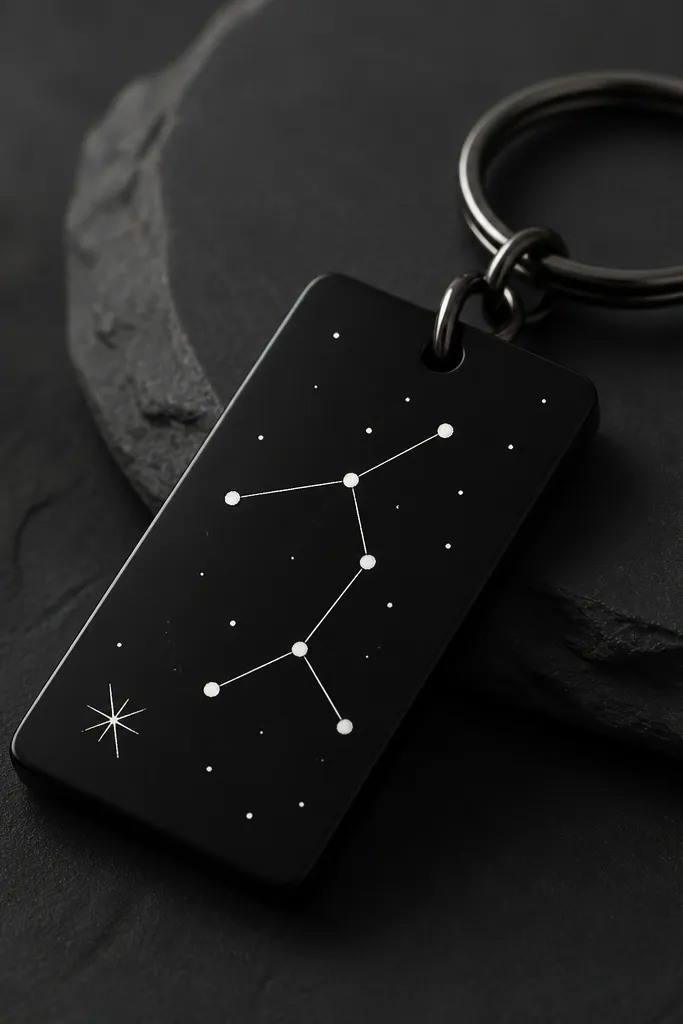
This is the gift I make when he likes space but also wants something practical. Black acrylic gives you a clean, modern base, and the glow dots look cool in low light without needing electronics. White dots also read as “constellation” even if your astronomy knowledge is basic. This works for night drives, camping, and guys who keep chargers and keys on a hook by the door. The keychain format means it’s always in his hands.
Cut a small acrylic piece about 2 x 3 inches and round the corners with sandpaper. Use a paper template to mark star positions, then paint tiny dots with glow-in-the-dark paint. Add one small curved line to connect stars if you want the pattern clearer. Seal with a clear acrylic sealer so the paint doesn’t scrape off. Drill or punch a hole at the top corner and attach a keyring with a jump ring.
Charge it under a bright lamp for 30 seconds before you show him — it looks dramatic.
Don’t paint huge dots — they look like random spots instead of stars.
15. Patchwork Lanyard with Metal D-Ring and Wrist Strap
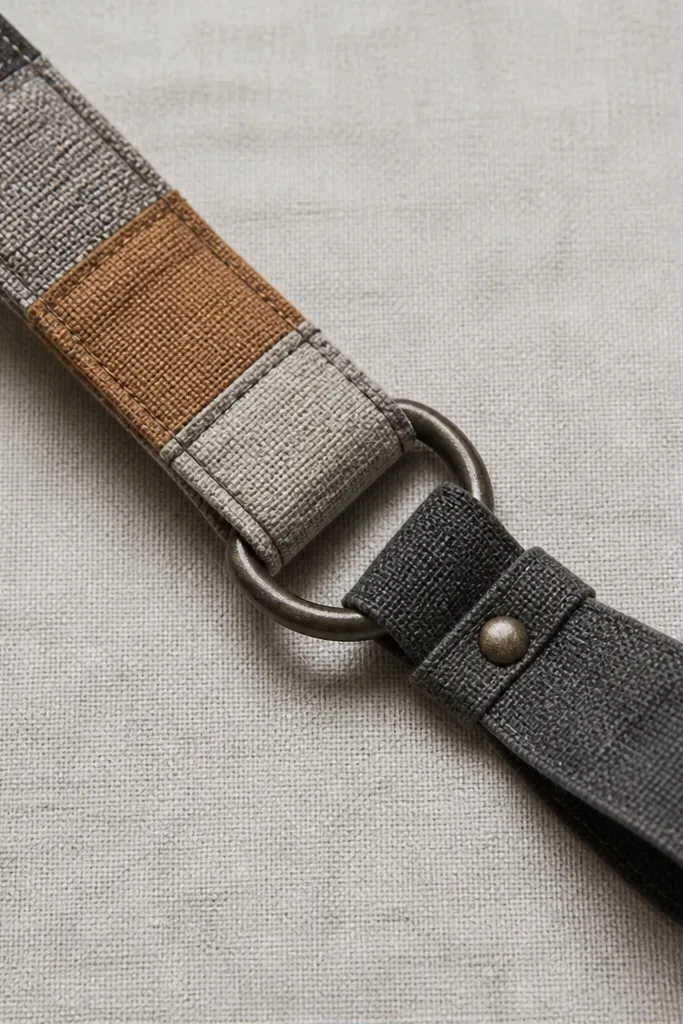
A lanyard is one of those gifts that feels useful immediately, especially if he goes to work sites, events, or carries a badge. Patchwork fabric looks intentional and hides wear spots from day one. Use neutral fabrics so it doesn’t look like a costume. This works best for guys who carry keys plus a wallet or who need quick access to a phone. A metal D-ring gives strength and also looks better than plastic clips.
Cut fabric strips about 1.25 inches wide and sew them into a long strip, then press seams flat. Fold the strip lengthwise and stitch along the edges so you get a clean, finished strap. Thread the strap through a metal D-ring, then fold the end back and stitch a box stitch for strength. Add a wrist strap by cutting a shorter strap piece and attaching it at the same fold point. Finish with a sturdy clasp if you want it removable.
Editor's noteUse a tight stitch length (around 2.0) so the patchwork seams don’t pull apart.
Skip thisSkip flimsy hardware — it twists and the strap twists with it.
16. Sticky Note Organizer with Hidden Phone Stand
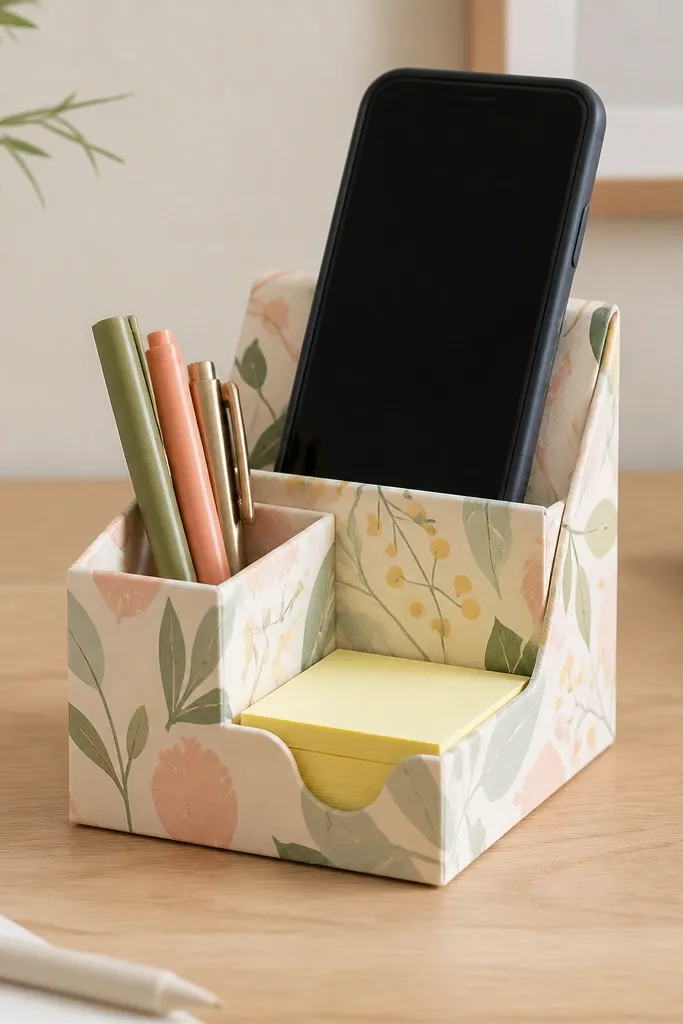
This organizer looks cute on a desk and solves a real annoyance: his phone falls over while he checks messages. You’re using cardboard and paper, but the trick is the hidden fold-out stand. Pick a pattern that matches his desk — black-and-white grid, muted camo, or subtle travel lines. This suits guys who work from home or study at a table. The sticky note slot keeps the desk looking tidy, even when he’s busy.
Cut cardboard to a base size around 8 x 6 inches and wrap with patterned paper using double-sided tape. Create a front slot by cutting a gap about 7.5 inches wide and 1 inch tall, leaving a bottom lip to hold sticky notes. For the phone stand, cut two side pieces that fold out from the back using a strip of tape as a hinge. Make the stand angle by testing with the phone, then glue the stop points so it doesn’t collapse. Seal the organizer with a matte clear coat so it wipes clean.
Editor's noteTest the stand with his exact phone model so the angle fits his camera bump.
Skip thisDon’t make the slot too tight — sticky notes should slide in without tearing.
17. Mini Succulent Planter from Tin Can with Painted Label
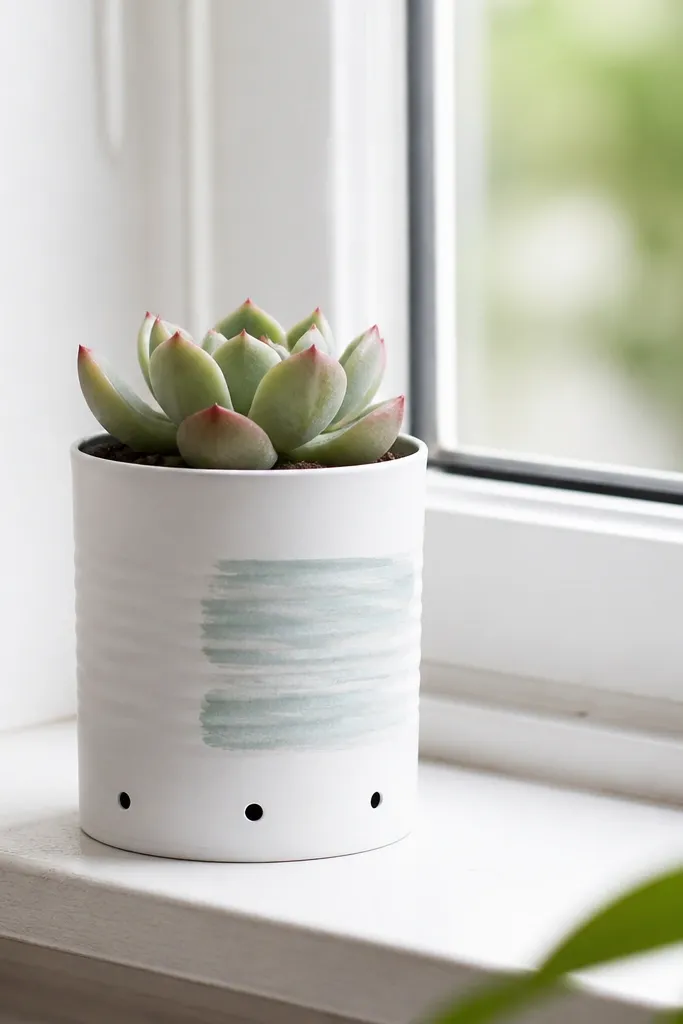
A mini plant gift is personal and low effort, and it looks good even after he forgets to water it for a week. Tin cans work because they’re sturdy, and painting them lets you match his room colors. Use matte paint in white, sage, or charcoal, then add a label like his name or a short word. This suits guys who like plants but don’t want a fussy full pot. The key is drainage — without it, succulents die fast and your gift turns into a disappointment.
Punch drainage holes into the bottom of a clean tin can using a hammer and nail. Wash and dry the can, then lightly sand so paint sticks. Paint two coats of matte acrylic, letting dry between coats. Mix cactus soil and plant a small succulent, then top with a thin layer of decorative sand if you want it cleaner. Paint a label strip on the front and clear-seal over it after it dries.
Pick a succulent with thick leaves and a compact rosette so it looks good immediately, not bare.
Skip decorative gravel on top only — use soil mix underneath for real drainage.
18. Felt Phone Sleeve with Button Closure and Contrast Stitch
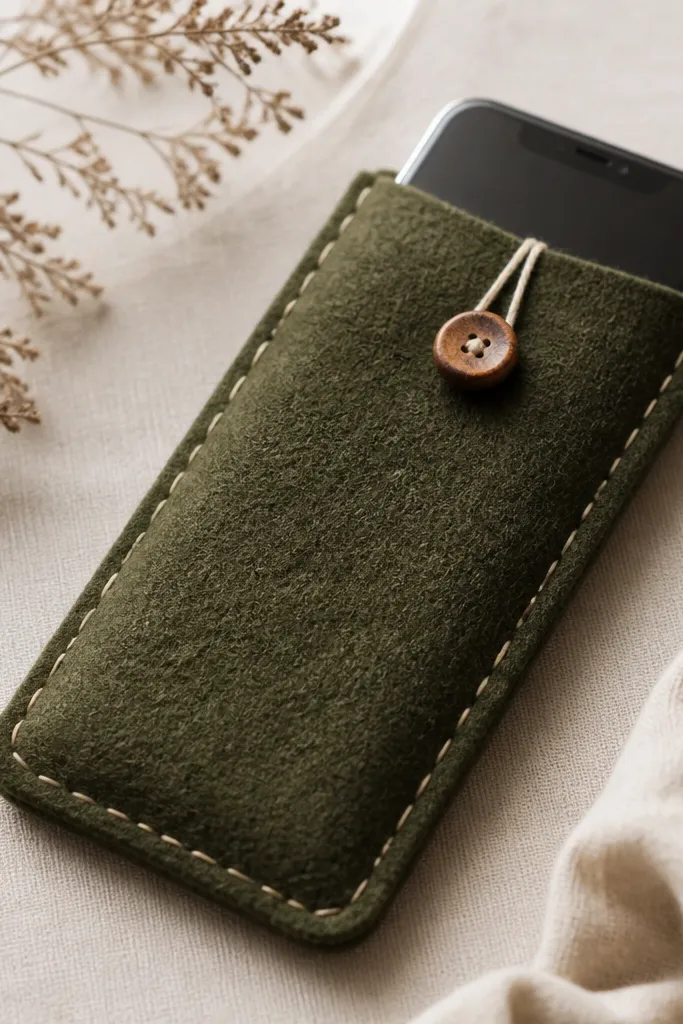
A felt phone sleeve is a practical gift that also looks cozy and styled. Felt is forgiving for beginners because it doesn’t fray much like fabric does. Deep olive with cream stitching looks classic and hides lint better than bright colors. This works for guys who carry their phone without a bulky case or who keep it in a bag and worry about scratches. The button closure keeps it secure without complicated zippers.
Trace his phone on felt and add 1 inch extra around for seam allowance, then cut two pieces. Sew or glue the side edges, leaving the top open, and add a strip of felt reinforcement if you want extra thickness. Place the phone inside to confirm fit, then sew a button on one side and a buttonhole or loop on the other. Stitch a visible contrast line around the perimeter using thick embroidery thread. Trim any uneven edges and press flat under a book while it dries.
Editor's noteUse embroidery thread and a simple backstitch so the contrast looks neat, not wobbly.
Skip thisDon’t skip reinforcement at the button — felt can tear when it gets pulled.
19. Printable Photo Heat-Transfer Keychain Tag
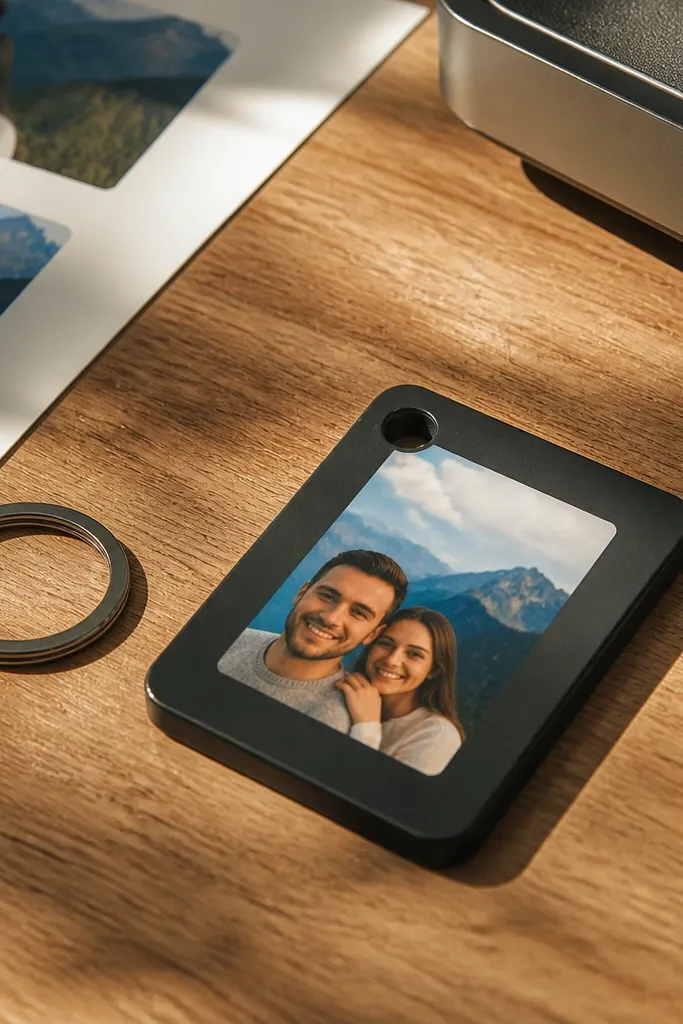
If you want a photo gift that doesn’t look like a cheap print, use heat-transfer paper on a hard tag base. The glossy finish makes the image look sharper and more “finished,” especially with high-contrast photos. This works for boyfriends because you can include a face photo, a landmark, or even a favorite concert shot. It also holds up better than paper-only tags when you seal it properly. The metal ring and tag shape make it feel like an actual accessory, not a craft.
Buy a pack of blank keychain photo tags that accept heat-transfer (plastic or metal). Print your image on heat-transfer paper using the exact size settings from the tag instructions. Trim the print with a clean border and place it face-down on the tag. Heat using a heat press or a household iron with firm pressure and time control, then let it cool fully. Seal with a clear protective coating if your tag instructions recommend it.
Use photos with strong contrast and avoid very dark images — they print muddy.
Don’t cut too close to the image edges — you need a small margin so it transfers cleanly.
20. Hanging Air Freshener Card from Felt with Waxed String
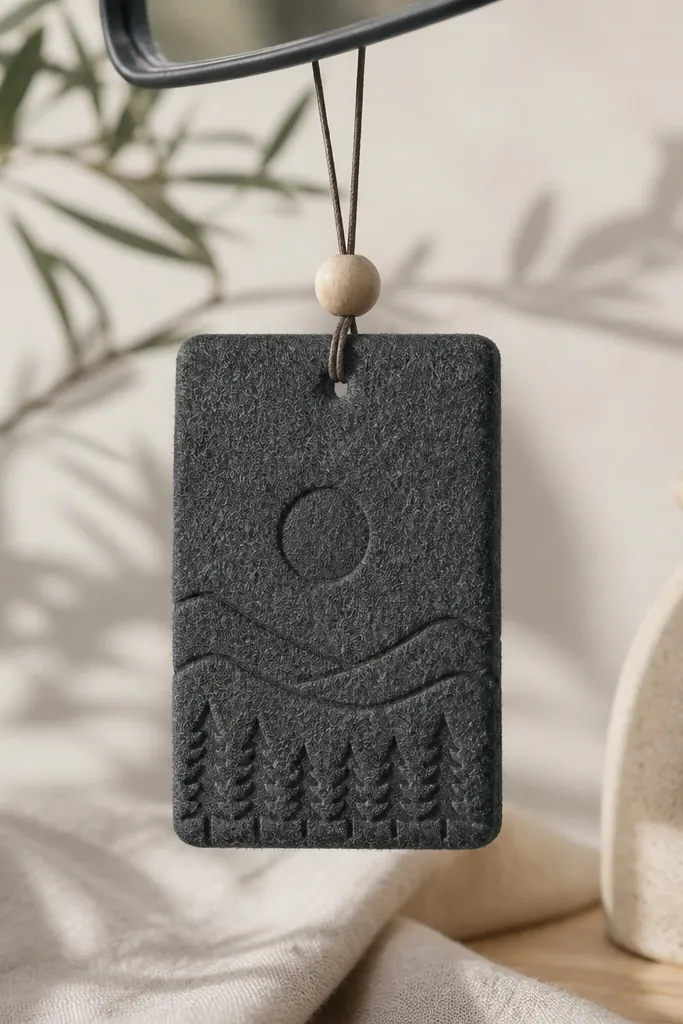
This looks like car decor, not a dangling cartoon. Felt holds scent well, and the hanging string with a bead looks intentionally styled. Choose a stamped symbol like a mountain, a simple line icon, or his initials. Charcoal and cream look clean against car interiors, and the waxed string doesn’t look messy. This suits guys who keep their car smelling good and don’t want the overpowering chemical smell. You can also swap the scent pouch later without replacing the whole gift.
Cut a felt rectangle about 4 x 6 inches and stamp or paint a simple design on the front. Punch two holes near the top corners and thread waxed string through, tying a loop at the top. On the back, create a small pocket by gluing or sewing a felt flap at the center and inserting a scent sachet. Add a small wooden bead at the knot for weight and a cleaner hang. Secure the pocket opening with a tiny stitch so the sachet doesn’t slide out.
Editor's noteUse a light scent oil only on the sachet, not directly on felt, so the color doesn’t stain.
Skip thisDon’t use thick, cheap felt — it sags and looks like a school project.
21. Cork and Brass Coaster with Straight-Line Engraved Look
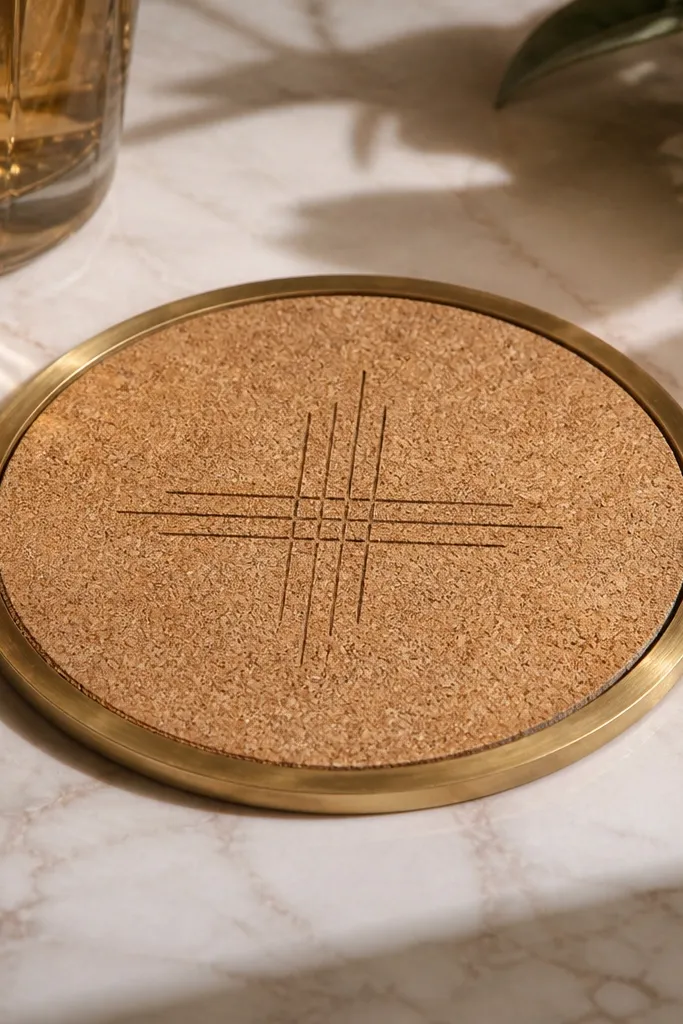
This coaster style looks modern because it uses clean geometry and a metal accent. Cork keeps it warm and textured, while a thin brass strip gives that “shop-bought” finish. You can create an engraved look with a metallic paint pen even if you don’t have an engraver. This gift fits guys who like clean desk setups or modern decor. The straight-line pattern also looks good on camera and doesn’t compete with his stuff.
Cut a round cork coaster at about 4 inches wide and sand the top edge lightly. Paint or draw a simple straight-line pattern in a dark brown or black metallic tone at the center. Add a thin border around the edge using adhesive brass tape, pressing it firmly so it sticks evenly. Seal with a matte clear coat so the tape doesn’t peel and the cork stays protected. Let it dry fully before stacking with other coasters.
Press brass tape with a flat tool and work slowly around the curve for a smooth edge.
Don’t use heavy metallic paint — it chips off at the edges.
22. Sewed-In Travel Wallet Key Holder from Canvas
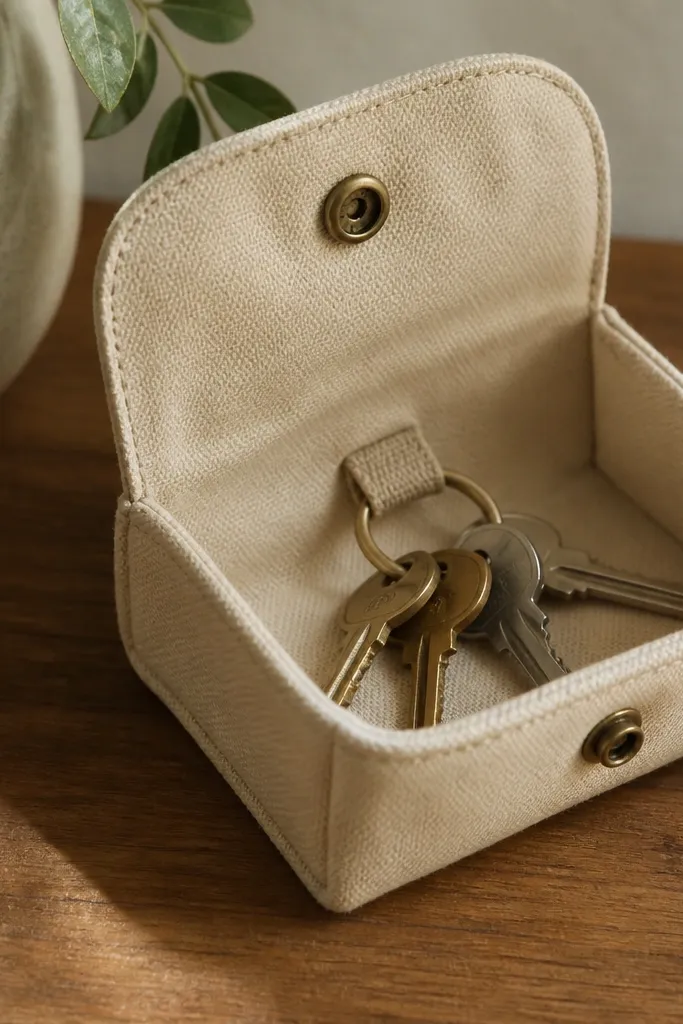
This is a gift for the boyfriend who always has pockets full of random stuff. A canvas pouch keeps keys and a folded card together, and it looks more like a product than a craft. Sturdy canvas holds shape, so the opening stays clean and he can find his keys fast. Choose beige or olive for a rugged look, and add a snap closure for quick access. It’s a great match for travel weekends, hikes, or even daily errands.
Cut canvas pieces to make a pouch about 5.5 inches wide and 6.5 inches tall. Sew three sides, then add a key loop inside using a strip of webbing and strong thread. Fold the top edge down for a flap and sew the flap sides, leaving the bottom open for the snap. Install a snap at the front flap and corresponding receiver on the pouch front. Finish by turning the pouch right-side out and pressing it so the edges look crisp.
Editor's noteUse upholstery thread or strong polyester thread so the key loop doesn’t loosen over time.
Skip thisSkip thin thread — it looks fine at first and then fails when he pulls keys out.
23. Super Simple Concrete-Style Desk Paperweight with Photo
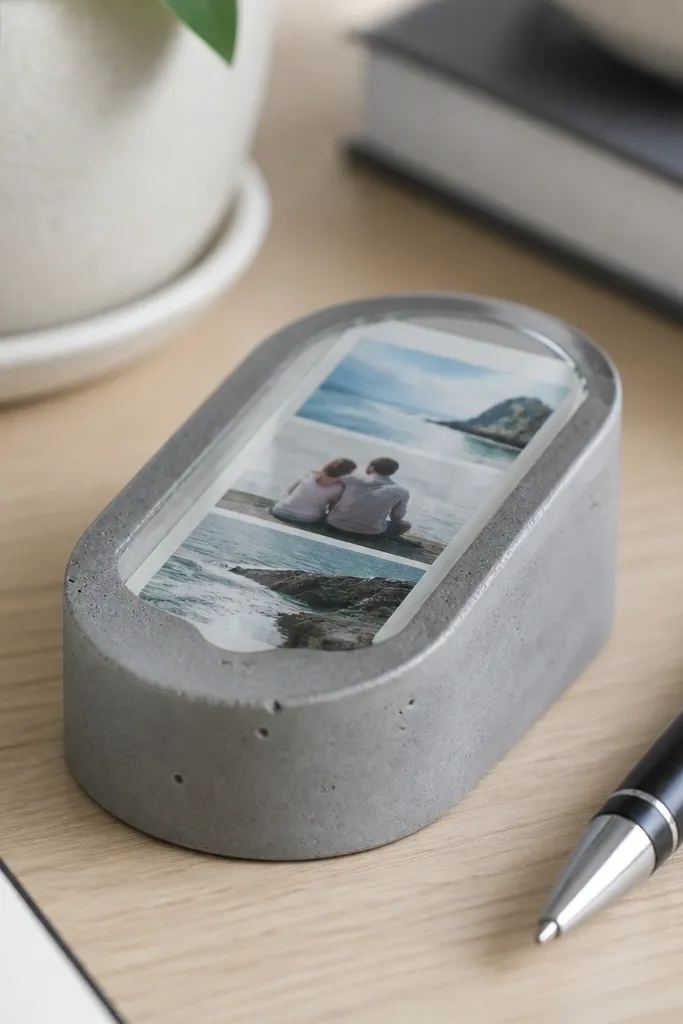
A paperweight is such a small object, but it makes his desk feel intentional. The concrete-style surface looks modern, and the embedded photo gives it a personal twist without needing a frame. Gray tones work with any office setup, and resin makes the photo look crisp. This suits guys who write, study, or keep documents on a tidy desk. The weight also stops paper from sliding, so it’s not just decoration.
Use a mold like a silicone cube or a small resin tray to make a piece about 2.5 x 2.5 inches. Mix a concrete-style resin or pourable epoxy tinted gray, following the product instructions. Place a small photo strip in the mold and pour a thin base layer to cover it, then add more resin to reach the final height. Tap the mold gently to pop bubbles, then let it cure fully. Remove from the mold and sand any rough edges lightly for a smooth feel.
Editor's noteSeal the photo with a clear coat if your resin instructions say it needs extra protection to prevent fading.
Skip thisDon’t rush demolding — resin edges can chip if cured time is short.
24. Stenciled Bourbon Bottle Label Candle Match Set
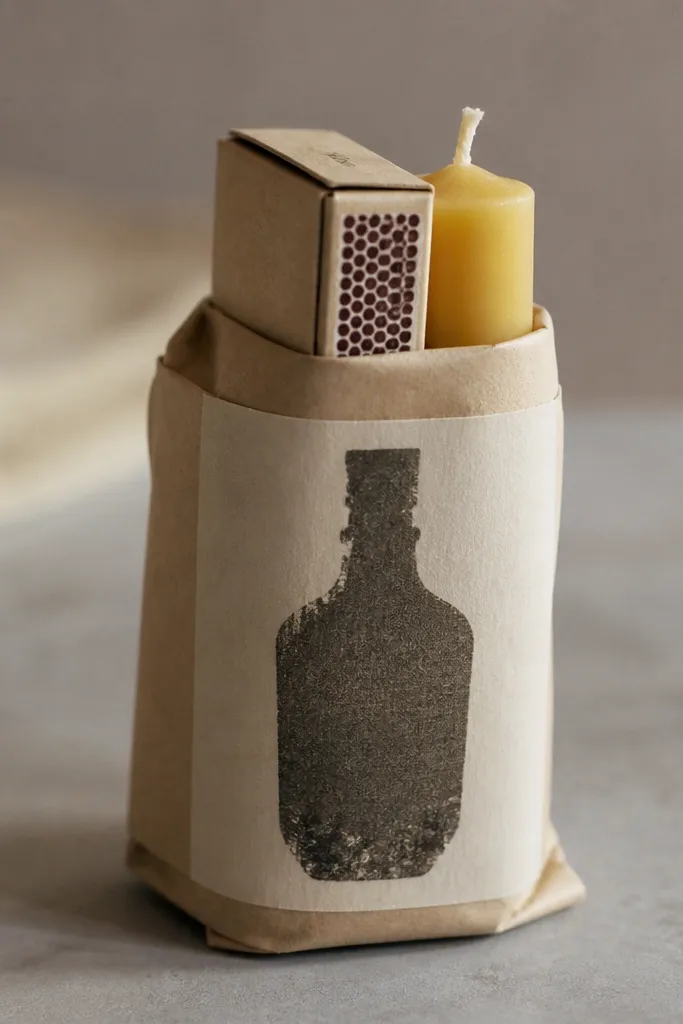
This gift reads like a bar cart accessory, and it’s made from two super common items: a matchbox and a candle. The stenciled label gives it that “bottle” look without needing fancy design skills. Choose a color palette: warm cream label with black stencil ink, or a dark label with gold paint pen. This suits guys who light candles or who like practical bar-style decor. When you wrap it neatly, it looks like you bought it as a set.
Wrap a mini candle in kraft paper and secure with twine so it sits snug. Create a label on cardstock using a simple stencil font, then cut it to fit the candle and matchbox. Glue the label to the candle wrap and the matchbox front. Add a small band of black tape at the top for a clean cap look. Place the matchbox in a pocket made from paper behind the candle label so the set stays together.
Editor's noteDo one test stencil on scrap paper so your letters land at the right thickness and spacing.
Skip thisDon’t freehand fancy script — wobbly letters ruin the “bought it” look.
25. Magnetic Toolbox Photo Frame with Sliding Label Strip
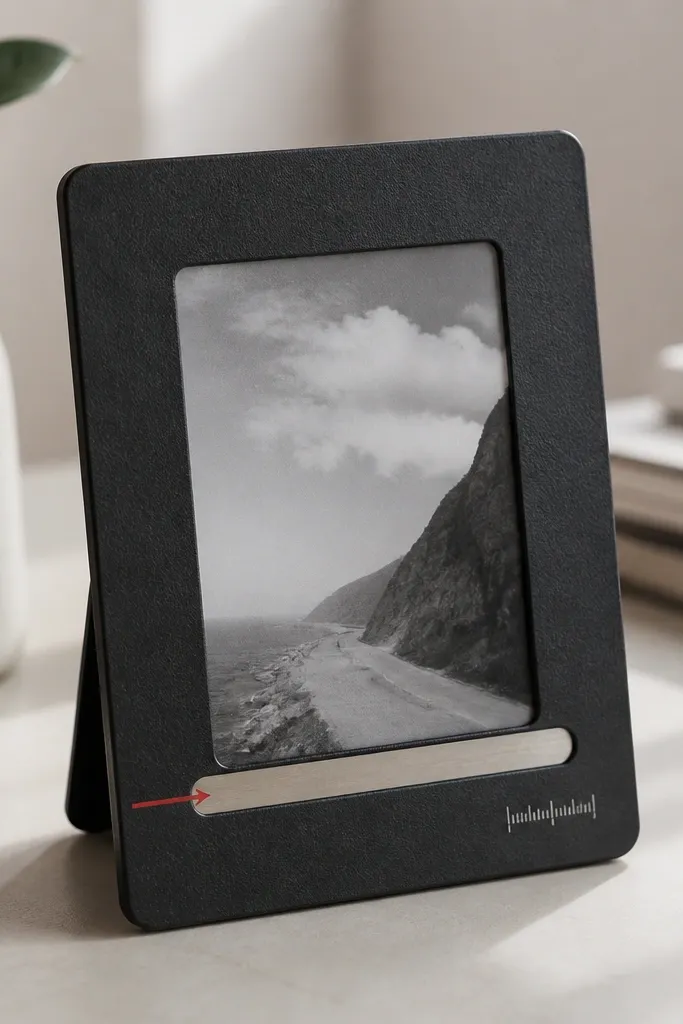
This gift looks like something you’d actually keep on a workbench, not a craft you’ll toss after the photos. The magnets let him stick the frame on his fridge, filing cabinet, or toolbox without hunting for a place to hang it. I built mine with a sliding label strip so the date or nickname can change later — I replaced mine after he finished a big project. It works because it combines a photo he cares about with a practical way to display it every day.
Cut a rectangle of thin metal sheet or thick aluminum craft sheet to fit a 2x3 photo with a 1/2-inch border on all sides. Sand the edges, then wrap the perimeter with black leatherette tape so it feels smooth and doesn’t scratch. Print your photo to 2x3 inches, then glue it to a backing board (foam board works) and cover it with a clear acrylic sheet cut to size. Attach two neodymium magnets to the back with epoxy, keeping them spaced about 1.5 inches apart so the frame sits flat. Make the sliding label strip from a brushed steel cardstock or thin metal strip — glue a strip of thin vinyl on the top as a runner, then slide a narrow label card under the clear acrylic edge so it can move without falling out.
Editor's noteUse epoxy for the magnets and rough up the metal sheet with 120-grit sandpaper first so it grips. If the label strip binds, trim the runner until it slides with light finger pressure.
Skip thisDon’t skip edge sanding — sharp metal corners will slice tape and ruin the clean look fast.



