
1. Scrap Wood Clip Frame With Clothespins
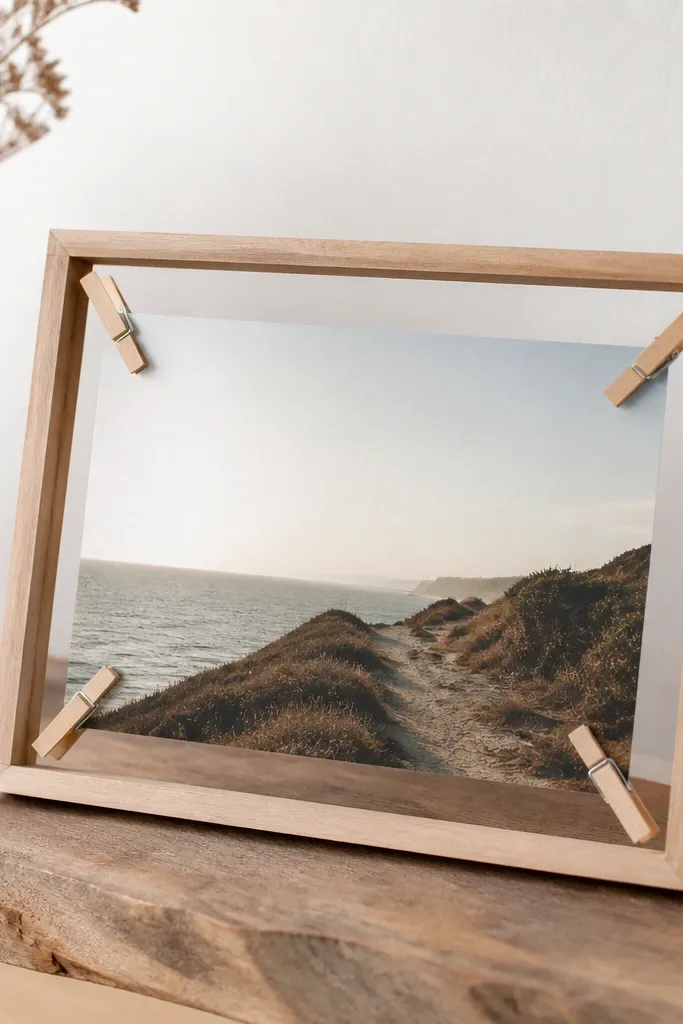
This one looks charming because the photo is held like a mini display, not sealed behind glass. Use light sanded wood and leave it matte - it gives a warm, lived-in look that still reads "designed." The clothespins add texture and a handmade rhythm around the edges.
Cut two vertical side strips and one top and bottom strip so the inner opening fits your photo snugly. Add a simple back ledge using thin scrap (like 1/4 inch) so the photo rests flat. Stain in a light walnut tone or paint cream, then finish with matte clear spray.
Pro tipUse two clothespins on the top corners only if you want a cleaner look; corner symmetry matters more than extra hardware.
AvoidDon't use glossy varnish - it makes the clothespins look plasticky and catches glare.
2. Book Page Mat Frame (No Glass, Paper-Backed)
This looks artsy without being hard because paper can hide small cuts. The book page mat creates a soft, speckled background that makes black-and-white photos pop. Skip glass to avoid glare and to keep the build beginner-friendly.
Cut a mat from cardstock first, then wrap it with book pages using spray adhesive. Build an outer border from a painted 1x2 inch wood strip frame, leaving the inner opening about 1/2 inch bigger than your photo. Glue the photo backing to the mat with photo corners or double-sided tape.
Pro tipMist the finished paper mat with a light matte sealer so it doesn't curl over time.
AvoidDon't soak the paper with thick glue - it wrinkles and shows bubbles.
3. Washer + Twine Frame for Tiny Photos
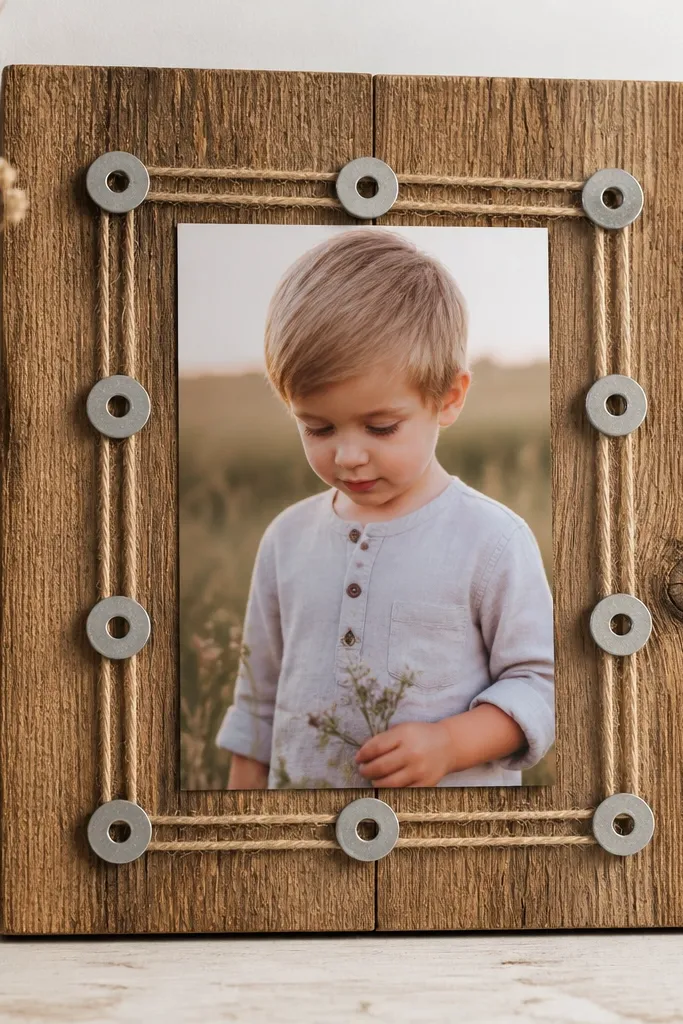
This is a great option when you want something light and minimal. The metal washers add a crisp, industrial sparkle while the twine keeps it warm. It also works for tiny photos because the photo sits flat against the backing.
Use a piece of scrap wood around 6x6 inches. Drill four small holes near each corner, tie twine through them, and add washers as spacers around the twine at the corners. Mount the photo behind the twine with a paper backing and tape the edges.
Pro tipPull the twine tight, then hot-glue the ends inside the back so the front stays clean.
AvoidDon't let the twine sag - it reads sloppy even if everything else is neat.
4. Cardboard Shadow Box With Fabric Lining
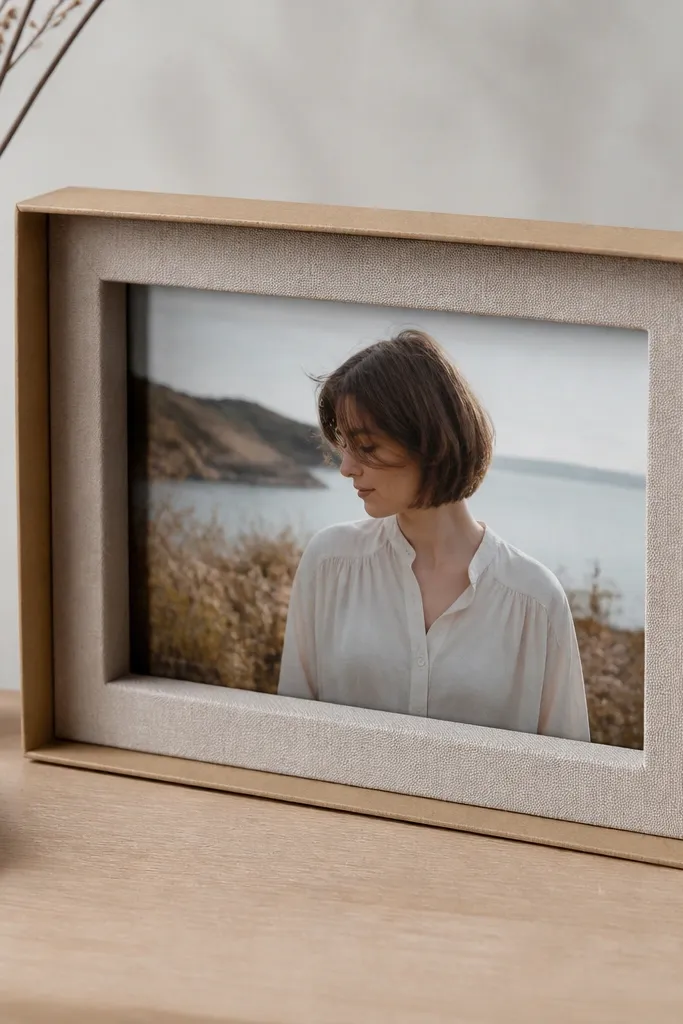
Shadow depth makes photos feel more expensive because your eye sees layers. Fabric lining adds color without needing paint, and it hides the ugly raw edges of cardboard. The result looks like a mini gallery box on your wall.
Cut cardboard into a shallow frame: outer rectangle plus a recessed inner opening. Line the inner walls with cotton fabric (choose solid colors like dusty blue or warm beige). Glue a backing board and mount the photo so it sits about 1/2 inch inside the opening.
Pro tipAdd a thin foam sheet behind the photo for a gentle floating effect.
AvoidDon't use shiny fabric - it shows wrinkles and glare.
5. Popsicle Stick Mosaic Frame (Simple Grid)
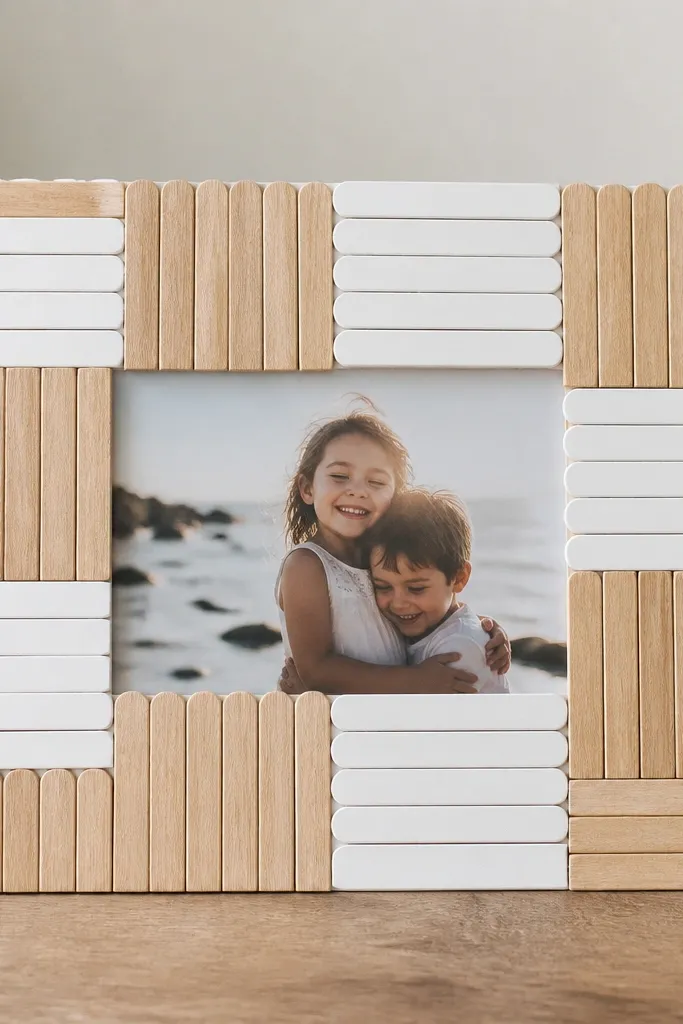
A grid pattern is forgiving because small miscuts blend into the design. Alternating light oak and white gives a clean, modern look that works with almost any photo. It's also fast - you can build one in an evening.
Measure your photo and cut a backing board slightly larger. Arrange popsicle sticks edge-to-edge around the photo opening, then glue in rows. Leave the inner opening tight enough that the photo sits without wobble, then paint or stain after assembly for consistent coverage.
Pro tipSand the front lightly so the sticks catch light evenly and don't look rough.
AvoidDon't glue sticks directly over glossy glue residue - you'll see shiny patches.
6. Tin Can Photo Frame With Painted Rim
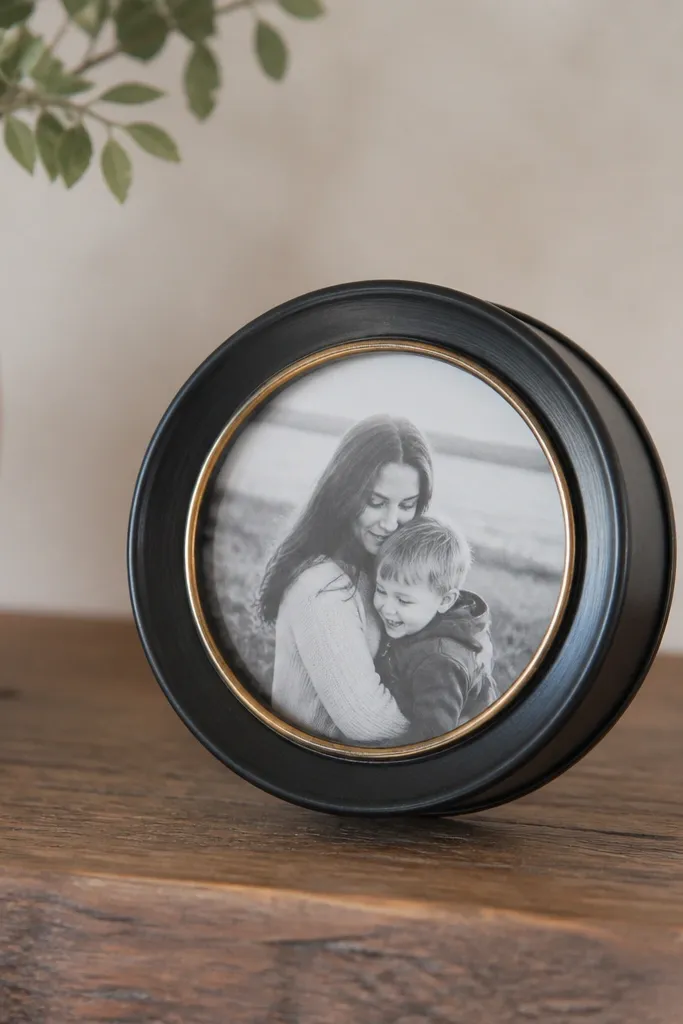
Metal edges look sharp even when the project is simple. The circular format feels playful and modern, and the matte black makes the photo look more dramatic. A thin gold rim gives it that "intentional" finish.
Clean and flatten the tin can rim if needed, then cut a circle backing board and mount the photo behind. Paint the outer can matte black, then tape a narrow stripe and spray a gold rim. Use a small ring hanger or two wire loops on the back for mounting.
Pro tipSeal the inside rim with matte clear so the photo backing doesn't pick up metal spots.
AvoidDon't use thick paint layers - the rim gets uneven and looks lumpy.
7. Palette Wood Frame With White Wash Edges
Pallet wood has character, but it can look messy without a finishing trick. White-washing the edges keeps the grain visible while making the frame feel airy. It's a strong look for family photos because it doesn't overpower the image.
Cut pallet planks into four pieces and sand only the front face. Mix white latex paint with water (about 1:1), brush it on edges and wipe off quickly. Build a simple back with cardstock and mount the photo so it sits flat against the backboard.
Pro tipUse a matte clear coat to keep the white-wash from turning chalky.
AvoidDon't skip sanding the front face - splinters show up instantly in photos.
8. Embroidery Hoop Frame With Fabric Tassel Border
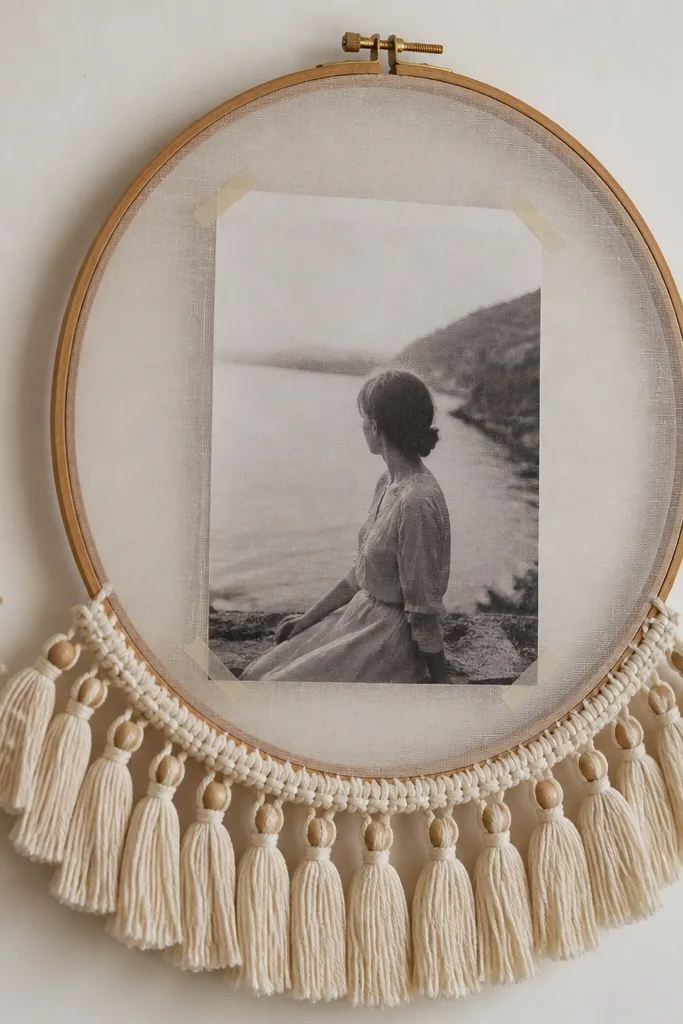
Hoops are beginner-proof because you don't need precision cuts. The tassel border adds movement and softness, and the photo looks like it's under a gentle veil. This style works especially well for portraits and warm-toned travel pictures.
Use an embroidery hoop slightly larger than the photo. Stretch sheer fabric (like voile) over the inner ring, then tape the photo behind it. Add a tassel strip using thin cotton fringe glued along the bottom edge of the hoop.
Pro tipTrim the tassels uneven on purpose - a tiny variation looks handmade, not sloppy.
AvoidDon't use thick, stiff fabric - it creates hard creases across faces.
9. Jute Rope Frame With Hot Glue Bead Outline
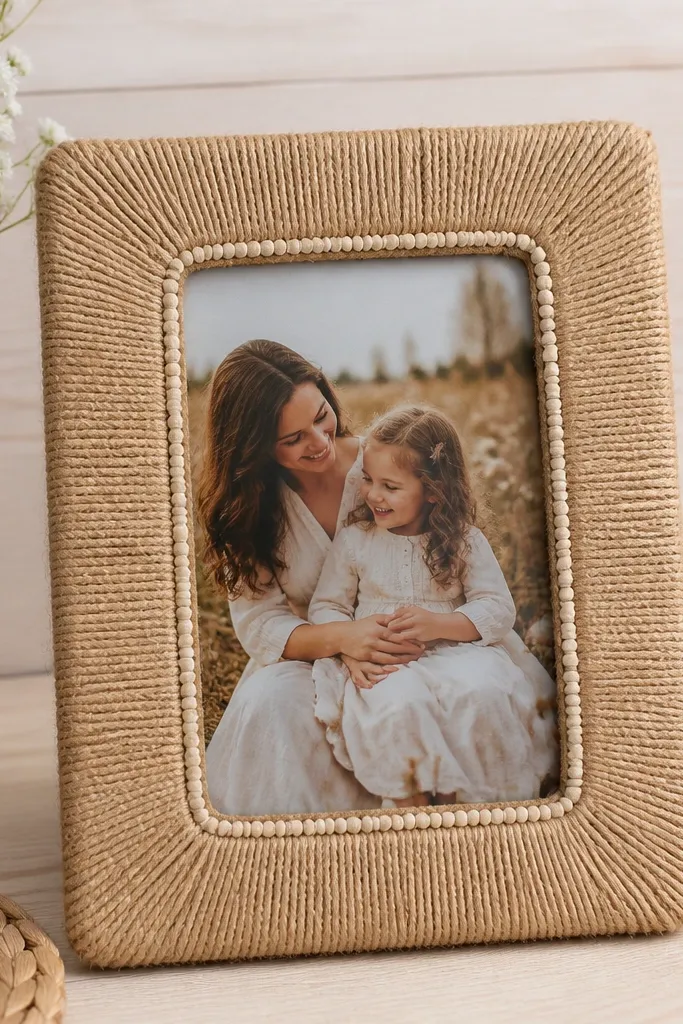
Rope frames look great because texture reads instantly from across the room. The hot-glue bead outline gives a crisp inner edge so the rope doesn't look chaotic. This one pairs well with beachy photos, black-and-white portraits, and warm interiors.
Wrap rope around the outer perimeter first, gluing along the back side and keeping the front edge clean. Build an inner border with jute pieces laid flat, then add hot glue beads to lock the rope in place. Mount the photo with a backing board and tape the edges.
Pro tipPaint the backing board light cream so the photo edges don't look gray.
AvoidDon't let glue squeeze out on the front - it shows up as shiny dots.
10. Matte Paint + Gold Tape Frame (Clean Geometry)

This is the fastest way to make a store-bought frame look custom. Matte paint reduces glare, and the gold tape draws the eye toward the photo without adding weight. It also works for a gallery wall because every frame can match the same tape pattern.
Paint the frame matte white or soft gray and let it dry fully. Add painter's tape strips to create an inner border about 3/4 inch from the photo edge. Spray or paint over the tape only if you need coverage; for maximum crispness, use the tape as a line guide and leave the gold as tape.
Pro tipBurnish the tape edges with a fingernail so paint doesn't bleed underneath.
AvoidDon't use duct tape - it pulls paint and leaves residue.
11. Magazine Cutout Frame With Single-Color Theme
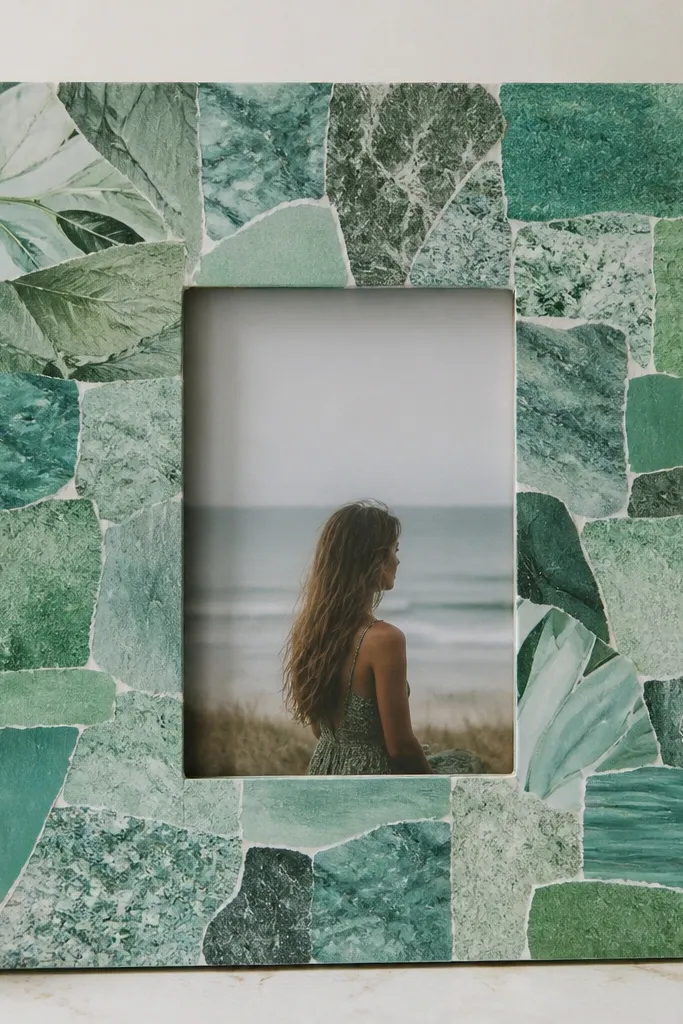
Patchwork borders look intentional when they share one color family. Choose a single theme color (teal, coral, or black-and-white) and cut small rectangles for a consistent rhythm. The photo stays the star because the border is color-limited.
Cut border strips sized to wrap the frame edges. Glue magazine pieces with matte Mod Podge, then seal over the whole border with two thin coats. Use a matching backing board so the border doesn't show raw cardboard.
Pro tipTear the magazine pieces instead of cutting - the jagged edges look more natural.
AvoidDon't skip sealing - the cutouts curl and pick up dust.
12. Washed Denim Frame With Stitched Border
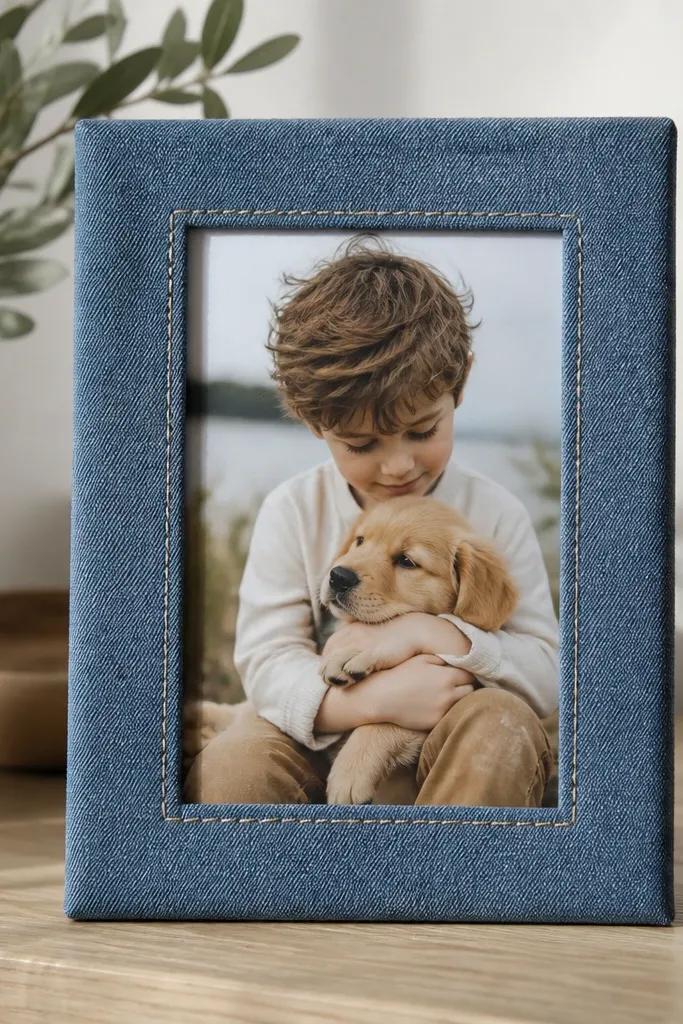
Denim adds a casual, sturdy feel and hides minor frame imperfections under the fabric. The stitched border makes it look like a real craft item instead of a quick wrap. This works great for family photos and kids' pictures because it feels durable.
Wrap a thin denim strip around the frame face and glue the seams on the back. Add a stitched-looking border by using fabric glue and thin twine or by sewing a straight line if you have a machine. Cut the inner opening so the photo sits flat and doesn't wrinkle the fabric.
Pro tipUse a fabric fray-control spray on the denim edges so they stay neat.
AvoidDon't stretch the denim too tight - it puckers at the corners.
13. Faux Tile Frame Using Scrap Ceramic Paint
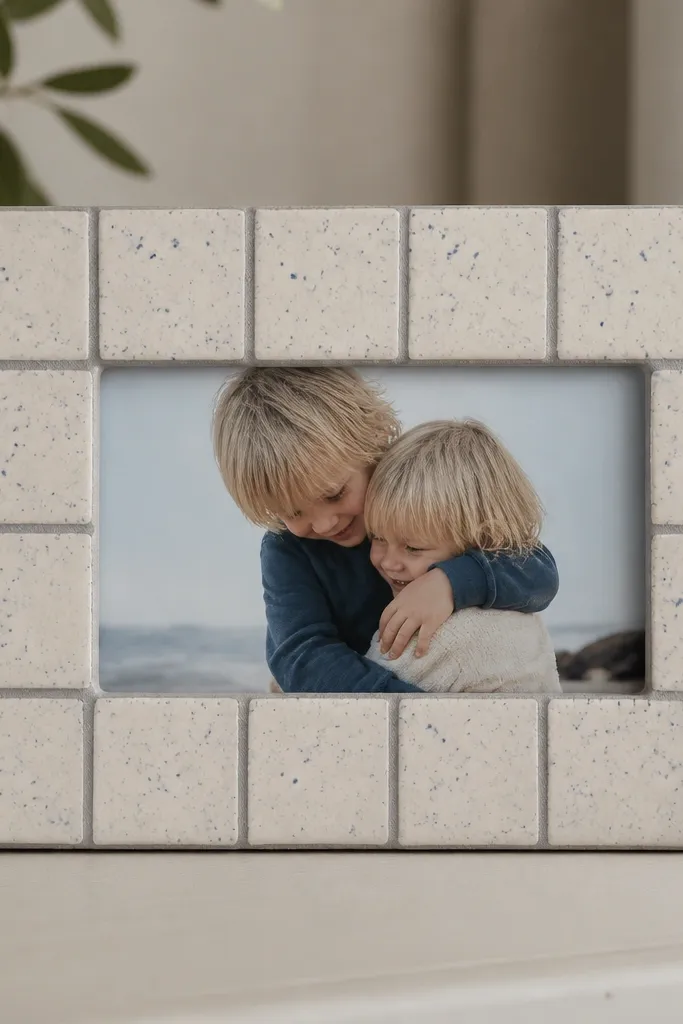
Tile-pattern frames look polished because the grout lines create structure. I've done this with leftover craft paints and it instantly makes simple frames feel like they belong in a kitchen or bathroom. The speckles add depth so the border doesn't look flat.
Start with a plain wood frame and paint it white matte. Use a fine brush to draw thin grout lines (about 1/16 inch thick) in a grid. Add tiny blue speckles with a dry brush and seal with matte clear to prevent smudging.
Pro tipPractice the grout line thickness on scrap first - consistency matters more than perfection.
AvoidDon't use glossy topcoat - it makes paint lines look like stickers.
14. Corkboard Frame With Pushpin Photo Corners
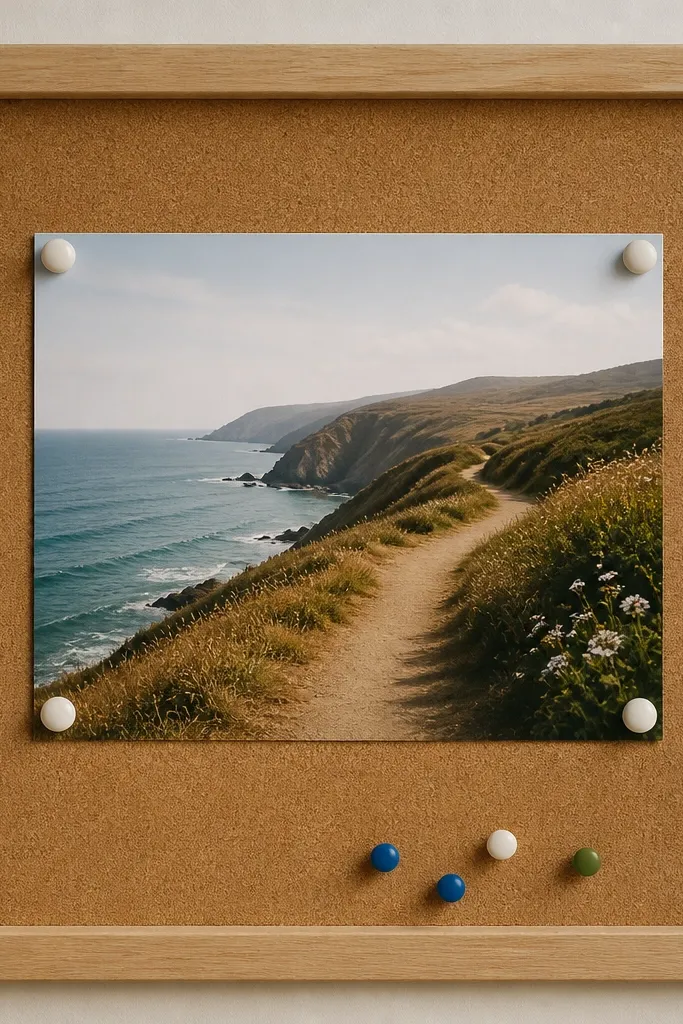
Cork makes it easy to swap photos and it looks cozy on entryway walls. The pushpin corners add a casual "note board" feel without needing a full cork wall. It's also forgiving: if you cut your opening a little off, cork hides it.
Cut cork to size and glue it to a backing board inside a wood frame. Center your photo and poke two pins into each top corner first, then adjust. Add a couple more pins along the sides only if your photo curls.
Pro tipUse photo corner strips (thin paper tabs) under the photo so it stays flat.
AvoidDon't place pins too close to the photo edge - it tears the paper border.
15. Painted Clothespin Garland Frame Set
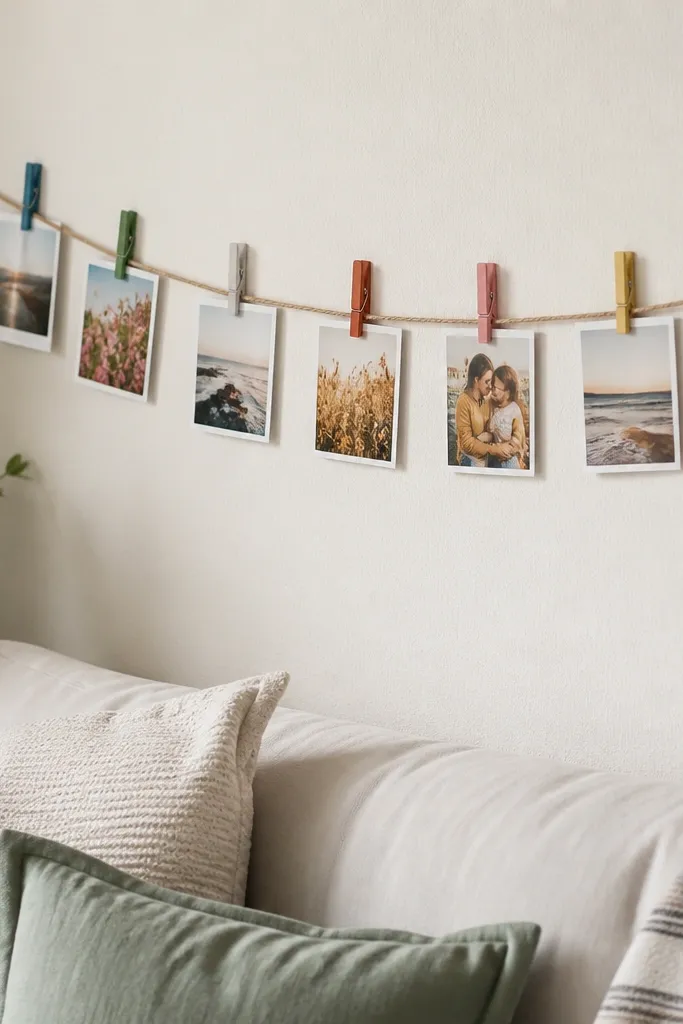
This doesn't look like a "craft project" when the colors match. I use a two-tone palette: matte black clothespins with off-white twine, then clip photos with consistent spacing. It's great for rotating seasonal pics because you can change them in seconds.
Mount two small hooks on the wall, stretch twine straight between them, then clip clothespins along the line. Print your minis with white borders or add white paper backing so photos look uniform. Hang the garland so the bottom photo sits about 60 inches from the floor.
Pro tipSpace clothespins 2.5 to 3 inches apart so your eyes read it as a neat row.
AvoidDon't use random photo sizes - crop them to match.
16. Ice Cream Stick Frame With Beaded Accent Line
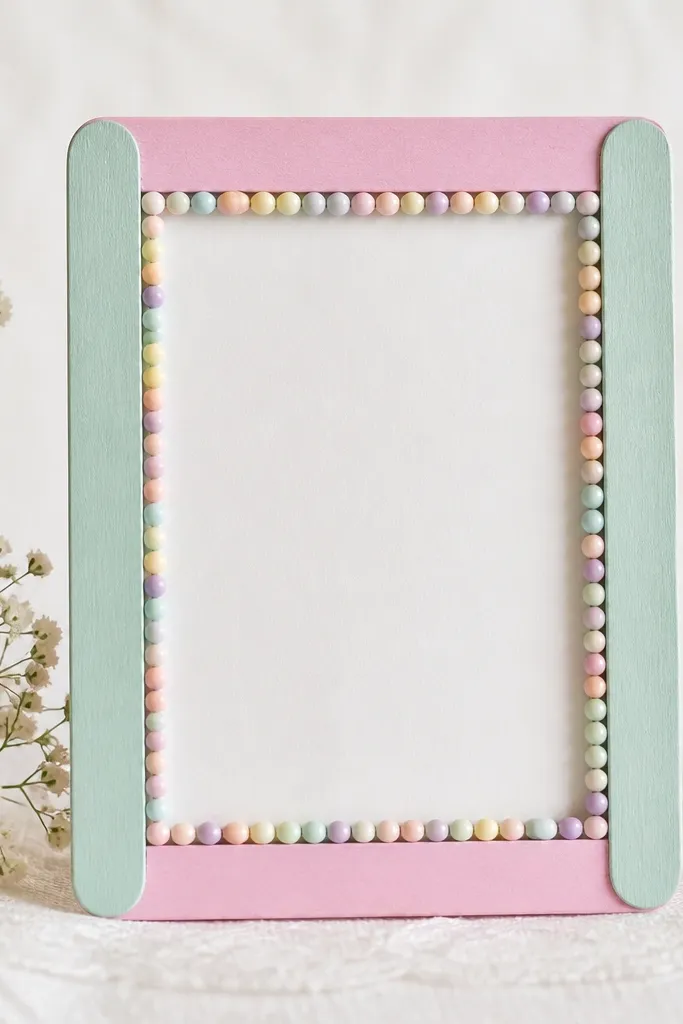
One bead line is enough to make a simple frame feel special. Pastel sticks keep it soft, and the bead line adds a subtle sparkle that doesn't fight the photo. This is a good beginner build because sticks are easy to cut and align.
Paint sticks and let them cure overnight. Glue them into a rectangle around the photo opening. Add beads along the inner edge using hot glue, keeping the bead line straight by running a thin pencil guideline first.
Pro tipUse small seed beads instead of big chunky ones so the line stays tidy.
AvoidDon't let beads drift - misalignment screams "quick job."
17. Air Dry Clay Frame Tile Border
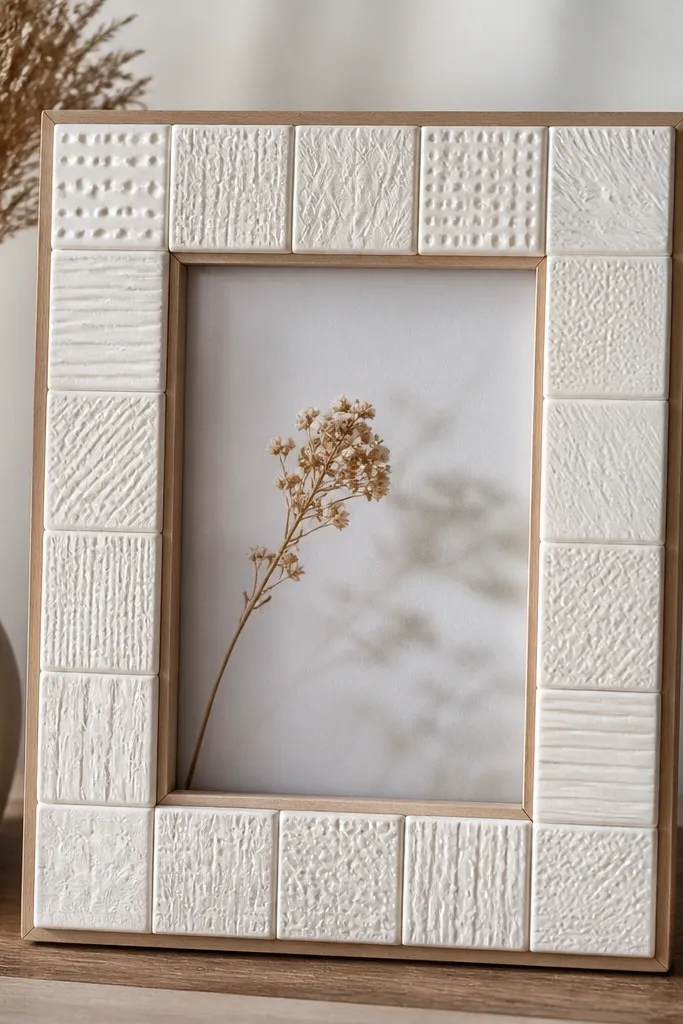
Clay borders look handmade and high-end because the texture shows up even in low light. I like using small, repeated tiles - it reads like a custom frame detail rather than random lumps. Keep the color simple so your photo stays the main event.
Roll air-dry clay to about 1/8 inch thickness and cut small rectangles. Press a texture (like a lace stamp or textured fabric) lightly, then let dry fully. Paint with white acrylic and seal matte clear, then glue the tiles around the frame face with a strong craft adhesive.
Pro tipDry tiles on parchment so they don't stick and tear during removal.
AvoidDon't glue tiles before the clay fully hardens - they shift as the adhesive sets.
18. Old Map Frame With Rope Hinge Back
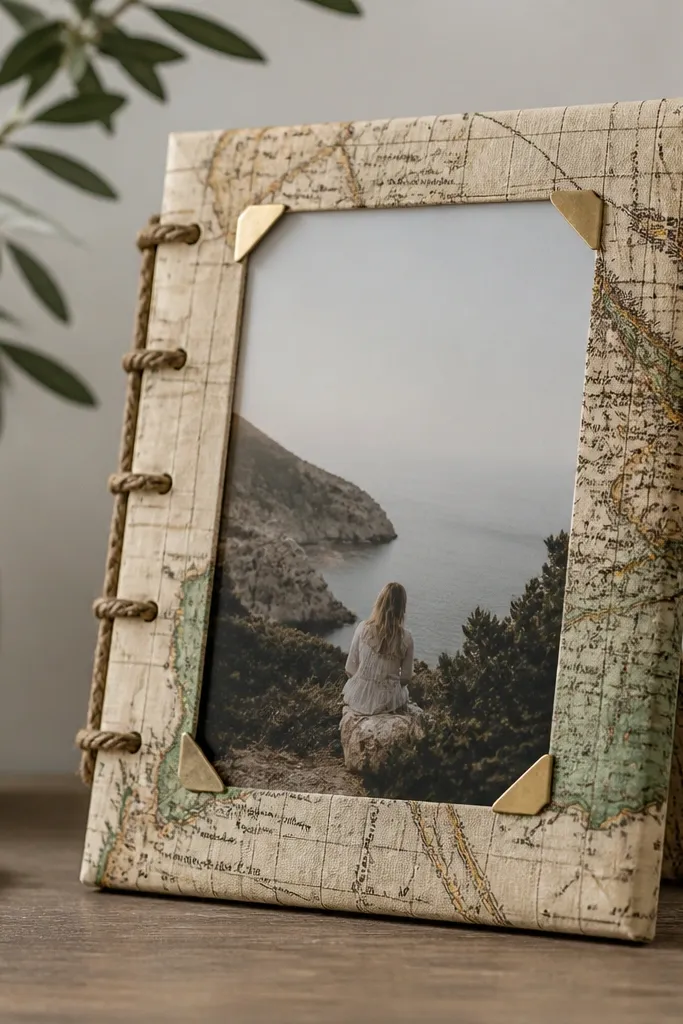
Maps add instant story and visual texture, especially when you wrap only the frame face and keep the photo area clean. The rope hinge back makes it easy to open and swap photos without breaking anything. It looks great in a home office or hallway.
Wrap the frame face in map paper using decoupage glue, then seal with matte finish. Attach a backboard with a rope hinge using two small screws and a short length of twine so it opens like a tiny door. Use a simple paper backing to keep the photo flat.
Pro tipTrim map edges with a sharp blade so they meet cleanly at corners.
AvoidDon't use glossy sealant - it makes map text look smeared.
19. Painted Clothespin Corner Frame (L-Shaped Layout)
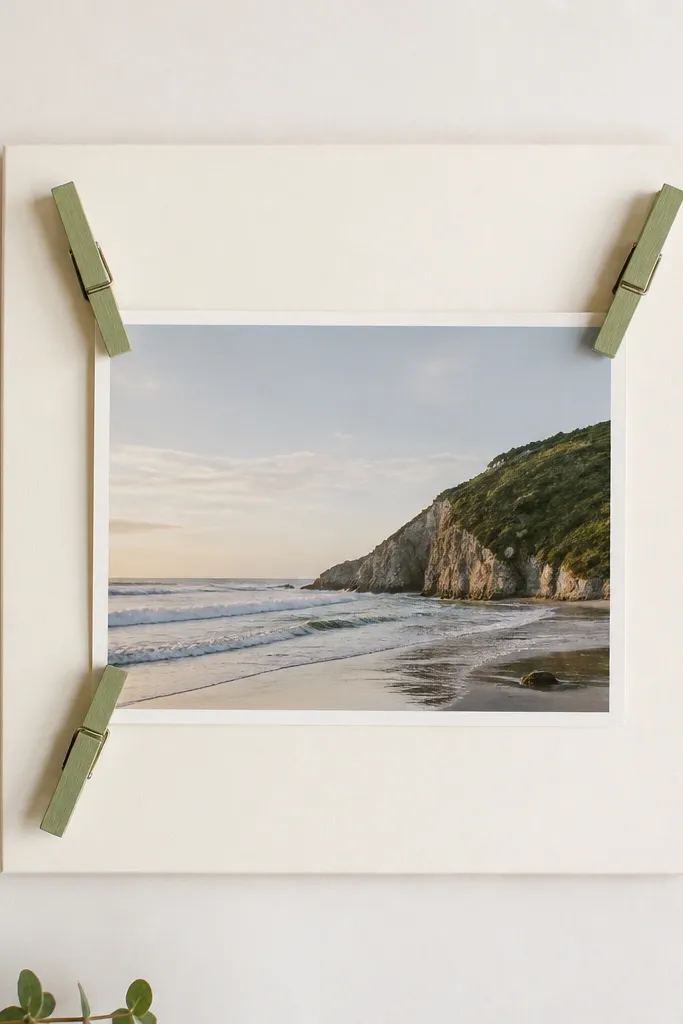
Corner-only clothespins keep the look tidy and modern. Muted colors like sage, terracotta, or dusty blue make the frame feel soft instead of "kid craft." This works well for simple prints because the photo stays centered and flat.
Paint clothespins matte and let dry. Cut a backing board and create a window opening for the photo. Clip the photo at each corner using clothespins mounted to small tabs so they sit at a consistent angle.
Pro tipAttach the clothespins to tabs first, then glue the tabs onto the backing. It keeps the spacing even.
AvoidDon't clip the photo too tightly - it bends and leaves dents.
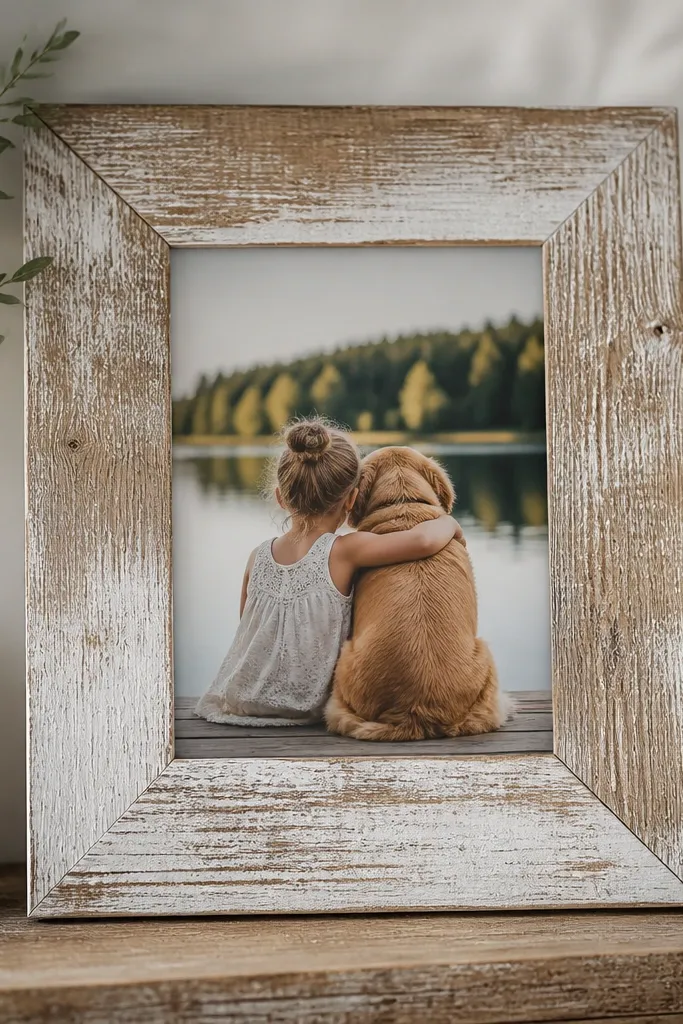
20. Reclaimed Fence Board Frame With Dark Stain
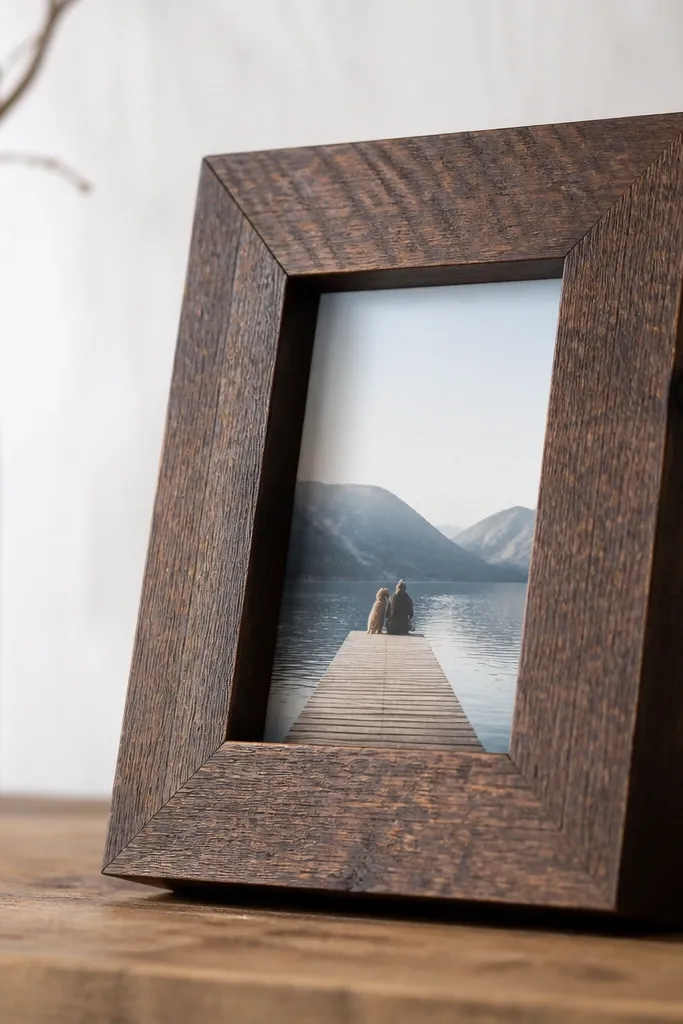
Thick reclaimed boards make even a small photo feel grounded. The dark walnut stain makes the grain look deeper and helps the photo colors look more saturated. It's a bold look for living rooms where you want the wall to feel solid.
Use fence board pieces about 3/4 inch thick. Cut them so the outer frame is sturdy and the inner opening leaves 1 inch of border around the photo. Sand only the front face, stain, then seal matte. Mount with a backing board and picture wire on the back.
Pro tipPre-drill holes for hanging hardware so the wood doesn't split.
AvoidDon't sand the whole board smooth - the uneven texture is part of the charm.
21. Foam Board Frame With Faux Gold Leaf Tape
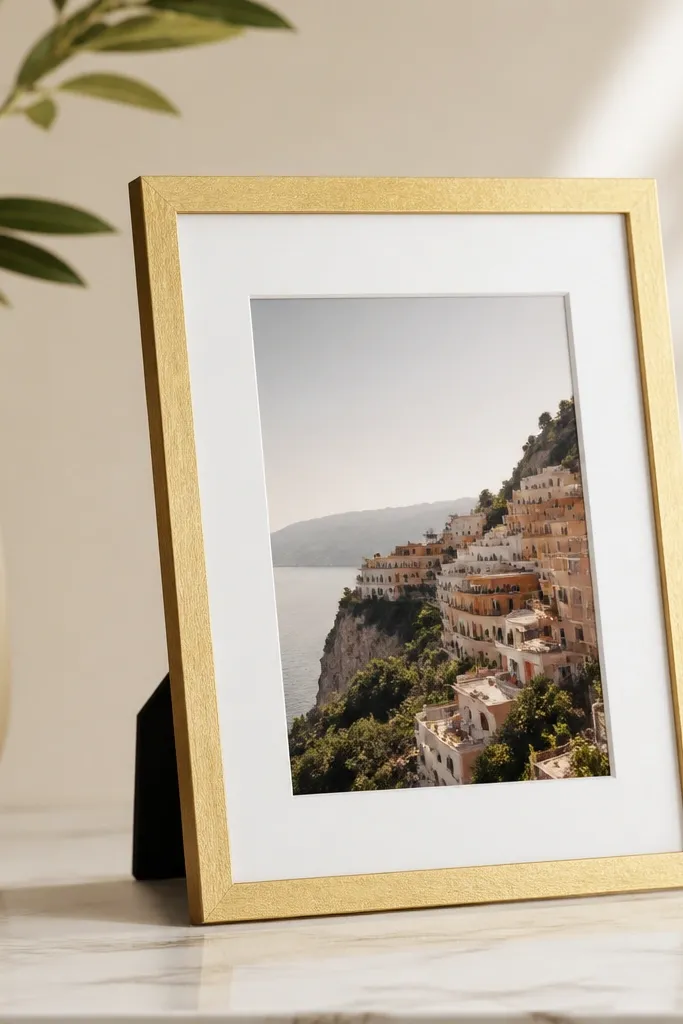
Foam board is the easiest material if you want a lightweight frame that still looks luxe. Gold leaf effect tape gives shine without the mess of real leaf. Pair it with a white mat and the frame reads crisp and modern.
Cut foam board into a simple outer rectangle and inner window. Add a white cardstock mat layer so your photo sits recessed by about 1/4 inch. Apply gold leaf effect tape along the outer edge and seal with a matte spray so it doesn't look too plastic.
Pro tipUse a metal ruler and craft knife for straight inner cuts - foam board shows wobble fast.
AvoidDon't leave foam edges raw - seal them with white acrylic or they look cheap.
22. Spoon and Fork Frame With Single Utensil Corner Detail
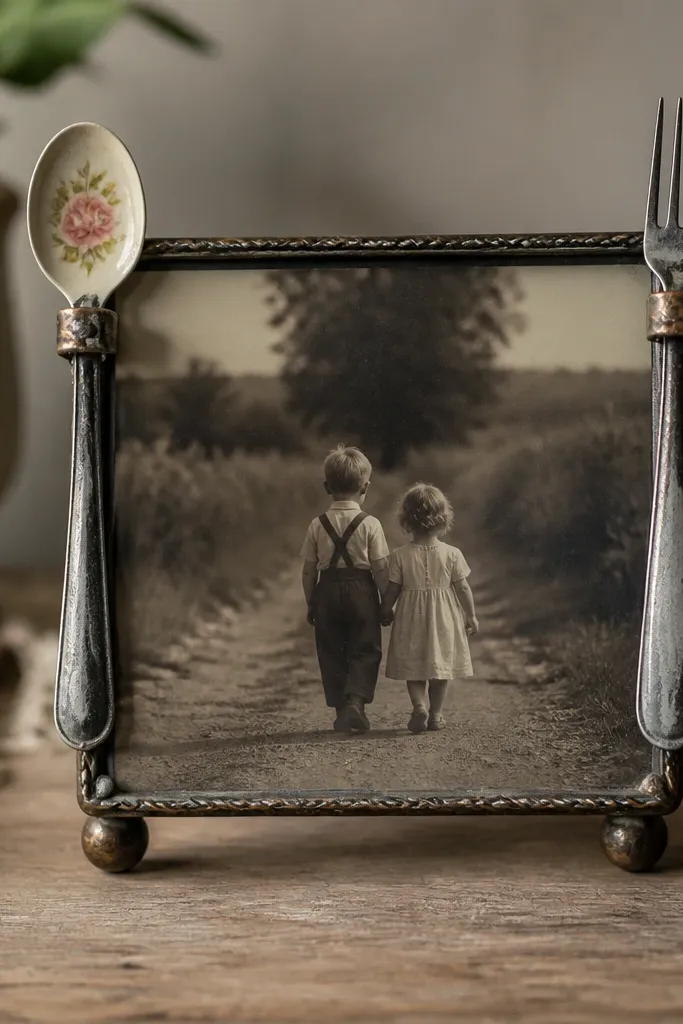
Utensil hardware looks cool when you keep it to one small detail. The contrast between metal and photo adds personality without turning it into a gag. I like using a single spoon and fork set at the top corners so your eye stays on the photo.
Use a simple thrifted frame or a wooden frame painted matte cream. Attach the spoon and fork with strong craft glue, then paint them in brushed silver or matte black. Keep the utensil pieces short so they don't block the photo.
Pro tipUse a tiny piece of felt between metal and frame so scratches don't show.
AvoidDon't cover the whole frame in utensils - it looks crowded quickly.
23. Polaroid-Style Frame With Oversized Border and Photo Strip
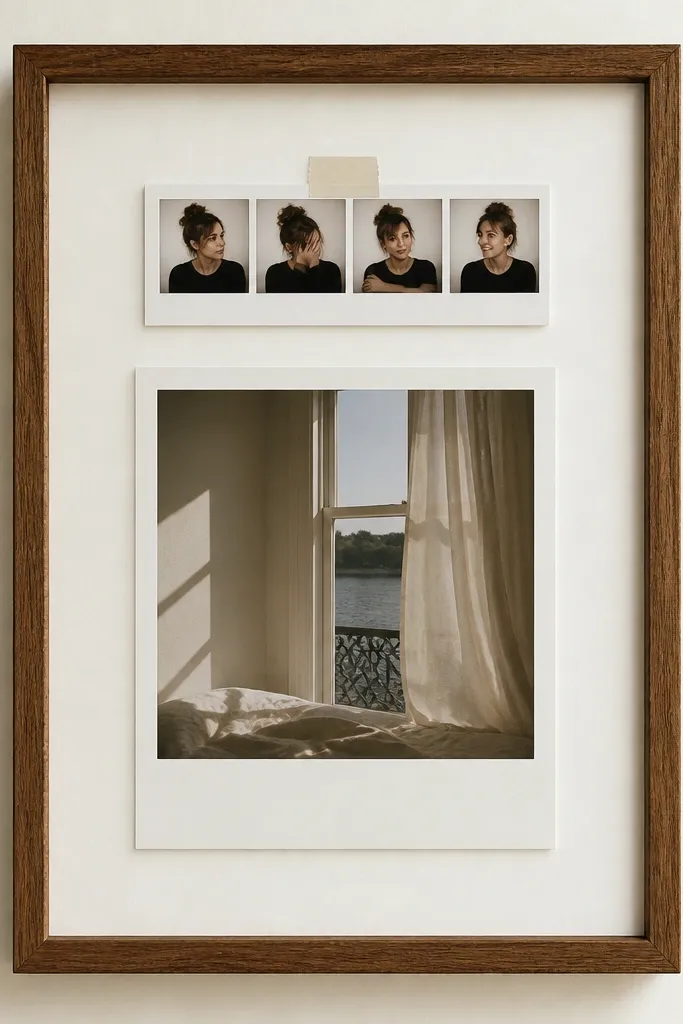
Oversized borders make beginner frames look intentional because they hide misalignment. Adding a small photo strip gives you a reason to use multiple shots without building a whole collage. This style works best for casual memories and travel photos.
Cut white cardstock to create a thick mat, about 1.5 inches around the main photo. Add a smaller strip photo above, centered, and tape it with photo-safe tape. Place everything inside a simple frame with clear acrylic or no glass if you prefer a softer look.
Pro tipRound the corners of the small strip photo with a corner punch for that instant polaroid vibe.
AvoidDon't use too many fonts or extra labels - let the photos do the work.
24. Cereal Box Frame With Comic Border and Matte Seal
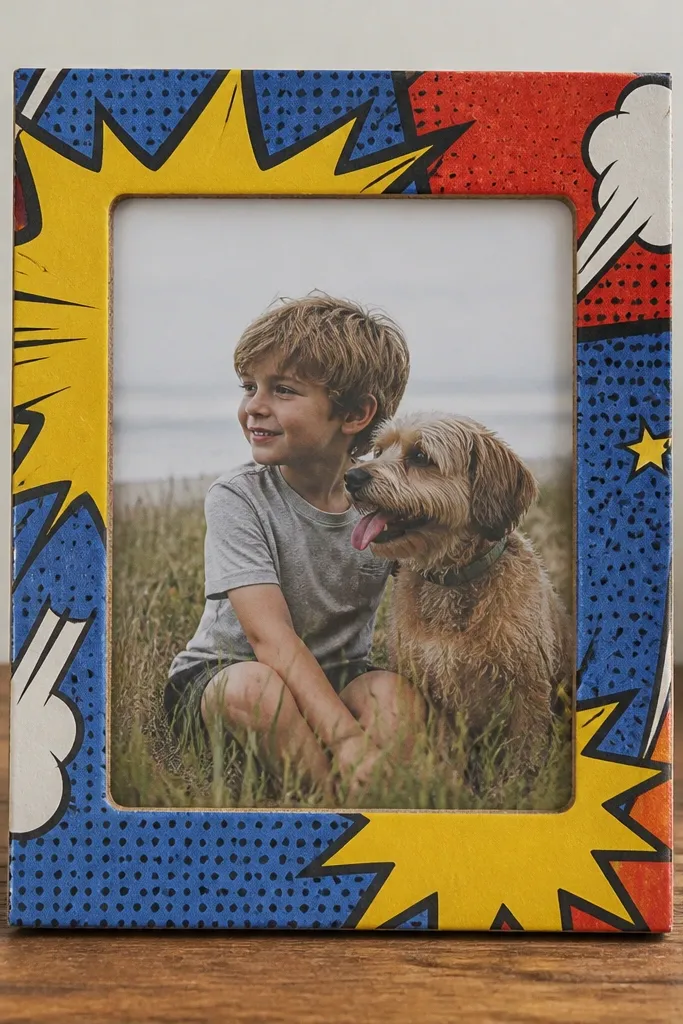
This is the repurpose win: cereal box cardboard is stiff and the printed graphics add energy. The trick is to keep the center clean so the photo doesn't fight the background. A matte seal makes the cardboard look smoother and less "printed packaging."
Cut the frame from cereal box cardboard and wrap the outer border only with the printed side facing out. Create a window opening for the photo and back it with plain cardstock. Seal the front with two thin matte coats so the prints look even.
Pro tipUse a craft blade on a cutting mat - cardboard edges get fuzzy if you rush.
AvoidDon't leave it unsealed - the ink rubs off on hands and clothes.
25. Mirror Back Frame With Fabric Photo Backdrop
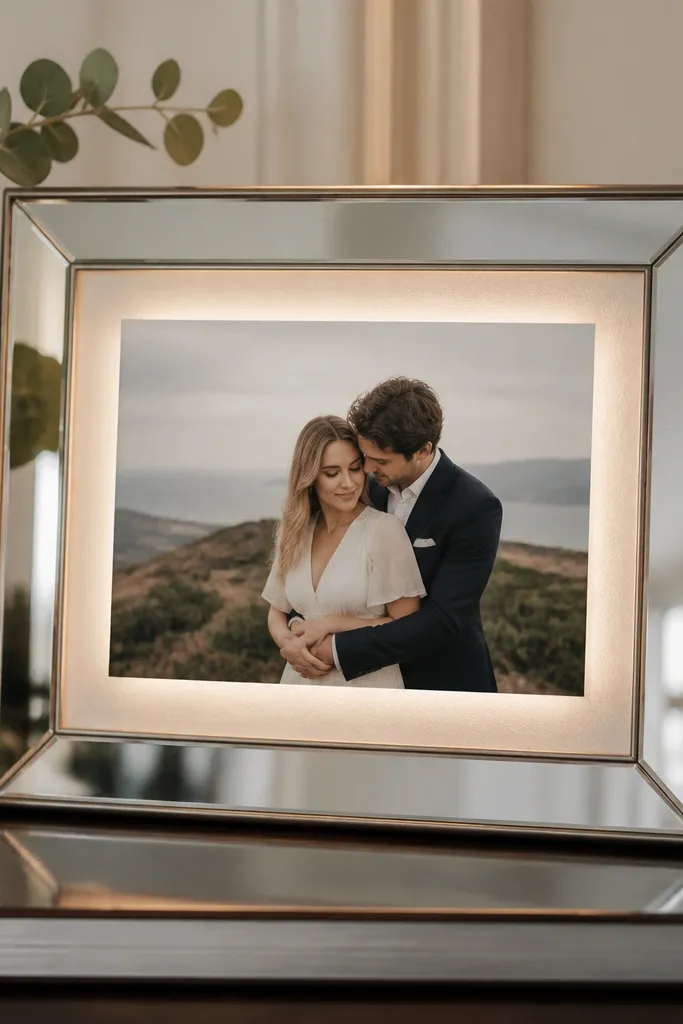
A reflective backing makes colors look more alive because it bounces light back through the photo. Pair it with a fabric backdrop in a single solid color, like burgundy or olive, for a warm halo effect. This style looks especially good in low-light corners.
Use a simple frame and replace the back with a thin mirror sheet or reflective craft mirror. Cut fabric to cover the mirror except behind the photo edges, then mount the photo on top of the fabric. Use matte tape around the photo so it doesn't slide.
Pro tipAvoid placing this where it hits direct sun - glare blooms fast on mirrors.
AvoidDon't use shiny satin fabric - it creates harsh hotspots behind faces.