
1. Photo Strip Keychain with Laminated Tabs
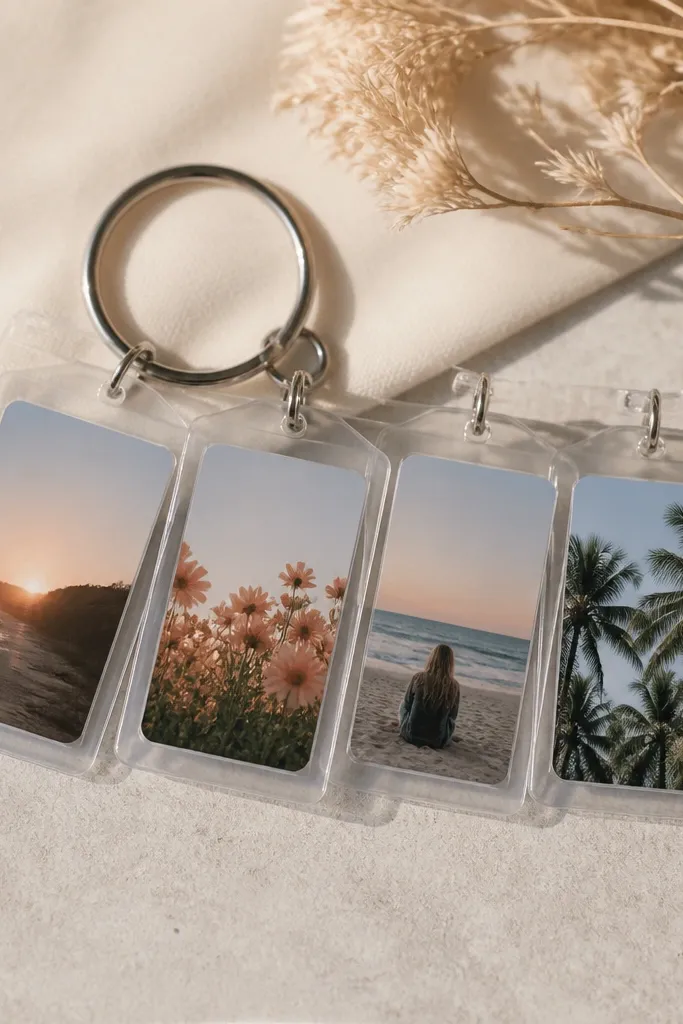
Start by printing 3-4 photos at 2 x 3 inches each on matte photo paper, then trim them to 1.5 x 2 inches for a tidy layout. Cut clear laminate sheets into slightly larger rectangles and place one photo per laminate with a 1/8-inch margin on all sides. Seal with a laminator or with clear laminating pouches heated per the pouch directions. Punch a hole at the top tab, then attach everything to a split ring using a small jump ring. Finish by adding a tiny metal tag with his initials stamped or written on a white label.
This is the easiest photo gift that still looks polished. You’re making a keychain that shows 3-4 mini photos, each framed by a clean border so the pictures don’t look messy. I like it for boyfriends who actually use their keys daily because it gets seen and touched. Use matte photo paper and a clear laminate so fingerprints don’t smear the image. Color-wise, keep the photos mostly warm or mostly cool — mixing neon lighting makes it look chaotic.
Skip thisDon’t use glossy laminate — it shows every fingerprint and makes the photos look cheap.
Editor's notePrint photos in black-and-white if his style is mostly dark clothes; it looks sharper than random color shots.
2. No-Sew Fabric Photo Pocket for His Wallet
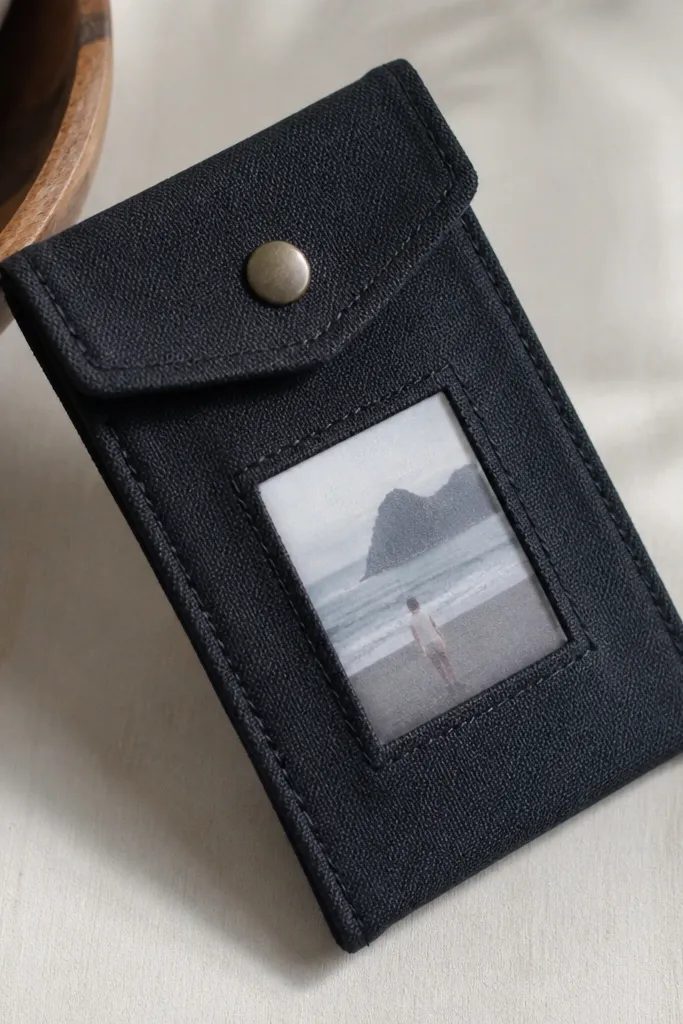
This one is for guys who keep their wallet tight and hate bulky add-ons. You’re making a slim pocket that slides into the back card slot, and the photo shows through a clear window. I’ve done this with dark canvas because it hides glue lines and looks better than flimsy fabric. It also works for different skin tones because you’re not making anything that touches the face; it just sits near his hands. Keep the photo centered and small so it looks like a design detail, not a craft accident.
Cut a rectangle of cotton canvas 3.5 inches wide by 2.25 inches tall, then round the corners with scissors. Cut a clear vinyl window 2.2 inches wide by 1.4 inches tall and glue it to the center using fabric glue made for fabric-to-vinyl. Add a small strip of fusible interfacing behind the window area if the fabric frays easily. Fold the rectangle in half like a wallet pocket and glue the sides, leaving the top open for the photo. Add a snap or small Velcro dot at the top edge and test it in his wallet before trimming.
Choose canvas in charcoal, olive, or deep navy so the pocket looks intentional with almost any outfit.
Don’t skip rounding corners — sharp corners catch and lift the glue.
3. Wood Slice Name Sign with Burned Outline
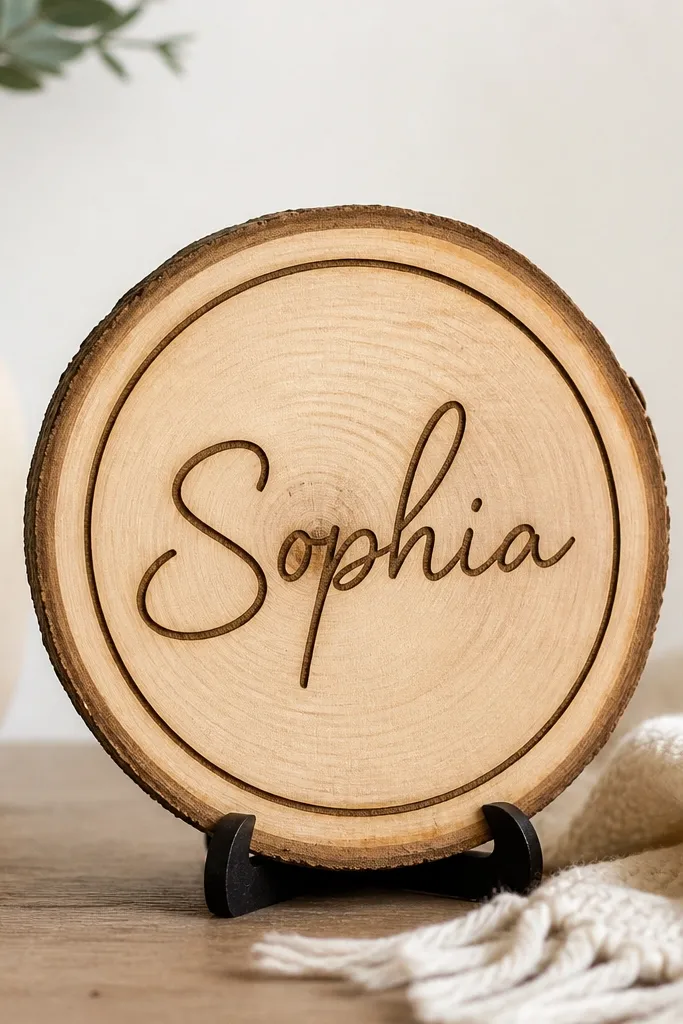
Buy a raw wood slice about 4-5 inches wide with a flat face. Sand the top lightly with 220 grit so the burn line doesn’t snag. Use a graphite pencil to trace his name in a simple block font, then burn the outline with a wood-burning pen on low heat. Wipe dust with a dry cloth, then brush a thin coat of matte clear sealer so the burn doesn’t fade. Attach a small stand or add a loop of jute twine to hang it.
This is a gift for a boyfriend who likes his space to look clean. The wood slice gives warmth, and the burned outline looks like something you’d buy at a craft fair. I like doing just the outline instead of filling the letters because it hides small wobble marks. Use a dark brown or black burn for contrast against light wood, and keep the name short for the best look. It works for any skin tone because it sits on a desk or shelf, not on his body.
Skip thisDon’t burn on wet or glossy wood — it smears and makes the letters look muddy.
Editor's notePractice the exact letter shape on scrap wood first — the burn line thickness is hard to fix later.
4. Map Line Coaster Set with Double-Sided Adhesive Vinyl
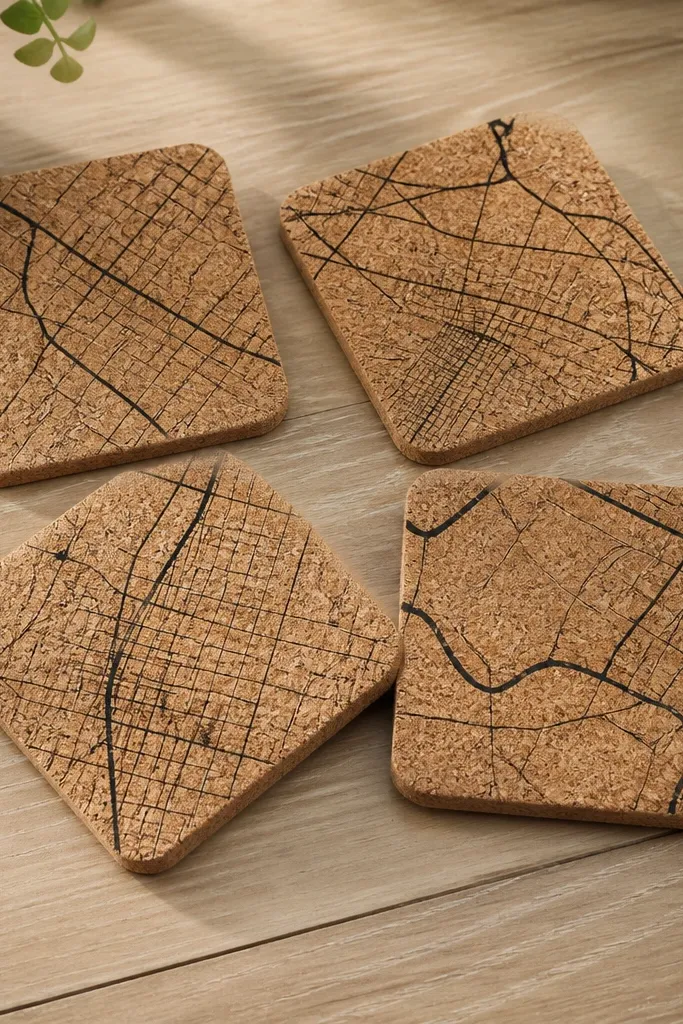
If you want something that looks like a store-bought set, this is it. You trace a single map line — your first date route, a hometown-to-where-you-met path — and print it as a thin graphic. The cork base makes it look warm and modern, and the black line stays crisp even at small sizes. It fits guys who like practical desk items and don’t want more clutter. Keep the line design minimal so it still reads as “map” up close.
Pick four cork coasters about 4 inches across and clean them with rubbing alcohol. Print your map line on adhesive vinyl, then cut each piece to fit the coaster face with a 1/8-inch border. Apply vinyl carefully starting at one edge, then press with a plastic card to remove bubbles. Seal over the vinyl with a thin layer of clear acrylic sealer so it won’t peel from drink condensation. Let it dry overnight before use.
Use a single-color map line (black or dark gray) — multi-color routes blur on tiny coasters.
Don’t skip sealing — adhesive vinyl lifts after a few wet rings.
5. Embroidery Patch Belt Loop Charm
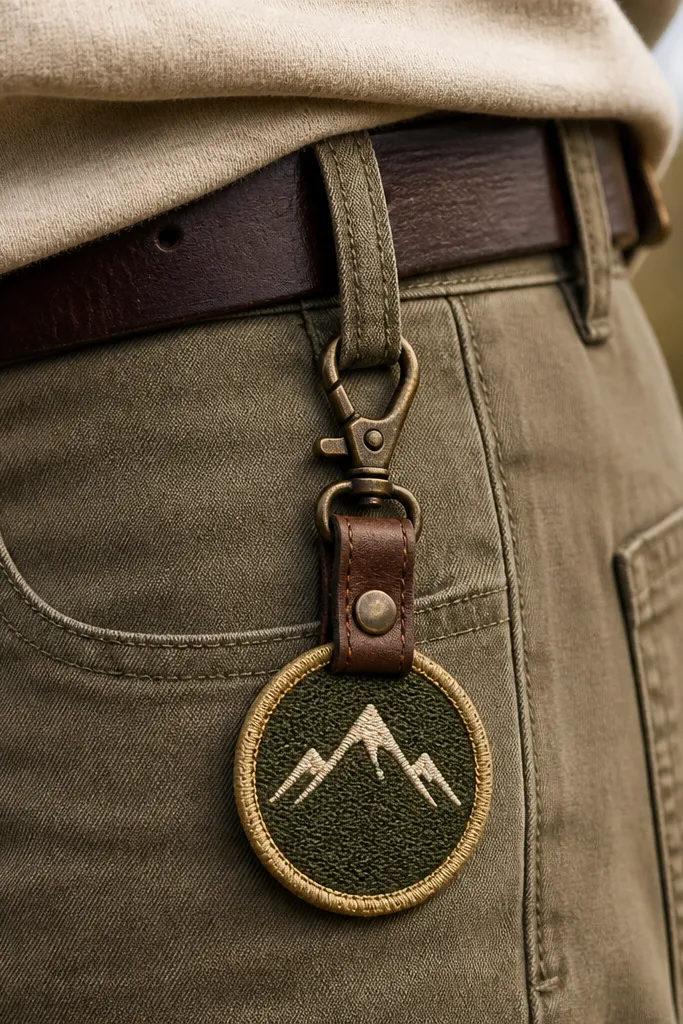
Cut a fabric patch base from sturdy cotton or felt, about 3 x 3 inches. Use fabric transfer paper or a printed stencil to mark the icon, then stitch with a backstitch outline and a satin fill for the icon area. Add a simple blanket stitch around the edge for a finished border. Cut a leather strip about 1 inch wide by 4 inches long and punch a hole at each end. Attach the patch to the strap with a few hand stitches, then add a small snap clip or belt-loop clip hardware.
This is a wearable handmade gift that looks tidy instead of “kids craft.” I’ve attached embroidered patches to a short leather strap so it clips onto a belt loop or bag handle. Choose one icon that matches him — a mountain outline, a coffee cup, a skateboard, a football. Keep the thread limited to two colors so the patch reads clean from a distance. It works well for all skin tones because it’s an accessory, not a skin-contact item.
Skip thisDon’t use thin stretchy fabric — it warps the embroidery and looks sloppy.
Editor's noteIf he wears mostly black, use off-white thread and a muted accent like olive or rust for contrast.
6. Cinch-Sleeve Travel Mug Cozy in His Favorite Color
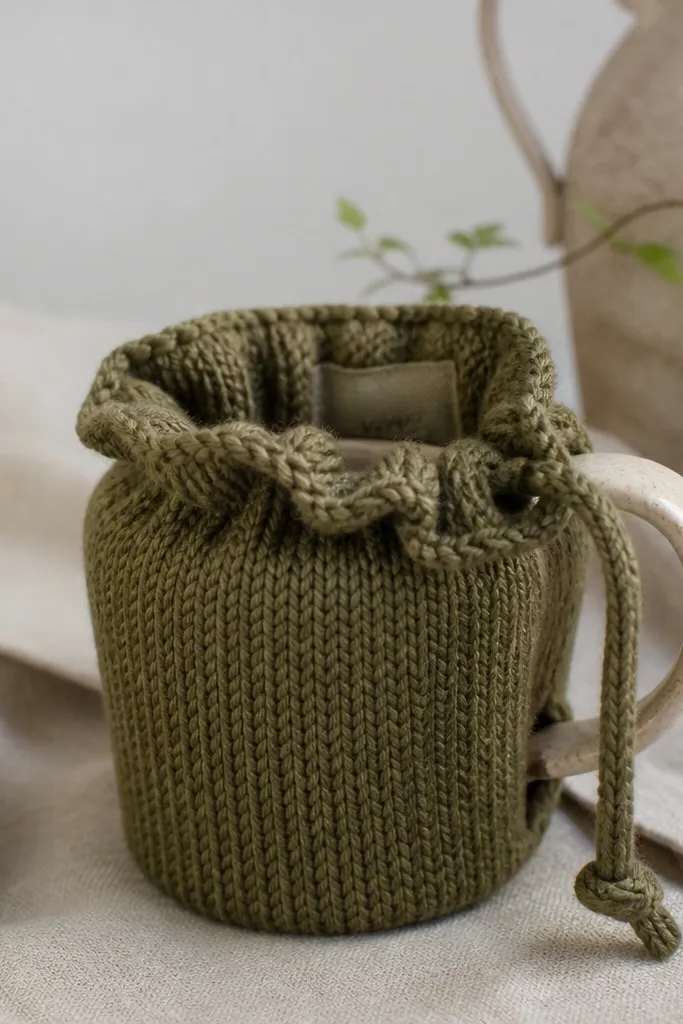
Measure his mug height and circumference. Cut fabric to a rectangle 10-12 inches tall by the mug circumference plus 2 inches for overlap. Fold the top edge down 1 inch and stitch to form a casing for a drawstring. Sew the sides with a 1/4-inch seam allowance, then turn right-side out and press flat. Add a drawstring made from cotton cord, then test the cinch on the mug and trim the ends.
This cozy looks good even when it’s simple because the cinch creates shape. You’re making a sleeve for his travel mug that grips without bulky seams. I like thick knit or sweatshirt fleece because it feels soft and hides uneven stitching. Choose a color he already wears — olive, navy, charcoal, or deep red. It works for any occasion: road trips, commuting, or gym bags.
Skip thisDon’t use thin jersey — it collapses and won’t hold the cinched shape.
Editor's noteUse a contrasting thread color only on the label area; it looks intentional, not messy.
7. Painted Ceramic Ring Dish with Tiny Speckle Accent
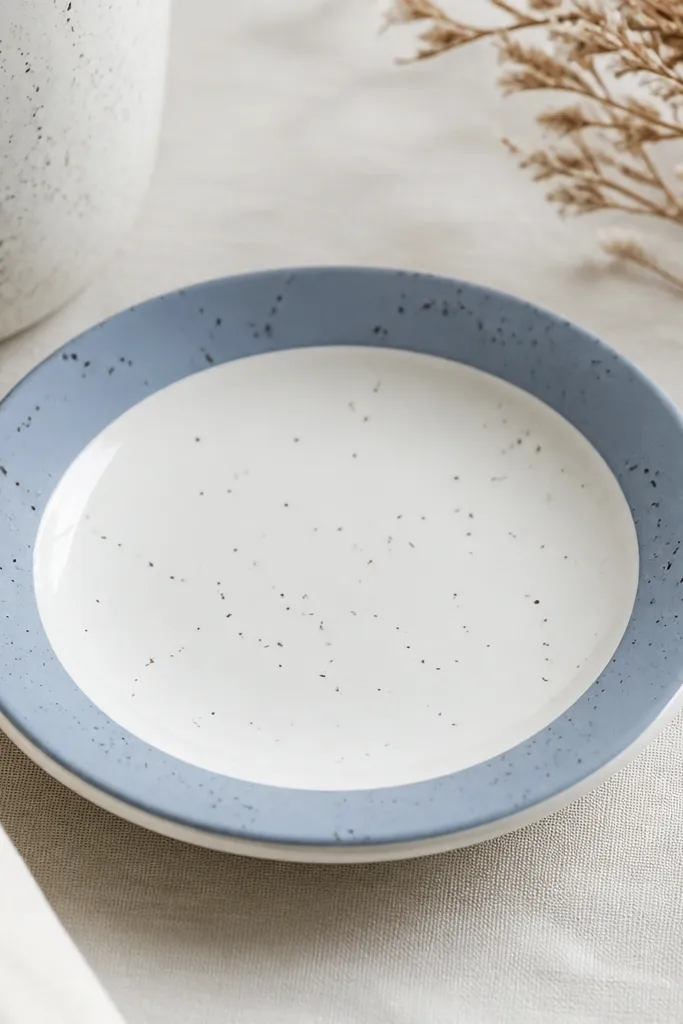
This is one of the few handmade gifts that feels “grown-up” on a nightstand. The dish holds rings, keys, or earbuds, and it looks clean because the base is white ceramic. I add a matte band and a few tiny speckles because it gives texture without looking childish. Choose a color that matches his desk gear — terracotta, forest green, or cobalt. For skin tones, it doesn’t matter since it’s a tabletop item, but it does matter that the finish is smooth so hands don’t catch.
Buy a plain white ring dish (about 4-5 inches wide). Clean it with rubbing alcohol and let it dry. Paint a 1/2-inch matte band around the outer rim using acrylic ceramic paint or acrylic made for ceramics. Add speckles with a stiff brush and watered-down paint, then let it dry 30-60 minutes. Bake or seal per the paint instructions, then add a thin glossy topcoat if you want a smoother feel.
Tape the rim with painter’s tape so the band line stays straight.
Don’t skip cleaning — fingerprints cause paint to peel later.
8. Sewn Tote with Stamped Coordinates Patch
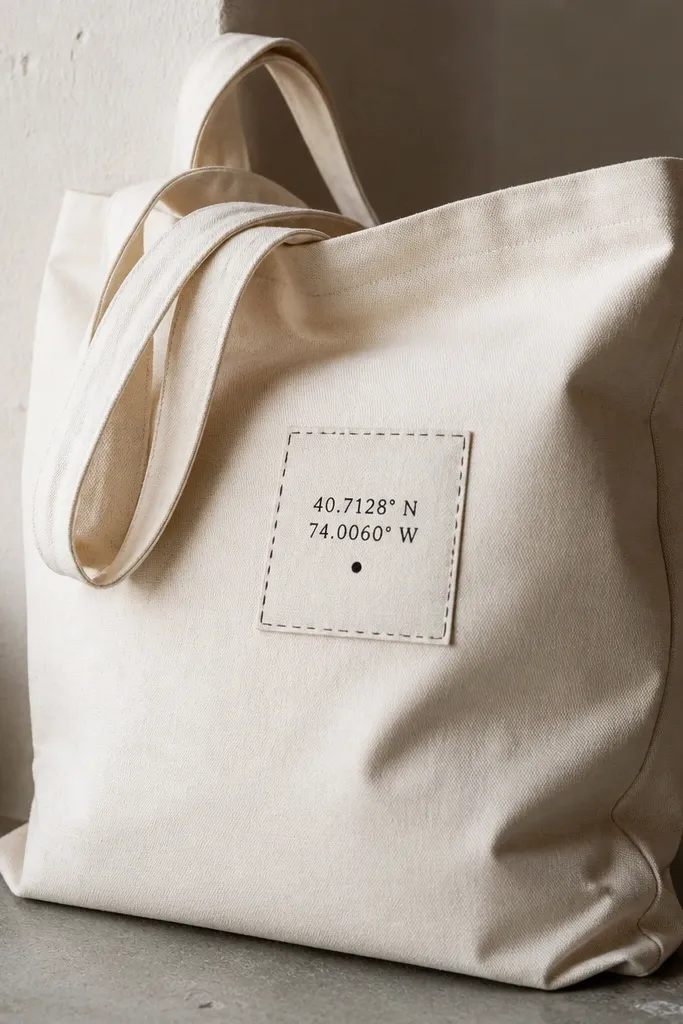
Buy a plain canvas tote with sturdy handles. Cut a patch piece from felt or canvas 4 x 2.5 inches, then stitch a 1/4-inch border around the edges. Use a fabric stamp or acrylic paint with a small foam stamp to print coordinates like 40.7°N 73.9°W, keeping the font small. Place the patch 5 inches down from the top edge and 3 inches from the center, then tack it with a few straight stitches. Reinforce by adding two rows of topstitching around the patch.
This is a practical daily gift that still feels personal. You’re sewing a small patch with the coordinates of where you met, then placing it on a tote he’ll actually use. Canvas tote + crisp black text looks sharp and doesn’t fight with his wardrobe. It also handles different skin tones because the patch is away from his face and hands. I like this for boyfriends who carry a laptop, gym clothes, or tools.
Skip thisDon’t put the patch too low — it drags across the front when he carries the tote.
Editor's noteUse waterproof fabric ink or set the stamped paint with heat so it doesn’t rub off when the bag gets washed.
9. Instant Vinyl Mug Wrap with Heat-Set Clear Topcoat
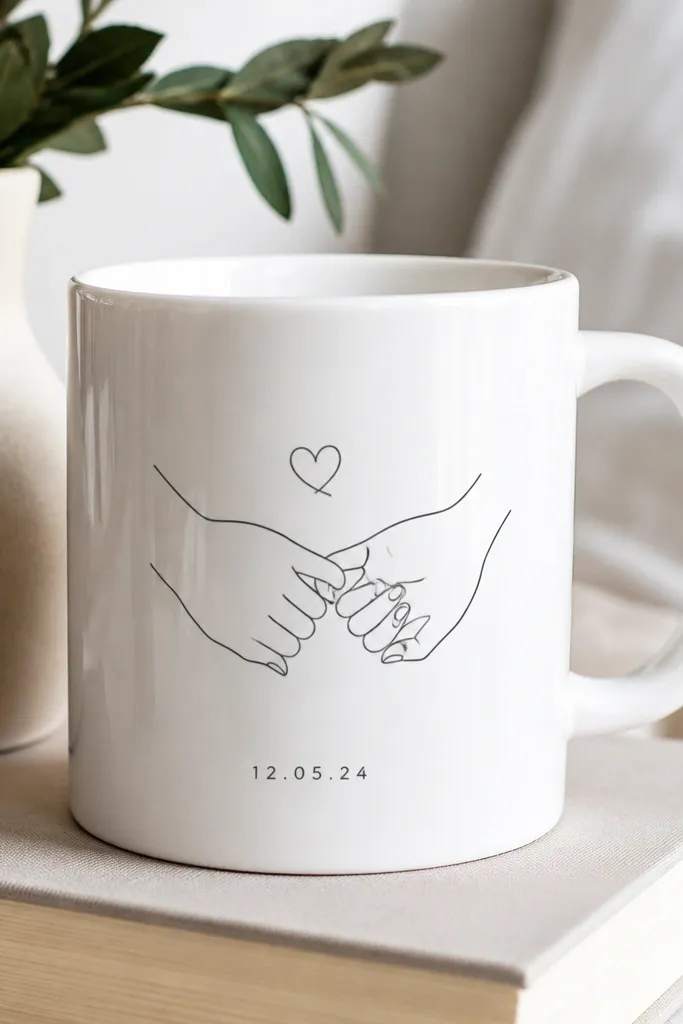
This looks like a store product because the vinyl is smooth and the topcoat makes it feel sealed. It’s ideal for easy handmade gifts for boyfriend because you can finish it in one evening if you already have a printer or cutting machine. Keep the design minimal — one line drawing and a short date — so it reads from across a room. Choose matte black vinyl for dark, clean contrast. It works for all skin tones because the vinyl is on a mug, not a wearable item.
Start by cleaning the mug with rubbing alcohol and letting it dry. Cut vinyl using a Cricut or silhouette, then weed out the extra material. Place the vinyl with transfer tape and smooth it down so there are no bubbles. Add a clear heat-set topcoat made for vinyl on mugs, and bake per instructions if required. Let it cool fully before you wash it the first time.
Use one simple line drawing instead of heavy shading; it stays crisp after baking.
Don’t use regular craft vinyl without sealing — it cracks and lifts after repeated washing.
10. Kraft Paper Love Letter Map Fold Frame
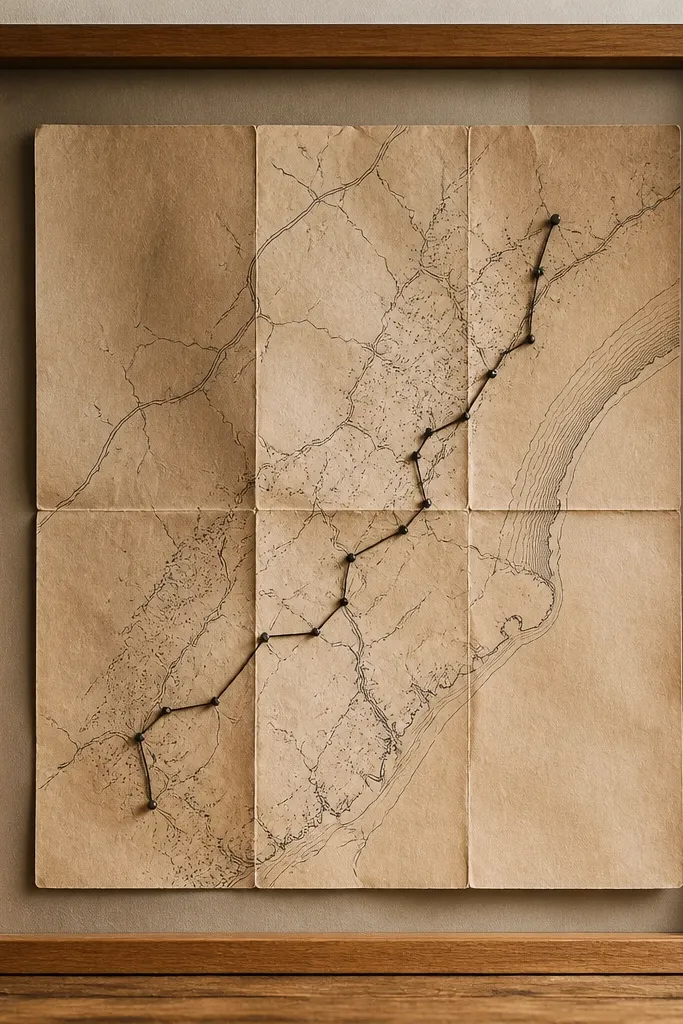
Print or hand-draw a simple route line on kraft paper and add two small labels like “Start” and “Where you met.” Fold the paper like a pocket map so it opens in one direction, then secure the fold with a tiny strip of washi tape on the inside. Mount the folded piece behind glass in a small wooden frame, or use a shadow-box frame if you want the folds to show. Add a small brass map pin or tiny brad to mark the “meeting point.” Seal the ink with a matte fixative if you used marker.
This is the gift for a boyfriend who likes sentiment but hates clutter. The map-style fold looks artsy, and the wooden frame makes it feel like decor instead of a note you throw away. I use kraft paper because it photographs warm and hides small ink smudges. The black ink route line gives a strong focal point. It works for different skin tones because it’s paper decor — no fabric on the body.
Skip thisDon’t use thick marker on kraft without sealing — it can smear when the frame is handled.
Editor's noteWrite labels in all caps and keep them short — long text looks cramped inside a frame.
11. Candle Label Set with His Initials and Date
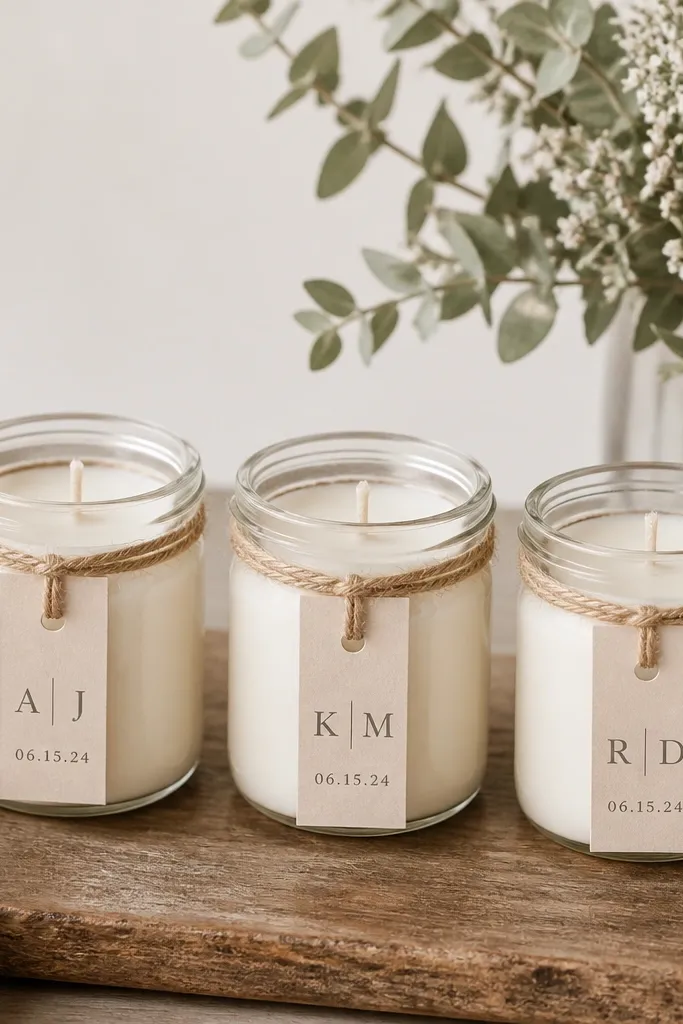
This turns a plain candle into a gift that looks intentional. I like using a matching label set because it makes the whole thing feel designed, not improvised. Use a single font style and one accent color like deep green or burnt orange. It’s perfect for a boyfriend who likes a cozy vibe but doesn’t want a bunch of handmade clutter. Since it’s a label and jar, skin tone doesn’t matter.
Buy unscented or lightly scented candles in similar jar sizes. Print labels on matte sticker paper sized to wrap around the jar front (about 2.25 inches wide by 3 inches tall). Add his initials in a bold font and include the date you met in a smaller font below. Wrap the label and smooth it with a credit card. Tie a short piece of twine around the neck and glue it in place with a tiny dot.
Choose a candle with a plain lid so the label doesn’t fight with extra patterns.
Don’t cover the wick area with vinyl or labels — it can trap heat and looks messy.
12. Carabiner Message Key Clip with Mini Enamel-Style Print
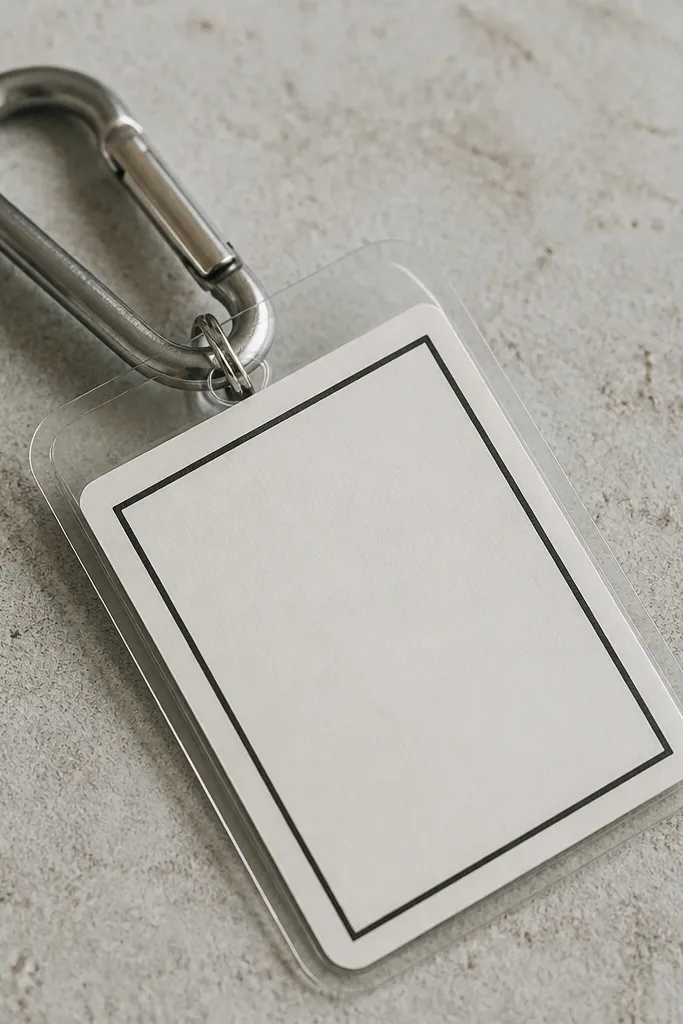
Print a message card on thick paper (about 3 x 2 inches) with a black border. Laminate it by placing it in a clear pouch or using a laminating sheet cut to size. Attach the laminated card to the carabiner using a small jump ring through the top edge. Add a small metal charm with a star or his first initial. Clip it to his key loop so it sits where he’ll see it daily.
This is a clean, modern version of a message gift. The carabiner is practical, and the mini protected card keeps the note safe. I like using a single bold message like “You’re my favorite” or “Home is you” because it reads fast. Use a black border around the card so it looks like a product label. It works for boyfriends who carry keys, a bag, or a camera strap.
Skip thisDon’t write tiny script messages — they blur once laminated.
Editor's noteUse thick paper and laminate — thin paper curls and looks sad next to metal hardware.
13. Felt Coasters with Stitched Edge and One Icon
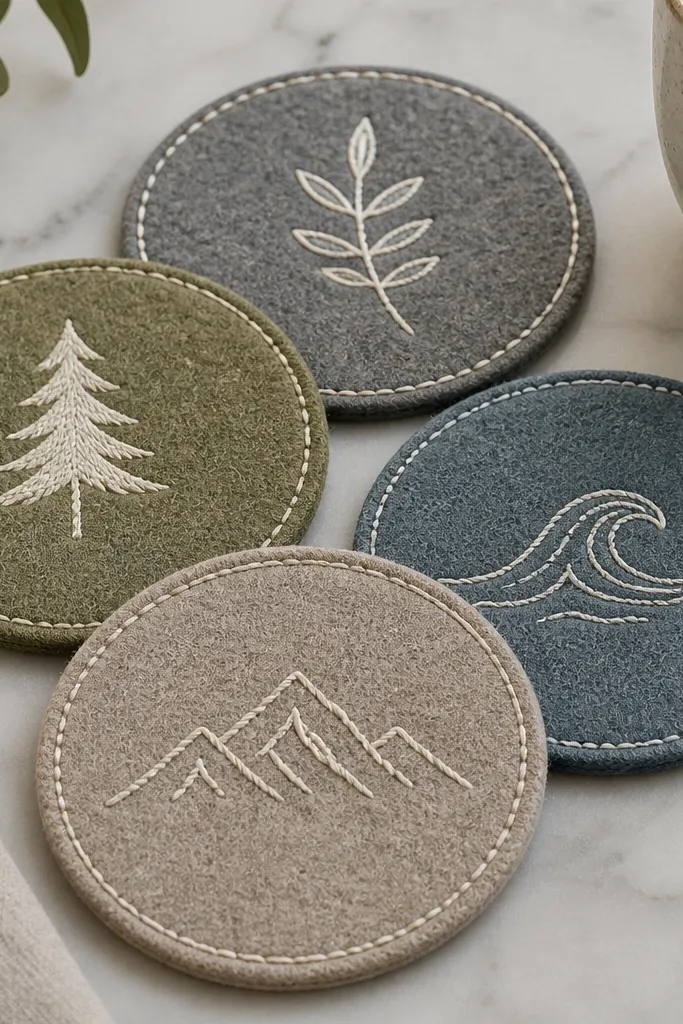
Cut circles out of felt — 4 inches for standard cup sizes. Choose one icon per coaster, like a tiny mountain, a coffee cup, or a lightning bolt, and transfer it lightly with chalk or a water-soluble pen. Stitch the icon with embroidery thread using a backstitch or satin stitch. Then sew a blanket stitch around the edge with a contrasting thread. Trim loose threads and lightly steam the coasters so they lie flat.
Felt coasters look cozy and hide imperfections because the fabric is forgiving. The stitched edge is what makes it look finished, and the icon keeps it personal. I like using two tones: one base felt color and one thread color that matches a detail in his room. If he has a lot of wood and neutrals, go with tan felt and dark brown thread. This is also a safe gift for any skin tone since it’s not worn — it just sits on a table.
Skip thisDon’t skip trimming to even circles — uneven edges make the set look homemade.
Editor's noteUse 6-strand embroidery floss and split it to 3 strands for a neat, not-too-thick line.
14. Custom Beer Cap Magnetic Frame for His Fridge
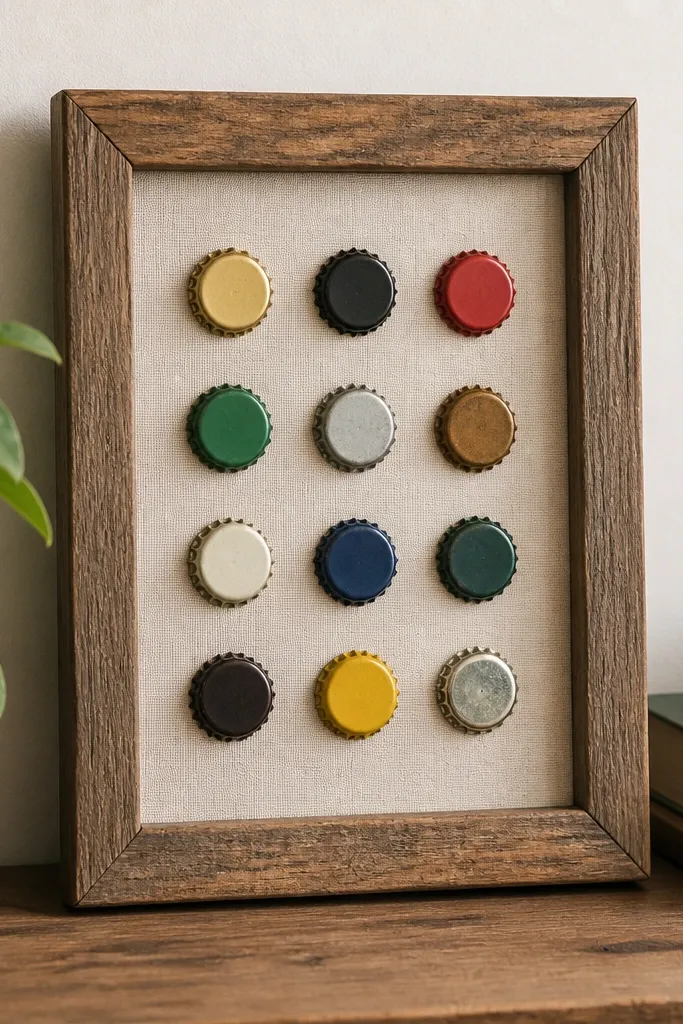
If he drinks beer or collects caps, this turns a random pile into decor he’ll use. The fridge magnet format is the reason it looks good — it stays flat and doesn’t require complex mounting. I like using a simple black frame so the caps pop. For personal touches, add a small label like “Our summer” or the year. Skin tone doesn’t matter here; it’s a magnetic wall gift.
Collect 10-12 bottle caps and clean them so labels aren’t gummy. Arrange them in a grid on a sheet of magnetic sheet or attach individual magnets behind each cap using strong adhesive. Mount the magnet sheet inside a small frame or attach it to a backing board cut to fit the frame. Add a label strip at the top using vinyl or printed paper sealed with clear tape. Finish by pressing the caps firmly so they align and don’t tilt.
Keep all caps facing the same direction for a cleaner look.
Don’t use weak magnets — caps sag and slide when the fridge door gets bumped.
15. Leather Wrap Coaster with Stamped Coordinates
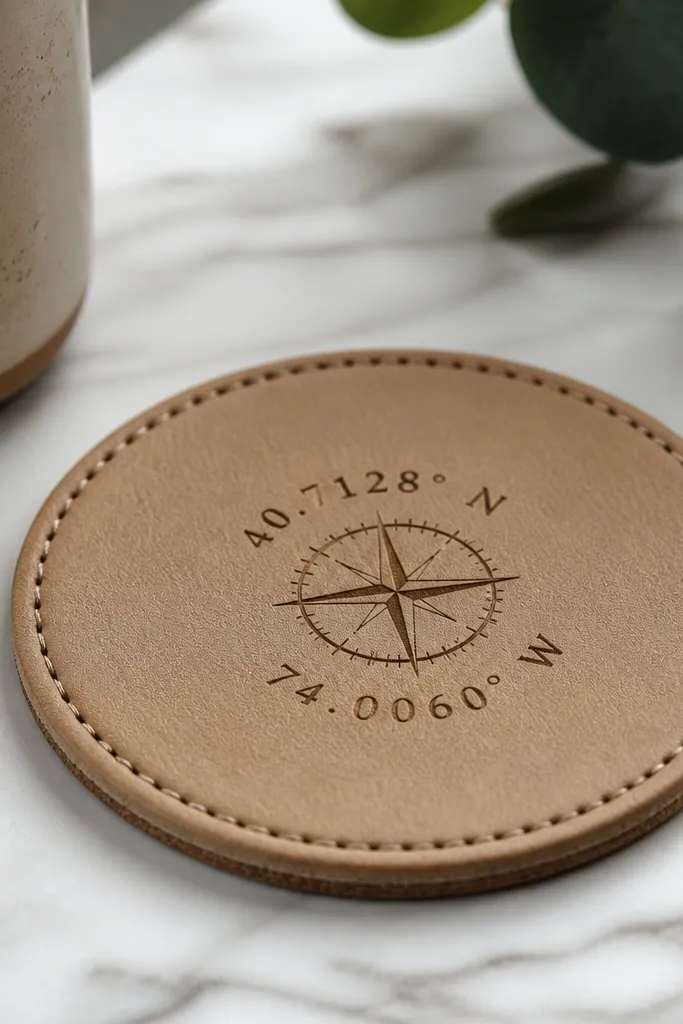
This looks like a premium shop item because leather stamping reads high-end fast. You’re wrapping a cork coaster with faux leather and stamping coordinates where you met. The stitching around the edge is what makes it look intentional instead of wrapped fabric. I like tan leather with dark brown stamping because it feels warm and masculine. It’s also easy to tailor to his vibe — darker leather reads more rugged, lighter reads more modern.
Start with a cork coaster and cut faux leather to wrap around it with a 1/2-inch overlap. Glue the overlap with contact adhesive made for leather or faux leather, then press firmly. Mark and stamp coordinates on the top center using a leather stamp and dark ink pad made for stamping. Stitch the perimeter with waxed thread using a simple running stitch or whip stitch. Seal lightly with a leather finish spray if the faux leather needs extra protection.
Stamp before you glue — it’s easier to press evenly on a flat piece.
Don’t stretch the leather tight — wrinkles show and look like a rush job.
16. Mini Desk Organizer with Washi-Lined Dividers
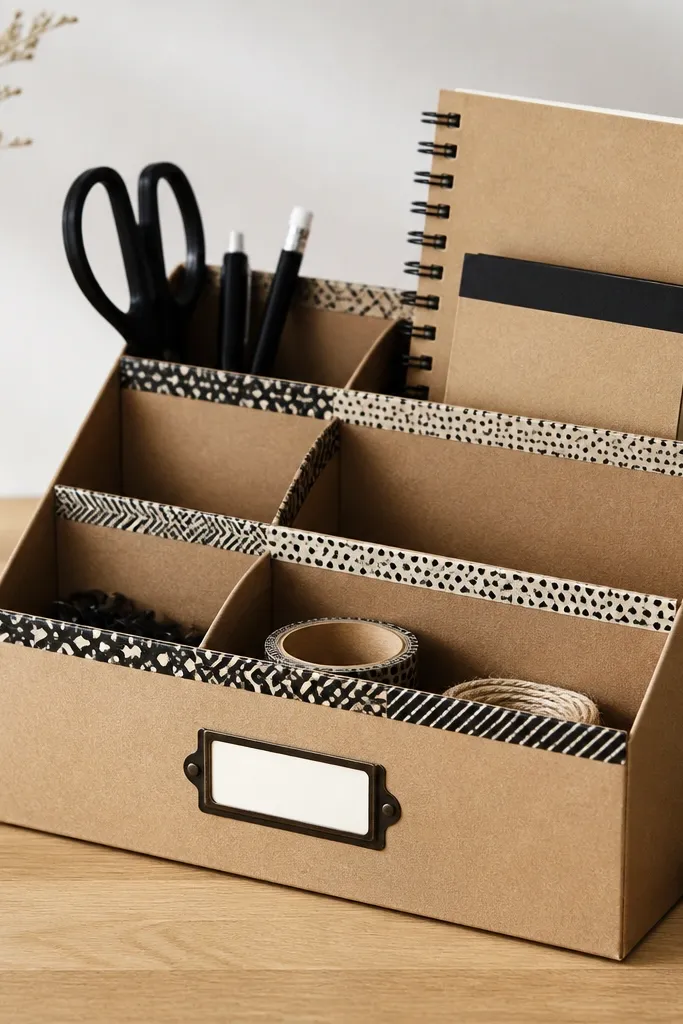
Use a shoebox-sized cardboard base or a thicker file tray cut down to 8 x 6 inches. Cut dividers from corrugated cardboard to create two pen slots and one small compartment for earbuds. Cover each surface with washi tape strips, overlapping 1/8-inch for clean seams. Glue the dividers in place and reinforce corners with a second layer of tape. Add a front label using vinyl letters or printed paper sealed with clear tape.
This is a practical decor gift that doesn’t scream “craft.” You’re building a small organizer (pens, sticky notes, cables) and lining it with washi tape so it looks designed. I like cardboard boxes or thick craft foam because they hold shape and are cheap. The tape pattern gives personality without needing fancy art skills. It’s great for boyfriends who work from a desk or have a messy nightstand. Since it sits in his space, it’s safe for any skin tone.
Skip thisDon’t use glossy tape — it reflects light and makes edges look uneven.
Editor's noteUse narrow washi strips (less than 1 inch) so the corners stay smooth.
17. Painted Mason Jar Planter with Tiny Photo Tag
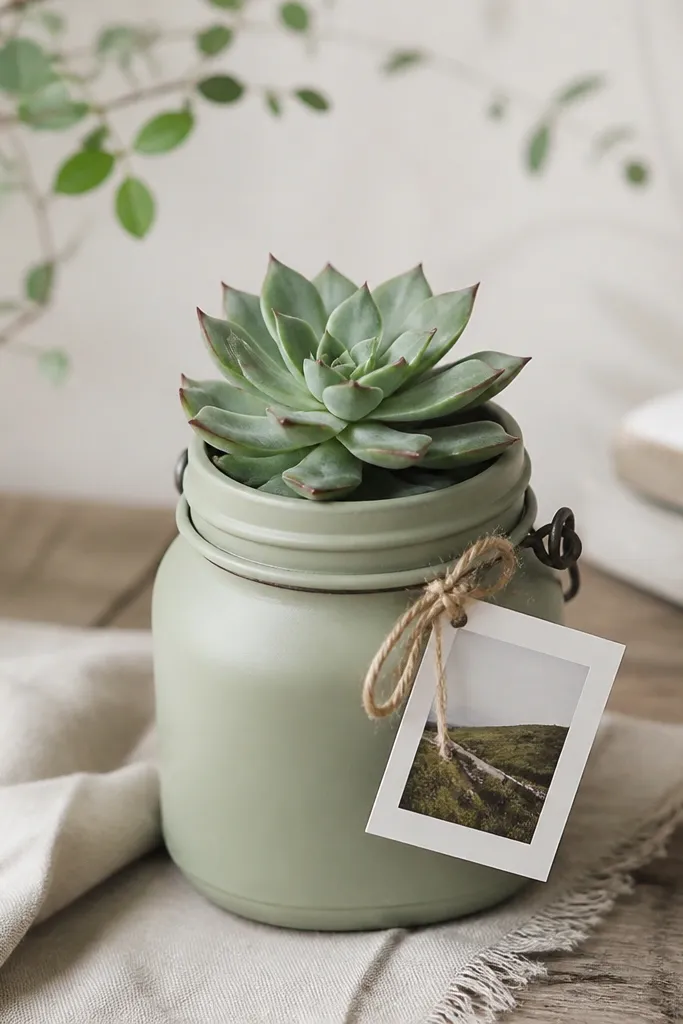
This is for a boyfriend who likes plants or at least tolerates them. The jar gives you shape and texture, and the photo tag makes it personal without overdoing it. I paint the jar in matte colors like dusty blue, sage, or clay and leave the top rim unpainted so it looks clean. You get a living gift plus a meaningful detail. It works for all skin tones because it’s handled by you and sits on a shelf.
Clean a small mason jar and remove any labels. Tape off the rim if you want it clean, then paint the lower half with matte acrylic in 2 thin coats. Let it dry fully between coats. Tie a tag made from cardstock to the handle or around the neck with twine, and attach a mini photo behind a clear tape window. Put a small succulent or hardy herb in and top with a thin layer of decorative pebbles.
Use two thin coats instead of one thick coat — thick paint can crack on glass.
Don’t seal the jar interior with random varnish — plants need breathable conditions.
18. Groomed Beard Oil Bottle Label Wrap
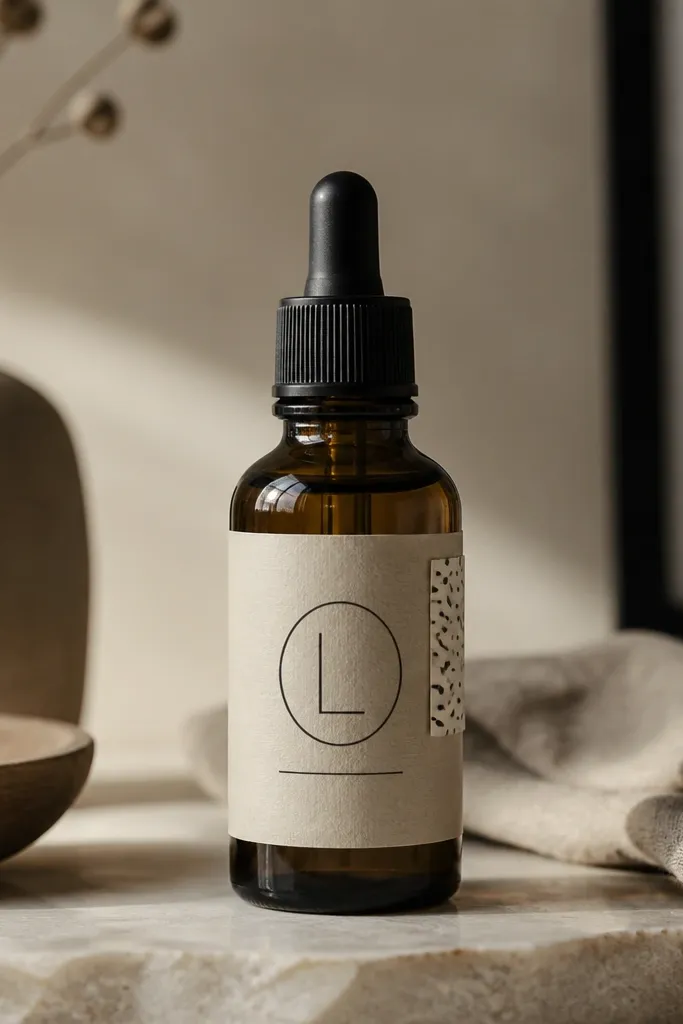
Find an empty or existing beard oil bottle with a smooth surface. Clean it with rubbing alcohol and let it dry. Print a label on waterproof label paper or use vinyl, sized to wrap around the front (about 2.5 inches tall depending on bottle). Apply the label straight, smoothing with a plastic card. Add a thin strip of patterned tape on the side seam as a “design line.” Seal the label edges with clear packing tape if you’re using paper labels.
This is a great option if he uses beard oil or grooming products. The gift is the bottle, and your job is making it look like it came from a boutique. I like labels that are mostly white or kraft with one bold monogram. Add one detail like “Made with love” and the date you met. It works for different skin tones because it’s a product label, not a wearable fabric. The finish matters — vinyl that peels looks worse than plain paper.
Skip thisDon’t wrap over wrinkles or textured graphics on the bottle — the label will look crooked.
Editor's noteUse a monogram — one letter — for a cleaner look than a full name.
19. Screen-Printed Tee Hanger with His Favorite Quote
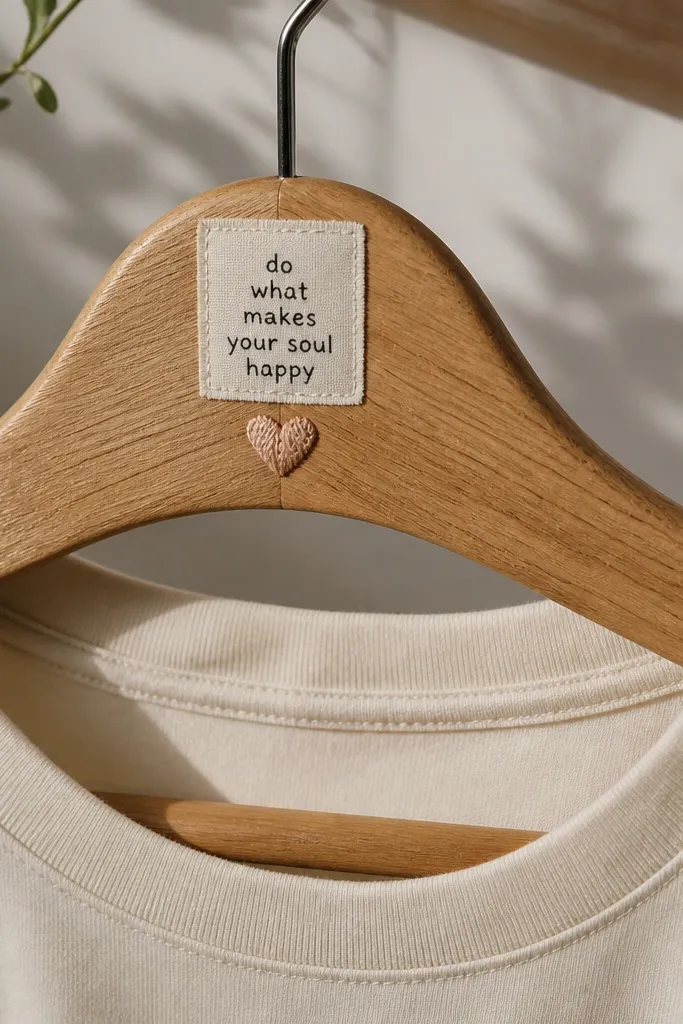
Buy a pack of plain wood hangers. Create a fabric patch from cotton — about 3 x 5 inches — and stitch a border around it. Use fabric paint or fabric marker to write his quote in neat block letters. Glue or sew the patch to the hanger crossbar area. Let it dry flat overnight, then hang a shirt he wears often to complete the presentation.
This is the gift for a boyfriend who keeps shirts crisp and likes a clean closet. You’re turning a basic hanger into decor with a quote and a patch. My favorite quotes are short and personal like “Good morning, handsome” or “Team us.” Keep the design small — about the size of a palm — so it doesn’t look like a billboard. It’s also easy to match his vibe by choosing fabric patch colors like black, cream, or deep green.
Skip thisDon’t use glitter paint — it looks messy when it catches lint.
Editor's noteUse fabric paint with a small foam brush so letter edges stay clean.
20. Tie Dye Style Socks with Stencil Star Centers
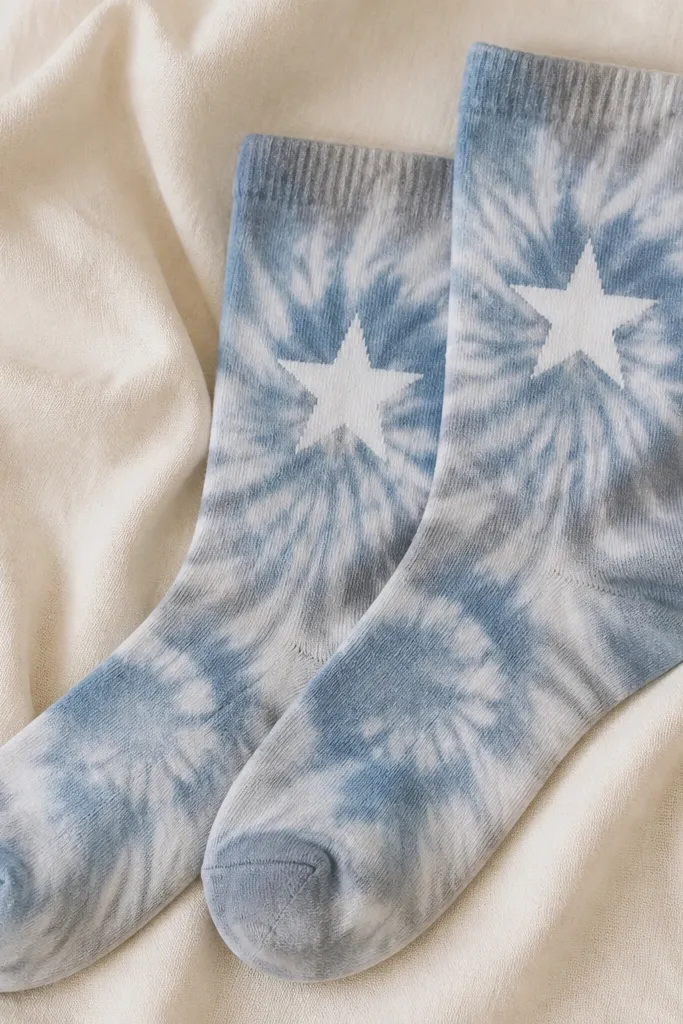
These socks look artsy without needing true tie-dye experience. The trick is using a stencil star center so the wild color has a calm focal point. I like muted dyes like slate blue, storm gray, and off-white because they match men’s everyday shoes. This is a good gift for boyfriends who like comfort and don’t mind a little style. Skin tone doesn’t matter because the socks are covered by shoes and pants, but sizing matters a lot for comfort.
Choose cotton crew socks and pre-wash to remove sizing. Mix fabric dye in a few muted colors and apply with squeeze bottles or brushes, then blot with paper towels. Place a star stencil on the ankle area and apply white dye or fabric paint in the center. Let the dye set per the dye instructions, then rinse until water runs clear. Dry flat and test with his shoe size to confirm fit and not too-tight ankle band.
Use a stencil that you can remove without smearing — freezer paper works well if you press edges firmly.
Don’t over-saturate — thick dye pools make the star edges bleed.