1. Oven-Set Marker Doodle Tumbler
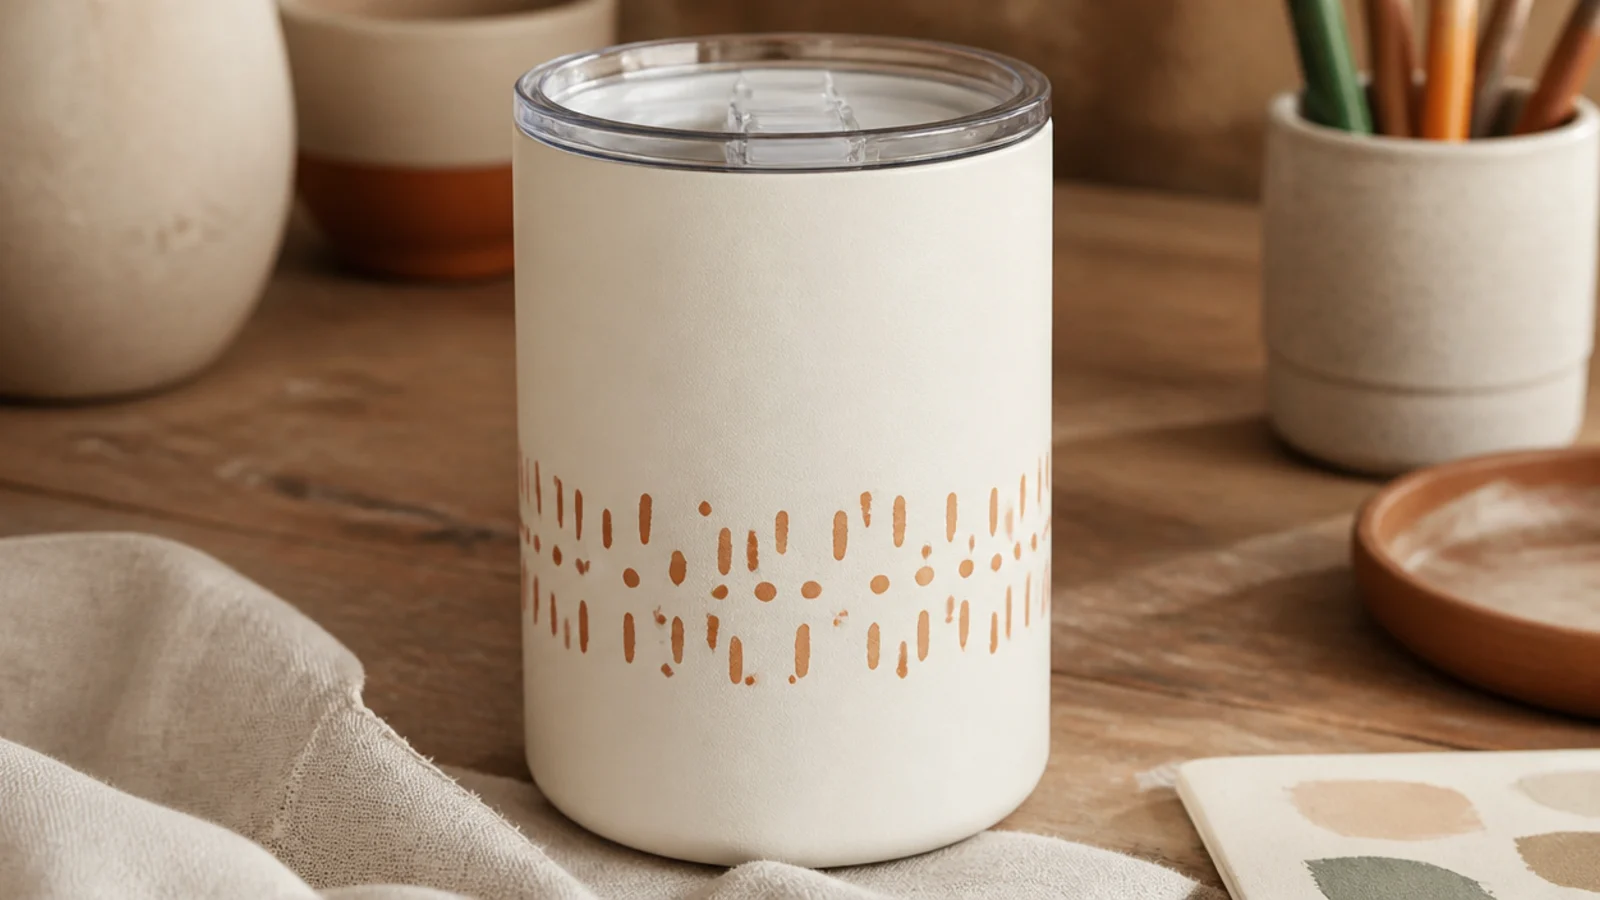
This is the easiest handmade travel mug there is — you draw on it with a pen and bake it. Oil-based paint markers give crisp color on a powder-coated tumbler, and a low oven cure turns the doodle from wipe-off to washable. Keep the design loose — dots, dashes, tiny sprigs — so there’s nothing to draw wrong, and it reads intentional rather than fussy.
Wipe the tumbler with rubbing alcohol and let it flash off. Draw your design with oil-based paint markers (like Sharpie oil pens), keeping everything at least an inch below the rim, and let it air-dry 20 minutes. Place the tumbler in a cold oven, set it to 350F, and once it reaches temperature bake 30 minutes, then turn the oven off and let the mug cool completely inside before touching it. This heat-cure is the seal — hand-wash only afterward, and never microwave a stainless mug.
Editor's noteSketch your doodle first on paper the same width as the mug so you know how the pattern wraps and where it should stop below the rim.
Skip thisDon’t skip the alcohol wipe or the bake; skin oils stop the ink bonding and an un-baked marker design washes straight off.
2. Painter's Tape Geometric Tumbler
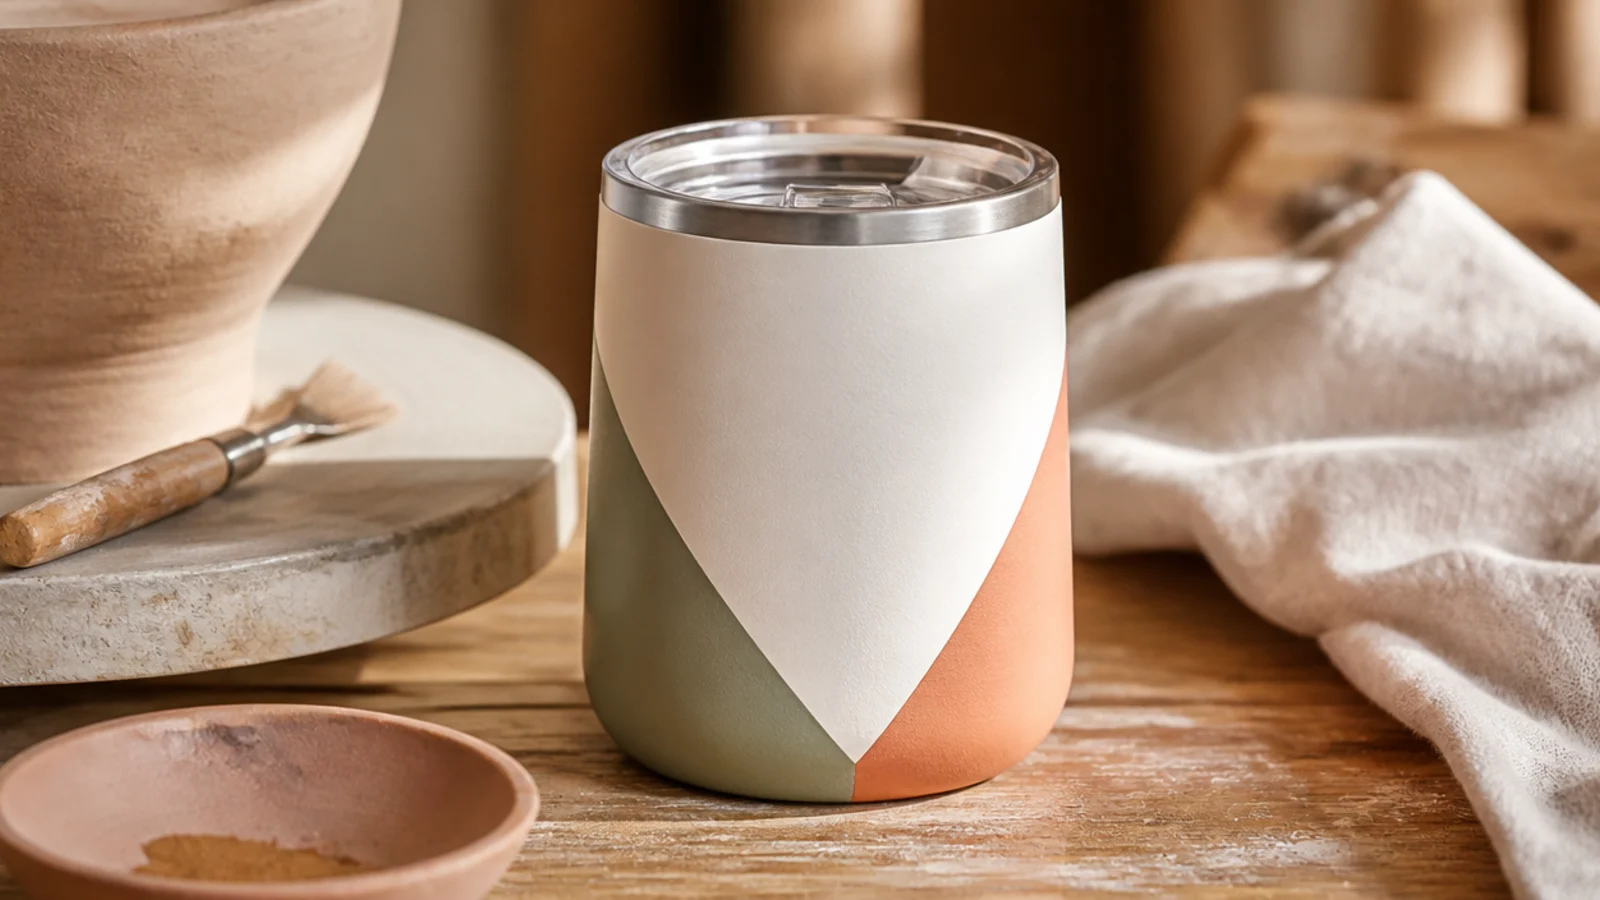
Crisp geometric blocks look designed and the tape does all the precision, so you need no steady hand. Angled triangles or a diagonal color-block band reads modern against a plain tumbler. Two muted colors plus the base coat is plenty — restraint is what keeps it looking boutique instead of busy.
Wipe the tumbler with alcohol. Lay painter’s tape in your geometric lines, pressing every edge down hard with a fingernail so paint can’t creep under. Brush oven-bake surface paint (Pebeo or similar) inside the taped shapes in two thin coats, letting the first dry before the second, and peel the tape while the last coat is still slightly wet for a sharp edge. Air-dry 24 hours, then oven-cure per the paint’s instructions (typically 35 minutes at 300F from a cold start) and hand-wash only.
Editor's noteBurnish each taped edge with the back of a spoon before painting — sealed tape is the whole secret to sharp geometric points.
Skip thisDon’t flood the taped area with thick paint; heavy coats seep under the tape and blur the clean edges you taped for.
3. Name and Monogram Vinyl Tumbler
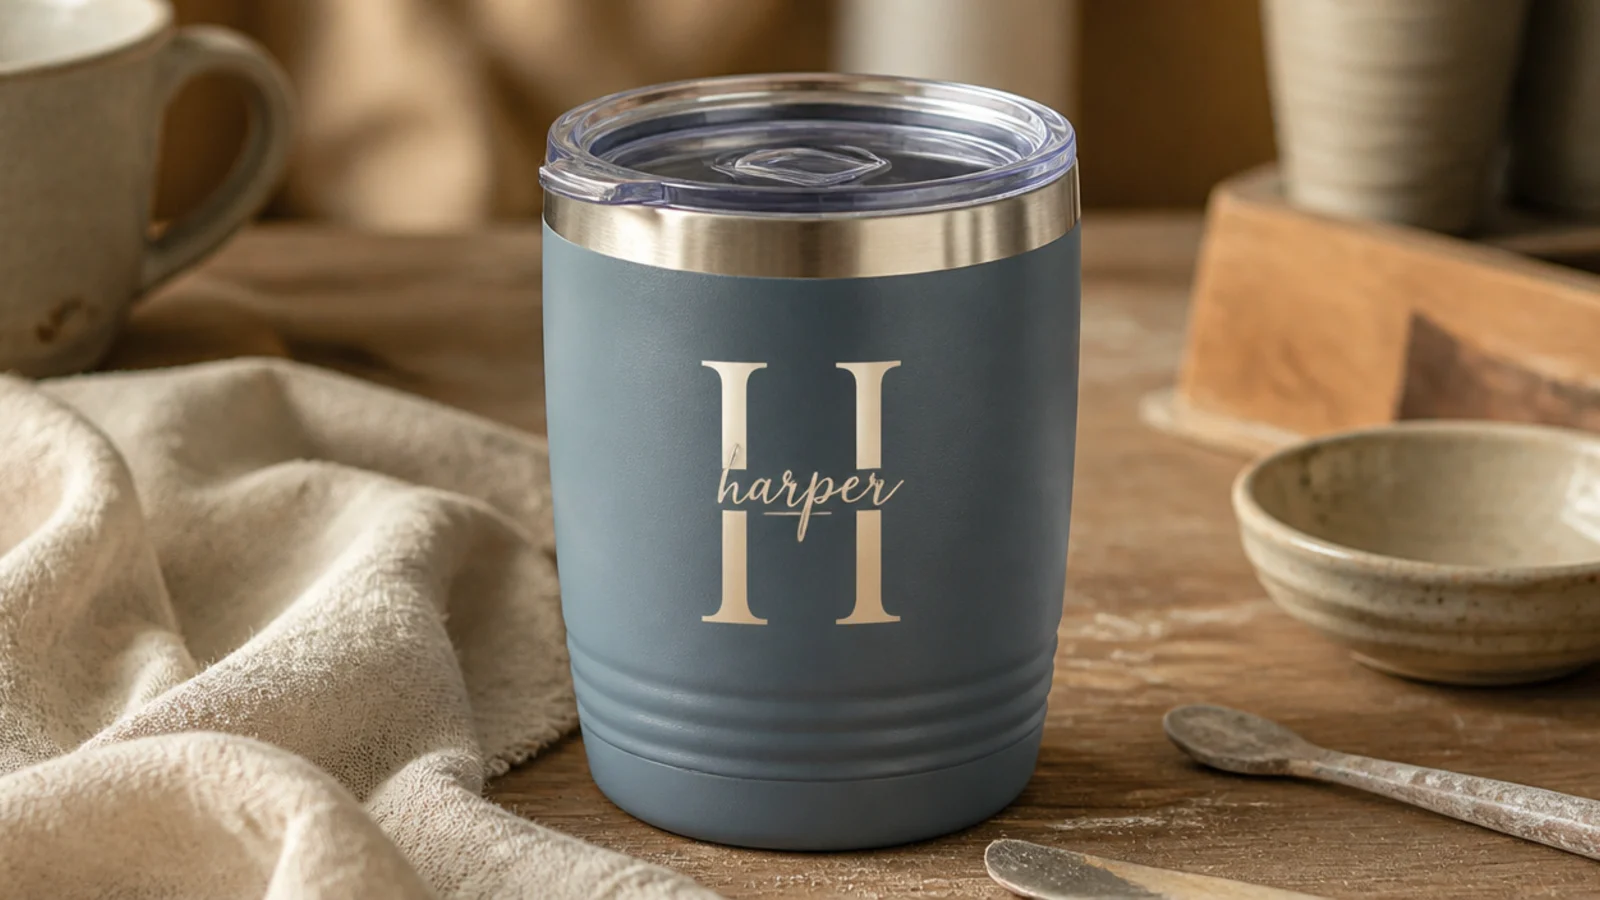
A cut-vinyl name or monogram is the fastest way to make a personalized, gift-worthy travel mug with a machine-clean finish. A cutting machine does the precise work, so you just weed and apply. One large initial or a short name in a simple serif or script reads best — thin, tiny fonts lift at the edges on a curved mug.
Cut your design from permanent outdoor adhesive vinyl and weed away the excess. Wipe the tumbler with rubbing alcohol, then lay transfer tape over the design and apply it centered on the front, snipping small slits in the tape around the curve so it lies flat. Burnish the vinyl down firmly with a scraper, peel the transfer tape back slowly at a sharp angle, and press any lifted edges. Let it bond 24-72 hours before the first hand-wash — never dishwasher.
Warm the vinyl and mug slightly with a hair dryer as you apply; gentle heat helps adhesive vinyl mold to the curve and stay stuck.
Don’t use removable indoor vinyl or place the design near the rim; both peel fast with washing and daily handling.
4. Hand-Painted Enamel Camp Mug
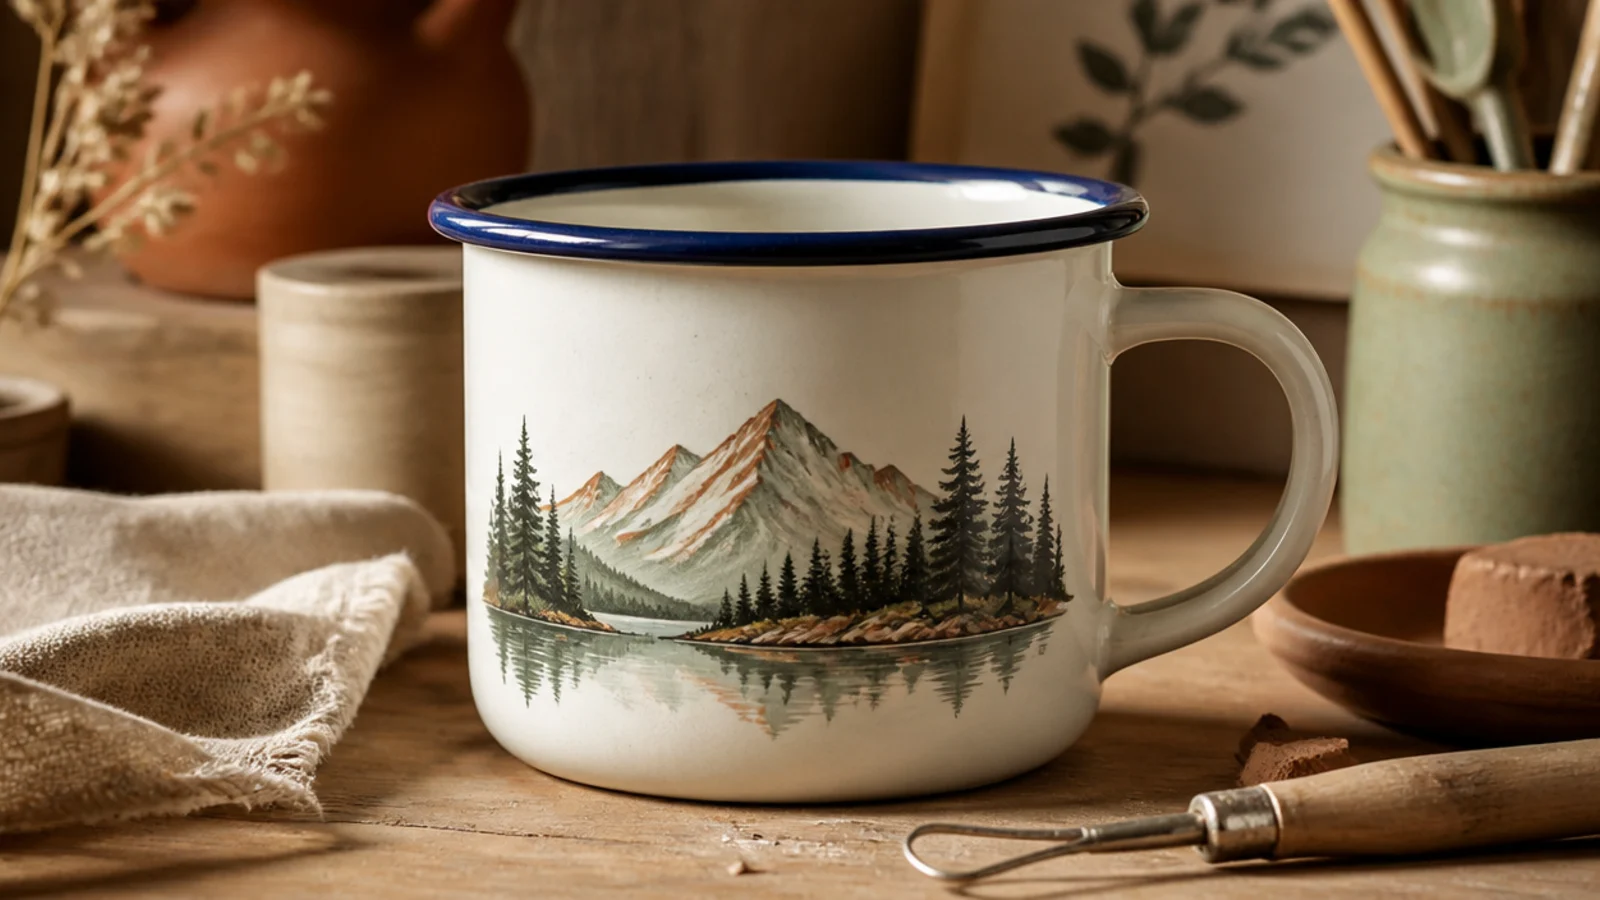
A speckled or plain enamel camp mug is a perfect canvas for a simple painted scene — a mountain line, a pine sprig, a wave. Enamel paint made for metal bonds to the glassy surface and cures glossy and tough. The retro camp-mug shape makes even a beginner’s little landscape look charming and outdoorsy.
Clean the mug with rubbing alcohol. Pencil a simple design on the outside, well below the rim, then paint it with oven-bake enamel or glass-and-metal paint in two thin coats, letting each dry. Once fully dry, cold-start the oven, bake at the paint’s rated temperature (often 300-325F for 30-40 minutes), and cool the mug in the oven. Keep paint off the inside and rim entirely, and hand-wash so the enamel scene stays crisp.
Keep the scene to a simple silhouette — a ridge line and two trees — because flat graphic shapes survive knocks far better than fine detail.
Don’t paint over the drinking rim or inside; camp mugs get bumped, and paint there chips into your coffee.
5. Botanical Silhouette Travel Mug
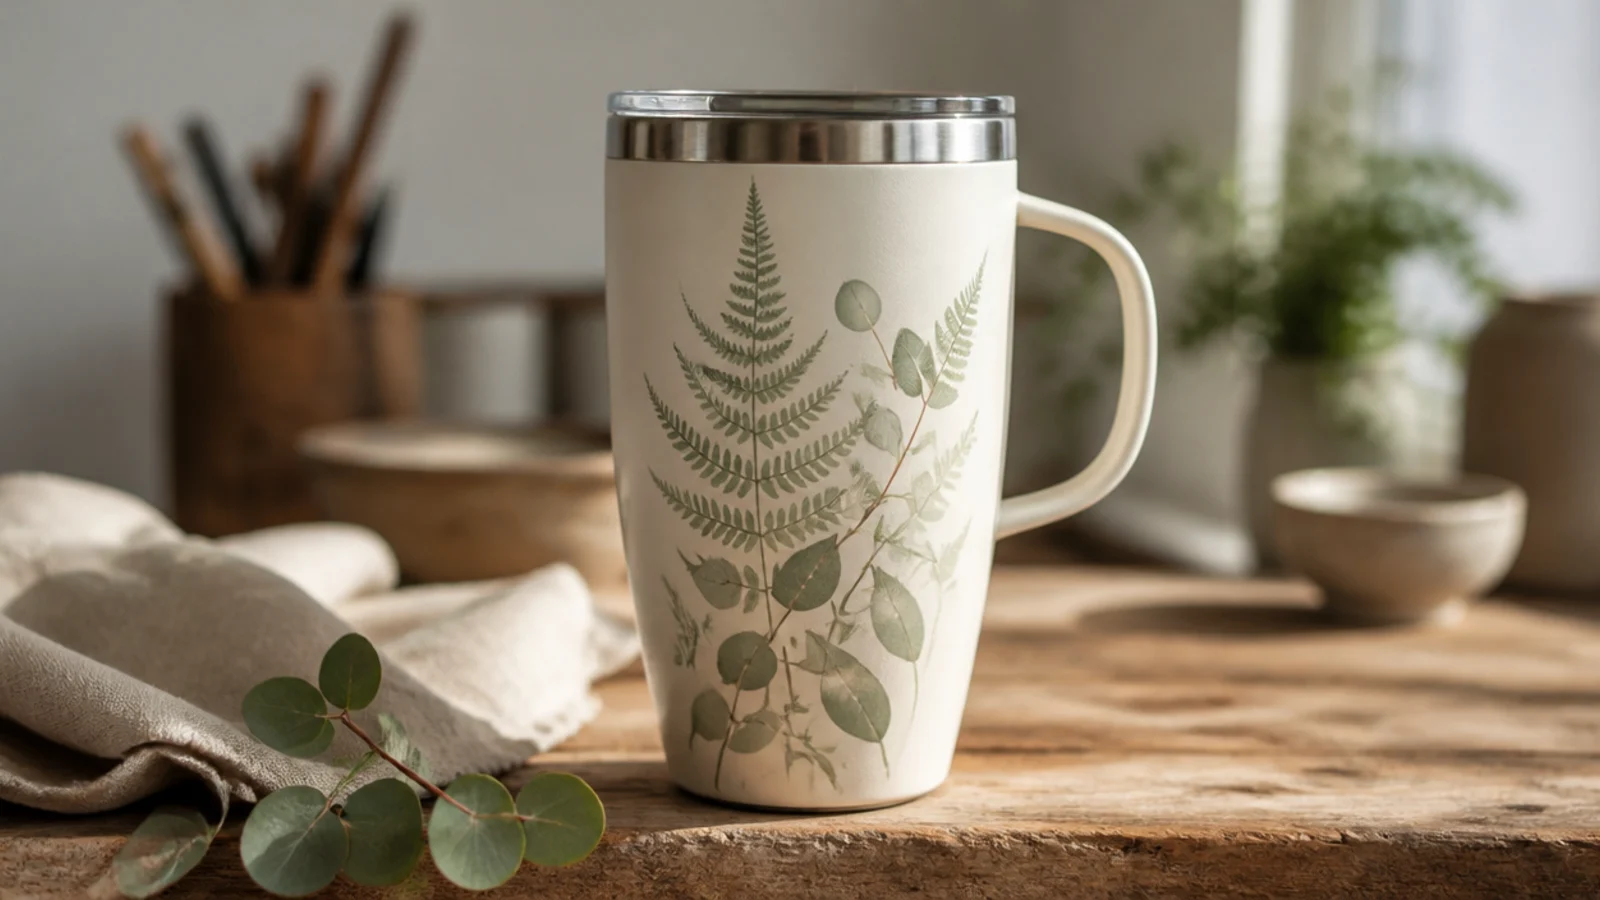
A botanical silhouette looks organic and calm, and you can print it with a real leaf instead of drawing. Ferns and eucalyptus with clean edges make the crispest prints and suit the travel-mug shape. It’s the prettiest low-skill option here — nature makes the pattern, you just cure it.
Wipe the mug with alcohol. Coat one side of a flat leaf lightly with oven-bake surface paint using a sponge, press it paint-side down onto the mug, cover with a paper towel, and press evenly, then lift straight up to reveal the print. Repeat with fresh paint for each leaf, keeping the design below the rim. Air-dry 24 hours, oven-cure per the paint (about 35 minutes at 300F from cold), cool inside, and hand-wash only.
Press the leaf flat through a paper towel so the whole shape and the fine veins make contact and transfer, not just the edges.
Don’t overload the leaf with paint; a thin, even coat prints crisp veins, while a heavy coat smears into a solid blob.
6. Cork Sleeve Wrap Travel Mug
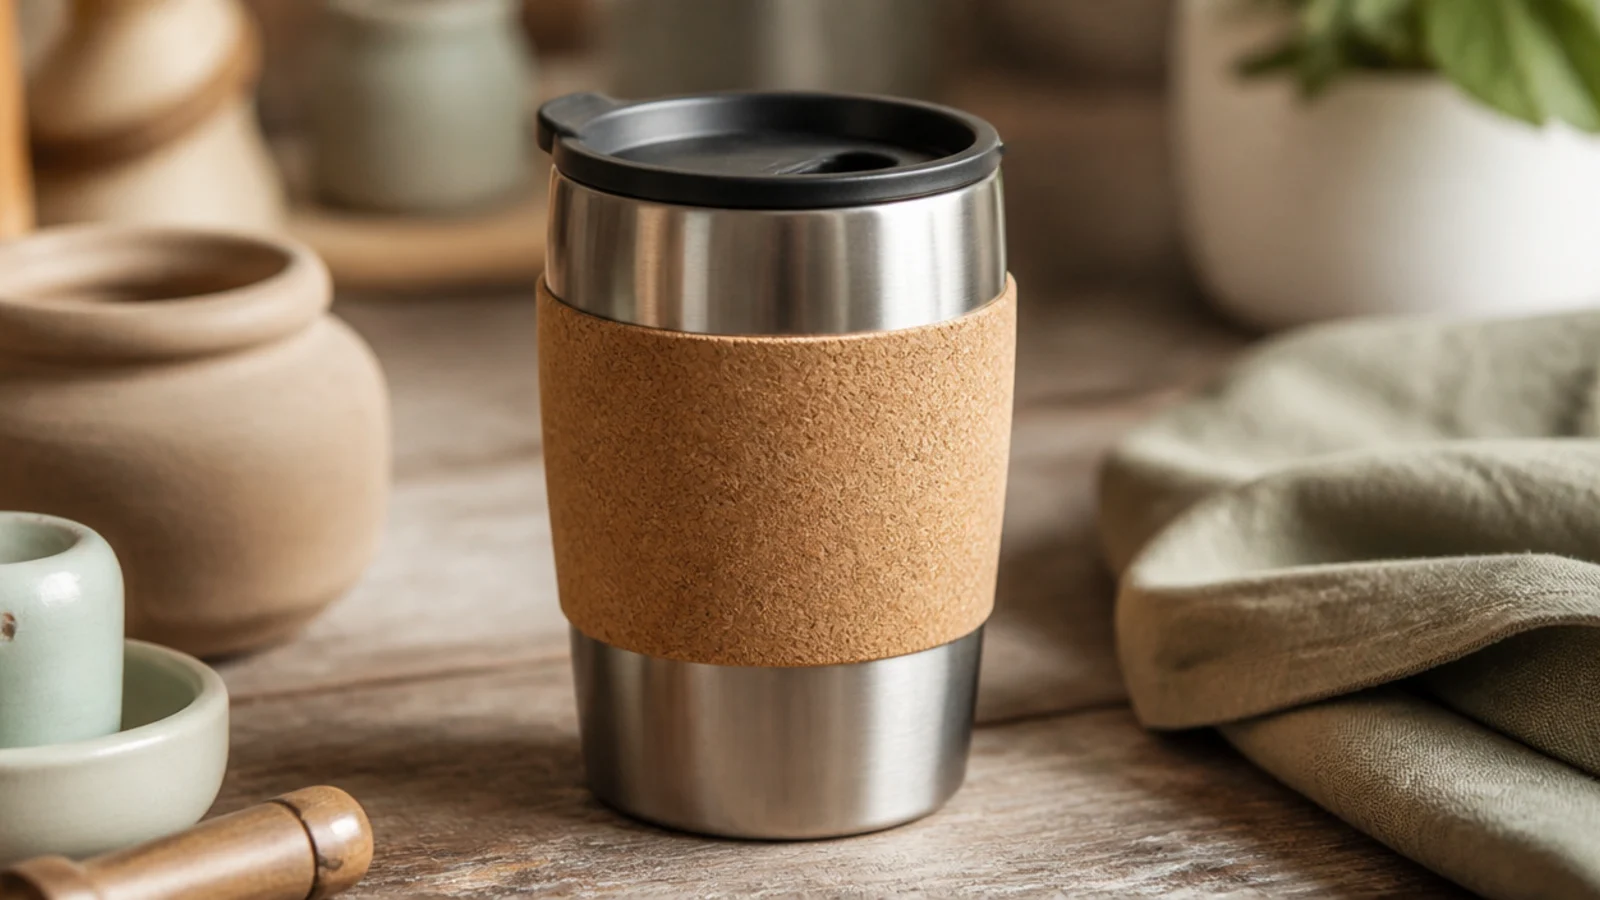
A cork sleeve adds grip, insulation, and a warm natural look, and it hides scratches on an older tumbler. Sheet cork is cheap, cuts with scissors, and wraps any straight-sided mug. It’s a no-paint, no-cure project that instantly makes a plain mug feel considered and boutique.
Measure the mug’s circumference and the height of the straight section, then cut a rectangle of thin adhesive-backed cork sheet (or plain cork plus contact cement) to fit with a small overlap. Wipe the mug with alcohol, peel and wrap the cork snugly around the body, pressing out air as you go, and butt or overlap the seam cleanly. Trim the seam with a sharp blade for a tight join and press the whole sleeve down firmly. Keep the sleeve off the base so it doesn’t wick moisture, and spot-clean rather than soaking.
Cut the cork an inch too long, wrap it, then trim the overlap in place with a craft knife for a seam that meets perfectly.
Don’t run the cork all the way to the base or over the lid threads; a sleeve that soaks up counter water peels and smells musty.
7. Hand-Stitched Felt Cozy
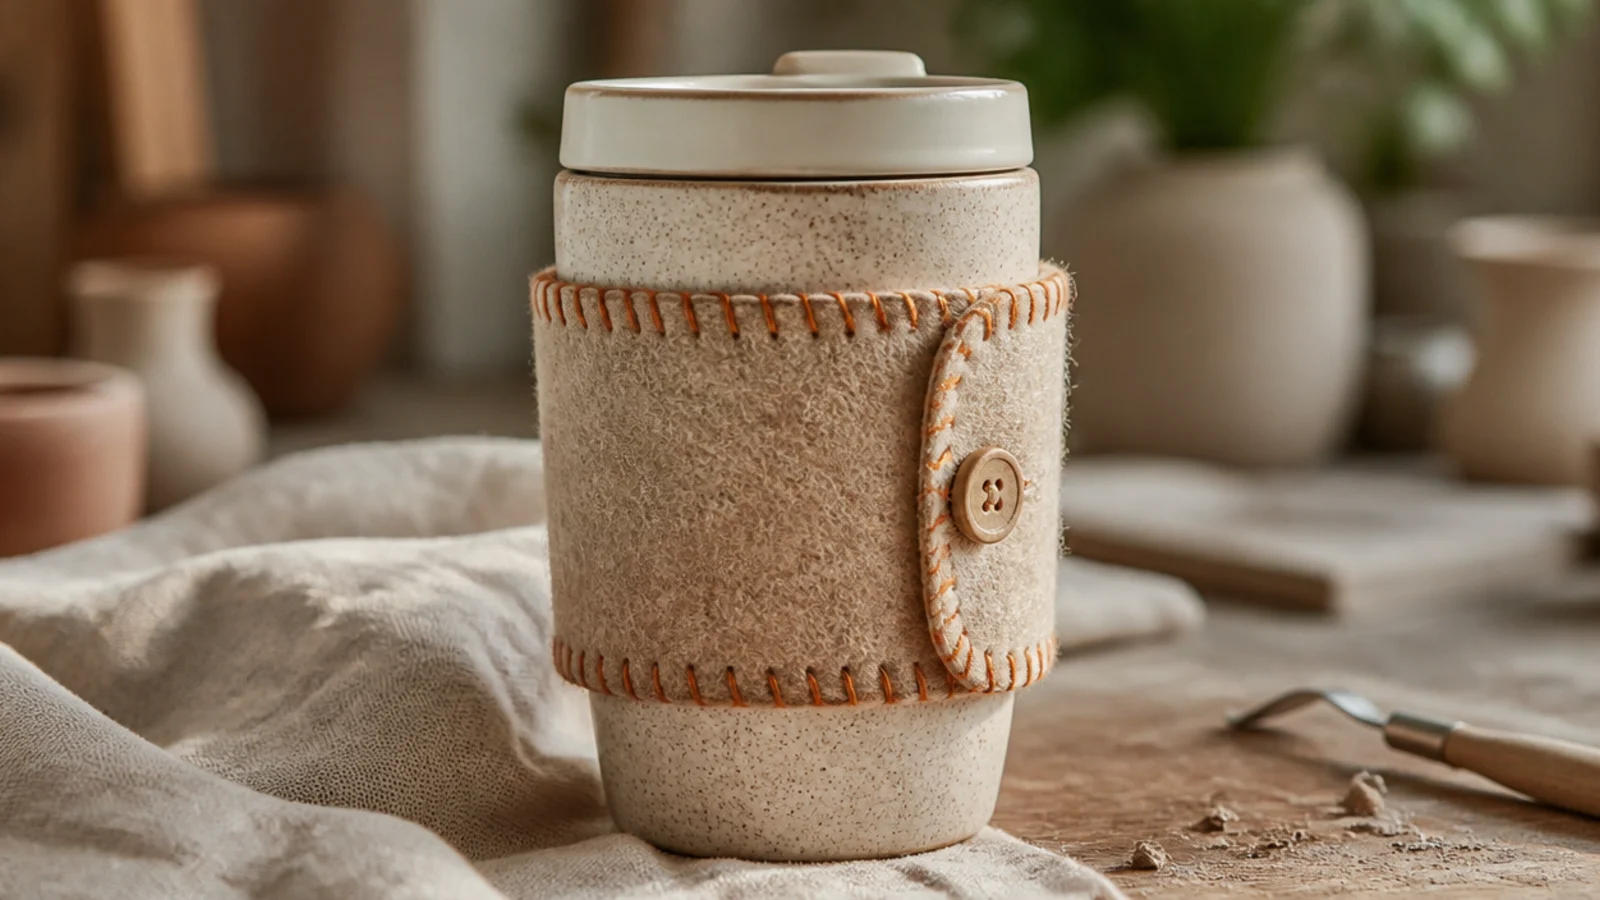
A stitched wool-felt cozy is cozy in the literal sense — it insulates, quiets the clink, and shows off simple hand-stitching. Wool or wool-blend felt doesn’t fray, so raw edges look intentional. It’s a satisfying no-machine sew that makes a heartfelt handmade gift.
Wrap a tape measure around the mug and measure the height of the straight section, then cut a felt rectangle to fit with a half-inch overlap for the closure. Blanket-stitch the top and bottom edges with contrasting embroidery floss for a finished look, then sew a small button on one end and cut a matching slit buttonhole on the other. Slip it on and button it snug. Because it’s removable, just unbutton and hand-wash the cozy when it needs it.
Editor's noteMake the cozy removable with a button or snap rather than gluing it on, so you can wash it and still lid the mug easily.
Skip thisDon’t use cheap craft felt if you want it to last; acrylic felt pills and stretches, while wool-blend holds its shape and edge.
8. Leather Handle Wrap Travel Mug
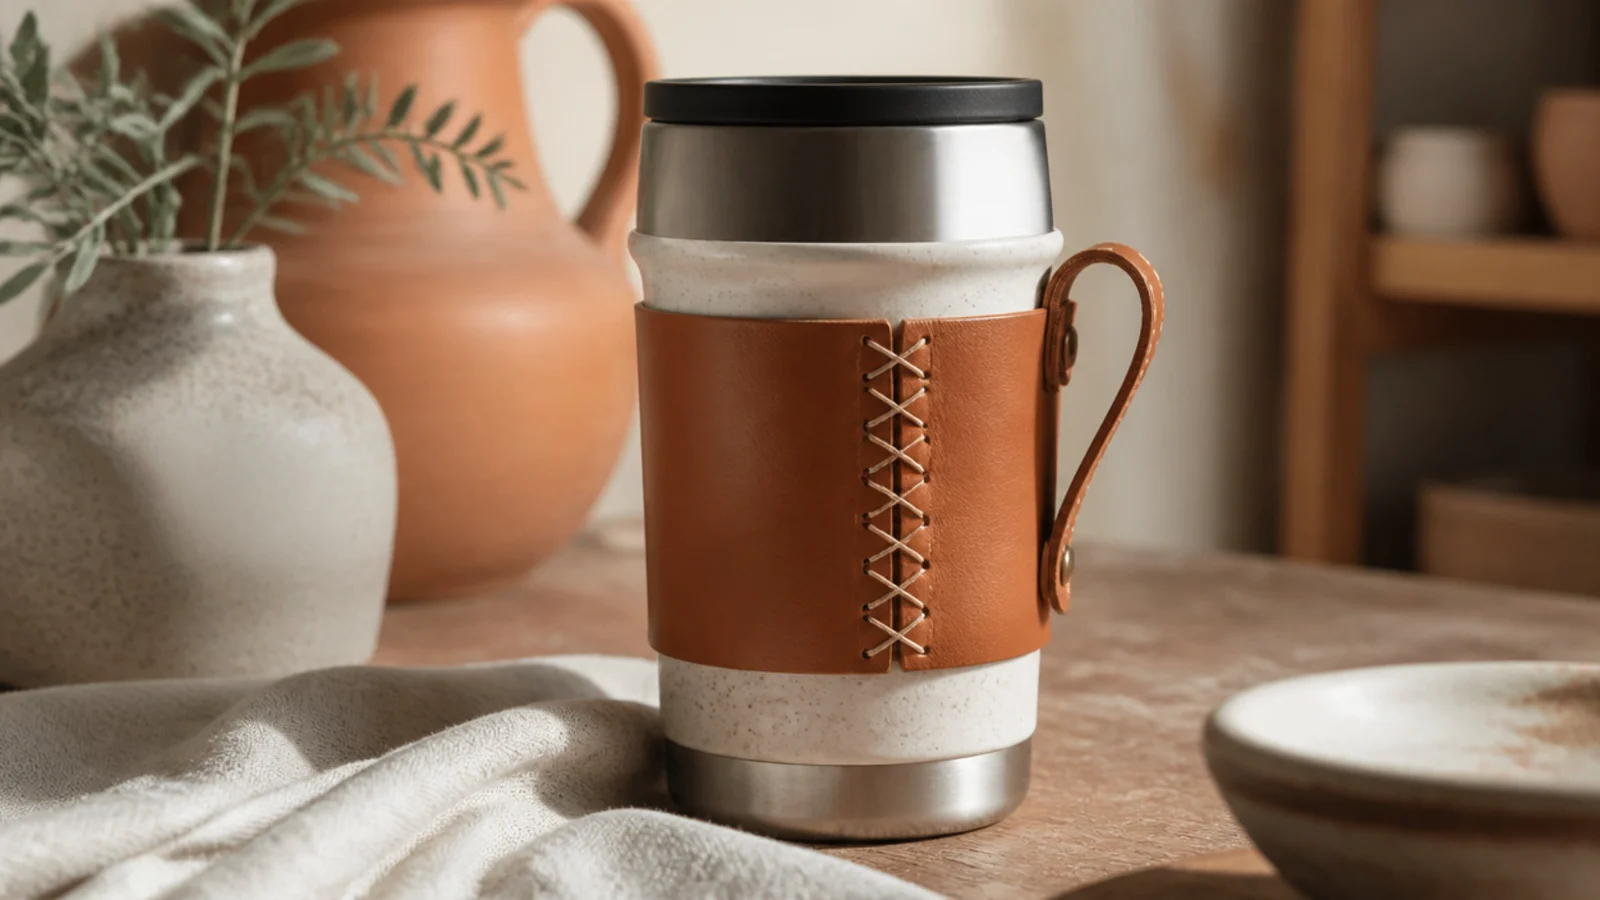
A wrapped leather band with a small loop turns a plain tumbler into something that looks like a heritage outdoor brand, and the loop clips to a bag. Veg-tan leather ages beautifully and grips warm. It’s a no-paint project that leans on one clean row of stitching or lacing for its whole look.
Cut a strip of 2-3mm veg-tan leather to wrap the mug’s circumference plus an inch. Mark and punch evenly spaced holes down both long edges with a rotary punch, wipe the mug with alcohol, and wrap the strip around the body. Lace or saddle-stitch the seam closed with waxed thread, forming a small loop of leftover leather at the seam if you want a carry tab. Rub in a little leather conditioner to seal it and keep the wrap off the base so it stays dry.
Editor's notePunch your stitching holes with the leather wrapped in place so the two edges line up exactly when you lace them together.
Skip thisDon’t glue untreated leather directly against condensation-prone metal; unsealed leather stains and stiffens when it gets repeatedly damp.
9. Ombré Spray Tumbler
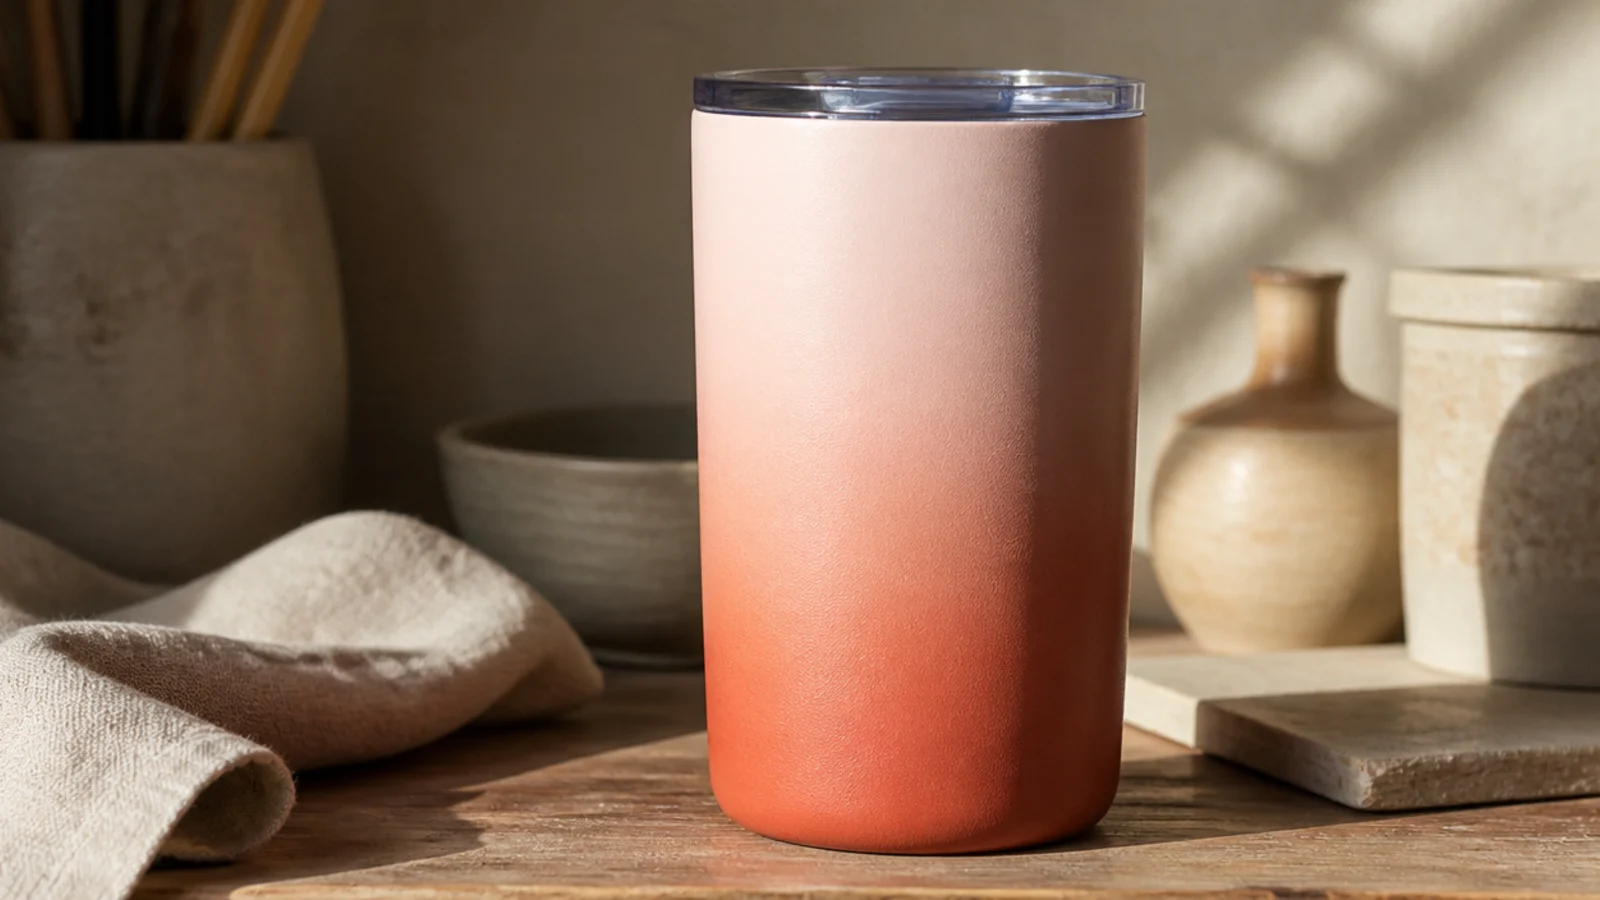
An ombré fade looks advanced but spray paint does the blending automatically. You build color heavier at the base and feather it lighter toward the top for a smooth gradient. Soft, tonal color pairs — terracotta to blush, teal to cream — blend the most forgivingly and look modern.
Scuff a shiny tumbler with 400-grit and wipe with alcohol, or start with a powder-coated one. Prime with a spray primer made for metal, then spray your lightest color over the whole tumbler in light passes. Once dry, spray the darker color starting at the base and sweeping upward, lifting the can away as you rise so it fades out — build it in several light coats, not one heavy one. Let it cure fully, then seal with two coats of a clear enamel spray rated for outdoor/dishwasher-adjacent use, and hand-wash to protect the finish.
Editor's noteHold the can 10-12 inches away and keep it moving in steady sweeps; distance and motion are what turn spray into a soft fade instead of drips.
Skip thisDon’t spray heavy coats to rush the color; thick spray runs and pools, and a single drip ruins the smooth gradient.
10. Dishwasher-Safe Ceramic Decal Keep-Cup
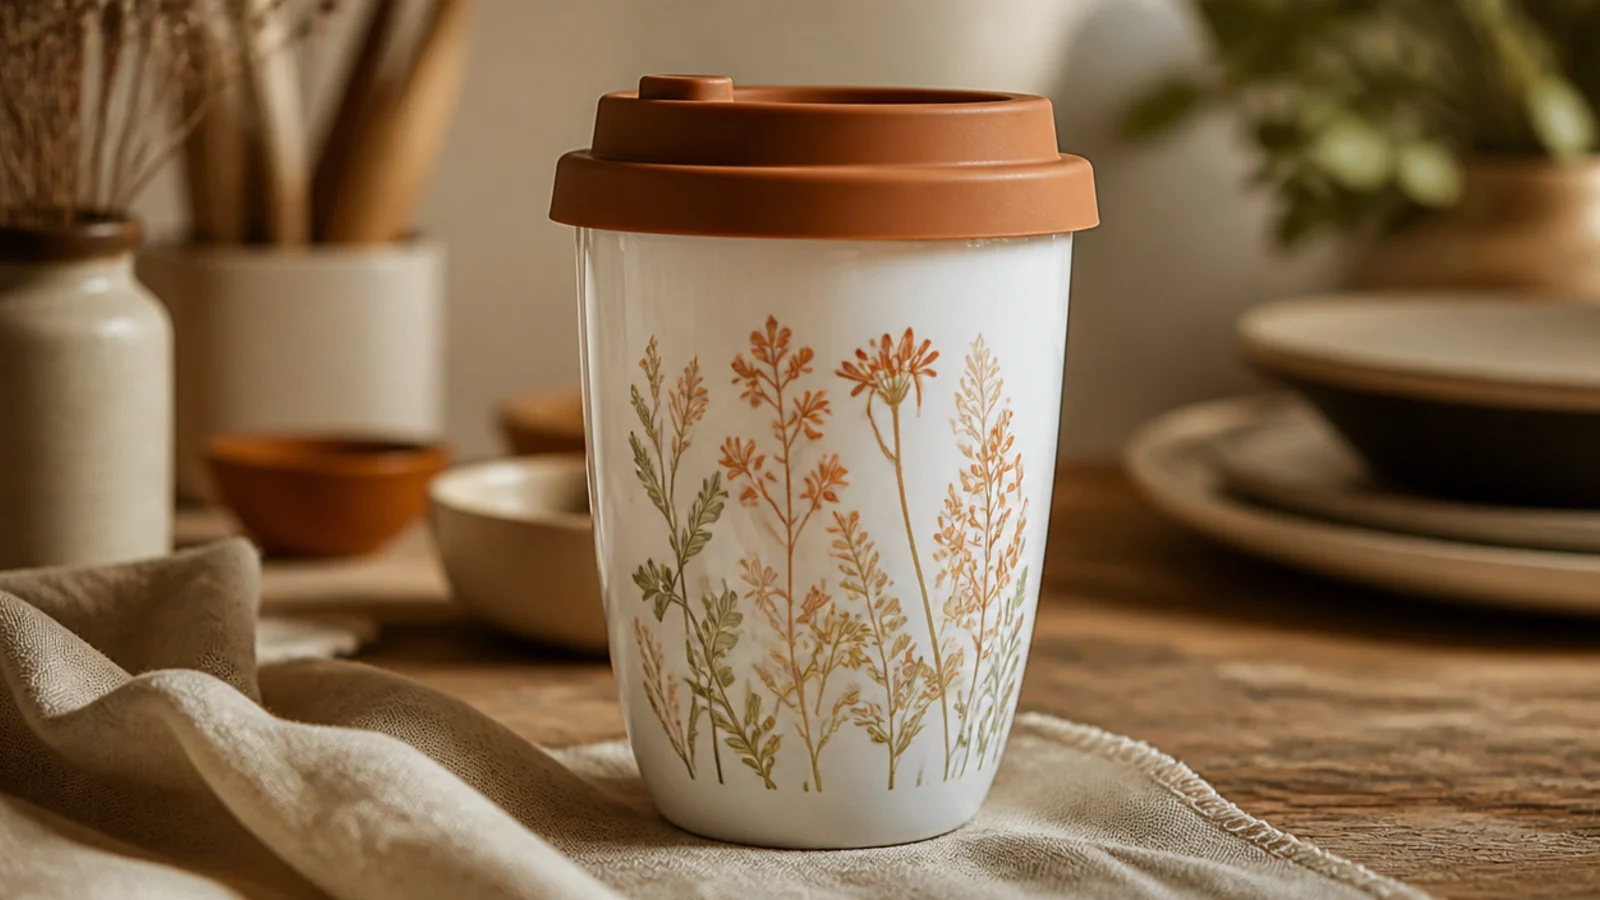
A fired ceramic waterslide decal gives you a professional printed graphic that’s genuinely dishwasher-safe, because it fuses into the glaze in a firing. You apply the decal to a glazed keep-cup and re-fire it low. It’s the most durable printed option here and perfect for detailed art you can’t hand-paint.
Start with a glazed, food-safe ceramic keep-cup and a fitted silicone lid. Buy a ceramic (not inkjet) waterslide decal rated for your firing temperature, cut it out, and soak it in warm water until the film slides on its backing. Slide the decal onto the clean glazed surface, squeegee out all water and air bubbles from under it with a soft rubber rib, and let it dry fully. Fire the cup in a kiln to the decal’s rated decal temperature (commonly around cone 018-016) so it fuses into the glaze — after firing it’s washable and food-safe.
Editor's noteSqueegee every bubble and drop of water out from under the decal before firing; trapped moisture or air blisters and ruins it in the kiln.
Skip thisDon’t use home inkjet 'waterslide' paper on a mug you’ll drink from and wash; only kiln-fired ceramic decals bond permanently and stay food-safe.
11. Marbled Hydro-Dip Tumbler
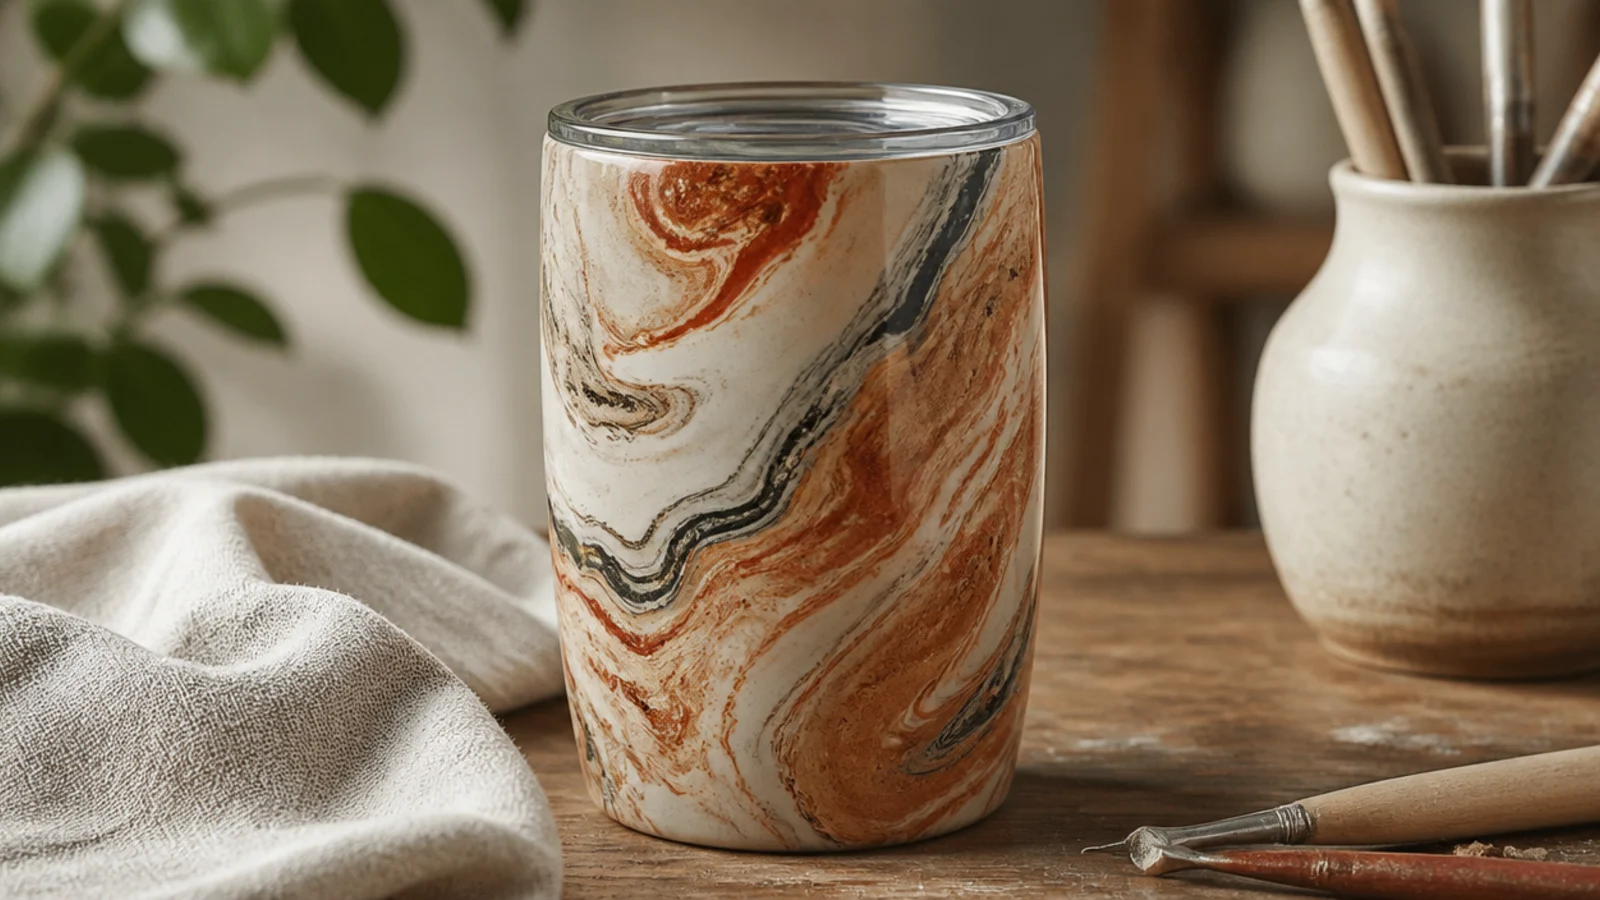
Hydro-dipping floats spray paint on water and rolls the mug through it, so a one-of-a-kind marble wraps the whole tumbler in seconds. Every dip is unique and the effect looks high-end. It’s messy and a little unpredictable, which is exactly why it’s fun and hard to get truly wrong.
Scuff and alcohol-wipe the tumbler, then base-coat it with spray primer and a solid spray color. Fill a bucket with room-temperature water and spray two or three colors of enamel spray paint onto the surface so they pool and swirl, then swirl gently with a stick. Blow away from any oversaturated spot, then slowly roll the tumbler through the floating paint in one smooth motion so it picks up the marble. Lift it out, let it dry fully, and seal with two coats of clear enamel spray — hand-wash only to keep the marble intact.
Work fast once the paint is on the water; enamel spray skins over within a minute or two and only marbles cleanly while it’s still fluid.
Don’t dip into cold water or wait too long; cold water and a skinned-over paint film give you a wrinkled, patchy transfer.
12. Epoxy Glitter Tumbler
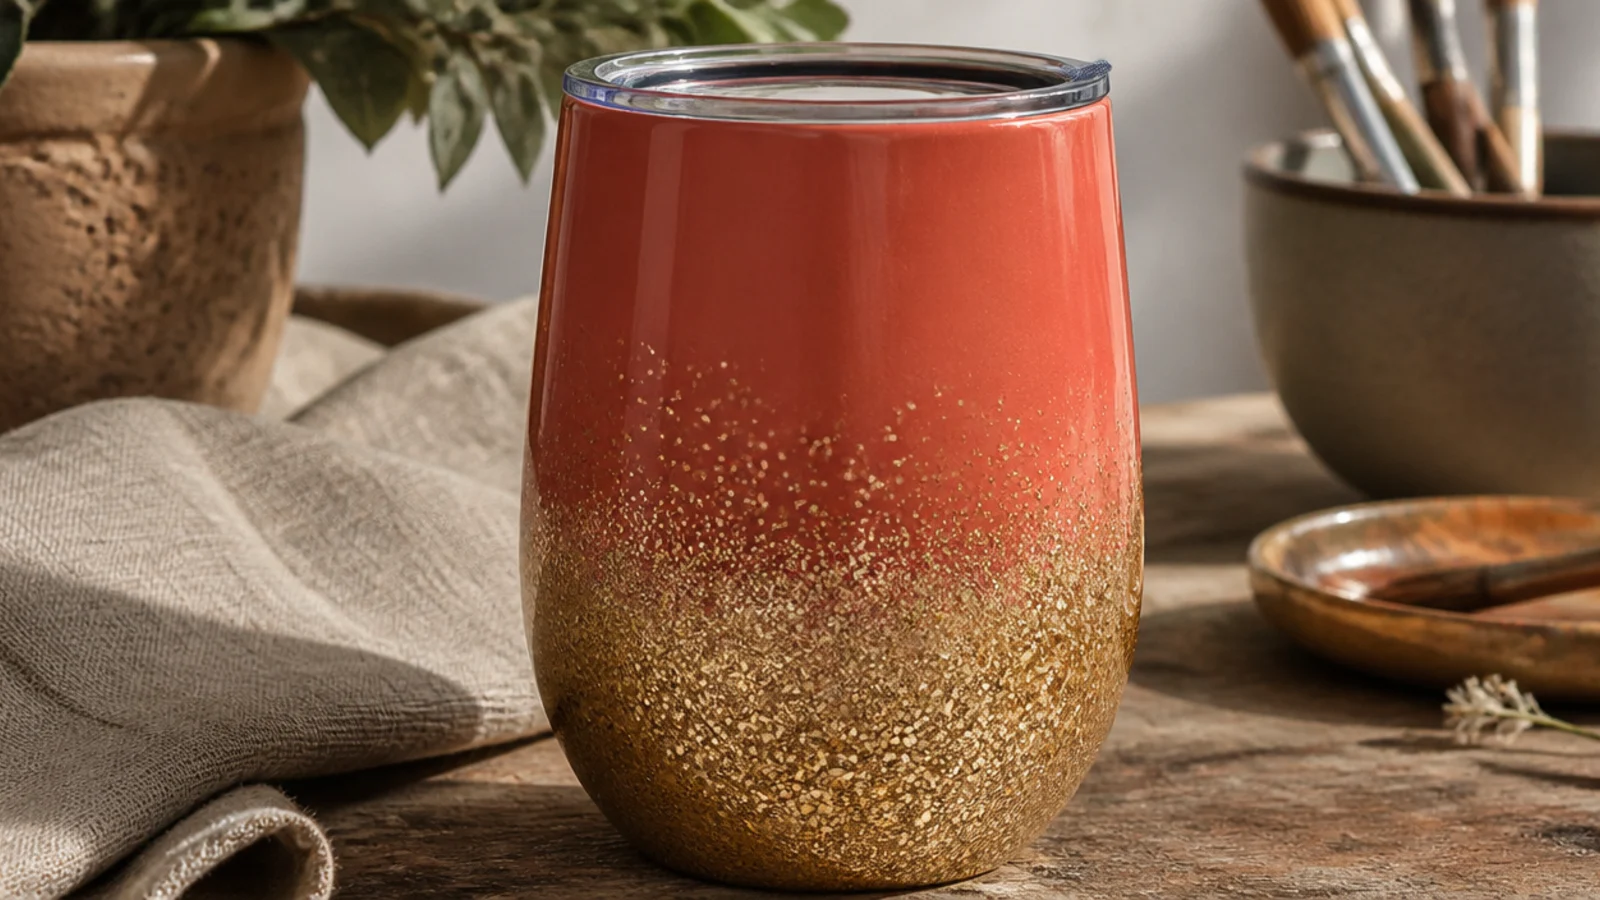
A glitter tumbler sealed under epoxy has that deep, glassy, glass-like shine that catches every light, and the epoxy locks the glitter down so nothing sheds. It’s the showpiece finish for gifts and celebrations. It absolutely requires a cup turner, because the epoxy has to rotate while it self-levels or it drips.
Scuff and alcohol-wipe the tumbler, spray a base color, and while tacky, dust fine polyester glitter over it (an ombré from the base up looks best), then seal the glitter with a light spray coat. Mount the tumbler on a cup turner, mix a food-contact-rated two-part epoxy exactly by the ratio and volume, and brush a thin even coat over the glittered area, keeping it below the rim. Let it turn 4-6 hours until it stops leveling, then keep it dust-free and turning or upright for 24 hours. Give it 3-7 days to fully cure before use, and hand-wash only.
Measure the two epoxy parts by exact volume and stir slowly for the full time on the label; guessed ratios or fast stirring leave it forever tacky.
Don’t epoxy without a turner or over the rim; unturned epoxy drips into blobs, and epoxy at the lip should never touch your mouth.
13. Engraved Insulated Bottle-Mug
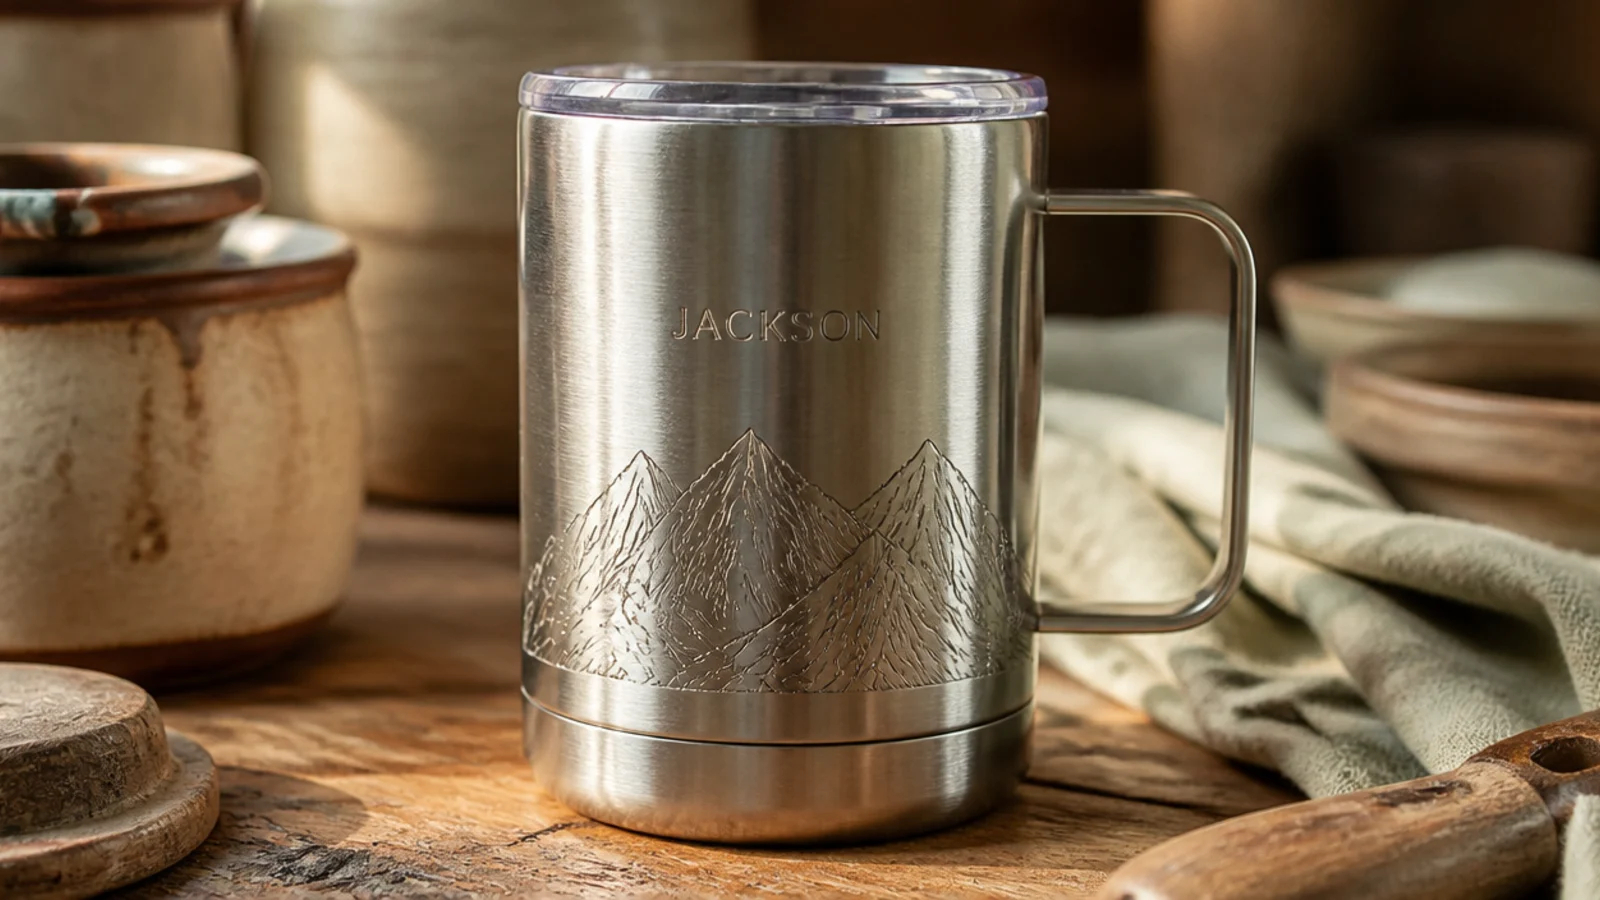
Engraving cuts the design straight into the metal, so it never peels, fades, or washes off — it’s the most permanent option here and needs no cure at all. A rotary tool or a laser gives clean line art or lettering on a brushed-steel bottle-mug. The bare, tone-on-tone engraved look is understated and genuinely bombproof.
Choose an insulated stainless bottle-mug with a smooth section for the design. Print your artwork, tape it in place, and either follow the lines with a rotary tool and a fine diamond burr at low speed, or run it on a laser engraver set for stainless. Work in light, steady passes rather than digging deep, keeping the engraving below the drinking spout. Wipe away metal dust, then rub a little food-safe mineral oil over the engraving to darken the cut lines and protect the raw metal — it’s dishwasher-tolerant since there’s no coating to lift.
Do a test pass on the base or an old can first to dial in speed and pressure; stainless scratches easily, so light repeated passes beat one deep cut.
Don’t engrave near the lip or through into the insulated wall; puncturing the double wall kills the insulation permanently.
14. Slab-Built Ceramic Keep-Cup with Silicone Lid
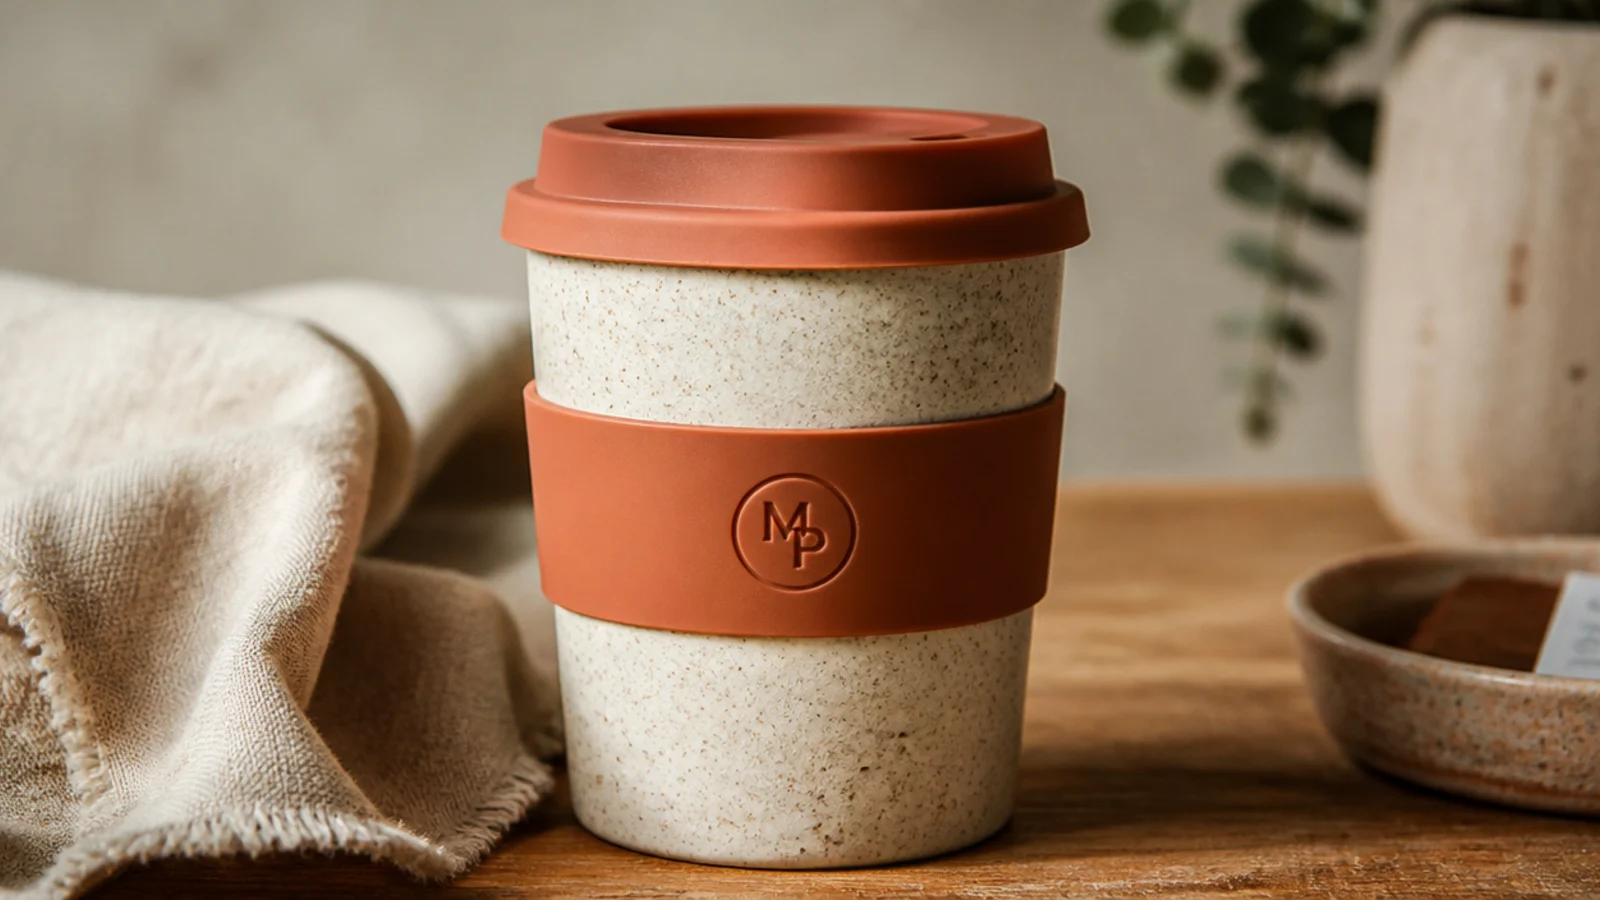
A slab-built ceramic keep-cup is the handmade answer to a disposable to-go cup — a real, glazed, kiln-fired cup with a fitted silicone lid you can sip through. Clean straight sides come from wrapping a slab, no wheel needed. Sized to a standard silicone lid, it becomes a daily-driver you actually made.
Buy a silicone lid and sleeve blank first and measure its inner diameter. Roll a 1/4-inch stoneware slab, cut a rectangle about 4-5 inches tall, and wrap it around a tube so the finished rim will match the lid’s diameter, scoring and slipping the seam. Cut and attach a base, seal the inside join with a smoothed coil, and refine the rim to a clean circle. Firm to leather-hard, bisque fire, glaze inside and out with a food-safe glaze (wipe the foot), and glaze-fire — then fit the silicone lid and band.
Build the rim to the exact inner diameter of your silicone lid and account for clay shrinkage (roughly 10-13%), so the lid actually snaps on after firing.
Don’t guess the lid size after firing; clay shrinks, so a rim built to look right green comes out too small for the lid you bought.
15. Wheel-Thrown Thumb-Grip Keep-Cup
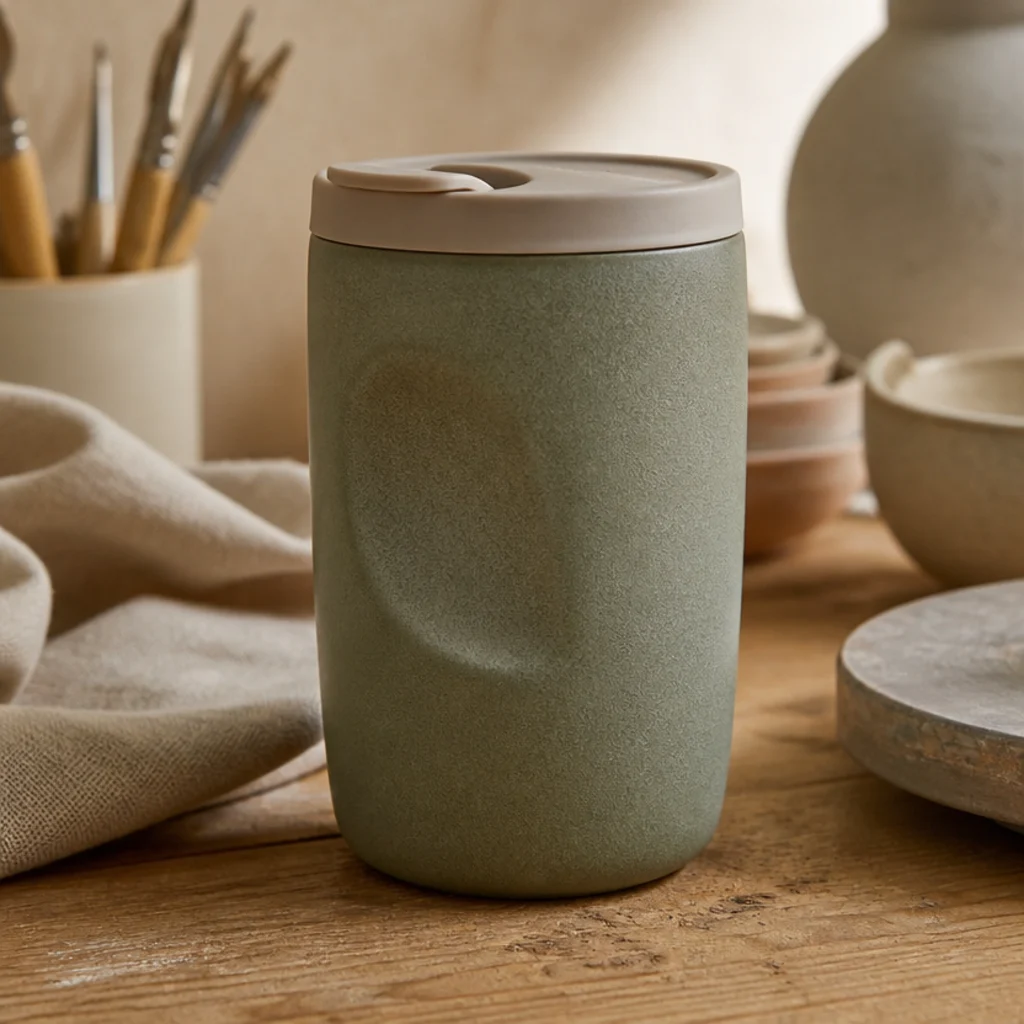
A wheel-thrown keep-cup with a carved thumb-rest is the pro version — a handleless ergonomic cup that fits the hand and sits under a coffee machine’s spout. The thrown walls are thin and even, and a shaped thumb divot makes it grippy without a handle. It’s last on the list because it rewards real throwing and trimming skill.
Center about a pound of stoneware, open to a 1/4-inch base, and pull the walls thin, tall, and even, sizing the rim to your silicone lid plus shrinkage. Compress the rim with a chamois, cut it off, and let it firm. At leather-hard, trim a clean foot and press or carve a shallow thumb rest into one side with a rounded rib. Bisque fire, apply a food-safe matte or satin glaze inside and out (wipe the foot), and glaze-fire, then fit the silicone lid for the road.
Editor's noteCarve the thumb rest at soft leather-hard and smooth it well; a rough or too-deep divot thins the wall and catches your lip when you drink.
Skip thisDon’t throw the walls too thin for a travel cup; ultra-thin walls chip in a bag and lose heat, so keep a sturdy even quarter-inch.