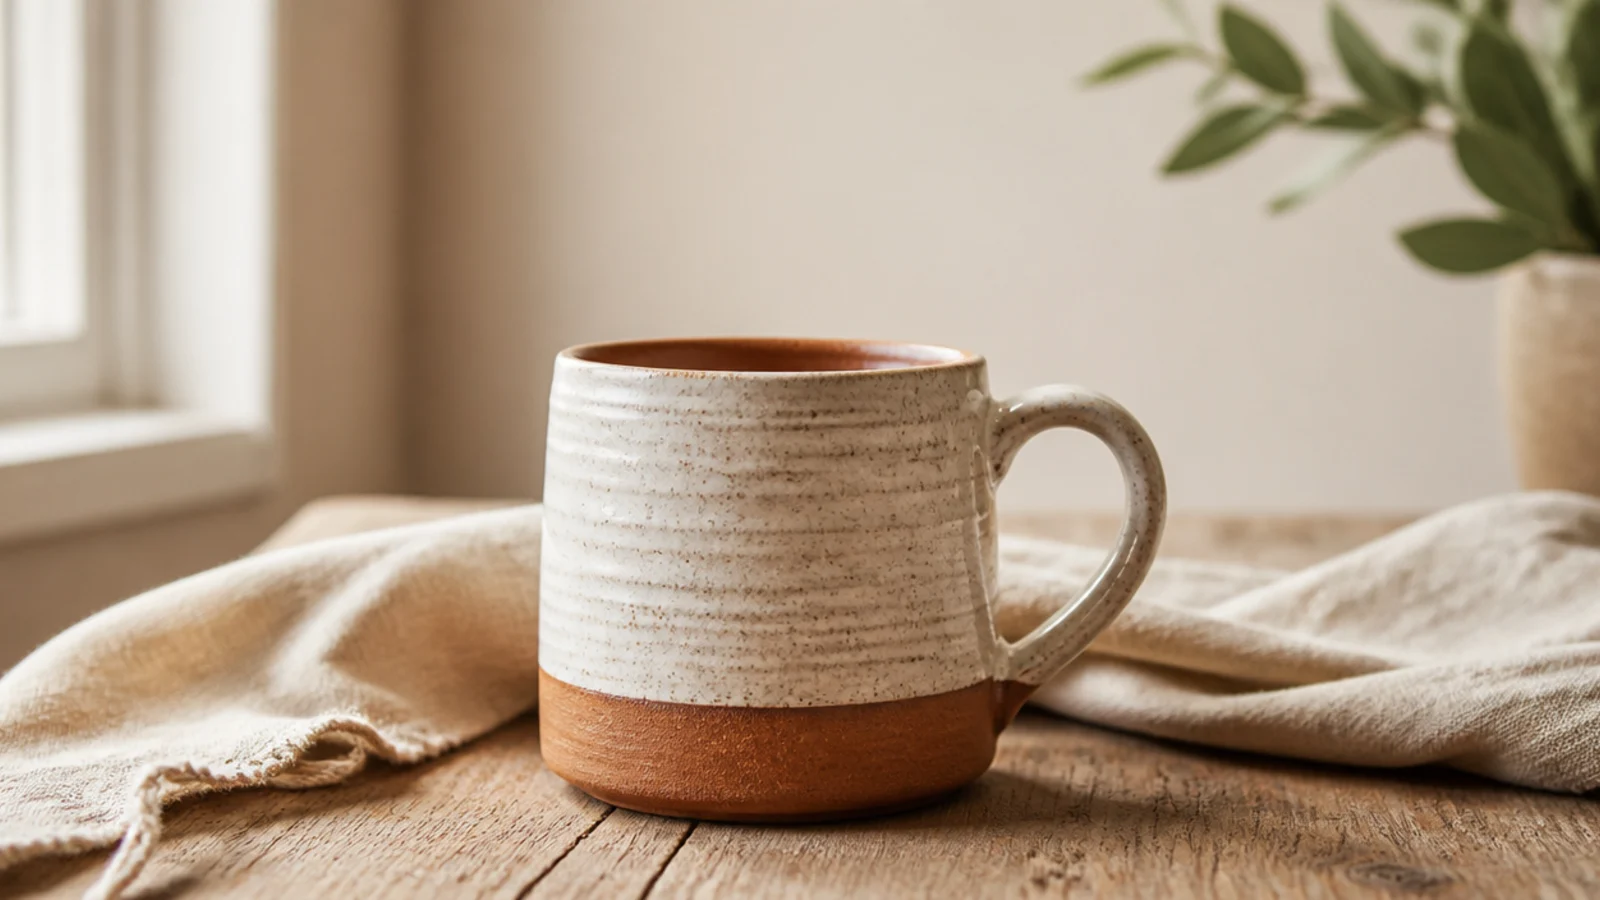
1. Speckled Minimalist Mug
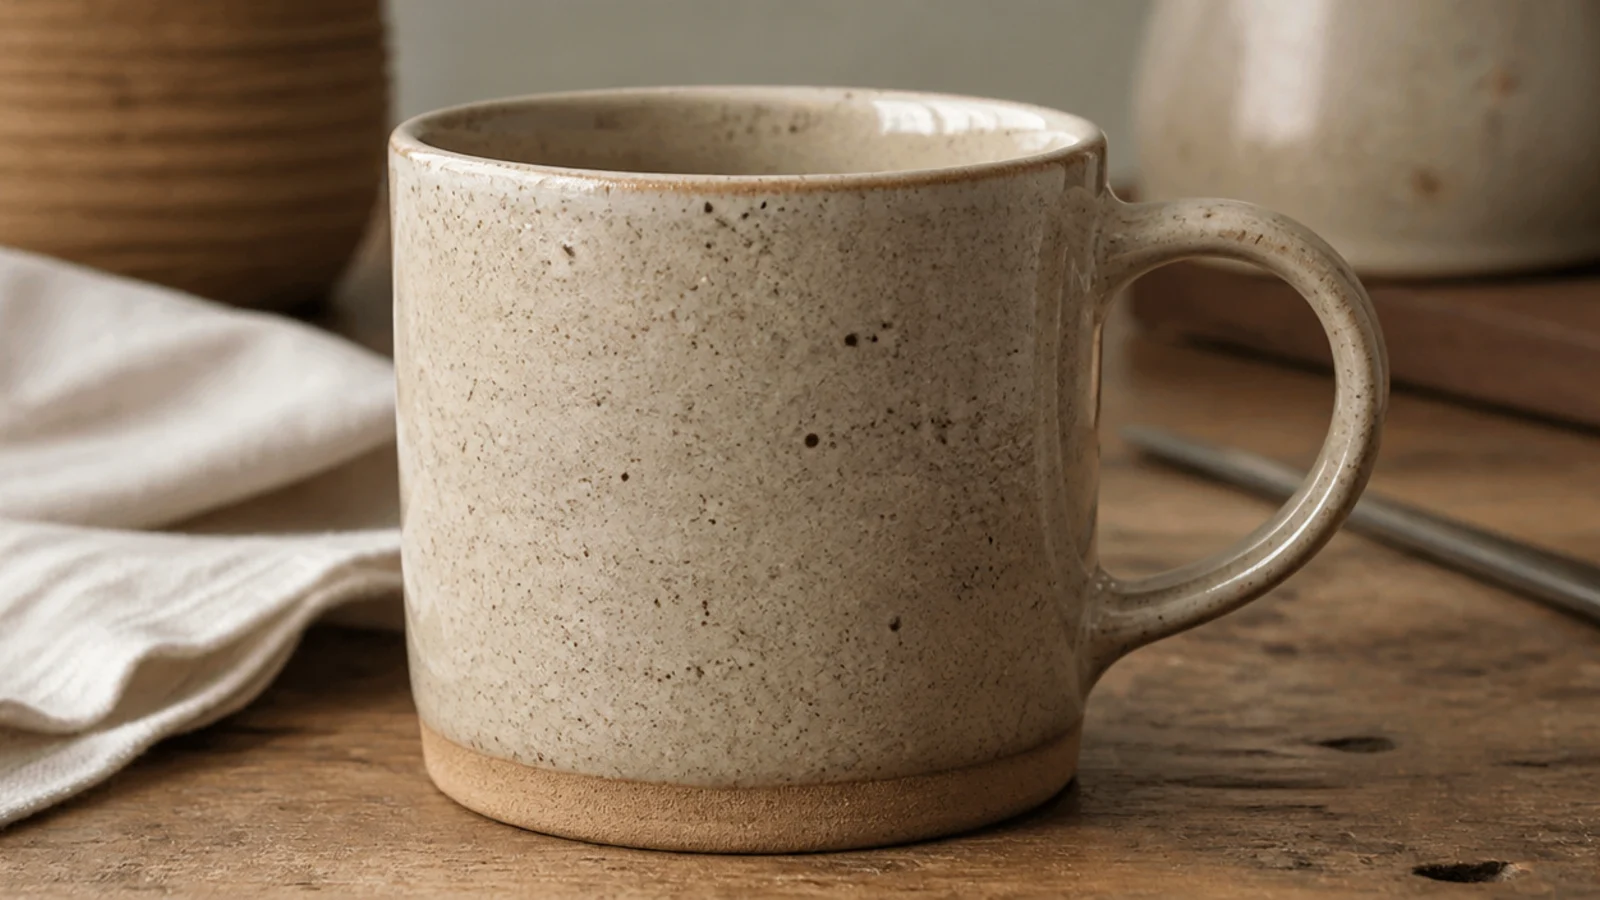
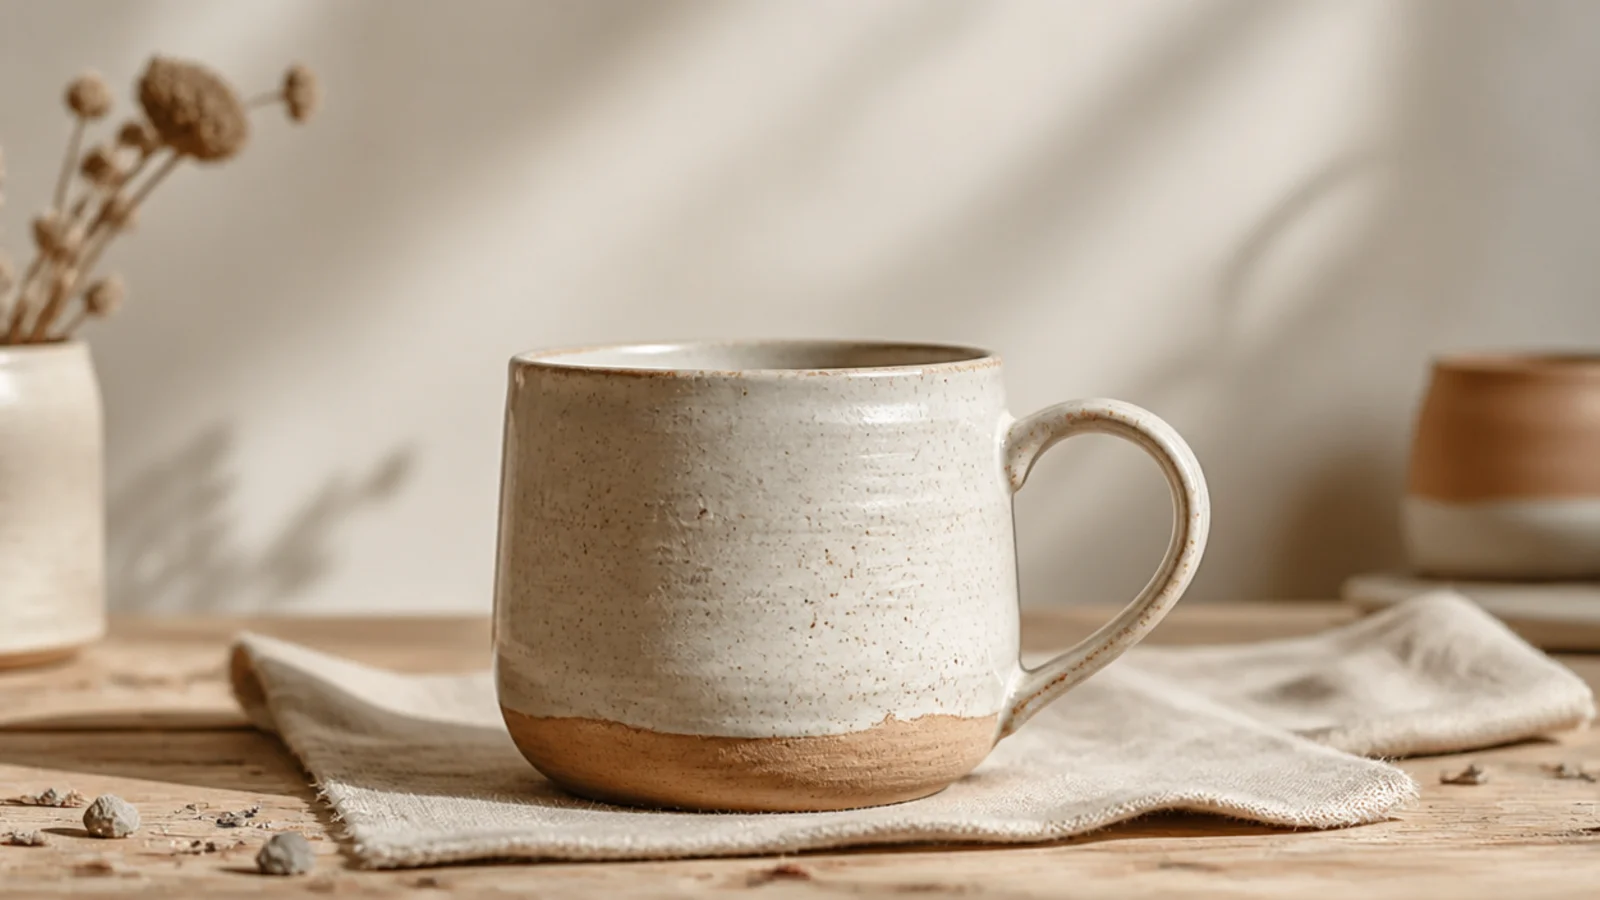
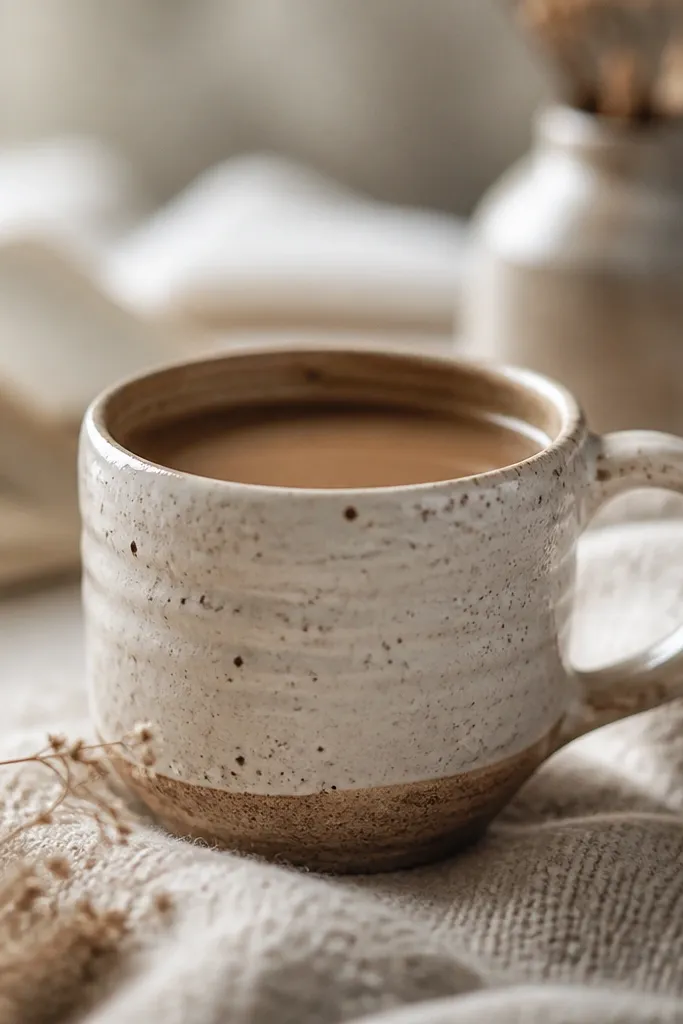
This is the easiest design that still looks current, because the clay does the work. A speckled stoneware body under a clear glaze gives you that oatmeal-fleck cafe look with zero brushwork. It has wide appeal — the neutral, tactile finish suits almost any kitchen, which is exactly why coffee shops and gift-buyers gravitate to it. It is the mug people pick up for someone who is hard to buy for.
Build or throw the mug in a speckled stoneware clay (look for bodies labeled 'speckled buff' or with iron speckle), keeping walls an even 1/4 inch and the surface smooth so nothing competes with the flecks. Compress the inside base with a rib, firm to leather-hard, then score and attach a comfortable pulled handle. Bisque fire, then coat inside and out with a food-safe clear satin glaze, wiping the foot clean. Glaze-fire to the clay’s rated temperature so the speckles bloom through the clear coat.
Choose a clear satin over a high-gloss clear so the speckles read soft and matte-modern rather than shiny and busy.
Don’t add a colored glaze over speckled clay; it hides the flecks that are the entire point of the look.
2. Dipped Color-Block Mug
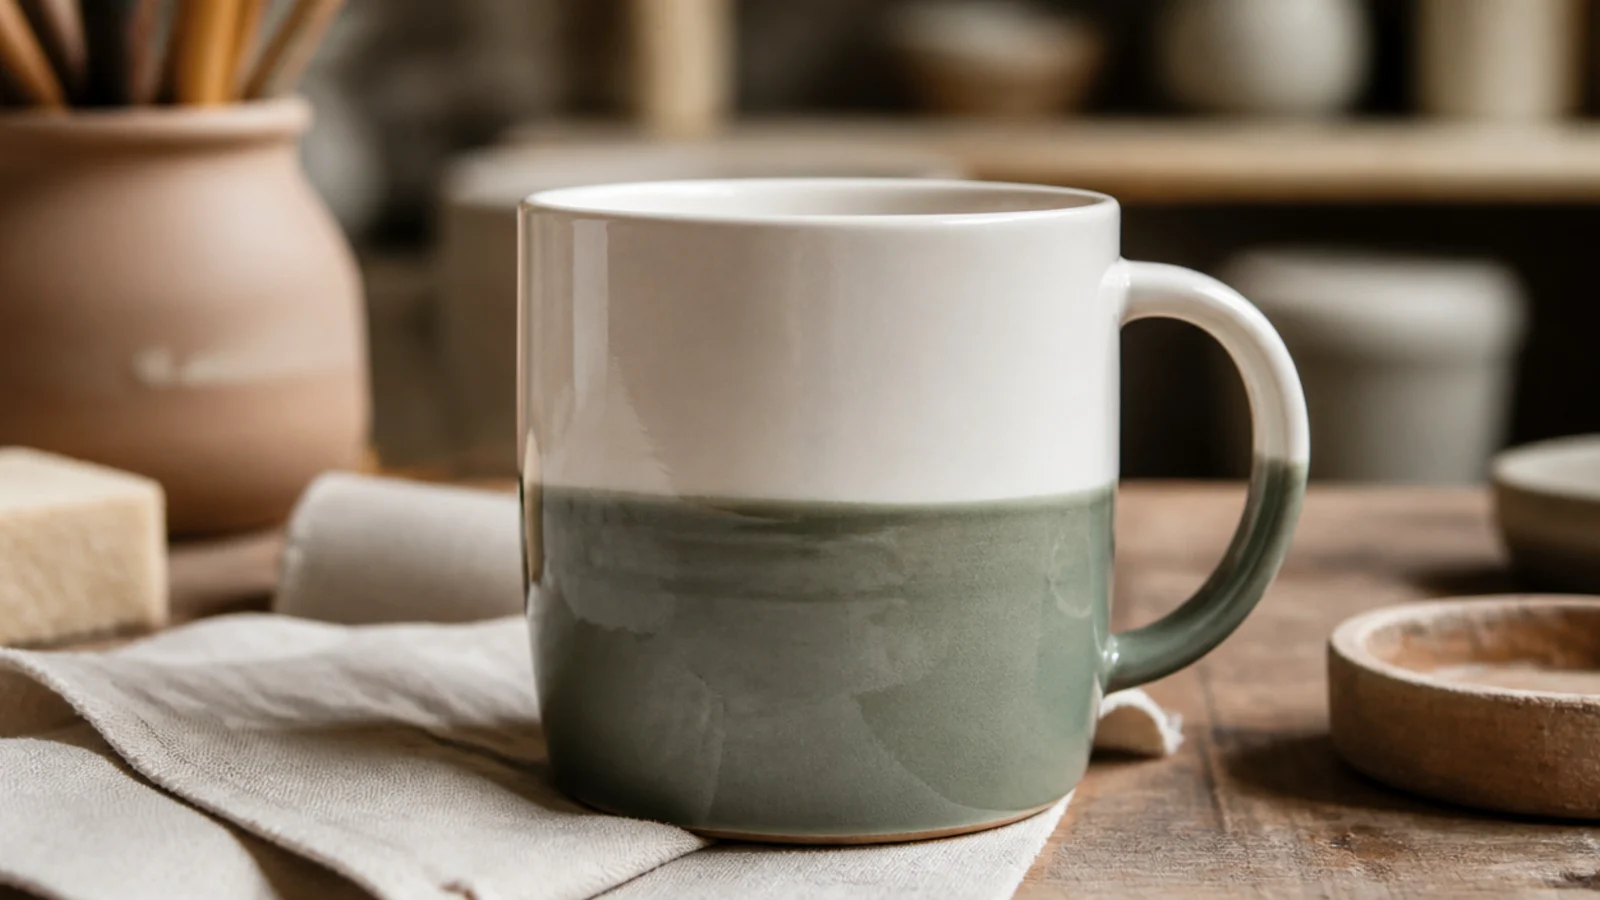
A two-tone dip is the glaze version of a color block — one clean line where a colored glaze meets a white base. It looks modern and deliberate, and the dipping does the precision for you, so it is a fast, repeatable maker favorite. Broad appeal comes from the calm palette; buyers who like simple, styled homewares reach for it first. It is the quickest way to make a plain blank look designed.
Editor's noteDip the second color in one smooth, level motion — hesitating or tilting gives a wavy, uneven glaze line.
Bisque fire your mug or start with a bisque blank. Pour or dip the whole mug in a white or cream food-safe base glaze and let it dry to the touch. Then dip only the bottom half into a colored glaze, holding it level for a slow count so the line stays even, and lift straight up. Wipe the foot clean and glaze-fire; the two glazes meet in a crisp band.
Skip thisDon’t dip the second color onto a soaking-wet first coat; let it go touch-dry first or the layers slide and run together.
3. Matte Pastel Solid Mug
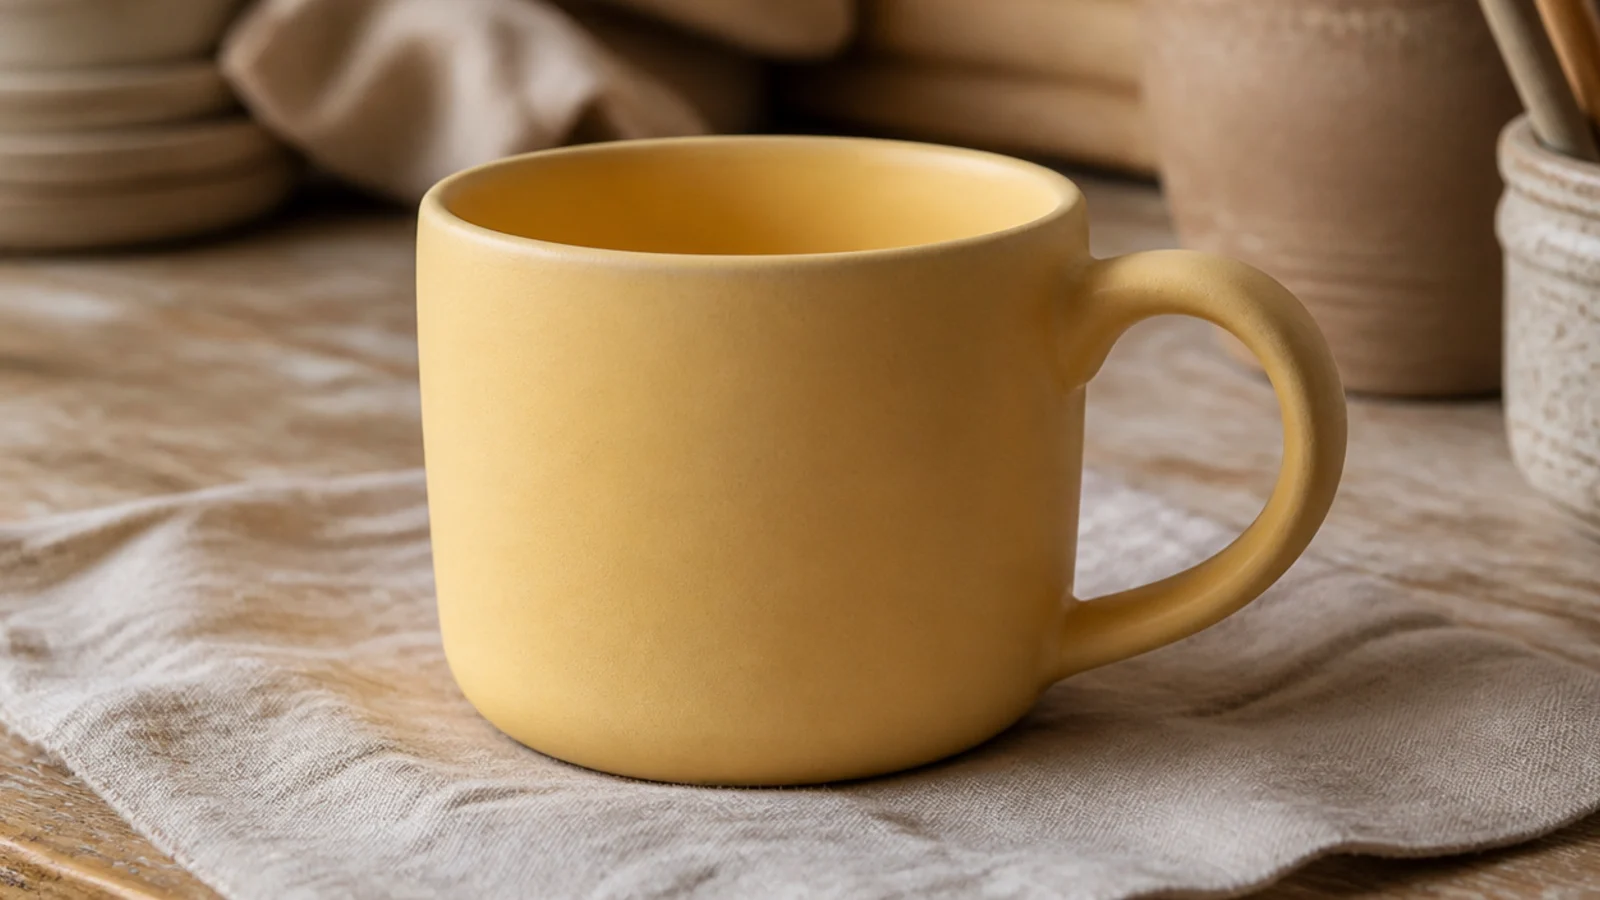
One soft pastel in a matte glaze is quietly popular because it feels like a considered homeware object, not a craft project. The whole design is the color, so it lives or dies on a clean, even coat. Its appeal is broad and gift-friendly — blush, sage, butter, and dusty blue read as tasteful to almost everyone. It suits buyers building a calm, tonal kitchen.
Editor's noteUse a matte glaze rated food-safe and durable, not a dry decorative matte, so the drinking surface stays smooth and washable.
Build or throw a clean-lined mug with an even 1/4-inch wall and a simple handle, keeping the surface smooth since matte glaze hides nothing. Bisque fire, then apply a food-safe matte or satin-matte glaze in the even number of coats the glaze recommends (usually three), brushing in alternating directions for consistency. Wipe the foot clean and glaze-fire. A stable, tested matte is essential so the surface stays smooth and food-safe rather than rough.
Skip thisDon’t apply matte glaze thin or uneven; a patchy coat shows every streak because there is no pattern to hide it.
4. Boho Earth-Tone Stripe Mug
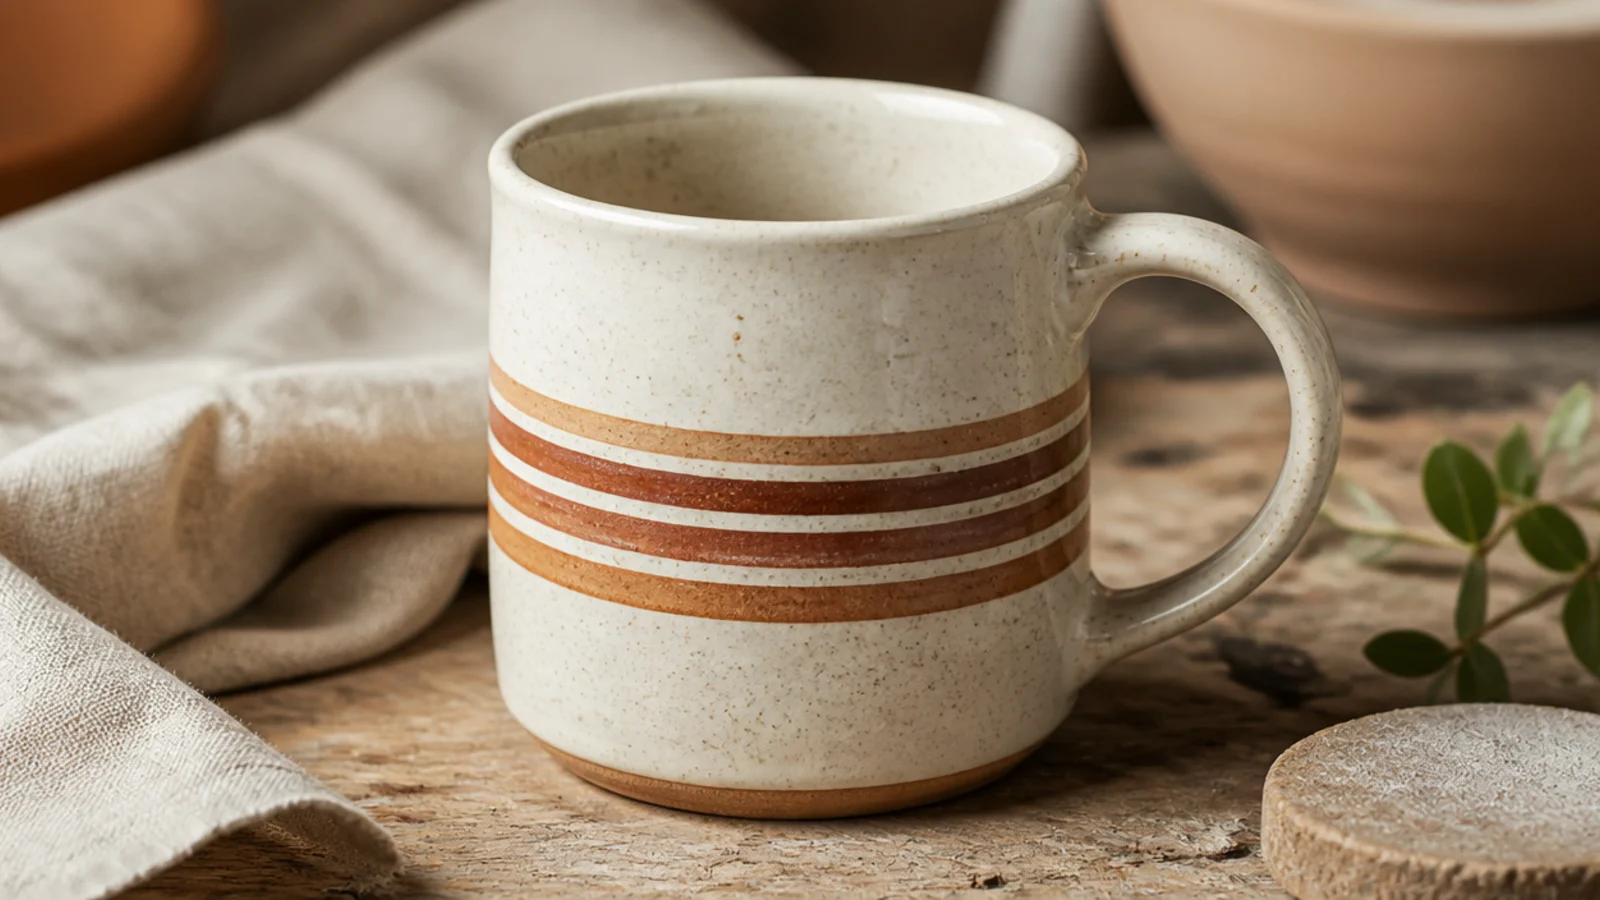
A few horizontal bands in warm earth tones give that boho, southwestern-adjacent look that has stayed popular for years. Stripes are calm and structured, so they read intentional and repeat cleanly across a set. The appeal is warm and neutral, which draws buyers styling cozy, natural interiors. Two or three bands is plenty — more starts to look busy.
On a bisque mug, base coat in cream underglaze if needed and let it dry. Wrap painter’s tape to mask clean gaps, or use a banding wheel and a loaded brush held steady while you spin the mug to lay even stripes in terracotta and warm brown underglaze. Build each stripe in two thin coats, peel any tape while slightly damp, then coat the whole mug in food-safe clear glaze and glaze-fire.
Set the mug on a banding wheel or lazy Susan and hold the brush still while you spin it — spinning the mug gives far straighter stripes than dragging a brush around it.
Don’t crowd in too many stripes or colors; two or three earth tones look styled, a rainbow of bands looks chaotic.
5. Botanical Sprig Mug
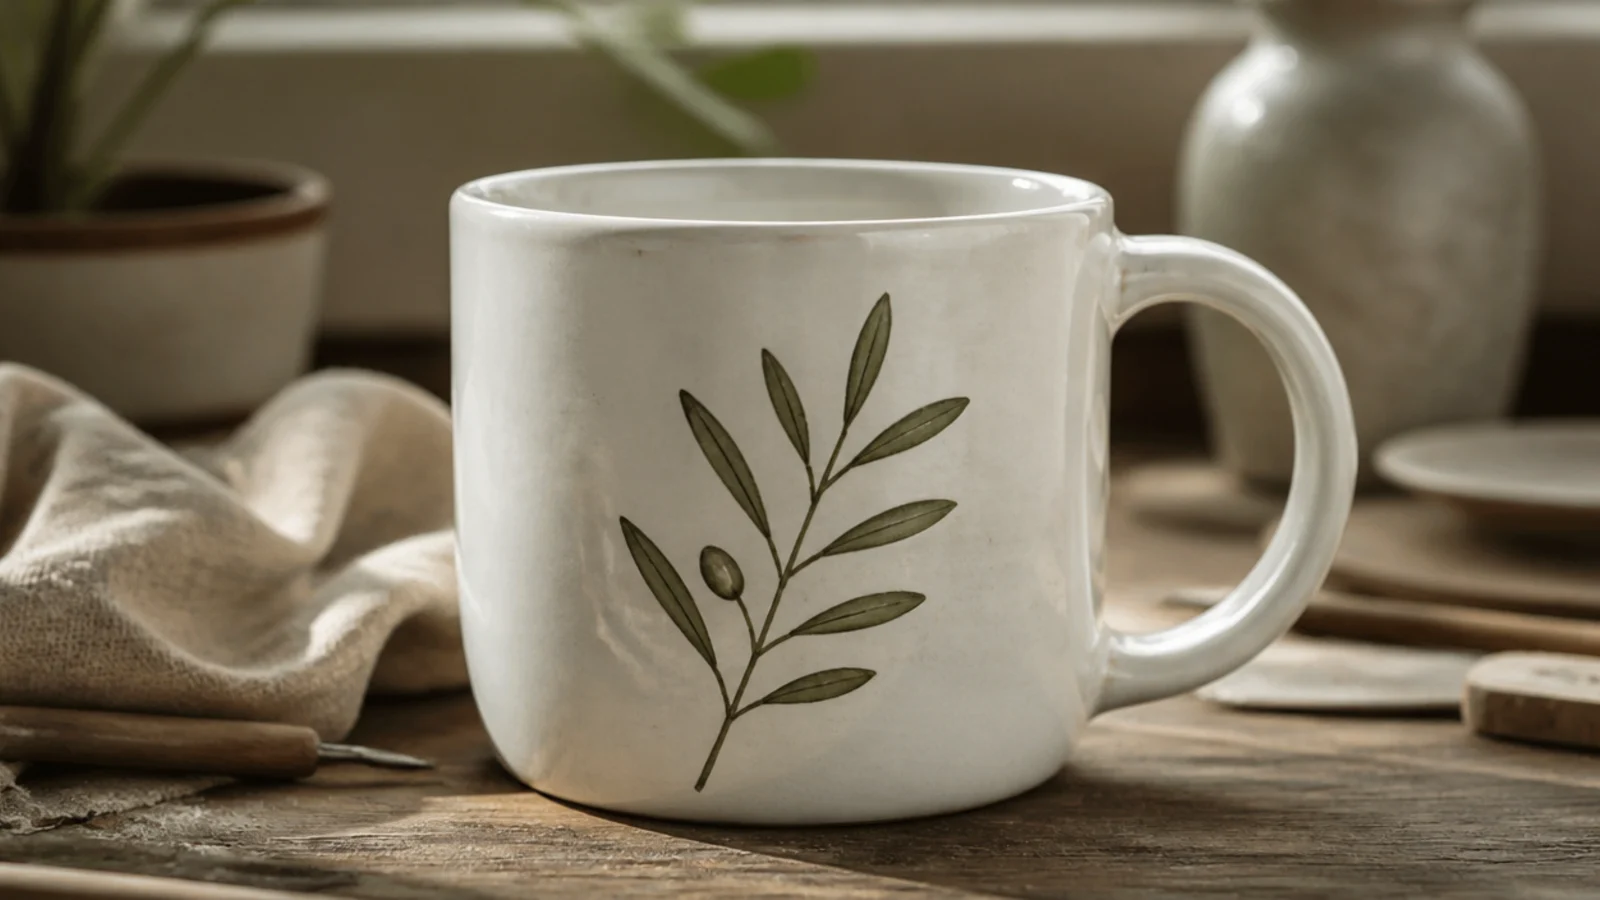
A single small botanical — a sprig, an olive branch, a few eucalyptus leaves — is one of the most reliably loved mug designs there is. One motif on the front keeps it calm and lets the negative space breathe, which reads expensive. Its appeal is nearly universal, especially with buyers who like natural, understated decor. Simple greenery flatters any table.
Editor's noteKeep the sprig small and off to one side rather than centered and large — the empty space around it is what makes it look designed.
On leather-hard or bisque, lightly pencil a simple sprig on the front (pencil burns away in firing). Paint the stem and leaves with a soft round or liner brush in olive or sage underglaze, building color in two or three thin coats for even, solid leaves. Let it dry, then coat the whole mug in a food-safe clear glaze so it is washable, and glaze-fire; the clear locks the painting in and deepens the green.
Skip thisDon’t overwork the leaves with fussy veining; a few confident, simple leaf shapes read cleaner than a labored, detailed drawing.
6. Hand-Lettered Funny Quote Mug

A short, funny or warm phrase turns a mug into an instant, giftable gag or keepsake — the reason quote mugs are perennial sellers. Keep it to a few words so it is legible and easy to space, and let the type be the whole design. Its appeal is emotional: people buy it for a specific person or an inside joke. Clean lettering is what separates charming from craft-fair-clumsy.
Editor's notePencil the full phrase and mark where it starts and ends before you paint, so the words stay level and centered instead of sloping down and crowding at the end.
On bisque, rule a faint pencil baseline and lightly sketch the words so spacing is even before you commit. Trace each letter with charcoal or black underglaze using a fine liner brush, or use an underglaze pencil for more control, going over each stroke twice for solid, even color. Let it dry fully, coat the whole mug in food-safe clear glaze so the text survives washing, and glaze-fire to set both.
Skip thisDon’t freehand a long quote with no guideline; the letters drift and cramp, and messy lettering undercuts the whole joke.
7. Name and Monogram Mug
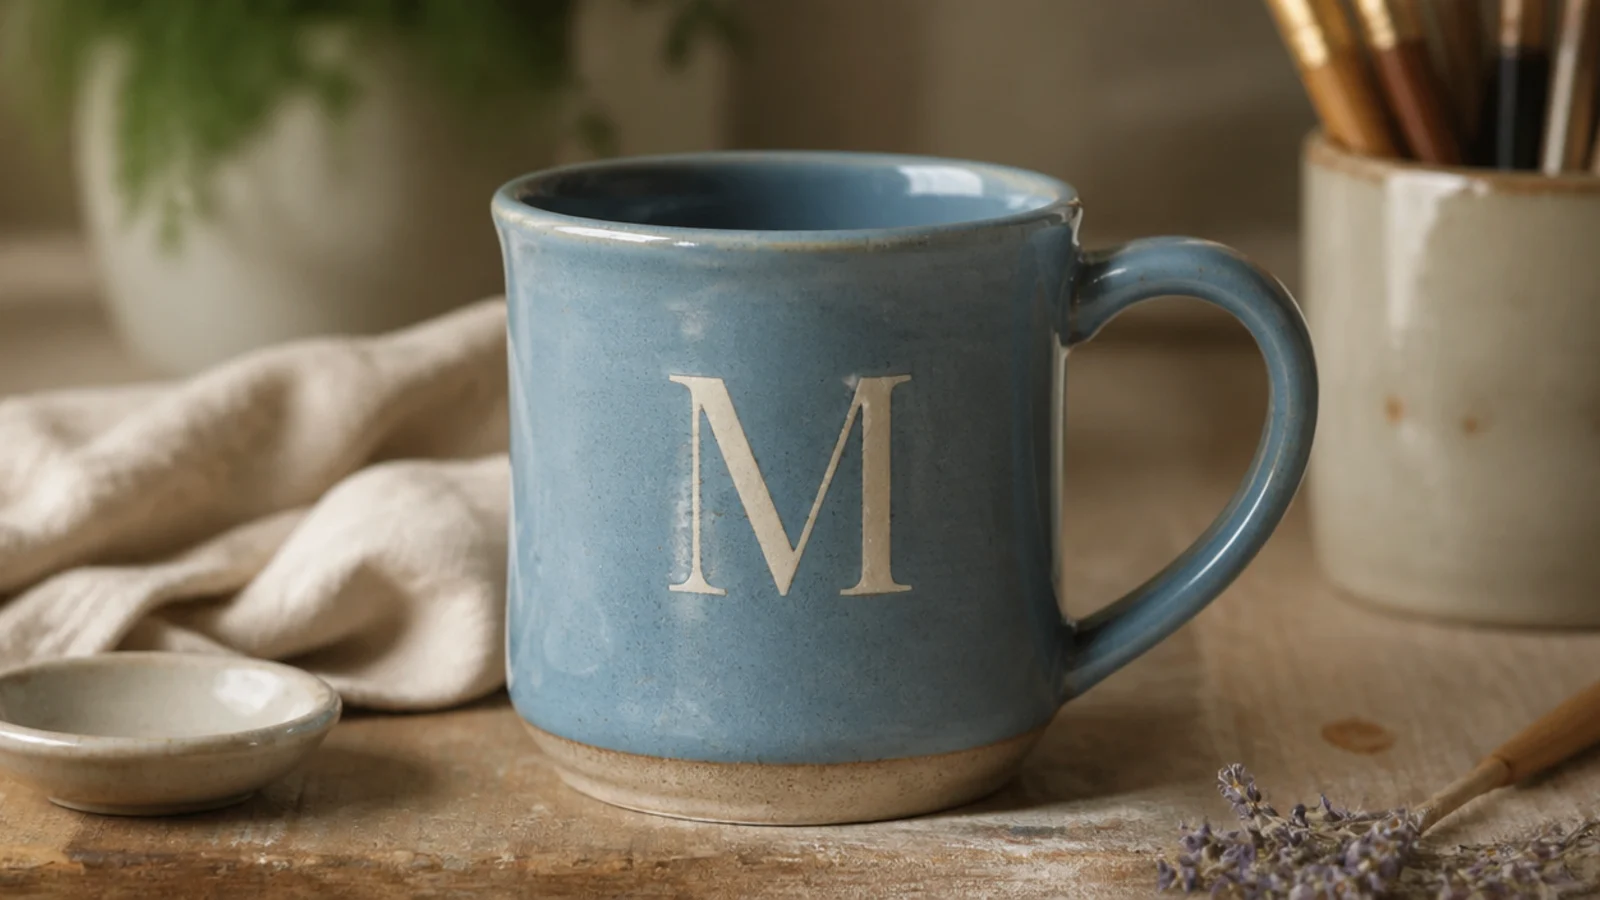
A name or single initial is the most personal design you can offer, and personalization is what makes a mug feel made-for-me rather than mass-produced. A big, simple serif or block letter reads best and is easy to keep clean. Its appeal is targeted and strong — buyers pick it for a specific person, which is exactly why custom name mugs move so well. Skip thin script, which is hard to paint crisply.
Editor's noteSize a single initial to about 60 percent of the front panel height — too small looks lost, too big looks cramped against the handle.
On bisque, print your letter or name at the size you want, cut it out, and trace lightly in pencil, or use a vinyl letter stencil for crisp edges. Fill the outline with two thin coats of underglaze using a small brush, working from the outline inward for clean edges. Erase stray pencil, coat the mug in food-safe clear glaze, and glaze-fire. For a raised look, pipe the letter in slip trailing instead of painting it.
Skip thisDon’t attempt fine freehand script for a first name mug; a clean block or serif letter is far more forgiving and legible.
8. Minimalist Line-Art Face Mug
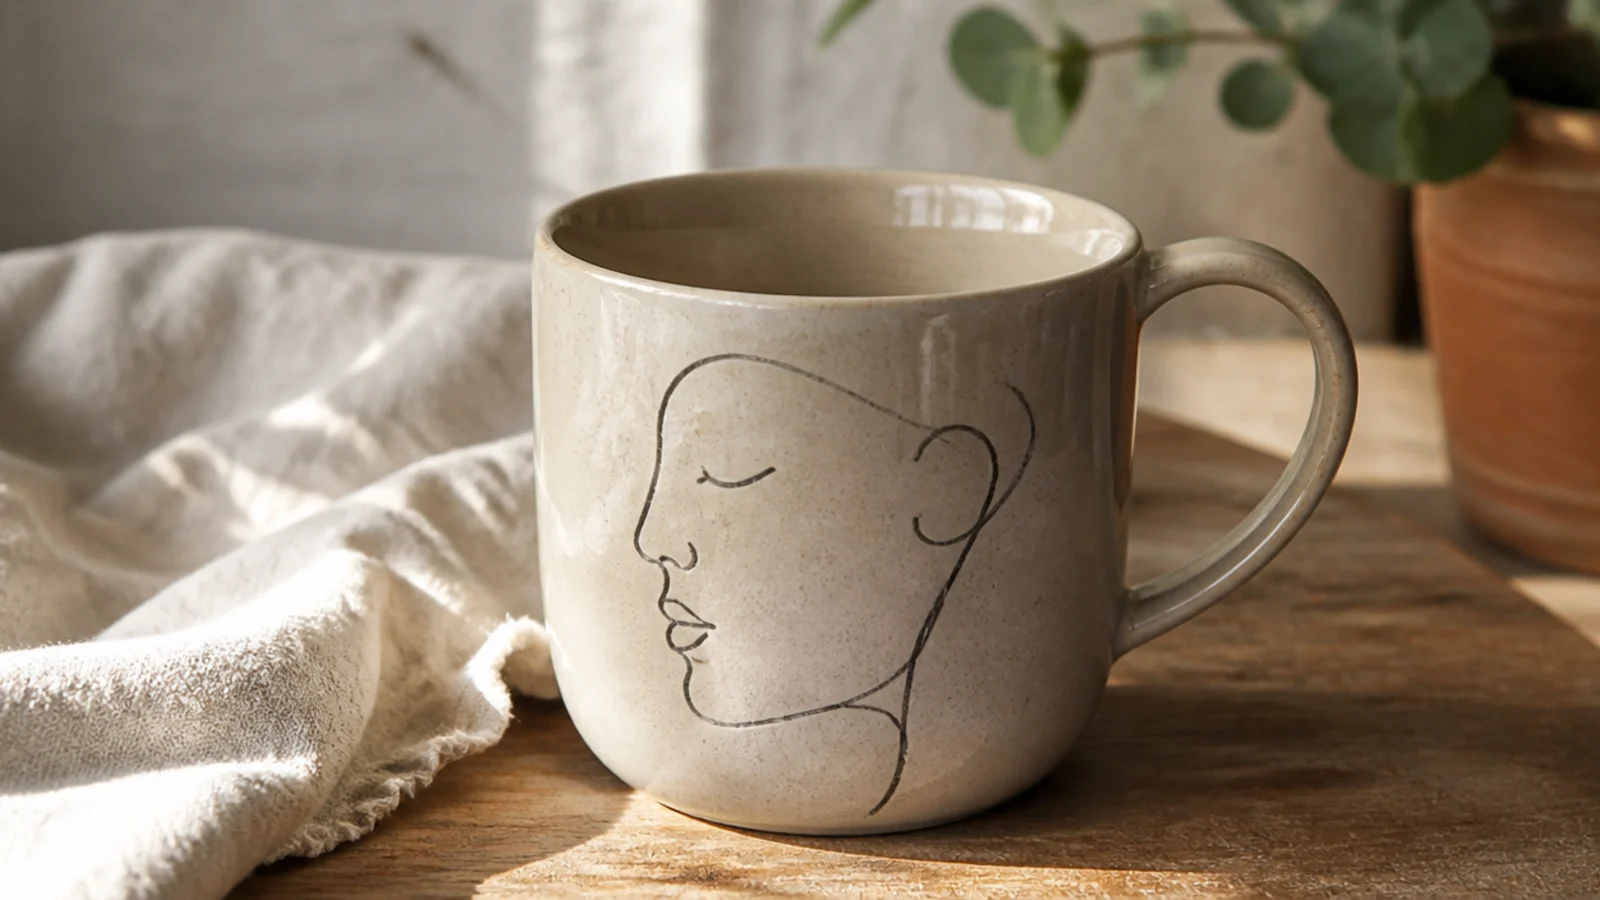
A single continuous-line face or figure is a modern, gallery-ish look that has been everywhere for good reason — it feels artful with almost no fuss. One unbroken line drawn on the front reads contemporary and photographs beautifully. Its appeal skews toward younger, design-minded buyers decorating minimal spaces. The whole charm is the confident, simple line, so restraint is the skill.
Editor's notePractice the line a few times on paper first so your real pass is one smooth, confident motion rather than a hesitant, patchy line.
On bisque, lightly pencil a simple face or profile in one continuous loop so you know the path. Trace it in a single confident pass with a fine liner brush and charcoal or black underglaze, keeping the line one even weight and not lifting mid-stroke where you can help it. Let it dry, coat the mug in food-safe clear glaze, and glaze-fire so the line stays crisp and washable.
Skip thisDon’t add shading or extra detail to the face; the minimalist look dies the moment it stops being a single clean line.
9. Abstract Brushstroke Mug
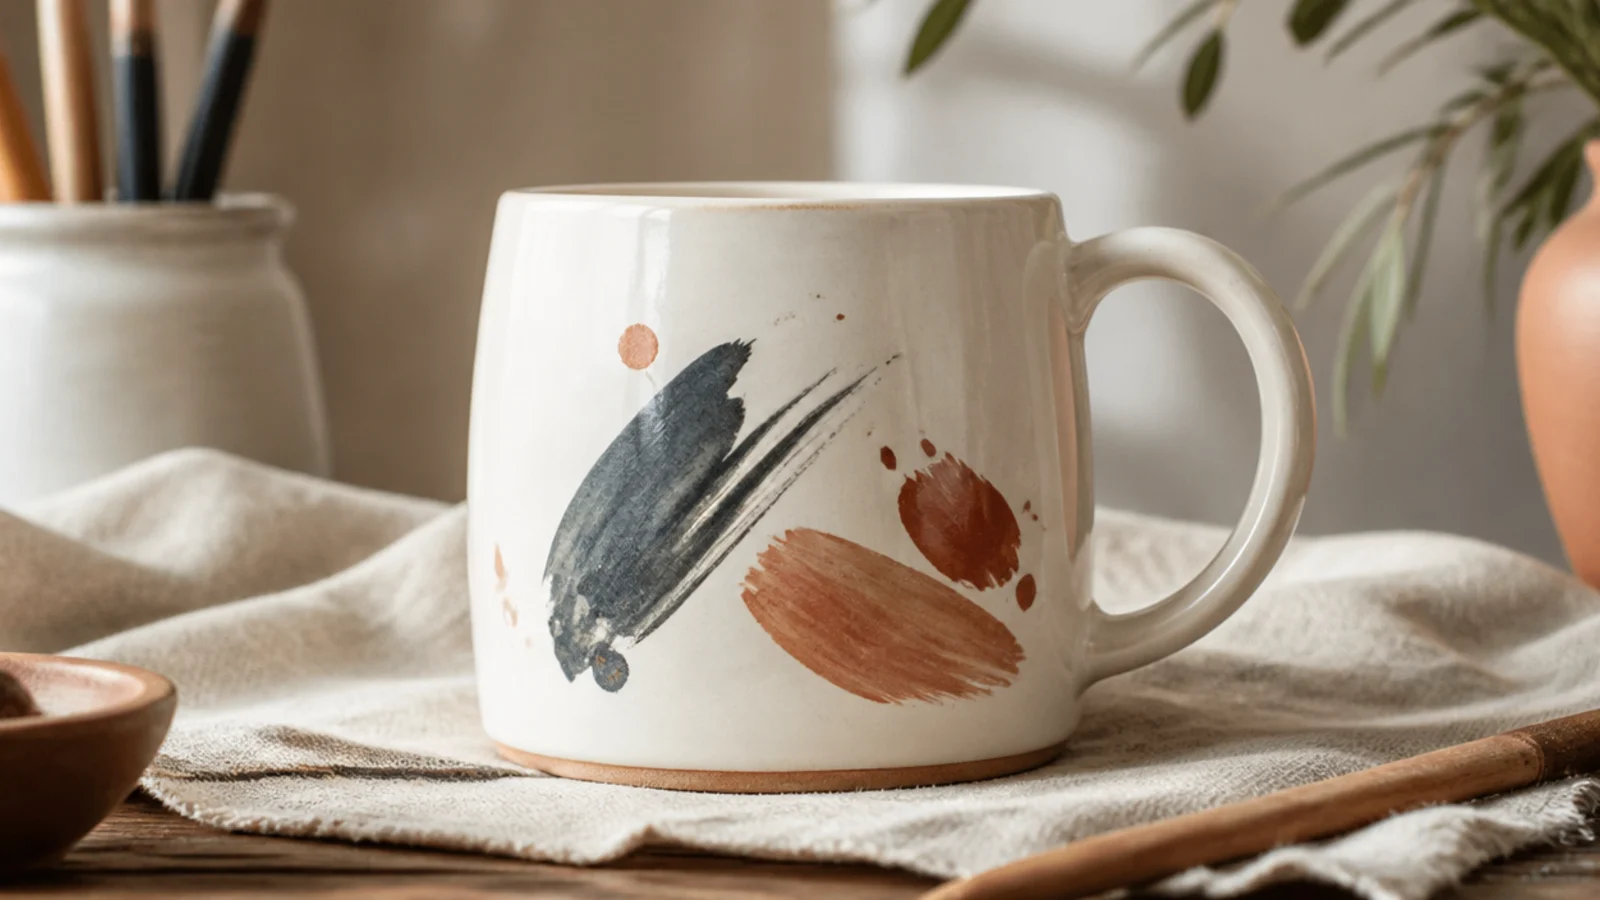
A handful of loose brushstrokes and dots looks like modern art and takes minutes, which makes it a fast, high-appeal design for makers. Because there is no right shape to hit, every mug is a little different yet clearly part of a set. Its appeal is contemporary and giftable, drawing buyers who like a bit of artful spontaneity. The secret is confidence and restraint — three or four marks, not twenty.
On bisque, load a medium round brush with one accent underglaze and make a few quick, curved strokes on the front, lifting as you go so the ends taper. Add two or three small dots in a second color to balance the strokes. Build any stroke you want solid with a second thin pass. Step back, resist adding more, then coat in food-safe clear glaze and glaze-fire.
Make each stroke in one fast motion rather than dragging slowly — quick strokes have the natural, tapered artist look.
Don’t keep adding marks to 'fix' it; abstract designs die from overworking, so stop while it still feels sparse.
10. Celestial Moon and Star Mug

A crescent moon and a scatter of small stars is a compact, evergreen theme that a whole segment of buyers loves. On a deep base color it feels calm and a little mystical, and the motif is simple enough to repeat exactly across a set. Its appeal is themed but wide — celestial decor has a devoted, gift-buying audience. Keep the elements small and sparse so it reads elegant, not cartoonish.
Editor's noteVary the star sizes slightly and cluster them loosely near the moon rather than dotting them evenly, so the night sky looks natural.
Build or use a mug and, on bisque, base coat the body in a deep navy or charcoal underglaze in two thin coats. Pencil a small crescent and a few star points on the front, then paint them in a pale cream or warm ochre underglaze with a fine brush, keeping stars tiny. Let dry, coat in food-safe clear glaze, and glaze-fire. For a metallic moon, add real gold luster in a separate low firing and hand-wash only.
Skip thisDon’t make the moon and stars big and even; oversized, evenly spaced shapes tip the look from elegant into juvenile.
11. Two-Color Checkerboard Mug
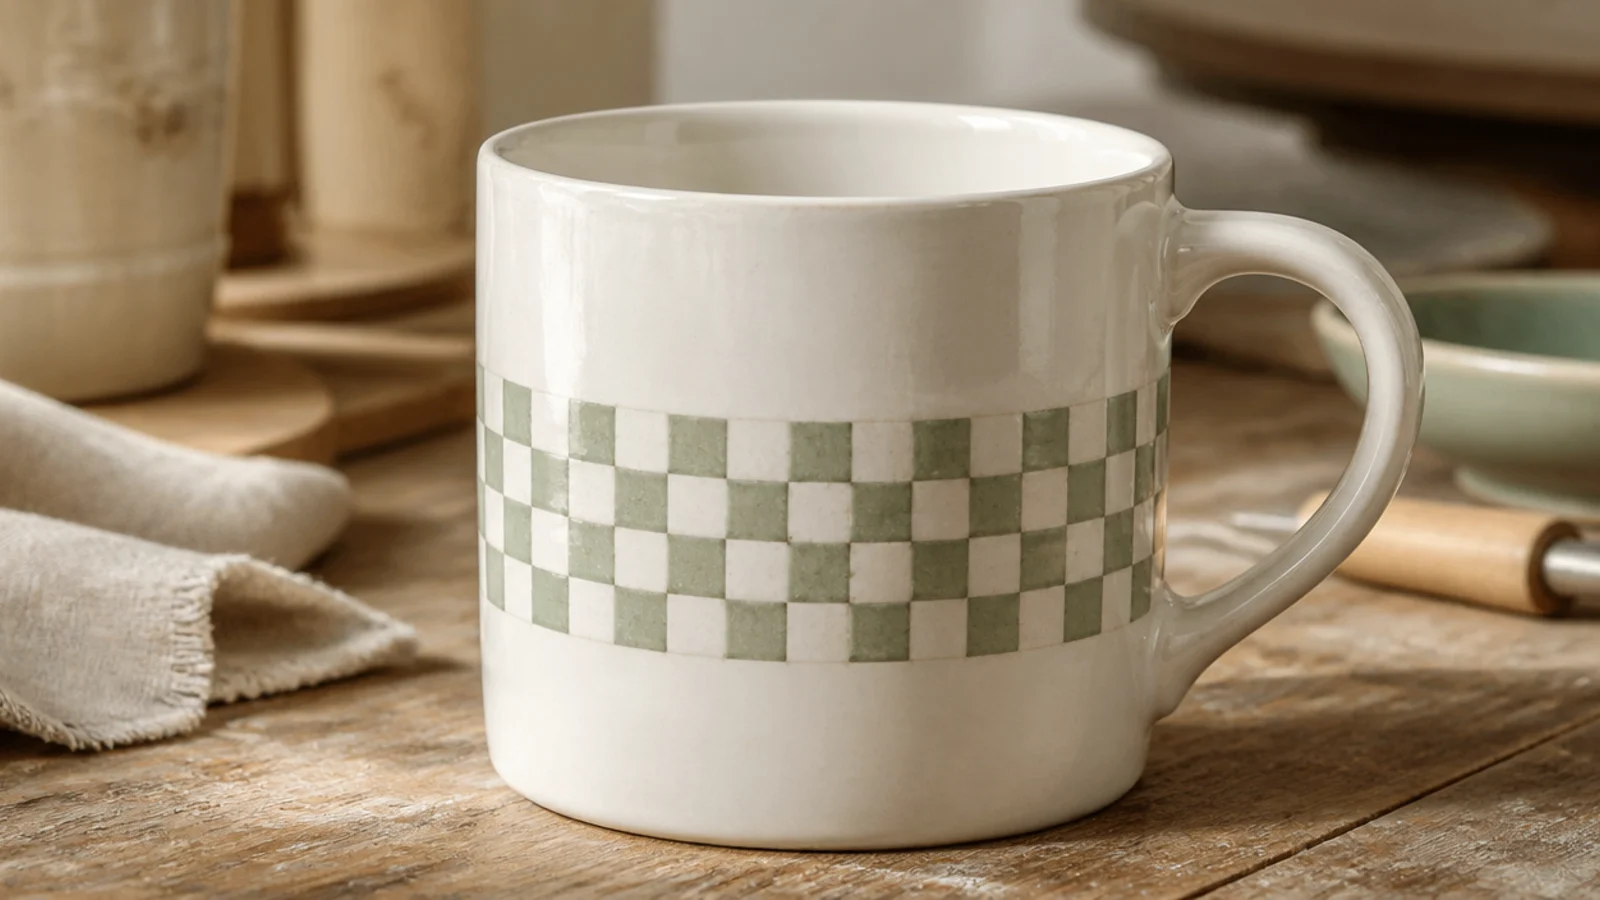
Checkerboard has been one of the strongest surface trends in ceramics, and its structure makes it forgiving — the grid hides small wobbles. Keeping it to one band around the middle stays clean and modern rather than overwhelming. Its appeal is playful and current, drawing younger, trend-aware buyers. Two colors in a soft palette keep it tasteful.
On bisque, base coat the mug in your lighter color if the clay is not already pale. Lightly pencil a grid for one horizontal band, then paint alternating squares in a second underglaze with a small flat brush, following the grid. Build each square in two thin coats so they stay solid. Erase visible pencil, coat in food-safe clear glaze, and glaze-fire.
Use a small flat brush rather than a round one so each square fills to crisp edges in fewer, cleaner strokes.
Don’t checker the entire mug; a single band is faster, reads intentional, and is far easier to keep even.
12. Coffee-Shop Diner Mug
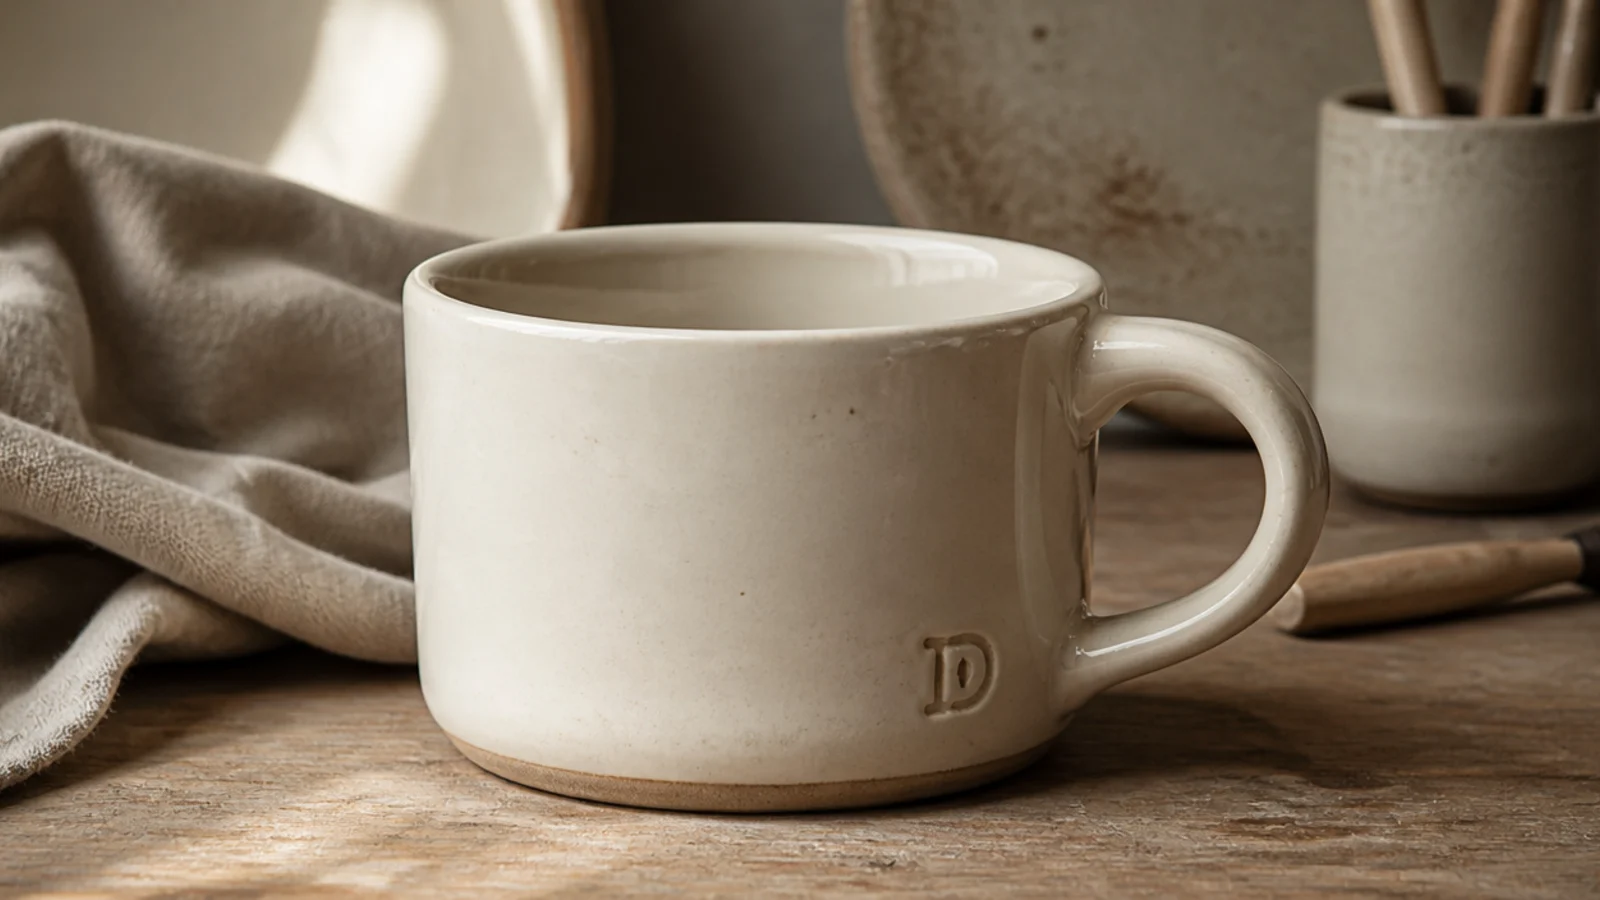
The thick, short, wide diner mug is a shape with huge nostalgic appeal — it feels like a proper cafe cup and holds a generous pour. The design here is the form itself plus a small stamped maker’s mark, which reads honest and handmade. Its appeal is broad and cozy, drawing coffee lovers and anyone who wants a substantial everyday mug. A simple glossy glaze keeps the focus on the classic silhouette.
Editor's noteWiden the base and lower the profile so the mug feels stable and cafe-solid in the hand, not tall and tippy.
Throw or build a short, wide cylinder with a slightly rolled rim and a thick, stable base, walls a comfortable 1/4 to 3/8 inch, and a chunky handle sized for a full grip. While the clay is soft, press a small carved stamp into the base or lower wall for a maker’s mark. Firm up, bisque, glaze in a glossy food-safe cream or classic diner color, and glaze-fire.
Skip thisDon’t make the diner mug tall and thin; the entire appeal is the low, wide, weighty classic proportion.
13. Seasonal Pumpkin Mug
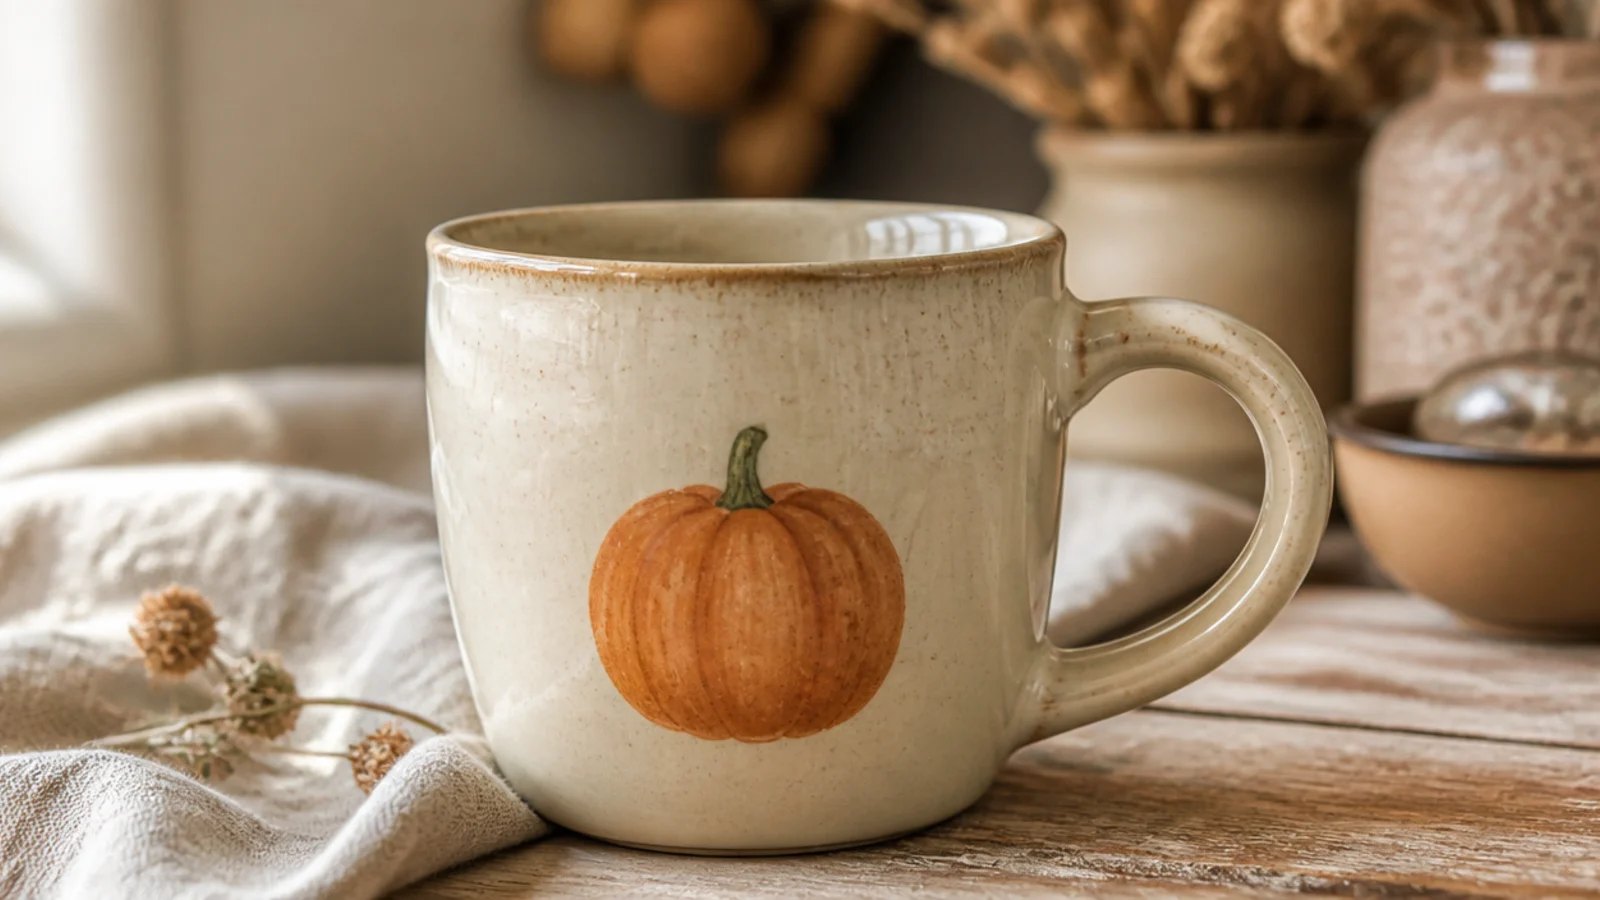
A tidy seasonal motif — a little pumpkin, a sprig of holly, a single snowflake — taps the strong gift-buying pull that runs around the holidays and fall. One small, well-drawn seasonal element keeps it giftable without turning kitschy. Its appeal is time-bound but intense, drawing buyers stocking up for a specific season. Restraint is what keeps it charming rather than novelty-store.
Editor's notePaint one small, well-placed motif rather than covering the mug in seasonal clutter — one clean pumpkin reads more premium than a busy autumn scene.
On bisque, lightly pencil a small pumpkin (or your seasonal motif) on the front. Paint the body in burnt orange underglaze in two thin coats, add a short green stem and a curl of vine with a liner brush, and keep the whole motif palm-sized. Let dry, coat in food-safe clear glaze, and glaze-fire. Work a small batch in one sitting so the seasonal set stays consistent.
Skip thisDon’t overload the mug with leaves, text, and multiple motifs; crowded seasonal mugs look like novelty-store stock, not handmade.
14. Marbled Agateware Mug
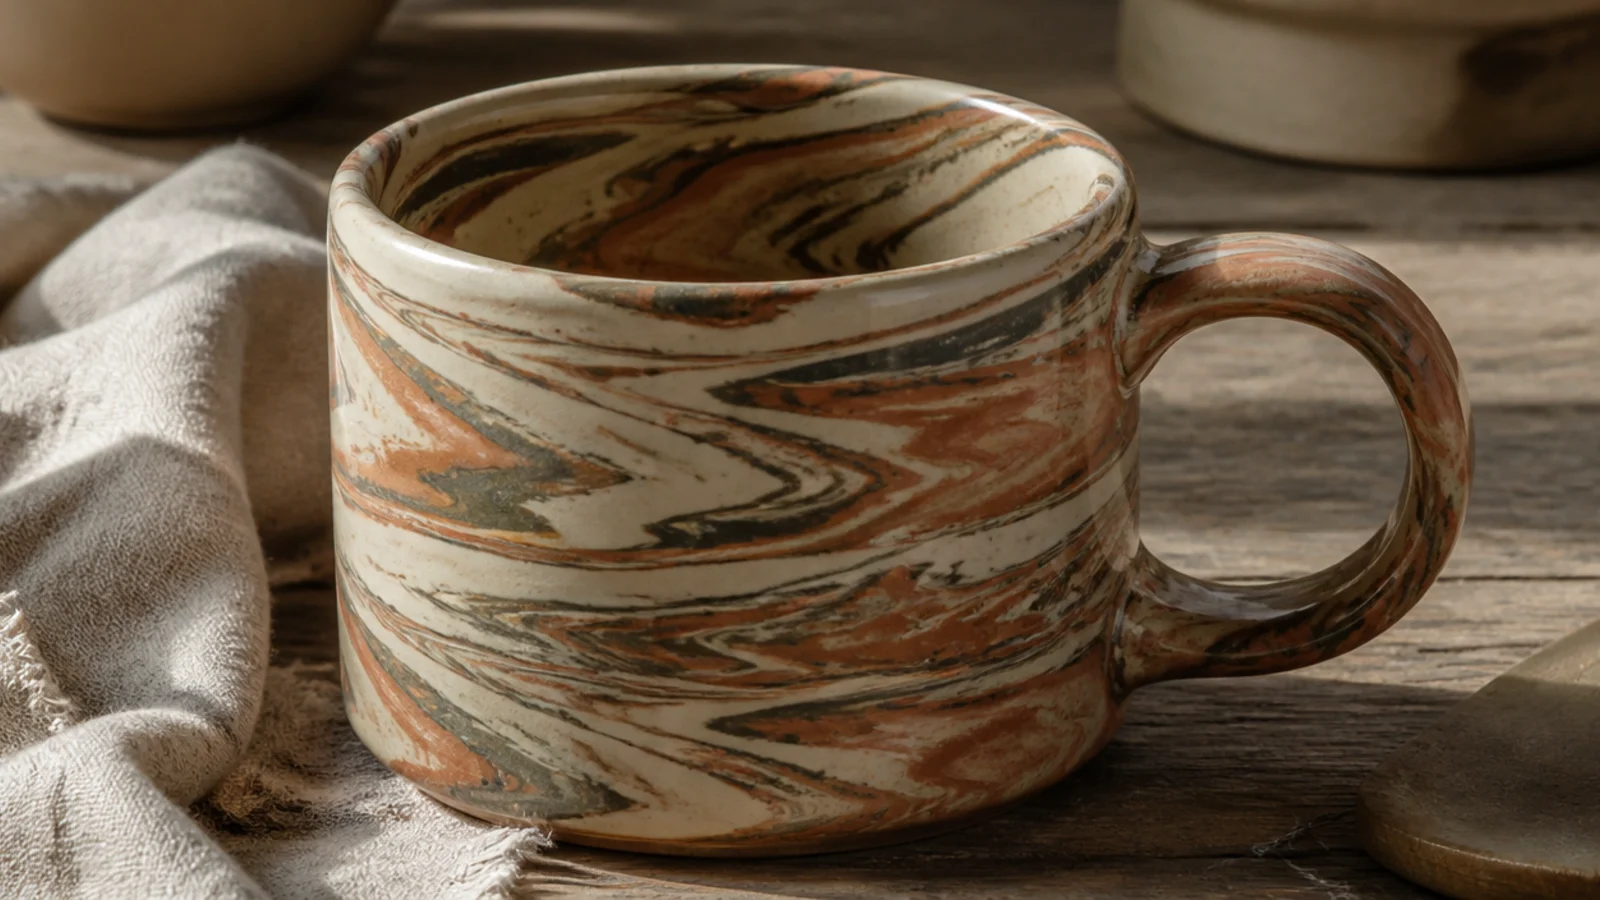
Agateware marbles two or more clay colors so the swirl runs through the whole wall, not just the surface — every mug is genuinely one of a kind. That uniqueness is exactly its appeal; buyers who want something no one else has gravitate to it. It looks high-end and modern, and a soft, restrained swirl reads more expensive than a chaotic one. The whole skill is a light touch.
Take two or three stoneware colors that fire to the same temperature, roll them into ropes, twist gently, and fold just a few times so the pattern stays distinct. Roll or wedge lightly, then build a slab or pinch mug from the marbled clay. Once leather-hard, scrape the surface with a metal rib to reveal the crisp pattern (the surface smears as you work). Bisque, coat in food-safe clear glaze, and glaze-fire.
Use clays with the same shrinkage and firing range, or the colors pull apart and crack where they meet as the mug dries and fires.
Don’t over-wedge the colors; three or four folds gives marble, ten folds gives a muddy uniform gray.
15. Sgraffito Botanical Mug
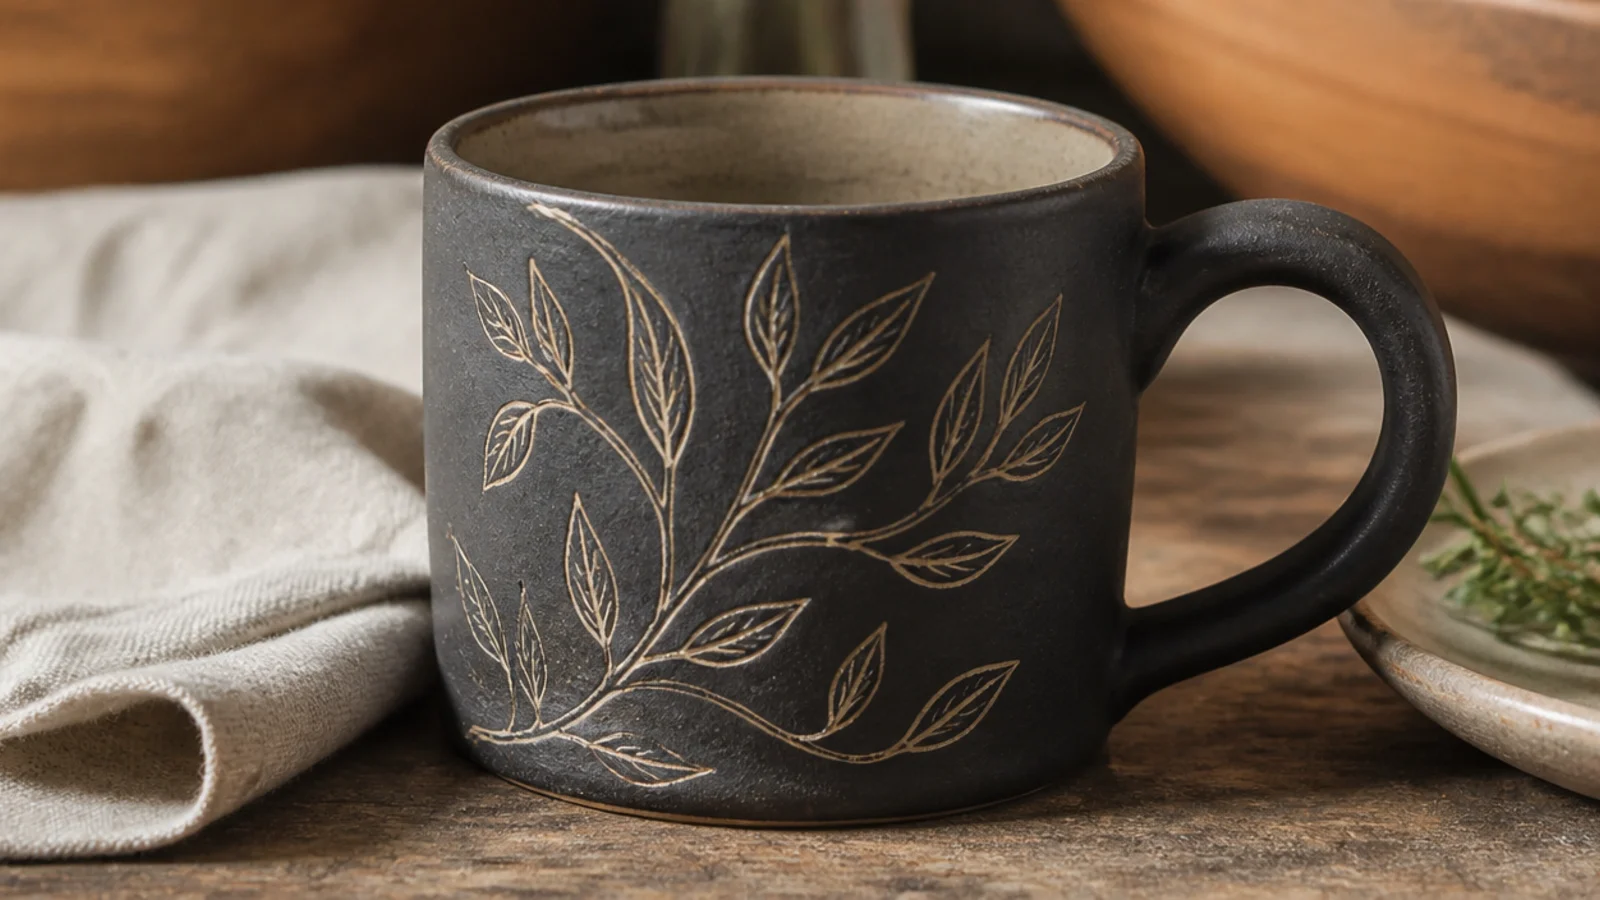
Sgraffito means scratching a design through a colored surface to reveal the clay underneath, giving crisp two-tone line art that looks far more intricate than it is. A botanical pattern in this technique reads as real studio work, which gives it strong appeal with buyers who want an heirloom-feeling piece. A dark underglaze over pale clay gives the highest contrast. It is really just careful drawing with a carving tool.
Coat a leather-hard mug in two even coats of a dark underglaze and let it set until just firm. Lightly sketch a botanical design, then carve through the underglaze with a fine loop or needle tool so the pale clay shows as your lines. Brush away the crumbs with a soft dry brush. Bisque fire, apply a food-safe clear glaze, and glaze-fire for a durable, washable surface.
Carve right at leather-hard — too wet and it smears, too dry and it chips instead of cutting clean lines.
Don’t leave carving dust in the lines; brush it off fully or leftover crumbs ruin the clear glaze coat.
16. Ribbed Fluted Mug
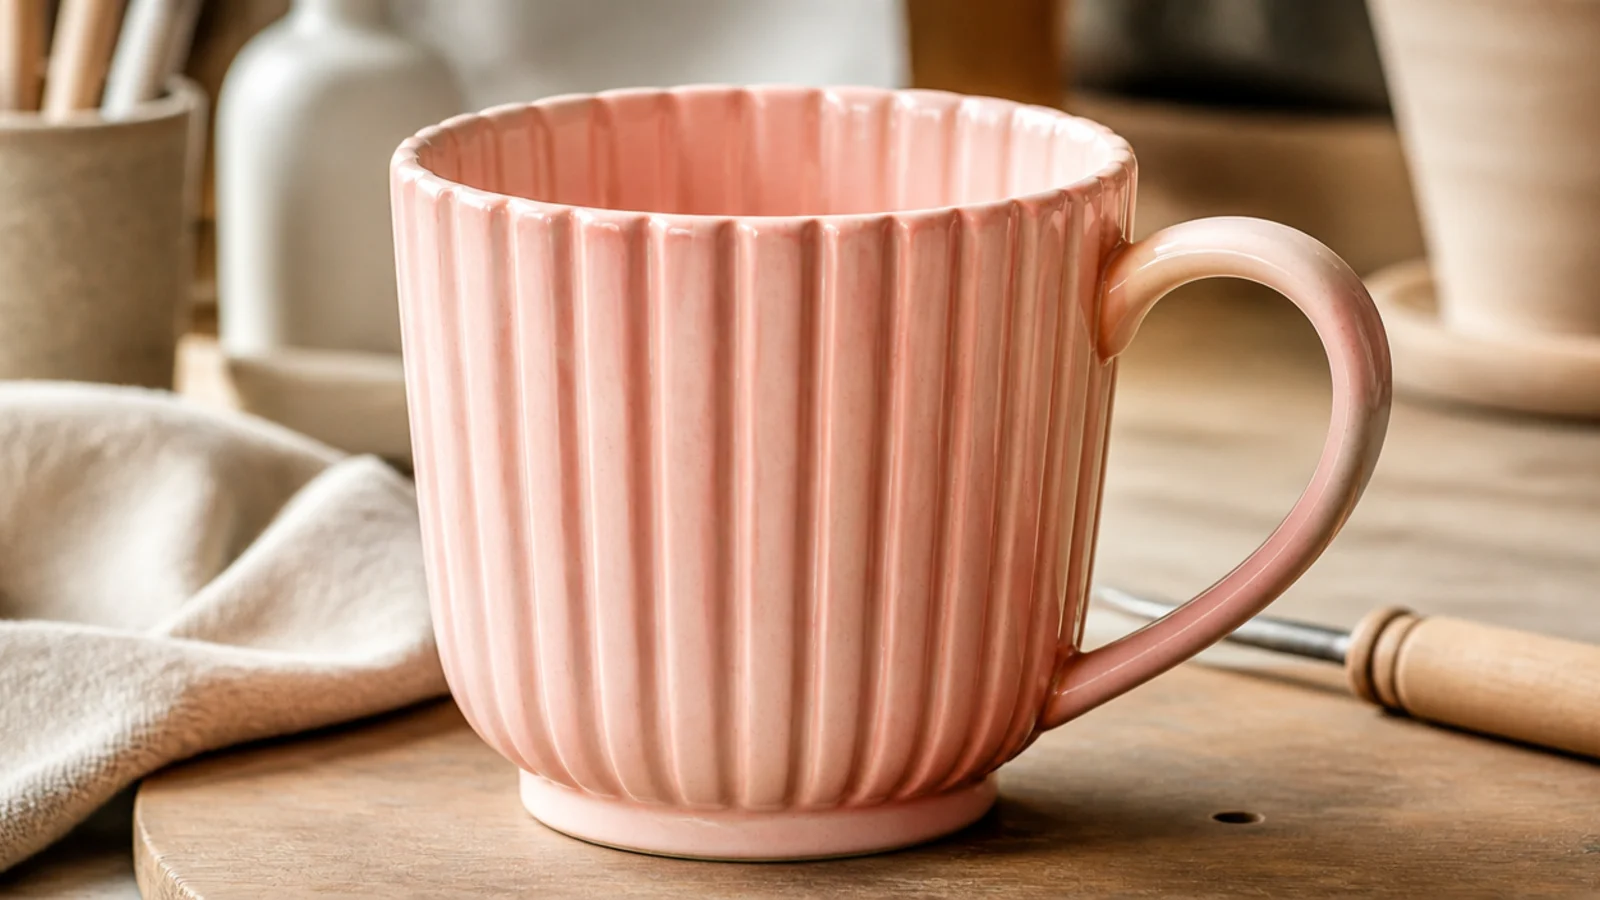
Soft vertical flutes carved into the walls give a rhythmic, ribbed column texture that feels both classic and current. Unlike sharp facets, flutes are rounded grooves, so they read gentle and invite the hand — texture you can feel sells because people pick it up. Its appeal is tactile and elegant, drawing buyers who like considered, sculptural homewares. A satin glaze settling into the channels makes the whole mug glow.
Build or throw the mug with walls a touch thicker than usual so there is clay to carve. At leather-hard, use a rounded loop or fluting tool to carve evenly spaced vertical grooves from just below the rim to the base, keeping depth and pressure consistent. Smooth rough edges with a damp sponge, attach a handle, and firm slowly. Bisque, apply a food-safe satin glaze that pools slightly in the grooves, and glaze-fire.
Draw guide lines down the mug and carve slowly with steady pressure — consistent depth is what makes flutes look machine-neat.
Don’t carve the flutes too deep or too close together; overlapping cuts thin the wall and can crack along the grooves.
17. Wavy Organic Rim Mug
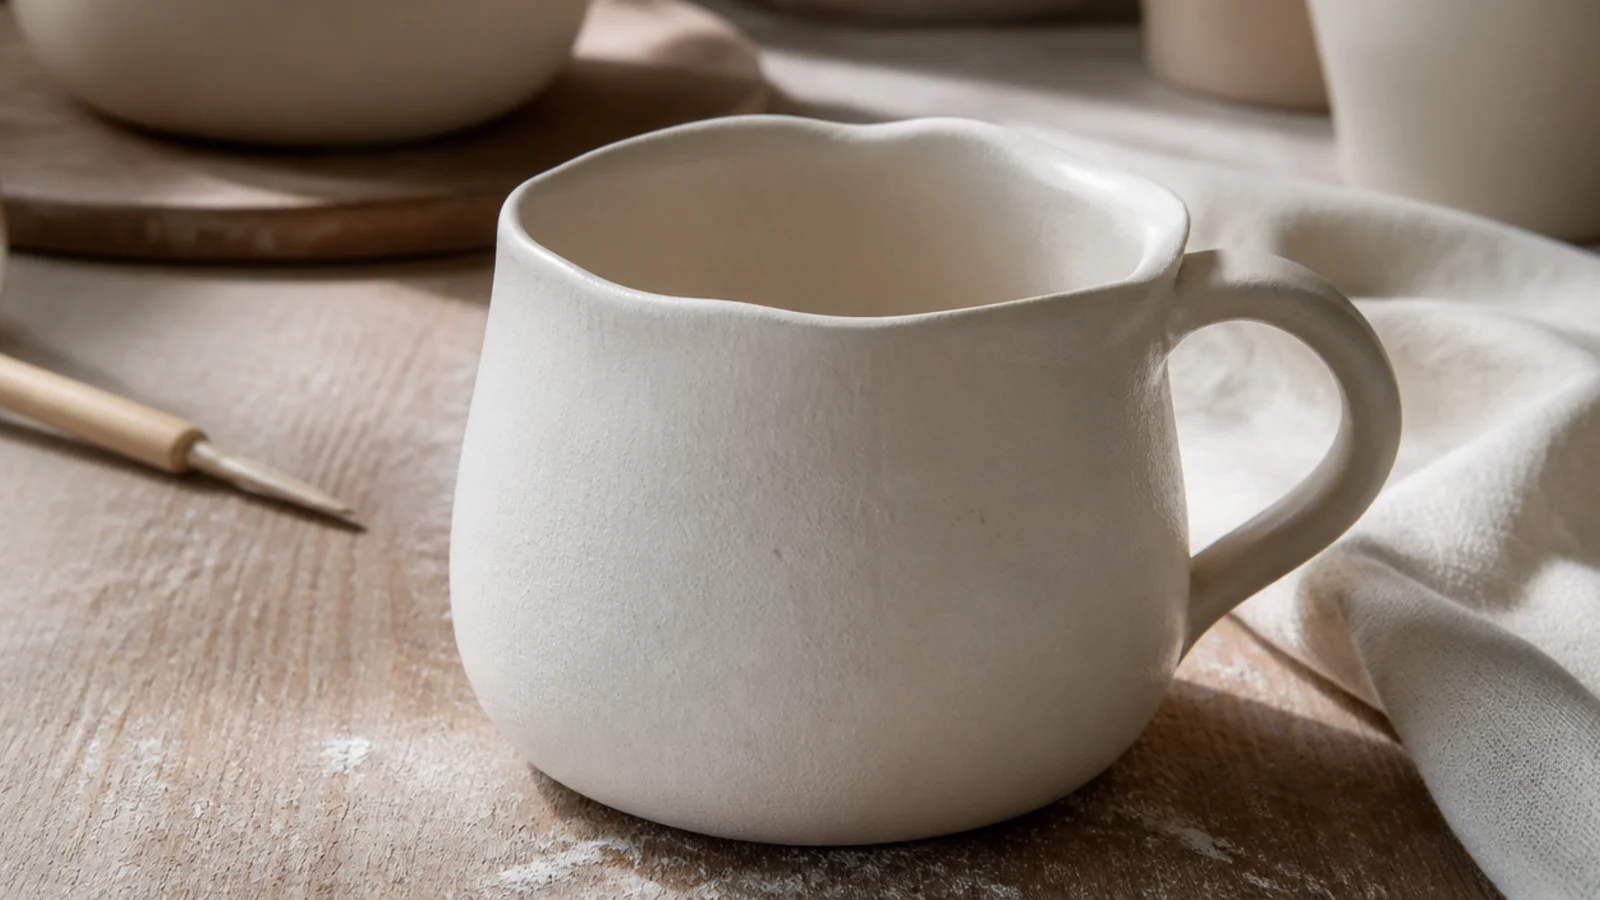
A gently wavy, softened rim gives a mug that hand-formed, organic look that has become a signature of contemporary handmade ceramics. The relaxed silhouette signals 'made by a person,' which is precisely its appeal to buyers tired of perfectly uniform factory mugs. It suits a calm, wabi-sabi palette in matte cream or oatmeal. The waves must look intentional and even, not accidental.
Editor's noteMake just a few soft, even waves and sponge the rim smooth so it stays comfortable on the lip — a jagged wavy rim is unpleasant to drink from.
Build or throw the mug with an even 1/4-inch wall, then at soft leather-hard gently push the rim into a few smooth, evenly spaced undulations with your fingers, supporting the wall from both sides so it does not crack. Soften every edge with a damp sponge so the rim is comfortable to drink from. Firm up, attach a handle, bisque, glaze in a food-safe matte or satin, and glaze-fire.
Skip thisDon’t over-manipulate the rim into sharp or random waves; too many uneven bends look like a mistake, not a design.
18. Thumb-Print Dimple Mug
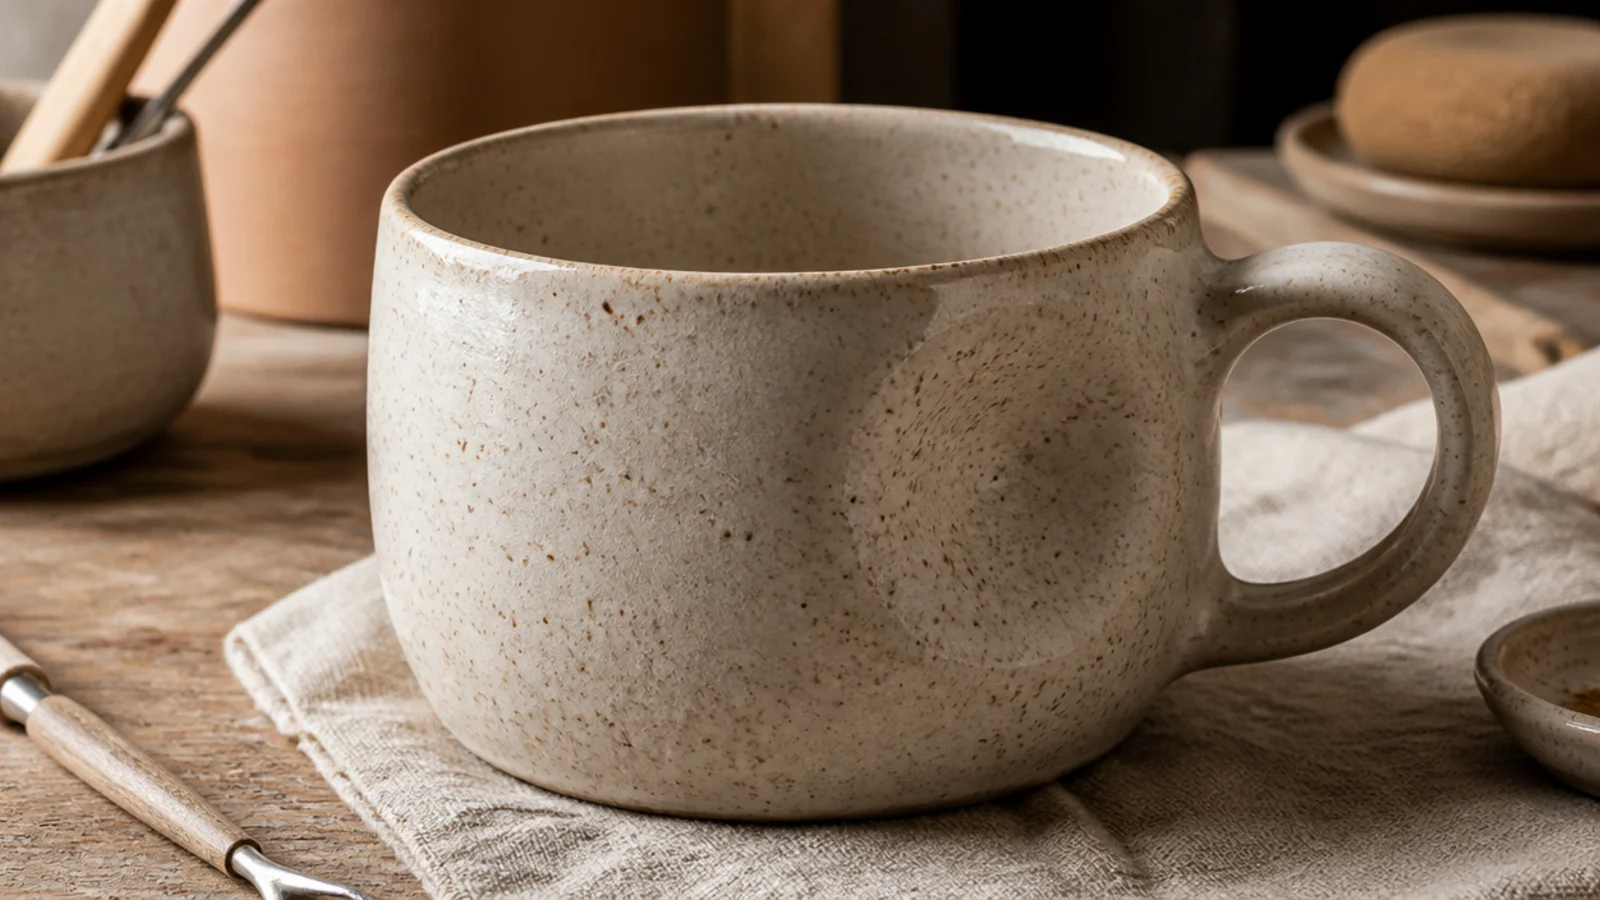
A pressed thumb dimple — or a pair of dimples where thumb and finger naturally land — turns the mug body itself into the design and adds real ergonomic comfort. The grip feels custom and personal, which is a big part of why hand-formed mugs charm buyers. Its appeal is tactile and functional; people who love the feel of a mug in the hand pick it instantly. It pairs beautifully with a speckled or matte finish.
Build or throw a rounded mug with an even wall, then at soft leather-hard press a smooth dimple into the side with your thumb, supporting the inside wall with your fingers so you do not thin or crack it. Add a matching lower dimple if you want a two-point grip, and smooth each hollow with a damp fingertip or sponge. Firm up, attach a handle positioned to suit the grip, bisque, glaze food-safe, and glaze-fire.
Press the dimples where your own thumb and finger naturally rest when you hold the mug, so the grip is genuinely comfortable rather than decorative.
Don’t press the dimple so deep it thins the wall; a too-deep hollow becomes a weak spot that cracks in the kiln.
19. Gold-Accent Rim Mug
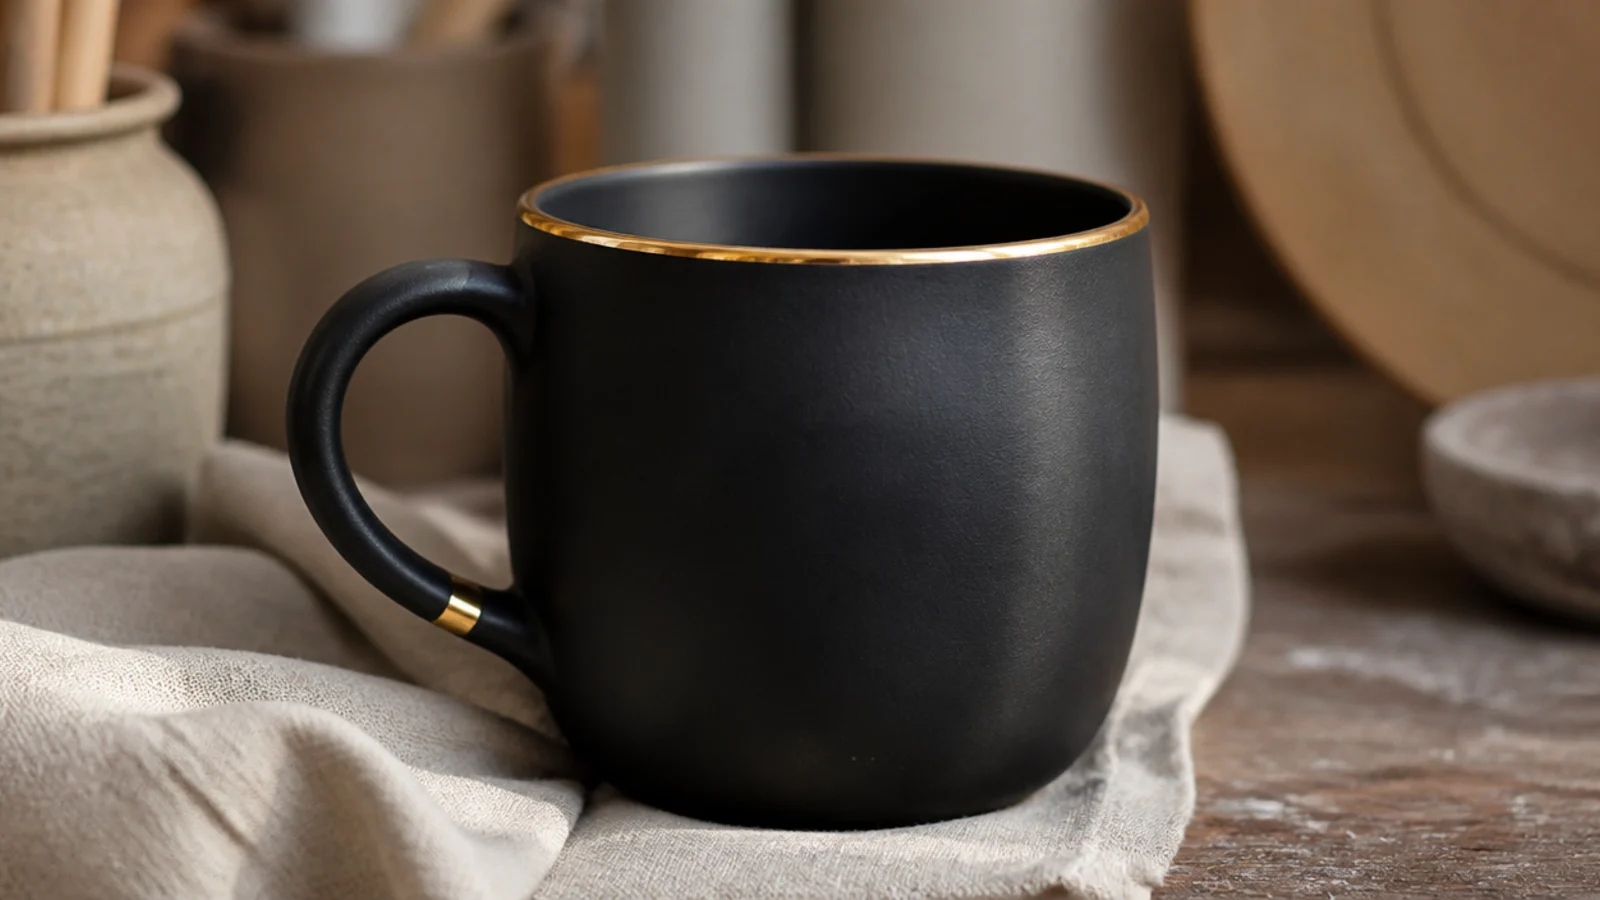
A thin band of real gold luster around the rim or handle turns a plain mug luxe with the tiniest amount of decoration. That touch of metal reads as a premium, special-occasion piece, which is exactly its appeal to buyers shopping for a standout gift. It looks most striking over black, deep green, or navy. Note it is not dishwasher- or microwave-safe, so it is for hand-washed special mugs.
Editor's noteApply luster in one thin, confident pass — thick or double-coated luster fires dull, brown, or blistered instead of bright gold.
Finish and glaze-fire your mug completely first. Then, with a fine brush, paint a thin, even line of liquid bright gold luster around the rim or handle, keeping it neat since luster shows every drip. Ventilate well and fire to the luster’s rated low temperature (around cone 018) in a well-vented kiln. Hand-wash only afterward, and never microwave a lustered mug.
Skip thisDon’t put gold luster where lips and heavy washing constantly hit it, and never microwave it; the metal degrades or sparks.
20. Stackable Nesting Set Mug
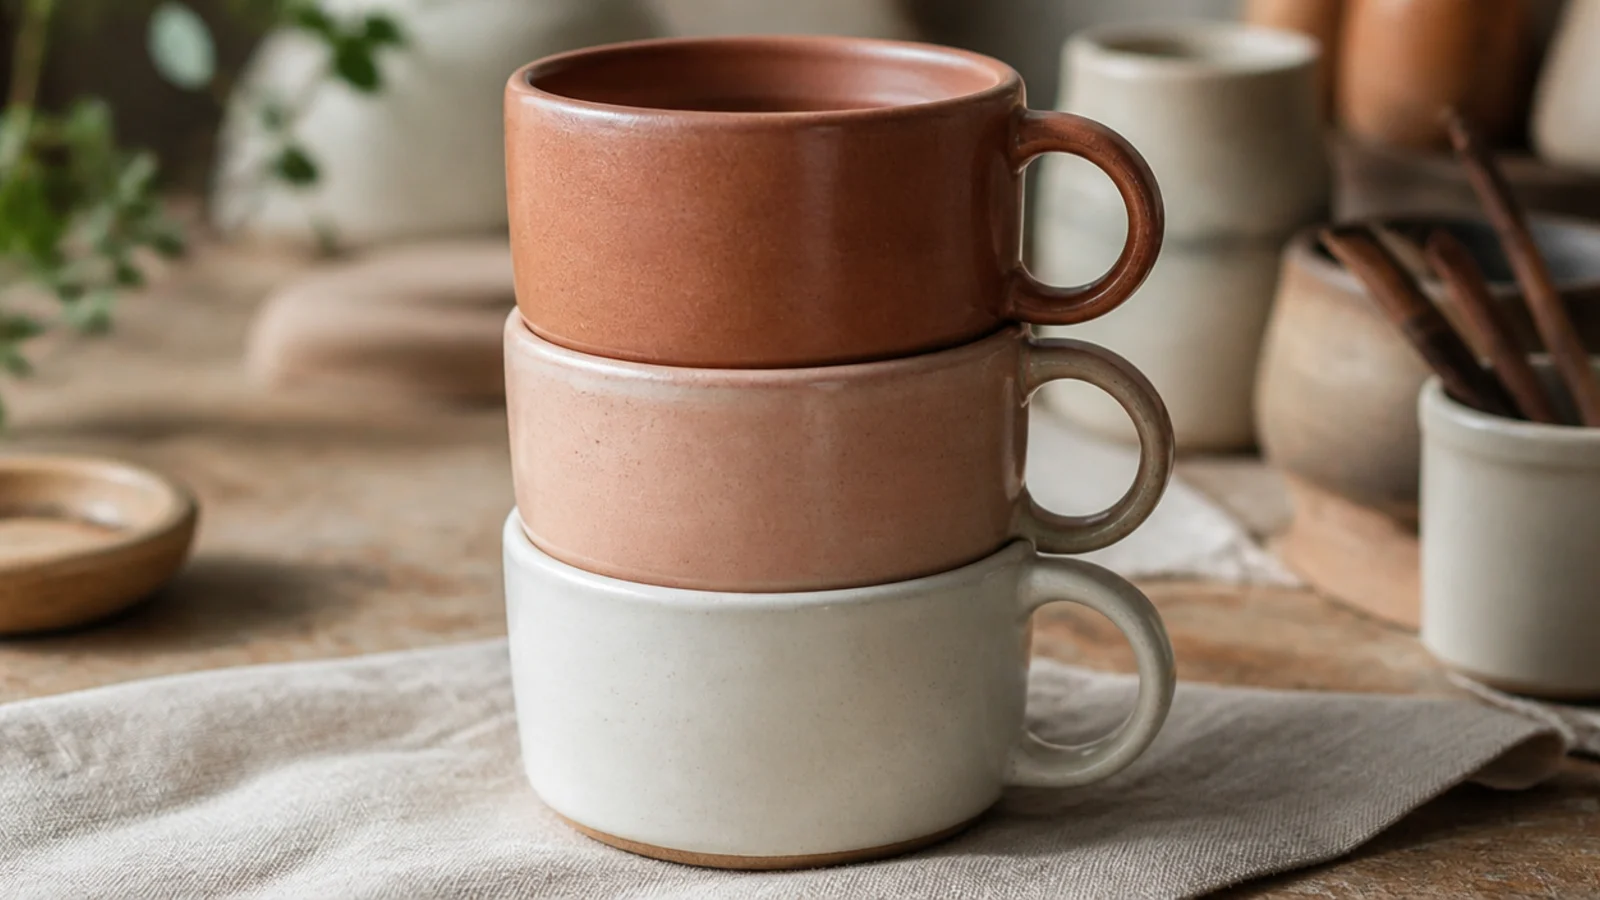
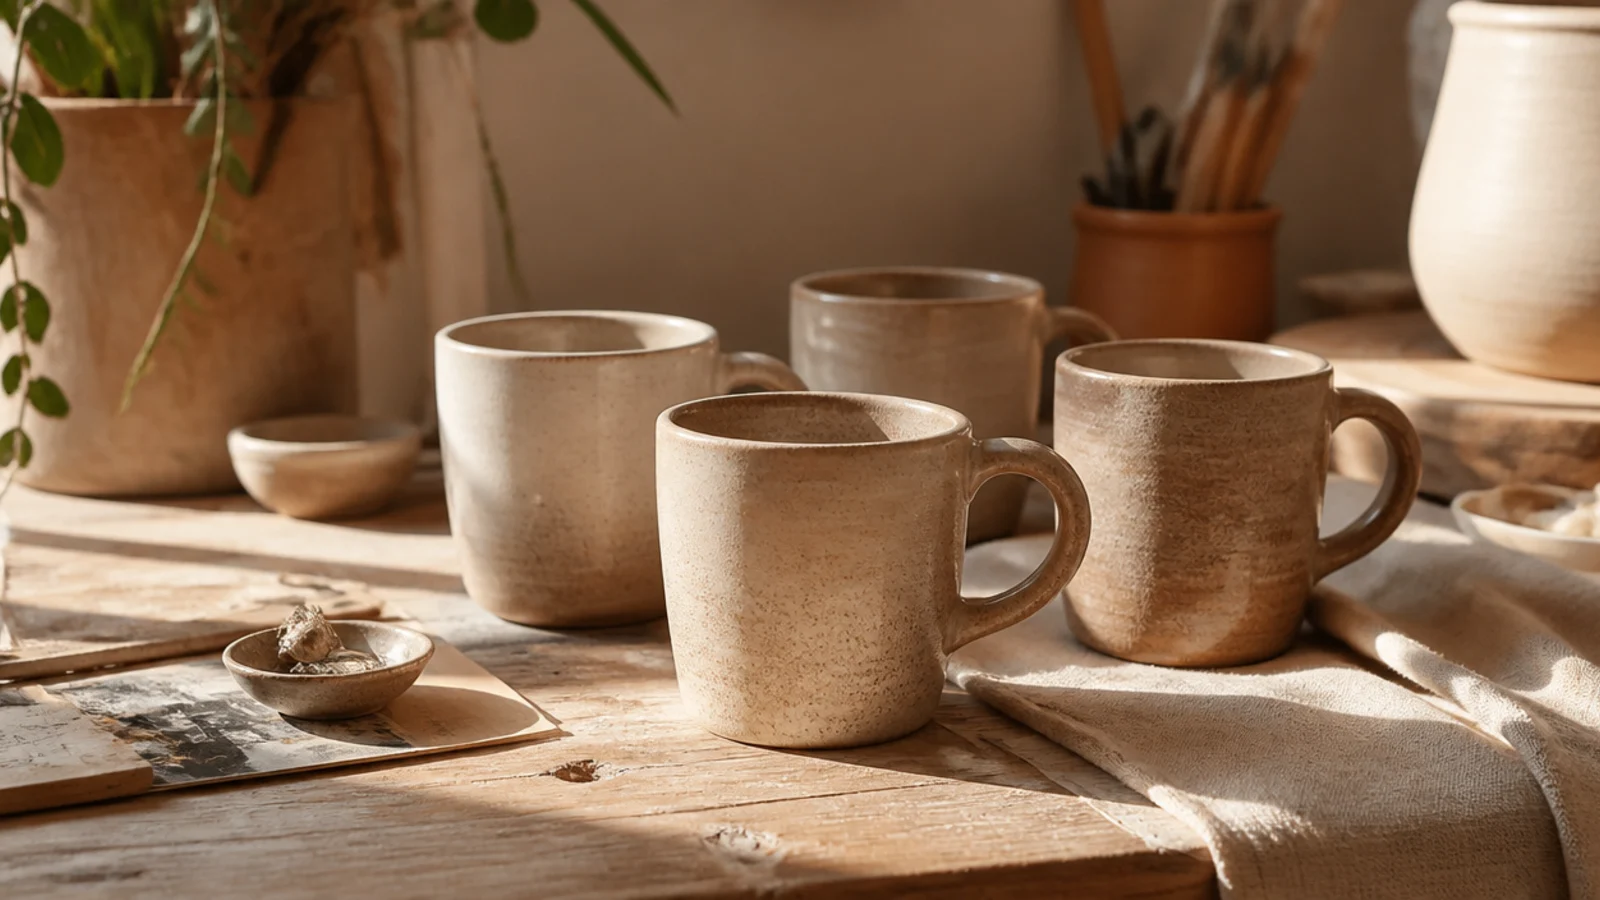
Designing mugs to stack or nest cleanly turns individual pieces into a coordinated set, which is a whole category of appeal — buyers love a matching four that stores neatly and looks styled on a shelf. The design is as much about consistent form and a graduated palette as any surface pattern. Its appeal is to gift-buyers and anyone furnishing a kitchen who wants a cohesive look. Consistency across the set is the entire skill.
Editor's noteMake a paper or cardboard profile template and check every mug against it, so heights and rims match closely enough to stack cleanly.
Build or throw each mug to the same template — identical height, rim diameter, and slightly tapered walls so they nest — using a cut cardboard profile or calipers to check every piece. Position the handles the same way so they align when stacked, and keep walls an even 1/4 inch. Glaze the set in a graduated palette of related tones (terracotta, blush, cream), keeping the glaze and application identical, and glaze-fire together for a matched finish.
Skip thisDon’t eyeball each mug in a set; even small differences in height or rim size mean they will not nest or line up on the shelf.