
1. Minimalist Line-Drawing Cat
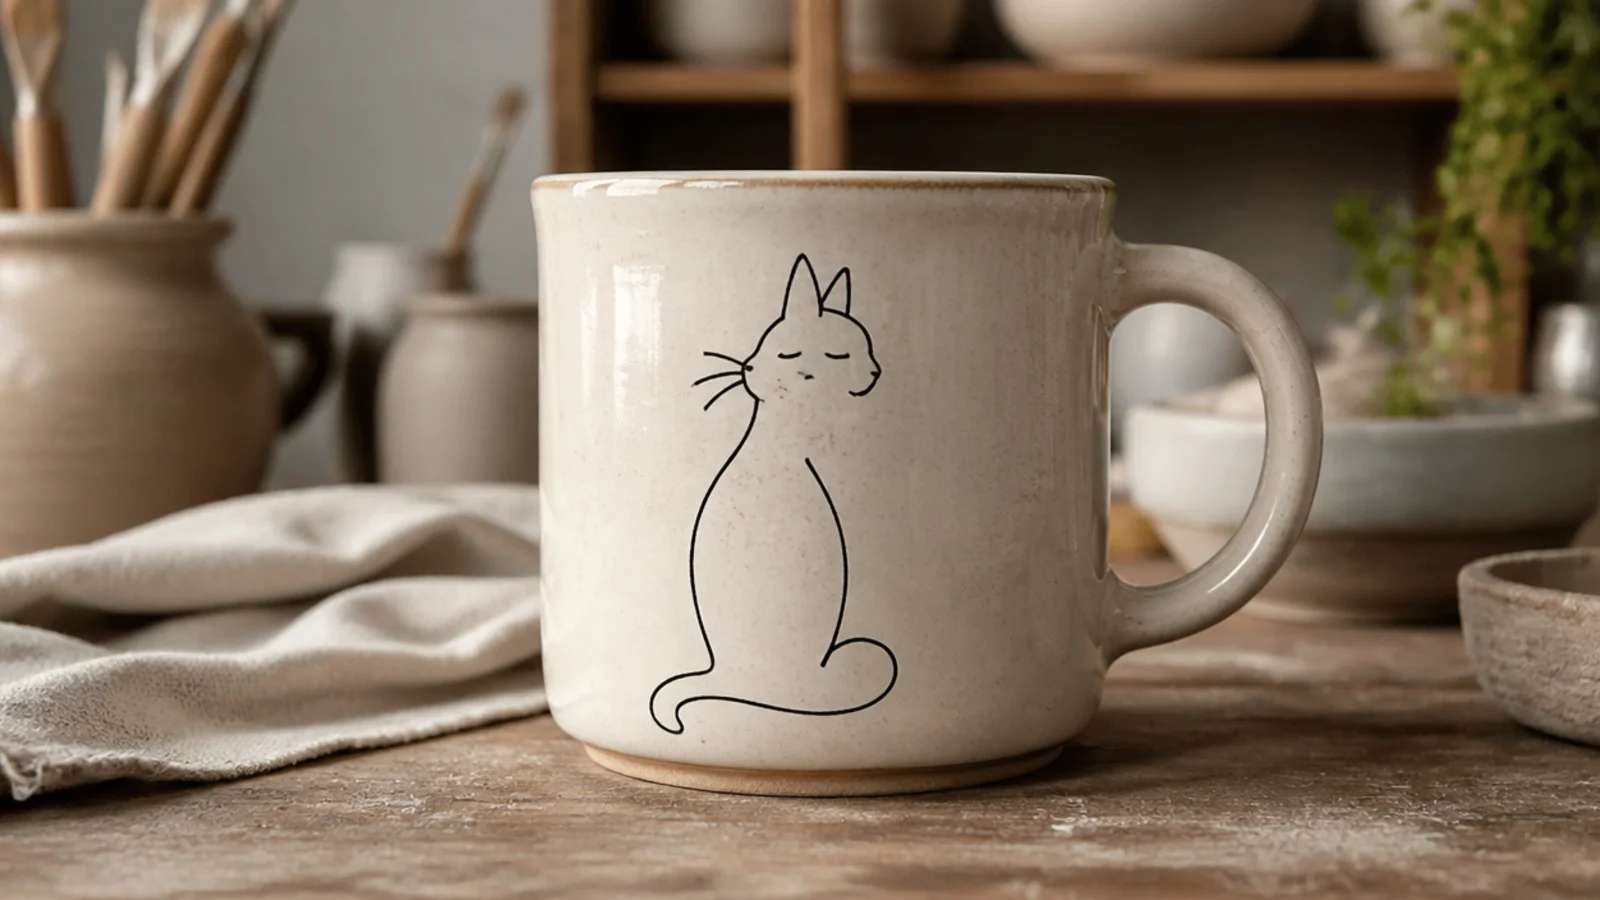
This is the easiest cat mug that still looks designed — one clean line, no shading, no clay-building. A single continuous outline of a curled or sitting cat reads modern and boutique, and because it’s just a line it forgives a slightly shaky hand. It’s the perfect first project on a plain bisque or glazed blank if you have no kiln of your own.
Start with a plain white bisque blank (or a fired glazed blank if you can’t refire). Sketch a simple sitting-cat outline lightly in pencil, keeping it to one unbroken line about the size of your palm, placed opposite the handle. Trace it with black underglaze using a fine liner brush, or use an underglaze pencil for more control, going over the line once more for solid color. On bisque, coat the whole mug in a clear food-safe glaze and glaze-fire; on a fired blank, use a bake-on food-safe ceramic paint and cure it per the label.
Editor's notePractice the whole cat in one continuous motion on paper five or six times first — a confident single-stroke line looks far more elegant than a slow, patched-together outline.
Skip thisDon’t add whiskers, fur, and paw details to your first line cat; the charm is in the single clean line, and extra marks make it look cluttered and amateur.
2. Whisker-and-Nose Front
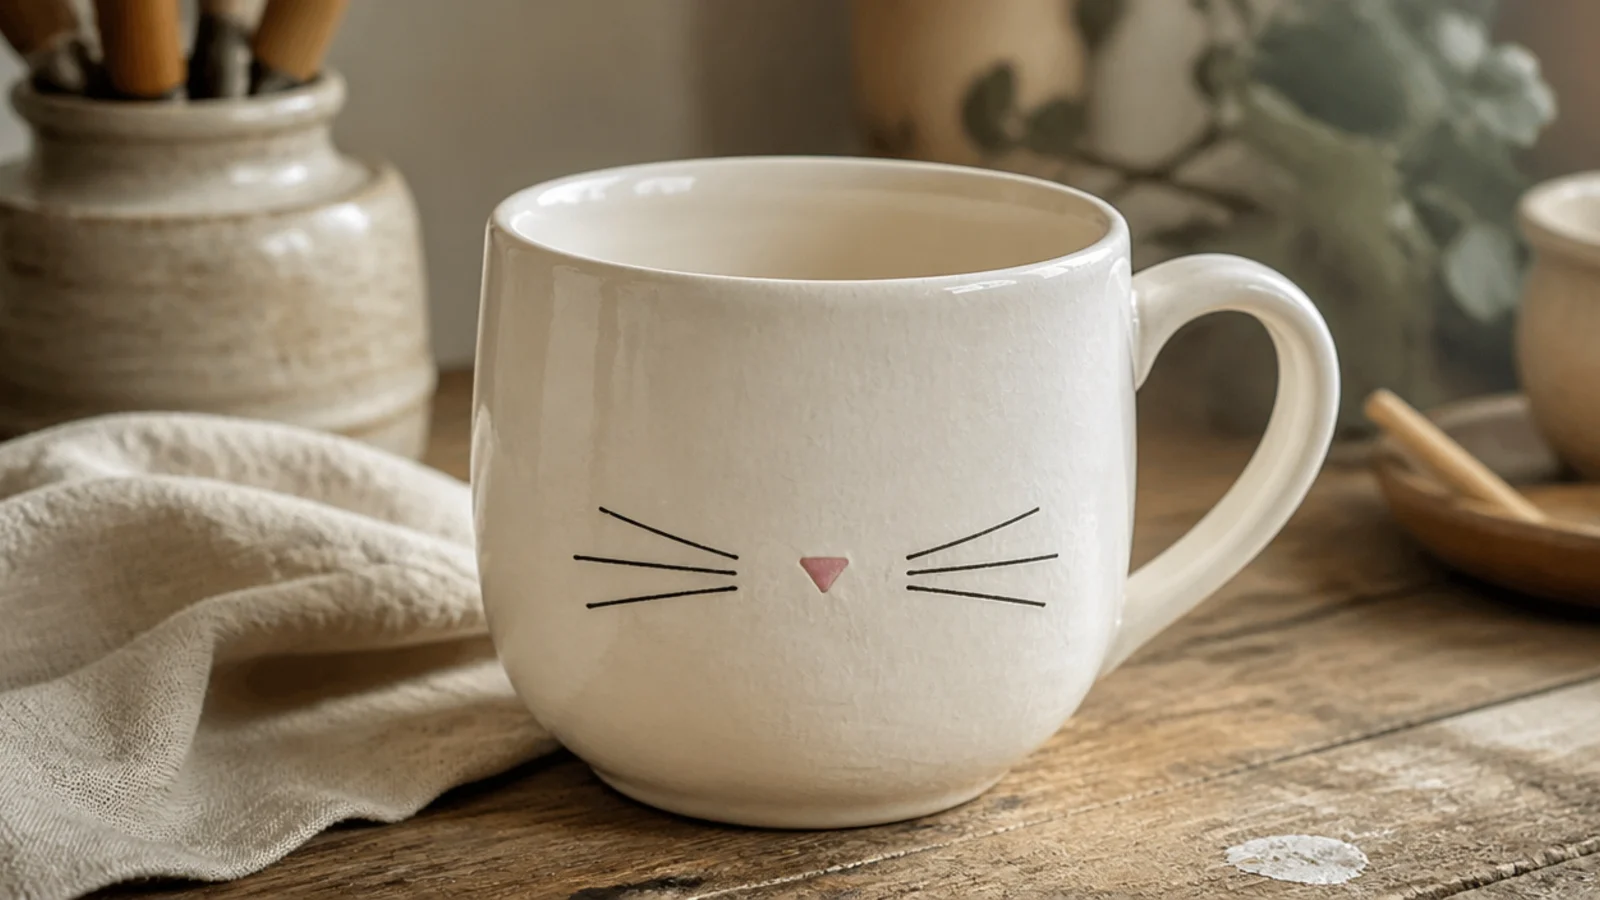
This design puts only a nose and whiskers on the mug, so the drinker’s own face becomes the cat when they lift it. It’s playful, incredibly simple, and needs the fewest marks of any face here. Because there are no eyes to get wrong, it’s a great confidence-builder that still gets a laugh.
On a bisque or glazed blank, pencil a small triangle nose low and centered on the front, roughly where your nose sits when you drink. Fill the nose with two thin coats of soft-pink or terracotta underglaze using a small round brush. Add three fine whisker lines on each side with a liner brush and a steady, tapering stroke, plus a tiny curved mouth under the nose. Clear-glaze and glaze-fire, or seal a fired blank with food-safe ceramic paint baked per its label.
Editor's notePosition the nose by holding the mug up to your face first and marking the spot — placed right, it lines up with your own nose for the full cat effect.
Skip thisDon’t make the whiskers thick or wobbly; keep them thin and lightly curved with a liner brush, or they look like scribbles instead of whiskers.
3. Underglaze Tabby Face
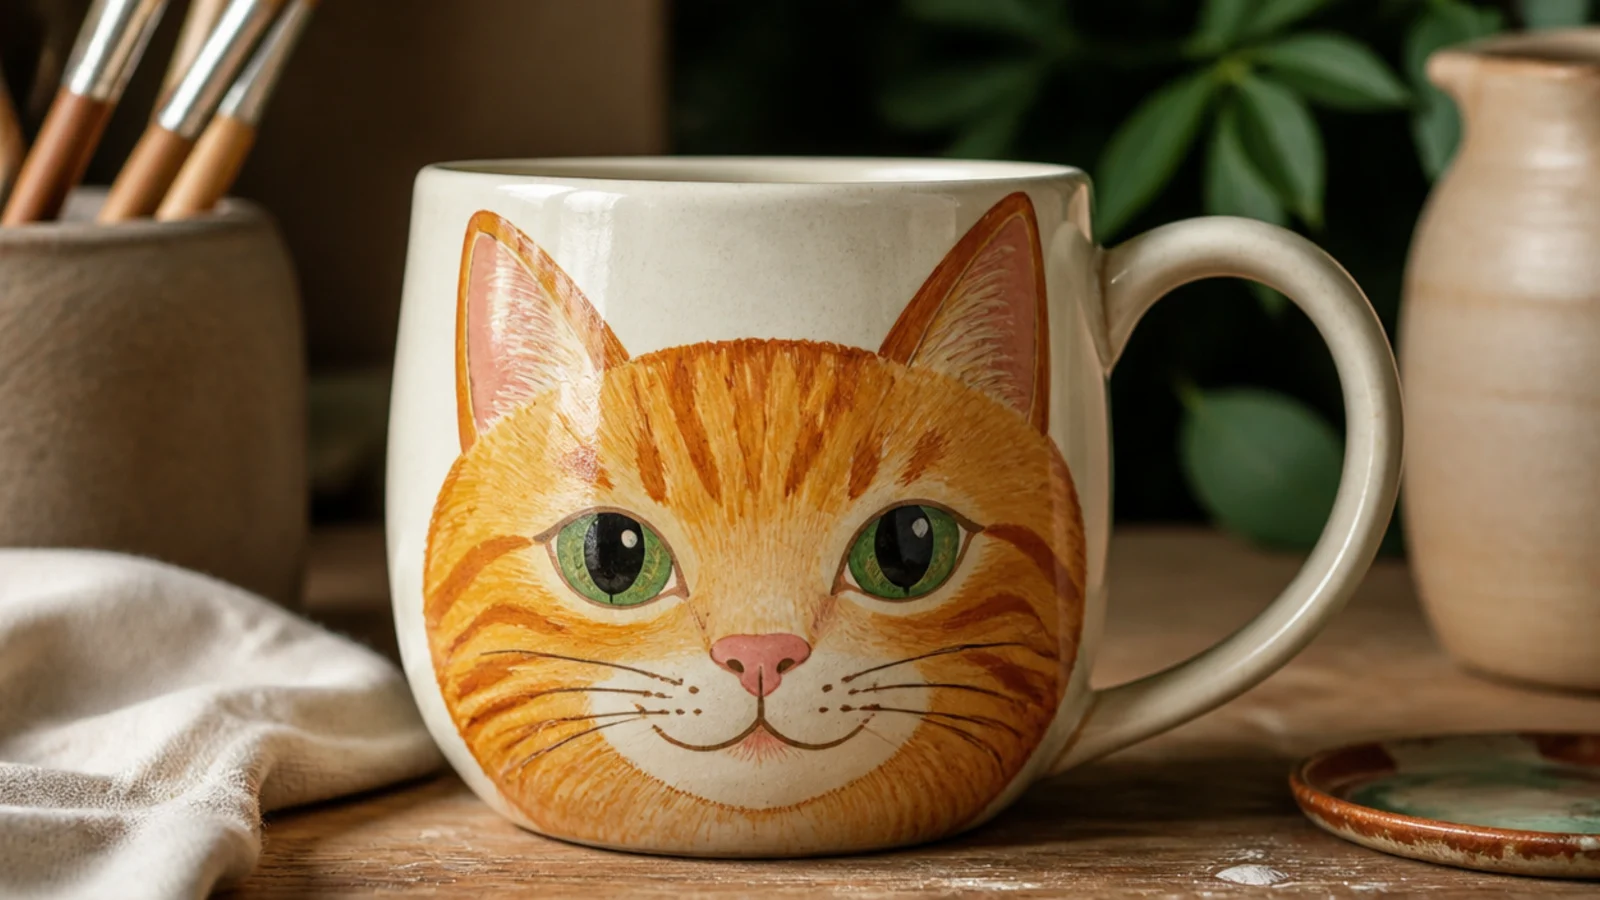
A full tabby face is the classic cute cat mug, and underglaze makes it approachable because you paint on firm clay or bisque, not slippery glaze. Warm orange stripes, green eyes, and a pink nose read instantly as a friendly tabby. It works equally well on a mug you built or a plain store blank.
On leather-hard clay or bisque, pencil a round face filling most of the front, with two triangle ears at the top. Paint the base coat in orange underglaze, let it dry, then add darker orange stripes, white muzzle patches, green almond eyes, a pink nose, and fine black outlines with a liner brush — two thin coats per color. Let everything dry fully, coat the whole mug in a clear food-safe glaze, and glaze-fire so the colors pop and the surface is washable.
Paint the eyes last and leave a tiny unpainted white dot as a catchlight in each — that single highlight is what makes the cat look alive instead of flat.
Don’t outline every feature in heavy black; a thin outline reads sweet, but thick black lines make the face look harsh and cartoonish.
4. Scattered Pawprint Pattern
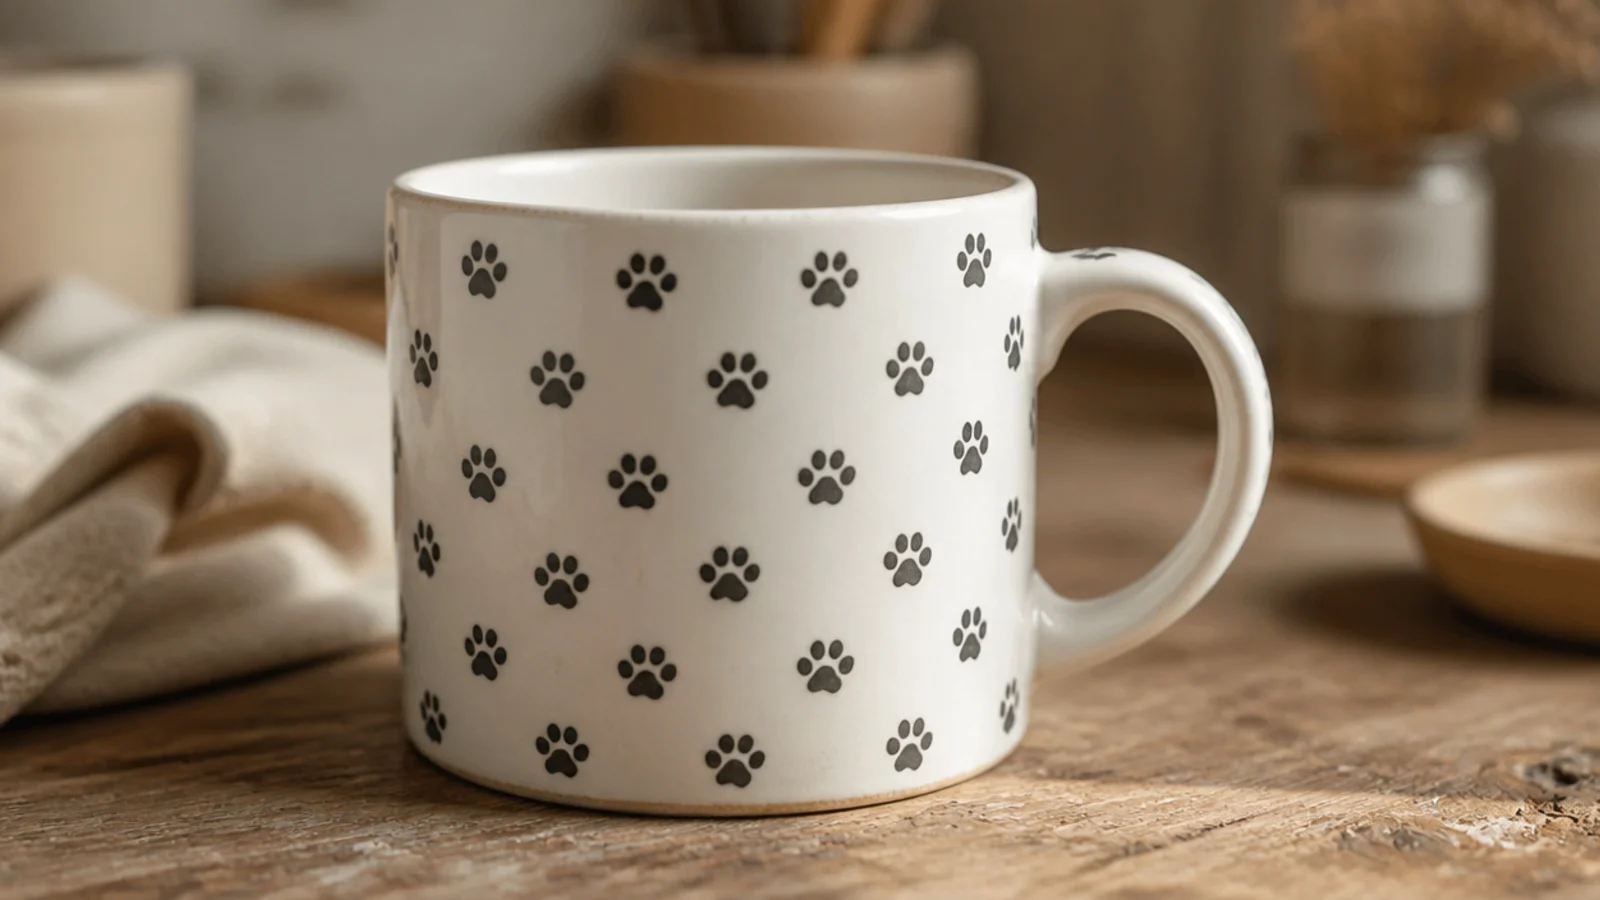
Little pawprints scattered over the mug are cheerful, foolproof, and endlessly repeatable — the cat-lover’s version of polka dots. Each print is just one larger pad with four small toe-bean dots above it, so there’s no drawing skill needed. One or two colors keeps it clean and modern rather than busy.
On bisque, plan a loose scattered grid so the prints look random but balanced. For each paw, press the flat end of a pencil eraser dipped in underglaze for the main pad, then add four tiny toe beans above it with the tip of a small round brush or a smaller dowel, re-dipping every time so they stay even. Let dry, coat in a clear food-safe glaze, and glaze-fire; the prints stay crisp under the clear coat.
Stamp all the main pads first and let them set, then add the four toe beans to each — working in two passes keeps every print the same size and spacing.
Don’t crowd the prints edge to edge; leave clear breathing space between each paw or the pattern turns into a muddy smudge instead of tidy tracks.
5. Black-Cat Celestial Mug
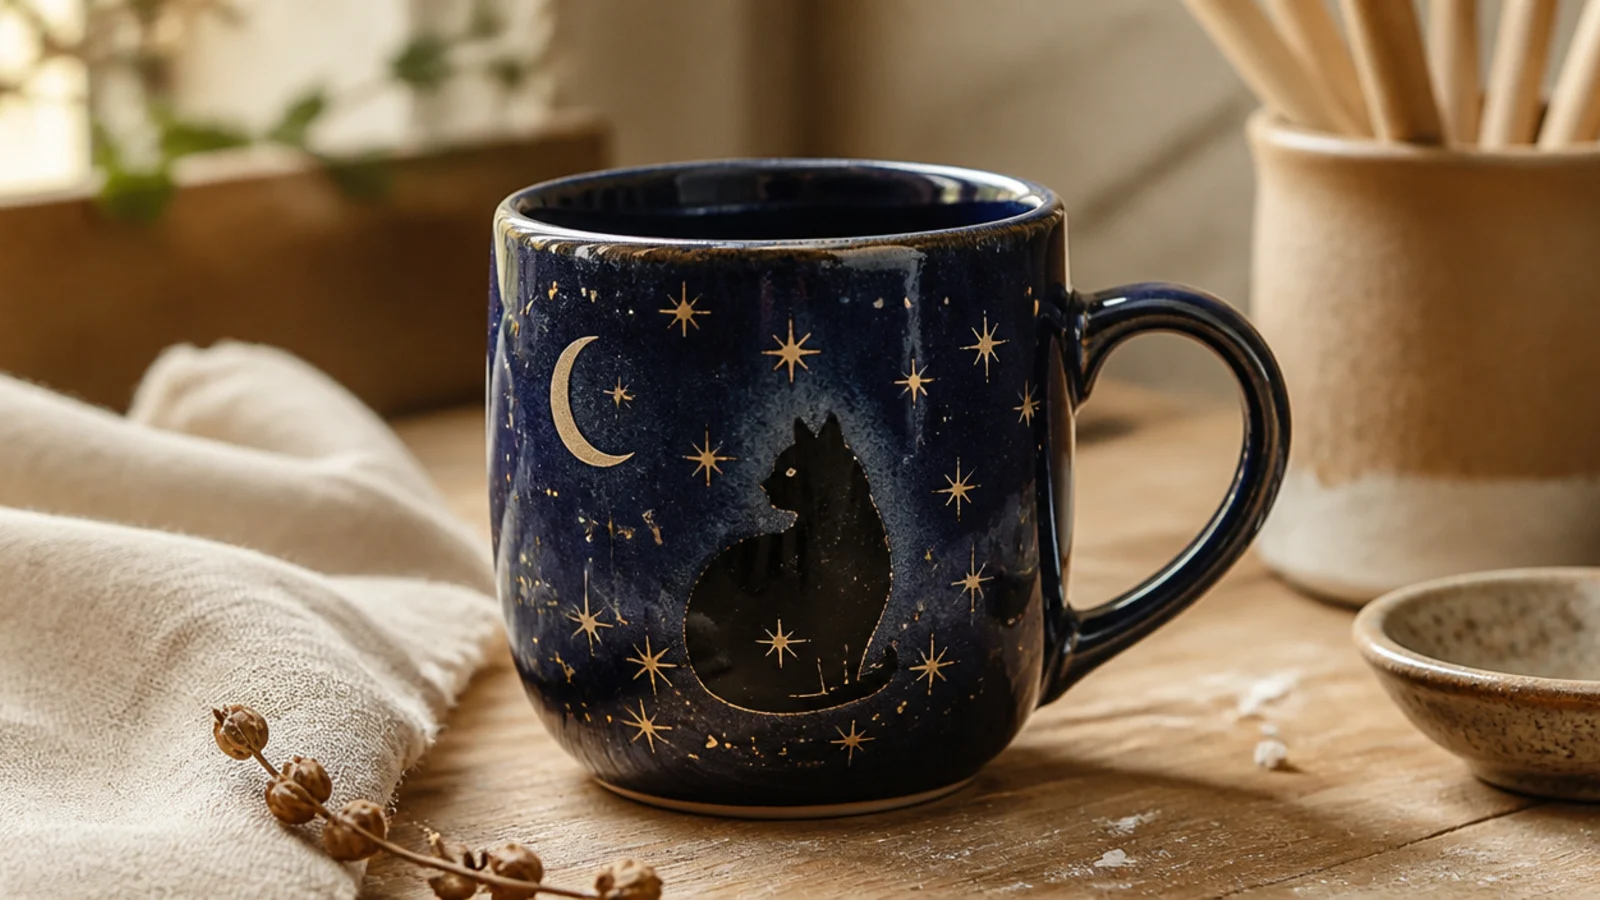
A black-cat silhouette tucked among tiny stars and a crescent moon gives you a moody, magical mug that suits Halloween and everyday cozy alike. The high contrast of a dark background with a solid cat and small gold accents looks striking and hides brushwork imperfections. It’s simple shapes only — a curled cat, dots, and a moon — so it stays beginner-friendly.
Base-coat the mug in deep navy or black underglaze over bisque and let it dry. Paint a solid black or charcoal curled-cat silhouette on the front — just an outline filled in, no interior detail. Add a scatter of small stars and a crescent moon with a fine brush in a pale gold or cream underglaze, keeping them tiny and irregular. Clear-glaze and glaze-fire; use a gold luster in a separate low firing only if you want true metallic stars (hand-wash those).
Editor's noteKeep the cat a pure filled silhouette with just two tiny dot eyes — resist adding fur or features, because the shape alone reads clearly against the dark sky.
Skip thisDon’t space the stars evenly like a grid; a natural, irregular scatter looks like a night sky, while a regular pattern looks like wallpaper.
6. Cat-and-Yarn Scene
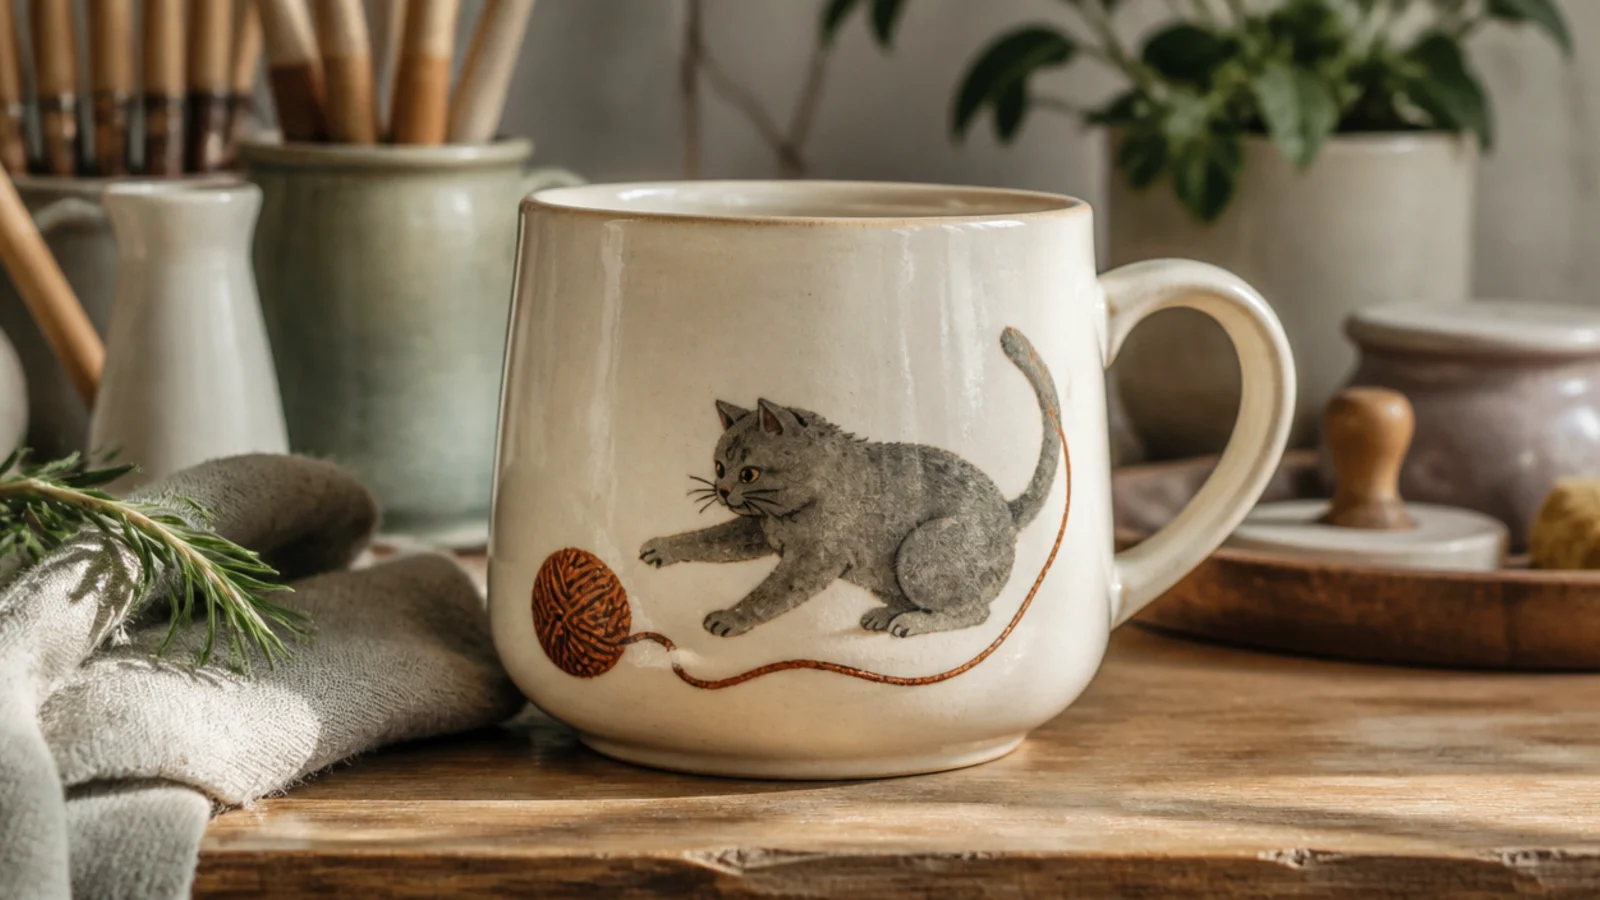
A little cat chasing a ball of yarn tells a tiny story and wraps beautifully around the mug, with the unraveling thread leading the eye around to the handle. It’s a step up from a static face but still built from simple shapes — a rounded cat and a circle of yarn. The trailing thread is the clever part, turning the whole mug into one continuous scene.
On bisque, pencil a small crouched cat on the front and a round ball of yarn a little ahead of its paws. Paint the cat in soft grey underglaze with a white chest and simple dot eyes, and the yarn ball in terracotta with a few curved lines to suggest wound thread. With a liner brush, trail one thin yarn line from the ball loosely around the body of the mug toward the handle. Clear-glaze and glaze-fire.
Editor's noteDraw the trailing thread as one loose, looping line rather than a tight scribble — a relaxed curve looks like real yarn unspooling, and it guides the eye around the mug.
Skip thisDon’t overwork the cat’s fur; a smooth grey body with a white chest patch reads sweeter than fussy hand-painted fur strokes that go patchy under glaze.
7. Calico Speckle Glaze Cat
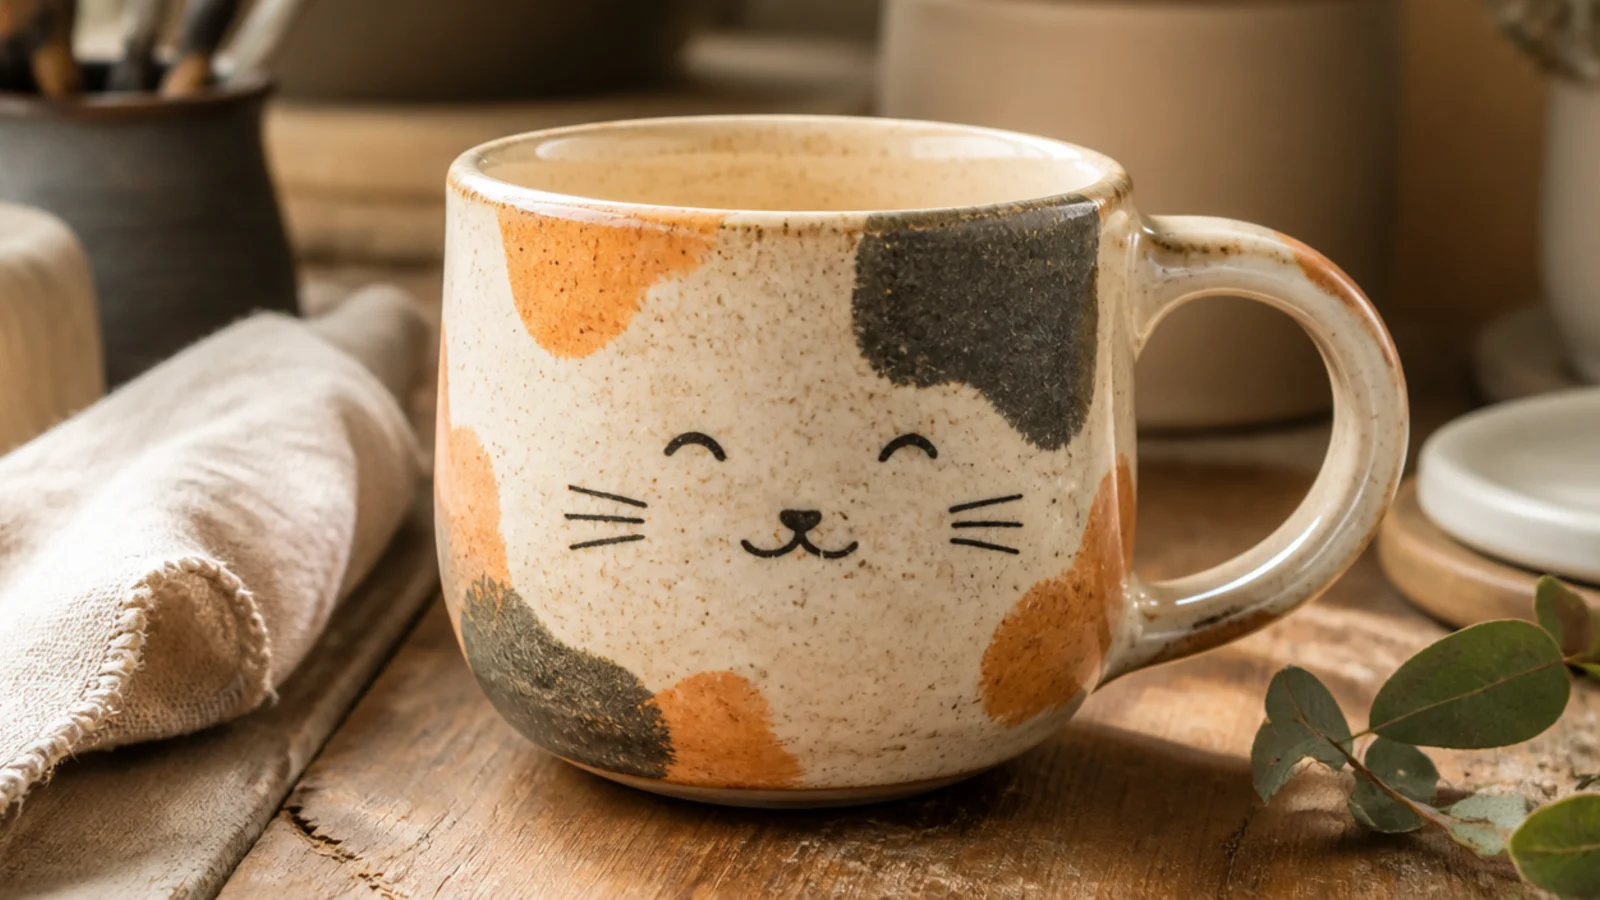
This design leans on the clay and glaze to do the calico work for you: irregular orange and black patches over a speckled cream body mimic a calico coat with almost no drawing. A simple sleepy face is all the detail you need on top. It’s a lovely middle-ground project — more character than a plain painted face, less fuss than a full portrait.
Build or use a mug in speckled buff stoneware, or a cream blank. On bisque, brush a few soft-edged patches of orange and charcoal underglaze in a random calico layout, leaving plenty of cream showing between them. Add a minimal closed-eye sleepy face with a small pink nose over the patches. Coat in a clear satin food-safe glaze and glaze-fire so the speckle and patches read as a real calico coat.
Dab the color patches with a slightly dry brush and soft, uneven edges — hard-edged blobs look painted, while soft irregular patches look like real fur markings.
Don’t make the patches symmetrical or evenly spaced; real calico is random and lopsided, so a balanced pattern instantly looks artificial.
8. Sgraffito Cat Silhouette
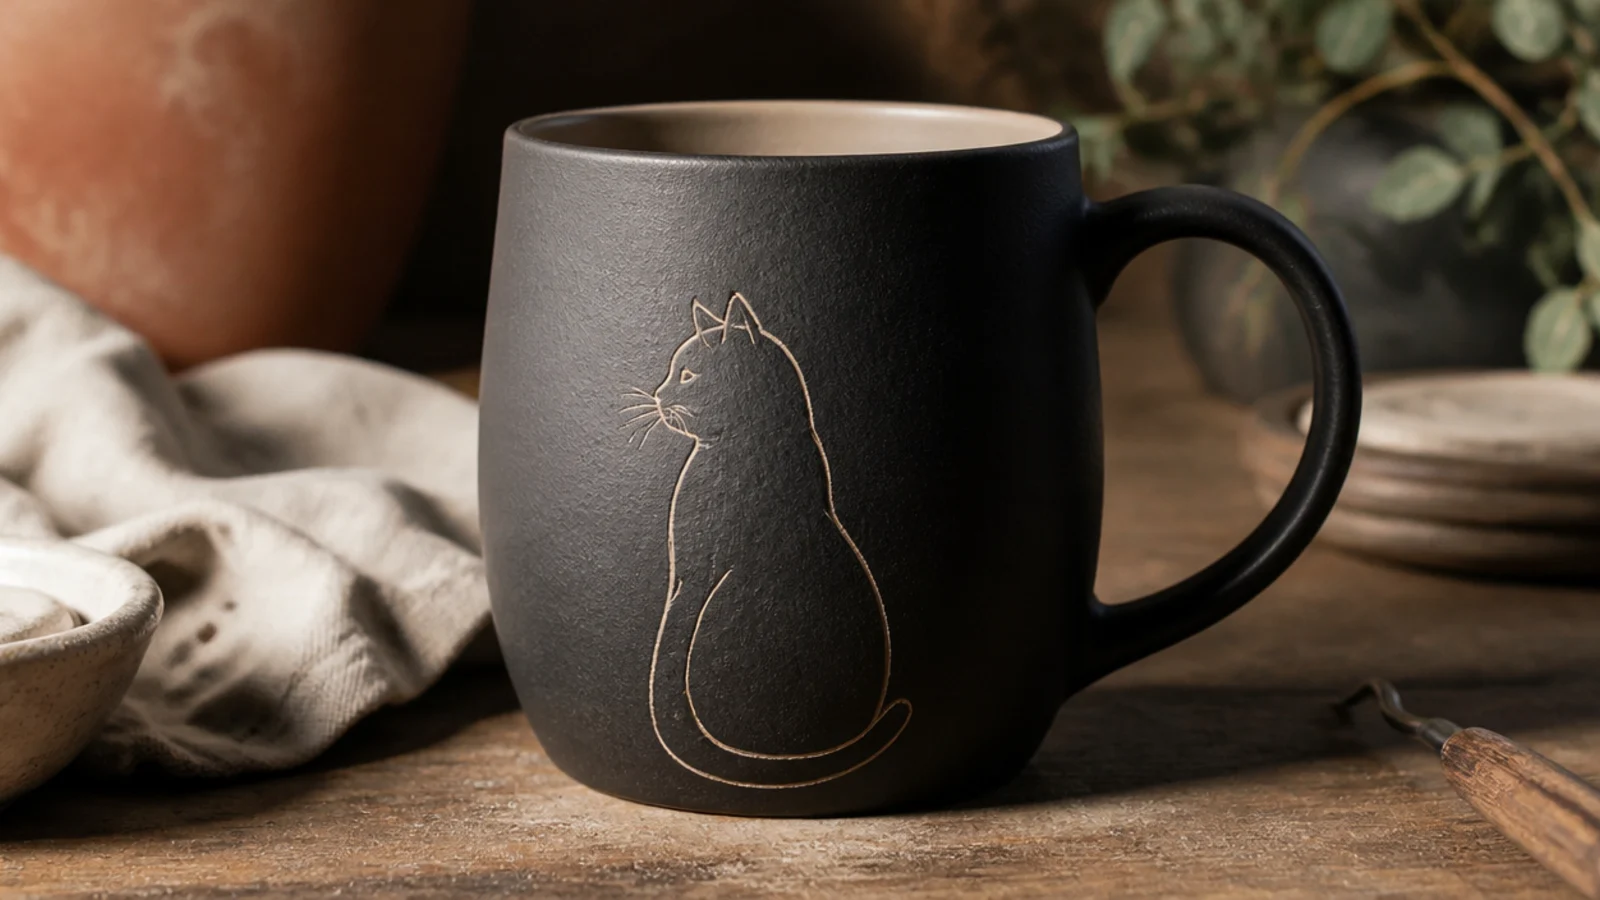
Sgraffito means scratching your design through a colored surface to reveal the clay underneath, giving crisp two-tone cat line art. It looks intricate but it’s really careful drawing with a carving tool. A dark underglaze over pale clay gives the highest contrast and the sharpest cat outline.
Coat a leather-hard mug in two even coats of a dark underglaze and let it set until just firm. Lightly sketch a cat silhouette — sitting or curled — then carve through the underglaze with a fine loop or needle tool so the pale clay shows as your lines, adding whiskers and a tail as clean scratched strokes. Brush the crumbs away with a soft dry brush. Bisque fire, apply a clear food-safe glaze, and glaze-fire for a durable, washable surface.
Carve when the clay is right at leather-hard — too wet and the lines smear closed, too dry and the edges chip instead of cutting a clean cat outline.
Don’t brush the carving dust away with your breath and leave crumbs behind; trapped bits ruin the clear glaze coat and blur your crisp lines.
9. Embossed Cat Stamp Mug
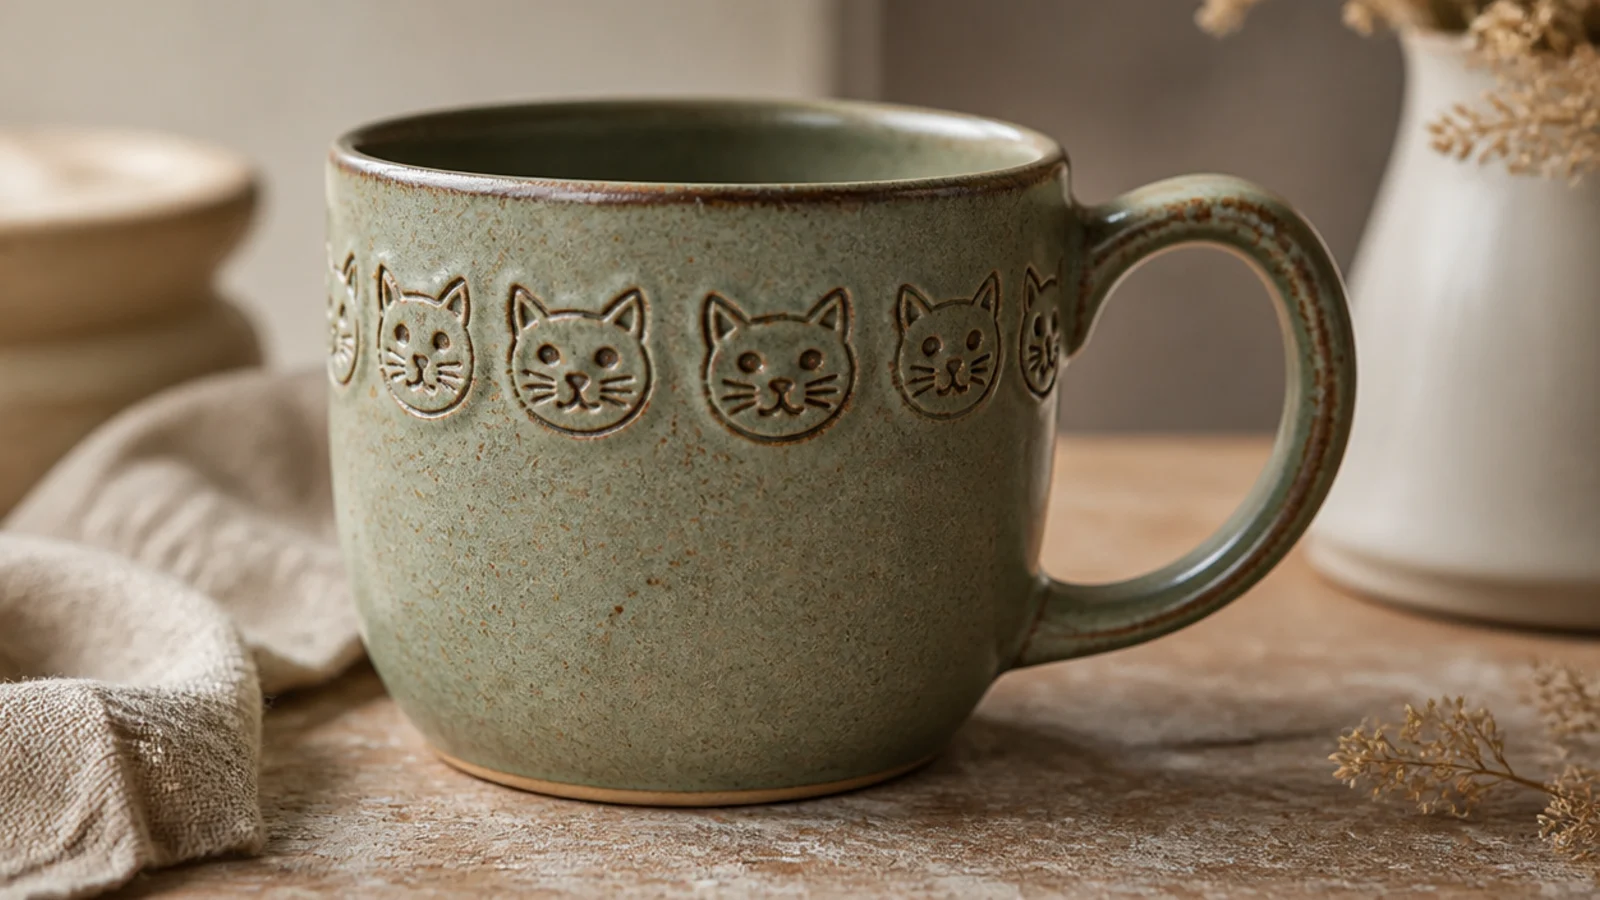
A carved or bought cat stamp pressed into soft clay gives you a neat repeating cat motif that a glaze pools into for depth. It’s a quick way to add lots of cats with total consistency — the stamp does every one identically. This is ideal if you love pattern but don’t trust your painting hand.
While the mug walls are still soft, press a small cat-face stamp (carved from an eraser or bought) firmly into the clay in an even row around the upper body, re-inking nothing — just clean, repeated impressions. Support the wall from inside with your fingers as you press so it doesn’t distort. Firm to leather-hard, attach a handle, then bisque. Apply a food-safe glaze that breaks over texture — a satin or celadon that darkens in the recesses — and glaze-fire so each little cat stands out.
Editor's notePress each stamp with the same firm, straight-down pressure and support the inside wall with your other hand, so every cat prints at the same depth and the wall stays round.
Skip thisDon’t stamp into clay that’s already firming up; a leather-hard wall barely takes the impression, so stamp while the clay is still soft and receptive.
10. Cat-Ear Rim Mug
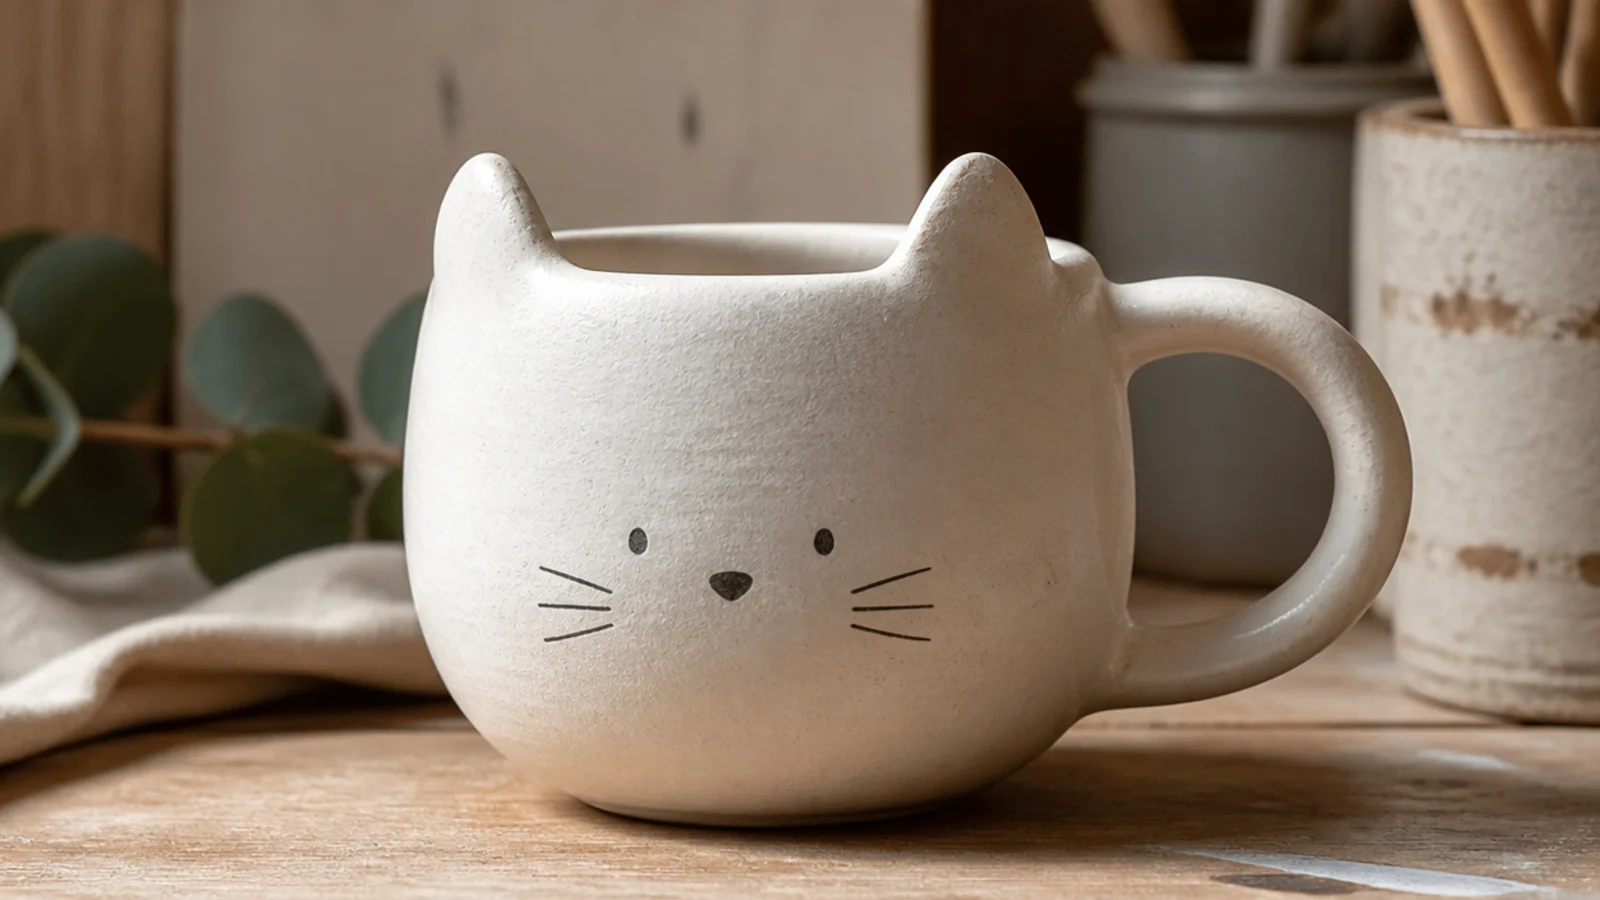
Two little ears rising from the rim turn any plain mug into an unmistakable cat, and it’s the simplest sculptural upgrade here. Paired with a minimal face just below, the ears do most of the cute work. It’s the natural first step from painting into shaping clay.
Build or use a leather-hard mug. Cut two small triangle ears from a 1/4-inch slab of matching clay, about an inch tall, and pinch a soft curve into each. Score and slip both the rim and the base of each ear, then press them onto the rim opposite the handle, smoothing a small collar of clay around each join so they don’t pop off. Add a minimal face below with underglaze, dry slowly under plastic, bisque, glaze food-safe, and glaze-fire.
Editor's noteAdd a tiny pinch of pink underglaze inside each ear before glazing; that little inner-ear color is the detail that makes them read as real cat ears.
Skip thisDon’t attach the ears to a bone-dry rim; join them at leather-hard with scored, slipped surfaces or they’ll crack off as the mug shrinks and dries.
11. Peeking-Cat Over the Rim
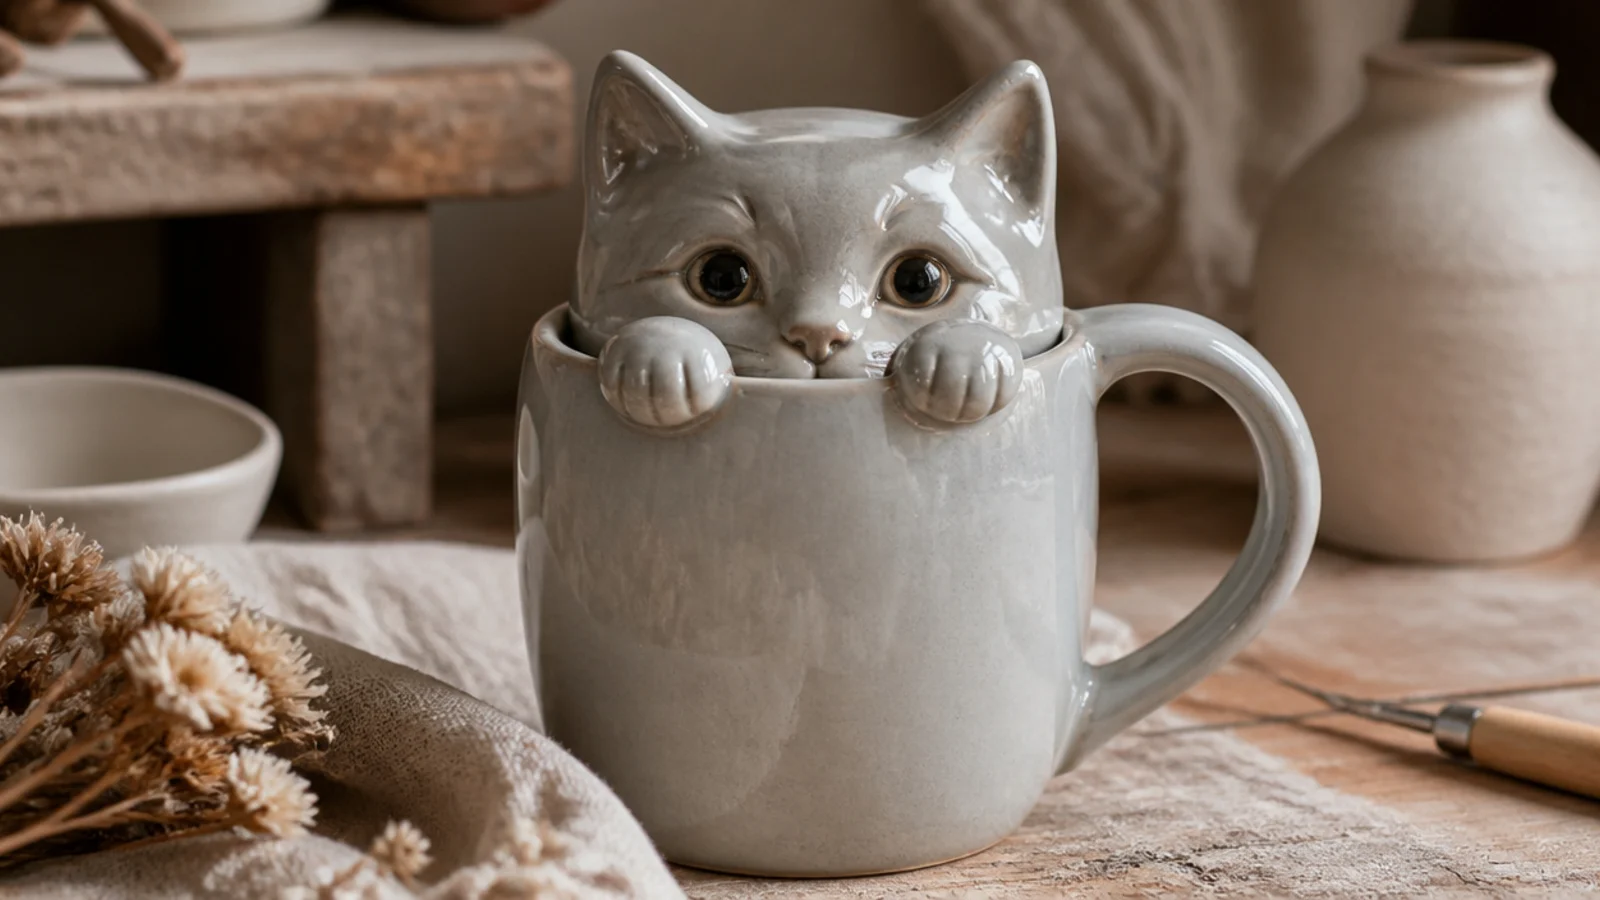
A little cat peeking over the rim — just two paws and the top of a face cresting the edge — is irresistibly cute and full of character. It looks advanced but it’s really a small sculpted add-on clinging to the rim. The half-hidden face is the charm, so you only sculpt the top of the cat.
On a leather-hard mug, sculpt two small flattened paws and the upper half of a cat face (eyes, ears, a hint of muzzle) from matching clay. Score and slip the rim and the backs of the pieces, then press the paws over the edge and the face just above them so the cat appears to peek in, smoothing every join. Keep the add-on on the outside and clear of where lips meet the rim. Dry slowly, bisque, glaze food-safe, and glaze-fire.
Hollow or thin the back of the sculpted face so it isn’t a heavy solid lump — a thick solid add-on can crack in firing and makes the mug tip-heavy.
Don’t place the peeking cat where you drink; keep it to one side of the rim so the paws and face never touch your mouth.
12. Cat-Paw Thumb Rest
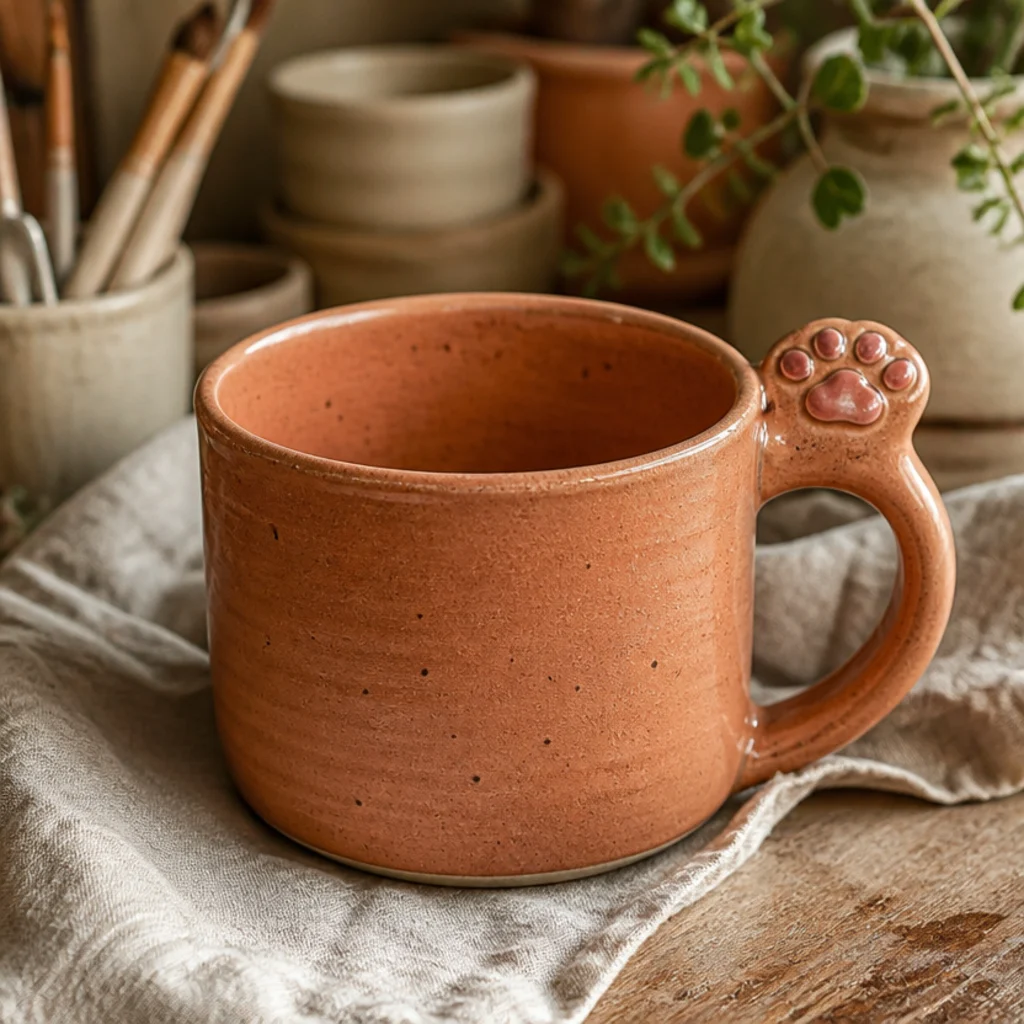
A little cat paw sculpted where your thumb naturally lands on top of the handle is a subtle, tactile detail that surprises people when they pick the mug up. It’s functional and cute at once, giving the thumb a comfortable rest. Painted pink toe beans make it unmistakably a paw.
Pull or attach your handle first and let it firm to leather-hard. Shape a small oval paw pad with four little toe beans from matching clay, sized to your thumb, then score and slip both the top of the handle and the base of the paw and press it on, smoothing the join. Paint the beans in soft-pink underglaze once leather-hard or on bisque. Dry slowly, bisque, coat in a satin food-safe glaze, and glaze-fire.
Press your own thumb gently into the soft paw pad to leave a shallow dish; that little concave rest makes the mug genuinely comfortable to hold, not just decorative.
Don’t sculpt the paw too tall or proud of the handle; a bulky lump digs into your thumb, so keep it low and rounded for a comfortable rest.
13. Cat-Butt Bottom Joke Mug
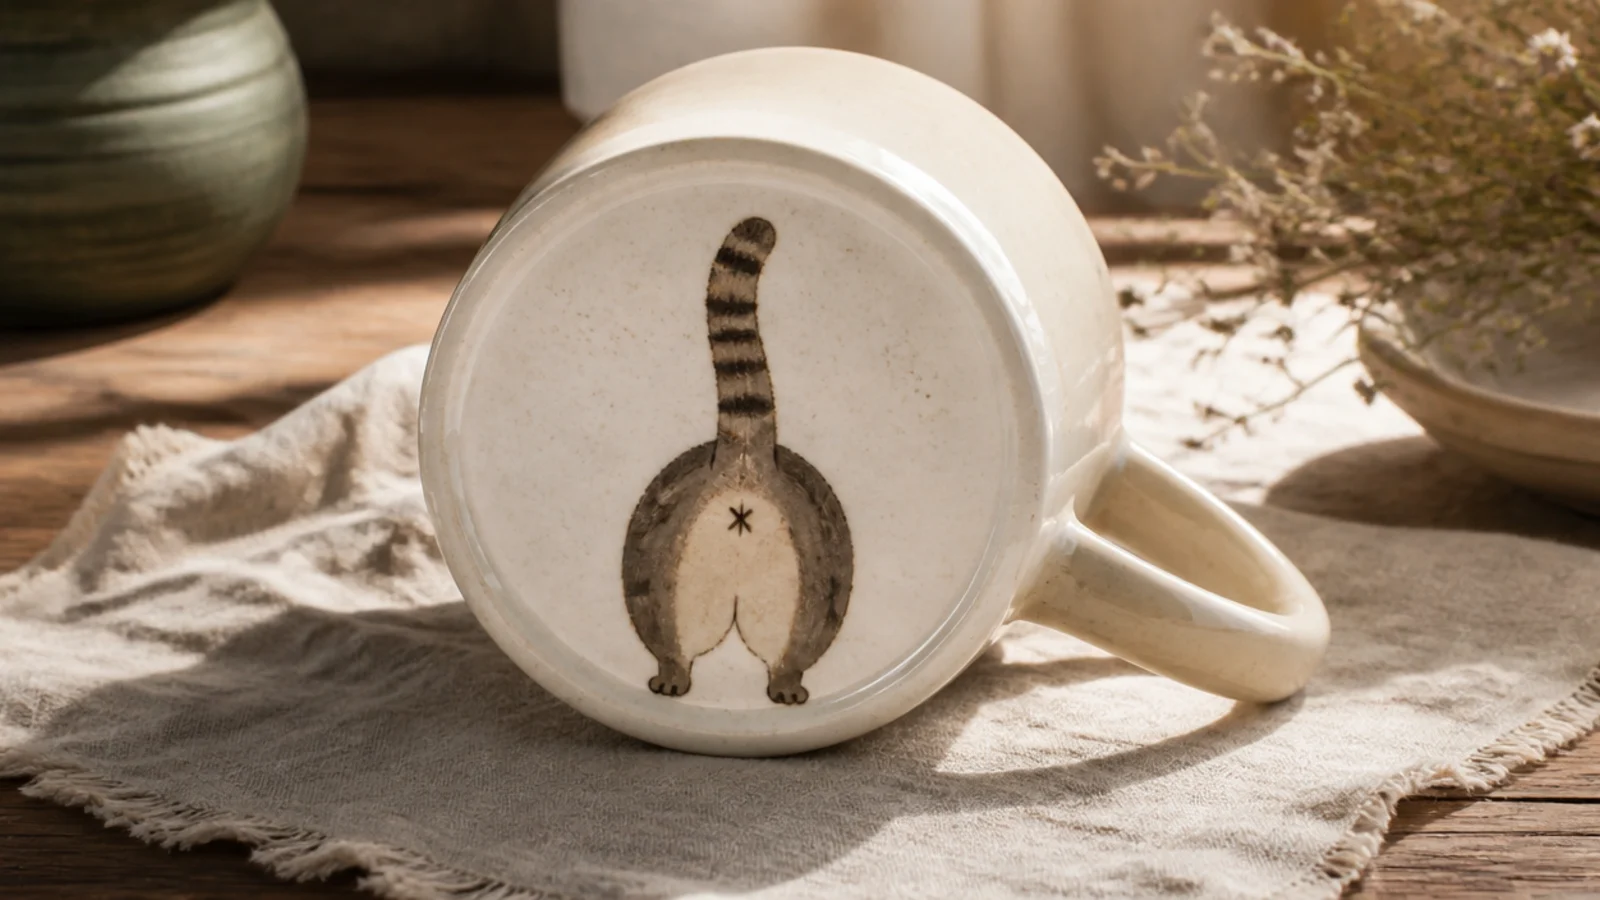
This is the classic gag mug: a plain, tasteful cat body on the outside, and a cheeky little cat rear with a raised tail painted on the bottom, revealed only when you tip it up to drink. It always gets a laugh and makes a great gift. The joke lives entirely on the underside, so the mug looks innocent on the shelf.
Decorate the outside simply — a small sitting cat or just a tail curling up one side in underglaze. On the unglazed base area inside the foot ring, paint a simple cartoon cat rear: a rounded bottom, two little back paws, and a striped tail standing straight up, all in the same fur color. Keep the paint inside the foot ring so it doesn’t touch the shelf. Coat the mug in clear food-safe glaze (wiping the actual foot clean) and glaze-fire.
Echo the fur color and tail stripes from the outside cat on the bottom cat, so the reveal feels like the same character turning around rather than a random add-on.
Don’t glaze the very foot ring where the mug sits; keep glaze (and the painted rear) inside it, or the mug fuses to the kiln shelf.
14. Sculpted Surprise Cat at the Bottom
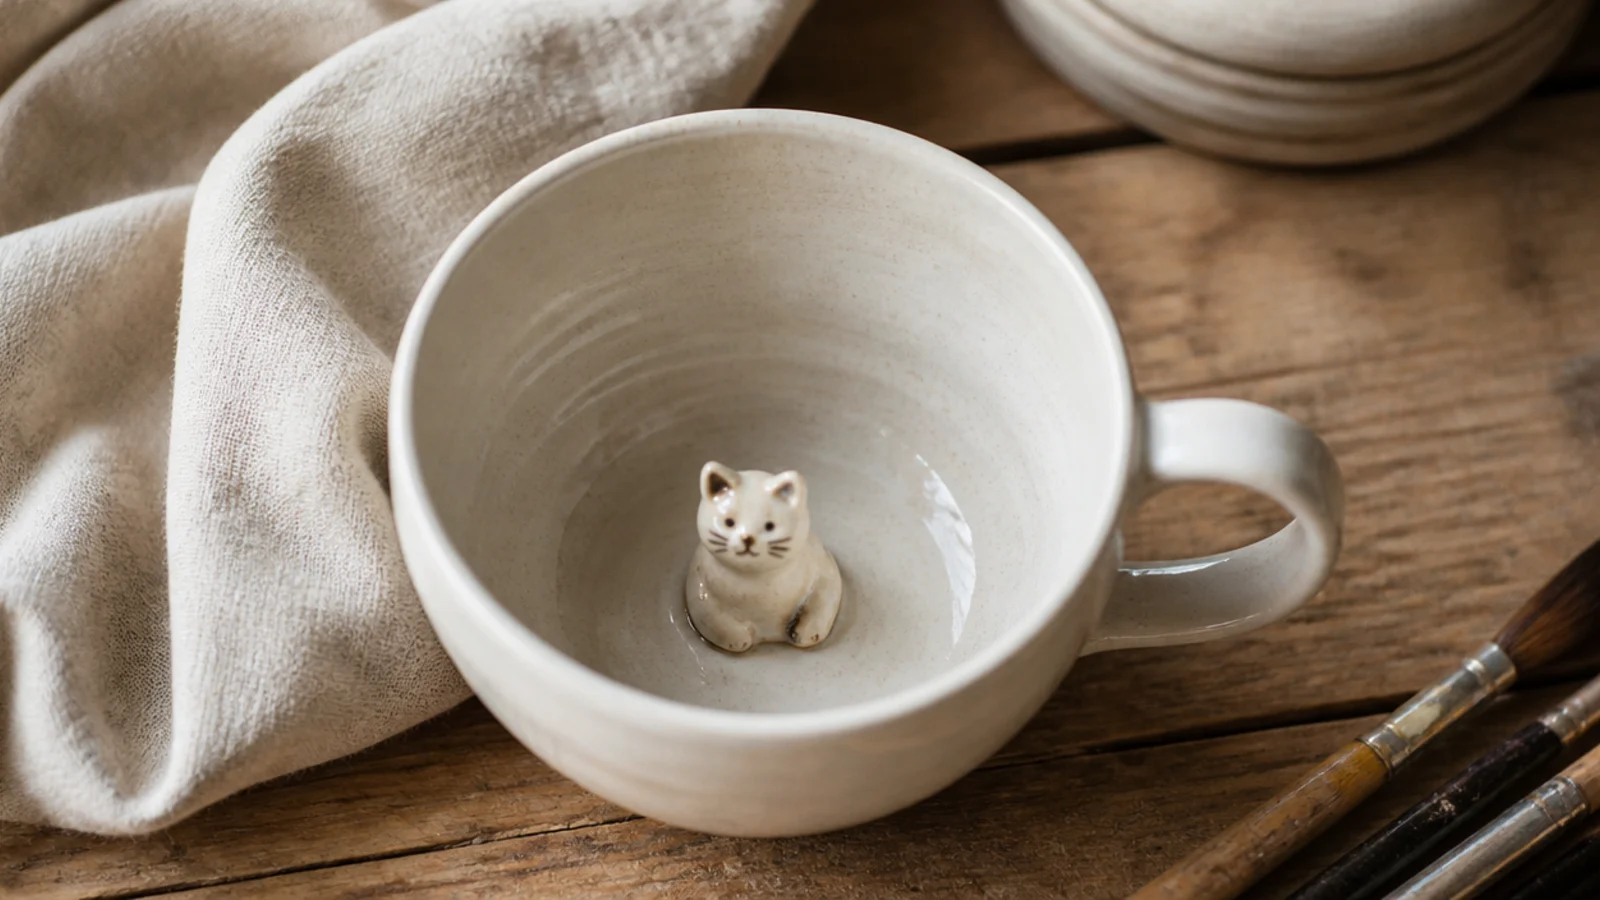
A tiny cat sculpted into the inside bottom of the mug waits at the end of your coffee like a little reward. It’s the surprise-at-the-bottom mug people love, and it turns finishing your drink into a moment. The cat is small and low enough that it never gets in the way of drinking.
Build your mug body first and let it reach soft leather-hard. Sculpt a tiny simple cat — a sitting silhouette about an inch tall — from matching clay, keeping it low and solid enough to survive but hollow-backed if it’s larger. Score and slip the inside base and the cat’s feet, press it in firmly at the center, and smooth the join well since it must be watertight. Dry slowly, bisque, then glaze the whole interior including around the cat with a clear food-safe glaze and glaze-fire.
Keep the surprise cat under an inch tall and centered so liquid still pours and drinks cleanly — it should peek out only as the mug empties, not block every sip.
Don’t leave any gap around the cat’s base; an unsealed join traps coffee and grime under the sculpt, so smooth and glaze it completely watertight.
15. Curled Cat-Tail Handle
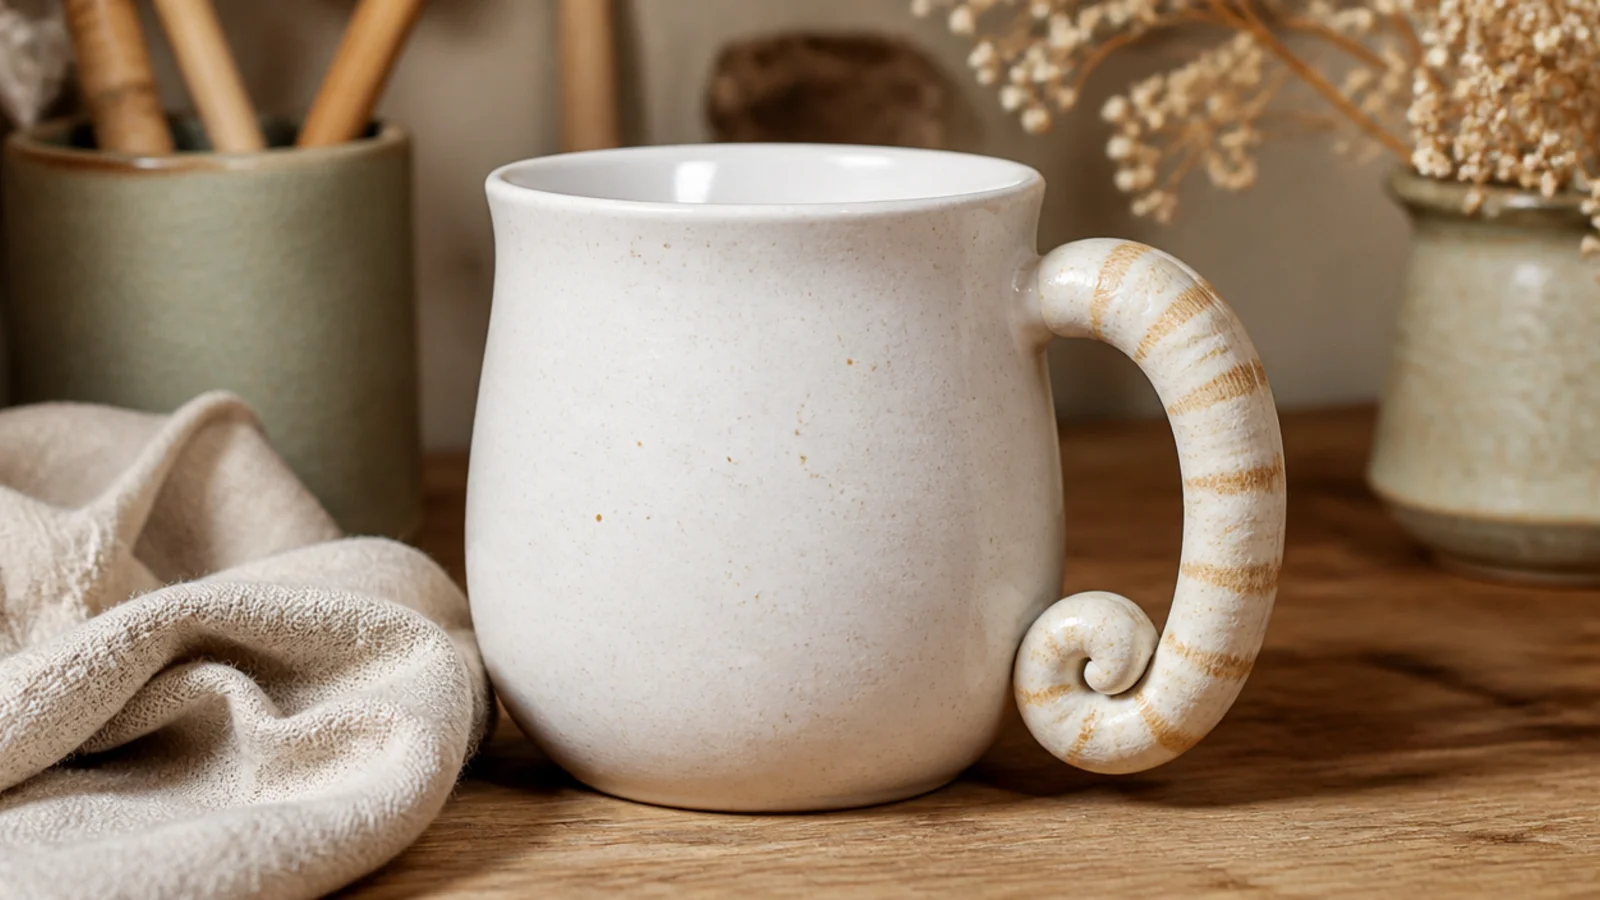
Replacing the ordinary handle with a curled cat tail is a clever, cohesive way to make the whole mug feel feline without a face at all. The tail’s natural S-curve makes a surprisingly comfortable, grippable handle. Painted stripes tie it to a tabby or ginger cat.
Roll a tapered coil of clay for the tail, thicker at the top where it meets the rim and narrowing to a rounded curled tip at the bottom. Let both the mug and the tail firm to leather-hard, then score and slip both ends of the tail and the two attachment points on the mug, pressing and smoothing generous collars at each join. Make sure the loop leaves enough room for fingers. Paint soft stripes in underglaze, dry slowly, bisque, glaze food-safe, and glaze-fire.
Test the handle gap with your own fingers before the clay firms — a cat tail curls tighter than a normal handle, so make the loop roomy enough to actually hold.
Don’t make the tail a thin, uniform rope; taper it and keep it sturdy where it joins the mug, or a slim handle snaps under the weight of a full mug.
16. Sleeping-Cat Handle
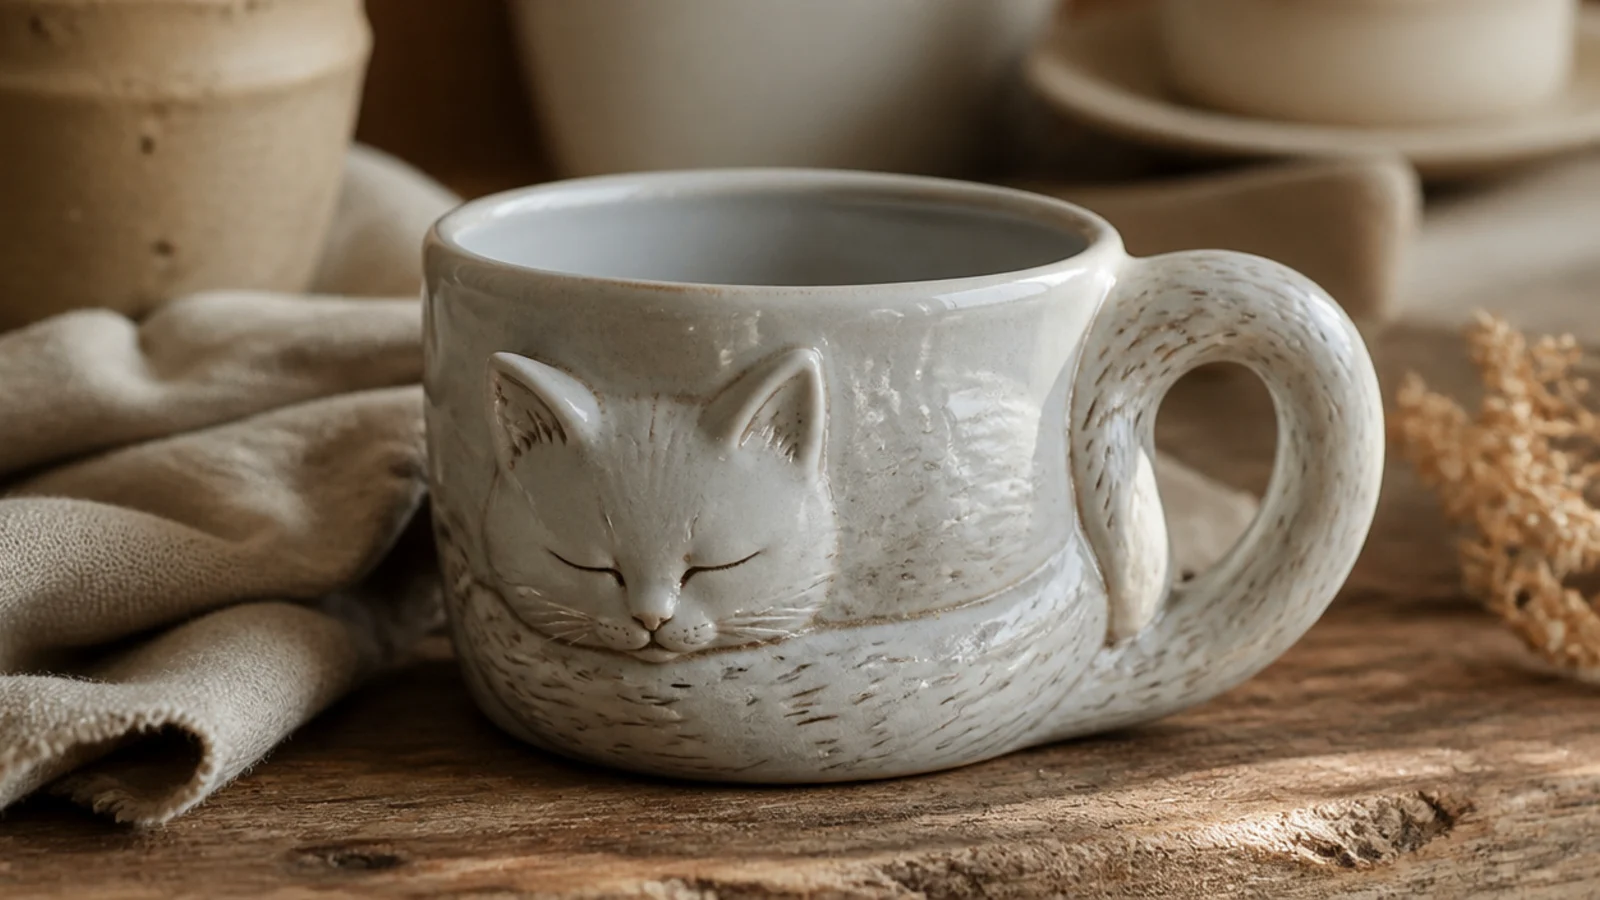
A cat curled asleep against the side of the mug, with its body and tail forming the handle loop, is peak cozy and a real conversation piece. The curled sleeping pose naturally makes a rounded handle shape. It’s more sculptural than the tail handle but follows the same join rules.
Sculpt a curled sleeping cat as a comma shape, with the head tucked at the top and the tail sweeping down and around to create the finger opening. Keep the cross-section thick enough to grip and hollow any bulky mass so it doesn’t crack. At leather-hard, score and slip where the head, back, and tail-tip touch the mug, press firmly, and smooth the joins. Add closed-eye and ear details with a needle tool, dry slowly under plastic, bisque, glaze food-safe, and glaze-fire.
Editor's noteMake sure the cat’s body meets the mug at two or three points, not one — multiple joins spread the load so a full mug doesn’t snap the handle off.
Skip thisDon’t sculpt the sleeping cat solid and chunky; a thick solid mass dries unevenly and cracks, so hollow the body or keep the walls thinner.
17. 3D Cat-Face Handle
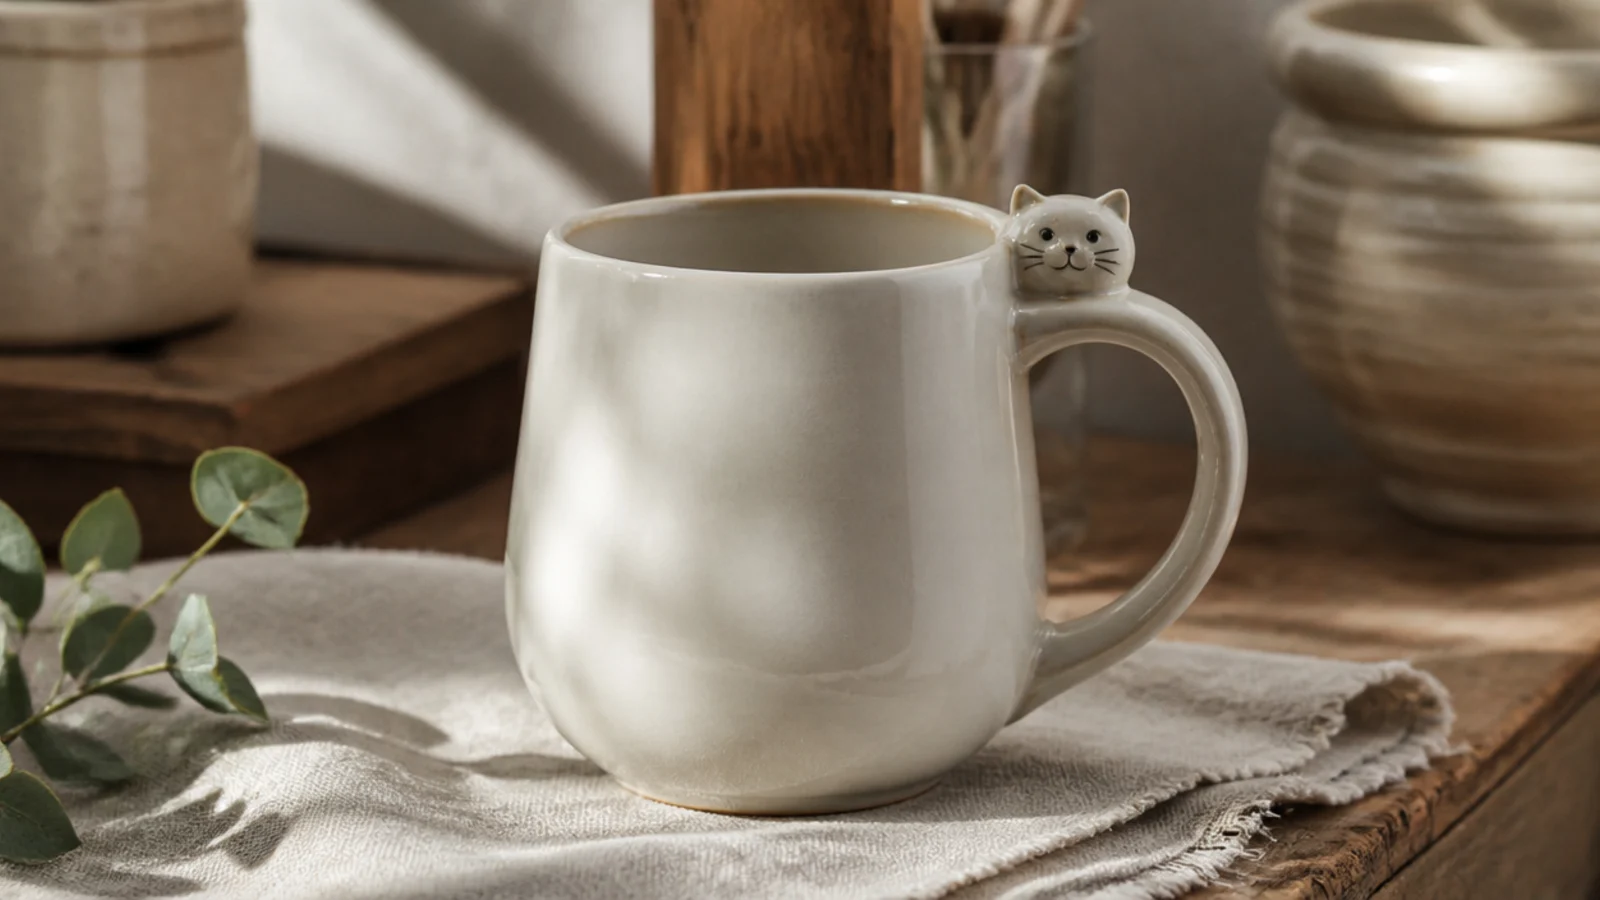
This keeps a normal, functional strap handle but caps the top with a little sculpted cat face and ears, so a cat pokes out from the side of the mug. You get full grip comfort plus a 3D cat, the best of both. It’s a friendly middle option between a painted cat and a fully sculpted handle.
Pull or cut a sturdy strap handle and attach it at leather-hard with scored, slipped joins as usual. Sculpt a small cat face — a rounded front with two triangle ears — and score and slip it onto the upper outside of the handle where it curves toward the rim. Smooth the join, then add eyes, nose, and inner-ear color in underglaze. Dry slowly, bisque, coat in a glossy food-safe glaze, and glaze-fire.
Editor's noteBuild the face onto the handle rather than a separate piece stuck on later — integrating it into the handle’s top curve makes the cat look like it’s part of the mug, not glued on.
Skip thisDon’t let the ears stick out where your hand grips; keep the face and ears on the outer top of the handle so they don’t jab your fingers.
18. Cat-Ear Lid Tea Mug
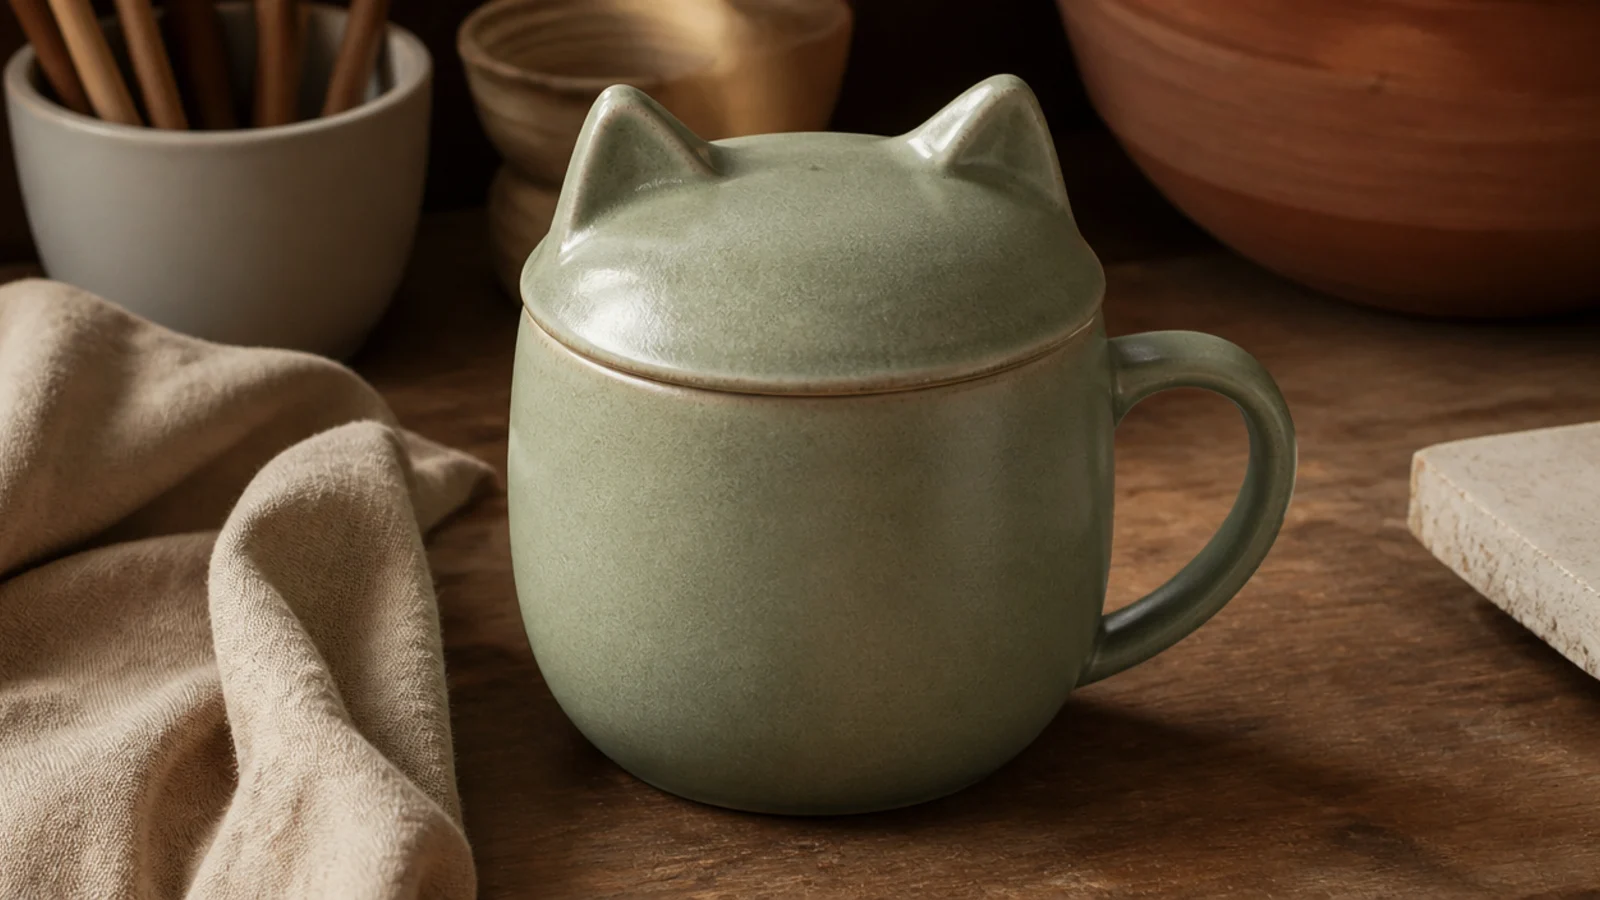
A tea mug with a fitted lid shaped like a cat’s head — two ears on top — keeps the drink warm and doubles as a spoon rest when flipped. It’s a genuinely useful project with a strong cat payoff. The lid is the star, so the mug below can stay simple.
Build a straight-sided mug, then measure the inside rim and build a slightly domed lid that sits just inside it with a small clay knob or a raised cat-head form on top. Add two triangle ears to the lid, scored and slipped on at leather-hard. Trim the lid to fit with a little play for glaze thickness, then bisque both pieces together so they shrink alike. Glaze inside and out with a food-safe glaze, keeping glaze off the mating rim edges, and glaze-fire the lid resting in place.
Editor's noteFire the mug and lid together and leave the touching rim edges bare of glaze — a fraction of extra room and unglazed contact points keep the lid from fusing shut.
Skip thisDon’t glaze the edges where the lid meets the mug; glaze there welds the lid permanently closed in the firing.
19. Cat-in-a-Box Shaped Mug
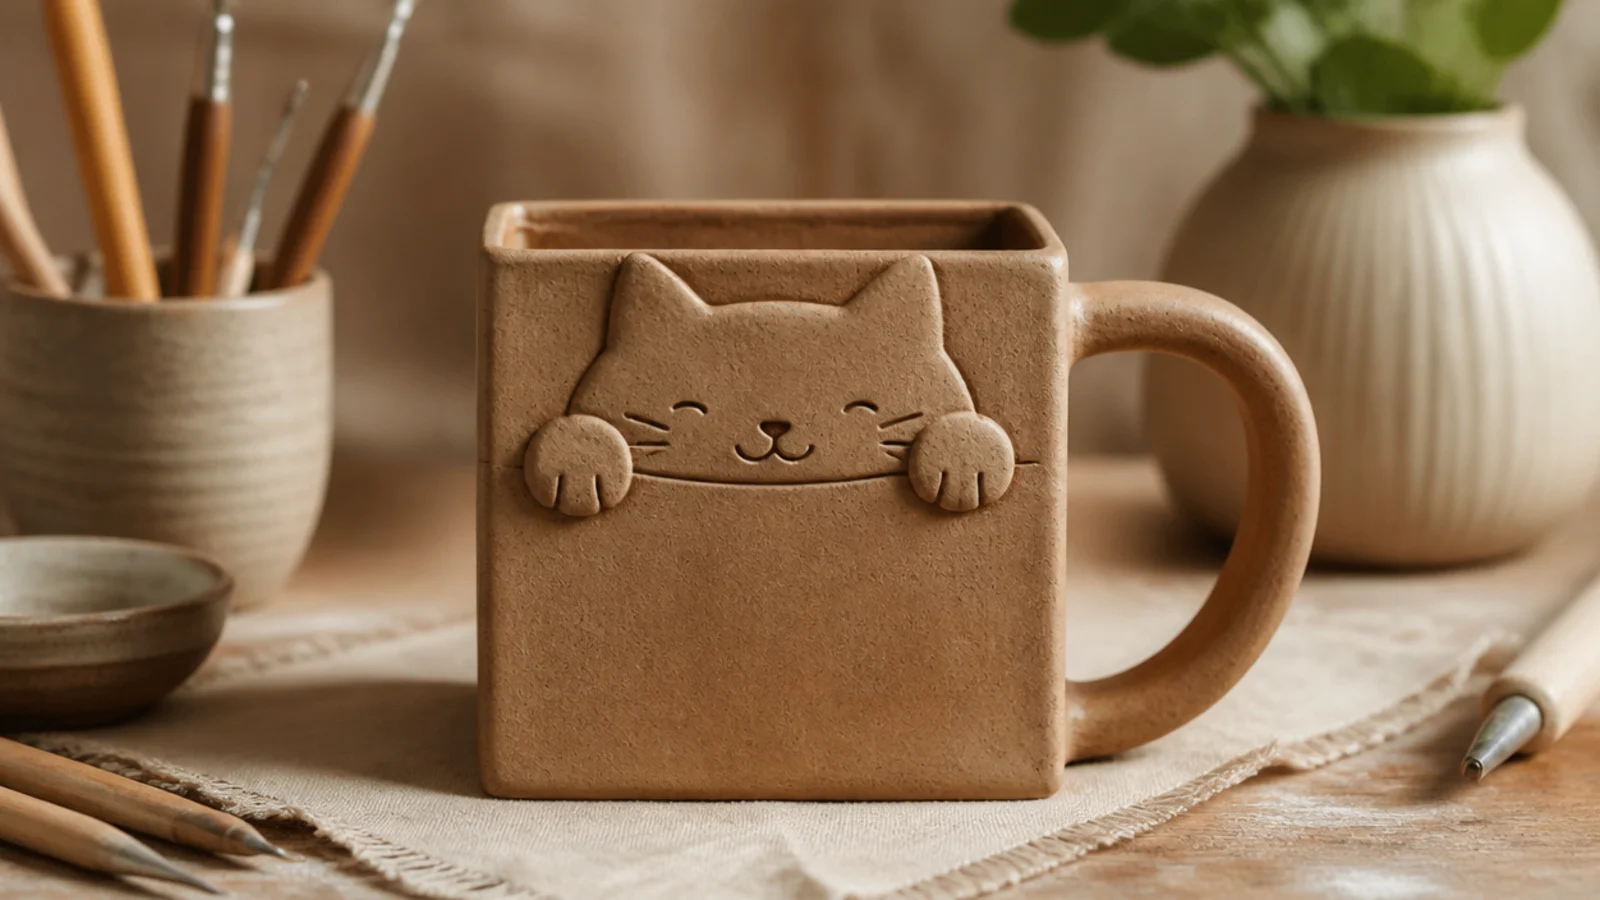
This slab-built mug is shaped like a little cardboard box with a cat settled inside, peeking over the edge — the internet’s favorite cat scenario made into a mug. The straight square walls are a fun change from a cylinder and show off slab-building. A kraft-brown glaze sells the cardboard-box look.
Roll a 1/4-inch slab and cut four rectangular walls plus a base, then score, slip, and join them into an open box shape, reinforcing every inside seam with a smoothed coil. Sculpt a simple cat head and two paws draping over one wall from matching clay, joined at leather-hard. Add a strap handle to the back wall. Paint flap lines and a kraft-brown tone in underglaze, dry slowly, bisque, glaze with a matte food-safe glaze, and glaze-fire.
Editor's noteReinforce every inside corner seam with a thin coil smoothed into the joint — square slab mugs leak and crack at the corners far more than round ones, so seal them well.
Skip thisDon’t rush the slab joins while the clay is soft and floppy; let the slabs firm slightly first so the box holds crisp square corners instead of bowing.
20. Kurinuki Cat-Body Mug
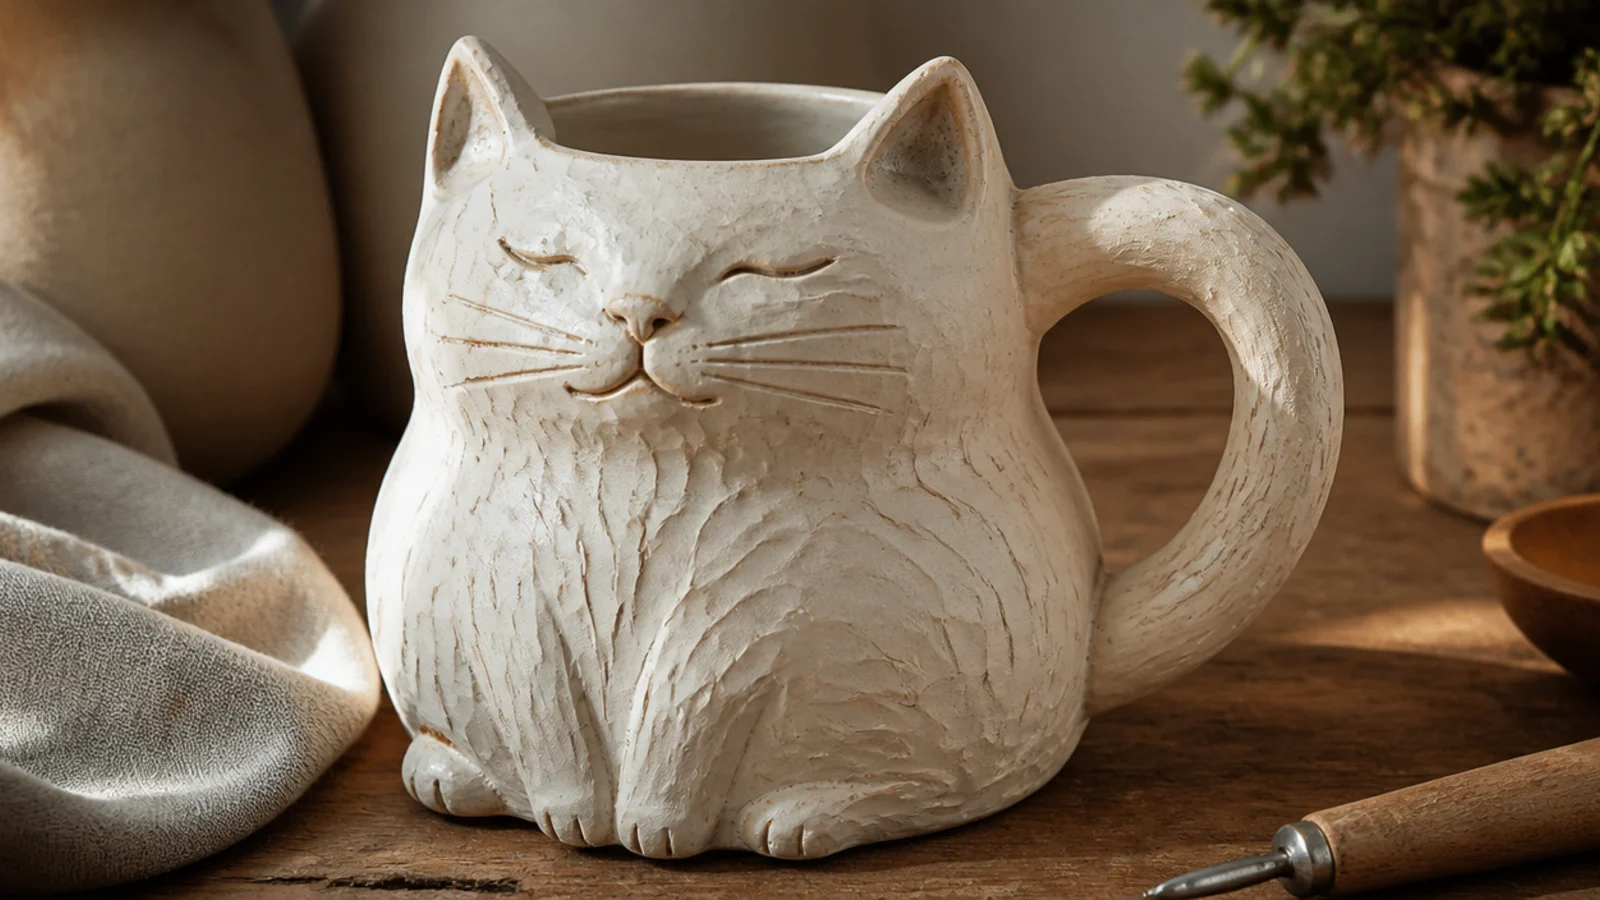
Kurinuki is the Japanese technique of carving a mug from a solid block of clay, and it’s the perfect way to sculpt a whole cat-shaped body with expressive tool marks. The mug becomes a sitting cat — ears at the rim, a tail forming the handle, a face on the front. It’s the showpiece of the list, rewarding patience with a completely one-of-a-kind mug.
Start with a solid block of clay a bit larger than your mug and shape the outside into a sitting cat form, including two ears rising at the rim and a tail curving down one side as the handle. Hollow the inside with a loop tool, keeping walls an even quarter-inch and checking depth and thickness often by pressing from both sides. Carve a simple face and paw details with a needle tool while the walls are firm but not dry. Dry slowly under plastic, bisque, glaze with a matte food-safe glaze that keeps the carved texture, and glaze-fire.
Editor's noteHollow slowly and check wall thickness by pressing gently from the outside and inside at once — a cat-shaped body has curves that make it easy to carve one side too thin.
Skip thisDon’t hollow the block while it’s very wet and sticky; let it firm to soft leather-hard so the cat shape holds its form as you carve out the inside.