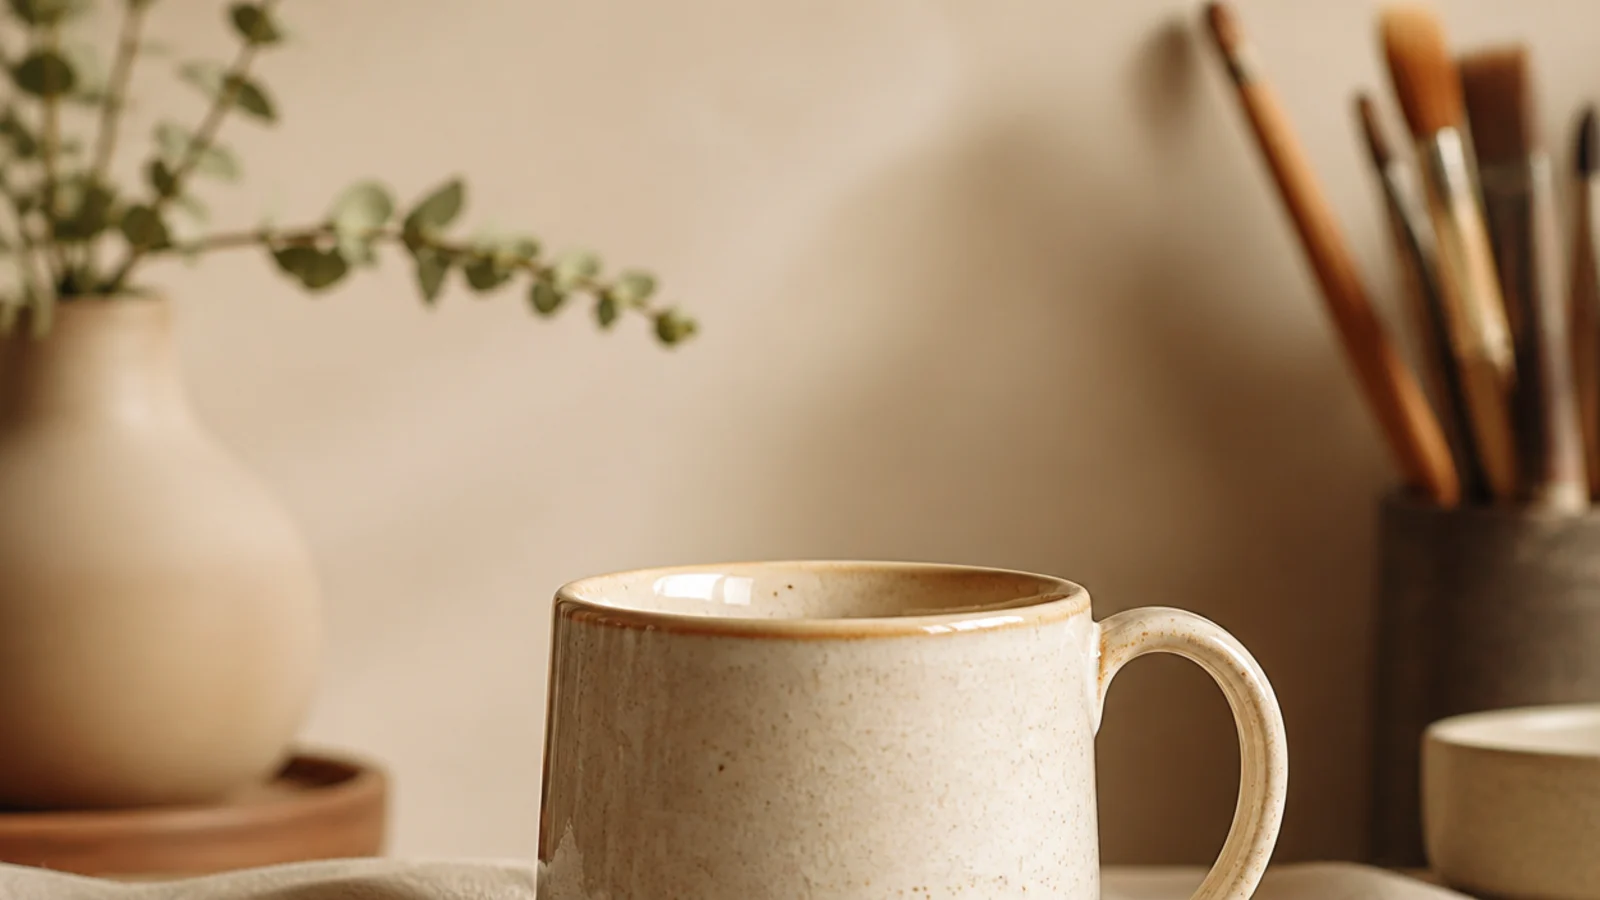
1. Classic Pinch-Pot Mug
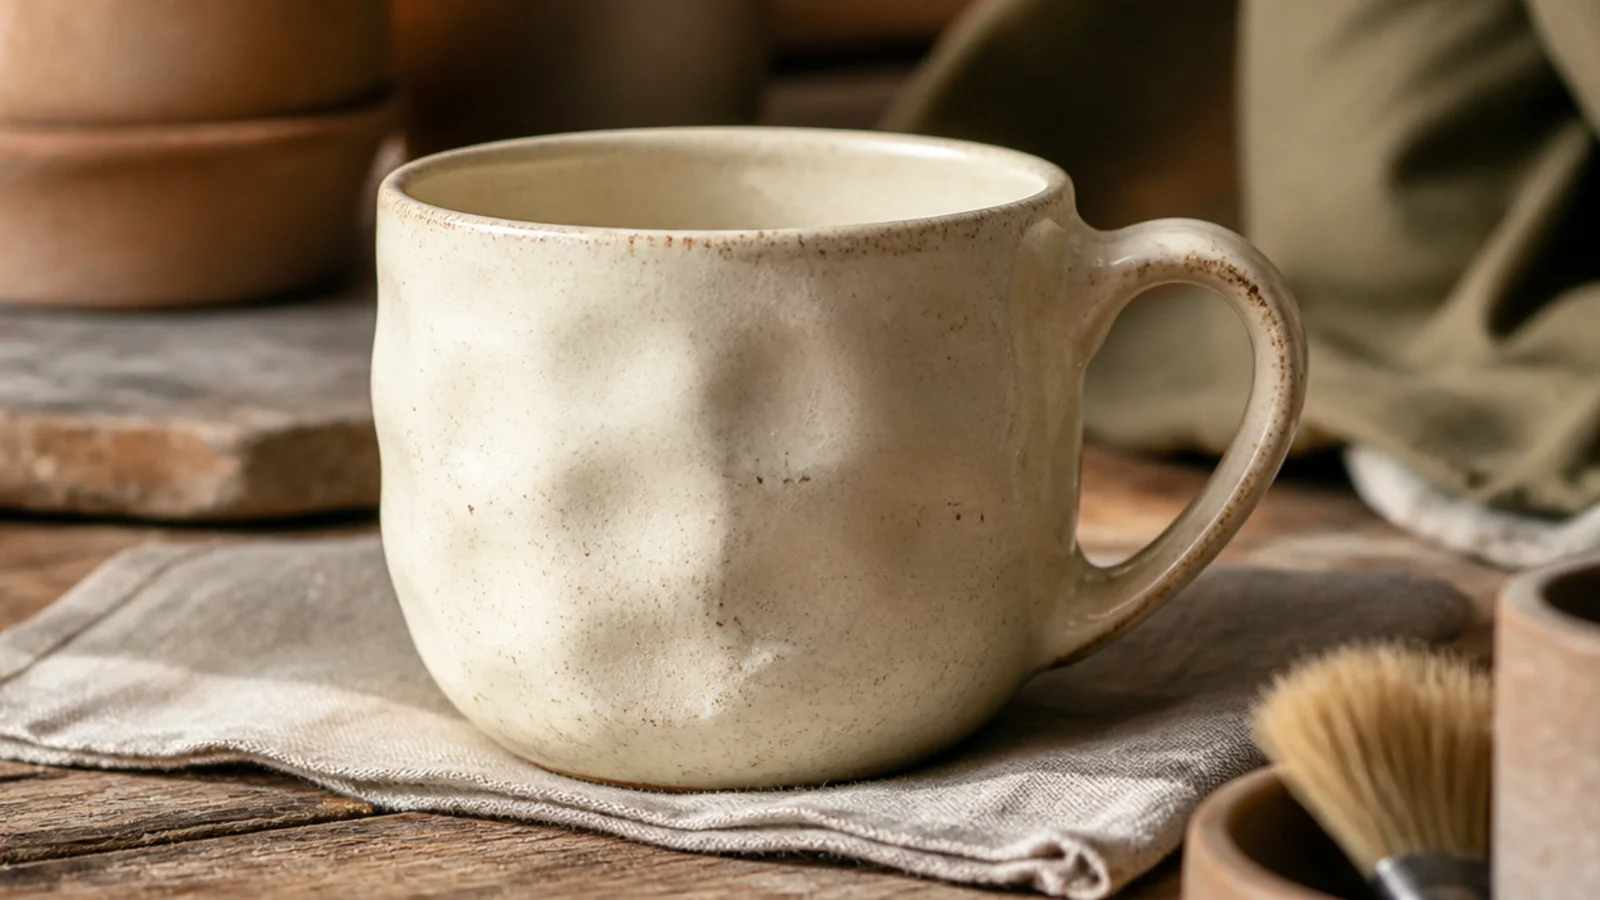
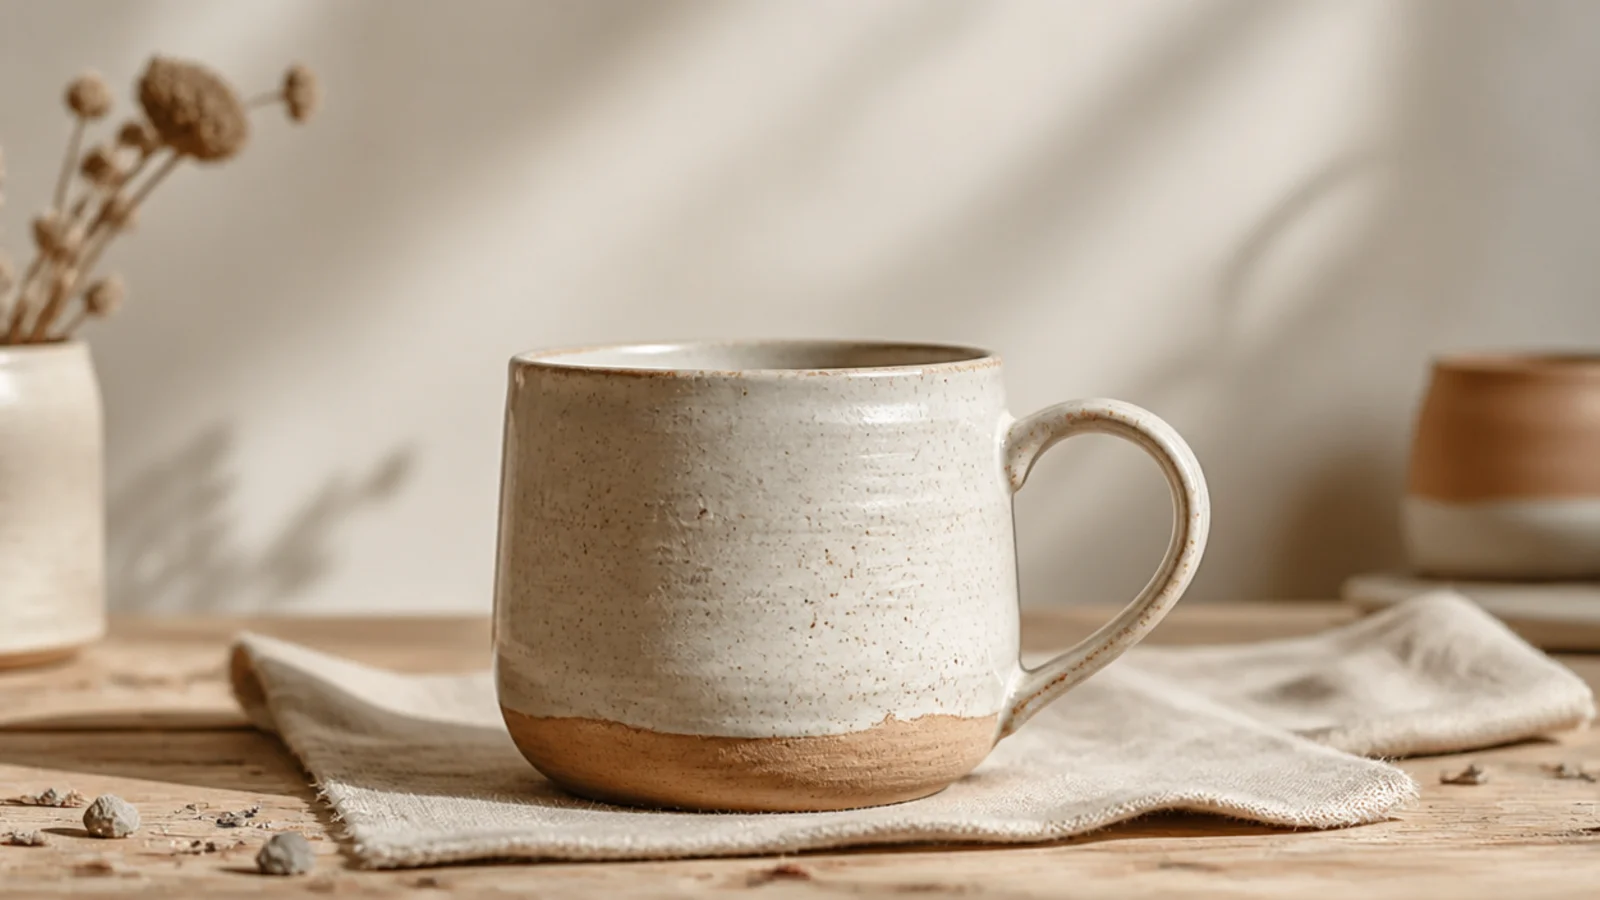
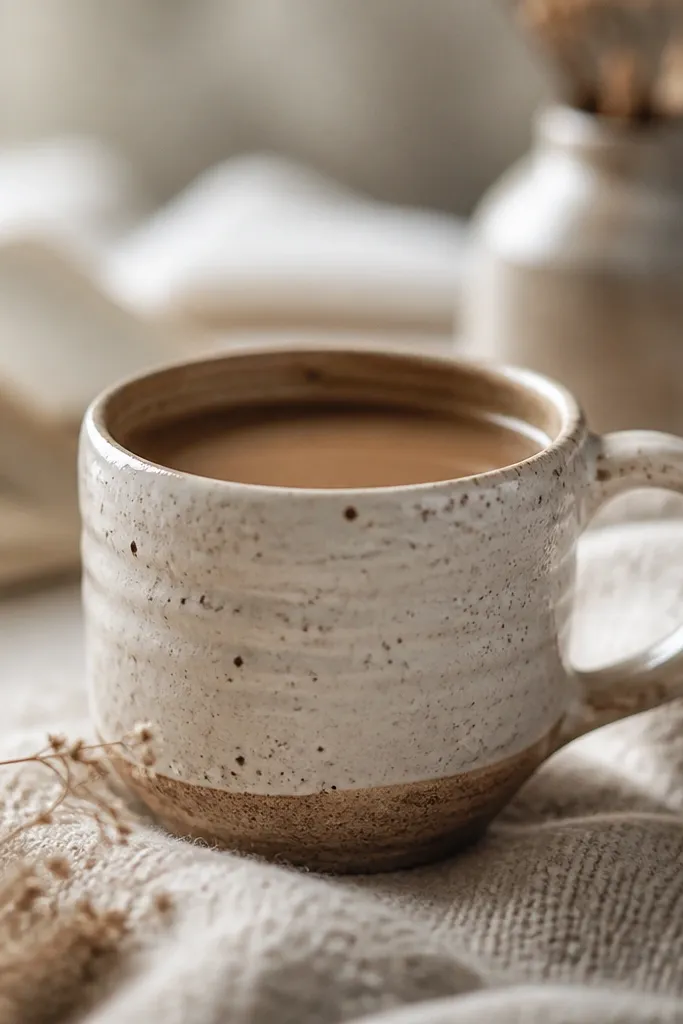
This is the true beginner’s mug — no wheel, no slab, just your hands. You open a ball of clay with your thumb and pinch the walls up even, which teaches the one skill that matters most: consistent wall thickness. The gentle finger texture reads as intentional and handmade in the best way, and a soft solid glaze lets it show.
Roll about a pound of stoneware into a smooth ball and press your thumb into the center, stopping a quarter-inch from the bottom. Pinch the walls between thumb and fingers, rotating as you go, working base to rim until they are an even 1/4 inch. Tap the base flat on the table, compress the inside base with a rounded rib to stop cracks, then firm to leather-hard before scoring and attaching a small pulled handle. Bisque fire, glaze inside and out with a food-safe glaze, and glaze-fire.
Keep a damp sponge nearby and smooth the rim every few minutes — a ragged, cracked rim is the fastest way to spot a first pinch pot.
Don’t leave the base thick while thinning the walls; an uneven base cracks in the kiln and makes the mug feel clunky.
2. Dimpled Thumb-Grip Mug
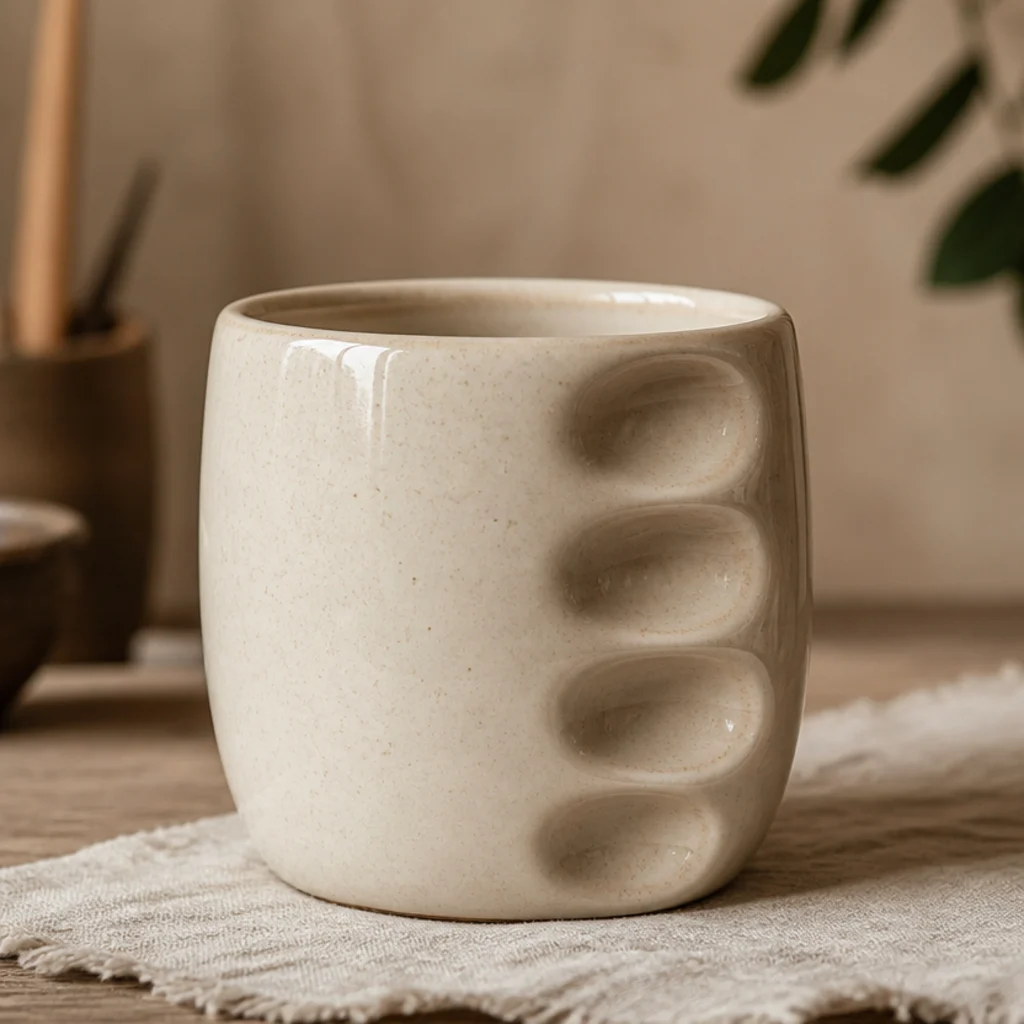
This is a pinch mug with a purpose — a row of deliberate dimples pressed into one side so your fingers nest right in. It’s just as beginner-friendly as a plain pinch pot but feels custom-made for your hand. The dimples also give a glossy glaze somewhere to pool, so the finish looks richer.
Build a pinch-pot body with even 1/4-inch walls as above, then, while the clay is still soft, press your thumb firmly into one side three or four times in a vertical column, supporting the inside wall with your other hand so you don’t punch through. Refine each dimple with a rounded rib or the back of a spoon and check the wall stays about 1/4 inch. Firm to leather-hard, add a small handle opposite the dimples or skip it entirely, then bisque, glaze food-safe, and glaze-fire.
Editor's notePress the dimples with your other hand cupped inside as a backstop so the wall stretches into a smooth curve instead of thinning to a weak spot.
Skip thisDon’t dimple so deep the wall goes thin and translucent; a blown-out thin patch is where the mug will crack in the kiln.
3. Chunky Rustic Pinch Mug
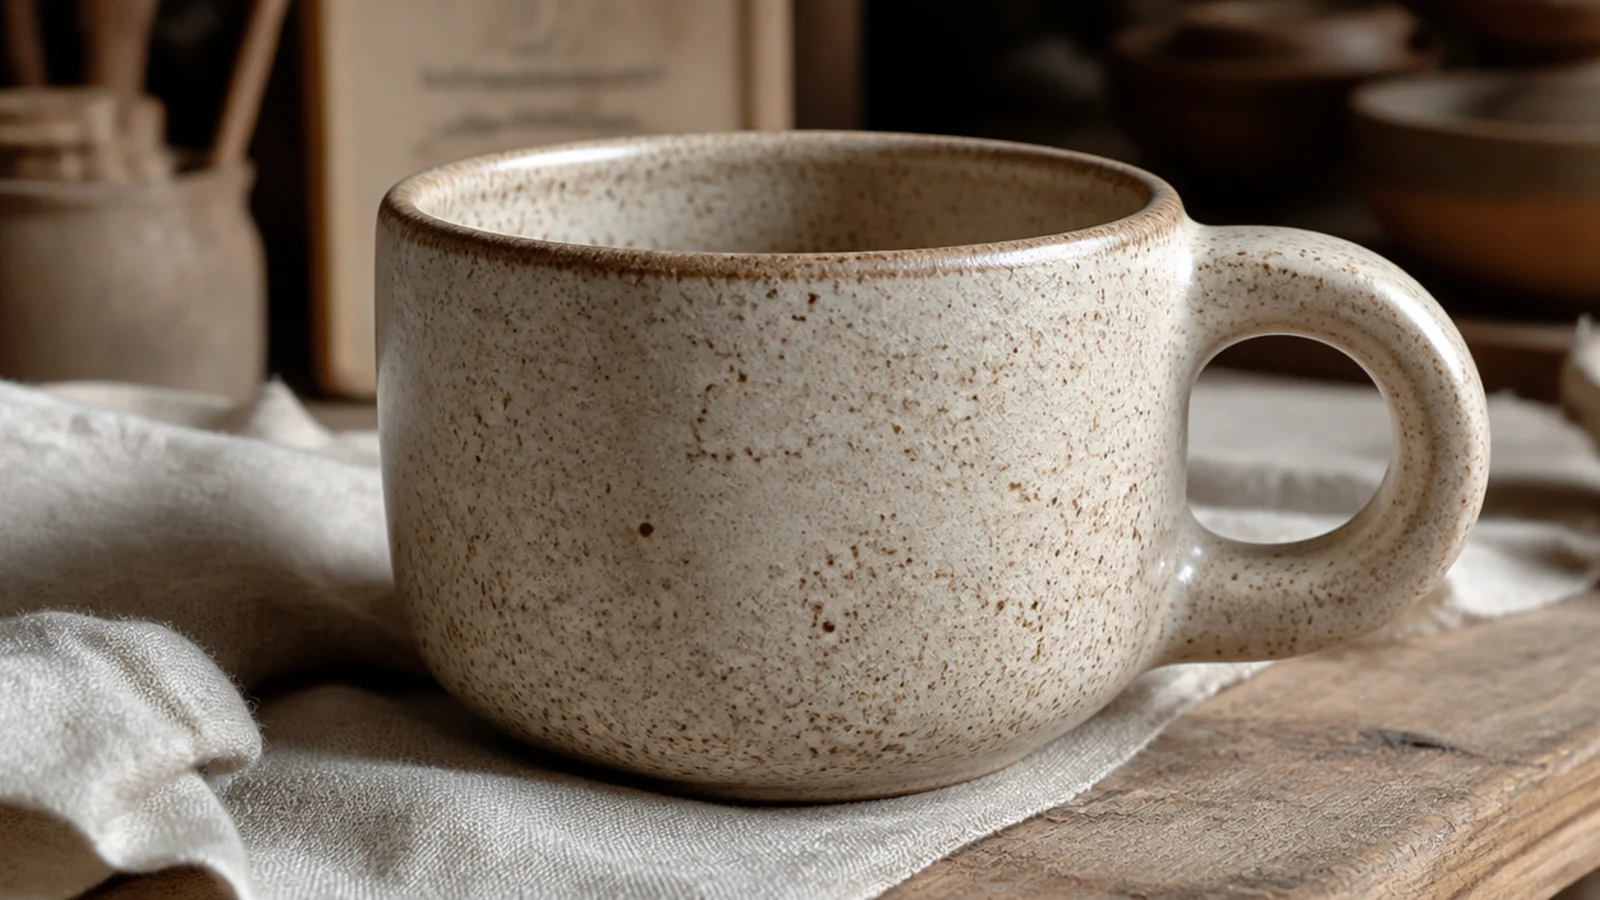
Sometimes the whole charm is heft and honesty. A short, wide pinch mug with slightly thicker walls and a fat handle feels grounding in the hand and forgives every wobble. It leans into the handmade look instead of fighting it, so it’s a confidence-builder that still looks like considered studio ware.
Roll about 1 to 1.25 pounds of speckled stoneware into a ball, open it with your thumb, and pinch the walls to a slightly generous 5/16 inch, keeping them even. Leave the surface lightly tool-marked rather than sanded glassy, and keep the form low and wide — about 3 inches tall. Compress the inside base, firm to leather-hard, then attach a thick strap handle rolled from a fat coil. Bisque, glaze with a matte or satin food-safe glaze that keeps the texture, and glaze-fire.
Editor's noteMatch the handle weight to the wall — a chunky mug needs a chunky handle, or a skinny handle looks tacked on and snaps under the extra mass.
Skip thisDon’t confuse chunky with careless; walls that swing from thick to thin still crack, so keep the thickness even even when it’s generous.
4. Slab-Wrap Cylinder Mug
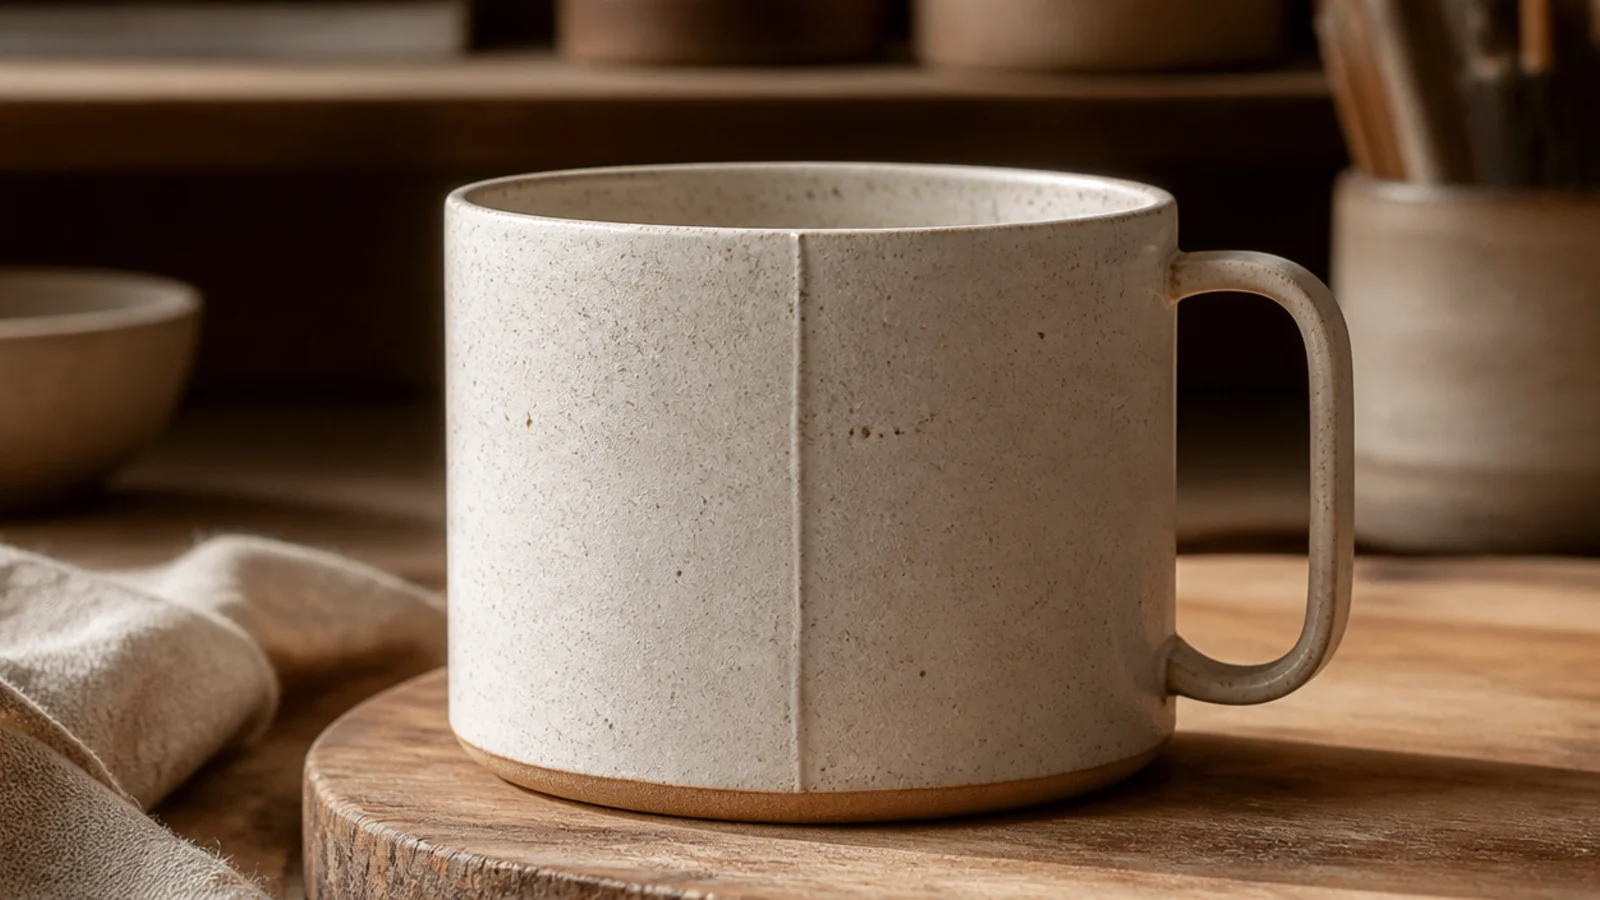
A slab mug gives you clean, straight sides and a modern cylinder without a wheel. You roll a flat sheet and wrap it around a form, which is fast and endlessly customizable with texture. It’s the most designed-looking beginner build and the base for a dozen surface ideas further down this list.
Roll a slab to an even 1/4 inch using two guide sticks and a rolling pin, then cut a rectangle about 4 inches tall by 9 to 10 inches long. Wrap it around a cardboard tube covered in newspaper, score and slip the overlapping seam, and blend it smooth inside and out. Cut a circle for the base, score, slip, attach it, and seal the inside join with a thin coil smoothed in. Firm to leather-hard, add a strap handle, then bisque, glaze food-safe, and glaze-fire.
Texture the slab before you wrap it — it’s far easier to press a pattern into a flat sheet than into a standing cylinder.
Don’t wrap the slab while it’s soaking wet and floppy; let it firm slightly or the cylinder sags and the seam won’t hold.
5. Stamp-Textured Slab Mug
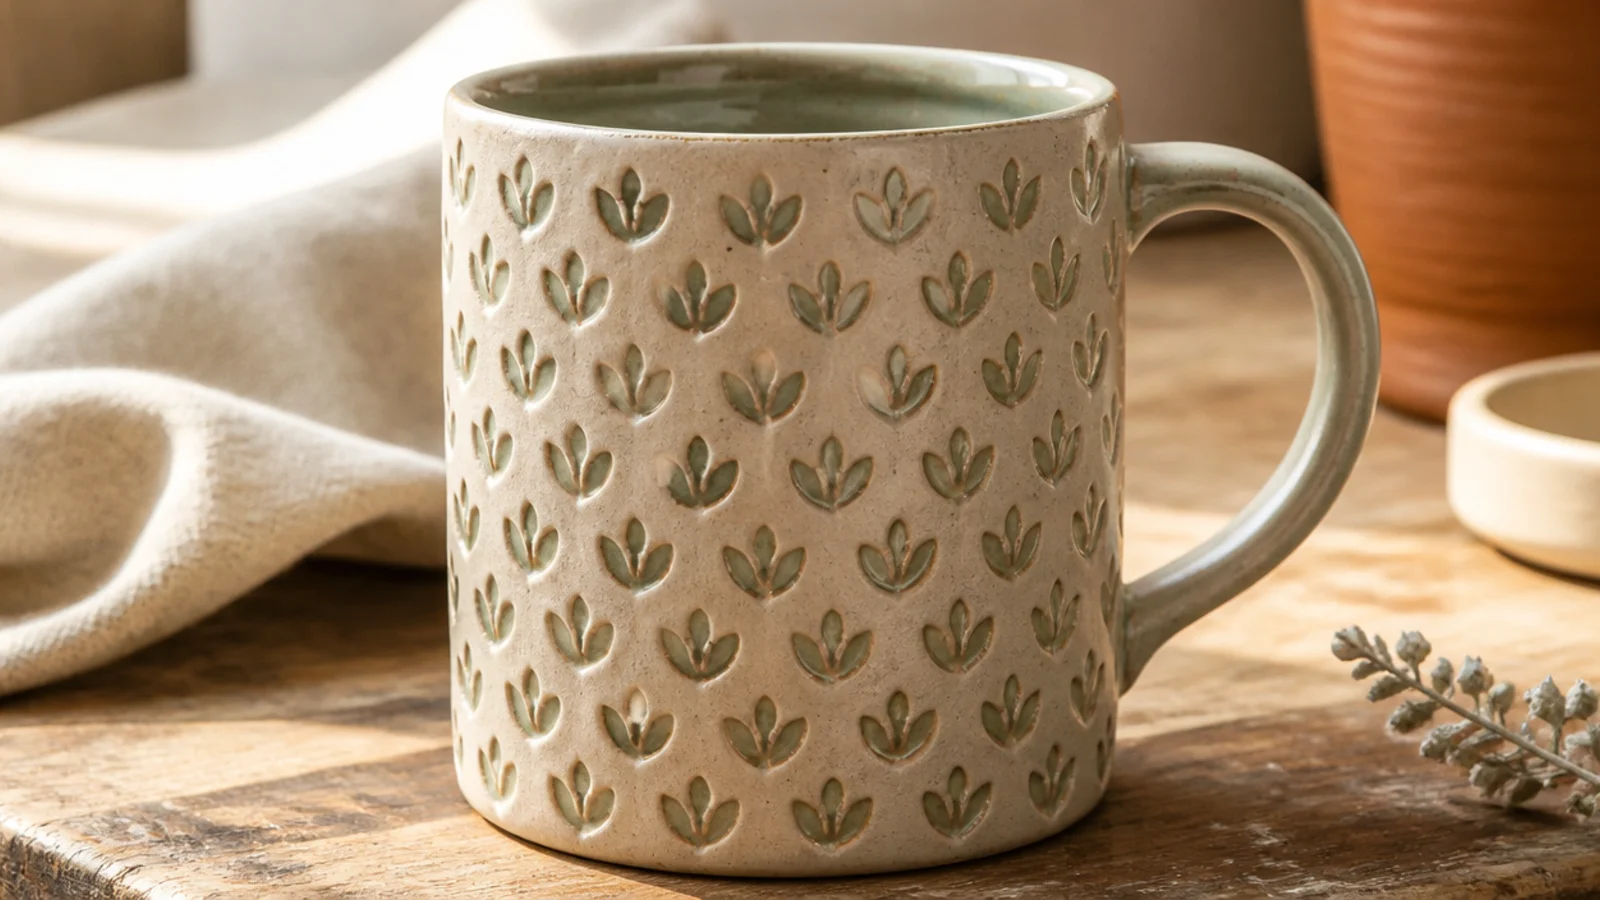
Small carved stamps pressed into a slab give a repeating relief pattern that looks like it took a studio and a kiln — and it’s just a flat sheet you rubber-stamp before wrapping. You can use bought clay stamps, carved erasers, or found objects like buttons. A glaze that breaks over the raised edges makes every stamp pop.
Roll a 1/4-inch slab and cut your mug rectangle. Lay it on a flat surface and press your stamp straight down in an even grid, re-inking nothing — just press, lift, and repeat, spacing by eye or against a ruler. Wrap the textured slab into a cylinder with the pattern facing out, join the seam, and add a base. Firm to leather-hard, attach a handle, bisque, then apply a food-safe glaze that breaks over texture and glaze-fire.
Editor's notePress each stamp with the same firm, even pressure — inconsistent depth is what makes a stamped pattern look accidental instead of designed.
Skip thisDon’t stamp so deep you thin the slab under each mark; deep stamps leave weak spots that crack along the pattern in firing.
6. Textured-Roller Pattern Mug
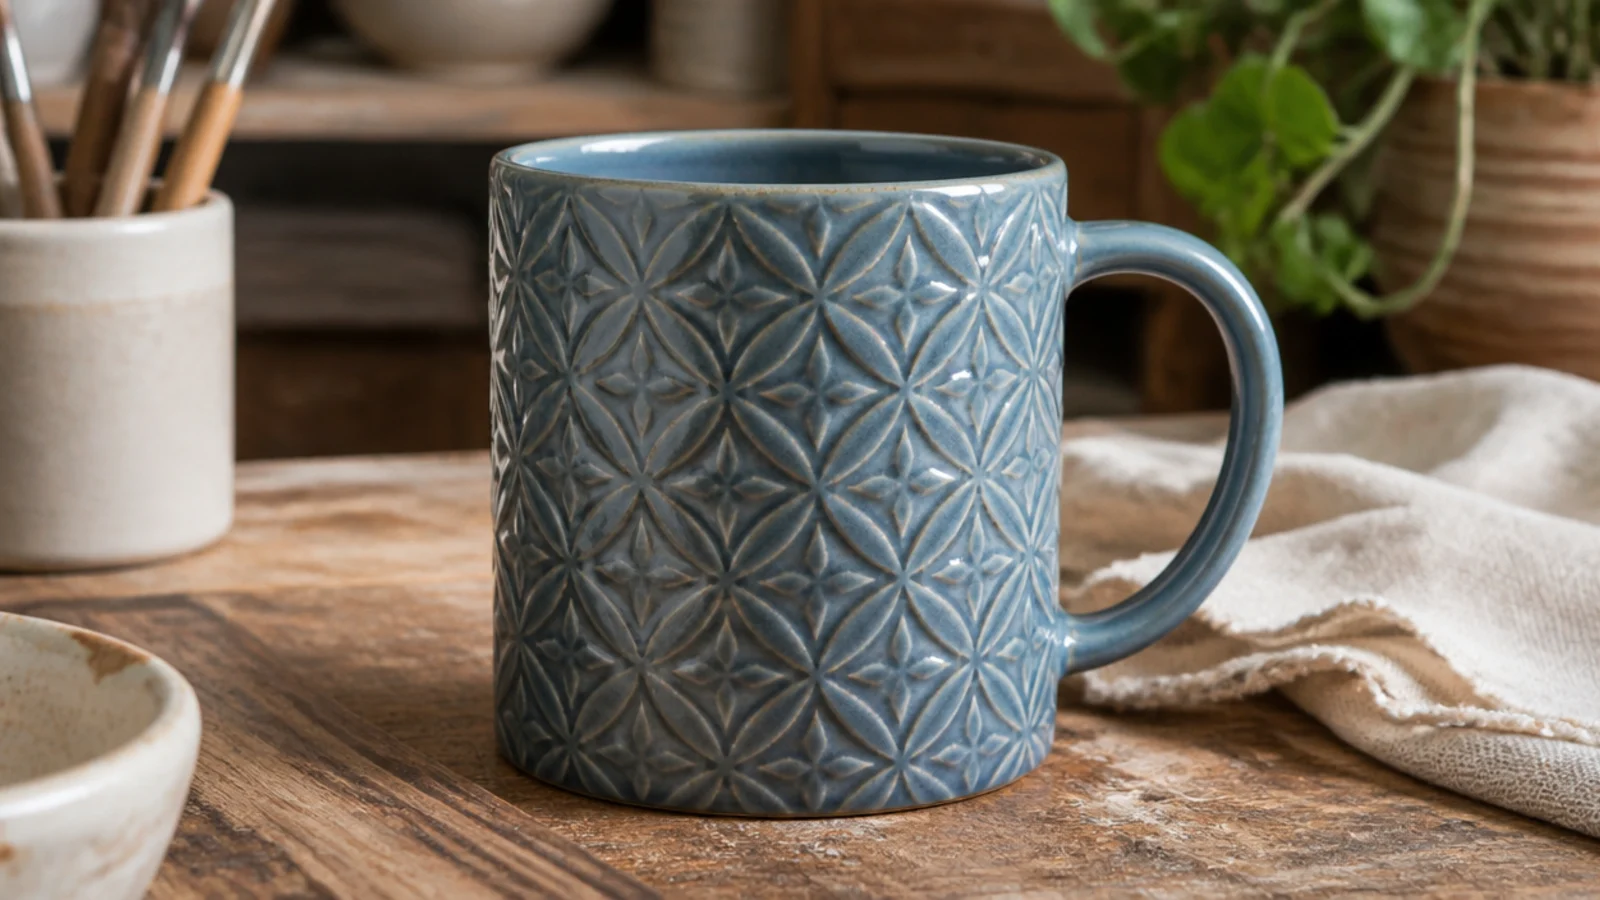
A carved or textured rolling pin lays down a seamless, all-over pattern in one pass — herringbone, florals, chevrons — with zero drawing skill. It’s the fastest way to cover a whole mug in crisp relief. Because the pattern is continuous, the mug reads like production ware from a real ceramics line.
Roll a plain 1/4-inch slab first, then roll a texture roller once firmly across it in a single direction so the emboss stays sharp and doesn’t double-print. Cut your mug rectangle from the patterned sheet, wrap it into a cylinder with the texture out, join the seam, and add a base. Firm to leather-hard, attach a handle, bisque, then glaze with a glossy food-safe glaze that settles into the recesses and glaze-fire.
Editor's noteRoll the texture in one confident pass without backing up — a second overlapping pass ghosts the pattern and blurs the crisp lines.
Skip thisDon’t roll the texture into a slab that’s already stiffening; the emboss only bites cleanly into fresh, soft clay.
7. Rope-Pressed Texture Mug
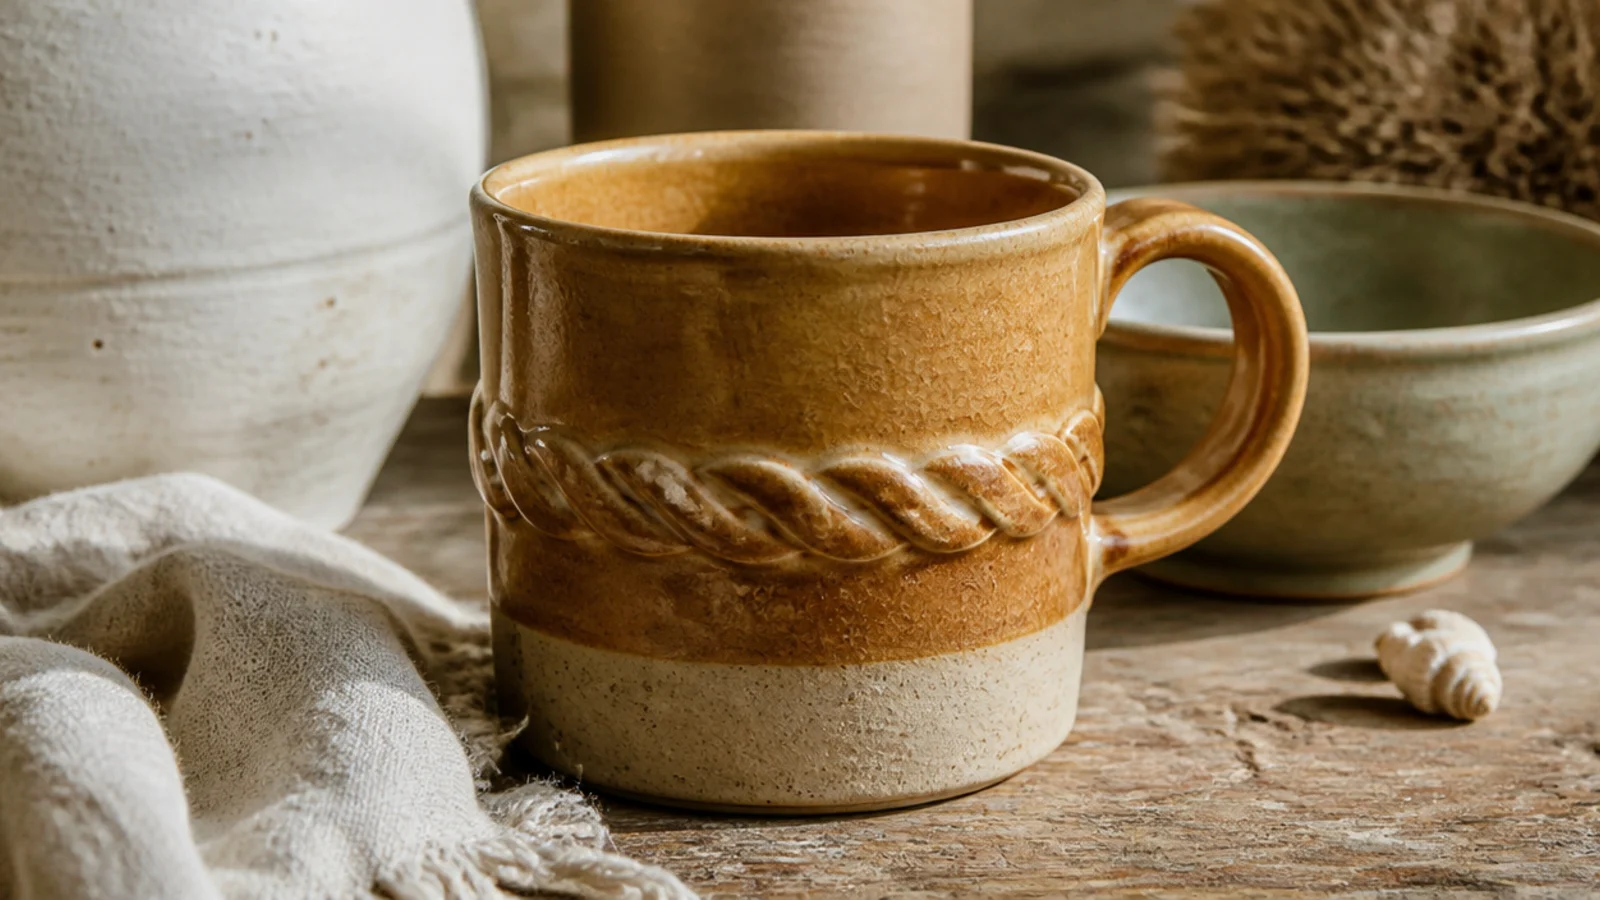
Pressing a length of twisted rope or jute into the clay leaves a braided, nautical texture that’s tactile and warm. You can band it around the middle or cover the whole body. It’s one of the easiest textures to get right because the rope does all the patterning for you.
Roll a 1/4-inch slab and lay a length of thick twisted rope across it, then roll over the rope once firmly with a rolling pin to press the braid pattern in. Peel the rope away and repeat in rows if you want an all-over look, or press a single band. Wrap the slab into a mug with the texture out, join the seam and base, firm to leather-hard, and add a handle. Bisque, glaze with a food-safe glaze that pools in the twists, and glaze-fire.
Editor's noteUse natural fiber rope, not synthetic — natural jute presses a crisper braid and won’t stretch out of shape as you roll over it.
Skip thisDon’t press the rope unevenly by leaning on one end; uneven pressure gives a texture that fades out and looks half-finished.
8. Burlap Fabric-Texture Mug
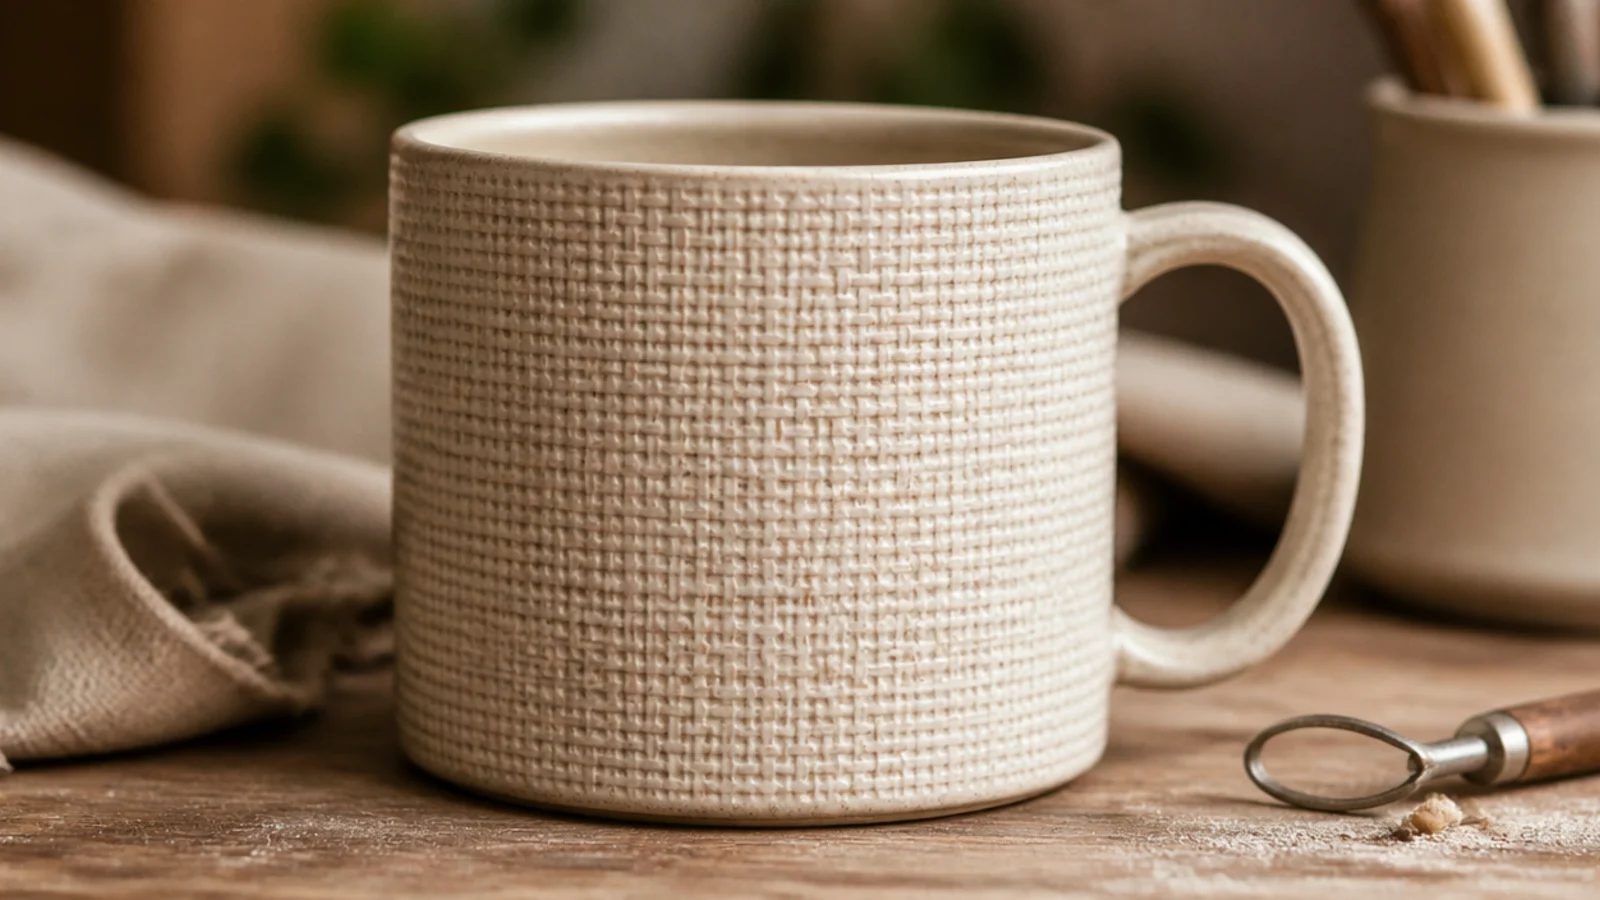
Pressing burlap or coarse linen into a slab gives a soft, all-over woven texture that reads like fabric and feels wonderful in the hand. It’s understated — a quiet grain rather than a bold motif — which suits people who want texture without a loud pattern. A satin glaze catches the weave beautifully.
Roll a 1/4-inch slab, lay a piece of burlap or coarse linen over it, and roll firmly once so the weave transfers evenly across the whole sheet. Peel the fabric away, cut your mug rectangle, and wrap it into a cylinder with the texture facing out. Join the seam and base, firm to leather-hard, attach a handle, bisque, then apply a satin food-safe glaze that settles into the weave and glaze-fire.
Editor's noteKeep the fabric taut and flat as you roll so the weave prints crisp and even instead of wrinkling into blurry patches.
Skip thisDon’t use fabric with a very loose, floppy weave; it shifts under the pin and prints a smeared texture instead of a clean grain.
9. Lace-Impressed Mug
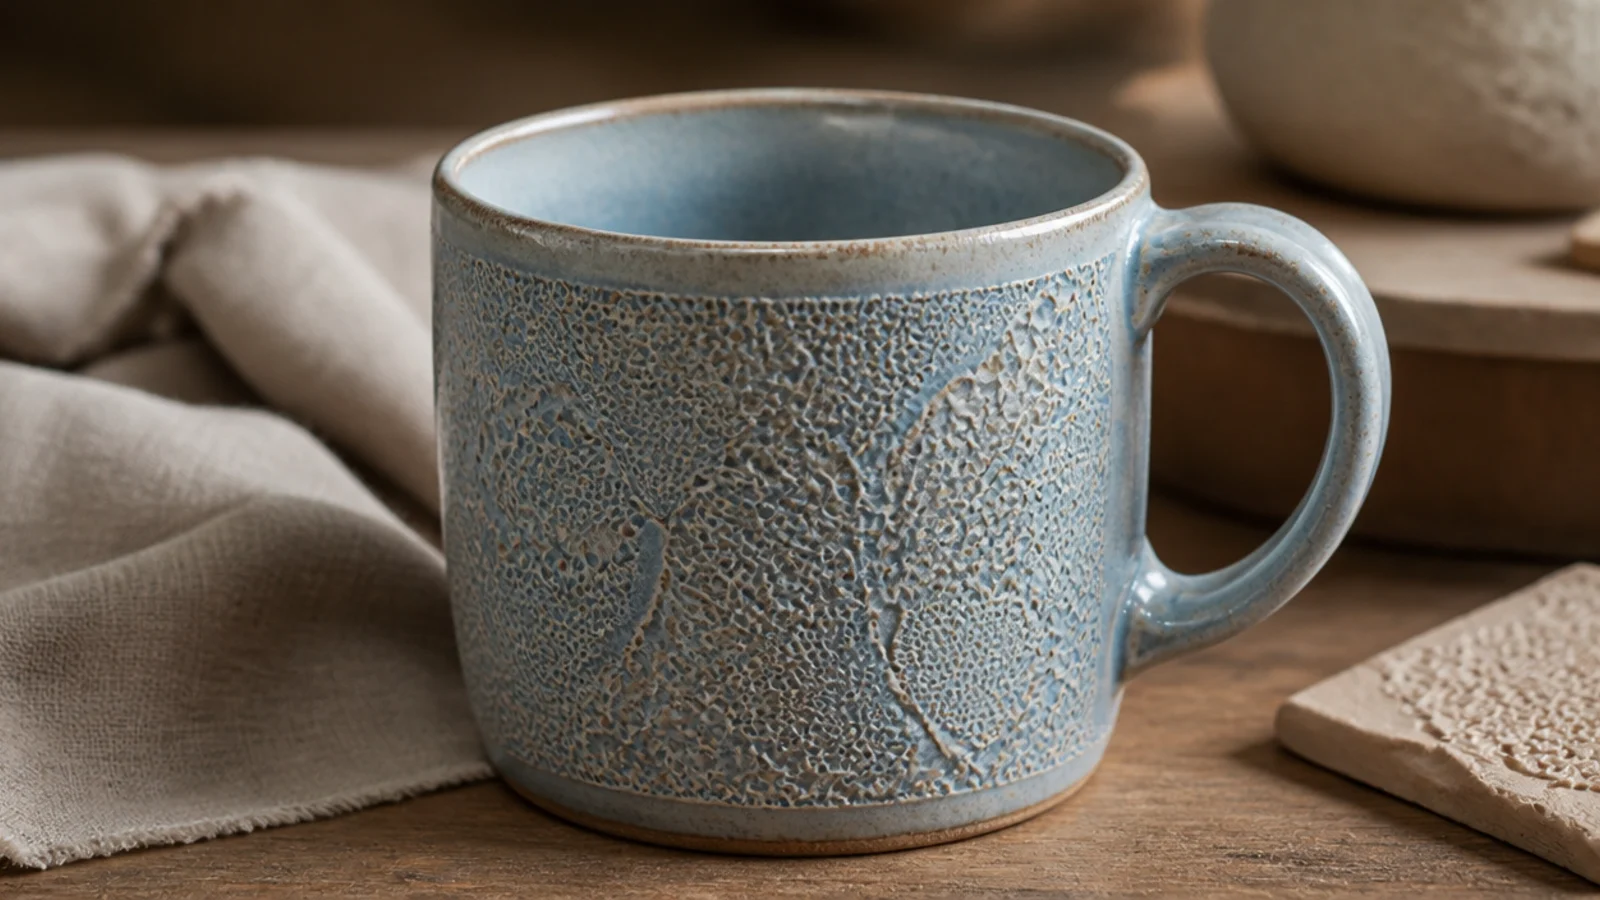
Pressing real lace or a doily into a soft slab leaves an intricate, delicate texture that looks far harder than it is. A glaze that breaks over the high points and pools in the recesses makes the lace pattern glow. It’s a lovely, feminine look for a gift mug.
Roll a 1/4-inch slab, lay a piece of lace or a textured mat over it, and roll firmly once to press the pattern in. Peel the lace away carefully, then wrap the slab into a mug with the pattern facing out, joining the seam and base gently so you don’t crush the texture. Firm to leather-hard, attach a handle, bisque, then apply a food-safe glaze that breaks over texture — a satin or semi-matte works well — and glaze-fire.
Editor's noteChoose a glaze known to break over texture so the raised lace lines show lighter and the pattern reads clearly instead of filling in flat.
Skip thisDon’t apply the glaze too thickly; a heavy coat fills the fine recesses and erases the detail you pressed in.
10. Pressed-Leaf Botanical Mug
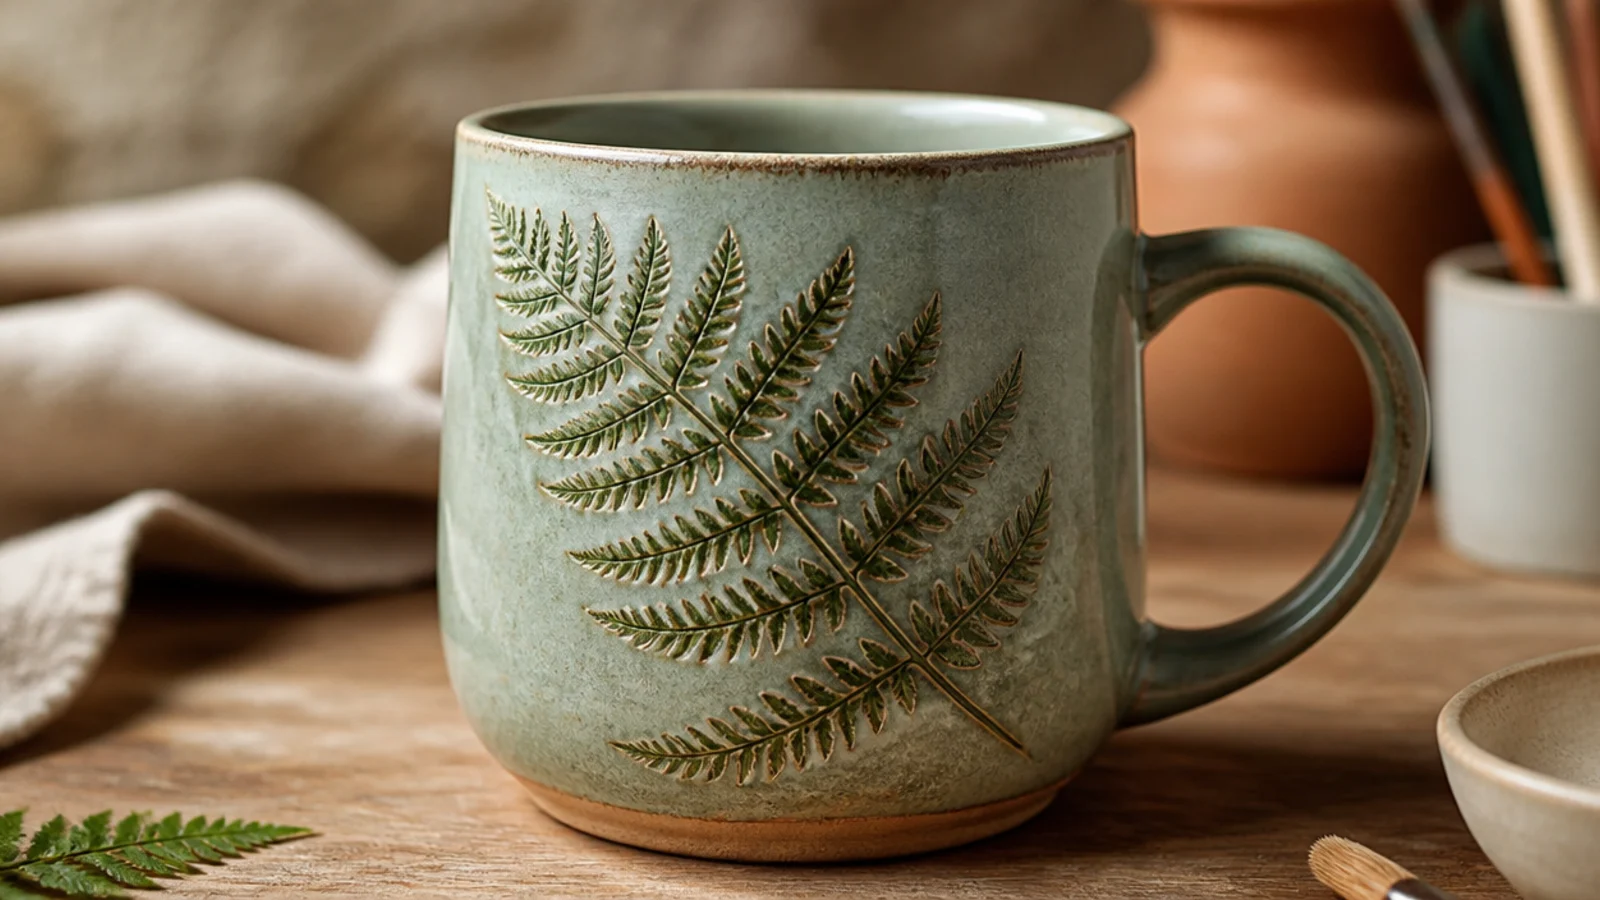
Pressing a real leaf into soft clay leaves a botanical impression that a celadon or translucent glaze pools into, highlighting every vein. It’s organic, calming, and needs no drawing — nature makes the pattern. Ferns and leaves with strong veins print the crispest and suit a plant-lover’s shelf.
Roll a 1/4-inch slab and, while the clay is still soft, press a flat leaf vein-side down firmly into the surface, rolling gently over it so the whole shape and veins transfer. Peel the leaf off carefully to reveal the impression, then wrap the slab into a mug with the print facing out and finish the seam and base. Firm to leather-hard, attach a handle, bisque, then apply a translucent celadon food-safe glaze that settles into the lines and glaze-fire.
Editor's notePick a glaze that pools and breaks in the recesses — a celadon that darkens in the grooves makes the leaf veins really read.
Skip thisDon’t press the leaf into clay that’s already firming up; only soft, fresh clay takes a crisp print with all the fine veins.
11. Coil-Built Smooth Mug
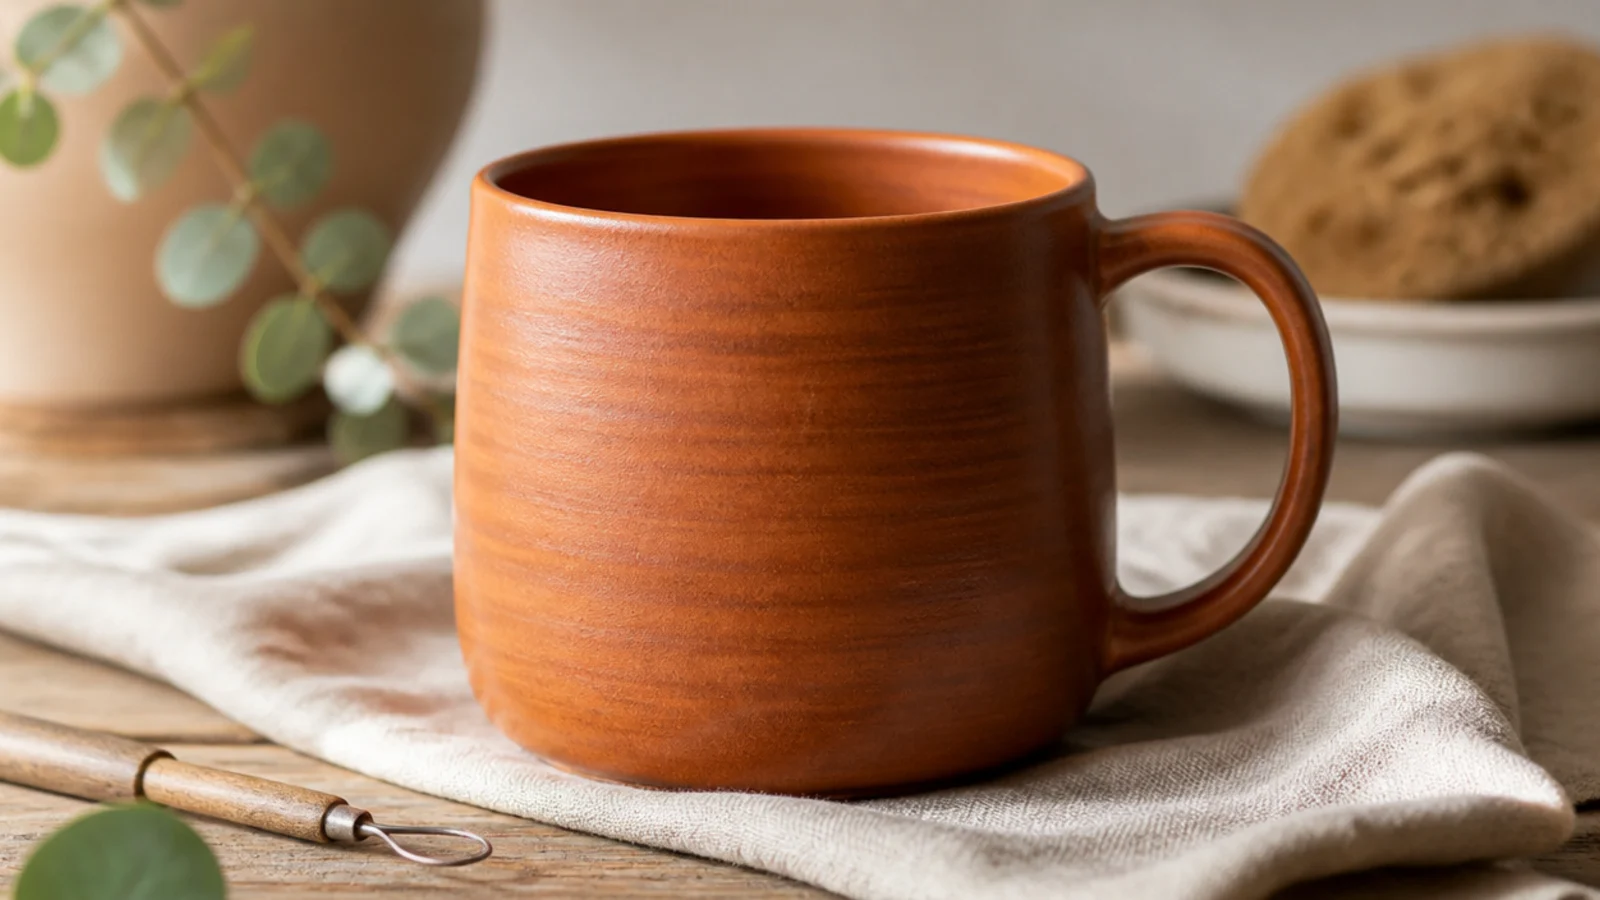
Coil building stacks rope-like ropes of clay into a wall, and blending them flush gives you a smooth, seamless mug you can shape however you like. It needs no equipment and lets you make forms a slab can’t — curves, tapers, and bellies. Smoothed coils are the quiet workhorse behind a lot of studio hand-building.
Start with a pinched or cut 1/4-inch base. Roll clay into even ropes about as thick as your finger, then stack them one at a time, scoring and slipping between each coil. Blend the coils together inside and out with a rib until the wall is smooth and an even 1/4 inch, shaping the curve as you go. Firm to leather-hard, attach a handle, then bisque, glaze with a food-safe glaze, and glaze-fire.
Editor's noteBlend downward from each new coil onto the one below, inside and out, so the joins actually fuse instead of just looking smooth on the surface.
Skip thisDon’t skip scoring between coils to save time; unscored joins separate along the seams as the mug dries and fires.
12. Coil-Swirl Visible-Coil Mug
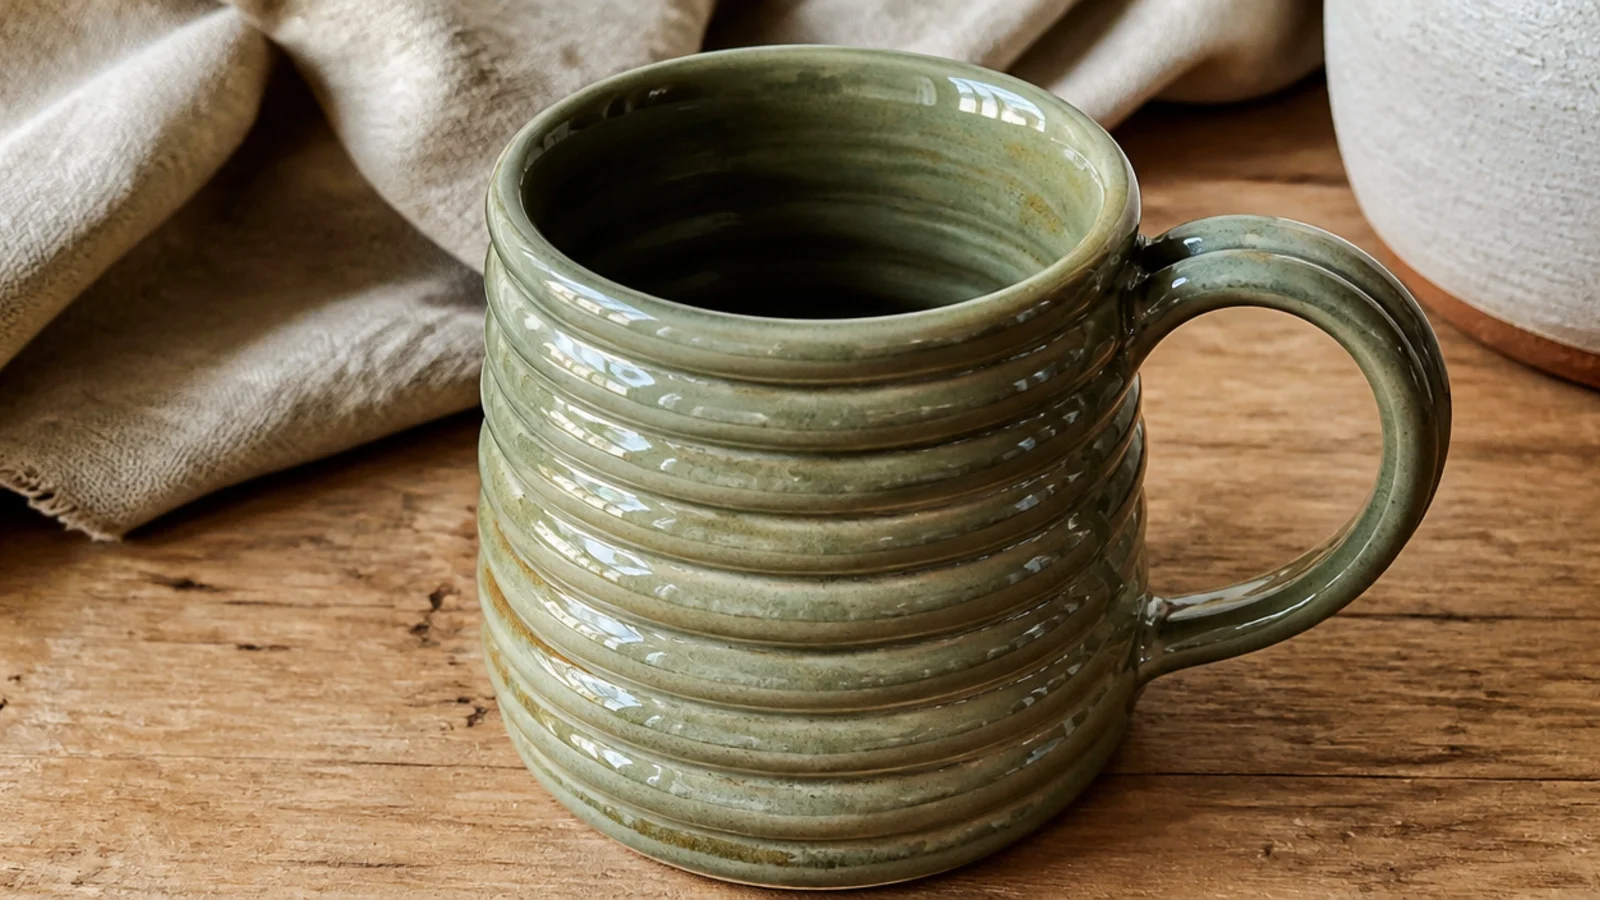
Leaving the coils showing on the outside turns the construction itself into the design — a ridged, basket-like spiral that a glossy glaze pools into beautifully. Inside stays fully smoothed and watertight; only the outside keeps its rhythm. It’s the same skill as smooth coiling, just with a different, more expressive finish.
Build the mug by stacking finger-thick coils on a 1/4-inch base, scoring and slipping between each one as usual. Smooth the inside wall completely with a rib for a watertight surface, but on the outside only press each coil to the next just enough to bond them, leaving the coil lines defined. Firm to leather-hard, attach a handle, bisque, then apply a glossy food-safe glaze that breaks lighter over the ridges and glaze-fire.
Editor's noteSmooth the interior fully even though you keep the exterior texture — an unsmoothed inside traps water between coils and can leak or crack.
Skip thisDon’t leave the outside coils barely touching; they need to actually bond, or the wall separates along the ridges in the kiln.
13. Ribbed Column Mug
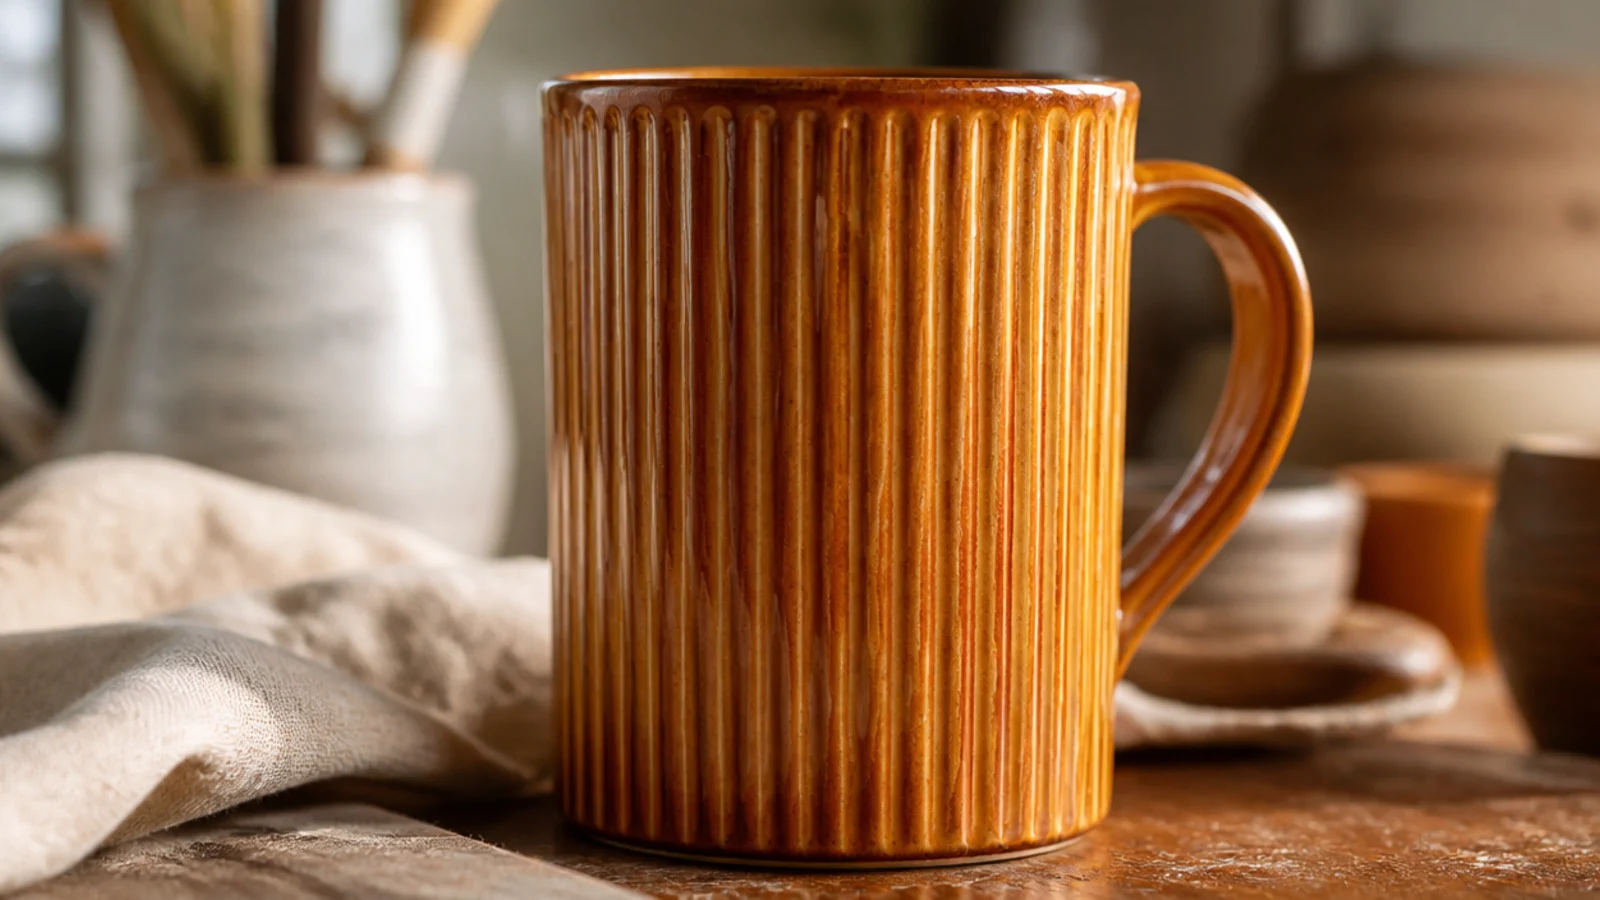
Tight, even vertical ribs give a mug a crisp, architectural rhythm — think a fluted column or a classic ribbed tumbler. Unlike carved flutes, these ribs are added or pressed onto the surface, so the wall stays full-thickness and strong. A glossy glaze running down each ridge makes the whole mug shimmer.
Build a slab or coil cylinder with even 1/4-inch walls. While the clay is soft, press a ribbed tool, dowel, or the edge of a rib vertically into the surface in evenly spaced lines from just under the rim to the base, keeping consistent depth. Alternatively, add thin rolled coils vertically and blend one edge for raised ribs. Firm to leather-hard, attach a handle, bisque, glaze with a glossy food-safe glaze that pools between the ribs, and glaze-fire.
Editor's noteMark equal points around the rim with a needle tool first so the ribs stay evenly spaced instead of crowding on one side.
Skip thisDon’t press the rib lines so deep they thin the wall; keep them shallow so the mug stays strong and doesn’t crack along a groove.
14. Speckled Naked-Clay Mug
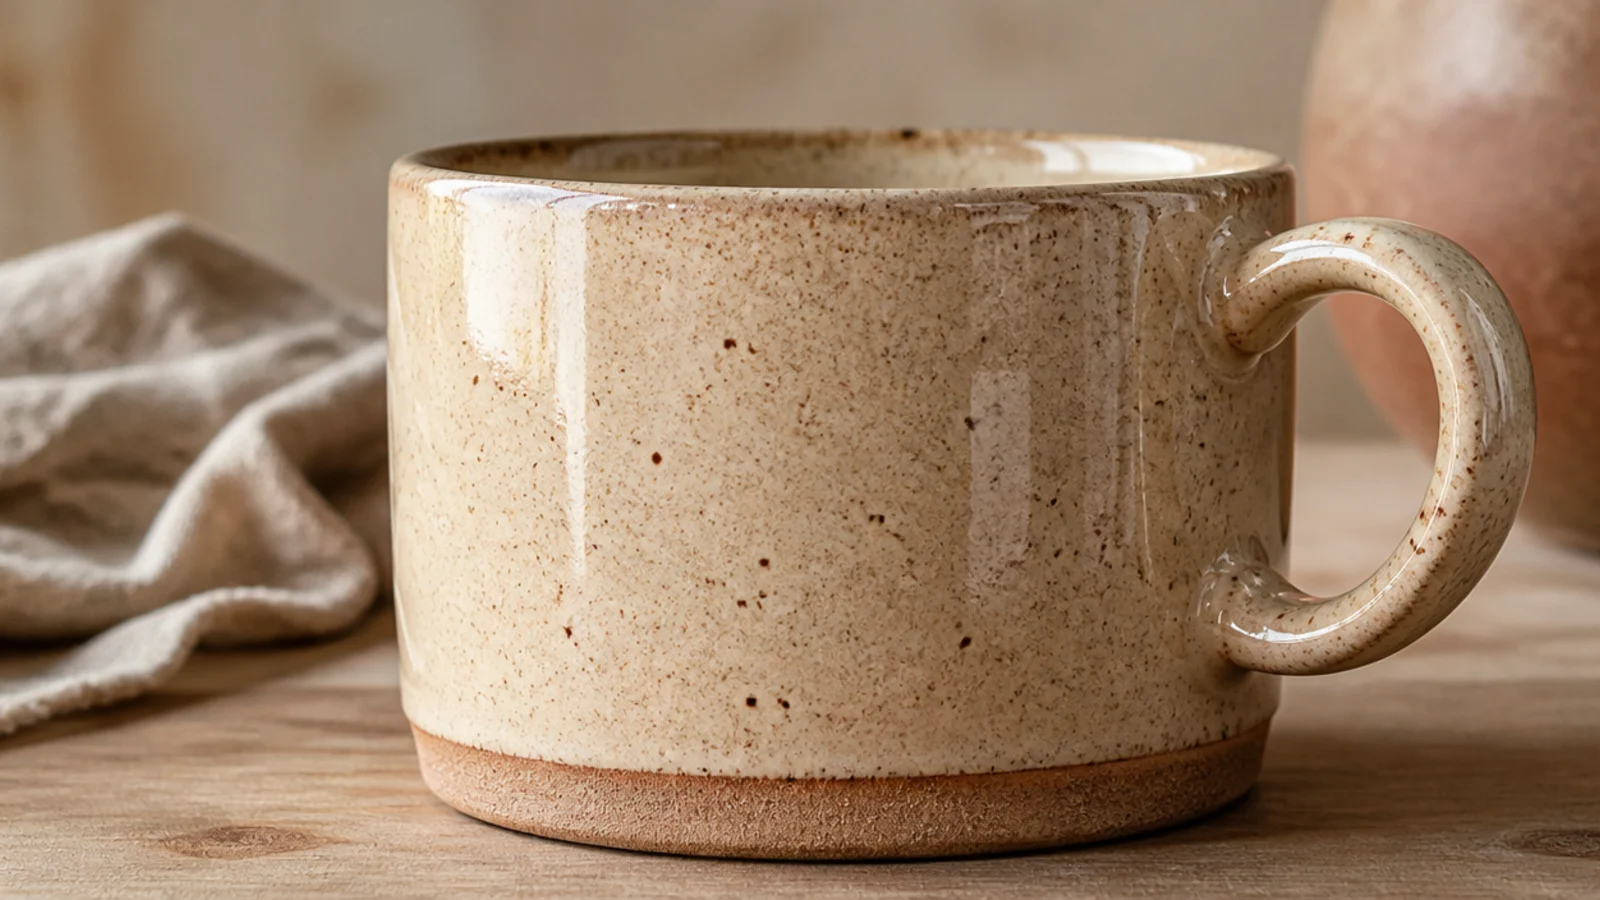
Sometimes the clay is the design. A speckled stoneware body under a clear glaze gives that popular oatmeal-fleck look with zero decorating skill. It suits any form and pairs with everything, which is why cafe mugs so often use it. The naked finish lets the material do all the talking.
Build or throw your mug in a speckled stoneware clay — look for bodies labeled iron speckle or speckled buff — keeping the surface clean and smooth so nothing competes with the flecks. Keep walls an even 1/4 inch and compress the base. Bisque fire, then coat inside and out with a food-safe clear or clear-satin glaze, wiping the foot clean. Glaze-fire to the clay’s rated temperature so the speckles bloom through the clear coat.
Editor's noteChoose a clear satin rather than a high-gloss clear if you want the speckles to look softer and more matte-modern.
Skip thisDon’t cover it with a heavily colored glaze that hides the speckle — the whole point is letting the flecks show, so keep the coat clear or barely tinted.
15. Terracotta Red-Clay Mug
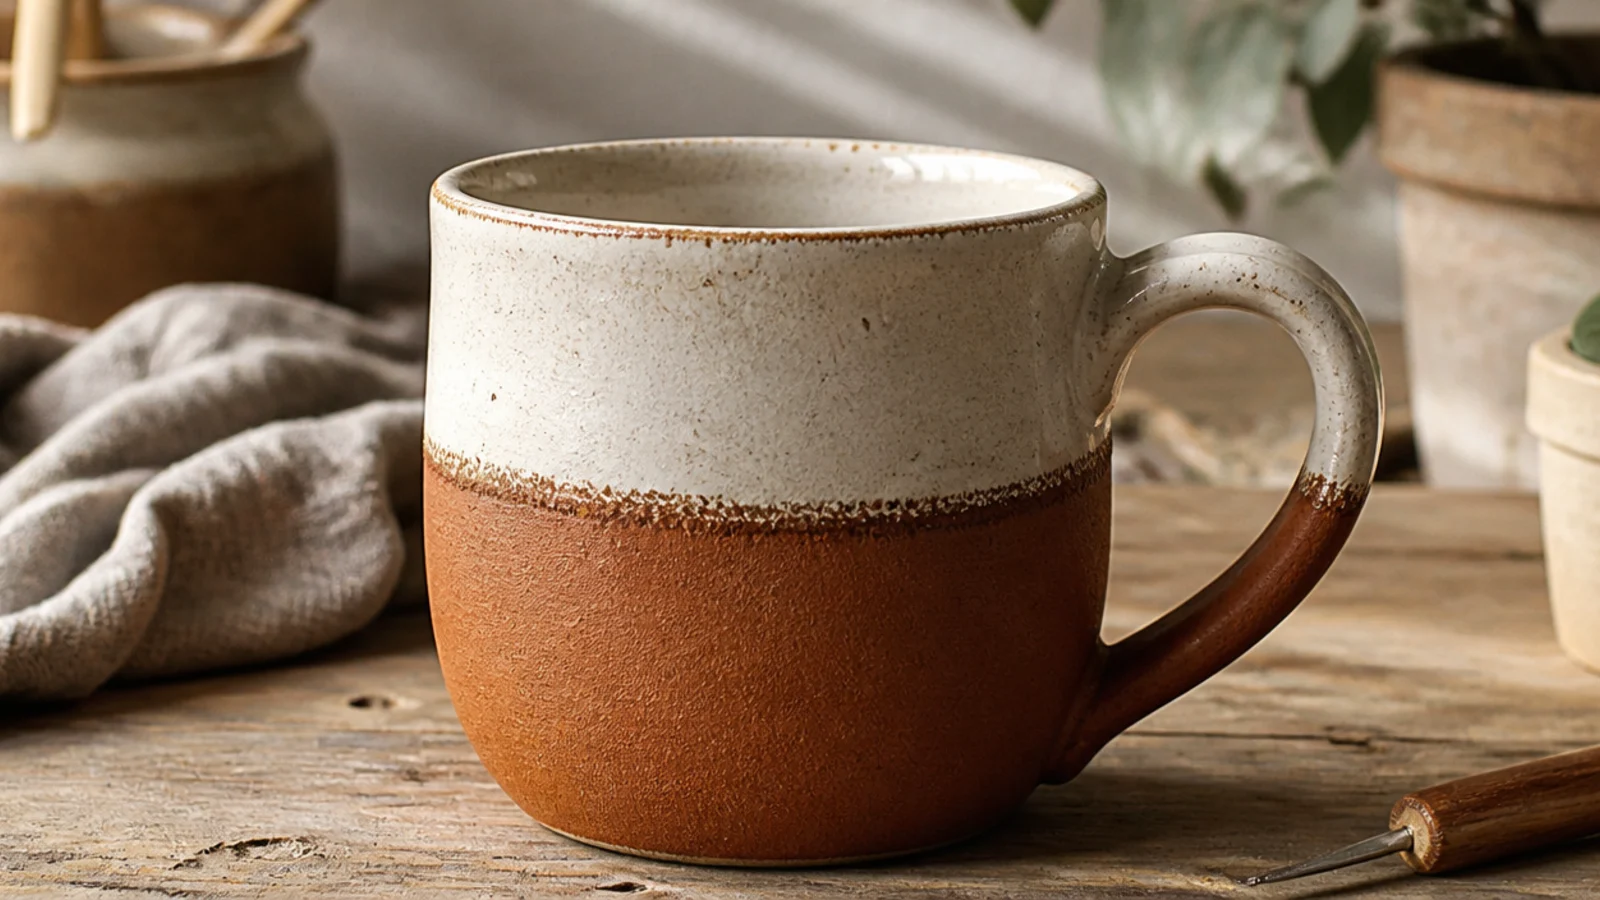
Red earthenware clay brings a warm, Mediterranean brick tone you can’t get from a glaze. Left partly bare against a creamy glaze band, the contrast between raw red clay and soft white looks rustic and expensive at once. It’s a form-and-material design more than a decorated one, which keeps it simple.
Build a pinch or slab mug from a low-fire red earthenware clay, keeping walls an even 1/4 inch. Because earthenware is porous, the inside must be fully sealed. Bisque fire, then glaze the entire inside and the top half of the outside with a food-safe cream or white glaze, leaving the lower outside as bare red clay for contrast. Wipe the foot, and glaze-fire to the earthenware’s lower rated temperature — do not overfire red clay.
Editor's noteSeal the whole interior with glaze even where you leave the outside bare — unglazed earthenware inside will seep and won’t be food-safe.
Skip thisDon’t fire earthenware to stoneware temperatures; red clay bloats or slumps if pushed past its lower rated cone.
16. Black-Clay Statement Mug
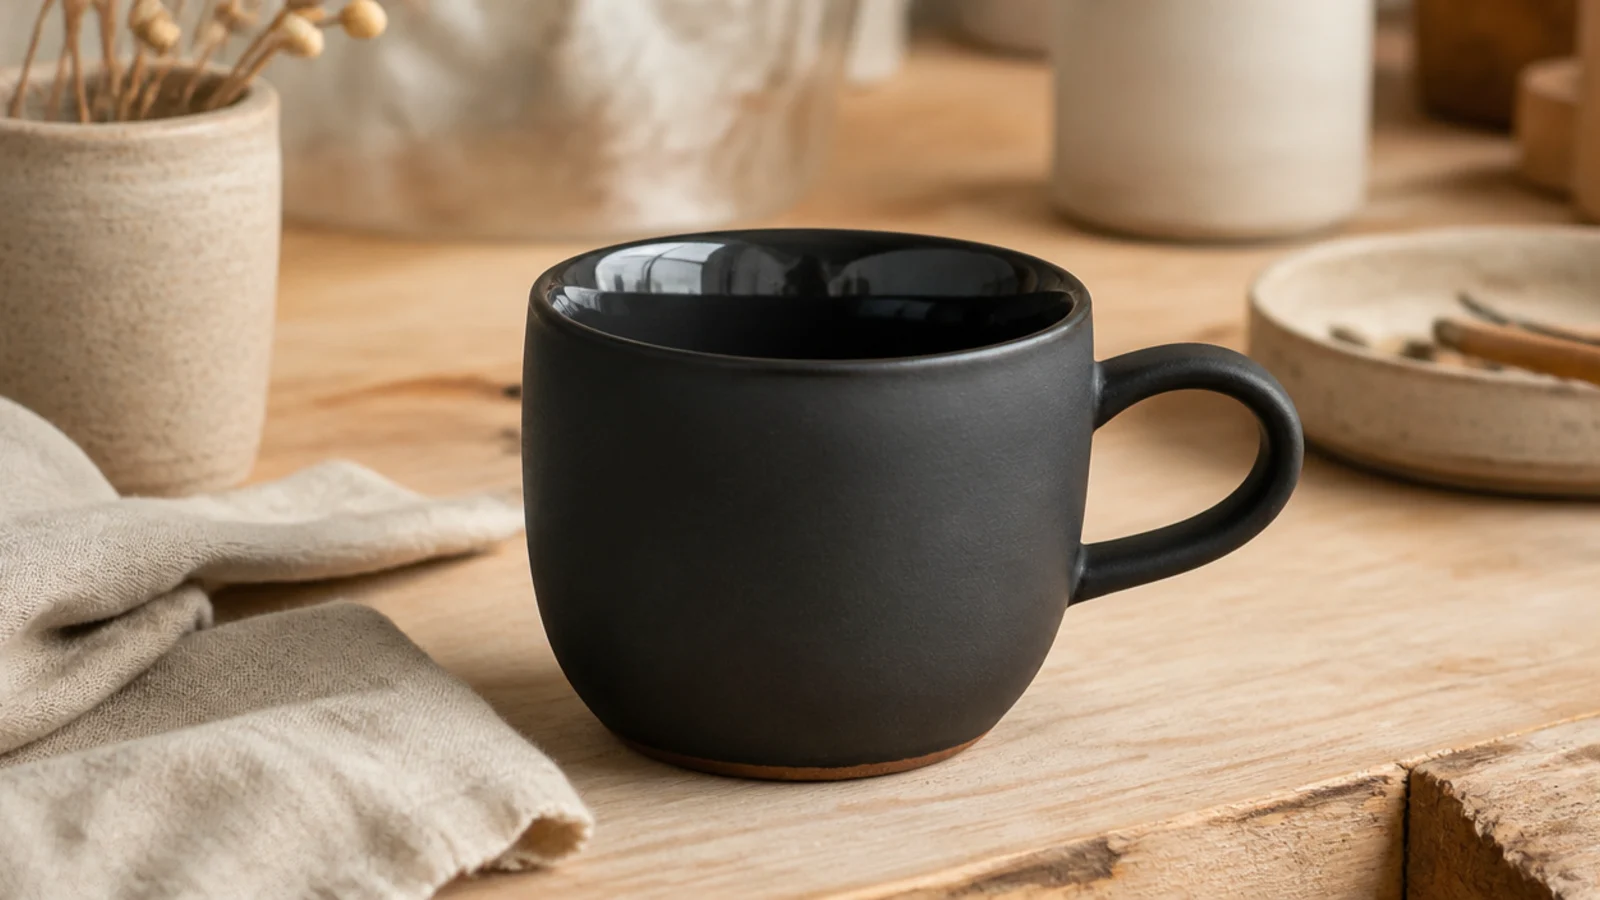
A dark stoneware or black clay body gives instant drama — a moody, modern mug that needs no decoration to look intentional. The contrast of a matte black exterior against a glossy interior is striking and gallery-like. It’s a material choice that does the design work for you.
Build the mug from a dark or black-firing stoneware, keeping walls an even 1/4 inch and the surface cleanly finished. Compress the base and firm to leather-hard before attaching a simple handle. Bisque fire, then glaze the entire inside with a food-safe clear or a glossy glaze for a comfortable drinking surface, leaving the outside as bare fired black clay or coating it with a clear satin. Glaze-fire to the clay’s rated temperature.
Editor's noteAlways glaze the interior even if you love the bare-clay outside; you need a smooth, sealed, food-safe surface where your mouth and coffee touch.
Skip thisDon’t leave the whole mug unglazed for looks; bare dark clay inside is rough, stains, and isn’t a safe drinking surface.
17. Wavy Organic-Rim Mug
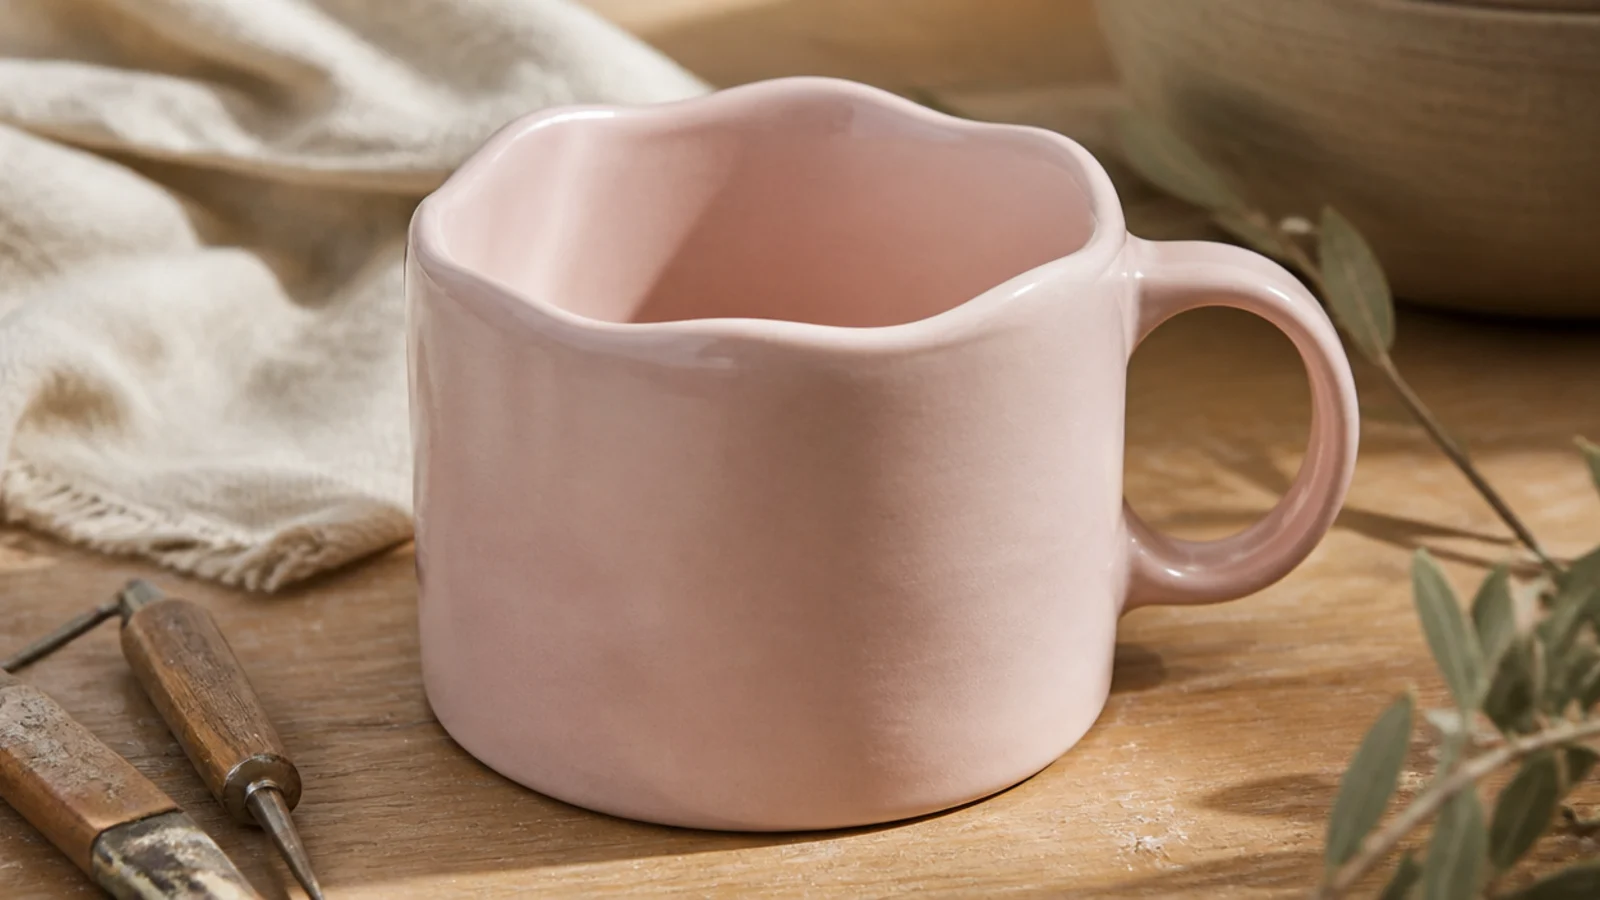
A gently rippling rim turns a plain cylinder into something sculptural and alive without any surface decoration. The soft waves catch light and feel organic against the lips. It’s a tiny change to a basic mug that makes it look like considered studio work.
Build a slab or coil cylinder with even 1/4-inch walls and let it firm just slightly so it holds shape but still bends. Gently push and pull the top rim into soft, even waves with your fingers, supporting each curve inside and out so the wall stays 1/4 inch. Smooth the rim edge with a damp chamois or sponge so it’s comfortable to drink from. Firm to leather-hard, attach a handle, bisque, glaze food-safe, and glaze-fire.
Editor's noteSmooth the wavy rim with a damp chamois at the very end — a soft, rounded rim edge is what keeps the wave comfortable against your mouth.
Skip thisDon’t wave the rim while the clay is bone-soft or it’ll flop unevenly; let it firm slightly so the curves hold their shape.
18. Torn-Edge Rustic Rim Mug
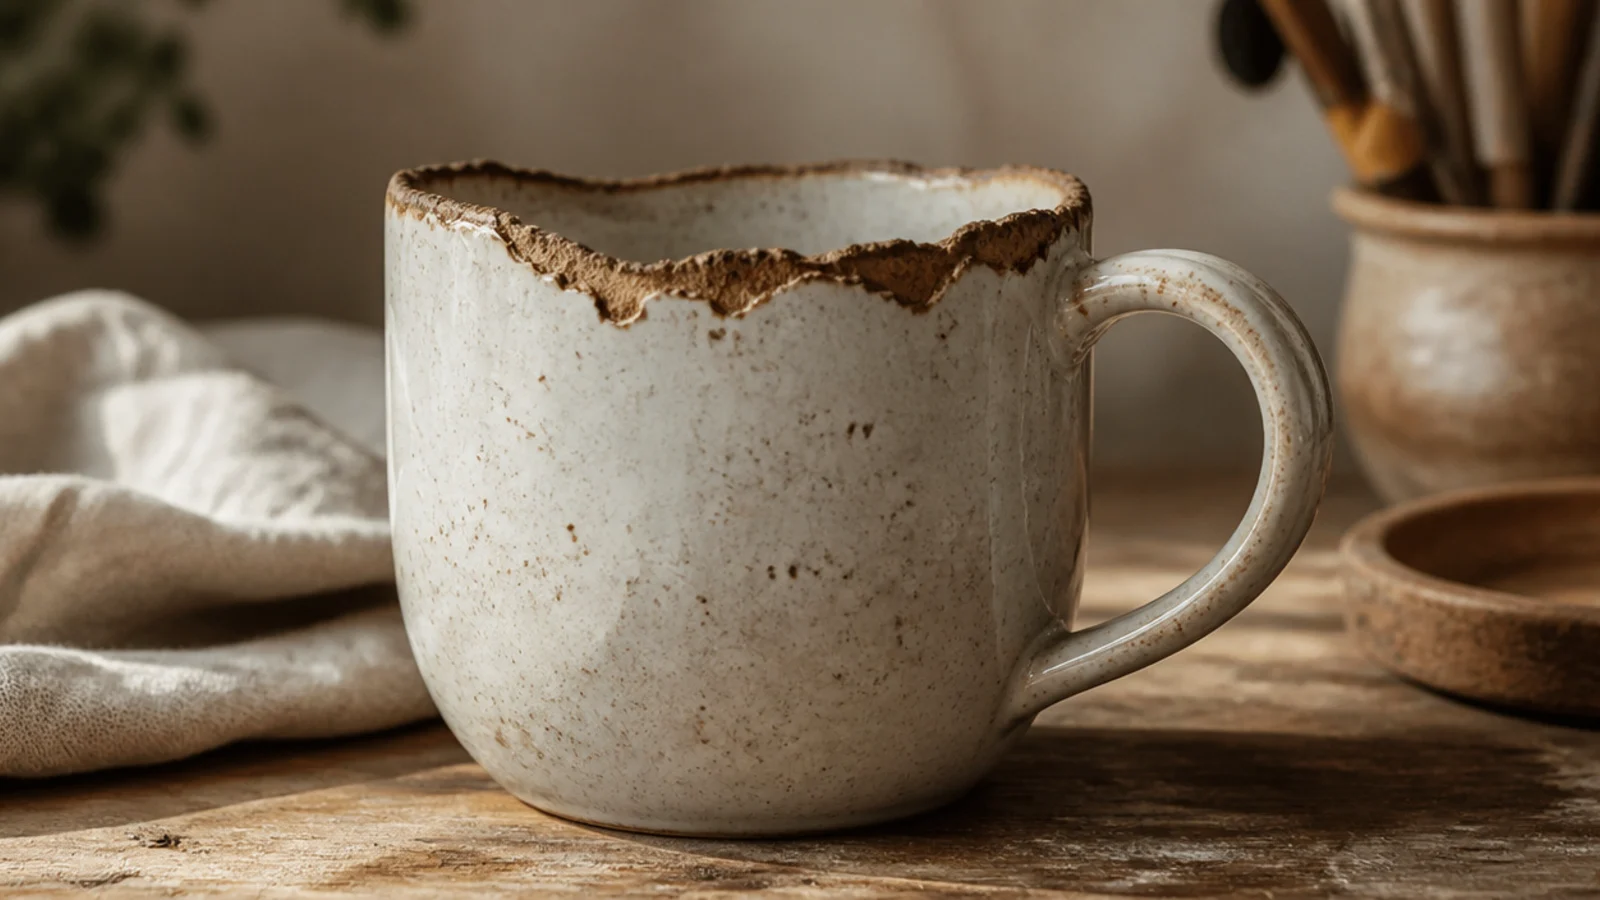
A deliberately rough, torn-looking rim leans hard into wabi-sabi — the beauty of the imperfect. Against a smooth glazed body, the raw ragged edge looks intentional and earthy rather than broken. It’s a bold, artful choice for someone who loves a handmade, gallery-craft feel.
Build a slab or pinch mug with even 1/4-inch walls, then, while soft to firm, tear or trim the top edge into an irregular, slightly angled line and leave it lightly textured rather than smoothing it fully. Round over just the very lip with a damp sponge so it’s still safe to drink from. Firm to leather-hard, attach a handle, bisque, then glaze the body and inside food-safe while leaving a hint of the raw rim texture, and glaze-fire.
Editor's noteRound only the drinking lip with a sponge and leave the rest of the torn edge rough — a sharp bare edge cuts, but a fully smoothed one loses the effect.
Skip thisDon’t leave any glaze-free rough clay where your mouth actually touches; the drinking edge still needs to be smooth and sealed.
19. Pinched-Spout Mug
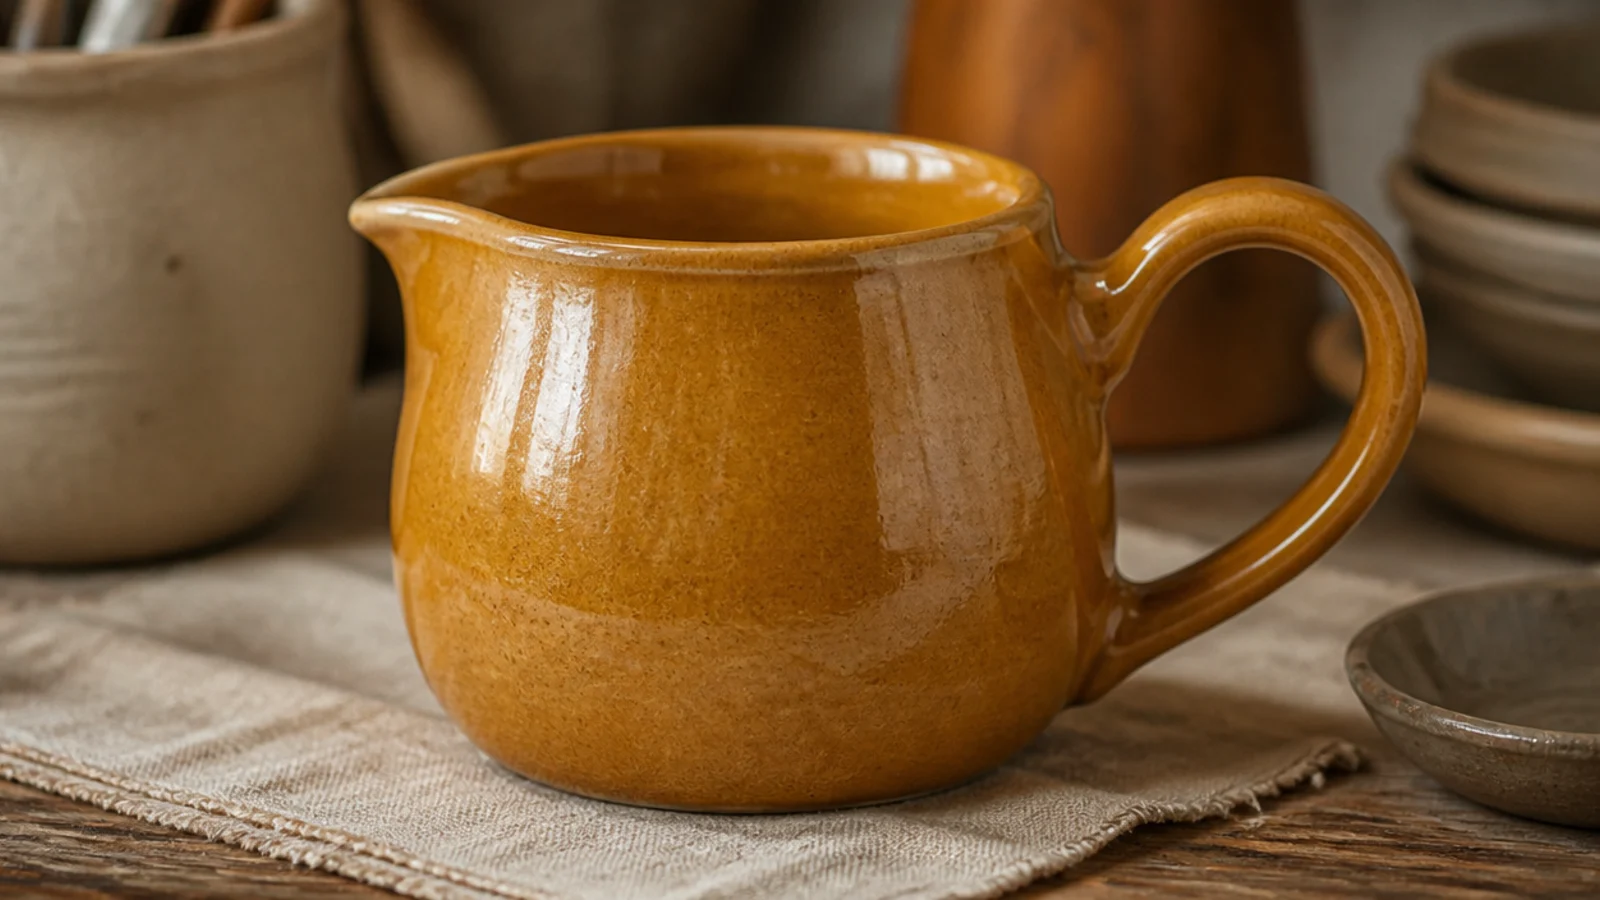
A small pinched spout in the rim turns a mug into a pour-friendly little vessel — great for milk, syrup, or a mug that doubles as a mini creamer. It adds instant character and a functional detail people notice. The spout is a two-second pinch that makes the mug feel designed for a job.
Build any mug body with even 1/4-inch walls and firm it just slightly. On the side opposite where the handle will go, wet the rim and pinch it gently outward between two fingers of one hand while pushing from behind with a finger of the other, forming a small V-shaped spout. Refine and smooth the spout edge with a damp sponge. Firm to leather-hard, attach a handle opposite the spout, bisque, glaze food-safe including the spout channel, and glaze-fire.
Editor's noteKeep the spout small and the channel smooth so liquid streams cleanly — a rough or oversized spout dribbles down the outside instead of pouring.
Skip thisDon’t form the spout on the same side as the handle; the pour and the grip need to be opposite so you can tip it comfortably.
20. Pedestal-Foot Mug
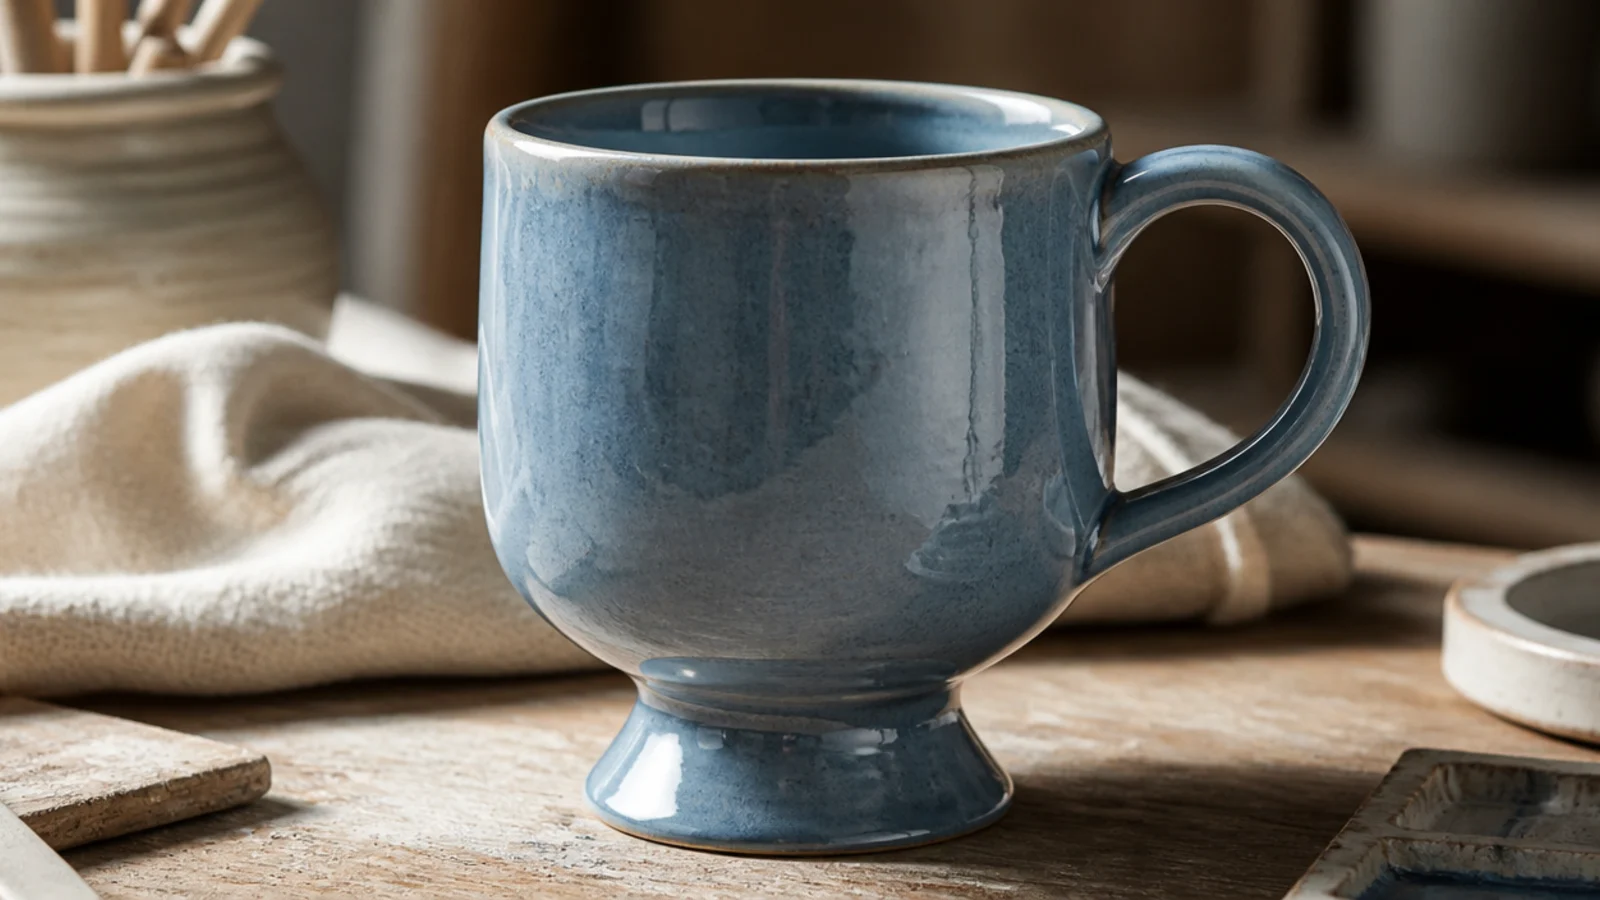
Lifting the mug onto a short pedestal foot gives it a refined, goblet-like elegance that reads more special than an everyday cup. The raised foot also keeps the hot base off the table. It’s a small structural addition that instantly makes a simple mug feel considered.
Build the mug body first with even 1/4-inch walls and let it firm to leather-hard. Roll a short, hollow pedestal from a small slab or wide coil ring, flaring it slightly at the bottom for stability, and keep its wall 1/4 inch. Score and slip both the base of the mug and the top of the pedestal, press them together centered, and smooth a small collar of clay around the join. Firm slowly, attach a handle, bisque, glaze food-safe, and glaze-fire.
Editor's noteFlare the foot slightly wider than you think — a narrow pedestal makes a top-heavy mug tip, while a gently flared base sits steady.
Skip thisDon’t attach the pedestal to a soft mug base; both pieces must be leather-hard and scored, or the foot cracks off as it shrinks.
21. Animal-Foot Tripod Mug
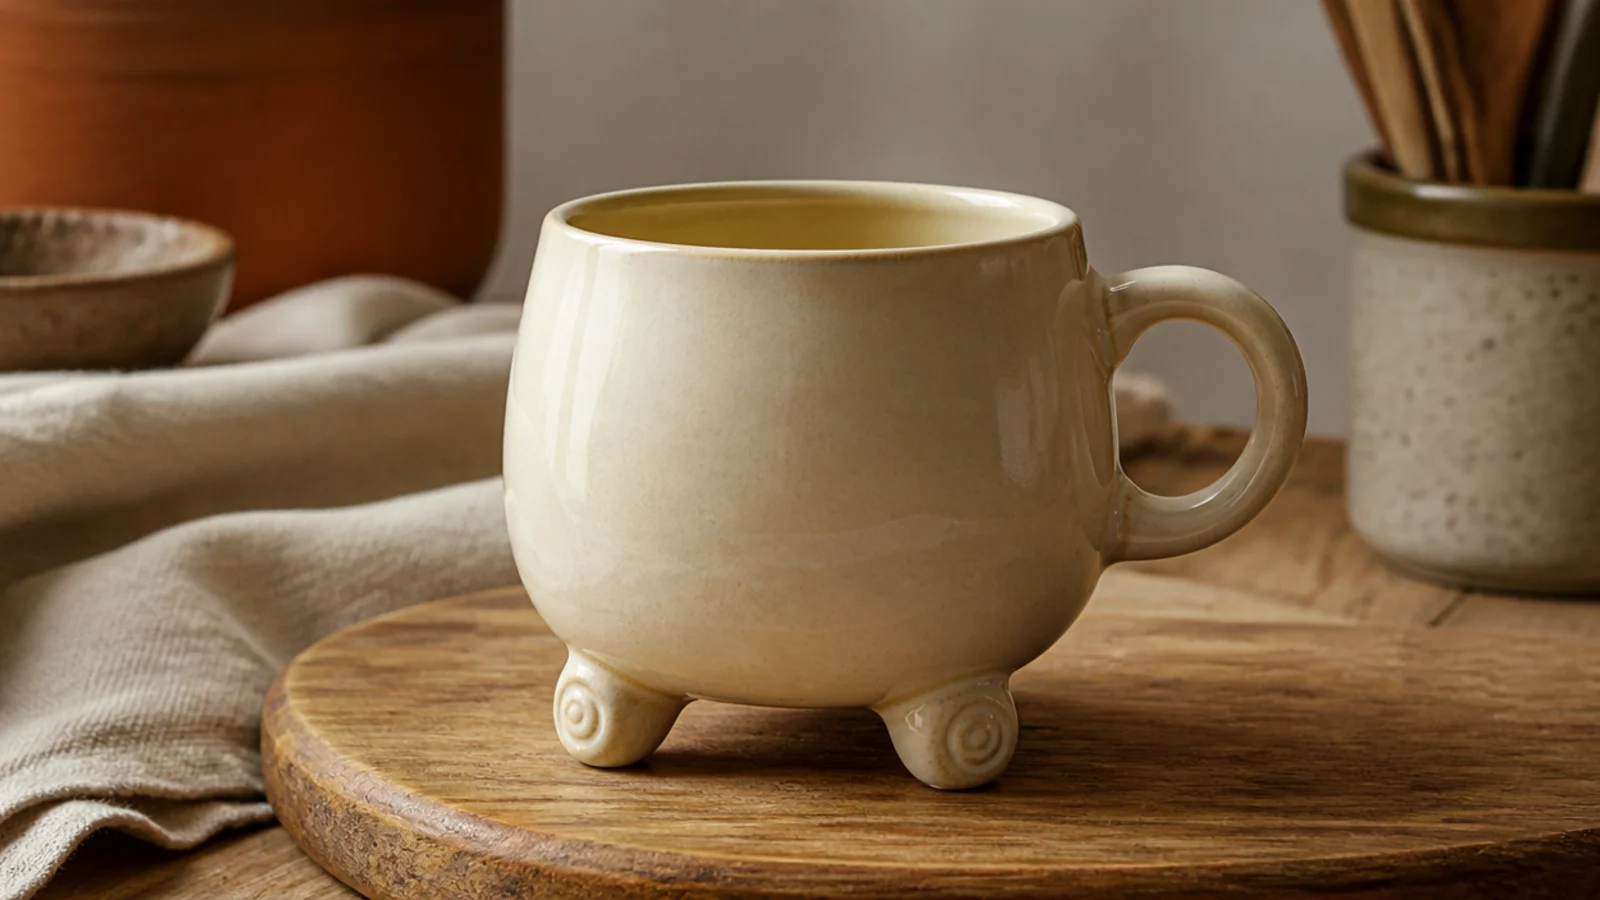
Three little rolled feet lift a rounded mug off the table and give it a playful, characterful stance — somewhere between a cauldron and a friendly creature. It’s a charming, gift-worthy detail that kids and grown-ups both love. The feet are just three small attachments, so it stays an easy build with a big personality payoff.
Build a rounded pinch or coil mug body with even 1/4-inch walls and firm it to leather-hard. Roll three small, equal balls or short coils of clay for feet, and mark three evenly spaced points on the base with a needle tool. Score and slip both the base points and the tops of the feet, press each foot on firmly, and smooth a small collar around each join. Check the mug sits level, firm slowly, attach a handle, bisque, glaze food-safe, and glaze-fire.
Editor's noteSet the mug down on a flat surface right after attaching the feet and nudge them until it sits dead level before the clay firms up.
Skip thisDon’t make the three feet different sizes; uneven feet make the mug rock, and the smallest one usually cracks off under the wobble.
22. Bud-Vase Double-Duty Mug
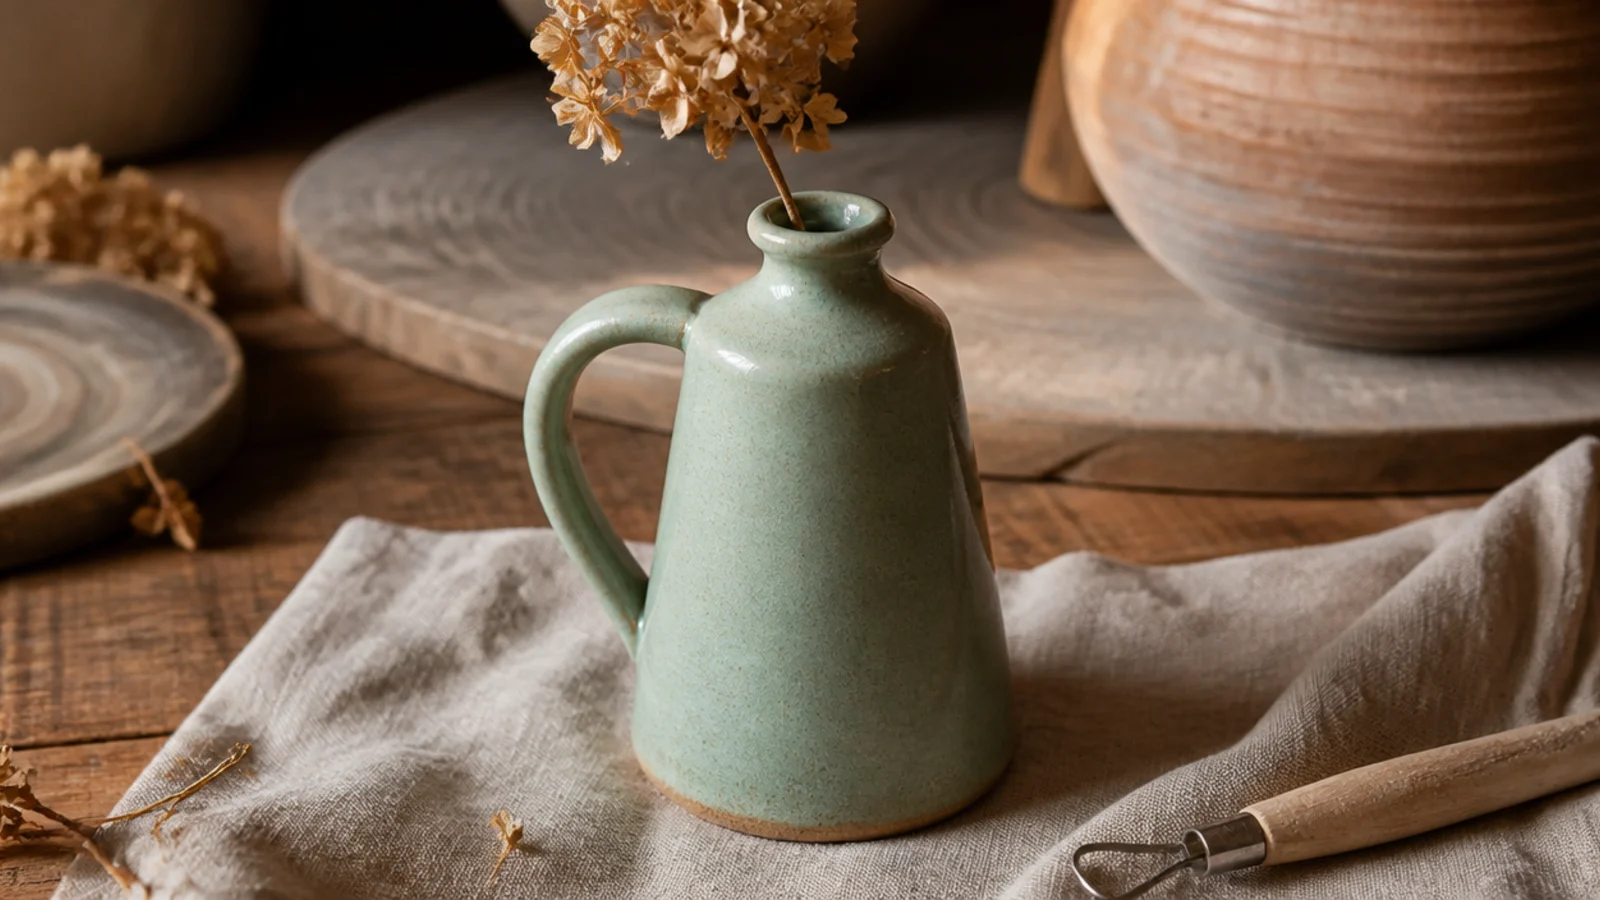
A mug with a slightly narrowed neck doubles as a bud vase — perfect on a desk or windowsill where it holds coffee some days and a single stem on others. The gentle taper is elegant and useful, and it photographs beautifully with a dried flower. It’s a subtle form tweak that gives the mug a second life.
Build a coil or pinch mug taller and narrower than usual, gently drawing the walls inward near the top to a slightly narrowed neck while keeping them an even 1/4 inch. Compress the base and smooth the interior fully so it holds water. Firm to leather-hard, attach a slim handle, bisque, then glaze the entire inside and out with a food-safe glaze so it’s watertight, and glaze-fire.
Editor's noteNarrow the neck just enough to cradle a stem but not so much that your nose bumps it when you drink — keep the opening wide enough for real use.
Skip thisDon’t leave any bare unglazed clay inside; a bud vase holds standing water, so the interior must be fully sealed or it seeps.
23. Cottage House-Shaped Mug
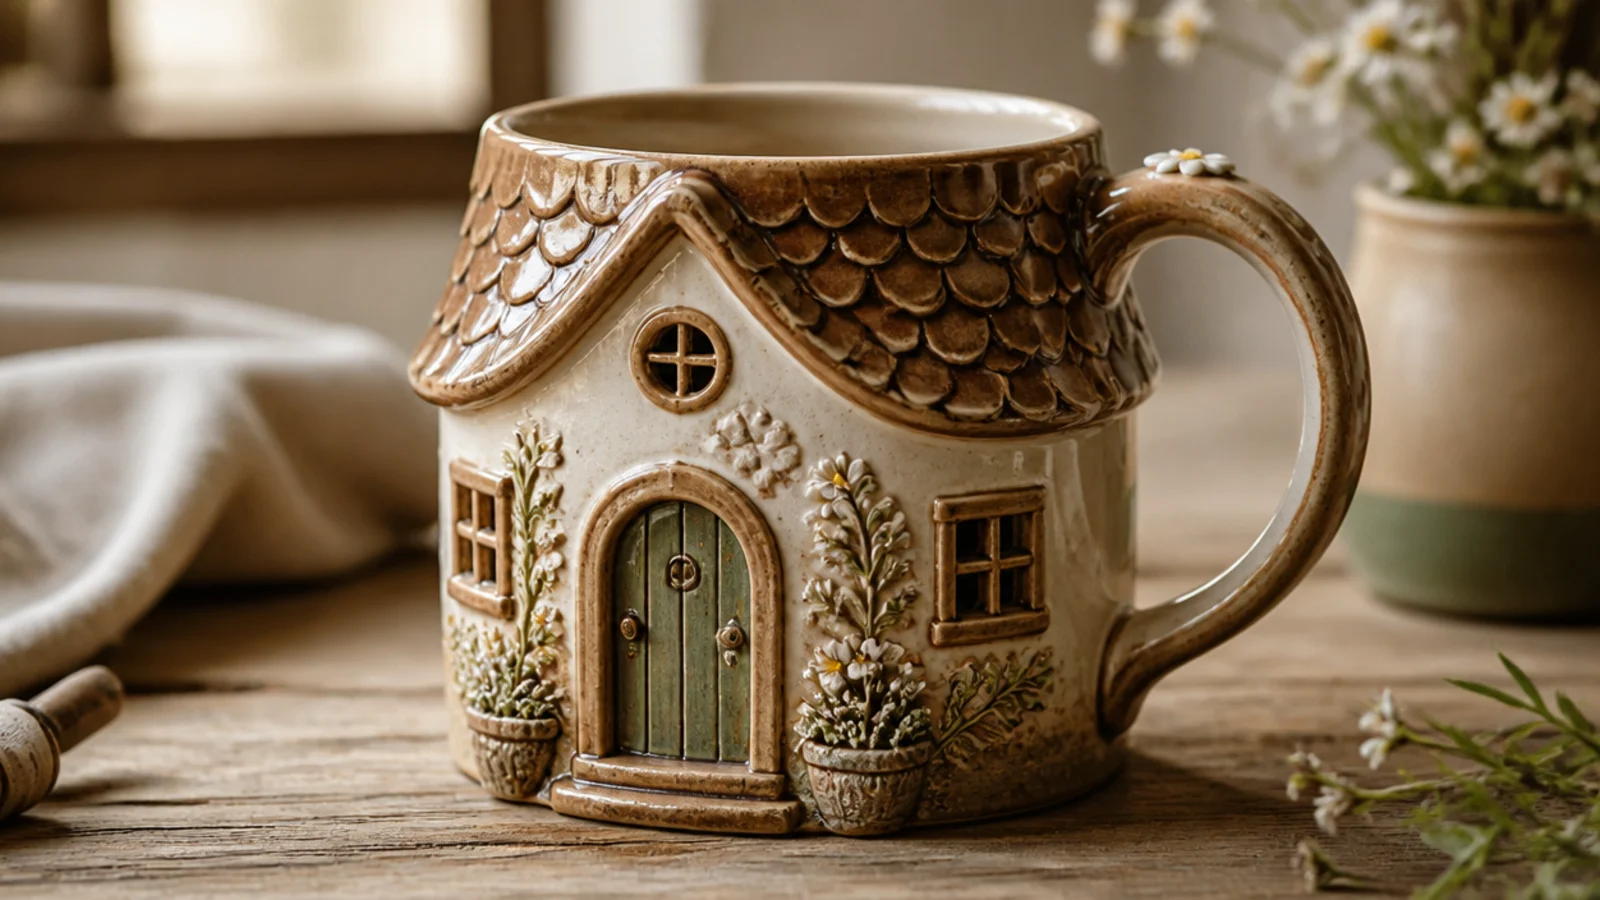
Building the mug to look like a little cottage — a pitched roofline at the rim, a carved door and windows — is the cozy, storybook design all over Pinterest. It’s more of a project, but the whole charm is the character, so precision matters less than personality. It makes an unforgettable gift.
Build a slab cylinder with even 1/4-inch walls as your house body. While soft, shape the top rim into a gentle pitched roofline or add a thin slab roof piece, scored and slipped on, leaving the opening usable. Carve or add relief doors, windows, and trim with a needle tool and tiny clay pieces, scoring and slipping each addition. Firm slowly, attach a handle as a chimney-side detail, bisque, glaze in soft earthy food-safe glazes, and glaze-fire.
Editor's noteKeep the roof detailing away from the drinking rim on one side so there’s a clean, smooth arc where your mouth actually meets the mug.
Skip thisDon’t stick tiny decorations onto dry clay; every window and door must be scored and slipped onto leather-hard clay or they drop off in firing.
24. Pebble Rock-Form Mug
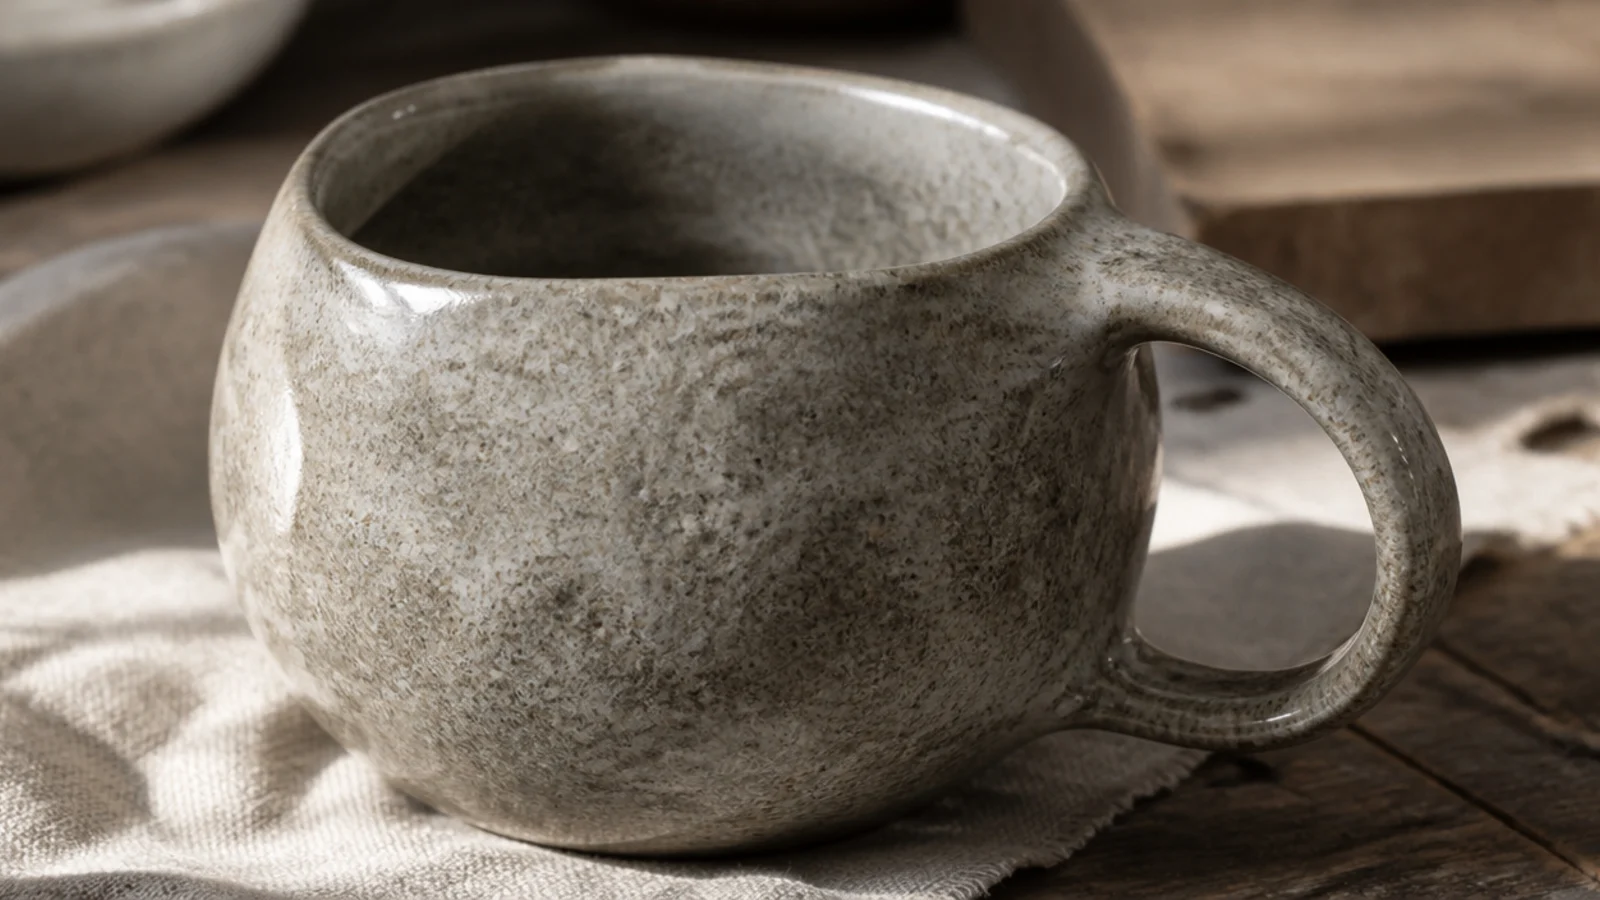
Shaping the mug like a smooth river pebble — asymmetrical, no true flat sides, softly lumped — gives an organic, found-in-nature feel that sits somewhere between mug and sculpture. It fits the hand in an unexpected, satisfying way. A mottled stone glaze completes the illusion that you’re drinking from a rock.
Build a pinch or coil body and then gently paddle and press it into an irregular, rounded pebble form, keeping walls an even 1/4 inch and the rim a comfortable smooth oval. Flatten just enough of the base so it sits without rocking. Firm to leather-hard, attach a low, organic handle or a thumb dimple instead, bisque, then glaze in a mottled or speckled stone-gray food-safe glaze and glaze-fire.
Editor's notePaddle the form with a wooden spoon or flat stick rather than only pinching — paddling gives those soft, faceted pebble planes without thinning the wall.
Skip thisDon’t forget to flatten a small stable spot on the base; a fully rounded pebble looks great but tips over and spills.
25. Wheel-Thrown Classic Mug
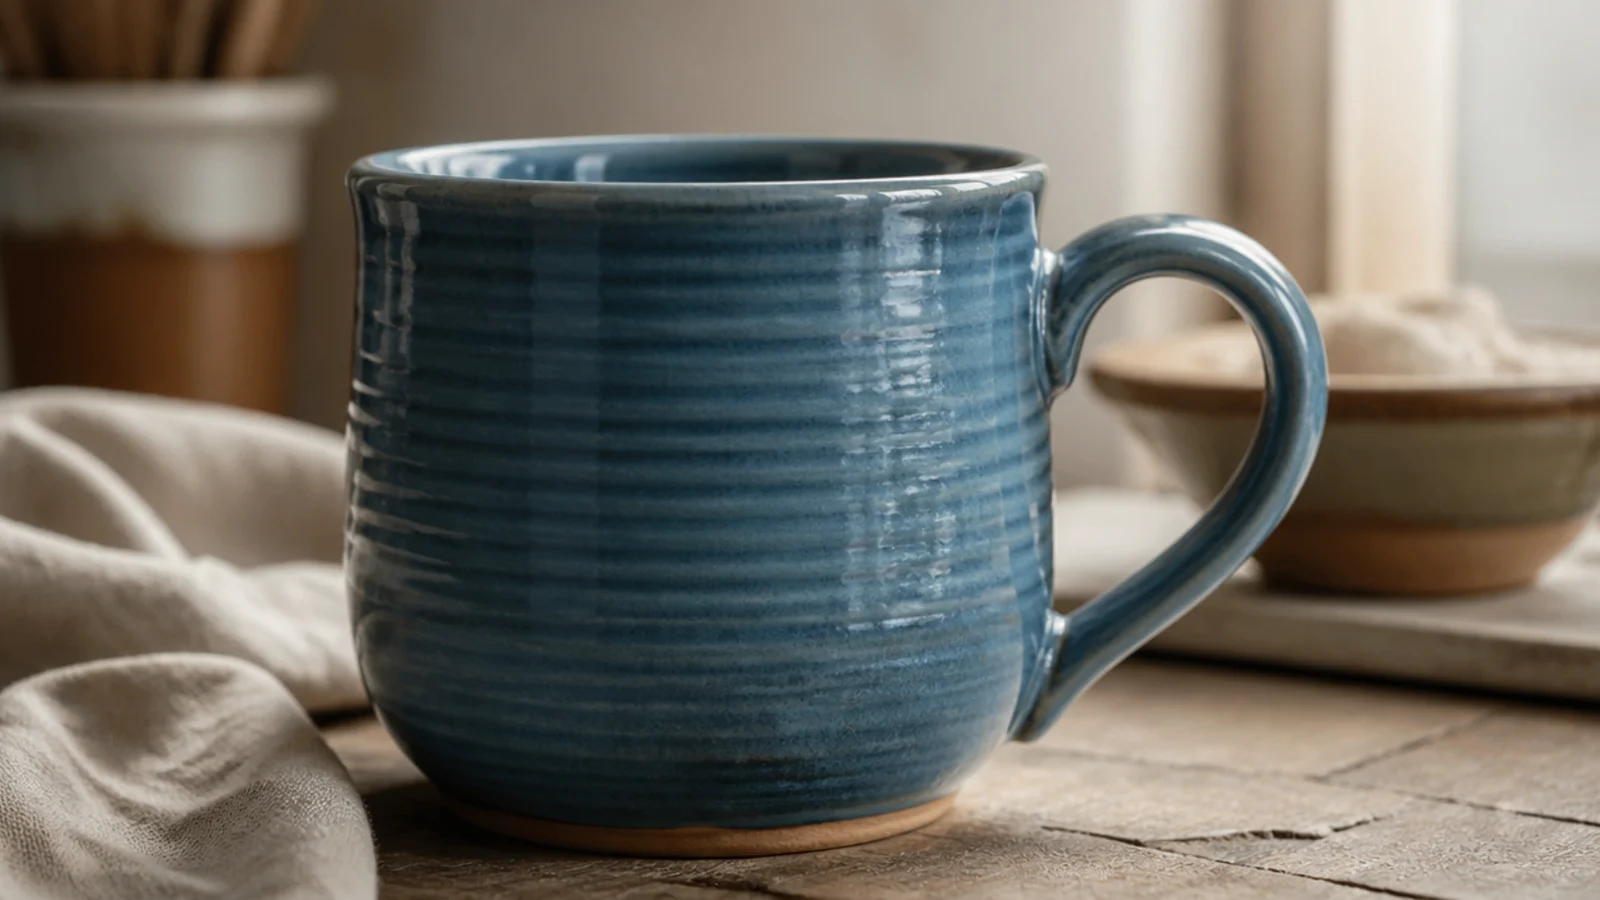
The wheel-thrown mug is the classic silhouette — smooth, symmetrical, with soft spiral throwing lines that read as real pottery. It takes practice, but once centering clicks it’s the fastest way to make a matching set. The subtle rings are a feature, so choose a glaze that settles into them.
Center about a pound of clay on the wheel, open to a 1/4-inch base, and pull the walls up in three or four even passes to about 4 inches tall, keeping them a consistent quarter inch. Compress the rim with a chamois after the final pull, cut it off with a wire, and let it firm. Trim a foot ring on the base at leather-hard, then pull and attach a handle. Bisque, glaze food-safe, and glaze-fire.
Compress the rim and the inside base thoroughly — a compressed rim resists chipping and a compressed base resists the dreaded S-crack.
Don’t leave water pooled in the bottom while throwing; over-wet clay slumps and the base stays weak and crack-prone.
26. Kurinuki Carved-Block Mug
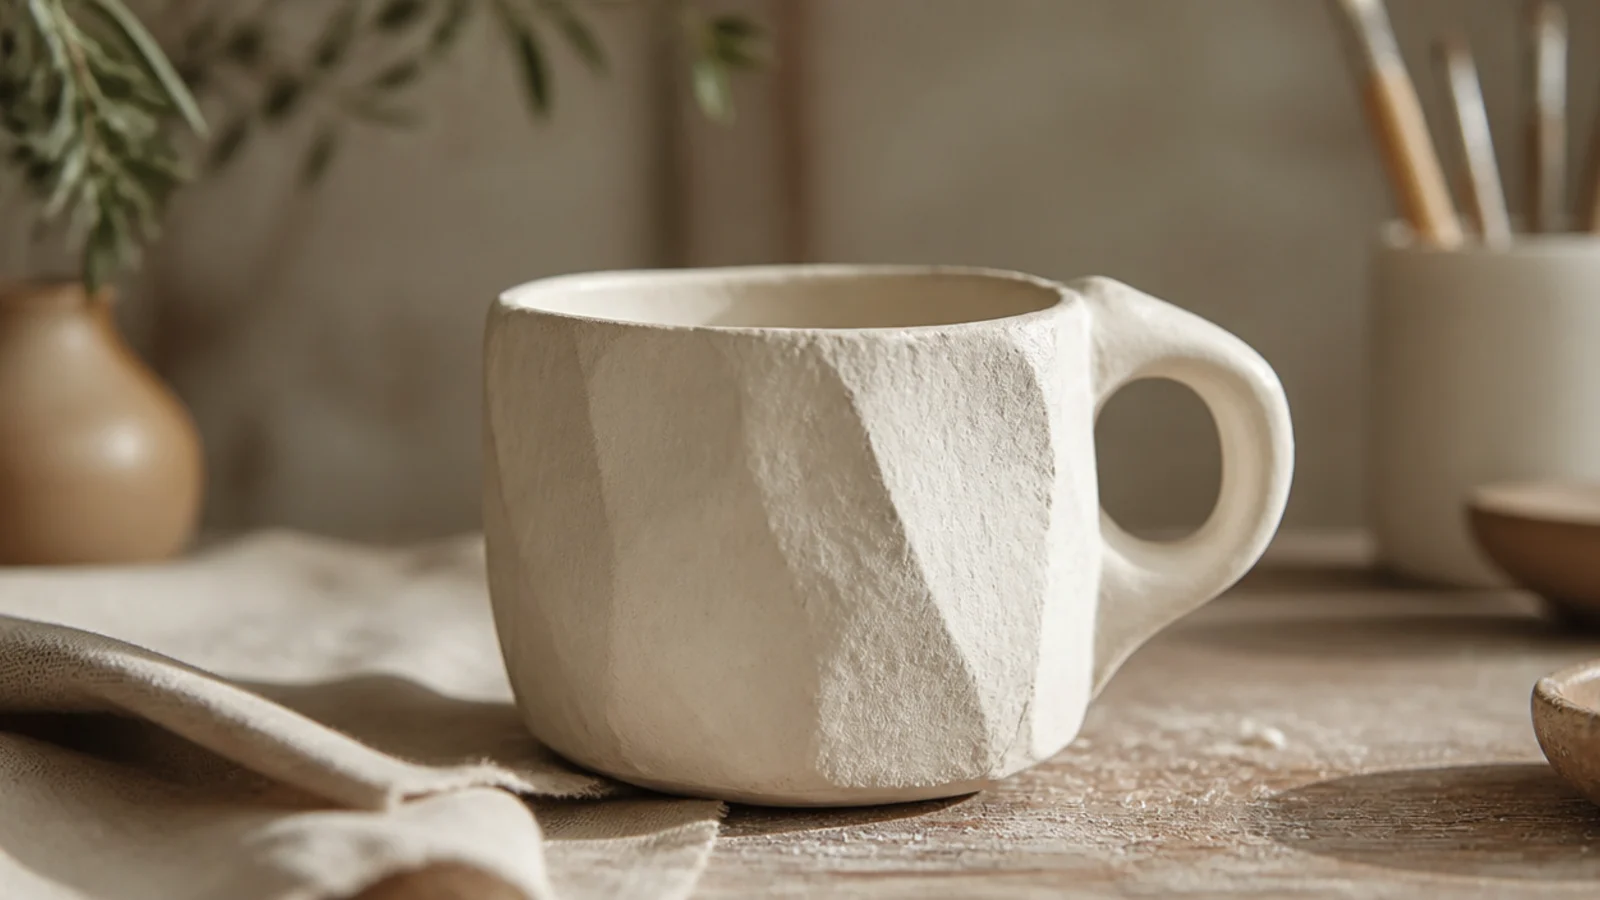
Kurinuki is the Japanese technique of carving a mug from a solid block of clay rather than building it up, leaving expressive tool marks. It produces the chunky, faceted, one-of-a-kind mugs that feel deeply handmade. The rough carved character is the entire appeal, so lean into the marks.
Start with a solid block of clay a bit larger than your mug and shape the outside first — angular facets or a soft square both work. Hollow the inside with a loop tool, keeping walls an even 1/4 inch and checking depth and thickness often by pressing from outside and inside at once. Refine the rim, carve a thumb dimple or handle if you like, and firm to leather-hard. Bisque, glaze with a matte food-safe glaze that keeps the carved texture, and glaze-fire.
Editor's noteHollow slowly and check wall thickness constantly by pinching from both sides — it’s very easy to carve one wall too thin without noticing.
Skip thisDon’t hollow the block while it’s very wet and sticky; let it firm slightly so the walls hold their shape as you carve.
27. Faceted Cut-Side Mug
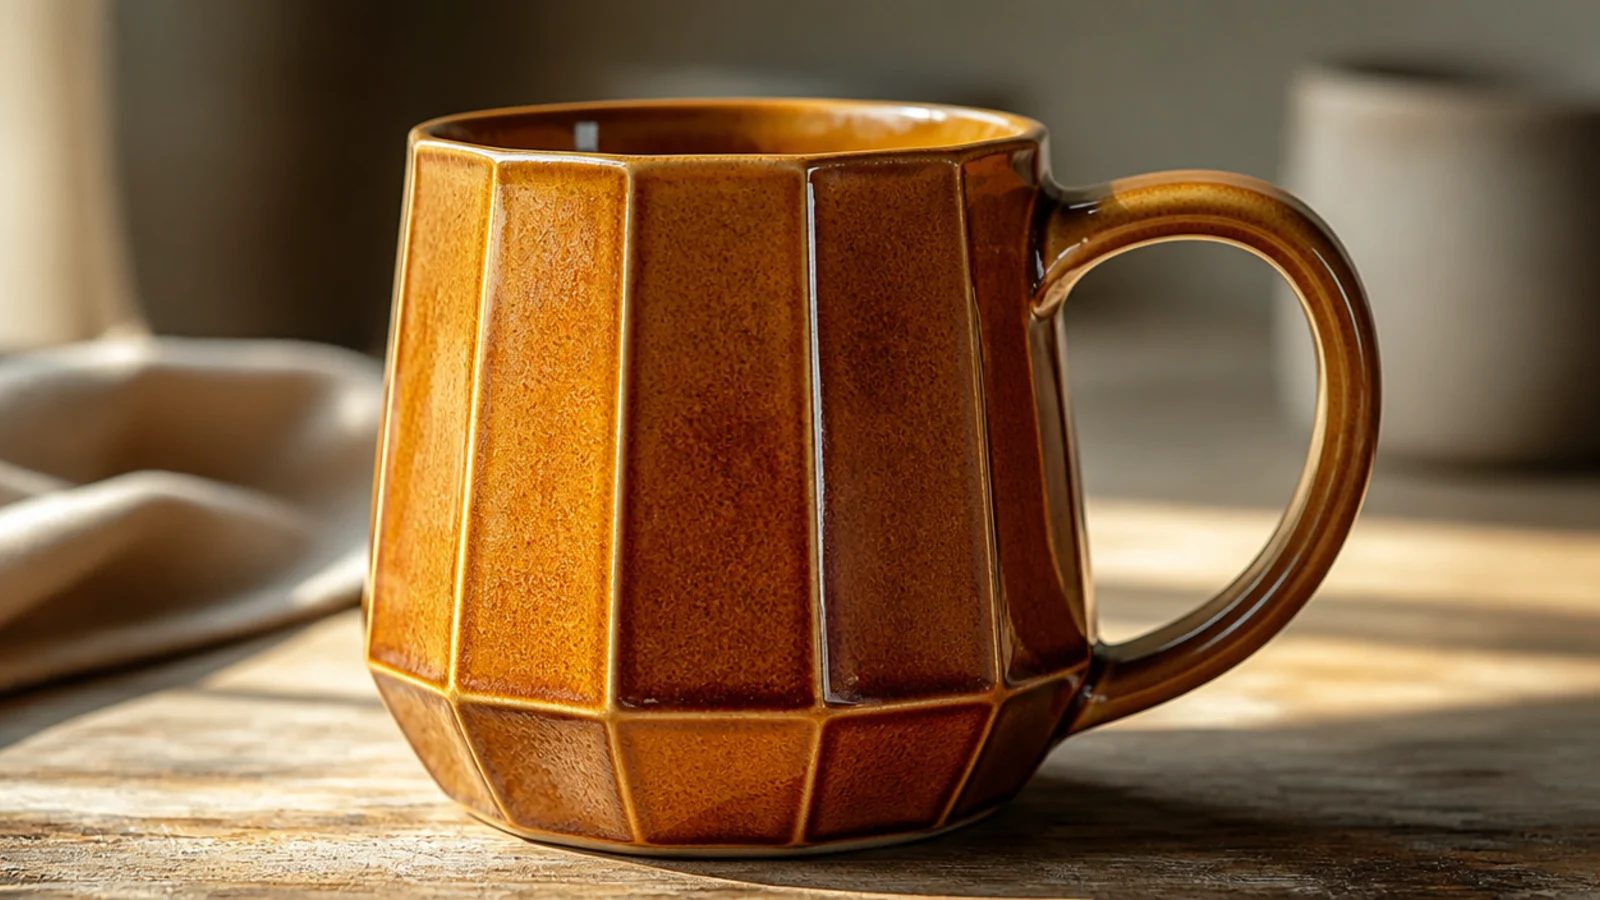
Faceting slices flat planes down the sides of a rounded mug so it catches light like a cut stone. It gives a thick-walled mug a crisp, architectural feel and a great grip. A glossy, slightly runny glaze pools in the cut edges and highlights every facet.
Build or throw the mug with slightly thicker walls than usual — about 3/8 inch — so there’s clay to remove. At soft leather-hard, use a wire tool or a flat metal rib to slice straight vertical facets from base toward rim, spacing them evenly around the mug. Clean each cut edge, firm up, attach a handle, then bisque. Glaze with a glossy food-safe glaze that breaks lighter over the facet edges and glaze-fire.
Editor's noteMark equal points around the rim first with a needle tool so your facets stay evenly spaced instead of drifting wider on one side.
Skip thisDon’t facet a thin-walled mug; you’ll cut straight through the wall or leave weak spots that crack in the kiln.
28. Fluted Column Mug
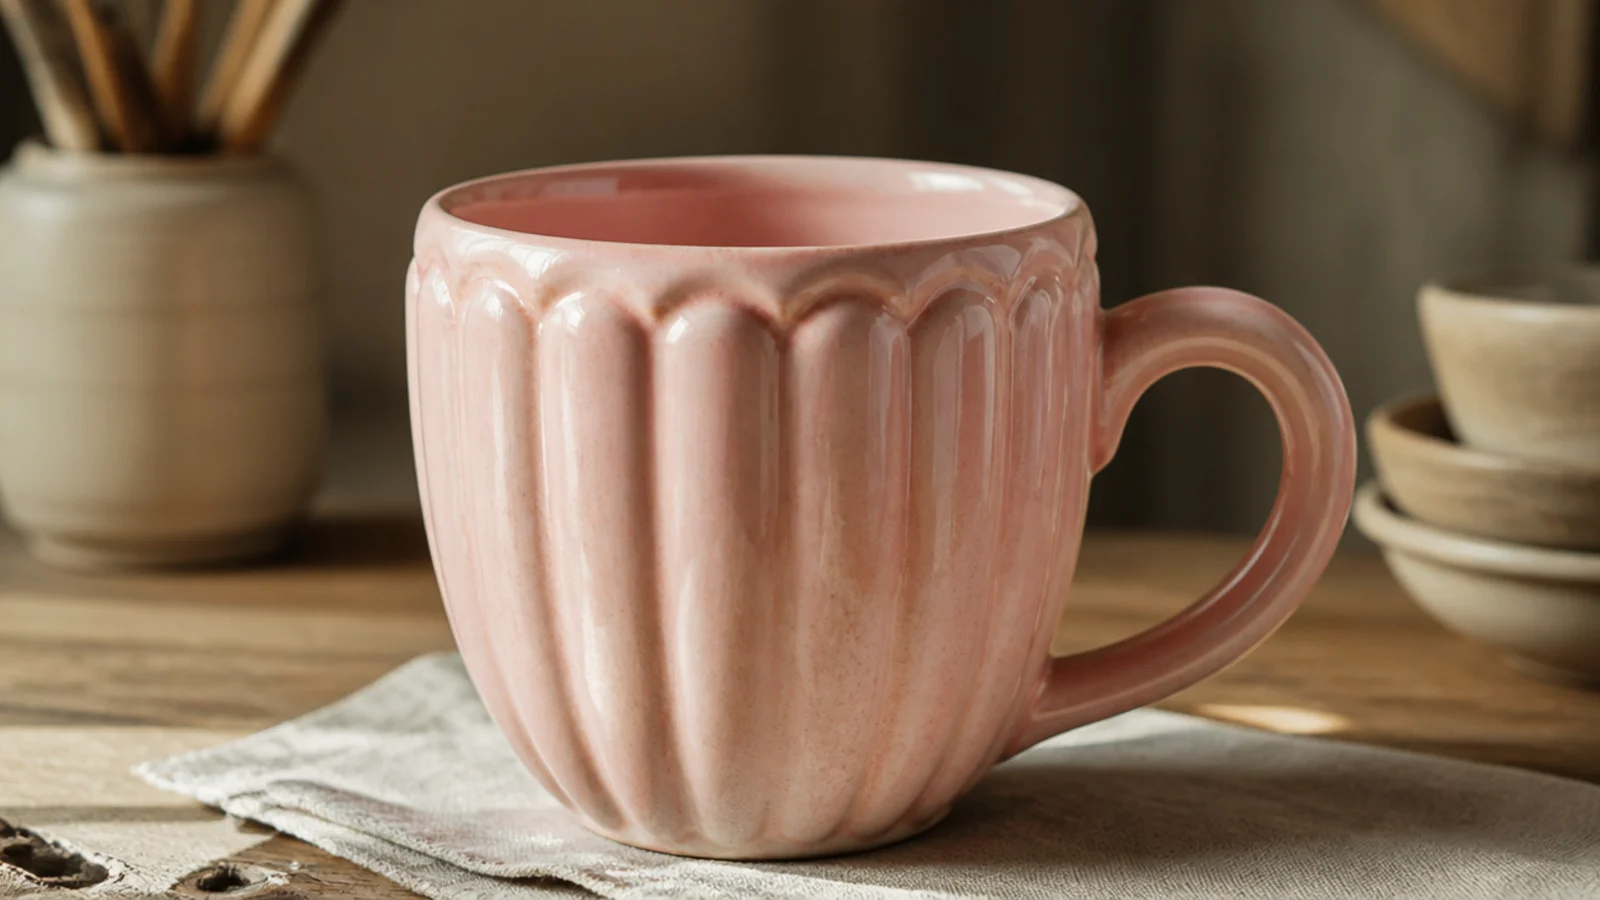
Soft vertical flutes carved into the walls give a rhythmic, scalloped column texture that feels both classic and current. Unlike sharp facets, flutes are rounded grooves, so they read gentle and tactile. A satin glaze settling into the channels makes the whole mug glow.
Build the mug with walls a touch thicker than usual so there’s clay to carve. At leather-hard, use a rounded loop or fluting tool to carve evenly spaced vertical grooves from just below the rim to the base, keeping consistent depth and pressure. Smooth any rough edges with a damp sponge, attach a handle, and let it firm slowly. Bisque, apply a satin food-safe glaze that pools slightly in the grooves, and glaze-fire.
Editor's noteDraw guide lines down the mug first and carve slowly with steady pressure — consistent depth is what makes flutes look machine-neat.
Skip thisDon’t carve flutes too deep or too close together; overlapping cuts thin the wall and can crack along the grooves.
29. Marbled Agateware Mug
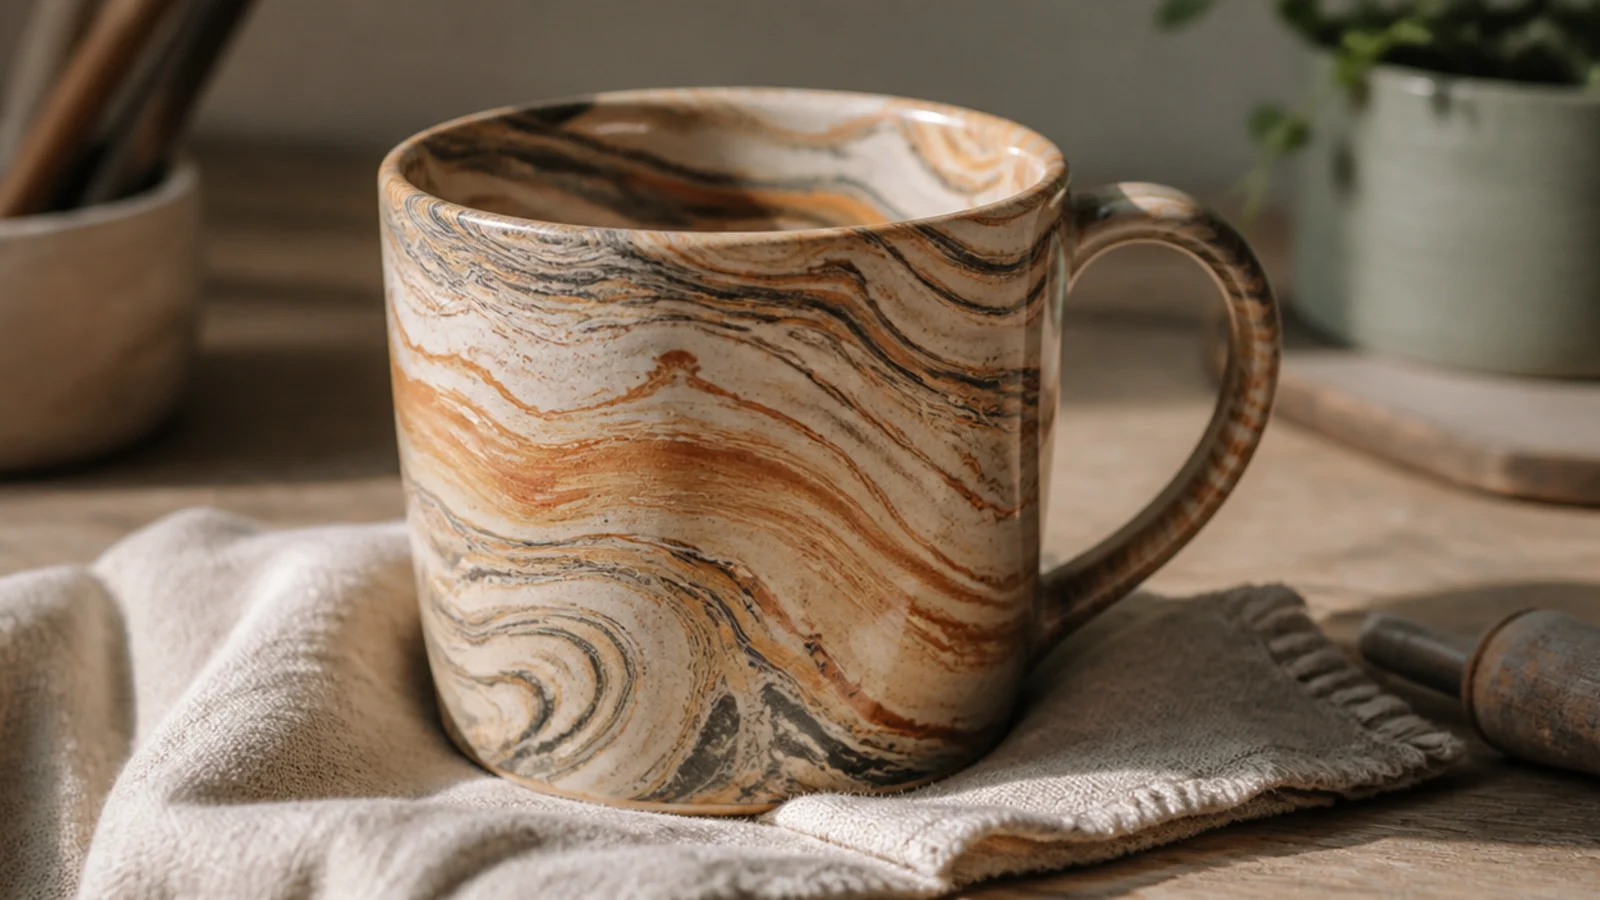
Agateware marbles two or more clay colors together so the swirl runs through the whole wall, not just the surface. Every mug is one of a kind and the effect looks high-end. It takes a light touch — overmix and the marble turns to mud — which makes restraint the whole skill.
Take two or three stoneware colors that fire to the same temperature, roll them into ropes, twist gently, and fold just a few times — stop while the pattern is still distinct. Roll into a slab or wedge lightly, then build a slab or pinch mug from the marbled clay, keeping walls an even 1/4 inch. Scrape the surface with a metal rib once leather-hard to reveal the crisp pattern, since it smears as you work. Bisque, coat in clear food-safe glaze, and glaze-fire.
Editor's noteUse clays with the same shrinkage and firing range, or the colors pull apart and crack where they meet as the mug dries and fires.
Skip thisDon’t over-wedge the colors together; three or four folds gives marble, ten folds gives a muddy uniform gray.
30. Nerikomi Patterned Mug
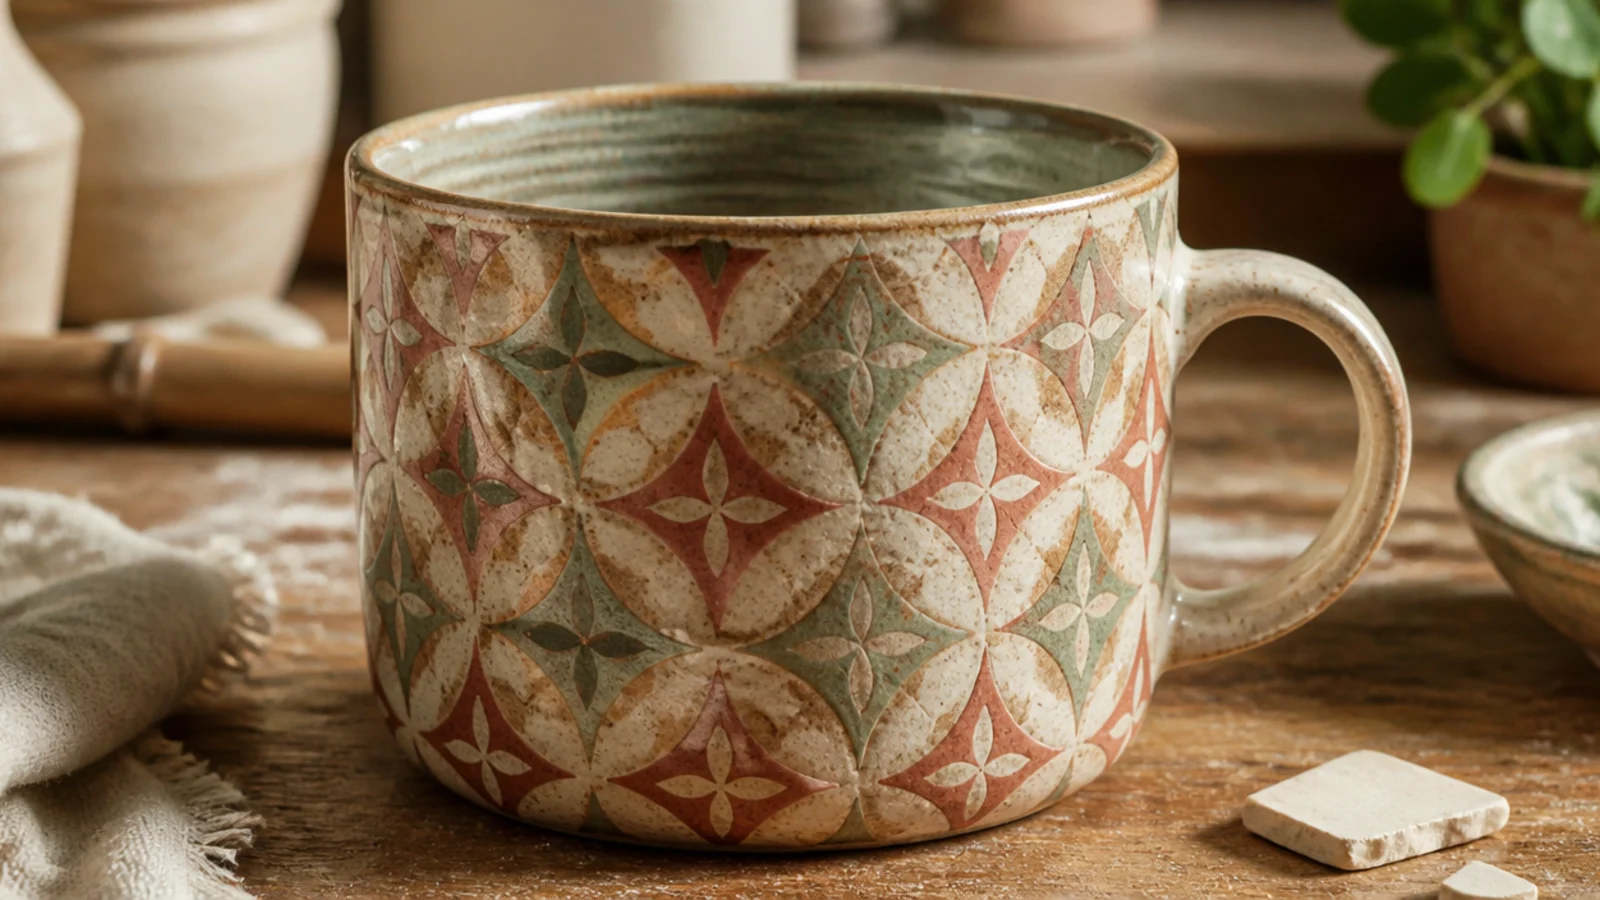
Nerikomi is the advanced cousin of marbling — you build a patterned loaf of colored clay, slice it into tiles, and assemble a mug so a repeating motif runs through the wall. It’s the showstopper of hand-building, and every piece is unique. It takes planning and patience, which is why it’s last on the list.
Layer and roll colored stoneware into a patterned block — a simple bullseye or checkerboard is a good start — then slice thin cross-sections that all show the pattern. Press the slices edge to edge onto a thin backing slab, roll gently in one direction to bond them without smearing, and build a slab mug from the patterned sheet with even 1/4-inch walls. Scrape the surface clean at leather-hard to sharpen the pattern, bisque, apply clear food-safe glaze, and glaze-fire.
Editor's noteUse clay colors with identical shrinkage and roll the assembled slices gently in one direction to bond them without smearing the pattern.
Skip thisDon’t mix clay bodies with different firing temperatures; mismatched shrinkage tears the pattern apart as the mug dries and fires.