


1. Counter caddy with a drain tray for sink-side chaos
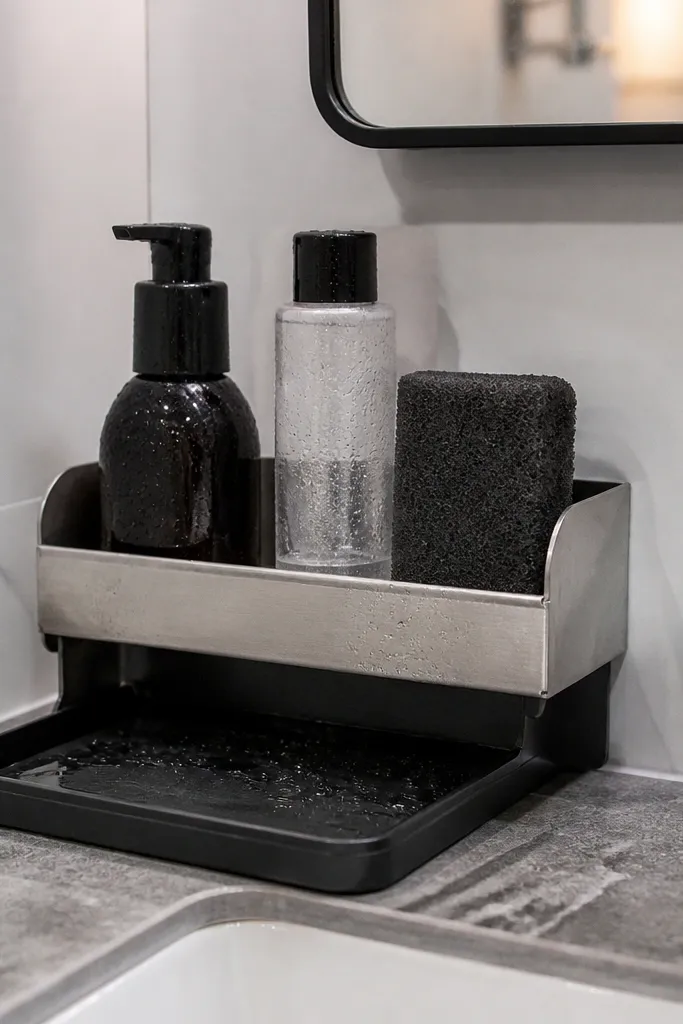
If your vanity counter turns into a wet science lab, you need a caddy that controls water, not just looks tidy. A drain tray matters because face wash foams, toner bottles, and wet sponges leave residue that makes everything stick and smell. Use a caddy sized to fit one corner of the counter so it’s a contained zone, not an open invitation to stack. This setup is ideal for shared bathrooms and for people who keep a sponge or brush at the sink. Skill level is beginner. Time is 20-40 minutes depending on whether you’re adding non-slip pads and rearranging bottles.
Start by clearing the counter and grouping items into three piles: daily sink items, weekly items, and “not this month.” Measure the counter corner width and choose a caddy that leaves at least 5 cm of breathing space from the edge. Place the caddy on a silicone non-slip mat, then add the drain tray insert if your caddy has one. Finally, put bottles upright with pumps facing out, and keep the sponge/brush in the drain zone so it dries between uses.
Line the drain tray with a thin layer of silicone mat or a washable tray liner so residue wipes off in seconds.
Avoid open catch-alls on the counter. They collect drips and turn into a sticky pile.
2. Drawer insert with sliding compartments for "tall bottle" control
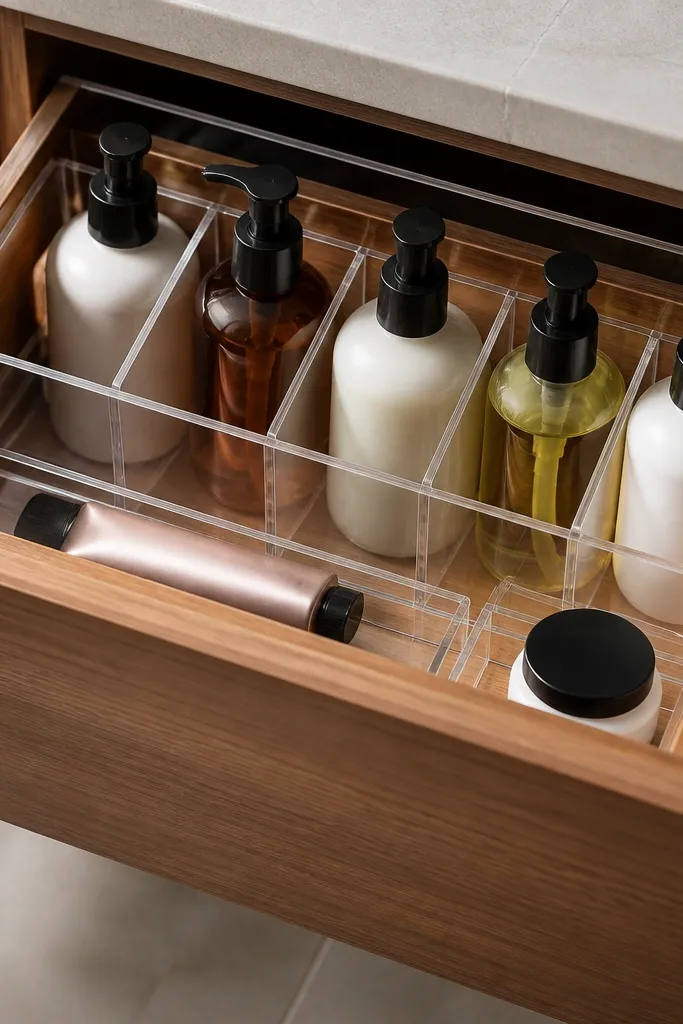
Tall bottles are the reason most vanity drawers become a jumble. When you store them with flat dividers, bottles tip, labels smear, and the drawer stops closing smoothly. A drawer insert with sliding compartments lets you lock in widths so pumps and tubes sit where you expect them. This is a strong option for deeper drawers where you can dedicate one section to skincare and another to tools like tweezers. It’s a practical fix that keeps the drawer usable for months, not just a weekend.
Start by removing everything from the drawer and measuring the interior length, width, and usable height. Choose an insert system that adjusts in millimeters and can be reconfigured without tools. Set the dividers so the tallest bottle stands with a 1 cm gap above the top of the insert. Then create two zones: one for bottles and one for flat items like cotton pads and small creams. Place the insert in the drawer, slide compartments to fit, and do a test close to confirm nothing catches.
Editor's noteAdd adhesive felt pads under any divider that touches glass or plastic to reduce sliding and label rubbing.
Skip thisDon’t force-fit bottles into a divider layout that leaves them leaning. That’s how drawers turn into a spill risk.
3. Magnetic strip for metal tools so they stop disappearing
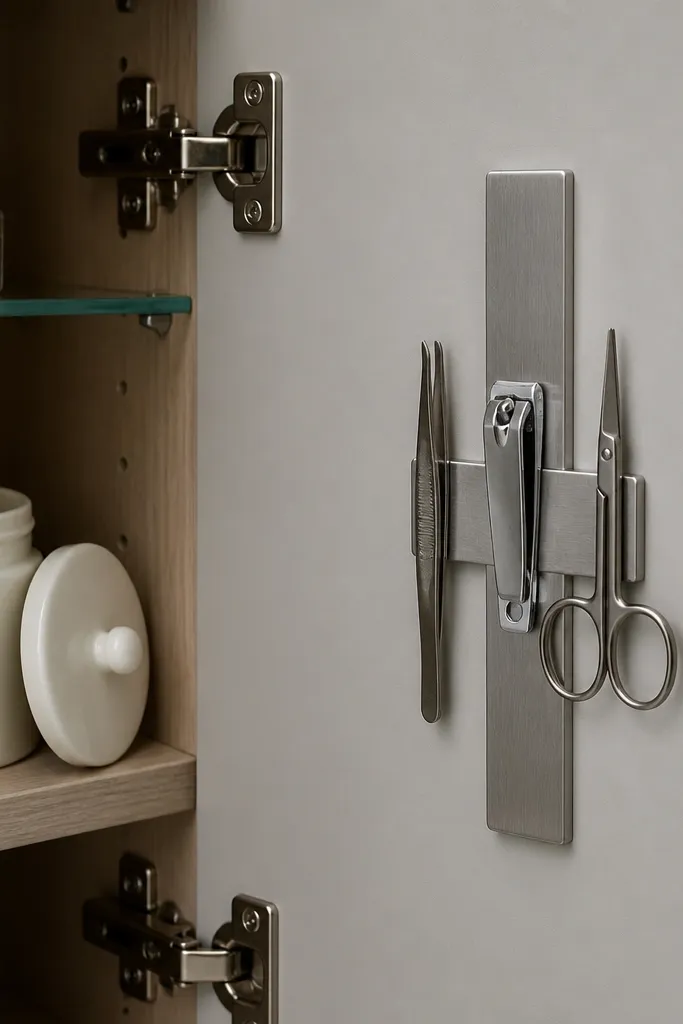
Tweezers, nail clippers, and small scissors vanish because they don’t have a “grab path.” A magnetic strip gives them a fixed landing point and keeps them from getting buried under cotton pads or hair ties. This is especially helpful for vanities with cabinet doors where you want tools stored vertically. Metal tools also feel satisfying to grab — you don’t have to dig. It’s beginner-friendly and fast, and it keeps your drawer space for products that actually need drawers.
Start by cleaning the cabinet wall where you’ll mount the strip with rubbing alcohol and letting it dry. If you’re using an adhesive magnetic strip, apply it to the backer with firm pressure and wait the recommended cure time before loading tools. If you’re screwing in, mark level points and pre-drill small pilot holes. Arrange tools by size so the biggest tool sits closest to eye level. Finally, test with one-handed grabbing to make sure nothing falls when the door closes.
Use a small strip for a few tools, not a long one. A short strip keeps the layout tighter and reduces tool clutter.
Avoid mounting on dusty surfaces. Weak adhesion makes tools slide and you end up with a new mess.
4. Lidded bin for cotton, wipes, and backups to stop drawer stink
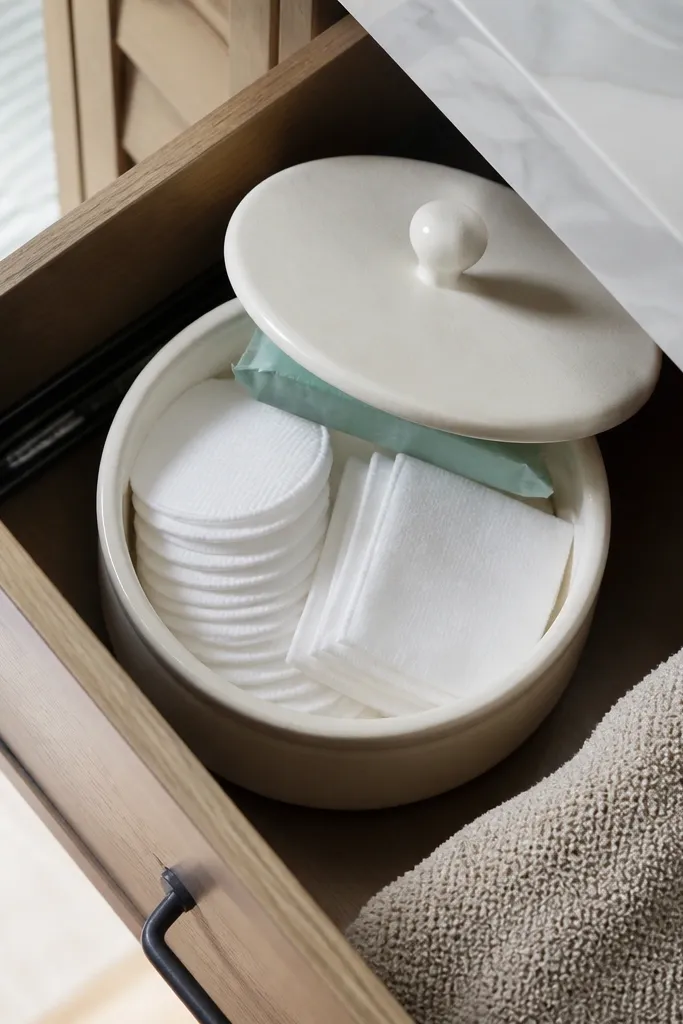
Open stacks of cotton pads and wipes pick up drawer dust and moisture, and the smell shows up fast. A lidded bin turns those loose items into a controlled zone. This also solves the “I’ll restock later” problem because the lid makes it obvious when you’re down to the last pack. It’s perfect for drawers that hold both daily supplies and backups. You’ll get a cleaner look and fewer surprise runs to the store.
Start by emptying the drawer and wiping it down so the bin sits on a clean surface. Choose a bin with a lid that fits the drawer height without forcing products to compress. Put daily items in the front section and backups behind them, so you can see what’s running low. Keep wipes and cotton pads in their original packaging or in a small pouch inside the bin to prevent loose edges from catching. Close the lid and do a quick shake test to confirm nothing shifts.
Label the bin lid edge with a washable marker: “Cotton + Wipes.” You’ll restock faster.
Avoid storing wipes and cotton directly loose in a wide drawer. They spread and collect crumbs.
5. Lazy Susan for the vanity corner that traps seasonal bottles

Corner shelves are where seasonal items go to die. You shove bottles in, forget them, and then the same three products stay at the front while everything else gets pushed to the back. A small Lazy Susan fixes the access problem by bringing the back items to the front with a simple turn. It’s great for tall bottles, hair styling products, and sunscreen backups. Choose the right size and it makes the whole system feel automatic.
Start by measuring the corner shelf diameter or the usable width and depth of the base. Buy a Lazy Susan insert that matches the footprint, then test fit with the shelf in place. Place heavier items at the center and lighter ones around the edge so it rotates smoothly. Add a thin non-slip mat under the tray so bottles don’t creep. Finally, create a rule: one rotation slot is “this season,” and one is “next swap.”
Use shallow baskets on top of the Lazy Susan for small items like lip products so they don’t roll.
Avoid placing the Lazy Susan where it blocks door clearance. A rotating tray that hits the door becomes unused storage.
6. Vertical acrylic organizer for lip products and small tubes
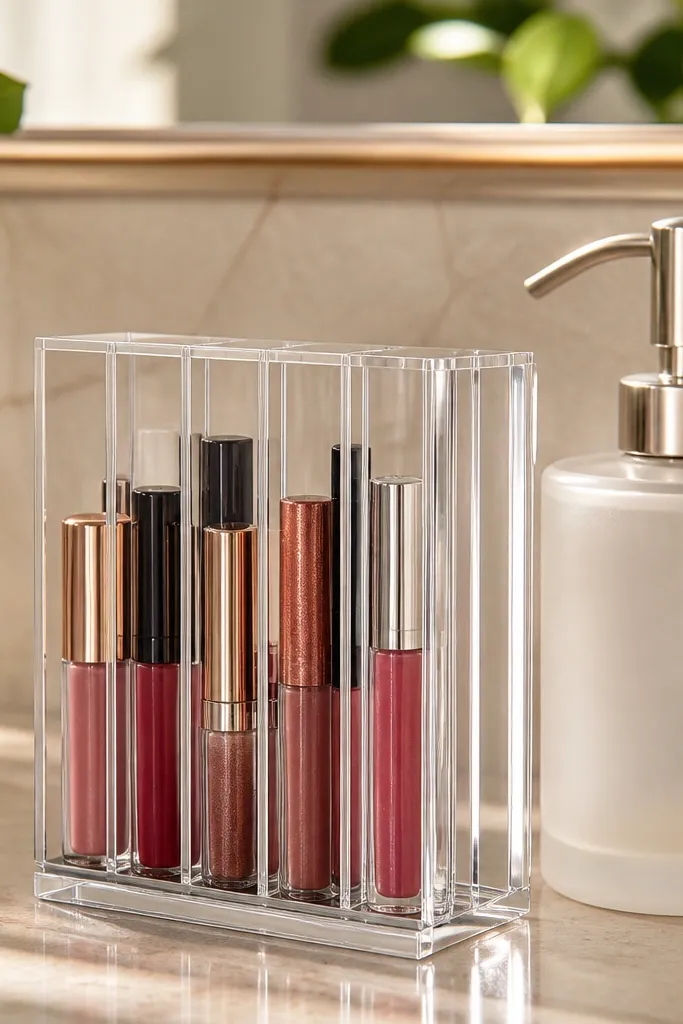
Lip products and small tubes are the worst offenders for rolling around and mixing finishes. A vertical acrylic organizer stops that by separating items into slots so you can see what you own. It also makes seasonal swaps easy because you can lift the whole organizer and move it. This works best on a countertop section or inside a drawer where you can keep it upright. It’s a clean look without being fragile if you choose one with wide base supports.
Start by counting your lip products and tubes so you buy an organizer with enough compartments. Choose a base that sits flat and has a lip or raised edge to prevent sliding. Place the organizer on a non-slip mat if it’s on the counter, or strap it down with double-sided tape if it’s in a drawer. Sort by category you actually use daily: “lip,” “lip balm,” and “tinted balm,” then keep the rest in an out-of-rotation bin. Wipe the organizer regularly because acrylic shows fingerprints from daily handling.
Editor's noteStore lip liners in a separate small tray. They snag less when they’re not mixed with round caps.
Skip thisAvoid mixing loose lip gloss wands with solid sticks in the same slot. They smear and create sticky buildup.
7. Under-sink pullout shelf for cleaning bottles and hair tools
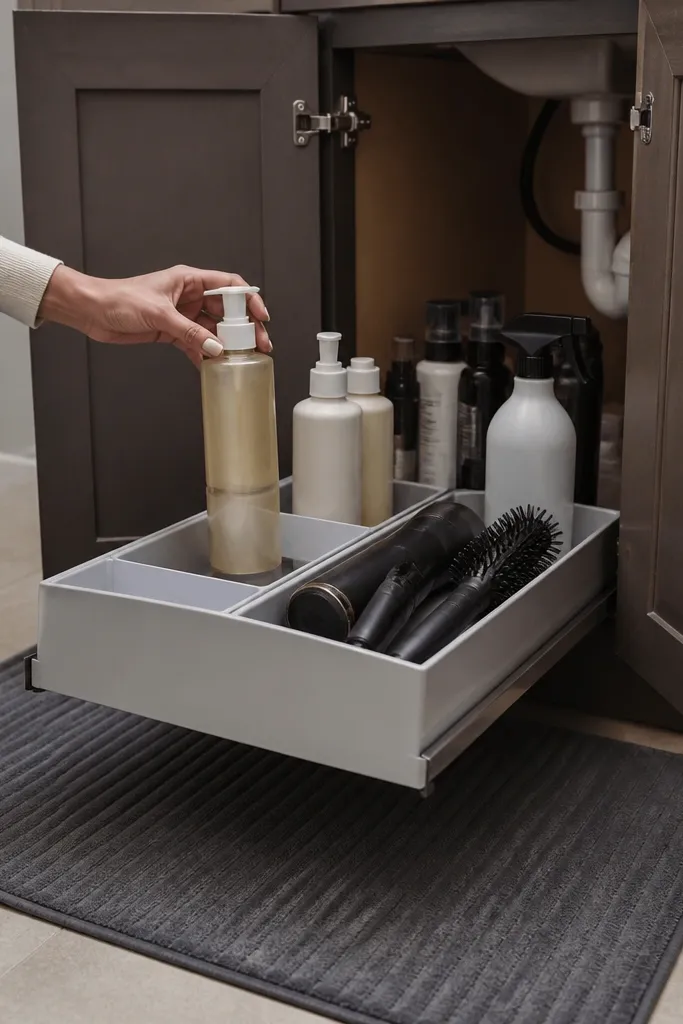
Under-sink storage gets chaotic because you can’t see what’s on the back shelf. A pullout shelf fixes visibility and reduces the “grab and knock” problem when you reach for shampoo or cleaning spray. This is a strong Year-round vanity organization move because it separates everyday bathroom liquids from seasonal extras like winter foot care or summer body sprays. It also makes it easier to clean under the sink without moving everything. The build is beginner to intermediate depending on whether you’re installing tracks or using a simple pullout basket.
Start by removing everything under the sink and measuring the cabinet width, depth, and height clearance. Choose a pullout shelf/basket sized to fit and check that the door can still close fully. Install tracks if you’re using a hardware kit, or place a no-drill pullout basket if that fits your cabinet design. Group items into two zones: one for cleaning liquids and one for hair and skin tools. Put heavier bottles on the lower pullout level and keep spray nozzles facing outward for quick grabs.
Add a waterproof tray liner under the pullout shelf. If anything leaks, cleanup stays contained.
Avoid storing bottles directly on the cabinet floor. Spills become permanent residue.
8. Pegboard vanity wall for daily tools and blow-dryer cords
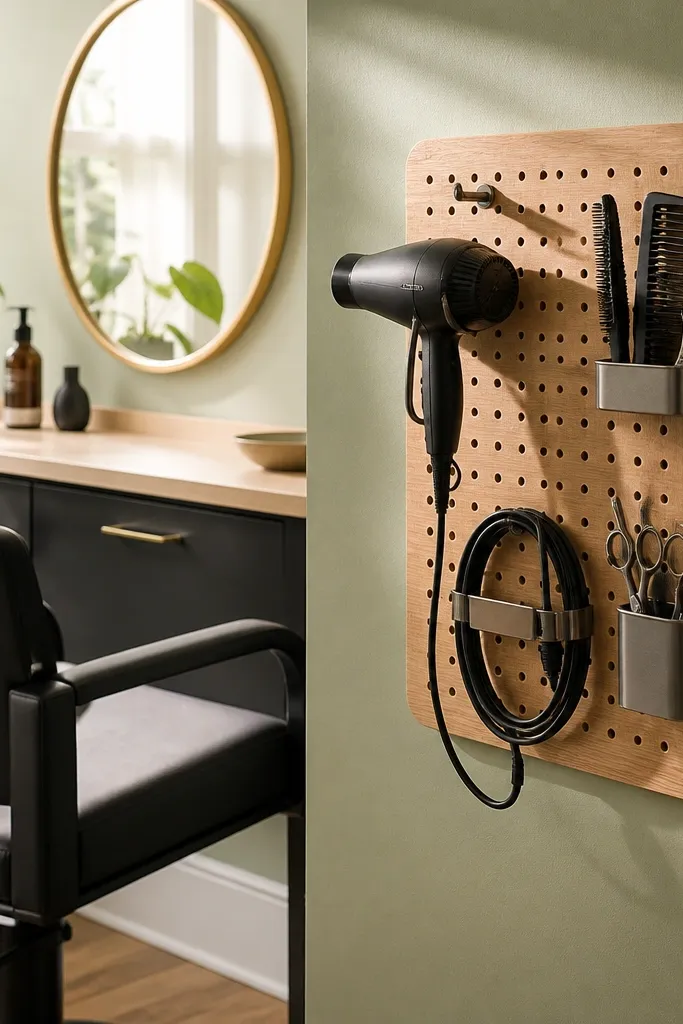
If your blow-dryer cord is always in the way, pegboard solves the physical problem, not just the storage problem. When you hang tools, you stop stacking them and you keep them dry between uses. This is best for bathrooms where the vanity has a blank wall beside it or inside a cabinet door. Pegboard also makes Year-round vanity organization easier because you can swap hooks for seasonal tools without replacing the whole system. It’s a beginner DIY if you keep it small and mount into studs or use proper anchors.
Start by finding studs behind the vanity area using a stud finder, then mark a level line. Cut or buy a pegboard panel sized to the wall space you want to dedicate. Drill pilot holes, mount the board, and add hooks for the tools you use daily. Create a cord zone with one hook for the cord wrap and one hook for the tool handle. Hang brushes and clips with open spacing so air moves around them. Finally, test by plugging in and wrapping the cord — make sure it doesn’t pull the board or stress the hooks.
Editor's noteUse colored hooks for a simple visual rule: one color for hair tools, another for skincare tools.
Skip thisAvoid mounting pegboard on drywall alone without anchors. A heavy hair tool will loosen it.
9. Silicone drawer liner + adjustable tray for hair styling clips
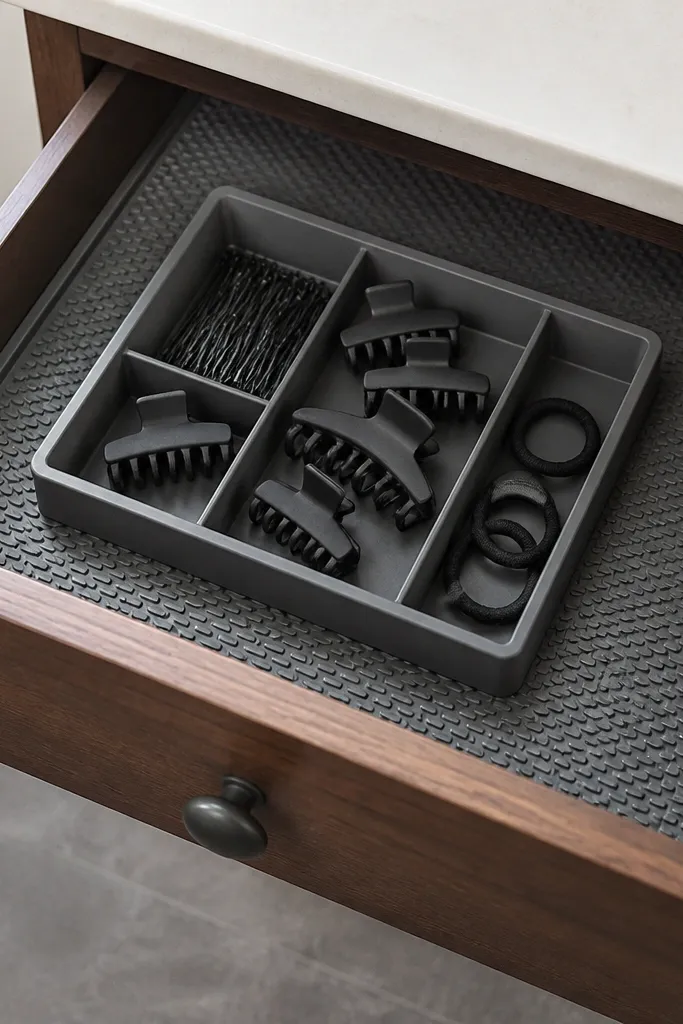
Hair clips, bobby pins, and small elastics are light and slippery. Without grip, they migrate across the drawer and turn into a scavenger hunt. Silicone drawer liner gives friction so clips stay put, and an adjustable tray gives them boundaries. This combination is a clean, low-effort fix that keeps everyday tools from mixing with makeup and skincare items. It’s ideal for anyone who wants Year-round vanity organization without drilling or permanent installs.
Start by cutting silicone drawer liner to match the drawer interior and trimming edges cleanly. Place the liner so it lies flat with no wrinkles. Then choose a small tray that fits the drawer depth and has compartments or raised dividers. Sort clips by type and place them into the tray compartments, keeping the most used ones closest to the drawer front. Finally, close the drawer and shake it gently — if items slide, add a slightly larger tray or use a smaller compartment size.
Editor's noteStore elastics in a small zip pouch inside the tray. They tangle less and you spot them faster.
Skip thisAvoid using paper liners. They shift, absorb moisture, and look messy quickly.
10. Seasonal swap bin with a "next season" label system
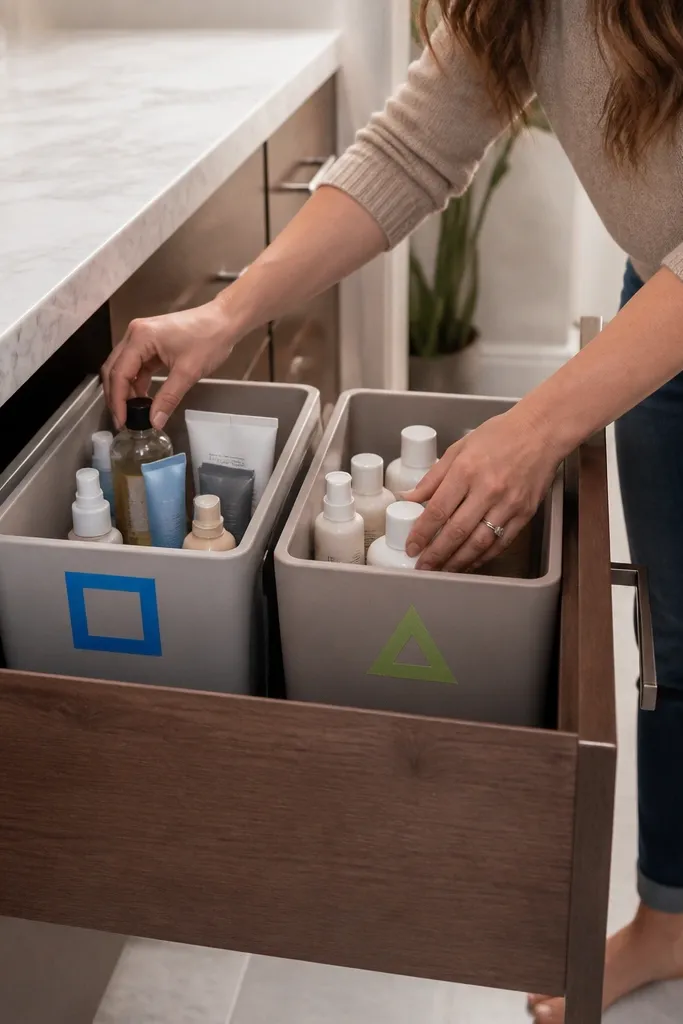
Year-round vanity organization fails when seasonal products live in the same drawers as daily items. You end up searching and you lose track of what’s actually in rotation. A seasonal swap bin system fixes that by separating “this season” from “next season” with clear labeling. You can do it with two bins inside one cabinet or on the top shelf. This keeps your daily setup stable while still making seasonal changes predictable and quick.
Start by picking one cabinet shelf or drawer you can dedicate to seasonal storage. Choose two bins that match the space and are easy to lift, ideally clear so you can see contents. Label one bin “This season” and the other “Next season” with a marker on the side. Move all seasonal items out of your daily zones and into the “This season” bin. When the season changes, swap the bins and do a quick wipe of the daily containers so residue doesn’t build up.
Editor's noteUse a sticky note on the bin bottom listing the product types inside. It helps when you forget what you packed.
Skip thisAvoid vague labels like “Summer” without a date. You’ll still guess when to swap.
11. Makeup brush cleaning caddy with a separate drying zone
Brushes create mess twice: once during use and again during cleaning. If you store brushes in a single container, wet bristles trap water and you get residue on your vanity. A cleaning caddy with a drying separation solves both. It gives you a place to soak, rinse, and dry without moving everything around. This is a smart Year-round vanity organization idea because brush care is constant, not seasonal. It also keeps your counter looking clean between deep cleans.
Start by choosing a caddy with two zones or add a small drying rack insert. Place a brush cleaning mat or silicone scrub pad on one side for rinsing and gentle scrubbing. Add a small cup for cleanser or soap and position it so it doesn’t tip. Put the drying rack on the other side so brushes rest at an angle and water drips into a tray. Finally, store the whole caddy in a cabinet so it doesn’t sit open on the counter.
Use a small microfiber cloth tucked under the caddy for quick wipe-downs of drips.
Avoid drying brushes flat on the vanity surface. Water sits and residue spreads.
12. Drawer organizer for hair ties and accessories with a "flat layer" rule
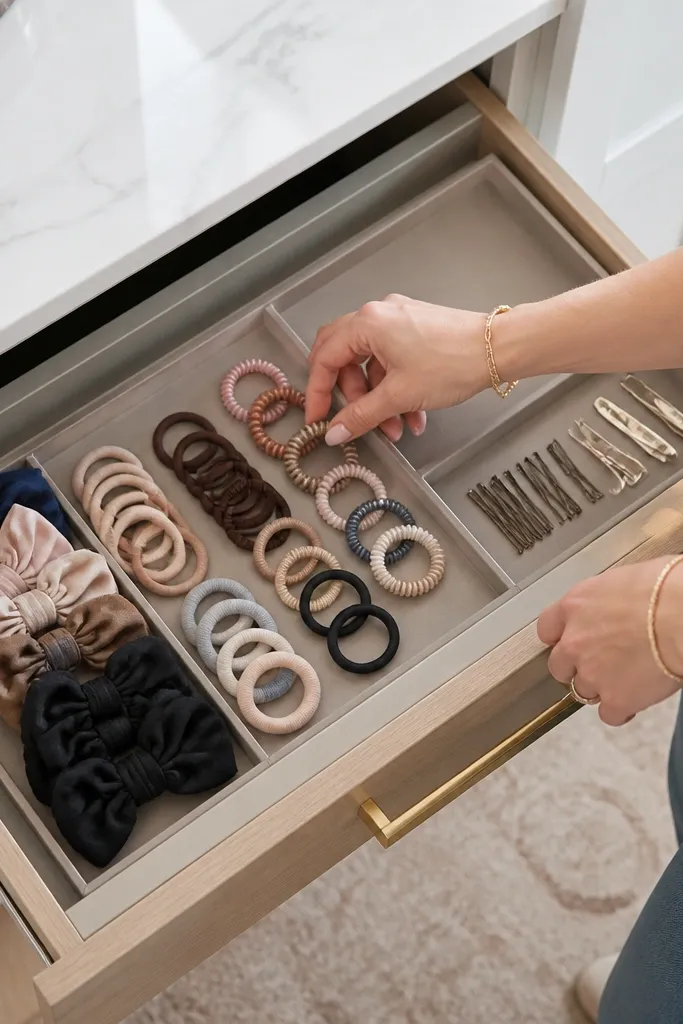
Hair ties and accessories behave like sand — they fill empty space and disappear into corners. The “flat layer” rule is what saves you: accessories should sit in a shallow tray so you can see and grab them without digging. This prevents the drawer from turning into a mixed pile with elastics tangled around cotton pads. It’s a simple upgrade that makes daily grooming easier and keeps your vanity looking intentional. Skill level is beginner and it takes about 15-25 minutes.
Start by emptying the drawer and separating accessories into groups: elastics, clips, and headbands. Choose a shallow organizer tray with compartments that don’t exceed about 2-3 cm of accessory depth. Place elastics in the largest compartment and keep clips in a separate narrow one so they don’t snag. Keep headbands in a single flat section rather than standing them upright. Close the drawer and pull it open twice to confirm you can find items without moving other compartments.
Store one extra pack of elastics in the seasonal bin, not in the daily tray. It keeps the daily tray from swelling.
Avoid dumping accessories into a deep bin. Depth hides tangles and you’ll stop using the system.
13. Bathroom cabinet door organizer with labeled pockets for daily top-ups
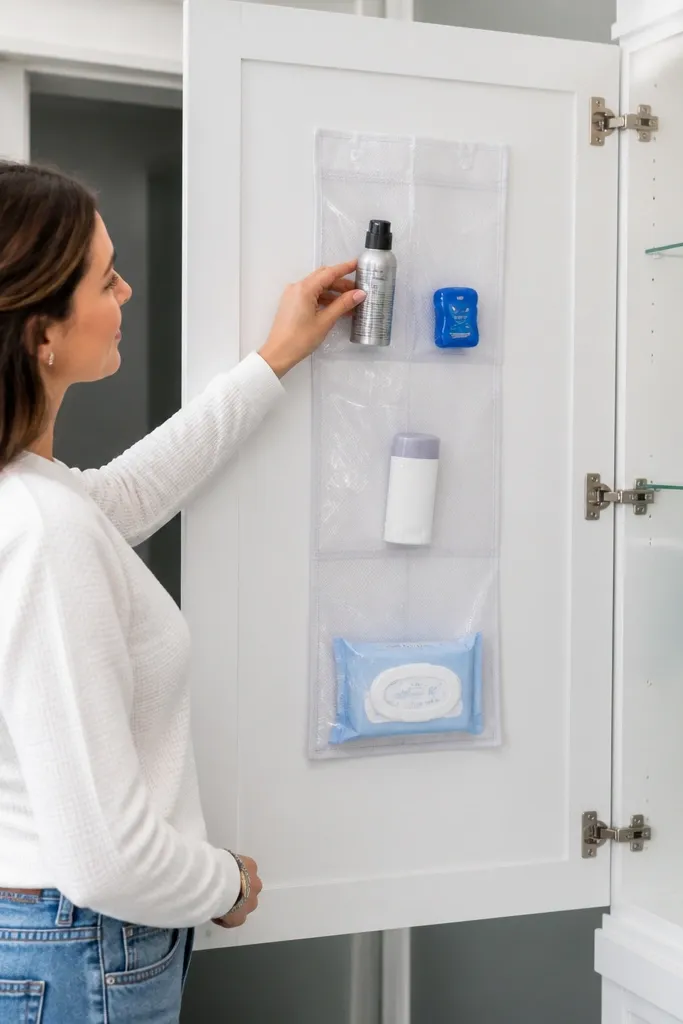
Door pockets are underrated because people fill them with everything and then nothing stays visible. The trick is using them for daily top-ups: deodorant, travel floss, hair spray mini, face wipes. This turns the door into a controlled staging area near where you stand. It keeps those items off the counter and reduces drawer rummaging. This is a strong option for smaller vanities where counter space is precious and for households where multiple people use the same bathroom.
Start by measuring the inside width of the cabinet door and buying a pocket organizer that fits without bending. Clean the door surface and install the organizer using the manufacturer method. Label each pocket with a single word using a label maker or washable label tape: “Deo,” “Wipes,” “Floss,” “Spray.” Put only daily items in the pockets so you can find them instantly. Close the door and check that bottles don’t press and unseat the pockets over time.
Use clear pockets for products with similar caps so you don’t mix up minis and full-size items.
Avoid storing liquids that can leak in door pockets. If something spills, it drips down and stains.
14. Under-drawer mini bin for backups so drawers stay slim
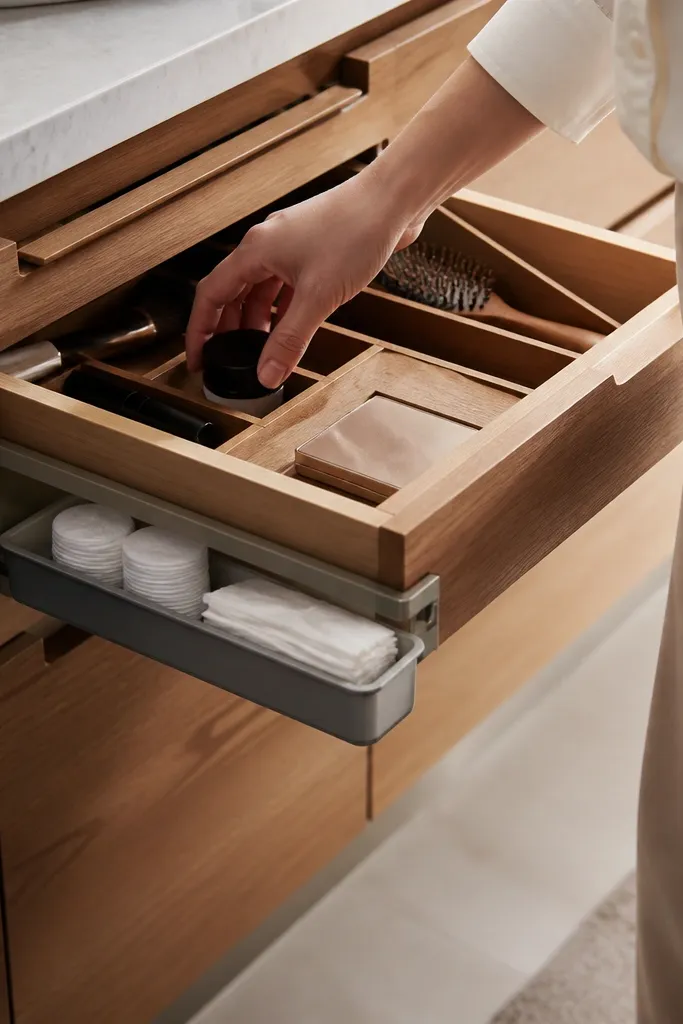
A drawer that’s full of backups looks organized until you need something quickly. The drawer becomes thick with extra packs, and daily items get buried. An under-drawer mini bin keeps backups out of the main drawer footprint while still staying accessible. You get slim, clean drawer space for daily use and a hidden storage spot for replacements. This is ideal for cotton pads, extra razors, travel sizes, and spare mascara. It’s low-cost and works great for Year-round vanity organization when you want change without clutter.
Start by checking your drawer clearance under the drawer lip and measure the usable depth and width. Purchase a small under-drawer bin that fits the gap and slides in without scraping. Put backups in the bin by category and keep daily items in the main organizer. Add a simple restock trigger: when a daily item hits 1/3 full, replace from the under-bin. Test the drawer opening and closing with the bin loaded to ensure nothing catches.
Editor's noteStick a small strip of non-slip tape on the bin bottom so it doesn’t creep when you open the drawer quickly.
Skip thisAvoid hiding backups with no system. If you can’t tell what’s in the under-bin at a glance, you’ll pull everything out.
15. Turntable tray for perfume, hair oil, and daily scent rotation
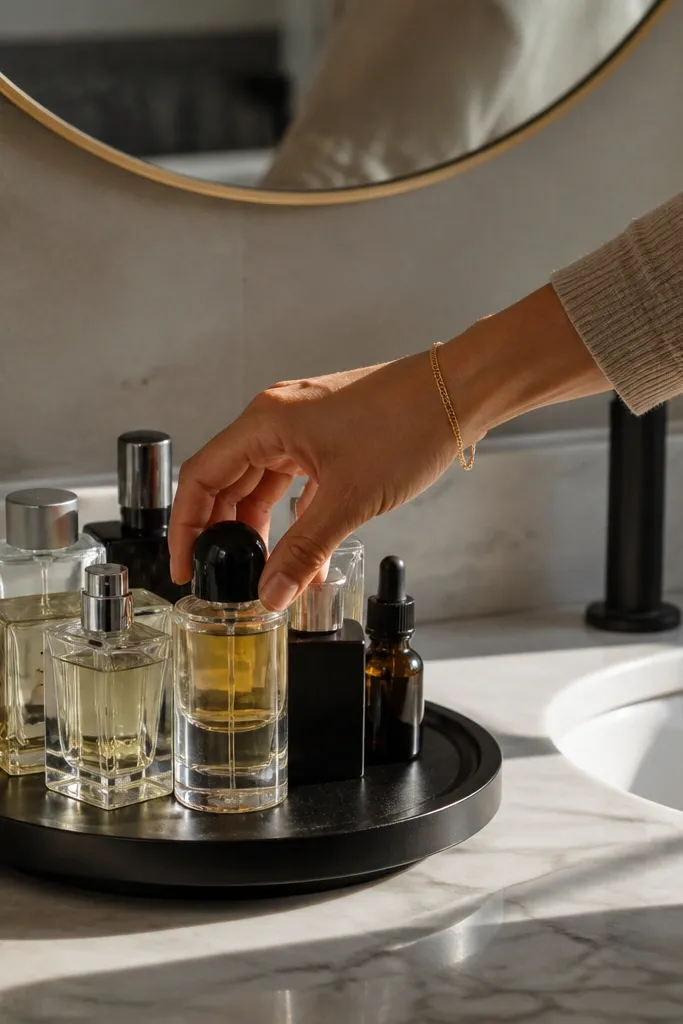
Perfume and hair oils get rotated by mood and weather, but people store them in static piles. That leads to the same bottle getting used while others sit untouched until they expire. A turntable tray fixes access and makes rotation automatic. It also keeps small glass bottles from sliding around on the counter. Use it for daily scent and styling oils only, then move anything seasonal to the swap bin. This keeps your counter clean and your routine intentional without constant re-sorting.
Start by cleaning the counter and choosing a turntable tray that fits the space you want to dedicate. Make sure the center gap is wide enough for bottle bases so they don’t wobble. Place the most-used item at the front slot and the rest around it. Add small labels to the tray edge or underneath the tray base so you know what’s in rotation. Finally, rotate the tray weekly as part of your swap rhythm so you don’t forget backups.
Editor's notePut hair oil and perfume on separate rings of the tray so you don’t mix sticky residue with spray bottles.
Skip thisAvoid mixing full-size bottles and tiny minis on the same flat surface. Minis roll and knock labels off.



