
1. Pegboard strip with labeled mini hooks
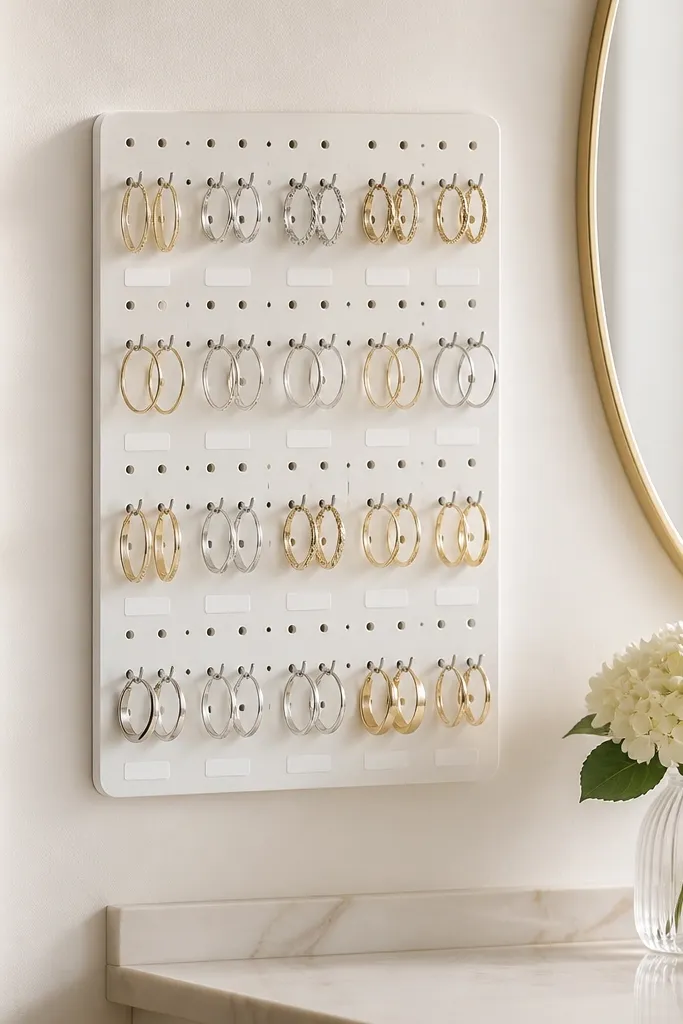
This is the fastest way to make jewelry look organized because everything hangs in sight. I use a pegboard strip even for small spaces since it takes depth off your countertop. The hooks hold weight well, and the spacing keeps hoops from tangling. Label tags make it feel like a system instead of a random wall of hooks.
Cut a scrap pegboard to a width that fits your vanity, like 10-12 inches, and mount it with two screws into studs or a strong adhesive mount if you can't drill. Add small hooks in a staggered pattern: studs on the top row, hoops in the middle, and longer pieces lower. Use a matte label tape so it doesn't glare under the vanity light.
Pro tipWrite labels in pencil on paper tape first, then commit with a label maker so you don't waste tape.
AvoidDon't cram hooks too close; they tangle the moment you add more than one hoop.
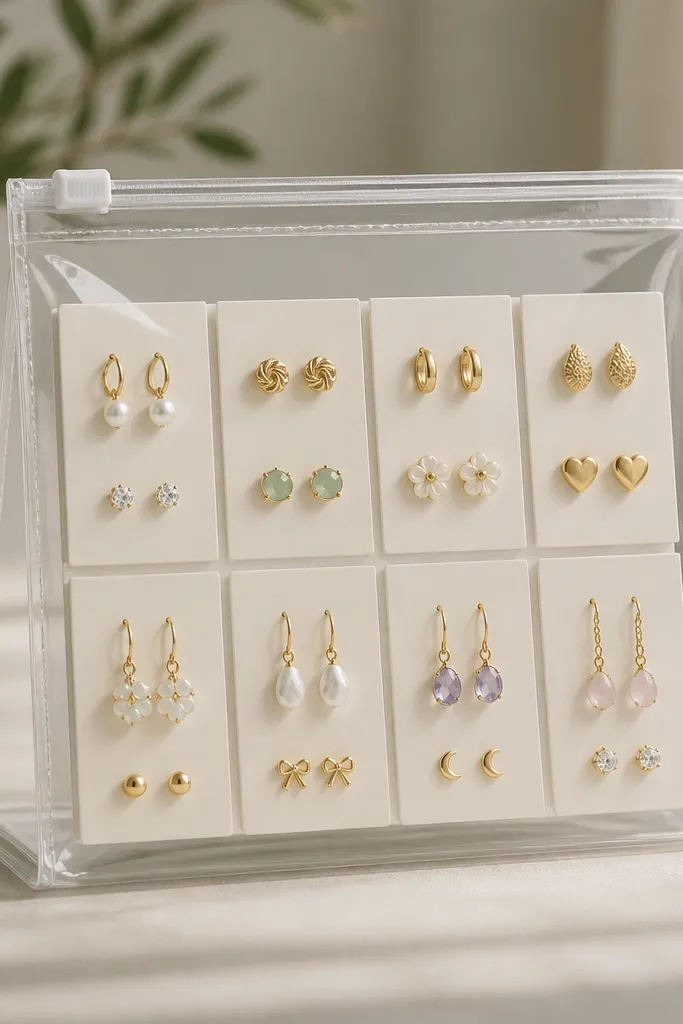
2. Clear acrylic earring tray with grid compartments
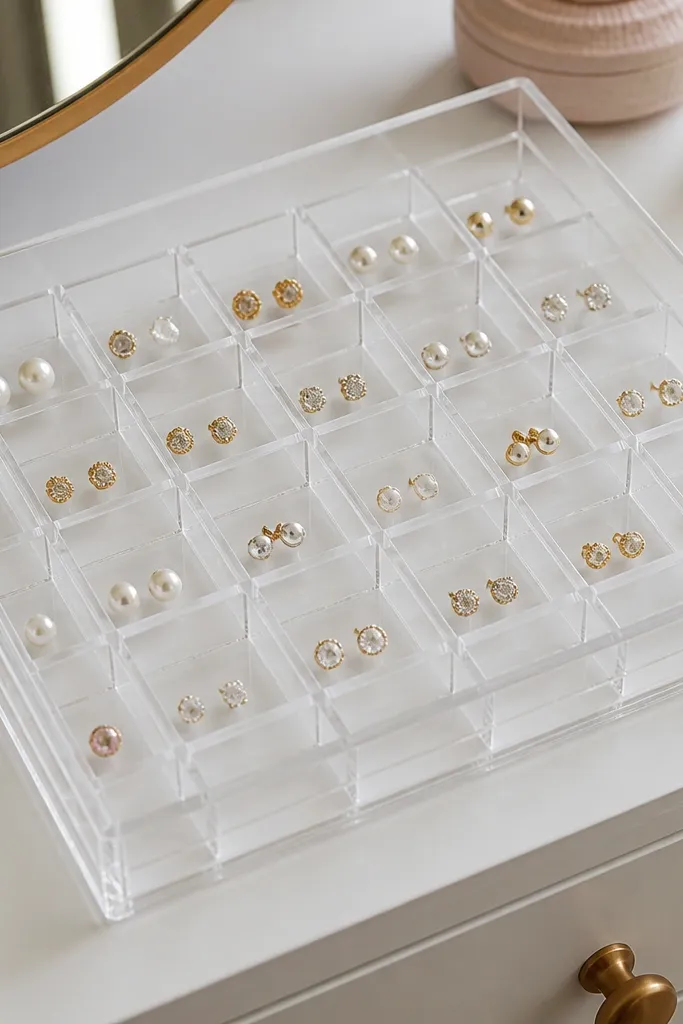
Clear compartments stop the "where did the other one go" problem. You can see pairs instantly, and the dividers prevent rolling. I like acrylic because it looks clean next to makeup brushes and it wipes down easily. The grid also makes it easy to assign categories like studs, hoops, and statement drops.
Buy a small acrylic organizer with removable dividers or make your own by cutting acrylic scraps and using clear adhesive to create partitions. Keep compartments around 1.25 to 1.5 inches wide for studs and small hoops. Place it in the center of your vanity where your hand naturally lands.
Pro tipLine the bottom with a thin strip of felt to keep posts from scratching and to reduce sliding.
AvoidAvoid frosted or heavily textured plastic; it hides small details and makes pairs harder to match.
3. Canvas necklace hanger with leather tie loops
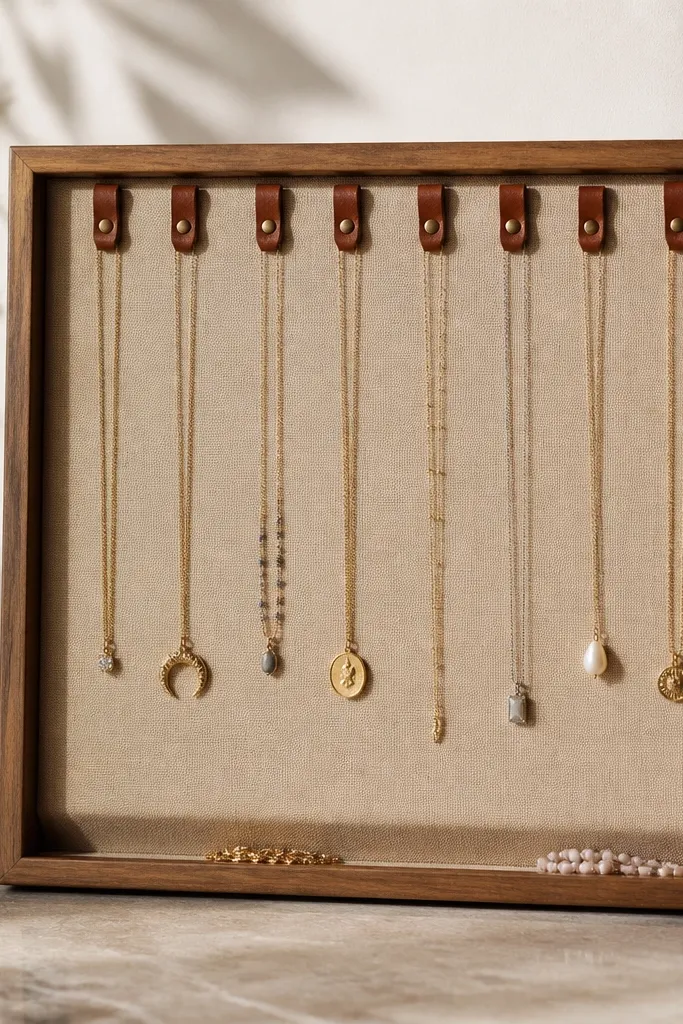
Necklaces tangle because they lie flat and rub against each other. This design gives each necklace a vertical home and a soft landing where it touches fabric. The canvas looks warm on a vanity and hides minor wear. Leather tie loops add grip without scratching metal clasps.
Stretch canvas over a 12x16 inch board and staple the back. Add 10-12 leather tie loops made from narrow leather strips, spaced about 1.25 inches apart. Keep the bottom channel shallow (about 1 inch tall) for shorter chains so they don't droop.
Pro tipHang only necklaces you wear weekly on the front - store the rest behind the frame with a hook-and-bag method.
AvoidDon't use slick satin or polyester fabric; necklaces slide and twist.
4. Drawer insert for rings using shallow felt wells
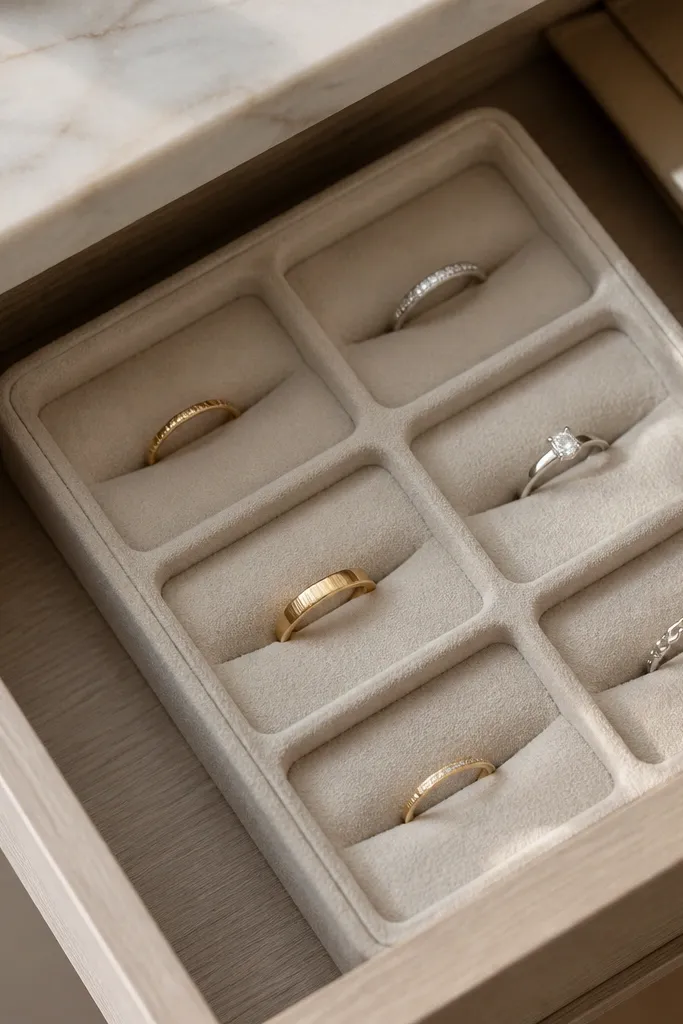
Rings roll when the surface is too smooth and when you toss them in a pile. Felt wells hold each ring in place while still letting you see the band. I use this in the drawer because rings are easy to keep tidy out of sight. The felt also prevents scratches on stones and metal.
Cut felt into a tray insert size that fits your drawer, like 10x8 inches. Glue felt down, then press shallow circles using a bottle cap as a mold. Leave at least 0.5 inch between wells so you can grab without disturbing neighbors.
Pro tipStore rings by metal color in different corners to reduce "which one is this?" moments.
AvoidSkip hot glue directly on delicate felt - it can shrink and create bumps that snag prongs.
5. Upcycled picture frame with push-pin earring map
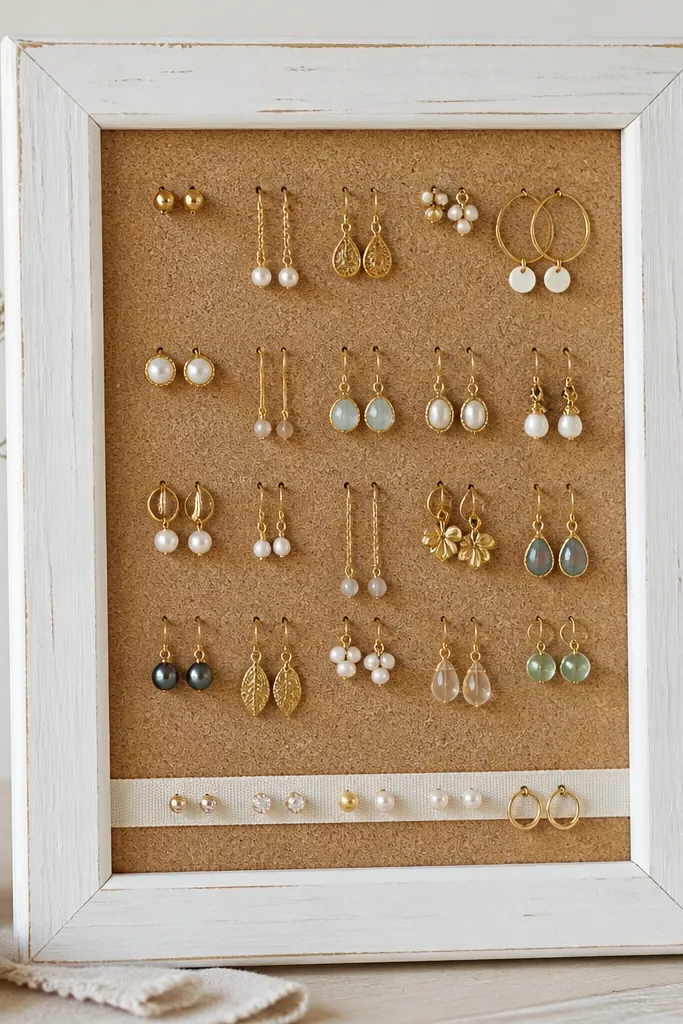
A frame instantly makes jewelry storage look intentional. Cork gives you grip so earrings stay put, and push pins act like mini hooks for studs and dangles. The frame also adds a clean border that looks good even if it's leaning on your vanity. I like this for organizing seasonal pieces because the layout stays visible.
Remove the glass and backing, then replace with cork sheet cut to fit the inside. Use push pins with a small head and place earrings at least 1 inch apart so they don't overlap. Paint the frame with two thin coats of primer + satin white for a smooth look.
Pro tipAdd a bottom ribbon strip as a visual "line" for where necklaces should end.
AvoidDon't use too many pins in one cluster; when you add one more earring, everything shifts and looks messy.
6. Binder clip chain organizer on a wooden dowel
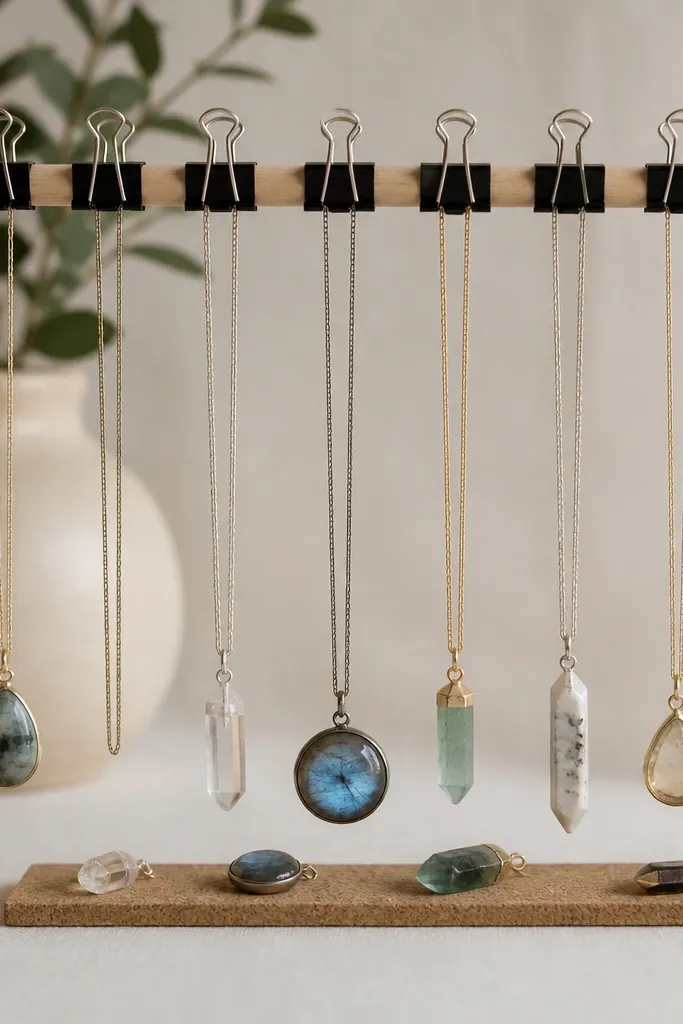
This is the easiest way I've found to keep chains from turning into a knot. Binder clips grip links without forcing you to hook delicate clasps onto tiny hardware. The dowel keeps it neat and horizontal, and the binder clip teeth grab enough to hold weight. It looks industrial in a good way next to makeup brushes.
Mount a dowel about 14 inches long on two small brackets. Clip binder clips along the top edge, spacing them 2-3 inches apart. Add a 1-inch strip of cork on the front for pendants so they don't scratch the dowel.
Pro tipPaint binder clips with hammered spray paint for a softer look that matches gold or gunmetal jewelry.
AvoidDon't clip directly over fine chain links without checking tension; some chains stretch at the clasp point.
7. Mason jar with felt ring pads and a label band
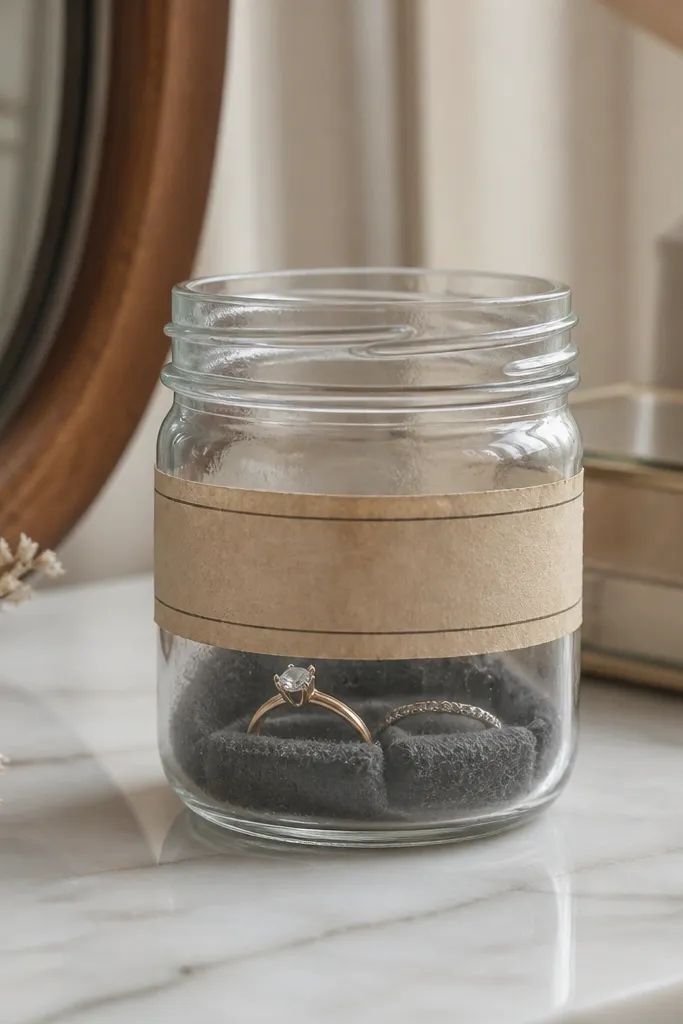
Mason jars look cute, but they only work when you stop rings from sliding around. Felt pads inside the jar create friction so rings land and stay put. I use this for "daily rotation" rings because it's visible and quick. The label band makes it feel like part of your decor, not a random jar.
Cut felt circles the size of the jar bottom plus a little overlap. Glue them in place and press three shallow wells with a bottle cap. Wrap a label band around the jar with double-sided tape and keep the handwriting in one neat line.
Pro tipKeep the jar for 8-12 rings max; once it's full, everything turns into a pile again.
AvoidSkip bare glass bottoms; rings clink, slide, and scratch in minutes.
8. Shoe organizer pocket panel for travel earrings
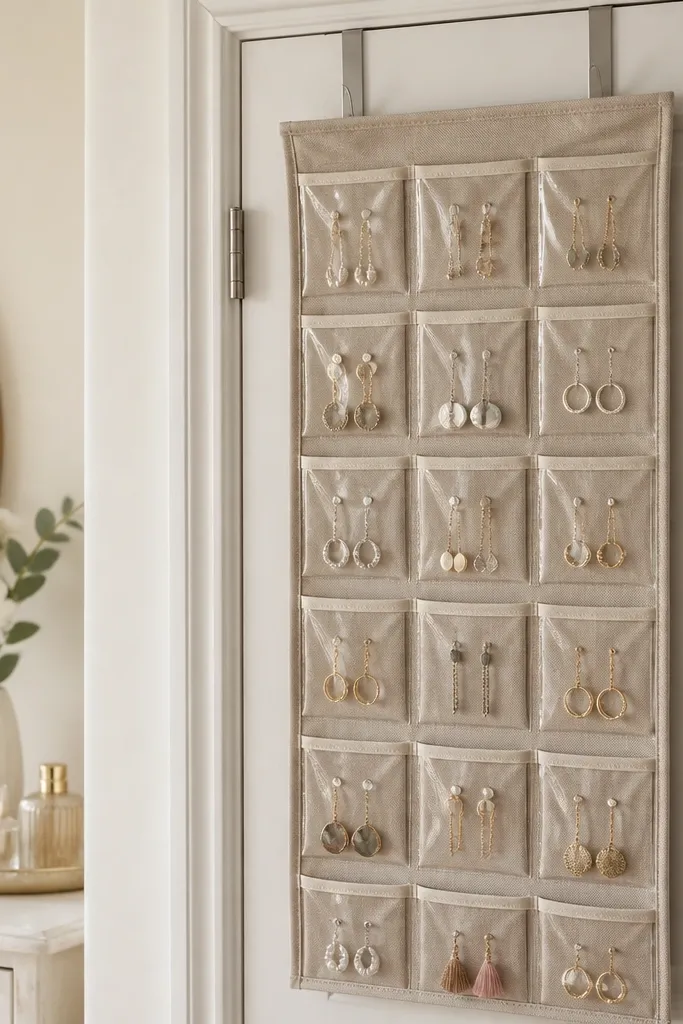
This works when you travel or rotate jewelry by season. Each pocket is a small bag, and the clear top makes pairs easy to spot without opening anything. I keep it for earrings that I don't wear every week, so my vanity stays calm. The fabric keeps metal from knocking around like it does in a hard case.
Pick a pocket organizer with 1-2 inch compartments and clear plastic on top. Hang it on the inside of a door or on a wall hook near your mirror. Store sets in pairs in each pocket and add a tiny paper tag with the month you wear them.
Pro tipUse a small dot sticker on the clear top so you can tell which side is studs vs drops at a glance.
AvoidDon't use pockets that are too deep; earrings sink to the bottom and you end up digging.
9. Silicone ice cube tray for bobby pin and earring backs
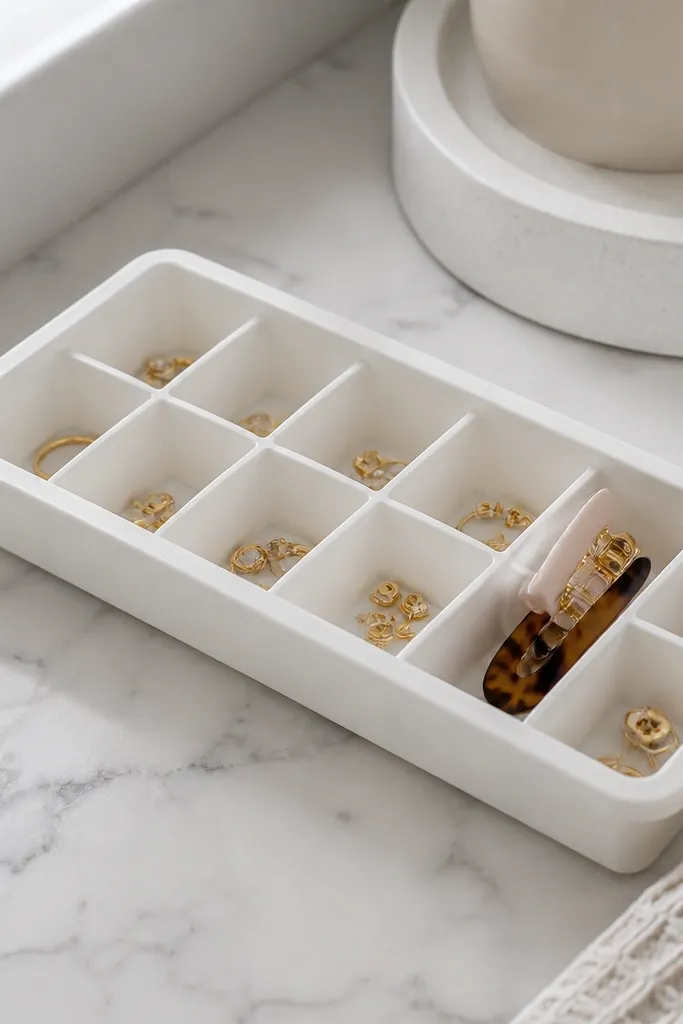
This is a weird one, but it fixed my earring-back chaos instantly. The shallow silicone cells keep small pieces from rolling, and the tray wipes clean. I use it for backs, tiny studs, and spare clasps because they're too small for most organizers. It also looks tidy because silicone trays are one color and simple.
Use a standard 12-cube tray. Label each cell type with painter's tape strips on the tray edge. Keep only one category per tray so it doesn't turn into a mixed junk bin.
Pro tipDrop a small strip of felt under the tray if your counter is slick and the tray slides when you grab.
AvoidAvoid mixing earring backs with rings; the backs cling to metal and get lost.
10. Pegboard hooks with small acrylic cups for studs
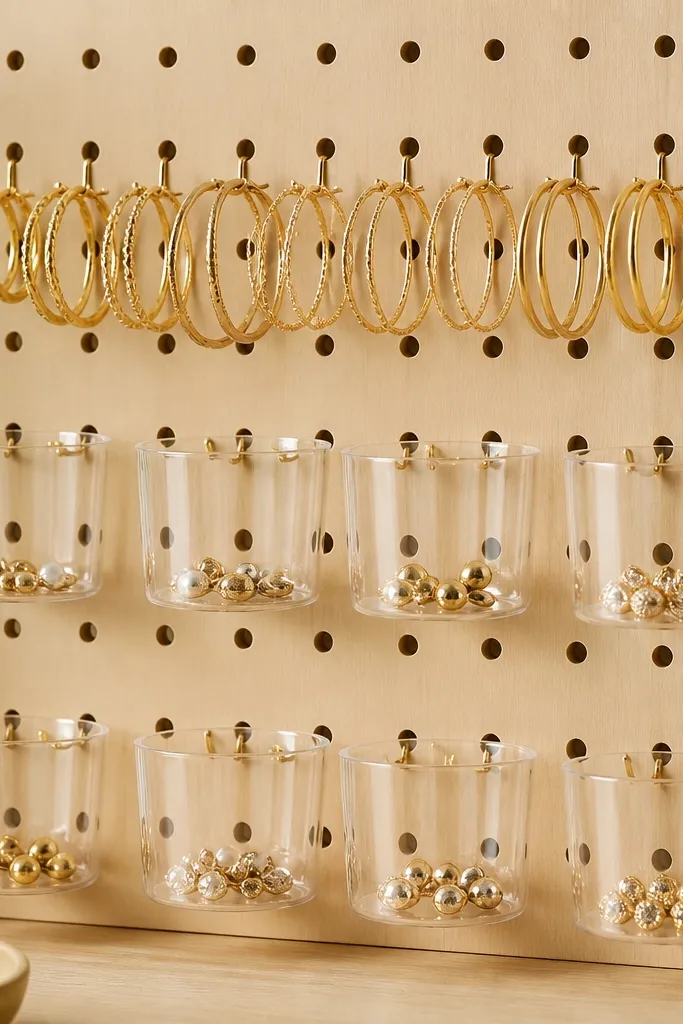
Hanging hooks alone are great until studs fall out or spin. Acrylic cups catch the stud posts and keep pairs separated. This setup gives you both visibility and containment. It looks clean because the clear cups don't add visual clutter.
Mount a pegboard panel and install hooks about 3 inches apart. Attach small acrylic cups under each hook using pegboard cup holders or screw-in cup brackets. Keep cups shallow so earrings don't stack too high.
Pro tipPaint the hooks matte black if your jewelry is mostly silver; it makes the metal pop in photos too.
AvoidDon't use large cups; oversized containers make studs look scattered.
11. Wooden drawer rail with hanging earring cards
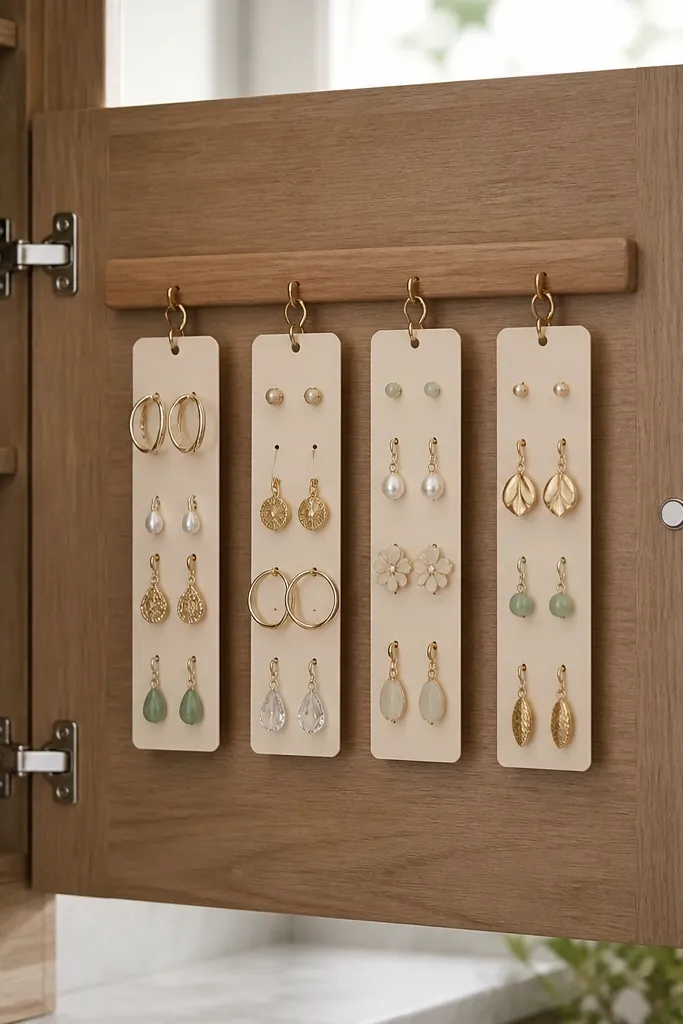
If your vanity has cabinet doors, this is the easiest way to use that wasted space. Earring cards keep pairs flat and prevent post bending. The wood rail makes the whole thing look built-in, not like a random organizer. It's great for statement earrings that you don't want to store in a jar.
Mount a small wooden rail (about 12 inches) inside the door near eye level. Use small S-hooks to hang cardstock earring cards with pre-punched holes. Keep cards narrow so they don't swing and snag when you open the door.
Pro tipUse two card sizes: one for studs and one for dangles so you don't have to force earrings into the wrong space.
AvoidSkip flimsy paper cards; they bend and make earrings slide.
12. Travel jewelry organizer tray from a shallow serving dish
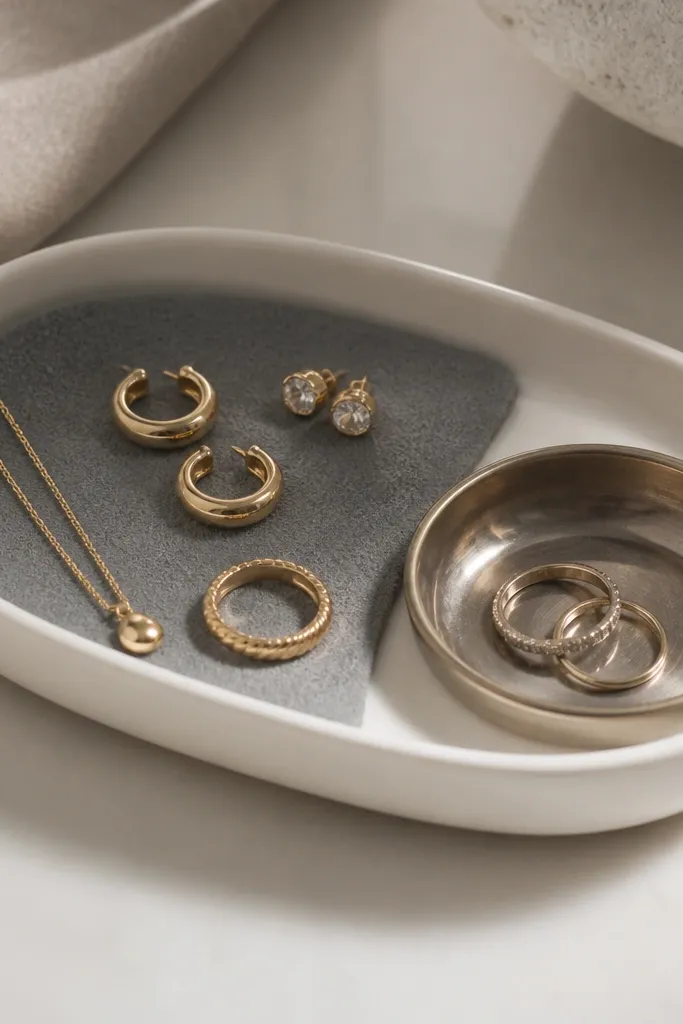
A serving dish gives you a "landing pad" that looks styled instead of cluttered. Felt insert keeps earrings from scratching and reduces clinking. I use this for the jewelry I wear the next day - it keeps my vanity calm in the morning. It's also easy to wipe down after you take everything off.
Pick a shallow dish about 10-12 inches wide. Cut felt to fit one half and glue it down. Add a small metal ring dish or a second shallow compartment on the other half for studs and rings.
Pro tipKeep it near your keys or on the vanity edge where you naturally set jewelry before bed.
AvoidAvoid deep dishes; they hide pieces and you end up digging.
13. Clear command-hook necklace ladder
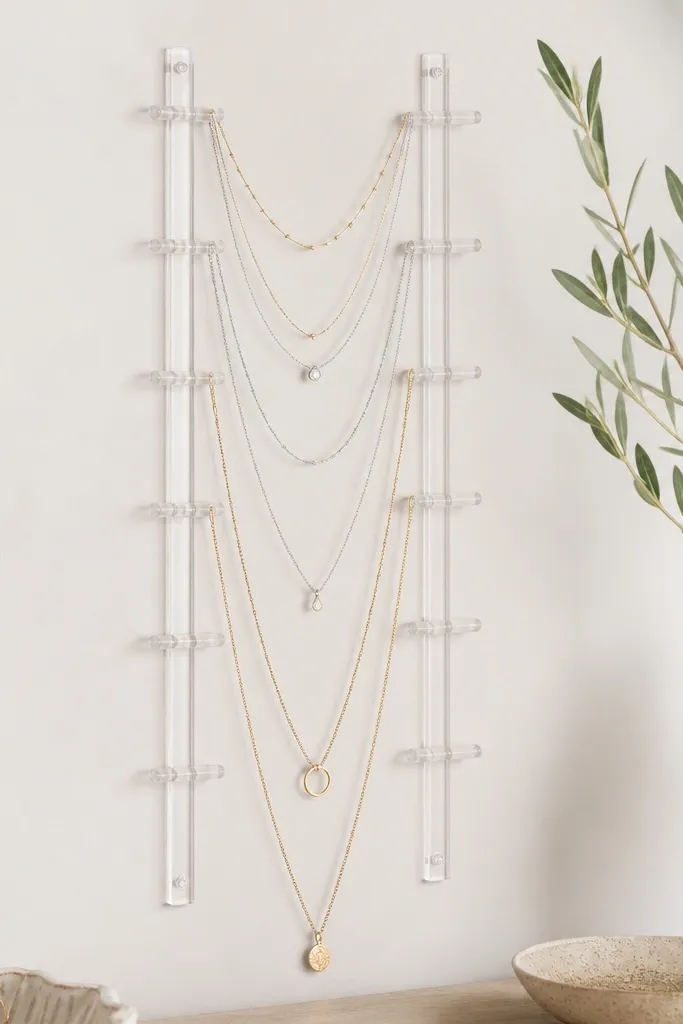
A necklace ladder keeps chains separated while keeping everything visible. The vertical layout prevents braiding and gives you quick pairing. Clear acrylic or even clear plastic looks light and doesn't block your mirror. This is also easy to remove if you rent.
Use two vertical acrylic strips and attach small hooks across at staggered heights. Mount with command strips rated for the weight of your heaviest necklace. Space hooks so each chain has at least a finger width of separation.
Pro tipHang necklaces by length: shortest on top, longest on bottom, so they don't overlap visually.
AvoidDon't overload the bottom hooks; long chains drag and tangle the moment they touch.
14. Ribbon and clothespins earring wall line
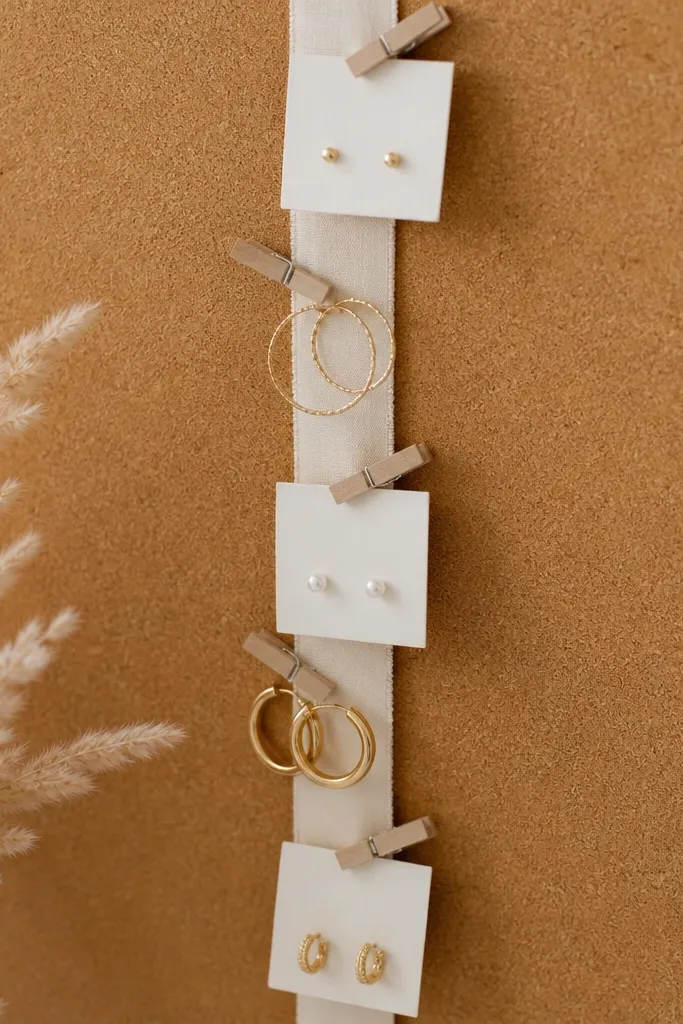
This looks artsy but works because clothespins grip gently and hold shape. Ribbon adds softness so earrings don't scratch your wall or board. I like it for mixing small earrings and earring cards without needing lots of metal hooks. It also makes rotation easy since you can clip and unclip in seconds.
Pin ribbon to a cork board or foam board and space clothespins every 3-4 inches. Use clothespins that have a rubber grip if you can find them. Clip earring cards flat and hang hoops from the pin edges.
Pro tipUse one ribbon color for the whole board so the setup looks intentional, not random.
AvoidSkip shiny satin ribbon; it catches light and makes the board look messy under bright bulbs.
15. Magnetic strip for metal earrings and pins
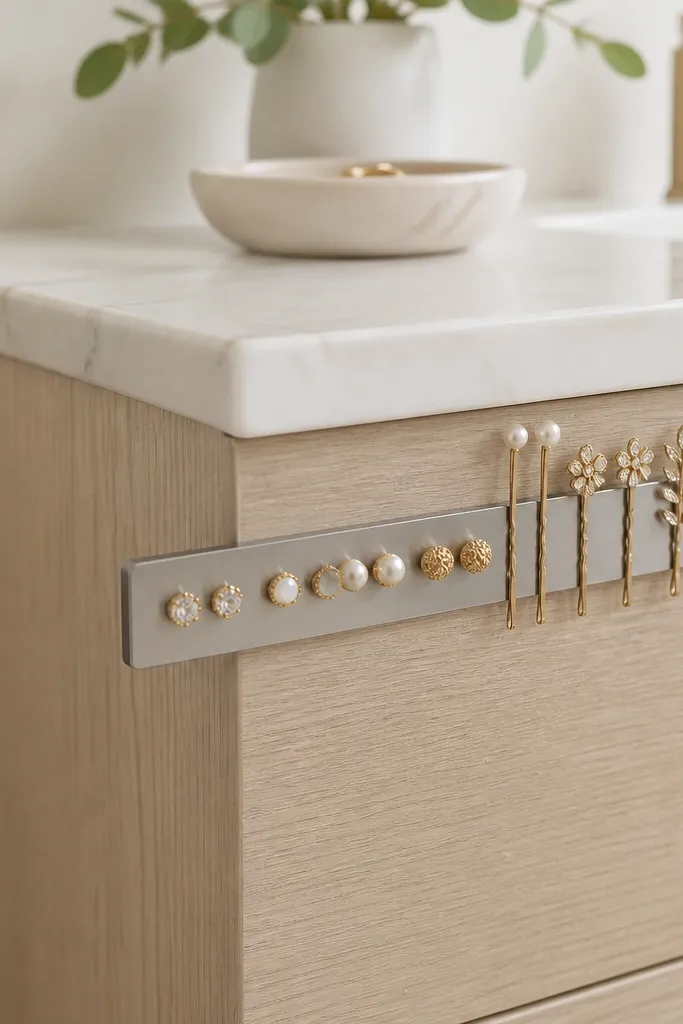
If you have earrings with removable metal backs or magnetic pieces, a magnetic strip is clean and fast. You see everything in a straight line, and there's no fiddling with tiny compartments. It also reduces tangling because pieces don't hang. I use it for pins and certain earrings that don't snag easily.
Mount a magnetic strip with screws to a cabinet side or use strong adhesive if it's lightweight. Add magnetic-backed hooks or small rare-earth magnets to your earring backs if you want consistency. Keep spacing about 1 inch so pieces don't clump.
Pro tipWipe the strip with rubbing alcohol before mounting so adhesive bonds better.
AvoidDon't try to magnetize delicate chains; they'll slide and wrap around the strip.
16. Wine cork necklace holders with satin ribbon ties
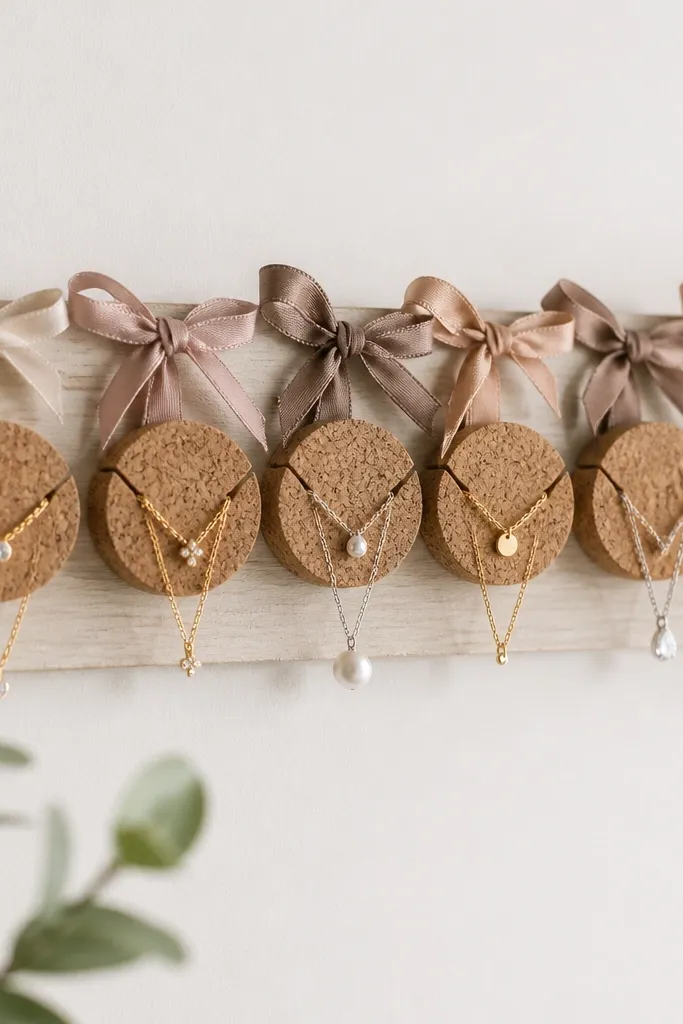
Cork has grip and it's soft, so necklaces land without scratching. Cut cork slices make individual "nubs" that stop chains from pooling together. I like this for short necklaces and chokers because they sit nicely in the groove. The satin ribbon ties add a gentle way to secure pieces without metal hooks.
Slice wine cork into 1.5-2 inch thick pieces and glue them to a board with a slight tilt. Cut a shallow groove with a craft knife so the chain sits in place. Thread satin ribbon through small holes behind the cork and tie the necklace ends lightly.
Pro tipSeal the cork with a matte clear spray so it stays clean and doesn't shed dust onto your vanity.
AvoidDon't leave raw cork exposed in a humid bathroom; it gets dusty fast.
17. Collapsible stand from bookends and dowel for bracelets
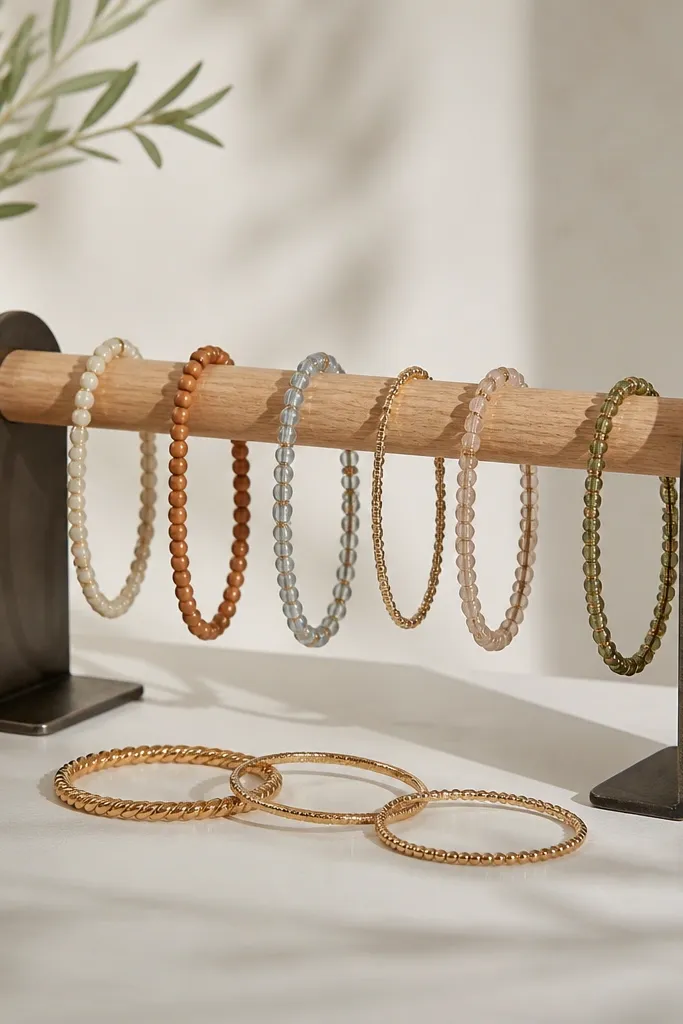
Bracelets tangle when they stack flat, and a stand fixes that. The dowel gives you a curved surface so bangles rest without slipping off. Bookends are stable and easy to move, which is great if you rearrange your vanity often. It also keeps bracelets visible, so you actually wear them.
Set bookends on the vanity and rest a dowel across the gap. Choose bookends that don't wobble and a dowel diameter around 1 inch for good grip. Space bracelets by type: bangles on one side, cuff bracelets on the other.
Pro tipWrap the dowel with a thin strip of felt for extra grip and a softer look.
AvoidSkip glass or slick acrylic dowels; bracelets slide and clatter.
18. Clear cup + spoon combo for rings and tiny earrings
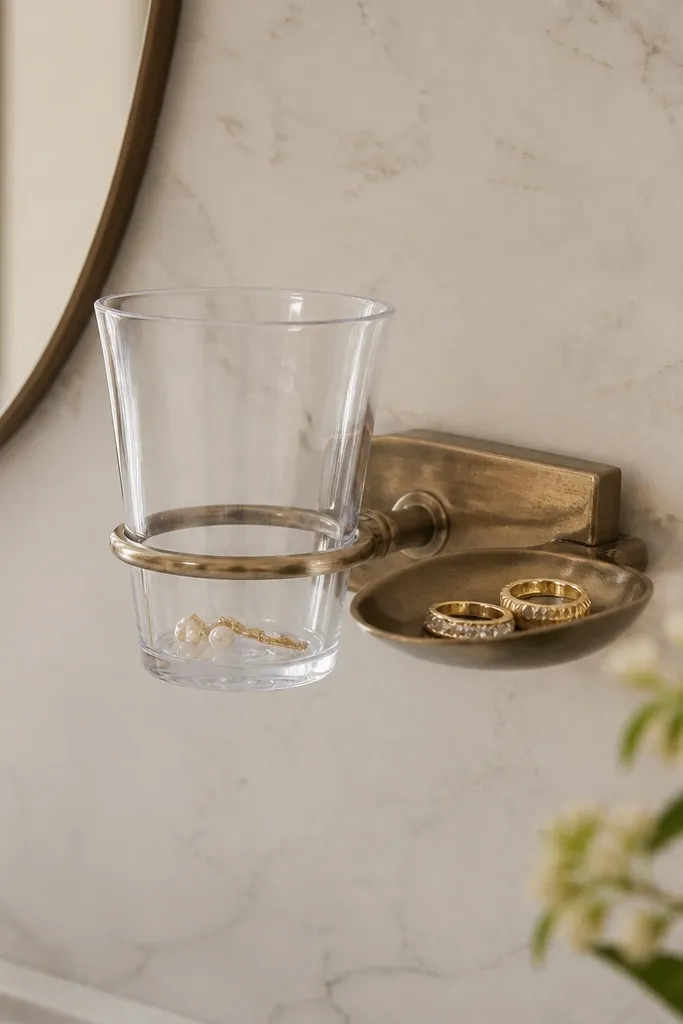
This is a simple hack that looks intentional once you style it. The spoon dish is shallow for rings, and the cup holds small earrings without them rolling. The clear cup keeps things visible and clean. I use a set like this for evenings when I take off studs and want them contained in one spot.
Find a small spoon dish or even a vintage teaspoon dish and attach it to a scrap wood base with a strong adhesive. Mount a clear cup next to it using a small clamp or adhesive mount. Keep the base narrow so it fits beside your mirror.
Pro tipUse a felt dot under the spoon so it doesn't slide on wet hands.
AvoidDon't use deep bowls; rings sink and you end up hunting.
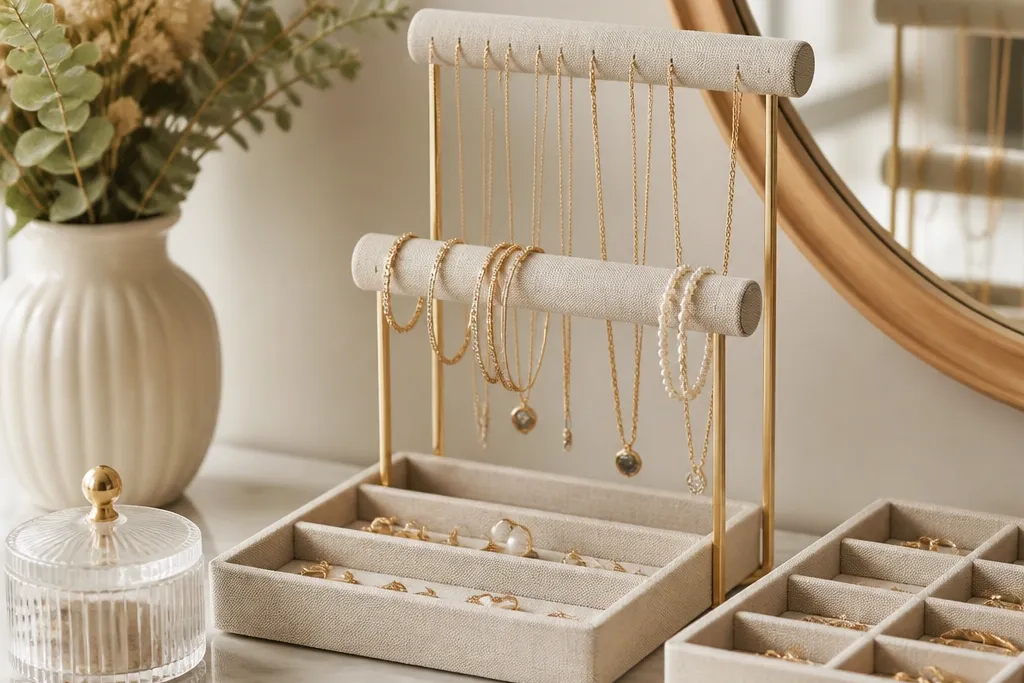
19. Linen-covered jewelry riser for watches and bracelets
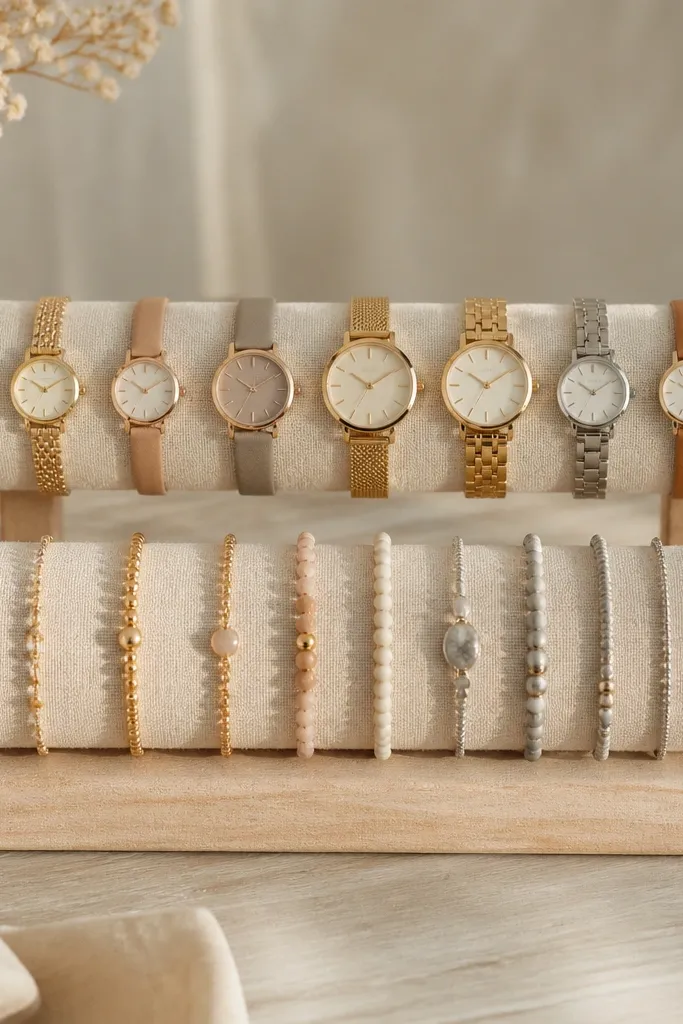
A riser makes your vanity look styled because it creates height and separation. Linen softens the whole piece and keeps metal from scratching wood. I like two-tier setups for watches and bracelets because you avoid mixing heavy and delicate items. It also makes your display look intentional even when it's not full.
Use a small two-tier wooden stand or build one with scrap wood and simple dowel pegs. Wrap tiers with linen using spray adhesive, then trim edges cleanly with a sharp scissors. Keep the top tier for watches and the bottom for bracelets.
Pro tipChoose linen in a warm neutral like oat or sand to match gold jewelry without looking yellow.
AvoidSkip glossy fabric; it shows fingerprints and looks messy under vanity lights.
20. Pegboard + dowel + S-hooks for layered necklaces
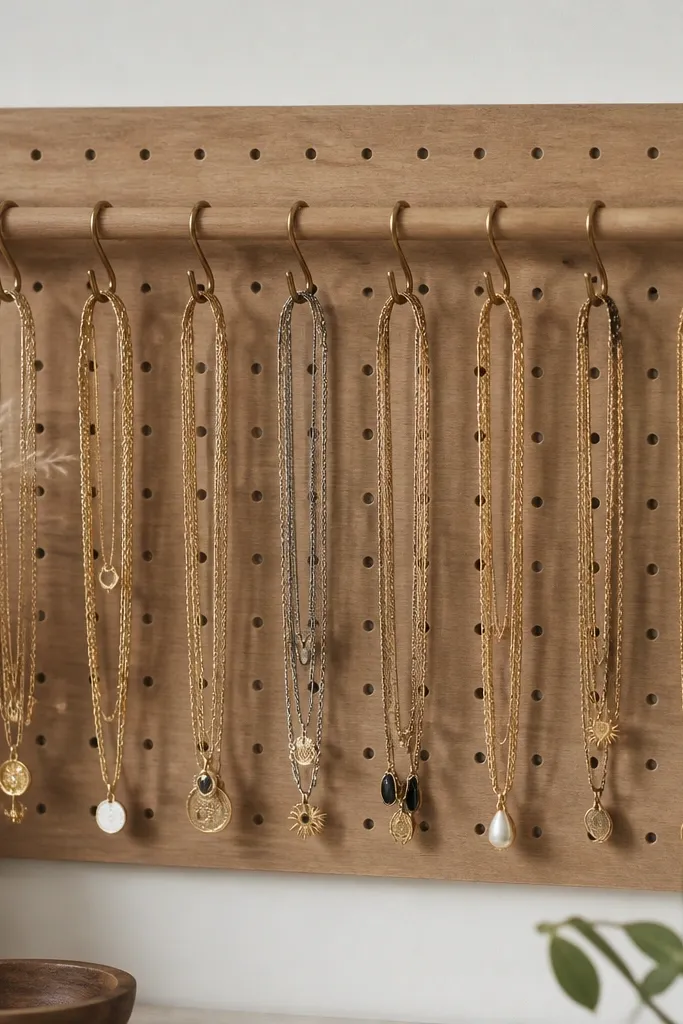
Layered necklaces look best when they hang in a consistent direction. This setup keeps each chain from collapsing into the pile and makes pendants face forward. Pegboard gives you flexible spacing - I change it depending on what I'm wearing that month. It also looks neat because the dowel creates a straight visual line.
Attach a dowel across the pegboard and use S-hooks spaced 2 inches apart. Hang necklaces by length: the shortest chain on the first hook and longer ones on the next. Add a tiny strip of felt behind each hook so pendants don't scratch the pegboard.
Pro tipUse small binder clips to pre-attach necklace lengths to the hook so you don't fight clasps every time.
AvoidAvoid hooks that are too thick; they stretch jump rings and leave marks.
21. Magnetic photo holder for rings on the side of a mirror
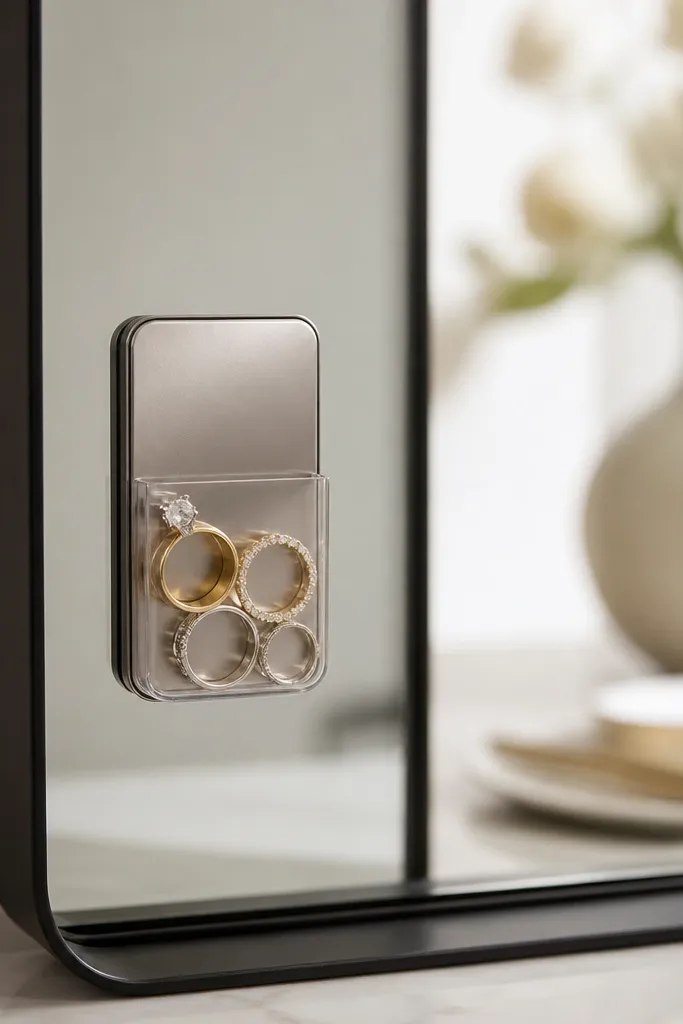
Mirror-adjacent storage is perfect because you see rings while you get ready. The clear pocket keeps pieces visible, and the magnetic backing keeps the unit stable. I use this for rings I wear daily so they're always in reach. It's also a clean look because it's flat against the mirror.
Buy a small magnetic photo holder or magnetic craft holder and mount it with the included adhesive or screws. Add a small felt liner inside the pocket to prevent scratching. Keep ring count low so the pocket stays neat.
Pro tipIf your mirror is curved, test the fit with one corner first before committing to adhesive.
AvoidDon't fill the pocket with too many rings; they stack and hide the ones you want.
22. Ceramic tile mini stations for studs and cuff links
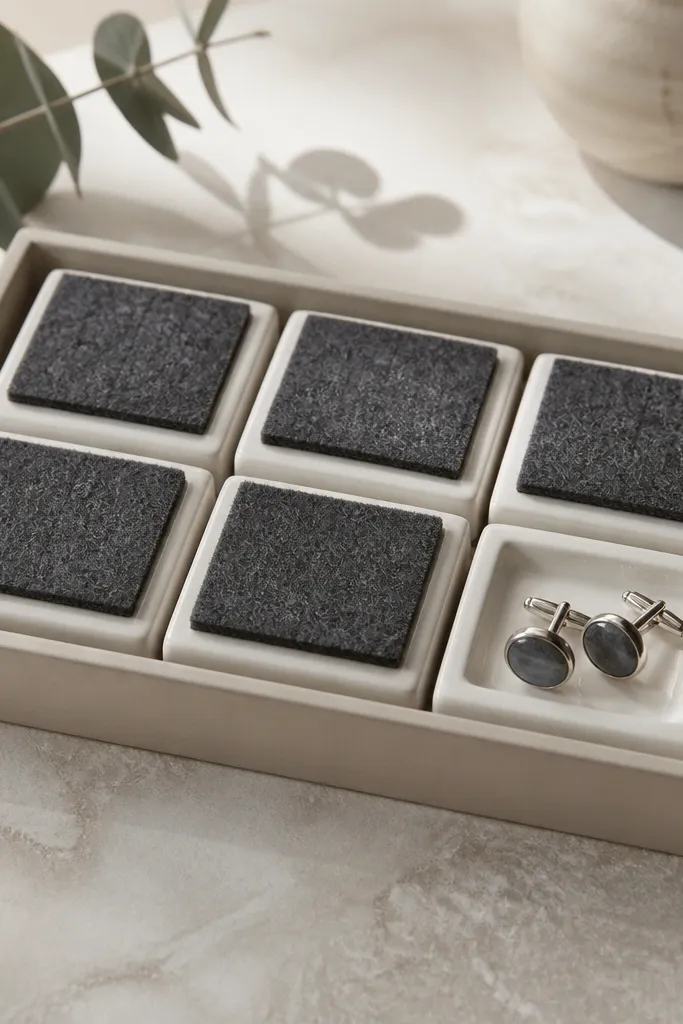
Ceramic tiles make jewelry storage feel like a countertop display, not a storage bin. The tile surface is stable and easy to clean, and felt squares keep metal from sliding. I use this for mixed small items like studs, cuff links, and spare clasps. The separate tiles keep categories from blending.
Glue four to six small ceramic tiles into a shallow tray base. Cut felt squares to the same tile size and glue them on top. For cuff links, leave one tile un-felted and use a small foam strip to cradle them.
Pro tipWipe tiles with a damp cloth and dry immediately so grout lines don't look dull.
AvoidAvoid tiles with rounded edges; they make felt lifts that snag earrings.
23. Clear zipper pouch stand for earrings you wear weekly
This is a neat trick for people who rotate earrings and hate digging. Clear plastic means you can see what's inside without opening it, and zipper closures keep pairs together. I like using paper dividers inside a pouch so studs don't mix with drops. It looks tidy because it's one upright unit instead of scattered pieces.
Use a clear pouch that stands on its own or build a small support with folded cardboard covered in fabric. Add internal dividers using thin cardstock cut to the pouch height. Keep the pouch on the vanity corner where you can grab it quickly.
Pro tipUse two pouches: one for studs and one for drops, so you never mix post sizes.
AvoidSkip pouches that flop flat; you end up fishing around every time.
24. Wall-mounted ring dish from a shallow plant pot
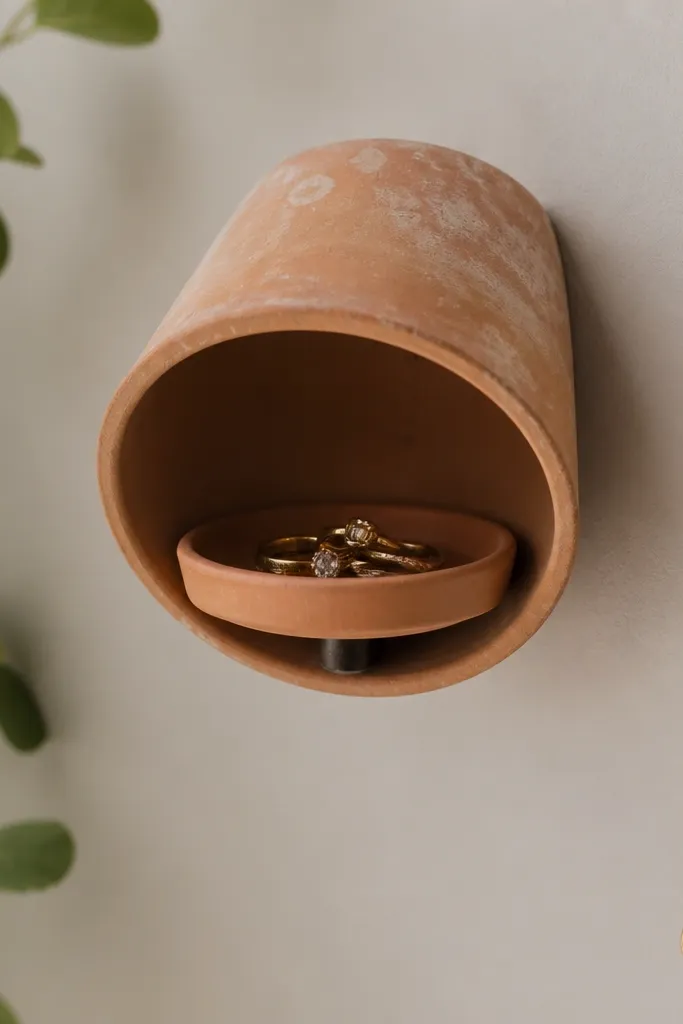
Plant pots are a good shape for rings because they're already concave. Mounting it on the wall keeps rings visible while saving counter space. The terracotta color also makes gold jewelry look warmer. Add one nearby hook and you get a mini station for your most-used set.
Mount a small shallow pot with a bracket or screws through the back. Add a felt circle inside the pot bottom so rings don't scratch. Place one hook next to it for a short chain or pendant.
Pro tipSeal terracotta with a matte clear coat if you're using it in a bathroom so it wipes clean.
AvoidDon't use a pot that's too deep; rings disappear into the bottom.
25. Index card earring organizer inside a small acrylic frame
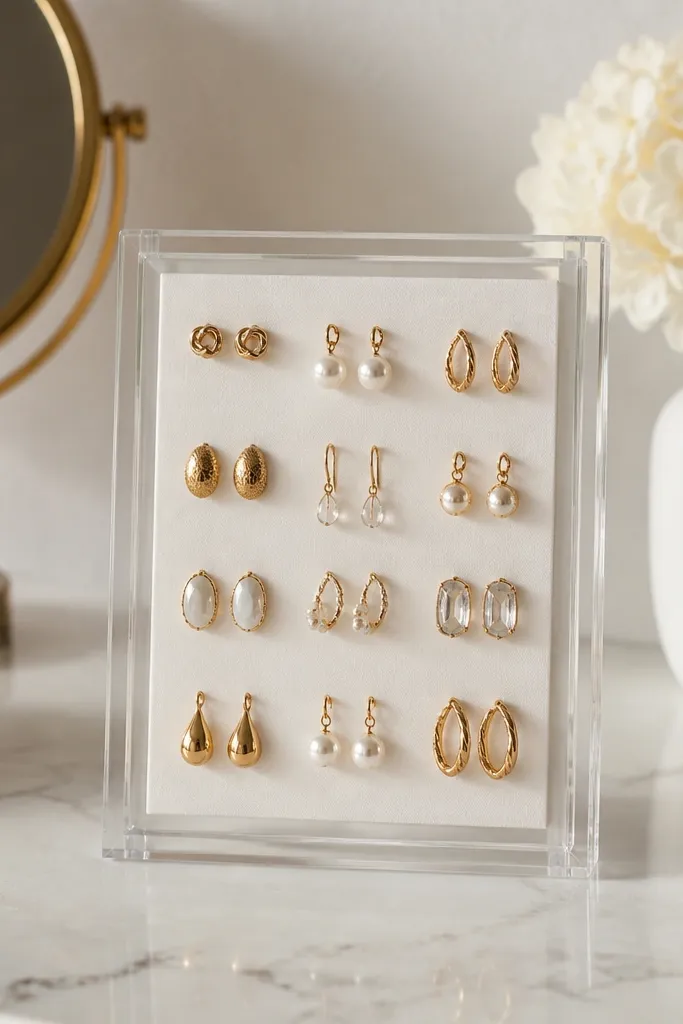
This turns a boring frame into a functional organizer. Index cards give you a flat surface for spacing studs and small dangles, and the acrylic front keeps earrings secure. I like it because it looks like decor even when it's active. It also lets you swap cards as your rotation changes.
Use a small acrylic frame with a backing you can open. Cut index cards to fit and mark spacing lines with a ruler. Attach earrings using small binder clips or pushpins through the card if the frame backing allows it.
Pro tipUse a consistent card color like kraft or cream so the display stays cohesive.
AvoidAvoid frames with thick reflections; they make earrings harder to see under lights.