
1. Wall-Mounted Shoe Ledges in a Row
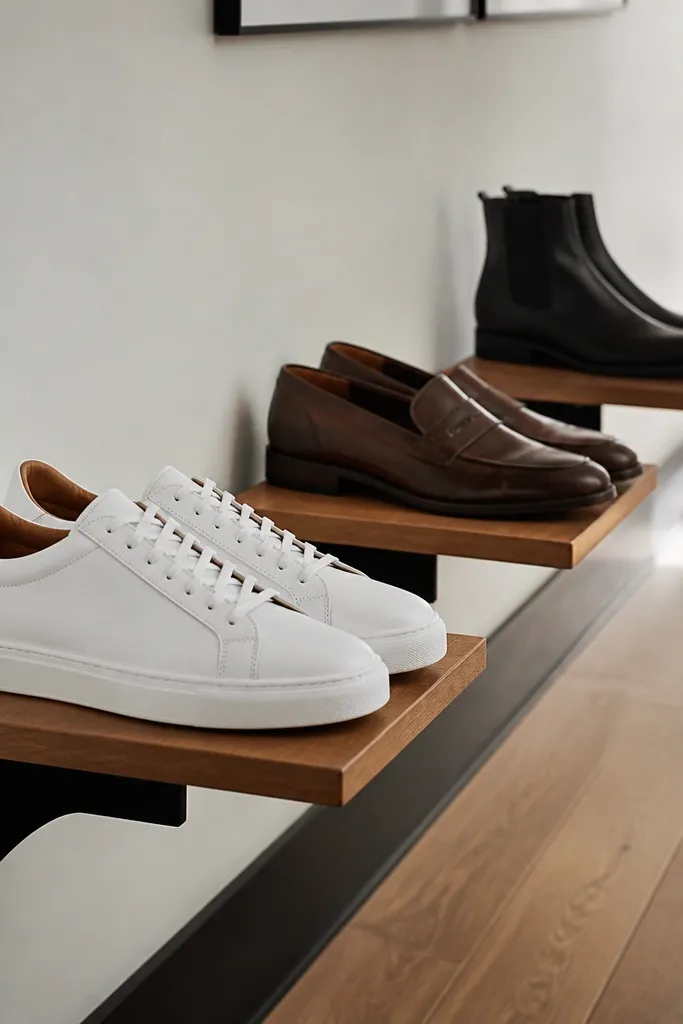
This is one of the cleanest beginner-friendly shoe storage ideas because it turns your shoes into decor. Wall ledges keep pairs off the floor, so you get instant visual order, and the open front makes it easy to grab what you need. For a polished look, use matching finishes and keep spacing consistent so every shoe “sits” the same way. It also works well for narrow entryways where a floor rack would crowd the walk path. Build them with a depth that matches your widest shoe so they don’t slide forward and look messy.
Start by measuring your widest sneaker and set ledge depth to about 2 inches more than that width. Cut shelf boards, then add a simple back lip (1 inch tall) or cleat so shoes can’t creep forward. Mount at staggered heights only if you have boots; for sneakers, keep all shelves at the same height for a tidy, grid-like look. Finish with a durable topcoat like matte polyurethane so scuffs wipe clean.
If you want it to look store-bought, use the same wood species or stain across every ledge and keep the gaps between shelves identical.
Don’t make ledges too deep — deep shelves hide shoe tops and make everything look bulky.
2. Slim Entryway Rack Under a Coat Shelf
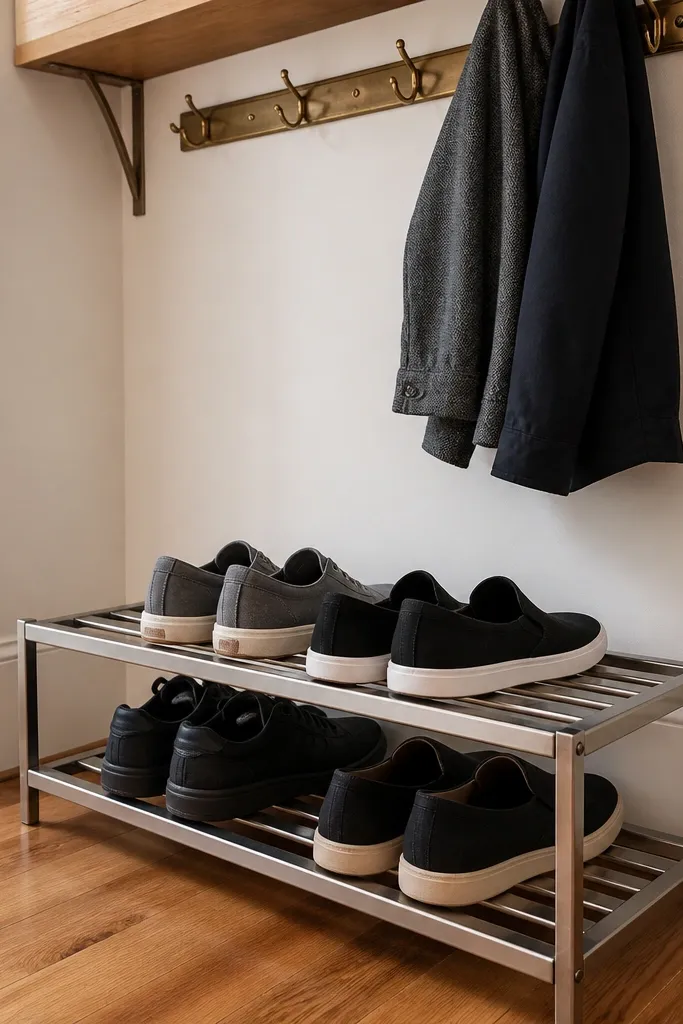
A slim under-shelf rack is ideal when your entryway is tight and you still want shoes to look intentional. It keeps daily pairs aligned and stops that “one boot on the floor, one shoe sideways” habit. The metal-and-wood look is photogenic because it shows structure: shoes sit in straight lines with clear spacing. It also gives airflow, which matters in high-traffic homes. Choose a rack with a bar height that matches sneaker soles, not tall enough that boots fall over.
Measure the underside height of your coat shelf and buy or build a rack that leaves at least 3 inches of clearance above shoe tongues. Install two end brackets into studs, then add slats or a wire rack surface so soles rest flat. Add a small front rail or angled stop so shoes don’t drift forward when you grab them quickly. Finish the wood parts with a stain that matches your other entryway furniture.
Use the rack for daily shoes only and keep seasonal pairs in bins behind a door so the entry stays crisp.
Avoid installing it too low — if the shoes hit the shelf above, they look jammed and you’ll stop using the system.
3. Boot Cradle Inserts for Tall Shafts
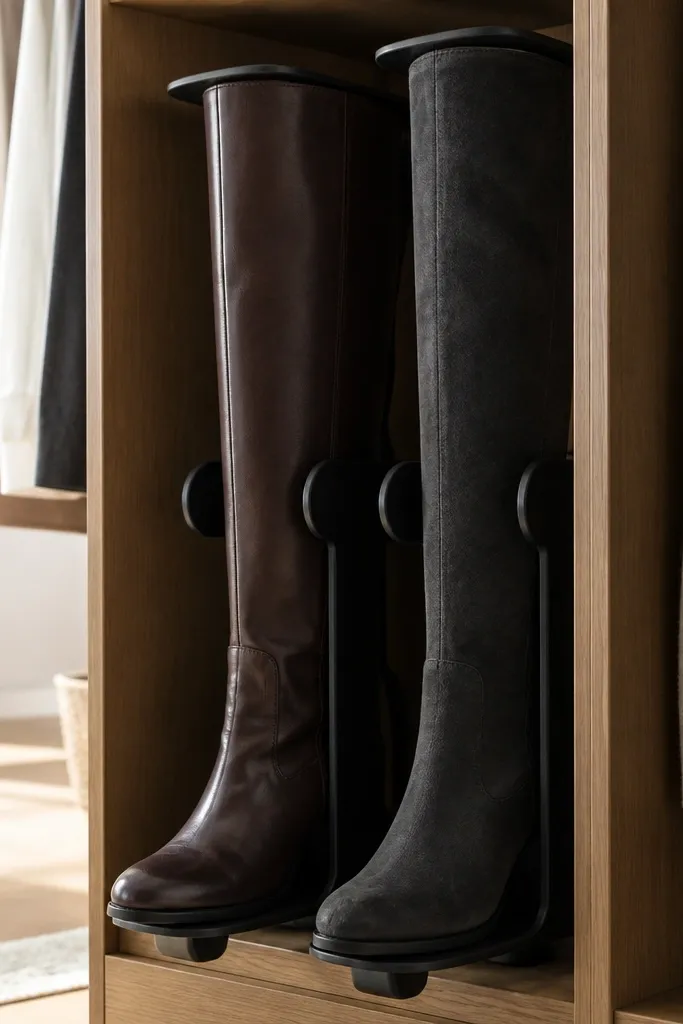
Cut two semicircle supports from plywood or thick foam board, then cover foam with fabric so it won’t scratch. Test-fit the cradle height so the boot shaft rests without forcing the leather or suede. Place cradles in a bin or cubby and add a flat base board so the boot sole stays stable. Secure the base board with screws or adhesive so the insert won’t shift when you move the boots.
If tall boots are your clutter trigger, boot cradle inserts fix the problem at the shape level. Instead of letting boots slump, cradles hold the shaft so they stand straight and look clean even from a distance. This is beginner-friendly because you’re not building a whole cabinet — you’re adding support. Use these in a closet shelf or inside a tall cubby so the boots don’t lean on everything else. The look is neat because each pair has a defined silhouette.
Skip thisDon’t store boots without support — leaning boots crease and the whole shelf looks chaotic.
Editor's noteFor suede boots, add a felt cover — it grips slightly and prevents sliding.
4. Clear-Front Shoe Drawers (Like a Closet Hack)
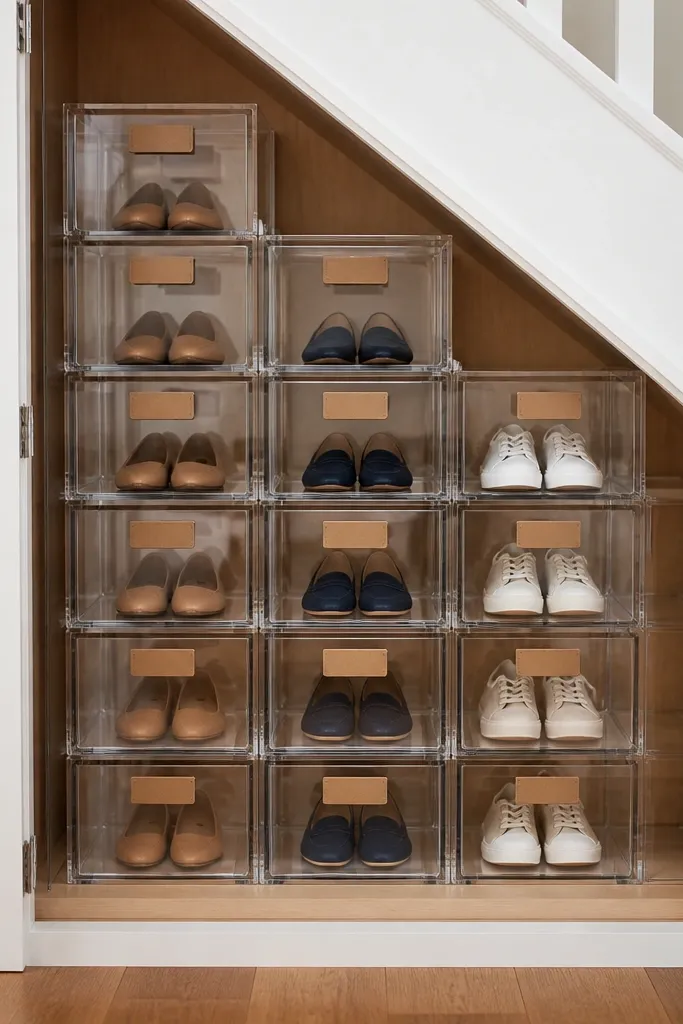
Build a shallow drawer frame from plywood, then attach a clear acrylic or polycarbonate front panel. Add foam strips or a thin rubber gasket along the edges so doors don’t rattle. Install drawer slides and set the drawer depth to about 1 inch deeper than your deepest sneaker. Label the drawer edges with a small, neat tag so it looks tidy, not messy.
Clear-front drawers keep shoes contained while still letting you see what’s inside. That visibility is what makes beginner-friendly shoe storage ideas actually work — you stop digging and you stop buying duplicates. The “drawer” format also prevents the toppling you get with open cubbies. Use it for a closet or under-stairs where you can’t dedicate floor space. For the best look, keep the drawer handles minimal and use consistent shoe orientation in each drawer.
Skip thisAvoid mixing random shoe directions inside the drawer — the visual clutter shows through the clear front.
Editor's noteChoose acrylic that’s thick enough to stay rigid — thin panels warp and look cheap fast.
5. Fabric Cubby Organizer with Rigid Panels
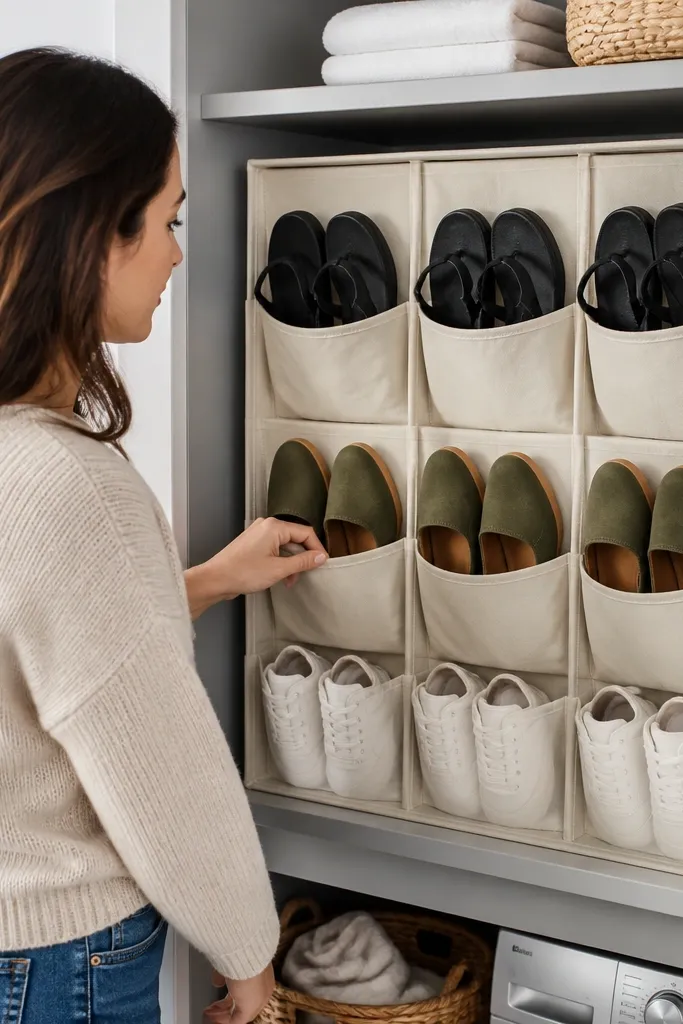
Choose an organizer with removable stiff inserts or a frame that holds each square shape. Place it against a wall or inside a closet with enough height to keep taller shoes from bending. Use one pocket per pair and store boots diagonally only if the square is too small. Add a small non-slip mat underneath so it doesn’t slide on carpet.
A fabric cubby organizer looks soft and calm, but the rigid-panel version keeps it from collapsing. This is a great option if you want beginner-friendly shoe storage ideas without woodworking. The squares make it easy to assign one pair per pocket, which keeps the whole system from turning into a pile. Pick a neutral fabric color so the organizer blends into your room instead of looking like a storage bag. It also works well for kids' rooms because the pockets stop shoes from rolling.
Skip thisDon’t stuff two pairs into one pocket — it breaks the “each shoe has a home” rule.
Editor's noteUse the top row for the easiest daily pairs and reserve bottom rows for shoes that don’t need quick access.
6. Stackable Crates with Chalk Labels
Pick crates with matching dimensions and build a small base shelf so the bottom stack sits flat. Line each crate with a thin breathable liner like canvas or perforated plastic so shoes aren’t sitting in dust. Sort by category first — sneakers, flats, boots — then place one type per crate. Label the front with chalk on a small sealed wood strip so the writing stays neat.
Stackable crates give you that farmhouse-leaning look while keeping shoes contained. They’re beginner-friendly because you can start with store-bought crates and just add a consistent system. Crates look photogenic when they’re all the same color and when you keep shoes standing upright instead of crammed. The chalk label approach is quick and cheap, and you can wipe it clean when your seasons change. It’s also good for closets where you want to store more than just the daily pairs.
Skip thisAvoid mixing boot shafts and sneakers in the same crate — the height differences make the crate look messy.
Editor's noteIf you want it to look designer, keep labels the same height and use one color of chalk marker across the whole system.
7. Under-Bench Shoe Compartments with Doors
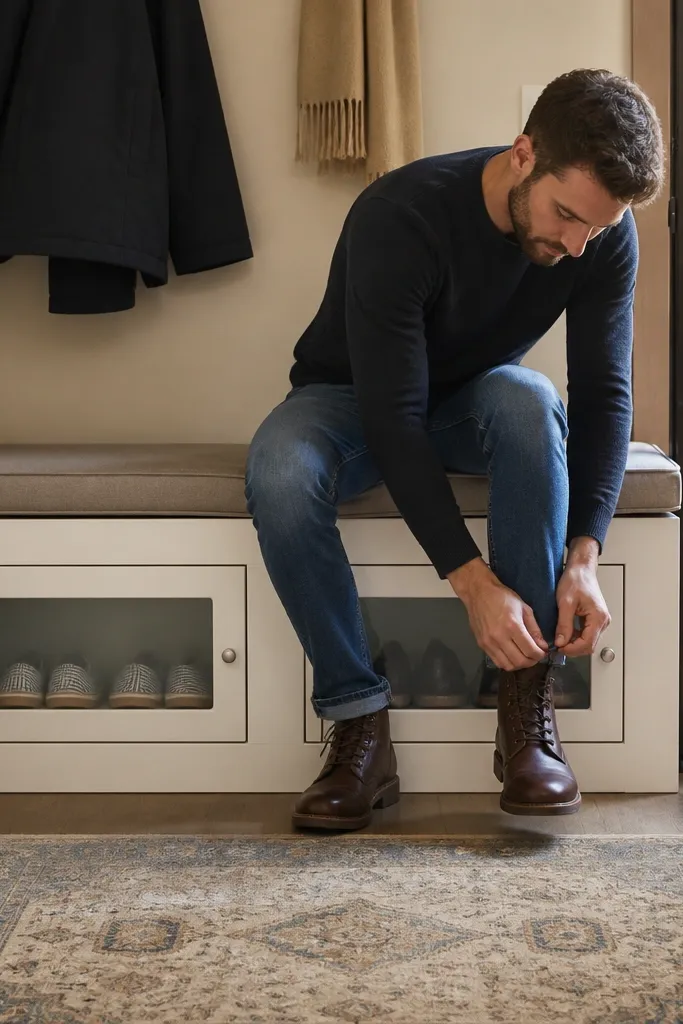
A bench with under-compartments is one of the best-looking beginner-friendly shoe storage ideas because it hides clutter and keeps the entry tidy. The doors make it feel “finished” rather than like a DIY rack, and the bench top gives you a place to sit while you change shoes. Use this for families or anyone who accumulates more pairs than a simple rack can handle. For the cleanest look, match the door style to your bench frame and keep the interior shelves evenly spaced. Shoes stay upright, and the exterior stays calm.
Build a bench base from plywood and 2x2 or a simple frame, then add a hinged door panel for each compartment. Add internal shelves or dividers using 1x2 rails so each pair has a slot. Set shelf spacing based on the tallest shoe you’ll store there, then leave a little headroom. Install magnetic catches or soft-close hinges so doors shut smoothly and stay aligned.
Add a small ventilation gap on the underside edge of each compartment so shoes don’t smell musty.
Don’t store wet shoes in a fully sealed box — leave ventilation or plan to air-dry first.
8. Pegboard Shoe Grid with Baskets
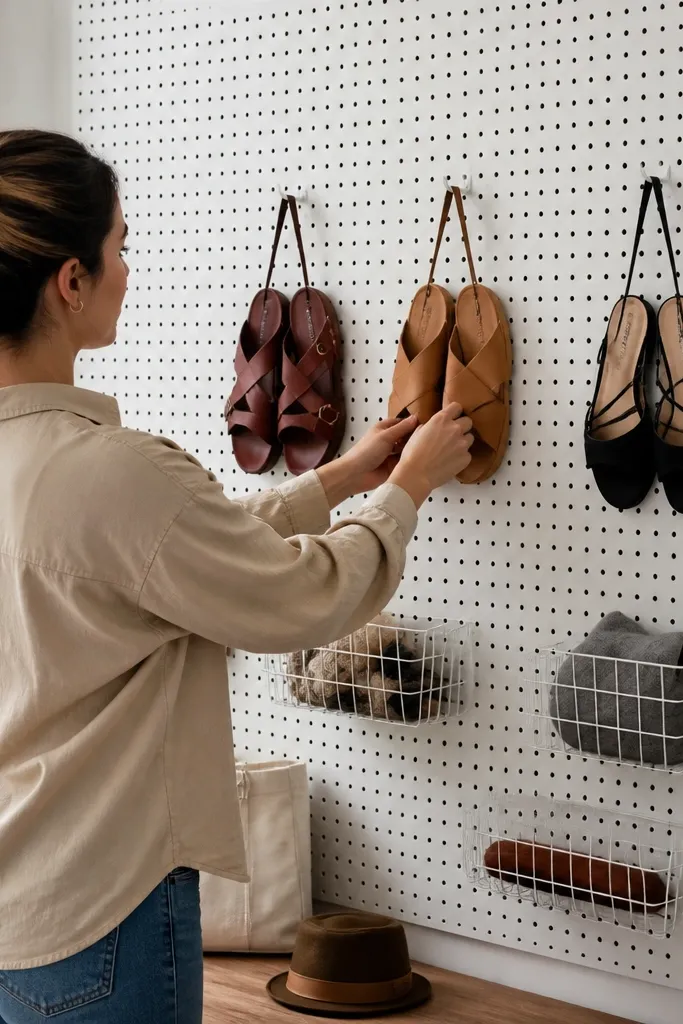
Mount pegboard securely into studs, then add basket hooks at consistent heights across the wall. Place one basket per shoe category and use dividers or foam strips inside to stop shoes from sliding. If you store sneakers, angle the basket slightly so the soles rest flat and the uppers don’t flop. Paint or seal the pegboard so it wipes clean.
A pegboard shoe grid turns a messy wall into a tidy, customizable system. It looks great because you can align baskets and hooks into a straight grid, which is instantly satisfying. This is beginner-friendly because you’re using pre-made hardware and you can adjust heights as your shoe collection changes. Use it for flats, sandals, and sneakers you grab often. The open pegboard also gives airflow, so the wall doesn’t turn into a shoe-smell problem.
Skip thisAvoid overcrowding baskets — if shoes overlap, the pegboard stops looking organized.
Editor's noteKeep basket sizes consistent and only change the basket height — it keeps the look uniform.
9. Vertical Over-the-Door Shoe Organizer with Clear Fronts
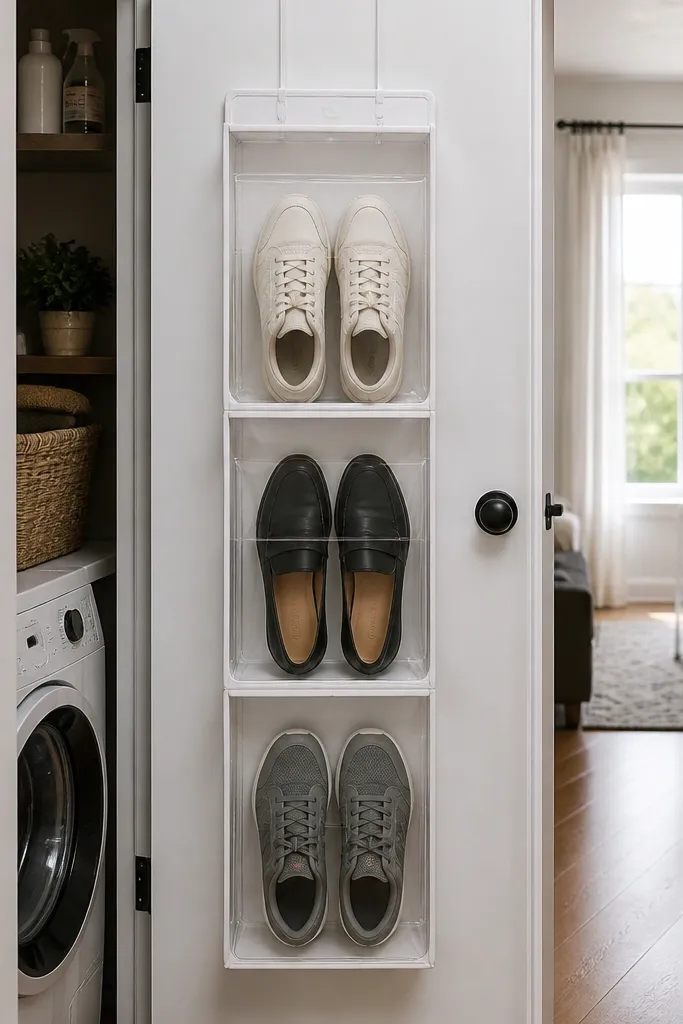
Over-the-door organizers are a practical, good-looking way to stop shoe clutter without building anything. Clear-front pockets help you see pairs instantly, and vertical storage keeps the floor open. This is a strong pick for apartments, laundry rooms, and small bedrooms where you don’t have closet space. The look is clean when the organizer is centered and when each pocket holds only one pair. Choose a version with reinforced seams so it doesn’t stretch and sag after a few months.
Hang the organizer on the door with the included hooks or straps, then check that the bottom edge stays level. Insert one pair per pocket and keep orientation consistent — toes up or toes forward, not random. For bulkier shoes, use the larger pockets first and reserve smaller pockets for flats. If the organizer shifts, add a non-slip door mat or adjust straps to lock it in place.
Use small fabric shoe covers for dusty seasons so the clear pockets still look clean.
Don’t store heavy boots in standard pocket organizers — they weigh down and distort the pockets.
10. Labeled Bin System on a Closet Shelf
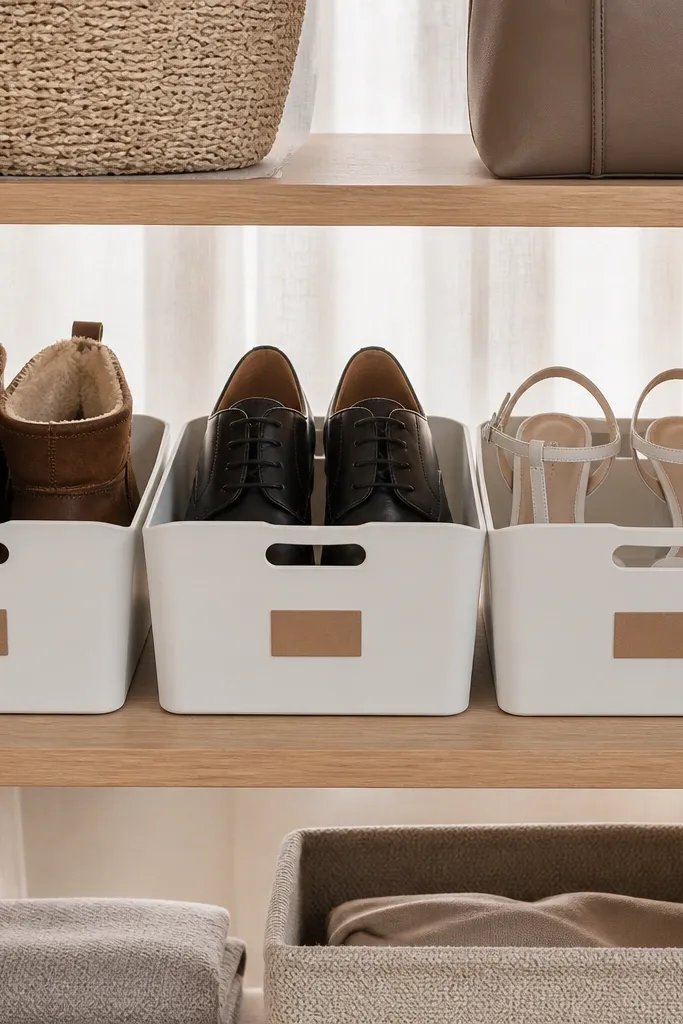
Measure your closet shelf depth and choose bins that fit with at least 1 inch of clearance so they slide in and out easily. Place one category per bin and keep shoes standing upright so they don’t become a tangled mass. Add label cards inside a clear sleeve on the bin front so the writing stays crisp. If bins sit too loosely, add thin felt pads on the shelf to prevent sliding.
Matching bins make beginner-friendly shoe storage ideas look intentional because the visual noise disappears. Instead of seeing ten different shoes at once, you see a few identical containers. This works especially well for people who hate clutter but hate “open shelf chaos” even more. Use bins for seasonal shoes, backup pairs, and shoes you don’t wear weekly. The key to the look is using the same bin type and keeping the labels consistent and placed on the front corner.
Skip thisAvoid mixing shoe types in the same bin — variety creates bulky, uneven stacks.
Editor's noteUse a simple color code: one label color for sneakers, another for dress shoes, another for seasonal storage.
11. Rope-Trim Basket Stacks for Sneakers
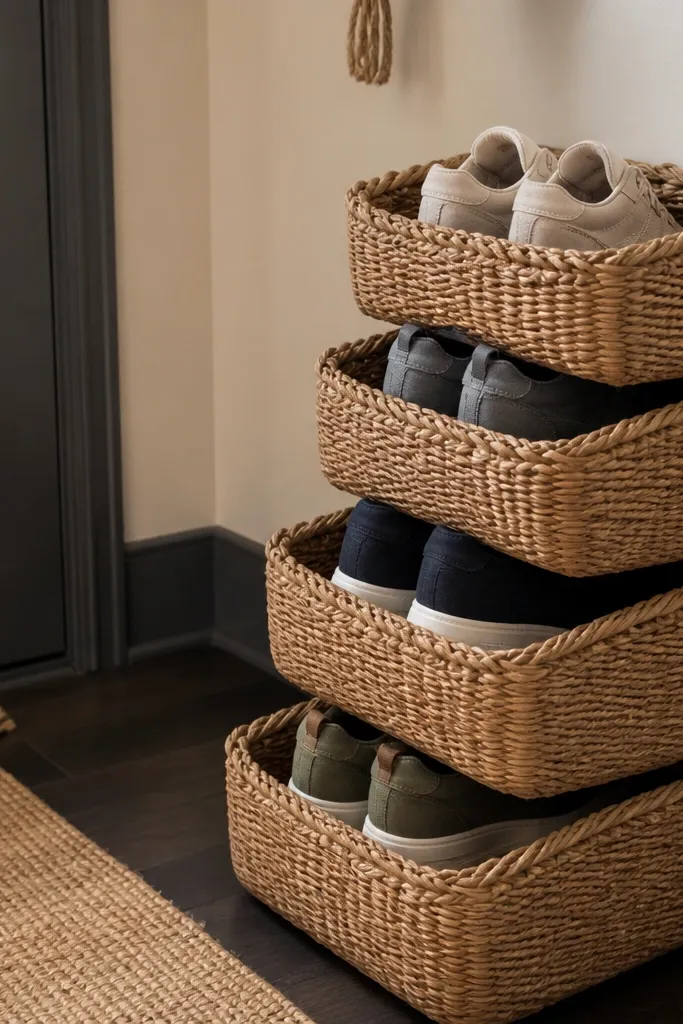
Woven baskets look warm, and rope-trim versions look especially polished. This storage idea is beginner-friendly because it’s modular — you can stack or rearrange without tools. It keeps shoes off the floor and reduces the “pile” look that makes entries feel cluttered. For the best aesthetic, use baskets of the same height and keep the sneakers facing the same direction. This works best for sneakers and flats, not for tall boots.
Buy baskets with sturdy sides so they keep their shape when shoes sit inside. Add a breathable liner like cotton canvas to keep dust down and make the basket easier to clean. Stack baskets so the top basket doesn’t crush shoes below — leave a small air gap if your baskets are thin. Label the front with a small tag tied to the rope trim so it looks like part of the design.
Keep one basket for “ready to wear” and one for “waiting” so the home stays tidy without constant sorting.
Don’t overfill baskets — crammed baskets make sneakers slump and look messy instantly.
12. Magnetic Shoe Strips for Hanging Sandals
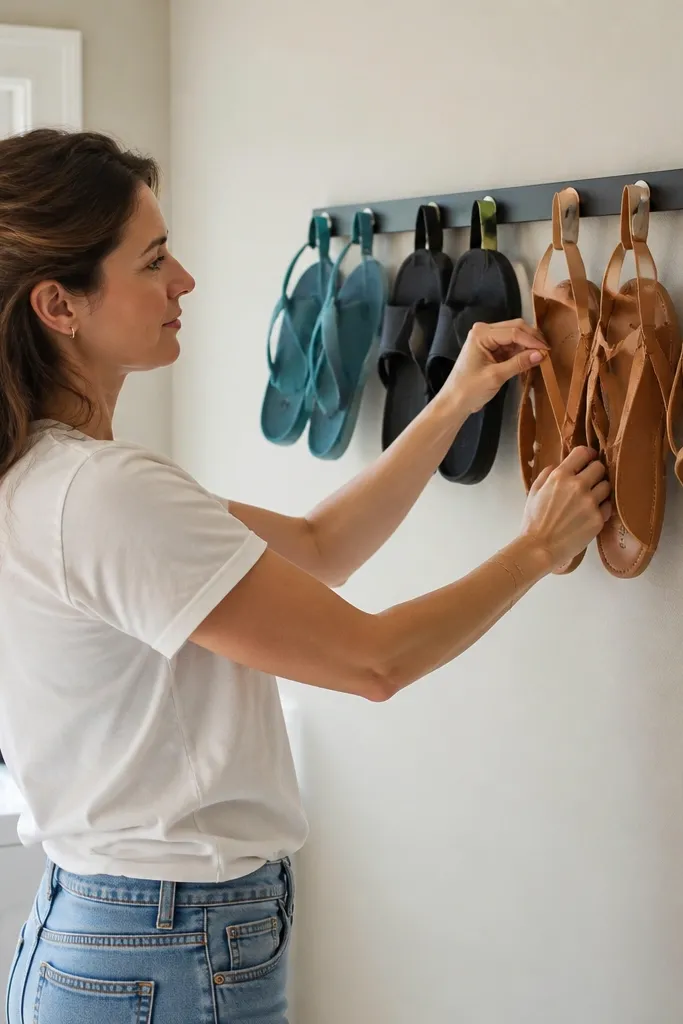
Mount magnetic strips to a wall or inside a closet door using screws into studs or strong anchors. Add small magnetic holders or tabs that grip the metal in sandal straps or attach with a lightweight clip. Hang each pair by the strap so the sole stays off the basket bottom. Keep strip spacing consistent so the sandals form a straight line.
If your sandals keep ending up on the floor, magnetic strips solve the problem with a clean look. Shoes hang by straps, so they don’t tangle and they dry faster than closed storage. It’s photogenic because you get a neat row of hanging pairs, all at the same height. This is beginner-friendly because you mount a strip and attach small magnetic tabs or hooks. Use it in a mudroom or by a closet door where sandals are used daily.
Skip thisAvoid placing strips where shoes get wet and drip — you’ll end up with water spots on the wall.
Editor's noteFor non-metal straps, use slim adhesive-backed clips that attach to the strap and snap to the magnet.
13. Shoe Organizer Drawer Inserts for Closets
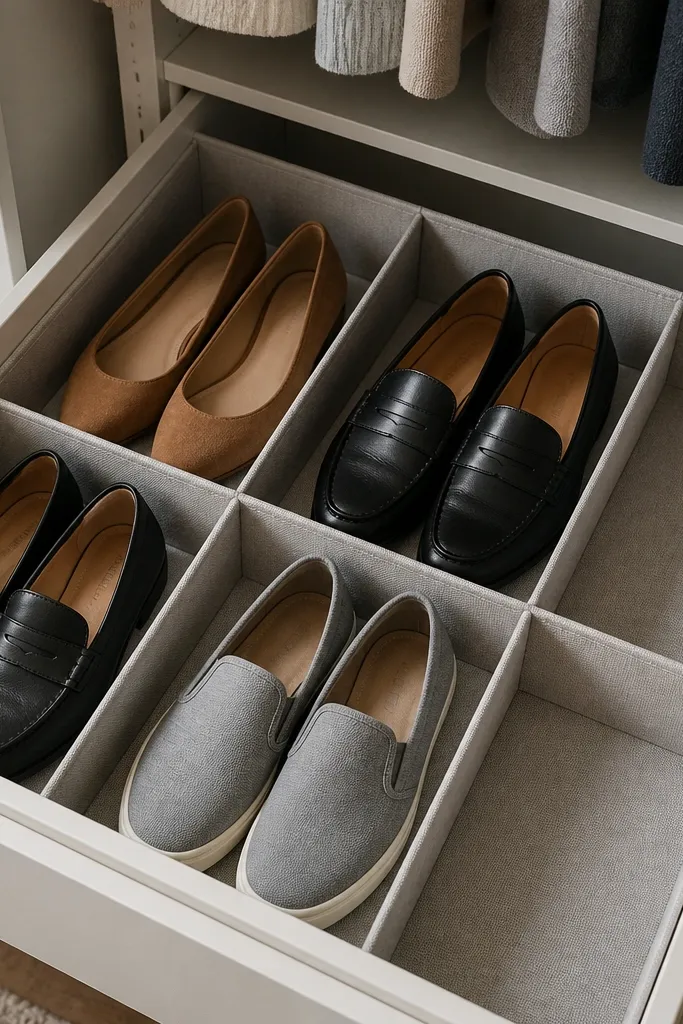
Drawer inserts make shoes look tidy because each pair sits in its own compartment. This is one of the most beginner-friendly shoe storage ideas for people who already have drawers but hate the chaos inside. The look is clean and symmetrical, and you avoid the “pile at the bottom” problem. Use inserts for flats, loafers, and dress shoes — styles that stack neatly. It also helps keep your closet organized because you can close the drawer and reset the space instantly.
Measure the drawer interior and cut dividers from foam board, thin plywood, or pre-made drawer organizer panels. Space dividers so each compartment matches your widest shoe in that drawer by about 1 inch. Add a non-slip liner at the bottom so shoes don’t slide. Insert the dividers and test-fit a full pair before sealing anything permanently.
Use clear tape on divider edges where shoes rub — it prevents scuffs and keeps the insert looking new.
Don’t store tall boots in drawer inserts — they force everything else to tilt and wreck the neat grid.
14. DIY Shoe Box Shelf with Front Labels
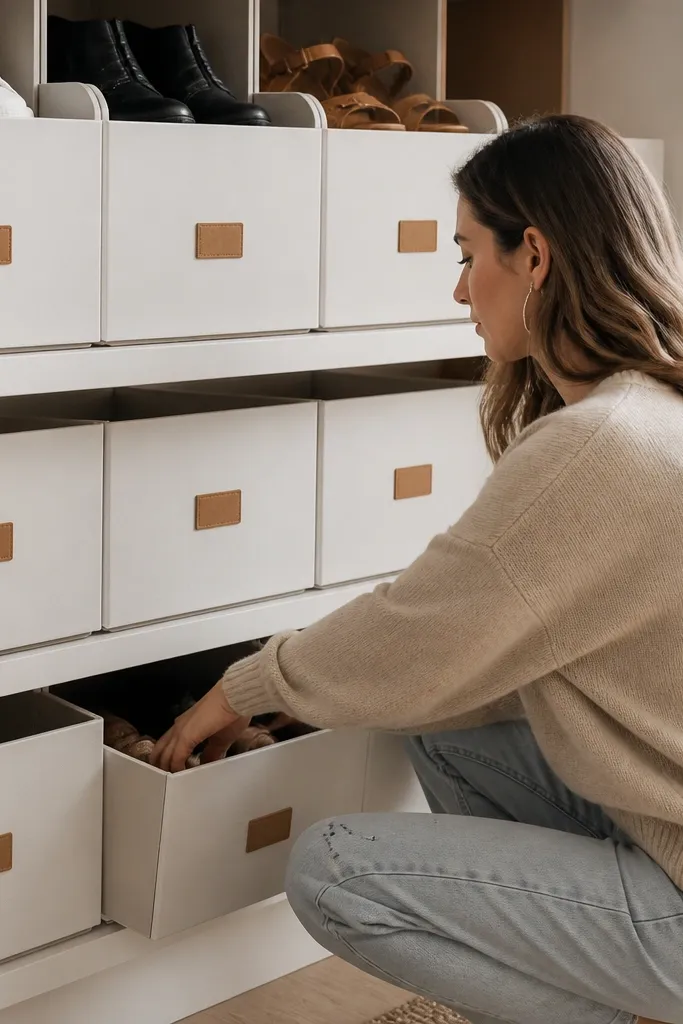
Choose matching shoeboxes or fabric boxes with rigid sides and measure the widest one you’ll store. Build a shelf frame from plywood strips and set internal spacing to fit the boxes snugly. Add a front label strip on each compartment so you can read the shoe type without opening anything. Seal the wood frame with matte finish so it doesn’t shine and look plasticky.
This is a simple, photogenic system: boxes with matching fronts create a clean row, and labels make it usable. It’s beginner-friendly because you can build it from pre-made storage boxes or wood frames with box inserts. The aesthetic is strong because every compartment looks the same, even when shoe types differ. Use it for seasonal rotation or backup pairs. Keep the shelf visible in a closet or entry alcove so the system helps you choose faster.
Skip thisAvoid mixing box heights across the same shelf — uneven fronts look sloppy.
Editor's noteUse one label style and one font size — consistent labels make the whole shelf look intentional.
15. Corner Shoe Tower with Adjustable Shelves
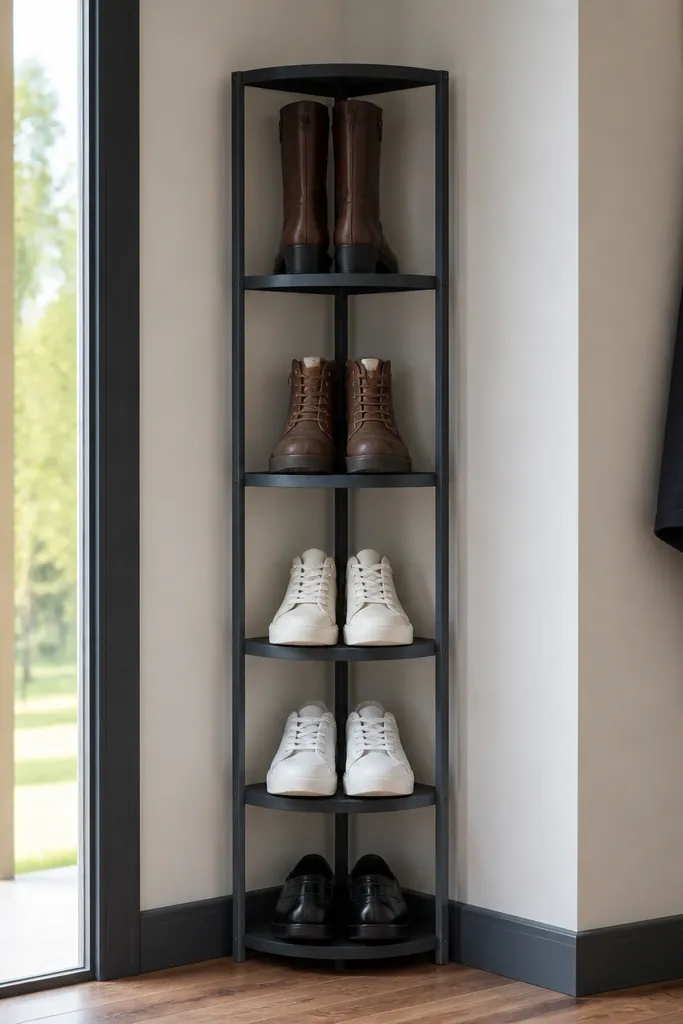
Pick a narrow cabinet width that fits your corner without blocking doors, then plan shelf heights based on your tallest pair in that zone. Install adjustable shelf pegs or pre-drilled holes so you can change spacing later. Add a back panel or thin divider boards so shoes don’t lean into the corner. Finish with a wipeable coat, then add simple handles aligned across all doors.
A corner tower is a smart-looking way to use wasted space while keeping shoes upright and visible. This idea is beginner-friendly if you use a simple freestanding cabinet frame and adjustable shelf pins or slats. The aesthetic is clean because the tower creates vertical lines and a tidy footprint. It’s best for entry closets, hallways, or laundry areas where you want a single storage “column” instead of scattered racks. Adjustable shelves matter because shoe collections change.
Skip thisAvoid storing shoes directly on bare wood — add liners or felt to prevent scuffs and keep it clean.
Editor's noteUse adjustable shelves for the top section and fixed shelves for the bottom so the tower stays neat even after you rearrange.
16. Clear Shoe Cubby Panels for a Built-In Look
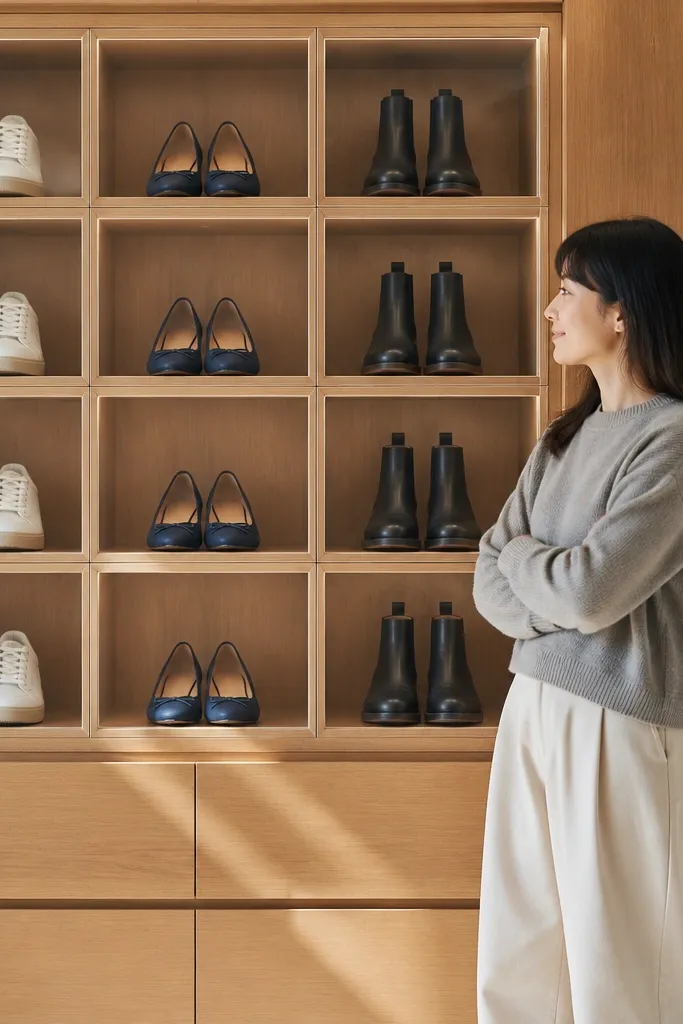
Assemble cubby units with fixed square openings, then cut clear acrylic panels to match each cubby front. Attach hinges or slide tracks so the panels open without wobbling. Add a thin rubber edge strip to prevent rattling and protect shoe edges. Install the cubbies at eye-level in an entryway or closet wall so the grid is visible and motivating.
Clear panels on cubbies give you the “built-in boutique” look while keeping shoes visible. It’s a beginner-friendly shoe storage idea because you can use pre-made cubbies and add clear acrylic fronts. The visibility helps you keep pairs together and stops the “where did my other one go” problem. It also looks sleek because the shoes sit in a grid and the clear doors reduce dust on uppers. This works best when you keep a consistent orientation so everything looks aligned through the panels.
Skip thisAvoid clear panels if you throw shoes in randomly — the transparency will expose every mess.
Editor's noteUse the same panel layout on every cubby — one consistent grid reads clean in photos and in real life.
17. Color-Blocked Shoe Steps for Kids
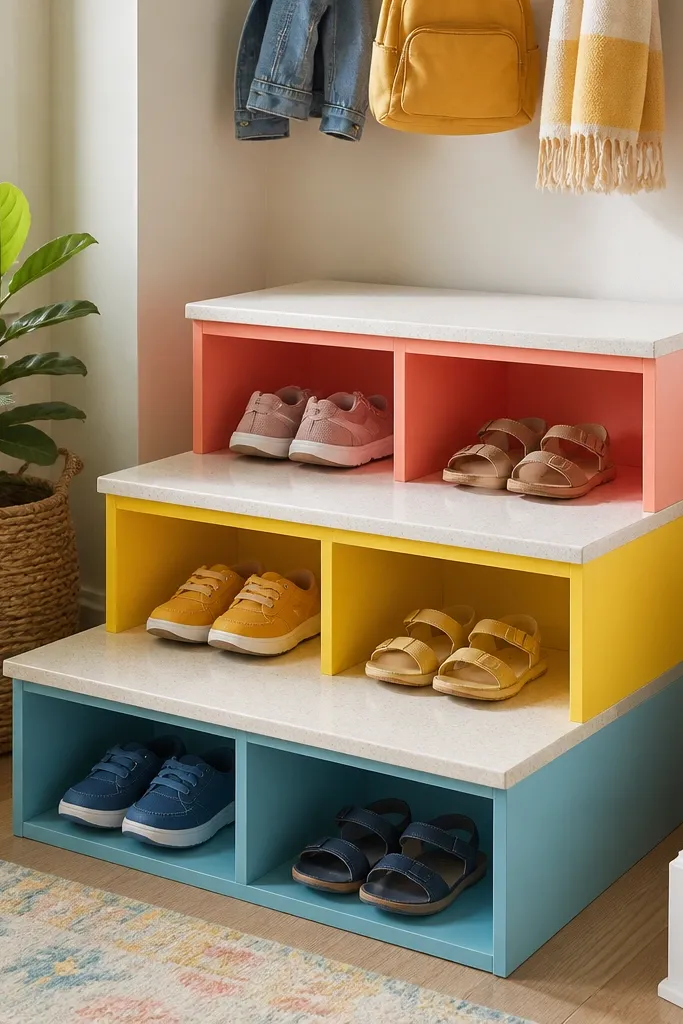
Kids' shoes become clutter because adults store by category and kids store by chaos. Color-blocked steps fix that by giving each kid a visual place to put shoes. This is beginner-friendly because you’re building a small, simple structure, not a full cabinet. The look is playful but still neat, especially when each step has a clear boundary. It also works in entryways because children can grab their shoes without opening bins. Use it for sneakers, sandals, and light boots.
Build a short step unit with 2-4 tiers from plywood and add a front lip on each tier. Paint or stain the steps in a limited palette, then add a color label on each step. Cut a non-slip mat for each tier so shoes stay put. Teach by assigning one color per child or one color per shoe type, then keep the system consistent.
Make the top step the easiest height for kids so they succeed quickly and keep the habit.
Don’t make steps too deep — deep steps invite stacking and turn into a pile.
18. Wire Shoe Rack with Fabric Sides
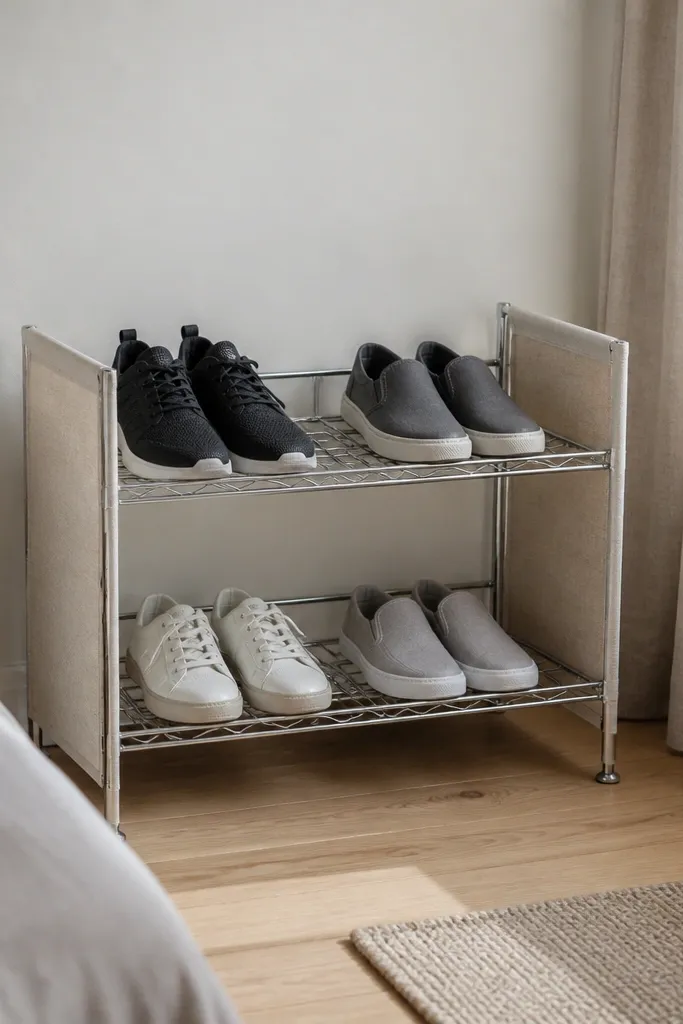
Assemble a wire rack frame and attach fabric side panels with zip ties or sewn loops. Add a flat base liner so soles don’t slip on the bottom wire. Place shoes upright and use small dividers or folded fabric to keep pairs from leaning. Wipe the wire regularly and spot-clean fabric panels when needed.
Wire racks are sturdy and airy, but the look can feel industrial. Fabric sides fix that by softening the visual and preventing shoes from catching on rough edges. This is beginner-friendly shoe storage ideas for renters because you can assemble a freestanding rack without modifying walls. It’s also great for people who want shoes to dry out without smelling up the room. Keep the rack against a wall and use uniform baskets or fabric dividers for a tidy, photo-friendly layout.
Skip thisAvoid mixing tall and short shoes on the same level — leaning kills the clean look.
Editor's noteChoose fabric in a neutral tone that matches your entry textiles so the rack looks integrated, not random.
19. Folding Shoe Organizer for Closets with a Door
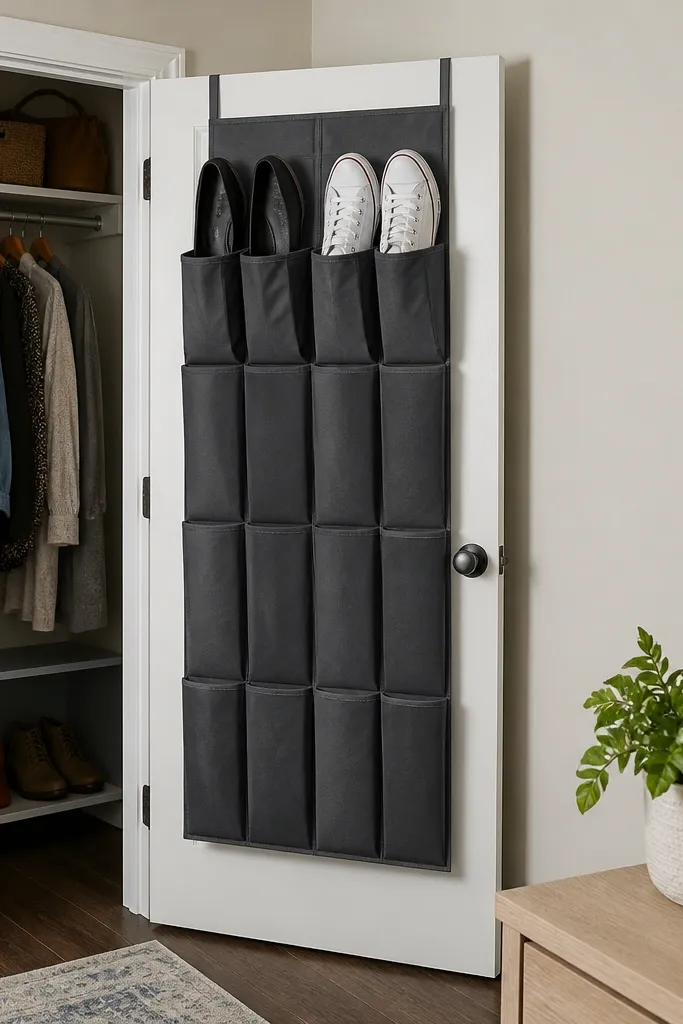
Select a door organizer with reinforced pocket seams and a foldable support frame. Attach the top hooks to the closet door, then check that the bottom edge clears the floor. Assign one pocket per pair and keep all shoes oriented the same way. Add a small anti-slip strip on the door surface if the organizer shifts.
A folding shoe organizer attached to a closet door keeps shoes off the floor and hides them when the door is closed. It’s beginner-friendly because it uses hooks and pockets instead of permanent construction. The folded look is clean, and the pockets keep pairs from turning into a tangled heap. This works best for flats, sneakers, and sandals that fit the pocket shapes. If you want the room to stay photo-ready, this is a strong pick because you can close the door and reset the space.
Skip thisAvoid overstuffing pockets — stretched pockets look saggy and messy within weeks.
Editor's noteUse the back side of the closet door for “currently wearing” shoes and the front shelf for seasonal bins.
20. Pegboard Bench with Shoe Slots
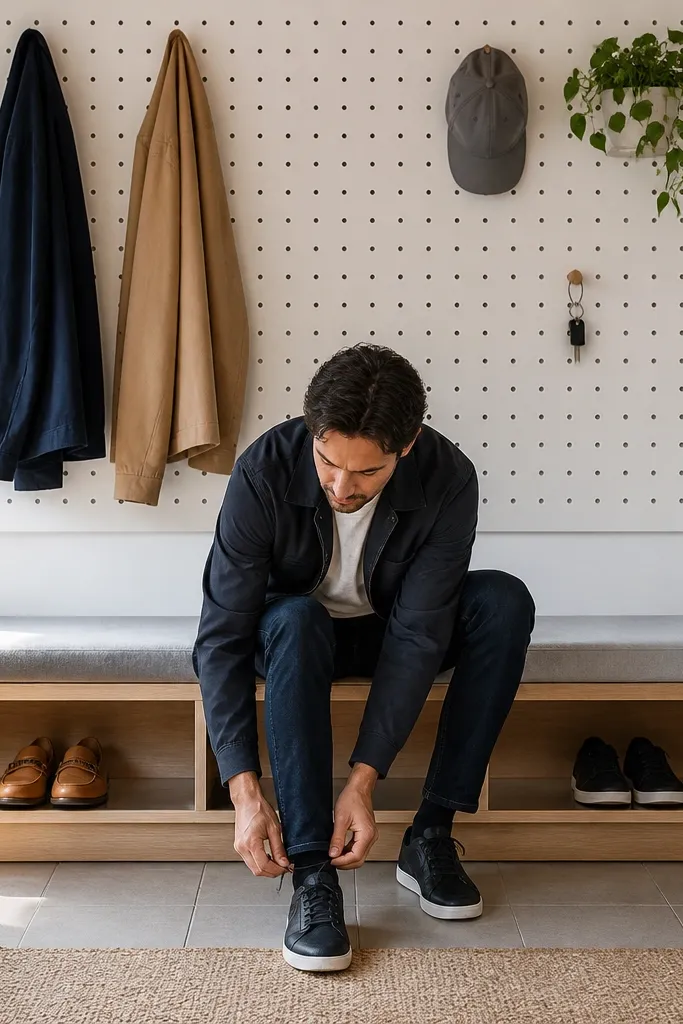
Build or buy a bench frame, then attach a pegboard panel to the back for hooks. Add slotted dividers under the seat using wood strips so each shoe has a slot width that matches its sole. Leave a small gap between slots for airflow and easy retrieval. Finish the bench with a wipeable topcoat and add a non-slip pad on the shoe slot floor.
A bench plus shoe slots is a high-impact look because it gives you seating and storage in one clean line. The pegboard panel helps you organize accessories like brushes and key hooks, which keeps the bench area from turning into a junk station. Shoe slots keep pairs aligned and stop the “bench base becomes a pile” problem. This is beginner-friendly if you use a pre-made bench frame or build a simple one with a pegboard backing. It looks great in entryways because everything sits at the same visual height.
Skip thisAvoid storing shoes without slots or dividers — without boundaries it becomes a pile again.
Editor's noteUse consistent slot widths for sneakers and separate wider slots for boots so the bench doesn’t look uneven.