
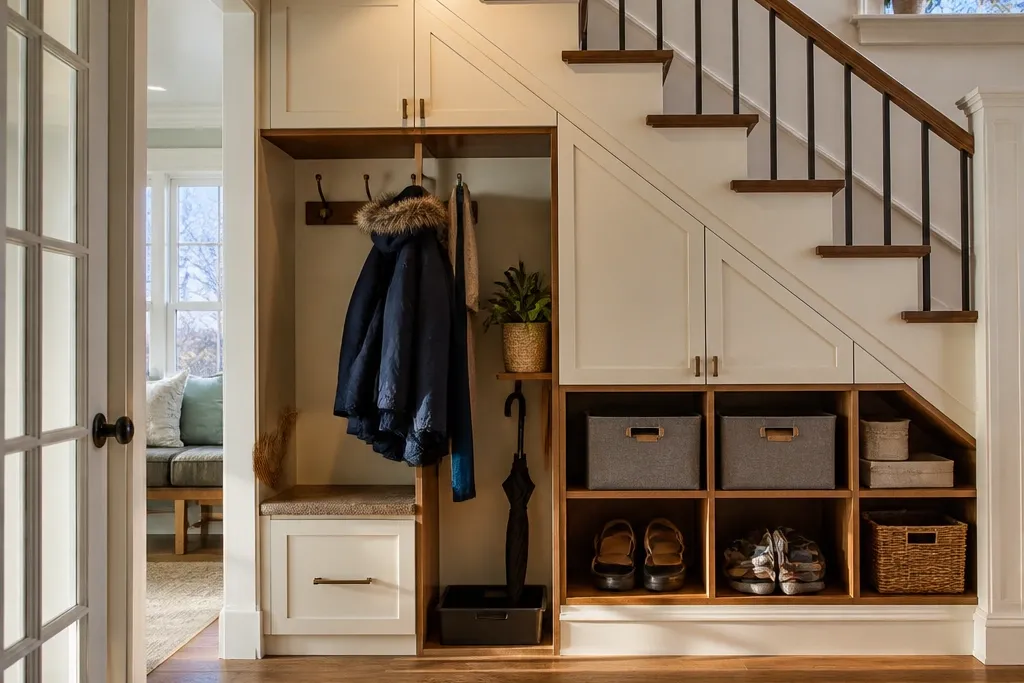
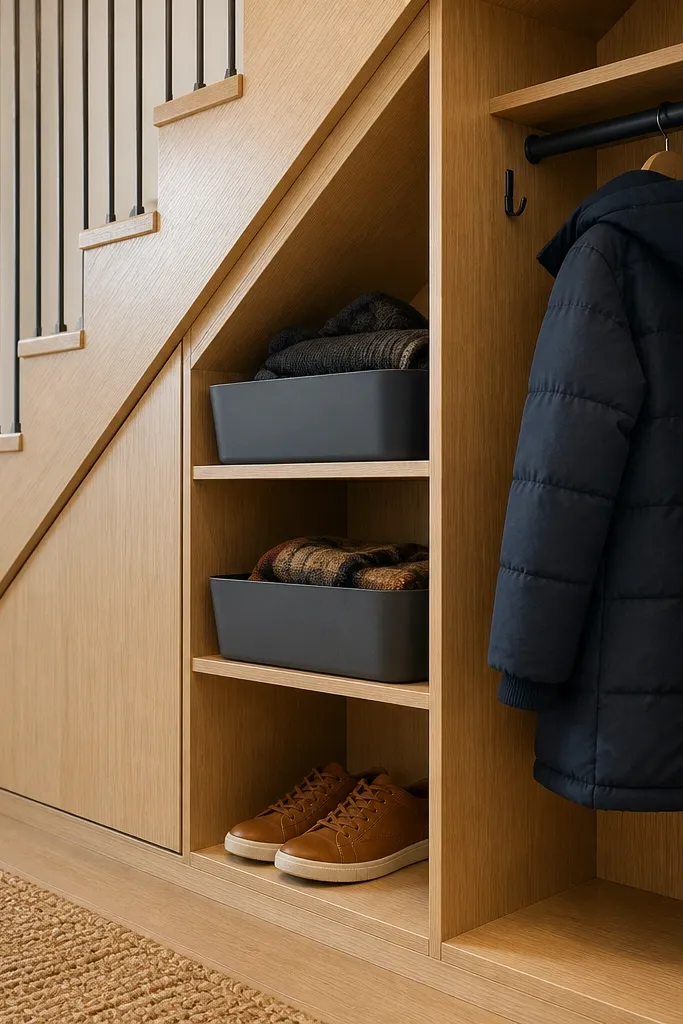
1. Toe-Kick Drawer Row Under the Lowest Run
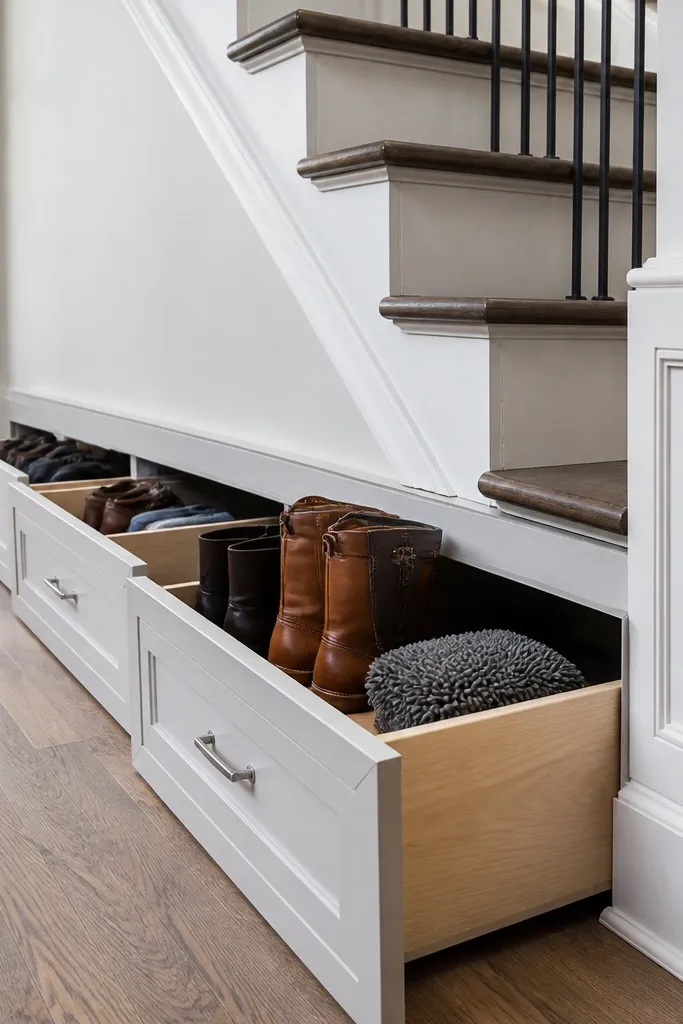
This is the best-looking fix when your stairs cut the space so shelves become useless. Toe-kick drawers keep the usable height low and consistent, so boots, cleaning tools, and overflow shoes fit without fighting the underside slope. The fronts read clean because the drawer face lines up with a crisp base panel, and the black pulls give a sharp, modern rhythm. It’s also practical year-round: you can store winter essentials at the left, summer swap items at the right, and still close everything quickly after a busy day.
Start by measuring the clear width at the front and the height of the toe-kick zone you can keep level (usually 4-6 in tall under many stairs). Build a simple carcass frame from 3/4-in plywood, then install drawer boxes using 1/2-in plywood sides and 1/4-in backs. Mount full-extension slides so the drawer front sits flush with the face panel, then add a 1/2-in MDF face board to create that built-in look. Finish by painting or veneering the fronts, then attach pulls and add a soft-close damper if you want extra smoothness.
Editor's noteUse a scrap spacer to set drawer face gaps. It keeps the reveal lines straight across multiple boxes.
Skip thisDon’t mount slides before you confirm the underside clearance at full drawer extension.
2. Pull-Out Pantry Shelves for Deep, Dark Under-Stairs Nooks
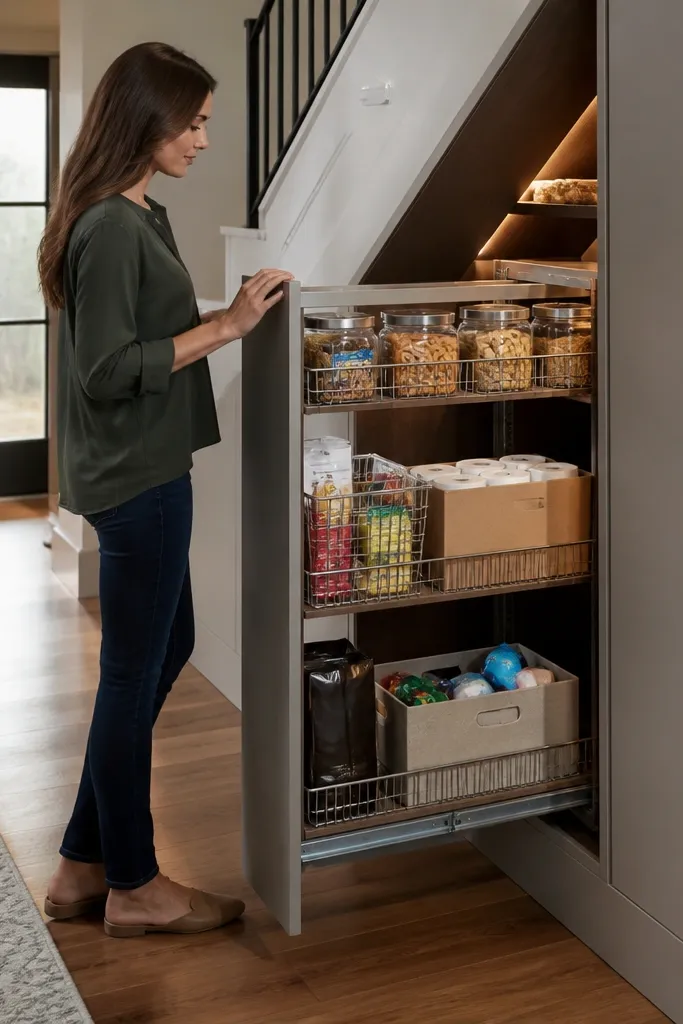
If your under-stairs space is deep but awkward, pull-out pantry shelves turn it into a clean “reach-in” unit. You get the look of a cabinet front, but the function of a storage cart that slides out to show everything. This is ideal for snacks, paper goods, pet supplies, and seasonal items that you don’t want visible all the time. The aesthetic is strong because you can keep the interior neat with matching bins and keep the cabinet doors closed on most days.
Build a fixed frame from 3/4-in plywood to the full width and deepest point, then install two or three pull-out shelf platforms using heavy-duty slides rated for the load you expect. Cut shelf boards to fit the opening and add a stop block so the shelf doesn’t rack when pulled. Add a back panel and a small LED strip on a switch or motion sensor powered by a low-voltage driver. Finally, attach cabinet doors with magnetic catches so the shelf stays aligned even when you pull it out repeatedly.
Choose bins that match the shelf footprint so the pull-out doesn’t look messy when it’s open.
Don’t rely on friction-only shelves; they drift and the rails look bad fast.
3. Slanted-Soffit Open Cubby Wall with Front Liner Panels
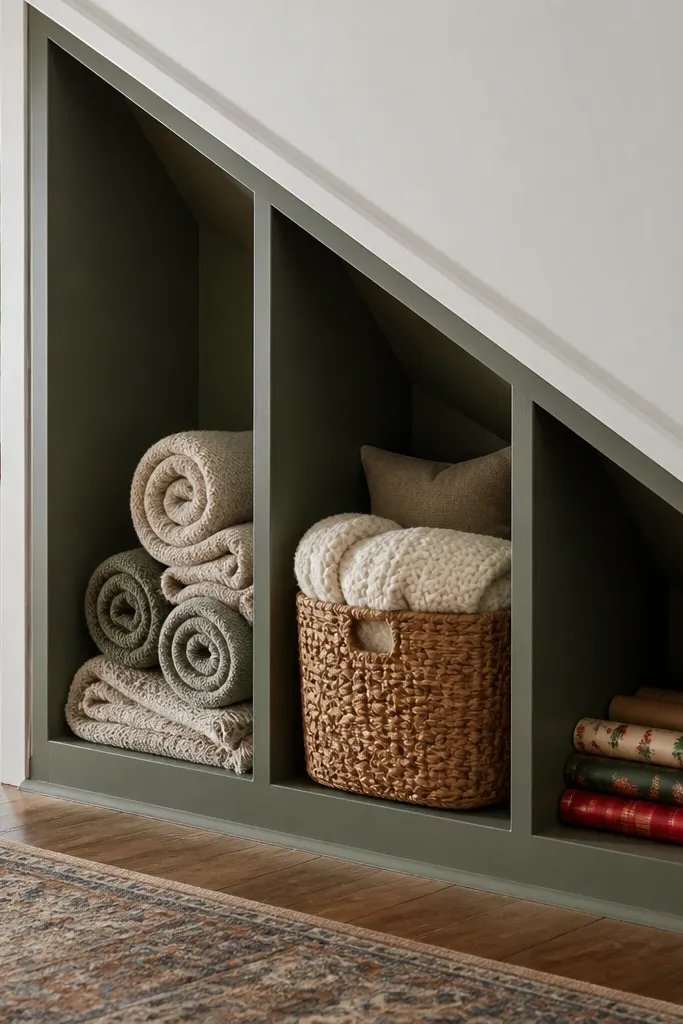
When the underside slopes and you can’t get equal-height shelves, open cubbies with angled back panels look intentional instead of broken. The trick is lining each cubby with a back panel cut to the soffit angle so the interior stays usable and visually balanced. This gives you the “designer shelf” look because the openings are symmetrical and the baskets match. Use it for book stacks, board games, and seasonal decor that you want to grab quickly.
Measure the slope line and decide how many cubbies you want across the width. Cut side frames from 3/4-in plywood and install horizontal cleats at each cubby height. Cut back panels from 1/2-in plywood or thin MDF, then label them so each one matches its cubby angle. Secure the cubby dividers, then add a face trim frame around the whole unit for a clean border. Finish by painting everything one color, then add matching baskets or small labeled boxes for a consistent look.
Editor's notePaint the inside back panels the same color as the trim. It makes the angled soffit disappear visually.
Skip thisDon’t make cubbies too narrow. If you can’t fit a standard basket, you’ll end up with ugly stack piles.
4. Hinged Cabinet Doors with Adjustable Middle Shelf
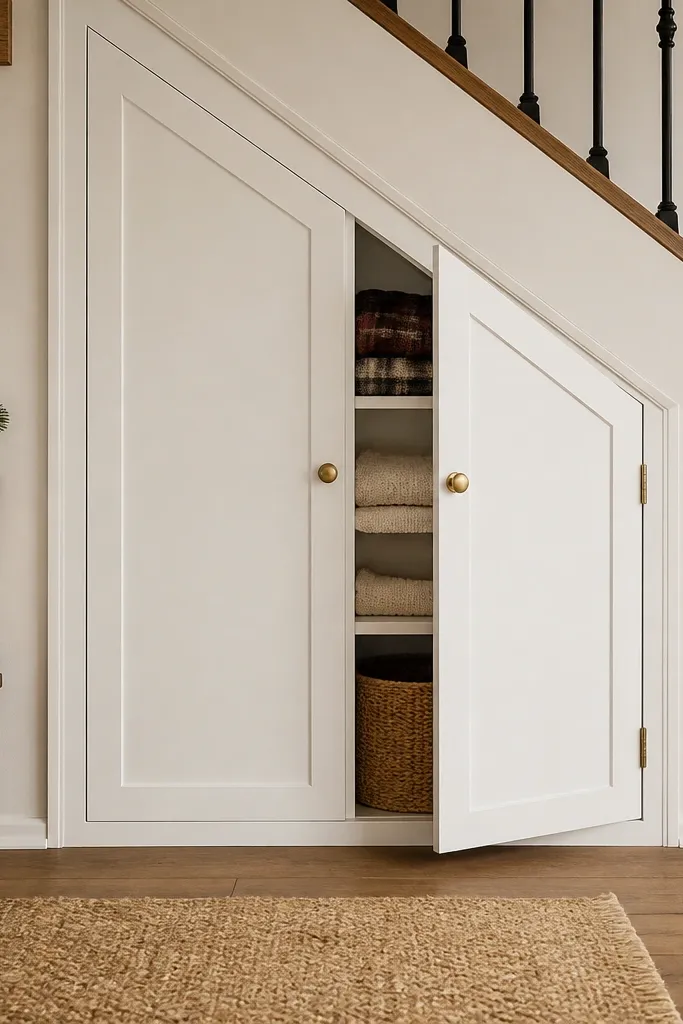
This is the cleanest solution when you want the under-stairs area to look calm and uncluttered. Two hinged doors hide random items, and an adjustable shelf lets you swap storage height for coats, shoes, or cleaning supplies across the year. The look is especially photogenic because you get straight door lines and a consistent handle placement. It also works in narrow spaces where pull-outs feel too bulky.
Build a cabinet box from 3/4-in plywood with a fixed top and bottom panel that match the underside clearance. Add a face frame or edge banding so the doors sit flush and look built-in. Install a shelf support system with multiple holes so you can adjust shelf height without tearing the unit apart. Hang doors with 3/4-in overlay hinges and set a consistent reveal gap using shims. Add a soft-close hinge option or a magnetic latch for a tight, quiet close.
Editor's noteUse a test door on scrap first to dial in reveal gaps. It prevents lopsided door lines.
Skip thisAvoid using loose shelf pins without a support rail; they rattle and scratch the side walls.
5. Ladder-Style Hanging Rail for Umbrellas and Leashes
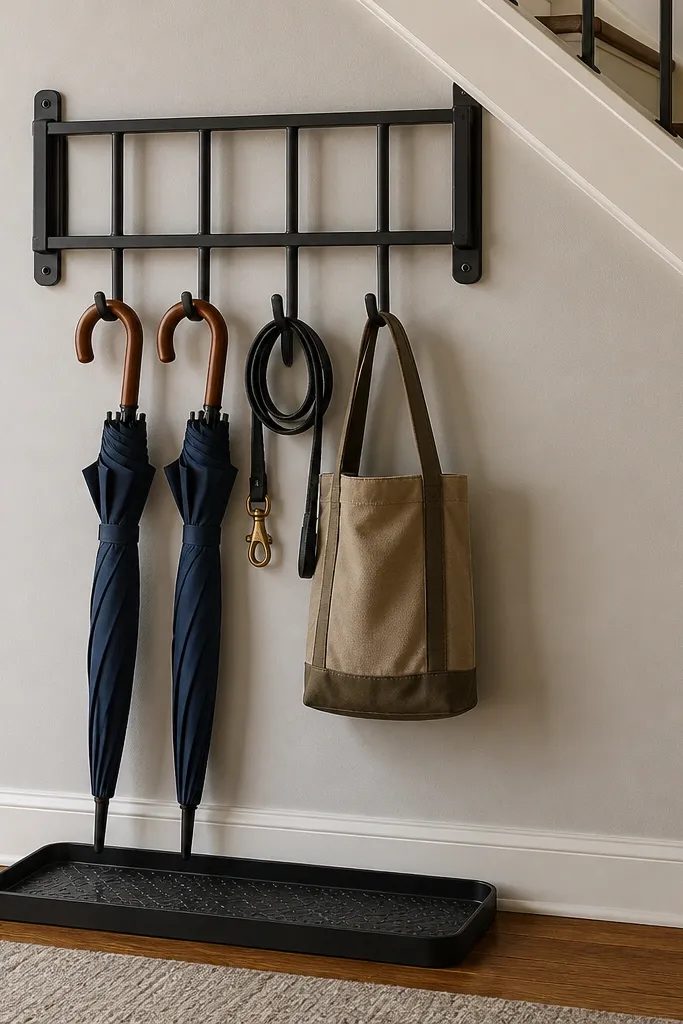
This one looks great because it turns “messy wet stuff” into a designed wall moment. A ladder-style hanging rail with evenly spaced hooks keeps umbrellas, leashes, and small bags off the floor. Under-stairs is perfect because it’s a sheltered zone, and you can add a removable tray or drip mat below for water. The look is clean when you keep the rail finish consistent and use matching hooks.
Cut two vertical side rails and add evenly spaced rungs from metal or hardwood to create the ladder structure. Anchor the rail to the studs inside the under-stairs cavity with structural screws and wall anchors only where studs are missing. Mount hooks on rungs so the hook tips line up at the same height across the row. Install a shallow drip tray under the lowest hooks, with a removable insert for easy cleaning. Finish by sealing the wood with a matte clear coat or paint so water doesn’t stain.
Add a small label strip on the inside wall for “umbrella tips” and “leash clips” so the system stays tidy.
Don’t attach hooks to thin panels. Use studs or you’ll get a sagging mess in months.
6. Hidden Cleaning Supply Cabinet with Flip-Down Front Panel
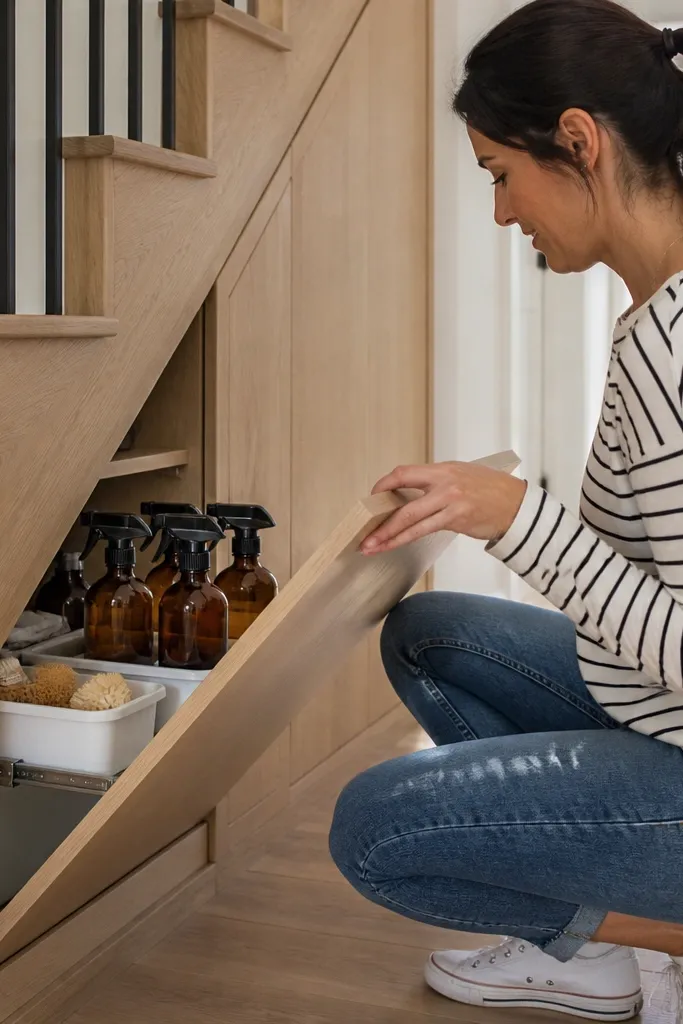
If cleaning supplies keep showing up in the wrong place, a flip-down front panel makes them disappear while staying easy to reach. This format is also photogenic because the front looks like a solid wall until you open it. Inside, you can use bottle racks and a slim bin for sponges so everything stays upright and tidy. It’s a strong year-round hack because you can store winter de-icer tools, summer stain remover, and all the “small bottles” that clutter counters.
Frame a cabinet box from 3/4-in plywood and set it so the front panel can swing down without hitting the floor or stair skirt. Build a slim interior rail system using bottle holders or simple cleats so bottles don’t tip. Mount a flip-down panel using sturdy piano hinge hardware and a gas strut or strong support arm so it doesn’t flop. Add a latch on the inside edge that holds the panel shut. Finish the panel to match your stair trim and add a rubber gasket if you want a tight seal.
Editor's noteUse a clear acrylic drip guard behind the bottles to keep drips from staining the back wall.
Skip thisDon’t skip a latch. A gravity-only panel looks sloppy and can pop open.
7. Built-In Shoe Cubby Bench with Removable Tray Base
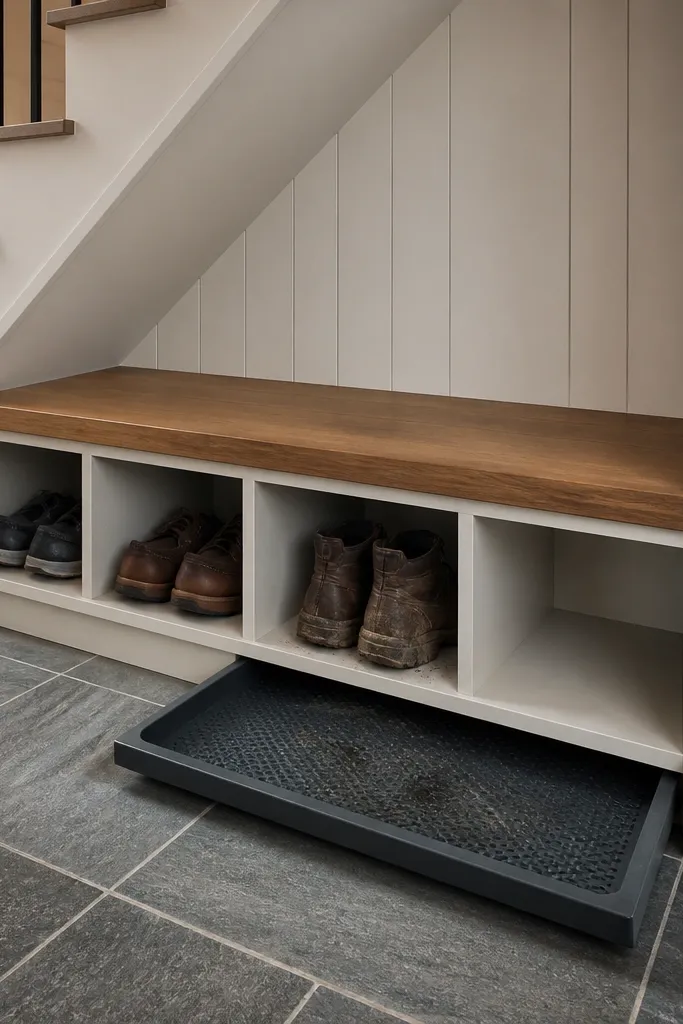
This is the under-stairs storage idea that looks like furniture, not storage. A bench top makes the space feel designed, and cubbies keep shoes separated by family member or season. The removable tray base solves the gross part: dirt and water from wet shoes fall into a tray you can pull out and dump. It photographs well because the bench top creates a clean horizontal line and the cubby fronts can match door trim.
Build a bench frame with 2x2 or 2x3 lumber for the base, then skin it with 3/4-in plywood for strength. Install dividers for shoe cubbies using 3/4-in plywood strips, spacing them to fit your shoe sizes (8-10 in wide per cubby works for most sneakers). Add a removable tray system using a shallow box and slide tracks or simple pull-out rails. Cover the top with a durable surface like butcher block sealed with hardwax oil or a thick plywood top with cabinet-grade paint. Finish with drawer pulls on cubby doors or magnetic catches if you use doors.
Editor's noteSeal the tray and bench top with the same sheen level (matte) so it looks intentional, not patchy.
Skip thisDon’t make cubbies too tight for boots. Store boots in the deepest section and sneakers in the front.
8. Drawer + Door Combo for Season Swaps
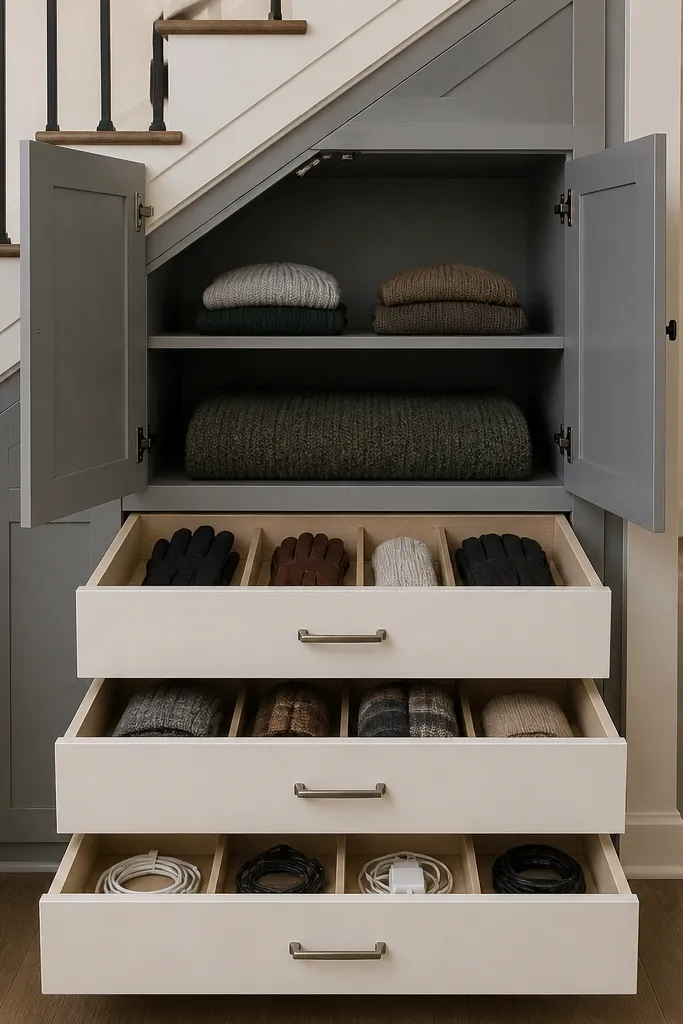
A combo layout looks balanced and solves the “some things need drawers, some need doors” problem. Put drawers on the bottom for small, grab-fast items like gloves, scarves, and charging cords. Use doors above for bulkier, seasonal stuff like hats, winter accessories, or extra bedding. The look is strong because you get two visual bands that align — drawers and doors — instead of a random mix of open shelving.
Plan a two-zone cabinet: a bottom drawer bay and an upper door bay. Build a carcass with a fixed divider panel between zones so drawer slides have solid mounting. Install two or three drawers using full-extension slides and 1/2-in plywood sides for sturdiness. For the upper section, build a door frame with hinges that match your reveal gap, then add an adjustable shelf inside for changing seasons. Finish with matching pulls and knobs so the unit reads like one piece of furniture.
Use the same handle style on both drawers and doors. It ties the whole under-stairs block together visually.
Avoid mixing handle sizes randomly. It makes the unit look like leftovers.
9. Back-Lit Shadow Box for Holiday Storage That Looks Like Decor
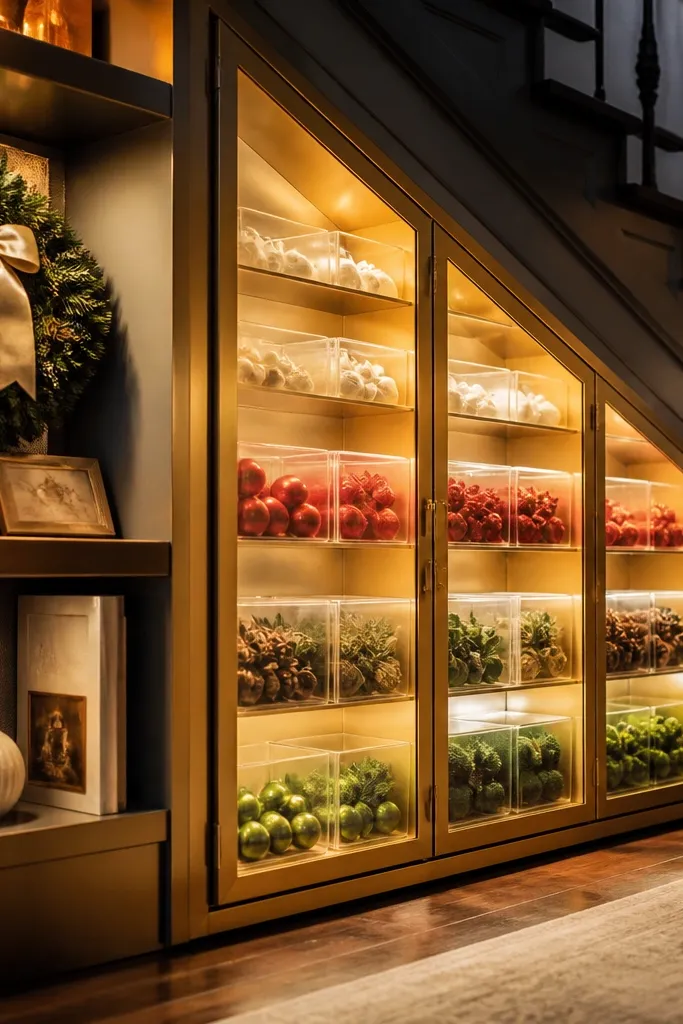
If you keep holiday items in the same place every year, make the storage look like part of your decor. A shadow box with back-lit panels turns labeled bins into a “display” instead of a hidden pile. Under-stairs is perfect because the light is contained and doesn’t spill into the hallway. This setup is great for ornaments, string lights, and seasonal decor that you want easy access to without digging through a dark cabinet.
Build a shallow frame with a deep back panel gap to hide LED strips. Cut a back board from 1/2-in plywood and drill a conduit hole for low-voltage wiring. Install LED strip lights behind a diffuser panel so the glow is even, then mount clear acrylic or thin slats on the front to create the shadow box look. Add labeled bins inside with a simple rail so they slide in and out without tipping. Finish the front trim with paint or veneer to match the stair skirt.
Use a warm 2700K LED temperature. It reads cozy and doesn’t look harsh in photos.
Don’t mount LED strips where they can be seen directly. The hot spots look cheap.
10. Accordion-Fold Door for Utility Zone Inside the Stairs
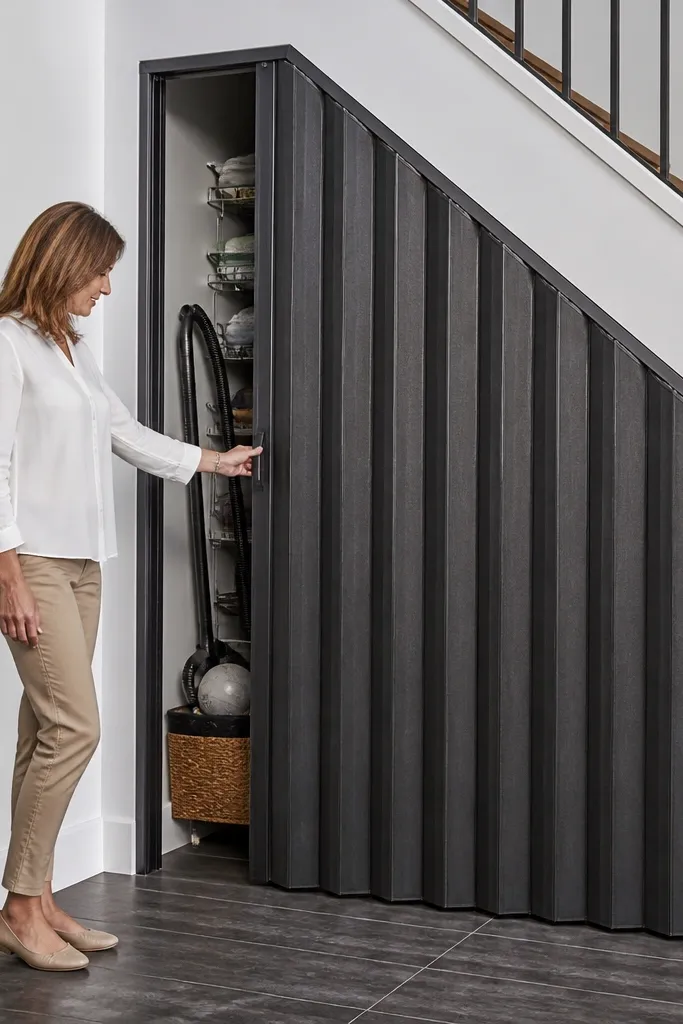
For under-stairs areas that are more utility than living-room-worthy, an accordion-fold door gives you the best compromise between access and clean appearance. You can store bulk cleaning tools, vacuum attachments, and seasonal gear behind it without building full cabinet doors. It looks tidy because the door hides the mess and keeps the opening from feeling cluttered. This is a smart choice when the space is too irregular for standard hinges to line up perfectly.
Measure the opening height and width, then choose an accordion door system that matches those dimensions. Build a simple frame from 3/4-in plywood or aluminum angle so the door mounts flush and closes evenly. Inside, install a vertical tool rail or pegboard strip so items hang neatly. Add a bottom shelf for small items and a removable bin for dust. Finish the frame in paint to match the stair trim, and mount the track so it clears the floor by a small gap.
Add a magnetic catch at the bottom so it doesn’t drift open when you’re grabbing items quickly.
Don’t mount the track to drywall alone. Use studs or solid backing.
11. Pegboard Back Wall with Matching Fabric Bins
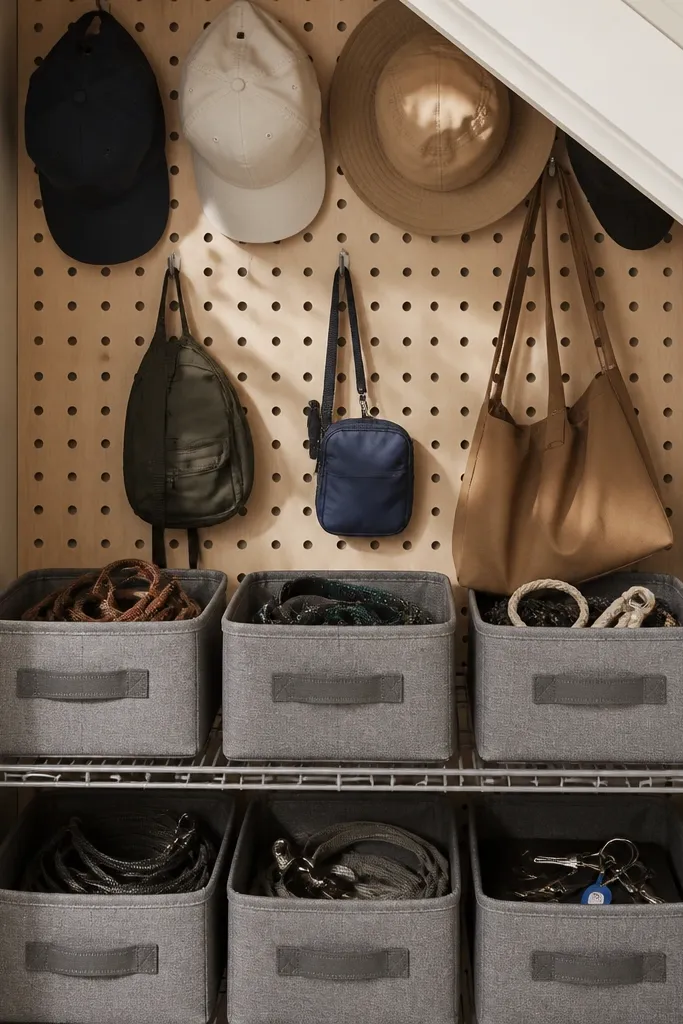
A pegboard back wall makes the under-stairs area feel like a functional workshop, and it looks good when you keep the styling consistent. Hooks handle hats, small bags, and leashes. Fabric bins keep smaller items from turning into clutter piles. The pegboard also lets you adjust the layout when seasons change, which matters for year-round storage. It’s ideal for entryways where you need quick access and a visually neat system.
Cut pegboard to fit the back wall area, then mount it with spacers so you can attach hooks securely. Add a rail or cleat around the edges for a finished border. Hang hooks in a grid pattern so your lines look straight even when you rehang items. Install a row of fabric bins on a small shelf ledge below the pegboard. Finish the pegboard border and shelf in the same color as your stair trim so the whole setup looks coordinated.
Use bins with identical front labels or plain tags. Consistency is what makes pegboard look intentional instead of chaotic.
Don’t overload the pegboard with mixed hook styles. Keep one hook type for a cleaner look.
12. Sliding Tray Organizers for Hats, Gloves, and Charging Cables
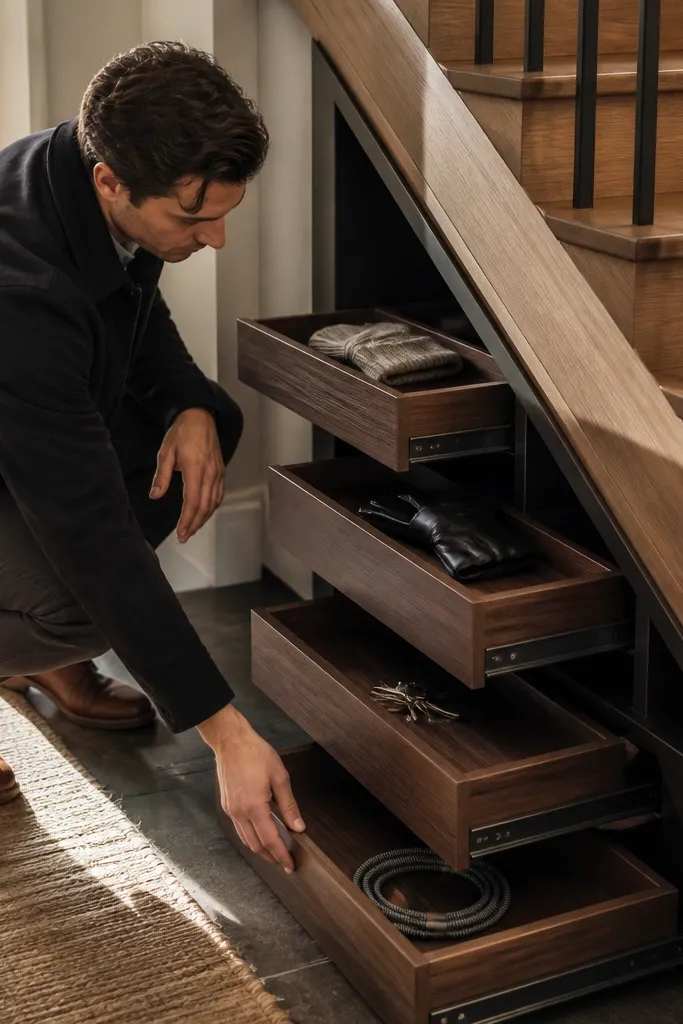
Sliding tray organizers turn the awkward under-stairs depth into a clean, front-access system. This is the best choice for small items that always end up in a drawer pile: hats, gloves, spare keys, and charging cables. The trays look sleek when they’re built with a consistent face height and matched hardware. You can keep a “daily grab” tray at the front and a “season swap” tray behind it, so the unit stays usable all year.
Build a shallow frame from 3/4-in plywood and install full-extension slides for each tray. Make trays from 1/2-in plywood with a 1/4-in back and a front lip to prevent items from slipping forward. Partition trays with removable dividers so you can reconfigure for different seasons. Add a face panel for each tray and set spacing so the reveals are even. Finish with paint or veneer on tray fronts, then install pulls or finger cutouts for easy grip.
Editor's noteUse matte drawer liner on trays. It keeps small items from rattling and scuffs from showing.
Skip thisAvoid trays deeper than your reach. If you can’t see the back, the system fails.
13. Glass-Front Cabinet for Displaying Baskets and Seasonal Decor
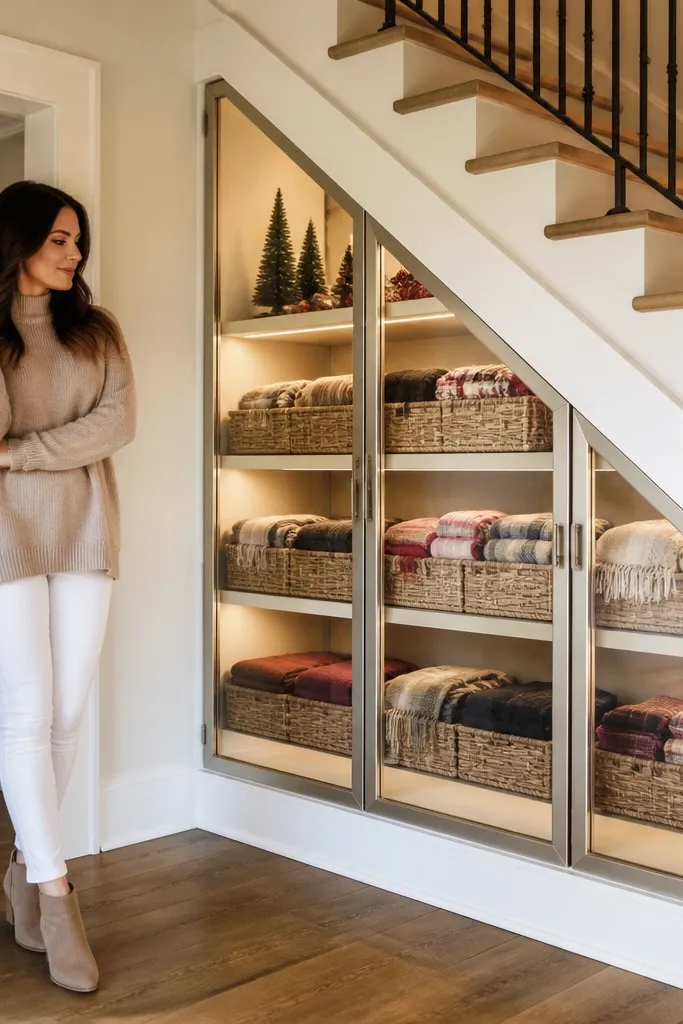
If you want under-stairs storage to look like built-in furniture, glass-front doors do it. You’re not showing random clutter — you’re displaying uniform baskets and neatly stacked items like scarves, throws, or holiday decor. The glass adds a clean “light” feel, which matters in hallways that get dim. Year-round storage looks better when the contents are styled, not hidden, so this works best if you keep bins matching and labels consistent.
Build a cabinet frame from 3/4-in plywood and use tempered glass door inserts with a wood or metal frame. Cut door frames with a consistent muntin pattern so the unit looks intentional. Install soft-close hinges and a magnetic latch so doors close tight. Inside, place baskets on fixed shelves sized to fit the glass opening. Finish the cabinet exterior with paint or veneer and add a small interior LED strip for gentle illumination.
Use frosted or textured glass if you want the cabinet to hide detail while still looking bright.
Don’t use glass if your bins are mismatched. The visual mess will show through.
14. Wraparound Bench Back Panel with Hidden Storage Under Seating
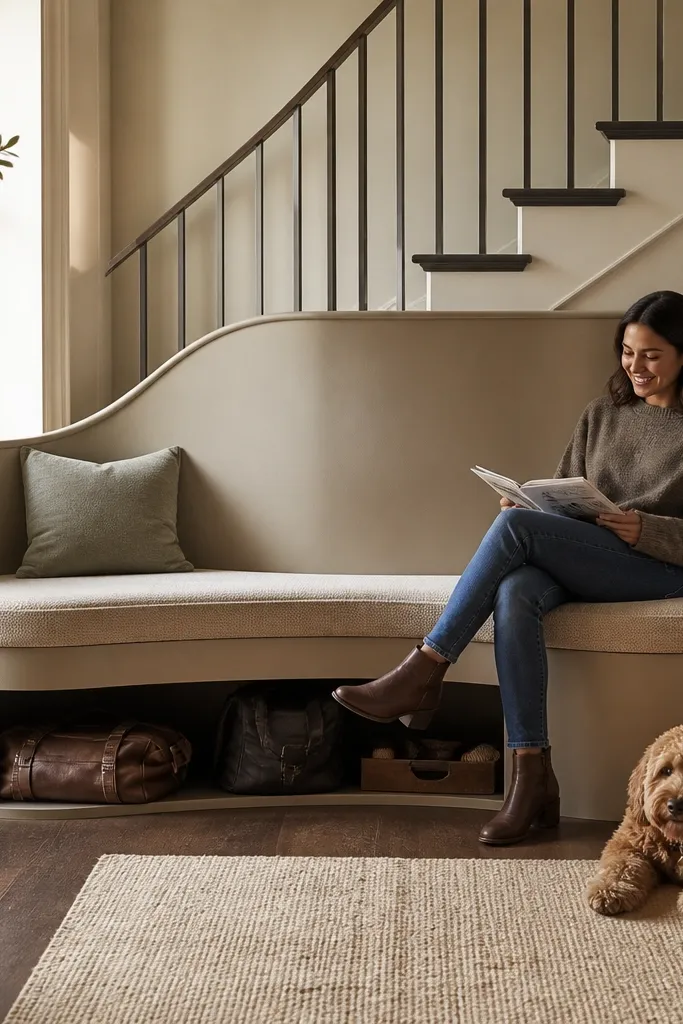
A bench with hidden storage is the under-stairs hack that makes the whole corner feel finished. The seat hides seasonal bags, extra blankets, and shoe care kits, while the wraparound back panel makes the unit look like part of the stair design instead of a box shoved in. It’s photogenic because the bench gives you a clean silhouette and a flat surface for styling. Year-round use is easy since you open the seat panel quickly and everything stays contained.
Frame the bench structure with a sturdy base and add a plywood seat panel hinged at the back. Build a storage cavity under the seat with 3/4-in plywood side walls and a back panel. Install supports or a prop mechanism so the seat stays open safely. Add a front trim panel to cover the storage opening so it reads like furniture even when closed. Finish the seat top with durable paint or sealed wood and add a soft-close hinge for quieter access.
Add a rubber gasket or felt strip around the opening. It reduces rattling and prevents dust from collecting inside.
Avoid using thin seat panels. If it flexes, it looks DIY and feels unstable.
15. Corner-Depth Rotating Carousel for Small-Item Cabinets
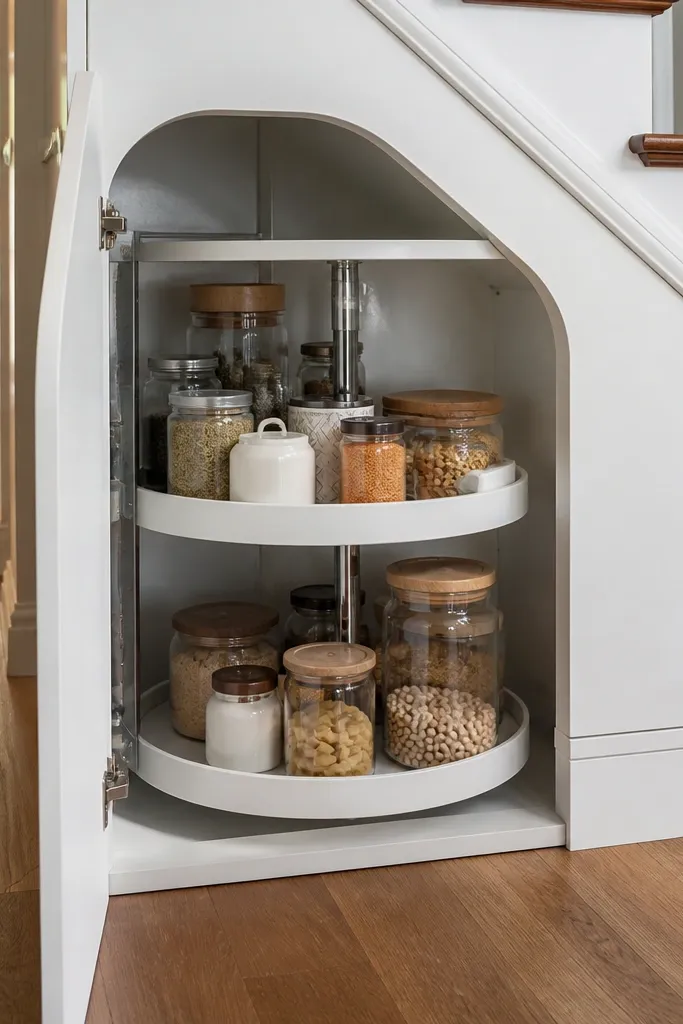
When the under-stairs space is awkwardly shaped, a rotating carousel fixes the “dead corner” problem. It turns hard-to-reach items into a front-facing storage system that stays neat. This idea looks modern because the carousel creates a clean circle or oval visual inside a compact cabinet. Use it for spices, tiny hardware, craft supplies, or bathroom backups — anything you need frequently but don’t want scattered.
Choose a carousel organizer kit sized to your cabinet opening. Build a cabinet box from 3/4-in plywood and mount the carousel base plate to the bottom panel with the kit’s hardware. Add a back panel for stability and to hide wiring if you add a small LED. Install a door front or hinged panel to keep the carousel hidden when not in use. Finish the exterior to match the surrounding trim and seal all edges so the carousel area stays easy to wipe.
Use shallow jars or uniform containers so the carousel looks tidy as it rotates.
Don’t mount the carousel on a flimsy bottom panel. It will wobble and look off-center.
16. Magnetic Tool Strip + Drawer for Seasonal Hand Tools
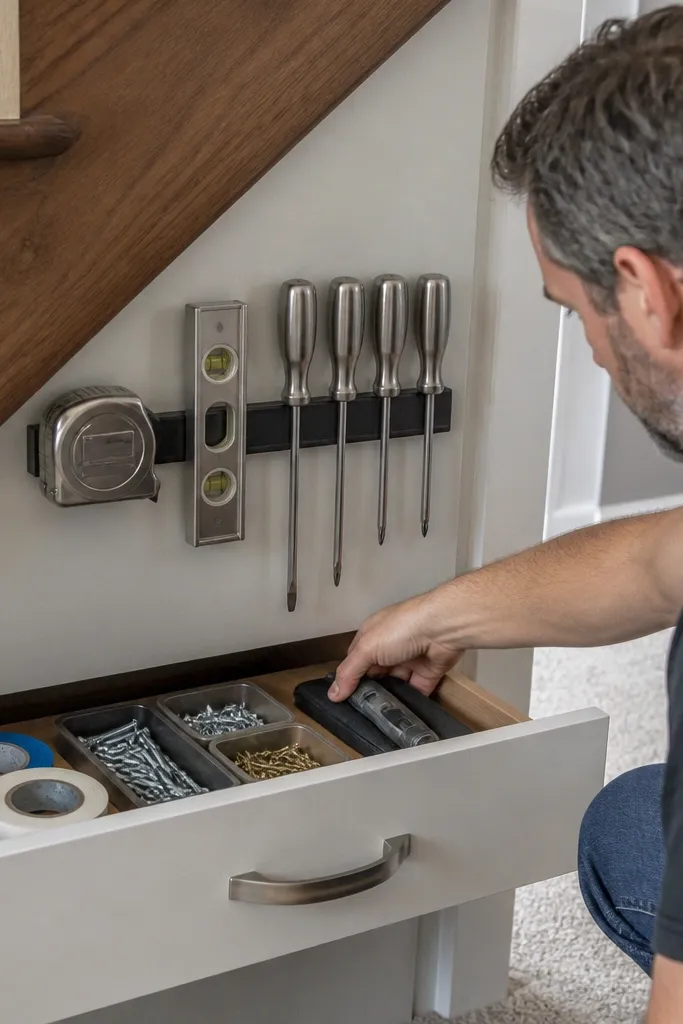
This is a smart, good-looking storage idea if the under-stairs area gets used for DIY or quick fixes. A magnetic tool strip keeps tools from living loose in bins, and a small drawer below holds grips, tape, and spare fasteners. The look stays clean because everything has a landing spot, and the drawer front keeps small clutter out of view. It’s year-round because you can swap tool sets by season without reorganizing the entire space.
Mount a magnetic strip to a plywood backing panel, then secure the panel to studs or solid framing behind the stair skirt. Add a drawer box under the strip with full-extension slides, sized for your tool accessories. Use dividers inside the drawer to separate tape, batteries, and small parts. Finish the backing panel and drawer front with paint or veneer so the unit matches the stair trim. Add a simple door or open shelf edge depending on whether you want the tool strip visible daily.
Label the drawer compartments with small engraved tape so the system stays consistent even when multiple people use it.
Don’t mount the strip directly to thin drywall. It will peel and the tools will slide.
17. Wallpapered Back Wall Behind Open Storage for Instant Color
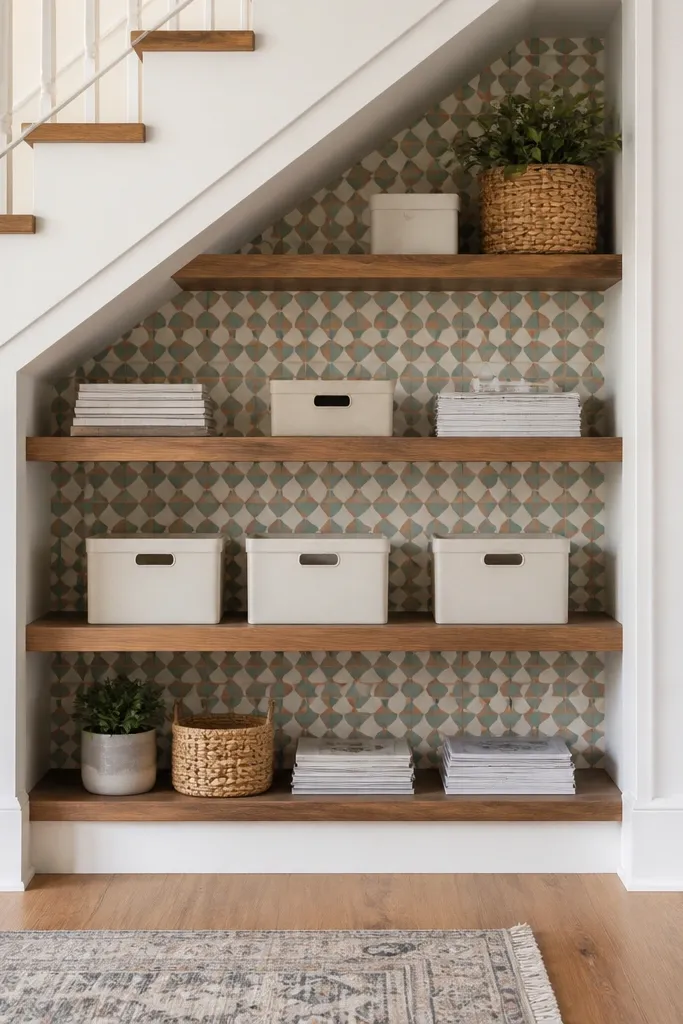
If your under-stairs storage is mostly open, you can make it look designer fast with a patterned back wall. The storage still does its job, but the eye reads the color first instead of the empty depth and shadow gaps. Use removable wallpaper or vinyl wall covering on the back panel so it wipes clean and doesn’t get ruined by dust. This is great for year-round decor storage like candles, seasonal books, and framed photos that change with holidays.
Build or install a back panel for the storage area from 1/2-in plywood, then sand and prime it so the covering sticks cleanly. Apply removable wallpaper or peel-and-stick vinyl, smoothing carefully around corners and edges. Seal the covering with a clear matte topcoat made for vinyl so it doesn’t scuff. Install shelves or cubbies on top of the panel, then add baskets that match the palette so the pattern doesn’t fight the contents. Finish the front trim in a neutral color to keep the look calm.
Pick a pattern with large shapes, not tiny busy prints. It stays readable in photos and doesn’t look chaotic.
Don’t cover a back panel that’s dusty or unprimed. Edges lift and it looks messy quickly.
18. Cabinet Skirt Wrap with Hidden Side Shelves
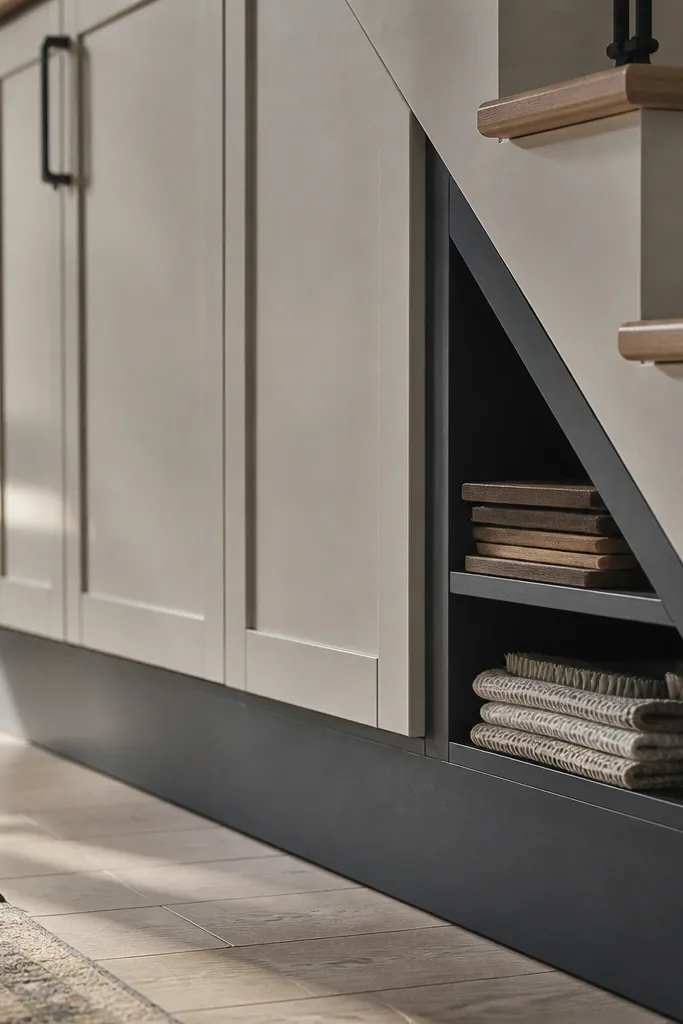
This idea makes use of the side volume that people ignore — the narrow gap between the cabinet face and the stair support. A wrapped skirt panel hides the unsightly edges, while side shelves hold thin items like umbrellas, cleaning rags, or flat seasonal boards. The look is clean because the face reads as one continuous built-in front. It’s also a great year-round hack because side storage doesn’t get used daily, so it’s perfect for seasonal swaps.
Measure the narrow side depth and cut two thin shelf boards from 1/2-in plywood to fit the gap. Build a cabinet face frame from 3/4-in plywood and wrap a skirt panel around the bottom and sides so the gaps disappear. Install side shelf cleats so the shelves sit level even if the floor isn’t perfectly flat. Add a small access door or removable panel on the side if you want full reach. Finish everything with paint or veneer, then add a toe-kick line so the unit looks aligned with the room.
Use edge banding on thin shelves. It makes the inside look finished instead of raw plywood.
Don’t leave the side shelves exposed with raw edges. The unfinished look ruins the built-in effect.
19. Roll-Out Laundry Hamper with Door-Closed Look
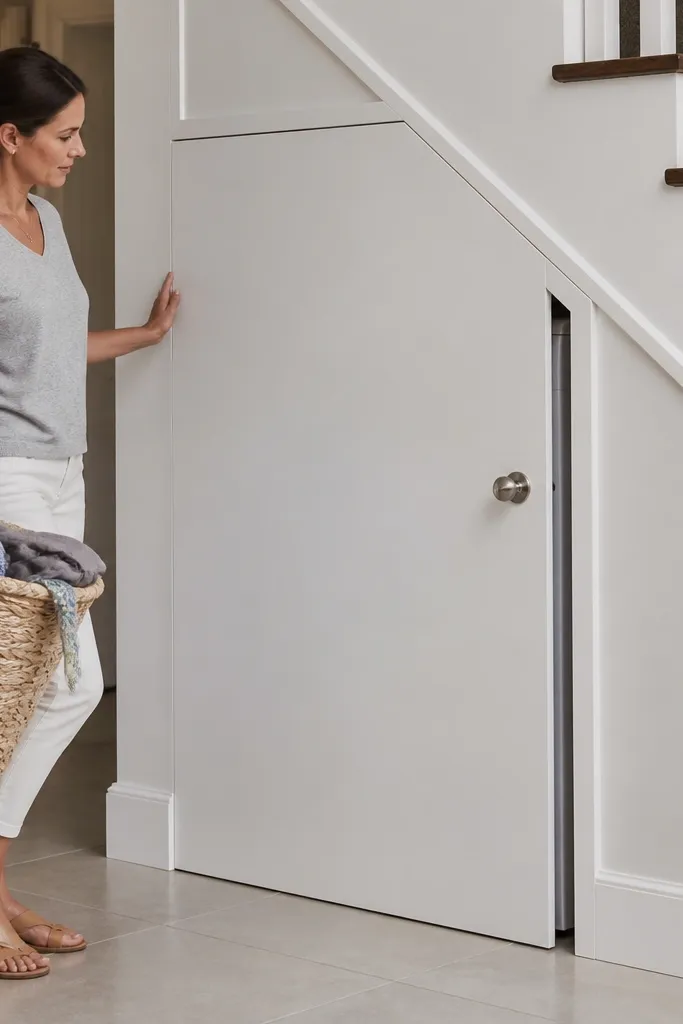
Laundry storage under the stairs looks best when the hamper is hidden behind a door, not open on the floor. A roll-out hamper keeps dirty clothes contained, and you get a clean face in photos because the door hides the bag. This is year-round because you can store towels, bedding, or seasonal wear swap items depending on your household routine. The aesthetic comes from a matching cabinet face and hardware, so it reads like furniture.
Build a cabinet opening at a comfortable hamper height, usually around 18-24 in to the top of the hamper bag. Install a hamper slide system or heavy-duty drawer slides mounted to the cabinet sides. Attach a hamper frame or bag holder to the slide platform so the bag rolls smoothly. Add a hinged door front with soft-close hinges, and include a latch that holds it closed. Finish the cabinet face to match your under-stairs trim and add a small ventilation gap on the interior back.
Choose a hamper bag with a rigid rim so it doesn’t sag into the door opening.
Don’t mount slides too high. If the hamper rubs, you’ll stop using it.
20. Vertical File-Style Drawers Along the Stringer (Tag-and-Label System)
Most under-stairs storage ideas chase depth. This one uses the space that already exists — the vertical face along the stringer — and turns it into a row of slim, file-style drawers. The look is clean and graphic: matching drawer faces, evenly spaced pulls, and labels that read like decor instead of clutter. It works best for paper, craft supplies, small holiday kits, and anything you want to grab fast without digging. Build it with simple carcasses and soft-close slides if you want it to feel furniture-grade. This is a mid-skill DIY project that takes a long weekend for layout and install, then an extra few hours for sanding, finishing, and labeling.
Measure the available vertical run along the stringer between the lowest tread and the underside of the next landing. Target drawer openings around 3-4 in wide and 10-14 in tall so they look intentional and you can still install standard full-extension slides. Build each drawer box from 1/2 in plywood with a 1/4 in back panel, then add a 1x face frame strip on the front so the drawer looks like a built-in. Install 1/2 in thick cleats inside the stair-side cavity, level them using a laser or long level, and screw the slide rails to the cleats first before mounting the drawer boxes. Finish by sanding to 180 grit, sealing the plywood edges with wood filler or edge banding, then applying two coats of paint or a durable clear coat over a painted base. Add pull handles or a recessed finger pull and finish with label cards behind a small clear plastic window so the labels stay readable year-round.
Editor's noteMake one cardboard mock-up drawer the exact width of your chosen slides, then test it in the cavity before you cut plywood. It saves you from a frustrating 1/4 in fit issue that can’t be corrected later without redoing the cleats.
Skip thisDon’t guess the drawer height by eye — measure the underside clearance at 3 spots along the stringer and lock the drawer layout to the tightest point.



