
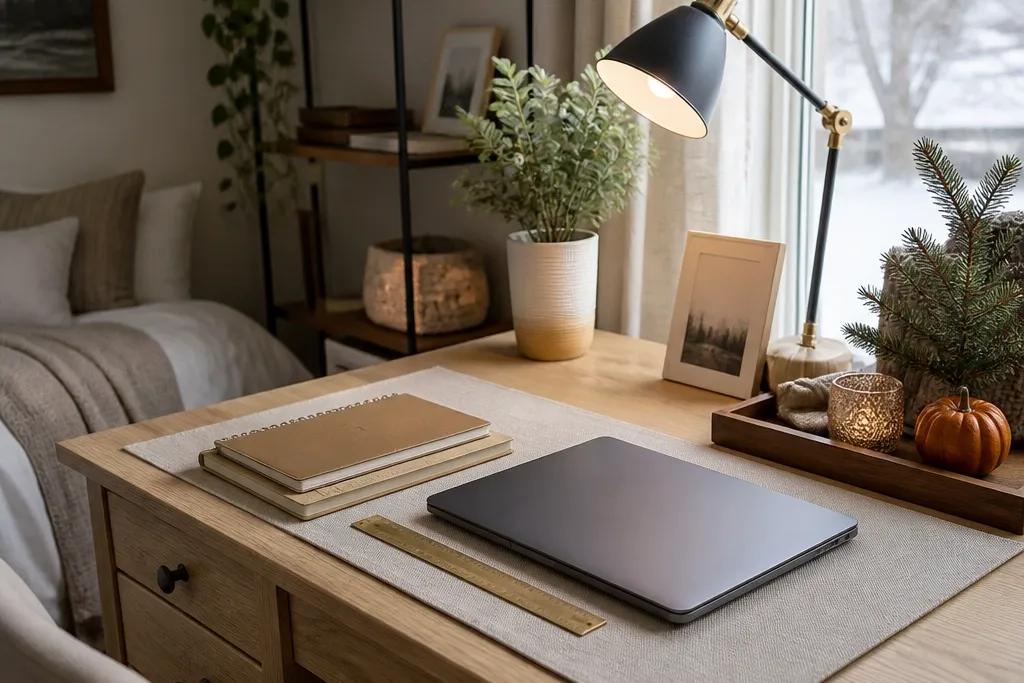

1. Two-tone desk with a floating shelf wall grid
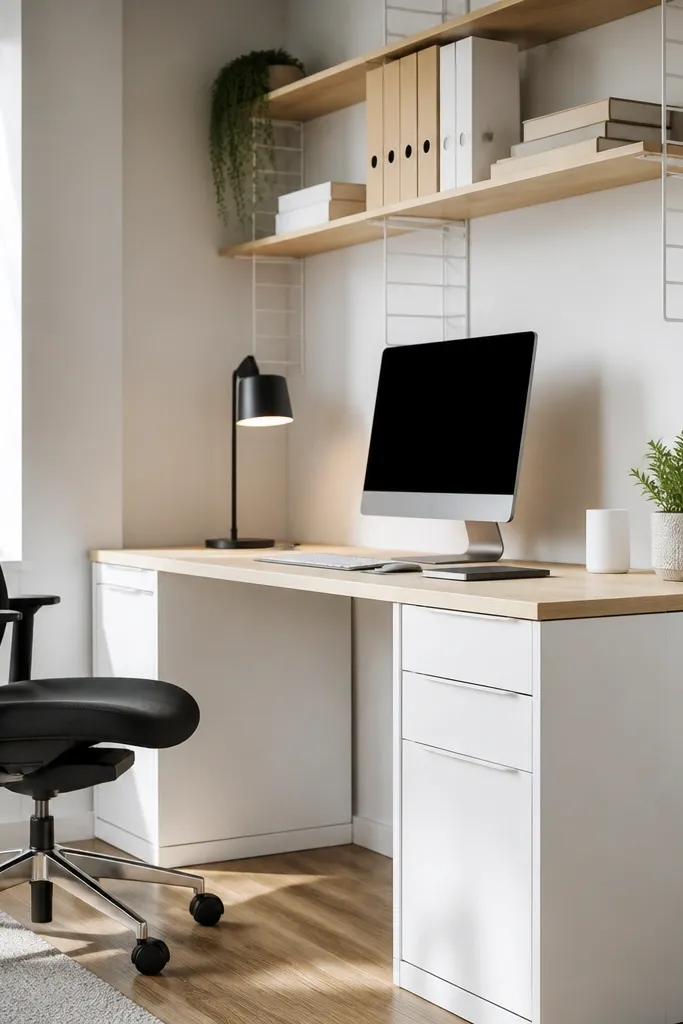
This design makes your study table look “designed” even when you change what’s on it. The light top keeps the space bright in winter, while the white base and wall grid reflect daylight in summer so the corner doesn’t feel heavy. The floating shelf grid above gives you a place for books, binders, and a small plant without covering the work surface. It also fixes a common aesthetic problem: stacks creep onto the desk when there’s no vertical home for them.
Step 1 — Build or buy a desk top that’s about 28 to 30 inches tall, then paint the base in a matte white. Step 2 — Mount a simple wall grid (1x2 strips or metal pegboard) above the desk, keeping the bottom of the shelf area about 54 to 60 inches from the floor so you can reach easily. Step 3 — Add two to three floating shelves and install matching hooks for bags or headphones so your daily items have a consistent spot.
Use a level and mark stud locations before you drill; a slightly crooked shelf ruins the whole “intentional” look.
Don’t mount shelves too low — they block sightlines and make the desk feel cramped.
2. Fold-down wall desk with a built-in cable tunnel
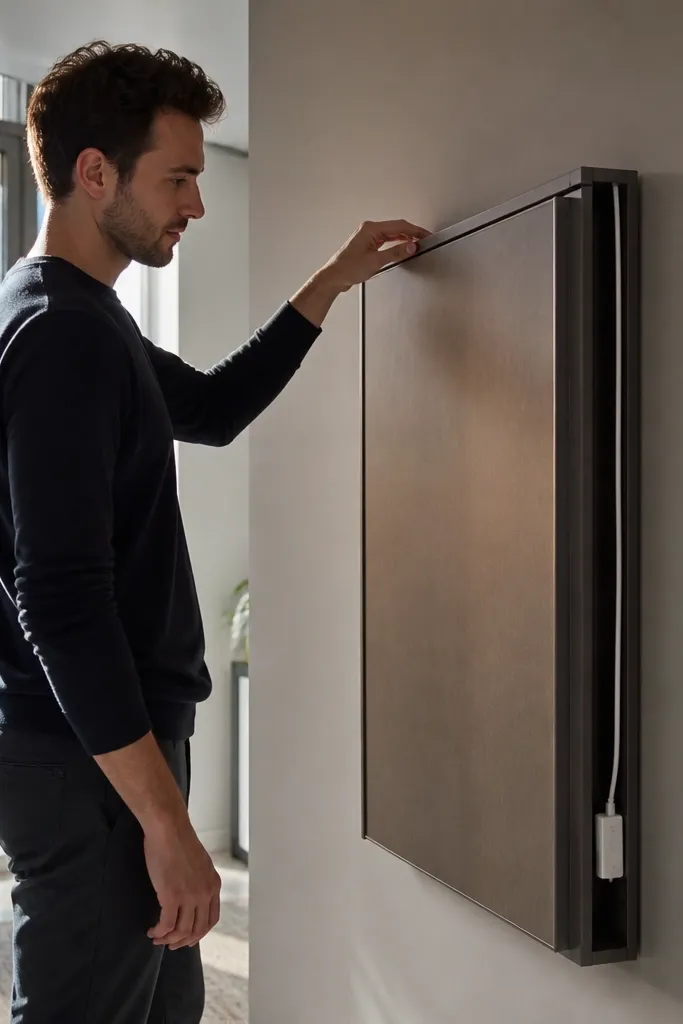
If your space is tight or you hate clutter, a fold-down wall desk gives you a clean visual reset every day. When it’s closed, you remove the messy desk vibe completely, which makes the corner look tidy year-round. The built-in cable tunnel keeps chargers and cords from turning into a tangled mess, and it prevents cable bumps from ruining the aesthetic of the closed panel. It’s a smart choice for shared rooms because you can store away supplies without hiding them in random drawers.
Step 1 — Pick a fold-down tabletop size around 36 to 40 inches wide and 18 to 22 inches deep, then attach it to heavy-duty wall hinges. Step 2 — Install a shallow cable channel behind the panel using a raceway strip, leaving a small opening for plugs near the hinge side. Step 3 — Add a lip or stop block so the tabletop locks flat when open, then finish with a wipeable top coat like water-based polyurethane.
Add a small felt pad where the panel meets the wall to prevent scuffs and reduce noise when you close it.
Don’t run cables across the hinge area — they wear out fast and look messy even when neat.
3. Rattan-front drawer desk with a solid wood top
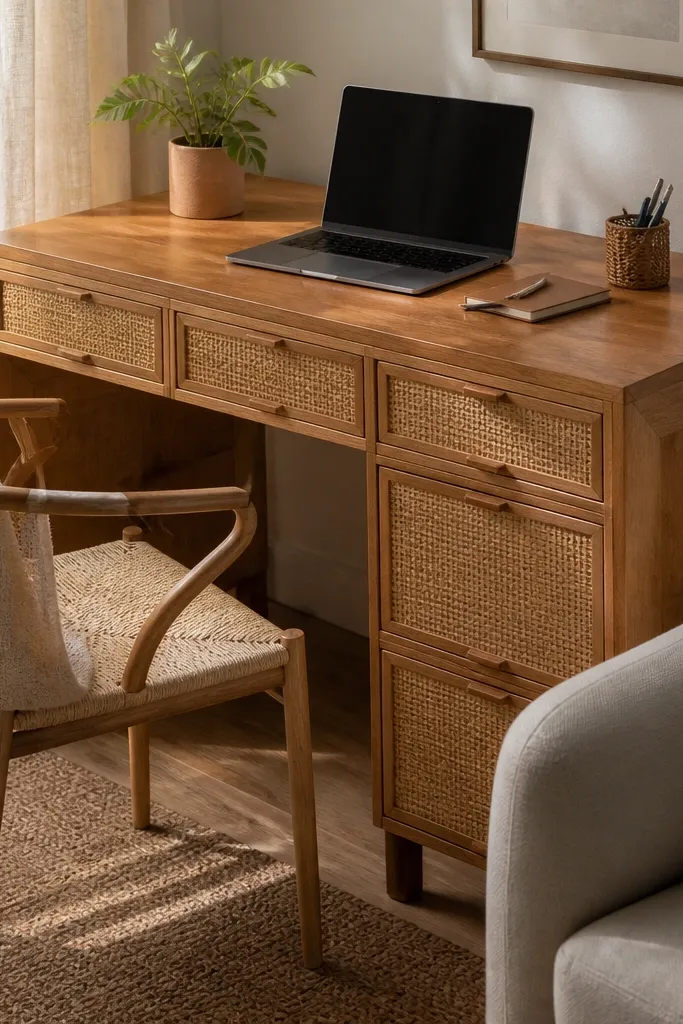
This is the aesthetic sweet spot between cozy and clean: rattan fronts hide supplies, while the solid top stays smooth for laptop work, writing, and crafts. The rattan texture adds visual warmth that looks good under both warm lamps and daylight, so it holds up across seasons. It’s also practical because you can slide in notebooks, paper, and small tools without compressing everything into messy piles. The solid wood top looks intentional and doesn’t get that “sticky note chaos” vibe.
Step 1 — Build a simple desk frame with two or three drawers, keeping the drawer opening height around 6 to 8 inches for easy storage. Step 2 — Use rattan panels cut to fit the drawer faces, then attach them with a thin wood frame so they don’t sag. Step 3 — Sand the top smooth, then apply two to three coats of clear polyurethane, sanding lightly between coats for a glassy finish.
Seal rattan with a clear matte coat before final assembly so it resists dust and accidental splashes.
Don’t skip drawer alignment; misaligned fronts look sloppy even if the rattan is beautiful.
4. Painted desk with color-matched peg rail and labeled trays
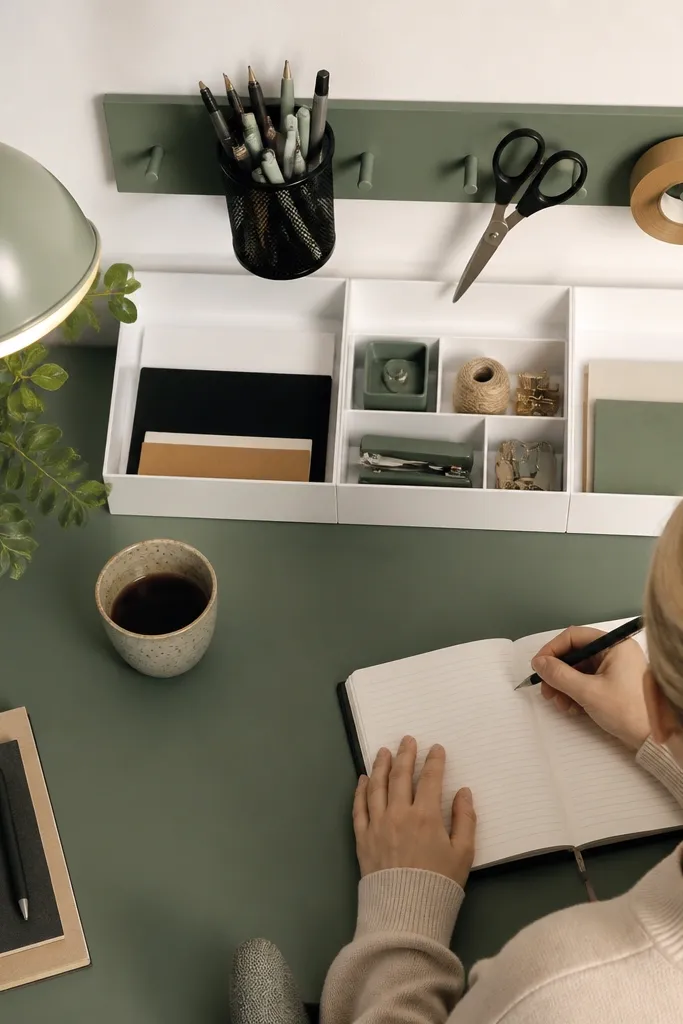
A painted desk looks fresh year-round, but it only stays good if the daily items have a home. This setup uses a peg rail above the desk for tools and daily carry — pens, scissors, tape — while labeled trays keep paper and small supplies in tight, visible zones. The visual payoff is big: the desk surface looks styled without being empty, and the labels make it easy to reset. If you’re the kind of person who changes projects by season, this design prevents your desk from turning into a storage dump.
Step 1 — Paint the desk body in a matte color that matches your room (soft white, sage, or warm gray), then add a peg rail centered over the work area. Step 2 — Use small wooden or acrylic trays and label them with a simple black marker on painter’s tape strips, then mount them on the desk with adhesive-backed cable clips or small brackets. Step 3 — Install one hook for headphones and one for a charging cable so cords never wander.
Use painter’s tape labels first, then commit with a label maker once you know the exact tray contents you’ll keep.
Don’t label everything — label only the things you touch daily so the look stays clean.
5. Industrial pipe desk with a butcher-block top and pegboard back
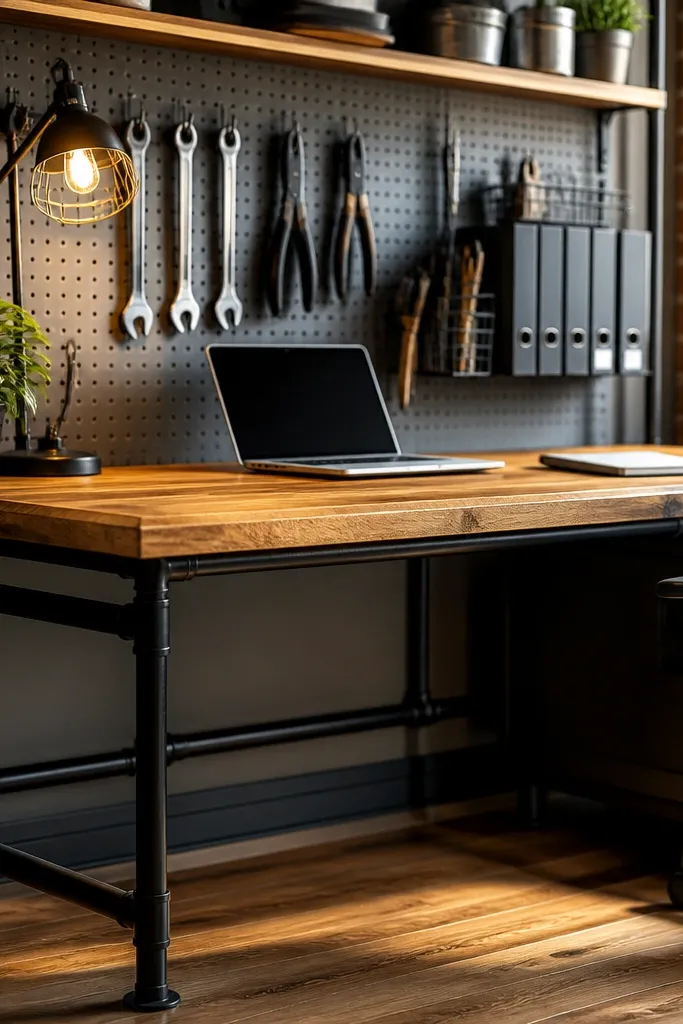
Step 1 — Build a frame with black steel pipe, keeping the desk height around 30 inches for most adults and using 1.5-inch pipe for a sturdy look. Step 2 — Mount a butcher-block top with wood brackets, then sand and oil the top with food-safe mineral oil or a durable hardwax oil. Step 3 — Paint pegboard in a matching black or dark gray, then add hooks for bags and a couple of small shelves for books.
This one is for people who want a bold look that still feels organized. The butcher-block top gives you that warm, tactile surface, while the black pipe frame keeps the design crisp and graphic. A pegboard behind the desk makes storage vertical, so you can keep the top mostly clear — which is what makes photos look good. It also handles seasonal clutter well because you can hang seasonal items like holiday planners, craft tools, or extra charging gear.
Skip thisDon’t leave pegboard bare — blank boards look unfinished even if the desk is heavy-duty.
Editor's noteOil the butcher block, then let it cure overnight before you place anything on it; fingerprints show on soft finishes.
6. Corner desk with angled shelf ledge for books and decor
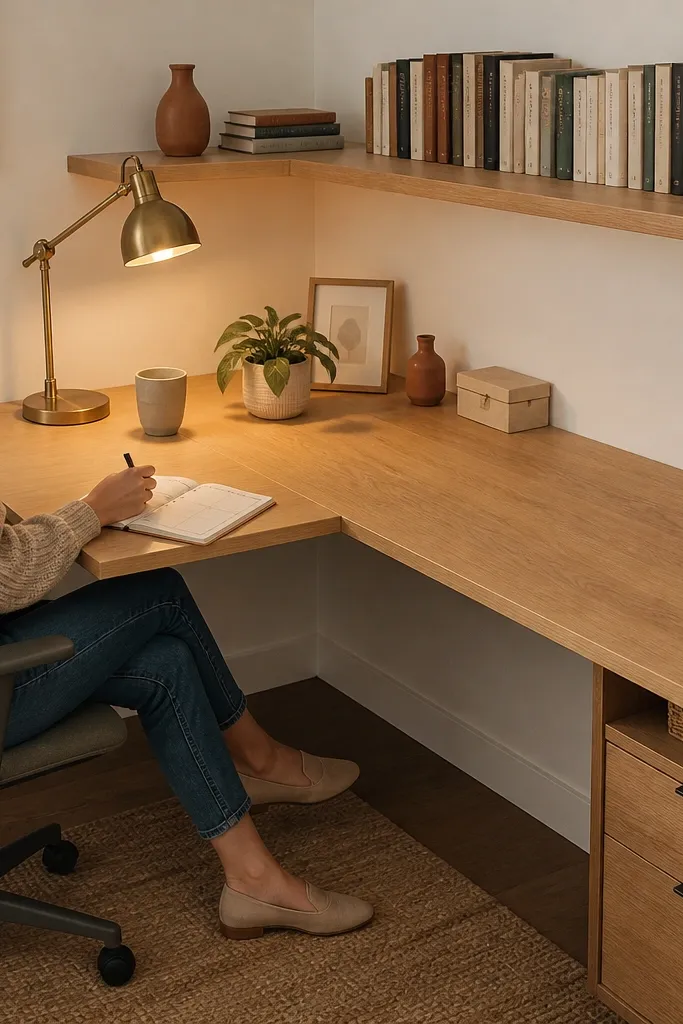
Corner desks look great in real rooms because they use dead space, and angled shelf ledges make the corner feel intentional instead of awkward. The angled shelf gives you a clean visual line while keeping books at eye level, so you stop stacking them on the work surface. It also improves workflow: you can grab a reference book without turning your whole body. For year-round Study Table Ideas, this matters because your “active” book list changes across the school year and seasons.
Step 1 — Build or buy a corner desk with a 24 to 28 inch depth on each side, then add a shelf ledge that angles upward at about 20 to 30 degrees. Step 2 — Install the shelf using a hidden cleat system so the underside stays smooth and photogenic. Step 3 — Finish the desk and shelf with the same stain so the corner reads as one unit, then add a small lip to keep books from sliding.
Use a single book color theme on the shelf (two to three shades) so the shelf looks styled even when you add new books.
Don’t make the ledge too steep — steep angles look like a display shelf, not a study shelf.
7. Curved-front writing desk with hidden under-shelf organizer
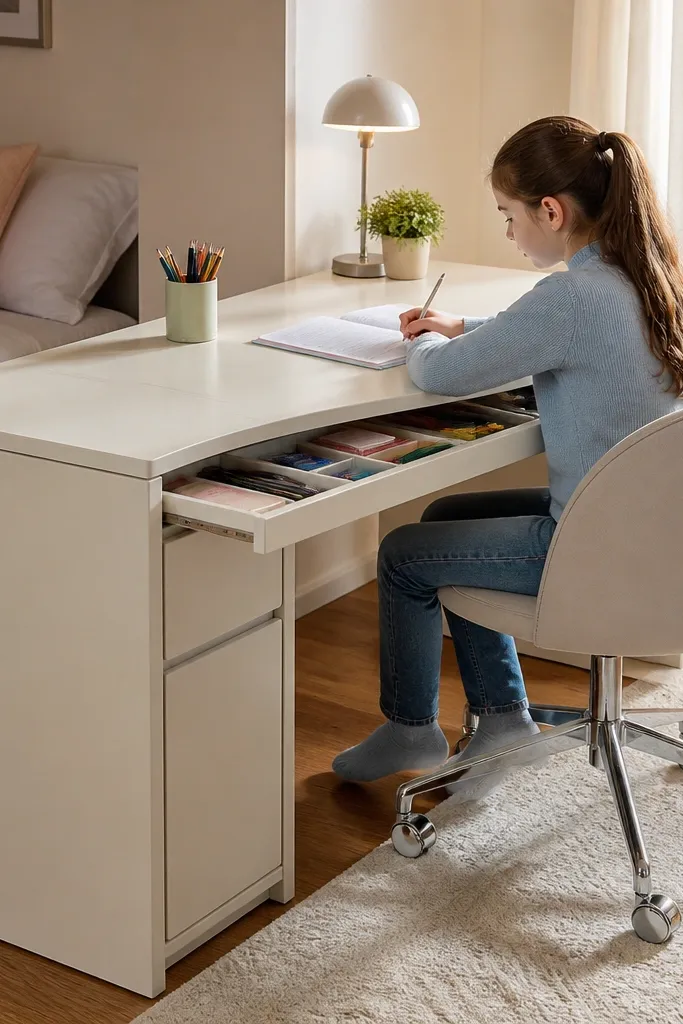
A curved-front desk instantly makes the study area look softer and more modern, especially in bedrooms where straight edges can feel harsh. The under-shelf organizer is what makes it practical: you pull it out for stationery and close it when you want the surface to look clean. This prevents the common problem where paper, pens, and sticky notes scatter across the desk. It’s a great choice for handwriting-heavy setups because you can keep tools within arm’s reach without cluttering the top.
Step 1 — Build a small desk top with a shallow curved front (use a template for smooth plywood edges) and keep the depth around 20 to 22 inches. Step 2 — Add an under-shelf drawer or slide-out tray under the front overhang, leaving 1 inch clearance so it moves smoothly. Step 3 — Sand all edges rounded and apply a satin top coat for scratch resistance.
Round edges with a 1/4-inch radius bit so you don’t snag sleeves while writing.
Don’t make the pull-out tray too shallow — you’ll end up storing things on the desk anyway.
8. Live-edge wood slab desk with removable tray rail

Live-edge tops look dramatic, but they only stay good if you control the mess. A removable tray rail gives you a clean side zone for a keyboard tray, small bins, or a catch-all for daily items. The result is a desk that looks like statement furniture while still functioning like a study station. Year-round Study Table Ideas need flexibility, and trays that lift off let you reconfigure for different projects without repainting or rebuilding.
Step 1 — Choose a live-edge slab with stable thickness around 1.5 to 2 inches, then flatten one side enough for a level top. Step 2 — Attach simple metal rail brackets along one edge, spaced 6 to 8 inches apart, and set a removable tray with a lip so it can’t slide. Step 3 — Finish the slab with hardwax oil or a thick wipe-on polyurethane, then add felt pads under the tray brackets to prevent rattle.
Seal knots and end grain first — those spots drink finish and can look patchy later.
Don’t skip stabilizing the slab; rocking ruins both comfort and the look.
9. Whiteboard-backed desk with magnetic pen ledge

A whiteboard-backed desk keeps your planning visible without paper clutter, and it looks clean in photos because the background is one color. The magnetic pen ledge makes daily tools look organized, not scattered. This design helps year-round because you can switch study goals, assignment lists, and weekly schedules by season without changing furniture. When the board is wiped down, the whole desk area looks refreshed instantly.
Step 1 — Mount a whiteboard panel behind the desk at about desk height plus 10 inches so it’s readable while seated. Step 2 — Add a magnetic pen strip or small magnetic tray under a shelf lip, and run a single charging station on one side to keep cables contained. Step 3 — Seal the desk top with wipeable finish and keep a small eraser tray mounted at the bottom edge.
Use dry-erase markers in two colors only; too many colors makes the board look messy fast.
Don’t mount the whiteboard too low — it forces you to crane your neck.
10. Gallery-style floating desk with picture ledge and hidden storage
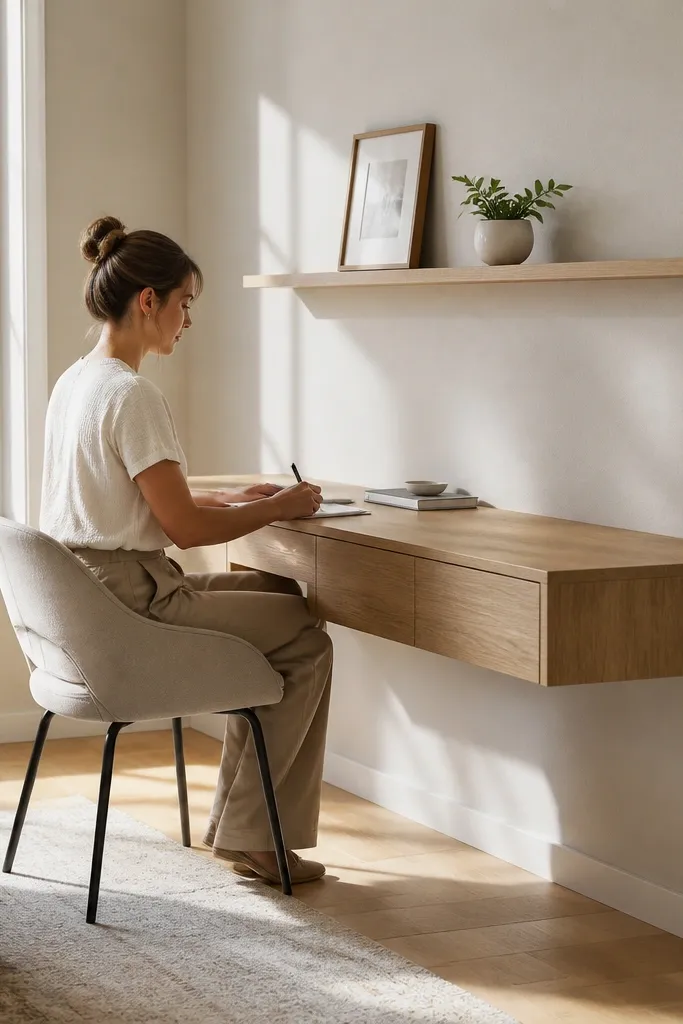
A floating desk looks airy and modern, and it instantly makes your study corner feel lighter. The picture ledge adds a styled layer above the work surface, while hidden storage below keeps supplies out of sight. This combination is perfect when you want your desk to look like part of the room, not a separate piece of furniture. It’s also great for year-round Study Table Ideas because you can swap decor seasons without changing the core storage plan.
Step 1 — Mount two heavy-duty brackets into studs and set a desk top about 30 inches high for comfortable writing. Step 2 — Build a small cabinet base underneath with a door or panel that matches the wall color so the underside stays clean. Step 3 — Add a picture ledge above the desk for framed photos or prints, then keep cords routed through a small hole inside the cabinet.
Use a matte paint on the underside — glossy paint shows dust and smudges under daylight.
Don’t mount brackets only to drywall; floating desks fail when they’re not anchored to studs.
11. DIY desk with slatted front drawer panel for airflow and easy grabs
Step 1 — Build drawer fronts using thin slats spaced about 1/2 inch apart, then attach them to a simple frame so the slats stay straight. Step 2 — Install the drawer into a desk base and keep the drawer face flush so the pattern lines up with the desk edges. Step 3 — Finish with a clear coat or paint, then wipe the top with a water-resistant finish for daily use.
Slatted drawer fronts look modern and they hide clutter without fully covering it, which keeps the desk feeling light. The airflow helps if you store paper, fabric covers, or craft materials that can hold moisture. It’s a strong aesthetic move because the slats create a consistent pattern that reads as intentional even when your drawer contents change. For year-round Study Table Ideas, it’s also practical: you can quickly see where things are without opening every drawer.
Skip thisDon’t use super thin slats that flex; wobbly slats make the whole front look cheap.
Editor's noteSand slat edges smooth before painting so you don’t get rough spots under fingerprints.
12. Desk + pegboard side tower for weekly supply rotation
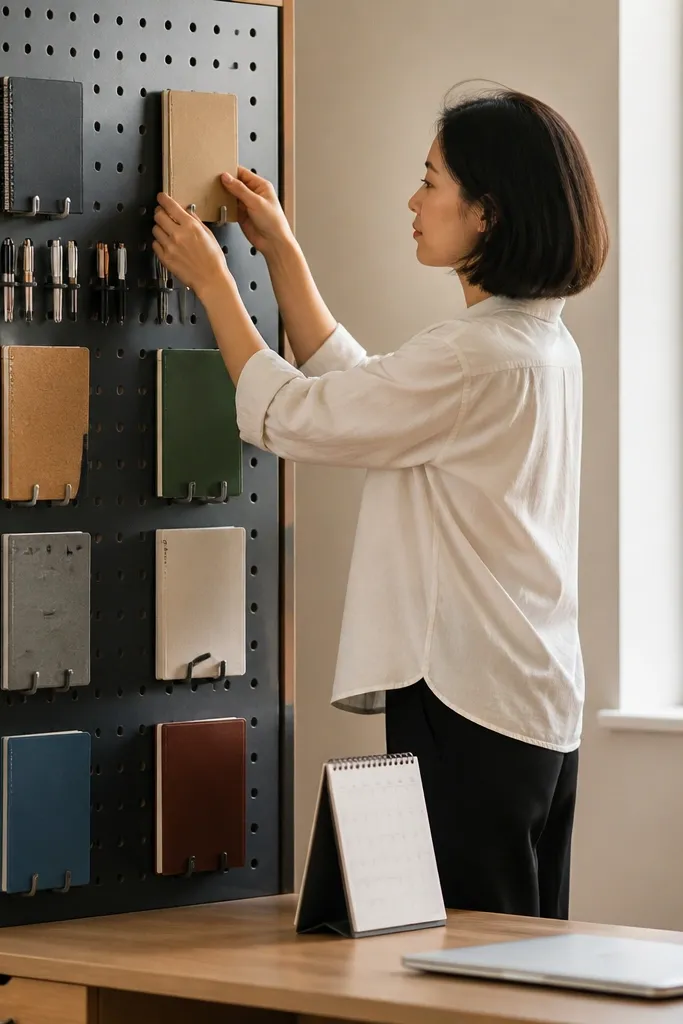
Step 1 — Build or attach a narrow side frame next to the desk, about 12 to 16 inches wide, then mount pegboard to it. Step 2 — Add a few shelves for books and small baskets for sticky notes and markers, spacing hooks so daily items hang at eye level. Step 3 — Paint the pegboard and frame to match the desk, then install a small tray at the bottom for chargers.
A side tower gives you vertical organization without eating desk space. The pegboard makes it easy to rotate supplies by week — new notebooks, different pen sets, project tools — while keeping everything visible and styled. The key aesthetic win is consistency: you hang items in the same spot so the tower looks curated. This is one of the best year-round Study Table Ideas if your workload changes seasonally and you hate digging through drawers.
Skip thisDon’t add too many hooks — a busy pegboard looks chaotic even if everything is labeled.
Editor's noteKeep only three hanging zones: pens/scissors, cables/chargers, and one “misc” hook.
13. Matte black desk with light oak floating tray for laptop and notes

Step 1 — Paint the desk in matte black (cabinet enamel or matte furniture paint) and let it cure fully, then lightly sand for a smooth finish. Step 2 — Build a floating tray from oak or birch, sized around 24 to 28 inches wide, with a lip that keeps it from sliding. Step 3 — Mount the tray with hidden brackets so it looks like it’s floating and route a single cable channel behind the tray.
This look is clean, modern, and photo-friendly because the desk surface stays mostly dark and the tray creates a bright focal point. The light oak tray gives you a defined “work zone” that keeps notebooks and laptop from blending into the desk. It also makes cleanup easier because you can lift the tray and wipe the surface underneath. For year-round Study Table Ideas, this is great because you can switch tray items by season without changing the furniture.
Skip thisDon’t use glossy black — it shows every smudge and makes the desk look dirty fast.
Editor's noteUse a small felt strip under the tray lip so it doesn’t scratch the painted top.
14. Terracotta and cream desk with tiled coaster rail

Step 1 — Paint the desk cream and add terracotta trim on the front edge or drawer pulls, keeping contrast moderate so it doesn’t look loud. Step 2 — Install a simple rail along one side and tile it with small square tiles, leaving grout lines clean and sealed. Step 3 — Seal the desk top with a wipeable finish, then add a matching tray for coasters and small tools.
Warm colors make the study corner feel inviting, and terracotta + cream gives you a seasonal palette that works in winter and summer. The tiled coaster rail is a practical detail that also looks good: drinks, mugs, and water bottles don’t leave ring stains on the desk. This is a strong option for anyone who studies with tea, water, or craft glue nearby. It keeps the surface protected while the color scheme makes the whole setup look styled.
Skip thisDon’t place the tile rail in the center of your work area — it will interrupt writing and keyboard placement.
Editor's noteSeal grout after curing so coffee and spills wipe off without staining.
15. Slim desk with vertical book tower and side document sleeves
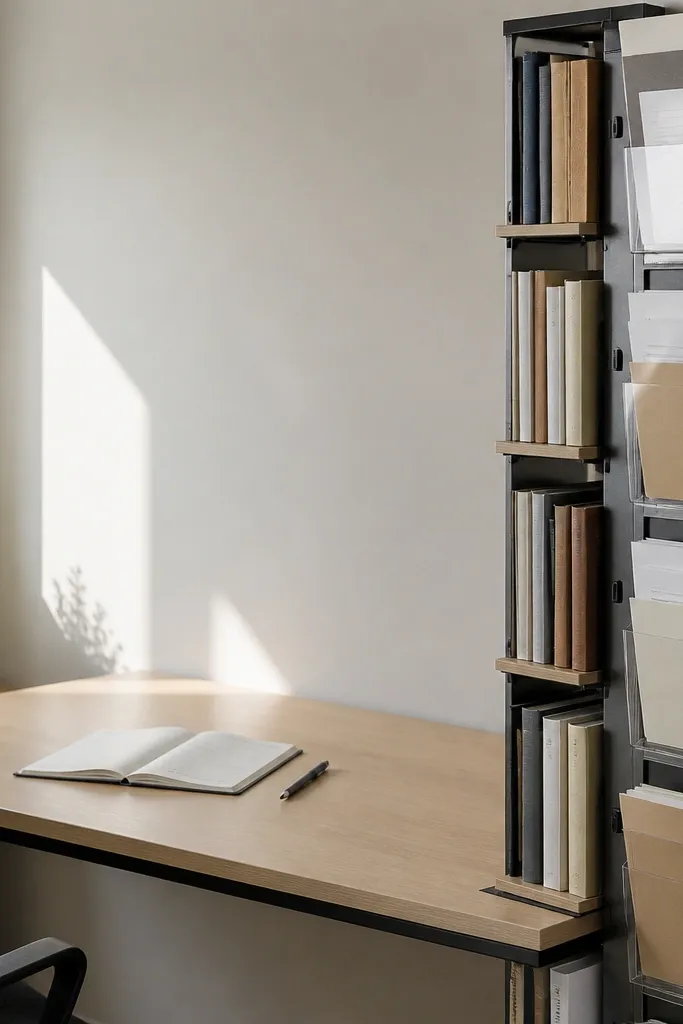
Step 1 — Choose a slim desk depth around 16 to 18 inches so it leaves breathing room in small rooms. Step 2 — Build a book tower next to the desk using a narrow frame with shelves spaced for your book sizes, then attach it securely to studs. Step 3 — Mount clear document sleeves or fabric sleeves on the side panel of the tower, then add a small ledge for a weekly planner.
This idea is built for students and planners who keep a lot of paper but hate desk clutter. A vertical book tower uses the height of the room, so the top stays clean and the desk looks more spacious. Side document sleeves keep current assignments visible without stacking loose sheets. The look feels organized because everything hangs in a neat, consistent vertical rhythm.
Skip thisDon’t store outdated papers in the sleeves; rotate weekly so the display stays clean.
Editor's noteUse sleeves in two sizes only: one for letter paper and one for thicker notebooks. Too many sizes looks messy.
16. Desk top with a removable felt desk mat and fabric cable leash
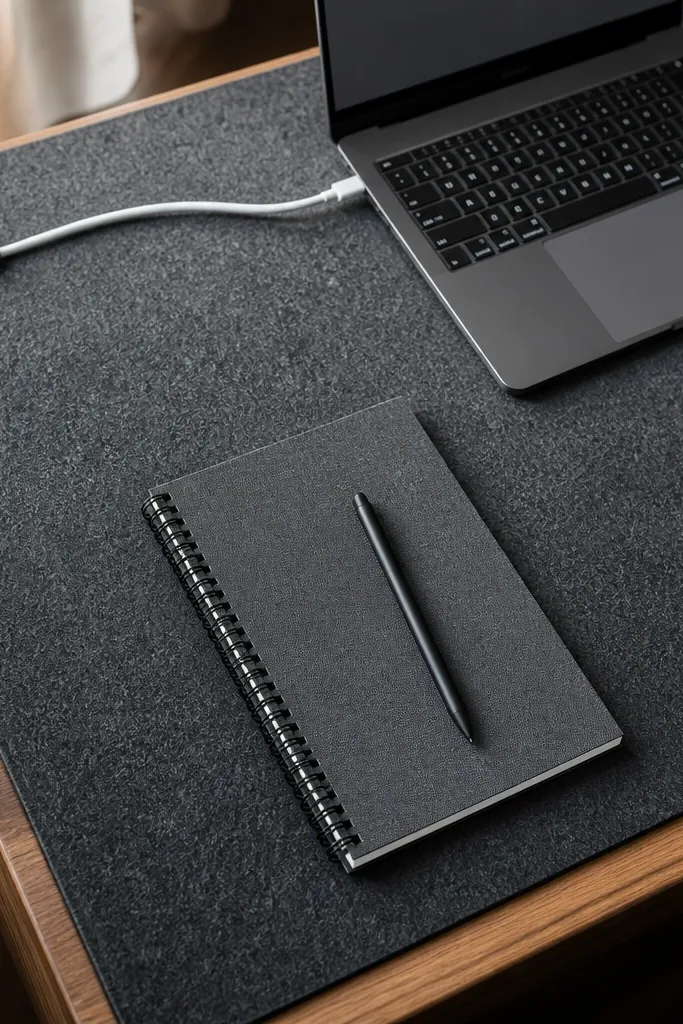
If you want a softer, cozy aesthetic without losing function, a removable felt desk mat does it. Felt makes the surface look uniform and hides minor scratches, so the desk stays photogenic even after months of use. A fabric cable leash keeps cords grouped and prevents the “bench of tangled cables” look. This is one of the best year-round Study Table Ideas for people who study with hands-on materials like handwriting, drawing, or crafting.
Step 1 — Cut a felt mat to match your desk surface, leaving a 1/4-inch border around the edges so it doesn’t bunch. Step 2 — Install a small adhesive cable clip strip on the underside or back edge, then add a fabric leash with a Velcro strap to tie cables together. Step 3 — Finish the desk top with a durable clear coat so spills don’t soak in, then place the felt mat on top for daily use.
Use a lint roller on felt before photos; it looks cleaner instantly.
Don’t use thin felt that curls — it will lift corners and make the desk look worn.
17. Wood frame desk with fabric drawer inserts and a hanging organizer panel
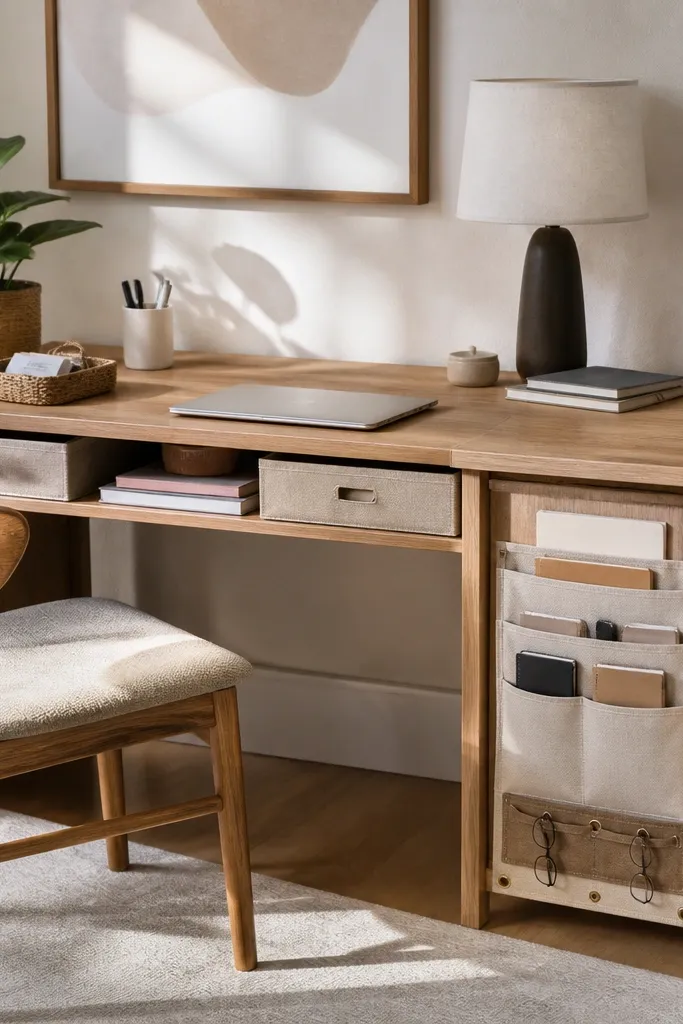
Step 1 — Build a desk base with open-front drawers sized to your inserts, keeping drawer depth around 8 to 10 inches. Step 2 — Sew or buy fabric inserts with stiff backing so they hold shape, then line them with matching fabric tones. Step 3 — Mount a hanging organizer panel on the side or back, then add two pockets for daily items and one larger pocket for a tablet or folder.
Fabric drawer inserts look soft and keep the desk quiet visually, while a hanging organizer panel adds a clean vertical line for daily tools. This combo helps year-round because you can swap insert types by season — thicker for winter stationery, lighter for summer school supplies. The wood frame gives structure, and the fabric keeps the setup from looking too hard or industrial. For aesthetic, the best part is the uniform fabric tones — everything looks like it belongs together.
Skip thisDon’t mix random patterns; mismatched prints make the desk look like storage.
Editor's noteChoose one fabric color family and repeat it in drawer inserts and organizer pockets so the look reads cohesive.
18. Rounded-edge standing desk riser platform with storage lip

Step 1 — Build a riser platform that sits on your existing desk, aiming for a height increase of 4 to 6 inches and a depth of 20 to 24 inches. Step 2 — Add a front storage lip about 1.5 inches tall, then round every edge with a router or sanding block. Step 3 — Finish with a wipeable top coat and add non-slip pads underneath so it doesn’t slide.
A standing-friendly riser platform upgrades any desk without fully rebuilding it, and it looks clean because it creates a single “platform” work surface. The rounded edges make it feel finished, while the storage lip holds a notebook, phone, or small tray so the top stays tidy. This is a strong pick for year-round Study Table Ideas because you can adjust your workflow daily: sit for reading, stand for writing, and keep everything in the same visual zone. It also works in small rooms because you don’t need extra furniture.
Skip thisDon’t place the lip too high — it blocks your view of the screen for laptop setups.
Editor's noteMeasure your keyboard reach before finalizing the riser height; too tall makes typing awkward fast.
19. Swing-out desk panel for craft tools and a clear acrylic writing guide
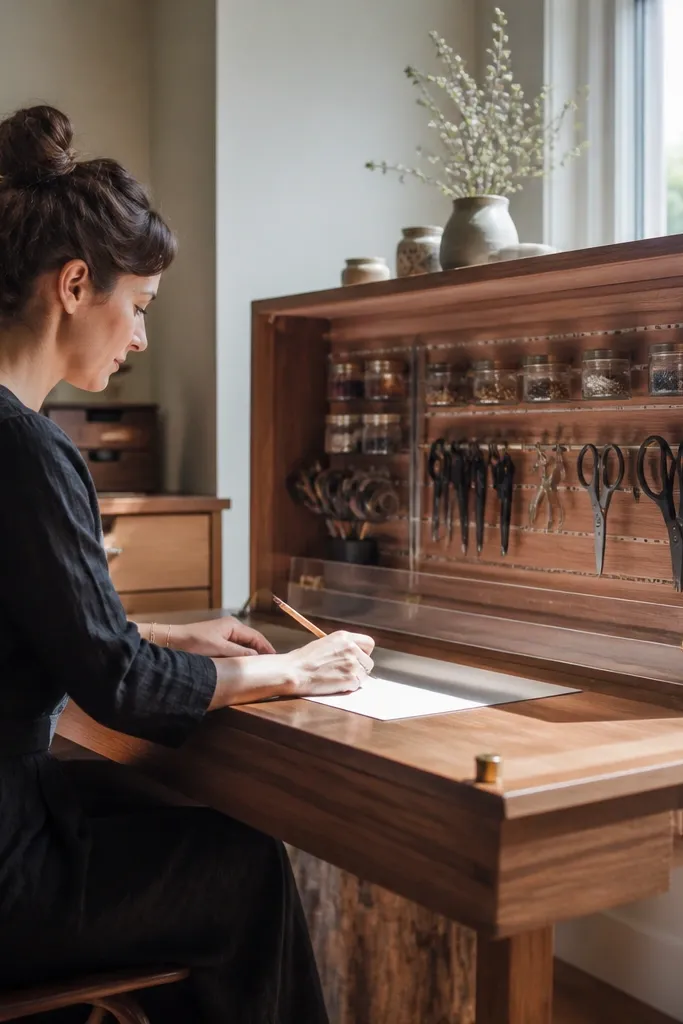
Step 1 — Build a small swing-out panel attached to the desk side using sturdy hinges, keeping the panel width around 10 to 14 inches. Step 2 — Add tool hooks on the panel and mount a clear acrylic strip above the writing zone for paper alignment, then secure it with countersunk screws. Step 3 — Finish the desk and panel with a durable clear coat and add a simple latch so the panel stays closed when not in use.
This is a clever way to keep craft or art tools visible and organized without cluttering the main desk. The swing-out panel gives you a dedicated working side, and the clear acrylic guide keeps paper aligned so your setup looks neat even when you’re mid-project. It’s photogenic because there’s a clear structure: tools on one side, writing surface on the other. For year-round Study Table Ideas, it works for both studying and making — assignments and sketching can share the same table without turning it into chaos.
Skip thisDon’t overload the swing-out panel; a few tools look intentional, too many looks like junk.
Editor's noteUse clear acrylic with rounded edges; sharp corners catch light and look messy in photos.
20. Sunburst Slat Desk with Pull-Out Pencil Rail
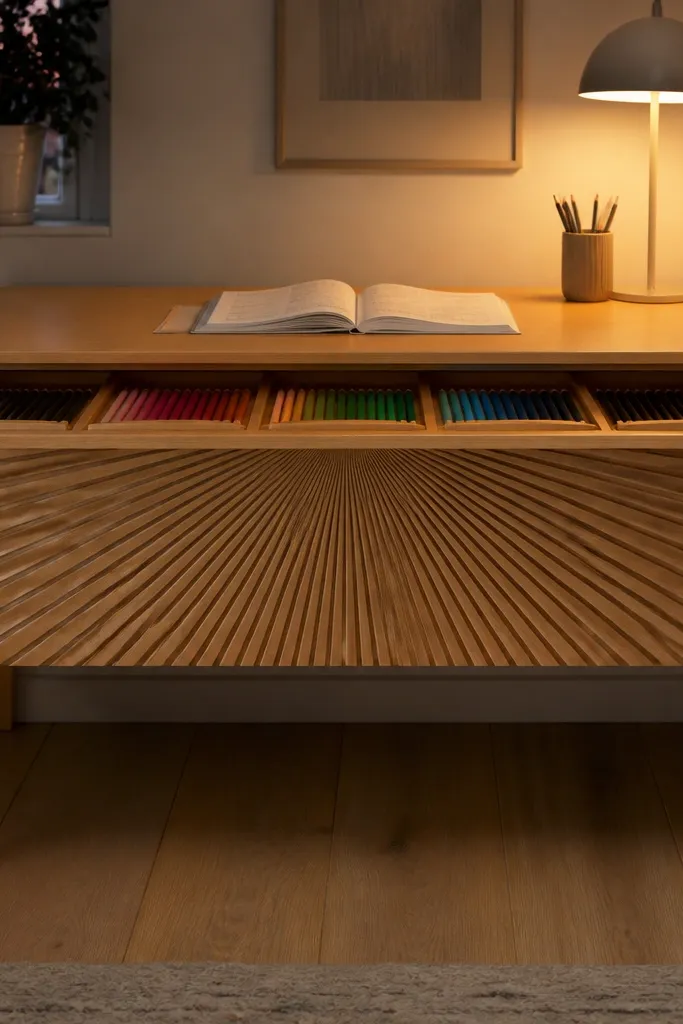
Cut a rectangle desktop from 3/4-in plywood or solid wood, sized to your space (a common fit is 30 in wide x 20 in deep). Build the sunburst front by cutting 1/4-in x 3/4-in slats and arranging them like rays from the center line across the width, then glue and nail them to a 1/4-in backing panel. Finish the front panel assembly, then attach it to the desk frame with screws so you can remove it later if you ever need to replace slats. For the pencil rail, use a 3/4-in x 1-in hardwood strip mounted on two small drawer slides (or full-extension slides if you want it to extend fully). Center the rail under the desktop edge with a 2-in gap above it, then install the slides to the inside of the desk frame first, test fit, and only then screw the rail strip to the moving part. Seal everything with two coats of water-based polyurethane, sanding lightly with 220 grit between coats, and add a felt pad on the rail contact points so it doesn’t rattle.
This design grabs your eyes fast because the front is a sunburst pattern made from thin slats — it looks custom even when it’s built from basic lumber. The pull-out pencil rail keeps tiny supplies visible and prevents the usual desk pile-up. You get a study table that feels tidy and intentional, which helps you actually use the space. It’s a strong year-round Study Table Ideas pick because it works in bright rooms (the slats catch light) and in darker corners (the finish brings warmth). I’d build this if you want a desk that photographs well and still gives you real storage you’ll use daily. Skill level is mid — plan on careful measuring and a little patience with the slat layout.
Skip thisDon’t glue slats directly to the desktop — build the sunburst front as a separate panel so seasonal wood movement doesn’t crack the pattern.
Editor's noteMark all slat angles on a scrap template before you glue anything — your sunburst only looks clean if every ray hits the same center point.



