
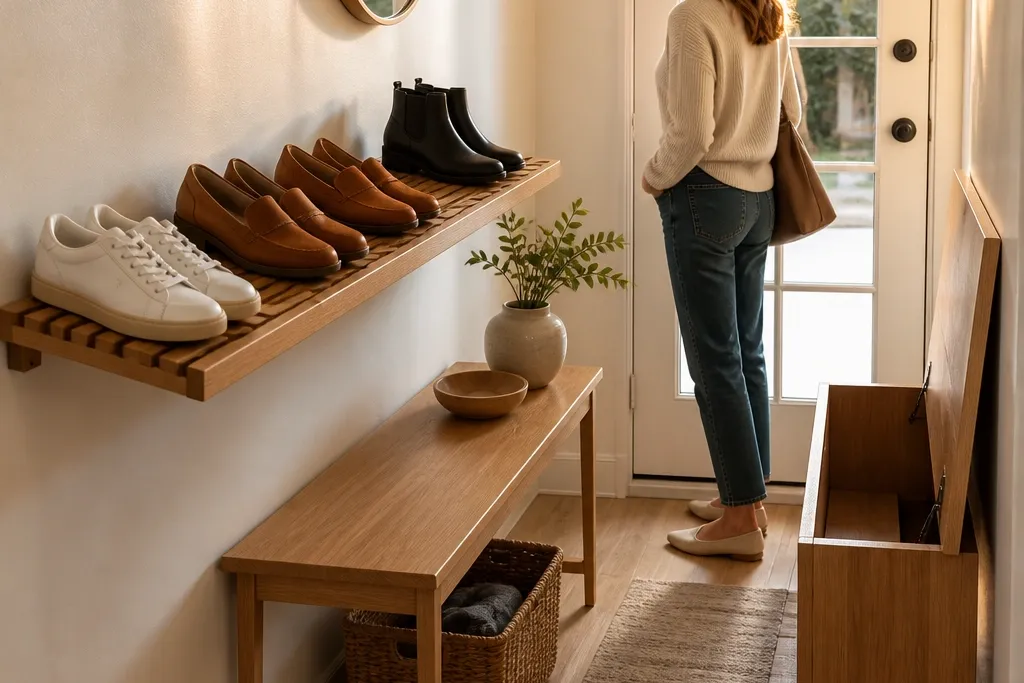
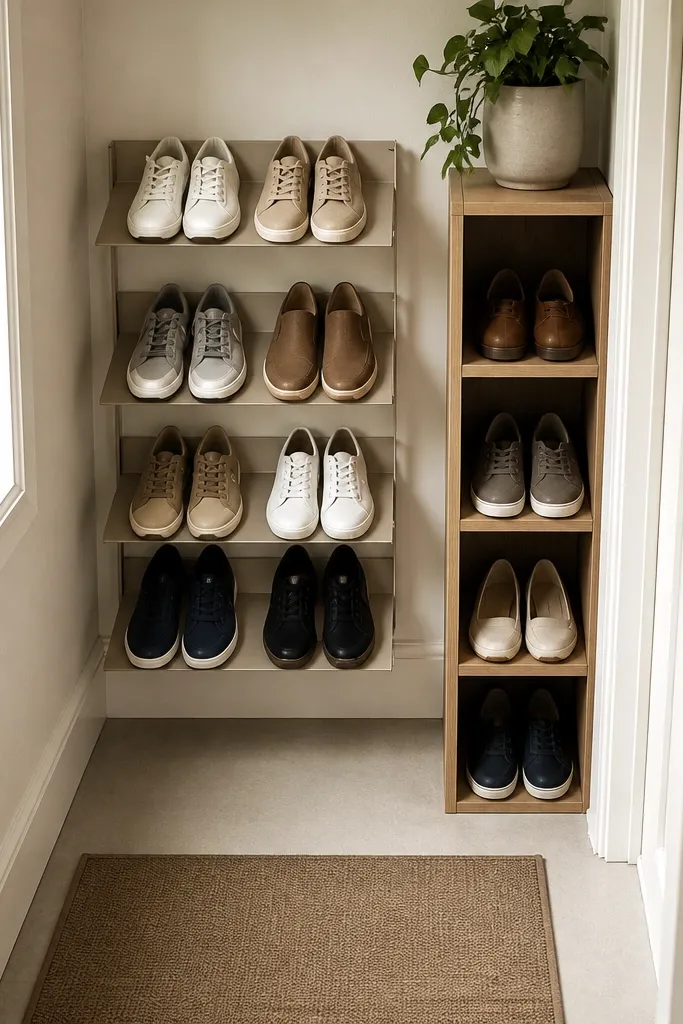
1. Slim Slatted Wall Shoe Shelf with Dusty-Oak Finish
This is the cleanest way to get year-round shoe storage ideas working in a tight entryway: shoes sit on a wall shelf, visible, and supported by slats that let air move under the soles. The slatted top also hides small scuffs better than smooth boards because dirt sits in the texture instead of smearing across a glossy finish. Use it for sneakers, loafers, and flats you grab daily. It looks intentional because the shoes are lined up like decor, not piled like laundry. Skill level is beginner-friendly with basic carpentry, and it takes about an afternoon once you have the wood cut.
Start by choosing a shelf depth of 10 to 11 inches and a length that matches your wall space (for example, 36 inches wide for 6-8 pairs depending on sizing). Use 1x4 or 1x6 boards for the frame, then add slats every 1.5 to 2 inches with screws from underneath so the top stays flat. Sand to 180 grit and stain in a dusty-oak tone or paint it in a matte warm gray; finish with a water-based polyurethane so you can wipe off tracked dirt. Mount on studs using two cleats or a French cleat system, then add a thin rubber strip at the bottom of each shoe zone to stop sliding.
Pre-drill for slats and clamp them in place so spacing stays even across the shelf.
Avoid a solid closed shelf top — moisture has nowhere to go and you’ll smell it in a week.
2. Narrow Bench with Lift-Up Lid and Hidden Shoe Compartments
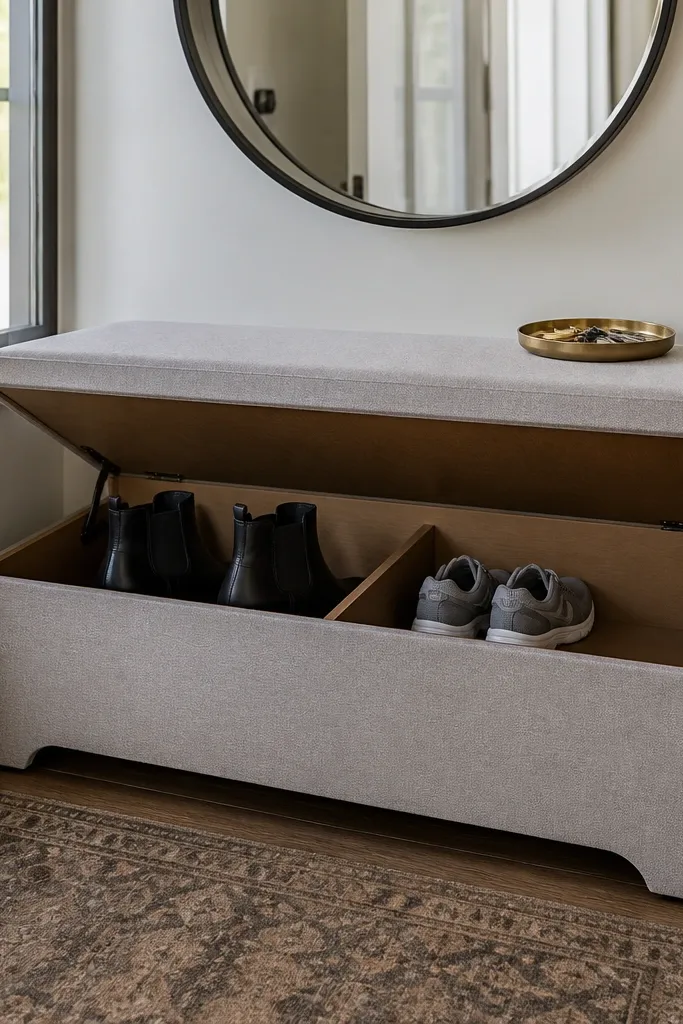
If your entryway is tight and you want a place to sit, a narrow bench with a lift-up lid makes shoe storage disappear until you need it. The compartments keep pairs from drifting around, and the bench top gives you a real surface for mail and keys. Aesthetic matters here: pick a bench with a clean, upholstered top in a dark neutral so it hides scuffs and light dirt. This works best for families because you can open the lid, drop shoes in by person, and close it without hunting for a spot. Build time is about a weekend if you can cut wood accurately, and the result looks like furniture, not a storage hack.
Editor's noteAdd a small magnetic latch so the lid closes quietly and doesn’t drift open.
Build a bench frame that’s 12 to 14 inches deep so it stays shallow, with a top lid sized to cover two or three compartments. Install internal dividers so each compartment is about 10 inches high and wide enough for a pair of flats or sneakers; tall boots need a separate solution. Use hinge hardware rated for the lid weight and add soft-close hinges if you want it to feel high-end. Line the compartments with a removable felt or canvas liner and leave a 1/2-inch gap at the back so air can circulate when the lid is closed.
Skip thisSkip fully sealed compartments — you’ll trap moisture and the bench will smell like wet rubber.
3. Over-the-Door Shoe Organizer with Clear Front Flaps
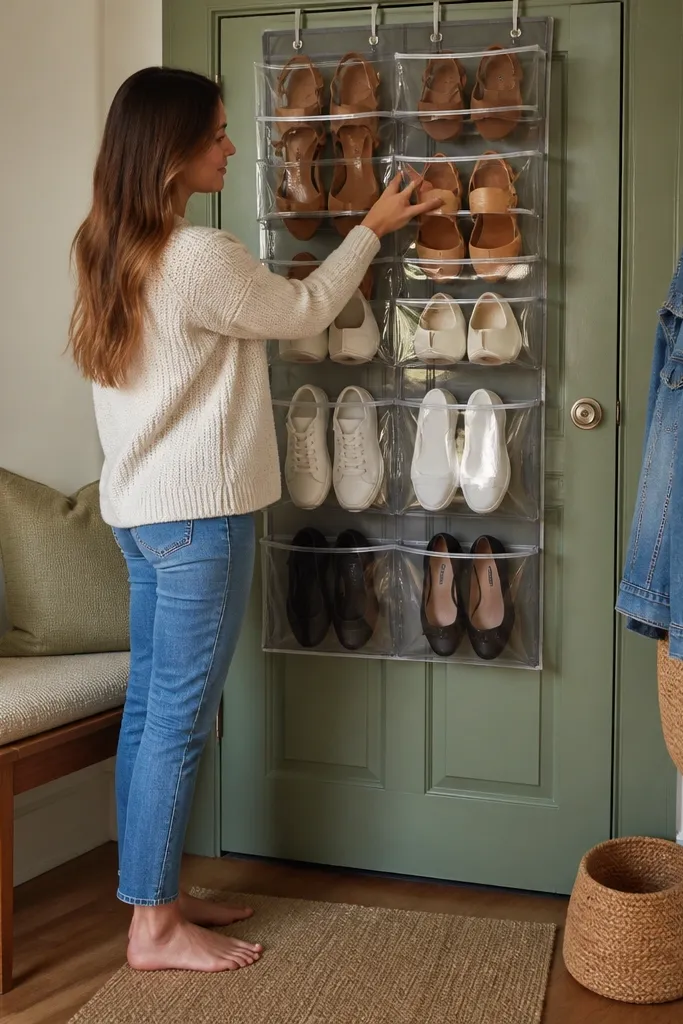
For the tightest entryways, over-the-door storage is hard to beat because it uses dead vertical space and keeps shoes off the floor. The clear front flaps make it look styled instead of cluttered; you can see what’s inside without opening everything. This setup is best for flats, sandals, and low-profile sneakers that you rotate through seasonally. It also keeps winter boots out of the mix, which prevents crushing and wrinkling. The build is minimal because you’re selecting the right organizer and adding the right finishing touches.
Choose an organizer with at least 6 rows and a depth that doesn’t hit baseboards; aim for a total hanging footprint that clears your door swing. Pick a model with clear PVC or vinyl window panels so it looks neat and you can spot pairs quickly. Add a small strip of hook-and-loop on the back of each row so individual sections don’t sag when you pull shoes out. For durability, wipe the window panels with a microfiber cloth and keep a small mat under the door so wet soles don’t leave residue.
Use matching shoe bags or slim fabric tags for each row so the organizer stays tidy even when it’s busy.
Don’t load it with heavy boots — the fabric rows stretch and the whole look collapses.
4. Corner Boot Rack with Angled Slats and Black Metal Frame
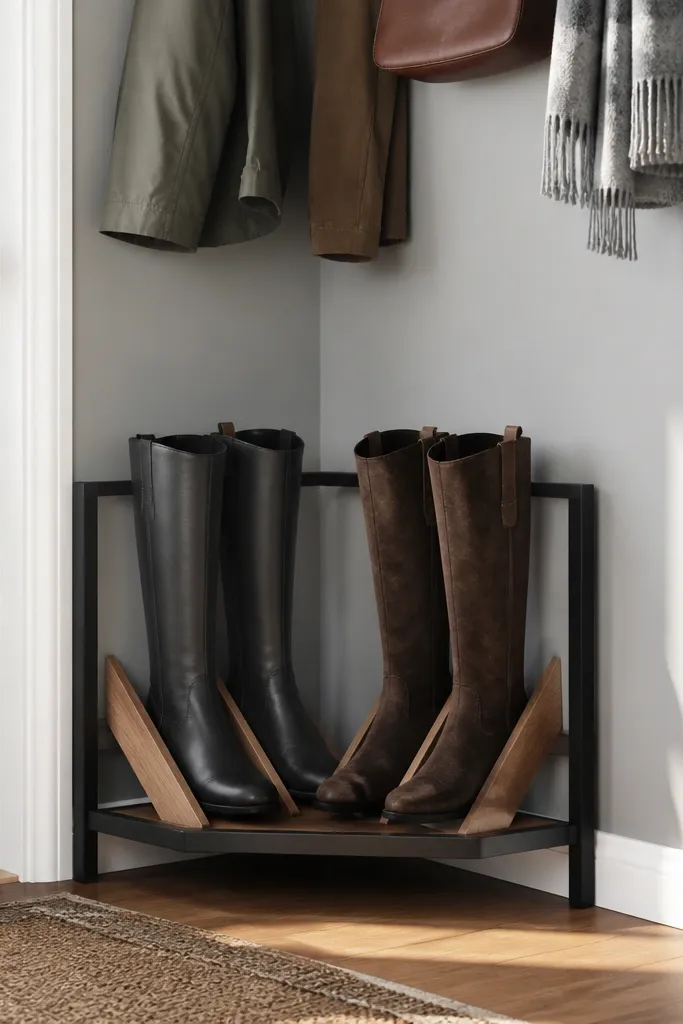
Tall boots wreck small entryways because they take up width and they flop over if there’s no support. A corner boot rack with angled slats solves that by holding boots upright while still letting air flow around the shaft. The black metal frame looks sharp against light walls and hides scuffs from everyday use. This is a year-round move because winter boots, rain boots, and even tall rainproof sneakers all benefit from standing storage. It also keeps boot legs from crushing each other, which preserves shape.
Build or buy a corner rack that fits the diagonal corner footprint without blocking the walkway; measure the corner width at the floor and at the shelf height. Use metal angle iron for the frame and install slats at a 20 to 30 degree tilt so boots slide in easily but don’t fall forward. Space slats wide enough for the widest boot you own, then add a small lip at the bottom to stop slipping. Finish by adding a matte black powder-coat look (spray paint made for metal works if you prep well) and mount it to studs or masonry with appropriate anchors.
Add removable drip trays or a thin rubber mat under the corner rack for wet winter days.
Avoid flat, horizontal shelves for boots — they cause creases and collapse.
5. Cabinet Door Insert Shoe Grid with Vented Back
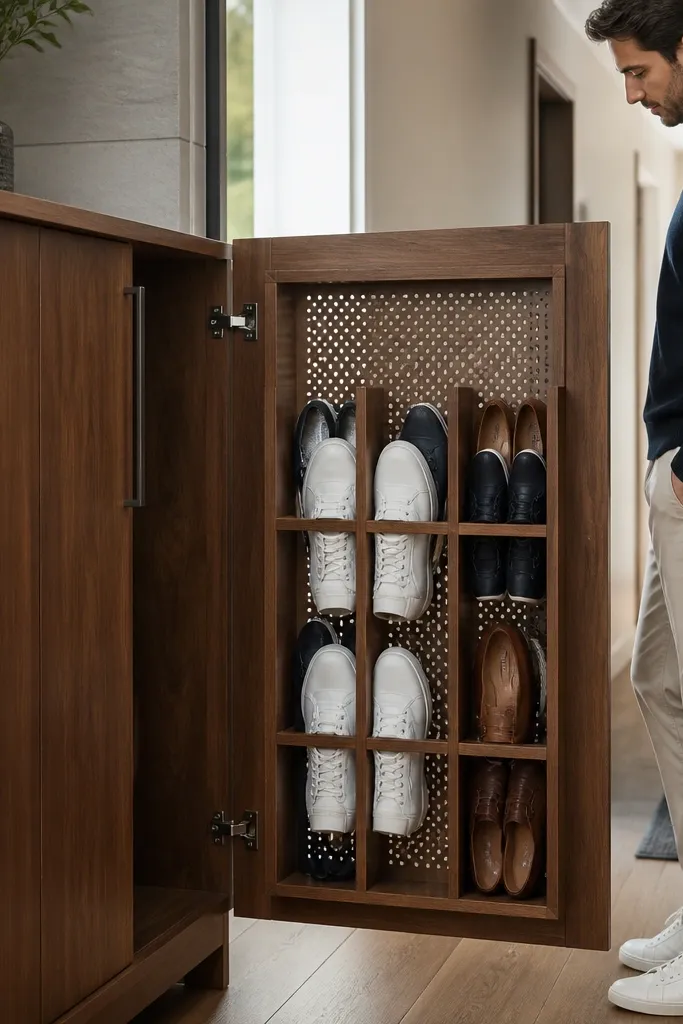
If you want a closed, furniture-style look but still need year-round shoe storage ideas that don’t smell, a cabinet door insert is the sweet spot. The grid holds pairs upright and visible when the door opens, while the vented back prevents moisture from pooling. This setup looks crisp because it hides shoes from guests while keeping the system easy to use. It’s best for narrow hallways where you can’t dedicate floor space. Skill level is moderate because you’re installing an insert, but it’s very doable with basic tools.
Editor's noteDrill drainage holes in the lowest tray area if you store rain shoes there.
Pick a narrow cabinet with interior depth around 11 to 12 inches so shoes don’t jam at the back. Install a shoe grid insert made from wire or slatted wood, then add a 1-inch vent gap at the back by using spacers between cabinet and wall. Use cabinet hinges and a door that opens wide enough to slide shoes in without scraping; check door swing before mounting. Seal the wood parts with a wipeable finish, and add a small rubber bumper on the door edge so it closes softly.
Skip thisDon’t skip the vent gap — closed cabinets without airflow turn into odor boxes.
6. Stacked Cube Storage with Fabric Liners and Open Sides
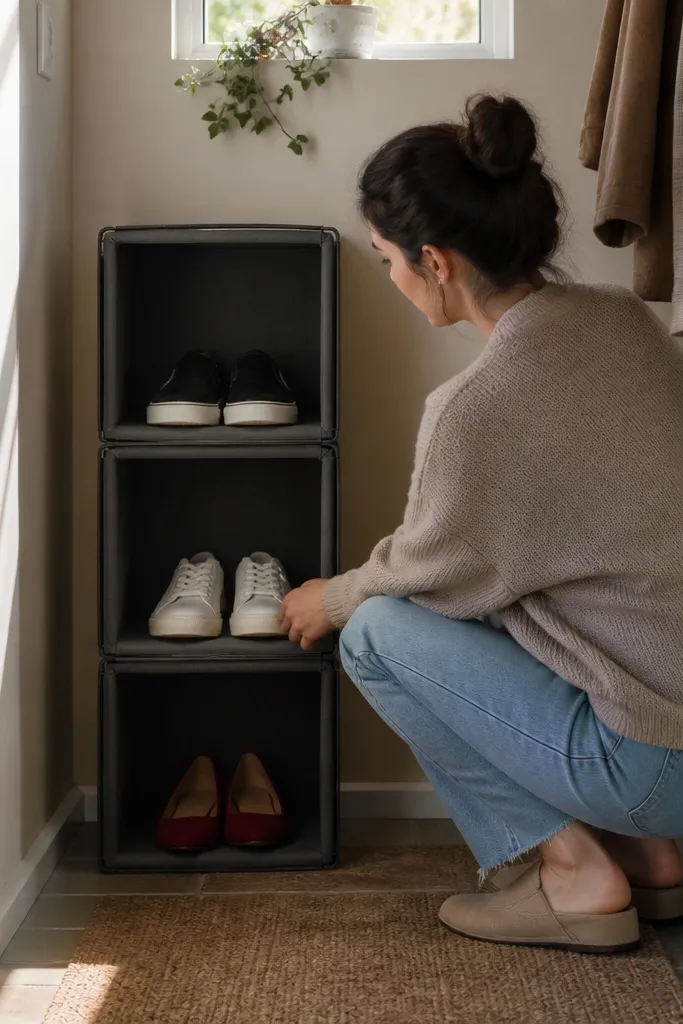
Stacked cubes look modern, and you can tune them for shoes by swapping in fabric liners and leaving sides open for airflow. The visual payoff is big: each cube becomes a neat “photo-ready” compartment with consistent spacing. Use this for small sneakers, slip-ons, and flats. It works in entryways with kids too because fabric bins make it easy to tidy fast. Build time is short if you buy a cube unit, and it looks intentional even when it’s not perfectly full.
Choose a cube unit with cells sized around 10 to 12 inches wide and deep so shoes fit without cramming. Insert fabric liners that are washable, then label the cubes by type or person using fabric tags. Keep at least one side open or avoid fully closing every cube; airflow matters for drying. Add a thin anti-slip mat at the bottom of each liner so shoes don’t slide when you grab them.
Use a uniform color for liners (all black, or all sand) so the storage looks designed, not random.
Avoid stacking tall boots in cubes — they’ll deform and the cube edges will get stretched.
7. Pegboard Shoe Wall with Removable Hooks and Shelf Ledges
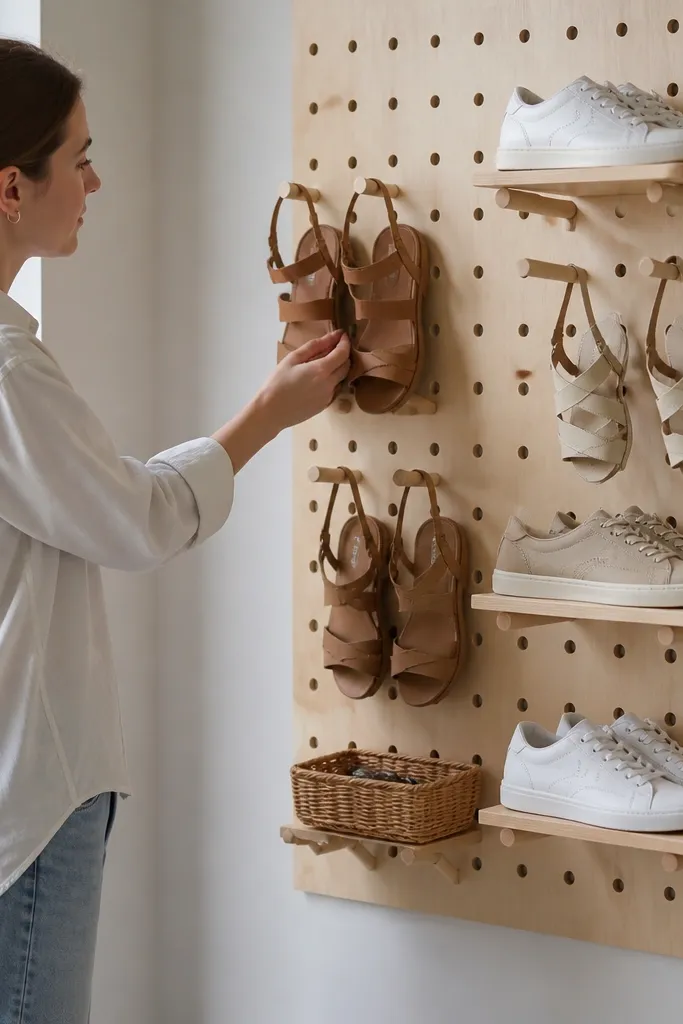
Pegboard is one of the best year-round shoe storage ideas for tight entries because it’s modular and looks like a curated wall system. Hooks hold sandals and slip-ons, while small ledges hold sneakers so they sit cleanly instead of tipping. The holes also let air circulate, which keeps odor down. This is great for people who rotate shoes often and want quick access without bending. The look is sleek and practical, especially in a dark pegboard with light shelves.
Mount pegboard to studs with a level line so the system stays straight; use a backer board if your wall is uneven. Paint pegboard matte black or a deep charcoal, then install hooks sized for the thickness of your shoe straps or soles. Add 1x3 ledges across a few rows using metal shelf brackets so shoes have a flat landing. Keep compartments shallow: ledge depth around 6 to 8 inches, and hook row spacing about 10 to 12 inches for sneakers.
Use removable hooks so you can reconfigure the wall when seasons change.
Don’t overload hooks with heavy boots — pegboard bends and the whole wall starts to sag.
8. Clear Acrylic Shoe Wall Riser for Display-Forward Pairs
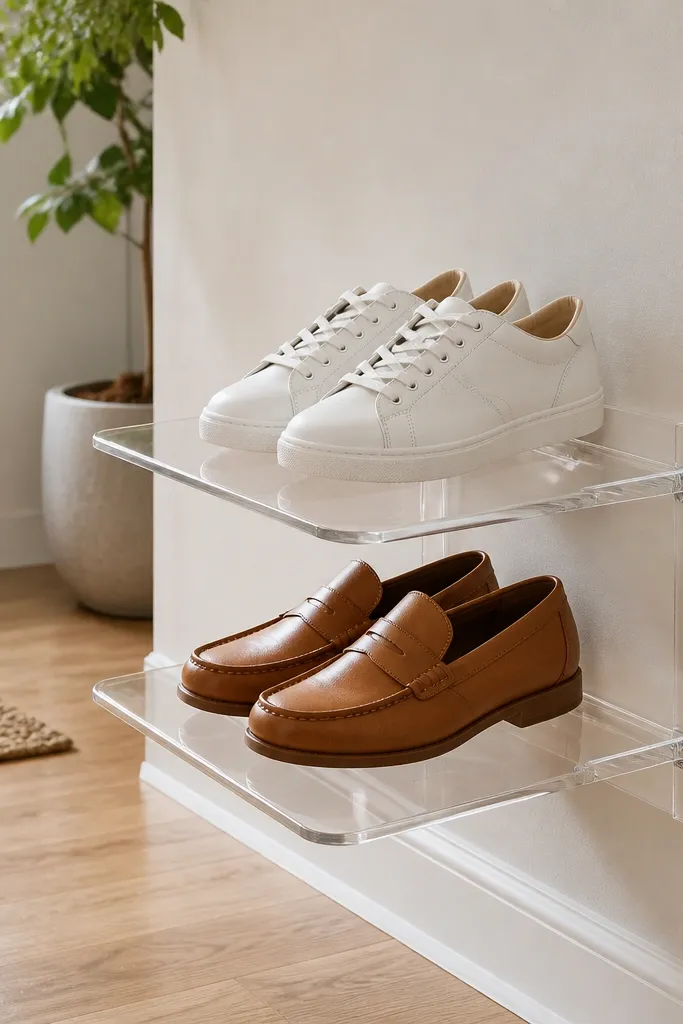
If you want your entryway to look styled, a clear acrylic riser gives you that gallery feel while keeping shoes organized. The riser lifts shoes slightly off the floor, which helps with airflow and makes the whole arrangement look lighter. Use this for your favorite daily pairs — think white sneakers, clean loafers, or a matching set of neutral flats. It’s not for heavy rain boots, but it’s perfect for tight spots where floor storage looks cluttered. Installation is quick and the aesthetic is very photogenic.
Pick a riser system with a footprint that fits your wall length and stays under 12 inches deep. Secure the riser to studs using the manufacturer’s mounting points, and add a non-slip pad between acrylic and any wall-adjacent material. Arrange shoes with consistent toe alignment so it looks intentional. Wipe acrylic weekly with a microfiber cloth and a cleaner safe for acrylic so it stays clear and doesn’t haze.
Keep the display to 2 to 3 pairs so the wall looks curated, not crowded.
Avoid stacking shoes on the floor next to it — that contrast makes the whole entry look messy.
9. Under-Bench Drawer Units for Sneakers and House Shoes
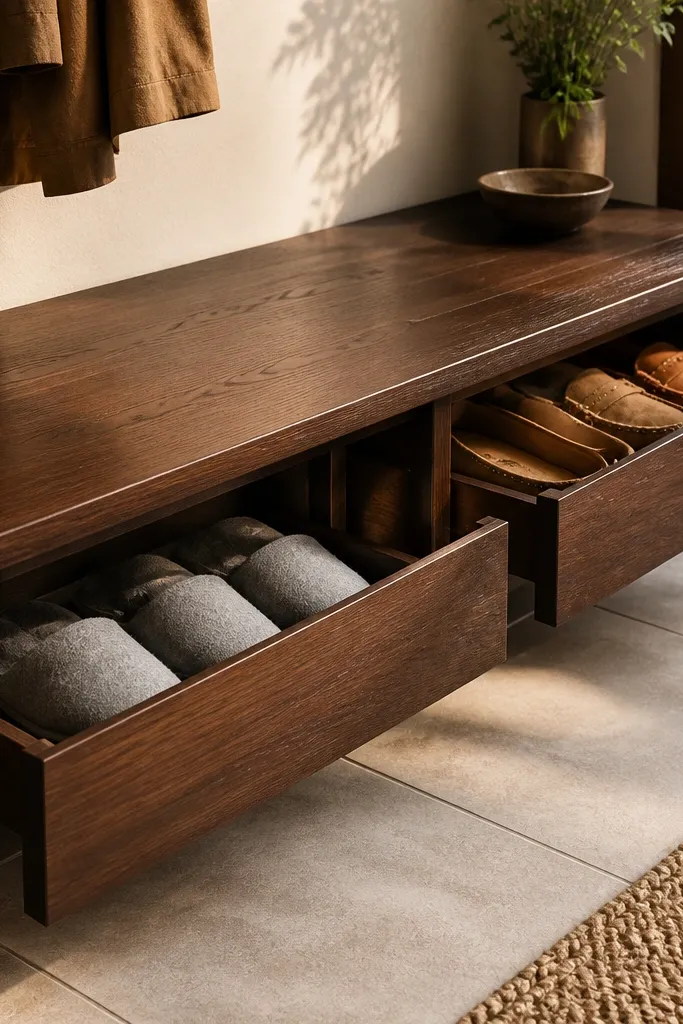
This is for the entryway that already has a bench or lower cabinet but wastes the space underneath. Sliding drawers hide shoes completely, which keeps your floor clean and gives you a calm look even on busy days. It’s best for house shoes, slippers, and everyday sneakers you don’t want on display. The drawer front also lets you pick a material that matches your entry style — wood veneer, painted MDF, or even a textured fabric panel. Build time is moderate because you’re installing drawer slides and measuring carefully.
Editor's noteUse a pull handle that matches your hardware so the drawers feel built-in, not temporary.
Measure the space under the bench and decide how many drawers you want; keep drawer heights around 6 to 8 inches for flats and sneakers, taller only if you have specific pairs to store. Install drawer slides level and square, then build or buy drawer boxes with a shallow depth that leaves clearance to slide smoothly. Add a simple divider in each drawer so shoes don’t turn into a pile. Finish drawer fronts with a wipeable paint or veneer and add felt at the bottom to prevent scuffs.
Skip thisDon’t mount slides slightly off level — drawers scrape and the whole system stops feeling smooth.
10. Slim Shoe Tower with Side Doors and Adjustable Shelves
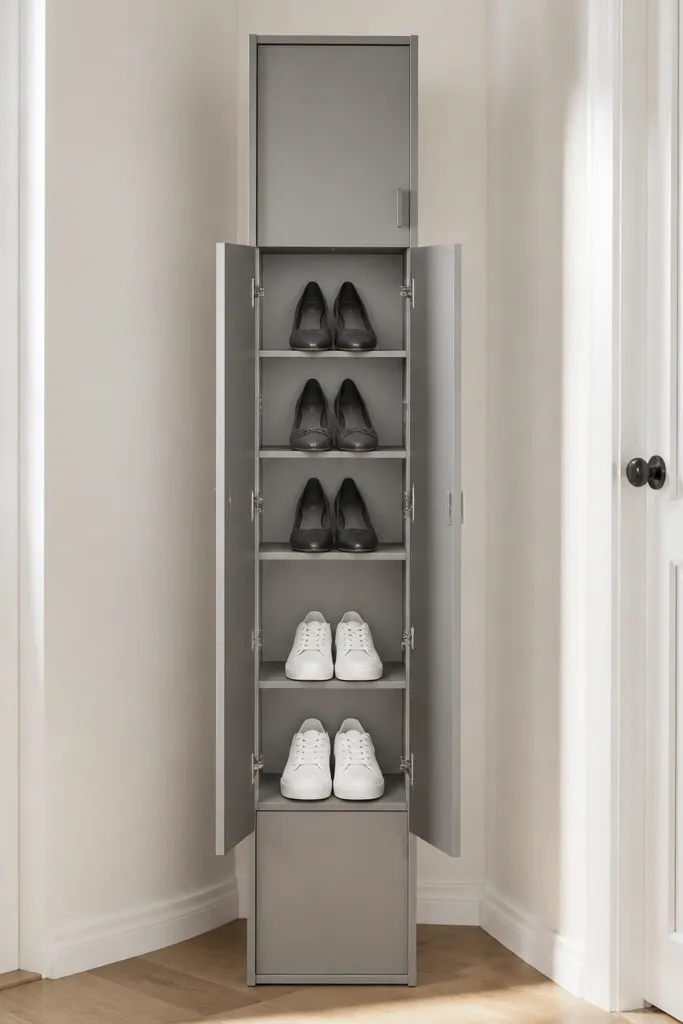
A slim shoe tower is how you get year-round shoe storage ideas into a small entryway without sacrificing floor space. Side doors are the key aesthetic choice: they look clean, and you can open only the section you need. Adjustable shelves let you handle flats and sneakers on one level and taller shoes on another without forcing everything into one height. This looks like a wardrobe piece, not a shoe rack, and it’s great for renters who want storage that doesn’t eat the room. Skill level ranges from beginner to moderate depending on whether you buy or build.
Choose a tower width around 14 to 16 inches so it stays narrow, and plan for shelf depth about 10 inches for most shoes. If building, use plywood sides with a sturdy back and install shelf pins so you can re-space as your shoe sizes change. Add doors with magnetic catches so they stay shut when you’re carrying bags. Use a matte finish in black, walnut, or warm gray, then add vent slats or a small back spacer to create airflow.
Label shelf heights with painter’s tape before you finalize the spacing so future changes are fast.
Avoid tiny shelf spacing for boots — you’ll end up shoving them in and deforming them.
11. Wall-Mounted Ledge + Basket Combo for Wet Weather Pairs
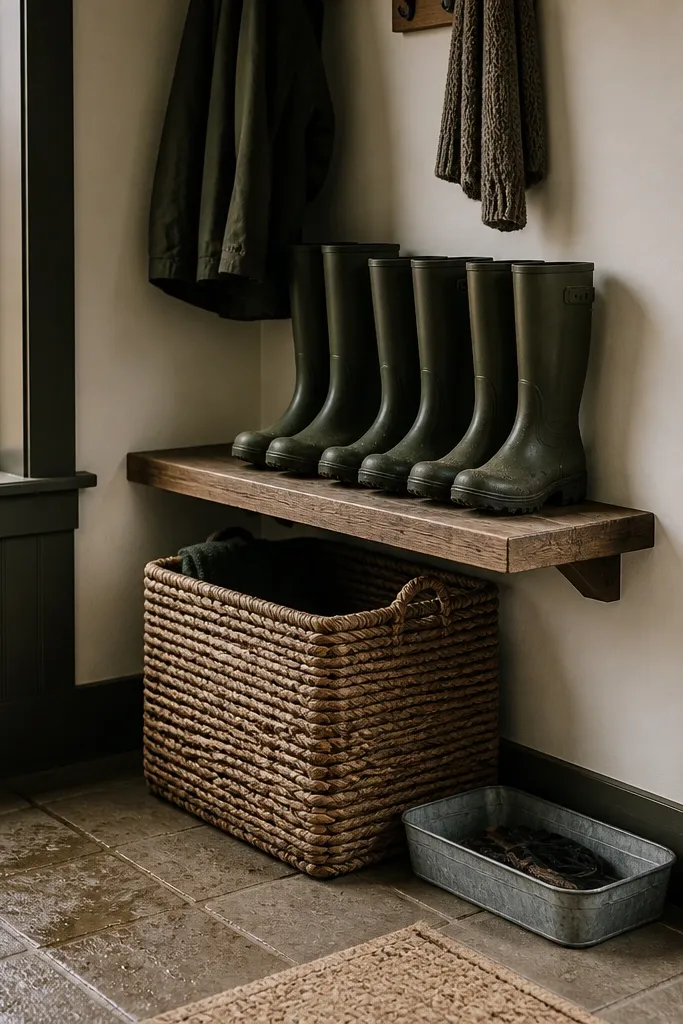
This combo is practical and looks good: a wall-mounted ledge gives you a clean line, and baskets catch the mess when shoes are wet. The basket texture hides dirt and makes the whole entry feel intentional instead of like you’re storing shoes in a laundry corner. Use it for rain boots, shoes you wear after mowing, or pairs that need to dry after a storm. The ledge keeps the rest of your shoes off the floor, while baskets handle the “messy” category without contaminating everything else. It’s quick to install and easy to maintain.
Mount a ledge 18 to 24 inches above the floor so you can slide shoes into place without bending too far. Place 1 to 2 woven baskets under the ledge spaced to match the shoe width, leaving a 1-inch gap between basket and wall for airflow. Add a removable liner inside the basket so it’s washable. Finish the ledge in a wipeable paint or sealed wood, then secure into studs for stability.
Keep a small spray bottle of shoe de-odorizer and a microfiber cloth on top of the ledge so maintenance is a 30-second habit.
Don’t put wet shoes into a sealed plastic bin — you’ll trap odor and it will spread.
12. Magnetic Shoe Strip for Metal-Studded Sneakers and Boots
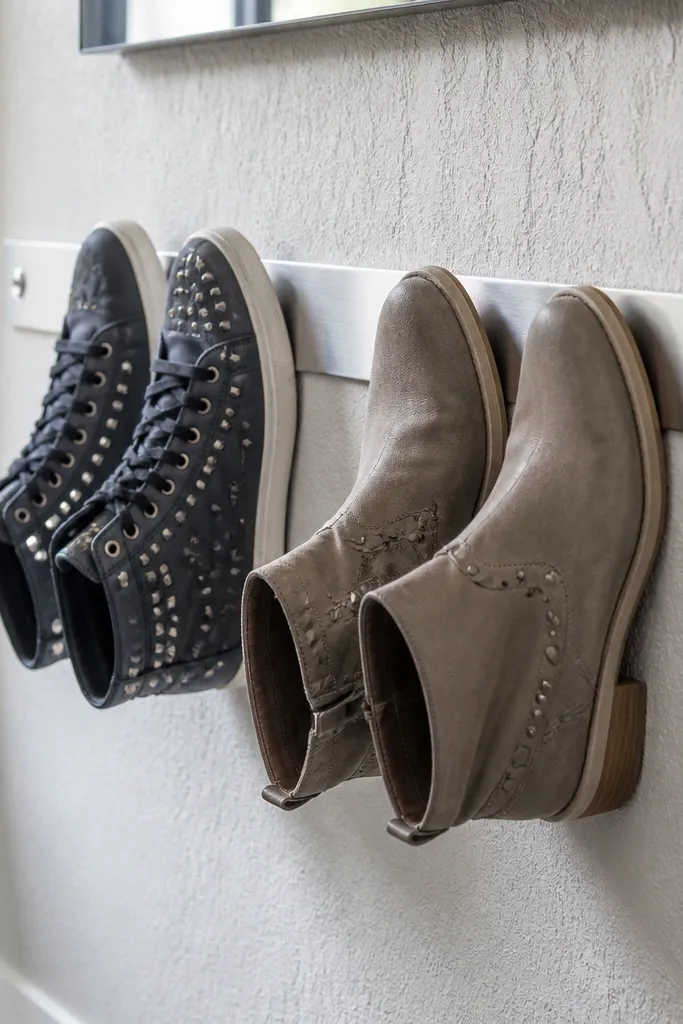
This is a niche but gorgeous option when your shoes have metal eyelets, studs, or a strap that can attach to magnet hooks. A magnetic strip lets you hang shoes vertically or at a slight angle, keeping soles off the floor and making the entryway look like a design wall. It’s best for lightweight shoes like sneakers, sandals, or a single pair of boots you don’t store heavy moisture in. The look is sleek because you get clean lines and no visible clutter. It’s also fast to use, which matters when you’re coming in with groceries or kids.
Editor's noteTest one pair first before committing to a full layout to confirm the magnet strength matches the weight.
Install a metal mounting strip on studs at a height that matches your comfort (usually 48 to 54 inches from floor). Attach magnet hooks or magnetic shoe holders spaced so each pair hangs without touching the next. If your shoes have laces or straps, use small leather loops or webbing tabs on the shoe so the magnet has something stable to grab. Add a small catch rail at the bottom so shoes don’t swing, and keep a floor mat under the strip to catch drips.
Skip thisAvoid using magnets for heavy winter boots — they pull off and damage straps.
13. DIY Ladder Shoe Rack with Stain-Grade Wood and Canvas Steps
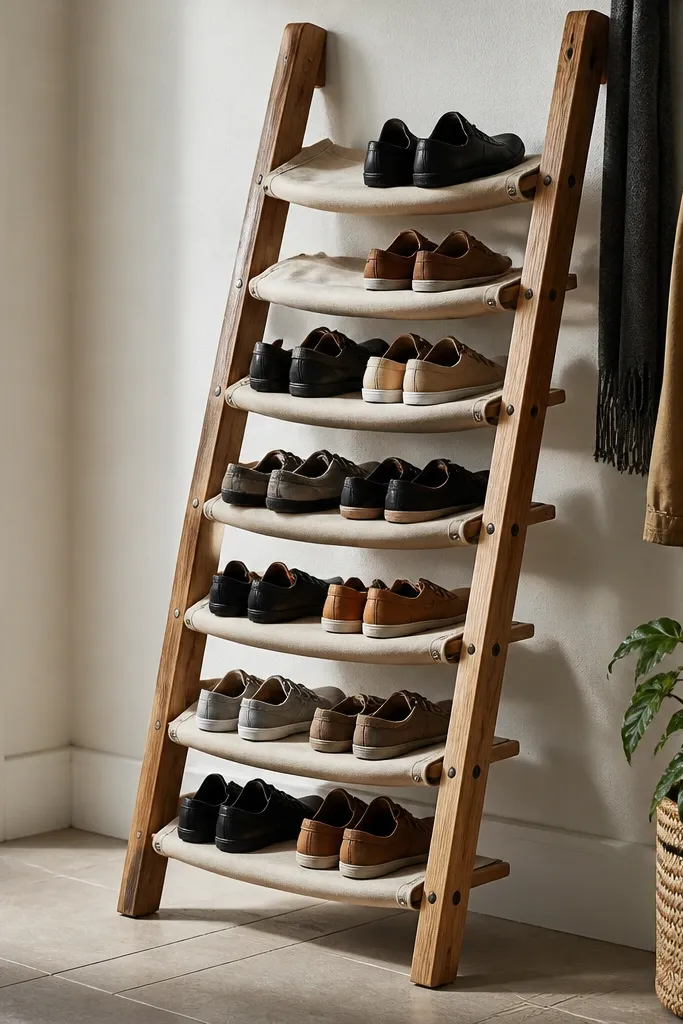
A mini ladder shoe rack looks good in a small entryway because it has a clear silhouette and the shoes become the “steps.” Canvas steps add softness and grip, so shoes don’t slide and scuffs don’t show as much as on bare wood. This setup works best for 8 to 12 pairs of low to medium height shoes, and it’s especially good for families because each rung can be assigned. It’s also one of the most photogenic options because the shoes line up vertically with consistent spacing. Build it with basic lumber and simple mounting hardware.
Build two ladder sides from 1x3 or 1x4 wood, then cut rungs spaced 9 to 10 inches apart to fit sneakers and flats. Attach canvas strips across each rung using staple gun or screws with washers so the canvas stays taut. Sand edges smooth and stain or paint in a dark, matte finish that hides scuffs. Anchor the ladder rack to the wall with L-brackets at two heights so it doesn’t tip when someone yanks a pair.
Use outdoor-grade canvas so it wipes clean after rain shoes go in.
Skip wall anchoring — a ladder rack tips easily in real entryway traffic.
14. Under-Console Shoe Shelf with Swing-Down Front Panel
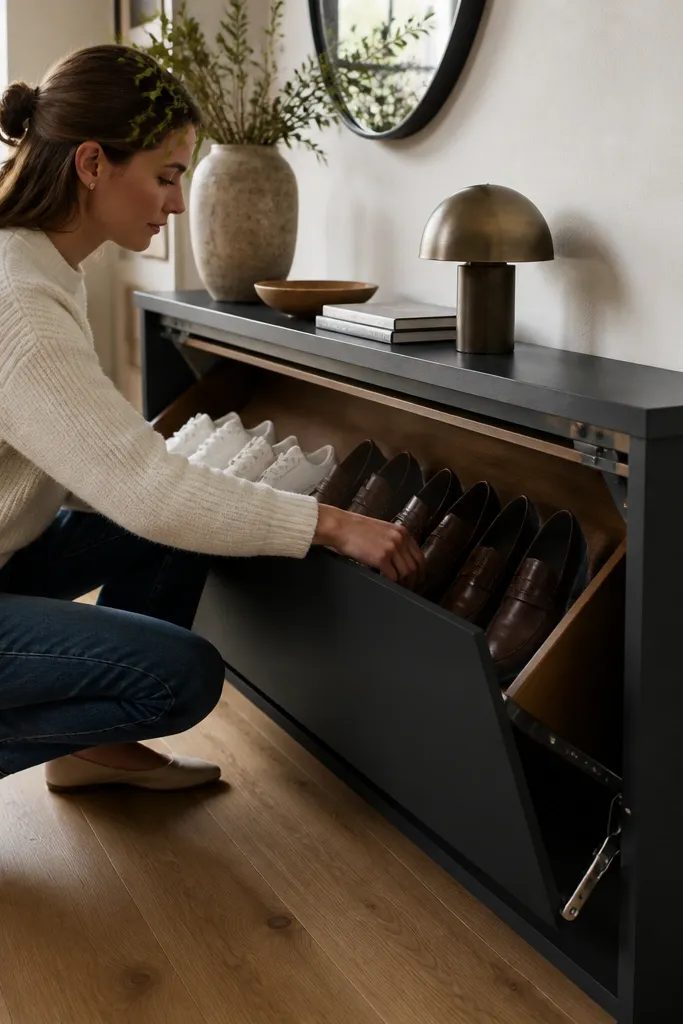
If you have a narrow console table, the underside is prime real estate. A swing-down front panel hides shoes from view and gives you a neat, built-in look that feels high-end in a small entryway. The shelf supports shoes at a slight angle so they sit neatly and don’t slide forward when you open the panel. This is ideal for flats and sneakers you want tucked away but still easy to grab. It also keeps the floor clear, which makes the entry look bigger even when it’s not. Skill level is moderate because you’re installing hinges under a finished surface.
Editor's noteAdd a rubber strip on the shelf face where shoes rest to reduce sliding.
Measure the clearance under the console and choose a shelf height that leaves at least 10 inches clearance for shoe height. Build a shallow shelf about 10 to 11 inches deep and add a 5 to 10 degree angle by shimming the back support. Install a swing-down panel with piano hinges so it opens evenly, then add a latch or magnetic catch to keep it shut. Add a vent gap at the back or use slats on the shelf so moisture can escape.
Skip thisAvoid solid backing with no gap — shoes trap moisture under the console.
15. Textured Woven Shoe Bins on a Shallow Rolling Rail
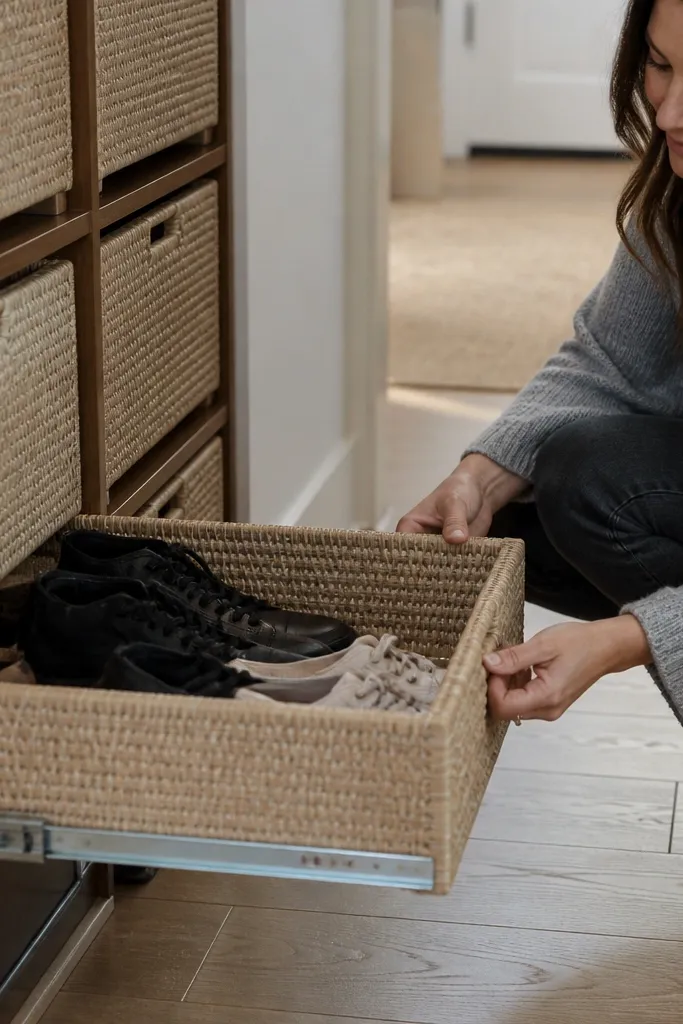
This one is for people who hate digging through a cabinet. Shallow rolling rails keep bins aligned and pull out just enough to grab the pair you need, while woven bins keep the look warm and photogenic. The texture hides dust and scuffs, and the open weave gives shoes some airflow even when they’re stored close. It’s a strong option when you have a narrow hallway and a wall you can mount a rail to, but you don’t want a fixed shelf. Build time is a few hours if you buy the rail and bins.
Mount a shallow rail system to the wall or inside a narrow frame, keeping the total depth under 12 inches. Use woven bins sized for 10-inch shoe depth so they slide in without crushing toes. Add a stopper at the end of the rail so bins don’t roll out completely. Line the floor under the bins with a wipeable mat and attach small labels to the bin fronts for fast sorting by season.
Choose bins with rigid sides so they keep their shape and look consistent even when half full.
Don’t use soft collapsible bins — they slump and make the whole setup look messy.



