
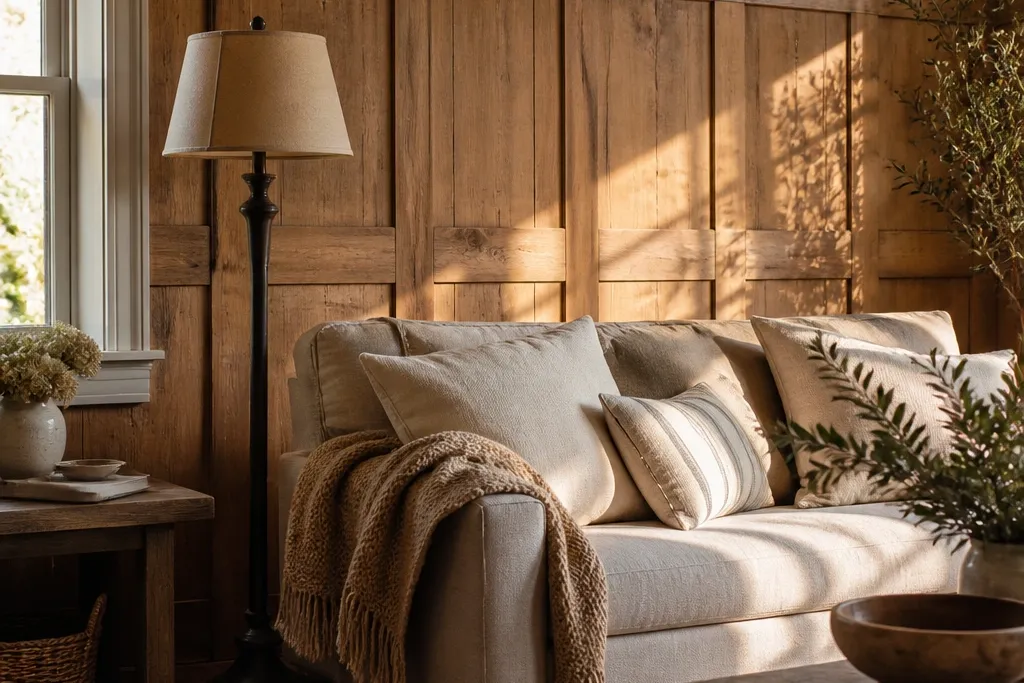

1. Whitewashed beadboard with a wide oak cap
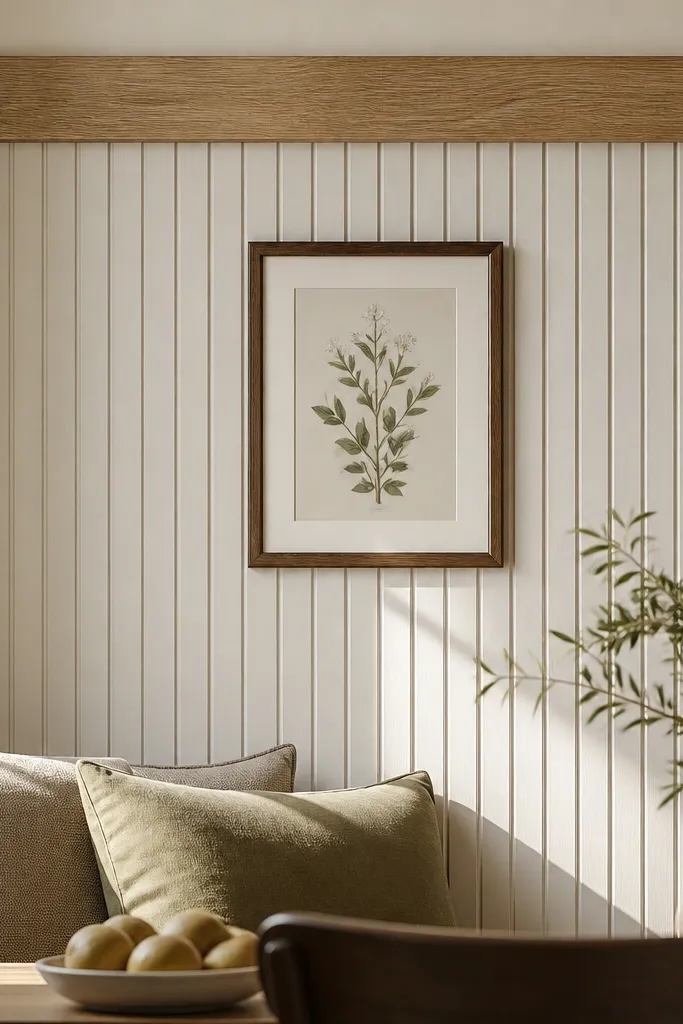
Beadboard gives you instant farmhouse texture because the tiny grooves catch light at every angle. A wide oak cap on top keeps it from looking like basic bathroom paneling and makes it feel like furniture trim. Go whitewashed instead of solid white if you want the wall to look cozy, not stark. This is a great choice for hallways, dining rooms, and entry foyers where you want warmth fast without heavy carpentry.
Start by marking your chair rail line at 36 to 38 inches from the floor, then install a level ledger board. Use 1/4-inch beadboard panels, fastening into studs with 18-gauge brads and leaving a small gap at corners for caulk. Trim the top with a 1x3 or 1x4 oak board, then seal and whitewash the beadboard with a thin wipe-on product until you like the tone. Finish with paintable caulk at seams, sand any raised grain, and topcoat with satin for a soft glow.
Pre-stain the oak cap before installation so you don’t get uneven edges from masking.
Don’t install beadboard tight to the ceiling without a plan for expansion gaps — it can buckle and telegraph through paint.
2. Two-tone farmhouse paneling with a dark lower wash
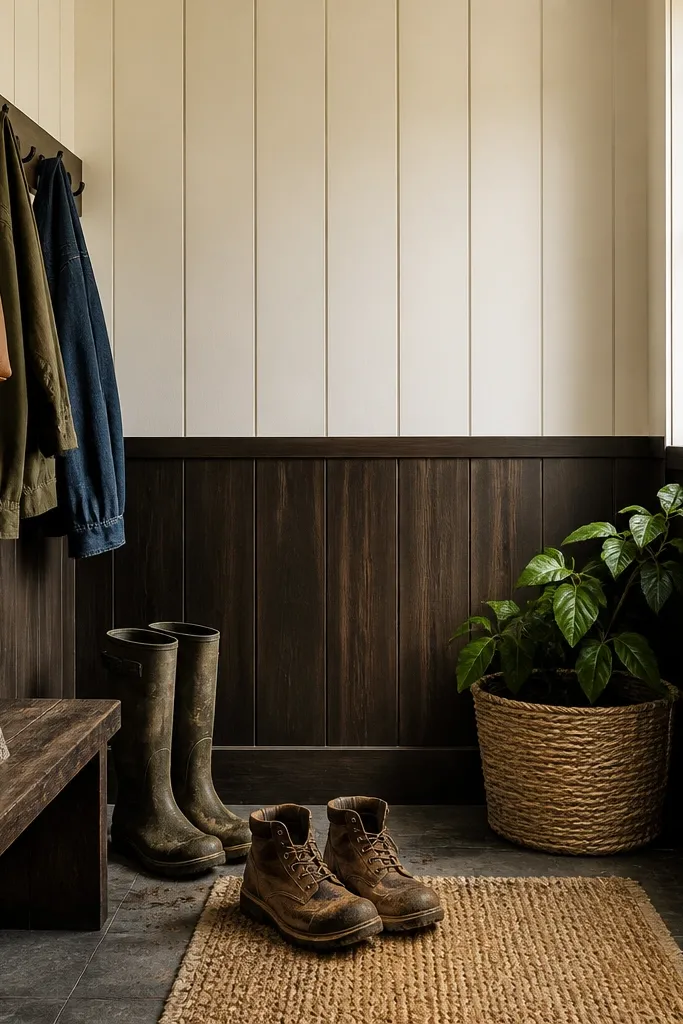
Two-tone wainscoting reads expensive because it mimics built-in cabinetry. The secret is keeping the upper color creamy and warm while the lower tone is deeper but not black. A dark walnut or espresso lower wash hides scuffs from shoes and everyday life, which matters if you want “year-round cozy” that still looks good. This style works in mudrooms, kitchens, and living rooms where the lower half gets touched.
Mark your chair rail at 38 inches, then frame your lower panel area with 1x3 rails using a level and a speed square for right angles. Install flat panel boards (3/8-inch thick) between rails, then fill nail holes and caulk edges. Stain the lower panels in a medium walnut or espresso, seal with satin clear, and keep the upper wall in a creamy off-white. Finish by painting the chair rail and base trim in the same off-white for a clean border line.
Use painter’s tape to mask a crisp color break right on the chair rail edge, then remove the tape while paint is still slightly tacky.
Avoid using cool gray paint upstairs — it makes the lower stain look muddy instead of cozy.
3. Square grid wainscoting with thin verticals
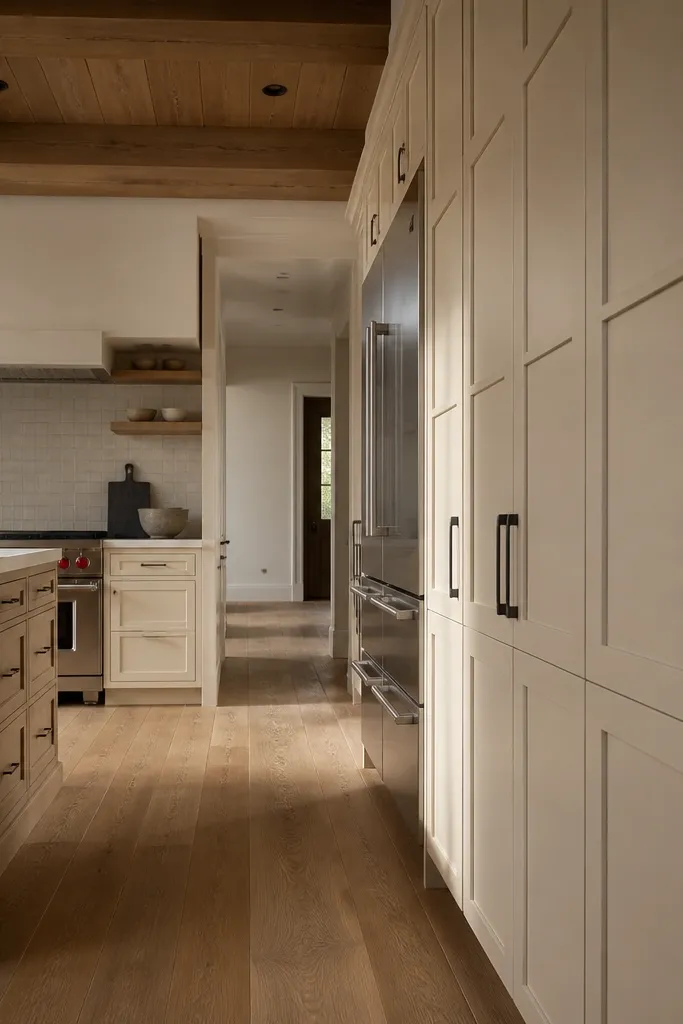
A square grid looks modern-farmhouse when the strips are thin and consistent. It creates a cozy rhythm because your eye keeps landing on neat blocks, and the shadow lines stay strong even in low light. Use this when you have a wider wall and want something structured that still feels warm. It’s also a smart choice if you’re not confident with complex moulding profiles — the geometry does the work.
Start by deciding panel size. Use 16-inch grid squares for most rooms, then set the chair rail at 36 inches. Install a horizontal ledger and base rail, then add vertical dividers using a scrap template to keep spacing exact. Use 1x2 trim strips for the dividers and 1x3 rails for the top/bottom borders. Prime everything that touches stain or paint, then paint the trim and stain or paint the inset panels to your chosen rustic tone.
Cut a cardboard spacing jig for the grid gap so every vertical lands the same distance from the last.
Don’t eyeball the first grid line — if that line is off, every square gets worse across the wall.
4. Classic board-and-batten with a slightly arched top
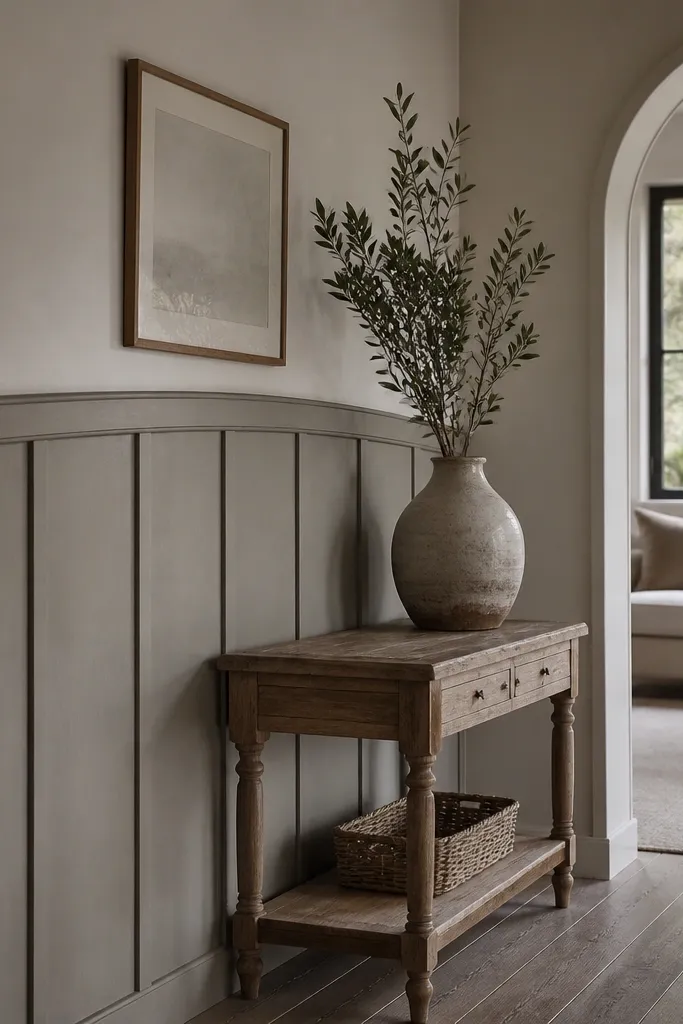
Board-and-batten is the quickest path to rustic charm, and a soft curved top rail makes it feel more handmade. The cozy part comes from vertical lines that elongate the wall, plus the battens that create shadow depth. This looks especially good in rooms with rounded elements like arched doorways or wall niches. It’s a great option for a single feature wall where you want warmth without turning the whole house into a project.
Mark your chair rail height at about 37 inches, then sketch a gentle arc on the top rail using a flexible batten or a string line. Install the bottom rail level first, then attach vertical boards spaced 12 to 16 inches apart, fastening into studs. Add battens over the seams, sized at about 1x2, and keep edges aligned with the arc using a laser or chalk guide. Prime, then paint in a warm white or stain the battens medium walnut and seal with satin.
Use a thin pencil line for the arc and check it from two corners before you cut the top rail.
Avoid thick millwork on the curve — it warps visually and looks clunky instead of cozy.
5. Reclaimed look shiplap wainscoting with a chair rail
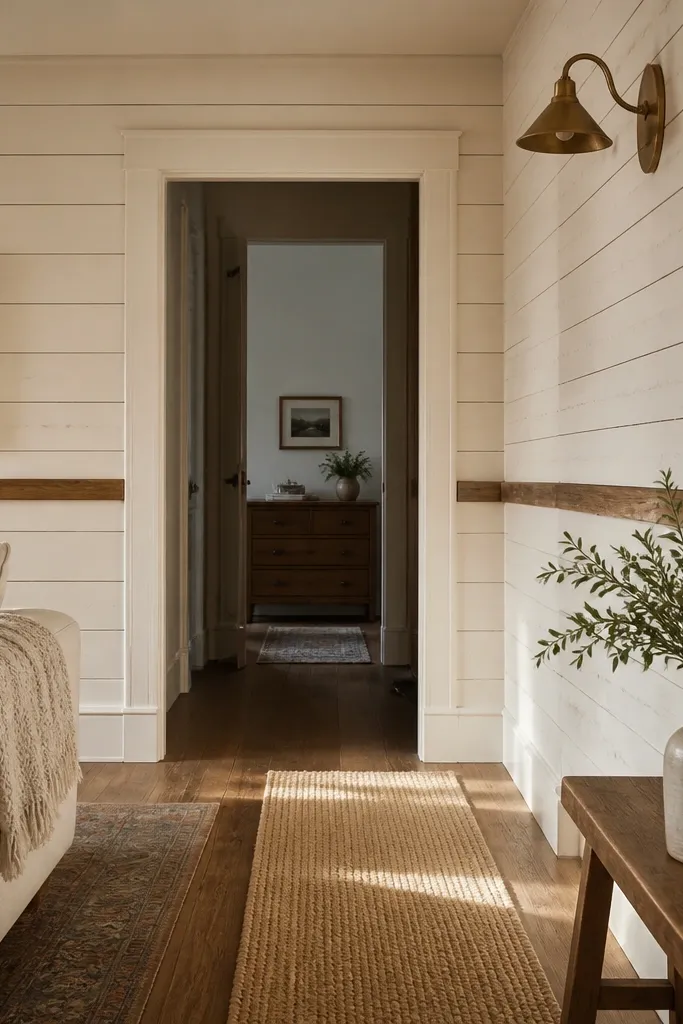
Shiplap gives you the rustic texture that reads cozy even when it’s painted. For this look, you want visible seams with consistent board widths, not random plank sizes. Add a chair rail to anchor it and keep the wall from looking like a closet makeover. This option works well in living rooms and entryways because it feels cottagey without needing heavy moulding.
Choose 1x6 shiplap boards cut to your panel height, typically 24 to 28 inches below the chair rail. Install a level starter strip along the bottom, then fasten boards into studs with 18-gauge brads, keeping seams tight and level. Add the chair rail trim on top, using a 1x3 or 1x4 profile, then caulk along the rail edges. Paint shiplap in a warm off-white, and lightly sand high spots after the first coat to mimic reclaimed wear.
Stagger board ends by at least 8 inches so the pattern looks intentional, not like a patch.
Don’t leave shiplap seams unfilled if you want crisp photos — use caulk sparingly and wipe it clean with a damp rag.
6. Herringbone wainscoting in the lower half
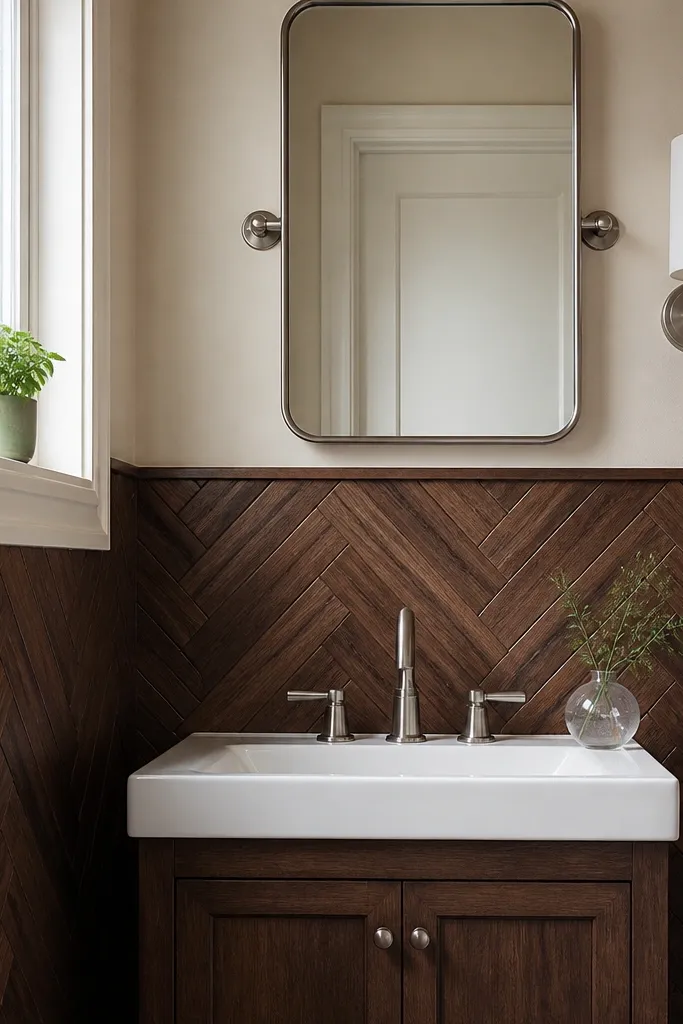
Herringbone looks warm because the angled cuts create strong shadows and a lot of depth. Keeping it only in the lower half makes it feel cozy instead of busy. This is a high-impact choice for dining rooms and powder rooms where you’ll see the detail often. It also hides minor wall imperfections better than you’d think, because the pattern distracts the eye from small dips.
Set the chair rail at 38 inches, then measure the lower panel area and plan your layout so the center line hits a stud. Cut small lath-like strips, around 3/8-inch thick by 1 1/4 inches wide, into alternating left-right angles. Dry fit the pattern on the floor to lock in the best starting angle, then transfer the layout to the wall and glue-nail into place. Finish with a simple frame border, then paint the wood in a warm greige or stain and seal matte.
Use a spacer block for the grout-like gaps between pieces so the herringbone looks even from across the room.
Avoid a random starting point — misaligned center lines make herringbone look crooked even when the rest is straight.
7. Wainscoting with faux inset panels and soft chamfer edges
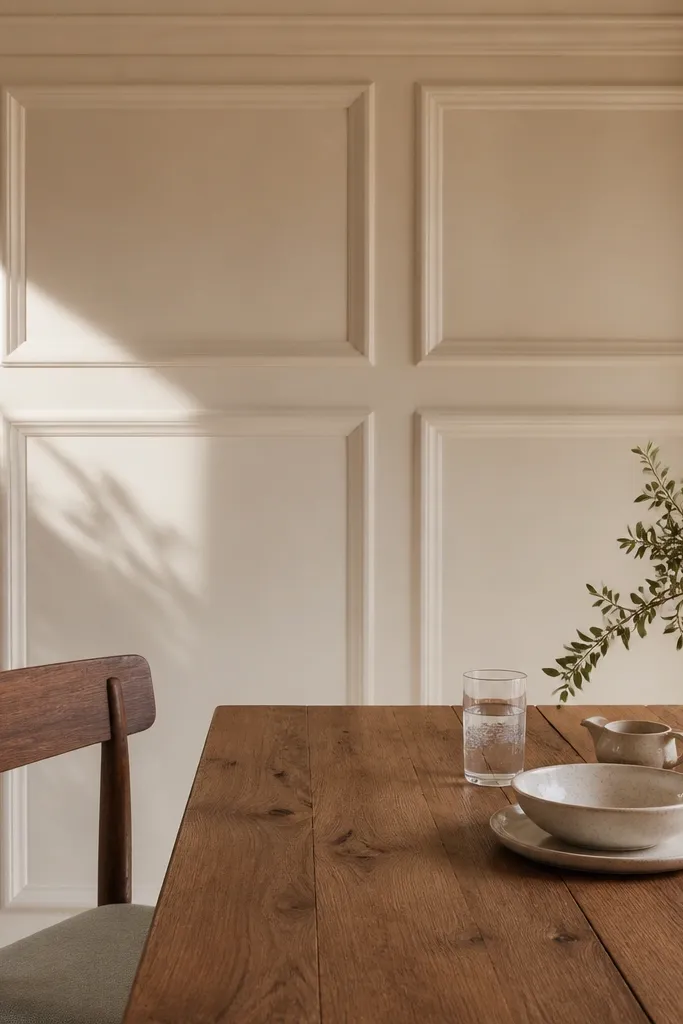
This look is cozy because it creates the illusion of deeper built-in panels without needing fancy moulding. Soft chamfer edges catch light gently instead of throwing harsh glare, which is what makes it feel warm. It’s a strong option for people who want a rustic finish but don’t want the wall to feel too heavy. Great for stair landings and living rooms where you want the trim to read “intentional” from multiple angles.
Install a chair rail at 36 to 39 inches, then frame a rectangle grid using 1x3 border strips. Use 3/8-inch plywood or MDF sheet panels cut to fit inside each opening, and attach with construction adhesive plus small brads. Add 1/4-inch trim pieces around each inset, then run a light chamfer on the trim edges with a router and sand smooth. Prime, then paint in warm white; for rustic tone, add a light dry-brush with a darker brown glaze.
Editor's noteSand chamfer edges with 180 grit then 220 so the paint lays down without a rough lip.
Skip thisDon’t skip primer on MDF inset panels — unprimed spots drink paint and create patchy sheen.
8. Rustic beadboard with a picture-frame border
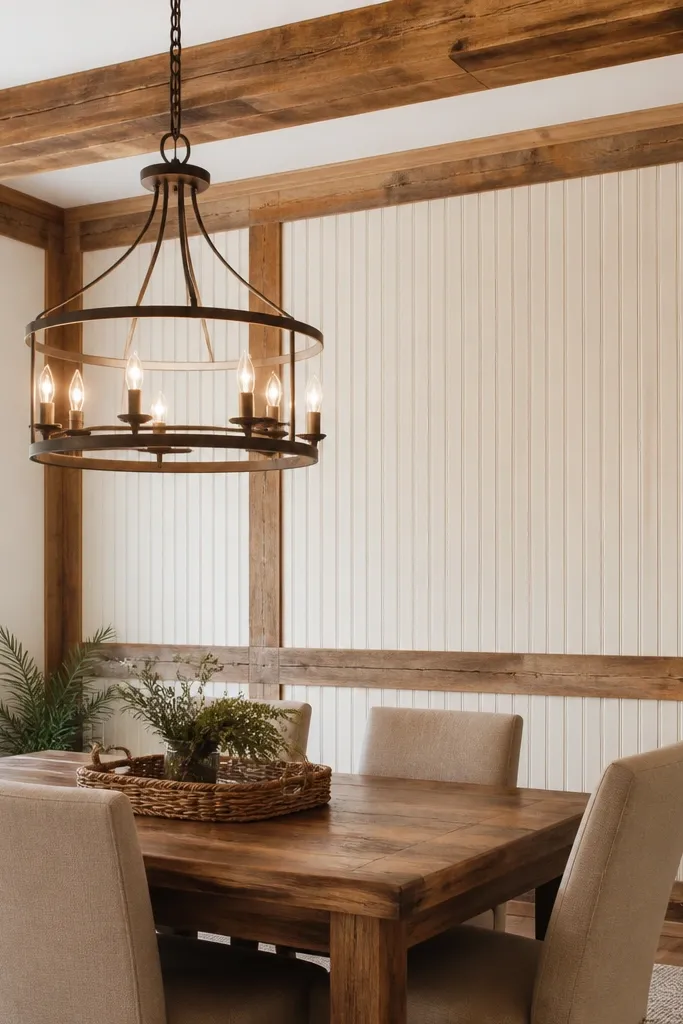
Beadboard is already cozy, but a picture-frame border makes it feel like real millwork. The border adds structure and gives the wall a crisp edge that reads clean in daylight. This style works when you want softness from beadboard grooves and sharpness from framed rectangles. It’s especially good in dining rooms and bedrooms where you want the wall to look finished without ornate carving.
Choose beadboard panels cut to your lower panel height, around 26 to 30 inches. Install horizontal rails for the border, then build a rectangle frame around the beadboard using 1x2 trim strips. Nail beadboard to studs with brads, leaving a small gap at corners for caulk. Caulk seams, then paint the beadboard and trim in a warm white with a slightly darker stain or paint for the border.
Editor's noteKeep the frame border thickness consistent so the corners look sharp instead of chunky.
Skip thisAvoid thick caulk blobs at the beadboard seams — wipe excess and use a thin line so it doesn’t look gummy.
9. Barn-door style vertical planks with a diagonal brace
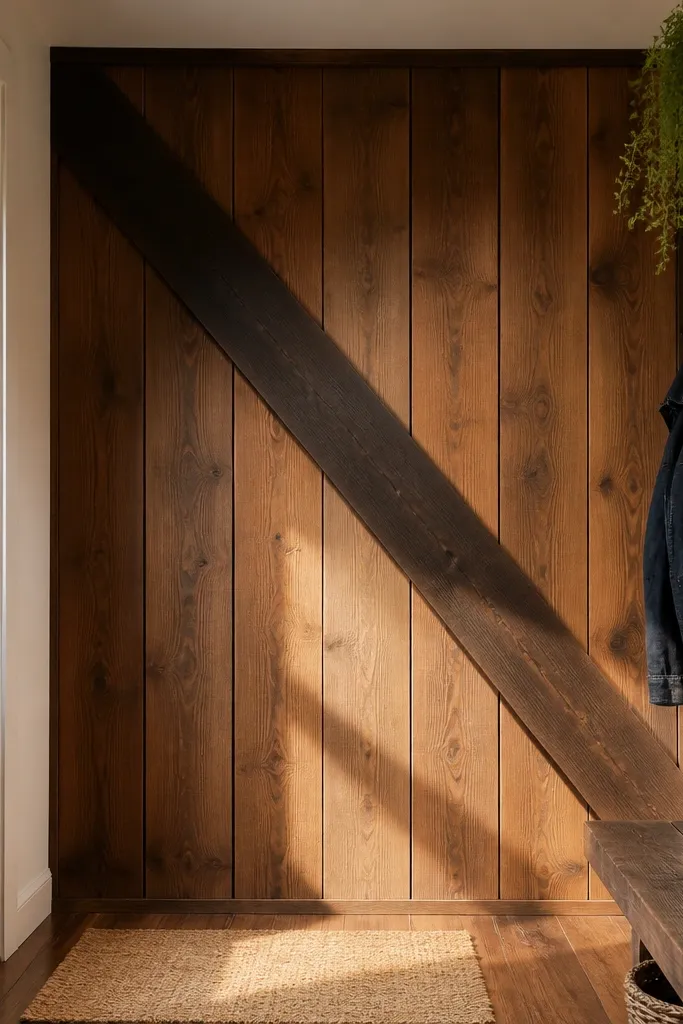
A diagonal brace adds that barn-door carpentry vibe, and it makes the wall look like a feature even when the rest is simple. Cozy comes from the warm wood tone and the fact that the brace creates a strong shadow line that reads well from across the room. This is a good fit for entryways and mudrooms where you want a little drama but still want a farmhouse feel. Keep the rest of the wall neutral so the brace becomes the focal point.
Mark your chair rail at 37 inches, then install a bottom rail and two side rails to form a tall rectangle. Use vertical boards, about 1x4 widths, spaced tightly and fastened into studs. Add a diagonal brace using 1x3 or 1x4 trim from corner to corner, centered within the opening. Stain the boards medium walnut, then seal with satin and paint or stain the rails to match the wood tone.
Editor's noteUse a chalk line for the diagonal and measure from both corners to confirm it’s centered before you cut.
Skip thisAvoid braces that hit the corner too tightly — leave a small reveal so caulk lines don’t smear into the diagonal.
10. Rustic panel moulding with a double chair rail

Double chair rails make the wall look layered, like it has depth built into the trim. It’s a cozy trick because the extra rail line creates a soft visual break and makes the lower panels feel intentional. Use it when you have a taller wall and want to avoid one single “flat” chair rail line. This works in staircases and hallways where you see the wall from different heights.
Set the top chair rail at 38 inches, then add a second rail below it at about 34 to 35 inches, keeping both level. Frame the space between rails with 1x3 trim and install panel boards below. Add vertical dividers only if you want more texture; otherwise keep it as simple rectangles. Prime and paint everything, then glaze the recessed areas with a light brown wipe-on stain for rustic depth.
Editor's noteDry-fit the rails and mark stud locations before you start cutting moulding so you don’t end up with nail heads in the wrong spot.
Skip thisSkip the level check for both rails — one rail being off by 1/8 inch shows up instantly.
11. Dark walnut stain with white painted rails
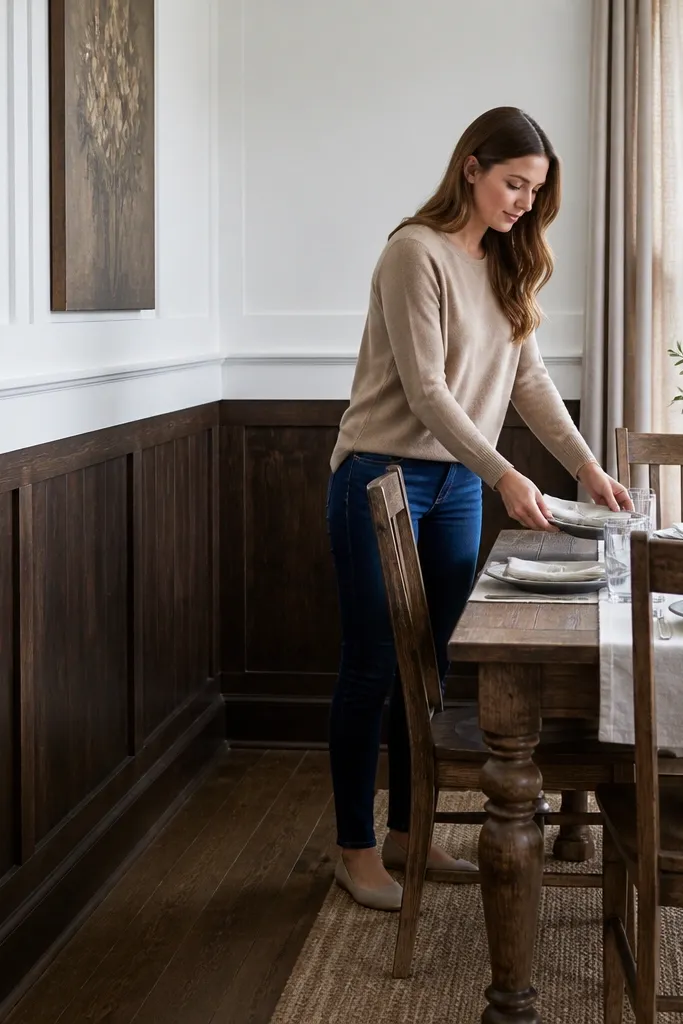
This combo is cozy because the dark lower panels hide everyday wear, while white rails keep the wall bright and airy. It reads farmhouse modern, especially when you use simple flat panels and clean lines. If you hate upkeep that comes with scuff-prone white trim, this is the compromise that still looks warm. Great for kitchens, entryways, and any room where kids or pets touch the lower half.
Mark your chair rail at 38 inches and build a rectangular frame using 1x3 trim for the rails. Install flat panel boards or shiplap in the lower section, then stain them dark walnut and seal with satin. Paint the chair rail and outer trim in a crisp warm white, keeping the paint finish slightly more matte than the sealed wood. Caulk seams between painted and stained surfaces so the color break stays sharp.
Editor's noteUse painter’s tape with a burnish tool along the stain edge to prevent bleed into the white paint.
Skip thisDon’t use a glossy clear coat on the stained panels — it makes the dark wood look harsh instead of cozy.
12. White painted panels with a walnut hand-rubbed glaze
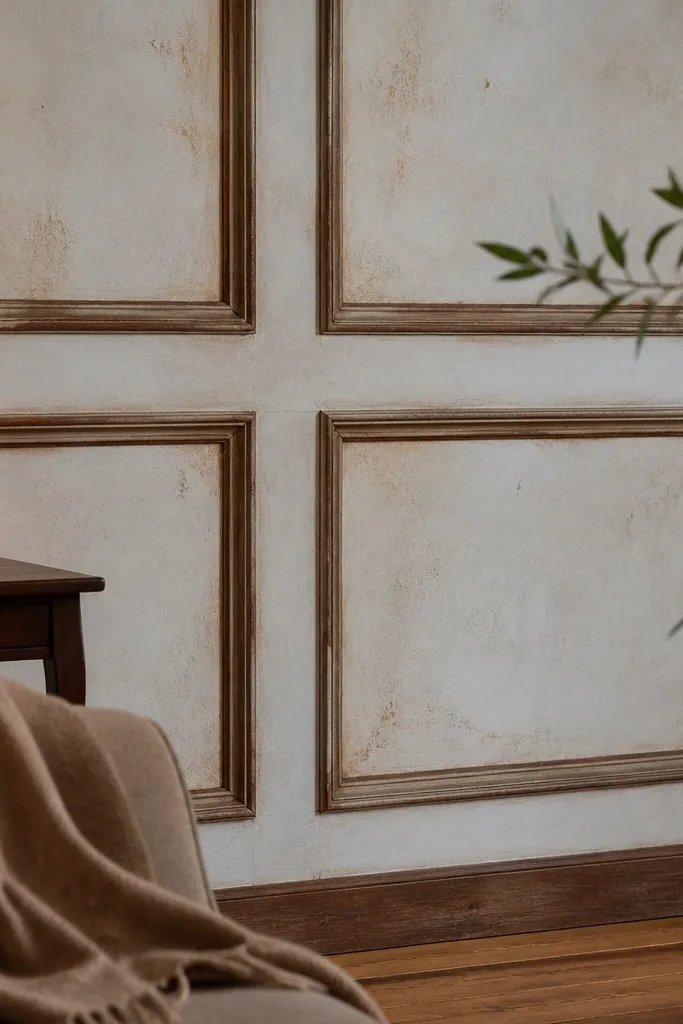
Painted panels can look flat. A walnut hand-rubbed glaze fixes that by tinting the grooves and recessed edges so the wall has depth. The result is cozy because it looks like aged furniture rather than new trim. This is a good move if you want the brightness of white but still want rustic warmth. Works in living rooms and bedrooms where you want it to feel soft, not stark.
Build your panel layout using 1x3 rails and 1/4-inch panel inserts, then prime and apply two coats of warm white paint. After the paint cures, apply a thin walnut glaze with a rag into grooves and around seams, then wipe back immediately so it doesn’t turn everything brown. Let dry, then seal with a matte topcoat so the glaze doesn’t smear. Touch up any spots where the glaze went too heavy with a tiny amount of white paint and a clean rag.
Editor's noteTest glaze on a scrap board next to the wall color — the same glaze looks different over warm white than over bright white.
Skip thisAvoid heavy glaze pooling in corners — it dries darker and looks dirty instead of aged.
13. Rustic "cabinet" wainscoting with recessed rectangles
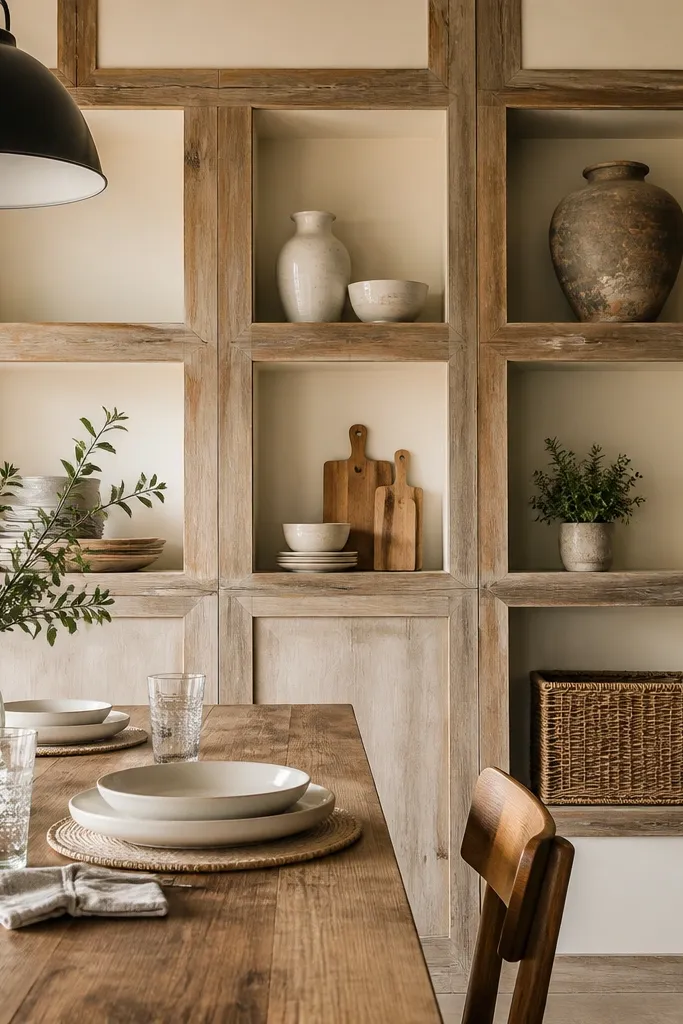
Cabinet-style wainscoting makes a wall feel organized and cozy because the recessed rectangles read like storage. It’s a photogenic look that works in kitchens and dining rooms where people notice trim details. You get warmth from the shadows inside the recesses, not from heavy ornament. Keep the frame simple and the inset consistent for a clean farmhouse finish.
Set the chair rail at 36 to 39 inches, then build a grid of rectangles with 1x3 outer frames. Cut inset panels from 1/4-inch plywood so they sit 1/4 to 3/8 inch back from the face of the trim. Glue and nail the inset panels, then add a thin 1x1 casing around each opening. Prime and paint the trim, then paint the inset panels slightly different (same hue, 1 shade darker) for depth.
Editor's noteUse a consistent inset reveal by measuring from the trim face to the inset edge with a small ruler at every opening.
Skip thisDon’t make the inset too shallow — if it’s under 1/4 inch, the recess won’t cast a visible shadow.
14. Cedar tone stained wainscoting with a simple baseboard frame
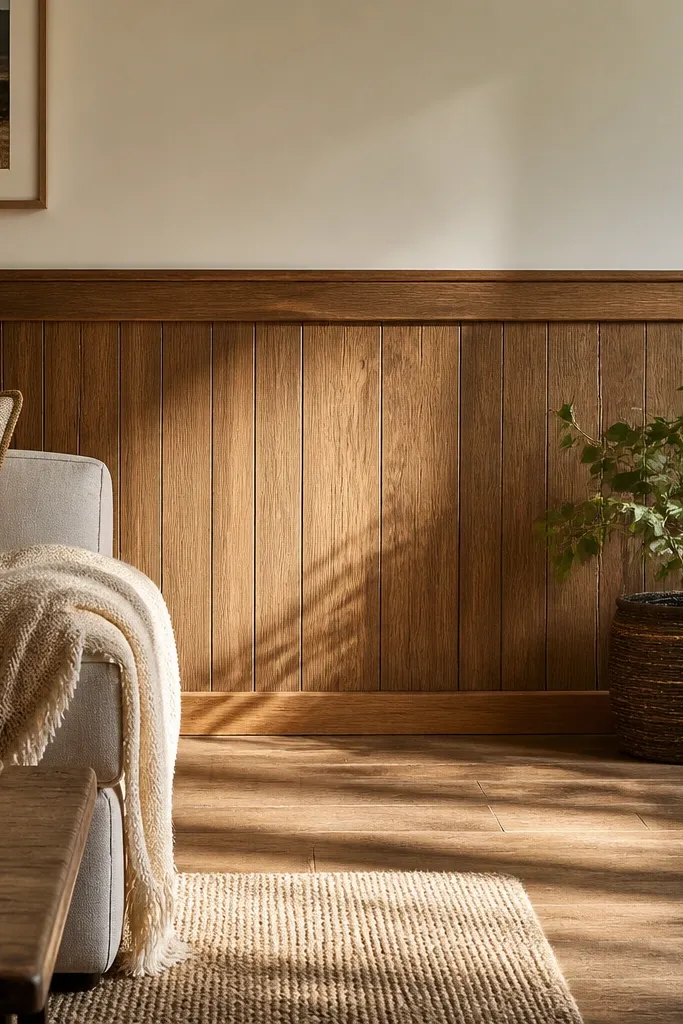
Cedar tone reads cozy because it has warm undertones that don’t go orange like some red stains. This option looks great in rooms with natural light and wood floors because it blends instead of competing. Use simple framing so the cedar color is the star. It’s a smart choice for people who want rustic warmth without distressing or glazing.
Install the chair rail at about 38 inches, then frame the lower panel area with 1x3 rails. Use tongue-and-groove boards or narrow panel boards as the inset, then stain with a cedar tone product and seal with satin clear. Add a matching base trim that hides the bottom edge of the panels, and caulk every seam that meets drywall. Let the stain dry fully, then do a second coat only if the tone looks uneven.
Editor's noteWipe stain off the flat faces more than the grooves so grooves stay darker and the paneling looks dimensional.
Skip thisAvoid applying stain over dusty drywall edges — it creates blotches that no topcoat fixes.
15. Rustic farmhouse tall wainscoting with a single rail
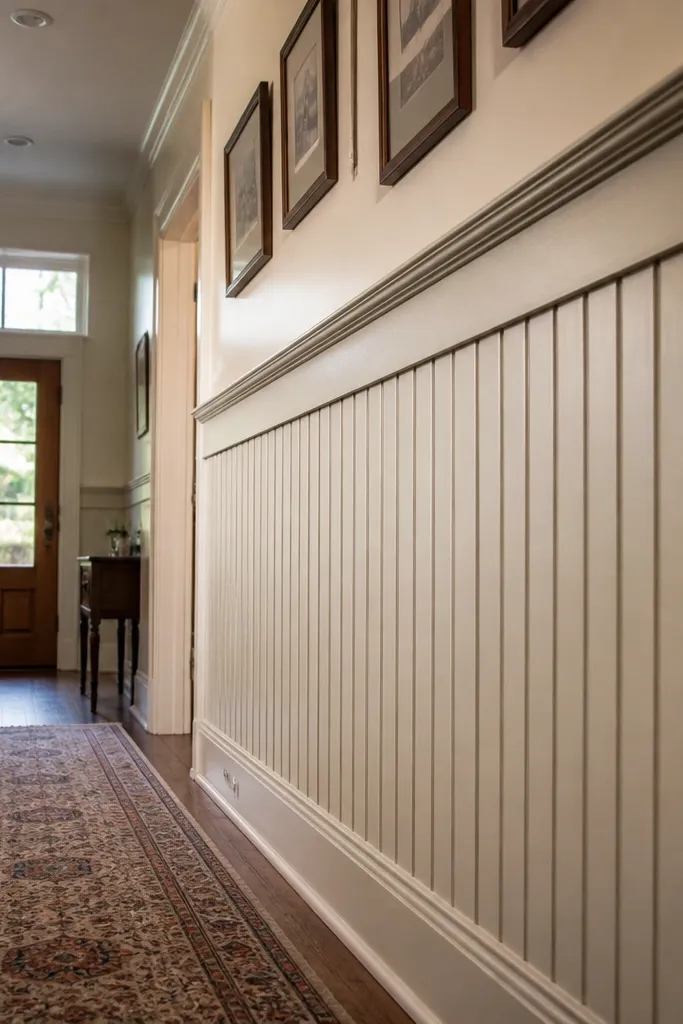
Tall wainscoting feels cozy because it covers more of the wall with warm trim color and texture. When you keep the design simple with a single rail and vertical slats or boards, it looks intentional rather than crowded. This is a strong option for older homes with awkward walls — the paneling visually smooths things out. It also works well in living rooms where you want the wall to feel like a feature without adding clutter.
Pick a chair rail height around 42 inches so the lower section reaches higher and still looks balanced. Install a horizontal ledger, then attach vertical boards between a top and bottom rail, keeping gaps consistent. Use 1x4 boards for a chunky rustic look or 1x3 boards for a lighter feel. Frame the bottom with a thicker base trim, then paint or stain the boards in a warm farmhouse tone and seal if stained.
Editor's noteUse a laser level for the ledger because tall wainscoting magnifies even small line errors.
Skip thisDon’t choose a tall height and then use very thin trim — the wall looks top-heavy and cheap.
16. Scalloped panel bottom with flat top wainscoting
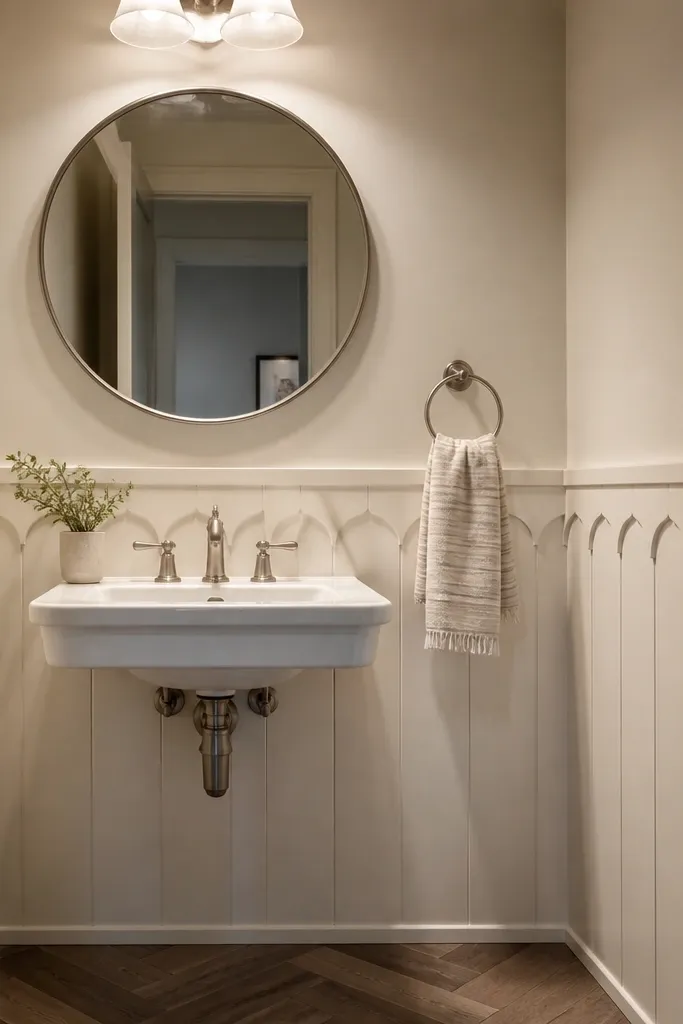
A scalloped bottom edge makes wainscoting feel cozy because it softens the geometry of the wall. Keep the top rail and main panels flat so the scallops look like a deliberate design detail, not a craft project. This works beautifully in powder rooms, breakfast nooks, and bedrooms where you want a little softness. The scallops also photograph well because the curve creates tiny highlights along the edge.
Build flat wainscoting panels up to the chair rail, then add a scalloped trim piece at the bottom edge of the lower section. Measure the bottom rail length and cut scallop blocks or a pre-profile scalloped trim at 45-degree miter corners. Install the scalloped trim after the main panels are painted or stained so you can match sheen and color. Caulk the scallop edges lightly and touch up with a small brush to keep the curves crisp.
If you’re painting, sand the scallop edges with 220 grit before the final coat so the paint doesn’t pool in the curves.
Avoid using scallops that are too small — tiny scallops look fussy and get lost from normal viewing distance.
17. Rustic board-and-batten with a thick framed window-like center
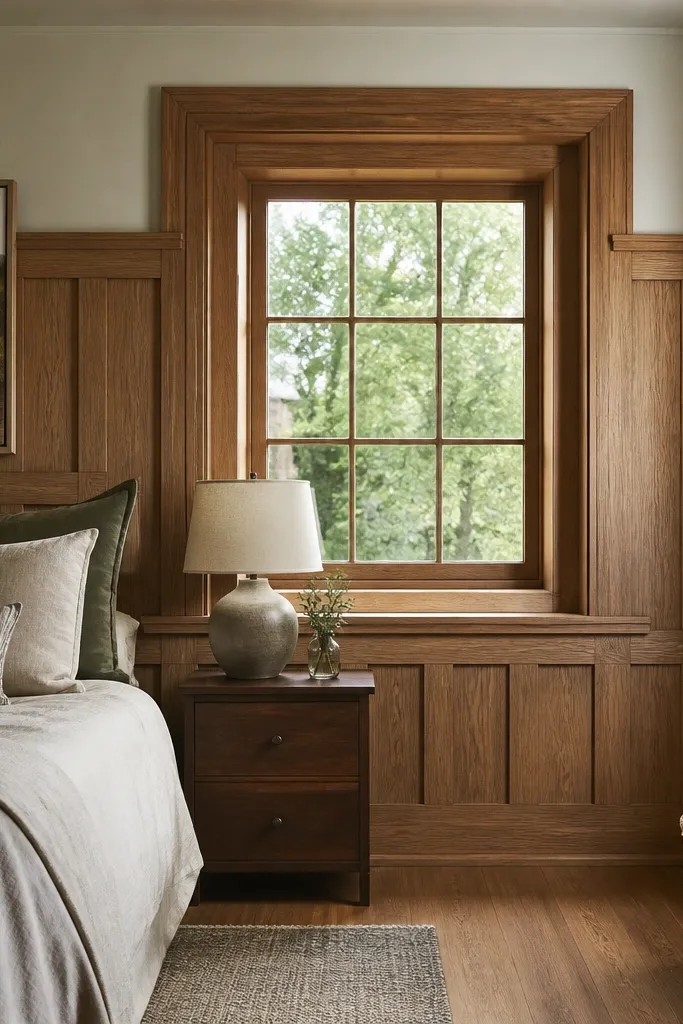
This is board-and-batten that looks like built-in furniture because you add a thick framed “panel” in the center. The center frame creates a focal point and makes the wall feel designed even if you keep the rest of the room simple. Cozy comes from the warm wood tone and the layered trim shadows. It’s a great move for a long wall where you want one strong visual anchor.
Install the chair rail at 36 to 38 inches and build a rectangle frame in the center using 1x4 trim. Fill the surrounding areas with vertical boards and battens, keeping spacing consistent. Nail everything to studs, then add the battens over seams to hide gaps. Stain the boards in a medium walnut, paint the thick center frame in warm white, and seal the stained wood with satin clear.
Mark the center frame placement first, then build the battens around it so you don’t end up with uneven slat widths.
Avoid mixing board widths without a plan — inconsistent slat widths make the center frame feel off.
18. Weathered board-and-batten with limewash panels
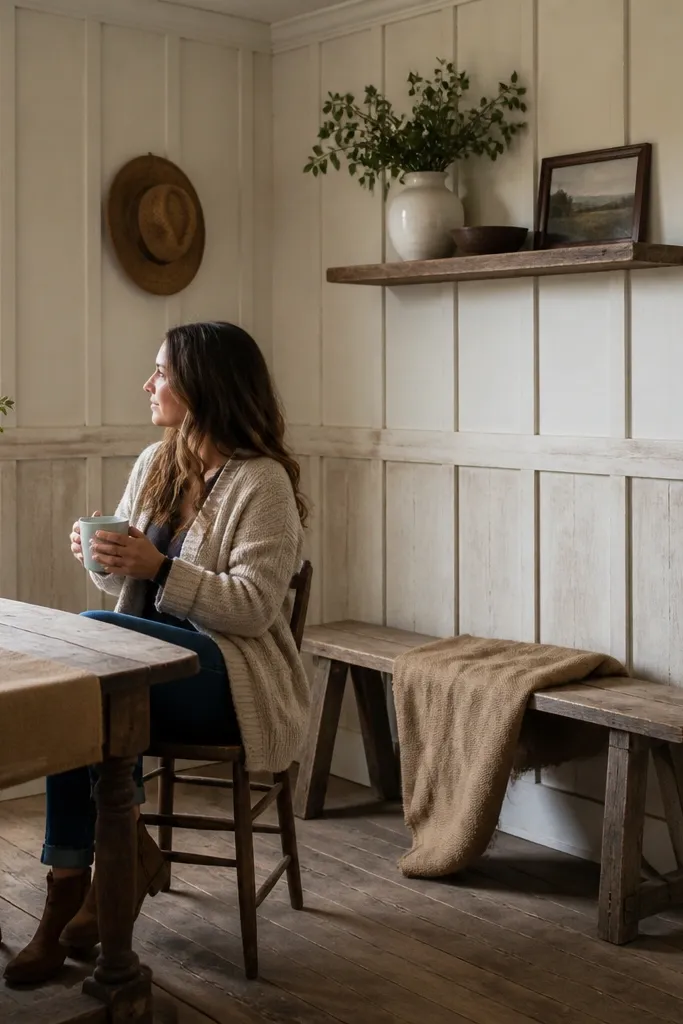
This one gives you that year-round cozy farmhouse feel without looking too “fresh” or too gray. The trick is limewash over a board-and-batten layout, because it breaks up the light and makes the wall look lived-in even when it’s new. Go for a wide top rail and leave the lower boards a touch more weathered than the rail so the whole thing reads warm, not flat. It’s a good fit for dining rooms, entryways, and hallways where you want texture that still photographs well. Skill level is medium — the joinery is simple, but the finish is where it looks expensive. Budget stays reasonable because you’re using standard 1x boards and building the “aged” effect with finish, not special wood.
1) Install a level guide line for the wainscot height at 40 to 48 inches from the floor, then nail 1x3 furring strips or a ledger along that line to keep the first boards straight. Use 1x4 vertical boards spaced with 1/2 inch gaps for the battens, then add a 1x3 or 1x4 horizontal top rail that overhangs the verticals by about 1/2 inch on each side. 2) Fill nail holes and sand the surface smooth enough to paint, then apply a primer (bonding primer if you’re on glossy paint) and let it cure. 3) Mix limewash (or a limewash-style paint) to a thin, milky consistency and brush it on in one direction, then lightly cross-brush for soft variation. After it dries, seal only if you need wipeable durability in a high-traffic spot — use a matte, breathable clear so the texture doesn’t turn slick.
Editor's noteBrush limewash in smaller sections and keep a wet edge — the uneven finish is the whole point, and stopping mid-board looks too deliberate.
Skip thisDon’t use high-gloss paint under limewash; it fights adhesion and kills the soft, chalky look.
19. Thick-slat cottage wainscoting with whitewashed saw marks
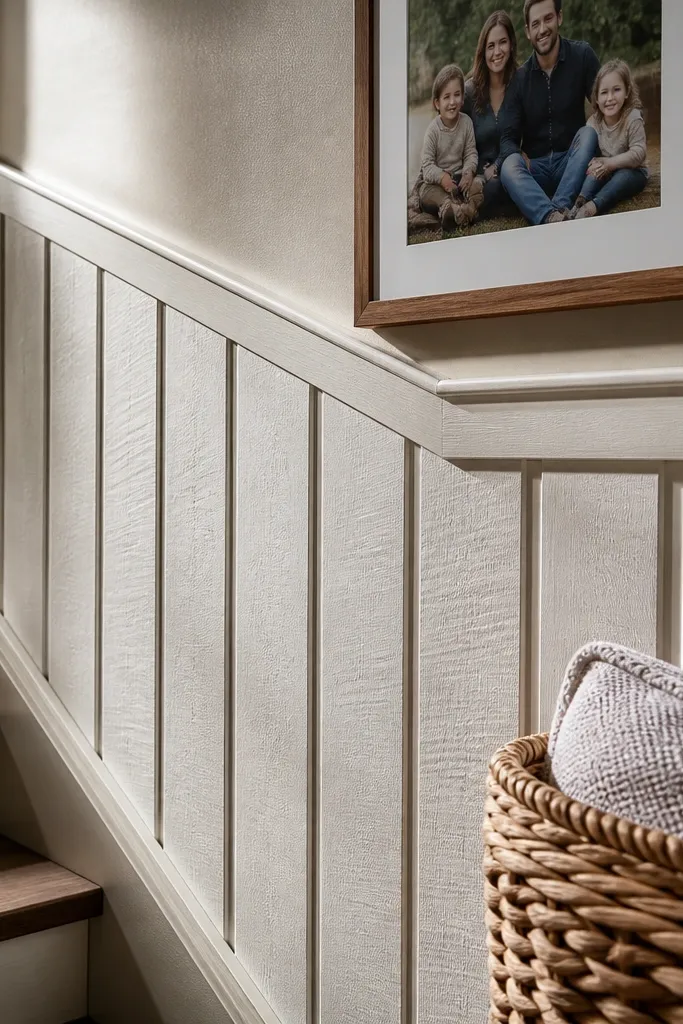
If you want rustic warmth that still looks clean, thick vertical slats are the move. This style reads cozy because the slats catch light in narrow bands, and the whitewash finish gives you that antique-cottage glow without turning the wall yellow. Keep the chair rail simple and let the slats do the work — a lot of people over-detail the trim and it starts to look busy in photos. This is perfect for kitchens, breakfast nooks, and bedrooms where you want texture close to eye level. It’s beginner-friendly for the framing, but you need patience for the stain/whitewash layering to get the saw-mark effect. Time is about a weekend for prep and install, plus drying time for the finish.
1) Choose 1x3 or 1x4 boards with visible saw texture if you can — even rough-sawn stock works if you sand only the face lightly. Set your wainscot height to 36 to 42 inches, then install a level ledger and attach vertical boards with 1/4 inch gaps for a tight, cottage look. 2) Add a 1x3 chair rail at about 28 to 30 inches from the floor, centered and level, and use a baseboard below the wainscot or a 1x2 base frame if you want it to look like a built-in. 3) Stain the boards first with a medium oak or walnut tone, wipe off excess, then let dry. Brush on a whitewash glaze (white paint cut with water and a little matte medium) and immediately wipe back to keep the saw marks visible; finish with a matte clear if the wall gets finger traffic.
Use a wide chip brush for the whitewash and wipe with a rag in long strokes — it keeps the streaks soft instead of patchy.
Don’t sand the slats too smooth; you’ll erase the saw-mark texture that makes this style look real.
20. Rustic shadow-box wainscoting with angled reveals
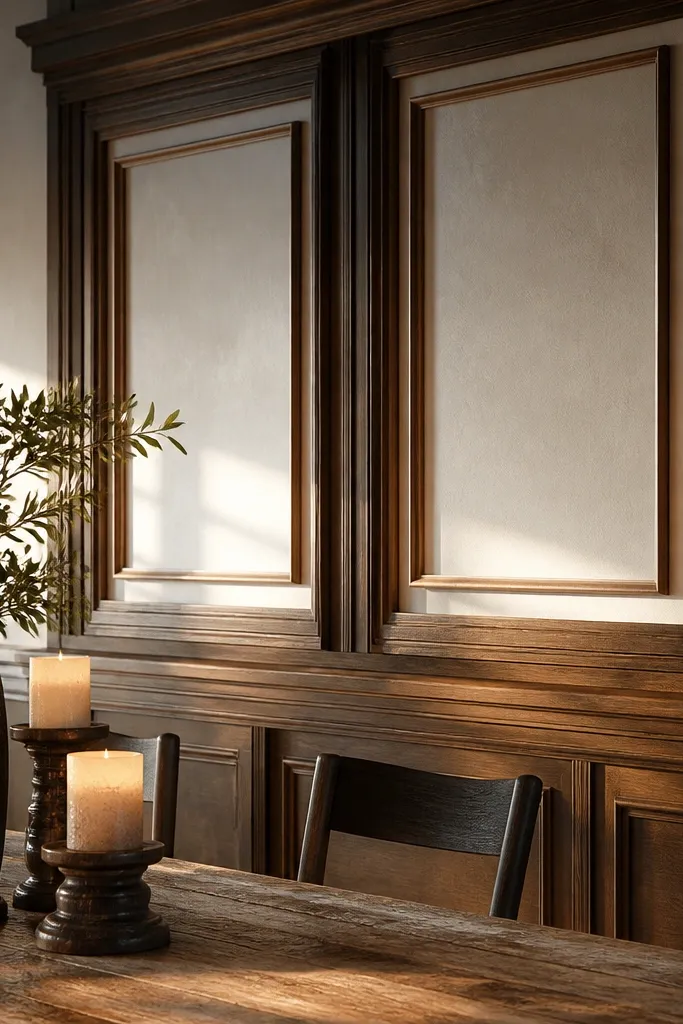
This is for when you want depth, not just decoration. Shadow-box wainscoting uses a stacked frame look that creates real visual layers, and the angled reveals make the lines look crisp even from across the room. The warmth comes from staining the frames and leaving the inner panels a lighter, creamy tone so the recesses show up year-round. It’s a great option for living rooms and stair halls because the depth helps the space feel taller and cozier at the same time. Skill level is medium — the cuts are straightforward, but you need to keep the reveals consistent. Expect 2 to 3 days including drying time if you’re staining and glazing.
1) Mark your wainscot height at 42 to 54 inches, then draw a grid for boxes with 16 to 24 inches between verticals. Build each box with 1x2 frame pieces: outer frame first, then inner panel rails so you create a recessed area about 3/8 inch deep. Use 45-degree miter cuts for the frame corners, and keep the inner reveal consistent by using a spacer board or a scrap gauge. 2) Install the outer frame grid to the wall over a thin shim if your wall is uneven, then fit the inner panels (use 1/4 inch plywood or MDF for stability) so they sit back in the recess. 3) Finish by staining the frame pieces (walnut or dark oak) and painting the inner panels a creamy off-white, then glaze the recesses lightly with a warm brown to make the shadows read. Seal the painted panels with a matte topcoat for wipeability.
Editor's noteMake one perfect test box on the floor, measure the reveal, then copy that exact spacing across the wall with a jig so every shadow line matches.
Skip thisDon’t skip checking wall flatness before you install the frames; warped walls make the shadow gaps look uneven and cheap.



