
1. Vertical slat cladding with 1/2-inch reveals
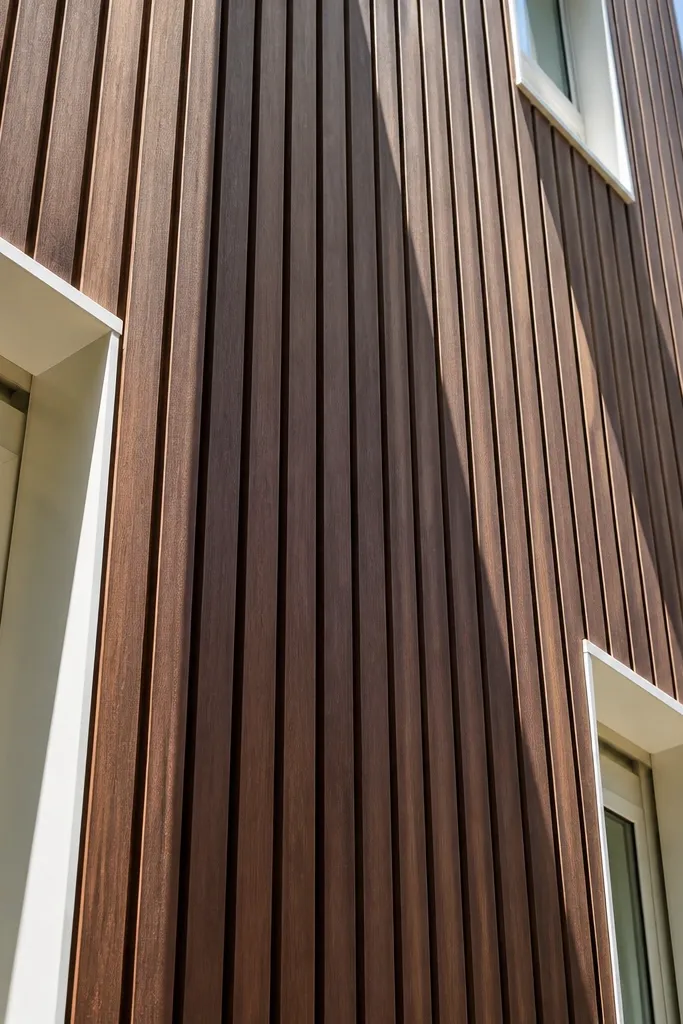
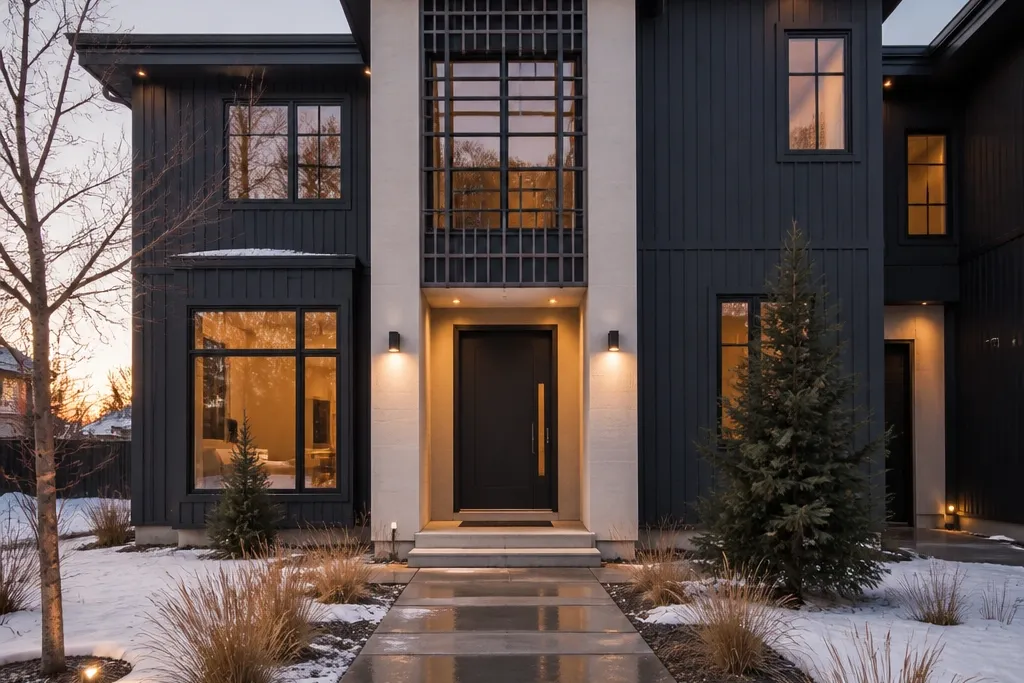
This is the fastest way to get that modern “tall and straight” facade look without gutting the whole exterior. Vertical slats add height, and the consistent reveal widths create a calm rhythm that photographs well in both flat winter light and bright summer sun. Go for a dark stain or paint on the slats and keep the trim lighter so the lines stay crisp. It works best on straightforward wall faces with a few window openings, because the grid can stay consistent. Skill level is DIY-intermediate due to straight layout and spacing, but the build is still manageable for a weekend project if your wall is flat.
Start by measuring the facade width and choosing a reveal plan that repeats. Mark a level reference line, then install furring strips horizontally at 16 inches on center (or follow your local code framing rules) so slats stay straight. Use spacers or a simple jig to keep 1/2-inch reveals between slats as you fasten with exterior-rated screws. Frame openings with trim boards so the slats stop cleanly and don’t look “cut off.” Prime all exposed edges and paint or stain the slats after installation, then caulk every seam where water can get in.
Editor's noteMake a cardboard or plywood spacer that matches your reveal width and leave it on the saw table — it keeps every gap identical.
Skip thisAvoid installing slats directly on uneven siding; you’ll fight wavy lines and the shadows won’t look intentional.
2. Horizontal plank banding with a crisp window frame grid
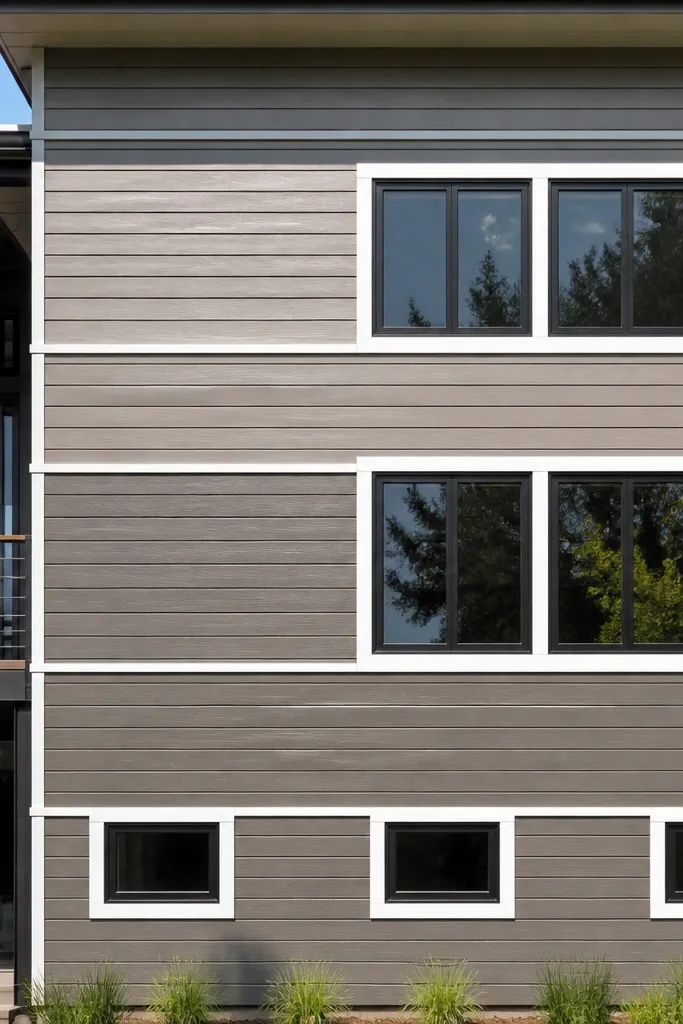
Horizontal banding is modern without looking trendy. When you align plank lines across the facade and wrap them cleanly around windows, the result reads like a designed exterior panel system. Use two or three band heights so it looks intentional instead of random. This idea is especially good if your existing siding is fine but too “plain,” because you’re adding structure and contrast rather than replacing everything. It’s a DIY-friendly approach since you’re working with bands, not full wall cladding.
Choose exterior planks or fiber-cement strips about 3 to 5 inches wide, then decide on two band thicknesses and one spacing gap (for example: 1 inch reveal between bands). Install vertical furring strips first so your horizontal lines stay level — start at the lowest band and work up with a laser level or long level. Fasten planks to the furring strips, keeping consistent spacing with a spacer block. Build a boxed window frame using trim boards so the band lines stop at a square edge around the window. Prime cut edges and caulk the perimeter where trim meets the wall.
Editor's noteDry-fit two plank lengths around each window before fastening so you don’t end up with a thin sliver on the top corners.
Skip thisDon’t rely on the existing siding’s levelness; if it’s wavy, your band lines will look off in photos.
3. Board-and-batten overlay using thinner stock for a modern edge
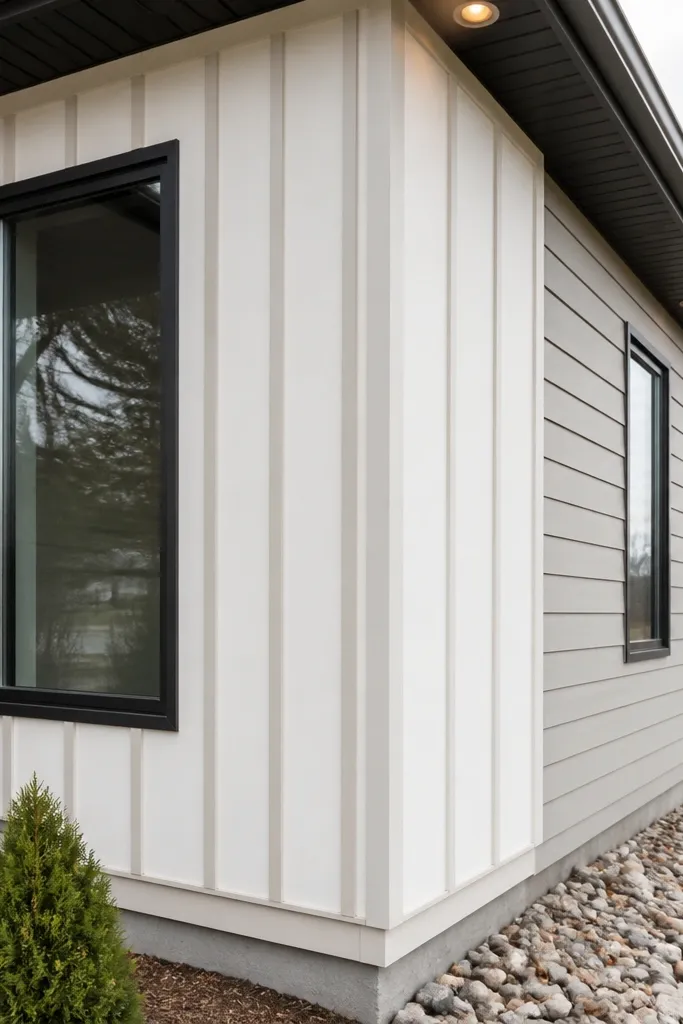
Board-and-batten can look modern if you reduce the thickness and sharpen the spacing. The key is to use wider “boards” with narrow battens, then keep the whole system in one color family so it looks like a single cladding plane. This reads clean from the street because you get strong vertical lines and consistent reveals. It works well on homes with a rectangular facade and enough wall space to let the pattern breathe. For DIY, this is a solid mid-level project because layout and straight cuts matter.
Plan your pattern first: for example, set wide boards at 10-12 inches and battens at 2-3 inches, with 1/4-inch reveals between. Install a grid of furring strips vertically so the overlay has a flat mounting surface. Start with the corner line — measure from a corner to set your first board so everything stays square. Fasten boards, then add battens, using a spacer to keep reveal width consistent. Prime and paint the entire system, and use exterior caulk at corners and around windows.
Editor's noteShoot for reveals that are easy to measure and repeat (1/4-inch or 3/8-inch). If you choose a weird number, you’ll hate yourself mid-build.
Skip thisAvoid leaving raw end grain at cut edges; water will wick and you’ll get paint failure at the ends.
4. Cement board panel grid with shadow lines
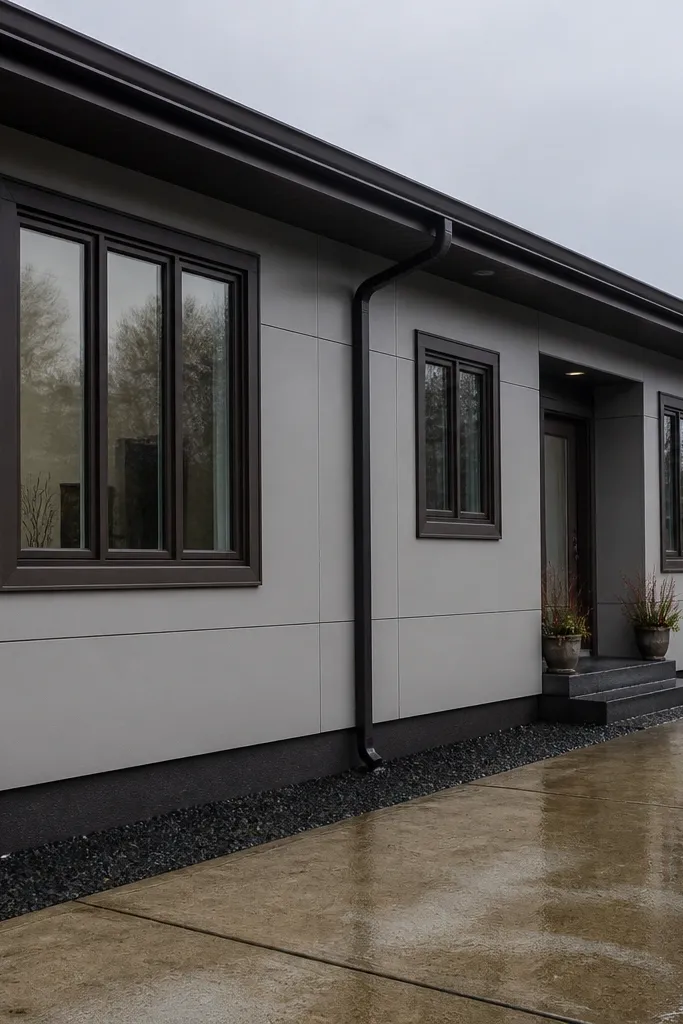
If you want modern that looks crisp year-round, a panel grid wins. Cement board gives you a flat, rigid surface that holds straight lines and tolerates weather. The shadow lines between panels create depth without needing expensive stone or metal. This is a great choice for facades that already have windows and doors in a regular layout, because the grid can align with openings. The look is clean and photogenic because everything is square, measured, and evenly spaced. DIY skill is intermediate due to cutting, fastening, and weatherproofing details.
Start by laying out your grid on the wall — pick a repeating panel size like 24x24 inches or 24x36 inches depending on your facade. Install a level furring frame behind the cement board so you don’t trap bumps — keep furring spacing around 16 inches on center. Cut cement board panels, leaving consistent 1/4-inch shadow gaps between them. Fasten with corrosion-resistant screws and tape/seal seams using exterior cement board tape and thinset-compatible sealant. Prime and paint with an exterior system, then caulk the perimeter and around windows.
Use a straightedge and mark panel edges with a chalk line; the whole look depends on straight seams, not fancy finishes.
Don’t skip seam tape and proper sealant; hairline gaps will leak and stain the grid over time.
5. Thin brick veneer over a cement board base
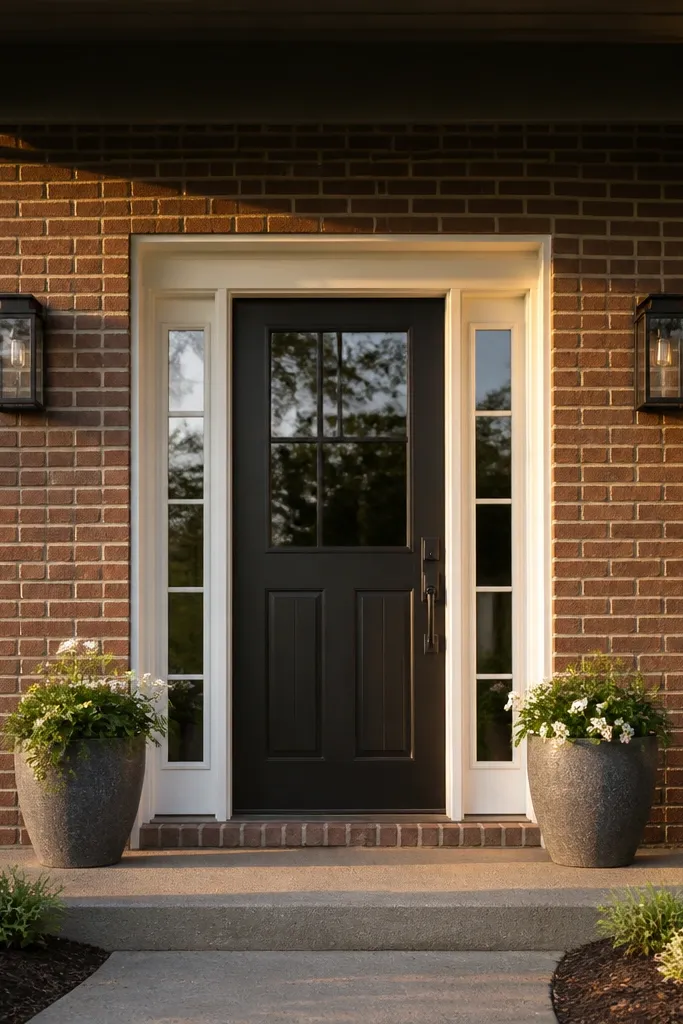
Thin brick veneer lets you get that modern masonry look without the weight and cost of full brick. The modern part is how you control the pattern: stagger the courses consistently and keep mortar joints uniform, then frame windows with simple trim. Use veneer only where you want impact — like an entry bay or a single facade plane — because it’s more expensive than paint-on overlays. This build photographs well because brick texture catches light at every angle. It’s DIY-able if you’re comfortable with cutting and following a leveling system, but don’t treat it like a casual weekend project.
Install cement board over properly prepared sheathing, using exterior-rated fasteners and tape/seal seams. Apply a scratch coat (thinset base) and use a level line to start your first brick course straight. Dry-lay a section to confirm your stagger pattern and adjust cuts near corners and window openings. Spread thinset, set bricks, and keep joint thickness consistent with spacers or a controlled trowel technique. Let cure, then grout if your veneer system uses grout; seal the finish if recommended by the manufacturer.
Editor's noteBefore you commit, measure one full course height including joints so your top course doesn’t end up too thin near the roofline.
Skip thisDon’t mount veneer directly onto unsuited siding; you need a rigid, sealed base or it will crack and loosen.
6. Stone-look porcelain facade tiles on a vented backer
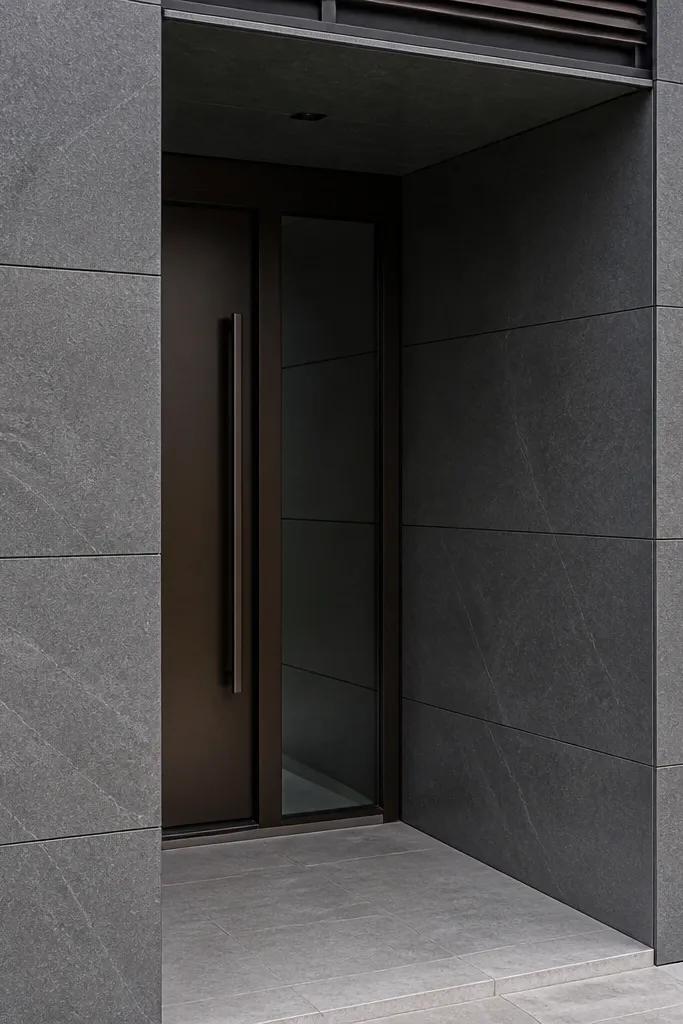
Porcelain tile gives you a modern, architectural look with very consistent geometry. If you pick a stone-look finish with low shine and a tight range of tones, it reads expensive in photos without the irregularity of natural stone. This also works well for year-round durability when installed over a vented, properly prepared substrate. Use large format tiles to keep grout lines minimal and maintain that clean modern plane. Skill level is intermediate because the layout and flatness requirements are strict, but the result is one of the most “done” looking facades in this budget range.
Build a vented backer system over the wall — follow your tile backer manufacturer instructions so water can drain behind the tile. Plan a layout that centers full tiles where possible; dry-lay from a level starting line and mark cut zones near corners. Use thinset rated for porcelain and a notched trowel size recommended by the system. Set tiles with spacers to keep grout lines consistent, then cut with a wet saw for clean edges. After cure, grout with an exterior-rated grout and seal if the grout system calls for it.
Editor's noteCheck flatness as you go with a straightedge; porcelain shows every bump under sunlight.
Skip thisDon’t rush the layout — if you start off-level, every tile line will drift and the facade stops looking modern.
7. Crisp EIFS-style foam trim frames with hard caulk lines
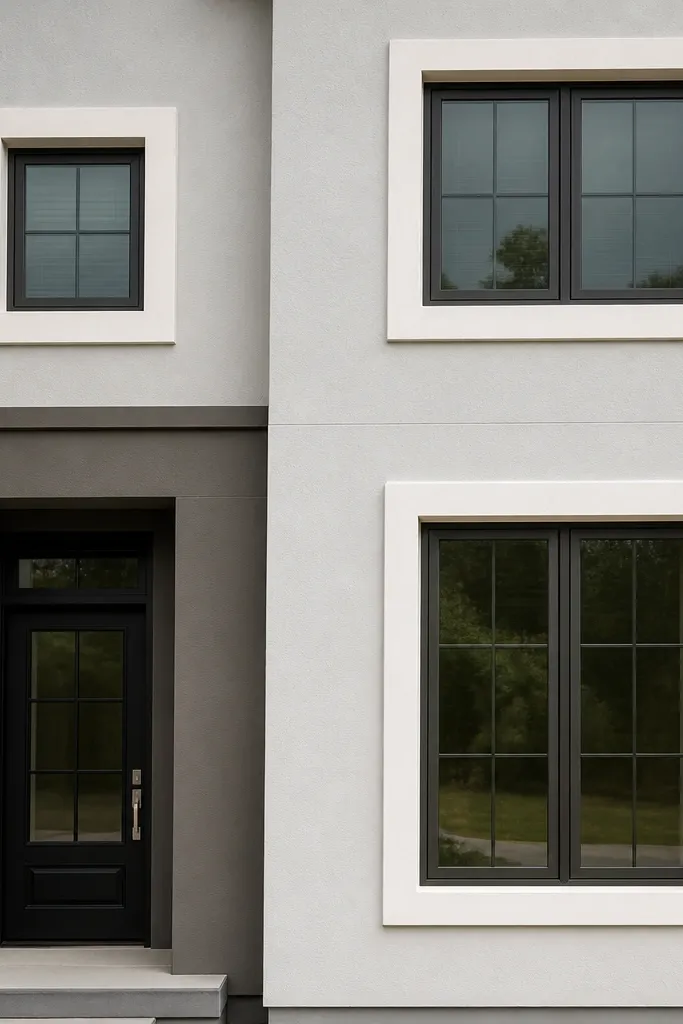
This is the budget trick that makes a facade look designed: add sharp, modern frames around windows and a clean band around the entry. Foam trim is light and easy to cut, and when you use the right base coat and hard caulk, it holds up for exterior use. Keep the facade mostly one color, then let the trim do the contrast. It’s photogenic because it creates strong, straight edges that read clearly from across the street. This is best for DIY beginners who want high visual impact without heavy construction.
Start by cleaning and priming the existing wall surface so the adhesive and base coat bond correctly. Install foam trim pieces using exterior foam-safe adhesive and mechanical fasteners where your system recommends. Tape seams with mesh and apply base coat to smooth transitions, then let cure. Use a paintable exterior caulk at every foam-to-wall and foam-to-foam seam so you get a hard, weatherproof line. Prime and paint with a durable exterior topcoat in a finish that matches the facade plan.
Pre-plan miters at corners — dry-fit every frame so your joints close tight before adhesive goes on.
Don’t paint over unprimed foam; it can soak and leave dull patches that ruin the crisp modern look.
8. Metal channel grid accent with powder-coated strips
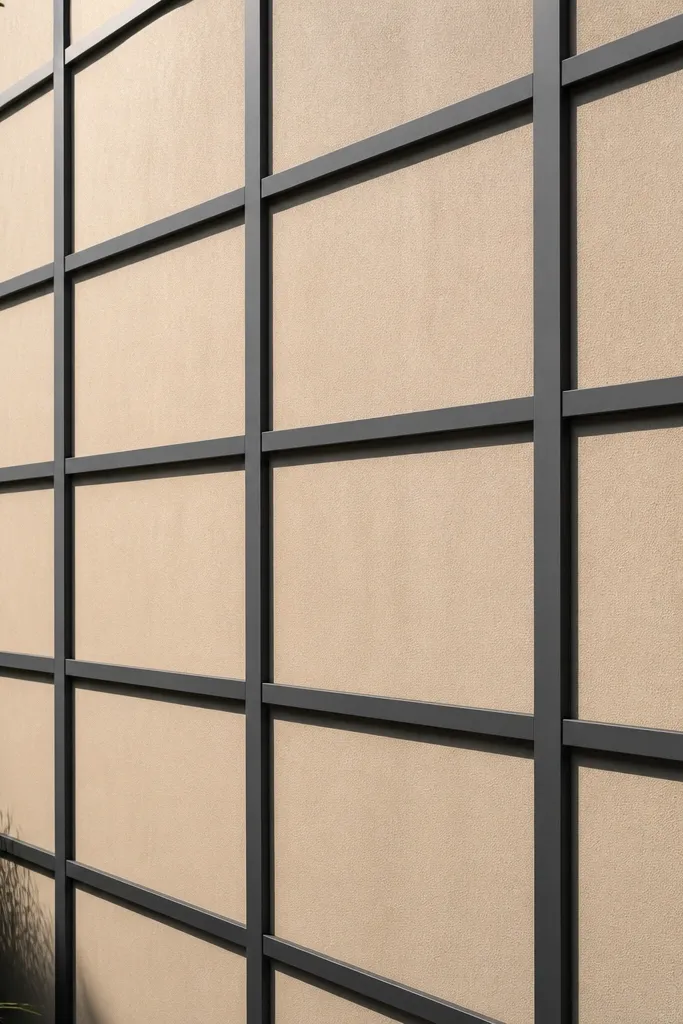
A metal channel grid turns any plain facade into something architectural. The modern look comes from the geometry: evenly spaced lines, clean intersections, and a slight shadow from the channels. Choose a powder-coated finish like matte black or dark bronze so it doesn’t glare in sun. This is a smart budget move because you’re adding impact without covering the whole wall. It’s ideal for entry bays, side elevations, or a single facade plane that needs a focal point. DIY skill is basic to intermediate — the hardware is straightforward, but layout must be precise.
Mark your grid on the wall with chalk lines — pick a spacing like 12-16 inches so it reads clean at distance. Install mounting points into studs or a solid backing, using corrosion-resistant screws and anchors rated for exterior use. Attach powder-coated metal channels so they sit evenly and create a consistent shadow gap (even 1/4-inch depth helps). Add cross channels at intersections, then tighten hardware without warping the channels. Prime touch-ups if needed, then apply exterior paint only if your coating system requires it.
Editor's noteUse a laser level for the first line and measure from that line only — grids look messy when the base line drifts.
Skip thisDon’t mount to weak siding panels; you need real structure or the grid will flex and crack caulk.
9. Shiplap-style cladding with a painted reveal shadow line
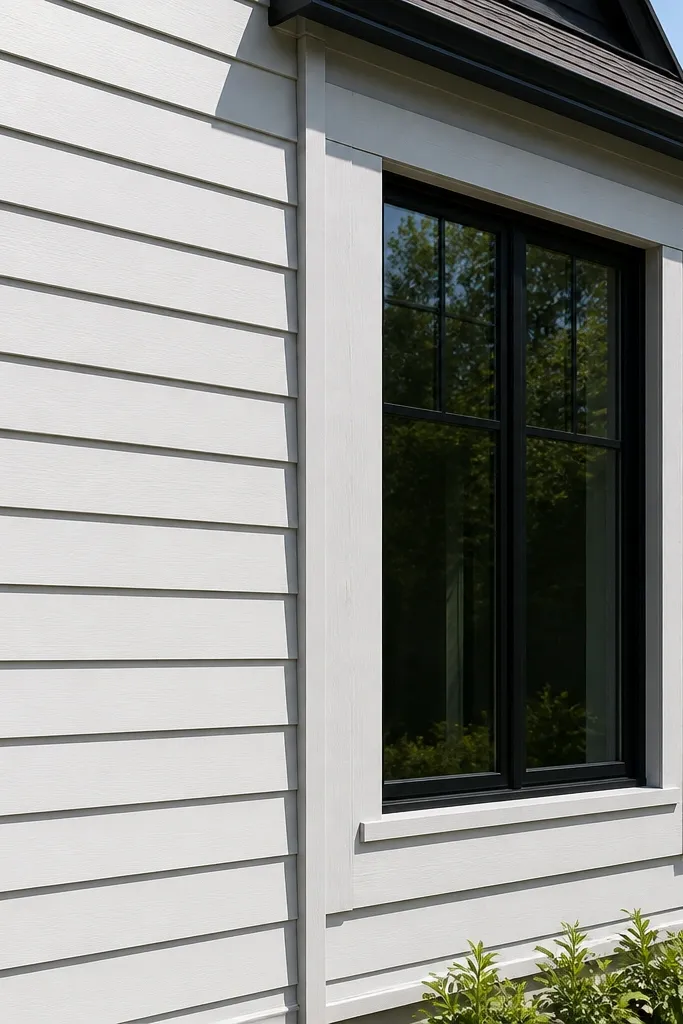
Shiplap can be modern if you control the reveal and keep the color plan strict. The look here is simple: one dominant wall color, a second darker trim color, and a visible shadow line that makes the boards feel like a manufactured system. This is one of the most photogenic options because the shadow line catches light and hides minor surface imperfections. It suits facades where you want a clean, updated exterior without heavy masonry. DIY is intermediate because you need consistent spacing and straight lines across long runs.
Use exterior-rated shiplap boards or a shiplap-style panel system designed for exterior use. Install horizontal furring strips level and spaced per your board system so boards don’t bow. Fit boards with a consistent reveal — aim for 1/4-3/8 inch so the shadow line is visible but not chunky. At windows and doors, box the openings with trim so the shiplap stops clean. Prime all surfaces, then paint with exterior-grade paint and caulk every seam where water can get behind the boards.
Editor's notePaint the boards before installation if your weather allows; you’ll get fewer missed edges and cleaner coverage.
Skip thisDon’t skip caulk at the top of each board seam; water intrusion shows up as peeling later.
10. Board-and-batten corner piers with contrasting top cap
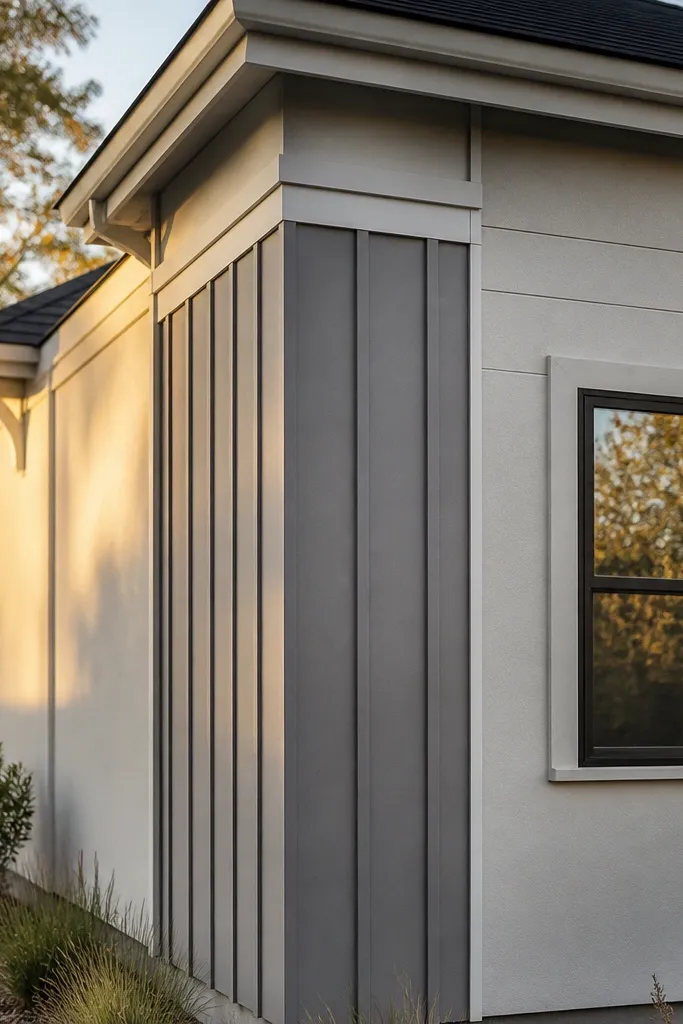
Corner piers make a facade look taller and more structured. The trick is to frame the corners with board-and-batten style cladding, then add a simple top cap that lines up horizontally across the facade. This keeps the budget down because you’re only cladding the corner zones, not the whole wall. It’s also great when you have existing siding you don’t want to replace — you cover the areas that matter most for the modern look. Photo-wise, corner piers give strong vertical lines that stand out even from across the street.
Measure your corner pier width — a common modern proportion is 12-24 inches wide per corner depending on facade size. Install furring strips behind the pier areas so you can fasten battens securely and keep everything plumb. Apply wide boards on the pier plane, then add narrow battens with consistent 1/4-3/8 inch reveals. Install a straight top cap board at the same height across both corners, using exterior screws and caulk at the ends. Prime and paint the pier system, then caulk where it meets existing siding.
Editor's noteKeep pier widths proportional to window width; if the pier is too narrow, it looks like an afterthought.
Skip thisDon’t let the pier top cap slope; even a small mismatch shows up hard in photos.
11. Panelized wood-composite facade with matching trim reveals
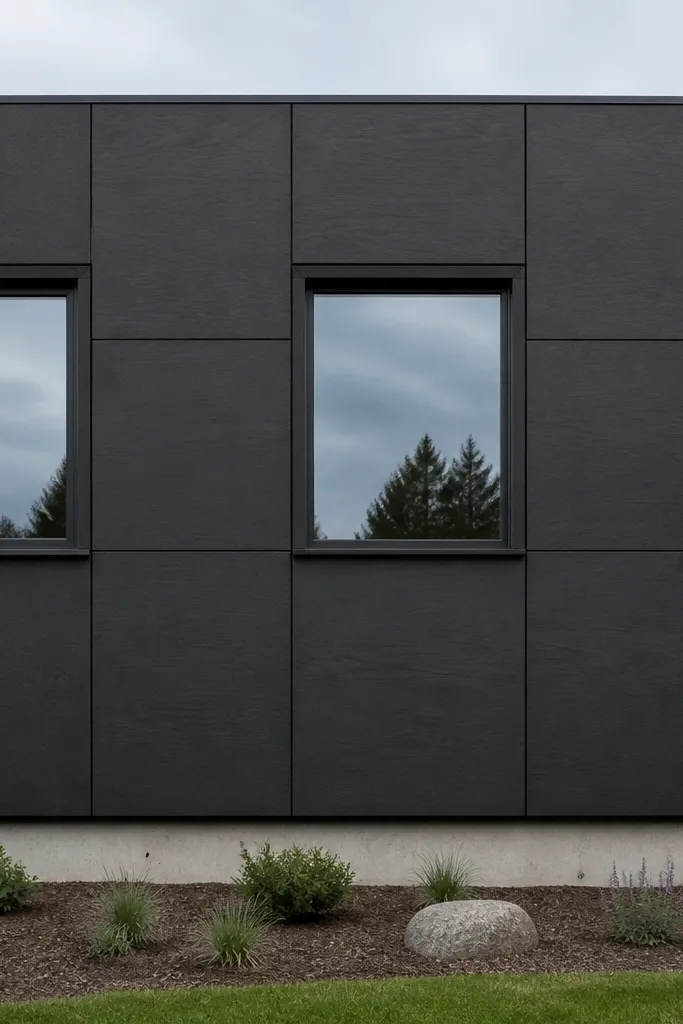
Wood-composite panels give you a modern, factory-like finish without the maintenance headaches of real wood. The key for year-round modern house facade designs is consistent trim reveals: slim shadow gaps around panels, and matching trim at windows. Pick a matte finish in a dark gray, warm charcoal, or off-white so the facade doesn’t glare. This works well on larger facade sections where you want a uniform look quickly. DIY skill is intermediate because panel systems have specific fastening requirements and you need to keep lines straight.
Choose an exterior wood-composite panel system that includes trim and fastening instructions. Install a proper backing frame so panels can expand and contract — follow the manufacturer’s spacing guidelines for gaps. Start at a corner and set a level reference line for the first row of panels. Fasten panels with the recommended screws and clips, then install trim pieces to cover edges and seams. Prime and paint only if the system requires it, then caulk at trim transitions where water can collect.
Editor's noteUse the manufacturer’s starter strips or edge guides if they include them; you’ll get straighter lines with less measuring.
Skip thisAvoid forcing panels tight against each other; expansion gaps prevent warping and seam buckling.
12. Large-format corrugated metal accent wall with concealed fasteners
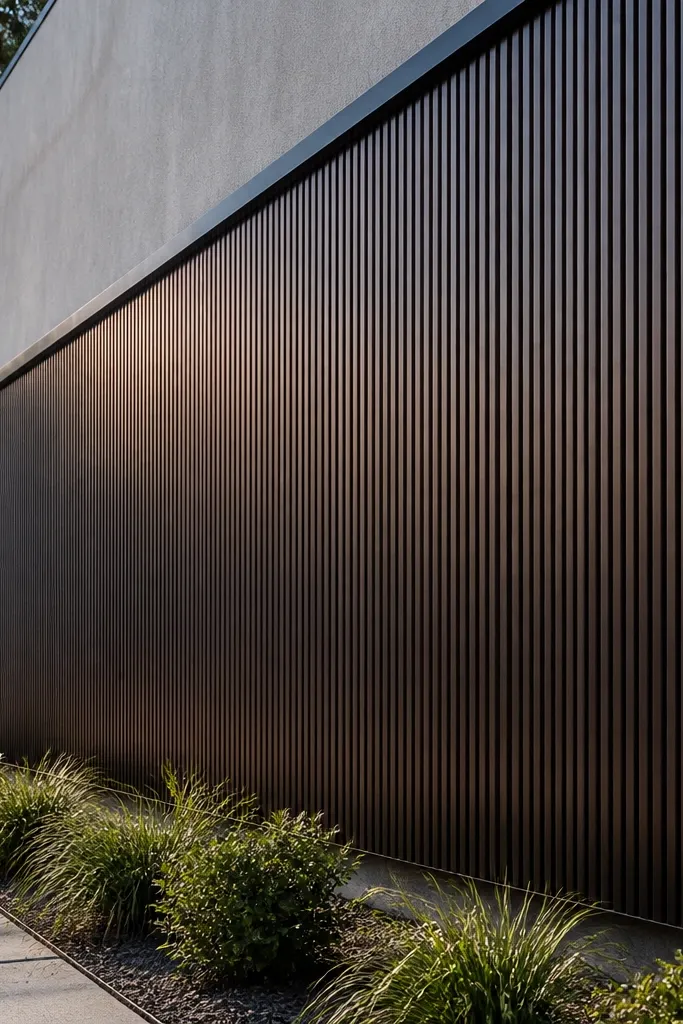
Corrugated metal looks modern when it’s used as an accent plane, not as a full chaotic wrap. Choose matte finishes and keep fasteners concealed so the surface reads smooth and architectural. This option is photogenic because the ridges catch light across the day, but matte paint keeps it from looking cheap. It’s ideal for entry recesses, porch areas, and side elevations where you want a strong focal point. DIY skill is intermediate because you’re working with cutting, flashing, and weatherproof sealing.
Install a rigid backing frame over the wall so the metal can mount flat and straight. Use exterior-rated underlayment or flashing tape where water will run behind seams. Cut corrugated sheets to your panel sizes and allow for expansion gaps at edges per the metal system guide. Mount with concealed fasteners and add trim flashing at corners, bottom edges, and around windows. Seal transitions with exterior-grade sealant and paint touch-ups if your system requires it.
Mark sheet lines with a chalk guide and cut with a proper blade meant for metal — clean edges reduce corrosion points.
Don’t skip flashing tape at seams; water will find tiny gaps and stain the wall behind.
13. Concrete-look stucco skim coat with a modern color blocking band
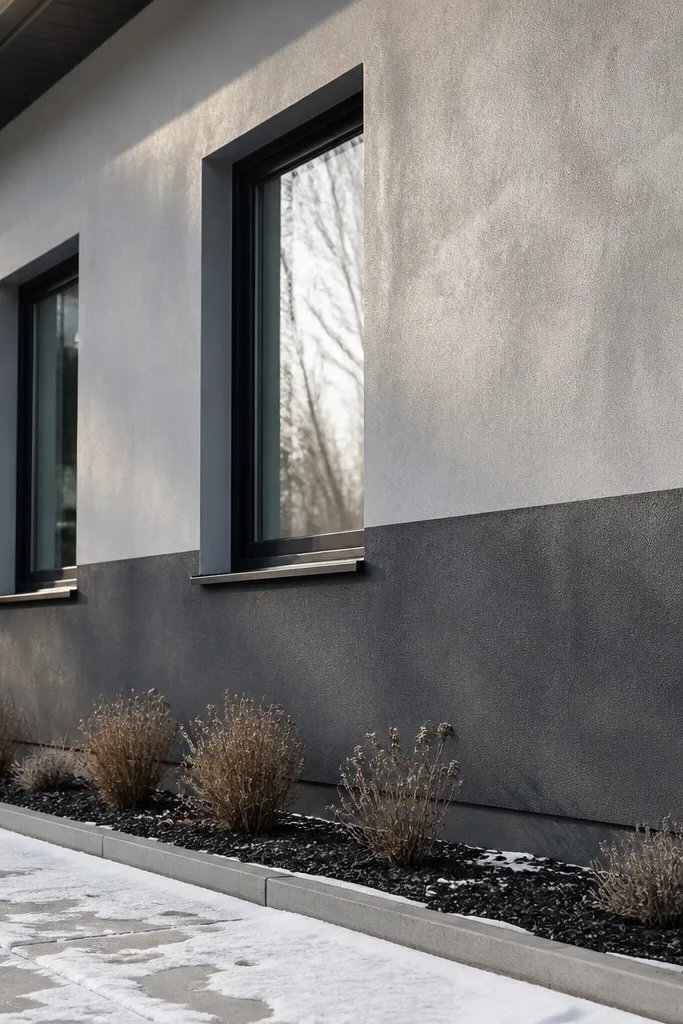
A skim coat can modernize a facade dramatically when you control texture and color blocking. A concrete-look finish hides minor bumps and makes the wall surface look intentional, especially when paired with one clean accent band. The modern part is the restraint: keep the main wall one tone and use a darker band to frame windows and the entry. This works best when your existing wall is already stucco or masonry, or when you can apply a compatible base coat over suitable substrate. DIY is intermediate because you need consistent trowel texture, but the payoff is a cohesive, architectural surface.
Prep the wall thoroughly: clean, repair cracks, and apply the correct bonding agent for your skim coat system. Apply base coat to achieve a flat surface, then apply a concrete-look skim coat using a consistent trowel pattern. Work in manageable sections so texture stays uniform and blends cleanly at edges. Mask a straight horizontal band location and apply the accent color in the same system so it cures together. After cure, seal if the product calls for it, then touch up edges and caulk where trim meets the wall.
Use painter’s tape with a firm burnish along the band edge so you get a sharp line without fuzzy texture overlap.
Avoid changing trowel pressure mid-section; texture shifts show up immediately in side lighting.
14. Exterior plywood paneling painted with a grid and sealed edges
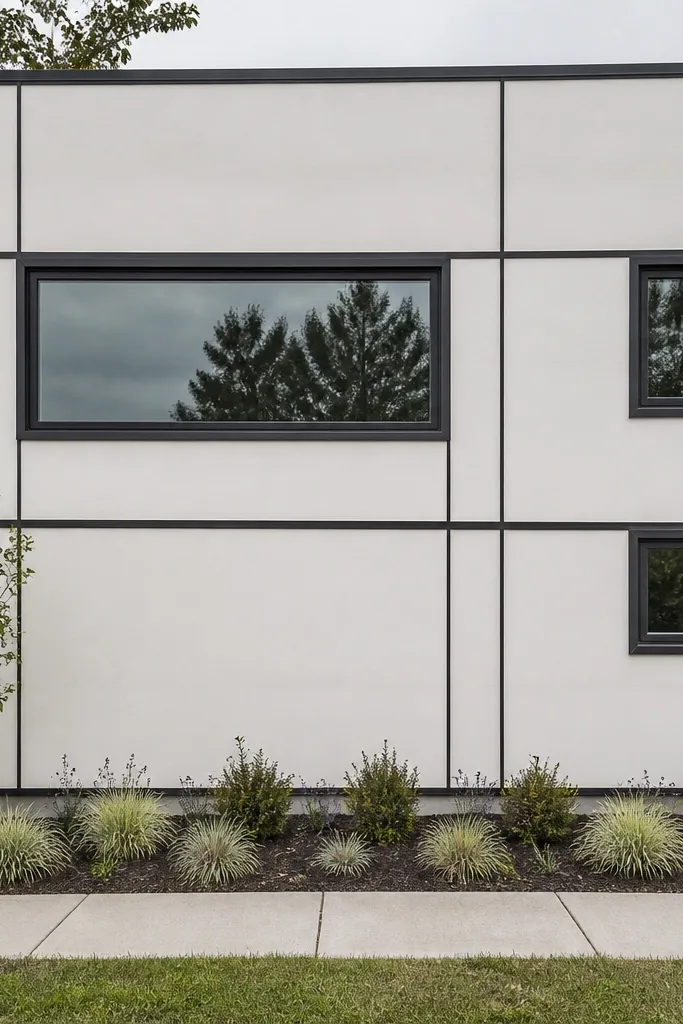
This is the budget option when you want strong geometry fast. Exterior-rated plywood panels, when installed over a solid backing and sealed properly, can look clean and modern with a simple grid and crisp trim. The look is all about edges: a thin shadow gap between panels plus dark trim around windows makes it read as facade architecture, not DIY scraps. It’s best for covered porches or areas with good roof overhang, though sealing and caulking can still make it work on small facade sections. DIY skill is basic to intermediate, with the biggest challenge being cutting accuracy and sealing.
Use exterior-rated plywood panels and cut them to a consistent grid size, leaving 1/4-3/8 inch gaps between panels. Install a backing framework on the wall and keep it flat so panels don’t rock. Seal every cut edge with an exterior primer/sealer before installation — don’t rely on paint alone. Fasten panels with exterior screws into studs or battens, then cover corners and panel seams with trim strips to hide imperfect edges. Prime and paint the main faces, then caulk every seam and trim junction.
Editor's notePre-seal the underside and edges too; edge failure is what ruins painted plywood facades.
Skip thisDon’t skip a real backing frame; if panels sit on uneven siding, you’ll get gaps that let water in.
15. Modern brick-look wallpaper paneling on a ventilated wall section
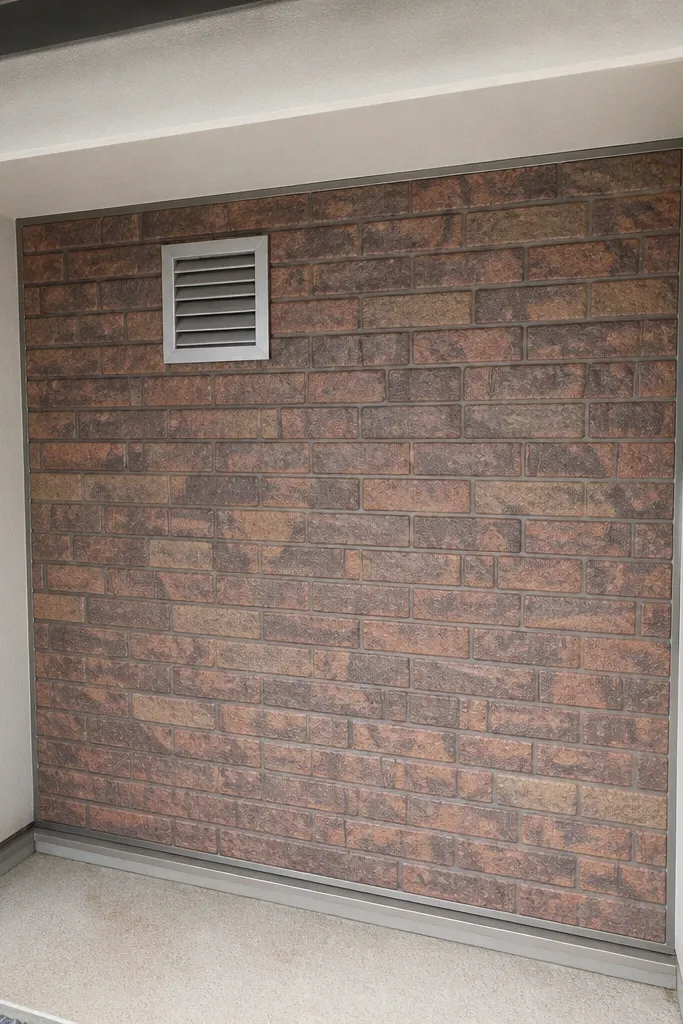
Yes, wallpaper can look modern outside — but only if you treat it like a panel system, not loose wall covering. Use it on a small, well-protected facade section like an entry recess wall under an overhang, framed with trim so edges are sealed. Pick a matte brick-look pattern with tight repeating texture so it doesn’t look like print from across the street. The modern aesthetic comes from clean trim borders, consistent panel sizing, and a restrained color palette. DIY skill is basic, and it’s one of the cheapest ways to test a modern facade vibe before committing to cladding everywhere.
Start with a smooth, solid substrate like cement board or properly skim-coated drywall rated for exterior exposure, then prime it. Cut wallpaper into panels and dry-fit them so you align the pattern across seams. Apply a wallpaper adhesive rated for your substrate and exterior conditions, then smooth firmly to remove bubbles. Frame each panel with exterior trim boards and caulk the trim edges so water can’t wick under the paper. Seal the surface with a clear exterior coating if your wallpaper system allows it, then touch up with exterior paint where trim meets wall.
Use short panel heights that match your overhang protection; fewer exposed edges means fewer failures.
Don’t put it on a fully exposed wall plane; wind-driven rain and sun will lift edges.



