
1. Black Shaker Solid Door with Warm Oak Trim Frame
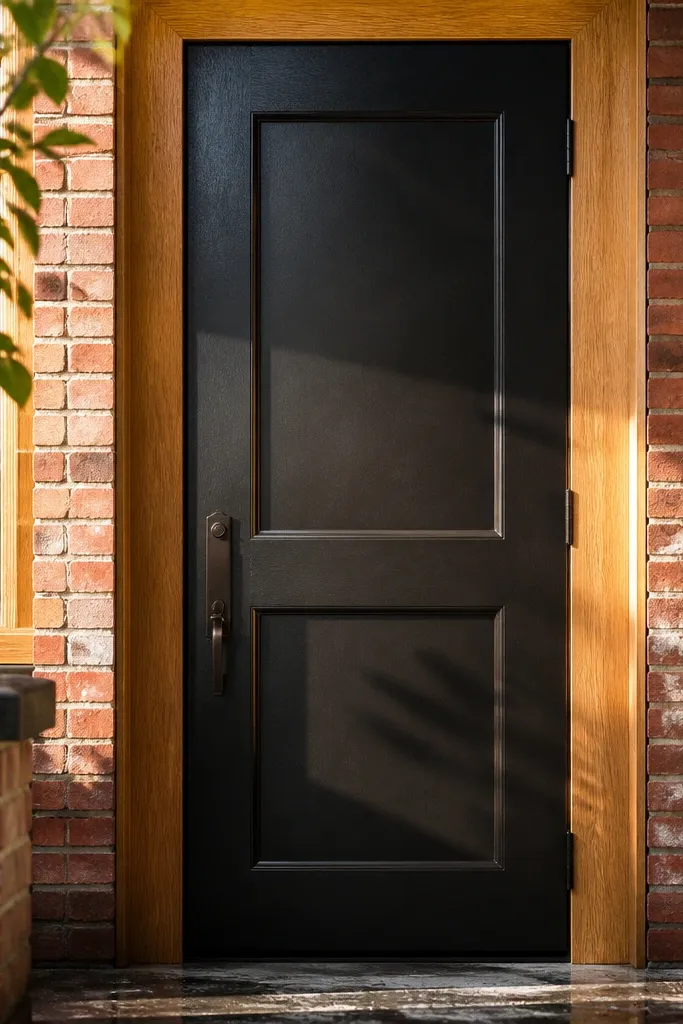
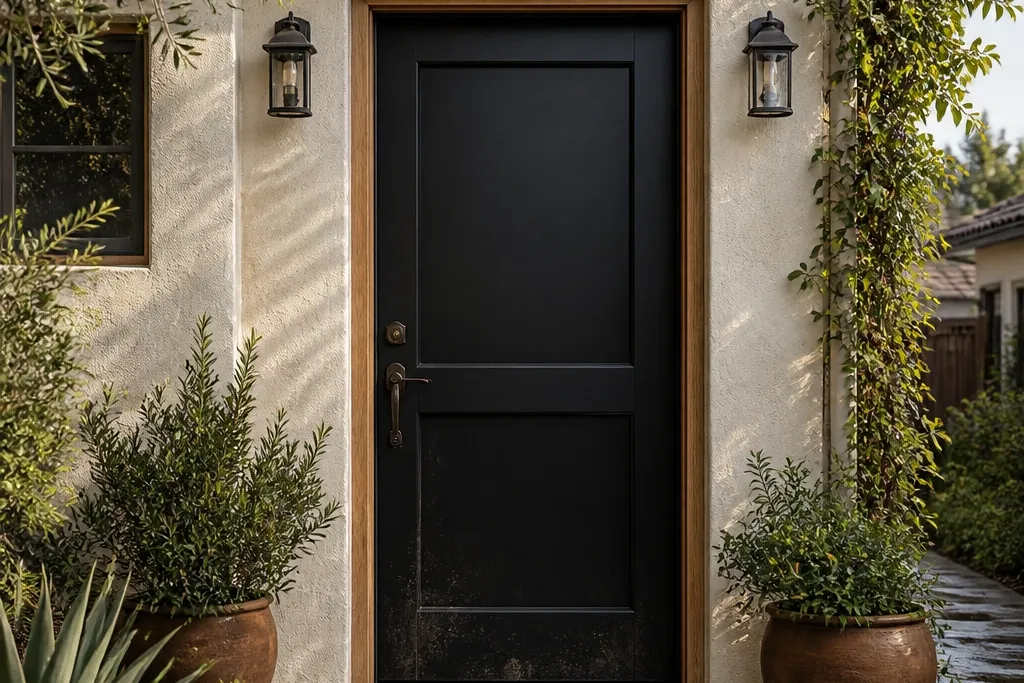
A black shaker-style solid door makes small homes look pulled together because the panel lines catch light and create depth even when the rest of the facade is plain. Pair it with warm oak trim so the black doesn’t feel heavy; the wood tone warms up the entrance in winter and doesn’t look washed out in summer sun. This is a great year-round main entrance door design because solid surfaces hide minor scuffs, and the panel geometry stays visually crisp through weather cycles. Plan on exterior-rated paint or a factory-finished door so you’re not fighting primer adhesion later. Skill level is beginner-friendly if you’re painting and installing trim, and the payoff is a “designed” look without complicated carpentry.
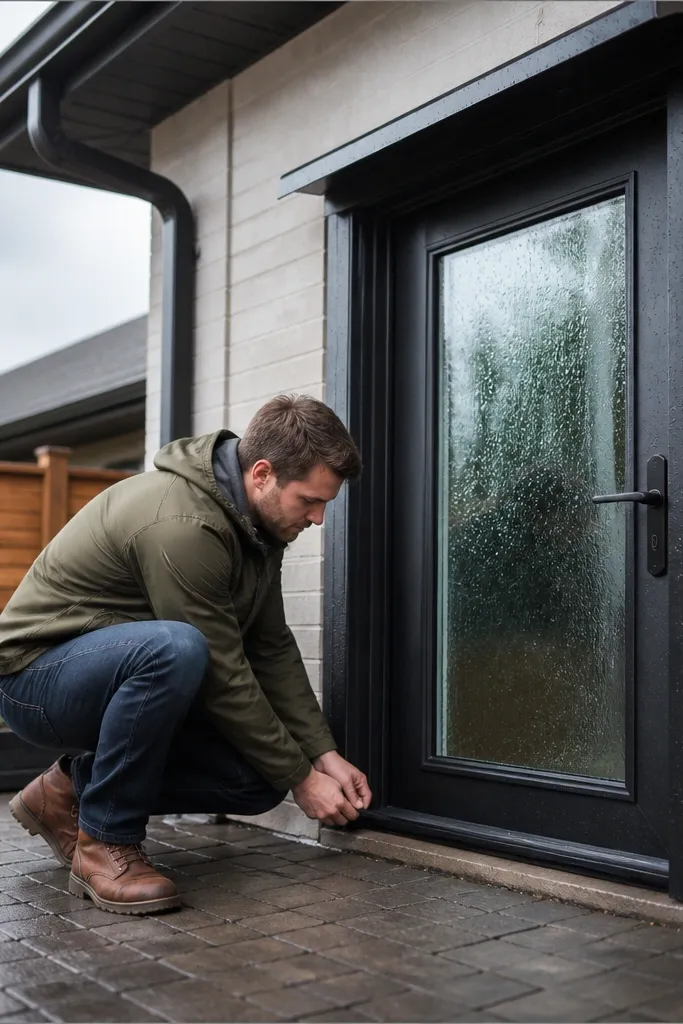
Step 1: Choose a door with shaker rails and stiles (panel depth around 3/4 in). Sand the door lightly with 180-grit, wipe with denatured alcohol, then prime with an exterior bonding primer and topcoat with two coats of exterior trim paint in matte or satin. Step 2: Cut oak trim to create a flat picture-frame effect around the door opening; keep joints tight and seal corners with exterior caulk. Step 3: Install a new door sweep and check the threshold for gaps, then paint or stain any exposed end grain and seal it.
Use satin paint on the door face and matte on the trim — it keeps glare down on sunny mornings.
Don’t skip end-grain sealing on the oak trim; that’s where cracking starts first.
2. Charcoal Vertical Slat Door with Brass Kick Plate
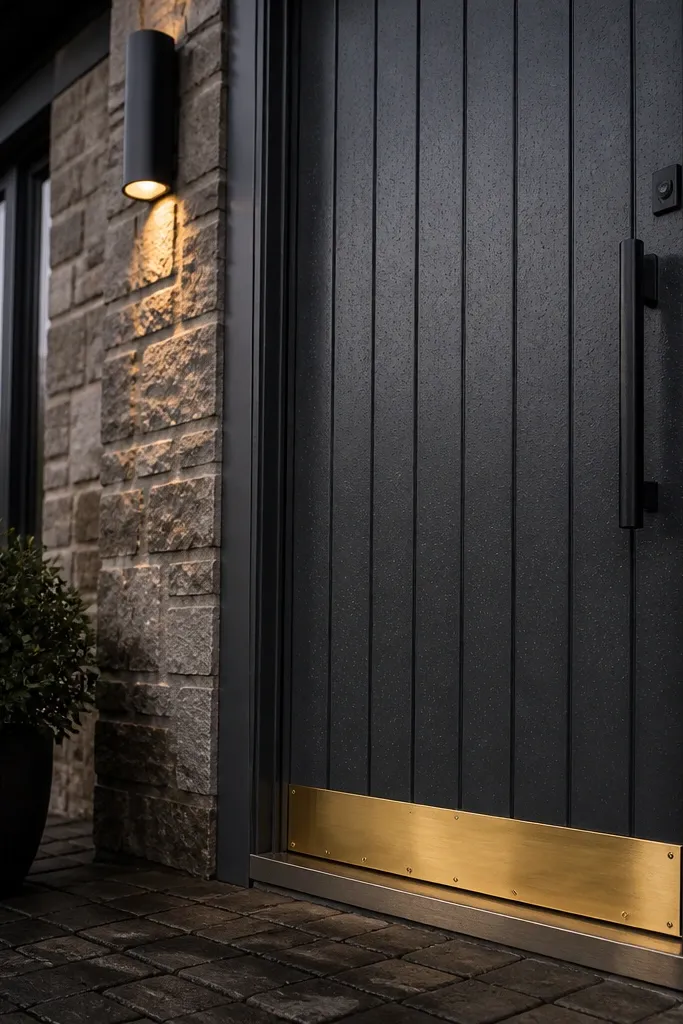
Vertical slats give you a built-in “taller doorway” effect, which is exactly what small homes need for year-round main entrance door design. Charcoal looks modern without going as stark as black, and it hides dust better than lighter colors. Add a brass kick plate near the bottom — it protects the door from scuffs and makes the entrance feel intentional. This design also photographs well because slats create highlights and shadow lines, especially in low-angle light like fall mornings. It’s a mid-level project if you’re fabricating slats, but if you buy a pre-slatted exterior door, the build becomes mostly finishing and hardware.
Step 1: If using a pre-made door, sand the slat faces with 220-grit and clean thoroughly; prime all surfaces, then spray or roll on two coats of exterior paint in charcoal satin. Step 2: Mark the kick plate height so it sits about 10-12 in from the finished floor, then locate it over a solid area you can fasten into. Step 3: Drill pilot holes, attach the kick plate with exterior-rated screws, and seal around any exposed hardware edges with clear exterior caulk.
Dry-fit the kick plate and stand back — placement that feels “right” up close can look off from the curb.
Avoid glossy paint on slats; it shows roller marks and glare lines.
3. Warm White Door with Tall Narrow Glass Sidelites
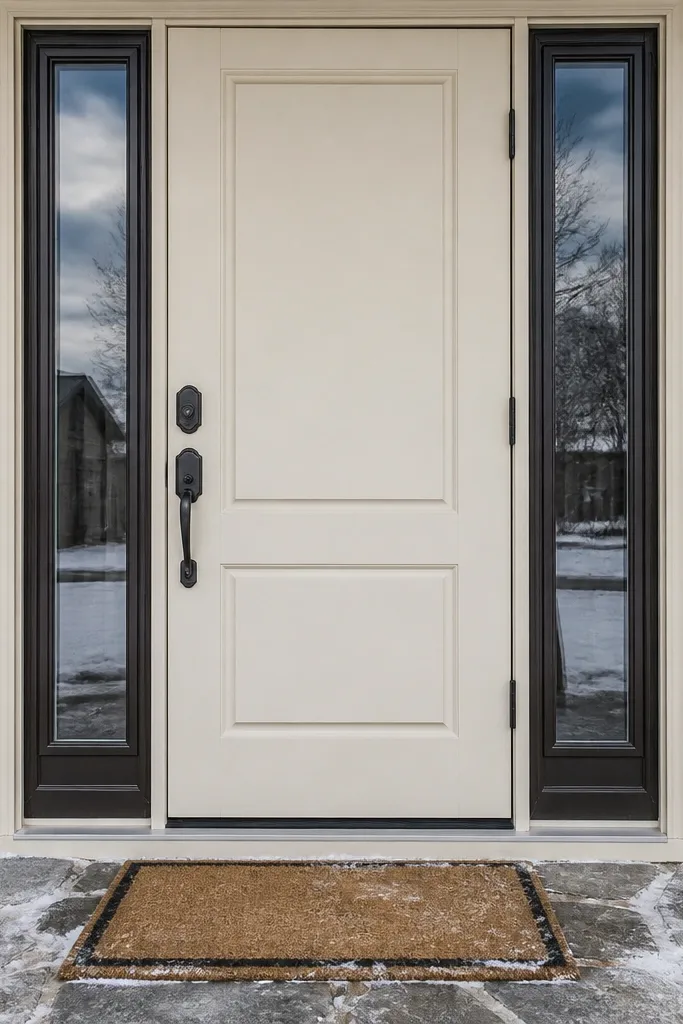
Step 1: Pick a door and sidelites unit with insulated glass and a manufacturer gasket system; verify the glass is tempered before you install. Step 2: Paint the door and trim in exterior-rated enamel; keep a uniform coat around the stiles so the glass openings look clean. Step 3: Install the unit with shims at the hinge points, then foam and seal around the perimeter using low-expansion exterior window/door foam and exterior caulk at the interior and exterior joints.
A warm white door with tall narrow glass sidelites makes the entrance feel brighter without turning your whole facade into a window wall. The glass shape is what matters here: tall and narrow reads elegant and keeps the doorway proportions tight for small homes. For year-round main entrance door design, choose tempered glass and a door frame that seals cleanly around the glass — you want a crisp gasket line, not visible gaps. This look is especially good if your entry sits in shade; the glass pulls in daylight and makes the door color look alive. It’s a straightforward project if you buy a door system with sidelites; otherwise it’s more advanced due to framing and waterproofing around the glass.
Skip thisDon’t rely on paint to seal around glass; use the right gasket and caulk.
Editor's noteUse painter’s tape to mask the glass edge line for a razor-clean caulk bead.
4. Deep Green Exterior Door with Arched Top Lite
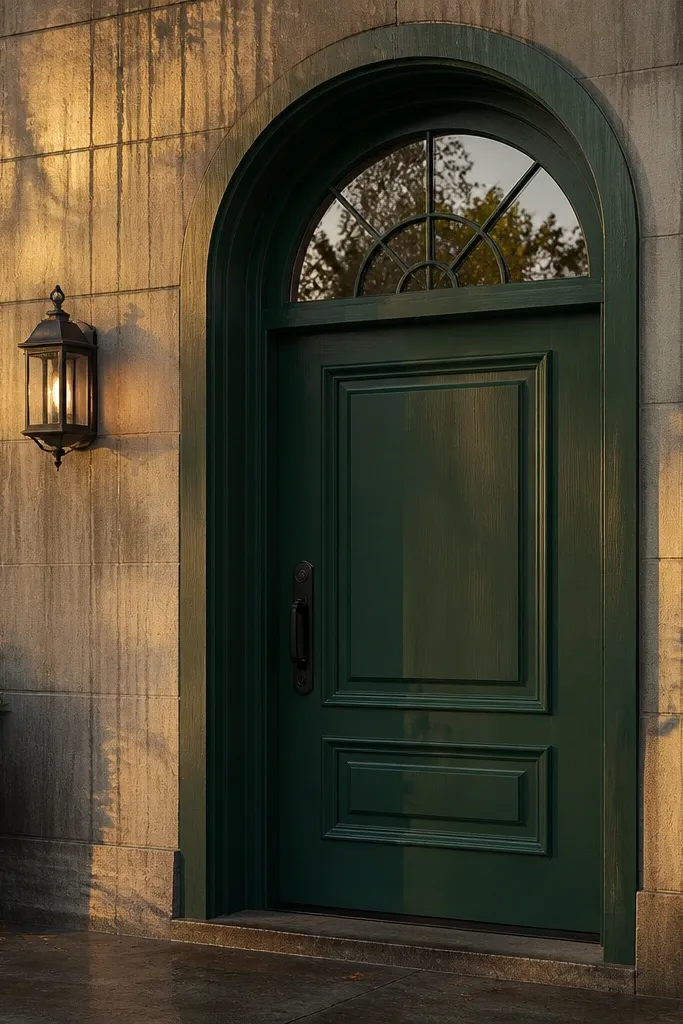
A deep green door with an arched top lite gives you classic curb appeal without needing a full porch makeover. The arch adds a focal point and makes the entry feel taller, while the rich green reads warm in winter and stays grounded in summer. For year-round main entrance door design, this look works best when the glass is textured or seeded so you get privacy and light without seeing every shadow detail. Choose a door with a solid lower panel so the finish can handle scuffs and winter salt. This is beginner to intermediate if you’re buying an exterior door with the lite already built.
Step 1: Choose a deep green exterior door color and stick to a single product line for primer and topcoat so adhesion stays consistent. Sand lightly, prime, then apply two coats of exterior enamel; paint the edges and hinge mortises carefully. Step 2: Install the door with correct shimming at hinges and strike plate, and check the reveal gap around the arch. Step 3: Seal perimeter trim with exterior caulk and install a good door sweep that matches your threshold gap.
If your facade is brick or rough siding, use a slightly satin finish so the green doesn’t look chalky under harsh sun.
Skip low-quality caulk; it shrinks and pulls away from the lite trim first.
5. Natural Cedar Door with Clear Exterior Finish and Black Hardware
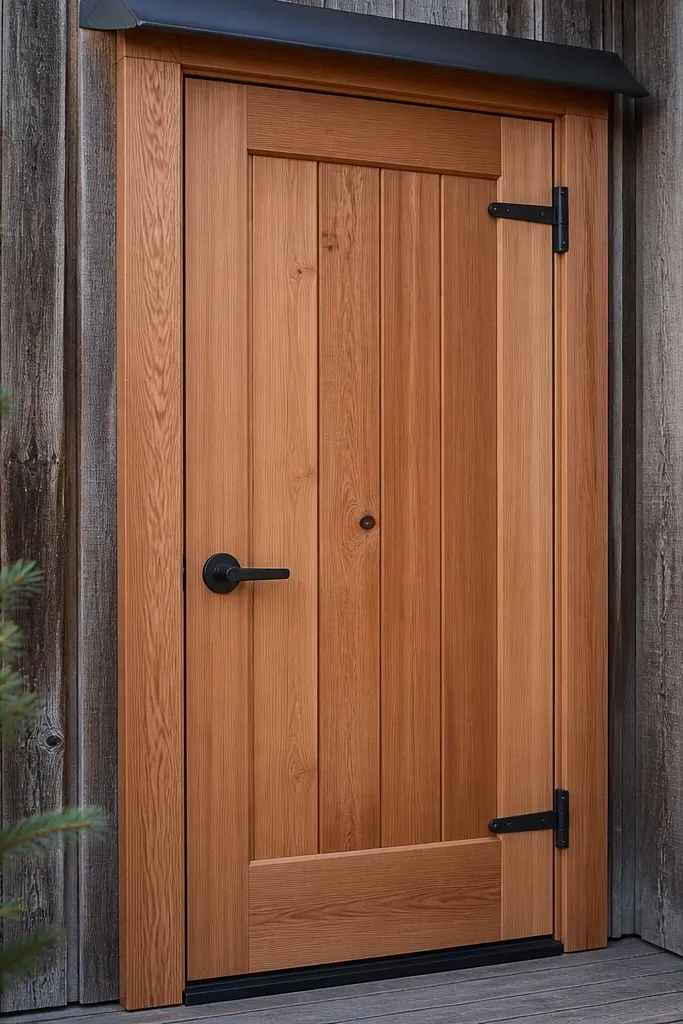
Step 1: Sand the cedar to 150-grit, then remove dust completely; stain if you want a slightly darker tone, but don’t over-darken because weather will shift it. Step 2: Apply an exterior clear finish system in thin coats — follow the product schedule and let each coat cure before sanding lightly with 220-grit. Step 3: Install the door, then seal around trim joints and hardware penetrations with exterior caulk so water doesn’t wick behind the finish.
If you want the door to look like part of the architecture instead of a painted block, a clear-finished cedar door is the move. Cedar’s warm grain looks good in small entries because it gives texture when the rest of the wall is smooth. For year-round main entrance door design, clear finishes only look great when you use a proper exterior clear system and keep recoat schedules realistic. Add matte black hardware and a black kick plate for contrast; it sharpens the look and protects the high-wear lower area. This project is best for intermediate DIYers because you’re dealing with clean sanding, finish compatibility, and weather exposure.
Skip thisDon’t use indoor polyurethane; it will fail quickly on a door that gets sun and rain.
Editor's noteUse a foam brush for clear coats; it leaves fewer streaks on grain-heavy cedar.
6. Textured White Door with Rectangular Glass Panels
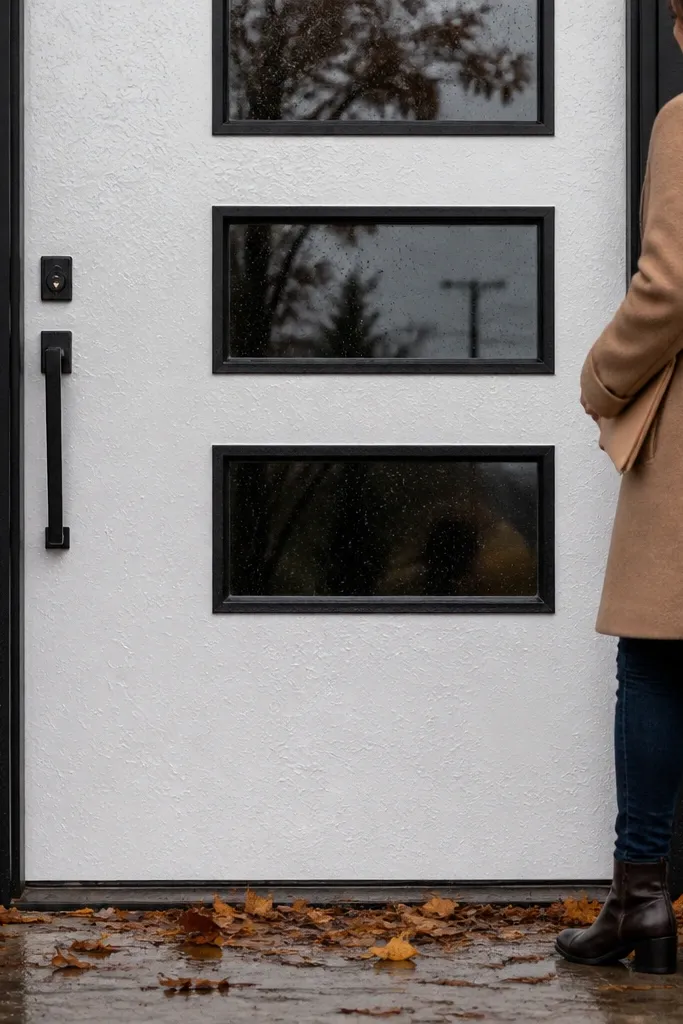
Textured doors photograph like crazy because the surface catches light differently at every angle. Pair that with rectangular glass panels for a modern “workshop” vibe that still feels clean for a small home entrance. For year-round main entrance door design, textured finishes help hide minor scuffs and micro-wear that would show on flat paint. Choose seeded or lightly frosted glass so you get light without full visibility. This is a mid-range DIY build if you’re painting a textured door, but it’s simple if you buy a textured exterior door slab.
Step 1: Clean the textured surface with a degreaser and let it dry fully; then prime with a tinted exterior primer to avoid patchy coverage. Step 2: Paint with exterior cabinet-grade enamel in two thin coats, using a foam roller for even coverage and brushing the edges by hand. Step 3: Install the door and ensure the glass gasket is seated evenly; apply a uniform caulk bead where the frame meets trim.
Roll in one direction on textured surfaces so you avoid visible swirls.
Avoid thick coats; they fill texture and make the door look dull instead of crisp.
7. Matte Black Door with Chevron Panel Inlay
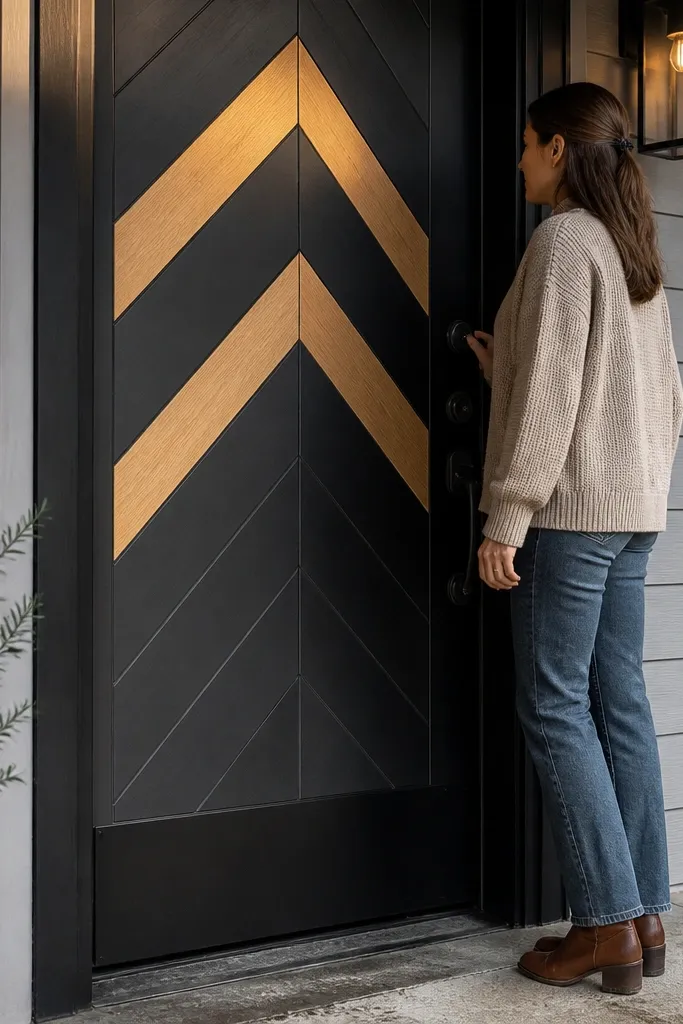
Step 1: Build the chevron inlay from exterior-rated thin strips (about 1/2 in thick) and test-fit the pattern on the door before gluing. Step 2: Sand, prime the black base, then spray or roll the matte black; once cured, glue the chevron inlay and stain it, sealing with an exterior clear. Step 3: Install the door, add a new weatherstrip and door sweep, then touch up caulk lines so the transition looks deliberate.
A chevron inlay on a matte black door gives you movement without adding clutter. For small homes, this works because the design reads intentional even if your entry lights are minimal. The key is contrast: use a lighter wood tone for the chevron so it separates from the black base from across the street. For year-round main entrance door design, matte finishes hide fingerprints but still need the right exterior clear topcoat if the door gets heavy sun. This is a good project if you can cut simple wood strips and glue them to a door panel — intermediate DIY.
Skip thisDon’t glue directly to glossy paint — scuff-sand and prime first.
Editor's noteUse a carpenter’s square to keep the chevron angles consistent; small angle errors show fast on matte black.
8. Oak-Framed Door with White Center Slab (Picture-Frame Look)
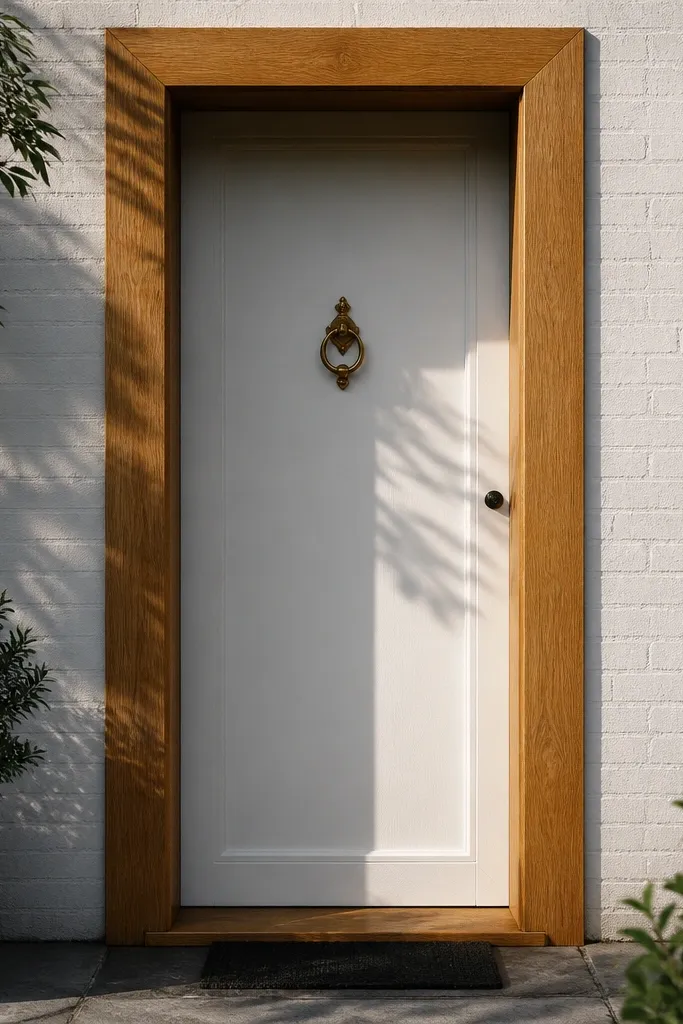
Step 1: Buy a solid exterior slab door and paint the center slab white exterior enamel (prime first, then two coats). Step 2: Cut oak trim strips to form an even border; aim for 1.5-2 in wide trim and keep the inner reveal consistent on all sides. Step 3: Glue and fasten the trim with exterior-rated construction adhesive plus finish nails, then seal joints and paint or stain the trim edges.
This design gives you a clean graphic look: a white center slab bordered by oak trim like a framed artwork. It’s perfect for small homes because it adds structure around the opening without needing sidelites or big porch changes. For year-round main entrance door design, the frame effect makes the door readable in any season, and oak brings warmth so white doesn’t feel sterile. The best part is you can DIY it even if you start with a basic slab door — trim does the heavy lifting visually. It’s beginner-friendly if you can measure accurately and use a quality exterior adhesive and caulk.
Skip thisDon’t use interior-only wood glue; it breaks down with moisture.
Editor's noteDry-fit trim with painter’s tape first; the spacing is what makes this look custom.
9. Rust-Colored Door with Horizontally Stacked Panels
A rust-colored door with horizontal stacked panels makes a small home feel grounded and artsy without being loud. The horizontal lines add width and balance if your facade has vertical siding or tall windows. For year-round main entrance door design, rust tones hide dirt and weather spotting better than bright whites, and the stacked panel pattern creates depth. Choose an exterior paint system that resists chalking so the color stays even. This is best with a pre-made panel door or a door with a simple raised panel pattern you can repaint.
Step 1: Sand and clean the door, then apply a bonding primer; rust colors show patchiness if you skip proper priming. Step 2: Paint two coats of exterior rust-toned enamel, letting the first coat cure fully before the second. Step 3: Install the door with fresh weatherstripping and confirm the sweep gap is tight — you want water to run off, not pool at the bottom edge.
If your entry gets hot sun, pick a paint labeled for exterior fade resistance and use satin instead of ultra-matte.
Avoid thin, single-coat color; rust tones need full coverage to look intentional.
10. Pale Gray Door with Oversized Glass Rectangle and Black Frame
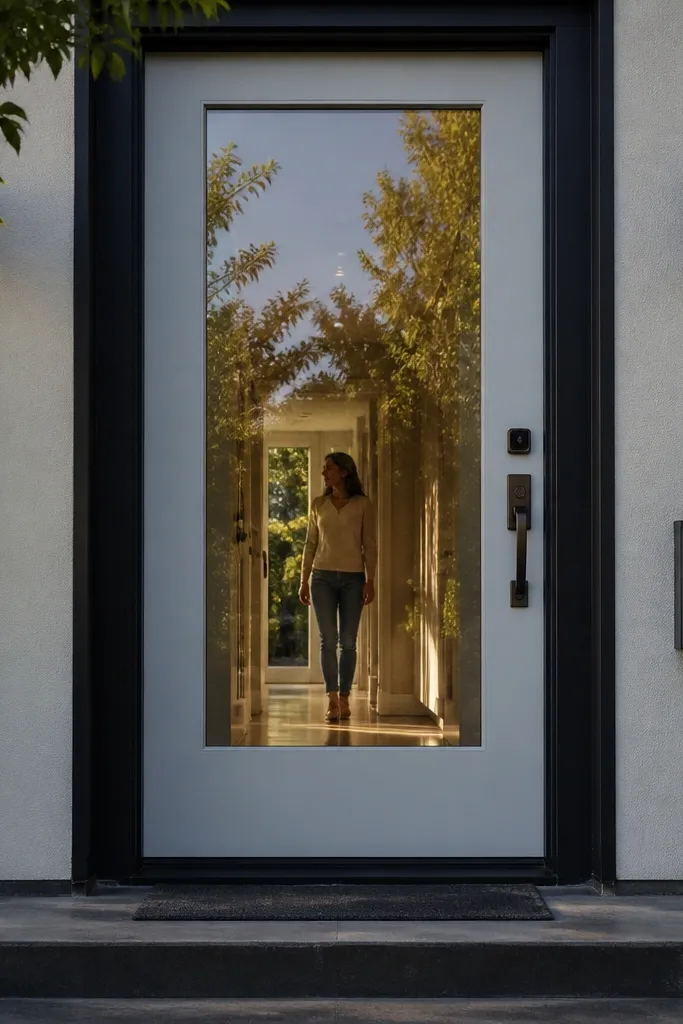
Oversized glass rectangles make the entry feel modern and airy, and the black frame around the glass gives you a strong graphic edge. For small homes, this is one of the cleanest year-round main entrance door design options because the window shape pulls attention to the doorway and makes the front facade look more “designed.” Use privacy glass like frosted or textured so the door doesn’t feel exposed. This looks best when your porch light and house numbers are also dark — the whole entrance reads cohesive. It’s intermediate DIY if you’re building the frame; easiest if you buy an exterior door unit with the glass and frame included.
Step 1: Choose a door with an oversized rectangular lite and a black exterior frame kit; verify the glass is tempered. Step 2: Paint the door body pale gray exterior enamel; keep the black frame separate if it’s already powder-coated, and mask edges for sharp lines. Step 3: Install with shims for level, then apply exterior caulk around the glass frame and perimeter trim so you don’t get water tracks.
Use a 2-3 mm caulk bead at the frame edges; thick caulk looks messy and shrinks unevenly.
Don’t install the glass gasket dry; seat it correctly so it compresses evenly.
11. White Door with Wrought Iron Scrollwork Insert
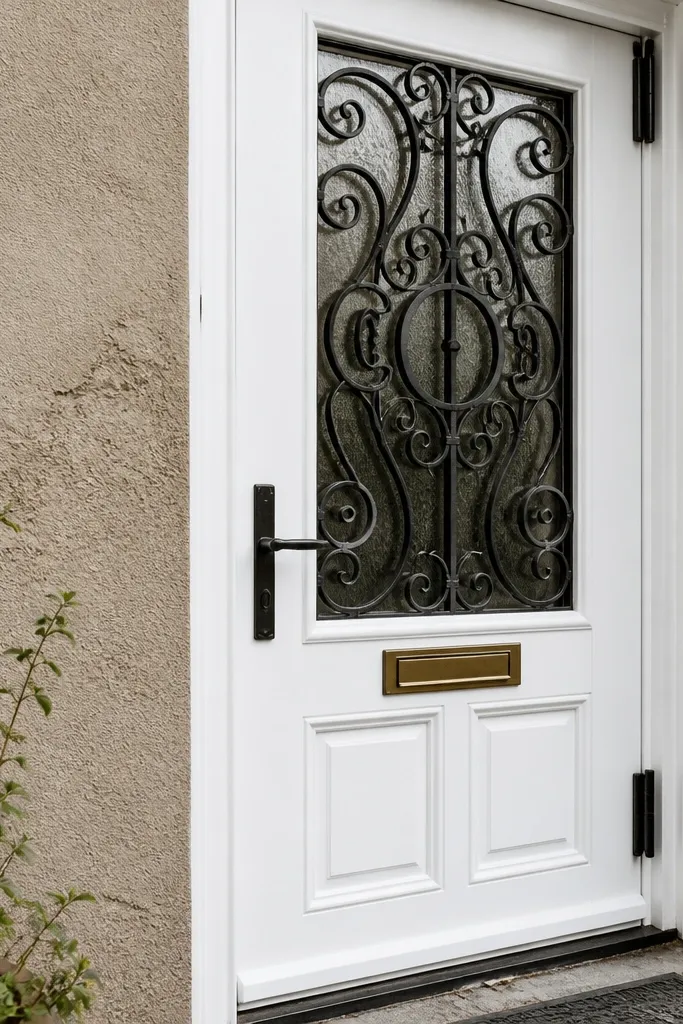
Step 1: Buy a powder-coated iron scroll insert sized to your door panel area and mark the mounting points through the insert holes. Step 2: Prime and paint the door first, then mount the insert with exterior screws into solid backing; seal any screw penetrations with clear exterior caulk. Step 3: Install the door, then set a tight door sweep and check the threshold seal so rain doesn’t run under the bottom edge.
Scrollwork insert details add a handcrafted look that still fits small homes because the design stays inside the door footprint. White keeps it bright, and black iron keeps it crisp and readable from the street. For year-round main entrance door design, this option hides everyday wear better than a fully glass door and gives you decorative interest without needing extra landscaping. Choose powder-coated iron so it doesn’t rust at the joints, and keep the insert anchored to solid wood or a metal backing. This is beginner to intermediate if you’re mounting a pre-made iron insert.
Skip thisAvoid raw iron; it stains the surrounding paint where moisture sits.
Editor's noteUse clear exterior caulk under the insert edges so you don’t see sealant squeeze-out on the white paint.
12. Natural Wood Door with Vertical Tongue-and-Groove Accent Panel
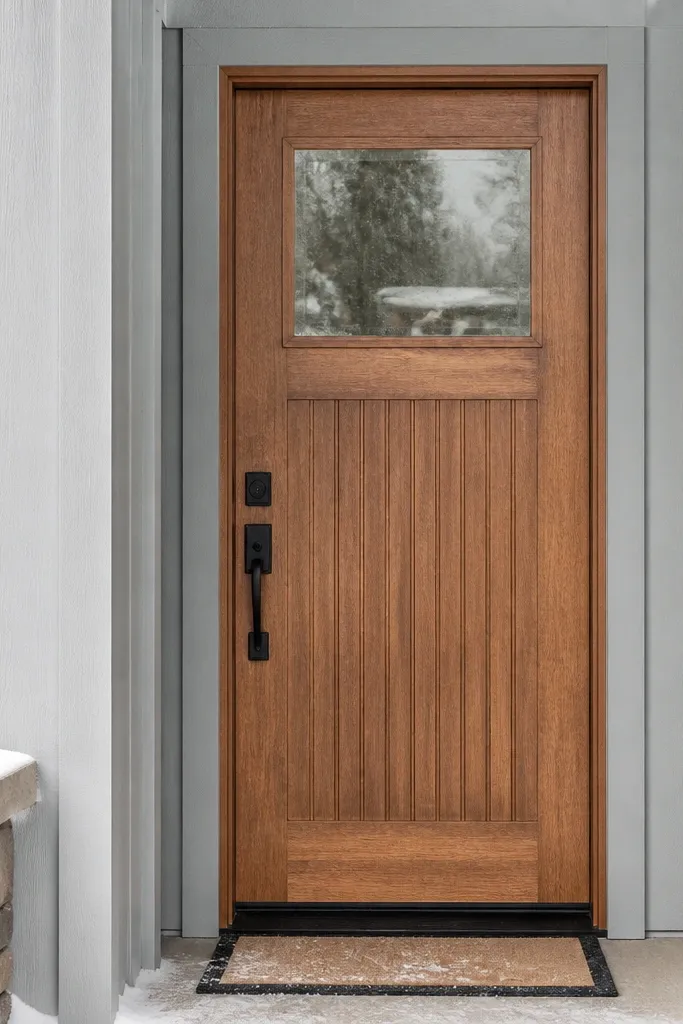
A natural wood door with a tongue-and-groove accent panel creates real texture without turning the entrance into a busy pattern. The vertical groove lines pull the eye upward, which helps small homes that feel squat at the entry. For year-round main entrance door design, this works best when you use a clear exterior stain or semi-transparent finish that emphasizes grain while still protecting against UV. Pair with simple black hardware and a matching black number plate for a clean, modern farmhouse look. This is intermediate because you’re adding a panel, but it’s still very doable with basic framing skills.
Step 1: Pick a base exterior door (solid wood or fiberglass) and decide the accent panel height so it sits centered around the handle. Step 2: Cut tongue-and-groove boards to size, sand them smooth, then stain and seal them before installation; attach with exterior construction adhesive and small brads. Step 3: Seal all edges and joints with exterior caulk, then finish the whole door with one compatible exterior clear coat system.
Pre-seal the back side of the accent panel too; it reduces warping from moisture swings.
Don’t leave end grain raw on the accent panel; it drinks moisture and lifts the finish.
13. Navy Door with Geometric Diamond Inset Panels
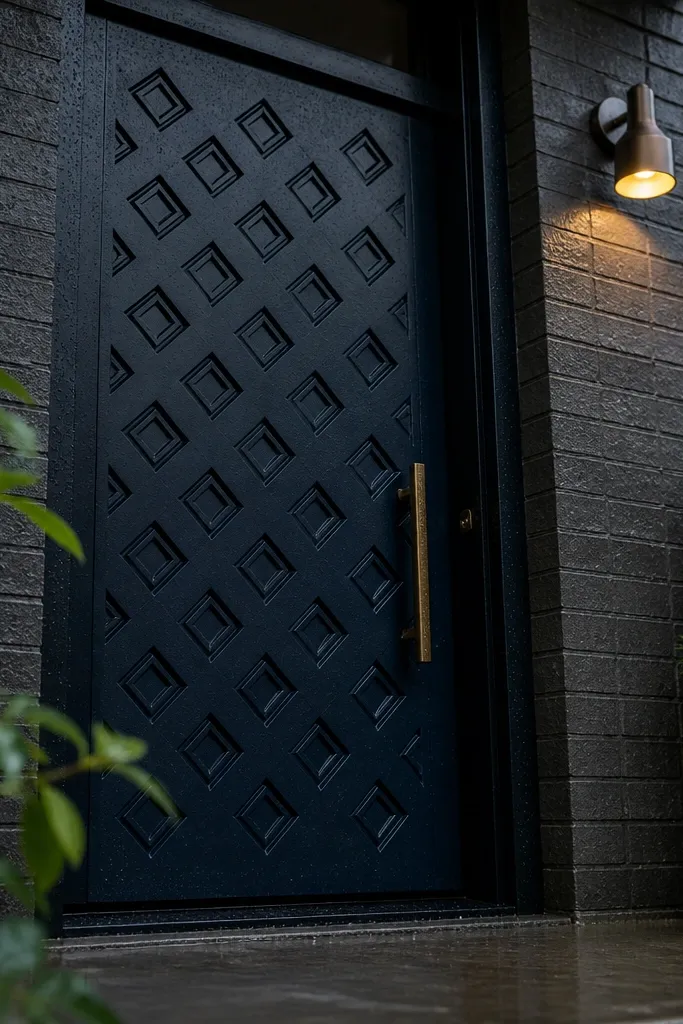
Step 1: If you’re building the diamonds, cut strips into diamond shapes from exterior-rated trim stock and test-fit them on painter’s tape first. Step 2: Prime the door, paint navy, then glue the diamond insets using exterior construction adhesive; fasten with finish nails if the base material allows it. Step 3: Sand any edges, then seal around the perimeter of the inset with exterior caulk to prevent water tracking.
Navy is the sweet spot between black and blue — it looks rich in shadow and doesn’t glare like pure black. Add geometric diamond inset panels for a crisp pattern that still reads clean in a small entrance. This design is photogenic because the diamonds cast tiny shadows, and the color stays consistent if you use a quality exterior paint system. For year-round main entrance door design, navy hides dust better than light colors and gives you a strong focal point without needing sidelites. Buy a door with the pattern already built or add thin trim diamonds yourself.
Skip thisAvoid glossy topcoat — it exaggerates uneven caulk lines and shows every brush mark.
Editor's noteKeep diamond spacing symmetrical; even a 1/8 in mismatch shows up immediately on navy.
14. Two-Tone Door: Dark Bottom Panel and Light Top Panel
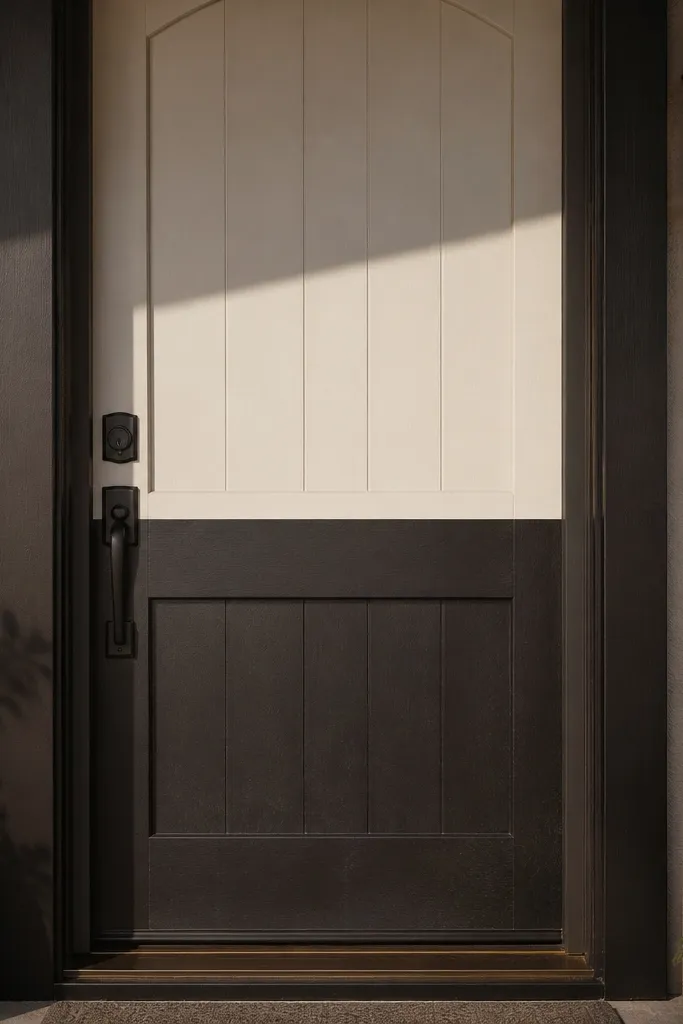
Step 1: Sand the door, prime with an exterior bonding primer, then paint the lighter top color first; let it cure so tape doesn’t pull it. Step 2: Mask the seam line with fine-line painter’s tape and apply the darker bottom color in two coats. Step 3: Remove tape while paint is slightly tacky for a cleaner edge, then seal the bottom edge and install a door sweep to protect the seam area from water.
Two-tone doors make small homes look designed because they add visual hierarchy inside the door itself. The clean approach is dark bottom panel and lighter top panel, which also helps you disguise scuffs at the lower half where shoes hit. For year-round main entrance door design, separate the colors with a straight horizontal seam and sharp masking so it reads intentional, not accidental. This look works with solid or panel doors; it’s also a great way to refresh an older door without replacing it. It’s beginner to intermediate depending on how steady you are with masking.
Skip thisAvoid painting in humid weather; tape lines get fuzzy and the seam looks soft.
Editor's noteUse a level and measure from the floor — don’t eyeball the seam line.
15. Solid Door with Half-Round Top Window and Brass Trim
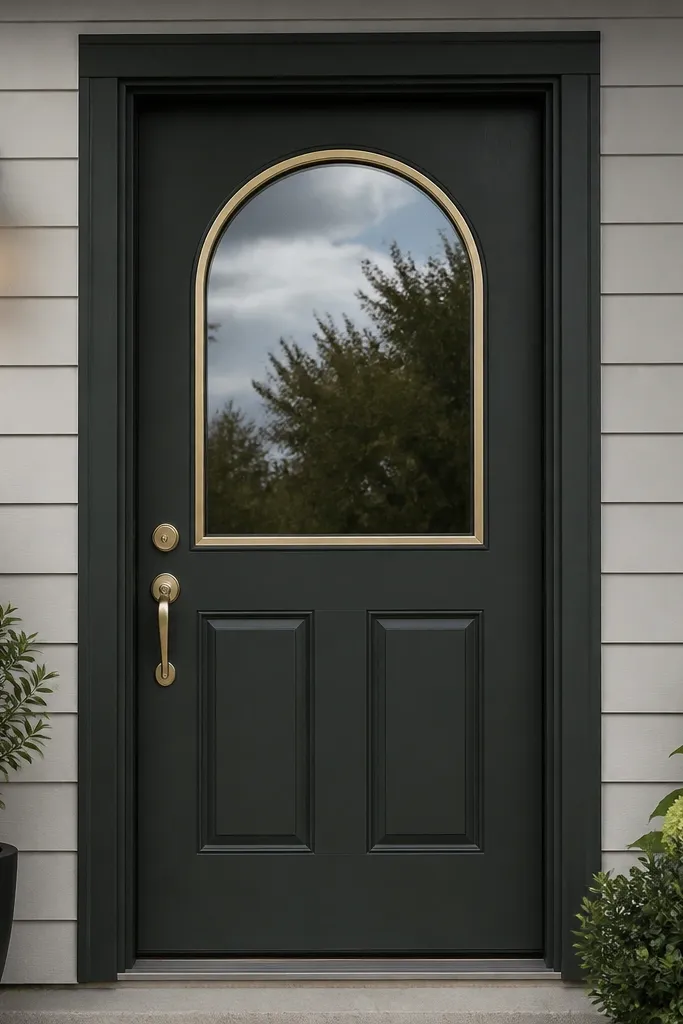
Step 1: Select a door with a half-round tempered lite and a brass trim ring; verify the gasket system is included. Step 2: Prime and paint the door body, then mask around the brass if you’re not refinishing it; apply exterior enamel in two coats. Step 3: Install the door with shims, then check the reveal around the half-round window; seal perimeter trim and window ring with exterior caulk where the manufacturer indicates.
A half-round top window is small-home friendly because it adds charm at the top without taking over the entire door width. The solid lower section keeps the door practical, and the round window reads decorative from across the street. Use brass trim around the window for a warm accent that pairs with many exterior light fixtures and house numbers. For year-round main entrance door design, choose tempered glass and install a gasket so the window seals properly through winter freeze-thaw cycles. This is intermediate if you’re installing a new window, but it’s easy if you buy a door already built with the half-round lite.
Skip thisDon’t skip checking the window ring for even compression; uneven gaps leak first.
Editor's noteWhen masking near curves, press tape into the edge with a plastic putty knife so the line stays crisp.



