
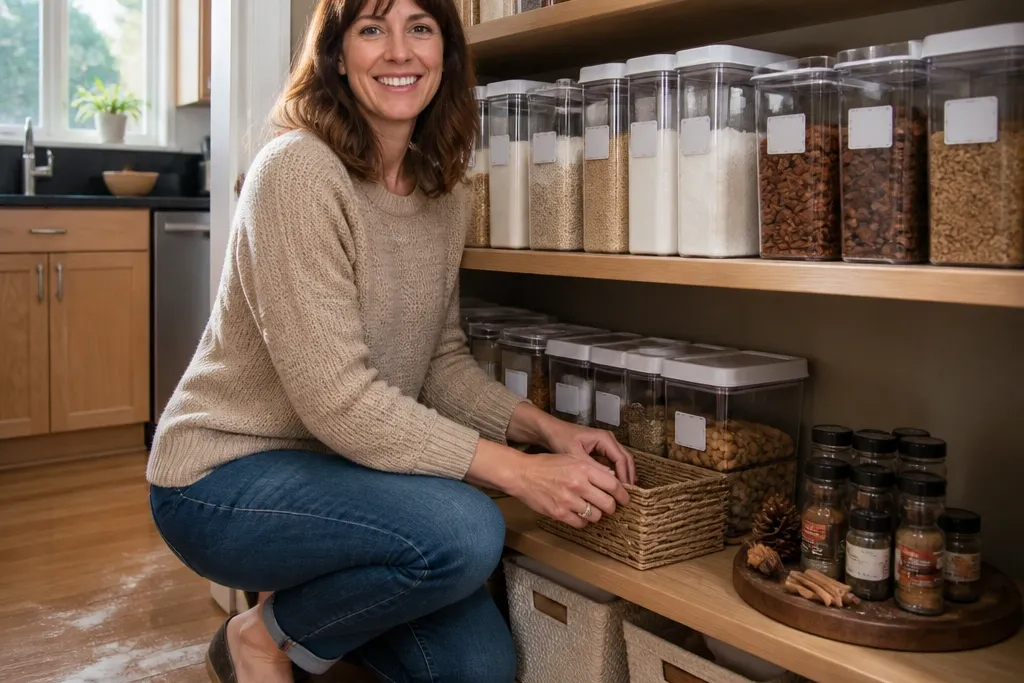
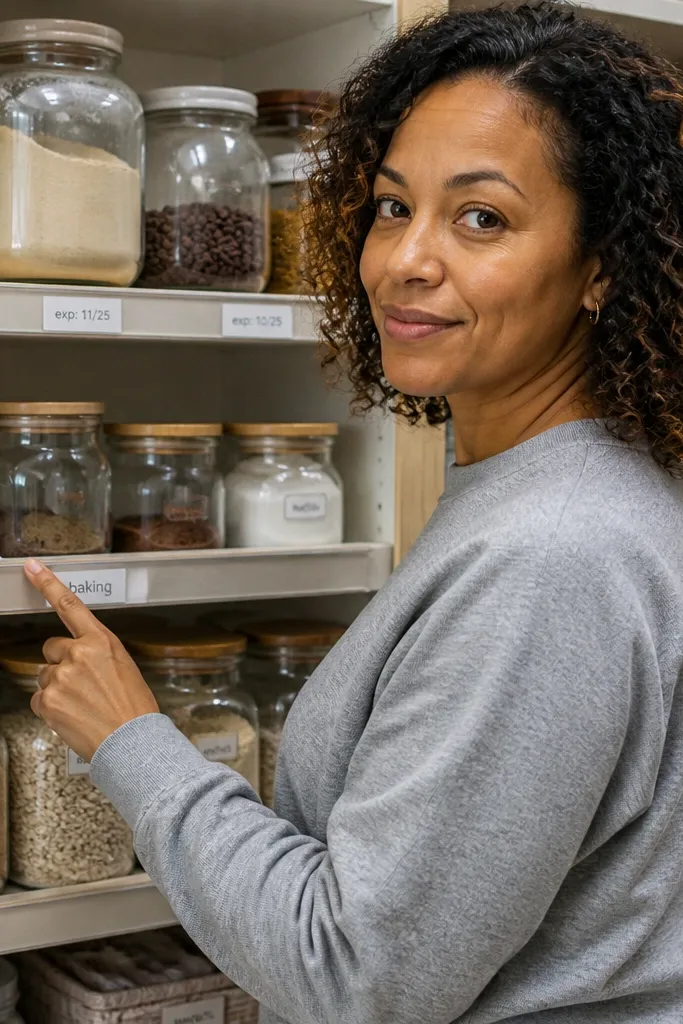
1. Front-Facing Label Rail for All Your Pantry Bins
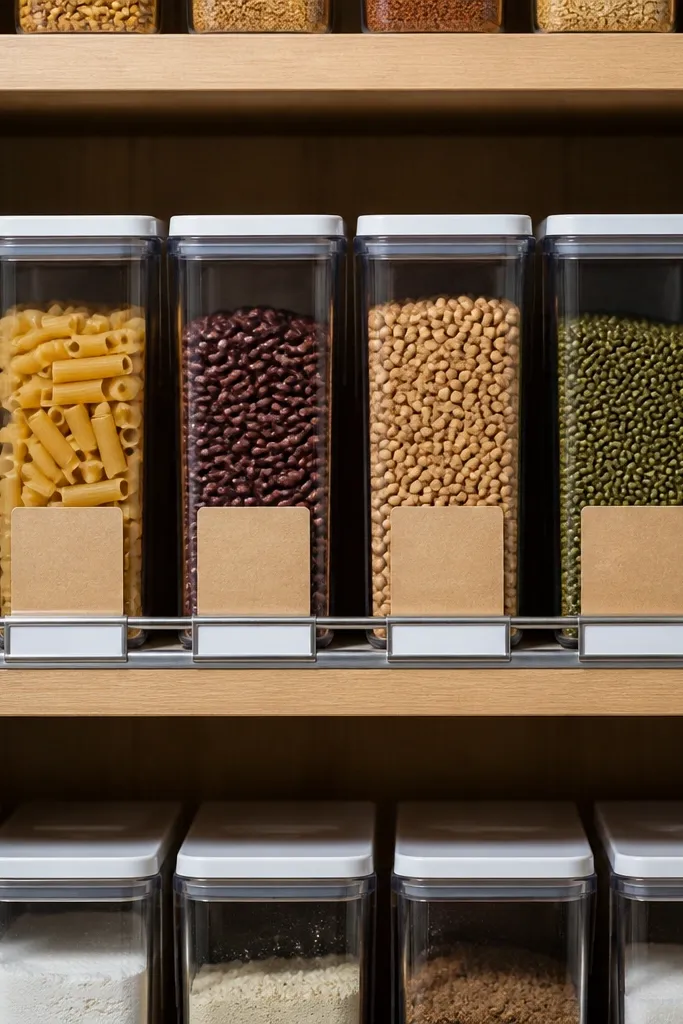
Start by measuring the shelf front length you want to cover and decide how many bins will sit across. Cut a thin strip of wood or purchase a pre-made label rail, then mount it so the bottom of the rail sits about 1/2 inch above the bin lid line. Print labels in the same font size and orientation, then apply them so they sit centered under the rail. Finally, place bins so their fronts touch the rail line, and do one “open test” to confirm doors and cabinet hinges don’t block anything.
This is the fastest way to make a pantry look intentionally organized instead of “stacked.” A label rail forces every bin to face the same direction, so you get clean horizontal lines across shelves. It also makes restocking calmer because you’re not re-labeling on the fly; you’re just swapping the bin into the same spot. Use it with opaque bins if you want a sleek look, or clear bins if you want the contents visible. Skill level is basic carpentry or even adhesive mounting, and it takes about an hour once you’ve measured.
Skip thisDon’t mount the rail too high; if labels sit above the lids, the whole pantry looks messy.
Editor's noteUse painter’s tape to mark bin positions on the shelf before you mount anything — it saves you from a crooked finished look.
2. Tiered Spice Drawer Insert with Numbered Lanes
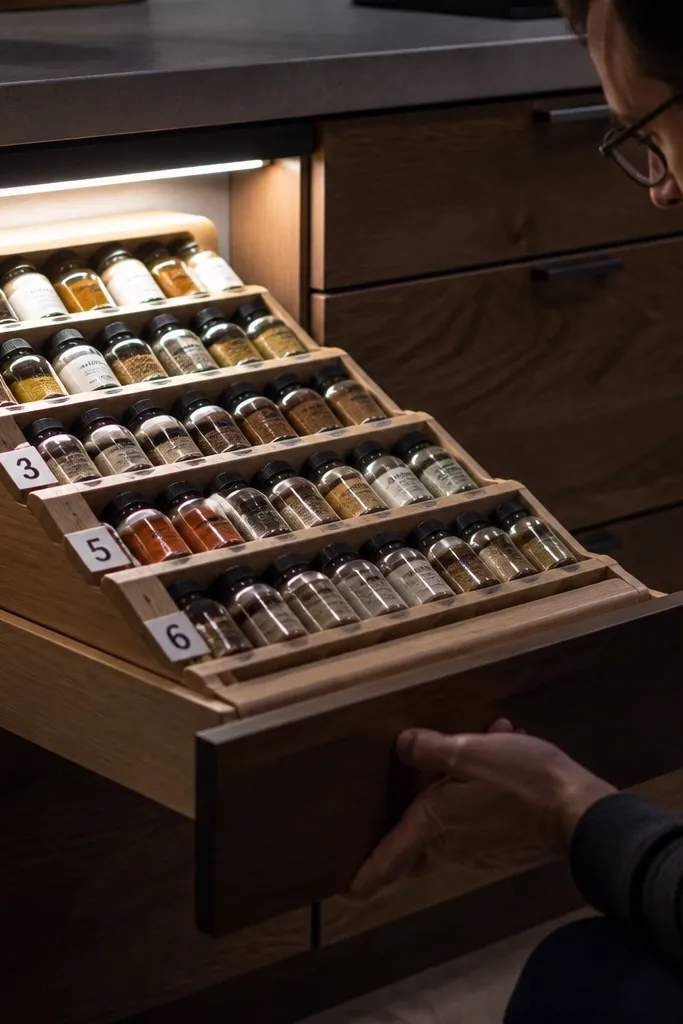
Measure your drawer interior width, depth, and height, then sketch how many spice bottles fit per tier with 1/4 inch spacing between lanes. Cut two or three “steps” from 1/2 inch plywood or hardwood strips, then attach them to a base using wood glue and small brad nails. Sand edges smooth so bottles slide in without scraping. Finish with a clear matte seal, then label each lane with a number sticker on the front to keep the order consistent.
Spices are where most pantries look chaotic because bottles vary in height and you end up with a jumbled front edge. A tiered insert fixes that by giving each spice a lane with a consistent front line. Numbered lanes also make it faster to find what you need when you’re cooking, and they look neat because the numbers line up like a mini spice grid. It’s photogenic because the drawer front becomes a tidy display instead of a cluttered pocket. Plan on this being a weekend project if you’re cutting wood, or a couple hours if you adapt a pre-made drawer insert.
Skip thisSkip glossy paint inside the drawer; it reflects light in a way that makes labels harder to read.
Editor's noteIf you have both tall and short bottles, put tall ones in the middle tier and keep bottom tiers for grinders or smaller jars.
3. Door-Mounted "Grab Zone" Organizer for Oils, Vinegar, and Baking Supplies
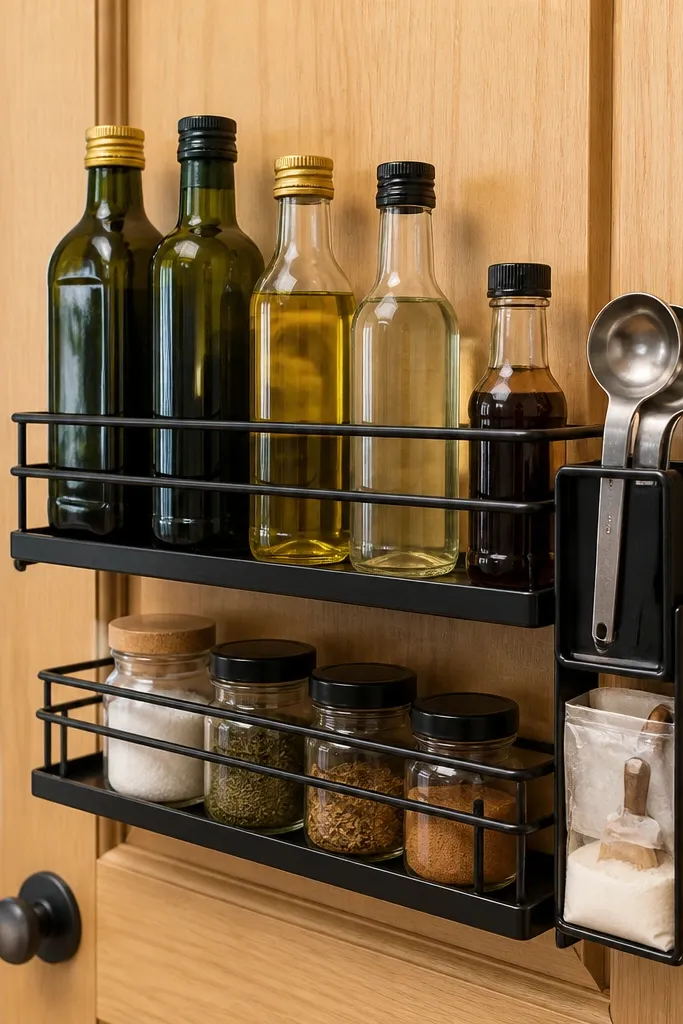
Choose a rack system that mounts with screws into a solid door frame, not just thin paneling. Mark mounting points with a level, then pre-drill pilot holes to prevent splitting. Install vertical bottle holders first, then add a small shelf for baking essentials like vanilla, vinegar, or cocoa. Put the most-used items at eye level, and keep backups on interior shelves so the door stays clean.
The door is prime real estate for year-round kitchen pantry organization ideas because you already open it every day. A grab zone makes the most-used bottles visible and reachable without moving anything else. It also keeps sticky items like oils and syrups from migrating into the main shelf clutter. For aesthetics, use a single finish rack (black powder-coated or stained wood) and match container shapes for a uniform look. This is a practical DIY with a big visual payoff and minimal mess.
Skip thisDon’t overload the door racks; if bottles tilt forward, the whole pantry looks sloppy fast.
Editor's noteAdd rubber bumpers or felt dots on bottle contact points so glass doesn’t clink and scratch.
4. Clear-Lid Pantry Drawer with Removable Front Tray
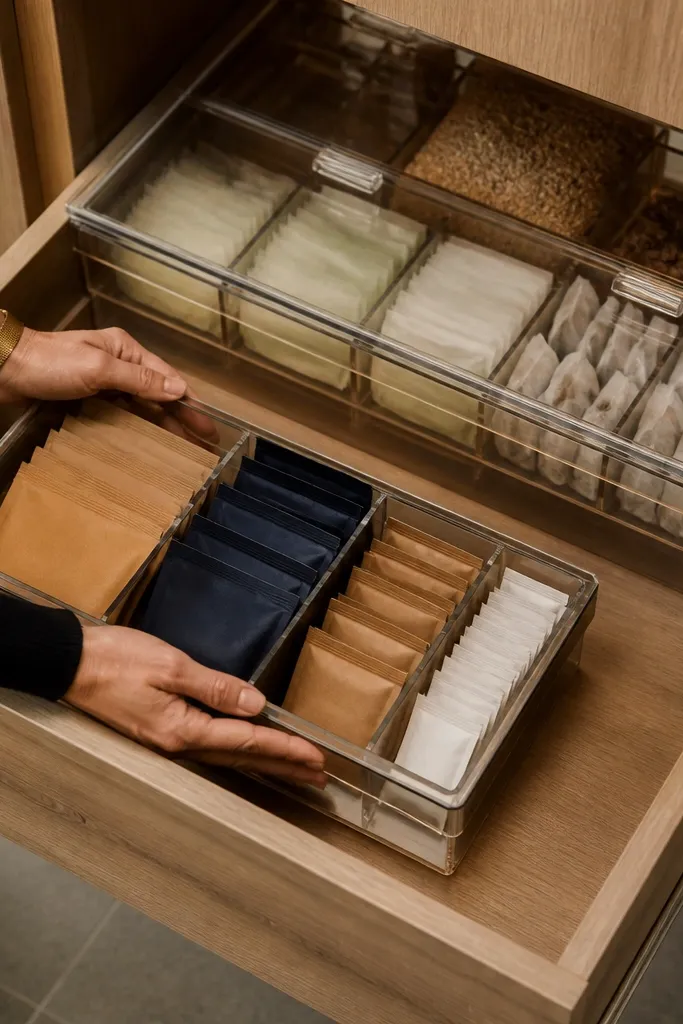
Build a drawer box from 1/2 inch plywood with a front opening sized to your tray insert. Add drawer slides or use a pull-out tray system that supports the weight of filled bins. Create a separate front tray from thin plywood with a lip so it lifts out easily. Cut a clear lid panel (polycarbonate or acrylic), drill mounting holes, and attach with small screws so you can remove it for cleaning.
If your pantry has a “bottom drawer chaos” problem, a clear-lid drawer fixes it. The clear lid keeps the look airy and organized, while a removable front tray gives you a clean landing for packets, tea bags, or instant mixes. This design is great for year-round use because you can swap the front tray seasonally without reorganizing the whole shelf. It also photographs well because the contents are visible but contained. Budget is moderate, and the build is doable with basic plywood and a clear lid panel.
Skip thisAvoid clear lids over heavy, messy items like open flour bags — condensation and spills show immediately.
Editor's noteUse a matte label on the side of the drawer, not a glossy one; it reduces glare in photos and in real kitchens.
5. Stackable Canister Set with a "Height-First" Layout Plan
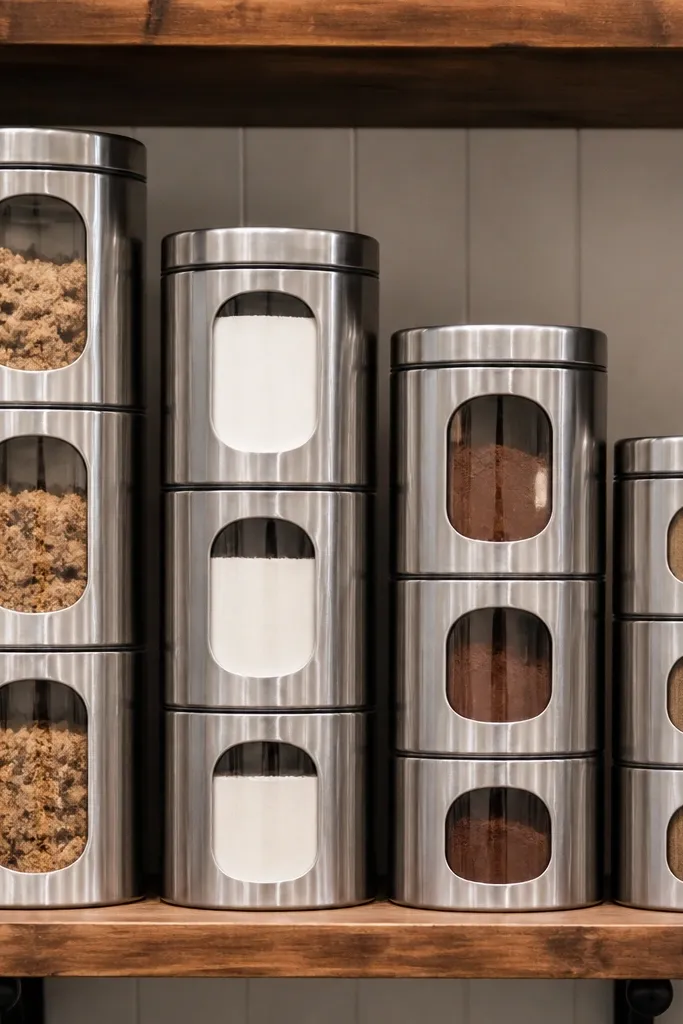
Matching canisters look good, but the real difference is planning the layout by height so shelves don’t become a patchwork. If you arrange canisters tallest-to-shortest in consistent columns, you get clean vertical lines and predictable restocking. This is a high-aesthetic, low-effort project because you’re mostly organizing and standardizing what you already own. It works year-round because the layout holds whether you’re buying more pasta or more baking flour. Time is about 1-2 hours once you have containers.
Pick a single canister type for each category that you buy frequently, like pasta canisters and baking flour canisters, and keep lids identical. Measure your shelf height and decide the maximum height per column with 1/2 inch clearance above lids. Arrange canisters tallest in the back column and shortest in the front column, then leave a 1 inch gap between columns for airflow. Label each canister on the same side so the shelf reads like a grid.
Use a strip of painter’s tape on the shelf to mark column boundaries before you start placing canisters.
Don’t mix lid heights; even small differences make the shelf look uneven.
6. Bulk Bag Organizer with Fabric Tie-Downs
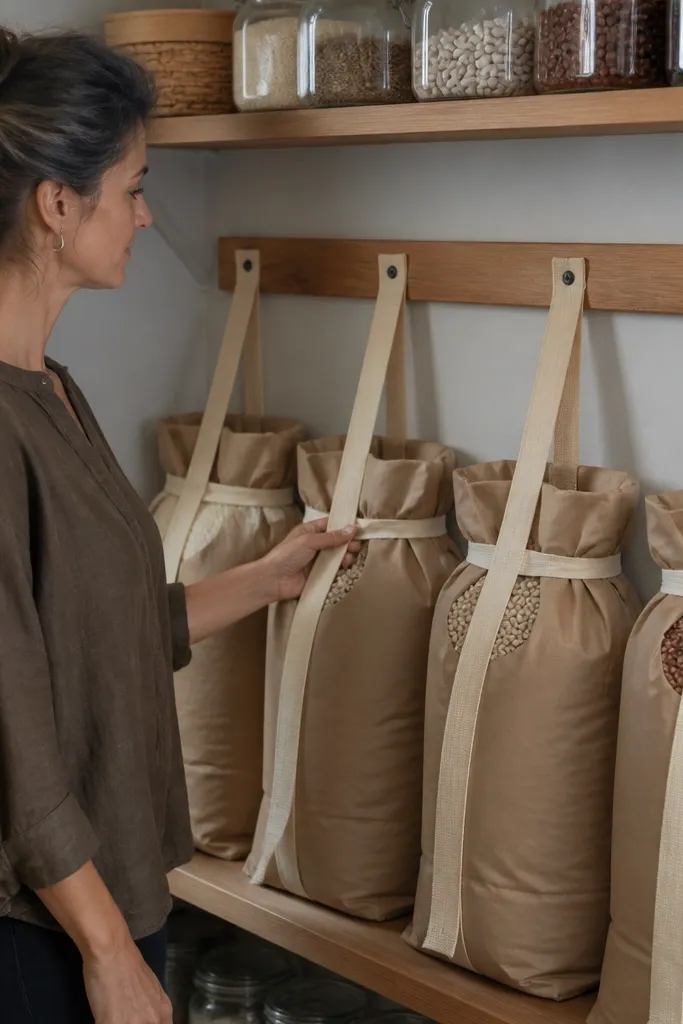
Bulk bags ruin pantry visuals because they sag, crinkle, and lean. A fabric tie-down system keeps bags upright and gives you a clean, repeatable look. Tie-downs also stop spills when you grab a handful because the bag stays anchored. For year-round kitchen pantry organization ideas, this is the fix for rice, beans, oats, and flour backups that you don’t want in small jars. It’s simple sewing or hardware work and looks surprisingly neat once bags stand straight.
Choose a bin or shelf section sized for your largest bulk bags, then line the bin with a wipeable mat. Install two fabric anchor points per bag slot — one near the top and one mid-height — using screws and fabric loops or tie straps. Place each bag upright, then cinch it to the anchor points so the front edge stays flat. Add a label tag on the bag front where it will be readable when the door opens.
Keep tie-downs in a neutral color like black or charcoal so they disappear visually behind the bag labels.
Don’t tie bags with stretchy elastic that loosens; you want a snug hold that stays consistent.
7. Seasonal Swap Bins with Color-Coded Front Tabs
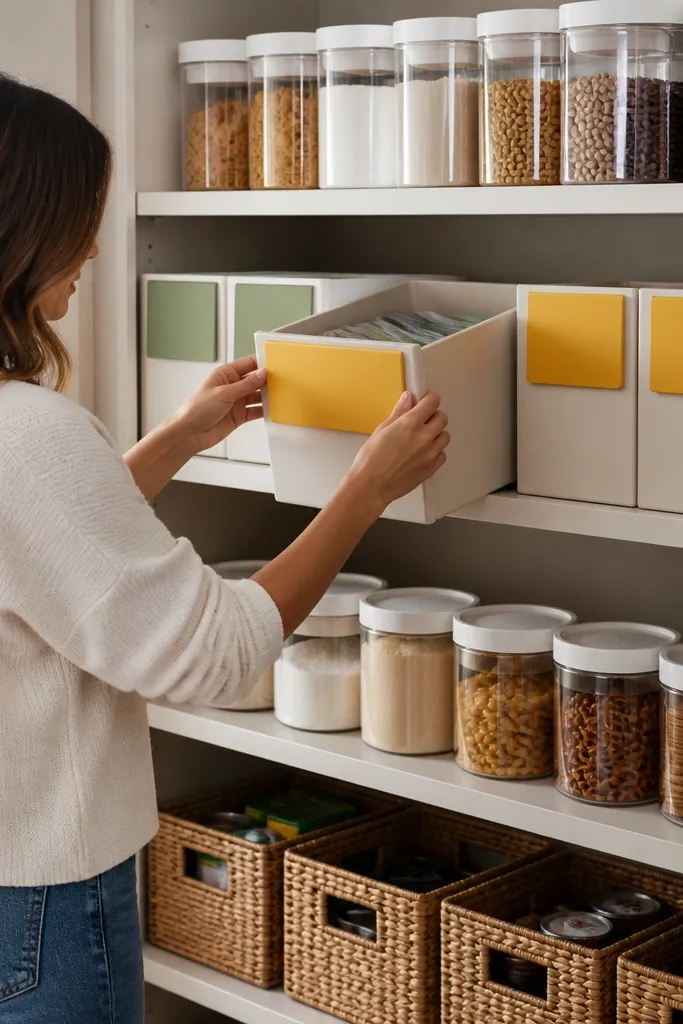
Measure the shelf depth for your seasonal zone and buy or build bins that fit without gaps you can’t reach. Label each bin with a category and month range on the front tab, then attach colored tabs using a label template so text stays aligned. Put winter items (cocoa, broth concentrates, baking spices) in the back and summer items (tea flavors, grilling rubs, salad add-ons) in the front. Create a simple rotation rule: swap bins on the first weekend of March and September.
Seasonal clutter makes pantries feel messy even when everything is “organized.” This project separates seasonal items into swap bins and uses color-coded front tabs so you can rotate fast. The look is clean because only one set of bins sits in the main zone at a time. When you switch seasons, you don’t move every jar; you just slide bins in and out. This is one of the best year-round kitchen pantry organization ideas for people who cook seasonally and buy seasonal ingredients.
Skip thisDon’t store seasonal bins mixed with daily staples; color tabs get ignored when everything is the same priority.
Editor's noteUse removable chalk markers on the bin front so you can update labels when you change what you stock.
8. Under-Shelf LED Shelf-Edge Light with Wire-Free Switch
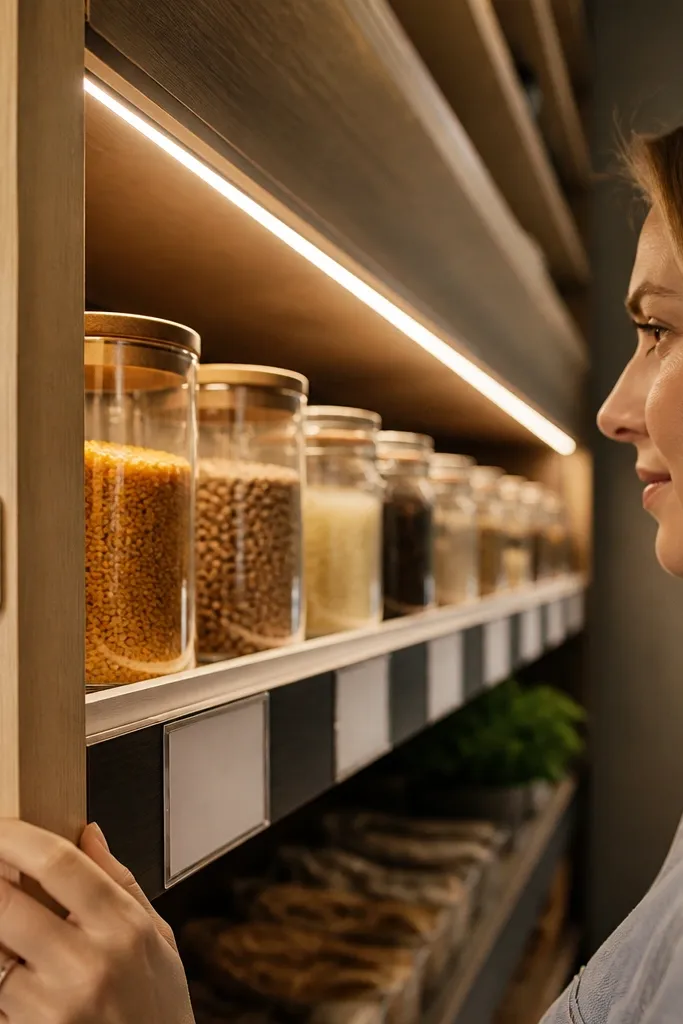
A pantry that looks good is usually well-lit. Under-shelf LED lighting makes labels readable, reduces the shadowy back-shelf problem, and makes your containers look intentional instead of dull. It’s especially effective for year-round kitchen pantry organization ideas because you’re constantly restocking different items and you want to see what’s there without digging. Choose warm white so spices and grains don’t look washed out. This is a DIY you can finish in a day with clean cable management.
Measure the shelf underside length and choose an LED strip kit with a built-in adhesive channel or clip system. Mount the LED strip 1-2 inches from the shelf front edge so light hits labels, not the cabinet interior. Use the kit’s stick-on switch or a small hidden switch panel so you don’t run wires everywhere. Test with the pantry door closed, then adjust placement until labels are evenly lit across the shelf.
Turn off overhead lights when testing; the right placement shows how your pantry will look in real kitchen lighting.
Don’t pick cool white LEDs; they make food look gray and labels harder to read.
9. Pegboard Pantry Back Wall for Hanging Ladles and Small Tools
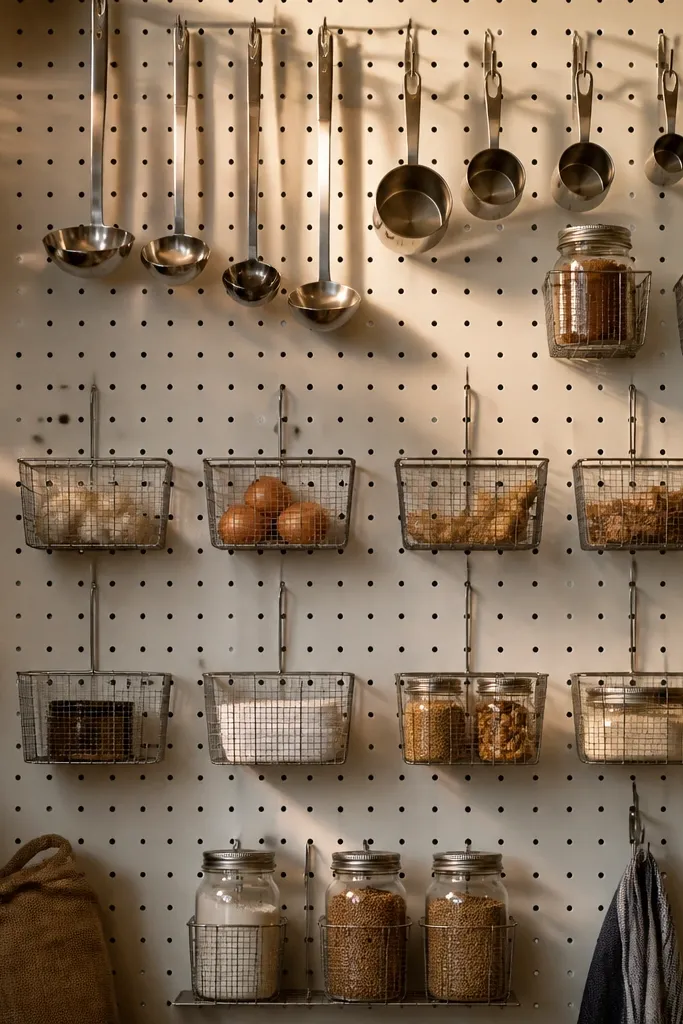
Install pegboard sized to your pantry back wall using screws into studs or strong backing. Sand edges and paint the pegboard a matte finish so it doesn’t reflect harsh light. Add hooks in a measured pattern — start with four hooks for scoops at eye level, then add smaller hooks for ladles and tool loops below. Place small jars on peg hooks using jar holders or wire loops so jars hang straight.
If your pantry has tools scattered on shelves, it looks messy even when food is organized. A pegboard back wall turns “extra stuff” into a clean, structured display. You can hang measuring scoops, spice scoops, mini baskets, and even small jars in uniform rows. The look is functional and photogenic because the grid pattern is tidy and repeatable. This project suits pantries where you have a flat back panel and want to free shelf space for containers.
Skip thisAvoid oversized hooks; they leave gaps that make the board look empty and uneven.
Editor's noteLabel the jar holders with tiny category stickers like 'cocoa' or 'oats' so the system stays consistent.
10. Magnetic Label System on the Pantry Sidewall
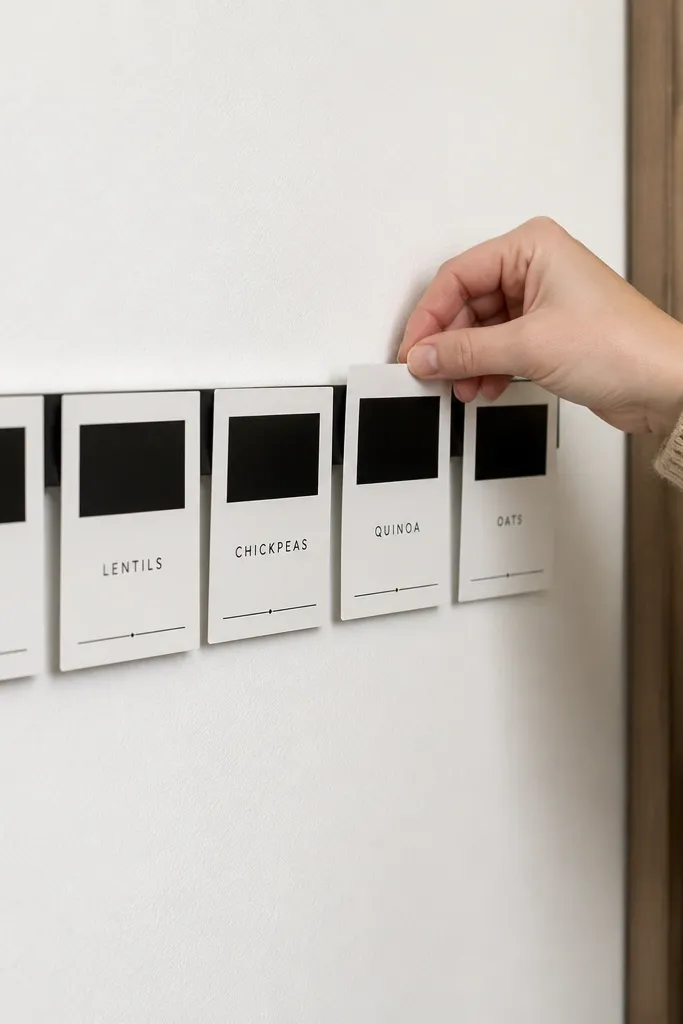
This is for people who hate re-labeling. A magnetic label system lets you swap labels when inventory changes, and it keeps the pantry looking crisp because the label format stays consistent. Use it for categories like baking, snacks, coffee, and spices. It’s also visually neat because labels sit in a single line at the same height, instead of scattered on containers at random angles. Build it once, then maintain it in under five minutes during restocks.
Attach a thin metal strip or magnetic sheet to the inside sidewall at a consistent height above bins. Create label cards on cardstock or thin plastic and add magnetic backing so they stick firmly. Place containers with their category centered under the label card position. When you restock or switch brands, swap the card instead of peeling and reapplying labels.
Use a clear label sleeve on the cards if your pantry gets steam from frequent cooking.
Don’t mount magnets too low; labels become hard to read when you open the door.
11. Bamboo Pull-Out Step Shelf for Reaching the Back
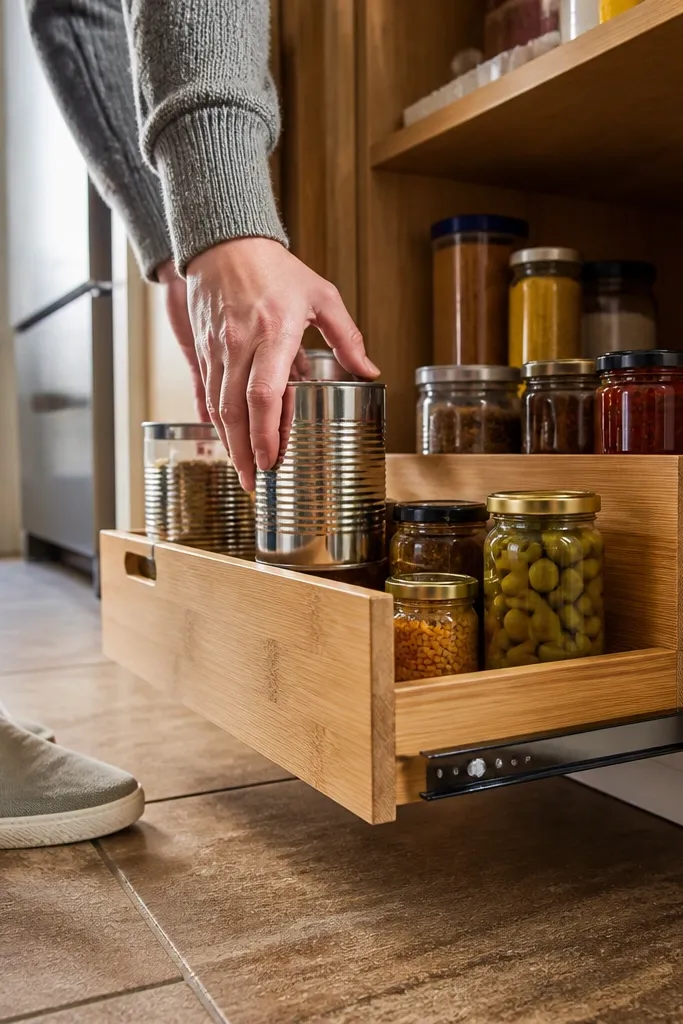
Measure your shelf depth and choose a pull-out frame with side rails that match your cabinet width. Build a step platform from bamboo slats or plywood topped with bamboo veneer, sized so it clears cabinet sides when pulled out. Install the rails and attach the platform, then add a lip to stop bins from sliding off. Finish with a food-safe seal and test the pull-out with empty bins first before loading heavy items.
The back of a pantry becomes a junk zone because reaching it is annoying. A pull-out step shelf fixes that by bringing items forward when you slide the shelf out. Bamboo looks warm and natural, which makes the pantry feel less clinical and more inviting. It’s also great for year-round kitchen pantry organization ideas because you’ll stop hiding seasonal cans in the back and start using what you already have. This is a mid-skill DIY that pays off every time you cook.
Skip thisDon’t install rails without clearance checks; a few millimeters of friction makes the step shelf feel stiff.
Editor's noteUse shallow bins (under 6 inches tall) on the step shelf so you don’t have to lift to see contents.
12. Cereal and Snack Bag Dock with Rolling Clips
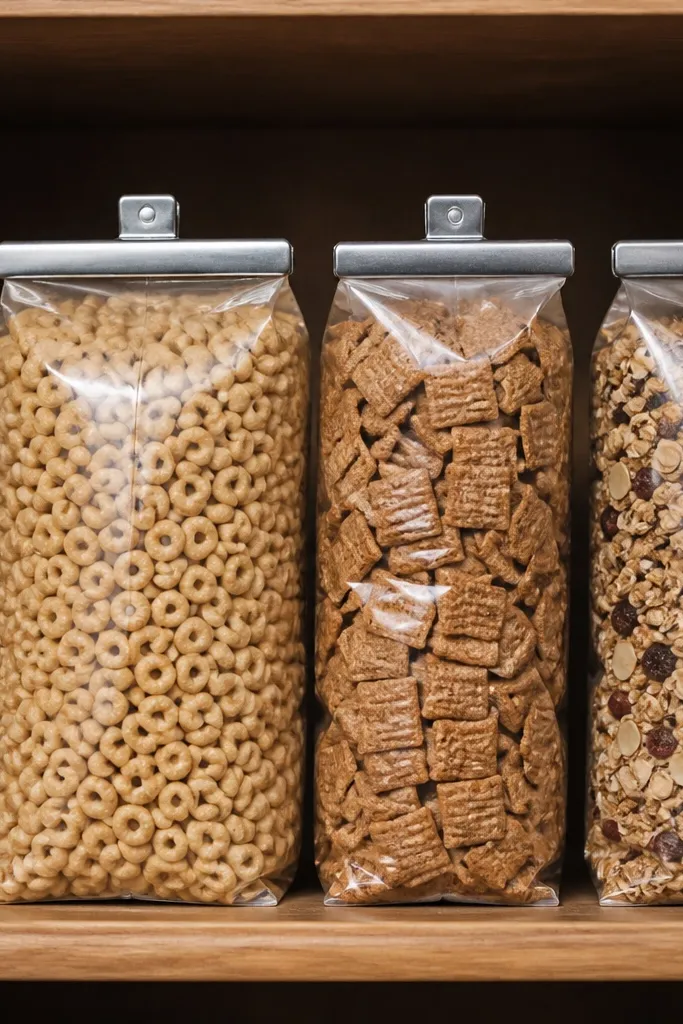
Cut a backboard to fit your shelf width and drill holes or mount clip brackets along the board at equal spacing. Attach the dock to the shelf back using screws so it doesn’t tip forward. Use rolling clips or spring clips sized for bag thickness, then test with one bag before installing all clips. Fold each bag top, clip it, and label the front with the same format so bags line up visually.
Cereal and snack bags are flexible, so they collapse and look messy fast. A bag dock holds them upright and aligned with rolling clips that grip the top seam. The visual payoff is big because the pantry front becomes a row of straight edges instead of crumpled plastic. This works year-round because it handles everything from cereal to chips refills without changing the system. It’s a simple DIY using a board, clips, and a few measuring steps.
Skip thisAvoid docks that sit too far forward; bags will block the view of labels when the door opens.
Editor's noteKeep clip spacing slightly wider than the widest bag so you don’t fight closures every time.
13. Clear-Front Pantry Canopy for Counter-Top Backups
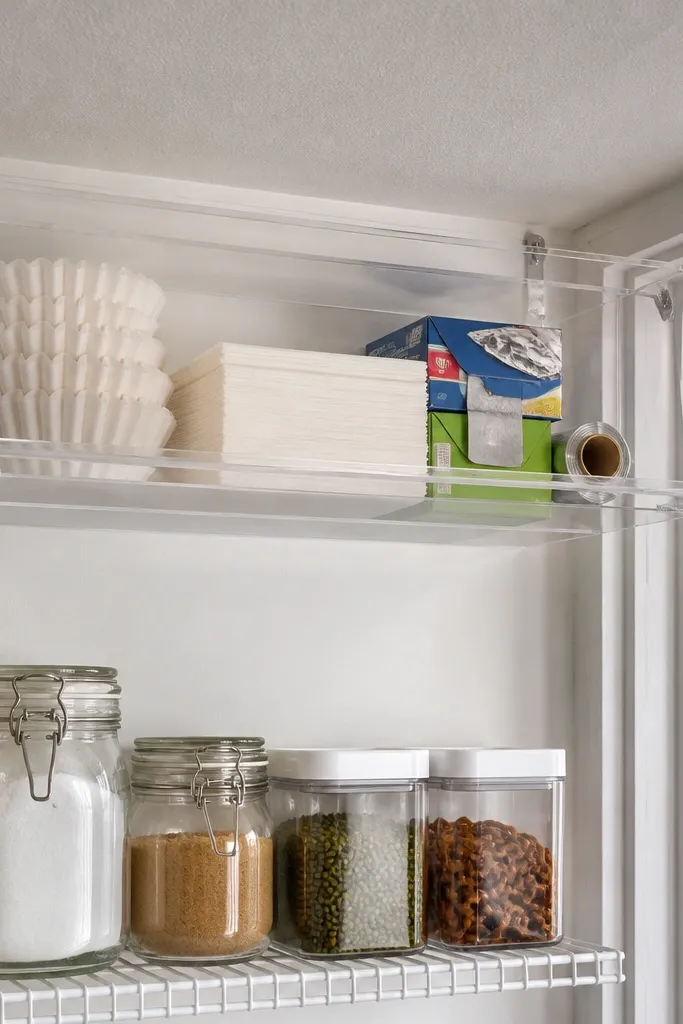
Some pantry items don’t belong in the main shelf clutter because they’re “ready-to-use backups,” like extra coffee filters, paper towels for spills, or extra foil and wrap. A small clear-front canopy keeps these items contained while still looking tidy. It also makes your pantry look styled because the canopy creates a frame around a specific zone. Use it with clear bins inside so the contents stay visible and photogenic. This project is more about design than brute storage, and it takes a couple hours.
Measure the area you want to frame and build a shallow box frame from thin wood, leaving the front open for access. Add a clear panel on the front using acrylic with small standoff brackets so it doesn’t scratch easily. Place matching bins inside and align labels to face outward. Secure the canopy frame to the shelf underside or back wall so it stays square when you open the door.
Choose a clear panel with a matte edge trim so fingerprints show less on the sides.
Don’t cover items that need quick grabbing; if it slows you down, it turns into storage you ignore.
14. Woven Basket Shelf Inserts with Slide-Out Handles
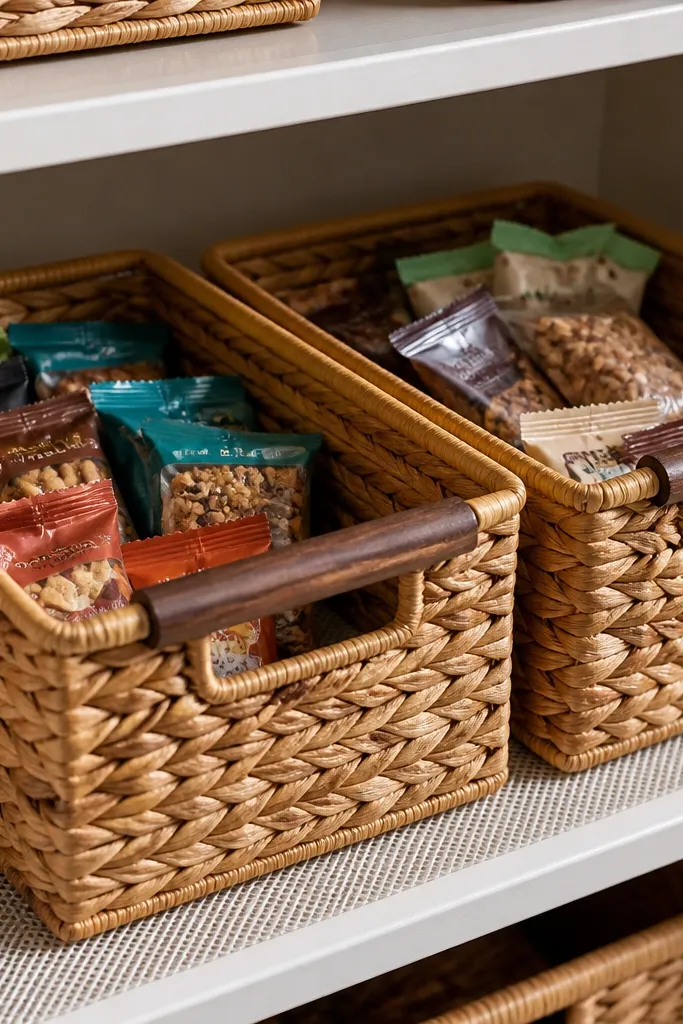
Woven baskets look warm and hide the messiest pantry items while still looking clean. The key is slide-out handles so you can pull the basket forward without yanking it or dumping contents. This is perfect for year-round kitchen pantry organization ideas because baskets can hold mixed items like snack packs, soup kits, or baking tools. When baskets are labeled and consistent, the pantry looks designed instead of random. Build time is moderate if you’re making inserts, but you can also adapt store-bought baskets.
Measure shelf width and depth, then choose baskets that fit with a 1-inch clearance around the sides for easy grip. Cut thin plywood or use shelf liner panels to create a base insert that keeps the basket from shifting. Attach fabric handles to the basket sides or use built-in loop handles if your baskets have them. Add labels on the basket front using a label maker or printed cards behind a clear tape sleeve.
Use baskets for “grab and go” categories, not for loose grains — they spill and stain the weave.
Avoid baskets without handles; you end up pulling by the rim and it looks chaotic over time.
15. Matte Black Corner Lazy Susan for Oils and Condiments
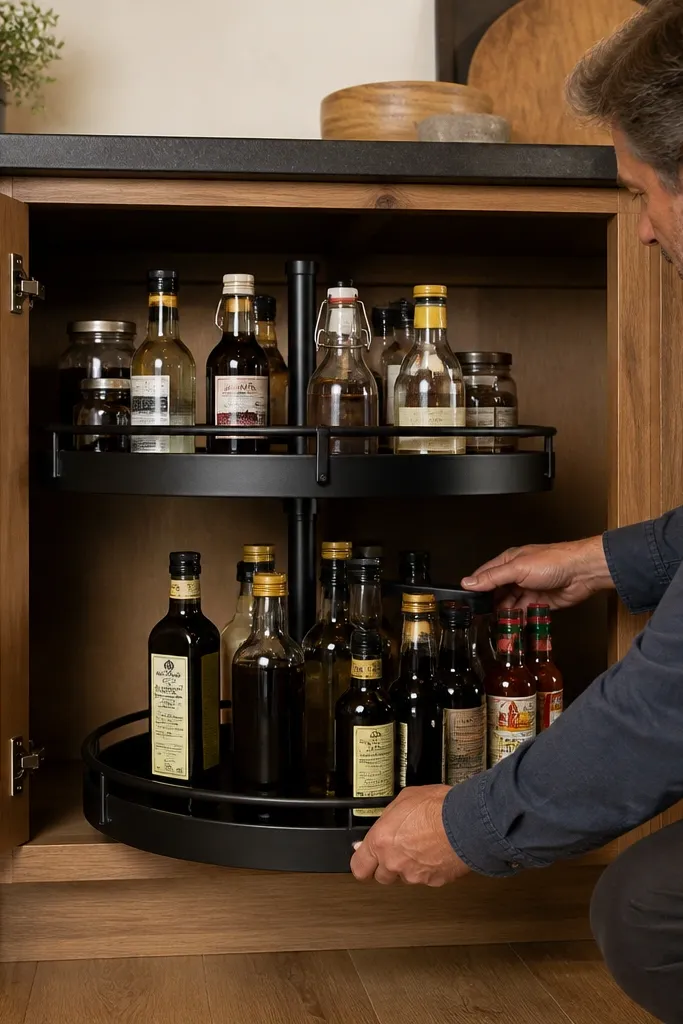
Corner shelves are where pantry organization dies because the back corner is hard to reach. A corner lazy susan makes oils and condiments visible and keeps them from migrating into the main shelf. Matte black hardware looks sharp against wood shelves and doesn’t glare. This project is photogenic because rotating contents create a neat circle of labels. It’s a solid year-round kitchen pantry organization idea because condiments and cooking liquids stay in rotation all year.
Measure the corner shelf diameter and choose a lazy susan insert that matches your cabinet opening. Install the mounting plate with screws into the shelf base so it stays level. Place a shallow tray liner on the top to prevent bottles from sliding, then arrange items by height so taller bottles don’t block labels. Add a simple label set on bottle fronts so you can see what’s where at a glance.
Use shallow bottles or remove bulky bottle caps from visibility; big caps create messy label angles.
Don’t overload the susan; leave space between bottles so you can rotate smoothly.
16. Two-Shelf "Canned Goods Wall" with Spacing Rules
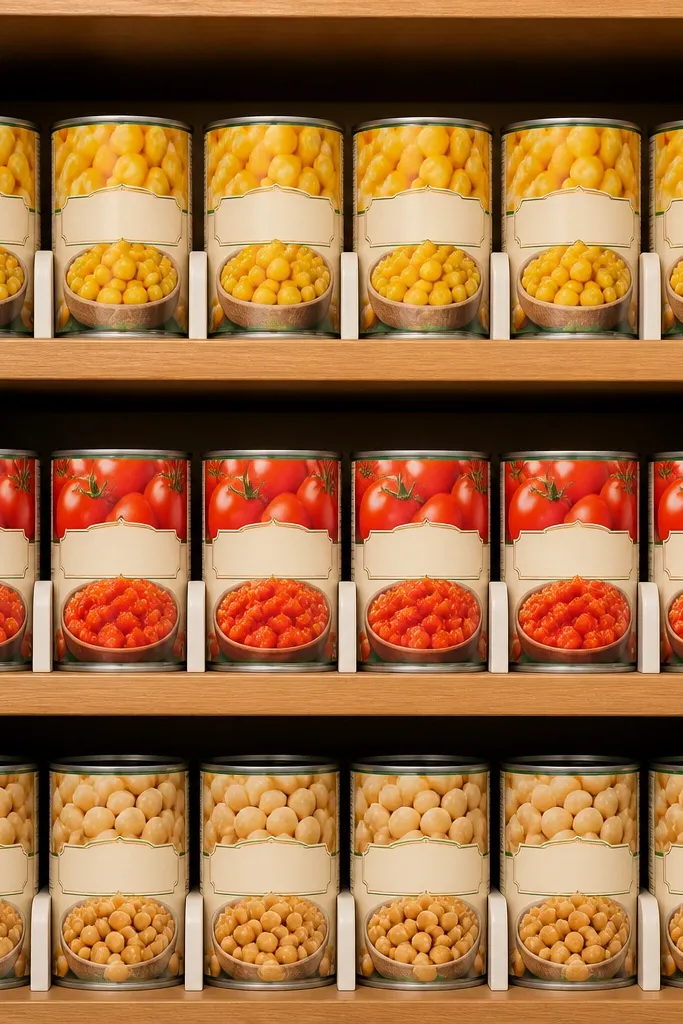
Canned goods look best when they’re aligned into a wall with consistent spacing. This project turns two pantry shelves into a clean canned goods display using a simple spacing rule and shelf stops. The look is striking because you get repeating rectangles of labels instead of mixed heights and half-filled stacks. Function improves too — you see what you have and you can restock without shifting everything. It takes about a day if you’re adding shelf stops and labeling.
Choose two shelves and decide your can capacity per row based on can width plus 1/8 inch gap. Install thin wooden shelf stops along the front lip to keep cans from sliding forward. Use a measuring jig made from scrap wood to place each can so labels face out at the same angle. Label the category rows on a label strip so you can keep beans, tomatoes, and broth separated.
Put heavier cans on the bottom shelf and lighter cans on the top to keep the shelves feeling stable.
Avoid mixing can types with different label depths; it breaks the clean wall look.
17. Pre-Portioned Baking Shelf with Scoop Stations
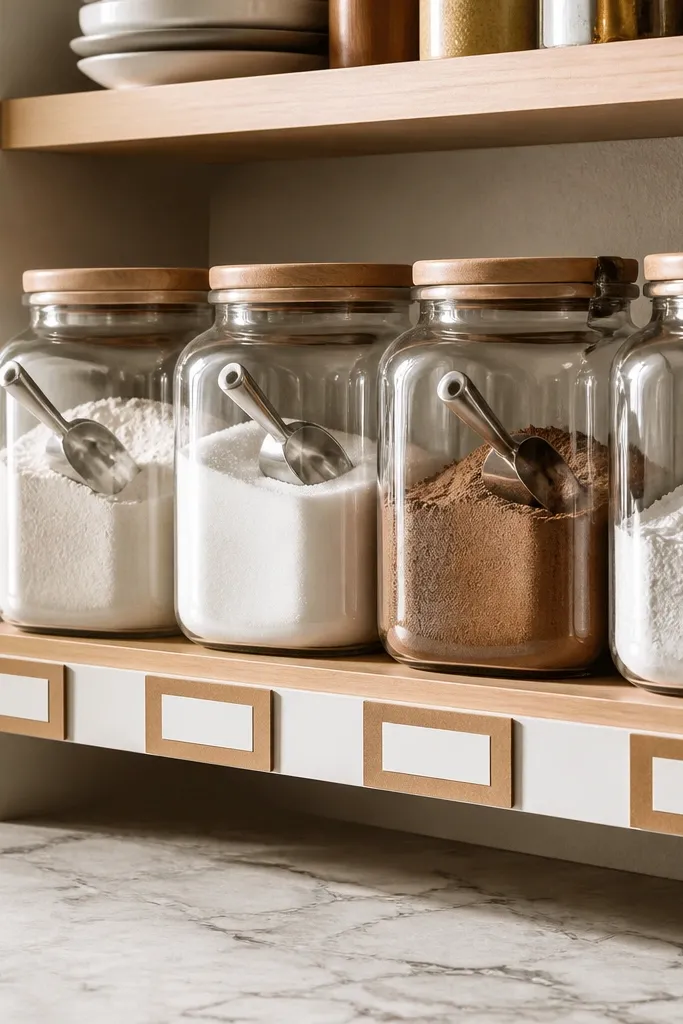
Baking shelves look messy when you store huge bags and random scoops. A scoop station setup makes flour, sugar, cocoa, and baking powder look styled and makes baking faster because you scoop from a jar with a matching scoop. It’s year-round kitchen pantry organization ideas because baking staples rarely go out of season, and the system stays consistent even when you buy different brands. The look is clean because jars, scoops, and labels share a coordinated color palette. Build this if your pantry is mostly functional but not pretty.
Pick a jar size for each staple and standardize jar shapes so labels line up. Place scoops in dedicated holders next to each jar so they don’t roll or disappear into the bin. Install small shelf dividers or a shallow rail to keep jars from sliding when you pull the door open. Label each jar with content and date applied for quick rotation.
Use a small tray under scoop holders to catch drips from cocoa or powdered sugar.
Don’t store wet measuring tools on the same shelf; moisture ruins labels and sticky residue looks ugly.
18. Wipe-Clean Pantry Shelf Liner with Color-Blocked Zones
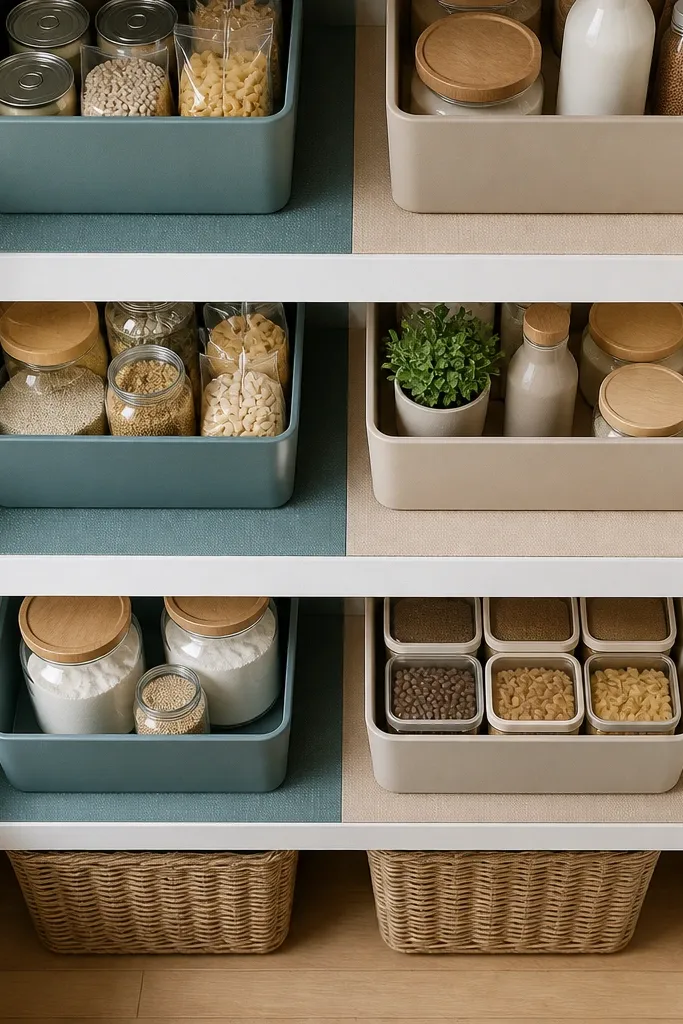
Measure each shelf and cut wipe-clean liner material to fit with a slight 1/4 inch margin at edges for easy trimming. Choose two colors only — one neutral base and one accent for zones like 'baking' and 'snacks.' Mark zone boundaries with painter’s tape, then lay the liner so the color blocks align straight. Install bins so their bases sit fully within the zone and keep labels facing outward.
Shelf liners are boring until you use them for zones. A wipe-clean liner with color-blocked sections makes your pantry look intentional and helps you keep items in their correct lanes. The liner hides scuffs, prevents residue stains, and gives you a visual boundary so bins don’t drift into each other. For year-round kitchen pantry organization ideas, this is a maintenance project that keeps the pantry looking good after months of cooking. It’s also cheap, which makes it easy to redo if you change your layout.
Skip thisAvoid printing patterns with busy textures; they fight your labels instead of supporting the clean look.
Editor's noteUse a craft knife with fresh blades; a dull blade tears liner edges and looks sloppy.
19. Under-Can Shelf Dividers for Taller Jars and Bottles
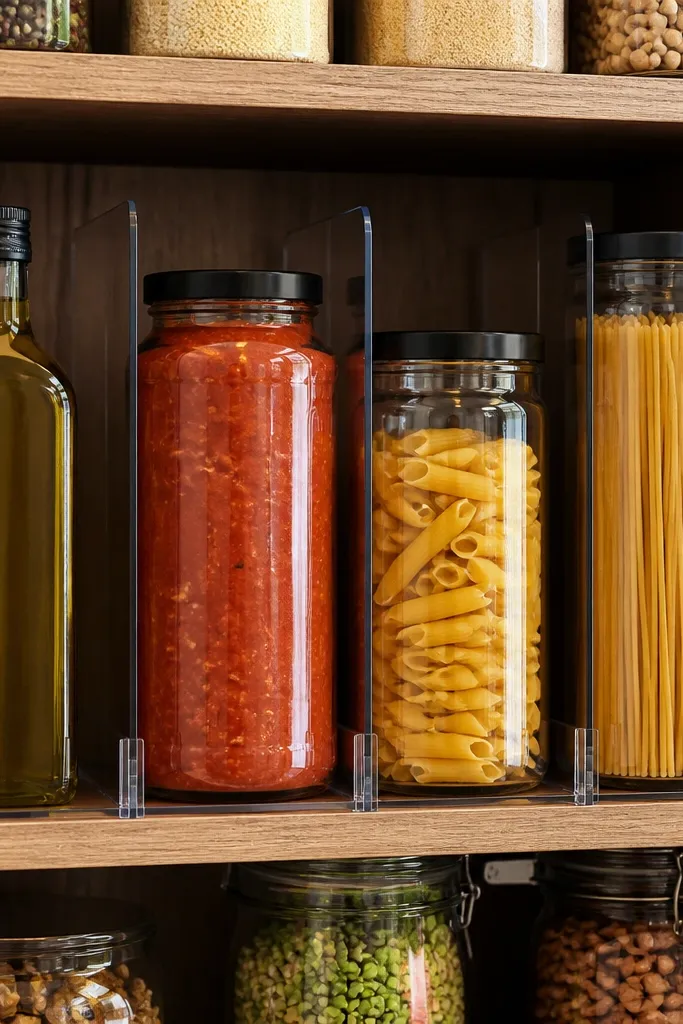
Measure bottle diameter and label height, then decide compartment width with 1/2 inch extra clearance. Cut vertical dividers from 1/4 inch plywood or thin plastic and sand edges smooth. Attach dividers to the shelf base using wood glue and small screws or strong adhesive rated for shelves. Place bottles, then adjust divider spacing until labels face outward without gaps.
When you store tall jars or bottles among cans, everything looks uneven because the front edges don’t align. Vertical dividers solve that by creating uniform compartments for tall items, so the shelf reads like a grid. It’s visually striking because compartments create repeatable shapes, and it’s functional because bottles stop tipping into each other. This is a great year-round kitchen pantry organization idea for people who buy sauces, vinegars, and specialty oils and want them to look neat. The build is quick and works with standard shelf boards.
Skip thisDon’t glue dividers without dry-fitting first; shelf boards warp slightly and you’ll hate the final misalignment.
Editor's noteStagger divider heights so taller bottles sit behind shorter jars; it keeps the front row readable.
20. Clear Plastic Recipe Card Pull-Out for Pantry Meals
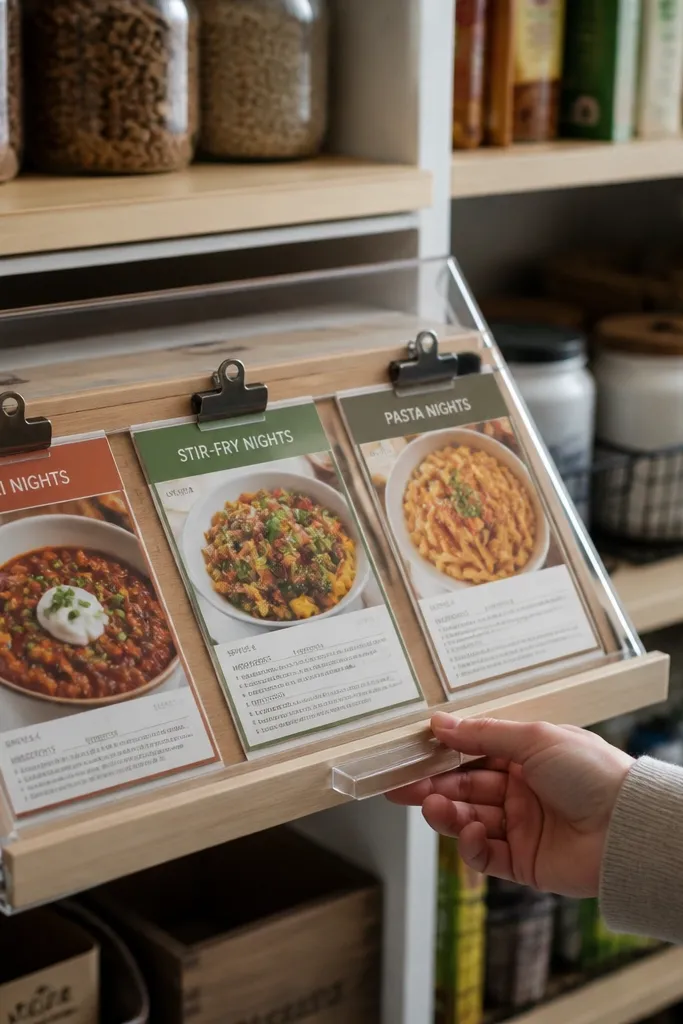
Measure the space beside your pantry shelves where you can mount a card holder without blocking doors. Install a small pull-out tray frame using drawer slides or a simple rail system, then add a clear plastic cover with a front lip. Print recipe cards on thick paper and write the shelf zones you use for each recipe on the back. Slide cards into the cover and keep the newest recipes on top.
Pantry organization looks better when it supports how you cook, not just what you store. A clear plastic recipe card pull-out gives you a tidy spot for family staples like chili, stir-fry, and pasta nights, tied to what’s on your shelves. The clear cover protects cards from splashes, and the pull-out keeps the pantry from turning into a paper mess. This works year-round because recipes rotate with seasons, and you can swap cards without reorganizing containers. It’s small, but it adds a styled, intentional feel.
Skip thisDon’t store loose recipes in piles; the pull-out must be the only paper location.
Editor's noteUse a single card format with big headings and a short ingredient list; it makes the system actually get used.



