
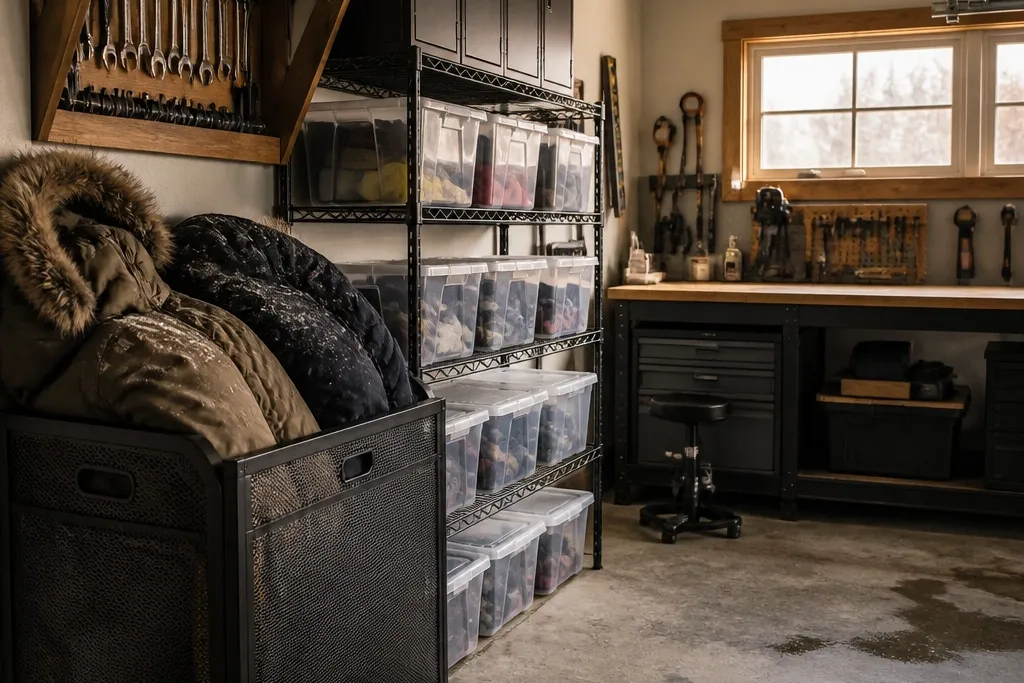
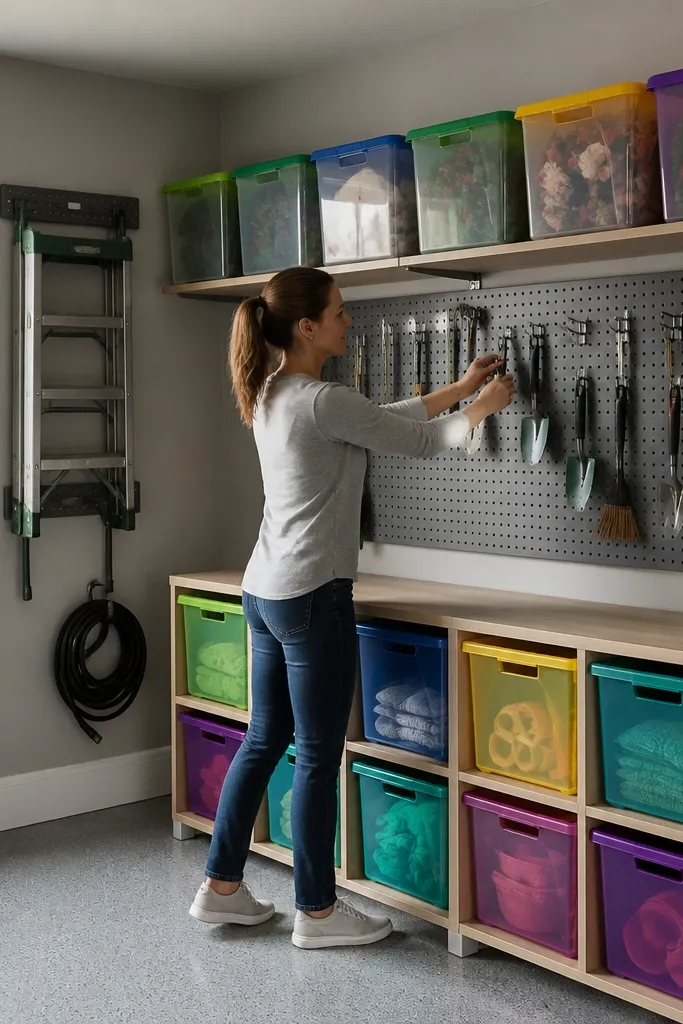
1. Slanted Tool Tray Wall for Hand Tools
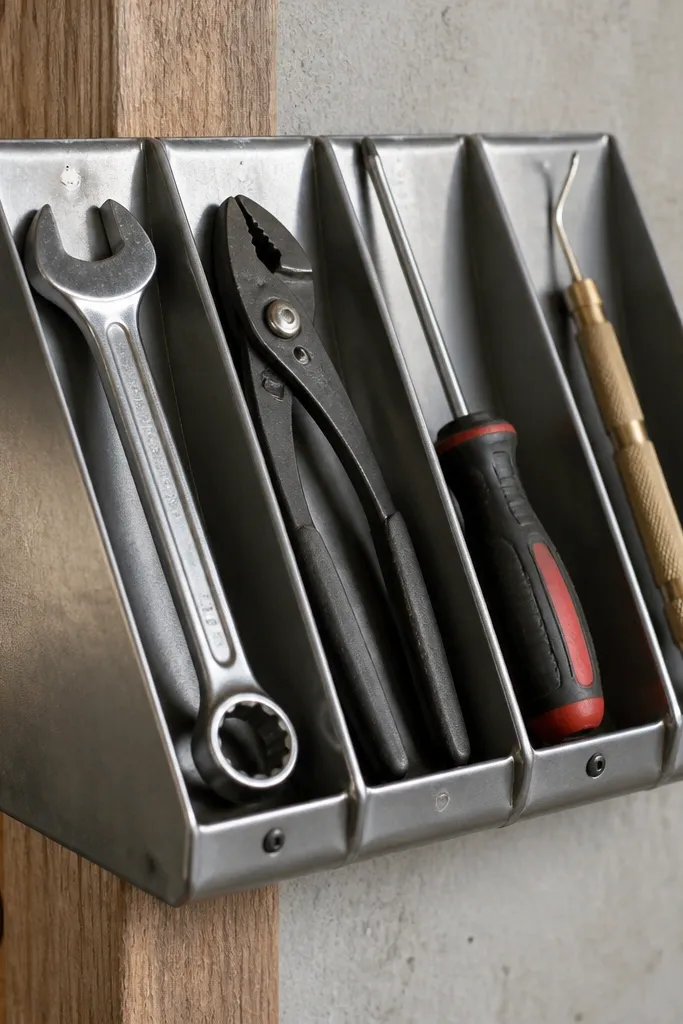
A slanted tray wall makes hand tools look like a curated set instead of a junk drawer. The angle keeps tools visible and prevents the “pile” look because each tool rests in its own spot. Use this for screwdrivers, wrenches, pliers, and anything you grab weekly. It’s also good for year-round use since the tools stay off the floor and dust doesn’t settle as much around them. Skill level is beginner-friendly: you’re building a straightforward frame and repeating identical dividers for a clean, gallery-like face.
Cut plywood strips for the back rail and side frames, then screw them to wall studs using 2.5 in wood screws. Add a slanted face by fixing a base strip that creates a 20-30 degree tilt; use a spacer block so each tray matches. For the tool rests, glue and screw thin 0.75 in dividers into a grid with 1-2 in spacing depending on your tool widths. Sand edges, then paint the base and stain or paint the tray face so the tools read clearly. Finish by adding a simple label strip on the front for quick returns.
Use a single spacer for every divider so spacing looks intentional even when your tools aren’t perfect.
Skip shallow trays — if tools can roll or slide, you’ll stop putting them back.
2. Clear Lid Bin Stack with Color-Coded Labels
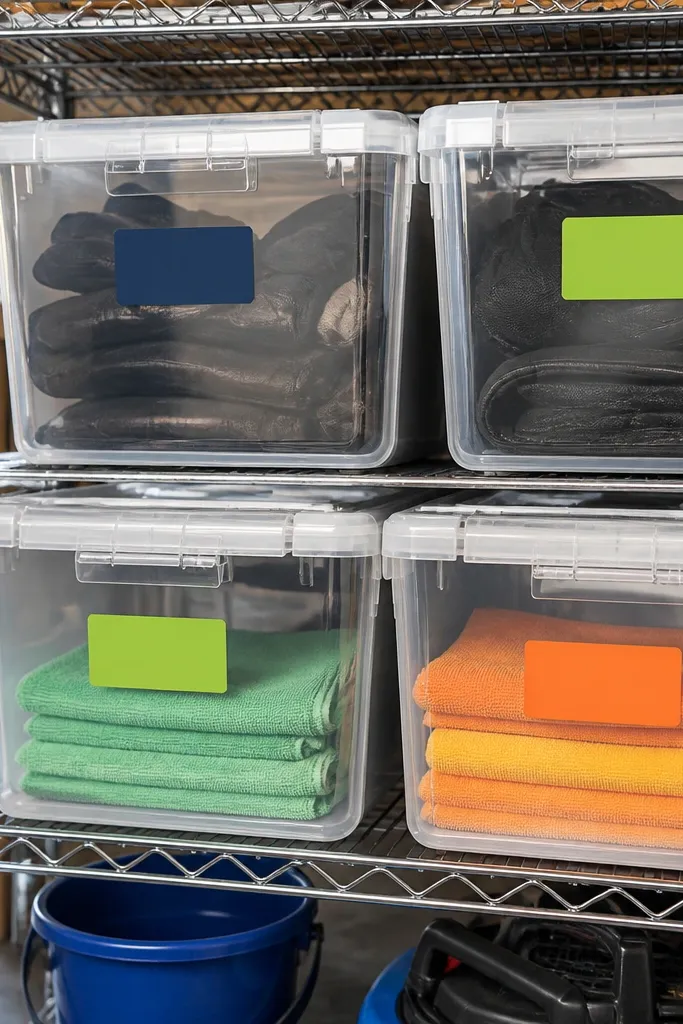
Clear lid bins are the fastest way to make seasonal organization look tidy year-round. You can see what’s inside without pulling everything down, which keeps the shelf face clean. Color-coded labels make the system usable even when you’re tired. This works best on a fixed shelf or a wire rack where bins sit at eye level. The look is crisp because the lids match and the label blocks repeat, giving your garage a uniform, designed feel.
Choose clear plastic bins with matching lids and measure the shelf depth and width so bins sit flush with minimal gaps. Add a label category system using 3-4 colors: for example, blue for winter gear, green for yard tools, yellow for car stuff, red for household repairs. Print labels on durable label tape or laminated stickers, then apply them to the front center of each bin. Stack bins by category, leaving one empty “overflow” bin space at the bottom for items you find later. Secure the shelf with shelf brackets so it doesn’t sag and ruin the clean stack lines.
Editor's noteLeave a 1-inch gap between stacked bins and the wall so dust wipes off without you knocking the stack.
Skip thisDon’t label vague categories like “misc” — it turns back into a pile quickly.
3. Pegboard Tool Organizers with Custom Backer Lip
Pegboard looks good when it’s controlled. A custom backer lip along the top and sides stops small tools from sliding off and keeps the wall tidy. This is perfect for small garages because it uses vertical space without blocking doors. The aesthetic is clean when tool hangers are consistent and spaced evenly, so everything lines up like a shop wall. It also stays year-round friendly: you can swap hooks for new tools without rebuilding the entire system.
Install pegboard over a thin backer or add a frame behind it so you can screw a top lip securely. Cut a 1x2 wood strip for the top lip and mount it so it overlaps the pegboard by about 0.75 in. Add side lips if you have lots of long-handled items. Use a mix of hooks: J-hooks for hand tools, peg cups for small bits, and a few specialty holders for pliers and screwdrivers. Paint or seal the pegboard face so it wipes clean and matches your other storage finishes.
Editor's noteArrange by tool size first, then by frequency. Put daily-use tools at chest height and seasonal tools higher.
Skip thisSkip mismatched hook sizes — the wall looks messy even when the tools are “in the right place.”
4. Vertical Bike and Ladder Lean Rack with Rubber Feet
Storing bikes and ladders the right way makes your garage instantly look bigger. A vertical lean rack keeps the mess off the floor and avoids the “objects everywhere” look. Rubber feet protect walls and prevent sliding, which matters year-round when humidity changes. This project is visually strong because the rack creates a clear vertical line — you see the tools instead of tripping over them. Build it even if you only have one bike and one ladder; it still cleans up the floor space.
Locate wall studs and mark mounting points 48-60 in apart depending on your ladder height. Build two vertical uprights from 2x lumber, then add horizontal cross braces at 12-18 in intervals for ladder contact points. Mount the uprights with lag screws into studs. Add rubber feet or foam pads at contact points on the rack so metal doesn’t scrape. Install a bike support cradle using a curved wood block and a strap anchor so the bike leans without flopping.
Put the rack near a corner where your car door won’t swing into it; it keeps the layout clean and safe.
Don’t rely on drywall anchors — the first time you load the ladder, the whole rack shifts.
5. Magnetic Strip for Bits, Nail Sets, and Small Metal Tools
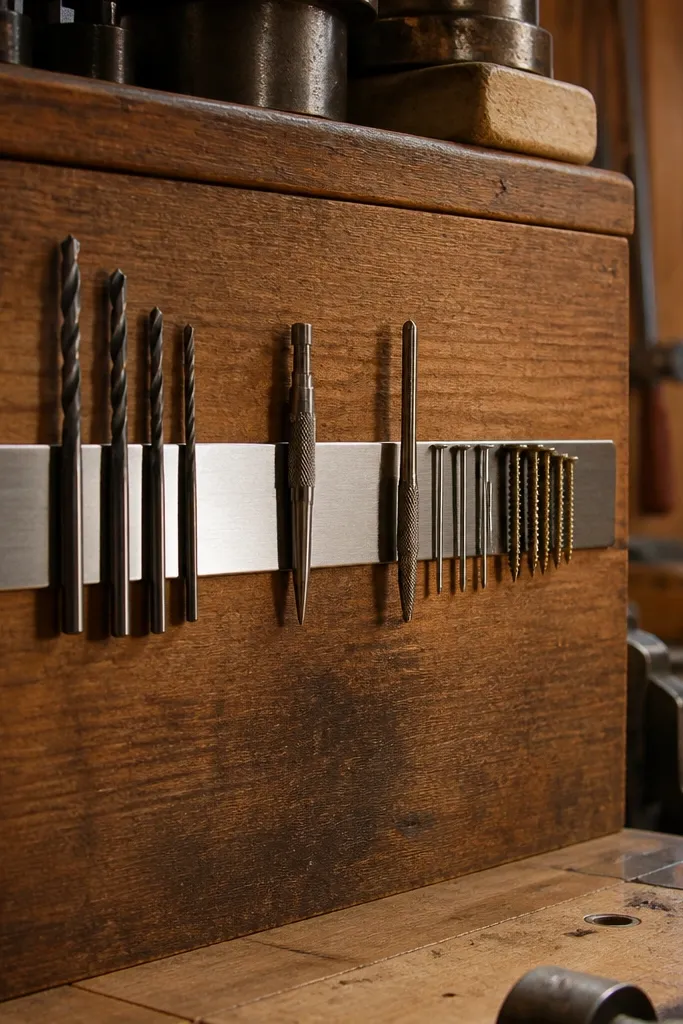
Magnetic strips make small metal tools look organized because the items stay visible and flat. It’s a great year-round solution for drill bits, nail sets, and steel fasteners you grab constantly. The visual effect is satisfying: you can spot the missing piece immediately, then return it without digging. Mount the strips on a board or cabinet door so the storage face stays clean. This is quick to build and works well in small garages where counter space is limited.
Buy a magnetic strip long enough for your most-used set and mount it to a painted plywood board using screws through mounting holes. Pre-drill pilot holes to avoid splitting. Attach the board to a wall stud or to the inside of a tool cabinet door with hinges if you need access. Add small labeled trays beneath for non-magnetic items like measuring tapes or plastic anchors. Keep the strip height where you can return bits while standing without reaching over clutter.
Editor's noteGroup bits by size and use small binder clip labels under each section so the strip stays readable.
Skip thisSkip mixed materials on the same strip — magnets won’t hold everything and you’ll end up with a messy pile beside it.
6. DIY Hose Reel Cabinet with Side Hook for Spray Wand
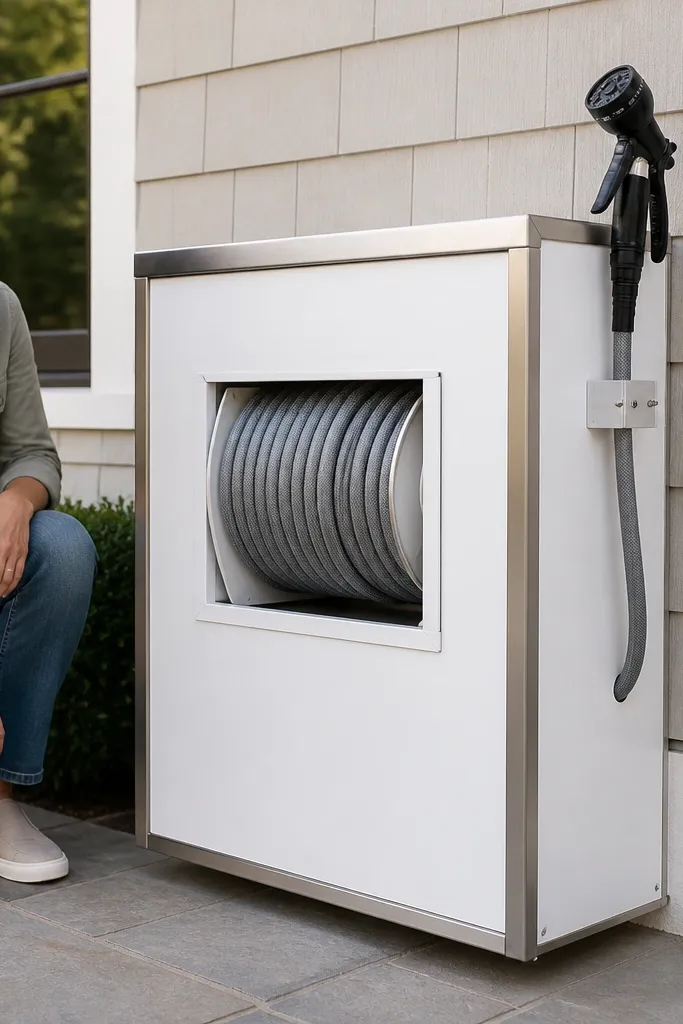
A hose reel cabinet makes the garage look sharp because hoses are the worst visual clutter. When the hose is stored on a reel behind a cabinet face, you remove the coiled mess and keep the floor clear. Add a side hook so the spray wand stays in view and doesn’t get lost behind the cabinet. Year-round matters because hoses crack and tangle when stored loosely, and a reel reduces stress on the line. This project gives you a clean focal point without taking over your entire wall.
Build a shallow cabinet box from 3/4 in plywood, leaving the rear open or ventilated so the hose can dry. Mount a manual hose reel inside using the reel’s manufacturer mounting pattern or by aligning the reel so the hose feeds straight down. Drill a small cable pass-through or hose outlet hole at the bottom. Add a hinged door with a simple magnetic latch so the front closes cleanly. Install a side hook or small rail for the spray wand at a height you can grab quickly.
Use a gasket strip on the cabinet edges so the door doesn’t scrape the hose.
Don’t trap the hose fully inside a sealed cabinet — it stays damp and smells.
7. Corner Pegboard Grid with Tool-Size Spacing
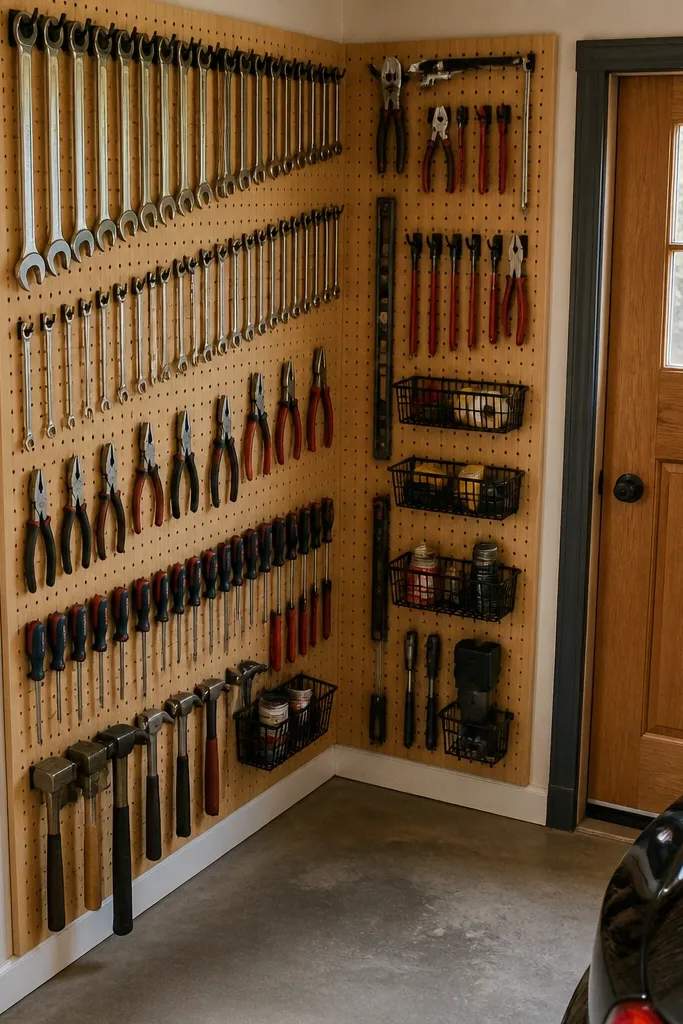
Corners are where small garages go to die, visually and practically. A corner pegboard grid turns that awkward space into a neat tool wall with a strong visual grid. The look is clean because you control spacing and keep tools aligned to the peg holes. This is great for wrenches, small hand tools, and frequently used garage odds and ends. Skill level is moderate only because you’re measuring to fit the angle, but the build is straightforward and the result is very photogenic.
Measure the corner width at the height you want the pegboard to sit, then cut two pegboard panels to fit each wall face. Frame each panel with 1x2 lumber so you can screw into studs and keep the board straight. Mark a consistent peg spacing pattern for hooks so you don’t end up with random gaps. Install hooks first on the floor using your tool sizes as a guide, then transfer the layout to the pegboard. Add a small shelf ledge at the top for items you don’t want hanging.
Use a temporary cardboard template for each tool outline so you don’t guess hook placement.
Skip “freeform” hook placement — the corner looks cluttered even with the right tools.
8. Drawer-Front Label Organizer for Screws and Fasteners
Fasteners make garages look messy because they spread out. Drawer-front organization fixes that by keeping small categories behind a clean face. The visual win is the labeled drawer fronts lined up like a cabinet. Use this for screws, bolts, washers, anchors, and bits that you usually toss into cups. Year-round, drawers keep moisture from reaching paper labels and keep piles from migrating across the workbench. This is a beginner project if you use pre-made drawer boxes or shallow plastic drawer organizers inside a simple frame.
Pick a drawer system that fits your wall or workbench area. Use small bins inside each drawer and label each bin with size and type using a consistent format. Build a simple plywood frame if needed, then mount it securely. Add drawer stops so the drawer doesn’t slam and spill contents. Put your most-used sizes in the top drawers and less-used specialty bags at the bottom.
Editor's notePrint labels with both size and common job code like “SCREW-#8 DRYWALL” so you don’t have to translate later.
Skip thisDon’t mix mixed-size bags in one bin — you’ll stop sorting and the drawer becomes a junk drawer.
9. Floor-Visible Storage Cubes with Removable Bins
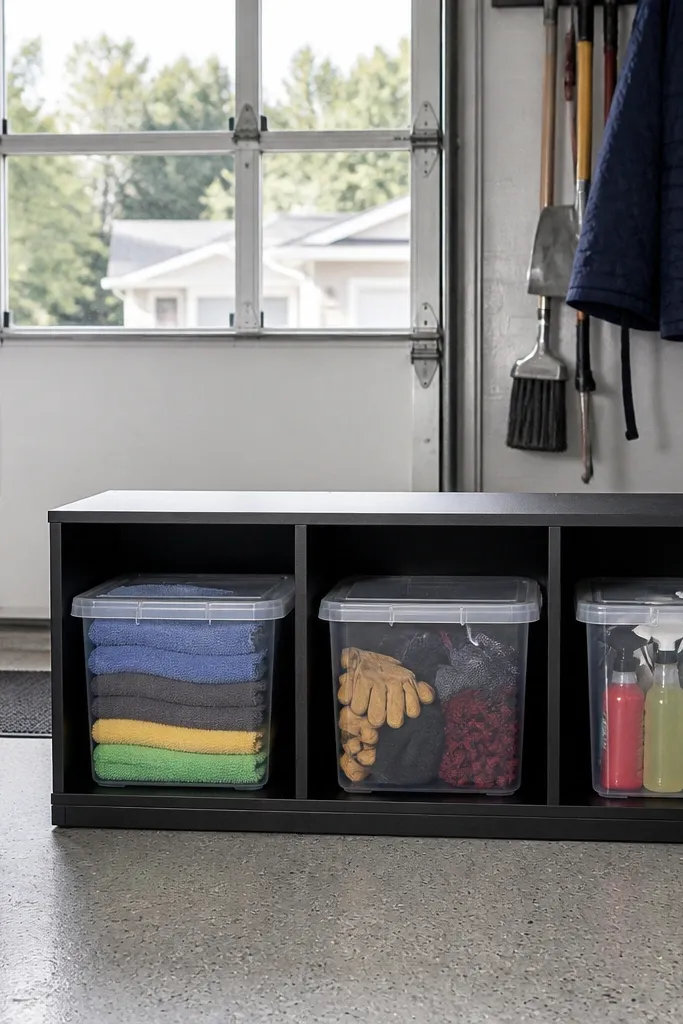
You get a cleaner look when storage sits at floor height with visible fronts. These cubes are perfect for things you grab often: cleaning supplies, shop rags, car wash extras, and seasonal gloves. Removable bins make it easy to pull the whole category and carry it inside without dumping. The aesthetic is strong because the cube grid creates straight lines and consistent spacing. This is one of the best year-round garage organization ideas for small spaces because it reduces clutter on shelves you already use.
Build a 3x2 or 2x2 cube grid from 3/4 in plywood with open back access so you can run a wall strap or anchor. Cut bin-sized inserts so bins slide in and out with a small clearance gap. Sand and paint the cube face a matte color to hide scuffs. Install a simple front label plate on each cube using label tape under a clear vinyl cover. Add corner bumpers or feet so bins don’t scrape the floor and leave scuffs.
Use bins with the same height so the labels line up perfectly across the front.
Skip deep cubes if you’re short on space — deep storage turns into a bottomless pit.
10. Overhead Rack with Tensioned Straps for Seasonal Items
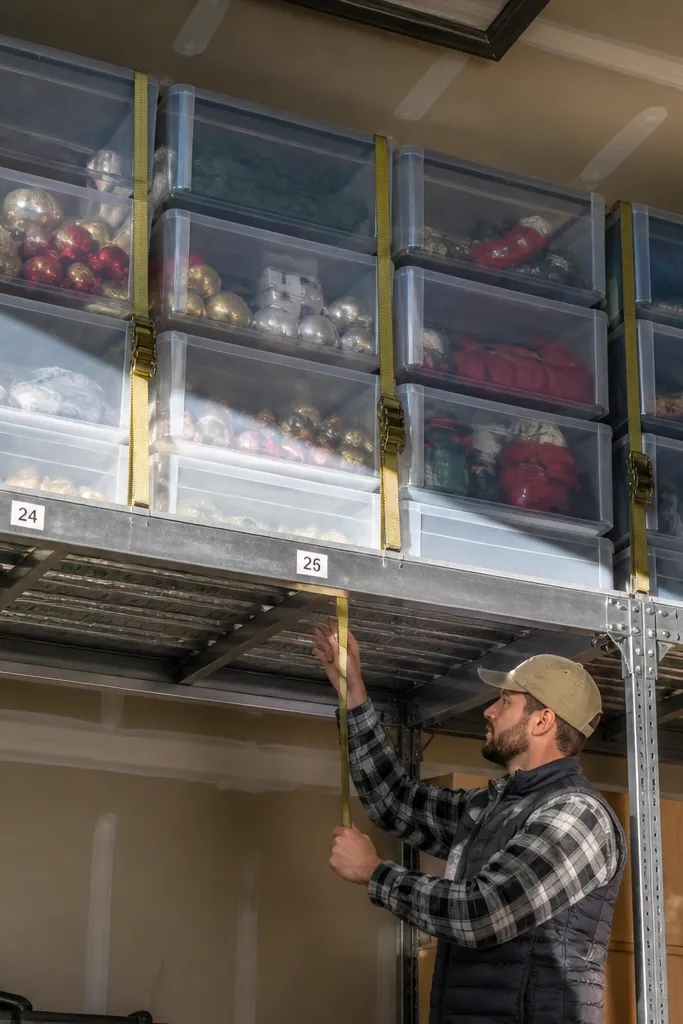
Overhead storage keeps the garage floor clear, and it looks clean when you strap bins down instead of stacking them loosely. Tensioned straps prevent bins from shifting, so the rack face stays neat even after months of use. This is ideal for seasonal items you don’t need daily: holiday decor, camping gear, and spare tires. Year-round benefit is simple: bins stay protected from foot traffic and dust. Visually, the rack reads like a designed storage ceiling instead of a clutter shelf.
Build a simple overhead frame from 2x4 lumber or metal angle, then anchor it into ceiling joists using lag screws. Hang a grid of rails spaced to match your bin sizes. Use ratchet straps or cam straps with protective edge sleeves so straps don’t bite into plastic. Place bins in the grid and strap them in at two points per bin. Add a clear height check so you can open the garage door and move without bumping bins.
Editor's noteMark a single “drop zone” on the floor for momentary items so you don’t stack on the rack and forget.
Skip thisDon’t store heavy items on the far edge — it warps the rack and makes the ceiling look messy.
11. Tool Cabinet Door with Folding Shelf for Paint Supplies
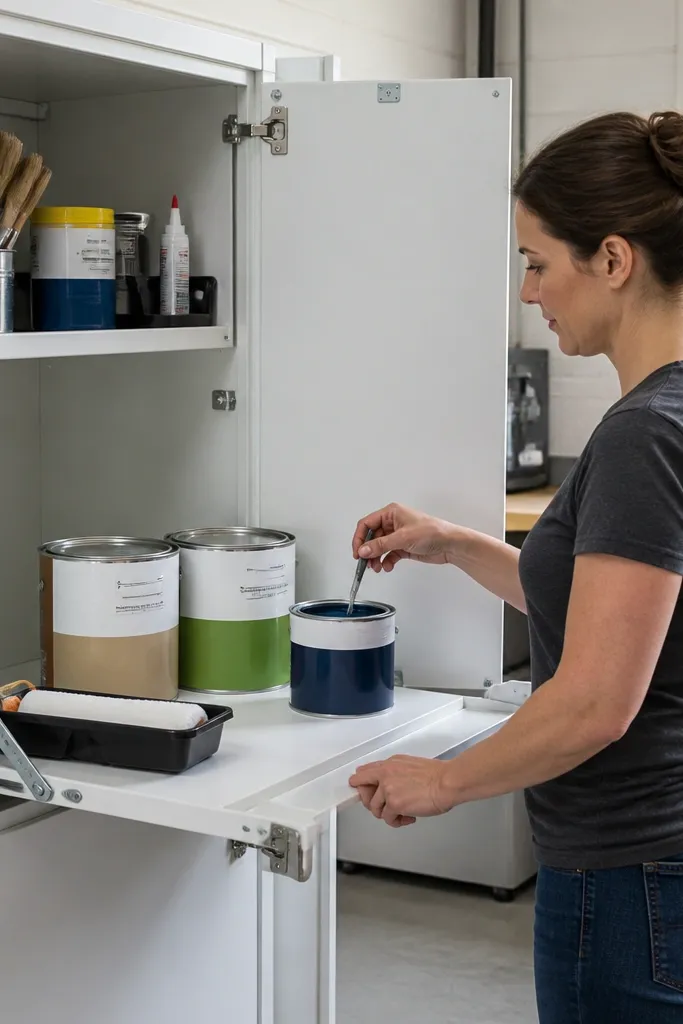
Paint supplies look chaotic because cans roll and labels fade. A cabinet door with a folding shelf keeps cans upright and visible when you open the door, which keeps the rest of the garage clean. The folding shelf saves space in small garages because it doesn’t need extra floor clearance. For year-round organization, this also protects paint from dust and reduces the mess when you’re mid-project. The look is neat because the door becomes a tidy “panel” with a consistent layout.
Build a shallow cabinet frame using plywood and mount it to a wall stud near your workbench. Install a door with hinges and add a folding shelf using a piano hinge or folding bracket designed for cabinets. Add a small lip on the shelf edge so cans can’t slide forward. Screw a foam or rubber mat to the shelf surface to stop rattling. Add a small ventilation gap near the top and store only sealed containers inside.
Label lids with painter’s tape and a date so you can find the right color even after months.
Skip storing open cans — you’ll create sticky drips and a permanent mess.
12. Workbench Side Rail for Measuring Tape, Level, and Markers
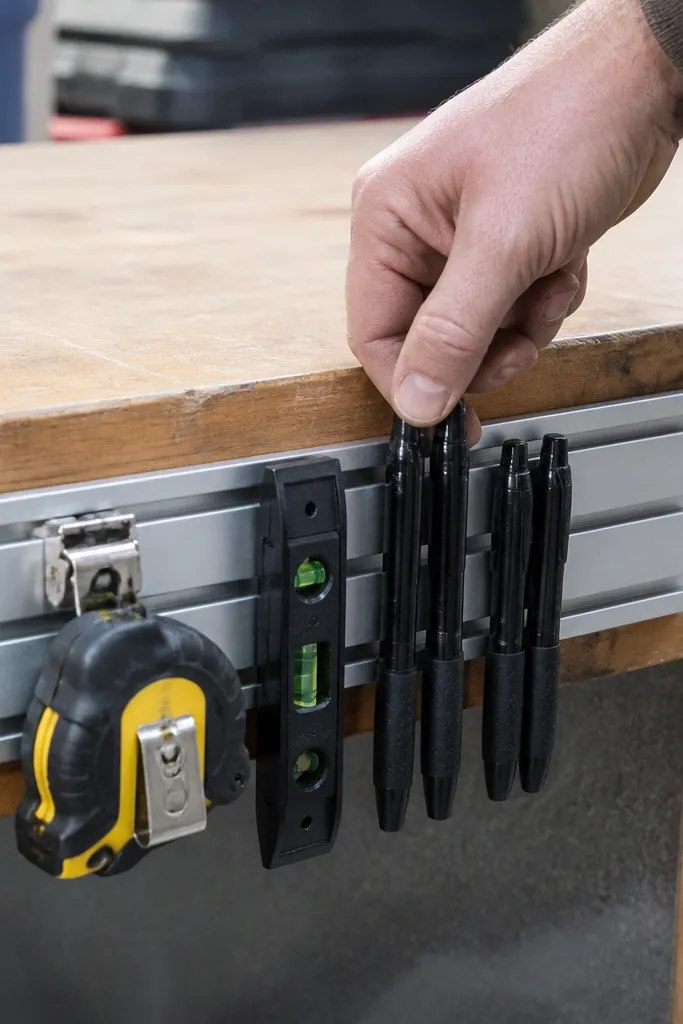
A side rail on your workbench makes the tools you use mid-project look organized instead of scattered across the top. The visual payoff is immediate: your bench face stays clear and your “active tools” are lined up vertically. This is year-round friendly because you can keep measuring gear in one place no matter the season. Use it for levels, measuring tape, pencils, marker pens, and small squares. Skill level is beginner: it’s a simple rail with slots and hangers.
Measure your workbench side clearance and cut a rail board from 1x lumber. Mark and cut slots for the measuring tape and pencil/marker holders using a jigsaw. Add two or three vertical hangers for small levels and squares using metal brackets. Seal and paint the rail so it wipes clean. Mount the rail to the bench frame or wall behind the bench with screws into solid wood or studs.
Keep the rail height so you can grab the tape without bending — it keeps the system in use.
Don’t mount the rail too low — tools fall off and you’ll stop using it.
13. Wrench Roll-Up Sleeve on a Wall Hook Bar
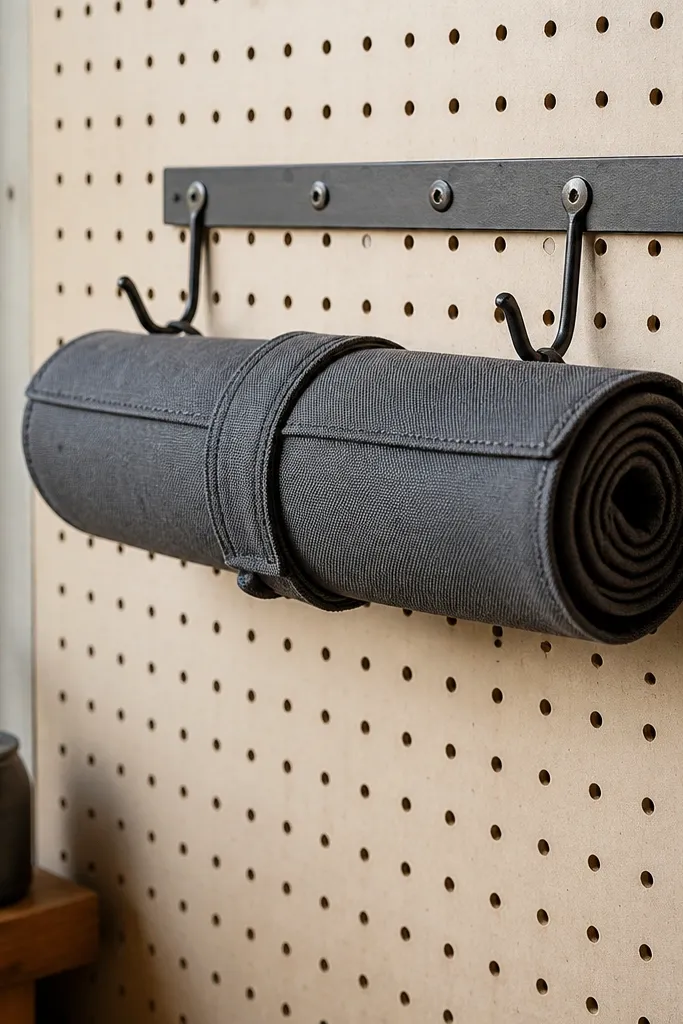
A roll-up wrench sleeve turns a messy tool pile into a clean, fabric-wrapped bundle. It’s photogenic because the roll looks intentional and the wall has a repeating pattern. Use it for socket wrenches, combination wrenches, and any set that gets mixed up. Year-round, this keeps tools dry compared to open bins and prevents corrosion caused by trapped moisture in drawers. The build is simple if you buy a sturdy fabric and add stitched pockets or use a pre-made roll with custom labels.
Cut fabric panels and stitch pockets sized to each wrench width, leaving consistent spacing between pockets. Fold the roll so it wraps tightly and stays closed with a strap or Velcro tab. Mount a bar to the wall using screws into studs, then hang the roll with a hook and loop strap. Add a label at the top flap for quick identification. If you want it to look extra clean, add a thin canvas backing so the roll holds its shape.
Editor's noteLabel pocket positions with a small printed tag so you can put wrenches back correctly in seconds.
Skip thisSkip loose pockets — if wrenches fall out, the roll becomes a storage failure.
14. Seasonal Cleaning Supply Caddy with Wheels
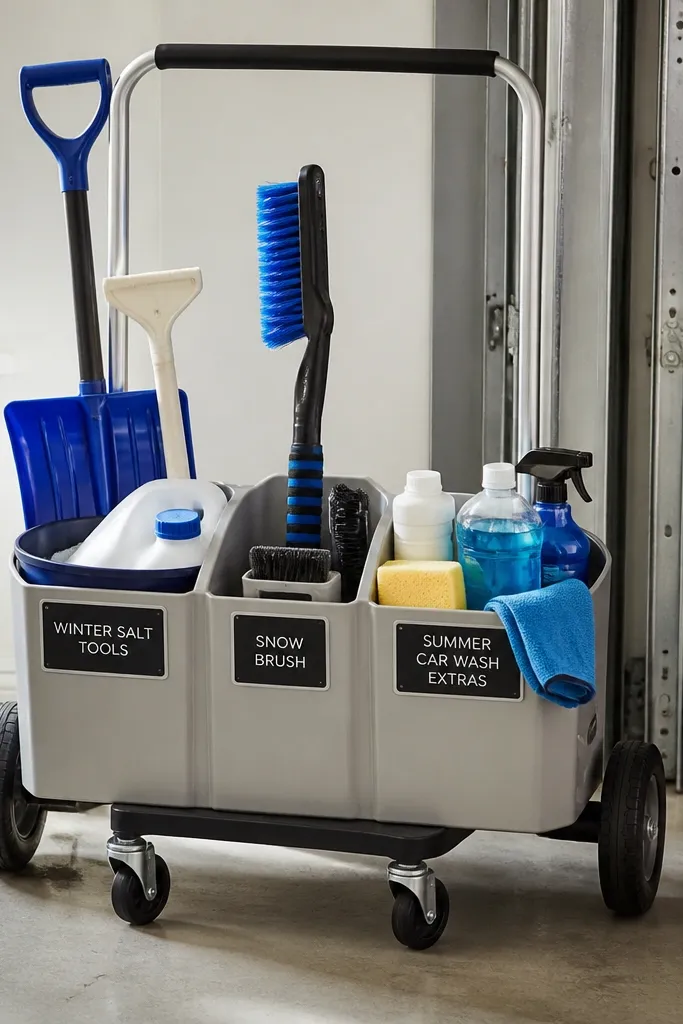
A wheeled caddy keeps cleaning supplies from turning into a random pile by the garage door. It’s visually neat because you can roll the caddy out when you need it, then tuck it away in the same spot. Year-round, you can swap the contents for winter salt tools, spring car wash extras, and summer yard cleanup. This is one of the best aesthetic solutions for small garages because it reduces countertop chaos while keeping items accessible. Build it with a clear layout so bottles stand upright and labels face forward.
Choose a compact plastic or metal rolling cart with 2-3 shelves. Use small bins or foam bottle holders so bottles don’t rattle. Label each shelf section with a consistent color scheme and add a top compartment for gloves and rags. Put frequently used items on the top shelf for quick grab. Store the caddy in one corner using a floor anchor so it doesn’t drift into the walkway.
Use one type of bottle cap color for each category so you can identify supplies without reading labels.
Don’t overload the cart — heavy bottles make it tip and the system stops being used.
15. Slatted Shelf with Front Rail for Oil and Chemicals
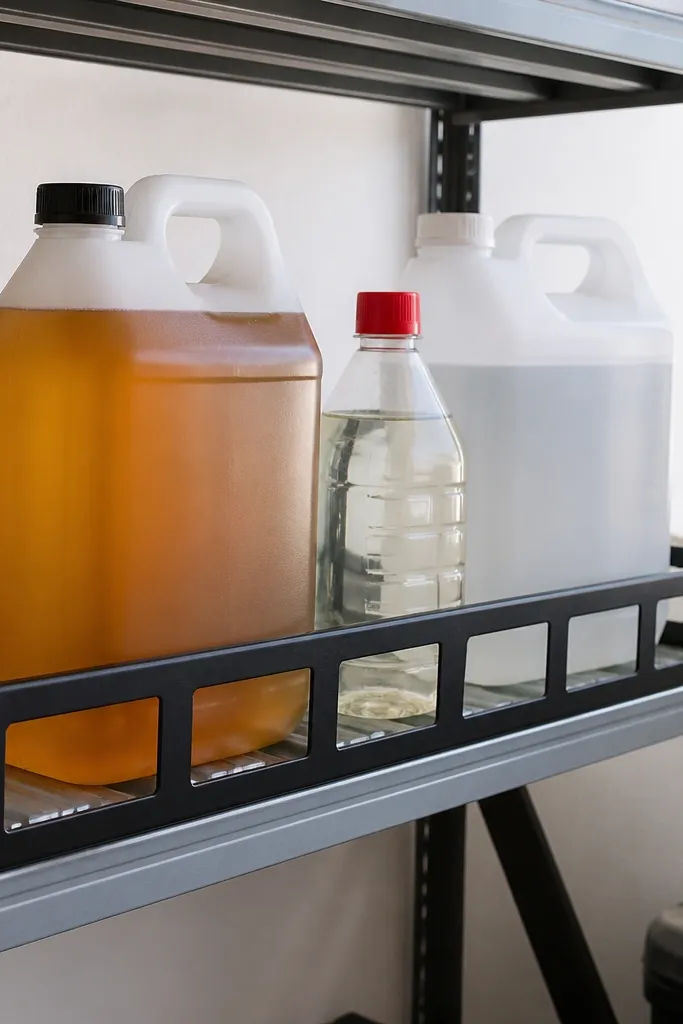
Chemicals and oil jugs look messy when they sit loosely on a shelf. A slatted shelf with a front rail keeps containers upright and prevents them from sliding forward. The slats reduce trapped dampness and make it easier to wipe spills. Year-round, this is a safer setup because accidental drips can be noticed and cleaned without digging through stacked items. The look is tidy because the rail creates a clean line and all containers face the same direction.
Build a shelf frame from 1x lumber and install slats spaced so jugs sit stable without rolling. Add a front rail about 2 in tall to keep containers from slipping. Sand and paint with a chemical-resistant coating on the frame. Use rubber shelf liners under each container contact point. Mount the shelf to studs using brackets and verify it can handle weight without wobble.
Keep absorbent pads in a small pocket under the front rail so spills get handled fast.
Skip open stacking without a front rail — one bump and you get a chemical domino mess.
16. Pegboard Cabinet for Spray Bottles with Clear Door
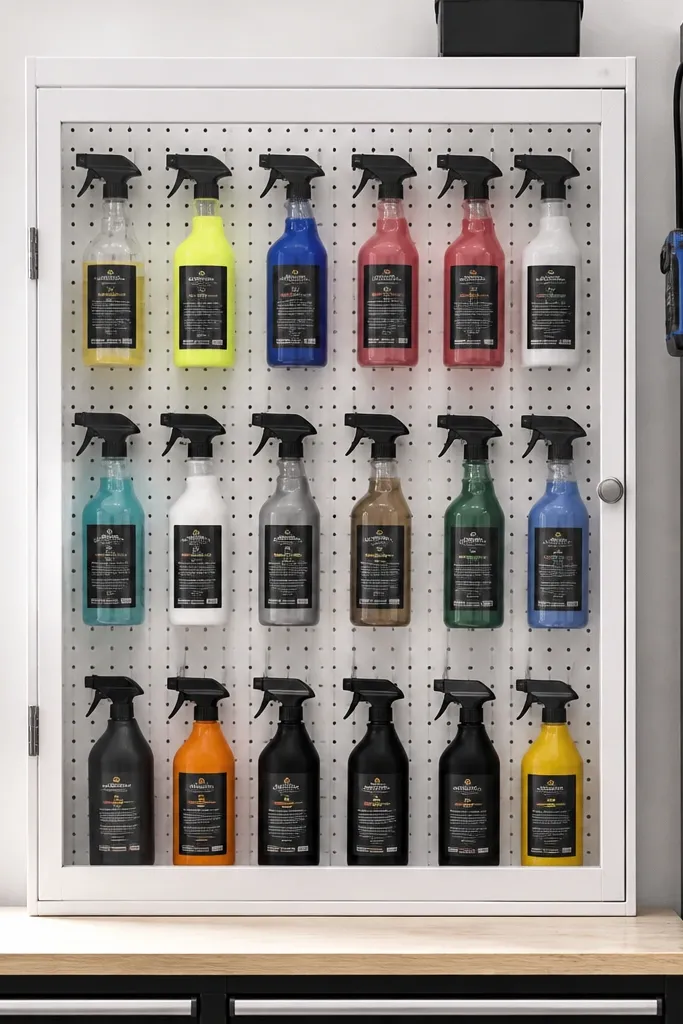
A cabinet with a clear door makes your spray bottles look organized while protecting them from dust. It’s one of the most photogenic solutions because you get the neat pegboard grid effect plus a clean front. Year-round, this keeps bottles upright and reduces label fading from grime. This works especially well for garages with limited wall space because you can mount it where you’d normally hang a single shelf. Skill level is moderate since you’re building a cabinet, but the layout is simple and repeatable.
Frame a shallow cabinet using 3/4 in plywood and mount it to studs. Install pegboard inside the cabinet so you can place hooks and bottle holders on a consistent grid. Use a clear polycarbonate door or clear acrylic panel with hinges and a magnetic latch. Add a small drip tray at the bottom using a removable plastic insert. Arrange bottles by type and height so labels face outward through the clear door.
Use bottle holders with a slightly angled base so bottles don’t tip when you open the door.
Skip a bottom tray — one slow leak ruins the look fast.
17. Ceiling-Mounted Lumber Rack with Numbered Slots
Long boards take over small garages because they lean everywhere. A ceiling-mounted lumber rack keeps everything off the floor and makes the garage look instantly more controlled. Numbered slots add clarity so you stop dragging boards out to find what you need. Year-round, it also protects lumber from getting knocked around by bikes and foot traffic. The visual style is strong because the rack creates a clean grid above your working area, and the numbered slots make it feel like a workshop. This is a mid-level build because you’re anchoring to ceiling joists.
Locate ceiling joists and mark mounting points so your rack loads transfer safely. Build two parallel support beams from 2x lumber and mount them with lag screws. Add cross slats or hooks at measured intervals based on your board widths, leaving 2-3 in clearance between boards. Paint the rack a matte dark color to make it look intentional against the ceiling. Add small numbered tags on the front edge of each slot and keep the numbers aligned with your storage list.
Measure the longest board you store and set the rack so it clears the garage door path by at least 6 in.
Don’t mount into random ceiling members — joists are the only safe choice for a heavy rack.
18. Coil-Safe Extension Cord Holder with Side Window Labels
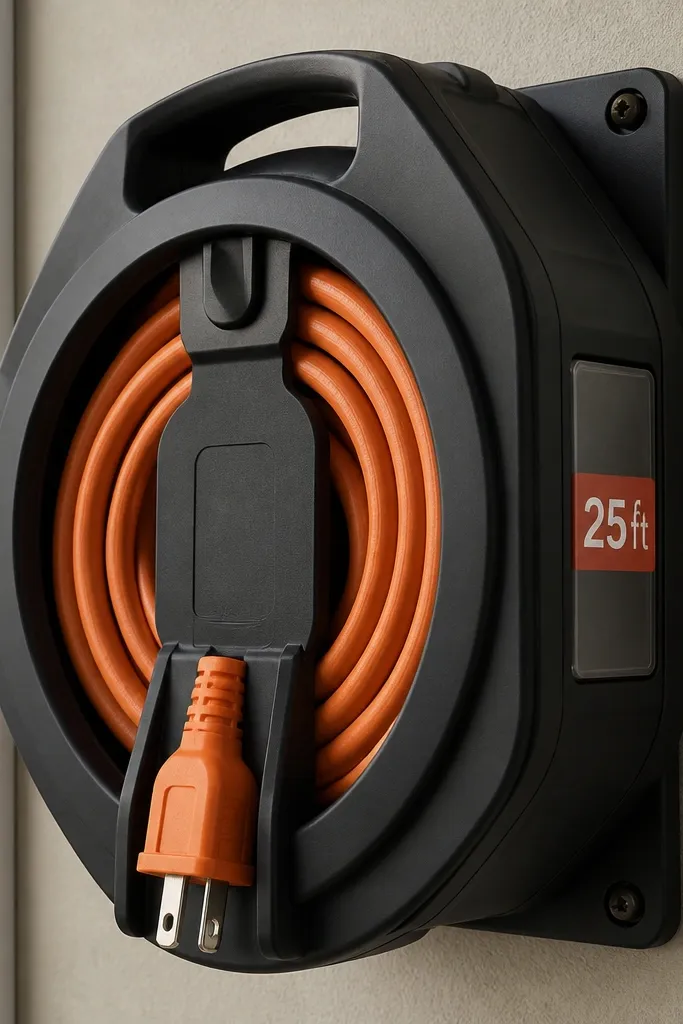
Extension cords ruin the look because they tangle and sprawl. A coil-safe holder keeps cords wound tight and visible, while the side label windows make it easy to grab the right length. Year-round, you avoid cracked insulation from kinks because cords don’t get folded sharply or stored in messy loops. The aesthetic is clean because the cords sit on a repeating arc pattern with label blocks aligned. This is a small build that makes a big visual difference in garages used for DIY projects.
Mount a vertical board to a stud and add two or three horizontal pegs or posts for coiling cords. Use adjustable side label windows or small transparent label holders so the length is readable at a glance. Secure each cord with a simple hook-and-loop strap so the coil stays tight. Wrap cords around the posts in a consistent direction, then clip the end strap to the board. Add a small storage pocket for plug adapters and small power tools.
Editor's noteUse label length in feet and voltage rating so you don’t guess when you’re mid-job.
Skip thisSkip “random wrapping” — tangled coils look messy and you’ll stop using the holder.
19. Wall-Mounted Trash and Recycling Sorter with Swing Lids
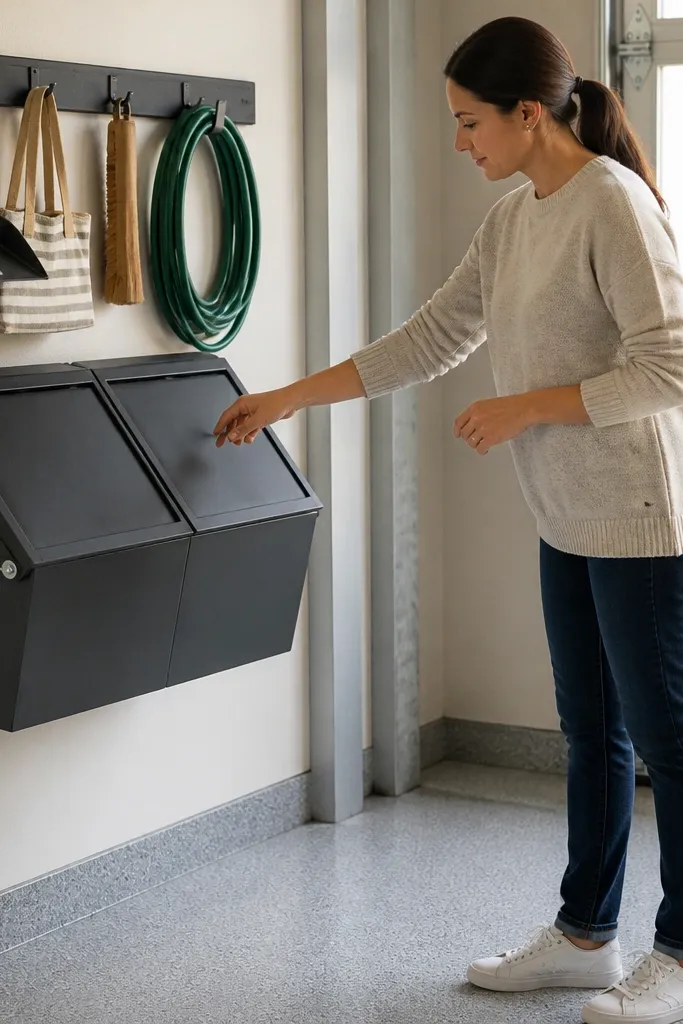
Garages look cluttered when trash and recycling land on the floor by default. A wall-mounted sorter with swing lids keeps bins aligned and reduces the “bags everywhere” look. The swing lids keep odor contained and make it easy to drop in cardboard or packaging without leaving the area. Year-round, it also helps because you’re not dragging full bags across the floor when it’s wet or cold. Visually, the unit looks tidy because it’s a straight front with consistent spacing.
Pick two matching bins with secure lids and measure their width and height. Build a wall frame from 1x lumber and mount it into studs at a comfortable drop height. Install hinged access panels or swing lids above each bin opening so you can toss items in. Add a front face board to hide the bin sides and keep a clean look. Use removable liners and add a small handle for quick bag changes.
Editor's noteSet the openings so cardboard can drop in without bending; it keeps the area looking clean between cleanups.
Skip thisDon’t mount too high — if you have to reach, you’ll toss trash on the floor.
20. Magnetic Level and Square Holder for Quick Layout
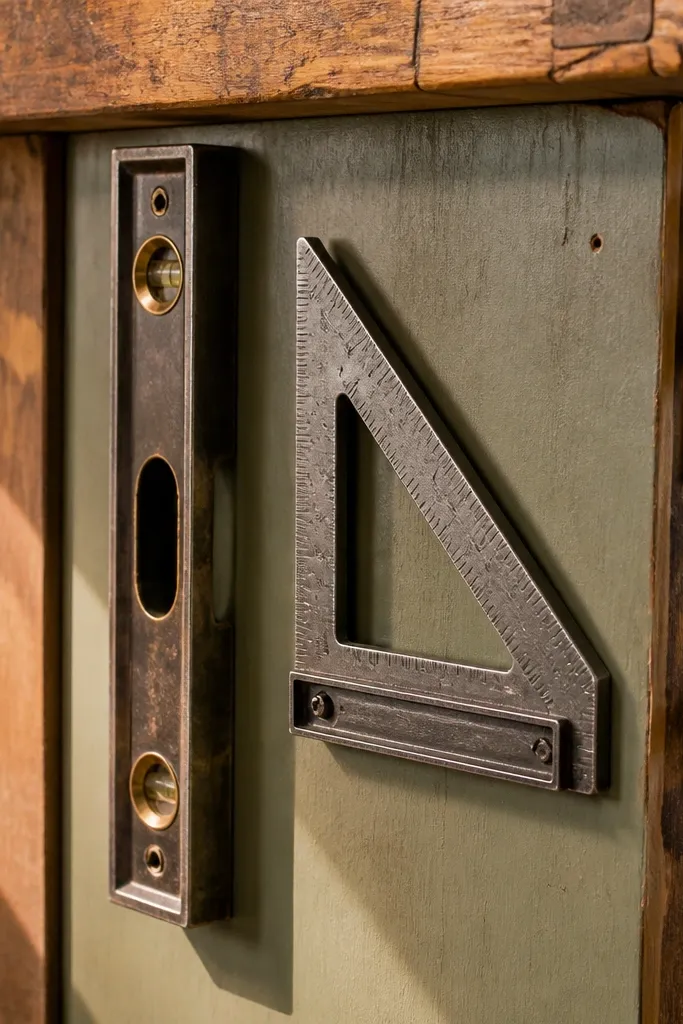
A magnetic holder for layout tools keeps your levels and squares from wandering onto the workbench. It’s visually clean because the tools hang flat against a board and line up neatly. Year-round, magnets also help with quick returns: you can place tools back instantly after a cut or measurement. The look is sharp and workshop-like, especially when the board finish matches the rest of your storage. This works best for metal-backed squares and compact levels; it’s less ideal for foam-backed tools.
Use a plywood board and mount it to a stud at bench height. Install magnetic strips or bar magnets behind a thin protective cover so tools don’t scratch the magnets. Mark tool placement points based on your tools' metal contact surfaces. Add a small bottom rail so the tools can’t slip down. Paint or seal the board so it wipes clean after dust and saw residue.
If your tools have different thicknesses, add spacers so each tool sits at the same height for an orderly look.
Skip protective covers — magnets can scratch tool faces and ruin the clean appearance.



