
1. Matte Black Bracket + White Oak-Effect Board Shelf (4-inch depth)
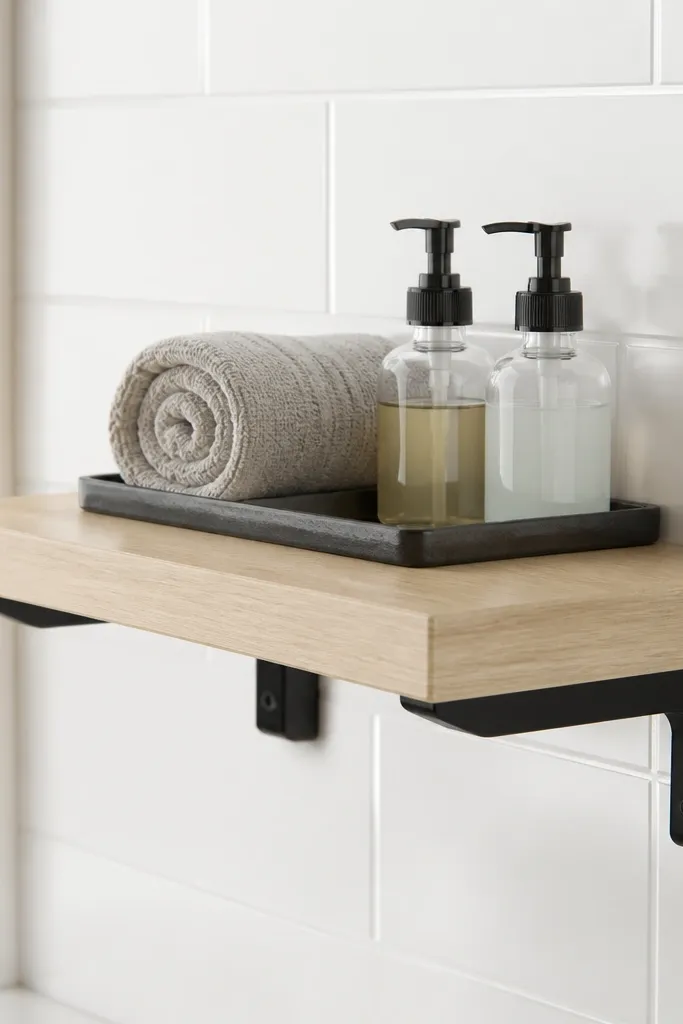
This is the “clean counter” look without giving up storage. The shelf is only 4 inches deep, so small bottles, a rolled washcloth, and a compact tray sit neatly instead of spilling forward. The matte black brackets add contrast against white walls and make the shelf read as intentional hardware, not a DIY afterthought. Use an oak-effect finish so it warms up the bathroom and doesn’t look like a temporary patch. It’s best for narrow walls near the sink or beside a mirror where you want vertical organization.
Start by cutting a 3/4-inch-thick board to a 4-inch depth and your chosen length, then sand to 180 grit. Seal all cut edges with a bathroom-grade primer or sealer so moisture can’t wick into the wood. Mark bracket positions on the wall using a stud finder or rated anchors, then install the brackets with level checks across the top line. Attach the shelf to the brackets with hidden screws from underneath (pilot holes first), then run a bead of paintable caulk at the wall/shelf seam and paint the caulk line to match.
Editor's noteHide fasteners with underside screws and countersink just enough to keep the surface flush.
Skip thisDon’t leave the board edges unsealed — that’s where bathroom humidity starts the ugly swelling.
2. Floating Corner Shelf Trio in Soft Sage (7-inch depth)
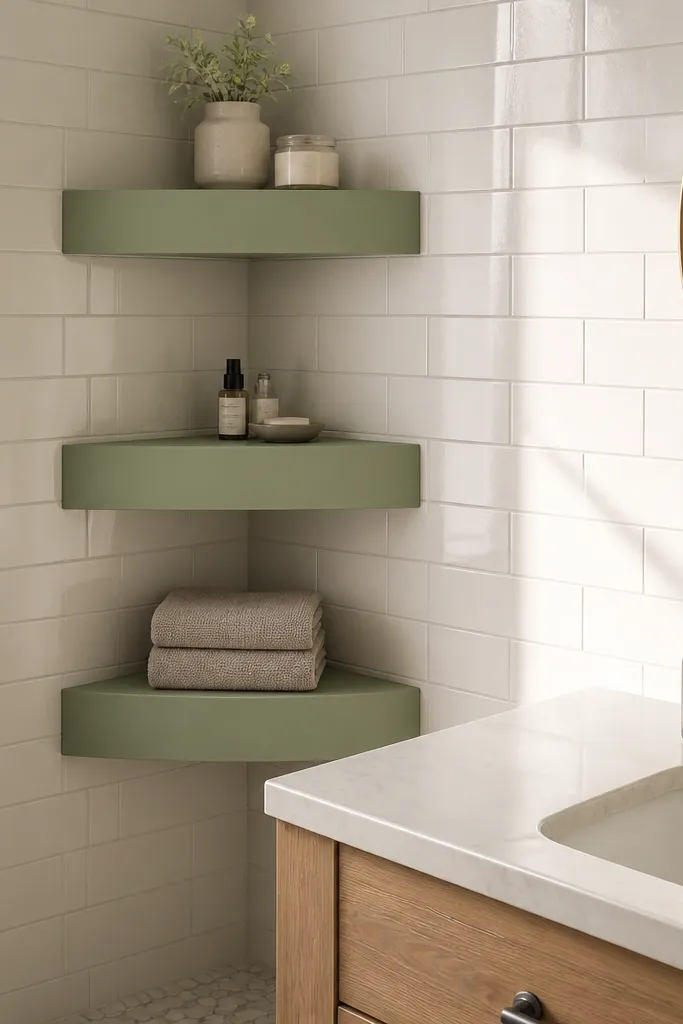
Corner shelves make bathrooms feel bigger because they use dead space without eating wall area. This trio uses 7-inch depth, which is the sweet spot for folded hand towels plus small skincare bottles. The soft sage paint gives a calm, spa-like color that looks good year-round, even when you swap decor. Corner shelves also help you avoid the “single lonely shelf” look by giving you a vertical rhythm. Install them in a tight spacing pattern so the lines stay visually balanced with the mirror height.
Cut three shelves from 3/4-inch plywood or solid lumber, each at 7 inches deep and the length that fits your corner (measure the corner width at the height you’ll mount). Paint the shelves with a moisture-resistant bathroom paint and seal with a clear topcoat after the paint cures. Find studs if possible, then mark two bracket points per shelf on the corner faces, keeping the top edges aligned with a laser level or long level. Mount the brackets first, then screw the shelf boards on and add caulk at the corner seams to prevent water from getting behind.
Use the same paint batch for all shelves so the sage tone stays consistent under bathroom lighting.
Don’t mount one shelf level and the others “close enough” — corner shelves exaggerate any tilt.
3. Dark Walnut Shelf with Brass Peg Brackets (8-inch depth)
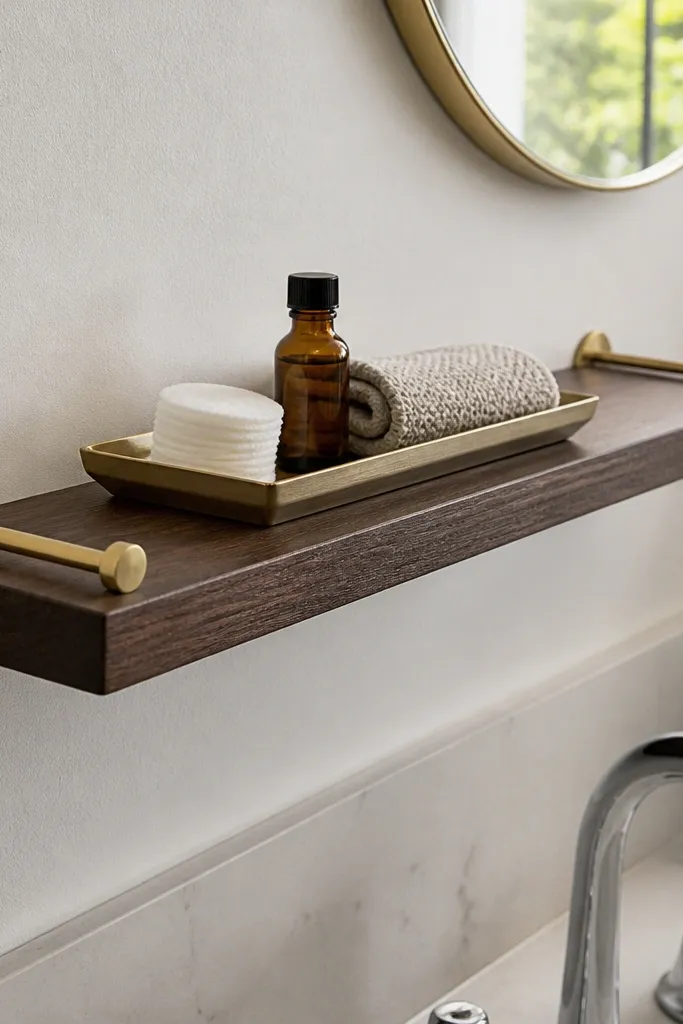
If you want a bathroom shelf that looks designer, walnut + brass is the move. The 8-inch depth holds a tray of everyday items without clutter creeping over the edge. Brass peg brackets add a sculptural look and give you a slightly lighter visual weight than thick metal brackets. This setup is great for a vanity wall where you’ll load the shelf with a soap pump, a candle jar, and a small tray. It also hides minor wall imperfections because the bracket hardware reads as part of the design.
Cut your shelf from walnut veneer plywood or solid wood, then sand to 220 grit. Wipe on a stain, let it sit per label timing, and finish with a clear water-resistant topcoat. Install the brass peg brackets by marking a level mounting line and pre-drilling holes for the bracket screws into studs or using rated anchors. Attach the shelf using the peg hardware system, then check for wobble and tighten evenly across the length. Finish by sealing any visible screw holes with matching wood filler or a touch-up stain.
Editor's noteDo a dry fit of brackets on the shelf first so you don’t end up with a bracket offset once the finish is on.
Skip thisDon’t skip topcoat — walnut looks amazing, but it needs a barrier against bathroom steam.
4. Reeded Front Shelf with Hidden French Cleat (10-inch depth)
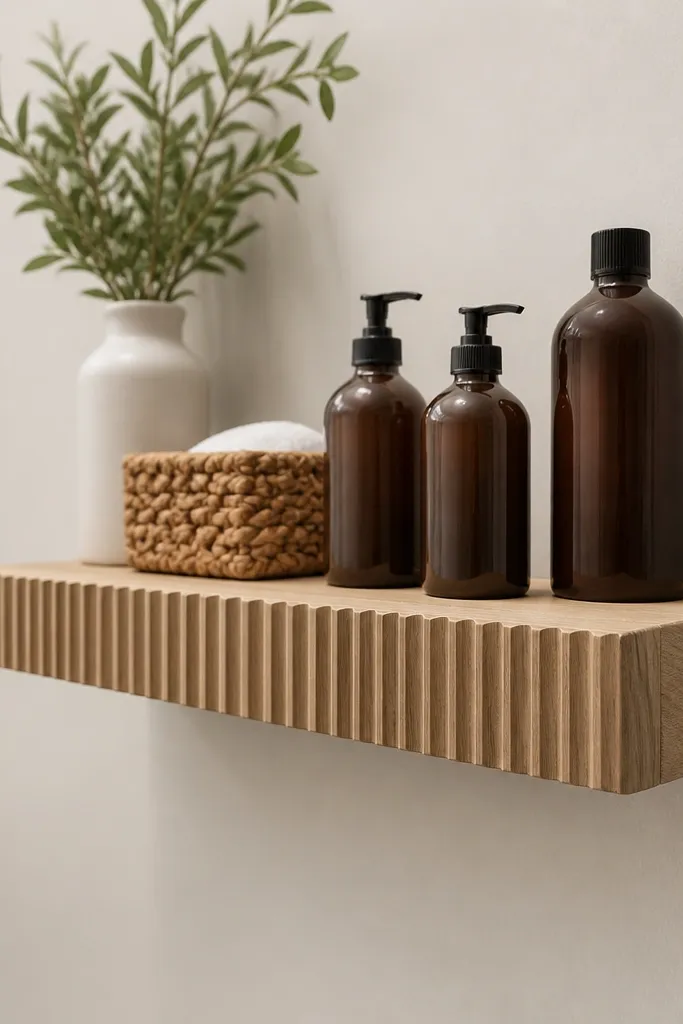
This one looks expensive because the front has reeded detail and the mounting hardware disappears. The 10-inch depth is perfect for baskets and thicker bottles; it gives you real storage without making the shelf look flat. A French cleat behind the wall creates a strong, straight hold and helps reduce shelf sway when you load it. The shadow gap from floating mounting also makes the shelf feel lighter, even though it’s holding more. Put it over a toilet area or along a long blank wall where you want a statement shelf line.
Build or buy a reeded face board and attach it to a flat backing board so the shelf thickness stays consistent, about 3/4 to 1 inch. Prime and paint the shelf, then seal with a hard topcoat so the reeded ridges don’t absorb moisture. Create the French cleat: mount the wall cleat level first into studs, then attach the shelf cleat half to the shelf with matching angles. Lift and lock the shelf onto the wall cleat, then secure with two hidden screws through the shelf underside into the cleat for safety. Seal the perimeter with paintable caulk for a crisp edge line.
Use a long straightedge to keep the cleat perfectly level — French cleats make alignment unforgiving.
Don’t rely on drywall anchors alone for a 10-inch basket shelf — use studs for the cleat.
5. White Tile-Look Shelf Box with Waterproof Interior (12-inch depth)
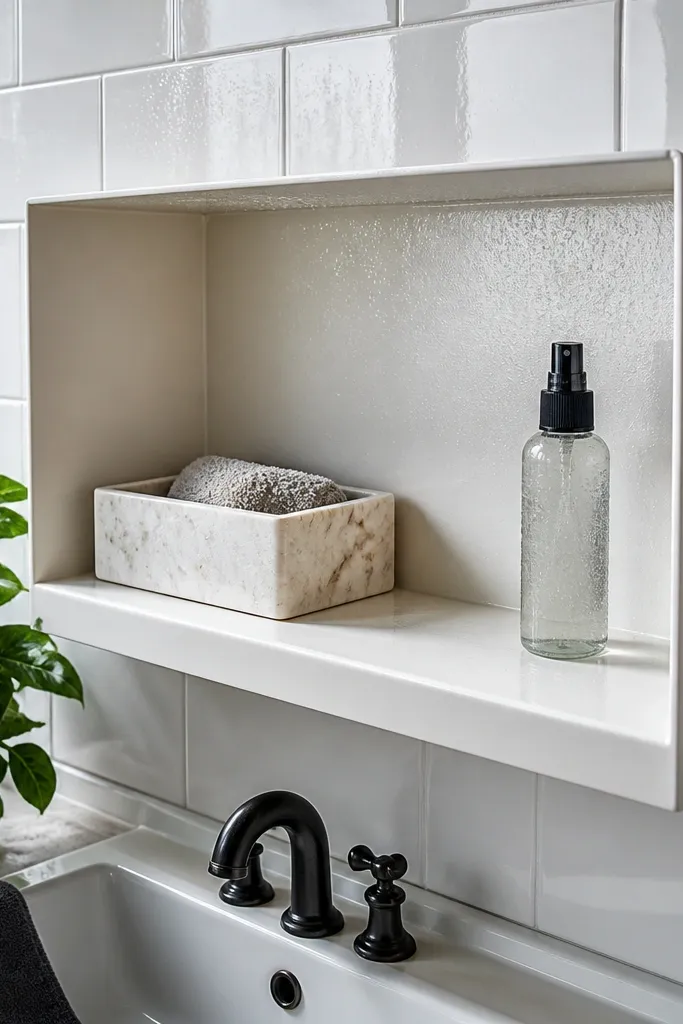
If your bathroom gets real splashes — kids, busy mornings, you know the drill — this shelf box shape helps. The 12-inch depth creates a stable landing for a small organizer box, and the waterproof interior finish keeps it from warping when water lands on the front edge. The outside looks like tile because you use a paint system that mimics ceramic sheen, paired with a clean, squared edge. It’s visually bold and reads as built-in, even though it’s a wall-mounted floating shelf. Best for a windowless bathroom where you want the shelf to brighten up the wall.
Build a box frame using 1x2 lumber for the sides and a plywood base, keeping the top opening flat and square. Apply a bonding primer, paint the exterior with a bathroom-rated semi-gloss, then seal the interior with a waterproof coating made for wet areas. Install wall cleats or heavy duty brackets into studs and mount the shelf box so the top edge sits level with your mirror frame. Drill pilot holes, screw from inside the box where you can reach, and wipe any squeeze-out before it cures. Finish by sealing the top seam and the underside where water could wick.
Editor's noteLet each coat cure fully before mounting so you don’t trap uncured solvent under the shelf.
Skip thisDon’t use standard interior paint on the inside face — it will dull and peel after steam exposure.
6. Slim Floating Shelf for Hair Tools with Raised Back Lip (5-inch depth)
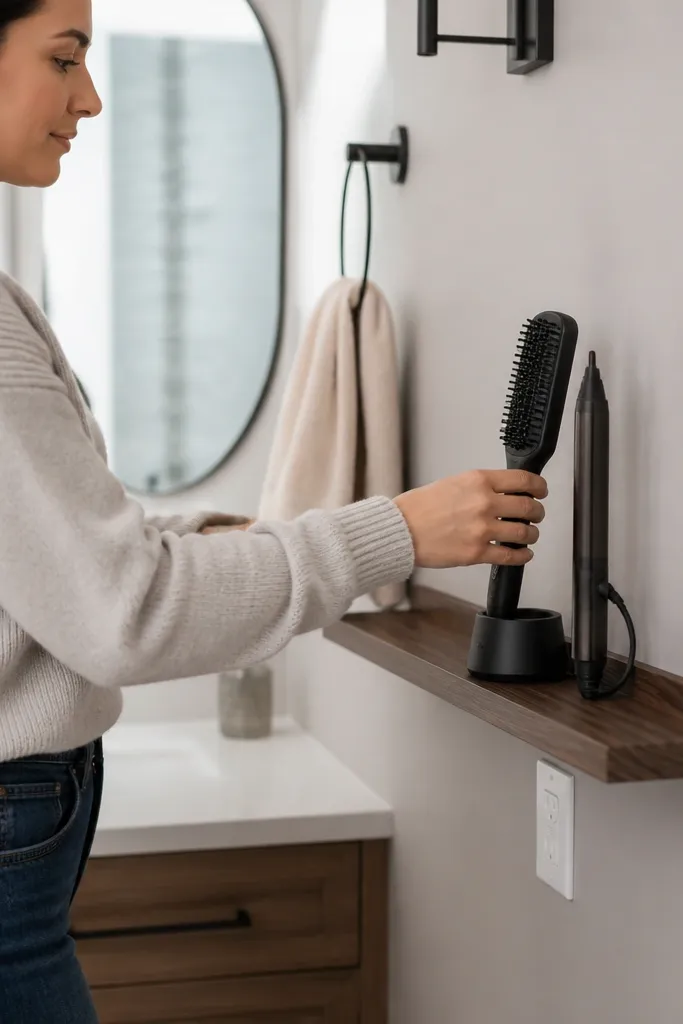
This is for the bathroom chaos: heat tools, cords, and bottles that end up on the counter. A 5-inch deep shelf with a raised back lip keeps items from sliding backward into the wall gap and gives you a visual barrier that looks tidy. Add a lip that’s about 3/4 inch tall and you can rest a heat tool stand or a small tray without worrying about it tipping. The look is clean because the lip creates a continuous line along the back edge. Great for powder rooms or shared bathrooms where counter space is always a problem.
Cut your shelf base to 5 inches deep, then add a back lip strip that’s 3/4 inch tall, glued and screwed from underneath. Seal every edge and the underside first, then paint or stain the exterior. Mark a level line on the wall and install brackets into studs; use two brackets for shorter lengths and three for longer shelves. Attach the shelf, then position the raised lip so it sits flush and doesn’t leave a gap. Finish with a quick seal along the lip-to-shelf seam to stop moisture from creeping into the joint.
Use a tray that matches your shelf finish — the lip helps, but the tray is what keeps everything looking styled.
Don’t put cords where they can touch the wall — route cords into a small organizer and keep the shelf dry.
7. Staggered Two-Tier Shelf with Open Center (8-inch depth)
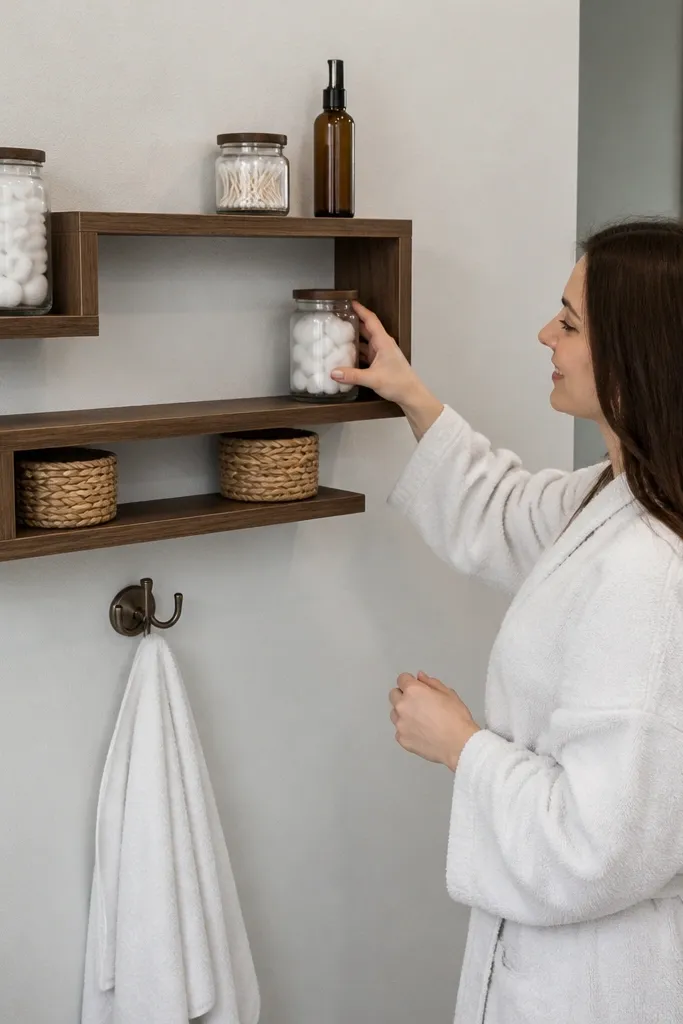
A single shelf can look flat. This two-tier staggered design adds dimension and gives you two “frames” for decor without making the wall crowded. The open center keeps baskets and taller items from blocking the shelf line, so the whole setup looks airy. Use 8-inch depth on both tiers so bottles and small jars don’t hang over. The stagger also helps you hide clutter by placing everyday items on the lower tier and swapping decor on the upper tier throughout the year.
Cut two shelves at 8 inches deep, but set them at different heights: plan a 10-12 inch vertical gap between top edges. Mount a pair of brackets for the lower shelf first into studs, level it, then mount the upper shelf brackets at the correct height. Keep bracket spacing consistent by measuring from the wall corner or vanity centerline. Attach shelves with underside screws, then add a thin back spacer strip if you need clearance for baseboard trim or wall outlets. Seal and caulk all edges and seams so water doesn’t get trapped behind the staggered structure.
Editor's noteChoose one container color for both tiers so the stagger doesn’t turn into visual noise.
Skip thisDon’t stagger randomly — decide the height gap first so the design reads intentional.
8. Natural Pine Shelf with Whitewashed Finish + Hidden Magnet Rail (6-inch depth)
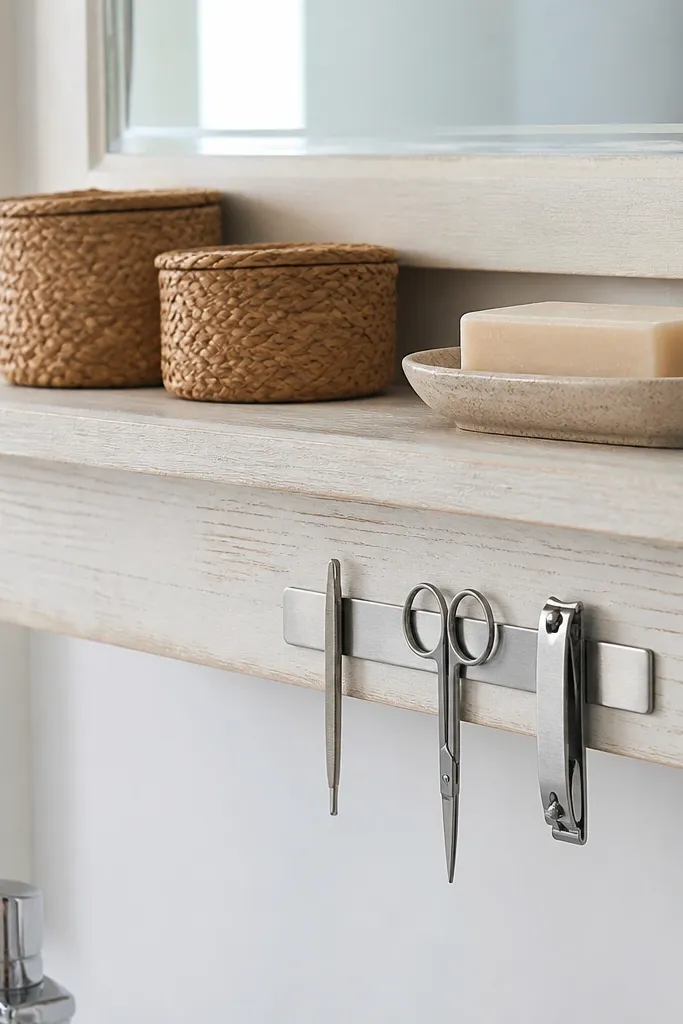
This one looks light and handmade but still works for a bathroom. Pine with a whitewashed finish gives a soft, coastal feel that stays good year-round because it’s not tied to one season color. The 6-inch depth is great for small baskets and countertop-style items that you want off the counter. Add a hidden magnet rail under the shelf edge so you can store a small metal razor holder or clip-on accessory without clutter. The rail is invisible from the front, which keeps the shelf aesthetic clean.
Sand pine to 180-220 grit, then apply a whitewash stain or diluted paint wipe-on and wipe back for an uneven natural grain look. Seal with a clear water-resistant topcoat, especially on the underside. Install mounting brackets into studs or use heavy duty anchors rated for the shelf load, then attach the shelf level. For the magnet rail, mount a thin metal strip under the shelf lip using screws and a dab of adhesive, then test magnet strength with your holder. Seal around the rail edges so moisture doesn’t creep into screw holes.
Editor's noteUse a satin topcoat, not high gloss — glossy finishes show fingerprints and water marks faster.
Skip thisDon’t skip sealing the underside — pine absorbs moisture from drips and steam.
9. Charcoal Painted Shelf with Bracket Covers and Matching Outlet Trim (9-inch depth)
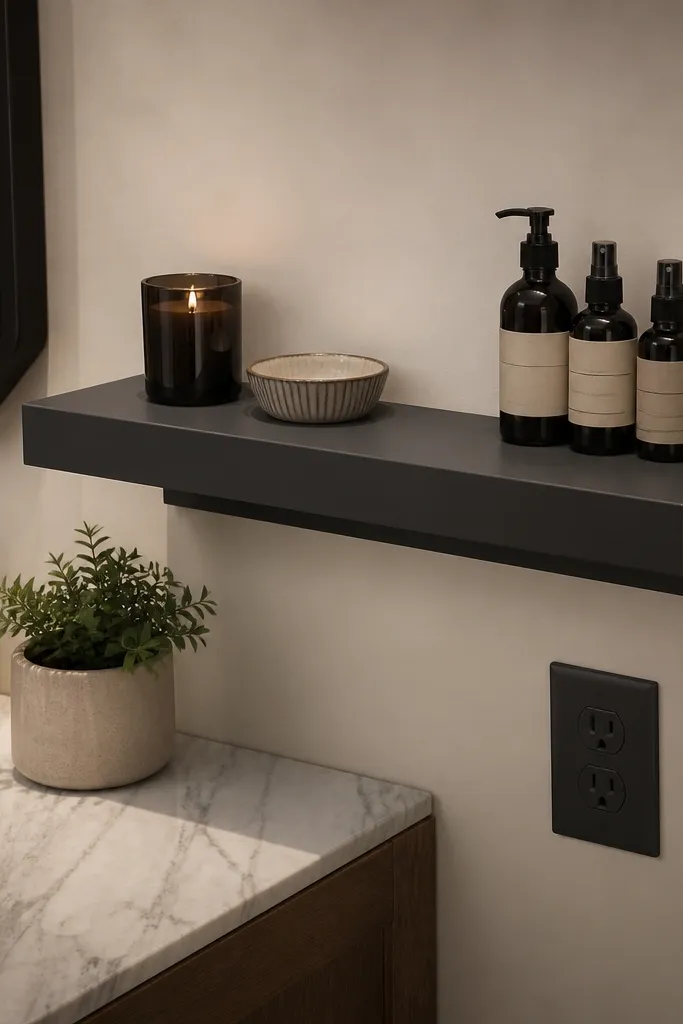
Charcoal shelves look sharp and hide small scuffs better than white. The 9-inch depth is a practical middle ground for everyday toiletries and a small decorative candle. Bracket covers make the hardware disappear, so the shelf reads like a built-in unit. Matching the shelf with nearby outlet trim or wall hardware makes the whole wall feel designed, not patched together. Use this when your bathroom already has dark accents like black faucets or dark mirrors.
Cut a 9-inch deep shelf board, sand, then prime with a bonding primer made for paint adhesion. Paint charcoal with a bathroom-rated satin finish and seal with a clear topcoat. Install bracket covers by mounting the bracket bases first into studs, then clip or screw on the covers. If there’s an outlet nearby, plan the shelf length so brackets land away from the outlet box edges. Attach the shelf underside with hidden screws, then caulk the top and sides where the shelf meets the wall.
Editor's notePre-fit bracket covers before painting so you don’t have to trim paint from tight edges later.
Skip thisDon’t mount bracket covers after the shelf is installed — it’s harder to align the cover seams.
10. Oak Shelf with Waterline-Proof Clear Coat and Brass Strap Brackets (7-inch depth)
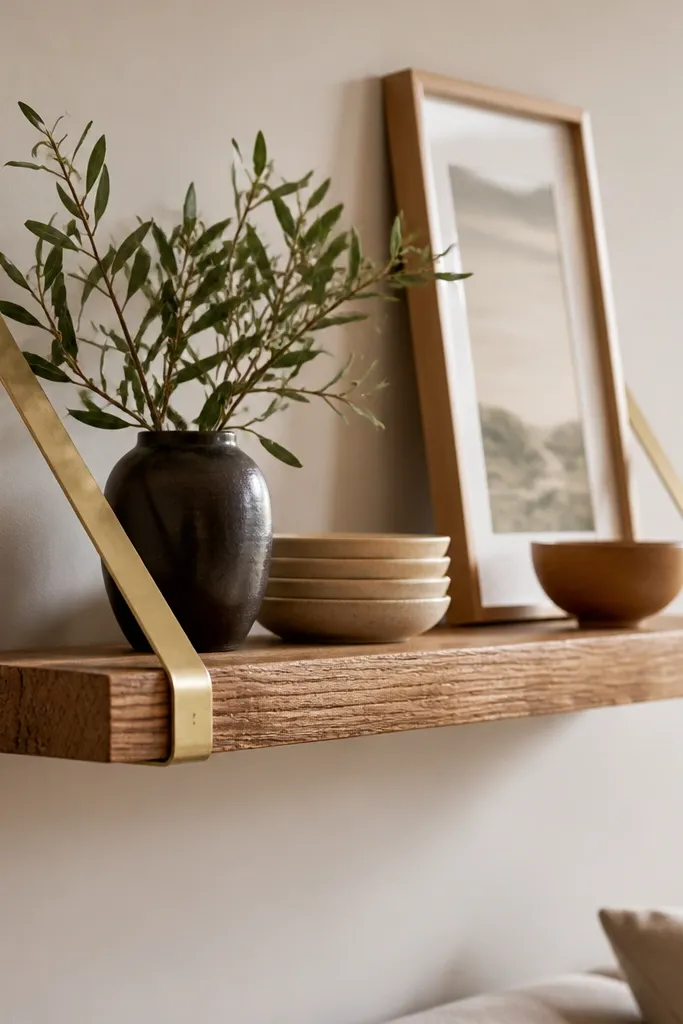
If you like warm wood but hate the idea of constant touch-ups, this is the cleanest path. A 7-inch depth keeps items from looking crowded and keeps bottles from looking like they’re teetering. Strap brackets add a classic, sturdy look, and brass ties it to common bathroom metals like faucets and towel bars. The clear coat system matters: you want a finish that resists water spotting and handles wipe-down cleaning. This setup works over a vanity where you’ll wipe shelves often and still want them to look like wood.
Use oak or oak veneer plywood, sand to 220 grit, then apply a moisture-resistant clear system in thin coats. Lightly scuff between coats with 320 grit so the next layer bonds well. Mark bracket locations into studs with a level line, then drill pilot holes and mount brass strap brackets. Attach the shelf with screws from underneath into the bracket mounting points. Seal any exposed wood edge at the underside with extra clear coat and wipe off drips before they cure.
Do a quick test wipe with a damp cloth on the cured finish in a hidden spot to confirm water spotting behavior.
Don’t use a general-purpose polyurethane — it can yellow and doesn’t handle bathroom steam as well.
11. Two Narrow Shelves with Hidden Cable Channel for Wall-Mounted Lights (3-inch depth)
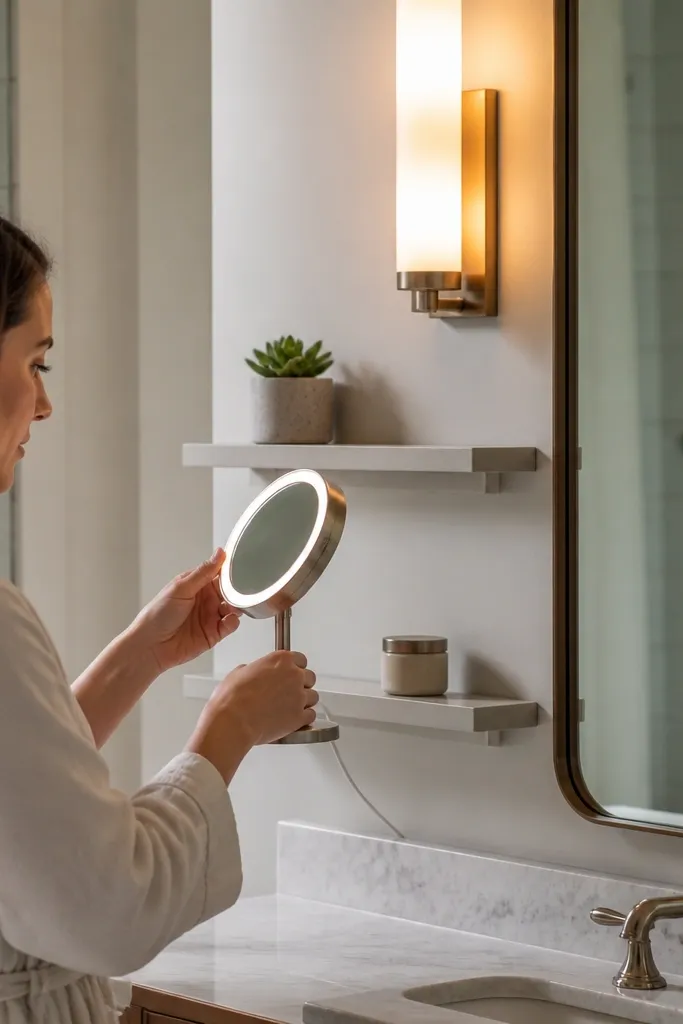
This is a smart aesthetic hack when you have wall-mounted mirrors or vanity lights. Two narrow shelves at 3 inches deep create a styling ledge without blocking the light or making the wall look heavy. The hidden cable channel under the shelf lets you keep cords for small devices (like a magnifying mirror light) from dangling behind the shelf area. You get a clean, symmetrical look because the shelf edges line up with the mirror frame. This works best in modern bathrooms with smooth, minimal walls.
Cut two shelves at 3 inches deep with a 3/4-inch thickness, keeping lengths matched to the mirror width. Seal and finish them before mounting so you don’t trap raw wood inside the channel area. Mark stud locations and install slim brackets at consistent spacing, then mount the shelves level. Build a shallow cable channel under the shelf using a thin backer strip and a raceway piece, then route cords into it before you attach the underside cover. Seal around the channel entry points and test cord movement so it doesn’t pull on the wall hardware.
Match shelf finish to mirror frame color so the shelves read like part of the lighting design.
Don’t run cords directly behind the shelf gap without a channel — they show and collect dust.
12. Vertical Slat Back Floating Shelf with Removable Front Tray (10-inch depth)
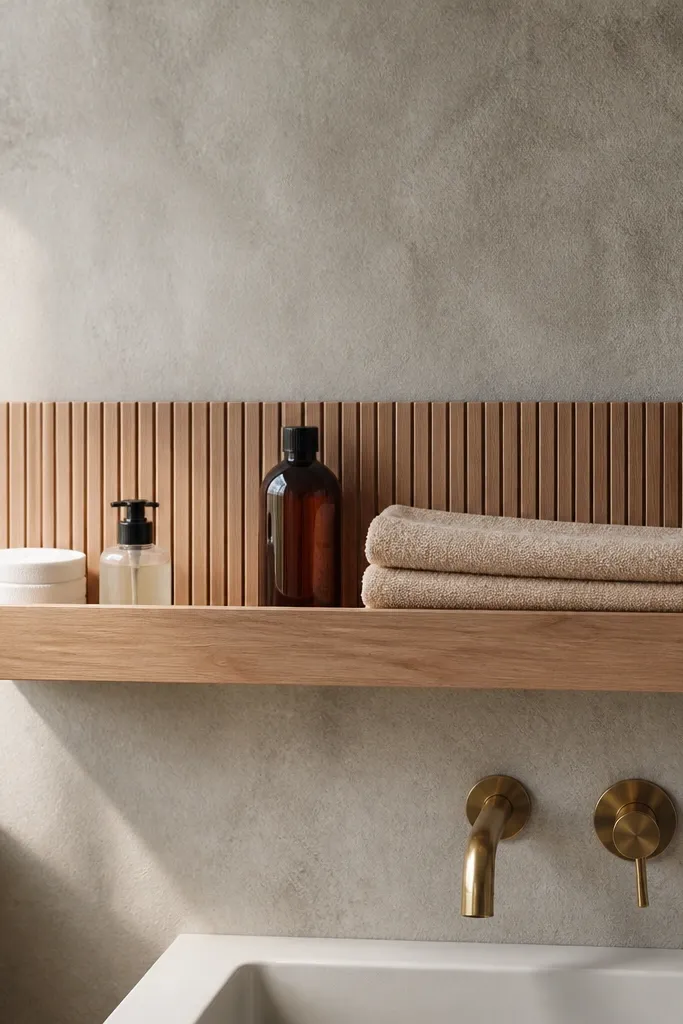
This shelf looks layered, not flat. The vertical slat back adds texture and makes the items in front look intentional, like they’re staged. The 10-inch depth lets you use a removable front tray for daily items, while the slat area behind can hold a small plant, a tall bottle, or a folded stack. Because the tray is removable, you can swap what’s on the shelf without changing the structure. It’s photogenic and works in bathrooms where you want a design touch that still handles real use.
Build a shelf base at 10 inches deep from 3/4-inch plywood, then attach vertical slats to the back face using wood glue and small brads. Finish the slatted back and shelf with a durable paint or stain system, then seal all edges. Mount the shelf using a cleat or heavy-duty brackets into studs, keeping the top edge level. Make a front tray that slides or lifts out: size it so it clears the slats and rests on small stoppers. Seal the tray edges lightly and add non-slip pads so it doesn’t shift.
Editor's noteUse a tray with slightly raised sides so water drips don’t run off into the wall gap.
Skip thisDon’t make the tray too tight — swelling from humidity makes tight-fit trays stick.
13. Slim Floating Shelf with Rounded Edge and Brass Rod Support (6-inch depth)
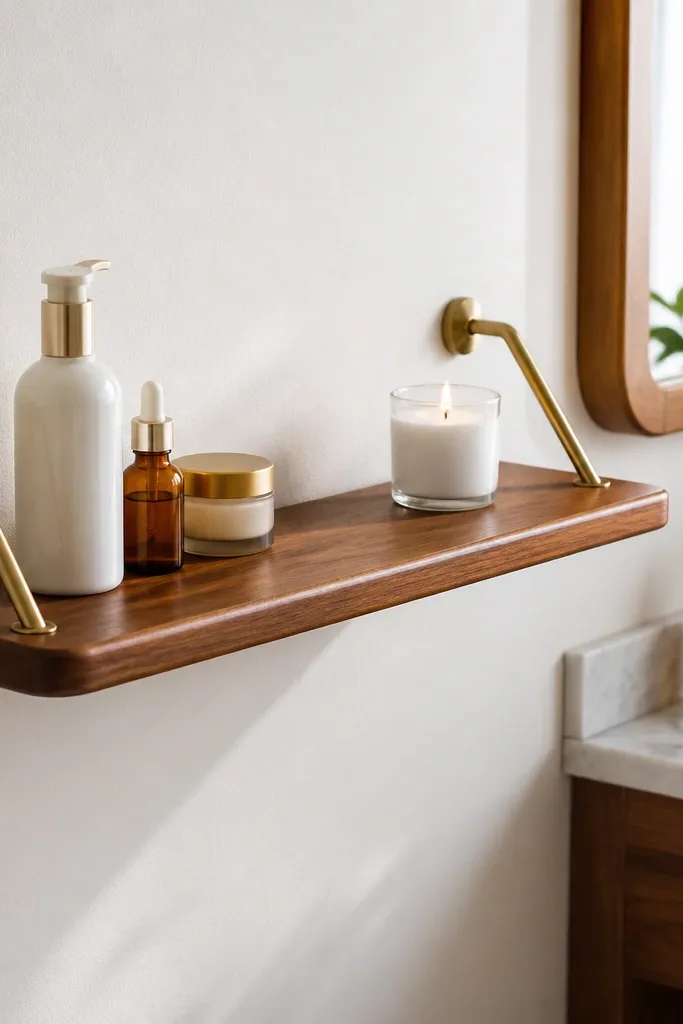
Rounded edges read softer and more expensive than sharp 90-degree corners, especially in bathrooms where everything else is smooth. A 6-inch depth is perfect for skincare bottles and a small candle, while brass rod supports add a clean, airy feel. The rods keep the shelf looking light even when the shelf is long. This design is great for a narrow wall beside a mirror where you want storage without blocking sightlines. It also gives you a subtle “floating” effect because the rods create a visible gap and shadow line.
Cut your shelf board to 6 inches deep and route a rounded edge profile on the front and sides. Sand smooth to 220 grit and finish with a sealed paint or clear coat system designed for moisture. Install brass rod supports into studs with the correct spacing for the shelf length, then attach the shelf by screwing into pre-drilled holes aligned with the rods. Use a level to align the rods before tightening everything fully. Seal around any screw holes and finish with a thin caulk line at the wall edge.
Editor's noteRound the underside too — it reduces places where water can pool at the shelf edge.
Skip thisDon’t skip routing — sharp corners collect drips and look rough after a few months.
14. White Floating Shelf with Hidden Drawer-Style Basket Rail (8-inch depth)
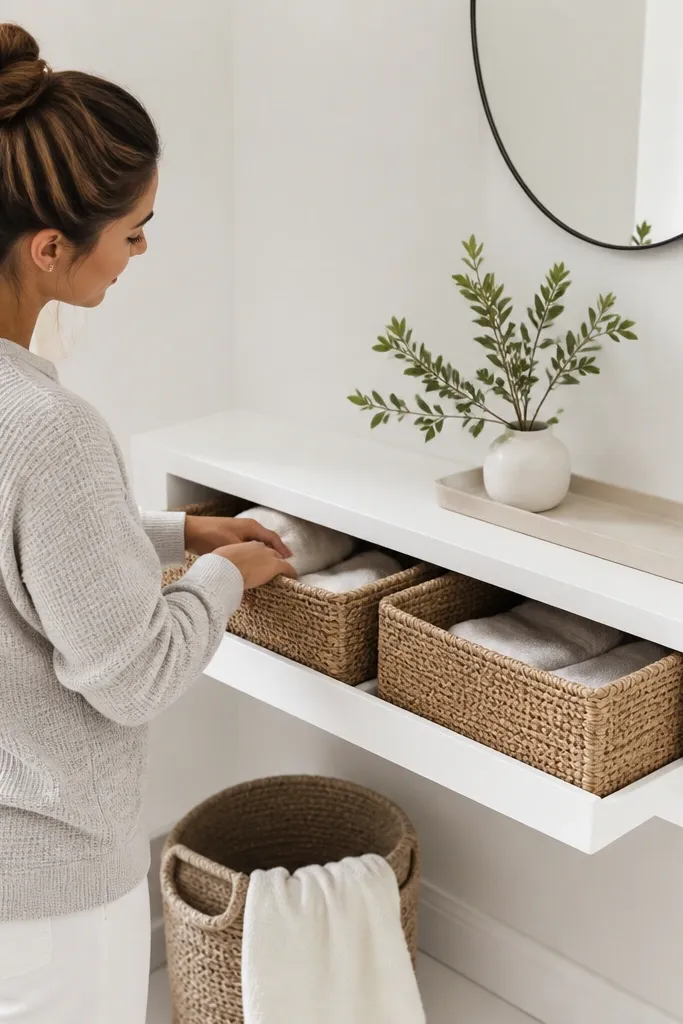
This shelf fixes the “my bathroom shelf always looks messy” problem by turning loose items into a system. The 8-inch depth holds baskets that cover clutter, while the front rail keeps baskets aligned so they look styled instead of shoved. White paint makes the wall feel brighter and the shelf reads clean under overhead lighting. The rail is hidden enough that the shelf still looks like floating wood, but the basket alignment is obvious. Great for bathrooms where you share storage with guests and want everything to look tidy quickly.
Build a shelf from 3/4-inch painted plywood and seal it with a bathroom-grade topcoat. Install the shelf brackets into studs, then attach the shelf underside with hidden screws. Add a hidden basket rail: mount two small cleats or a thin metal rail under the shelf front edge so baskets rest and don’t slide. Measure basket height so the basket top sits 1-2 inches below the shelf face for a clean silhouette. Seal the underside and cleat screw points so moisture doesn’t seep into the rail area.
Choose baskets with the same color weave or finish so the shelf looks cohesive even when you swap basket contents.
Don’t use baskets that are too tall — they will visually block the shelf and make the wall look heavy.
15. Stained Cedar Shelf with Copper Nails and Storm-Resistant Finish (7-inch depth)
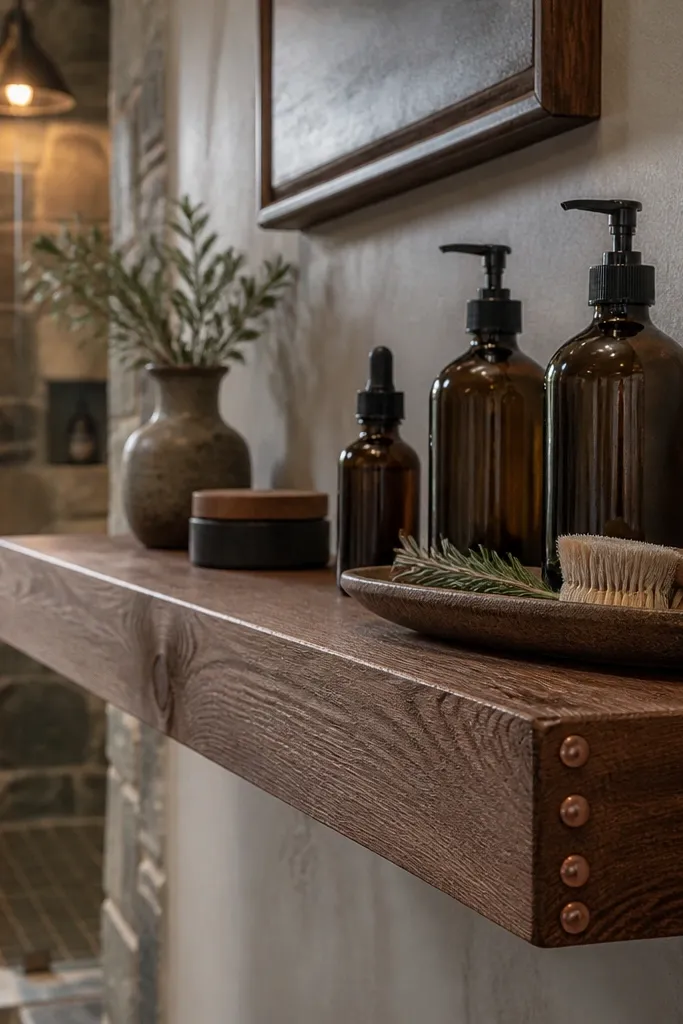
Cedar is a sneaky good bathroom wood choice because it handles moisture better than most softwoods when it’s finished correctly. A 7-inch depth works for bottles plus a small decorative tray, and the warm stain makes the shelf look like it belongs in a cabin-style bathroom or a modern rustic space. Copper nails add a subtle decorative detail that looks intentional, not random. This shelf is photogenic because the wood grain shows through the finish and the copper gives you a warm metal echo. It’s a strong option when you want something warmer than oak but less common than walnut.
Use cedar boards cut to 7 inches deep and sand to 220 grit. Apply a stain that matches your bathroom metals, then seal with a water-resistant clear topcoat system in multiple thin coats. Mark bracket locations on the wall and install into studs for strength. Attach the shelf using brackets and add copper nails as decorative accents only, not as structural support. Seal around nail heads with a clear touch-up finish and caulk the shelf perimeter so water can’t get behind.
Editor's notePre-stain first, then topcoat — it gives more even coverage on cedar grain and reduces blotchiness.
Skip thisDon’t leave copper raw — unsealed copper can stain the finish over time.



