
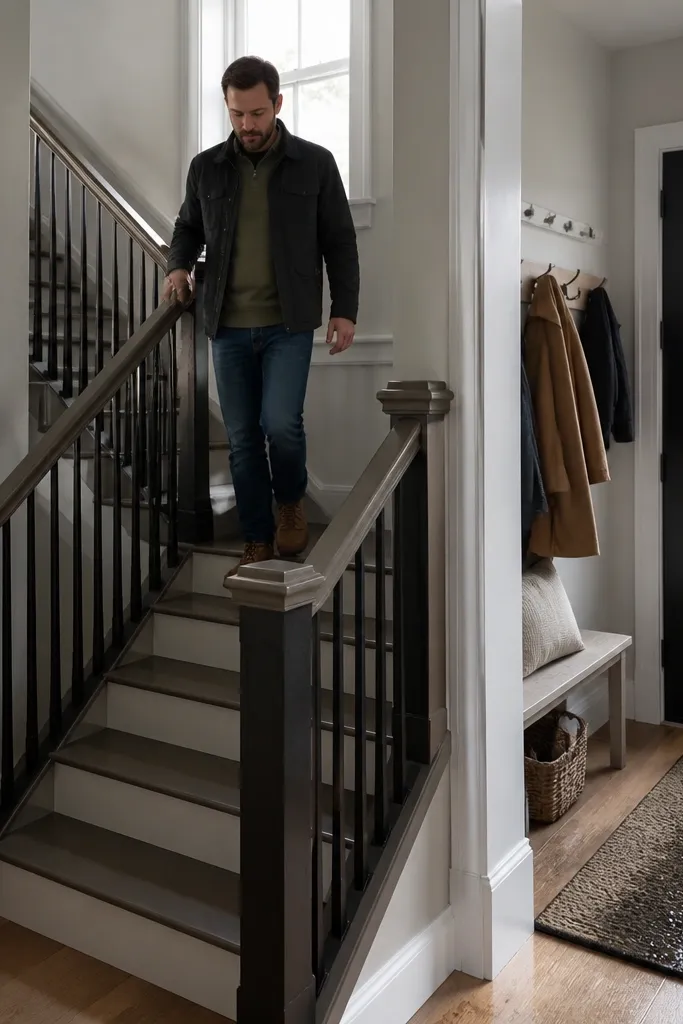
1. Warm White Oak Handrail with 2-Tone Stained Balusters
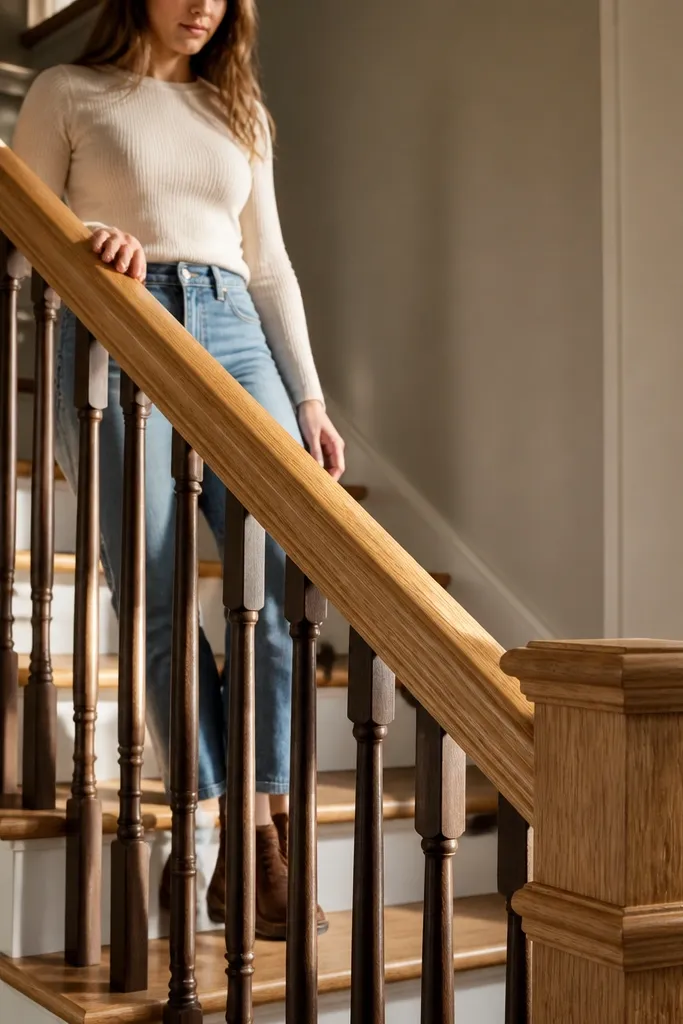
Cut your handrail to a comfortable width and shape the top edge with a 1/4-inch roundover bit or a router jig for a consistent radius. Sand everything to at least 180 grit, then wipe with a tack cloth so dust doesn’t get trapped under stain. Stain the handrail first with a warm golden tone, wipe off evenly, and let it dry fully. Then stain the balusters darker, keeping the color consistent across pieces by brushing in the same direction and not re-wetting dry spots. Finish with a hard clear topcoat system: apply thin coats, sand lightly between coats with 320 grit, and let the final coat cure before heavy use.
This look is cozy because the handrail reads rich and natural, while the balusters add depth without making the whole staircase heavy. White oak’s grain stays attractive under a clear or lightly tinted finish, and it holds up well to frequent hand contact. Use a lighter stain on the handrail and a deeper stain on the balusters so the eye has a clear “track” to follow. It also photographs well because the contrast creates crisp lines rather than a flat, one-note wood tone. If you want year-round easy care stair railing, the smoothness of the topcoat matters more than the stain color, so keep the surface glassy and even.
Skip thisDon’t skip sanding between coats — texture telegraphs through the topcoat and makes fingerprints look worse.
Editor's noteUse a foam brush for stain and a lint-free rag for wipe-off; it gives more even color than a cloth that goes dry halfway through.
2. Matte Clear Maple Rail with Charcoal Iron-Look Spindles
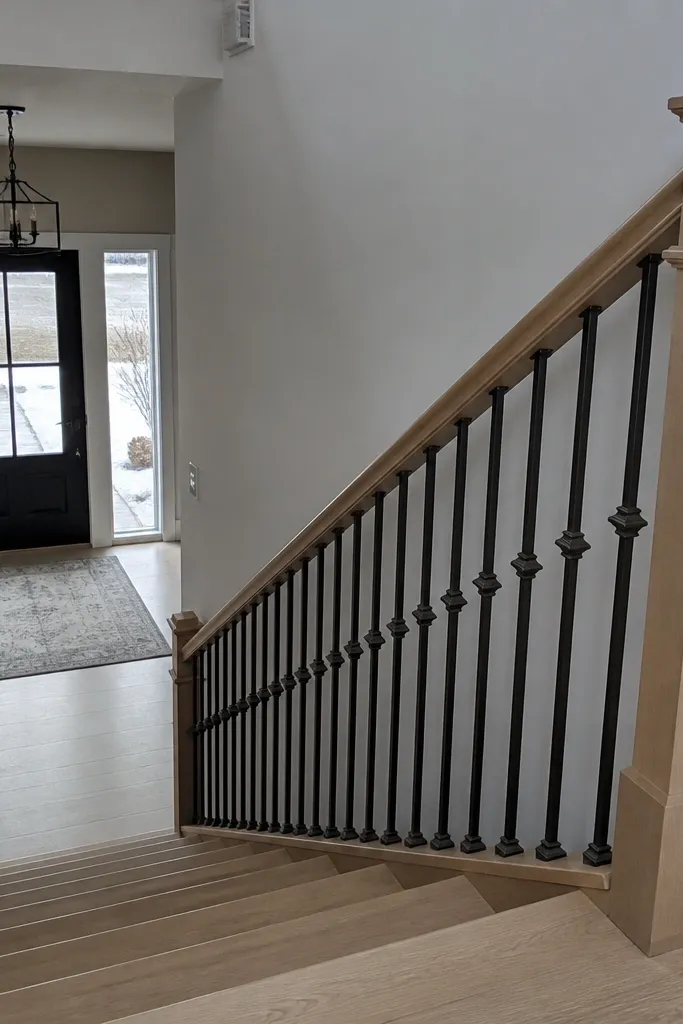
Maple under a matte clear finish stays bright and “clean” looking, which makes the stairs feel calmer in both winter and summer. The trick is pairing that light handrail with darker balusters so the railing still shows structure. Even if your home is cozy, matte reads modern and soft instead of shiny and sticky. Choose a matte topcoat that wipes clean; some matte finishes smear if they’re too thin or too flexible. This design works great in entryways with daylight because it doesn’t turn warm in a bad way — it stays balanced. For year-round easy care stair railing, matte is fine as long as the film build is hard enough to resist hand scuffs.
Sand the maple to 180 grit, then do a quick sanding pass to 220 grit on the handrail only so it feels silky. Apply a pre-stain conditioner if your maple is blotchy, then stain lightly or use a clear tinted wash depending on how white you want it. Build the clear finish in 3-4 thin coats with proper dry time, sanding with 320 grit between coats for a smooth feel. For balusters, use pre-made charcoal wood spindles or paint wood spindles with a bonding primer and a durable topcoat. Install balusters using spacers so spacing stays uniform and the railing looks intentional.
Test your matte clear on a scrap piece — matte can look chalky if the film build is too thin.
Avoid gloss on maple if you hate glare; but don’t go “water-based matte” with a soft finish either.
3. Cedar Rail with Honey Oil Finish and Tight Spindle Grid
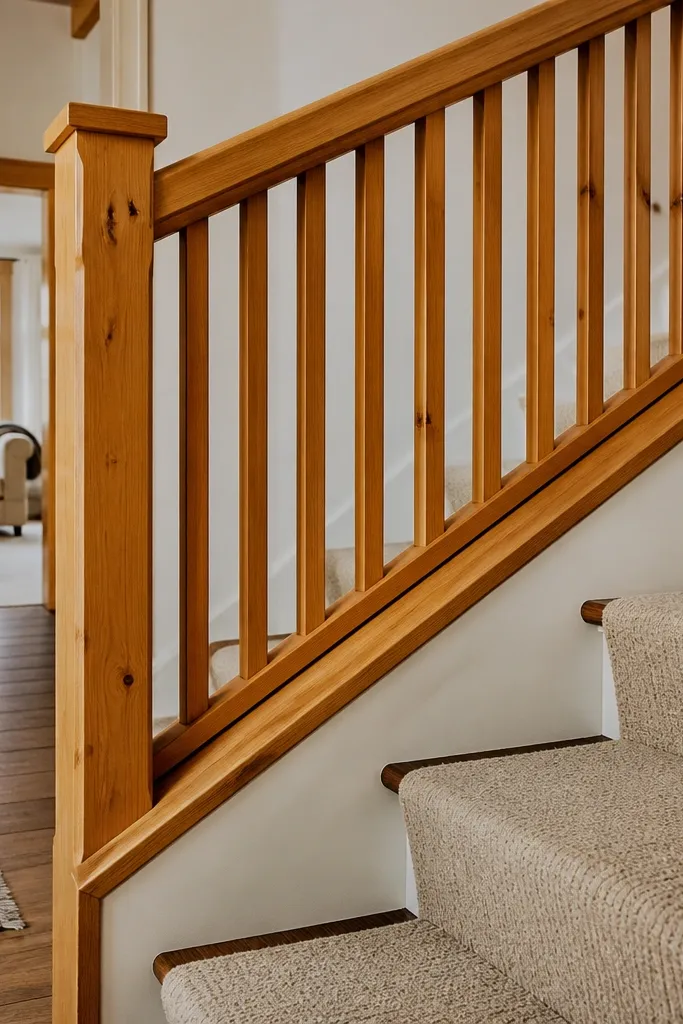
Cut and sand the cedar handrail to 180 grit and round the edges so the hand naturally glides. Use an oil-based wood finish system that includes a protective topcoat or hardening step; pure oil alone won’t give you wipe-clean durability. Apply in thin coats, letting each coat soak in, then buff between coats for an even sheen. For the tight grid, set balusters with consistent spacing using a simple spacer block so every gap matches. Install and then wipe the entire railing with a damp cloth after cure to remove any residual film before you start regular use.
Cedar gives you that instantly cozy smell and warm tone, and a honey oil finish keeps the wood looking alive instead of sealed-off. The reason this works for year-round easy care stair railing is the design choice: a tight spindle grid reduces dust pockets and makes the whole railing look uniform. Cedar also hides minor surface wear better than very pale woods when the finish is in the “oil + protective topcoat” category rather than bare oil alone. Keep the handrail rounded so the surface gets less edge scuffing from real-life grabbing. The result looks rustic without looking messy.
Skip thisDon’t leave cedar at “just oil” if you want easy care — it will darken unevenly where hands land.
Editor's noteUse a sacrificial cardboard sheet under the balusters when finishing — cedar oil stains everything fast.
4. Walnut Handrail with Clear Coat Over Filled Grain
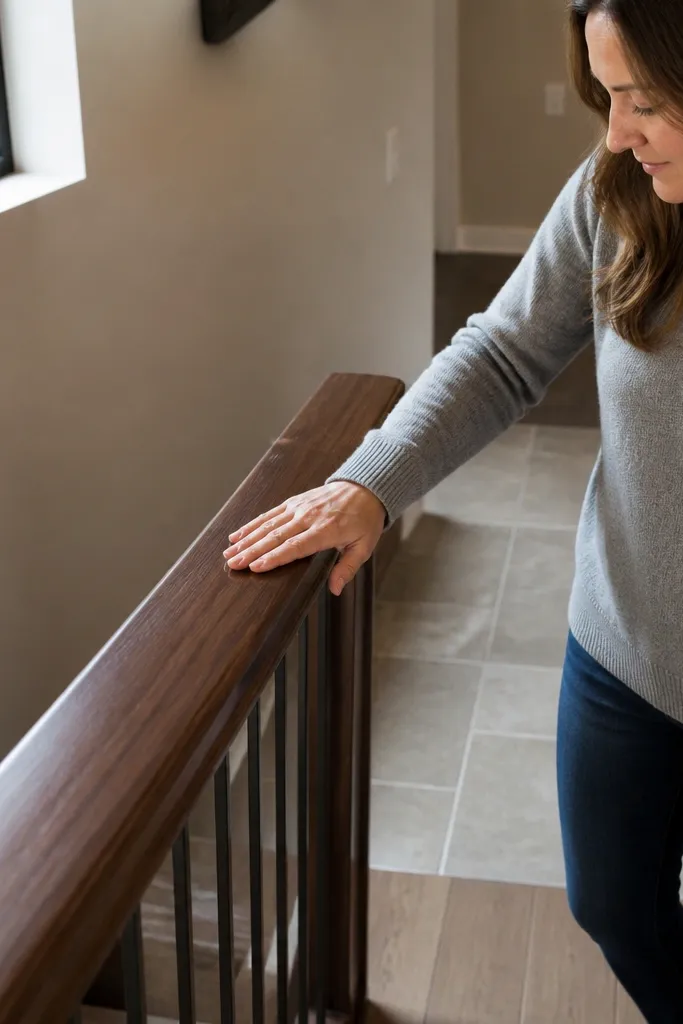
Walnut looks expensive because the grain has depth, and filling the grain makes it feel like one smooth piece instead of wood texture. That smoothness is what makes year-round easy care stair railing realistic: fewer grooves mean less dirt and fewer places for fingerprints to turn gray. Use a clear coat that stays honest to walnut tone, not a thick amber coat that makes it look orange. This design also photographs well because the walnut sheen catches light in a controlled way, especially along the rounded handrail. If your stairs are in a high-traffic hallway, this is a good choice because it hides minor wear better than lighter woods.
Sand walnut to 180 grit, then use a wood grain filler matched to walnut tone so the surface stays flat. Scrape off excess filler across the grain direction, then sand lightly when it’s cured so you don’t leave filler ridges. Seal with a clear sanding sealer or thin first clear coat, then build 3-4 coats of a hard clear finish. Lightly sand with 320 grit between coats to keep it smooth. Install balusters using pre-drilled holes and a consistent jig so the railing doesn’t look wobbly at the joints.
If you can feel grain after finishing, you didn’t fill enough — sand and re-coat until your fingertips glide.
Don’t rush grain filler cure time; soft filler under clear coat can shrink and leave tiny pits.
5. Painted White Handrail with Natural Wood Balusters
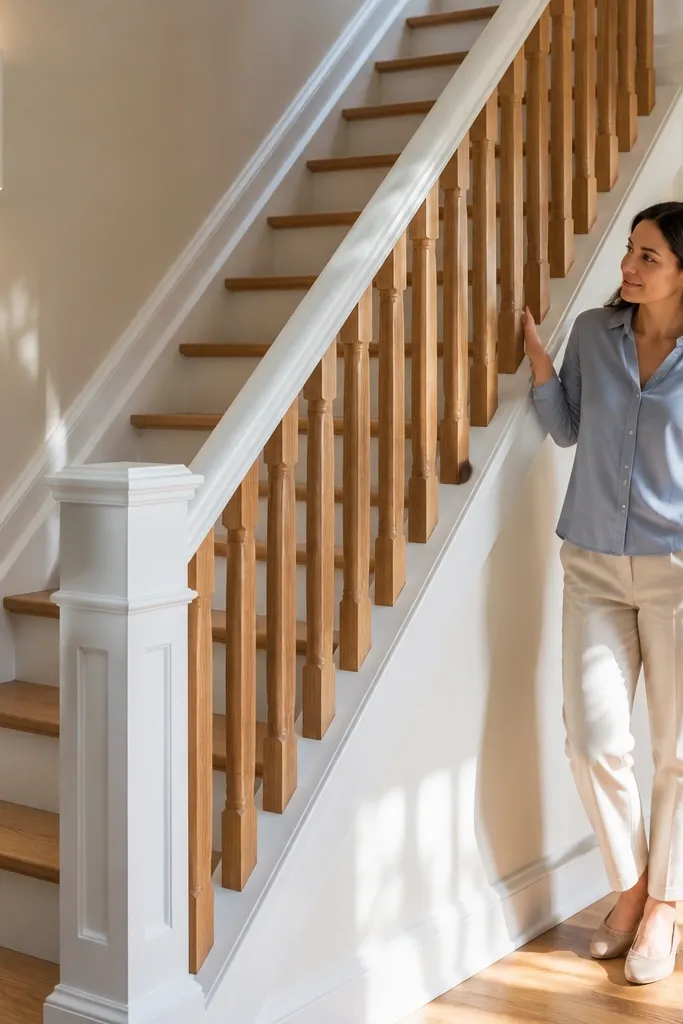
This is the “cozy but clean” railing look. A painted white handrail hides scuffs better than natural wood, while natural balusters keep the staircase from feeling sterile. For year-round easy care stair railing, paint wins at hand-height because you can wipe it without worrying about darkening stains or uneven wear. Choose a handrail paint system that dries hard and sands smooth, not a soft satin paint that dents. The contrast looks intentional and makes the stairs feel brighter. It’s also a great option if you’re reworking an older staircase and want to refresh the top rail quickly.
Sand the handrail thoroughly to 180 grit, then fill dents and nail holes with a paintable wood filler. Prime with a bonding primer made for wood, then sand the primer lightly with 220 grit for a smooth base. Apply paint in thin coats and sand between coats if you want a crisp finish; two to three coats usually gets it even. Leave balusters natural: sand to 180 grit, stain lightly or clear-seal, then apply a hard clear topcoat for wipe-clean durability. Assemble and install so the handrail joints are tight; caulk the seam lightly and wipe excess immediately.
Use a small foam roller for the handrail for a flatter finish than brush marks.
Don’t paint over glossy old sealer — it causes peeling right where hands rub.
6. Shaker-Inspired Flat Rail with Chamfered Edges
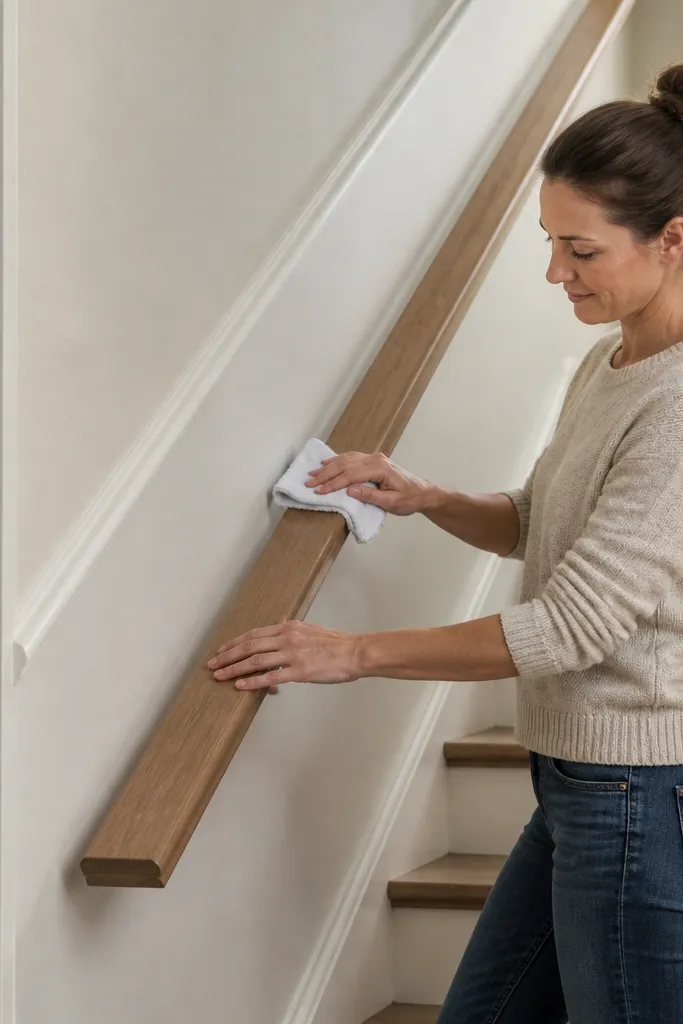
Build the handrail as a rectangular profile and cut a gentle chamfer along the top edges, aiming for a 1/8-inch chamfer so it feels rounded but stays crisp. Sand to 180 grit and then 220 grit on the chamfer areas so the edge is smooth, not fuzzy. Finish with a hard clear topcoat in multiple thin coats, sanding between coats with 320 grit for a glass-smooth feel. Use a baluster jig to drill evenly spaced holes or to set consistent mortises if you’re doing deeper joinery. Install and check the handrail for level — small dips look obvious on flat profiles.
Shaker lines look cozy because they’re calm and honest. A flat handrail with chamfered edges keeps it visually simple while still feeling comfortable under the hand. This style is great for year-round easy care because the flat face can be finished smooth and hard, and you can keep the rest of the railing clean-lined. It also hides DIY imperfections better than ornate profiles — fewer curves mean fewer spots to sand unevenly. Pair it with straight balusters in a consistent wood tone for a crisp, tidy look that doesn’t demand constant attention.
Skip thisDon’t keep the chamfer too sharp — it feels uncomfortable and shows wear quickly.
Editor's noteChamfer edges show less dirt than sharp corners, but only if you sand them to “no catch” smoothness.
7. Reclaimed Look Oak Handrail with Modern Clear-Topcoat
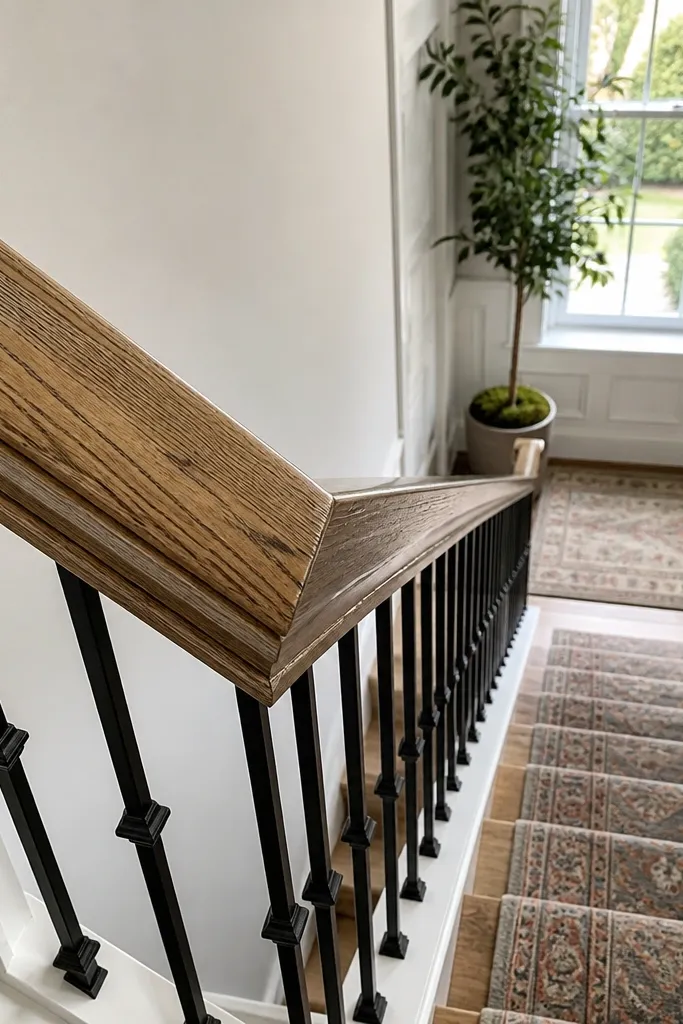
Choose oak boards with varied grain and cut them into a consistent handrail profile. Sand just enough to remove splinters and rough high spots, staying around 150-180 grit so you don’t erase all character. Apply a clear sanding sealer first, then build a hard clear topcoat system in multiple thin coats, sanding with 320 grit between coats. For balusters, keep them simple and clean, ideally matching the oak tone with a light clear finish. Install with uniform spacing and avoid over-tightening screws — you don’t want wood to split at the edge.
The reclaimed look is cozy because it has character, but you need the right finish to make it easy care. The goal is to show the wood’s natural marks while sealing them under a hard, wipe-clean topcoat so dirt doesn’t sink into pores. Use oak with visible grain variation and keep the topcoat clear rather than heavy stain — heavy stain fights the whole “character” vibe and makes everything look muddy. This design works in homes with warm decor because the railing reads textured without being chaotic. It’s also a good choice if you want a railing that hides minor scuffs better than flat-painted styles.
Skip thisDon’t try to “distress” after finishing — you’ll damage the coating and create rough spots that grab grime.
Editor's noteUse a brush to get finish into grain pores, then wipe off runs — reclaimed boards love to hold extra liquid.
8. Black Stained Handrail with Clear Matte Topcoat on Oak
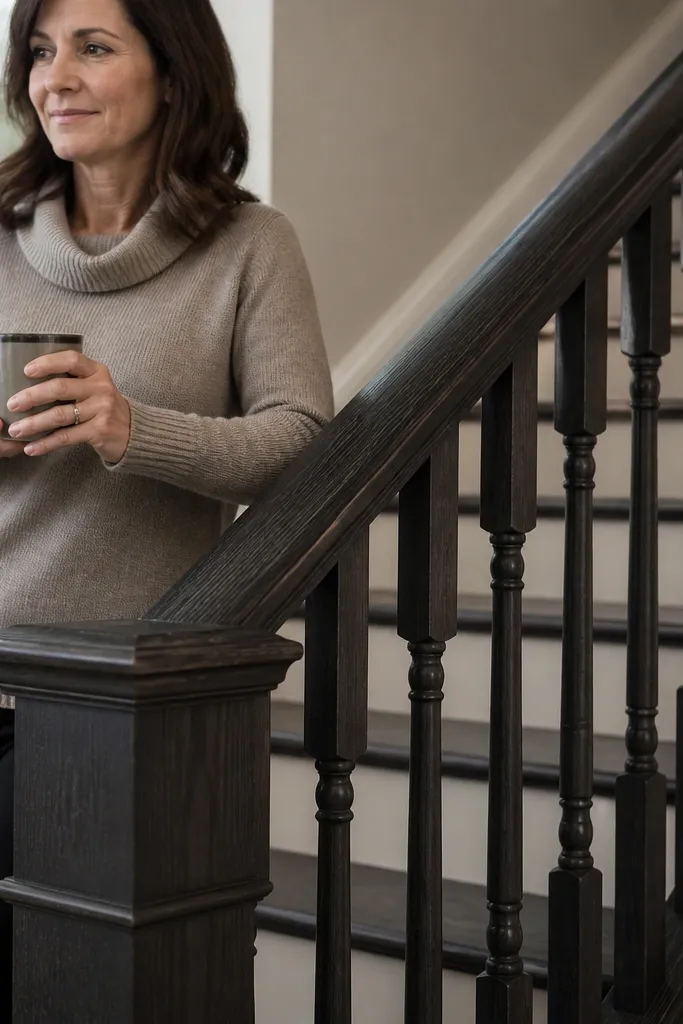
Sand oak to 180 grit and wipe clean. Apply a black stain in thin, even passes, then wipe off promptly so you don’t get blotchy patches. Let it fully dry, then apply a matte clear topcoat in thin coats, sanding lightly with 320 grit between coats. For balusters, use the same stain approach or paint them with a durable matte system so the sheen matches. Install with spacers to keep every baluster aligned; black railings make misalignment obvious.
A black stained handrail looks cozy in a grounded way, especially when the balusters are also dark but not glossy. Matte clear keeps it from feeling slick, and the oak grain still shows under the stain. For year-round easy care stair railing, black is forgiving visually because light scuffs blend in better than on white finishes. The key is a matte clear that’s hard enough to wipe clean, not a soft matte that smears. This design looks sharp in entryways with neutral walls and works well with wood floors too. It also photographs clean because the matte finish reduces glare.
Skip thisAvoid heavy satin paints over stain; they can crack at edges where hands rub.
Editor's noteKeep a rag schedule — change cloths when the stain starts to drag so you don’t create uneven streaks.
9. Rounded Edge Handrail with Vertical Slat Panels
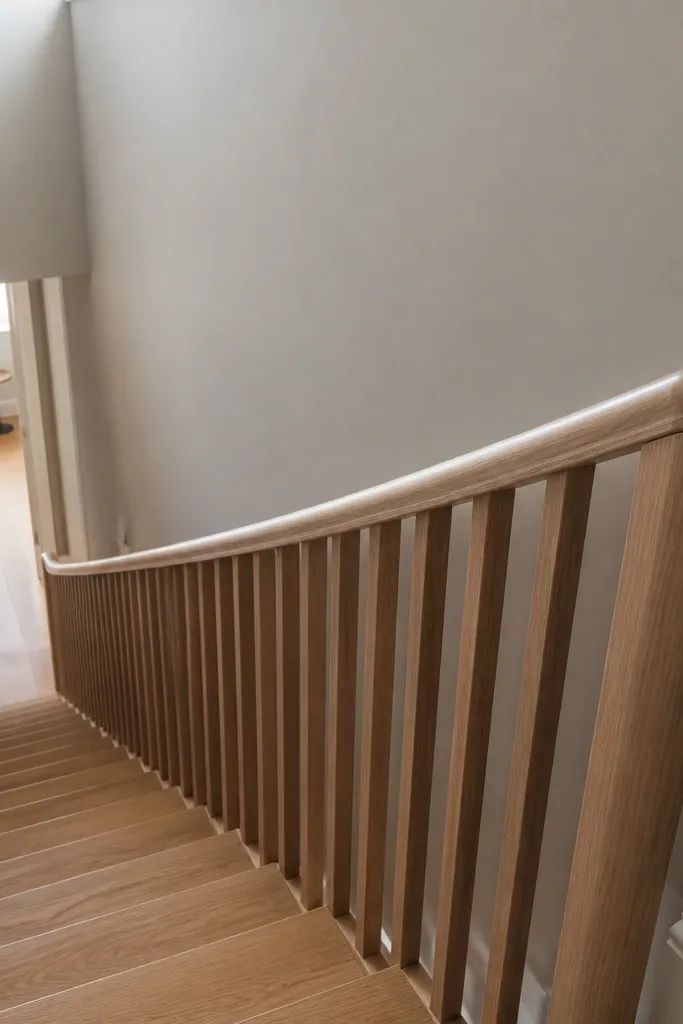
If you want a railing that looks custom without complex joinery, vertical slat panels are the move. They look sleek, and they also reduce dust accumulation compared to widely spaced balusters. Pair this with a rounded handrail and a clear wipe-clean finish and you get year-round easy care stair railing that stays neat. This design is photogenic because the slats create repeating lines, and the handrail edge catches light. It also feels more “architectural” and less like standard builder-grade spindles. Choose a warm wood tone so it still feels cozy, not industrial.
Build a slat panel frame first, using straight stock and ensuring it’s square so the slats look even. Cut slats to the same width and install them with a spacer block so gaps match perfectly. Shape the handrail with a router roundover and sand smooth to 220 grit. Apply your stain or clear-seal, then topcoat with a hard clear finish in multiple thin coats, sanding between coats with 320 grit. Secure the panel to the posts and add a handrail that aligns with the panel top so the lines look intentional.
Use 1/8-inch or 3/16-inch spacers for slat gaps; both look balanced and are easy to keep consistent.
Don’t leave slat edges rough — they snag cleaning cloths and show wear faster than you’d expect.
10. Two-Tone Stair Railing with Light Oak Posts and Dark Rail Cap
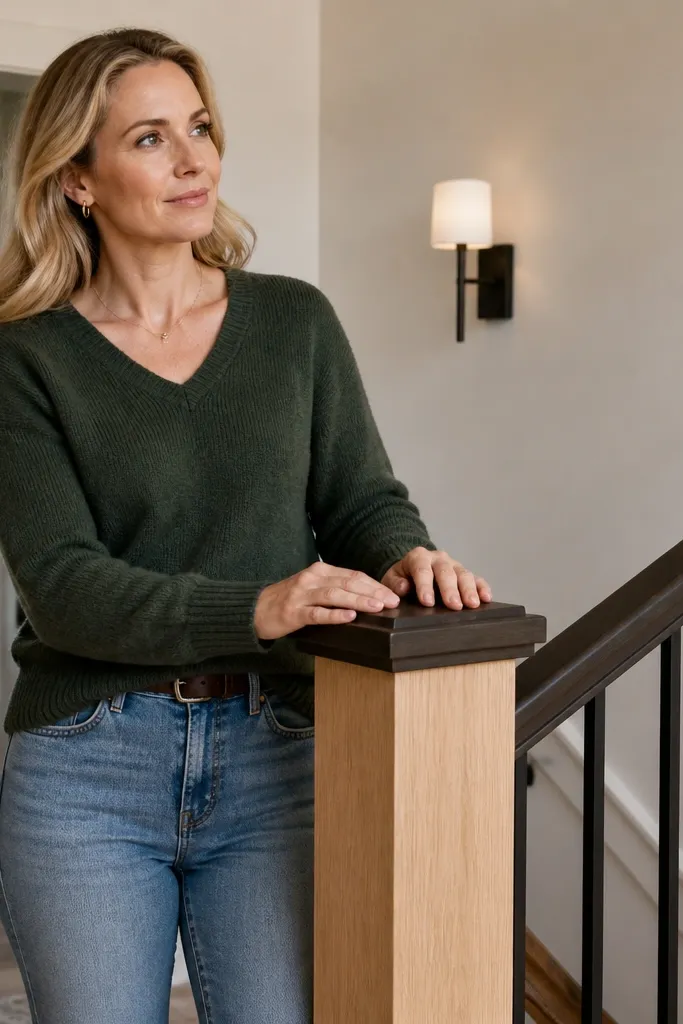
Two-tone railings look expensive because your eye reads structure first: posts are the “frame,” and the handrail cap is the “focus.” Light oak posts keep the staircase warm and bright, while a darker handrail cap adds contrast where your hand naturally lands. This is a strong option for year-round easy care stair railing because the dark cap hides tiny scuffs, and the lighter posts look clean between deep cleans. Keep the balusters simple and matching to avoid visual clutter. The result is cozy, modern, and very readable in photos.
Cut posts from light oak and sand to 180 grit. Stain posts with a light warm tone and seal them with a clear topcoat. Build the handrail cap separately and stain it darker; keep the top edge rounded for hand comfort. Topcoat both parts with the same hard clear so sheen matches across the railing. Install posts first, then attach balusters, and finally mount the handrail cap with tight joints and a clean seam line where the colors meet.
Mask the color boundary with painter’s tape after stain cures so the two tones stay razor clean.
Don’t apply the same stain to both light and dark parts — the contrast will turn muddy.
11. Gray Wash Wood Handrail with Clear Satin Protection
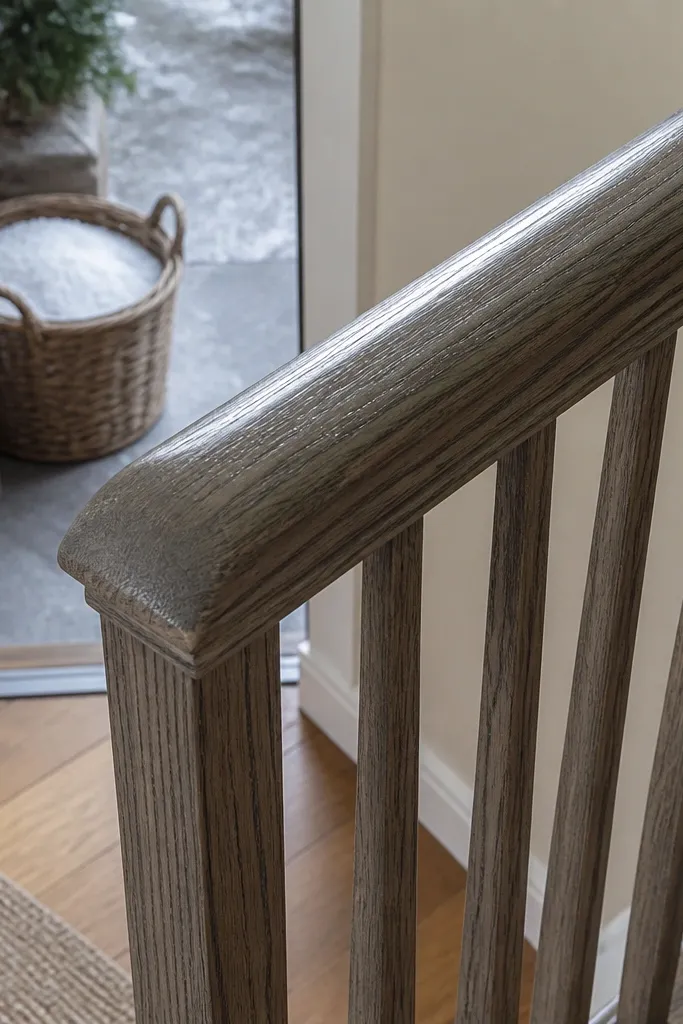
Sand to 180 grit and remove all dust. Apply a gray wash in thin layers, wiping off consistently so the grain still shows. Let the wash dry completely, then apply a satin clear topcoat with hard film build. Sand lightly between clear coats with 320 grit so the surface feels smooth and not chalky. Choose balusters in the same gray wash tone or keep them in a complementary wood tone with clear coat so the railing looks cohesive. Install and then check the handrail for smoothness — gray wash can reveal rough sanding spots fast.
A gray wash looks cozy in a soft, lived-in way, especially when paired with a satin clear topcoat that wipes clean. The trick is controlling the wash so it doesn’t look streaky or cheap. This style works for year-round easy care stair railing because gray hides the “ghosting” of fingerprints better than white and shows less contrast than black. If your home has cool neutrals, gray wash makes the railing feel like it belongs. It also looks good in daylight because the satin finish reduces glare.
Skip thisAvoid heavy gray stain — wash looks best when wood grain still reads clearly.
Editor's noteUse a damp rag to control wash wipe-off — dry wiping can leave patchy “hot spots.”
12. Natural Oak Handrail with Brass-Detail Spacers
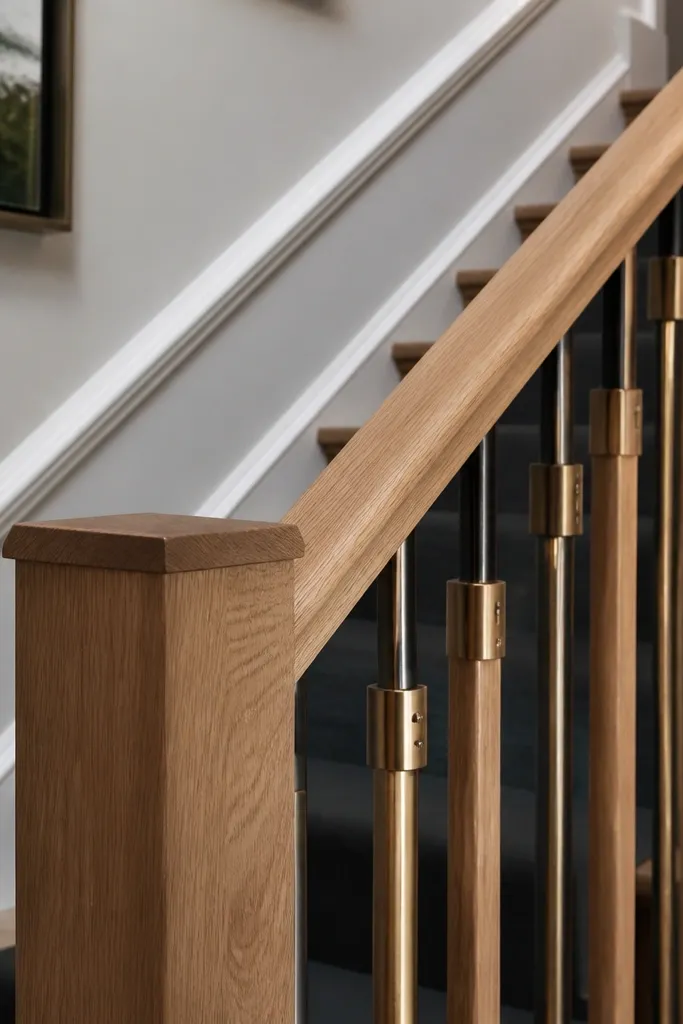
This is the cozy-home version of a “designer” railing. Natural oak keeps the warmth, and brass detail adds a little glow without turning the whole staircase into a showroom. The brass spacers also make the balusters look intentionally lined up, which helps with the clean look that makes year-round easy care stair railing feel effortless. Use a clear topcoat that stays smooth so brass and wood both wipe well. The contrast between warm wood and warm metal reads beautifully in photos, especially near a runner rug. It’s more work than plain spindles, but the payoff is the kind of detail people notice.
Select oak for the handrail and sand to 180 grit. Apply clear sealer or a light stain if you want more warmth, then build a hard clear topcoat in multiple thin coats, sanding between coats with 320 grit. For balusters, use pre-cut wood spindles and install brass spacers or small brass collars at the top and bottom of each baluster. Dry-fit the spacing first so you can adjust baluster lengths before final assembly. Install the posts and handrail last, then wipe everything clean and buff the final coat lightly after cure.
Keep brass pieces clean during assembly — fingerprints on brass get dragged into finish residue and look dull later.
Don’t use a soft clear coat if you want easy care; brass detail looks great, but only if the wood surface stays smooth.
13. Stained Walnut Handrail with Hidden Fasteners and Clean Shadow Lines
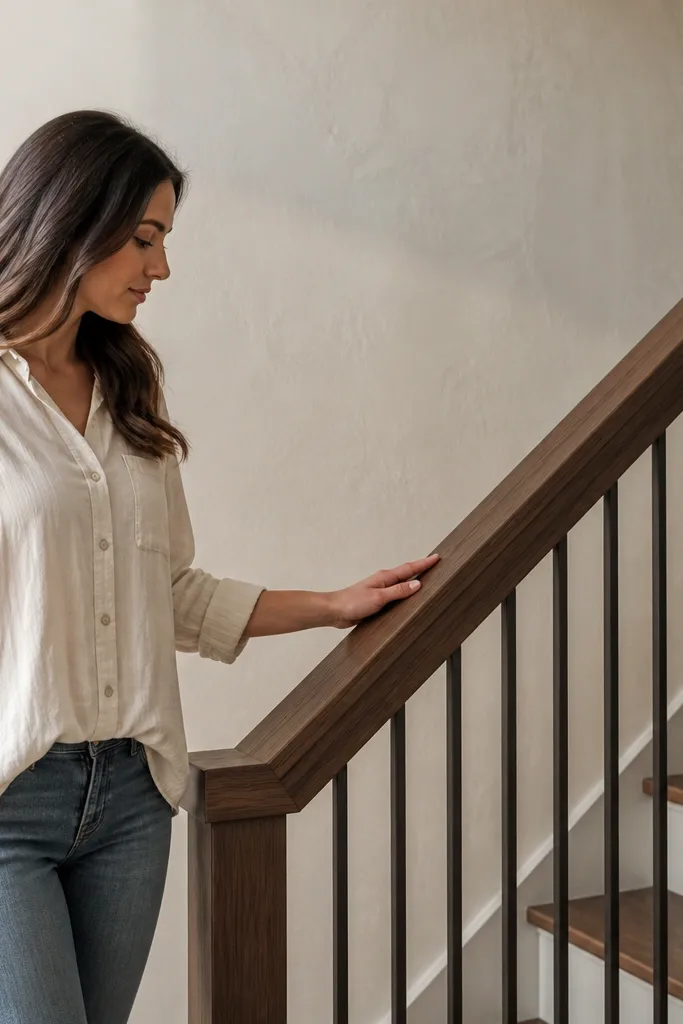
Cut walnut handrail components and route a shallow channel for a concealed mounting system, then drill pilot holes for the mounting hardware inside the channel. Sand to 180 grit, fill grain if needed, and stain evenly. Apply a hard clear topcoat in 3-4 thin coats, sanding between coats with 320 grit so the surface stays smooth. Install posts first, then mount balusters so their tops align at a consistent height to create the shadow line. Finally, attach the handrail using the concealed hardware and confirm the handrail sits level before the adhesive or fasteners cure.
Hidden fasteners make a railing look custom, and walnut makes it feel cozy. The reason this design hits the year-round easy care stair railing goal is practical: fewer visible screw heads mean fewer grime traps and fewer spots for dirt to build around. Shadow lines also look tidy in photos, which is a big part of “good-looking” here. Use a hard clear coat so the walnut stays smooth and wipe-clean at hand height. This style looks best when the handrail wraps naturally around posts or when it aligns cleanly with the baluster tops. It’s a great choice when you want the railing to look finished, not DIY-rushed.
Skip thisDon’t rely on caulk alone to hide gaps; gaps under clear finish collect grime and look worse over time.
Editor's noteUse a straightedge across multiple balusters during installation — the shadow line only looks clean if the tops are truly even.
14. Natural Birch Handrail with Clear Topcoat and Patterned Baluster Spacing
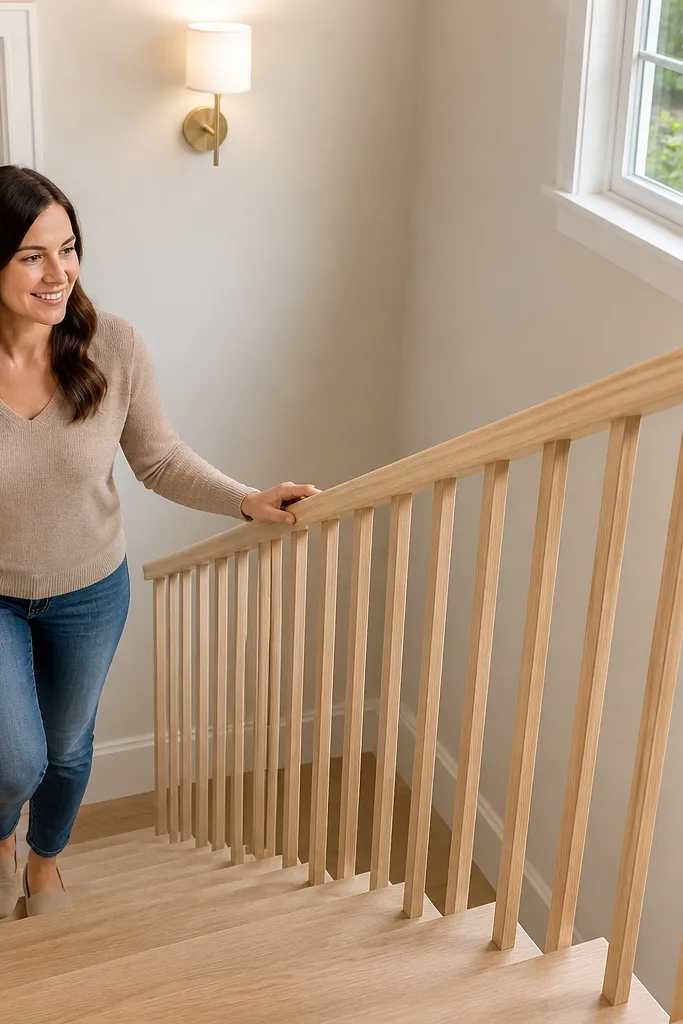
Birch is light and friendly, and it takes a clear topcoat in a way that keeps the railing looking fresh year-round. The “cozy” part comes from the grain pattern and the fact that birch stays bright in hall lighting. For easy care, keep the surface smooth with a hard clear finish; light woods show scuffs, but smooth coats wipe clean and look newer longer. This design also uses patterned baluster spacing — not random — so it looks intentional rather than uneven. It’s photogenic because the repetition creates a rhythm that draws the eye up the stairs. If you want a railing that looks custom without heavy staining, birch with clear is a smart move.
Sand birch to 180 grit, then 220 grit on the handrail for a silky feel. Use a clear sanding sealer, then build a hard clear topcoat in thin coats, sanding lightly with 320 grit between coats. For patterned spacing, map your baluster layout so the gaps are consistent and the pattern centers on the stair centerline. Cut balusters to uniform length and install using a spacer block so every gap matches. Install handrail last and verify alignment with a level so the light wood doesn’t exaggerate dips.
Mark your baluster spacing directly on the top rail with a pencil and ruler — it prevents the “drift” that ruins the rhythm.
Don’t rush the clear coat cure; light woods can feel dry but still be vulnerable to smudges.
15. Satin Black Rail with White Oak Cap Accent Strip
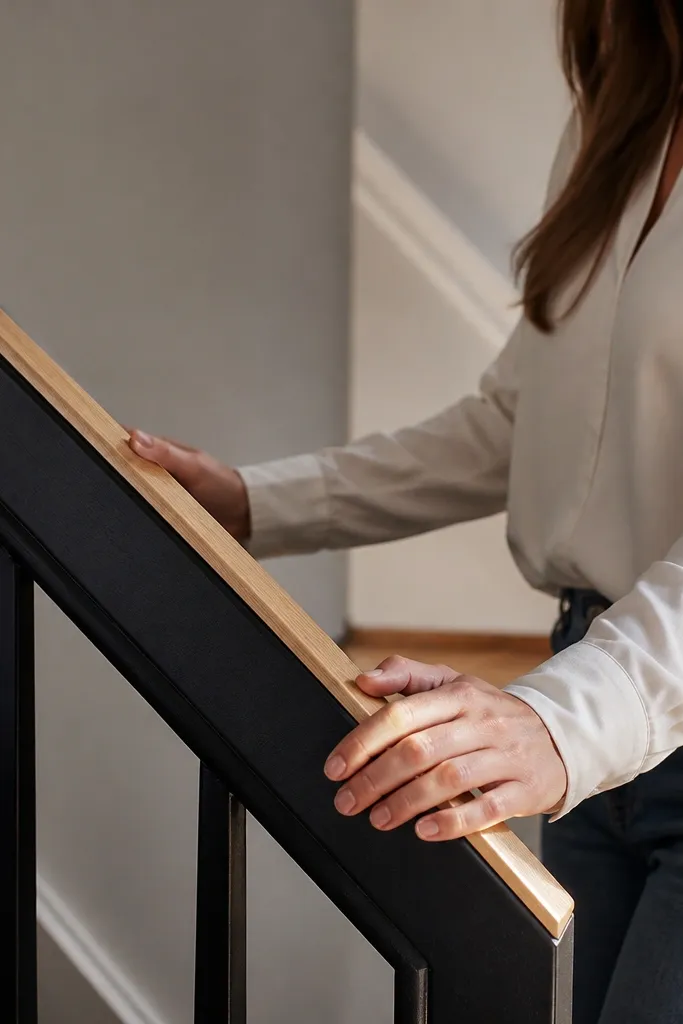
Build the main handrail from a straight wood blank and stain it black evenly, then apply a satin clear topcoat in multiple thin coats, sanding between coats with 320 grit. Cut a thin accent strip from white oak and pre-finish it with a light warm tone and the same clear topcoat sheen. Attach the oak strip to the top edge of the black rail using wood glue and small brads or clamps with protective pads. Sand the seam flush so the accent line stays crisp, then apply a final clear coat over both pieces. Install the railing and check the accent strip for straightness — it should look like a clean line, not a wobble.
This design gives you contrast without going loud. The satin black rail hides everyday wear at hand level, and a thin white oak accent strip adds warmth and makes the railing look layered. It’s cozy because the oak strip brings back natural color where people expect wood, not paint-only. For year-round easy care stair railing, satin black is forgiving visually, but you still need a hard topcoat so it wipes clean instead of building grime in a matte haze. The layered edge also reads well in photos because it creates a crisp highlight line. This is a great choice for modern cozy homes with neutral walls and black hardware.
Skip thisDon’t leave the accent seam proud; raised seams trap cleaner residue and show up fast.
Editor's noteUse a clamp caulking spacer or scrap wood to keep even pressure so the accent strip doesn’t creep.



