
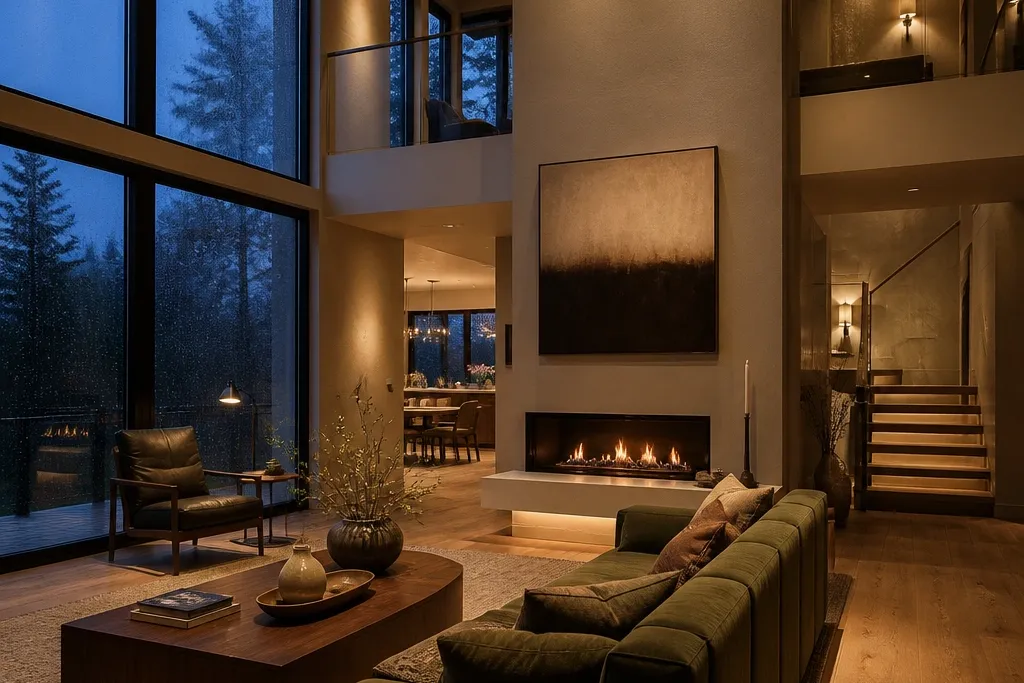
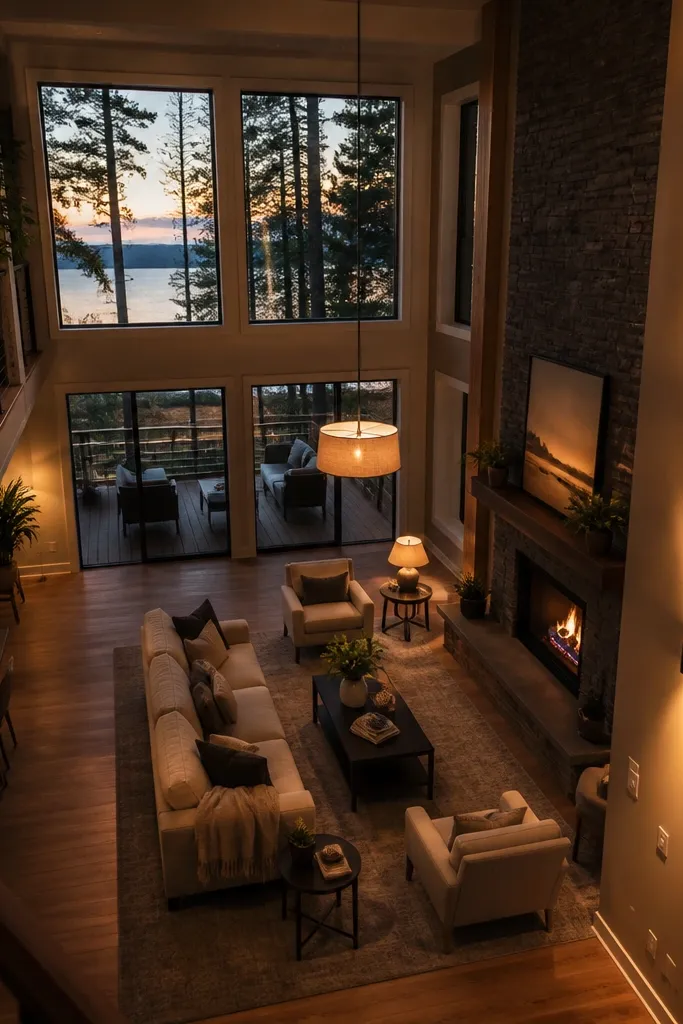
1. Black Louvered Pendant Over the Tall Sitting Area
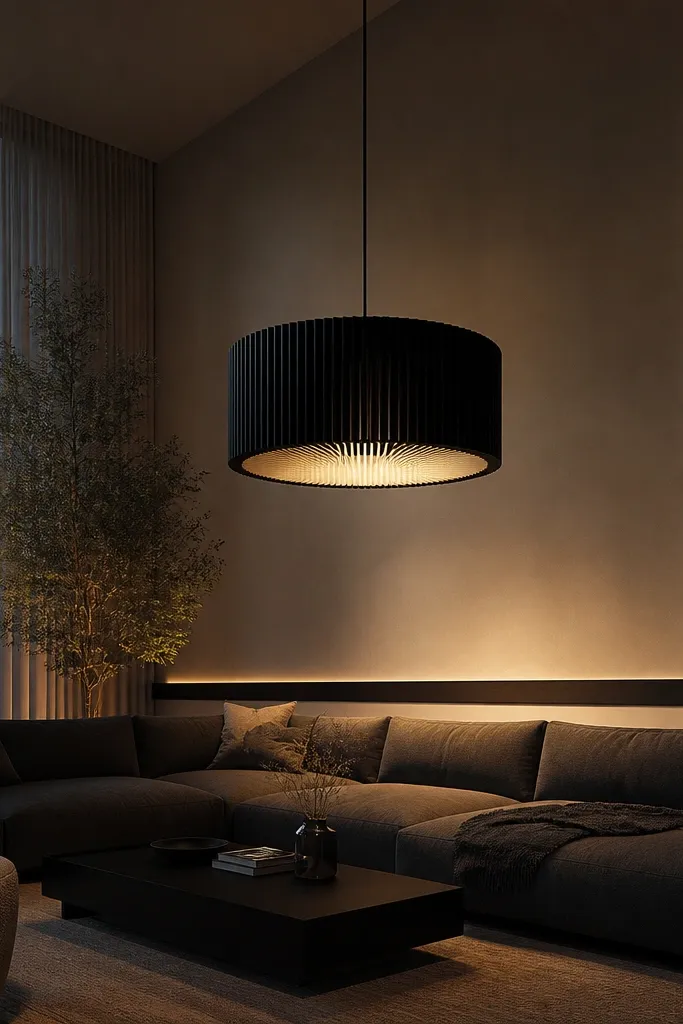
A louvered pendant looks expensive because it controls glare. In a double-height living room, glare is the fastest way to make lighting feel harsh and “DIY.” Mount it so the pool of light lands on the seating zone and the surrounding wall gets a gentle bounce. Choose a matte black canopy and a diffuser inside the shade so you don’t see the bulb filament from eye level.
Editor's noteIf you can see the bulb from the couch, your shade isn’t doing its job — swap for a deeper diffuser.
Start by picking a pendant with a louvered or ribbed interior and a dimmable socket. Hang the pendant so the bottom of the shade sits about 28-34 in (70-85 cm) above the sofa seat height, then use a helper to check sightlines from the couch and the stairs. Wire it to a dimmer and add a 2700K-3000K bulb with a diffuser cover if the fixture doesn’t include one. Finally, use a warm bulb and test brightness at night, aiming for “comfortably bright,” not supermarket bright.
Skip thisDon’t mount a plain open-bottom pendant too high or you’ll light the ceiling more than your seating.
2. Cove LED Strip at the Balcony Edge
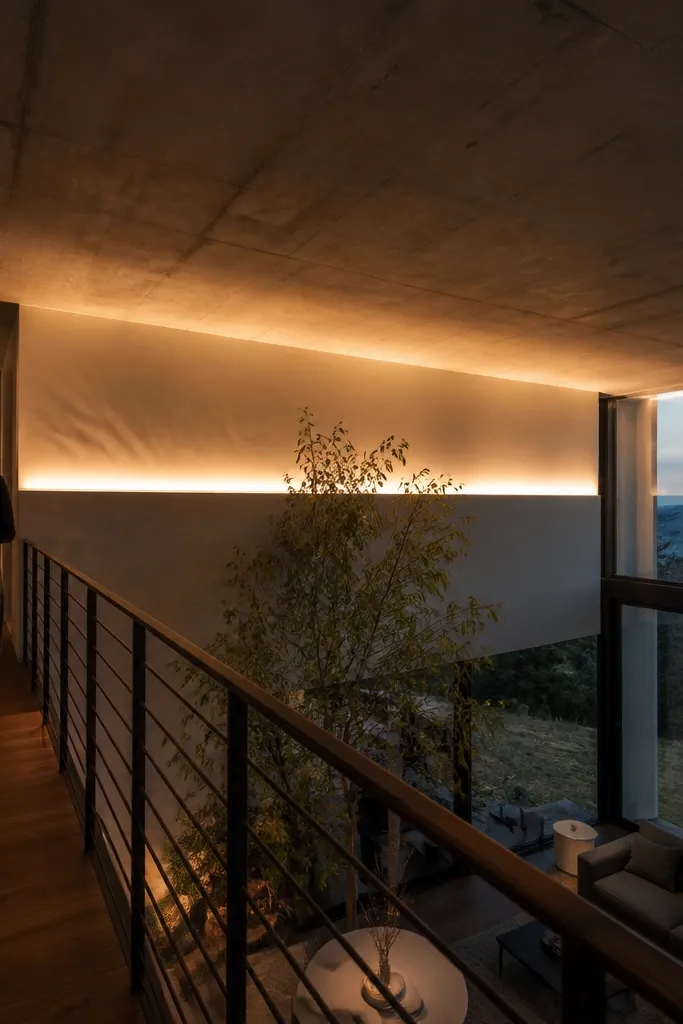
A balcony-edge cove makes the room feel designed because it draws a continuous warm line across a vertical space. The light doesn’t blast outward; it washes the ceiling and softens shadows from above. This is one of the best “luxury without glare” moves for double-height rooms because it reads as architecture, not a fixture. Go with a high-CRI LED strip and a frosted diffuser channel so the line stays smooth.
Editor's noteUse 3000K and CRI 90+ so skin tones and wood finishes look warm, not yellow-green.
Install an aluminum LED channel with a frosted lens along the top of the balcony soffit or a built-out ceiling edge. Plan the run length, then cut the channel and mount it level using screws and anchors every 12-16 in (30-40 cm). Wire the strip to a constant-voltage driver and connect it to a dimmer that matches your driver type. Finish by sealing the channel ends, then test before closing the wall with trim.
Skip thisDon’t skip a diffuser lens — bare strips look like a line of dots.
3. Wall-Wash Sconces on a 45-Degree Aim Jig
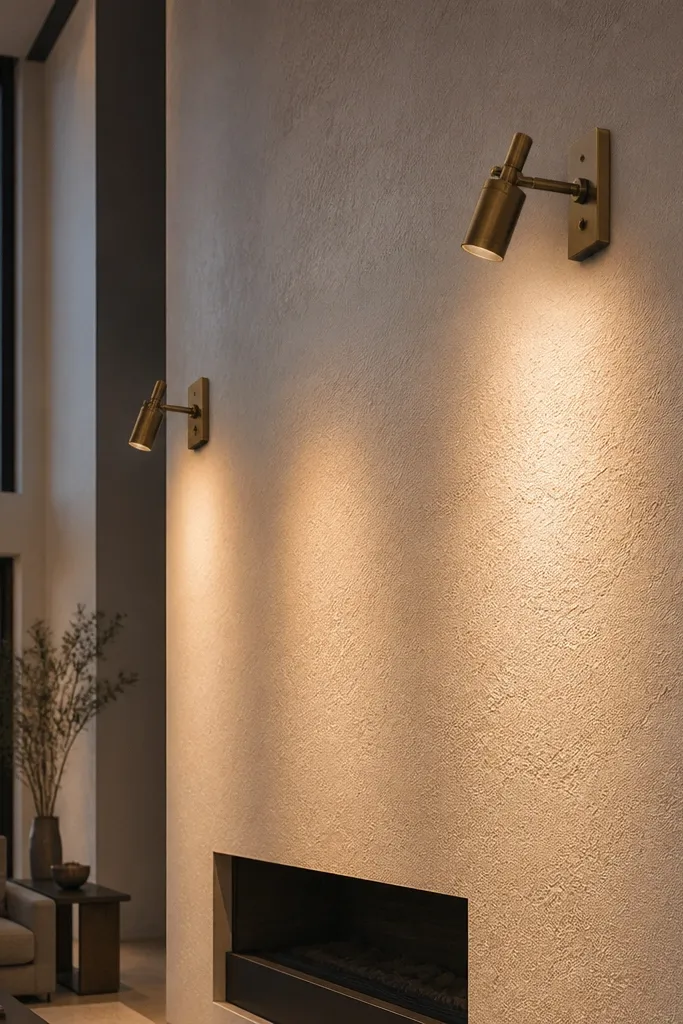
Wall-wash lighting is the cheat code for making double-height spaces feel finished. Sconces with adjustable heads let you graze plaster, paint texture, or wood paneling so the room looks sculpted. The “luxury” effect comes from even coverage — no bright spots, no dark bands. Pick warm metal finishes like aged brass or oil-rubbed bronze and pair them with diffused bulbs.
Editor's noteTape a temporary cardboard “beam blocker” at the target height to check where the hotspot lands.
Mark mounting height so the center of the light sits around 6-8 ft (1.8-2.4 m) depending on your wall height. Use a simple paper protractor or laser level to aim at about 30-45 degrees upward, then adjust until the brightest part lands around the 1/3 height mark. Mount the backplate, run wiring through a junction box rated for your wall type, and attach the sconce head. Install a dimmer and confirm the wall glow stays smooth at night.
Skip thisDon’t point sconces straight up — you’ll see a bright stripe and the upper wall will look patchy.
4. Picture Light Line for a Gallery Wall That Goes Up Two Floors
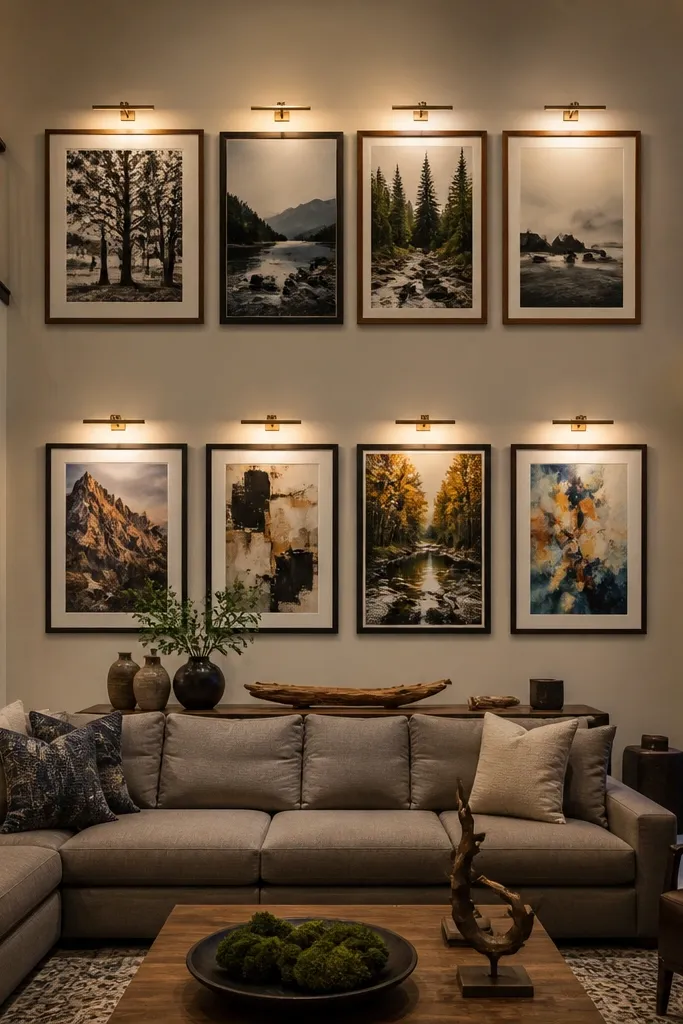
A two-floor gallery wall looks high-end when the art is evenly lit without glare. Picture lights work because they focus light onto the wall surface and the frames, then the reflected light softens the rest of the wall. In a double-height room, this is also practical: art becomes a built-in lighting focal point. Use a warm temperature so the frames look natural, especially if you have wood or gold accents.
Editor's noteUse CRI 90+ bulbs so paintings and textiles don’t shift color under warm light.
Choose a linear picture light system or multiple adjustable heads with diffusers. Mount the first row so the light is centered over the top of the frames, then align the beam to hit the art surface, not the glass directly. Keep a consistent spacing between heads and frames so brightness feels uniform. Wire through a switch or dimmer, then test with a flashlight on the wall to fine-tune aiming.
Skip thisDon’t mount picture lights too close to the wall or you’ll create hot spots on the frames.
5. Rope Light in a Wood Slat Ceiling Border
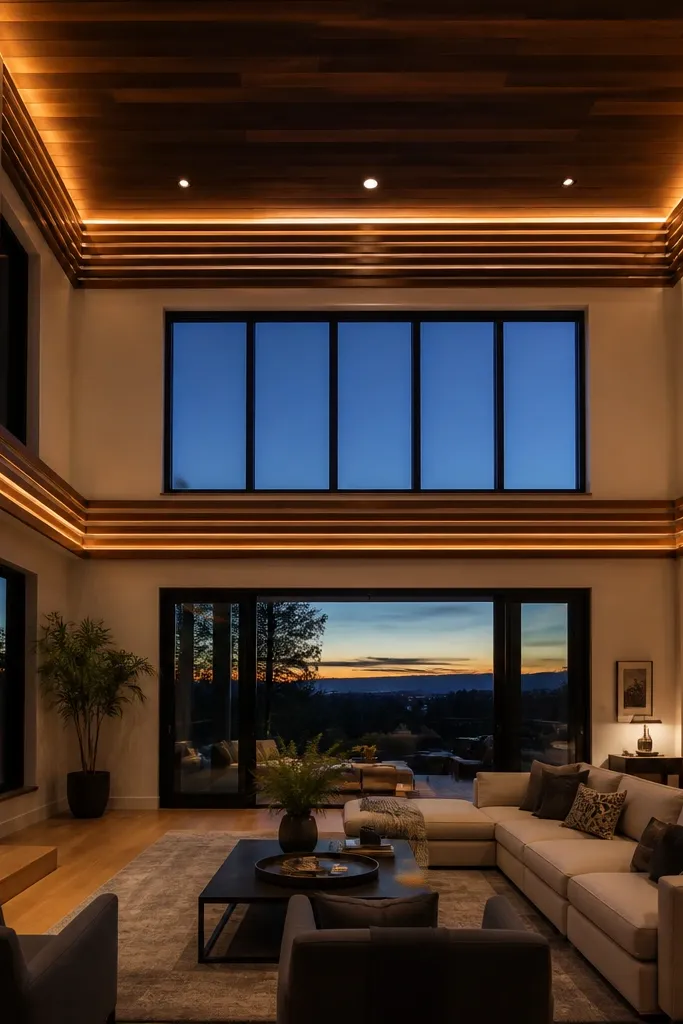
Wood slat borders look like custom millwork, and rope light is a DIY-friendly way to light them. The beauty trick is hiding the source behind slats so you get glow and shadow, not visible tubing. This works in double-height rooms because the ceiling border becomes a “frame” for the whole space. Keep the color warm and the diffuser tight so the light reads as one clean line.
Build a shallow border box from 1x3 or 1x4 wood, then mount wood slats on top with a consistent gap. Install a rope light track behind the slats so the rope stays out of sight from standing eye level. Use a dimmable LED rope light rated for your environment and connect it to the correct power supply. Finish by sanding sharp edges and sealing the wood so dust doesn’t collect on the glow line.
Paint the inside of the border flat black to prevent light leakage and weird reflections.
Don’t use a glossy interior — reflections make the glow look uneven.
6. Adjustable Track Lighting on a Ceiling Beam
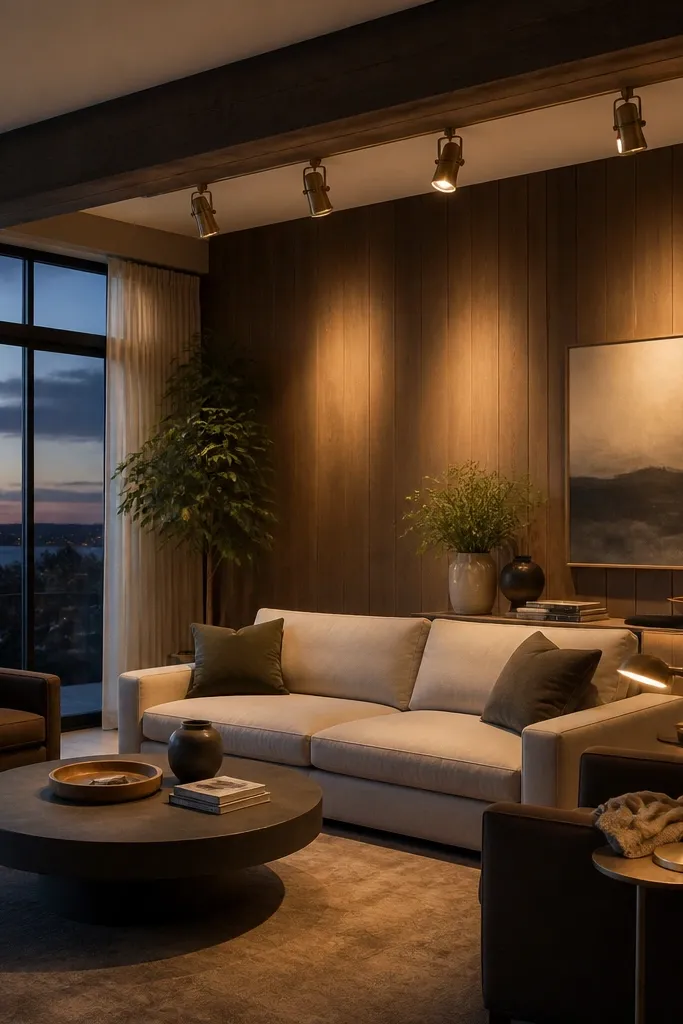
Track lighting feels “architectural” when you aim it intentionally. In a double-height living room, adjustable heads let you light the wall wash and the seating without swapping fixtures. You can aim one row at art or wood paneling and another at the conversation area. Pick a track finish that matches your hardware and keep the bulbs diffused so you don’t get glare.
Mount a track to a ceiling beam or a sturdy ceiling mount with anchors rated for your ceiling material. Install two runs if your room is long: one aimed at the seating zone and one aimed at the upper wall. Use 2700K-3000K bulbs with a diffuser lens or frosted glass. Label the track positions with painter’s tape so you can re-aim after any painting or furniture moves.
Aim the first row to hit the wall at 1/3 height; aim the second row to graze texture, not blast it.
Don’t choose tiny spot heads with no lens cover — they create harsh pinpoints from below.
7. Three-Tier Pendant Cluster With Heat-Resistant Shades
A multi-height pendant cluster looks luxury because it adds rhythm to the vertical space. It also solves a real double-height problem: one hanging light can’t cover both top and bottom of the room visually. Choose shades that hide the bulb and use diffusers to keep the cluster from looking “spotty.” This project works best over a seating group where you want the light to feel intentional and layered.
Editor's noteUse the same bulb type in all three fixtures so color stays consistent when you dim.
Pick three pendants with matching finishes and compatible wiring kits. Hang the center pendant slightly lower and the outer two a bit higher, keeping the bottom of shades around 30-36 in (75-90 cm) above the sofa seat height. Use dimmable bulbs at 2700K-3000K and ensure every pendant has a shade that blocks direct bulb view. Test the spacing with a cardboard cutout first so the cluster doesn’t feel lopsided.
Skip thisDon’t mix random pendant heights without checking for glare from the stairs.
8. Floor Lamp With Linen Shade and Hidden LED Uplight
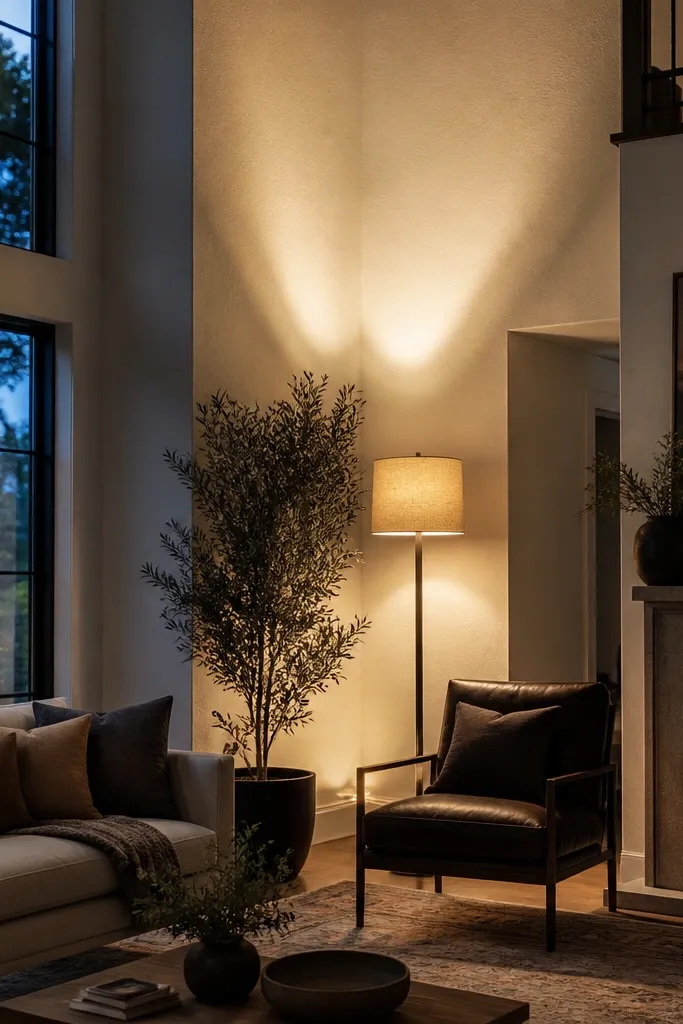
A linen-shaded floor lamp feels soft and expensive, and adding an uplight makes it work in double-height rooms. The wall uplight gives you that tall-room glow, while the linen shade keeps the direct beam comfortable. This is a good DIY route if you don’t want to rewire ceilings. Place it near a corner or beside a tall plant so the light bounces along the wall instead of hitting the floor only.
Editor's noteChoose a shade with a slight off-white tone; pure white can look stark in warm lighting.
Use a linen shade lamp kit or a lamp base you already own, then add a small LED puck or strip inside the base pointing upward. Cut a discreet mounting plate so the uplight aims at the wall about 6-10 ft (1.8-3 m) away. Wire the uplight to a separate switch or a smart plug so you can control ambiance. Finish by securing all wiring with heat-resistant connectors and test with the shade in place for glare.
Skip thisDon’t aim the uplight at a glossy wall — it will hotspot and look cheap.
9. DIY Recessed Wall Wash With Adjustable Micro-Gimbal Spots
If you want the cleanest wall glow, recessed micro-spots with adjustable gimbals are hard to beat. You get a uniform wash without visible fixtures stealing attention, which is exactly the luxury look. In double-height rooms, the key is spacing and aim so you don’t create bright bands. This works on feature walls behind the seating, especially if you have textured paint, plaster, or wood paneling.
Editor's noteUse a laser pointer through the trim opening to confirm beam hit height before you close the wall.
Frame a shallow wall recess or use surface-mounted housings that look recessed, then install adjustable gimbal spot modules. Space the spots so each beam overlaps slightly with the next, usually every 24-36 in (60-90 cm) depending on beam angle. Use 2700K-3000K bulbs with a narrow-to-medium beam and test aiming before final trim. Caulk edges, install trim rings, and wire to a dimmer for night comfort.
Skip thisDon’t pick a too-wide beam — it washes the lower wall and leaves the upper area flat.
10. Gas-Style Sconce Faces With Frosted Bulb Cover
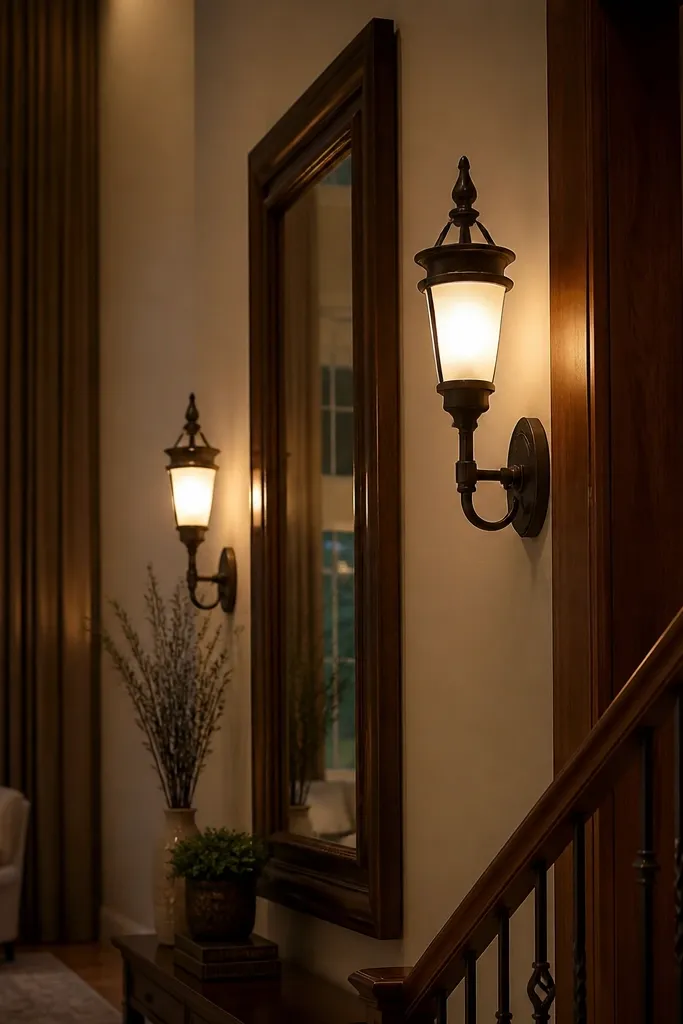
Gas-style sconces look upscale because their shape reads classic, and frosted bulbs keep the light soft. In a double-height room, repeated sconces create a vertical rhythm and make the wall feel intentionally lit. Frosted glass reduces glare and makes the wall glow feel smooth instead of harsh. This works especially well along stair walls or beside a gallery area.
Editor's noteMatch sconce finish to your pendant hardware so the room looks cohesive, not random.
Pick wall sconces with adjustable mounting depth so you can align them evenly. Mount at a height that keeps the bulb center roughly at shoulder-to-eye level when standing in the room, then aim slightly downward to soften direct glare. Use frosted bulbs in 2700K-3000K and add a dimmer if your fixture supports it. After wiring, test with lights on and stand at the main seating position to check for direct bulb visibility.
Skip thisDon’t use clear bulbs — the glare will fight the tall ceiling.
11. LED Strip Behind a Floating Media Console Shelf
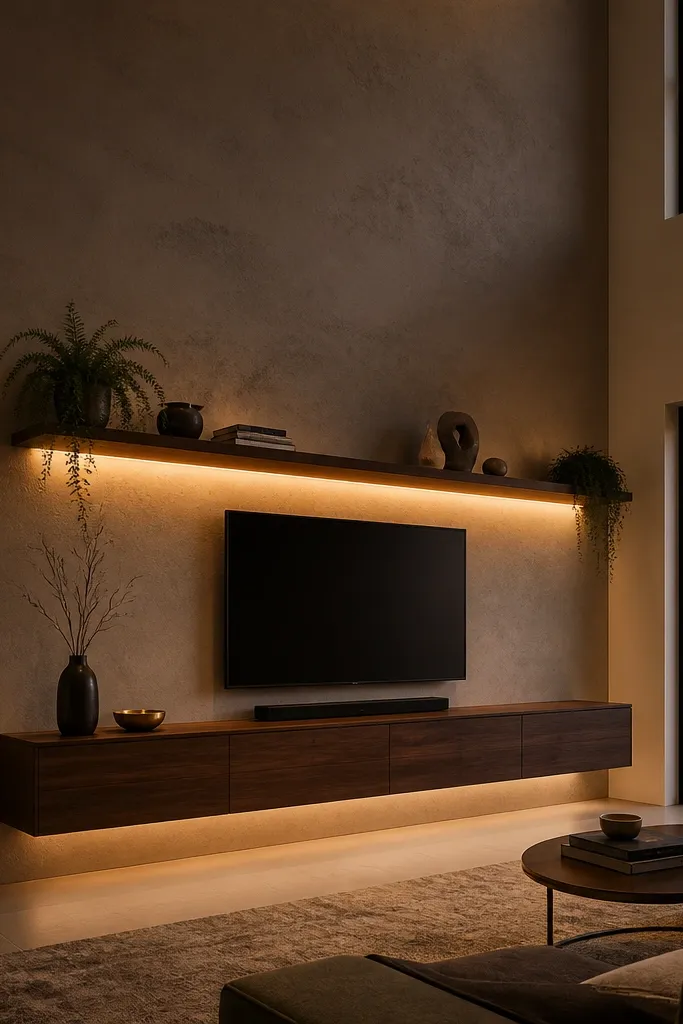
Indirect lighting behind a floating shelf gives you a clean glow that reads modern and expensive. It’s also a practical way to light the lower third of a double-height room without adding more ceiling fixtures. The floating effect hides the LED source and keeps glare down. Choose warm white LEDs and keep the diffuser frosted so you get a continuous ribbon of light.
Editor's noteUse a diffuser lens rated for the strip brightness — cheap diffusers turn a smooth ribbon into a hazy blur.
Install a backing cleat under the shelf, then mount an aluminum LED channel with a frosted lens along the underside. Leave a small gap behind the shelf so the strip isn’t crushed and so heat can dissipate. Wire to a constant-voltage driver and connect to a dimmer. Seal the channel ends and cover any wiring with a raceway so the run looks intentional.
Skip thisDon’t place the strip too close to the edge or you’ll see the light source from the couch.
12. Suspended Linear Light Bar Over the Balcony View
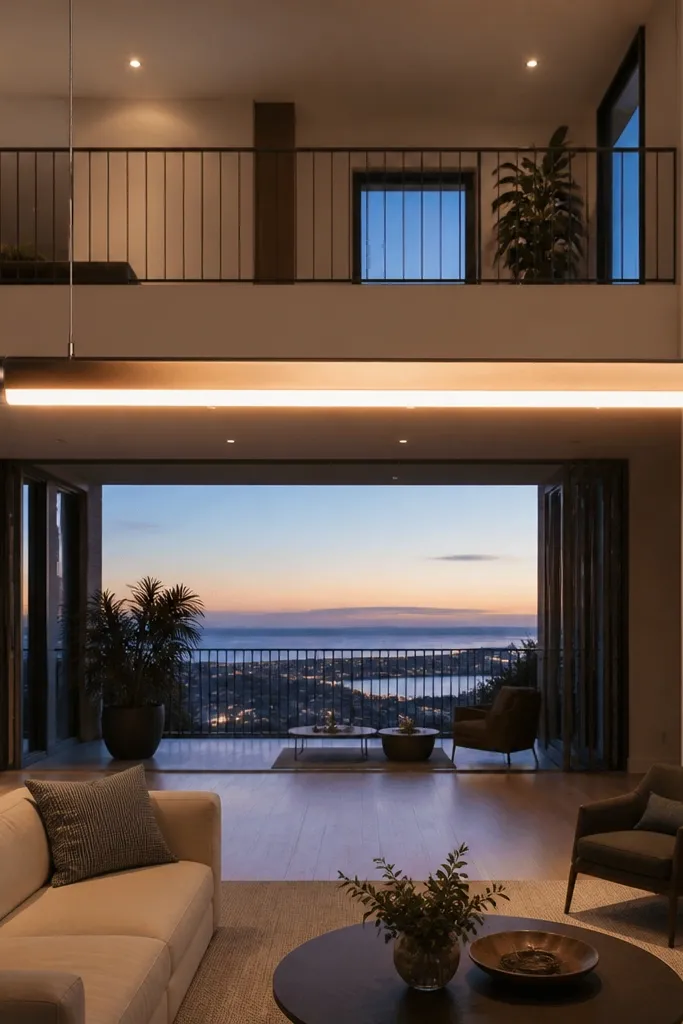
A suspended linear bar looks like a high-end hotel lighting plan because it creates a controlled, even wash across a wide area. In double-height rooms, it helps bridge the visual gap between floors — the space feels “connected.” This is a great DIY option when you can mount to a ceiling beam and you want a single statement piece. Go for a frosted acrylic lens to keep it glare-free.
Editor's noteUse a frosted lens with uniform diffusion; it makes the fixture look like one solid glow line.
Choose a linear LED fixture or build a frame with an LED module and a frosted diffuser. Mount hangers from ceiling anchors so the bar is level across its full length. Set the height so the bar doesn’t reflect directly into TV screens or windows; check sightlines from the seating. Wire to a dimmer circuit and use 2700K-3000K LEDs for warm atmosphere.
Skip thisDon’t use a clear lens — the LED points show and kill the luxury look.
13. Tapered Shade Pendant With Brass Interior
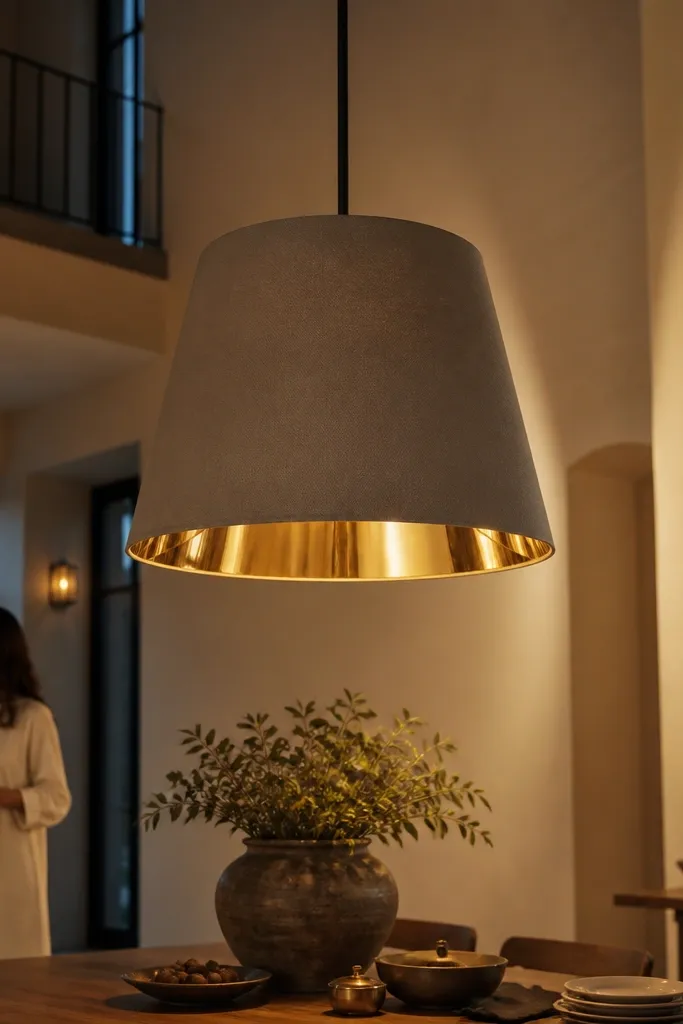
A tapered shade with a brass interior makes the light look warmer and more flattering on walls. Brass reflects light back into the room and adds a soft glow around the edges of the shade. In a double-height living room, this helps fill the vertical space without turning the ceiling into a bright disc. It’s a good middle ground between modern minimal and classic warm.
Editor's noteIf your walls are cool-toned, brass interior helps the room read warmer without higher color temperature.
Find or build a pendant shade that has a brass-painted or brass-finished interior and a diffuser bottom. Hang it centered over the main seating, keeping the bottom of the shade about 30-34 in (75-85 cm) above the seat. Use dimmable bulbs at 2700K-3000K and test brightness with the room’s overheads off. Tighten all hardware and check that the cord exits cleanly so the shade sits perfectly centered.
Skip thisDon’t pick a wide shade if your ceiling is extremely tall — it can light too much wall and feel washed out.
14. Ceiling Fan Light Kit With Recessed Glass Diffuser
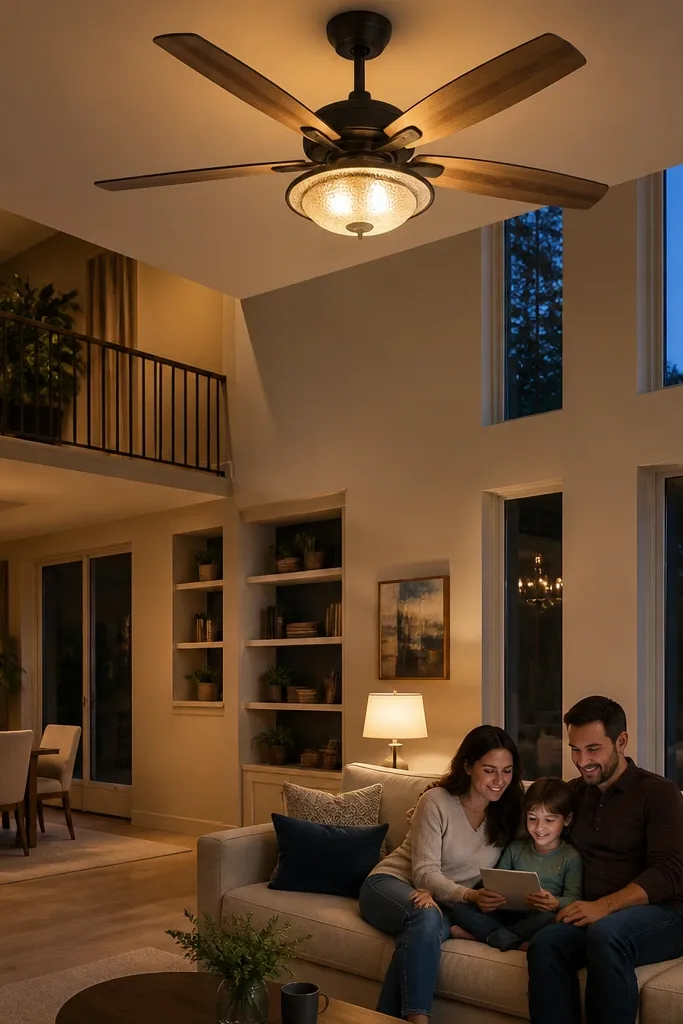
In some double-height rooms, the ceiling is already working hard because of airflow needs. A fan light kit with a recessed glass diffuser gives you overhead light without harsh glare. It’s not as “statement” as a chandelier, but it makes the room feel complete because it lights the ceiling and spreads warmth evenly. This works best when your double-height ceiling is visible from seating and you want soft ambient light.
Choose a ceiling fan light kit with a glass diffuser and a dimmable driver. Install the fan at the correct ceiling height for clearance, then adjust the light so it centers in the room’s visual middle. Use 2700K-3000K bulbs and test dimming range so the lowest setting still looks warm. Make sure wiring is rated for fan and follow the fan instructions for junction box and ground.
Use a dimmer that matches LED fixtures so you don’t get flicker at low brightness.
Don’t mount a bare-bulb fan kit — the glare from above ruins the soft look.
15. Handmade Macramé Shade With Hidden LED Candle Bulbs
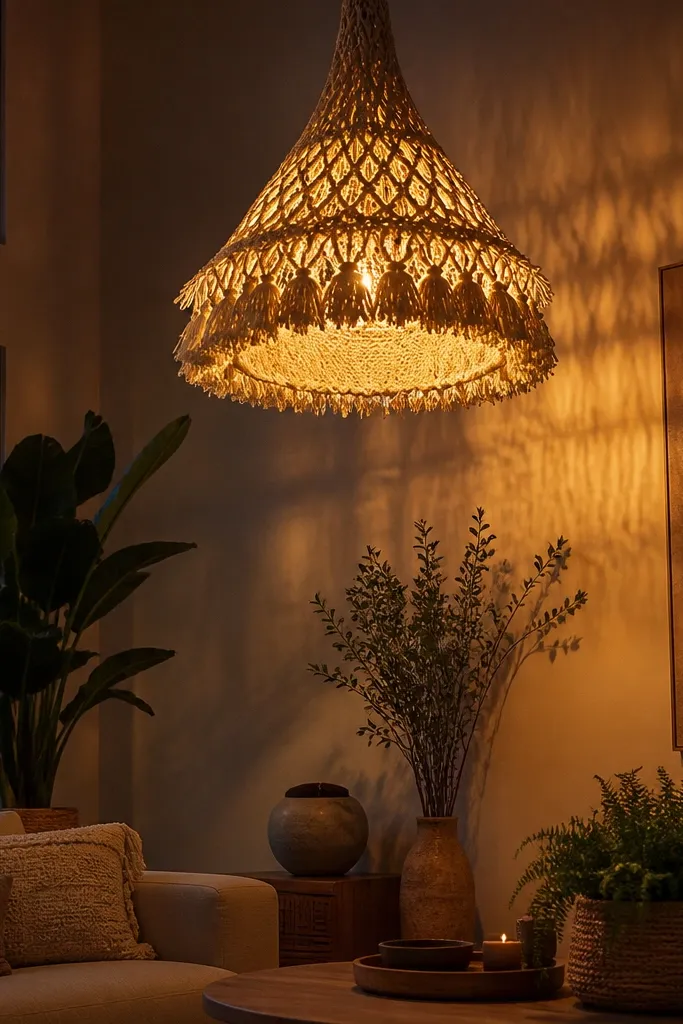
Macramé shades look luxe when the light is controlled. The knot texture throws interesting shadows, and in a double-height room that shadow pattern climbs up the wall and adds depth. The key is hiding the bulb so you don’t see exposed LEDs or wiring. Use LED candle bulbs for safety and to keep the shade from heating.
Editor's noteChoose a macramé shade with tighter knots for a cleaner shadow pattern.
Hang a macramé shade on a pendant socket kit rated for the fixture weight. Insert LED candle bulbs at 2700K-3000K and check the bulb visibility from the couch. Route the cord through the pendant canopy so it stays tidy and doesn’t snag on the shade. Adjust the hanging height until the shadow pattern looks intentional on the wall behind the seating, not scattered across the ceiling.
Skip thisDon’t use high-watt incandescent bulbs — heat warps the shade and dulls the look.
16. DIY LED Cornice Along the Upper Wall Line
A thin LED cornice makes double-height rooms look designed because it creates a continuous architectural line at the ceiling junction. It’s subtle, but it changes how the room reads — the top feels intentional instead of empty. This works especially well in rooms with crown molding or a planned trim line. Use a narrow strip and a diffuser so the glow is soft and the light source disappears.
Build a shallow cornice box or use existing trim and attach an aluminum channel under it. Run a narrow LED strip with a frosted lens so the light spills gently onto the upper wall. Mount the channel with screws through the trim into studs or solid backing. Wire to a dimmable driver and test brightness, then caulk seams and paint the cornice the same finish as the ceiling.
Keep the cornice glow line narrow, around 1/2-3/4 in (12-20 mm), for a high-end look.
Don’t install the strip too far from the diffuser — you’ll see the LED points.
17. Grazing Light on a Plaster Accent Wall With DIY Linear LEDs
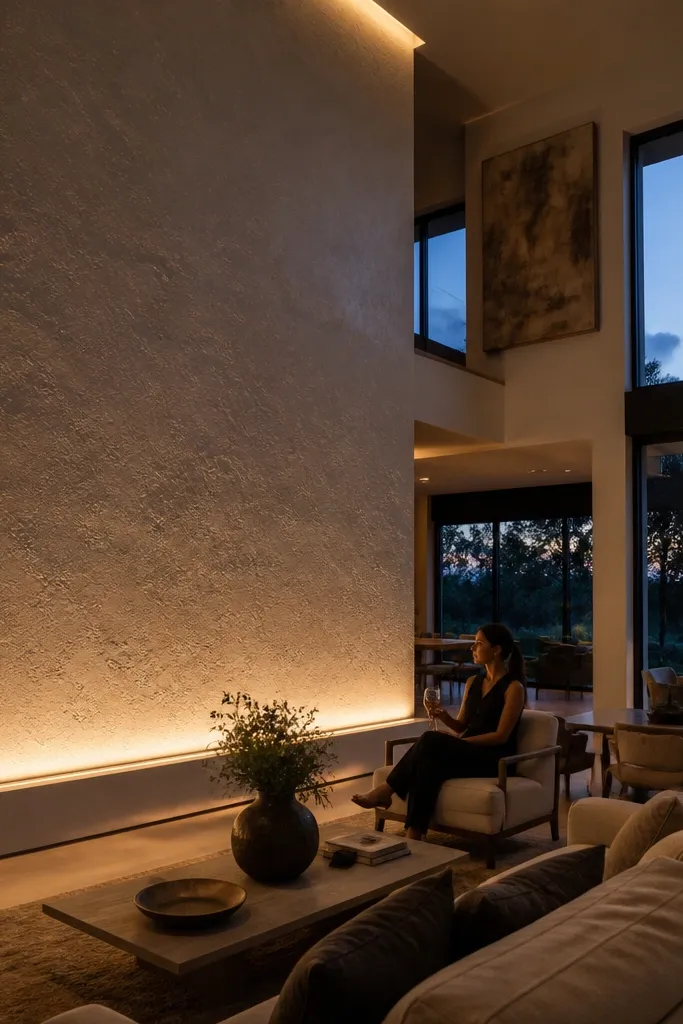
Grazing light is what makes textured walls look expensive. The beam skims across plaster, limewash, or microcement and turns texture into highlights instead of shadows. In a double-height living room, this is one of the strongest aesthetic upgrades because your eye naturally reads texture and depth. Use a linear LED source with a diffuser and aim it low enough to create contrast.
Editor's noteIf your wall is glossy, switch to a softer diffuser or your highlights will look like glare spots.
Mount linear LED bars in a shallow recess or on a track positioned near the floor line. Aim so the light hits the wall texture about 10-20 in (25-50 cm) above the floor, letting the beam travel upward. Use 2700K-3000K LEDs with a diffuser lens to avoid glare. After mounting, adjust in small increments and take photos from the couch to confirm the highlight band looks smooth.
Skip thisDon’t aim grazing lights straight at eye level — it turns into a glare problem fast.
18. Chandelier With Custom Drop Rods for Perfect Height
A chandelier can look luxurious in double-height spaces when the height is right. Too high and it becomes a decorative ceiling blob; too low and it blocks sightlines and feels heavy. The luxury look comes from balancing scale with the vertical space so the chandelier feels intentional, not random. Choose warm bulbs and a finish that matches your hardware — black, aged brass, and bronze are the safest for a rich glow.
Editor's noteUse a dimmer even if the chandelier has multiple bulbs — single brightness looks flat in big rooms.
Pick a chandelier with enough spread for the seating area below. Measure from the chandelier bottom to the sofa seat height and target about 30-36 in (75-90 cm) clearance at the lowest point. If the included chain is too short or too long, use custom drop rods or cut-to-length chain links with proper connectors. Install with a ceiling-rated box, then use dimmable bulbs and check for reflections on glass surfaces.
Skip thisDon’t guess the hanging height; do a measurement from the seating, not from the floor.
19. LED Cove Under a Stair Tread for a Soft Shadow Trail
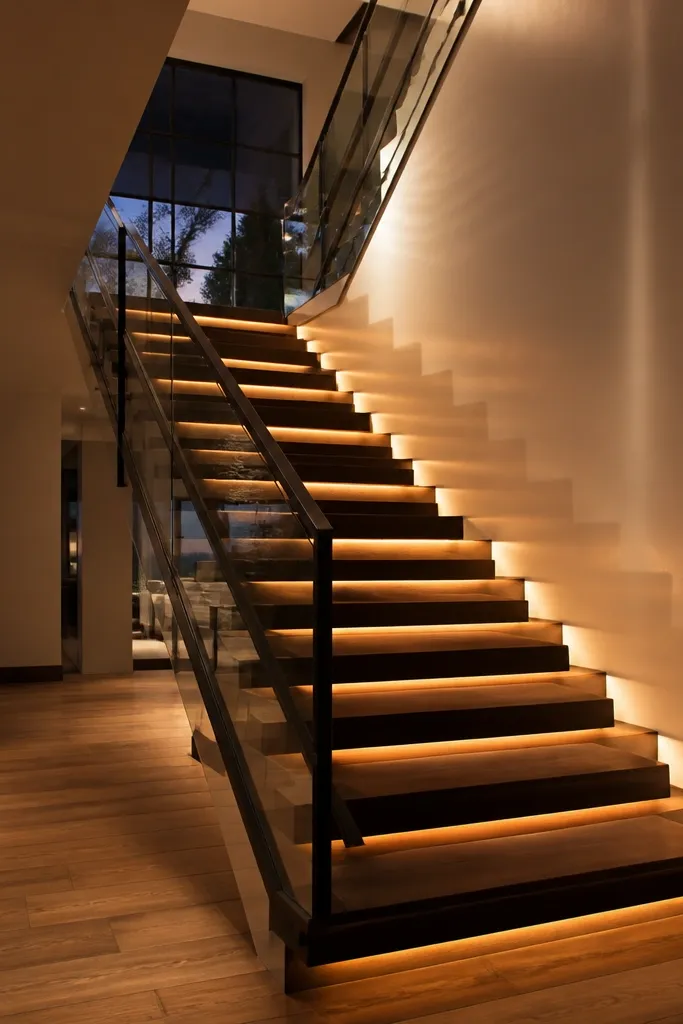
Stairs in double-height rooms are prime real estate for lighting, because they create a vertical path. A cove under the stair tread gives a warm shadow trail that makes the architecture feel carefully planned. It also improves safety at night without harsh step lights. This looks high-end because the light is indirect and the source is hidden from view.
Frame a small channel under the stair tread edge using thin wood strips or aluminum angle. Install an LED strip in an aluminum channel with a frosted lens so the glow spreads softly. Wire it to a driver with a dimmer, then run wiring through the wall cavity or a chase behind the stair stringer. Finish by sealing the channel and painting it to match the underside so only the glow shows.
Use 3000K and CRI 90+ so the stair wood tones look warm, not lifeless.
Don’t place the strip where it can be seen from the landing — hide it behind the tread lip.
20. Corner Lantern Sconce Pair With Warm Glass Diffusers
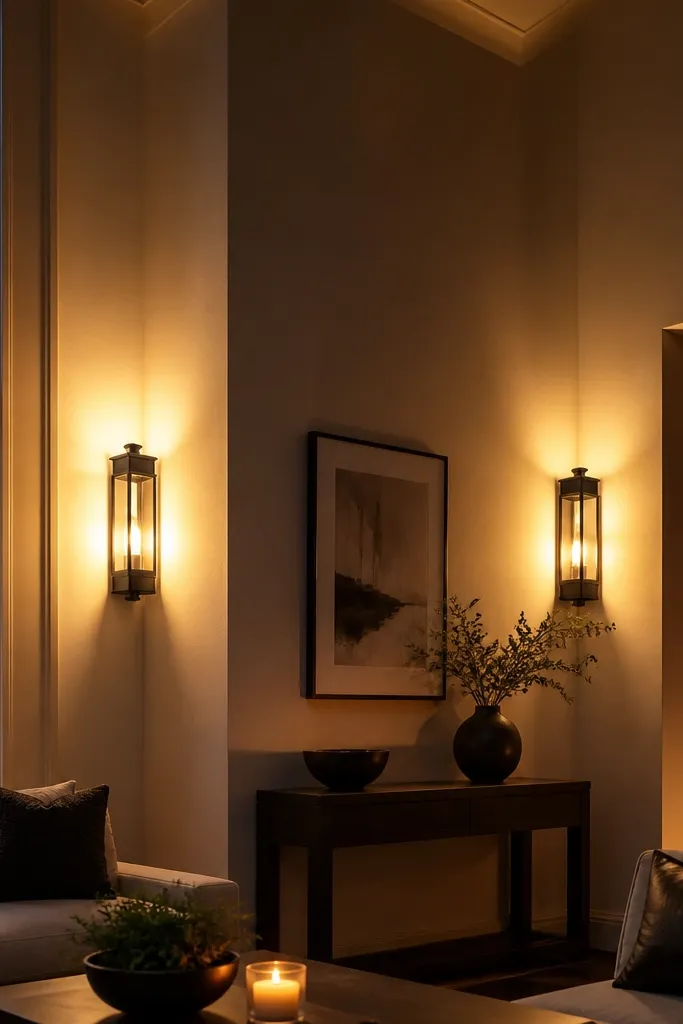
Lantern-style sconces in corners make double-height rooms look balanced because they fill the vertical edges. Corners are where rooms feel “lost” when lighting is only centered. Use warm glass diffusers so light spreads and softens, not pinpoints. This setup is also visually forgiving — it hides minor imperfections in wall texture.
Editor's noteKeep the lantern finish consistent with your ceiling fixture so the room looks planned.
Choose lantern sconces with glass diffusers and install them symmetrically on the left and right corners near the seating. Mount so the bulb center is around eye level, then aim slightly upward if the fixture allows. Use warm dimmable bulbs and connect each sconce to the same dimmer circuit for consistent ambience. After installation, stand in the center of the room and adjust until both corners glow evenly.
Skip thisDon’t mix lantern sizes — mismatched corners look accidental in tall rooms.
21. Indirect Ceiling Light With Reflector Sheet Behind a Recessed Slot
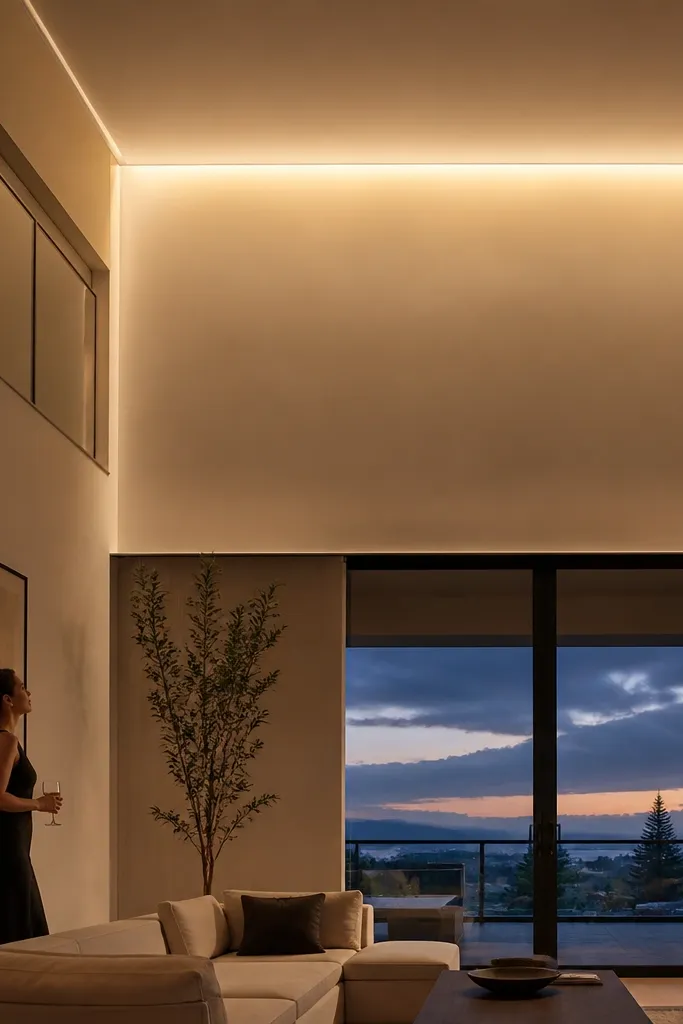
An indirect ceiling slot makes your double-height ceiling feel like it’s lit from within. Instead of lighting the ceiling with a bright fixture, you create a soft glow that fills the top half of the room. This is the luxury look people chase when they say the room feels “architectural.” Use a reflector surface behind the LED so the light spreads evenly across the slot length.
Editor's noteUse matte finishes inside the slot; glossy surfaces create bright hotspots.
Build a narrow ceiling slot frame using MDF or drywall returns, then install an LED strip in an aluminum channel behind it. Add a matte white or brushed reflector sheet behind the strip so the light spreads, not concentrates. Keep the slot opening small enough to hide the LED, then mount trim to create a clean line. Wire to a dimmable driver and test the glow pattern before you paint the slot interior.
Skip thisDon’t make the slot too wide or you’ll see the LED and it stops looking architectural.
22. DIY Table Lamp Pair With Oversized Shades for Upper-Wall Bounce
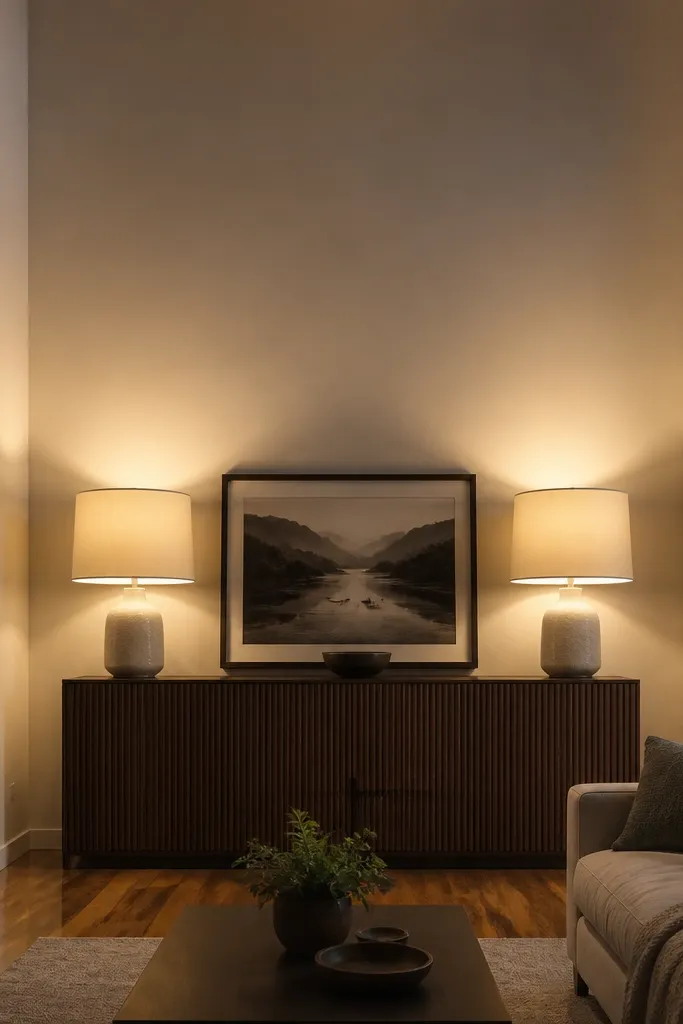
Table lamps sound basic, but in a double-height living room, oversized shades matter. When you use larger shades and place them at the right height, the light bounces up the tall walls and fills the vertical gap. Pair them on consoles or side tables so the room reads symmetrical and intentional. Pick warm dimmable bulbs and shades that diffuse well.
Editor's noteIf your shades are thin fabric, add a white liner inside for smoother diffusion.
Choose two table lamps with stable bases and large drum or bell shades that hide the bulb. Set the shade height so the top of the shade sits near the mid-wall height line, roughly 5-6 ft (1.5-1.8 m) from the floor. Use 2700K-3000K dimmable bulbs and test the wall bounce from the center of the room. Secure shade hardware tightly so the shade doesn’t sag over time.
Skip thisDon’t use tiny shades — the light stays low and the upper wall stays dark.
23. Backlit Wood Panel Wall With Edge-Lit Diffuser
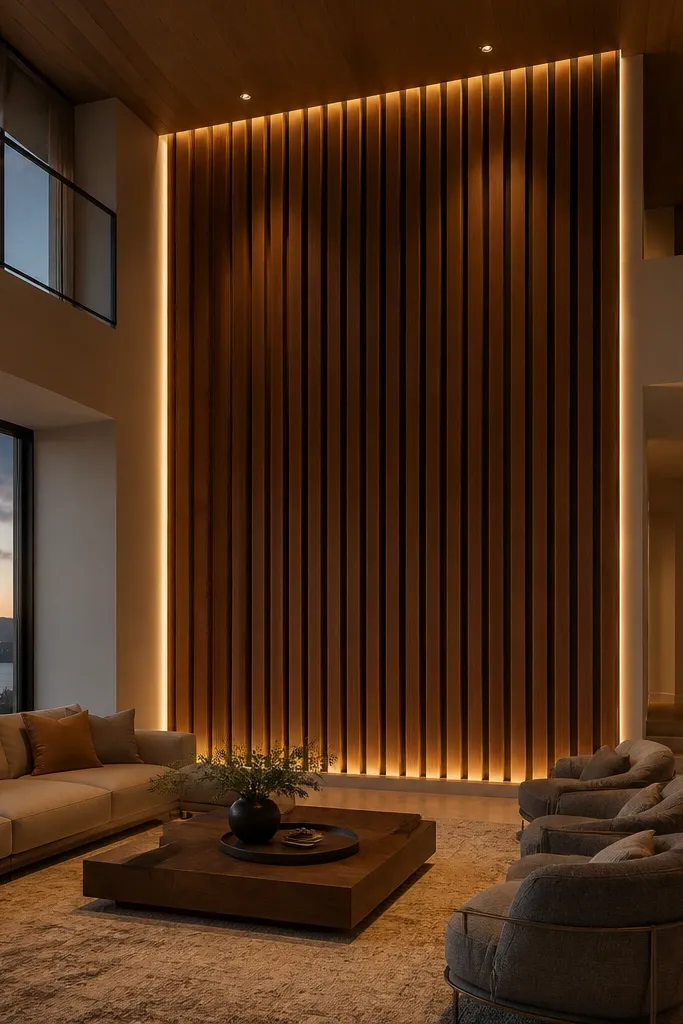
Backlit wood paneling looks like custom joinery because the light moves through the material. It’s one of the best ways to light the upper half of a double-height wall without visible fixtures. The secret is edge-lit diffusion so you get a soft even glow instead of LED hotspots. This is photogenic because it creates a gentle halo around the panel edges and makes the wall feel dimensional.
Editor's noteUse a diffuser with uniform light transmission; cheap frosted film creates a patchy glow.
Build a wood panel frame and attach a translucent diffuser sheet behind it, leaving an air gap for mounting. Install LED strips or modules along the edges using an aluminum channel so the light travels evenly. Wire to a driver and keep all connections accessible behind a removable access panel. Finish by sanding and sealing the wood so the panel looks clean in daylight and glows evenly at night.
Skip thisDon’t place LEDs directly behind the wood without a diffuser — you’ll see bright lines.
24. Recessed Step Light Style Glow for a Lower Seating Nook
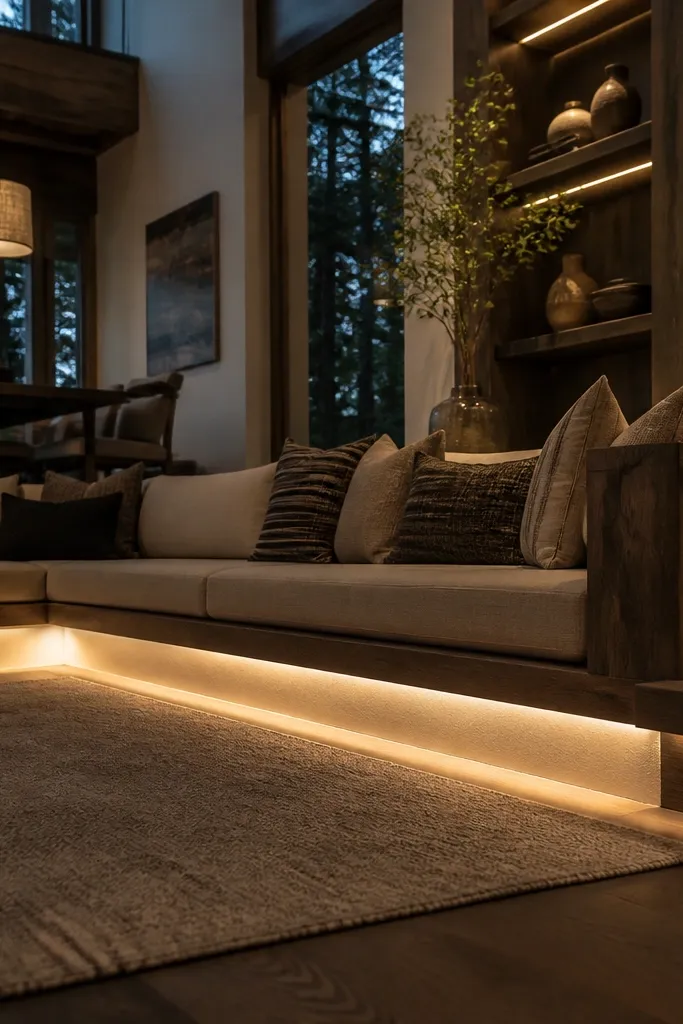
Low-level glow is a luxury detail because it adds depth without stealing attention. In double-height rooms, the floor-level lighting helps the seating area feel anchored while the upper layers handle ambiance. This works well near a reading nook, a small bar ledge, or under a built-in bench. Use diffused fixtures so you get a soft upward wash, not a spotlight aimed at ankles.
Editor's noteUse warm 2700K bulbs even if the rest of the room is 3000K — lower glow should feel extra cozy.
Mark a line near the base of a bench, wall, or step and install low-voltage recessed step-style lights with a frosted lens. Space fixtures so their beams overlap slightly, usually every 24-30 in (60-75 cm). Connect to a transformer rated for the total wattage and wire to a dimmer or low-voltage controller. Test after installation and adjust the aiming angle if the fixtures include a tilt mechanism.
Skip thisDon’t install without a diffuser lens — visible LED dots look cheap fast.
25. Ladder-Style Pendant Rail With Lantern Bulbs Over the Centerline
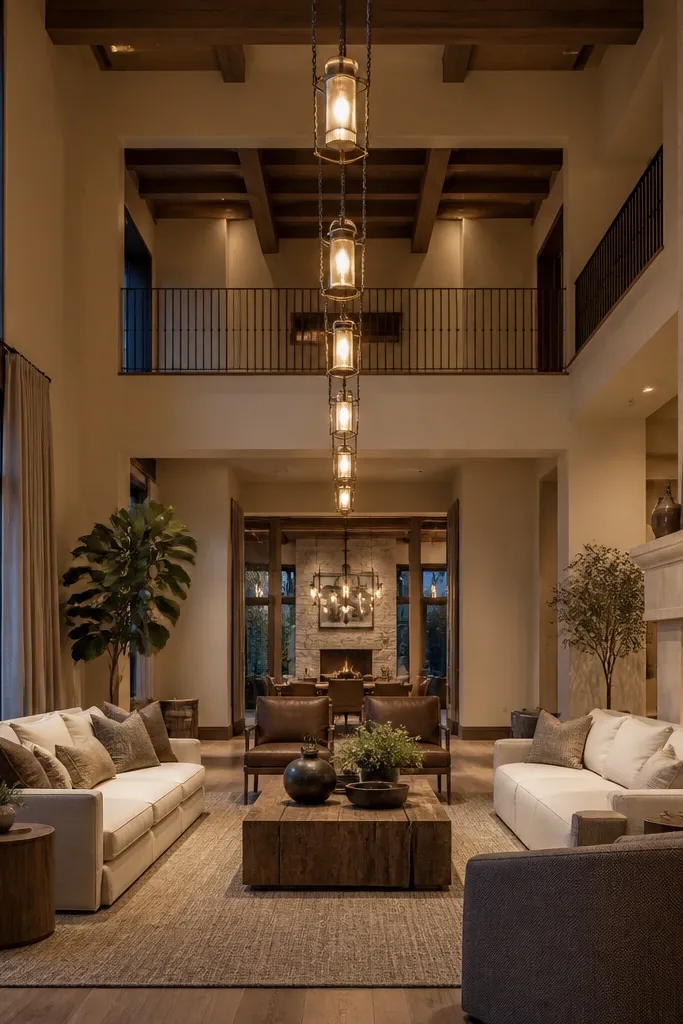
A double-height living room looks “luxury” when the light has a clear vertical rhythm. This ladder-style pendant rail does that by repeating a line of lantern bulbs that visually climbs the full height. The payoff is strong: you get focused pools of warm light where people gather, plus a sculptural silhouette that reads from the balcony. It also fixes the common double-height problem where a single ceiling fixture looks too small and ends up visually floating. Build this if you want a statement lighting feature that still feels DIY-able and stays photogenic year-round in both day and night shots.
Editor's noteUse cord grips with strain relief and label each wire before you connect — it keeps height adjustments painless and prevents mismatched pendants later.
Pick a rail length that matches your seating layout — measure the distance from the left/right ends of the main sofa or rug, then subtract 6-10 in for a centered look. Build the rail from 2 in x 1 in steel flat bar or aluminum angle, then add two “side rails” and 3 cross rungs spaced 12-16 in apart; pre-drill holes for 3 pendant drops on the centerline. Mount the rail to a ceiling junction box using a steel mounting plate and four standoffs, using anchors rated for the ceiling type (toggle bolts for drywall, sleeve anchors for masonry). Run 3 separate pendant cords through strain relief, wire each to a cord-grip, and hang lantern shades so the bottom glass sits about 72-78 in above the floor at the lowest point. Finish by wiping metal parts with degreaser, then spray with matte black or oil-rubbed bronze rated for high-heat fixtures, and use 2700K dimmable bulbs.
Skip thisAvoid hanging the lanterns by “eyeballing” the height — in double-height rooms the mismatch is obvious in photos.



