
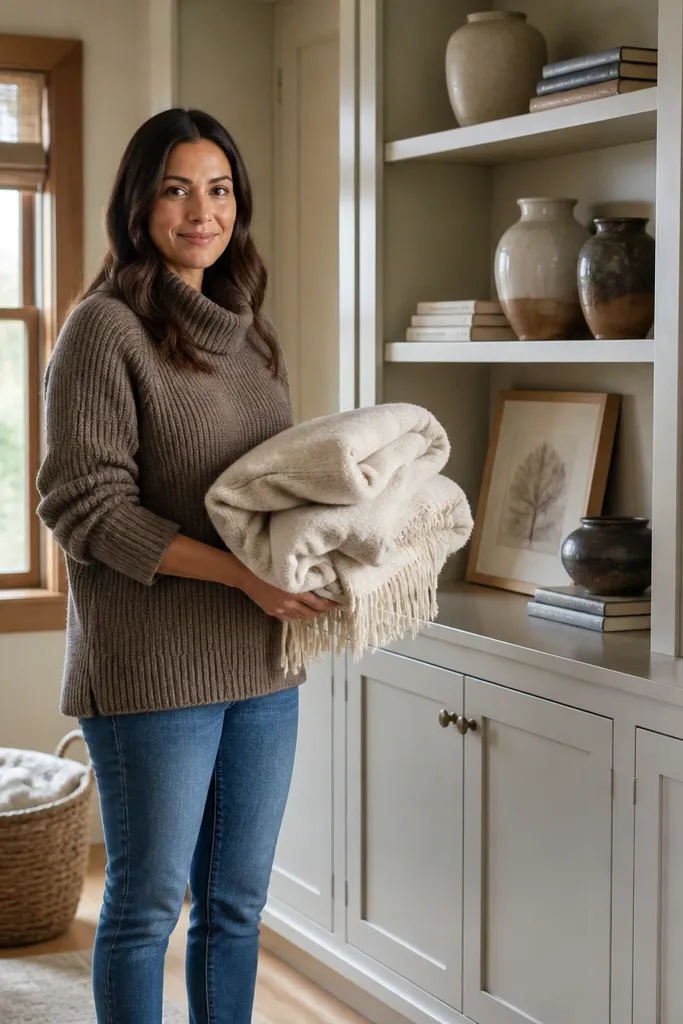
1. Tall book wall with hidden cord shelf
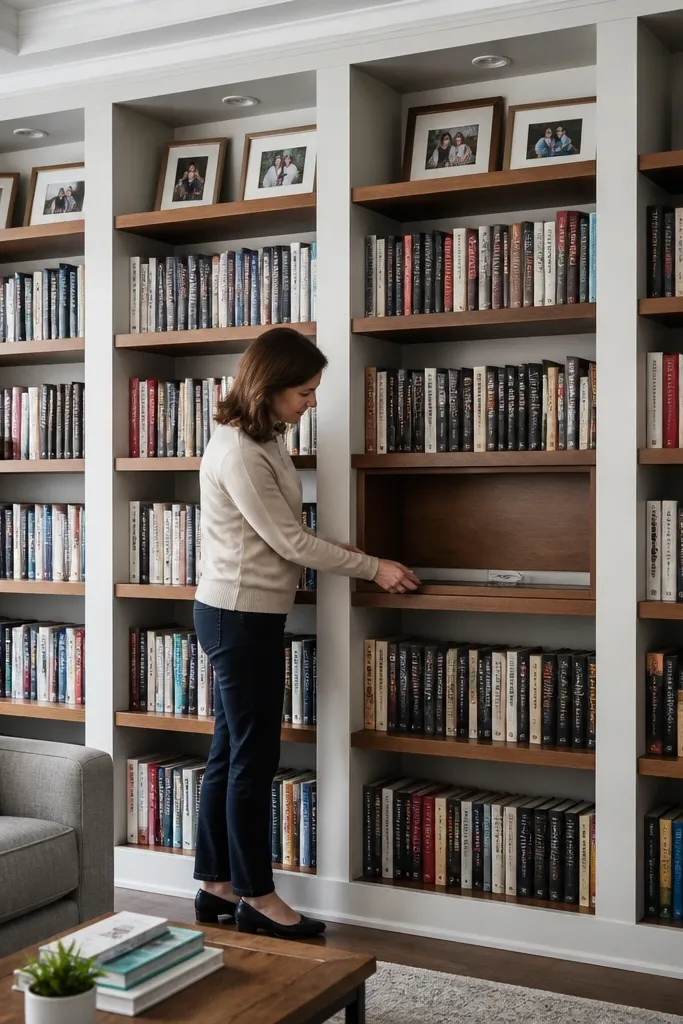
This design fixes the most common living room storage problem: cables, chargers, and power strips that ruin the look. You get tall, full-height open shelving for books and framed photos, then one shelf bay has a shallow back panel that lets you route cords behind the wall. The front stays clean because the cord access is inside the built-in, not a messy power strip on the floor. It looks cozy year-round because the shelf lines are consistent and the cord clutter is contained, even when you’re charging devices in winter or summer.
1) Build a tall frame using 3/4-in plywood panels and locate studs before you cut. Set shelf spacing for books first: plan 11-12 in clear height for most paperbacks and small hardcovers, then add one taller bay around 14-16 in for oversized art books. 2) Add a cord shelf bay by leaving a 3-4 in gap behind the shelf at one location and installing a removable access plate on the back. Route cords to that pocket before you install the back panel and finish. 3) Finish with a warm stain or paint matched to your trim, then add a cable-friendly power strip mounted inside the pocket with zip ties.
Use a removable back access plate so you can replace a charger without tearing the whole section out.
Don’t route cords through the front shelf face — you’ll see them every time the room is lit.
2. Shallow display ledge with deep basket base
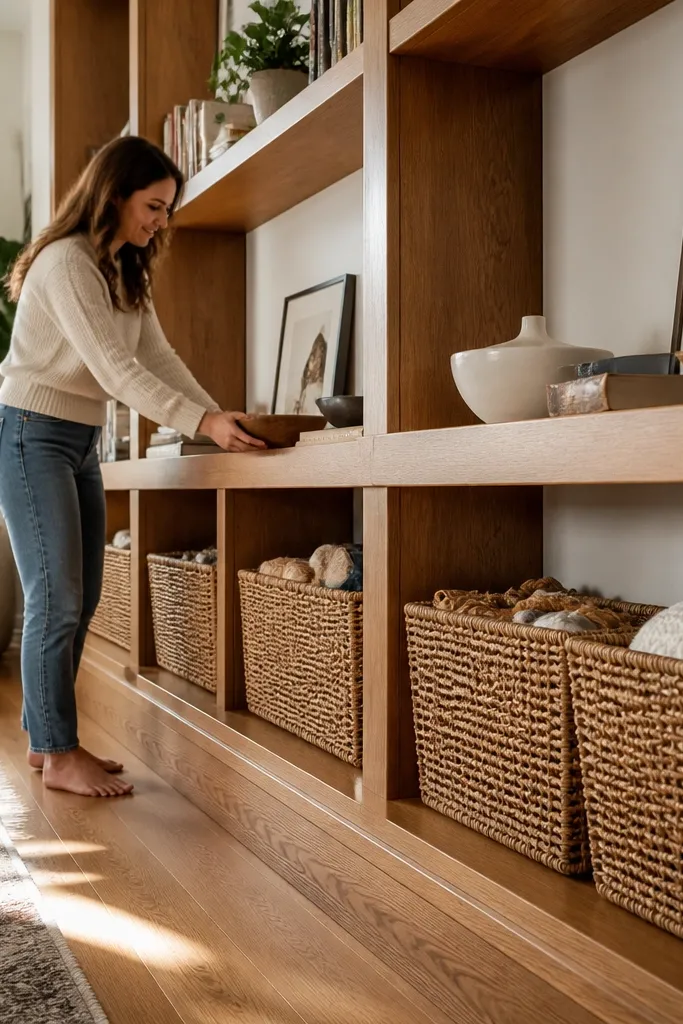
If you want built-in shelves that look styled but still handle daily mess, this split-depth setup is the answer. The upper shelves are shallow enough to display decor and books without turning into a junk shelf. The lower area is deeper and built for baskets, so throws, kids' items, and game pieces disappear. The contrast reads intentional and cozy because the room shows pretty things above and calm storage below, year-round.
1) Frame the built-in with two shelf lines: set the top shelves at 10-12 in depth and the bottom compartments at 16-18 in depth. Keep the top clear height around 11-13 in so books sit neatly and don’t slump. 2) Install basket-ready rails or cleats inside the lower bays so baskets slide in square. Use a simple face frame or flat trim so the built-in looks like it came with the house. 3) Finish by painting or staining the face and sealing the interior surfaces so baskets glide and dust wipes easily.
Pick baskets with the same footprint across bays so the visual rhythm stays clean.
Don’t make all shelves deep — you’ll end up hiding everything and losing the styled look.
3. Window-side banquette shelves with toe-kick storage
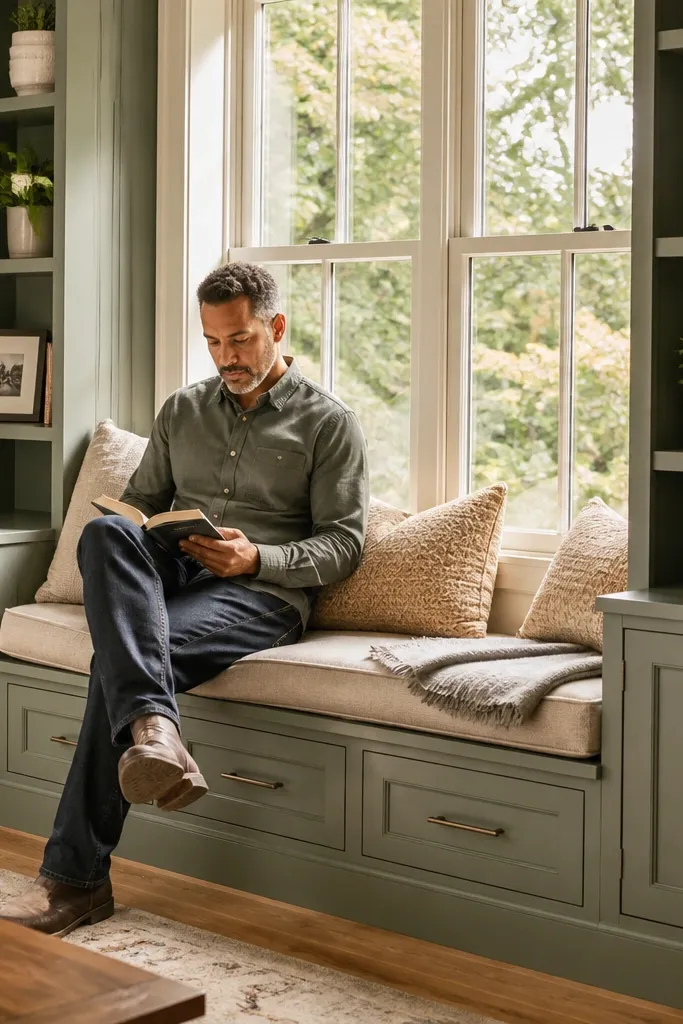
This is one of the prettiest ways to get year-round built-in storage because the shelves hug a natural focal point. On the sides of a window, built-ins look built-in with the right proportions, and the banquette or bench gives you a cozy reading corner. The toe-kick drawer is the secret weapon for living room storage: remote controls, batteries, and small season items fit there and stay hidden. The result is a warm, lived-in look without the clutter that shows up the minute you host guests.
1) Plan the built-in to align with window casing and keep the shelf height consistent with the bench top. Build a bench with a front panel that matches your trim, then frame two side shelf bays above it. 2) For toe-kick storage, cut a drawer opening just above the floor line, mount drawer slides, and use a shallow drawer box (about 3-5 in tall). Install the toe-kick face after drawers are tested for smooth travel. 3) Seal all cut edges and paint/stain with a durable finish so the area survives daily use.
Use a soft-close drawer slide rated for the drawer weight so the toe-kick storage feels luxury without squeaks.
Don’t trap the drawer with a tight toe-kick gap — clearance matters for smooth operation.
4. Mantel-height shelves with closed media cabinets
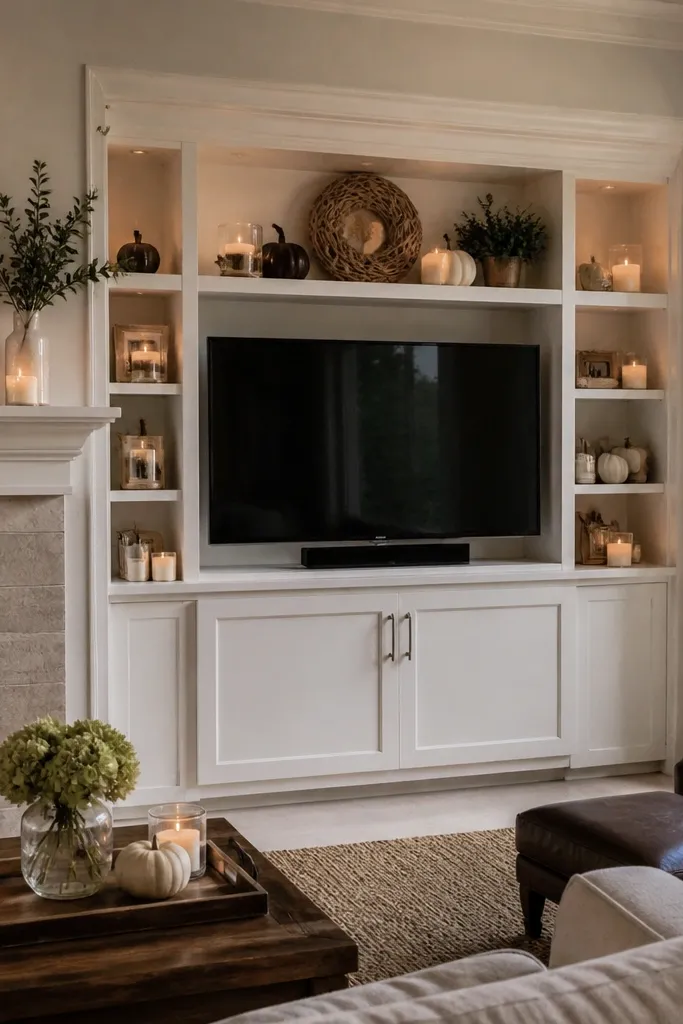
This setup makes the TV wall look intentional even when you’re not watching anything. You get open shelves at mantel height for decor and candles, while the media clutter stays behind closed cabinets. That separation is what keeps your living room storage from looking messy when winter accessories come out. It also makes the room look cozy because the eye reads a warm, framed center with hidden storage below.
Editor's notePut adjustable shelves in the media cabinets so you can reconfigure after you switch consoles or streaming devices.
1) Choose a TV cabinet width that matches your TV, then frame two side cabinets with a shared center opening for the TV. Build open shelves above the cabinets at about 52-58 in shelf line so decor sits at eye level. 2) Install doors that align with the cabinet face, and add adjustable shelves inside the media cabinets for game systems and remotes. 3) Add a simple backer board for mounting the TV and route wires through a framed chase behind the cabinet. Finish with wood stain or satin paint and add hardware that matches other trim.
Skip thisDon’t leave media items on open shelves — they kill the tidy look fast.
5. Corner wrap built-ins with rounded shelf ends
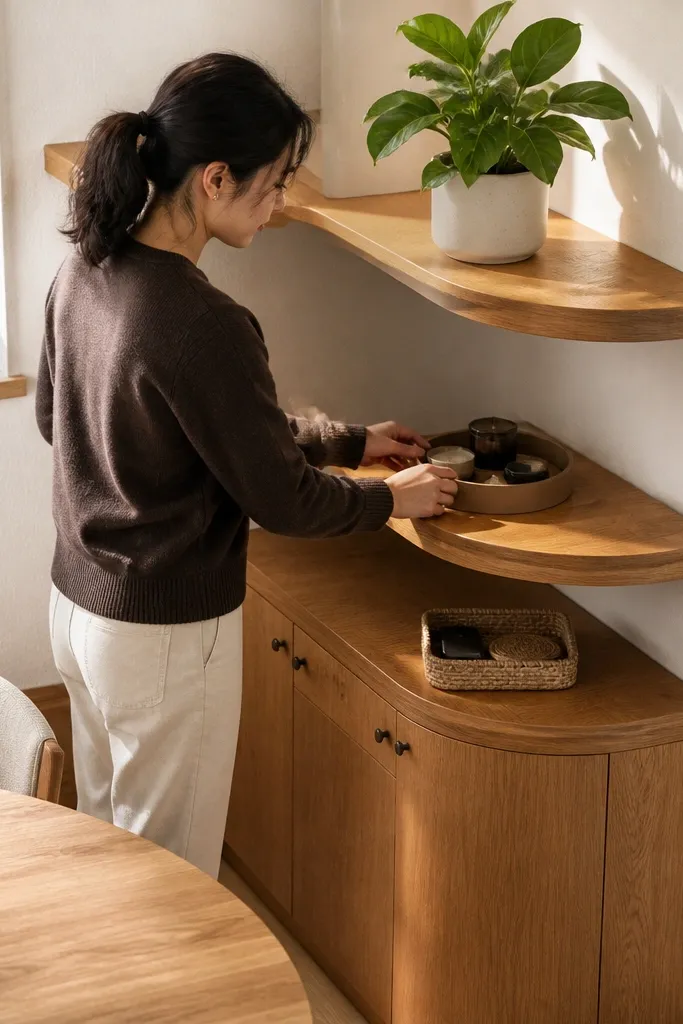
Corners waste space unless you treat them like a design feature. Wraparound built-ins with rounded shelf ends look softer and more cozy than sharp angles, and they give you storage where a normal shelf would be awkward. You can use the corner shelves for small plants, baskets, or a rotating tray for keys and coasters. The rounded edges also make the built-in feel custom, not DIY-with-scraps.
1) Build the corner frame using 3/4-in plywood for the back and sides, then cut rounded shelf ends with a template. Keep the corner shelf depth consistent so baskets sit flat. 2) Install shelves starting from the corner outward, using a level and spacer blocks to keep shelf lines straight across both walls. 3) Add a face trim that wraps the corner smoothly and finish with paint or stain plus a clear topcoat.
Use a template for every rounded shelf end so the curves match and the whole run looks planned.
Don’t wing the curve sizes — one mismatched shelf makes the corner look DIY.
6. Picture rail shelves with hidden behind-art storage
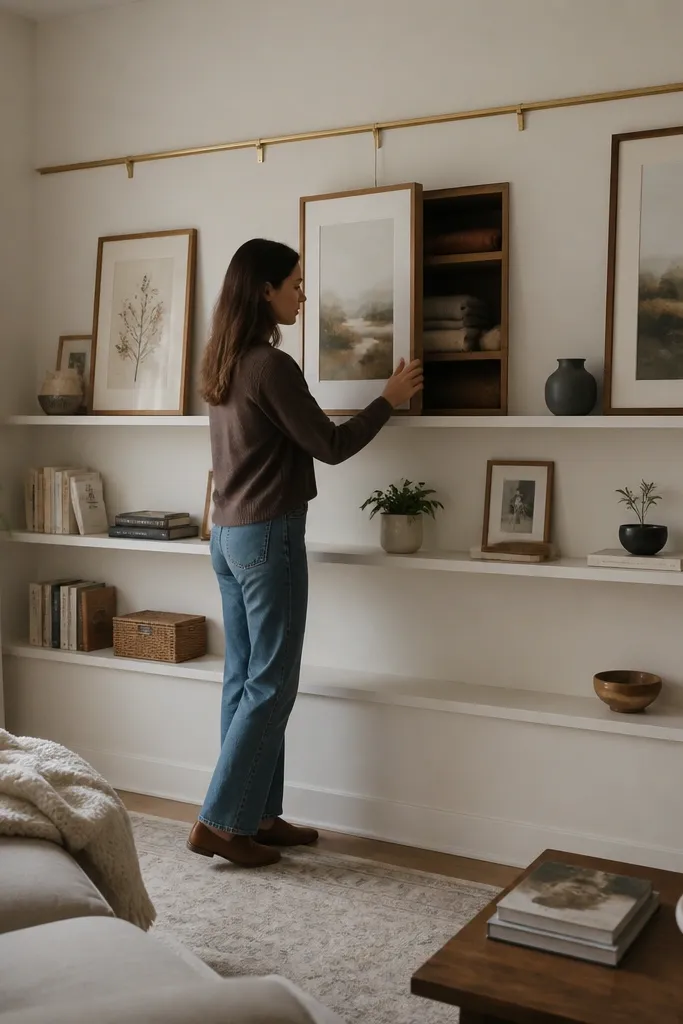
This is a clever way to keep living room storage out of sight while still showing your style. A picture-rail style built-in uses a slim top rail and evenly spaced shelves that look like a gallery wall. Behind one section, you add a removable panel behind a framed print or a faux panel so you can stash seasonal items and small clutter. It’s photogenic because the front reads clean lines, and it’s practical because you get one hidden pocket without turning the whole wall into cabinets.
Editor's noteMake the hidden panel open toward the wall, not outward, so it stays flush and doesn’t snag decor.
1) Install a sturdy ledger rail and build a long shelf run with 3/4-in plywood shelves at 10-12 in depth. Use consistent spacing (about 12-14 in clear height) so the wall looks intentional. 2) Choose one shelf bay as the access bay and install a pull-off panel behind a frame-sized opening. Mount the panel with magnets or a concealed latch so it opens without sagging. 3) Finish the front like a gallery: paint to match trim, then add a matte clear coat to protect against fingerprints.
Skip thisDon’t put the access panel in a high-traffic visible spot — it’ll get noticed every time you open it.
7. Floating shelves with thick face frames and cabinet bottoms
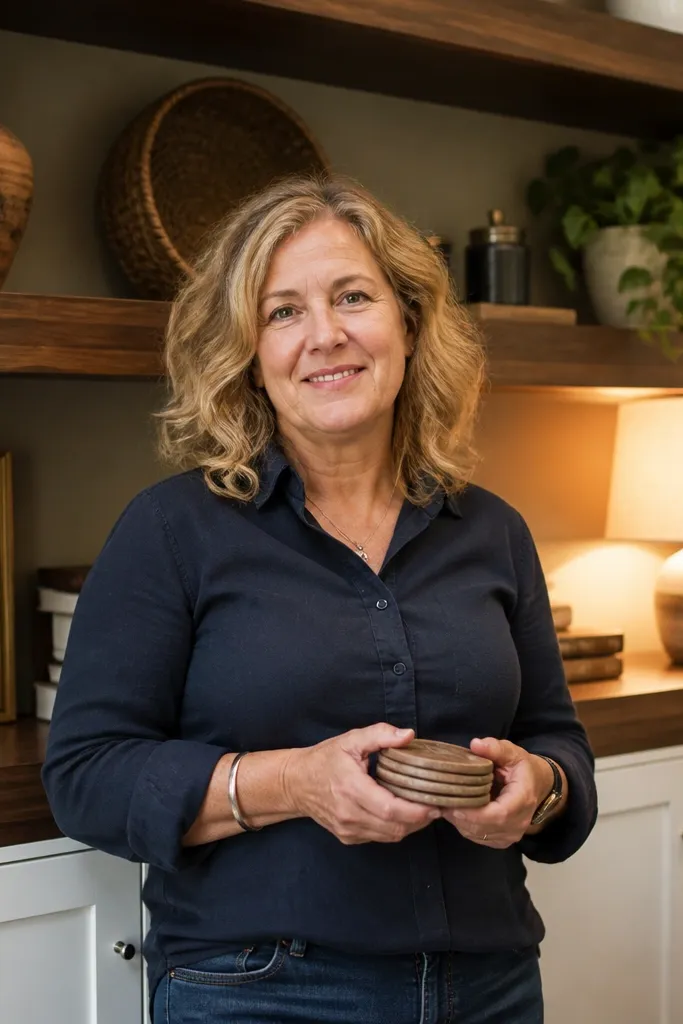
This is the “cozy but clean” approach: shelves look light, but the storage below is serious. Thick face frames make the shelves feel solid, while cabinet bottoms hide everyday clutter. The aesthetic comes from contrast: open shelves show curated items, and the lower doors keep mess out of the camera frame. It works in living rooms where you want built-in storage but still want the room to breathe.
1) Build the bottom cabinets first with plywood boxes and install door hinges before you mount shelves. Make the shelf depth 10-12 in and keep the shelf supports hidden behind a face frame. 2) Use a thick face frame profile (about 1.5-2 in) to create the built-in look, then anchor everything to studs. 3) Add a consistent back panel color so the open shelves don’t look unfinished. Finish with satin paint and add magnetic catches to keep doors aligned.
Use a single color for the back panel behind shelves so the wall doesn’t look patchy behind decor.
Don’t skip door alignment checks before painting — misaligned doors scream DIY.
8. Sculpted alcove shelves with fluted side panels
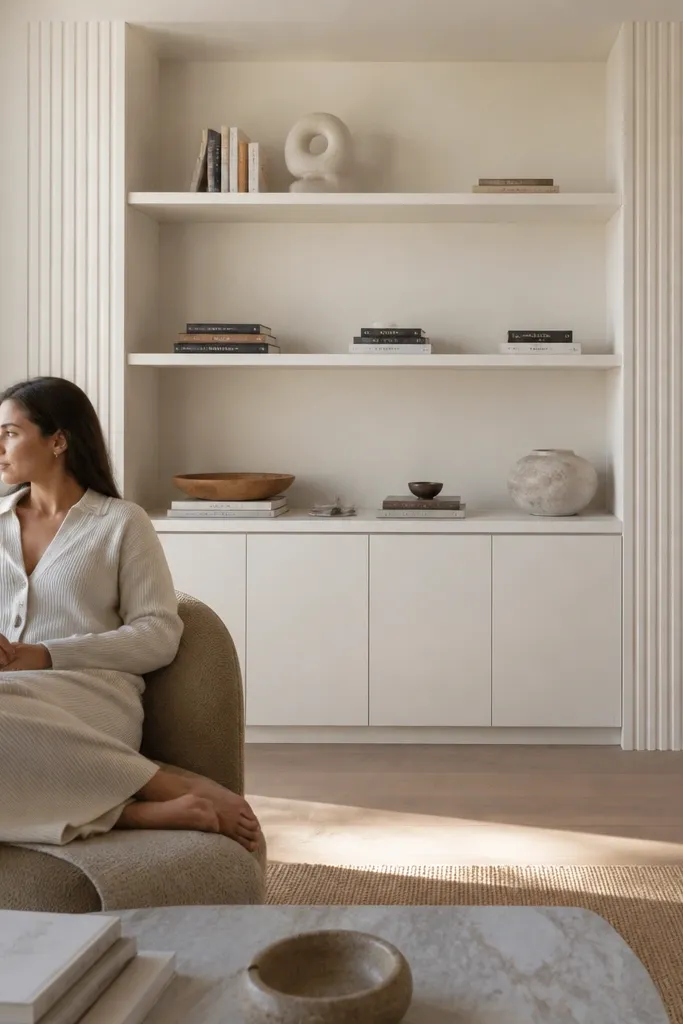
Alcoves are already architectural. If you frame them with fluted side panels and a simple shelf run, the storage looks custom without needing complicated joinery. The fluting adds texture that photographs well, and it hides the edges where shelves meet the wall. You get year-round built-in storage because alcove shelves are sized for decor plus one or two deep basket sections for seasonal items. It’s cozy because the texture and warm finish make the room feel softer.
Editor's noteUse a matte paint on the fluted panels so glare doesn’t wipe out the texture in photos.
1) Measure the alcove and build a fluted side panel stack using MDF strips or pre-made fluted trim, then attach to plywood backers. Install shelves with 10-12 in depth for display and one deeper bay at 16-18 in for baskets. 2) Add a back panel and install a small LED strip behind the top shelf line, wired through a switch or plug. 3) Caulk edges, sand flush, then paint the panels and shelves with a satin sheen so the fluting stays crisp.
Skip thisDon’t oversize the flutes — if the grooves are too thick, it looks like cheap paneling.
9. Low media credenza with upper open shelves
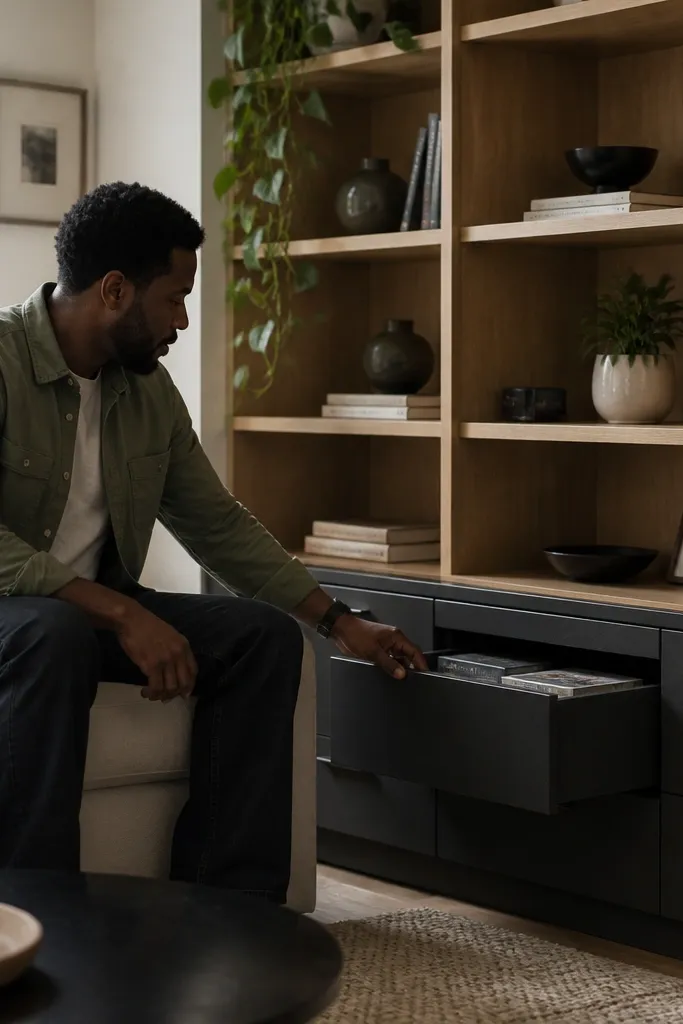
This design keeps the room grounded and cozy by lowering the storage footprint. A low credenza handles media, games, and board storage, while upper shelves show decor and books without making the wall feel tall and heavy. The look stays tidy because drawers and cabinets are right where people toss odds and ends. It’s also great for living rooms with lower ceilings because you get vertical storage without stacking everything up high.
1) Build a credenza box with drawers sized for remotes, cables, and small accessories, then add two cabinet doors for bulk items. Put open shelves above at 10-12 in depth and keep the shelf line spacing consistent for a clean grid. 2) Anchor the unit into studs and add a back brace so it feels solid. 3) Finish with a durable topcoat on the credenza top, then add a slim LED puck light under the top shelf to highlight decor.
Use drawer organizers with fixed sections so board-game pieces don’t migrate into random corners.
Don’t rely on open shelving for media clutter — it turns into a visual mess fast.
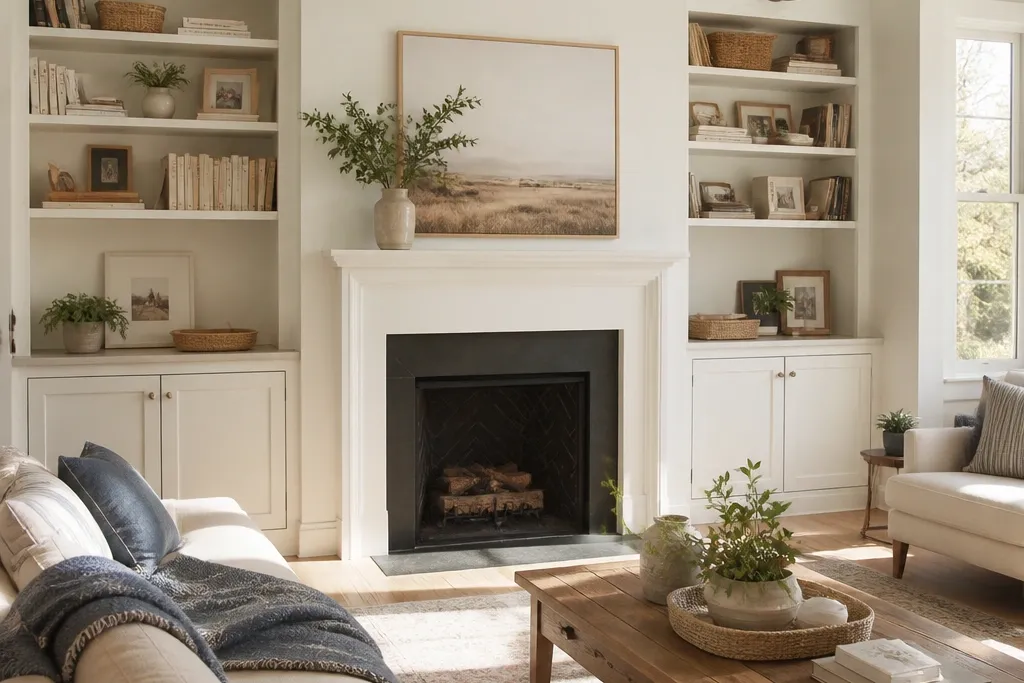
10. Symmetrical fireplace surround shelves with cabinet sides
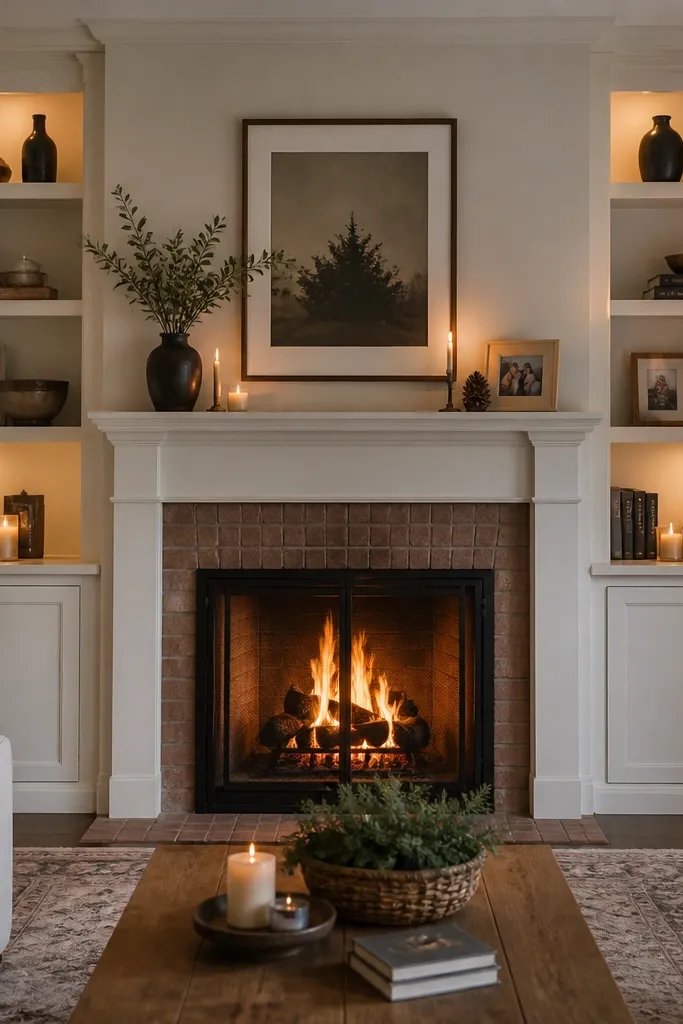
Fireplace walls are perfect for year-round built-in shelves living room storage because you already have a focal point. Build shelves at each side height so you can keep seasonal decor near the mantle without the clutter spreading across the room. Add cabinet sides for logs, blankets, or vacuum attachments, and keep the open shelves for framed photos and candle holders. The symmetry looks cozy and polished even when your decor changes from fall to winter.
Editor's noteUse adjustable shelves on the cabinet sides so blanket sizes and storage bins can change over the year.
1) Frame the built-in around the fireplace with two cabinet bays on either side and open shelves above or beside them. Use 14-16 in clear height in cabinet bays for bulky items and 11-12 in clear height for shelf bays. 2) Install shelves with proper support spacing so they don’t sag under books and ceramics. 3) Finish with heat-safe materials where needed near the fireplace, and seal the rest with a wipeable topcoat.
Skip thisDon’t place heavy shelves too close to the fireplace without thinking about clearance and heat.
11. TV console with vertical slat doors and open cubbies
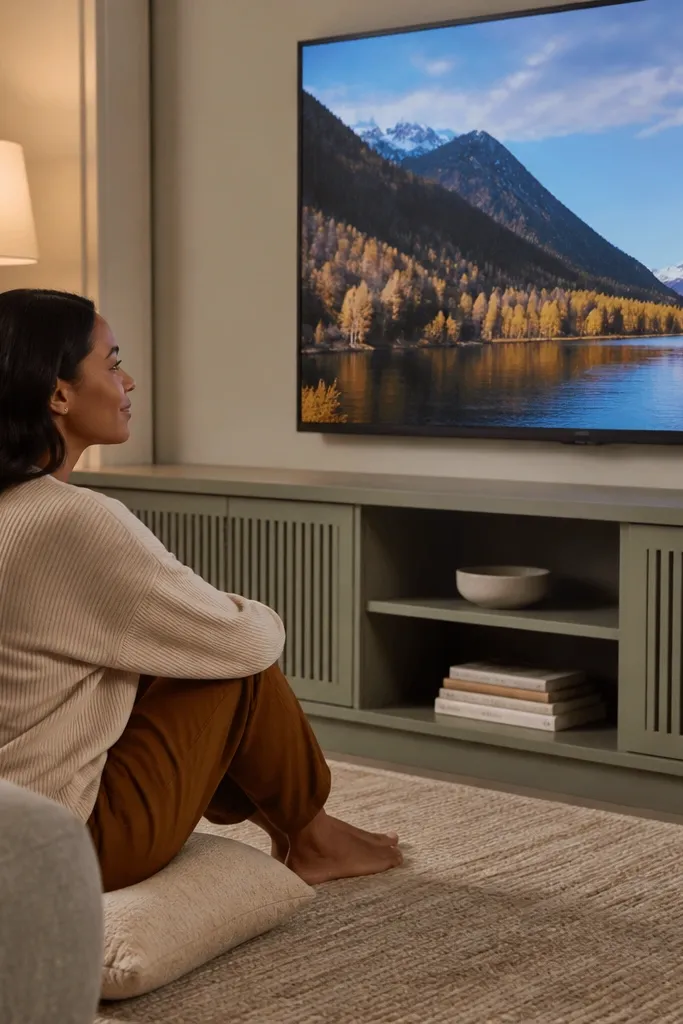
Slat doors add texture and softness that reads cozy instead of harsh. With a TV console, you get open cubbies for styled items and slatted doors for clutter you don’t want to see. The slats also hide small items better than flat doors because the lines break up visual noise. It’s a strong choice when you want storage that looks designed, not generic cabinet boxes.
Editor's noteStain the slat doors darker than the frame so the texture reads clearly.
1) Build a console frame with open cubbies centered and cabinet sections on the sides. Set cubby depth at 10-12 in for decor, and keep cabinet interior depth at 16-18 in for baskets. 2) Make slat doors using a frame with evenly spaced slats, then attach hinges and adjust for a consistent reveal. 3) Route cords through a center chase behind the TV and mount a power strip inside the cabinet with a cable path to the back.
Skip thisDon’t use slippery gloss paint on slat doors — glare makes the pattern look cheap.
12. Gallery grid shelves with adjustable dividers
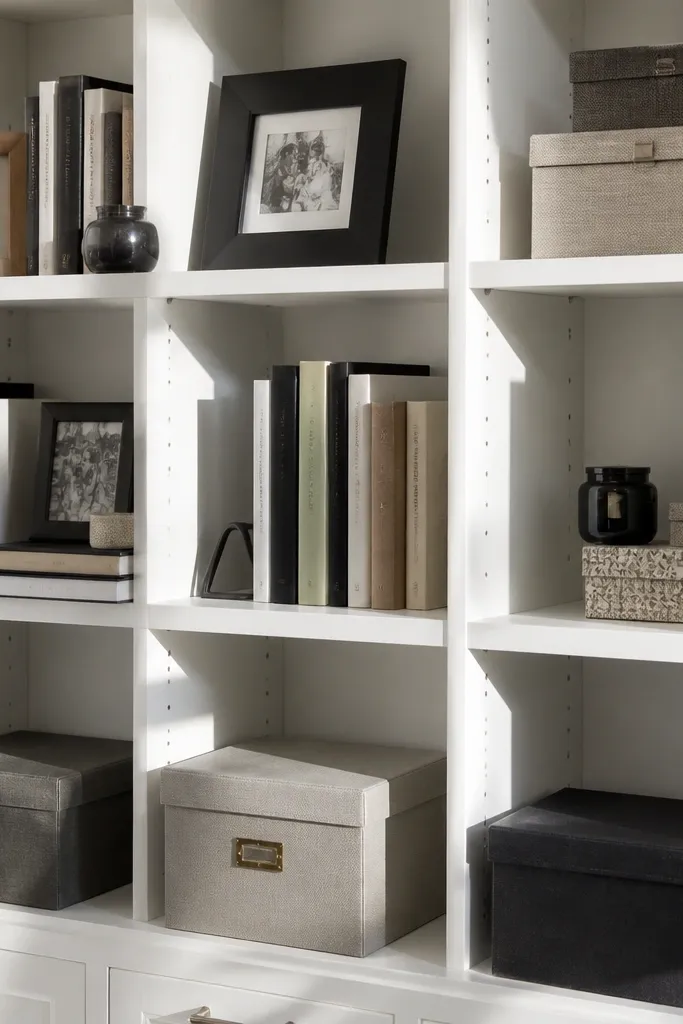
If you like swapping decor and want your year-round built-in shelves living room storage to stay organized during every season change, adjustable dividers are the move. This built-in uses a grid shelf system with modular compartments sized for books, small framed photos, and storage boxes. The look is clean because the grid lines are straight and consistent, and the dividers keep small items from sliding into each other. It’s especially good for living rooms where you rotate seasonal candles, holiday books, and rotating gallery frames.
1) Frame a wall grid using 3/4-in plywood uprights and install shelf ledgers at consistent intervals to create repeatable bays. Use 10-12 in depth for the grid shelves and make the compartments narrow enough for small boxes. 2) Install adjustable dividers with track systems or removable cleats so you can reconfigure without rebuilding. 3) Finish the wall face and add a back panel color that matches your trim so the grid looks crisp behind objects.
Label the underside of dividers with pencil marks before you install so future reconfiguration is fast.
Don’t skip a back panel — empty space behind the grid makes it look unfinished and visually busy.
13. Corner bar shelves with bottle storage drawers
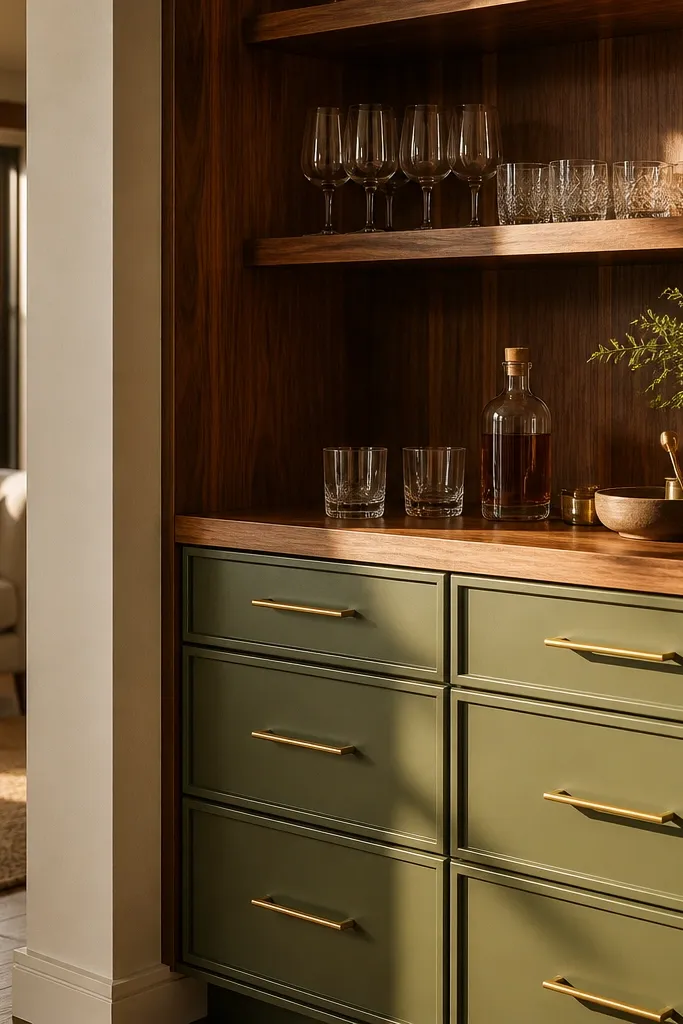
A corner bar built-in looks fun and cozy while still solving real living room storage needs. You get open shelves for glasses and small decor, plus drawers sized for bottle storage and mixers. The drawer approach keeps bottles from becoming a visible mess, especially when you’re hosting and the room fills up fast. It’s photogenic because glassware looks good behind clean lines, and it stays organized because drawers control the clutter.
1) Build a corner unit with shelves at 10-12 in depth for glasses and small items, and add a drawer section below with interior depth of 16-18 in for bottles. Make drawer width wide enough for bottle spacing without forcing awkward angles. 2) Use a backer board behind shelves and drill wire routing holes for any small lighting or charging. 3) Install drawer slides, test alignment, then finish the face with stain or paint and add a simple pull style.
Use a bottle divider insert so bottles don’t clack and slide when you open drawers.
Don’t put bottles on open shelves — you’ll see labels and clutter every day.
14. Sofa-back shelves with low-profile storage pockets
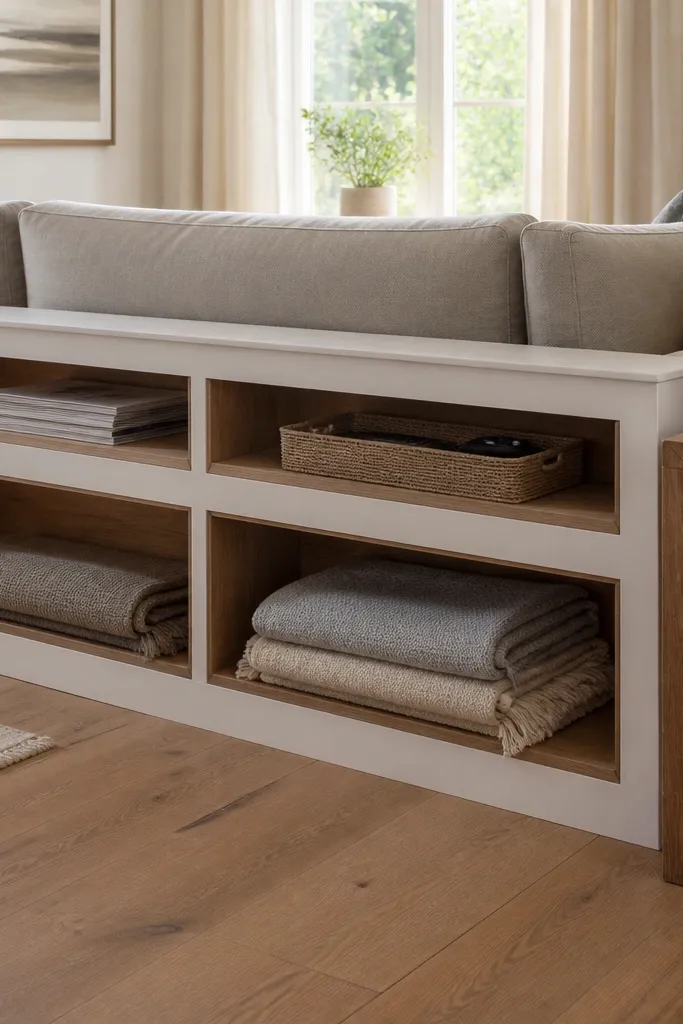
When the wall behind your sofa is blank, it becomes the dumping ground. Sofa-back built-ins solve that by creating low-profile storage pockets that feel like part of the room, not an add-on shelf. Keep the shelves shallow so they don’t look bulky behind seating, and use baskets for remote controls, magazines, and throw blankets. The look stays cozy because the storage sits close to the wall line and doesn’t visually crowd the room.
1) Measure the sofa height and plan shelf placement so you don’t block sight lines. Build shelves at about 8-10 in depth behind the sofa and set shelf line heights around 18-30 in for easy reach. 2) Add shallow basket compartments and install a simple face trim to hide the basket edges. 3) Anchor the built-in into studs and finish with satin paint for wipeable everyday living room storage.
Use felt or rubber shelf liners under baskets so they don’t rattle when you move items.
Don’t make shelves too deep behind a sofa — they create a visual wall.
15. Asymmetrical floating shelves with panel door blocks
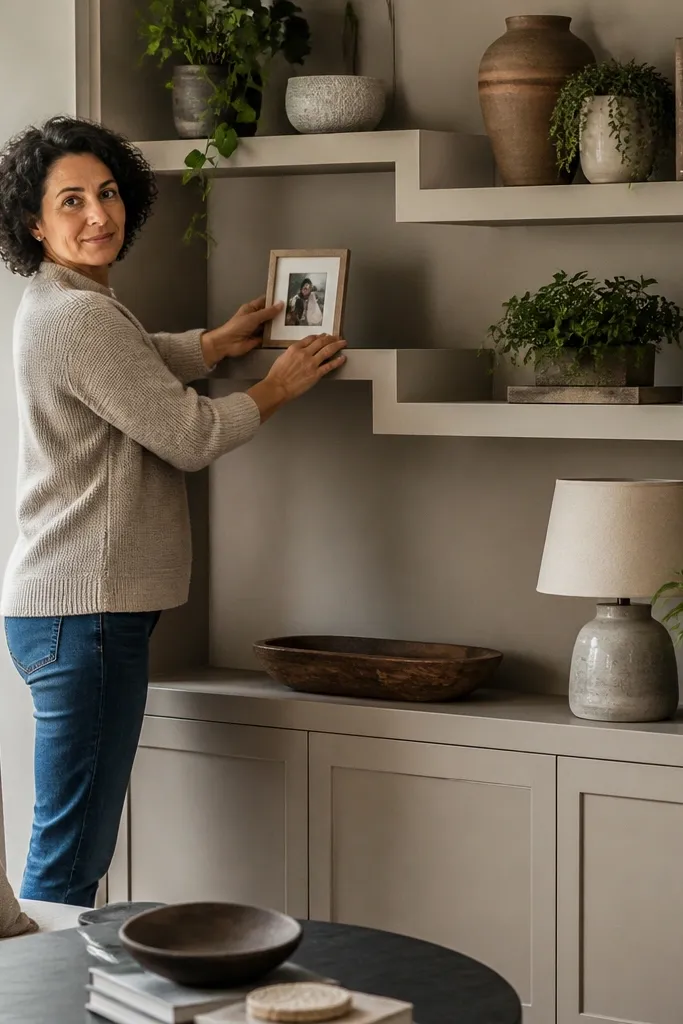
Asymmetry reads modern and cozy when it’s done with restraint. This design places shelves at different heights to create a natural styling rhythm, then uses panel door blocks to hide the stuff you don’t want on display. It’s great for living rooms with a fireplace, entryway, or awkward wall that can’t handle a strict grid. The panel doors keep the storage functional while the open shelves stay photogenic.
Editor's notePut your “mess magnets” like chargers and coasters inside the door blocks, not on the open shelf edges.
1) Mark a layout on the wall based on your largest decor pieces, then space the shelves at 10-12 in depth with clear heights that match your items. Build a few open shelves and a few small door sections with panel doors. 2) Install a hidden French cleat or ledger supports so the shelves sit level and don’t sag. 3) Finish the doors and shelves in the same color and add hardware that matches your existing lighting fixtures.
Skip thisDon’t randomize shelf heights without a plan — chaos looks like a mistake.
16. Built-in media fireplace hybrid with warming drawer
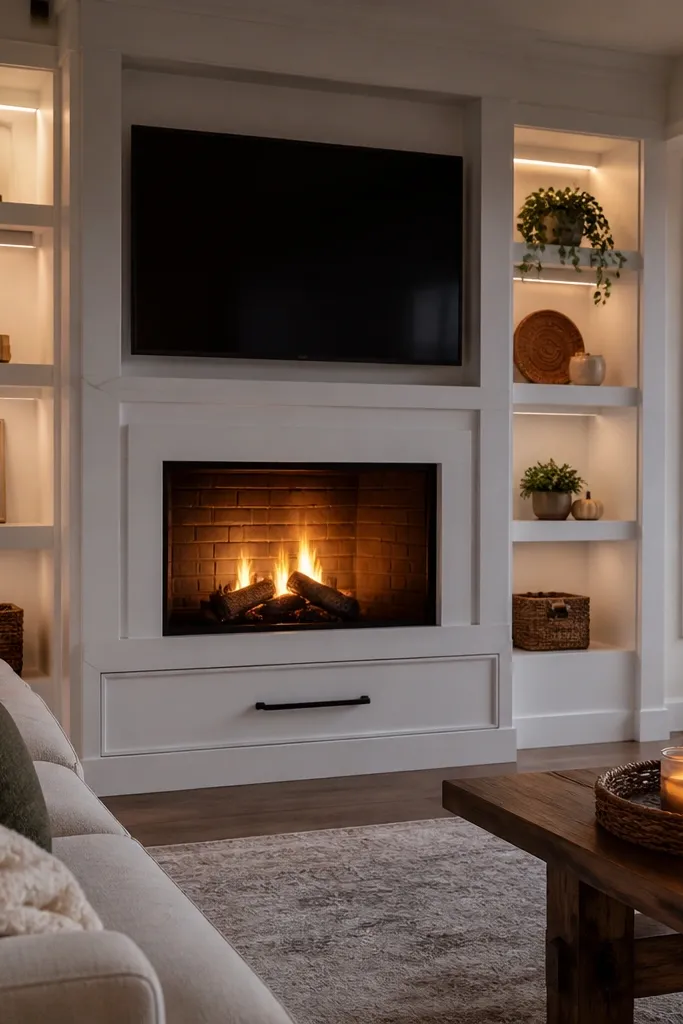
This is for living rooms where you want cozy storage and a functional center. Combine a fireplace or mantel-like focal point with built-in shelves and a warming drawer for blankets, mugs, or seasonal items. The warming drawer keeps small cozy necessities ready without taking up cabinet space. It looks cohesive because shelves are framed around the center, and the drawer adds a premium, intentional detail.
Editor's noteUse a matte finish on the drawer face so the metal pull doesn’t reflect harsh highlights.
1) Build the surrounding frame with two shelf runs on the sides and a drawer bay below the center. Use 10-12 in shelf depth for decor and books, then plan a deeper cabinet bay for bulky items. 2) Install the warming drawer with the correct electrical setup and follow the manufacturer’s clearances. 3) Finish the entire built-in with a durable coat, then add lighting under the top shelf for warm glow.
Skip thisDon’t place the warming drawer too low relative to the mantel — it should feel like part of the built-in, not an add-on.
17. Built-in window seat storage with book shelves above
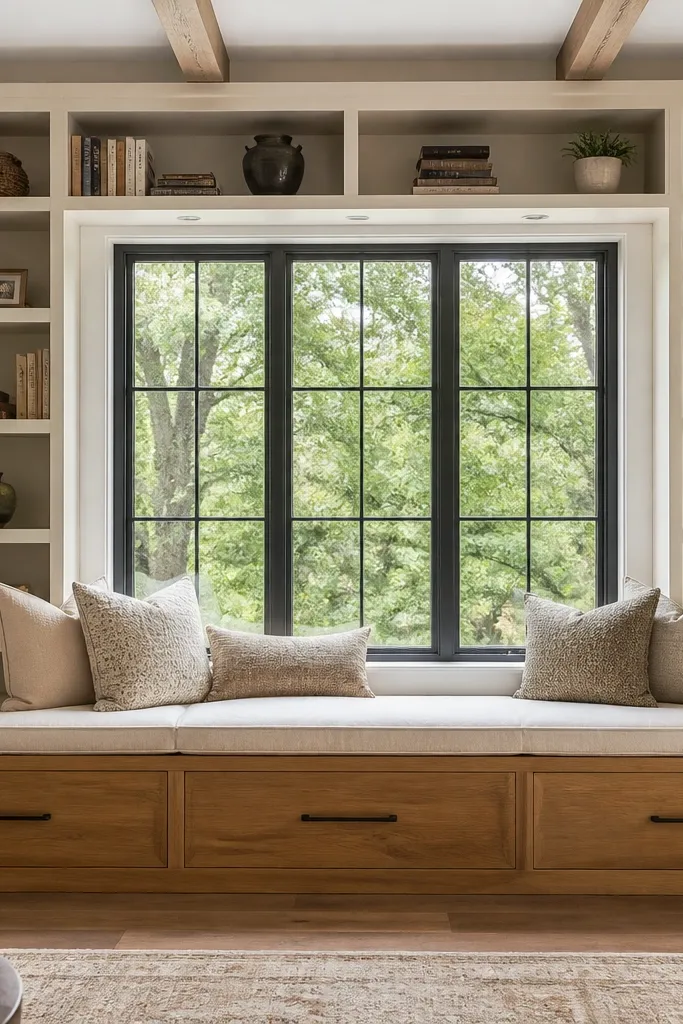
This one nails year-round built-in shelves living room storage because it combines seating, storage, and display in one line. The window seat storage drawers handle bulky seasonal items like extra blankets and holiday wrapping, while the shelves above keep books and decor close at hand. It’s cozy because the seating makes the storage feel like comfort, not chores. Visual payoff is strong: you get a continuous built-in run that frames the window and looks custom.
Editor's noteUse soft-close drawer slides so the window seat feels quiet and calm.
1) Build the window seat carcass and add drawers or lift-top storage with plywood boxes and slide hardware. Keep the drawer height around 6-10 in so blankets fit without bending. 2) Frame shelves above the seat with 10-12 in depth and consistent shelf spacing for books. 3) Install a durable top finish on the seat surface and seal drawer interiors for easy wipe-down after dust.
Skip thisDon’t store heavy items on the seat top — protect the finish and hinges.
18. Open shelves with hidden pull-out magazine racks
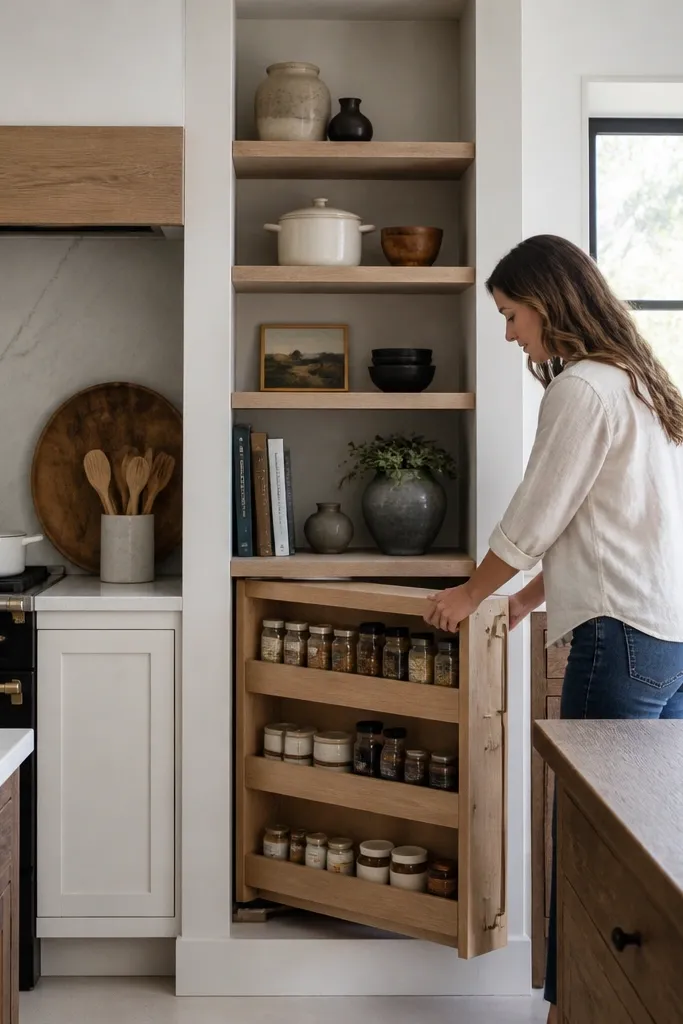
This is the cleanest way to keep magazines and catalogs from taking over your coffee table. The shelves look open and styled, but one bay has a pull-out rack that holds magazines flat. When the rack is pulled, you still get a tidy look because items are contained and aligned. It’s photogenic because the front face stays minimal, and it’s practical because you can reset the shelf in seconds when guests come over.
Editor's noteMount the rack rails level even if the shelf face is perfectly level — the rack needs to sit true for flat magazine storage.
1) Build an open shelf bay at 10-12 in depth and leave a section sized for a magazine rack mechanism behind the face. Use a pull-out rack frame that mounts to the sides inside the built-in. 2) Install a concealed handle or lip and test the pull-out clearance so it glides smoothly without rubbing. 3) Finish the face to match the rest of the built-in and add a backer board to hide the mechanism when closed.
Skip thisDon’t use a rack that’s too tall — it will steal space from books and look awkward.
19. Double-height storage with top cabinet and bottom drawers
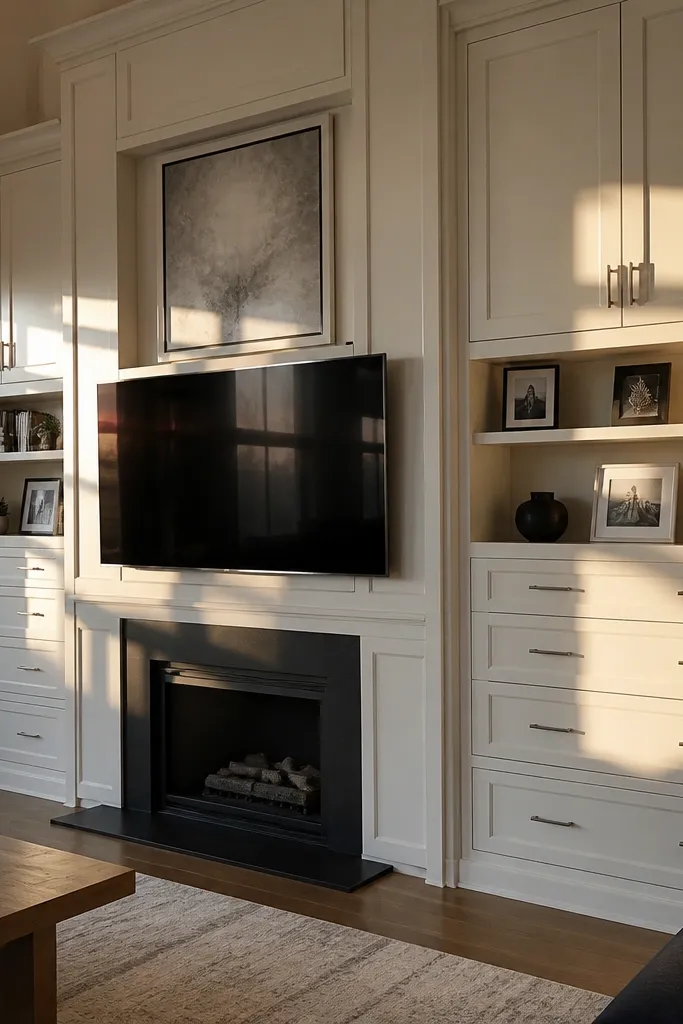
Double-height built-ins look expensive and they solve storage problems fast because they separate bulky items from everyday ones. Use a top cabinet for seasonal decor and holiday pieces, then bottom drawers for daily clutter like remotes, chargers, and kids' small items. The aesthetic stays cozy because the top cabinet doors create a clean block, while the drawers add a tidy, functional rhythm. It also helps keep the room year-round organized because you don’t have to dig through deep shelves to find what you need.
Editor's noteAdd felt liners to drawers so small items don’t slide around and create noise.
1) Frame a tall cabinet section with a top door and a bottom drawer section, keeping overall bay width consistent across the wall. Use interior heights around 18-22 in for top storage and 6-10 in for drawers depending on what you store. 2) Install a drawer slide system rated for the drawer weight and add adjustable shelves inside the top cabinet if needed. 3) Finish with matching paint or stain and add simple pulls that sit in line with the rest of your built-in hardware.
Skip thisDon’t put fragile decor in bottom drawers where it gets bumped when you open them.
20. Ladder-style shelving with enclosed bottom baskets
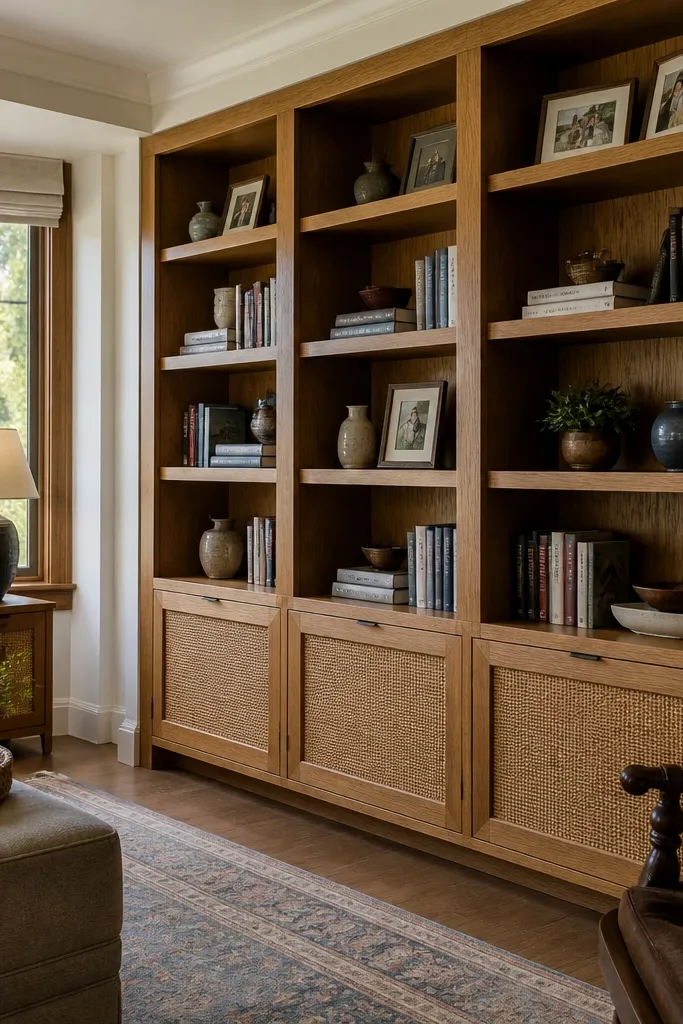
Ladder-style shelves add movement and a cozy, lived-in feel, especially when the wood tone is warm. This design keeps the top open so you can style books and framed photos, while the bottom has enclosed baskets for practical storage. It’s a good option if your living room needs a bit of character but you still want tidy storage year-round. The enclosed baskets hide visual clutter without making the whole wall look heavy.
1) Build ladder-style side frames with evenly spaced rungs, then attach shelves across at 10-12 in depth. Keep shelf clear heights around 12-14 in for books and decor. 2) Install a lower enclosed section with doors or a face front that holds baskets at 14-18 in depth. 3) Seal and finish with a matte clear coat so the ladder texture looks warm and doesn’t glare under lighting.
Use thicker side frames (around 1.5 in) so ladder shelves feel sturdy and don’t wobble visually.
Don’t leave the bottom open — baskets need containment to keep the room looking clean.
21. Hidden pantry-style pull-out drawers under shelves
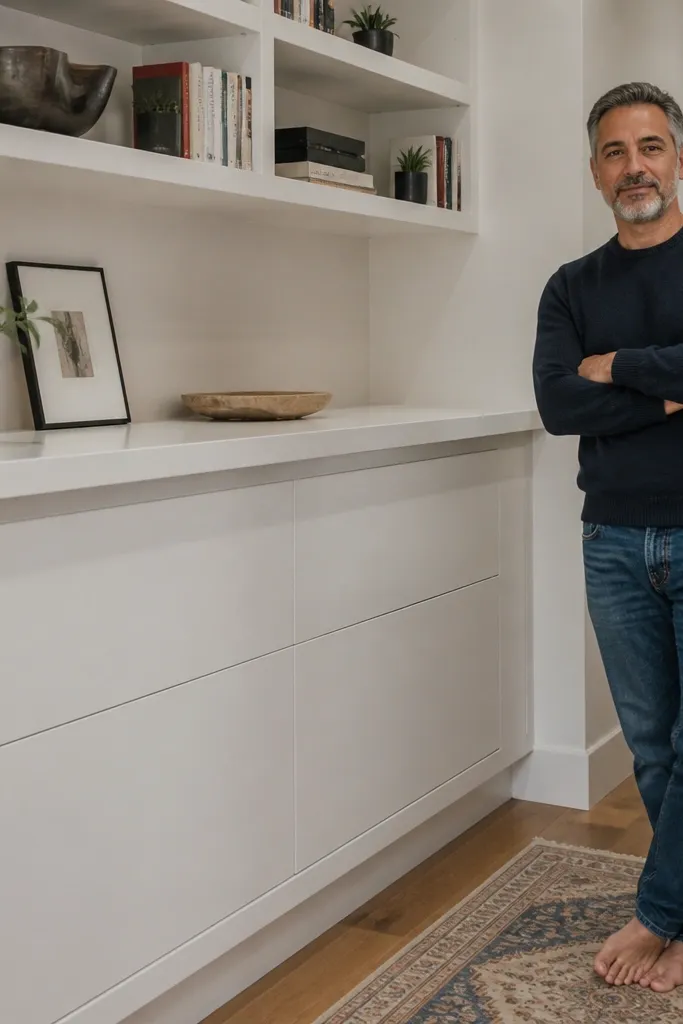
A lot of living room storage is actually small utility storage. This design hides pull-out drawers under shelves so you can store batteries, candle refills, coasters, and seasonal odds without cluttering the open areas. The front stays clean and photogenic because drawers disappear behind a solid face. It’s a strong choice for people who want a cozy look but also hate messy surfaces and open bins.
Editor's noteUse push-to-open or recessed pulls so the shelf face stays smooth and easy to wipe.
1) Frame the built-in with shelf boxes above and drawer cavities beneath, keeping the drawer height around 3-5 in for small utility items or 6-8 in for larger packs. 2) Install drawer slides and attach a face panel that lines up perfectly with the shelf front. Add handles on the inside of the face edge or use a push-latch style so the exterior stays minimal. 3) Finish with paint matched to the built-in and add a backer board behind drawers so the mechanism isn’t visible when closed.
Skip thisDon’t mount drawers too close to the shelf bottom — you’ll lose clearance for smooth travel.
22. Built-in corner fireplace mantel shelves with lower cabinet
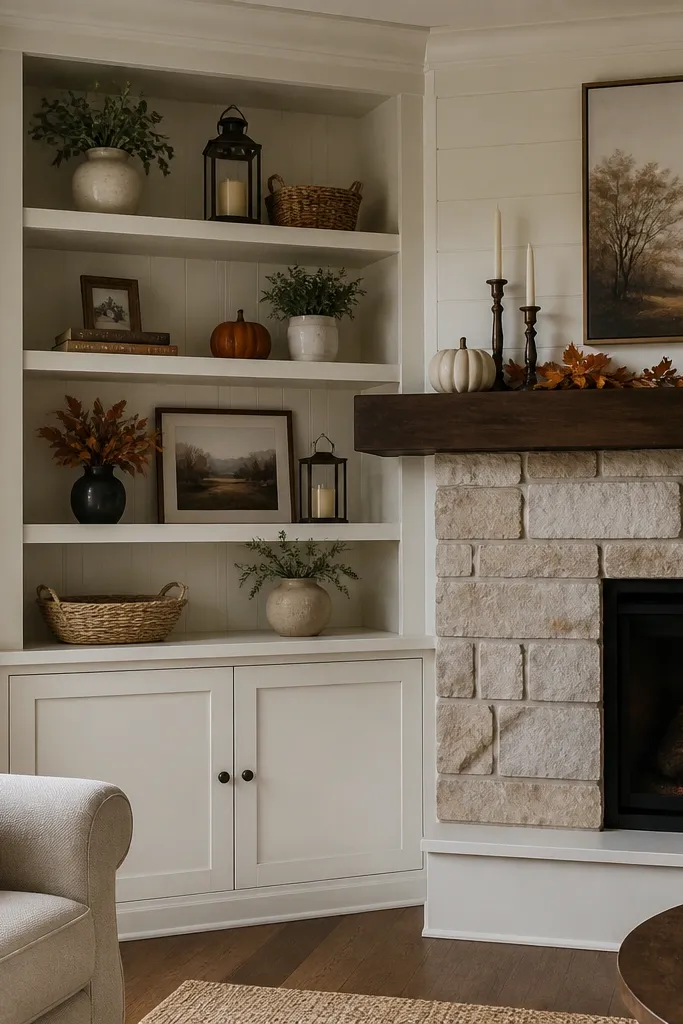
Corner fireplaces can look awkward without built-in framing. This layout builds shelves around the mantel area and adds a lower cabinet that hides blankets and extra decor. The shelf run is framed so the corner looks intentional, not like shelves were added after the fact. It keeps year-round built-in shelves living room storage tidy because you can swap decor on the mantel while blankets stay hidden in the cabinet below.
1) Frame the corner built-in with two side panels and a mantel shelf at the correct viewing height, usually around 54-60 in to the top shelf line. 2) Add a lower cabinet with adjustable shelf inside if you want flexible storage for folded blankets or seasonal items. 3) Anchor everything into studs and finish with trim that matches the room’s existing molding so the built-in reads cohesive.
Use a slightly darker stain or paint for the cabinet base so it visually anchors the shelves and feels cozy.
Don’t leave the cabinet interior unfinished — raw plywood looks messy through cabinet gaps.
23. Matte painted shelves with glass-front doors for collectibles
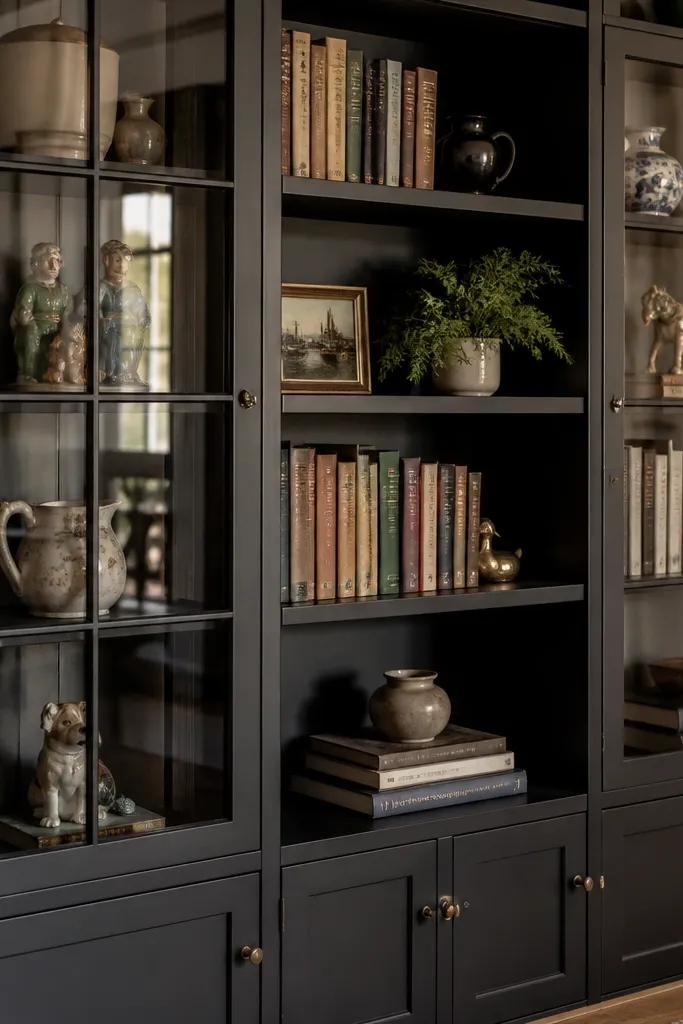
If you have collectibles you want to protect but still show, glass-front doors on built-ins make the living room storage look curated without being cluttered. Paint the frame matte and keep shelf depths consistent so the glass reads clean. Use open shelves for everyday books and closed glass bays for items you don’t want dusty, like ceramics or seasonal village pieces. The look stays cozy and photo-ready because the room has structure, not random stacks.
Editor's noteUse museum-style glass when possible for fewer reflections, especially if you have strong windows.
1) Build a painted frame using 3/4-in plywood and install glass-front door frames with appropriate glazing material. Set shelf depth at 10-12 in for the glass bays and add adjustable shelves so items fit. 2) For the open areas, install fixed shelves with consistent spacing so books don’t look scattered. 3) Add a soft back panel color inside the glass bays so items look cohesive, then seal all edges and paint with a durable matte or satin finish.
Skip thisDon’t use glossy paint around glass doors — glare makes the whole built-in look harsh.
24. Open shelves with cabinet doors only on the bottom row
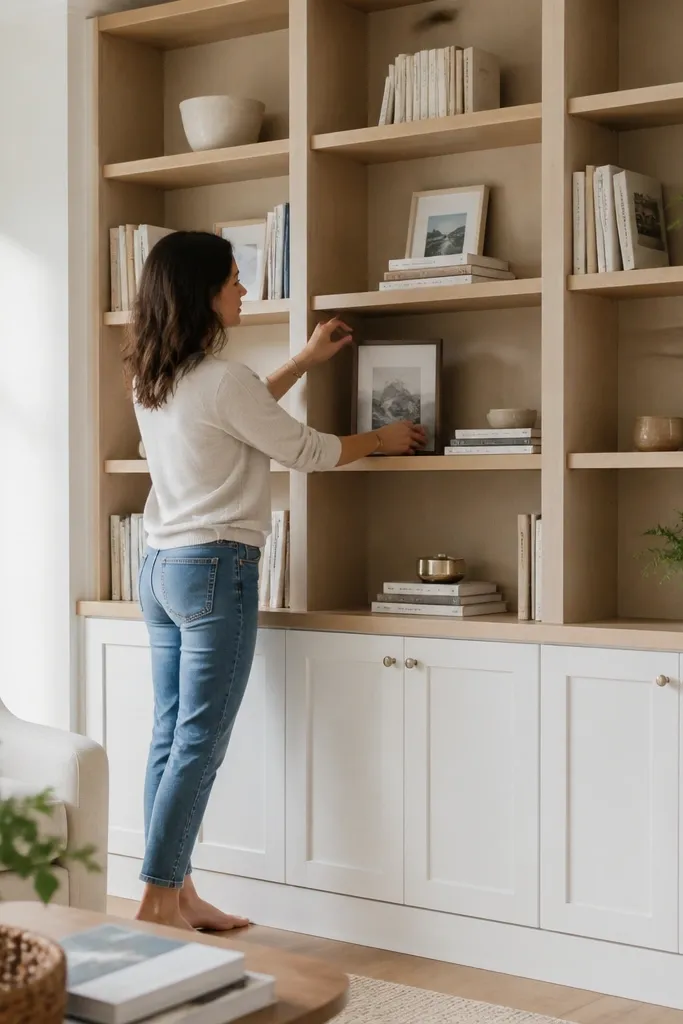
This is the simplest “pretty on top, tidy below” strategy. Keep the top shelves open for books, frames, and small plants, then add doors only on the bottom row so baskets and everyday clutter are hidden. You get a cozy, airy look because the open top doesn’t block light, and the closed bottom stops visual mess. It works for most living rooms because it’s easy to scale up or down across a wall.
Editor's noteChoose door panels that match your existing wall trim profile so the built-in looks like part of the room.
1) Build a consistent open shelf run at 10-12 in depth and install a bottom cabinet row with doors aligned to the shelf face. Use cabinet interior depth around 16-18 in so baskets fit without squeezing. 2) Anchor the built-in into studs and keep shelf spacing consistent so the open top looks intentional. 3) Install doors with soft-close hinges and add magnetic catches. Finish with paint or stain that matches your trim and seal edges for durability.
Skip thisDon’t put doors on random bays — one continuous bottom door line looks cleaner.
25. Built-in shelves with pull-down desk panel for living rooms
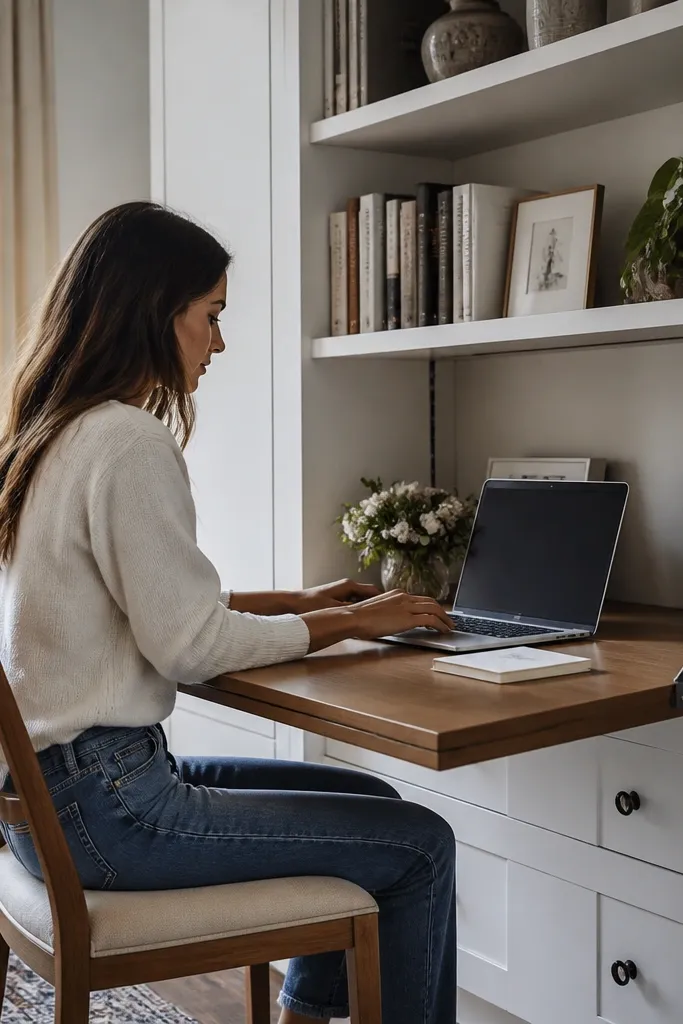
This design is for living rooms that need occasional work space without a separate desk. The shelves stay decorative when the desk is up, and the pull-down panel gives you a flat surface for bills, kids' homework, or planning. For year-round built-in shelves living room storage, the desk panel comes with hidden compartments for stationery and small supplies. It looks cozy because the desk disappears into the built-in and the wall keeps its clean, built-in lines.
Editor's noteUse a desk panel with a thicker top (about 3/4 in) so it feels solid and doesn’t flex when you write.
1) Frame a built-in shelf wall with one section sized for a pull-down desk panel, usually around 24-30 in wide depending on your needs. Build the shelf depth around 10-12 in and position the desk panel so it folds without hitting decor. 2) Install a heavy-duty pull-down desk hinge mechanism and add stops so the desk locks securely when down. 3) Add small drawers or cubbies inside the built-in for supplies and finish with a durable topcoat on the desk panel.
Skip thisDon’t mount the desk too low — you’ll hate using it and it will feel cramped.



