
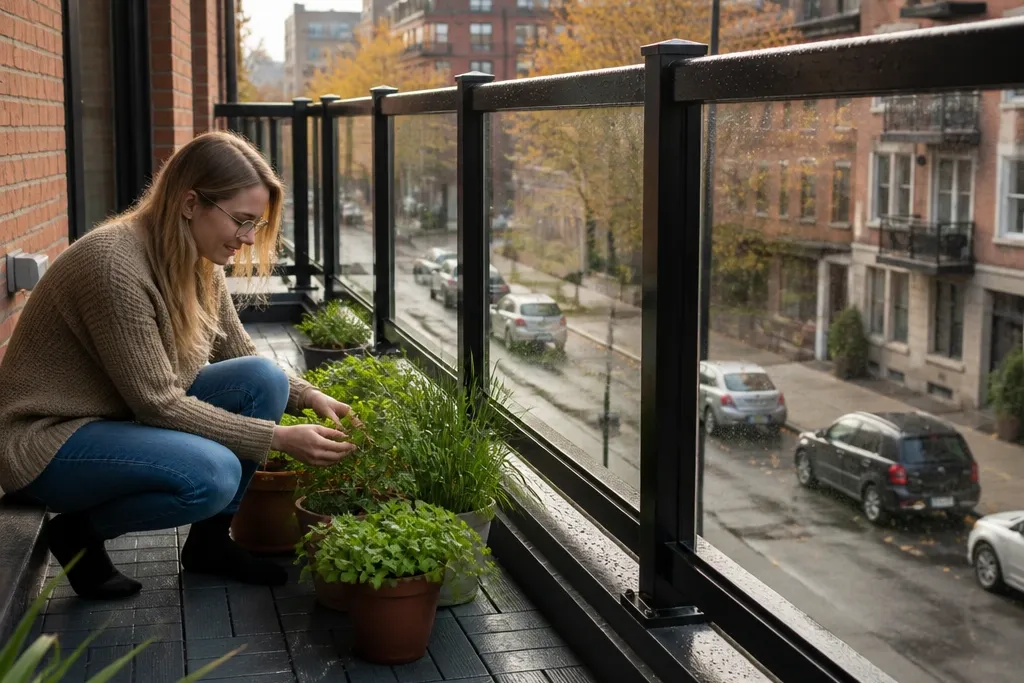
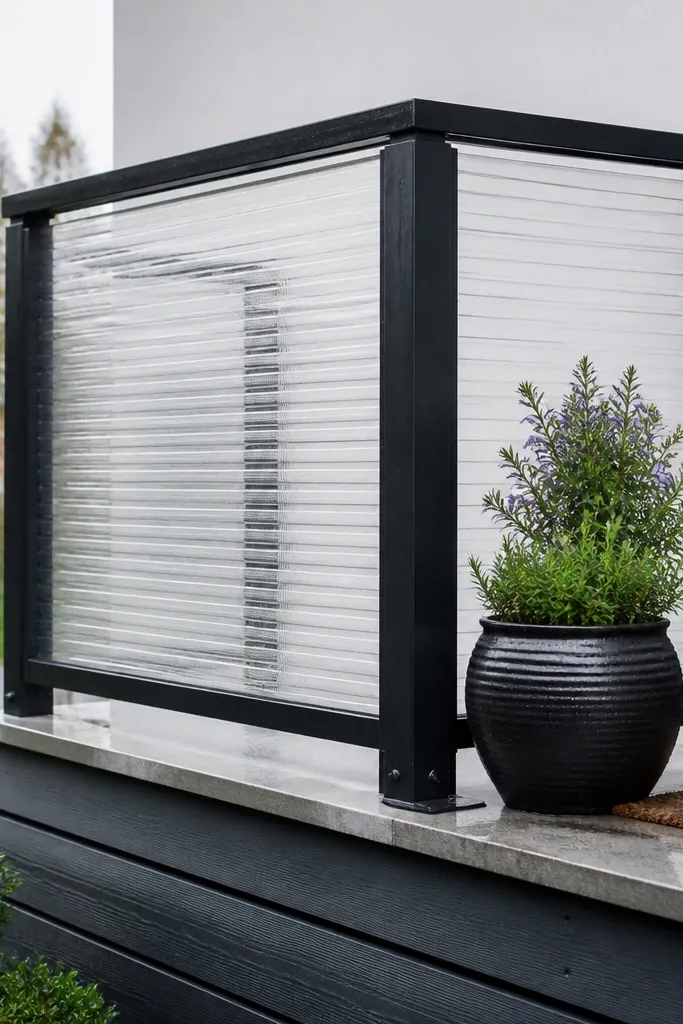
1. Powder-coated black steel frame with clear polycarbonate panels
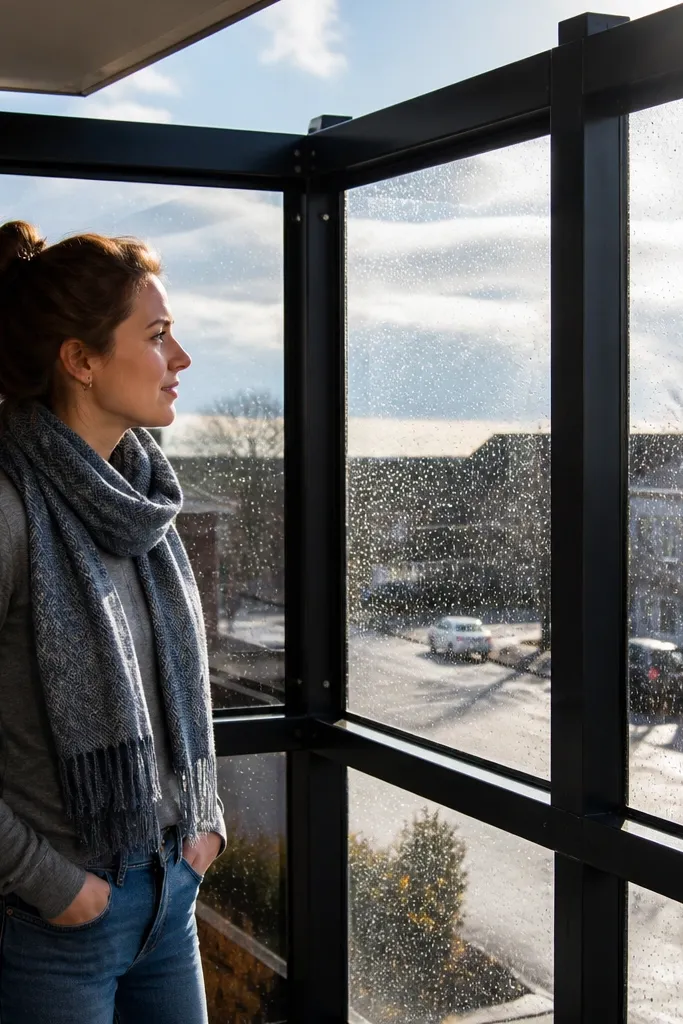
This is the clean, modern option when you want a railing that looks sharp but doesn’t block all the light. A black steel frame gives you straight lines and crisp geometry, while clear polycarbonate keeps the balcony feeling open and bright. It also hides the messy “in-between” gaps that happen when old railings don’t match perfectly. You get year-round usability because polycarbonate takes impact better than most plastics and it doesn’t yellow as fast as bargain acrylic. Skill level is medium: the build is simple, but getting panels square matters for a good finish.
1) Build a rectangular frame between posts using steel angle or flat bar, then test-fit clear polycarbonate sheets cut to panel openings. 2) Drill pilot holes and use exterior-rated stainless hardware with rubber washers to prevent vibration noise. 3) Apply exterior paint only to bare metal parts (primer first), then install panels and tighten evenly so the sheet doesn’t bow. Finally, add a top cap or trim strip to cover sharp panel edges.
Cut polycarbonate with a fine-tooth blade and keep the protective film on until the last step.
Don’t clamp polycarbonate metal-to-metal — vibration will crack it over time.
2. Cedar slat railing with a black steel top rail
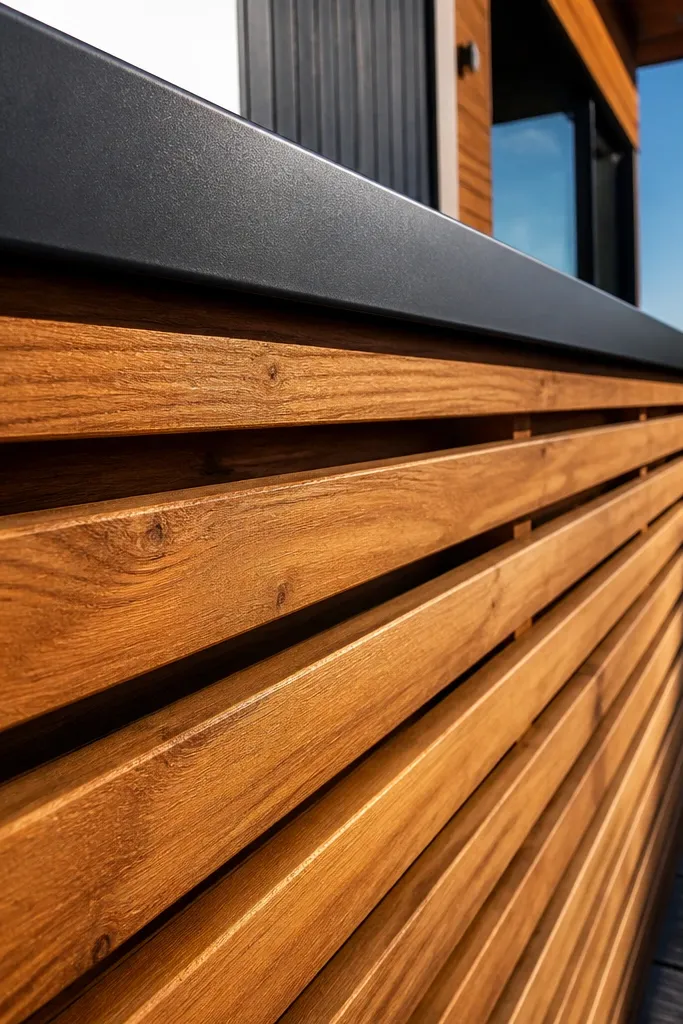
1) Install or attach black steel top rail brackets to your posts, then mark a straight centerline so slats stay level. 2) Cut cedar slats to the height you want privacy (many people aim for 42-48 inches) and space them with 1/2-inch spacers for a consistent rhythm. 3) Pre-drill slats and fasten them with exterior deck screws, then sand edges lightly and finish with an exterior stain/oil. Use a clear sealer only if your stain requires it; follow the product label for recoat timing.
If you want that warm, photogenic balcony look without fancy carpentry, cedar slats are the move. The black steel top rail makes it feel modern and keeps the top edge looking crisp even when the wood weathers. Cedar is naturally rot-resistant, and when you use exterior oil or stain made for decks, it holds up well against seasonal swings. This design also gives you partial privacy because the slats break sight lines while still letting air flow. It’s a DIY-friendly build because you’re working with repeatable slat spacing instead of ornate joinery.
Skip thisSkip face-screwing without pre-drilling — cedar splits fast near the ends.
Editor's noteUse two spacer blocks at once: one for spacing and one for keeping slats aligned while you screw.
3. Galvanized cable railing with a tensioned top wire
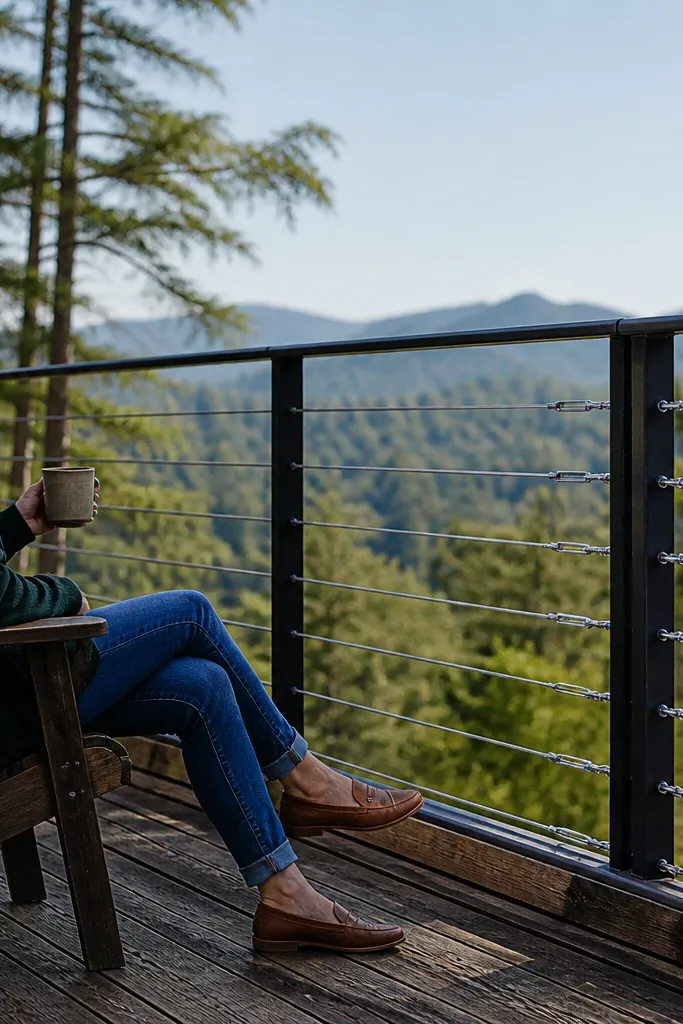
Cable railing looks expensive because it creates thin, uninterrupted lines. With galvanized or stainless cable, you get a year-round budget-friendly balcony railing that resists rust and stays visually light. It also works on uneven balconies because you can set tension and adjust turnbuckle alignment. The look is airy, and it photographs well because the railing doesn’t visually clutter the view. You still need solid anchoring points, but the build is straightforward if you follow cable spacing rules and measure carefully.
1) Use a cable railing kit matched to your post type, then mark evenly spaced holes or mounting points along the posts. 2) Thread cables through standoffs or terminals, then tension each run evenly with a turnbuckle until the cable is straight with minimal sag. 3) Crimp or swage terminals per the kit instructions, then cap ends to keep them safe and neat. Finish exposed hardware with a corrosion-resistant coating if your posts aren’t already protected.
Dry-fit every cable run and label them before tensioning so you don’t mix lengths.
Don’t eyeball spacing — cables look “off” even when the balcony is level.
4. DIY lattice privacy panel mounted to existing posts
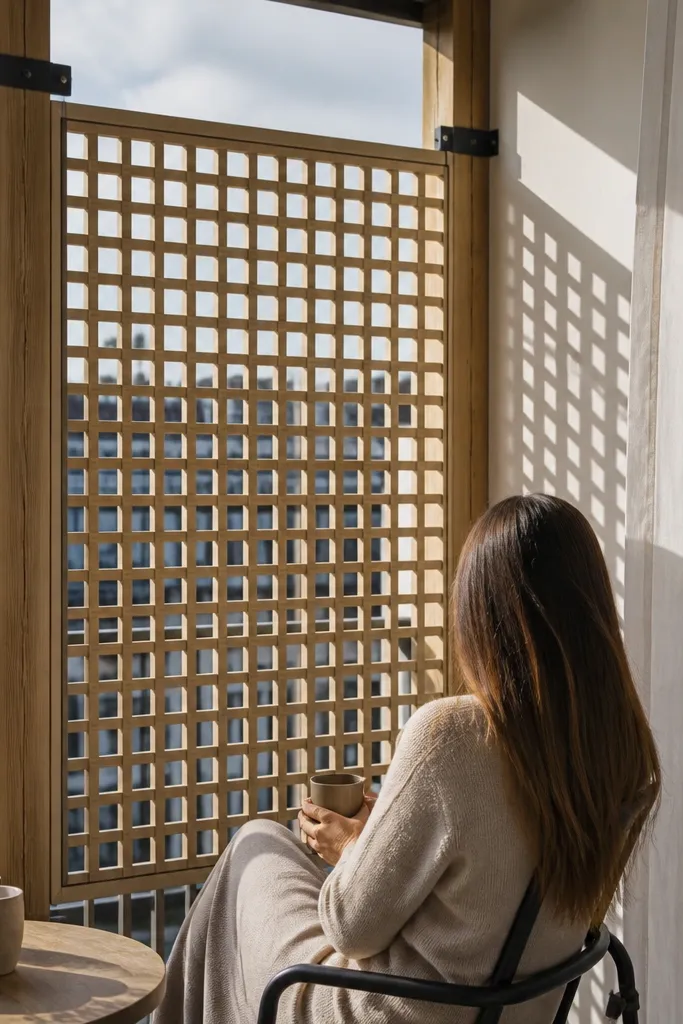
1) Measure the opening between posts and cut lattice panels to fit, leaving a small gap for expansion. 2) Mount a simple perimeter frame (1x2 or 2x2 treated lumber) to the posts using exterior screws and metal corner braces. 3) Attach the lattice to the frame with galvanized nails or screws, then prime and paint with exterior paint made for wood. Add a top trim board to cover the cut edges and keep water from sitting in seams.
This is the fastest way to make an ugly railing look intentional when you have existing posts or a basic top rail. Lattice panels add texture and a clear pattern that reads well in photos, and they give you privacy at eye level without fully blocking wind. Choose exterior-rated lattice and frame it lightly so it doesn’t warp. Painting it a crisp color makes it look custom even if the panels are store-bought. Budget-friendly matters here because you’re not rebuilding the whole railing — you’re upgrading what’s already there.
Skip thisDon’t mount bare lattice directly to metal without spacers — trapped moisture causes warping.
Editor's noteUse a semi-gloss finish for paint so the lattice lines catch light instead of looking flat.
5. Horizontal wood slats with a weatherproof stain grid
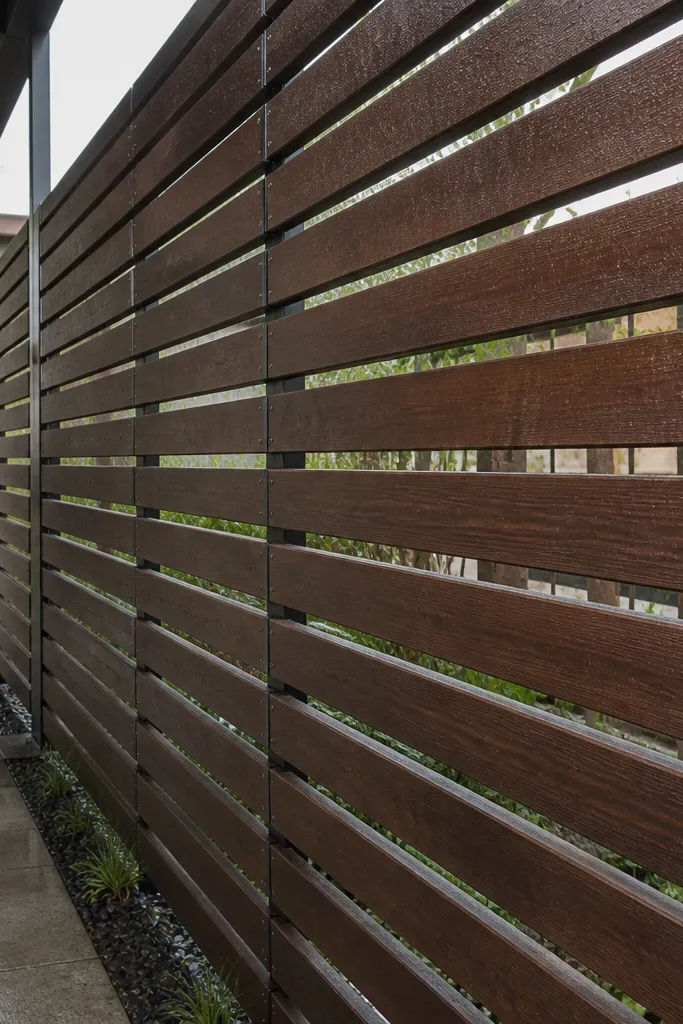
Horizontal slats look modern and give a strong, clean silhouette from across the street. They also handle wind better than many solid panels because air moves through the gaps. For year-round budget-friendly balcony railing, you need treated framing behind the slats and a finish that resists water pooling. This design is photogenic because the slats create repeating lines, and it’s forgiving if your balcony posts aren’t perfectly plumb — the slats hide small irregularities. It’s a good DIY choice if you can measure and cut repeatably.
1) Build a backer frame between posts using exterior-rated lumber, then attach horizontal slat supports with consistent spacing. 2) Cut slats to length and pre-drill, then fasten with exterior screws so the heads sit flush. 3) Sand smooth, then apply a deck stain designed for horizontal surfaces; start with primer if the wood needs it. Let it cure fully before you expose it to rain so the finish locks in.
Stain in thin coats and keep a wet edge so you don’t get lap marks across the slat lines.
Skip end-grain sealing — the ends soak water and the slats start to cup.
6. Black aluminum picket railing with wide spacing

1) Choose an aluminum picket kit or buy uniform pickets in straight lengths, then measure for the exact count between posts. 2) Install top and bottom rails first, using level marks at each post so the pickets line up. 3) Attach pickets with the included brackets or stainless screws, then touch up any cut ends with exterior paint made for aluminum. Finish with a post cap so the top edge looks finished, not DIY.
Aluminum pickets give you that crisp “built-in” look with low maintenance. If you’re chasing a year-round budget-friendly balcony railing, aluminum is worth it because it doesn’t rust and it doesn’t demand re-sealing like wood. Wide spacing keeps it airy and cheaper than dense picket layouts, while still reading as intentional. The black finish photographs well because it contrasts with light floors and plant pots. This is best for balconies where you want a straightforward railing upgrade without custom fabrication.
Skip thisDon’t mix picket sizes — even small differences show up immediately in photos.
Editor's noteUse painter’s tape on posts to mark picket positions before you start mounting — it saves you from redoing one crooked run.
7. Brick-pattern vinyl fence panels with metal uprights
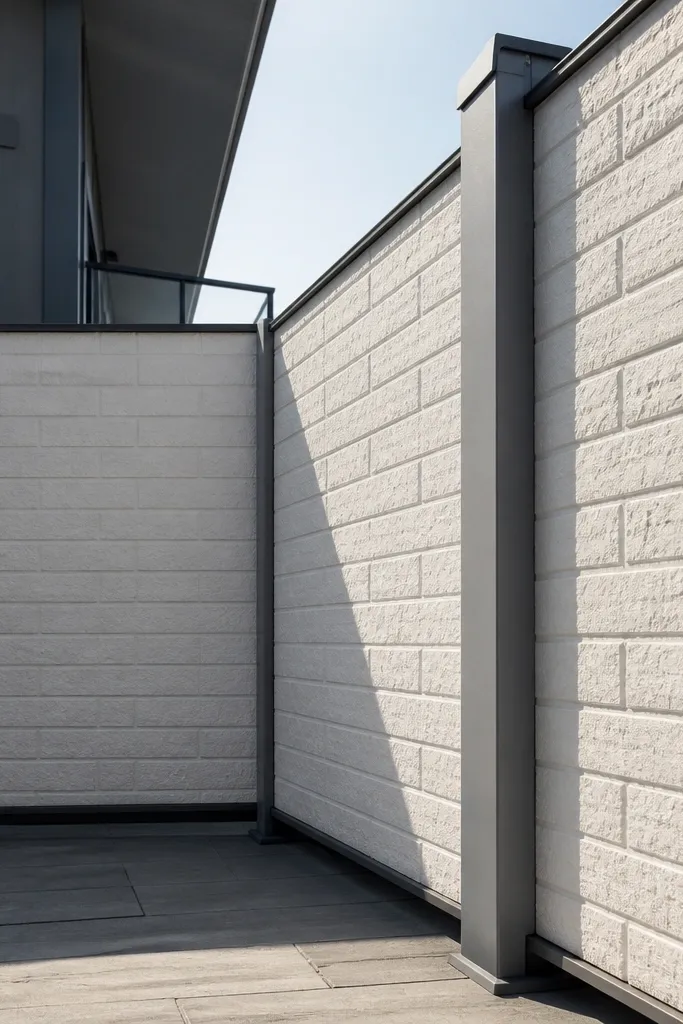
If you want privacy and pattern without carpentry, brick-pattern vinyl panels mounted to a metal subframe do the job. They look architectural, especially in white or off-white, and they photograph well because the texture catches shadows. A metal subframe keeps everything straight and prevents vinyl from sagging. This is genuinely budget-friendly because panels are mass-produced and you’re only paying for hardware and a simple mounting system. It’s also practical — you can wipe it clean instead of maintaining wood finishes.
1) Install two horizontal rails (or a ladder-style frame) between posts using galvanized or powder-coated metal and confirm level. 2) Cut the panel-to-panel fit with a fine blade and mount panels using the manufacturer’s mounting holes or pre-drilled screw points with washers. 3) Seal gaps at the bottom edge with exterior-rated trim so water doesn’t sit behind the panels. Finish by adding a cap rail to hide the frame edges.
Pick a panel color that matches your balcony trim — the railing looks custom when the undertones match.
Don’t overtighten vinyl screws — stress cracks show up after temperature swings.
8. Woven outdoor reed panels with a removable support frame
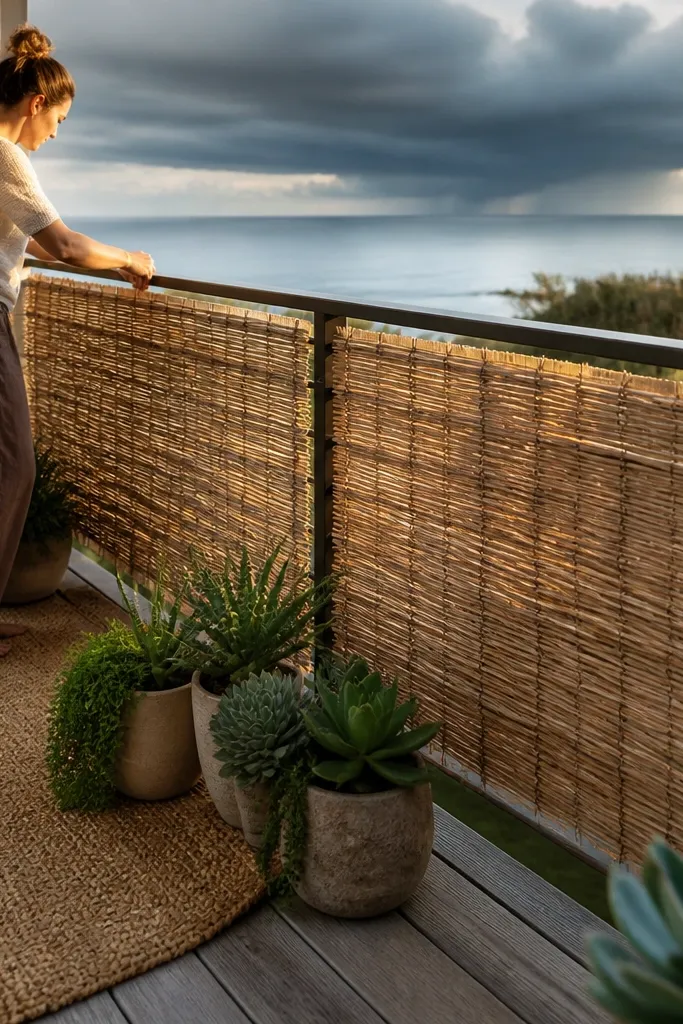
1) Build a lightweight rectangular frame around your railing opening using treated lumber or aluminum angle, then attach it to your posts with brackets. 2) Cut reed panels to size and staple or screw them to the frame using exterior fasteners and corrosion-resistant staples. 3) Add a top and bottom trim strip so the panel edges don’t fray, then secure the frame with quick-release hardware if you want it removable. Seal treated wood with exterior sealer on the cut edges so water doesn’t soak in.
This is the warm, coastal-looking option when you want instant style and you don’t need full structural permanence. Woven reed panels are budget-friendly and they create a soft, textured look that photographs beautifully in side light. The key is a removable support frame so you can take them down for storms or when you need to clean underneath. For year-round use, you need a weather-rated reed product and a frame made from treated wood or powder-coated metal. The look is relaxed but still organized because the frame keeps the weave straight.
Skip thisDon’t let the reed take the load — the frame must hold everything.
Editor's noteIf you get heavy rain, store panels flat when you remove them so they don’t twist.
9. Stamped metal privacy screen panels bolted to a railing top rail
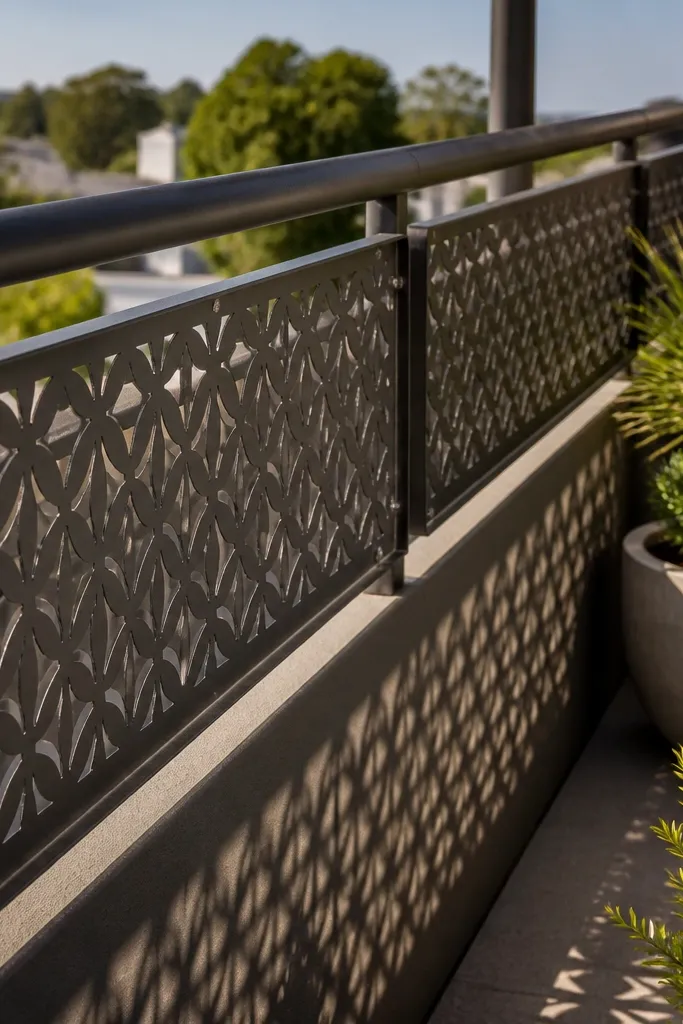
1) Buy or cut stamped metal panels sized to your opening and mark mounting points to match your posts or a top rail. 2) Bolt a top rail bracket system first, then align the panels and fasten with stainless hardware plus rubber isolators. 3) Add a bottom retention strip so the panel doesn’t rattle in wind, then check for sharp edges and cover them with metal trim if needed. Finally, touch up any cut or drilled spots with a metal-safe exterior paint.
Stamped metal screens look like a designer product because they cast patterned shadows at different times of day. You get privacy and a strong visual identity without building a full solid wall. For year-round budget-friendly balcony railing, choose powder-coated steel or aluminum screens so the finish holds up in sun and rain. This design is also forgiving because small gaps around posts are hidden by the screen’s pattern. It’s a DIY-friendly project if you can drill and bolt accurately, and it’s great for balconies that face bright sun where you want shade and texture.
Skip thisDon’t mount screens without a bottom support strip — wind flexes them and loosens bolts.
Editor's noteUse anti-rattle washers — they stop the screens from ticking in the wind.
10. Outdoor curtain privacy with cable + track hardware
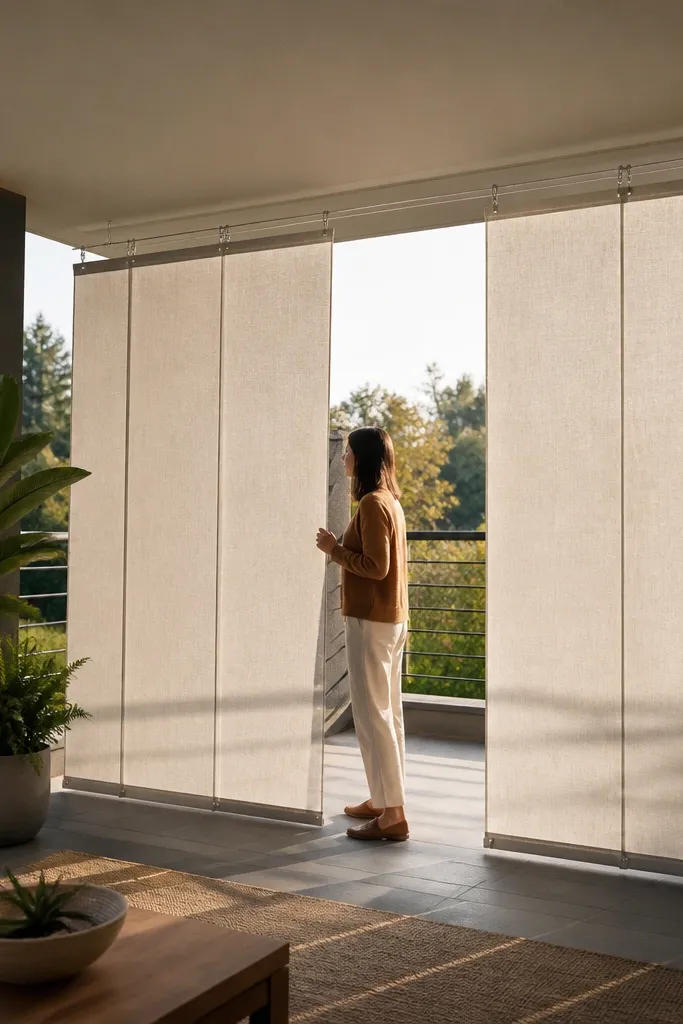
1) Install two anchor points at the ends of your balcony span and stretch a cable line at about 6-8 feet from the floor for a natural drape. 2) Hang outdoor curtain panels using grommets or curtain rings that slide on the cable, then adjust so the bottom edge clears wet concrete by a couple inches. 3) For extra privacy, add a second inner curtain on a lower line. Use quick-release clips so you can remove fabric for washing and storm storage.
This is the smartest budget move when you want privacy on demand, not a permanent wall. An outdoor curtain system makes the balcony look styled in minutes and it adapts to season: sheer in summer, opaque in colder months. Visually, it’s clean because the hardware line stays straight and the fabric falls in soft vertical folds. For year-round budget-friendly balcony railing, pick weatherproof outdoor fabric and a solution that drains and dries quickly. It also helps if your current railing has odd shapes because the curtain system covers imperfections.
Skip thisSkip indoor curtains — they stretch, fade fast, and look sloppy after one season.
Editor's noteChoose fabric with a weighted hem so it hangs straight instead of flapping.
11. 2x2 welded grid with reclaimed wood top cap
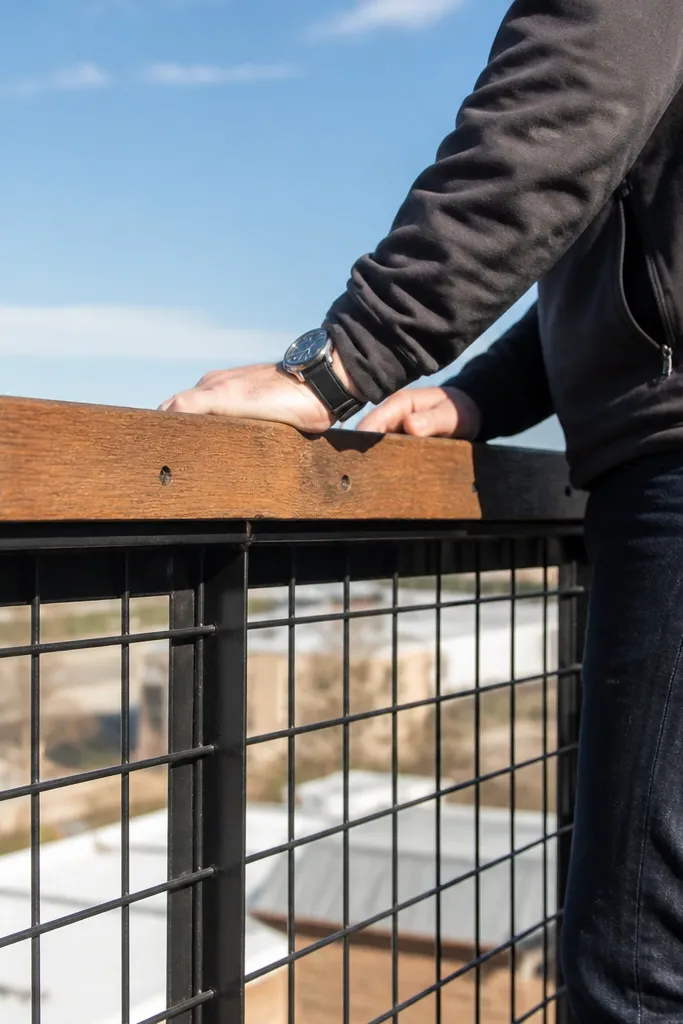
1) Create a grid using 2x2 steel squares welded or assembled into a rectangular frame that fits between posts, then test fit for level. 2) Bolt the frame to posts using plates and exterior-rated anchors, then add a wood top cap sized to overhang by about 1 inch on each side. 3) Seal the wood with deck finish and add metal edge trim so water can’t soak into the joint. Finally, paint the steel frame with exterior primer and a durable top coat.
A welded grid looks industrial and modern, and it’s cheap when you build it from common steel stock. It’s also sturdy for year-round budget-friendly balcony railing because the grid resists bending and wind pressure better than thin decorative panels. The reclaimed wood top cap gives you that warm contrast where your hands rest — the top rail is where the look matters most. This combo photographs well because the grid creates a pattern and the wood adds a natural color block. It’s a medium DIY build because you’re working with metal cuts and alignment, but the design is simple.
Skip thisDon’t leave sharp steel edges exposed — they look bad and they’re unsafe.
Editor's noteIf you can, sand and round the top cap edges slightly so it feels good and looks intentional.
12. DIY stained glass look using acrylic window film panels
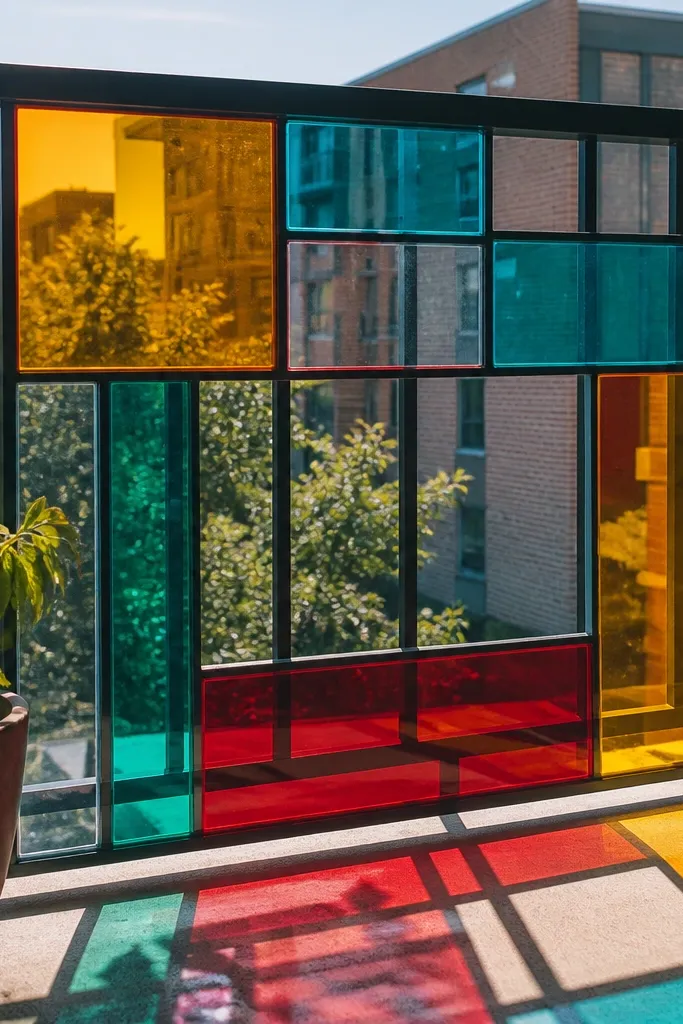
This one is about aesthetics on a tight budget: stained-glass-style window film applied to clear panels mounted in your railing. It’s photogenic because it creates colored light patterns when the sun hits, and the balcony instantly looks designed. For year-round budget-friendly balcony railing, use film meant for exterior or use it on a protected clear polycarbonate insert. The frame keeps the film flat so it doesn’t bubble, and the clear base means you can still see out. This is a low-difficulty DIY project — measuring and smoothing are the real skills.
1) Mount clear polycarbonate or acrylic inserts into a simple frame between posts, keeping the surface smooth and clean. 2) Cut stained-glass-style window film to fit, spray the surface with the manufacturer’s application solution, and squeegee from center outward to remove bubbles. 3) Trim edges neatly and seal borders with a thin exterior trim so water can’t creep under the film. Let it cure per instructions before you expose it to rain.
Use a squeegee with a felt edge — it reduces micro-scratches in the film.
Don’t apply film to dirty panels — dust shows as permanent specks in colored light.
13. Terracotta and black metal planter railing insert
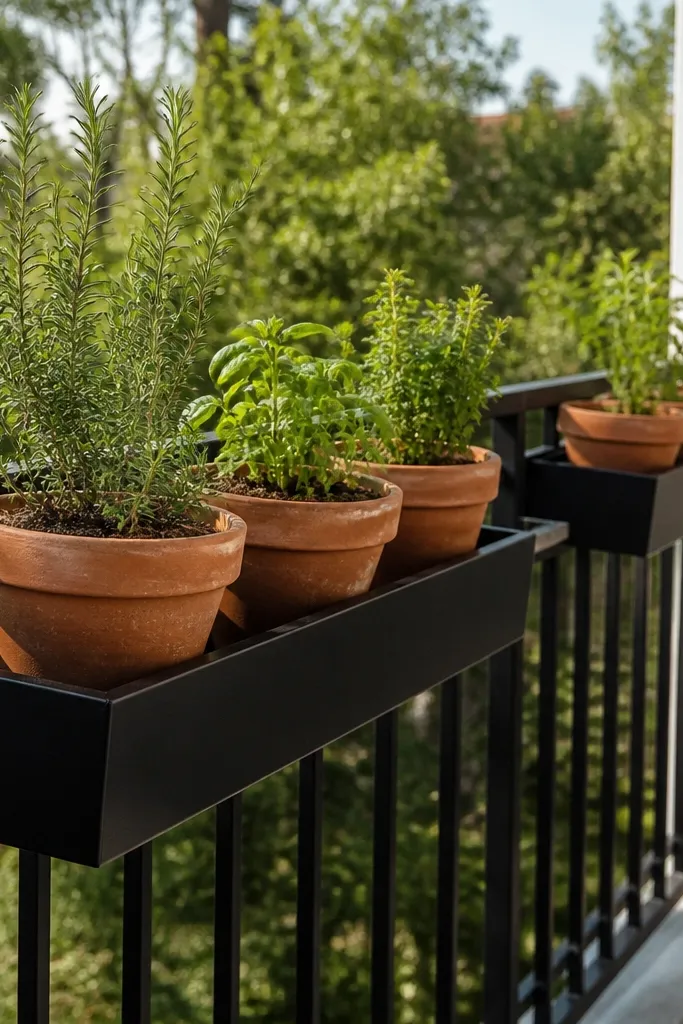
1) Build or buy a black metal planter rail insert sized to your railing span, then mount it to posts with brackets and stainless hardware. 2) Install planter boxes or directly secure pots in a grid using pot clips, leaving drainage paths open. 3) Use a waterproof liner in each box and add gravel at the bottom so water doesn’t sit against metal. Finish by filling with potting mix and staking taller plants if needed.
This idea turns your railing into a design feature. A black metal insert with built-in planter boxes lets you add plants that soften the balcony and make the railing look finished, even if your base railing is plain. Terracotta pots look classic, and the metal grid keeps the structure stable and easy to maintain. It’s year-round budget-friendly balcony railing because you can swap plants seasonally without rebuilding the railing. The look is strong in photos because you get color blocks and height changes along the railing line. It also helps if you want privacy — taller plants create a natural screen.
Skip thisDon’t use metal-to-soil contact — it accelerates rust and ugly staining.
Editor's noteKeep the heaviest planters near the middle bays so the railing load doesn’t concentrate at the ends.
14. White PVC board-and-batten railing panels with black hardware
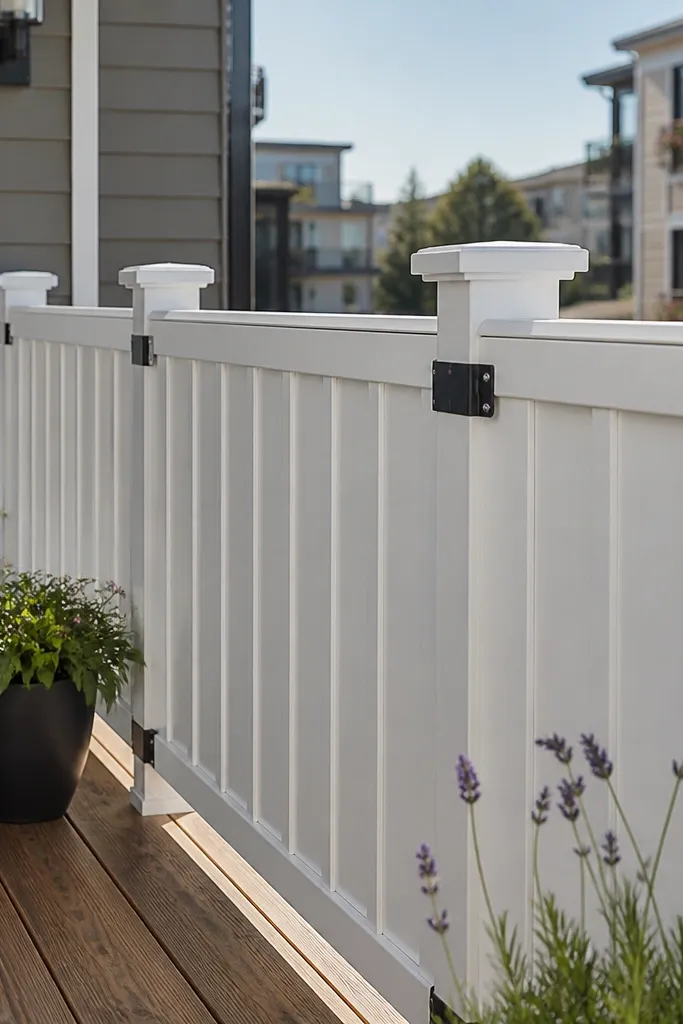
Board-and-batten looks farmhouse-clean, and PVC makes it weatherproof without the wood maintenance cycle. White panels with black hardware look intentional and modern, and they photograph well because the vertical lines are bold. This is a great budget-friendly solution if you want privacy but don’t want to deal with warped lumber. PVC also wipes clean and doesn’t need re-staining, so your railing stays looking crisp year-round. The build is beginner-friendly with basic cutting and drilling — just be careful about expansion gaps.
1) Measure each opening and cut PVC boards to size, leaving a small gap at ends for thermal expansion. 2) Attach boards to a simple back frame or directly to your existing posts using exterior-rated PVC screws and pre-drilling to prevent cracking. 3) Add battens (narrow strips) to create the pattern, then install a top cap board to cover seams. Caulk only where the product label allows it, then paint touch-ups if you need a color match.
Use a spacer shim to keep the battens perfectly straight across every bay.
Don’t tighten screws fully — PVC needs room to move with temperature.
15. Reclaimed wood and metal mesh combo for privacy without bulk
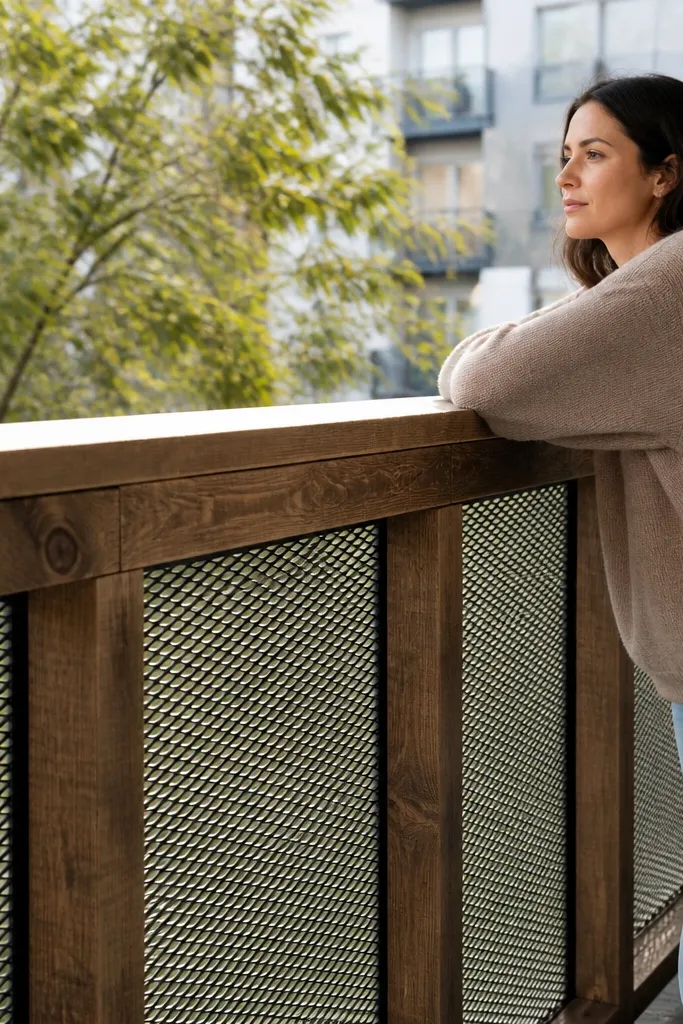
1) Build a rectangular frame that fits between posts using exterior lumber, then sand and seal all sides and edges before assembly. 2) Stretch powder-coated metal mesh over the frame, pull it tight, and fasten with staples or screws with washers so it stays taut. 3) Mount the framed sections to posts with brackets, then add a top cap and bottom trim to cover sharp mesh edges. Check alignment and adjust before final tightening so the mesh doesn’t sag.
This combo looks artsy and intentional because it mixes warm timber with a crisp, industrial mesh pattern. The wood frame gives you a thick, grounded top edge, while the metal mesh adds privacy texture without creating a solid wall. It’s also practical: mesh lets wind pass, which reduces rattle and stress on fasteners. For year-round budget-friendly balcony railing, use treated reclaimed wood or new exterior lumber for the frame, then seal it, and use powder-coated mesh to avoid rust. This is a medium DIY build because mesh cutting and frame alignment matter for a clean look.
Skip thisDon’t skip edge trimming — exposed mesh corners look messy and catch hands.
Editor's noteWear gloves and use tin snips — mesh edges are sharp and they snag cloth.



