
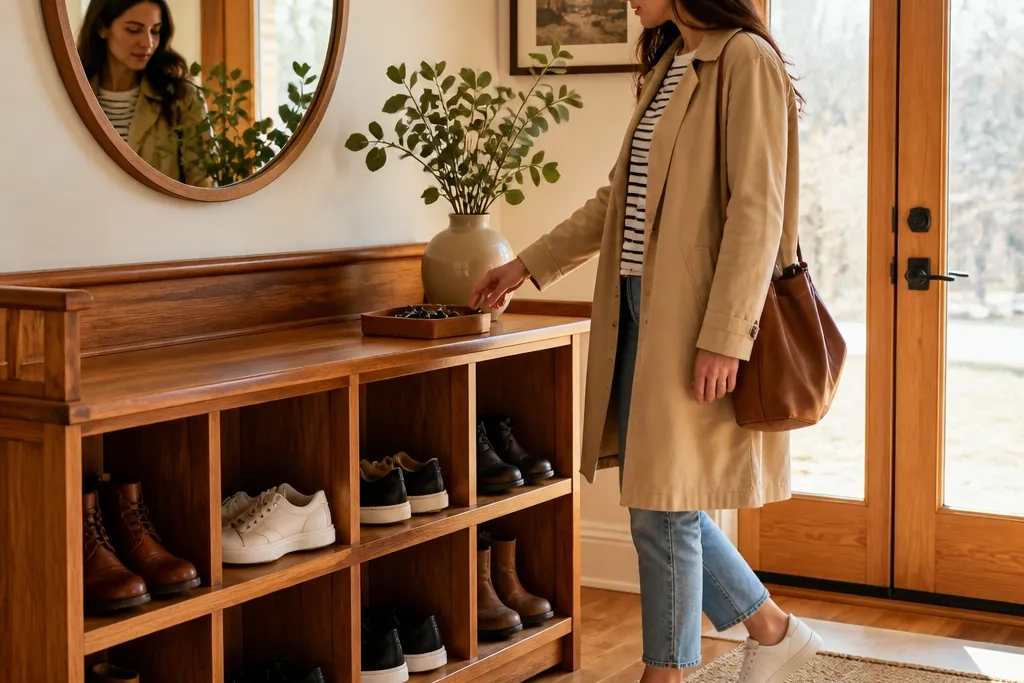
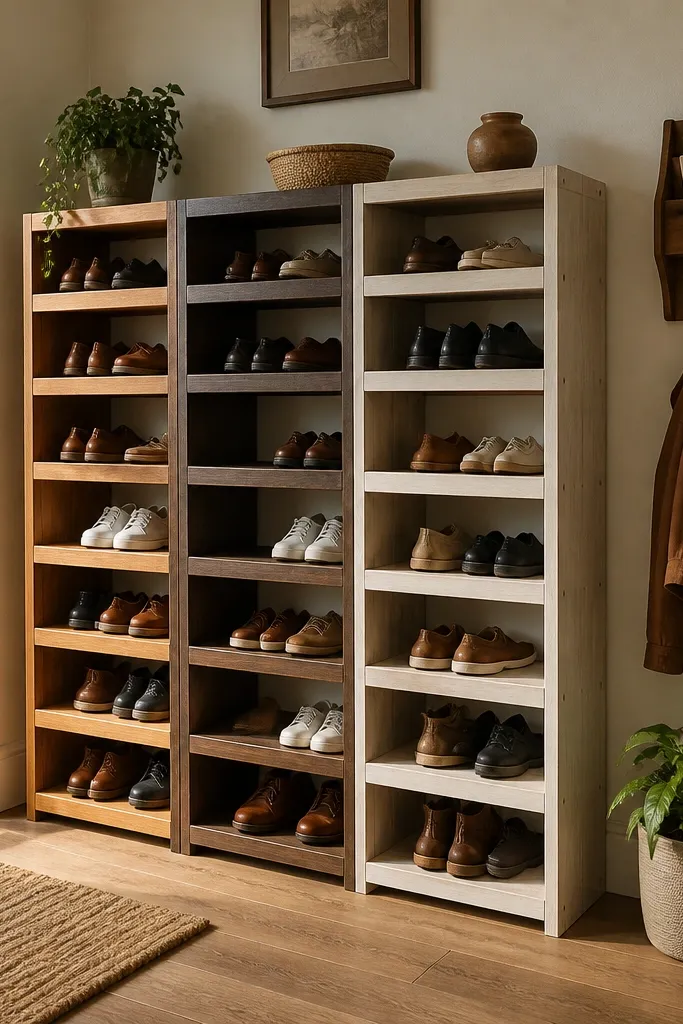
1. Honey-Walnut Bench Rack with Seat-Top Landing
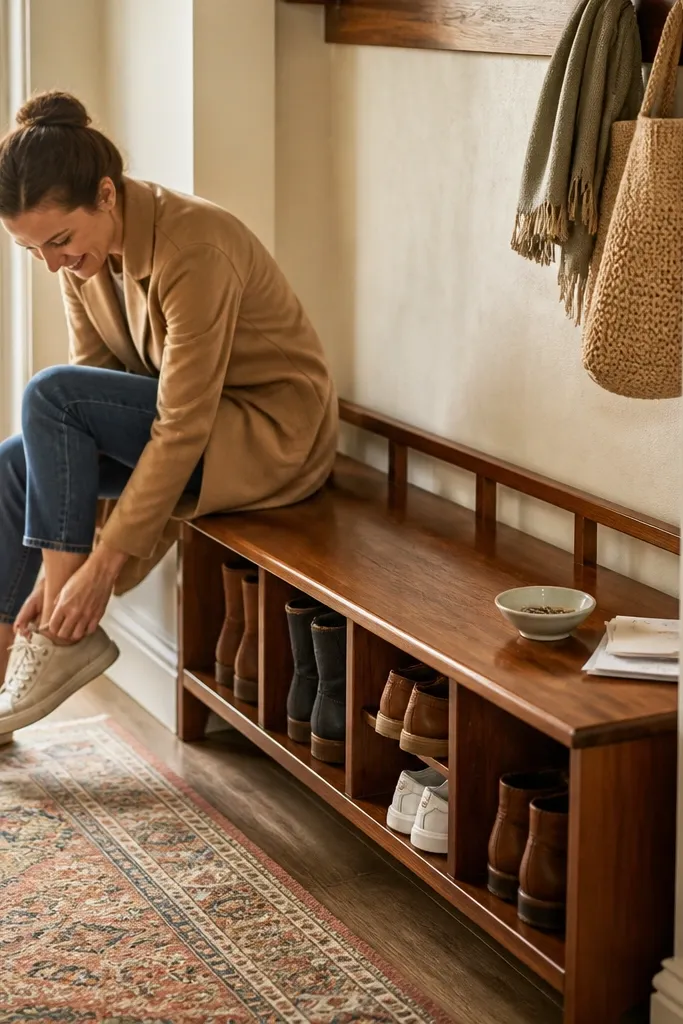
This is the entry piece that makes people stop shoving shoes under a console. A bench rack gives you a flat seat for quick socks and a top landing for keys, while open cubbies keep shoes from trapping odors. The cozy look comes from warm honey-walnut stain and rounded edges on the seat top so it feels soft, not boxy. Build it with a back panel that’s mostly open or slatted so airflow still wins. It fits best in hallways where you want one furniture-like object instead of a tall shoe tower.
Start by cutting a rectangular frame: two side panels, a top seat board, and a bottom shelf that’s wider than the sides by at least 1 inch for stability. Build three to four cubbies using vertical dividers spaced 10-11 inches apart for sneakers, then add a backer board with gaps or slats so air moves. Sand everything to 120 grit, stain in a honey-walnut tone, then wipe off excess and let dry fully. Finish with two thin coats of matte polyurethane, and pre-drill holes to anchor the back of the frame to wall studs through the top rail.
Round the seat edges with a 1/2-inch radius bit or sand a consistent chamfer so it feels comfortable without looking handmade-rushed.
Don’t use a glossy finish on the seat top — it shows scuffs and fingerprints fast in entries.
2. Angled Cubbies Rack with Slatted Front for Airflow
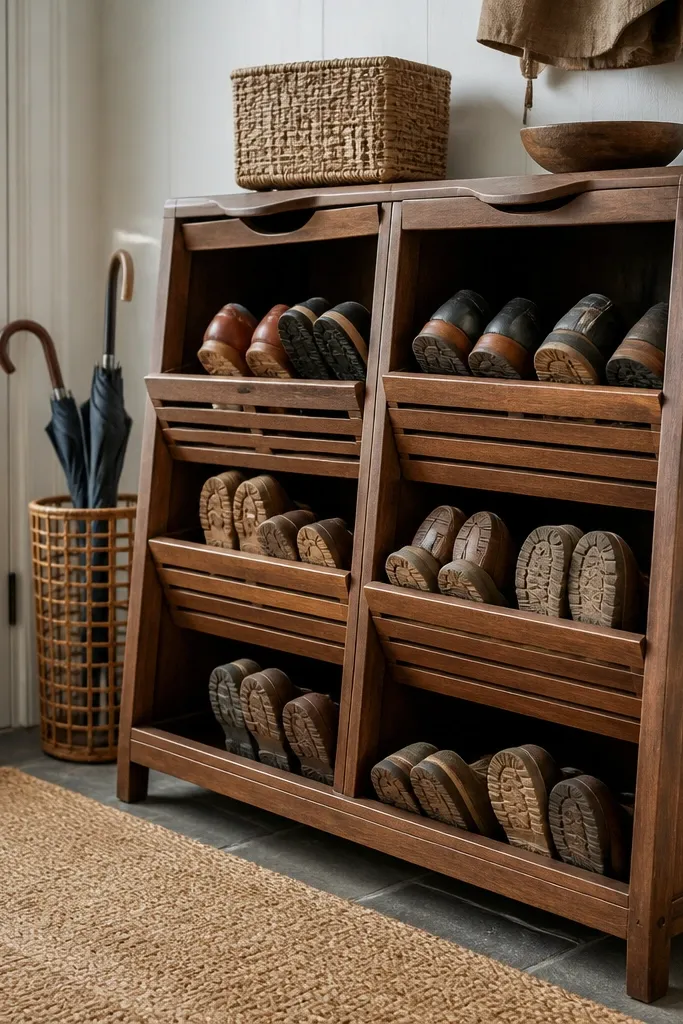
If your shoes smell like they’ve been in a closed box, this design fixes that. Angled cubbies let shoes dry faster and make it easier to see which pair you’re grabbing, so the rack stays tidy. The slatted front gives a cozy, cottage feel while still letting air through. It also looks lighter than a solid-front cabinet because the slats break up the wood tone visually. This style works in narrow entries because it’s usually shallower than bench racks while still holding a lot.
Build a rectangular base frame first, then install two rows of angled dividers using scrap plywood cut into wedges. Aim for a 20-30 degree tilt from horizontal so the toe doesn’t disappear behind the back panel. Cut slats for the front — 1x2 or 1x3 strips — spaced about 1/2 inch apart, then screw them to a thin front face frame. Sand, stain in a medium walnut, and seal with matte poly. Finally, add a back stop strip so boots and heels can’t slide out when you pull shoes.
Use spacers when installing dividers; consistent gaps make the rack look intentional instead of wobbly.
Don’t make the angle too steep or the shoes will slide forward and you’ll end up pushing them back every time.
3. Tall Narrow Shoe Tower with Open Side Compartments
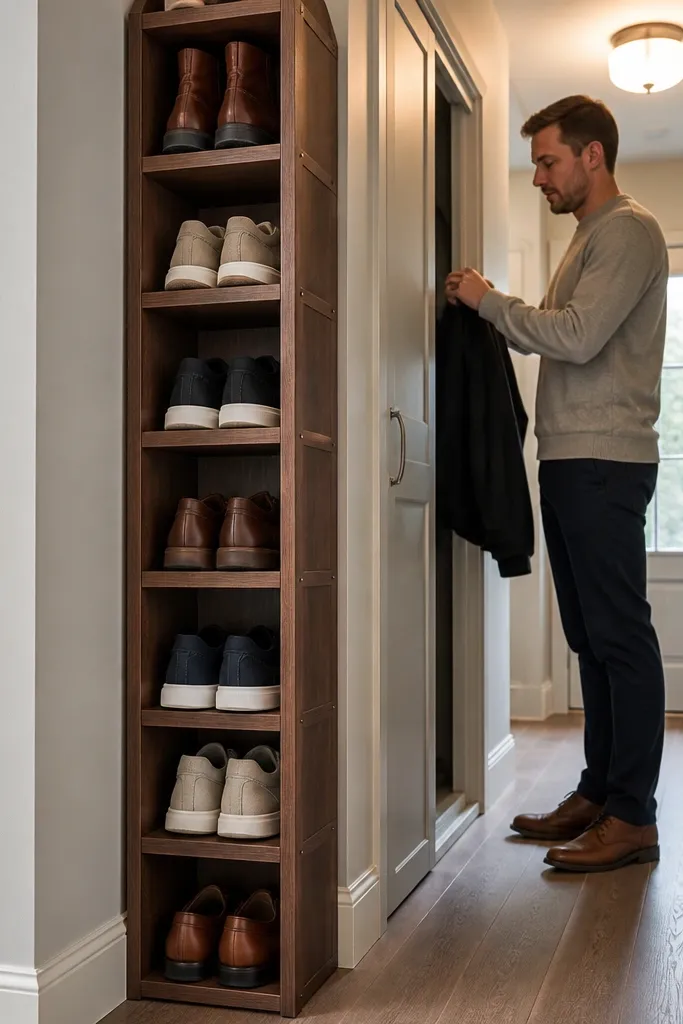
For apartments and tight foyers, a tall narrow tower gives you storage without eating floor width. Open side compartments hide the chaos just enough while keeping pairs visible so you don’t mix up boots and sneakers. The cozy factor is in the framing: thick rails, simple muntin-style dividers, and a warm stain that darkens the wood grain. This look is especially photogenic when you keep the top rail clean and add a small wood tray for sunglasses or mail. It’s best where you want vertical organization and a clean walking path.
Cut two long side rails and connect them with top and bottom crosspieces, then add internal vertical dividers to create 6-8 compartments. Space compartments for the shoe type you store most: 9-10 inches for sneakers, 11-12 inches for mixed pairs, and add one or two deeper sections for boots. Use a back panel with slotted openings or leave the back mostly open with a thin brace so air can move. Sand to 120 grit, apply a walnut stain, and seal with matte poly. Anchor the tower to the wall using two anti-tip brackets on studs.
Editor's noteAdd a 1-inch thick bottom base board even if it feels heavy — it makes the whole tower look sturdier and reduces wobble.
Skip thisSkip fully enclosed backs; trapped moisture makes entries smell worse over time.
4. Reclaimed-Look Slat Rack with Warm Whitewash
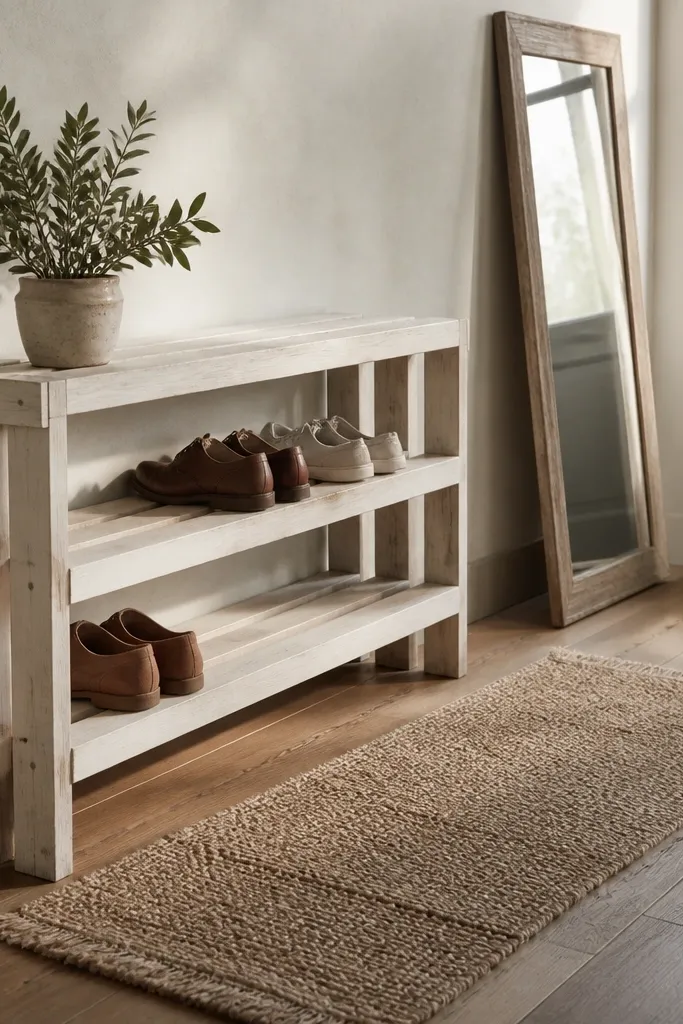
This one gives a cozy, lived-in farmhouse vibe without looking messy. Slatted shelves show just enough of the shoes and let dust and moisture fall through instead of collecting under a solid board. A warm whitewash over pine or spruce keeps the wood light and airy, which helps small entries feel bigger. The look is photogenic because the slats create repeating lines that catch light. Build it if you want a soft, bright entry that still hides clutter.
Use 1x2 slats for the shelf surfaces and a simple rectangular frame made from 1x3 or 2x2 lumber. Cut three shelf levels spaced 8-10 inches apart for sneakers, and add one lower shelf for boots with extra clearance. Distress lightly with 150-grit sandpaper where you want a worn edge, then apply a warm whitewash stain (thin paint + water mix) and wipe back until you still see grain. Seal with matte clear to lock the finish. Screw slats into a cleat system so they align consistently across the frame.
Whitewash looks best when you stain first lightly, then whitewash — the grain stays warm instead of turning gray.
Don’t use thick paint layers; they hide the wood texture that makes this style look intentional.
5. Herringbone Back Panel Shoe Rack
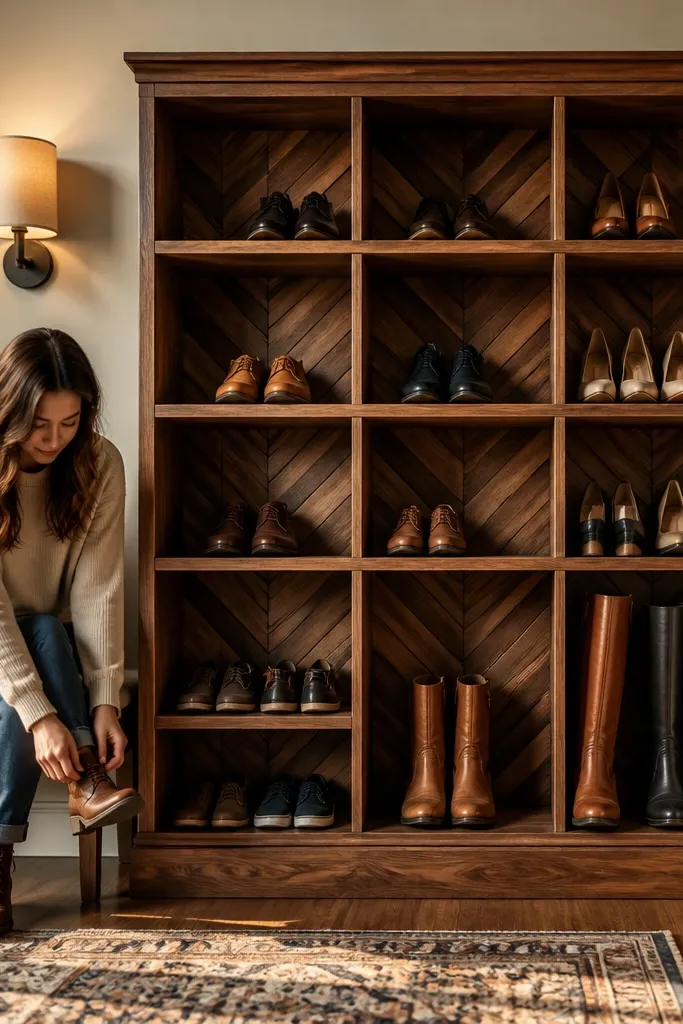
This is the “stop and stare” rack. The herringbone back panel gives a pattern-rich background that makes the entry look styled even when shoes are sitting inside. It still functions like a shoe rack because the front can stay open or slatted for airflow. The cozy part is the pattern plus warm stain — it reads like craftsmanship, not like mass-produced storage. It suits entryways where you can see the rack straight-on, like across from the front door or against a hallway wall.
Build a basic frame first with two side pieces and three to four cubby openings. Create the herringbone back panel using small strips, like 1/4x1-inch wood, arranged at 45 degrees on a backing board. Glue and pin the pattern before attaching it to the back of the frame so it stays flat. Sand edges smooth, stain the whole rack in medium walnut, then seal matte poly. Add a simple toe kick strip at the bottom to keep the frame from looking like a floating box.
Editor's noteUse a scrap spacer jig for the strip spacing; herringbone looks off fast if the lines aren’t consistent.
Skip thisDon’t skip sealing the back panel seams — moisture can swell strips if the finish is thin.
6. Walnut-Framed Grid Rack with Removable Dividers
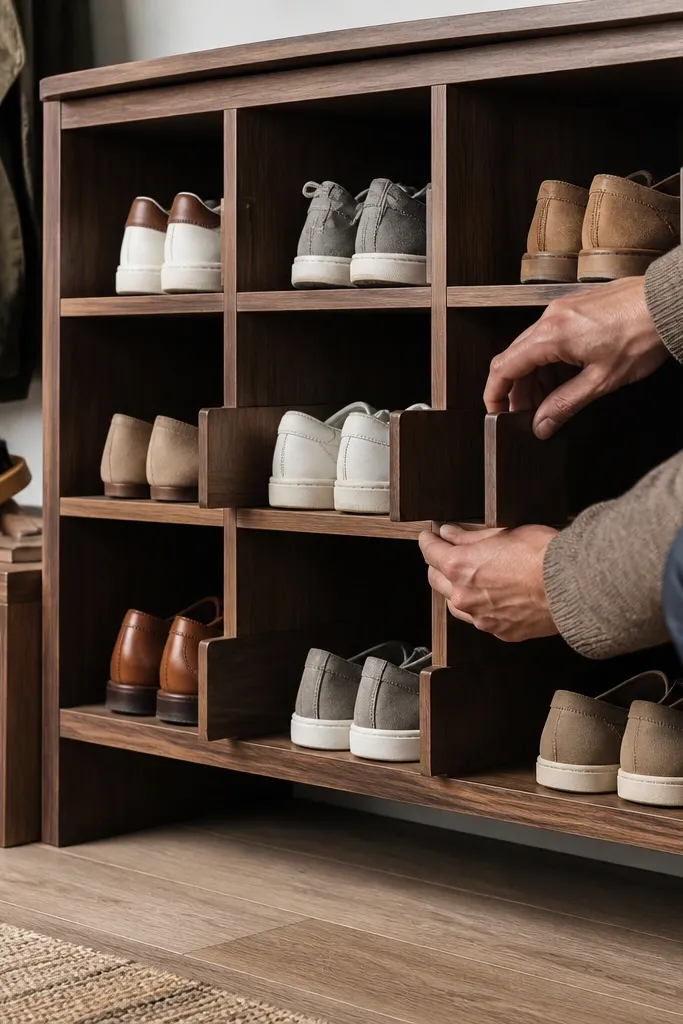
This design stays good-looking because the dividers let you adjust spacing as your shoe collection changes. The grid frame creates a clean, structured look, and the warm walnut stain makes the whole thing feel cozy instead of industrial. Removable dividers also make cleaning easier since you can pull them out and wipe the bottom. It’s a smart pick for mixed entries where you store sneakers, flats, and boots together. The photogenic appeal is the repeating rectangles — it looks tidy even with real life chaos.
Make a rectangular frame from 2x2 or 1.5-inch thick boards for a solid border. Cut a set of dividers from 3/4-inch plywood strips sized to fit inside the grid. Mark divider locations using a measuring tape and square so spacing stays straight across all levels. Install a back rail and optional front rail so dividers don’t tip forward when you pull a pair. Stain the frame and dividers together, then seal. Finally, attach two wall anchors to keep the grid from tipping.
If you want the dividers to feel effortless, add 1/4-inch stop blocks so they slide in and lock without forcing.
Don’t rely on friction-only dividers; they shift and the grid stops looking clean.
7. Round-Dowel Side Panels for a Soft, Cozy Look
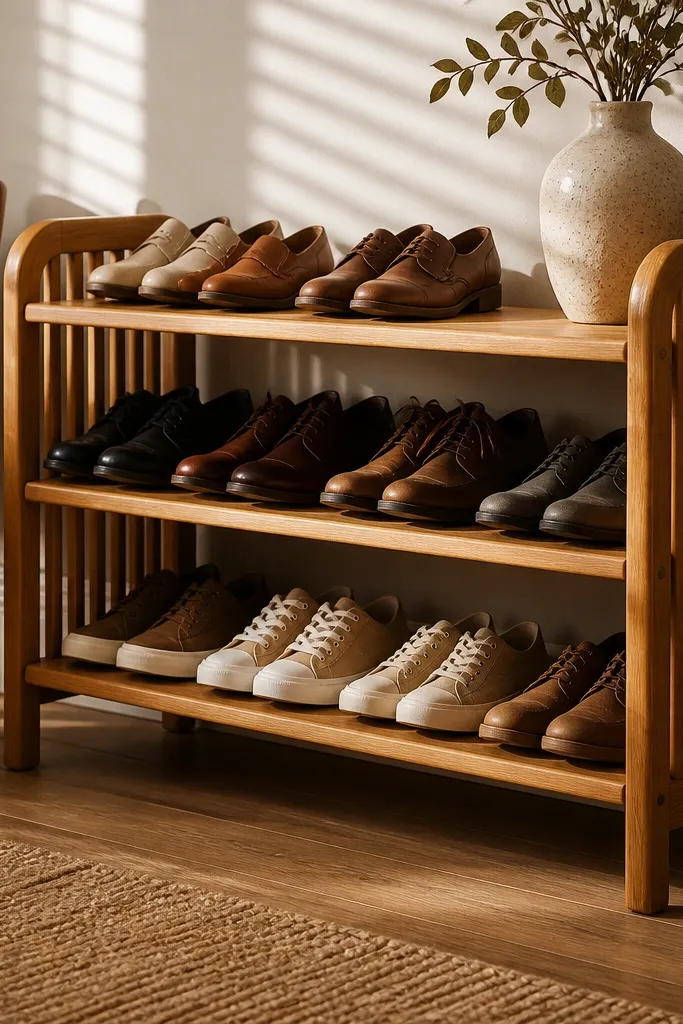
Round dowels make the rack look friendlier than flat boards, and that’s the cozy effect. The structure stays practical because cubbies can still be open and airy, but the sides add texture and light play. Use this when you want something that looks handmade and warm without going full farmhouse. The rack looks especially good in entries with beige walls or light wood floors because the dowels echo that softness. It’s best as a mid-height rack so you can see the shoes and the detail at once.
Build the main frame using 1x3 or 2x2 lumber, then cut side panels from plywood. Drill evenly spaced holes for 3/4-inch dowels and glue them into place, leaving 1/2 inch clearance at the top and bottom. Add internal shelves or cubby dividers sized for 10-12 inch sneakers and a deeper bottom row if you store boots. Sand dowels flush where needed, stain the whole rack, and seal matte poly. Use corner braces to keep the dowel sides from flexing.
Keep dowel spacing consistent by drilling from a template board; it’s the difference between “nice” and “looks professionally built.”
Don’t skip sanding the dowel ends smooth; rough ends catch splinters and ruin the cozy feel.
8. Floating-Look Shoe Rack with Hidden Cleats
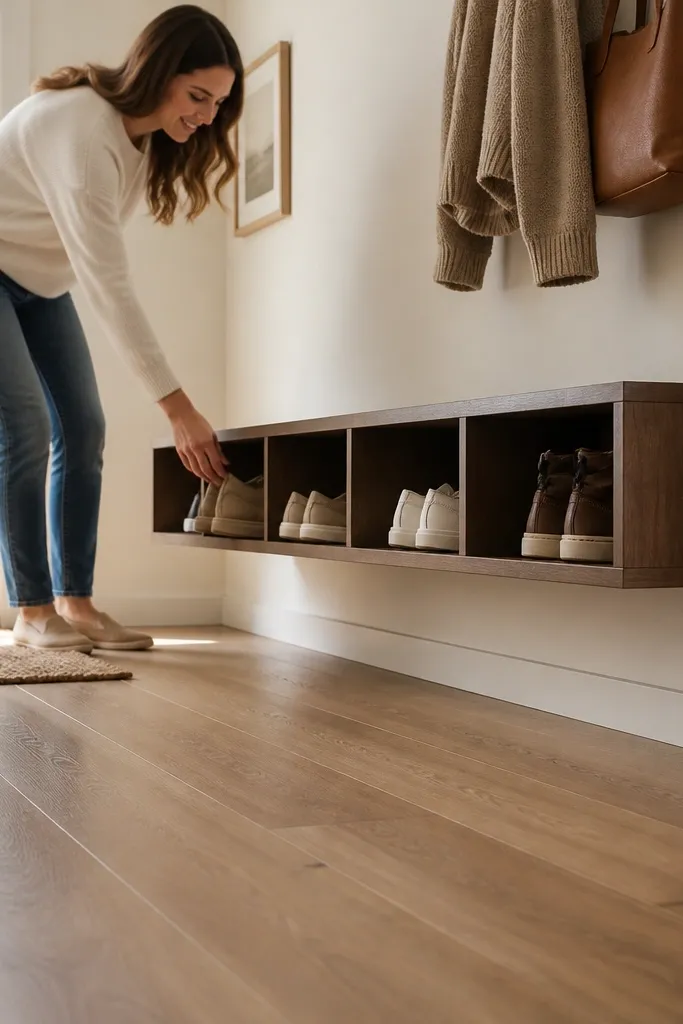
A floating-look rack makes the entry feel lighter and more designed because the floor stays clear. You still get shoe storage in shallow cubbies, but the project reads like wall decor. Hidden cleats keep the build clean and allow you to use warm wood stain without showing random support hardware. It’s great if you hate bending down to reach shoes on the floor. This style looks best in a hallway where you can install two or three wall-mounted levels.
Cut a series of shallow cubby boxes from 3/4-inch plywood with open backs for airflow. Install a level cleat rail into wall studs at the correct height for the top box, then screw each box to the cleat from inside the frame. Use a spacer block to keep all boxes aligned so the lines look crisp. Sand and stain the boxes and cleats together, then apply matte seal. Add a small lip at the front edge so shoes don’t slide off when you pull them.
Editor's noteMark stud locations with painter’s tape before you stain anything — you want mounting accuracy more than aesthetics at that step.
Skip thisDon’t mount into drywall alone; a loaded rack needs studs or proper anchors.
9. Sliding-Door Shoe Rack Cabinet with Slatted Interior
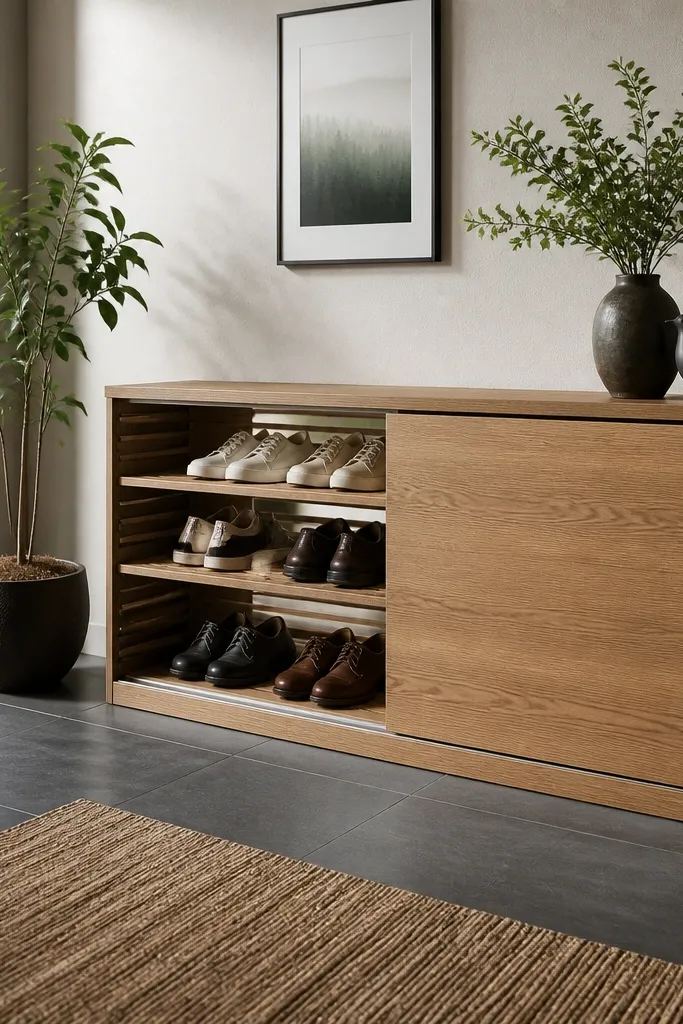
If your entry photos always look cluttered because shoes are visible, a sliding-door cabinet fixes that instantly. The door keeps the chaos behind wood, while slatted interior shelves keep airflow so the cabinet doesn’t smell. Choose a track system that feels smooth and quiet, and the cozy look comes from the wood front plus a warm finish. This is the best option for people who want storage that looks like furniture, not storage. It works well in living spaces where the entry blends into a main room.
Build a cabinet frame from plywood or boards, leaving the interior open with slatted shelves every 8-10 inches. Install a sliding door panel using a surface-mount or recessed track kit — route or place it so the door clears the frame cleanly. Add small spacers to keep the door from rubbing as humidity changes. Sand, stain, and seal both the cabinet and door for consistent color. Finally, add a stop block so the door doesn’t slam into the end of the track.
Use a slat spacing of about 1/2 inch inside so air moves and shoes don’t sit in stagnant pockets.
Don’t make the interior fully solid; that’s how cabinets start to smell.
10. Boot-Ready Deep Cubbies with Toe-Kick Base
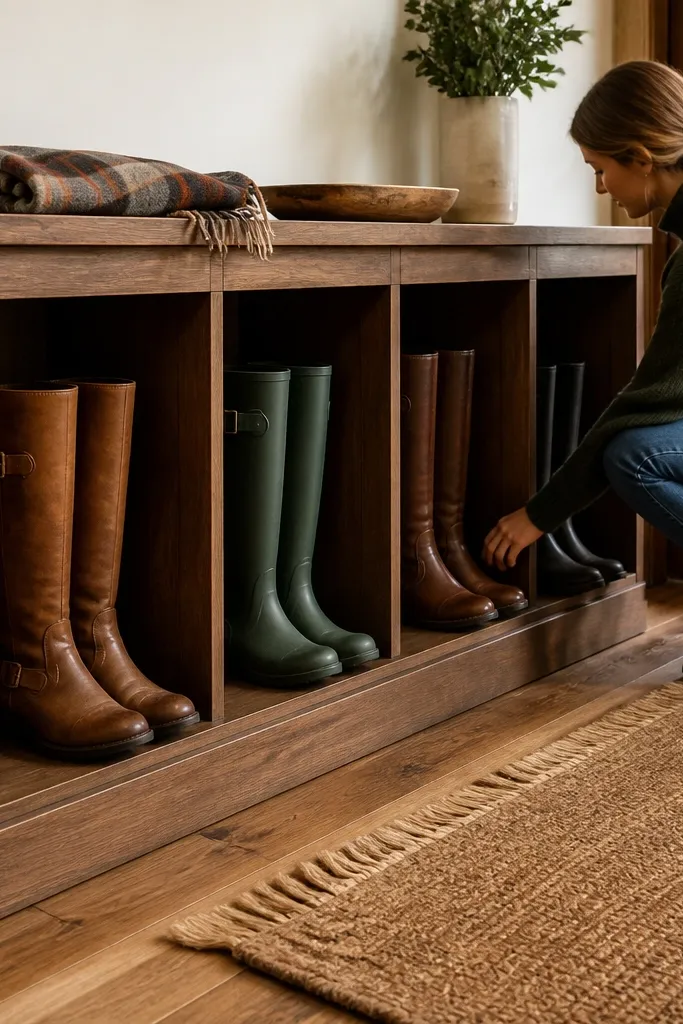
Boots need depth, and most shoe racks cheat by making cubbies too short. This project uses deeper cubbies and a toe-kick base so boots sit neatly without leaning. The look is cozy because the wood frame is thicker at the bottom and the finish is warm matte, not glossy. Add a top surface for seasonal items and you’ll keep the entry from turning into a pile. This is the best style for weather-heavy areas where boots are part of daily life.
Cut the frame with a wide bottom shelf for stability and a toe-kick board that adds a clean visual line. Build three to four deep cubbies using dividers spaced for 14-16 inch boot clearance, then add a back stop strip to prevent sliding. Leave the front open or add a simple slat grille for airflow. Sand to 120 grit, stain in a warm walnut or dark honey, and apply two matte poly coats. Anchor the back of the frame to studs using brackets hidden behind the top rail.
Editor's noteIf you store tall boots, make one cubby slightly wider than the others so the shaft doesn’t scrape the divider.
Skip thisDon’t design for “average shoes” if you own tall boots; you’ll hate the fit in week two.
11. Corner Shoe Rack with Angled Storage Panels
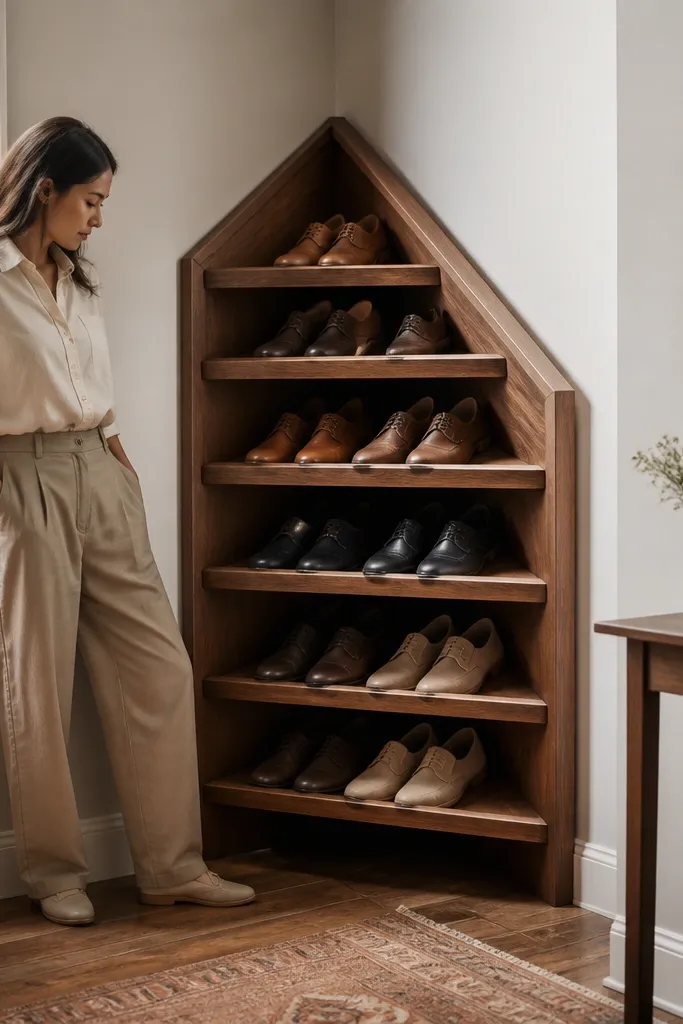
Corners are wasted space until you turn them into storage that looks intentional. An angled panel corner rack makes the most of the diagonal area and creates a cozy, boutique look. It also helps shoes stay visible because the angle prevents the rack from becoming a dark hole. Use warm stain and a clean front rail so the project looks like furniture, not a hack. This works in entry nooks, small apartments, and hall corners where a straight rack won’t fit.
Measure the corner and build a triangular or L-shaped frame using plywood side panels cut to match the corner geometry. Install angled dividers using a simple miter cut at the panel edges so the shoe openings face outward. Space dividers at 10-12 inches for sneakers and create one deeper section for boots. Sand everything, then stain and seal matte. Add a front rail and toe-kick board, and anchor through the back braces into studs.
Use a scrap template to test the angles with a real sneaker before you commit to cutting all dividers.
Don’t leave the corner open with no back bracing; racks rack up wobble fast in corners.
12. Shiplap-Style Wall-Mounted Shoe Cubbies
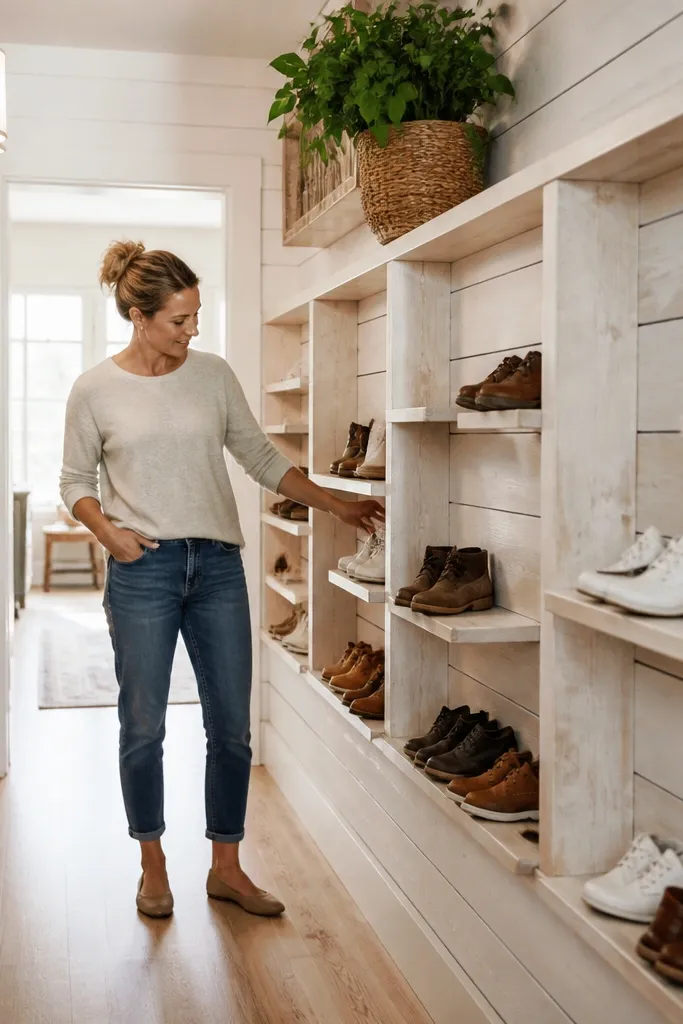
Shiplap texture makes any entry feel warmer, and it’s a great trick for shoe storage. Wall-mounted cubbies keep the floor clear, and the shiplap back texture gives visual interest even when shoes are messy inside. This style is cozy because it reads like a built-in wall detail, not an add-on shelf. It’s best for narrow entries where you want storage without taking up walking space. Use open cubbies or slats to keep airflow moving and prevent odor buildup.
Build a backer board from plywood strips arranged like shiplap, then attach it to a simple frame that holds multiple cubbies. Cut cubby boxes from plywood with open fronts or slatted fronts for airflow. Mount the frame to studs using a level rail, then screw through the frame into the studs. Sand and stain the shiplap and cubbies together, and seal matte. Add a small lip at each cubby opening so shoes don’t slide out.
Editor's noteKeep shiplap joints tight and consistent; sloppy seams look cheap and undo the cozy built-in vibe.
Skip thisDon’t mount too high — if the top cubby is unreachable, shoes end up on the floor again.
13. Peg-Board Style Shoe Rack with Wooden Dowel Pegs
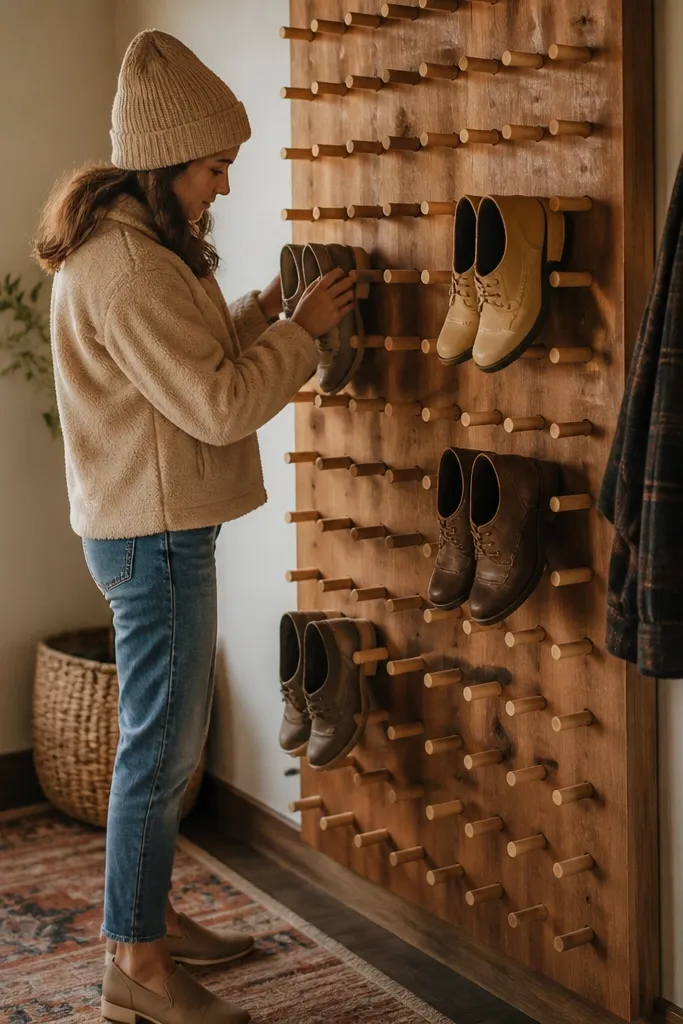
This design looks like a craft wall and holds shoes in a way that shows off the lines of the footwear. Wooden dowel pegs let you hang shoes slightly off the backer so air moves and the entry feels airy. The cozy look comes from the warm wood tone and the repeating peg pattern. It’s photogenic because it turns shoes into part of the display, not a pile. This is best for sneakers, flats, and slip-ons that don’t need flat support.
Make a plywood backer panel and cut a peg pattern with consistent spacing — enough room for the width of your shoe. Drill holes sized for wooden dowels, glue and insert dowels, then leave them slightly proud. Add a base board shelf so the bottom row has support and looks grounded. Sand, stain, and seal matte, then mount the backer to studs with anti-tip brackets. Test with a real shoe to confirm it holds without sliding before you stain.
Use dowels with a tight fit and sand them lightly so they slide in without splitting the plywood.
Don’t use pegs that are too short; shoes will pop off when you grab them.
14. Top-Heavy Shoe Rack with Patterned Side Frames
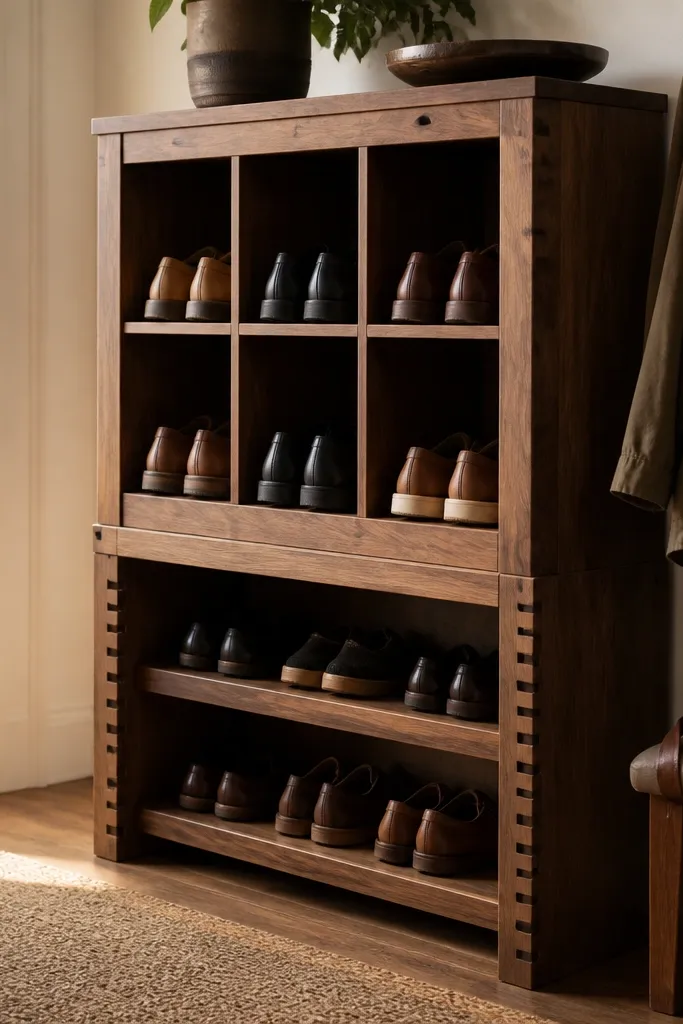
When people say shoe racks look “messy,” it’s usually because the design is top-light and the frame feels flimsy. A top-heavy rack with patterned side frames looks grounded and cozy, even when it’s holding a lot of shoes. The pattern can be simple — repeated notch cutouts or a grid of small squares — but it adds visual warmth. This style works in entryways where the rack faces the hallway, so you see the side detail. It also hides clutter better because the frame draws your eye upward.
Build side frames with a thicker top rail and cut simple decorative cutouts using a jigsaw or scroll saw. Assemble the main base and add vertical dividers for 10-12 inch sneakers, plus one deeper section if you store boots. Install a back board that’s partially open or slatted to keep airflow. Sand thoroughly, stain in a walnut or dark honey, and finish with matte poly. Anchor the top rail to studs to prevent tipping.
Cut patterns before assembly so you can clamp pieces flat and avoid wonky shapes.
Skip thin side panels; flimsy frames look cheap and wobble when pulled on.
15. Round-Edge Shoe Rack with Woven Basket Inserts
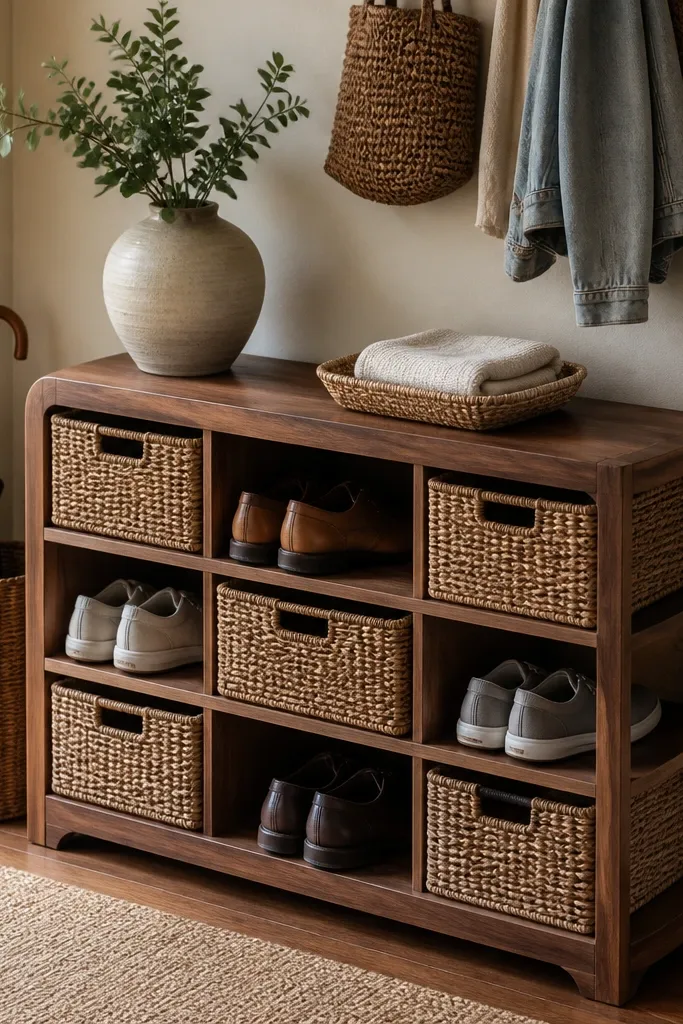
This one makes the entry feel cozy because woven baskets soften the wood and hide shoes that don’t look great in open storage. The wooden rack keeps baskets organized, and the rounded edges keep the whole piece friendly. Use it when you want a cleaner look without building complicated dividers for every shoe type. The basket inserts also help with odor because they let you remove shoes quickly for cleaning and air-drying. It’s ideal for entries where you store assorted pairs and want fast reset.
Build a rectangular wood frame with open cubby openings sized to match off-the-shelf woven baskets. Install a middle shelf or dividers so basket sizes stay consistent and don’t tip. Sand, round edges with a router or sand a consistent bevel, then stain and seal matte. Place baskets inside and add a front lip to keep them from sliding out. Add wall anchors through the back to stop movement when you pull baskets.
Choose baskets that sit 1/2 inch below the top rail so the wood looks intentional and the baskets don’t look crowded.
Don’t oversize baskets — they’ll force shoes to slump and the entry will look untidy.
16. Ladder-Shelf Shoe Rack with Warm Stain
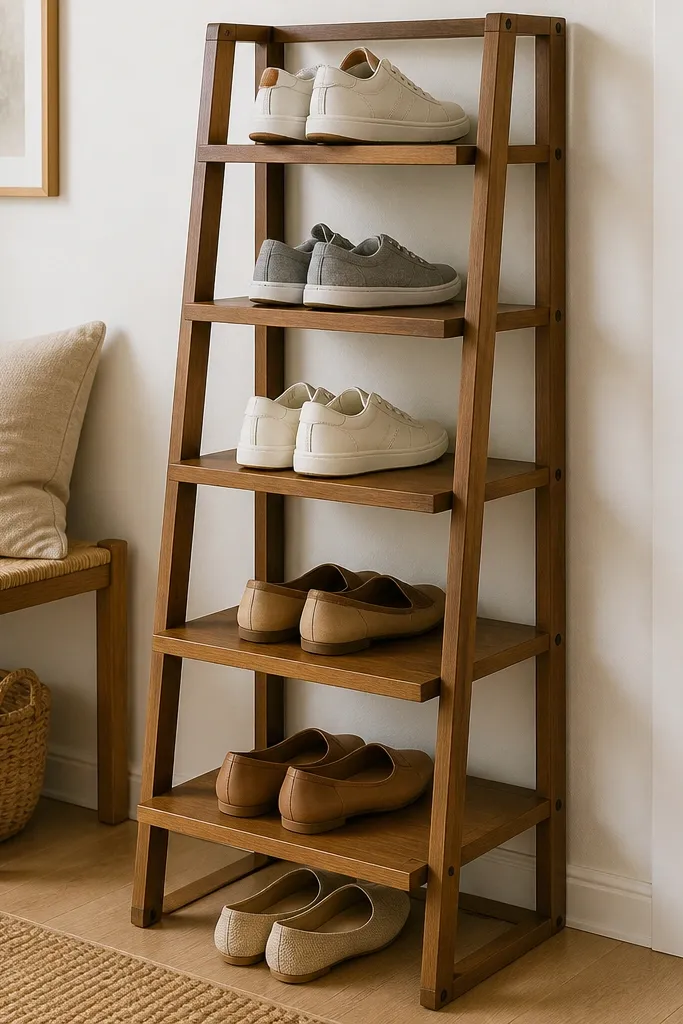
A ladder-shelf shoe rack looks cozy because it’s airy and has that friendly, open shelving vibe. Staggered shelves let you store shoes without a heavy cabinet look, and you can space them so sneakers stand upright while flats sit flatter. The warm stain and matte finish keep it from looking like a garage shelf. This is best for entries where you want shoes visible but not messy, because the staggered layout makes it easier to keep pairs grouped. It also looks great with a small runner rug nearby because the lines match.
Build two side “ladder” rails from 1x3 boards and connect them with staggered shelf supports cut to length. Create 4-6 shelves, spacing them 8-10 inches apart, and use 3/4-inch boards for shelf surfaces. Add a back brace board or diagonal supports so the ladder doesn’t rack sideways. Sand all edges smooth, stain in a warm walnut tone, and seal matte. Anchor to studs using two brackets at the top rail.
Pre-drill shelf screws at an angle so the shelves pull tight without splitting the rails.
Don’t skip diagonal bracing; ladder racks tip when people yank shoes out.
17. Slim Shoe Rack with Drawer-Style Key Shelf
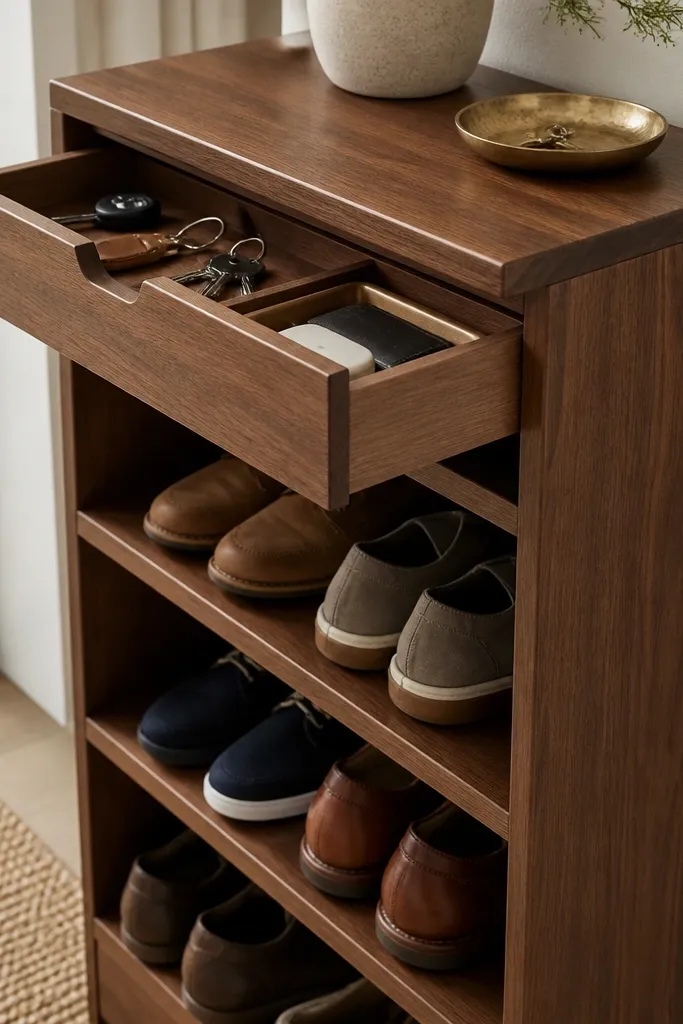
This is a practical cozy upgrade: the storage is slim, but the top part actually gets used. A drawer-style key shelf keeps small items from landing on the floor, so the entry stays neat and the rack looks good even on busy days. The shoe cubbies stay open for airflow, and the wood finish gives warmth. It’s ideal for narrow hallways where you can’t fit a bench but still want a furniture-like feel. The look is clean because the top shelf creates a horizontal line that visually calms everything below.
Cut side panels and create a slim frame with cubby openings sized 10-11 inches wide and 8-10 inches tall. Build a top drawer-like shelf using 1/2-inch plywood sides and a front panel, then mount it on slides or simple cleats so it opens smoothly. Add a back slat panel for airflow, and install a front lip to keep shoes from sliding forward. Sand, stain, and seal matte. Anchor the rack to studs through the back brace at the top.
Add felt pads to the drawer shelf contact points to stop squeaks and keep the finish from wearing.
Don’t make the top shelf too deep — if it sticks out, it bumps bags and looks awkward.
18. Solid-Top Shoe Rack with Leather Strap Front
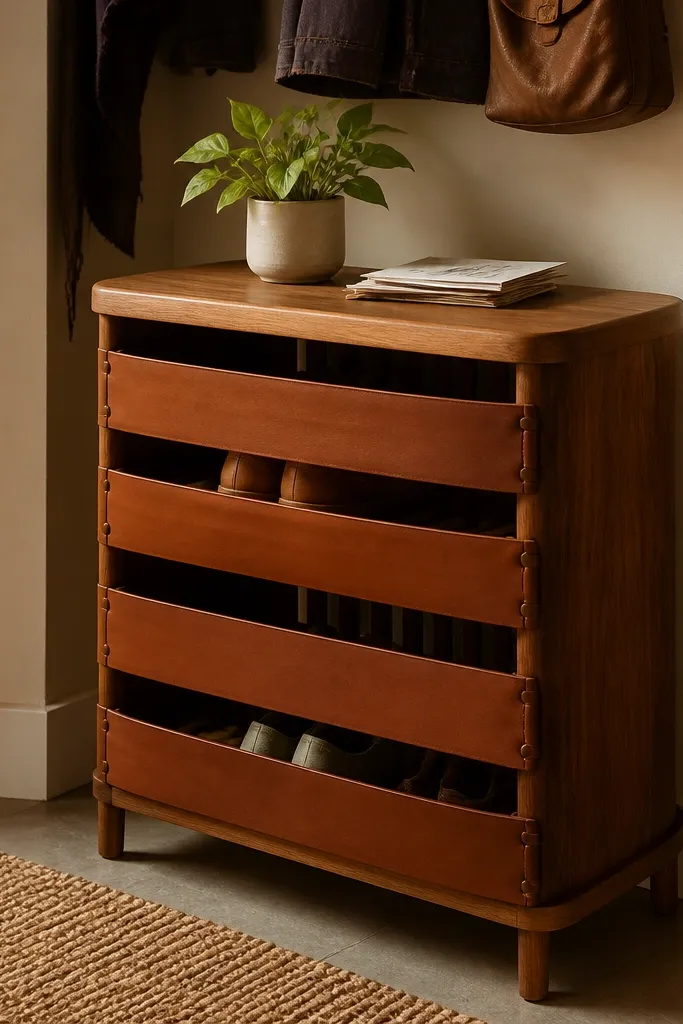
Leather straps add a cozy, warm texture contrast to wood and make the rack look intentional. This design hides shoes behind a front that can be partially closed, but keeps airflow by using slats or gaps on the interior. The solid top is great for everyday grab items, and the leather makes the whole thing feel like a handmade piece. It’s best for entries that need organization without going full cabinet. The look reads premium because the materials contrast is clear and the lines are clean.
Build the main box frame with cubbies inside, then install a solid top board that overhangs the front by about 1 inch. Add a front panel made from slats or a thin grille so air moves, then attach leather straps across it using small brass screws and washers. Create interior dividers for 10-12 inch shoe spacing and a deeper section if you store boots. Sand, stain, and seal the wood matte, then condition the leather with a light leather balm. Add anti-tip anchors through the top rail or back brace.
Use brass washers under screw heads so the leather doesn’t compress and curl over time.
Don’t skip sealing around screw holes; unfinished end grain around fasteners can absorb moisture.
19. Rustic Ladder Bench Rack with Distressed Edges
This is the cozy entry piece that looks like it belongs in a cabin, even in a modern apartment. The ladder sides add height and visual interest, while the bench top gives you a practical place to sit. Distressed edges make the wood feel lived-in, but you still keep the function of open cubbies for airflow. It’s great when you want storage that looks like furniture and you don’t mind a slightly rugged vibe. Keep the finish matte so it doesn’t look shiny or cheap.
Build a bench-like frame with two ladder side rails and two to three internal shelves or cubby dividers. Use dividers spaced for sneakers (10-11 inches) and leave the bottom cubby deeper if you store boots. Sand to 120 grit, then distress edges lightly with 150-grit sandpaper and a metal chain for tiny scuffs — keep it subtle. Apply a warm stain, then seal matte polyurethane. Anchor to studs and add rubber feet so it doesn’t slide on hardwood.
Distress after staining, not before, so the wear shows the wood tone instead of raw pale spots.
Don’t overdo distressing; heavy scuffs make the rack look dirty instead of rustic.
20. Two-Tone Oak and Walnut Shoe Rack with Slat Front
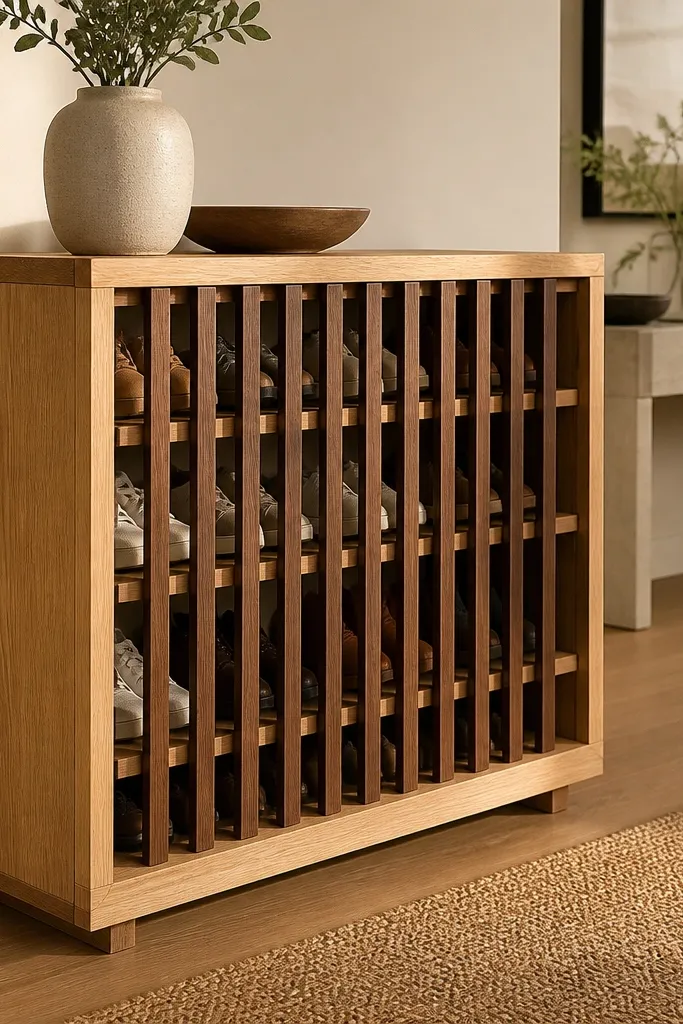
Two-tone wood makes a shoe rack look designed, even when it’s a simple build. Use oak for the frame and walnut for the slat front or dividers, so the entry has contrast without looking busy. The slat front keeps airflow and gives that cozy texture pattern. This style is very photogenic under warm lighting because the oak stays lighter and the walnut adds depth. It works in modern entries where you want warmth but not heavy farmhouse clutter.
Build the frame from oak boards and sand smooth. Cut slats and dividers from walnut boards and assemble the front panel separately so you can stain evenly. Apply oak stain to the frame first, rinse/wipe, then stain walnut pieces and seal both with matte poly. Assemble the rack and use a square to keep the slats aligned. Anchor the back to studs and add a bottom shelf for stability.
Mask edges with painter’s tape when staining so the two tones stay crisp and don’t bleed into each other.
Don’t use the same stain color on both woods; it flattens the contrast and removes the cozy effect.



