

1. Simple Daisy Chain
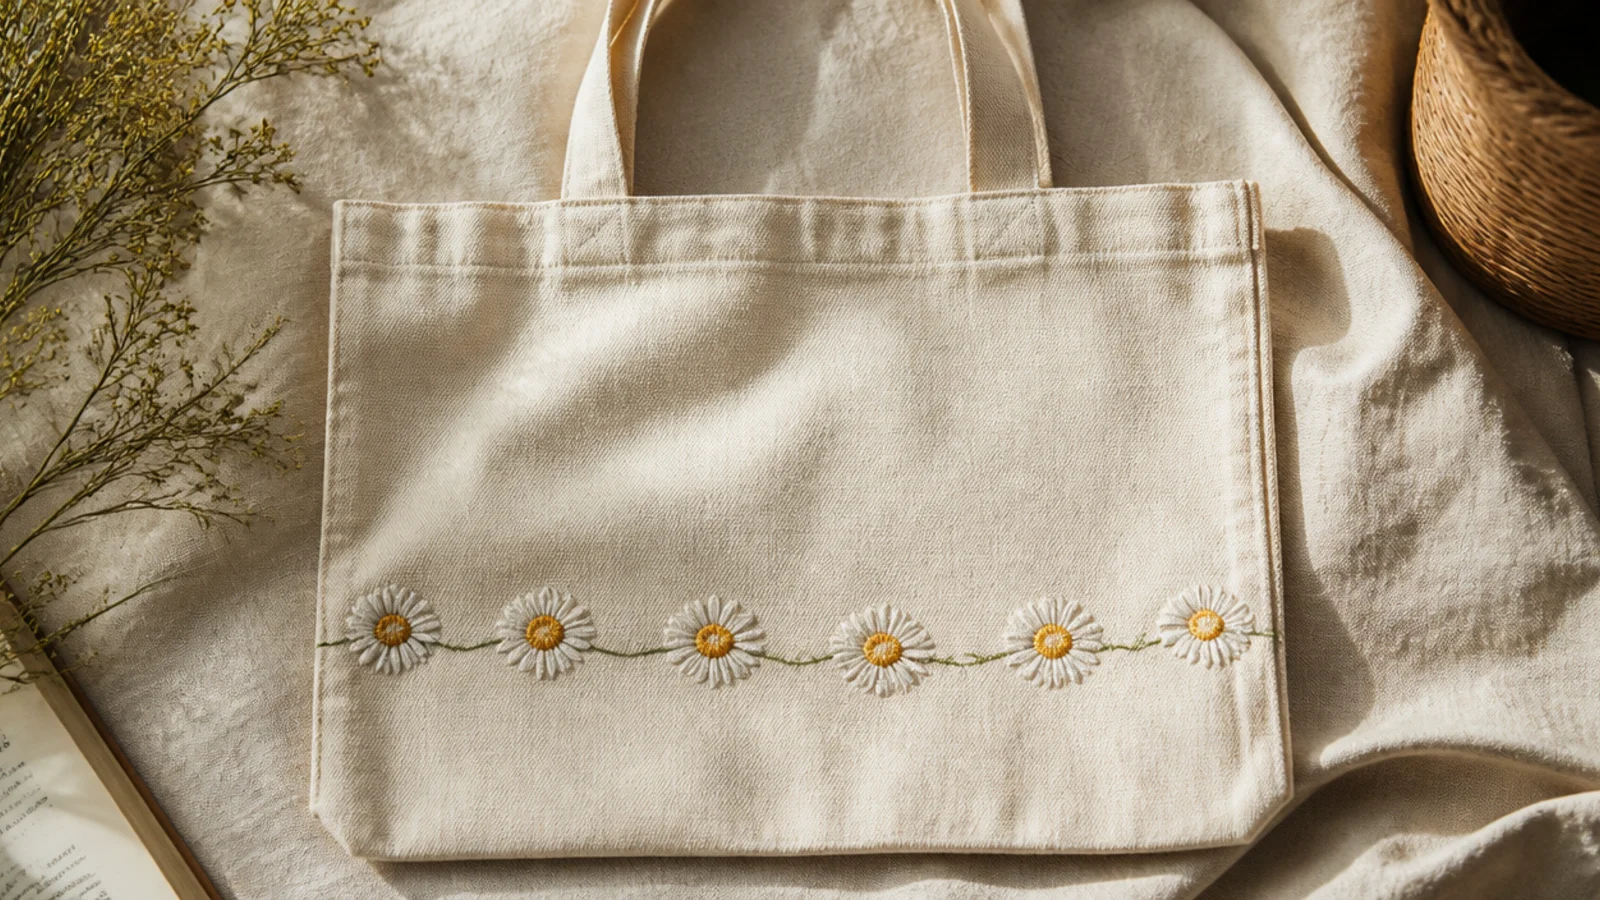
A chain of simple daisies is the friendliest flower to start with — each bloom is just petal dabs around a center dot. Linked by one green stem, they read as a sweet garland. This design teaches the single petal press you will use for every flower after it.
Editor's notePress each petal from the outer tip inward toward the center and lift; the tapered end that leaves is what makes the daisy look soft.
Prep and iron the tote, then insert cardboard. Paint a thin green stem across the lower front with a liner brush. At intervals, press five or six white petals in a circle with a size 4 round brush, pointing each outward from a center point. Add a yellow center dot to each, tuck in small leaf dabs, cure, and heat-set.
Skip thisDo not paint the yellow centers before the petals; add them last so they sit cleanly on top instead of getting covered.
2. Single Bold Sunflower
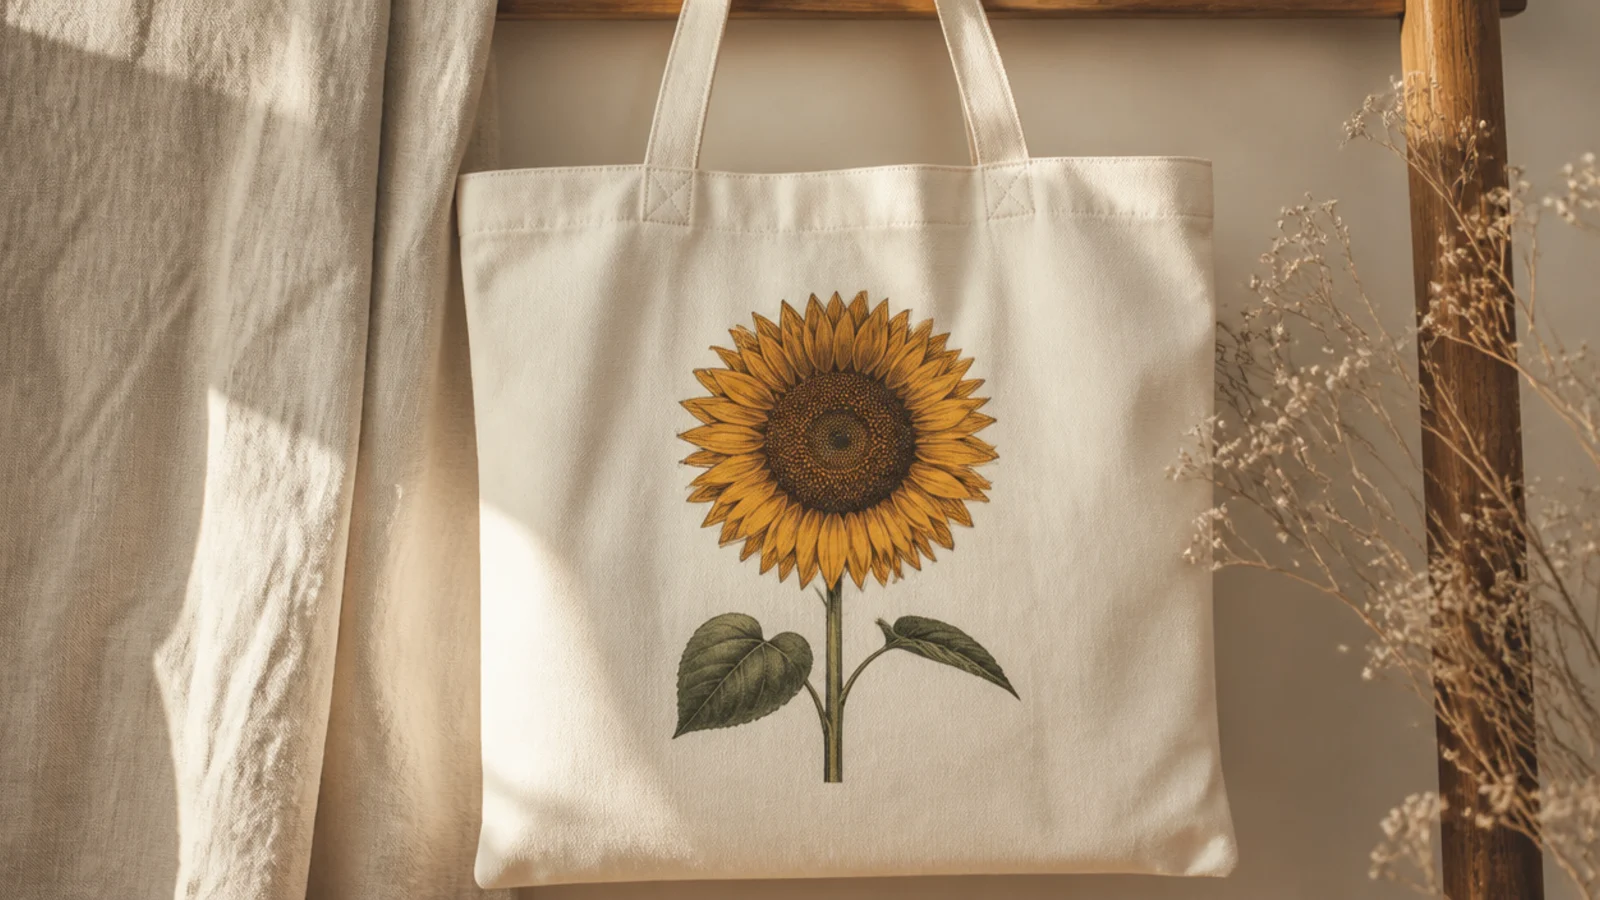
One big sunflower makes a cheerful, high-impact statement with a single bloom. The layered golden petals and dark textured center are simple shapes at a large scale. It suits anyone who wants a bold flower without a whole bouquet.
Editor's noteOffset the back ring of petals so they sit between the front ones; two staggered rings give the sunflower its full, layered look.
Prep the tote and insert cardboard. Pencil a circle for the center. Press two rings of pointed ochre petals around it with a size 6 round brush, offsetting the back ring so it peeks between the front petals. Fill the center brown, then stipple darker brown dots over it for seed texture. Add a green stem and a couple of leaves, cure, and heat-set.
Skip thisDo not leave the center flat brown; stippling darker dots over it is what gives a sunflower its realistic seeded texture.
3. Lavender Sprigs
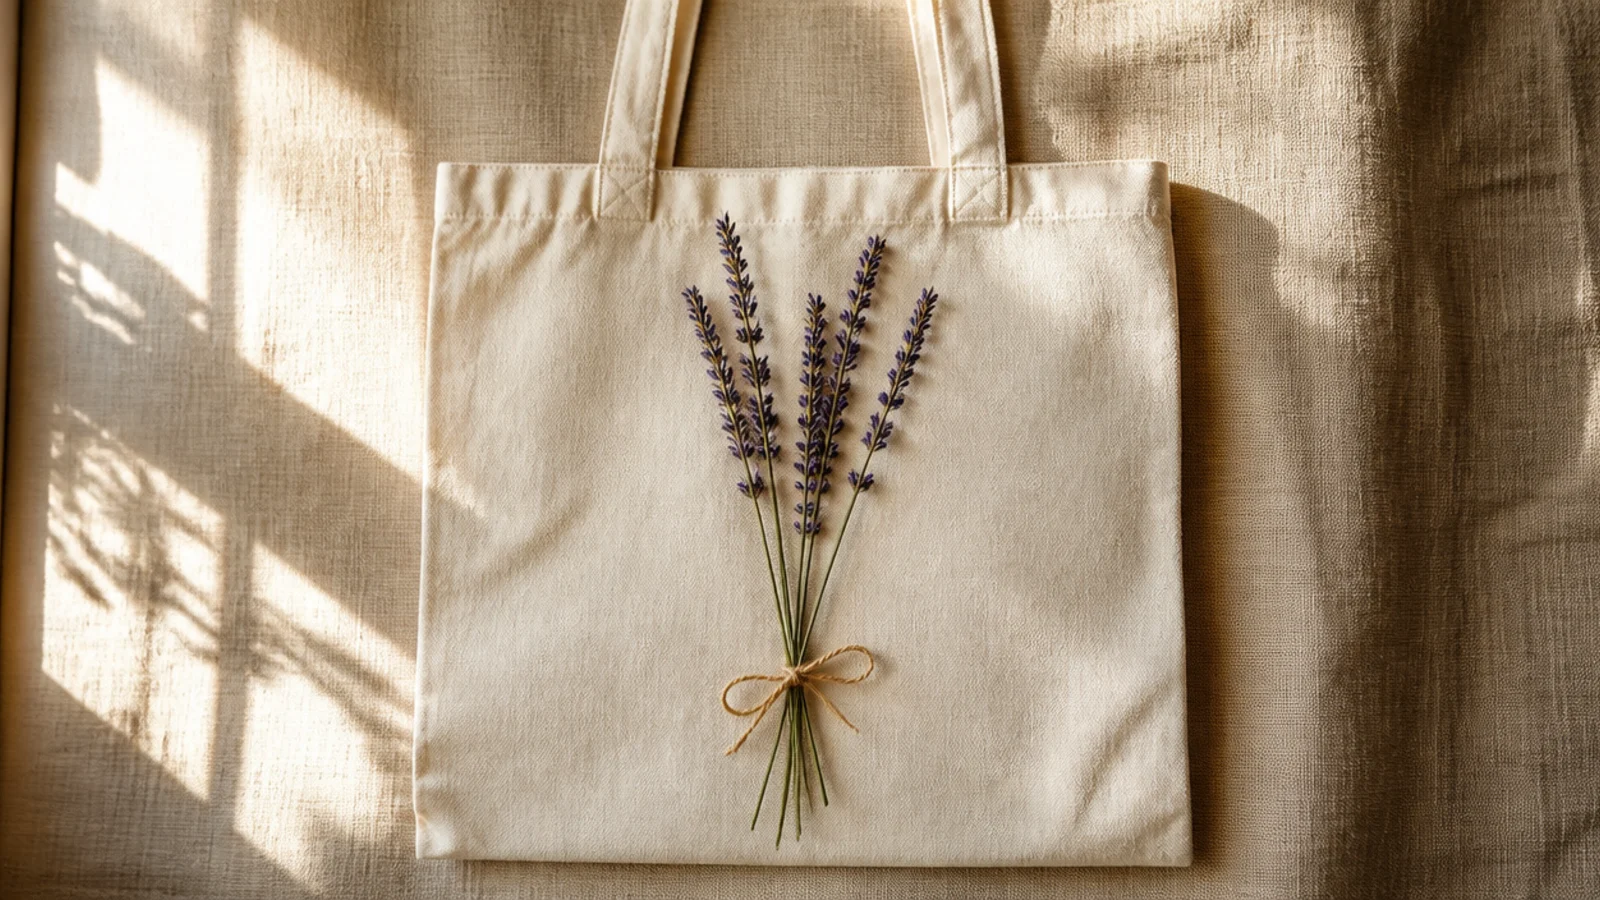
A little bundle of lavender is elegant and calming, built entirely from small dots climbing a thin stem. There is no petal work at all. Three sprigs tied at the base look like a gathered bunch.
Editor's noteMake the buds smaller and sparser toward the tip of each sprig; the taper is what makes lavender read as lavender.
Prep and iron the tote, insert cardboard. Paint three thin sage stems rising from one point with a liner brush. Along the top third of each, dab small purple buds in a tapering column, denser at the bottom and finer toward the tip. Add a few slim leaves low on the stems and a thin tie at the base, cure, and heat-set.
Skip thisDo not run the buds all the way down the stem; lavender flowers cluster at the top, with bare stem below.
4. Tidy Tulip Row
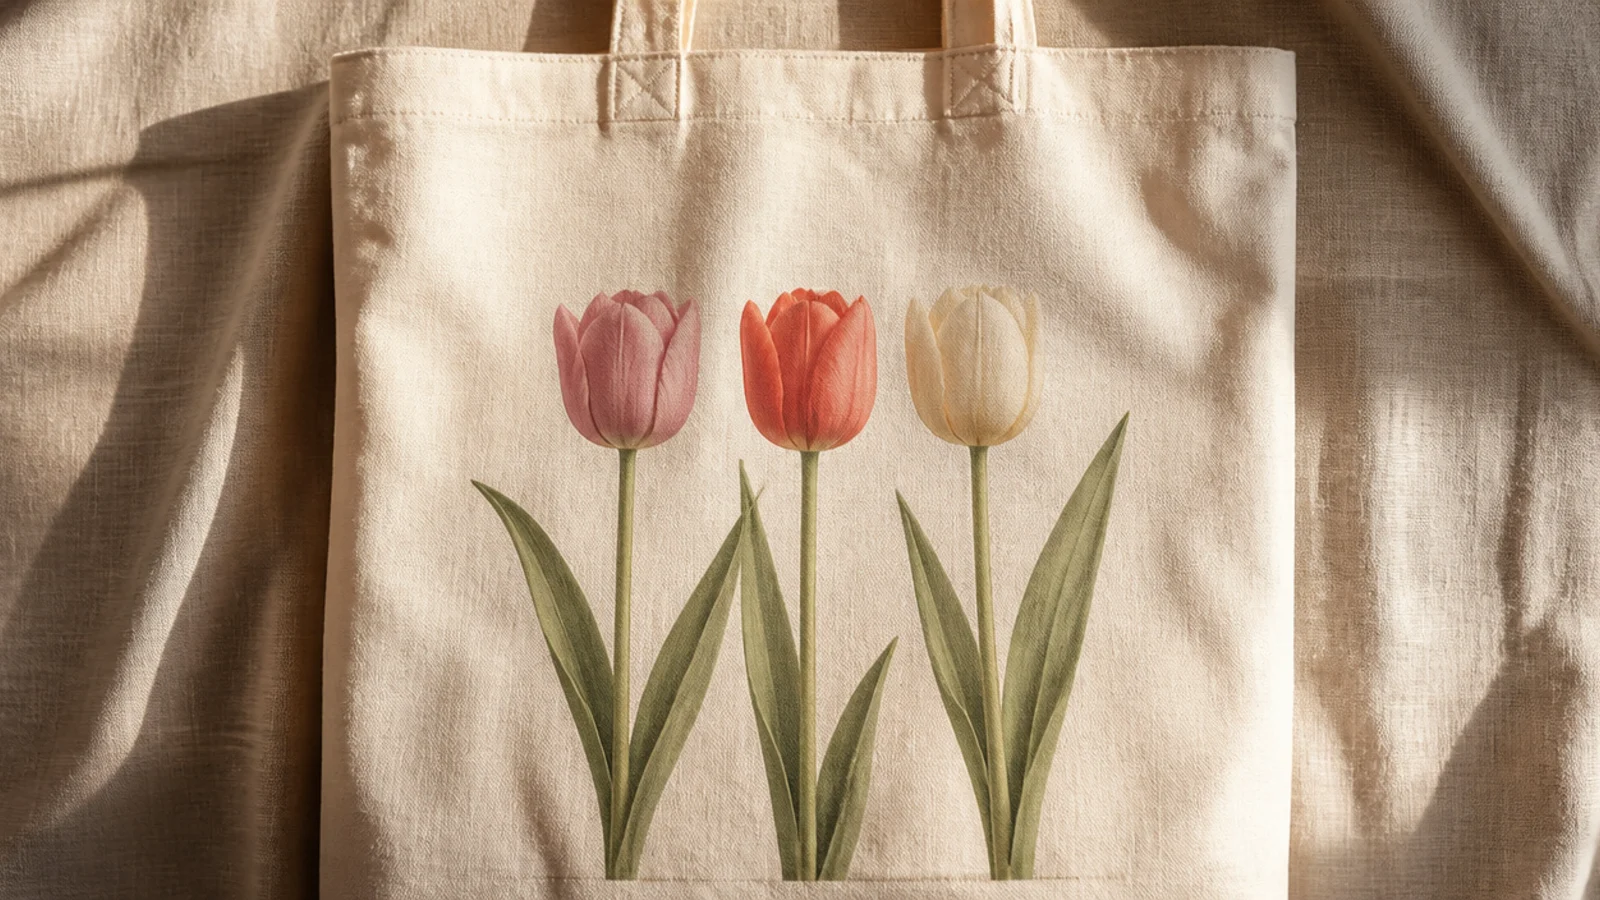
A row of simple tulips is clean and springlike, and each bloom is just three rounded petals. The upright stems and long leaves give it a tidy, graphic feel. Varying the three flower colors keeps the row lively.
Prep the tote and insert cardboard. Paint three straight green stems with a liner brush. At the top of each, press a rounded cup of three petals — one center petal and one on each side — with a size 4 round brush, in dusty pink, coral, and cream. Add one long sword leaf beside each stem, cure, and heat-set.
Paint the two outer petals slightly taller than the center one so each tulip cups inward like a real bloom.
Do not make the petals pointed; tulips read best with soft rounded tops, while points make them look like flames.
5. Red Poppy Cluster
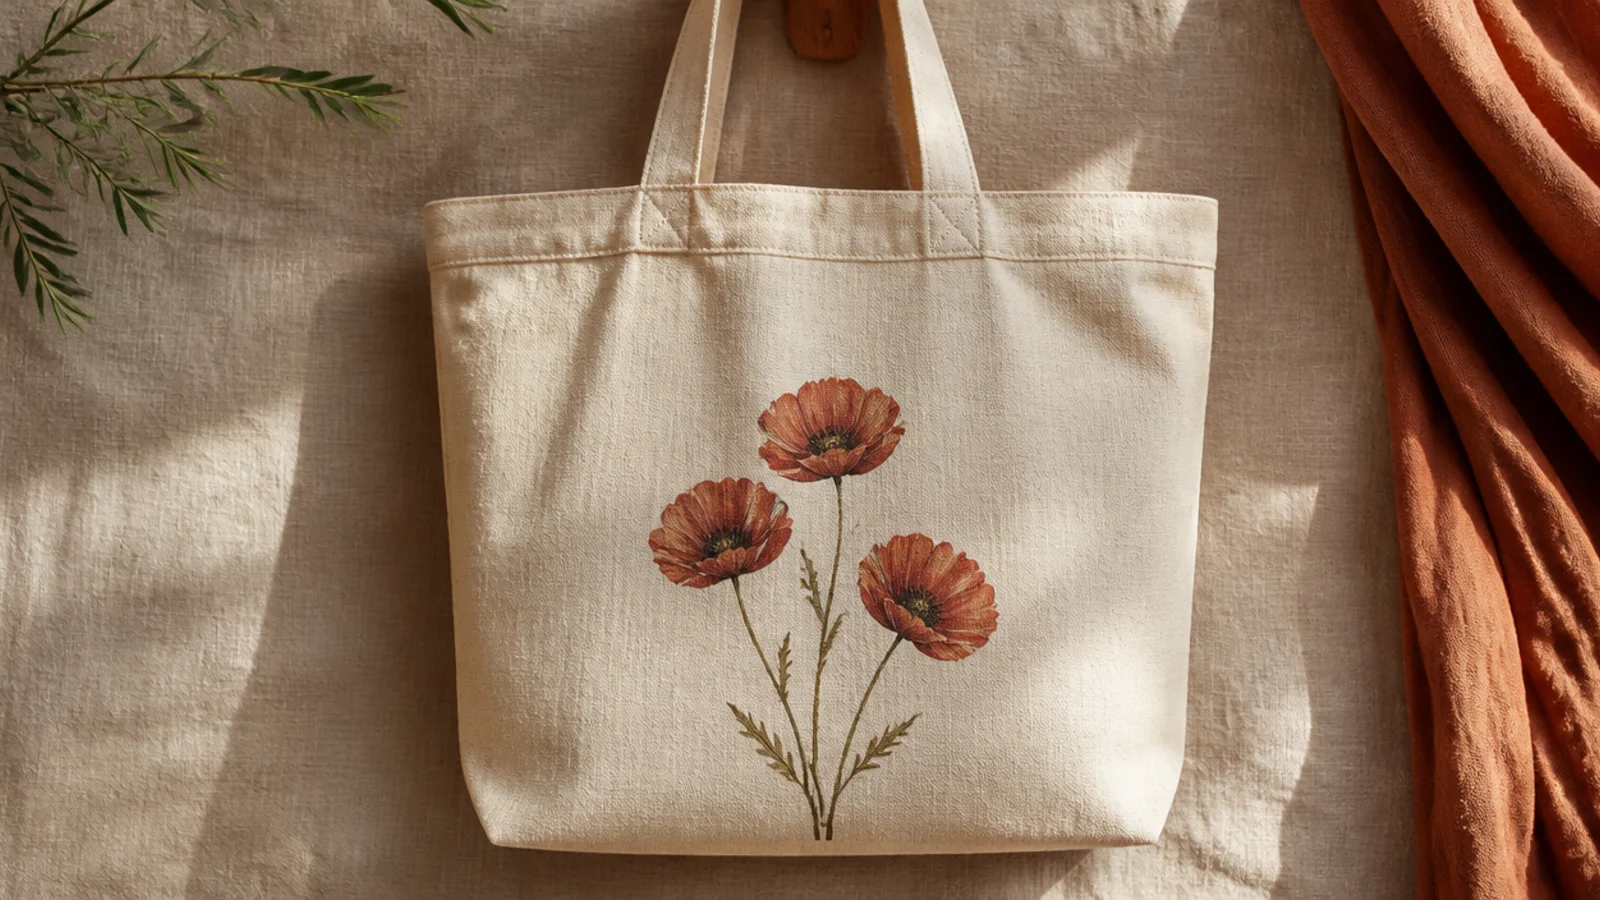
Poppies are loose, papery flowers built from a few wide petals around a dark center. Their slightly ragged edges are forgiving and add character. A small cluster in muted red feels wild and painterly.
Editor's noteLet the poppy petal edges stay slightly ragged and overlapping; poppies are papery, so imperfect edges look more real than tidy ones.
Prep and iron the tote, insert cardboard. Paint thin wiry green stems. For each poppy, press four wide, slightly overlapping petals in dusty red with a size 6 round brush, letting the edges stay a little ragged. Dab a black center and ring it with tiny black dots for stamens. Add a bud or two, cure, and heat-set.
Skip thisDo not use fire-engine red; a slightly dusty, deepened red keeps the poppies looking painterly instead of plastic.
6. Spiral Rose Posy
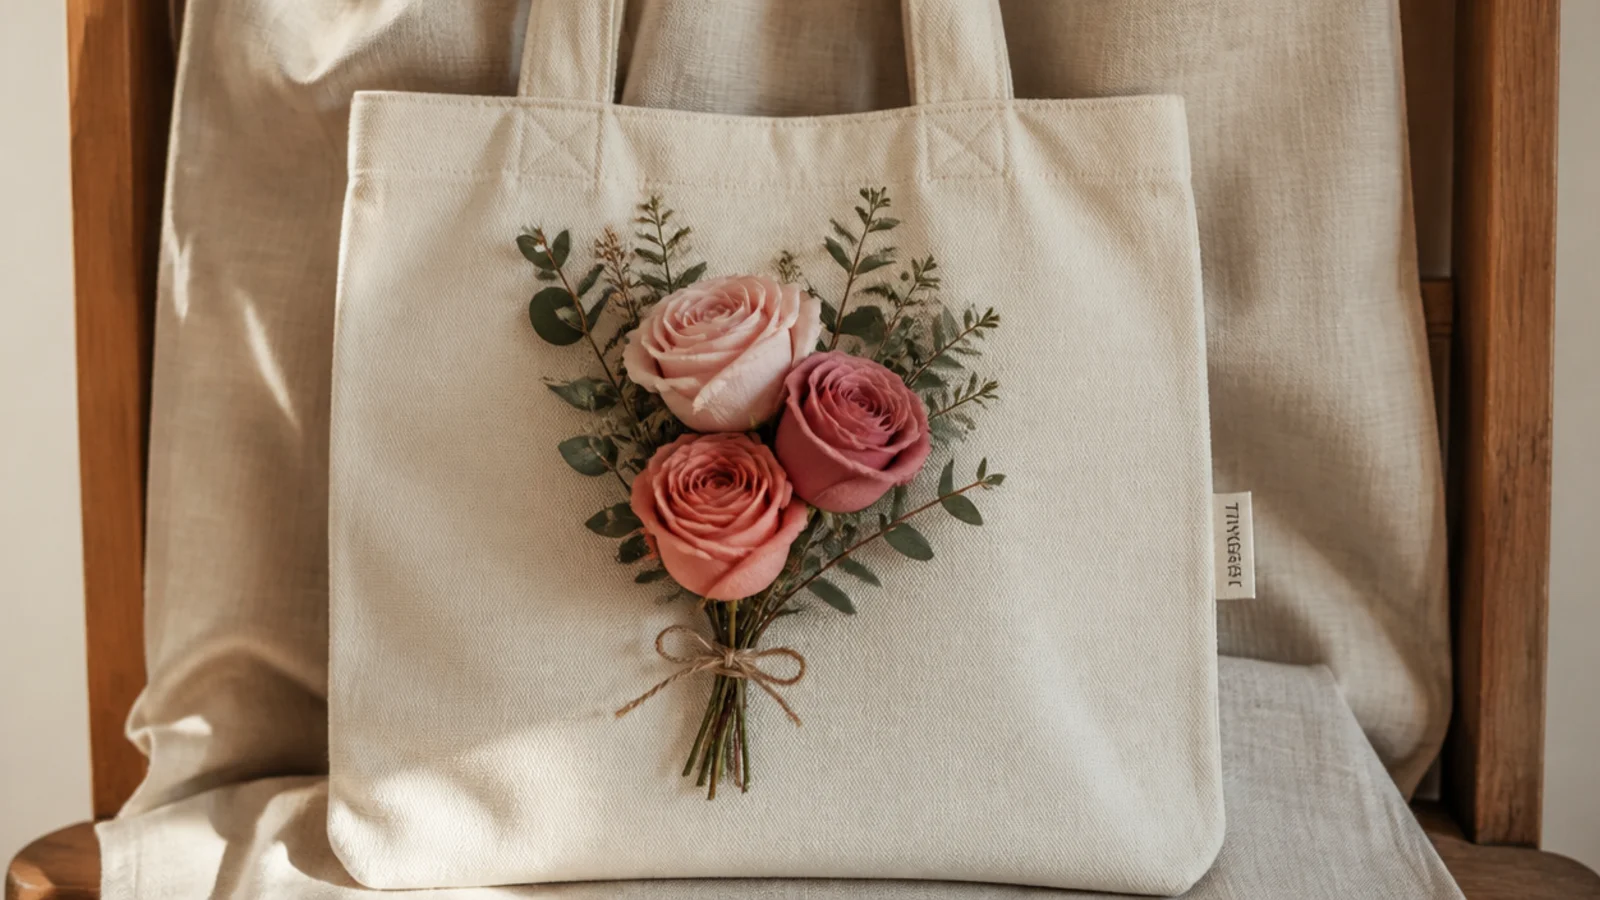
Spiral roses look intricate but are painted as a coiled swirl that reads instantly as a rose. Grouped into a small posy, they feel romantic and full. Blush and dusty rose together give soft, layered color.
Editor's noteStart each rose from a tight center spiral and open the strokes outward; the coil-to-petal progression is what fakes a real rose.
Prep the tote and insert cardboard. For each rose, paint a small spiral swirl in blush with a size 4 round brush, then add a few curved comma strokes around the outside in a deeper rose for outer petals. Cluster three roses, tuck sage leaves between them, add a loose tie at the base, cure, and heat-set.
Skip thisDo not overwork the roses trying for realism; a few confident swirls read as roses, while fussy petals turn to mud.
7. Cherry Blossom Branch
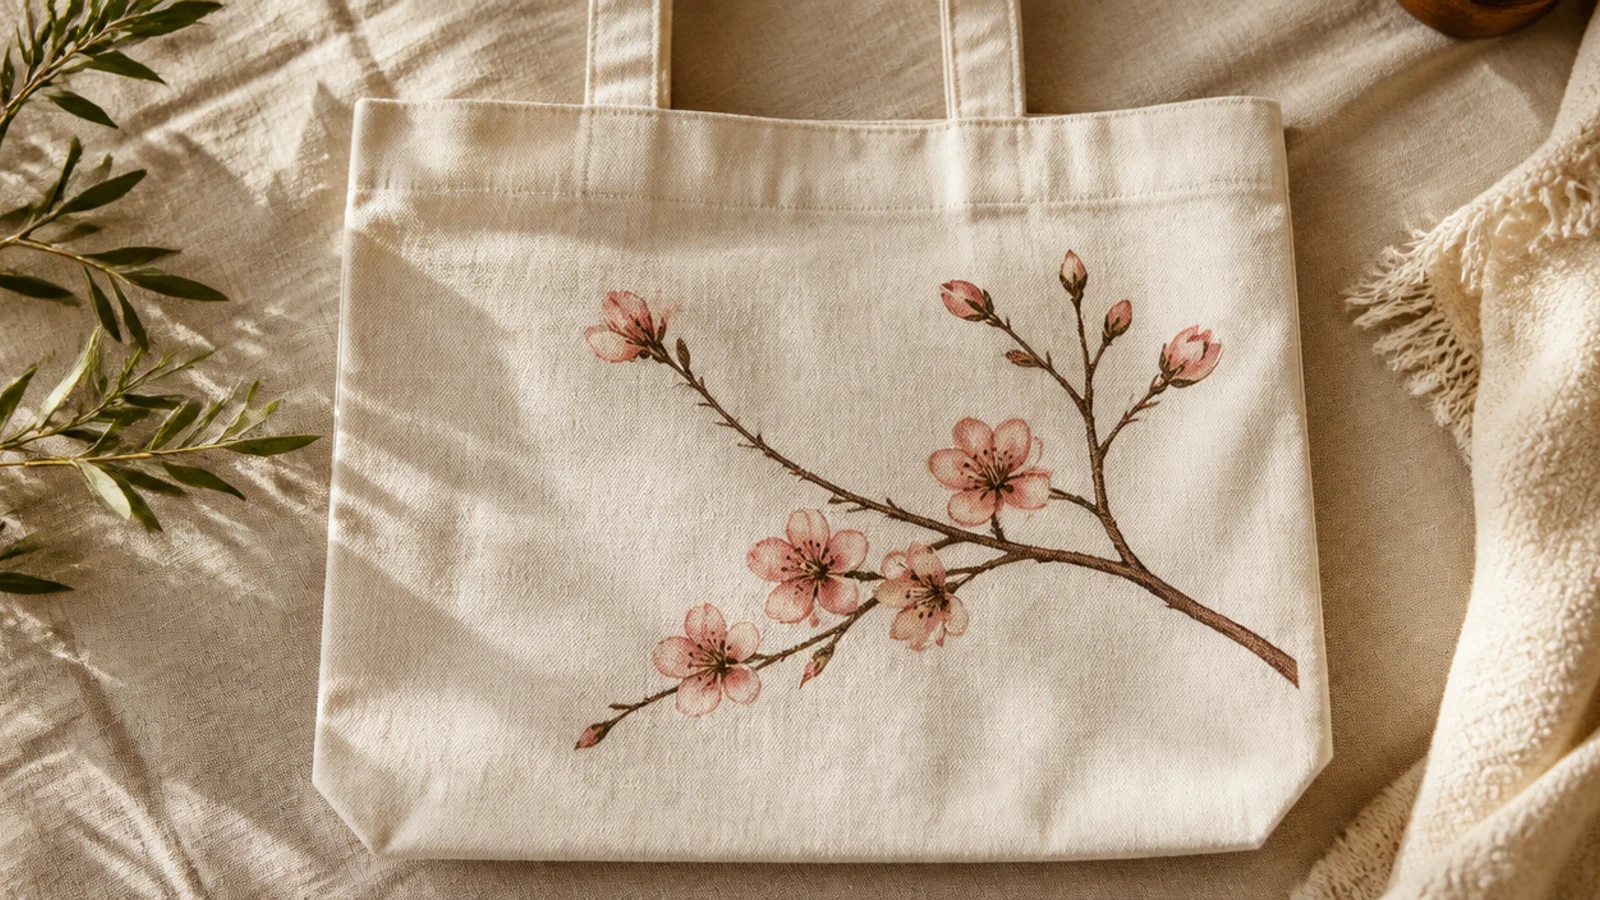
A cherry blossom branch is delicate and graceful, with tiny five-petal flowers scattered along a bare arcing branch. The negative space around the branch is part of the beauty. It looks Japanese and refined.
Editor's noteCluster a few blossoms and leave stretches of bare branch between them; the empty branch is what makes it look elegant.
Prep and iron the tote, insert cardboard. Paint a slender brown branch arcing across the front with a liner brush, adding a few thin offshoots. Along it, press five small pink petals in a circle for each blossom, with a tiny darker center. Add a few unopened buds as single dots and heat-set after curing.
Skip thisDo not cover the whole branch in flowers; a solidly flowered branch looks heavy, while gaps keep it delicate.
8. Wildflower Meadow Band
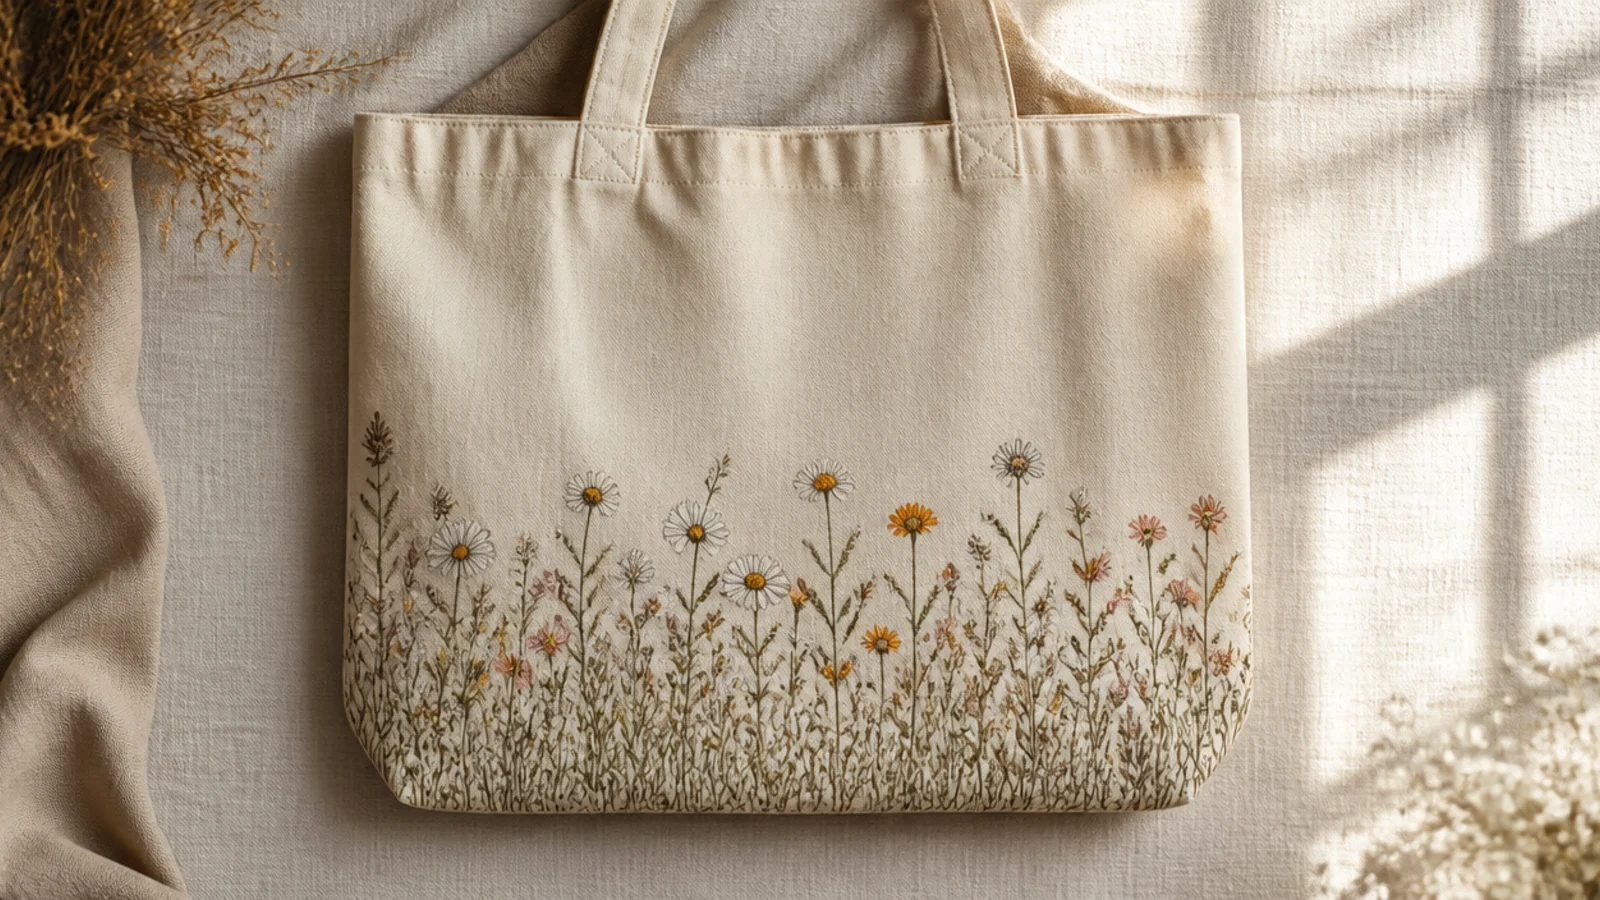
A loose meadow band across the bottom mixes several simple flowers and grasses for a wild, gathered look. Variety and uneven heights are what make it feel natural. It fills the lower bag while leaving the top open.
Editor's noteStagger the flower heights and let stems cross; a level, evenly spaced row looks planted, while a jumble looks like a real meadow.
Prep the tote and insert cardboard. Paint a scatter of thin green stems and grass blades of varying heights across the lower front. Top some with daisy dabs, others with bud dots and small dashes, in dusty pink, ochre, and cream. Vary heights and let some overlap, then add tiny leaves, cure, and heat-set.
Skip thisDo not use too many colors; three flower tones plus green keeps a busy meadow from turning into visual noise.
9. Dandelion Puff
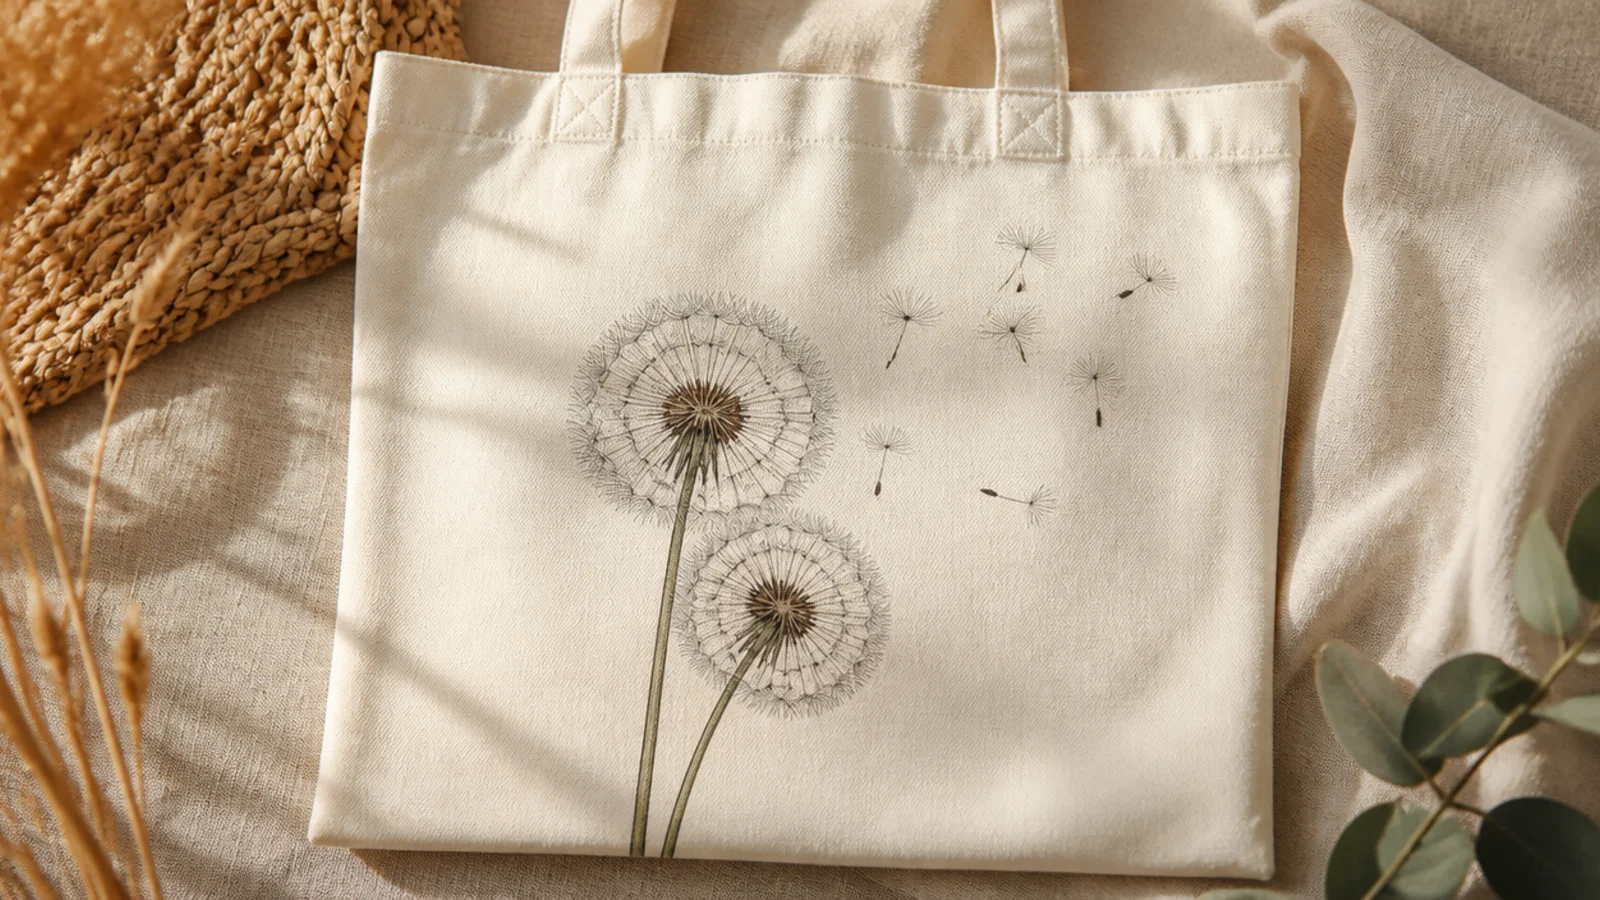
A dandelion puff is all fine radiating lines from a center, with a few seeds floating off — airy and poetic. It is line work, not petals, so a fine brush or marker does it. The drifting seeds add movement and charm.
Prep and iron the tote, insert cardboard. Mark a small center dot. With a liner brush or fine fabric marker, draw many thin lines radiating out in a sphere, each ending in a tiny fluff dab. Add a thin curved stem, then draw a few detached seeds drifting to one side, cure, and heat-set.
Let a few seeds break away and drift toward one edge; the escaping seeds are what give the dandelion its breezy, wish-making feel.
Do not make the radiating lines thick or uneven; fine, even lines are what read as a delicate seed head rather than a burst.
10. Hydrangea Cluster
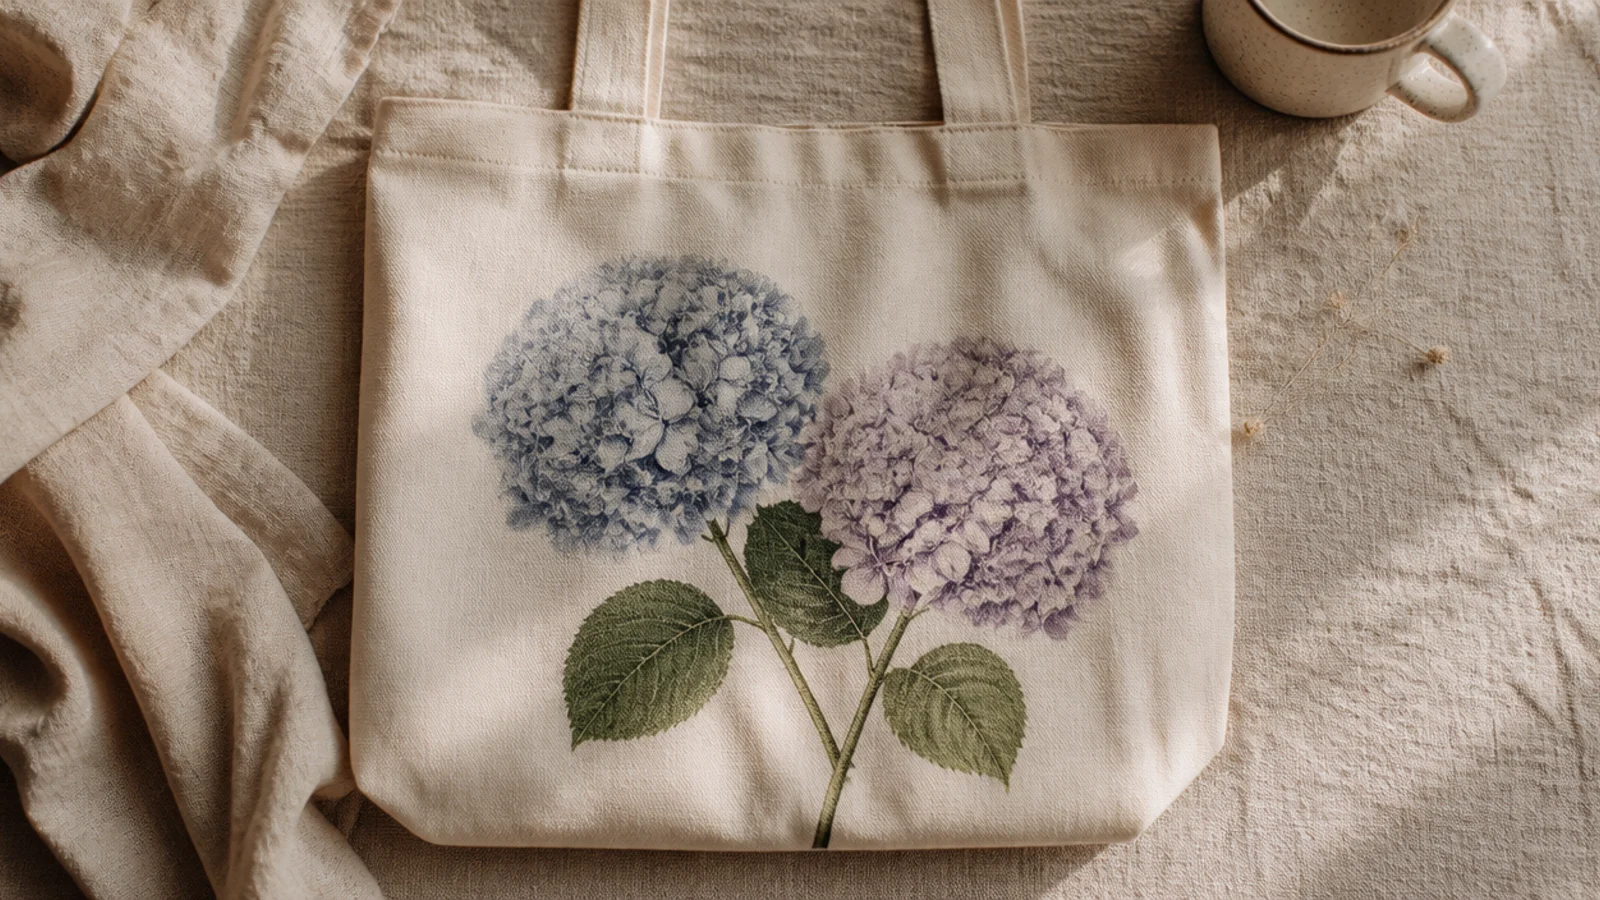
A hydrangea is a rounded cluster of many tiny four-petal florets, built up dot by dot. The mass of small blooms in blended blues and lilacs looks lush and full. It is repetitive but genuinely easy — just lots of little flowers packed together.
Editor's noteMix two close shades of blue and lilac across the florets; the subtle color variation is what gives a hydrangea its depth.
Prep the tote and insert cardboard. Pencil a rounded mound shape for each bloom. Fill it with many small four-petal florets, pressing four dots per floret with a size 2 round brush, mixing dusty blue and lilac. Pack them close to fill the mound, add big green leaves below, cure, and heat-set.
Skip thisDo not leave gaps of canvas showing between florets; a hydrangea needs to look densely packed, so fill the whole mound.
11. Pressed Pansy Print
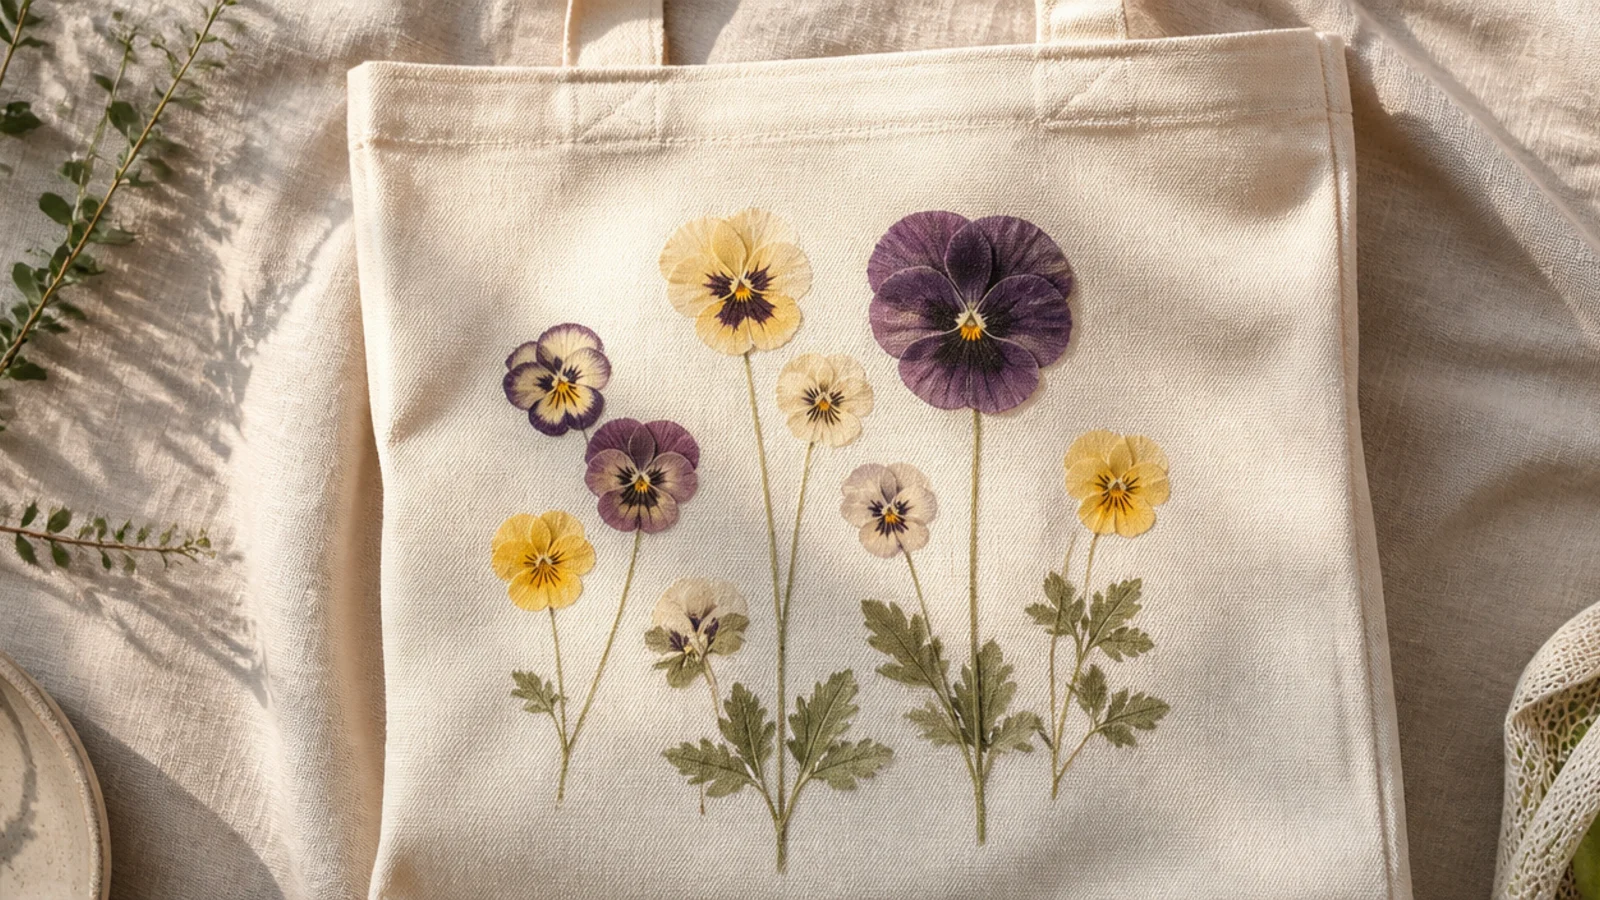
Pansies painted flat and simple look like pressed flowers in a botanical study. Their two-tone petals with a dark face are distinctive and cheerful. Arranged in a loose scatter, they feel like a pressed-flower keepsake.
Editor's noteAdd the dark radiating face lines only after the petals dry; that little dark face is what makes a pansy unmistakable.
Prep and iron the tote, insert cardboard. For each pansy, press two larger back petals and three smaller front petals in purple with a size 4 round brush. Once dry, add a soft yellow patch at the base of the front petals and fine dark lines radiating from the center. Scatter three or four pansies, add small leaves, cure, and heat-set.
Skip thisDo not skip the two-tone detail; a flat purple flower with no yellow face just looks like a generic bloom, not a pansy.
12. Abstract Floral Blobs
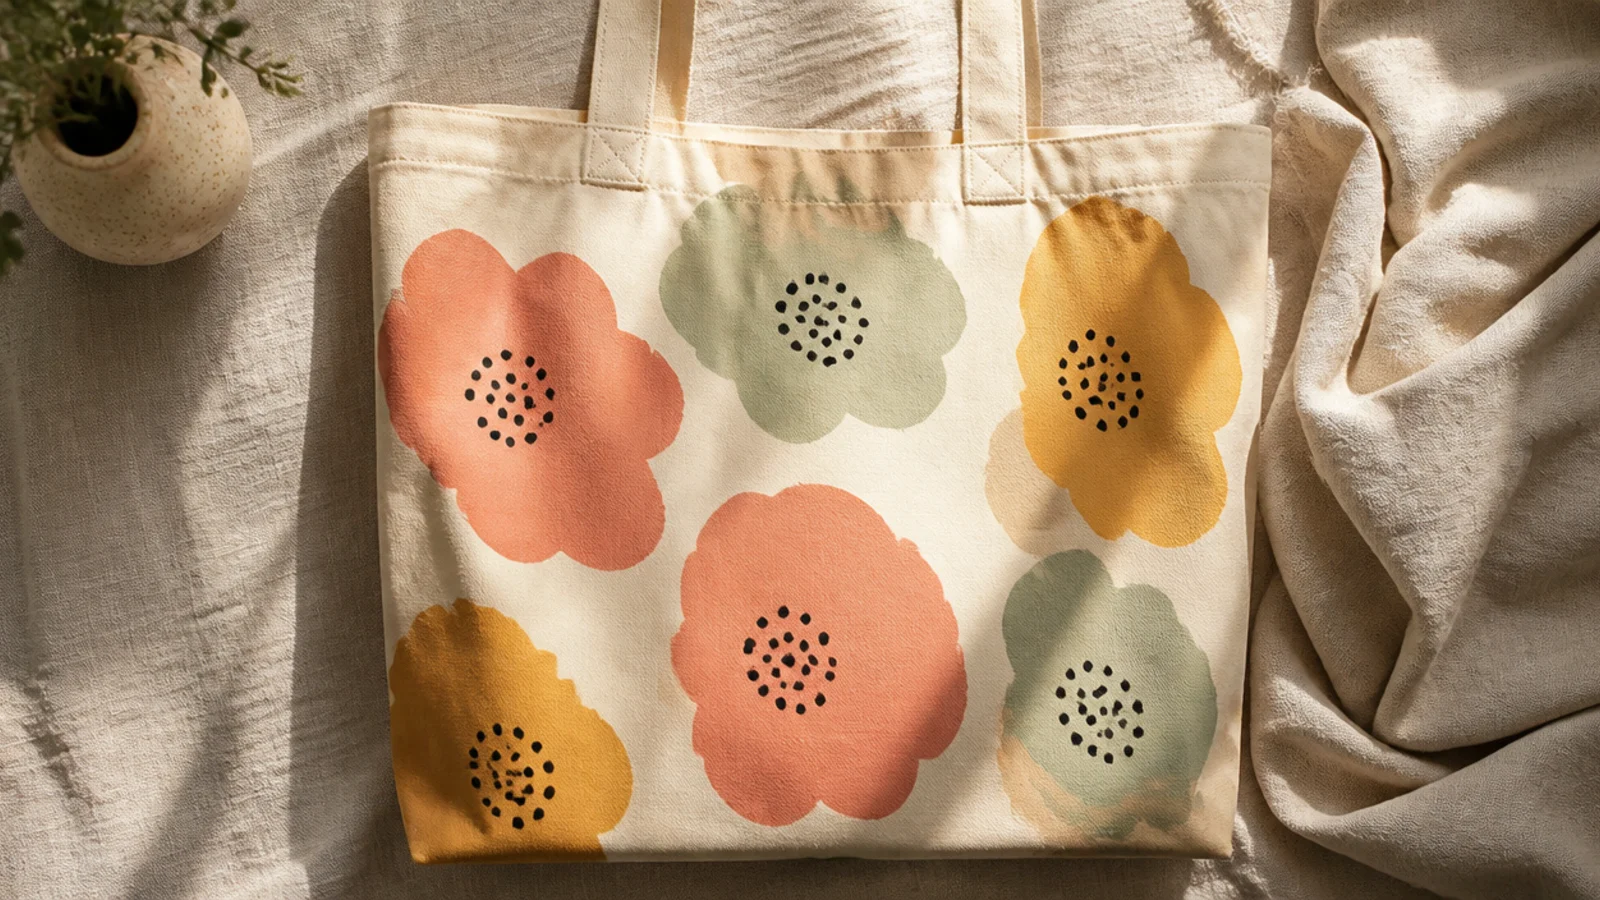
Abstract flowers built from loose color blobs and dot centers are modern, forgiving, and impossible to get wrong. There is no correct shape, so every bloom works. Muted blobs with contrasting centers read as flowers without any realism.
Editor's noteAdd a clear contrasting center to each blob; that single dot is what turns an abstract shape into a recognizable flower.
Prep the tote and insert cardboard. Press a few soft, rounded color blobs across the front with a size 6 round brush in coral, ochre, and sage. Add a contrasting dot or short-dash center to each blob so it reads as a flower. Connect some with thin stems, keep spacing loose, cure, and heat-set.
Skip thisDo not blend the blobs into each other; let each keep its own soft shape so they read as separate flowers.
13. Full Peony Bloom
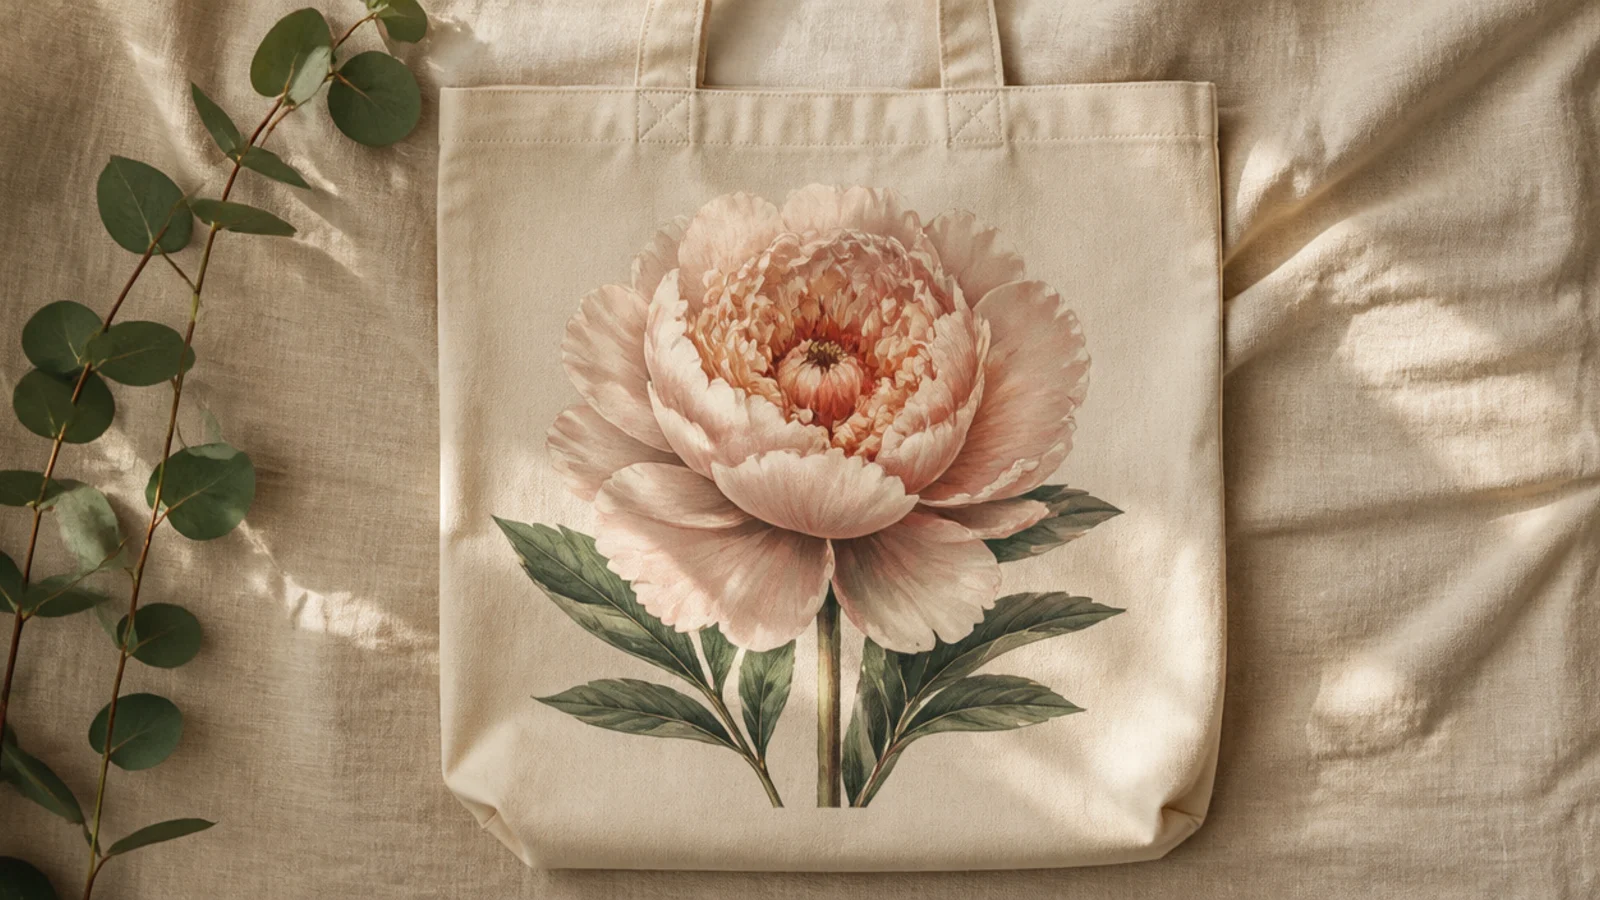
A single lush peony is romantic and full, built from layered ruffled petals in tones of one color. The many overlapping strokes give it depth. It is the most advanced bloom here but forgiving because peonies are meant to look loose and full.
Editor's noteWork from small tight petals in the center outward to larger looser ones; the size progression gives the peony its full, ruffled depth.
Prep and iron the tote, insert cardboard. Pencil a circle. Fill the center with small curved petal strokes in the palest blush, then work outward in wider strokes in slightly deeper blush, letting layers overlap. Ruffle the outer edge with looser petals, add a few sage leaves, cure, and heat-set.
Skip thisDo not paint every petal the same blush; shifting from pale center to deeper edges is what gives the bloom dimension.
14. Cheerful Daffodil Trio
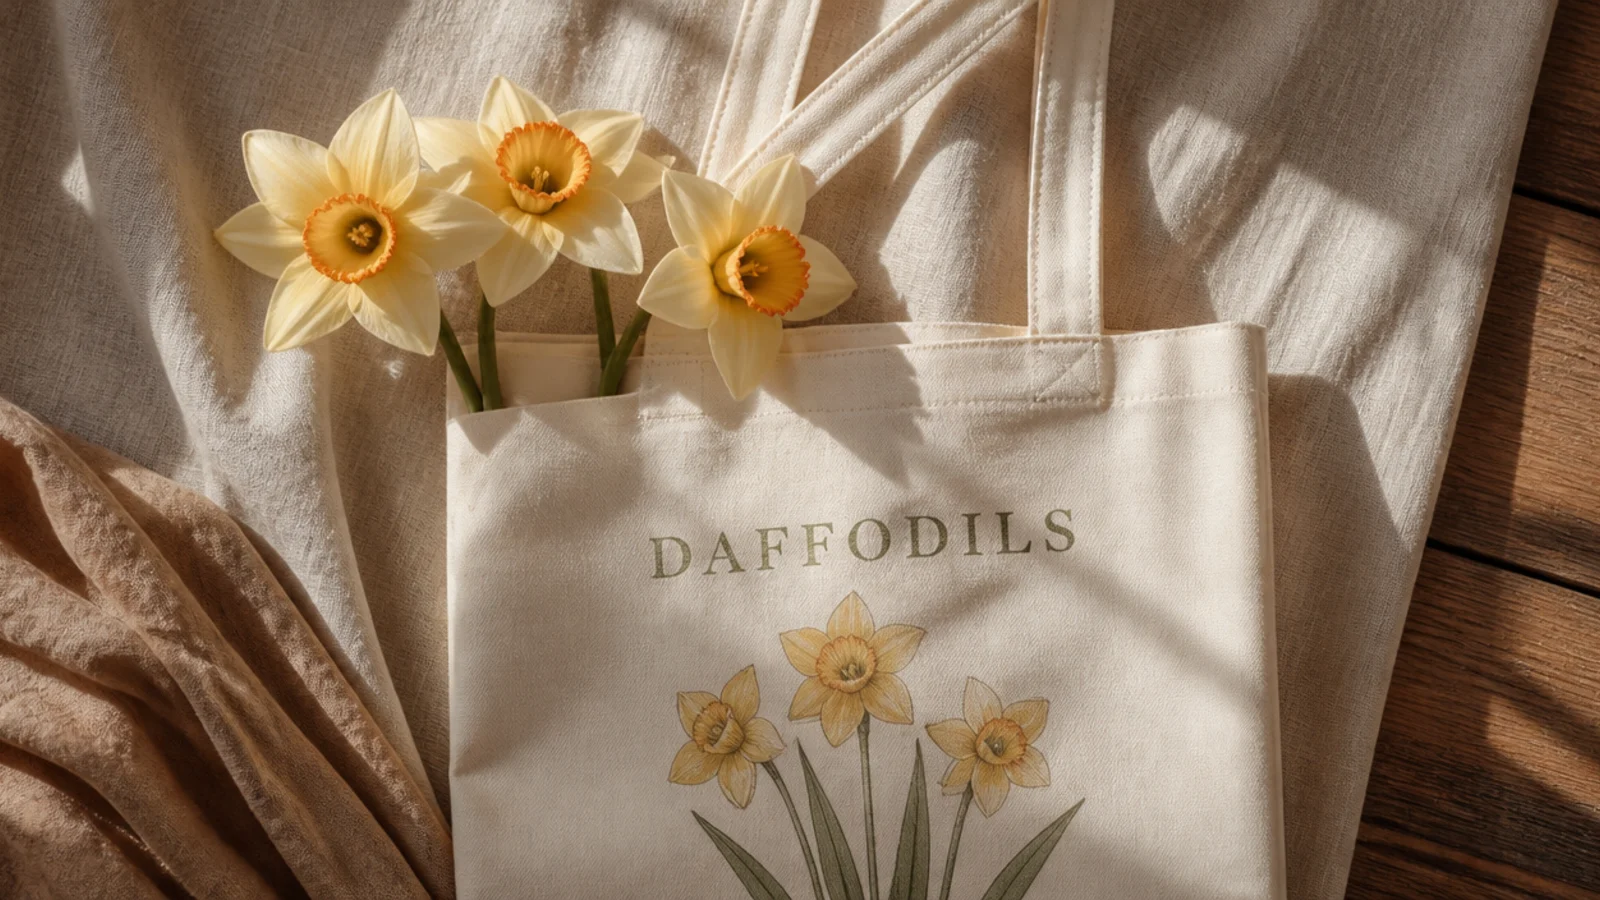
Daffodils are instantly recognizable from their trumpet center ringed by six petals. Three on tall stems make a bright, spring-fresh trio. The two-tone yellow gives them dimension with simple shapes.
Prep the tote and insert cardboard. Paint three tall green stems. For each flower, press six pale-yellow petals in a star around a center with a size 4 round brush. Once dry, paint a deeper ochre trumpet cup in the middle with a small ruffled rim. Add slim leaves at the base, cure, and heat-set.
Paint the darker trumpet cup on top only after the pale petals dry; the contrast between the two yellows makes the daffodil pop.
Do not use one flat yellow for the whole flower; without the deeper trumpet, it loses the daffodil’s signature shape.
15. Circular Floral Wreath
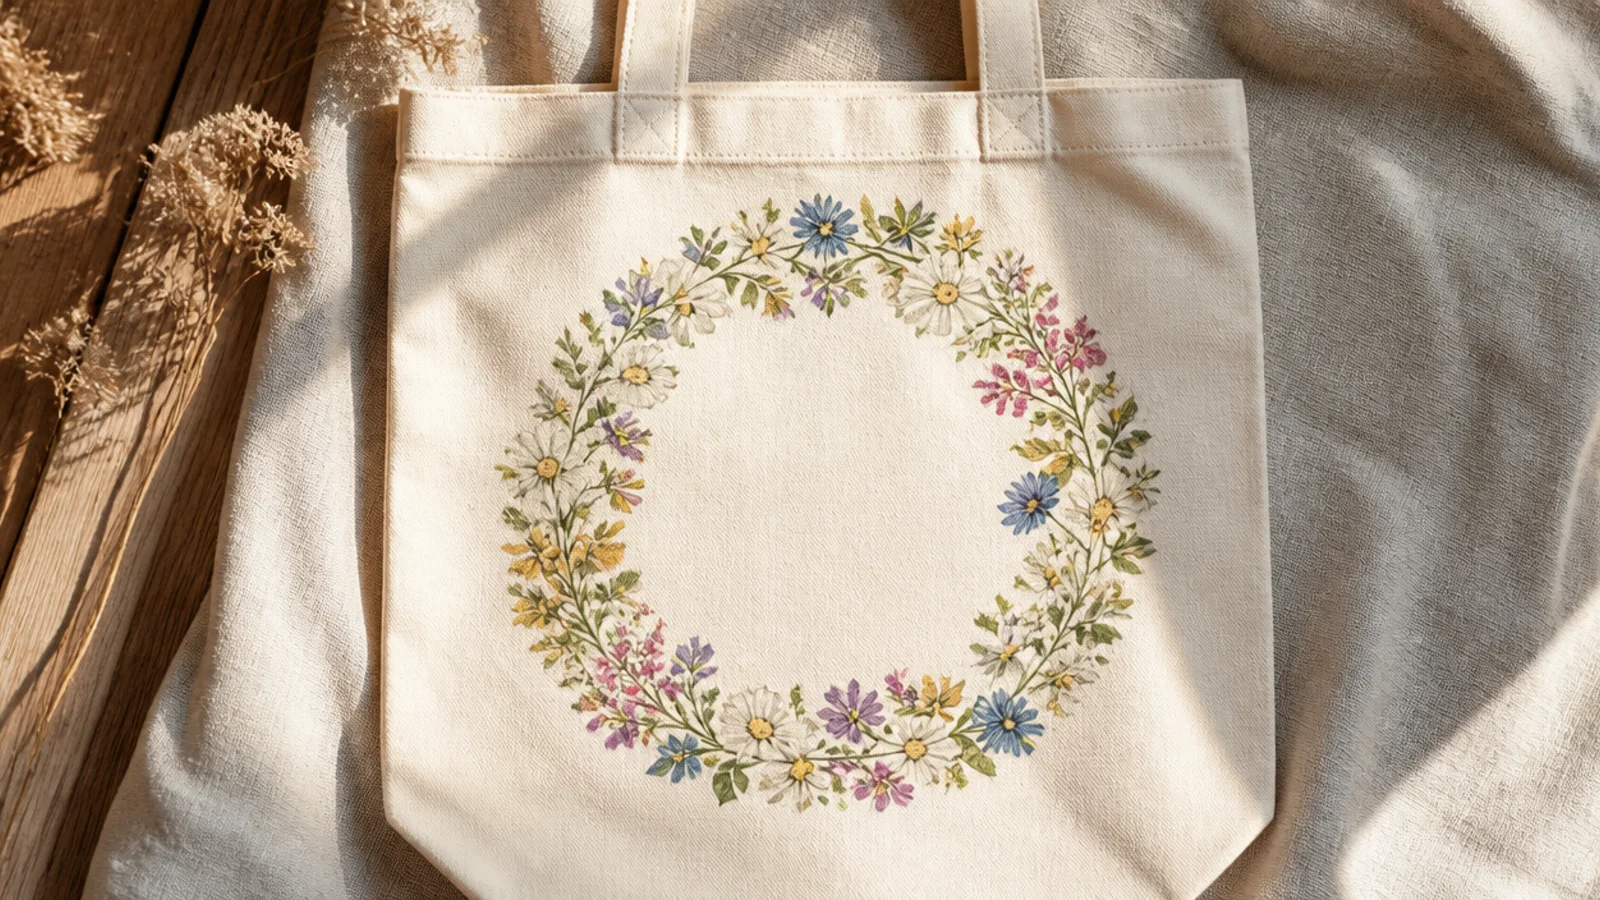
A floral wreath rings the front with mixed small blooms and leaves around an open center. The bare middle can frame a monogram or just stay empty and elegant. Building it from the simple flowers you already learned makes it approachable.
Editor's noteLay down the greenery ring first, then nestle flowers into it; building leaves-then-blooms keeps the wreath balanced all the way around.
Prep and iron the tote, insert cardboard. Lightly pencil a circle as a guide. Paint a loose ring of green leaves around it first, then fill in with small daisies, buds, and dot flowers in a muted palette, spacing them around the circle. Keep the center bare, vary the blooms, cure, and heat-set.
Skip thisDo not crowd the flowers unevenly; a lopsided wreath draws the eye to the gap, so distribute blooms around the whole ring.



