
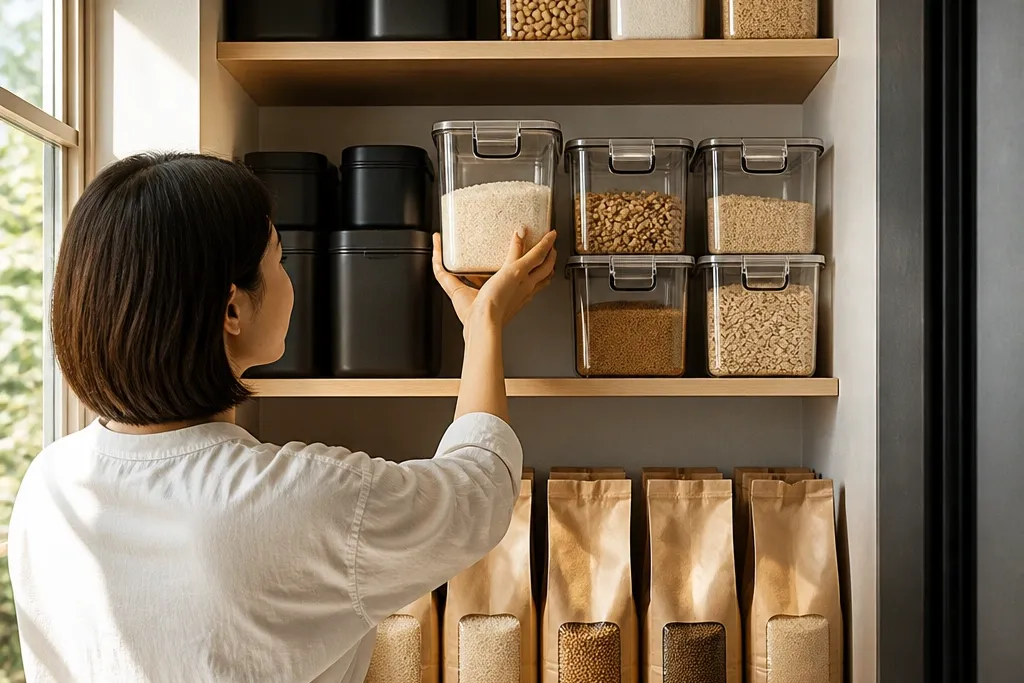
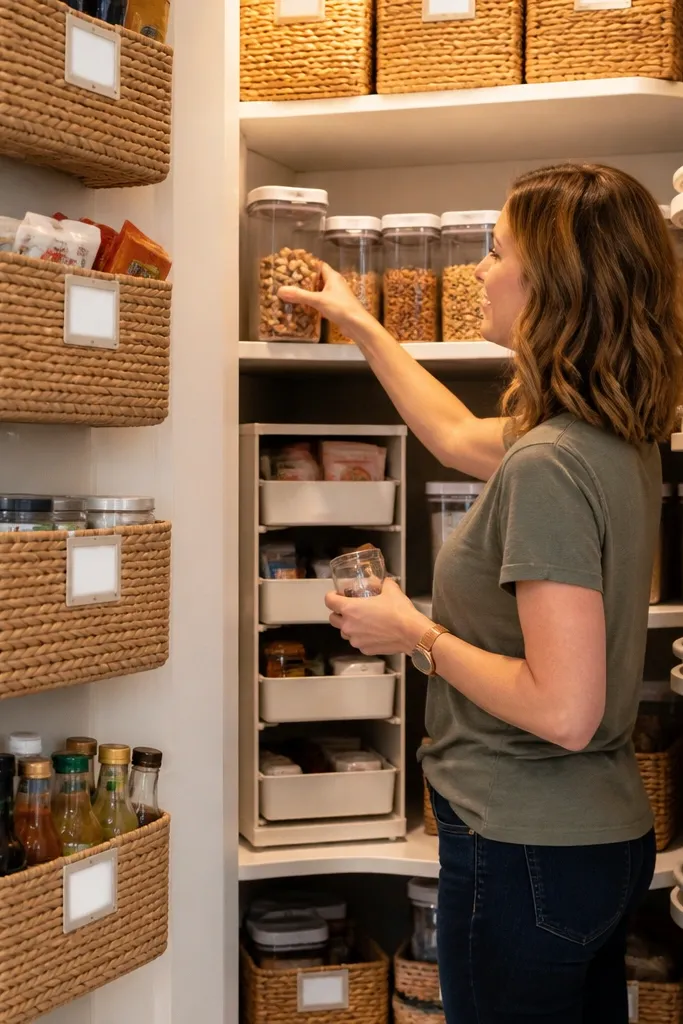
1. Shallow Shelf Front Rail for Tight Pantries
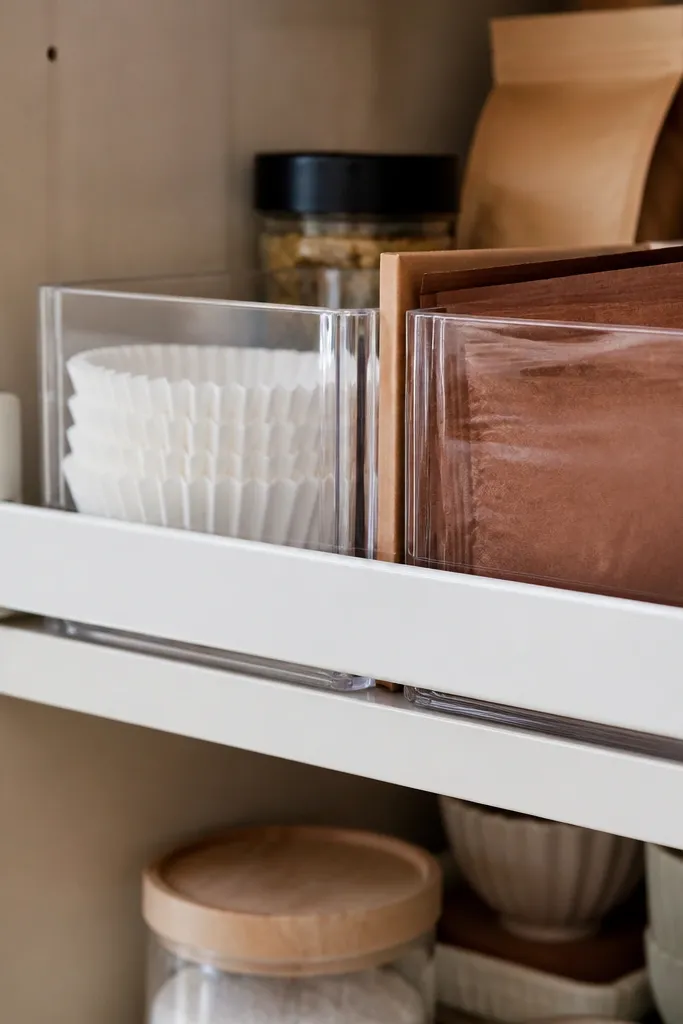
This is the cleanest fix for tiny pantry shelves where bins slide around and labels get scuffed. A front rail keeps containers from drifting forward, so your shelf looks aligned even after you pull stuff out. Use it for snacks, baking cups, or single-ingredient bins that you want visible. It also makes the shelf depth feel bigger because you stop losing space to “dead front” where items tip or hide behind each other. The look is modern and photo-friendly: clear bins, straight lines, and a subtle rail that reads intentional.
Start by measuring your shelf depth and the container front — you want the rail to sit about 1/4 inch behind the container lip so it can’t snag. Cut a strip of wood (1x2 or 1x3) or thin metal angle to your shelf width, then sand the edges smooth. Pre-drill and attach the rail with screws into the shelf supports or side walls. Finish with matte paint or a light stain, then mount the bins so labels face front.
Use a scrap bin as a spacer while you mark the rail position so you don’t guess and end up with tight clearance.
Don’t mount the rail flush to the shelf edge — containers will catch and you’ll stop using the system.
2. Corner Lazy-Susan Turntable Shelf Insert
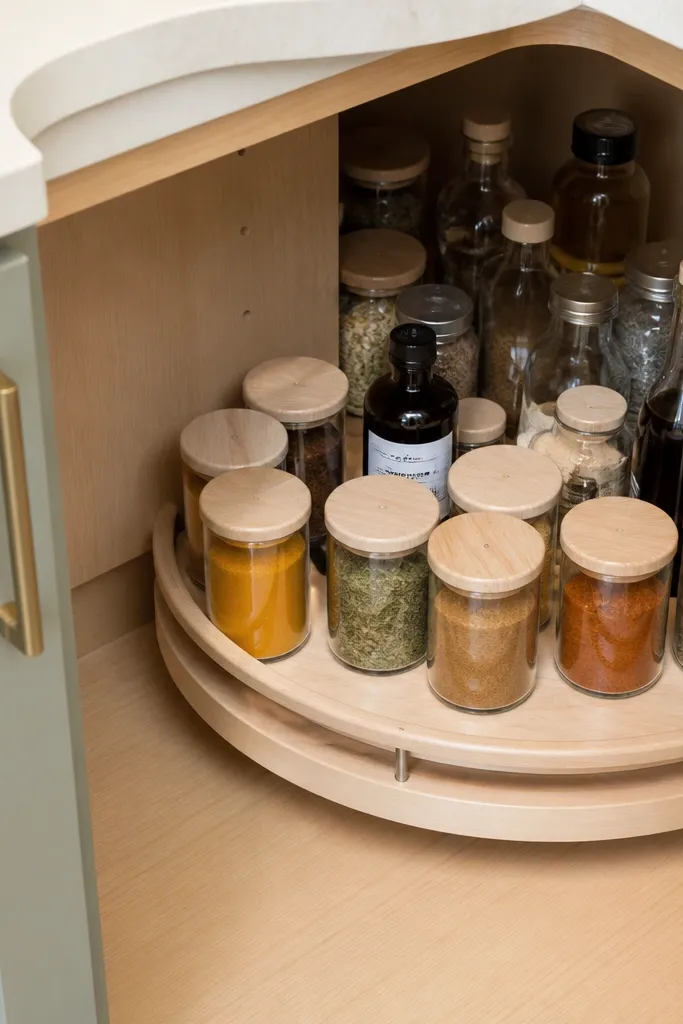
Corner shelves are where tiny pantries go to die. A turntable insert gives you full access to items that normally sit buried in the back, while keeping the shelf looking curated. Put spices, baking extracts, or small baking staples on the rotating tray so you can spin and grab without reaching. The visual payoff is big: you get a clean circle of labels and jars instead of a chaotic pile. Skill level is straightforward, and the project is fast because you’re building an insert, not a full cabinet remodel.
Measure the inside corner shelf area — you need a turntable that fits without scraping the side walls. Buy a small rotating lazy-Susan plate kit with a diameter that leaves 1/2 inch clearance around it. Attach the plate to a plywood base cut to shelf size, then add a low front lip (1/2 inch tall) so jars don’t roll. Sand edges, seal the wood, and mount the base so it sits flat.
Editor's noteStick felt pads on the underside so the turntable glides smoothly and doesn’t scratch your shelf.
Skip thisSkip tall jar stacks on a turntable — they wobble and make the shelf look messy when you spin.
3. Door-Mounted Spice Organizer with Clear Flip Pockets
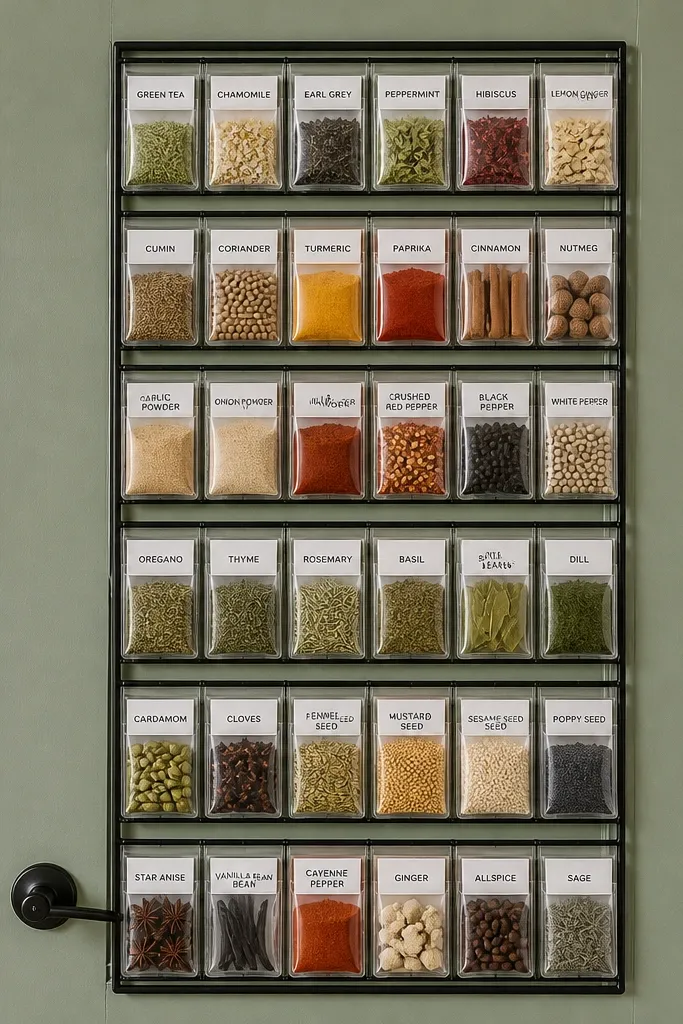
If your door is where small things go to hide, this turns it into a neat wall of labels. Clear flip pockets let you see contents without pulling everything out, and they look crisp because the pockets line up in rows. It’s ideal for spices, tea bags, ramen packets, and baking extracts that you want front and center. You also free up shelf space for bulk ingredients and larger items. The look is sleek and organized — like a mini pantry showroom on the door.
Measure the door interior and choose a clear pocket organizer panel that fits, leaving 1 inch of clearance around hinges. If you can’t find the exact size, mount individual clear pocket sleeves onto a thin plywood backing board cut to door size. Screw the backing board to the door frame using spacers so it doesn’t rub. Label each pocket with a small black vinyl strip and a bigger white-on-black name label.
Use magnetic corner guards or a rubber door bumper so the pockets don’t shift when the door closes.
Don’t mount pockets too close to the hinge side — door movement will tear labels and misalign the rows.
4. Wire Basket Pull-Out Drawer for Snack Backups
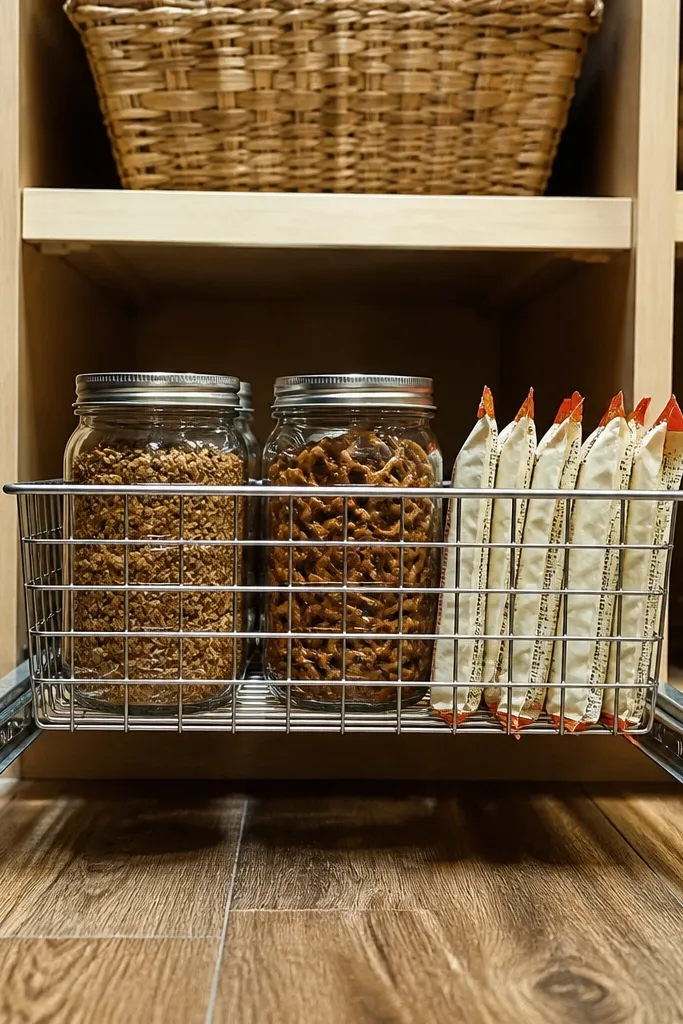
Tiny pantries often have shelves above eye level, which means snacks get shoved to the back. A pull-out wire basket solves that by bringing items forward in one motion. Wire baskets look airy and don’t trap dust, and they photograph well because they show the jar shapes instead of hiding them. Use this for snack backups like granola bars, crackers, and single-serve packets. It’s a practical upgrade that also makes your shelves feel lighter and more intentional.
Pick a wire basket sized to your shelf opening and install full-extension drawer slides on the pantry cabinet sides. Build a simple frame from 1x2 lumber or plywood strips to support the basket and keep it level. Screw the basket to the frame, then mount the frame onto the slides. Sand any rough edges and add a small pull handle so you can open it without grabbing jars.
Keep the basket height around 4 to 6 inches so it fits under shelves and doesn’t waste vertical space.
Don’t overload the basket — if it’s too heavy, slides feel sticky and everything looks shoved.
5. Stackable Mason Jar Set with Color-Coded Lids
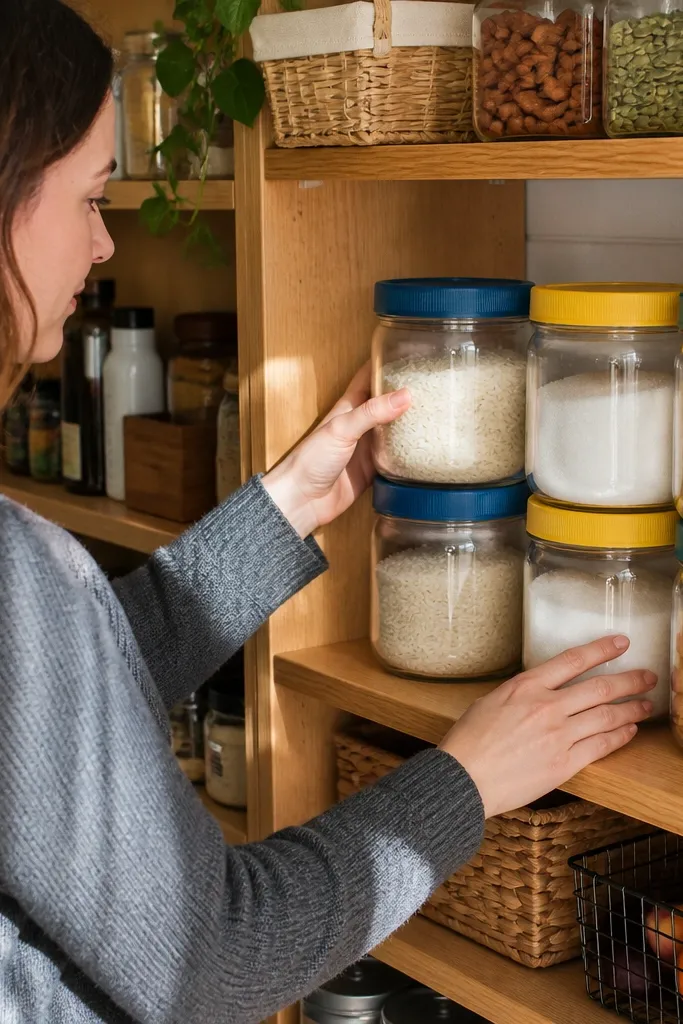
Matching jar sets are the fastest way to make a small pantry look styled instead of cluttered. Color-coded lids create a visual system even from a distance, so you can spot flour, sugar, rice, or pasta without reading every label. Mason jars also photograph beautifully: the glass catches light and the labels look clean. This idea works best when you use the same jar size across one category. The result is neat, consistent, and easy to maintain because everything has a home.
Choose one jar size for dry goods — 16 oz is a good starting point for small kitchens. Clean jars, dry them fully, then apply label vinyl to the jar body at eye level. Swap lids so each category has a distinct color, then stack jars by category across shelves. Add a thin shelf liner underneath to prevent jars from sliding and to protect wood or laminate.
Label the side of the jar facing the aisle, not the back — it keeps the pantry readable at a glance.
Don’t mix jar sizes within one category — it breaks the clean grid look.
6. Expandable Tension-Rod Organizer for Vertical Packs
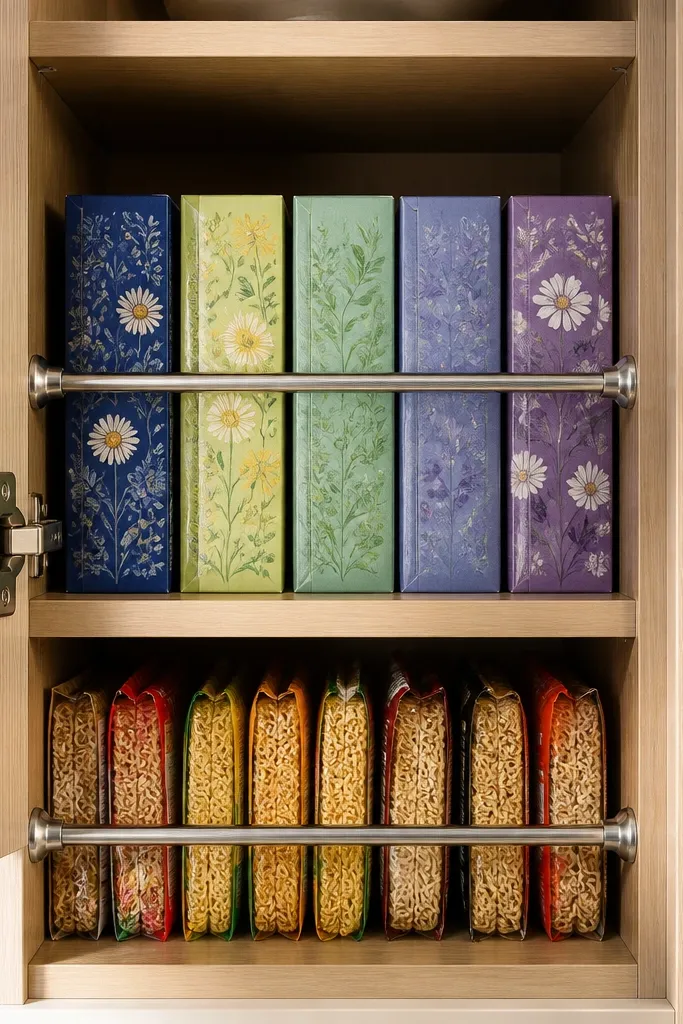
When you have a skinny pantry cabinet, you need vertical storage that doesn’t steal width. A tension-rod setup lets you store upright boxes and packets so the front stays visible and the cabinet looks tidy. It’s great for tea boxes, ramen packs, breakfast cereal single servings, and small baking mixes. The aesthetic is clean because items stand in a uniform line instead of leaning into a pile. This is also one of the least invasive DIY options, so you get the look without major carpentry.
Measure the inside width of the cabinet and install a tension rod at the height that matches your tallest pack, leaving 1 inch above for clearance. Add a second rod lower down if you need two rows, keeping spacing around 6 to 8 inches. Place a thin shelf board or tray under the bottom rod so packets don’t slide. Finish by aligning all labels to face forward and tightening the rods so they don’t drift.
Use anti-slip rubber pads on the rod ends so it grips smoothly on laminate.
Don’t put heavy jars on tension rods — stick to lightweight boxed items and packets.
7. Magnetic Strip for Metal Measuring Spoons and Small Tools
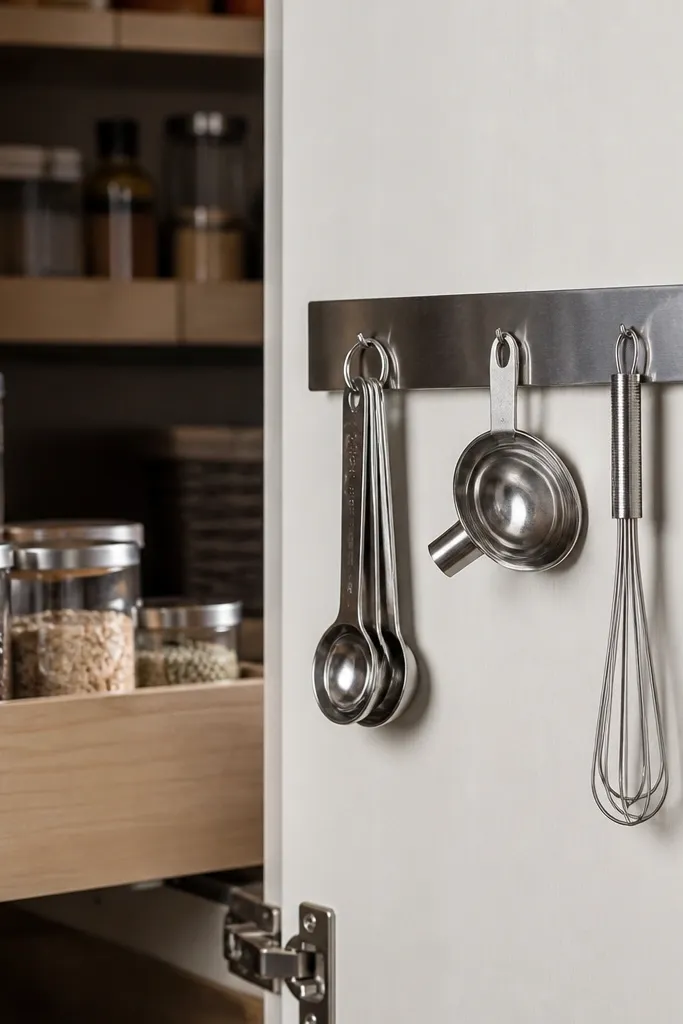
This makes tiny pantry organization look intentional because it adds a clean vertical line of tools. Measuring spoons, small funnels, and mini whisks take up space when stored in a drawer, and they’re annoying to hunt for. A magnetic strip on the pantry wall or inside the door keeps them visible and makes cooking prep faster. The look is neat because the metal tools form a tidy row, and your labels for ingredients stay unobstructed. It’s a small project that changes the whole vibe of a cramped cabinet.
Pick a stainless or painted magnetic strip long enough to hold your spoon set, then mark placement on the pantry wall. Clean the surface with alcohol and let it dry. If you can screw into studs or a solid panel, use screws through the strip mounting holes; otherwise use heavy-duty magnetic strip adhesive rated for the weight. Place spoons and tools so the handles align and don’t overlap. Test door closure and make sure nothing hits when the door swings.
Keep the strip at 52 to 56 inches from the floor so it’s comfortable to grab without a step stool.
Don’t mount above shelves where you’ll bump jars — it creates dents and chips in a hurry.
8. DIY Label Station with Pantry-Safe Vinyl and a Consistent Font
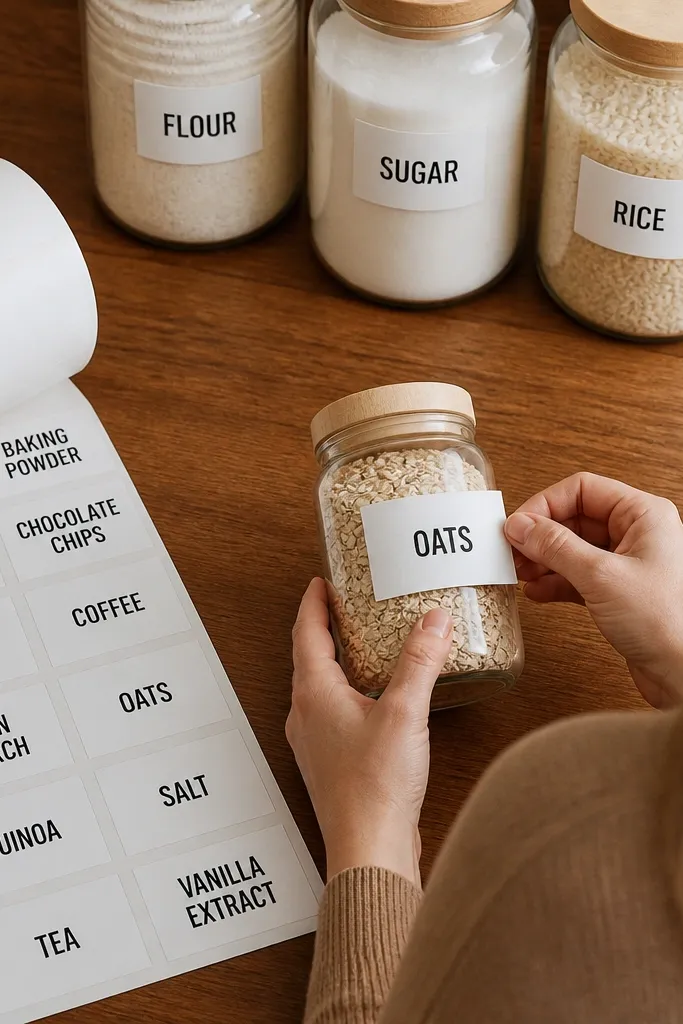
A tiny pantry can look messy even when it’s organized, and labels are the difference. This project is about creating a label system that makes every container look like part of the same set. Use pantry-safe vinyl so labels survive handling, and choose one font style so the pantry reads clean in photos. You’ll get instant visual order because categories line up: grains, baking, snacks, and spices. It’s not glamorous, but it’s the fastest way to make the whole pantry look “done.”
Buy pantry-safe vinyl sheets or rolls and a label cutter or scissors with a straight edge. Clean and dry your containers, then apply labels centered at eye level. Create a simple layout rule: two-line labels for ingredients (like “BROWN SUGAR” / “LIGHT PACK”), one-line labels for single items. Add a small date or “refill” marker using a different color dot so you can rotate stock.
Editor's notePrint labels slightly taller than you think — small labels get lost on glass and look cluttered.
Skip thisDon’t use mixed label sizes across the same shelf — it breaks the tidy grid effect.
9. Fold-Flat Linen Shelf Liner Pockets for Sachets and Tea
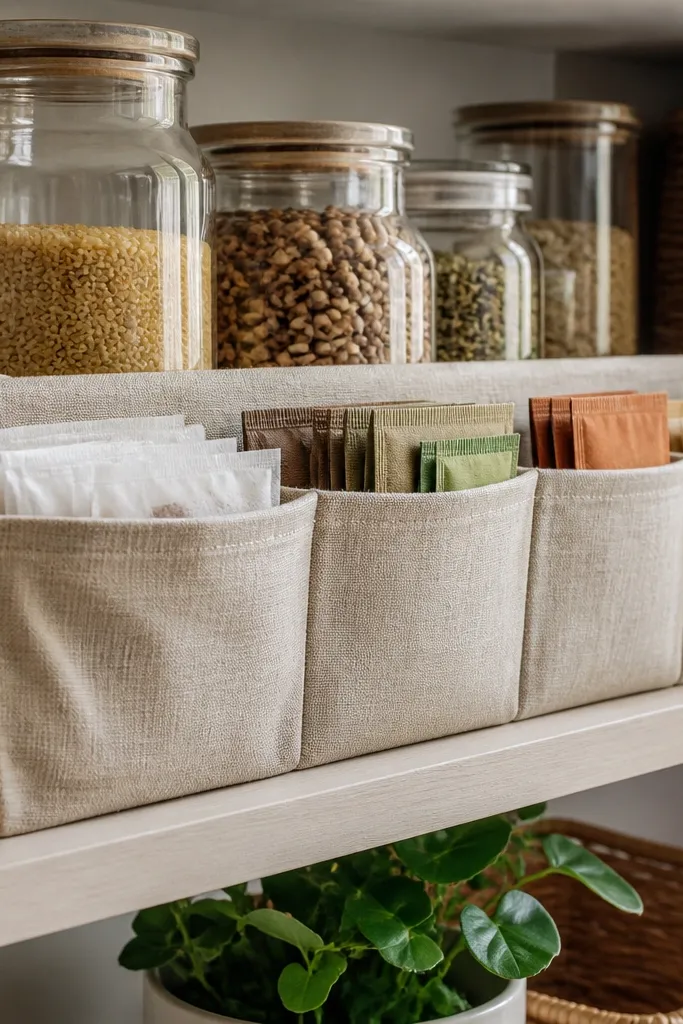
This is a soft, pretty way to store small paper items that always slide around. Linen pockets look warm against clear jars and make a tiny pantry feel intentional instead of industrial. They also solve the annoying problem of tea bags, seasoning packets, and drink mixes getting mixed together. The compartments keep everything visible and separated, and the fabric hides scuffs on shelves. It’s a beginner-friendly sewing project with a big aesthetic payoff.
Cut linen fabric strips and sew pocket fronts into a shelf liner sized to your shelf depth. Make pockets about 3 inches wide for tea bags and 4 to 5 inches wide for larger sachets. Hem the top edges so they stay neat, then attach the liner to the shelf with removable adhesive dots or Velcro tabs. Fold the pockets so they sit flush and don’t bulge. Add labels on small tag corners so each pocket category is clear.
Use a medium-weight interfacing behind the pocket area so pockets don’t collapse under light loads.
Don’t overstuff fabric pockets — it makes the pantry look lumpy instead of clean.
10. Clear Bin System with Color-Blocked Drawer Labels
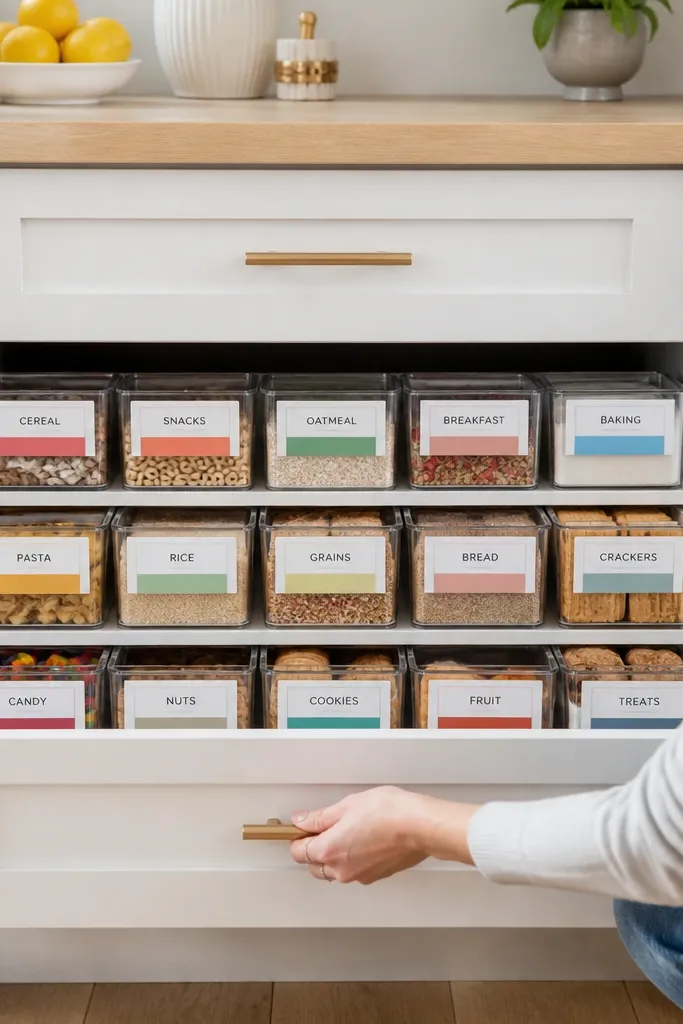
Clear bins are great for visibility, but they can look chaotic if every label is different. This system uses color blocks on the bin fronts so categories pop while the bins stay uniform. It’s especially good in tiny pantries where you’re sharing shelves between multiple family members. The color blocks create a consistent look, and the clear plastic lets you see what’s inside without opening everything. The whole pantry looks like a planned set, not a pile of containers.
Choose one clear bin size for the shelf section, then standardize height across categories. Apply label vinyl to create a color-block rectangle on the bin front, leaving a small window for the ingredient name. Use one color per category: baking, snacks, breakfast, or spices. Add a small icon (like a whisk or a coffee cup) to speed up scanning. Place bins in a grid and keep the label blocks aligned at the same height.
Editor's noteUse matte vinyl for the label blocks so they don’t glare under kitchen lights.
Skip thisDon’t put handwritten labels on clear bins — they look uneven and hard to read.
11. Under-Shelf Pull-Out Tray for Oils and Vinegars
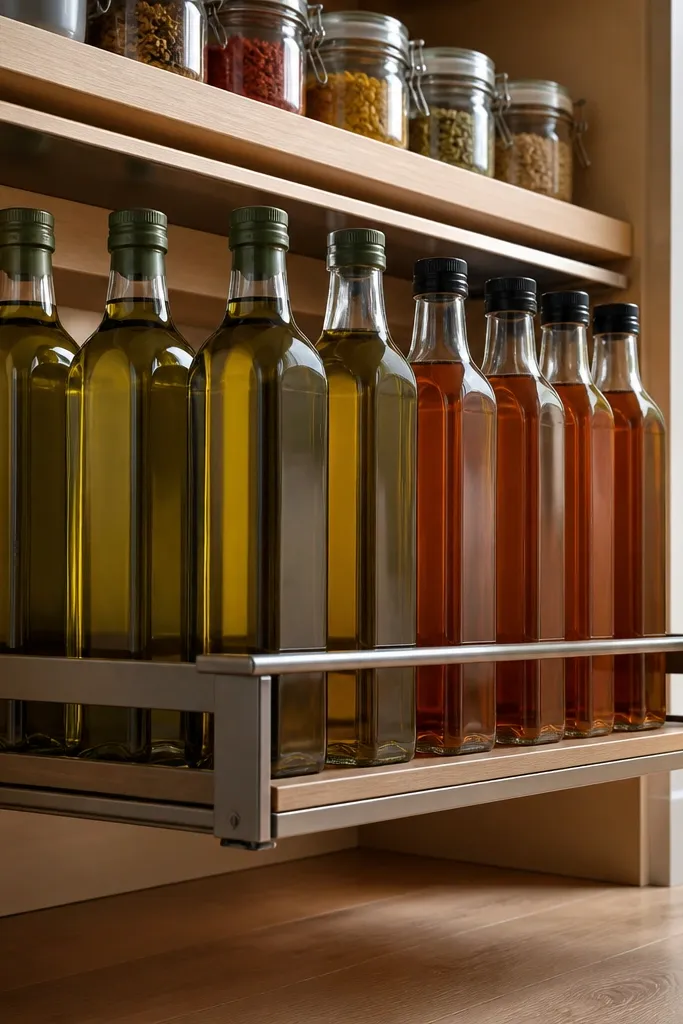
Under-shelf space is wasted space in small kitchens, and it’s perfect for tall bottles that are annoying to reach. A pull-out tray keeps oils, vinegars, and sauces in a neat row with labels facing forward. It also reduces the mess on the main shelf because you stop storing bottles on top of other items. Visually, it looks clean because the bottles line up and the tray creates a straight boundary. This project is a practical carpentry step, but it’s worth it for the look and the access.
Measure the underside clearance so the pull-out tray can slide out without bumping shelf edges. Install side rails or small drawer slides to the underside using screws into the cabinet structure. Build a tray from thin plywood with a lip so bottles don’t roll, then sand and seal it. Attach the tray to the slides, then add a front pull tab for easy opening. Arrange bottles upright with a spacing of about 1 inch between them.
Wrap slide edges with painter’s tape during assembly to prevent scratches on painted surfaces.
Don’t skip a front lip — bottles will slide when you pull the tray out.
12. Bamboo Divider Wall Inside a Pantry Shelf
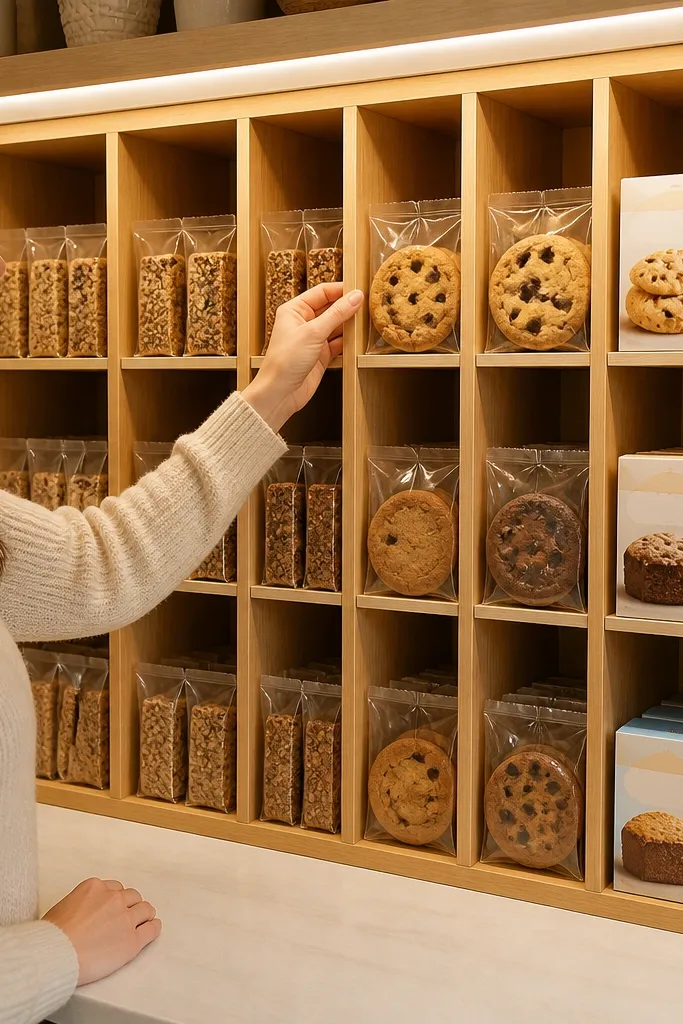
Dividers turn a chaotic shelf into a tidy display. Bamboo dividers look warm and clean, and they’re strong enough to hold lightweight snack bags and boxes upright. This makes tiny pantry organization look curated because each item has a slot and a straight front. Use dividers for granola bars, single-serve cookies, and small baking chips. The aesthetic is natural and photogenic, and it also prevents items from collapsing into a pile.
Measure your shelf width and decide on divider spacing — 2.5 to 3 inches is good for snack bags, 4 inches for small boxes. Cut bamboo strips to shelf depth and sand both ends smooth. Attach dividers using wood glue and small brads or screws into a backing strip. Seal bamboo with a clear matte finish so it doesn’t darken unevenly. Set dividers in rows and test-fit each container so fronts align.
Editor's noteLabel the dividers with tiny tags stuck to the front edge for fast restocking.
Skip thisDon’t make dividers too tight — bags crumple, and the shelf looks sloppy fast.
13. Painted Pegboard Backer for a Tiny Pantry Wall
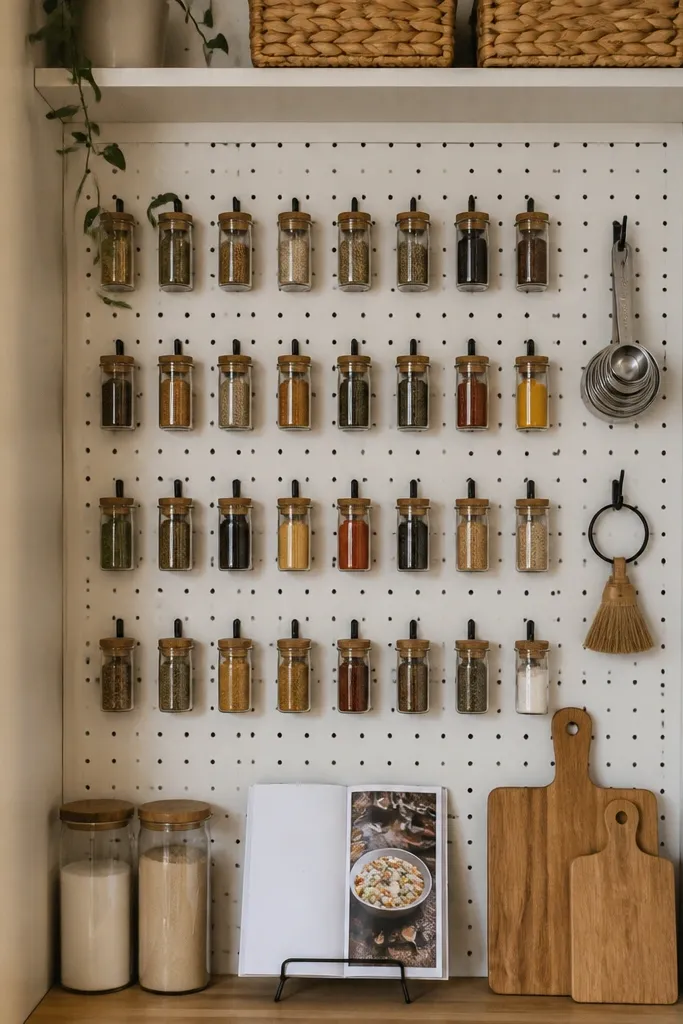
Pegboard is one of the few systems that looks good even when you swap items. In a tiny pantry, a painted pegboard backer gives you vertical storage for utensils, small spice jars, and measuring tools without eating shelf space. The look is organized because hooks and jars form a grid, and you can keep labels consistent. Choose a matte paint color that matches your kitchen hardware — black for a modern look, or warm white for airy brightness. This project turns an empty wall into a functional display.
Cut pegboard to fit the pantry wall section and sand edges. Paint with matte cabinet paint and let it cure fully. Mark a grid with light pencil lines, then screw in hooks or small jar holders at consistent heights. Add small clear jar clips for spices and attach a few baskets for packets. Mount the pegboard using wall anchors into studs or solid cabinet backing, then check that jars don’t swing when the door opens.
Use two hook depths: one for tools, one for jars — it keeps the visual layer consistent.
Don’t overload hooks — if everything hangs at once, the board looks cluttered.
14. Clear Lid Pantry Jar Rack with 2-Tier Front View
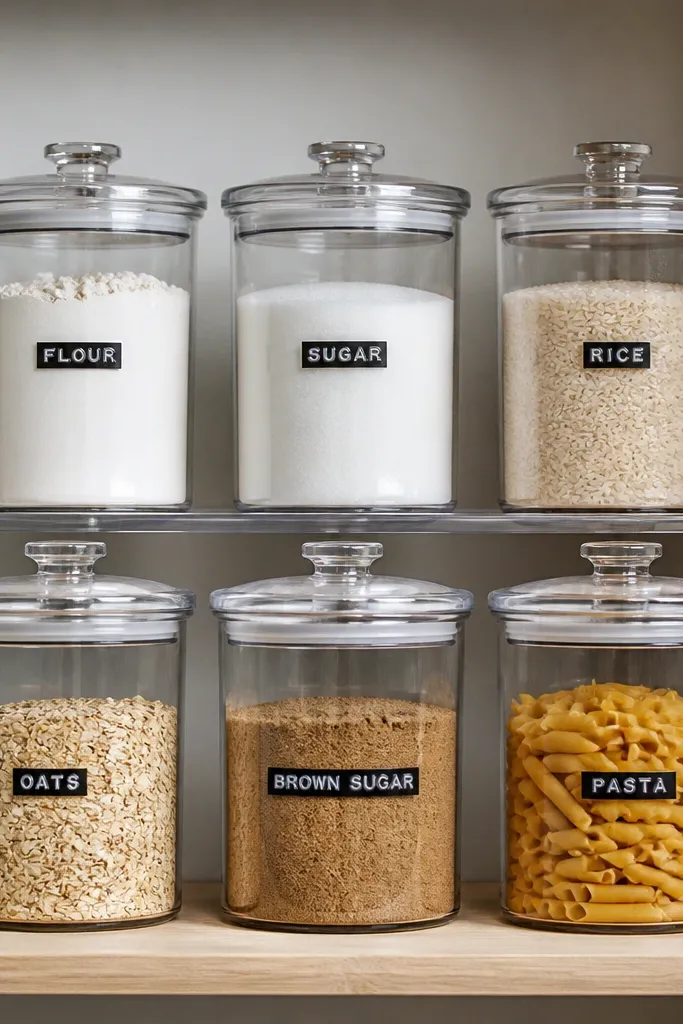
This idea makes small pantry shelves look like a retail display. A two-tier rack lets you keep more items at eye level without building tall stacks that become unstable. The clear lid rack or acrylic risers create a layered look that photographs clean and keeps jar labels visible. It also fixes a common problem: the back shelf always disappears, so ingredients get forgotten. With a two-tier system, you pull forward the front row and the back row stays aligned.
Choose a rack system that fits your shelf depth, then measure jar diameter and height. Use acrylic risers or build a simple two-tier base from wood and clear acrylic panels, leaving a 1/2 inch gap between tiers. Sand edges and add a non-slip liner on the bottom. Arrange identical jars in a grid so labels face front. Secure the rack so it can’t shift — use small screws through the base into the shelf or side supports.
Stick to one jar brand or lid style for this — mismatched lids make the rack look messy.
Skip mixed heights on the same rack — one tall jar ruins the straight two-tier look.
15. DIY Spice Drawer with Sliding Index Card Labels
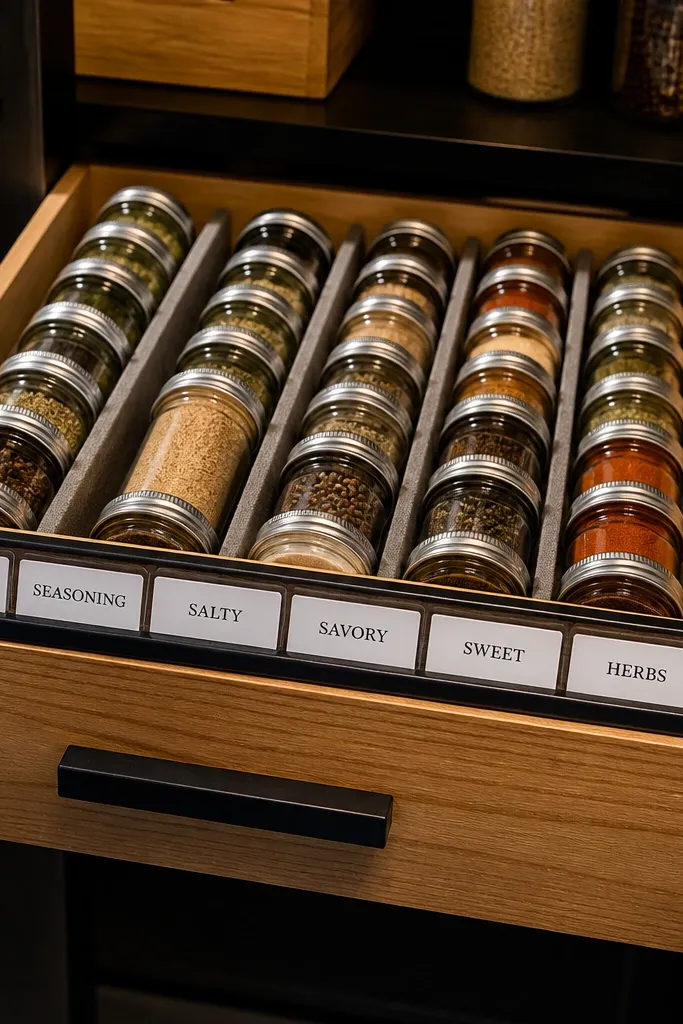
A tiny pantry drawer can look super clean when labels are part of the system. This build uses a drawer front label strip with sliding index cards so you can update names without re-sticking vinyl. The jars sit in foam or adjustable dividers, and the cards keep the front readable. It’s a good choice for spices, baking spices, and tiny condiment bottles. The aesthetic is crisp: uniform jars, neat foam, and a clean label line that stays aligned.
Build a shallow drawer insert from plywood sized to your drawer, then cut grooves or use foam sheets to create jar slots. Install a label track along the drawer front using thin wood strips so index cards slide in and out. Create cards on cardstock with waterproof clear tape on the top edge. Fit the jars, then slide cards into the track and line them up with jar positions. Seal the drawer insert with matte clear coat so it wipes clean.
Editor's noteUse foam that’s 1/2 inch thick so jars don’t rattle and the drawer stays quiet.
Skip thisDon’t use loose foam without adhesion — jars shift and labels end up misaligned.
16. Fabric-Covered Hanging Bag for Produce-Adjacent Dry Goods
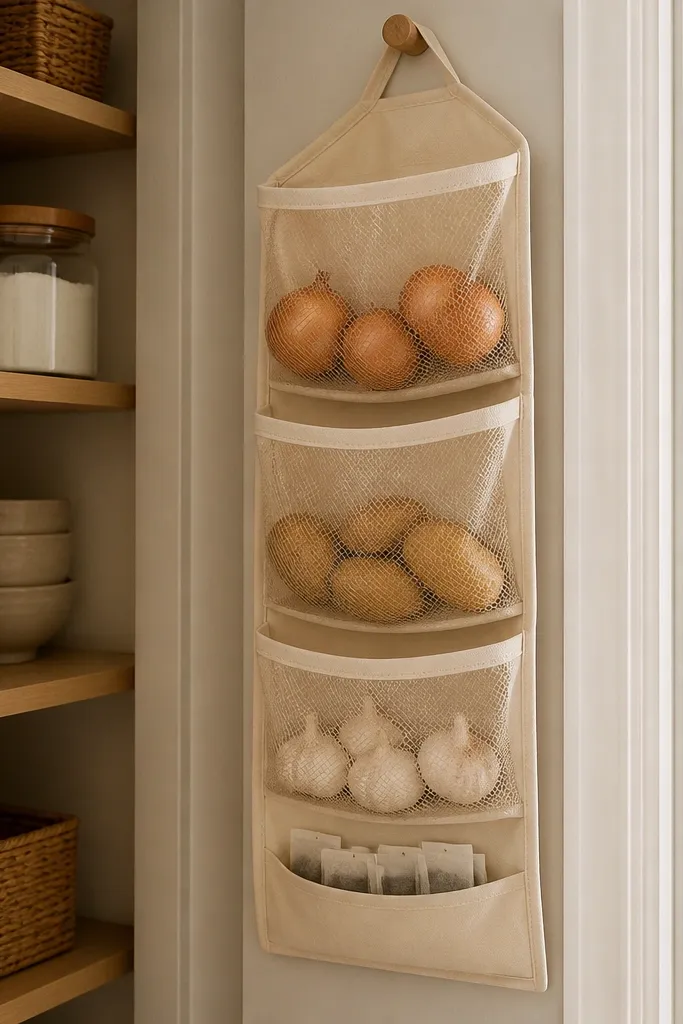
Some dry goods hate being sealed in plastic, and they also shouldn’t be shoved into the back of a shelf. A hanging fabric organizer with breathable compartments keeps onions, potatoes, and garlic from getting lost while still looking tidy. The fabric softens the space visually, so the pantry looks warm instead of all hard plastic and glass. This is best for small pantries where you can mount a hook rail under a shelf or on the side wall. It’s photogenic because the compartments are neat and the fabric adds texture.
Choose breathable fabric like cotton canvas and cut panels for 3 to 5 compartments, each about 6 inches wide. Sew dividers and a top channel for a dowel or hook bar. Mount a sturdy rail on the pantry wall using screws into studs or solid paneling. Hang the bag so it stays clear of shelves, then add a small label tag for each compartment. Test for clearance with the door closed so nothing rubs.
Add a removable bottom liner so you can shake out crumbs without washing the whole bag.
Don’t hang it where it blocks the shelf pull-out — you want access, not a new obstacle.
17. Slim Stackable Can Riser with Angled Fronts
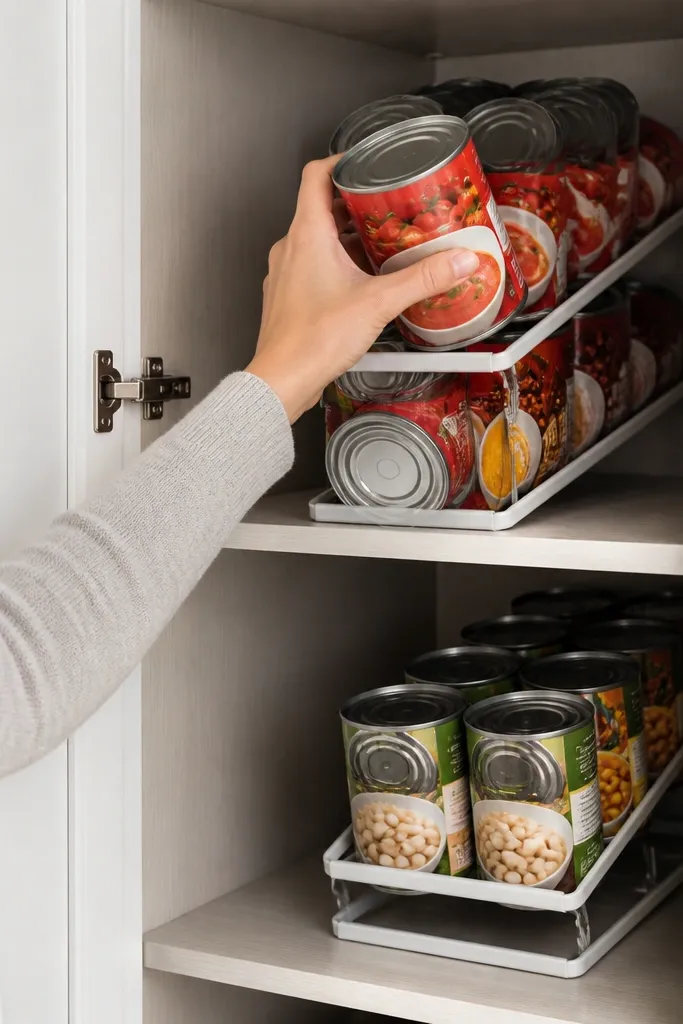
Cans look messy when they’re stacked flat because labels don’t line up and you end up pulling the wrong one. A slim stackable riser with angled fronts keeps can labels readable and makes the pantry look like a neat display. This works well for beans, tomatoes, and soup cans in tiny cabinets where width is limited. The angled face also creates a small shadow line that makes the shelf look more dimensional in photos. It’s a DIY that’s simple woodwork and gives you a very “designed” look.
Measure your can height and choose riser height so you can fit two layers without crushing labels. Cut wood blocks and bevel the front edge at a gentle angle, then sand smooth. Seal with matte paint or stain so it matches your pantry hardware. Stack the risers in a grid format so cans sit upright and labels face front. Place a non-slip mat under the bottom riser to prevent sliding.
Use painter’s tape to mark the angle on your first riser, then copy it for the rest so all fronts match.
Don’t stack risers that are too tall — it forces awkward reach and makes the shelf look uneven.
18. Under-Canopy Mini Lazy Shelf for Baking Trays
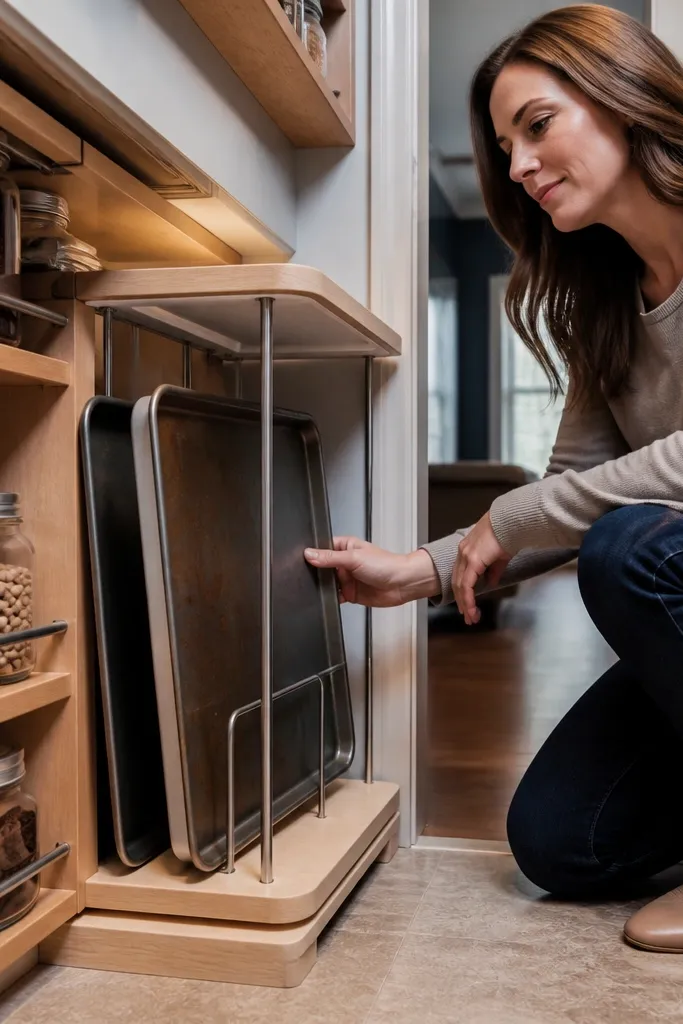
If your tiny pantry also holds baking trays, the mess is usually because they’re stored flat and shoved behind things. A mini lazy shelf pull-out makes trays accessible without turning your pantry into a junk drawer. The look is tidy because you keep trays vertical or neatly stacked on a guided shelf section. This is best for small kitchens where you store baking gear in a cabinet next to ingredients. The project is more “hardware” than “decor,” but it creates a clean front view that stays that way.
Measure the cabinet opening and pick a pull-out shelf kit sized for the space. Install rails with screws into cabinet sides, then mount the shelf board on the slides. Add a small stop lip so trays don’t slide out when pulled. Seal the shelf surface and add felt strips where trays contact wood. Load trays upright with a spacer so they don’t scrape each other.
Use a soft strap to keep trays from clattering when you close the cabinet.
Don’t store trays loose — they scratch shelves and look chaotic immediately.
19. Clear Acrylic Packet Organizer with Slanted Tabs
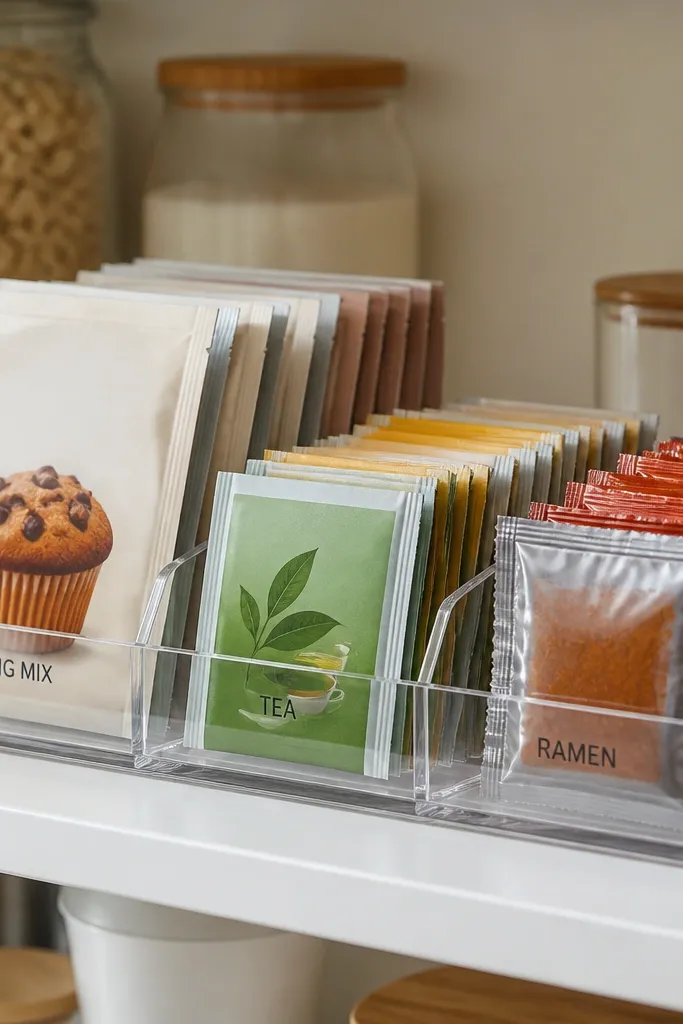
Packets kill the look of tiny pantries because they fold, crumple, and hide behind boxes. A clear acrylic packet organizer with slanted tabs makes everything visible and keeps label edges aligned. The slanted tabs are the trick: you can read the category name without pulling every packet out. It looks sleek because it’s transparent, and it’s functional because packets stop sliding into each other. Use it for seasoning packets, drink mixes, and snack packets you want to grab fast.
Measure the space on a shelf and cut acrylic dividers or use pre-cut acrylic organizer sheets. Create slanted tab pieces from thin acrylic or cardstock sealed with clear tape, then attach them to each divider so they stick out toward the front. Assemble the organizer with acrylic glue or small screws designed for acrylic. Place packets upright and confirm they don’t fall when you tilt the shelf slightly. Label tabs with bold vinyl for high contrast.
Round the acrylic edges with fine sandpaper so fingerprints don’t show as much.
Don’t use thin, flexible dividers — packets slump and the organizer looks messy fast.
20. Magnetic Spice Jar Labels on the Shelf Edge
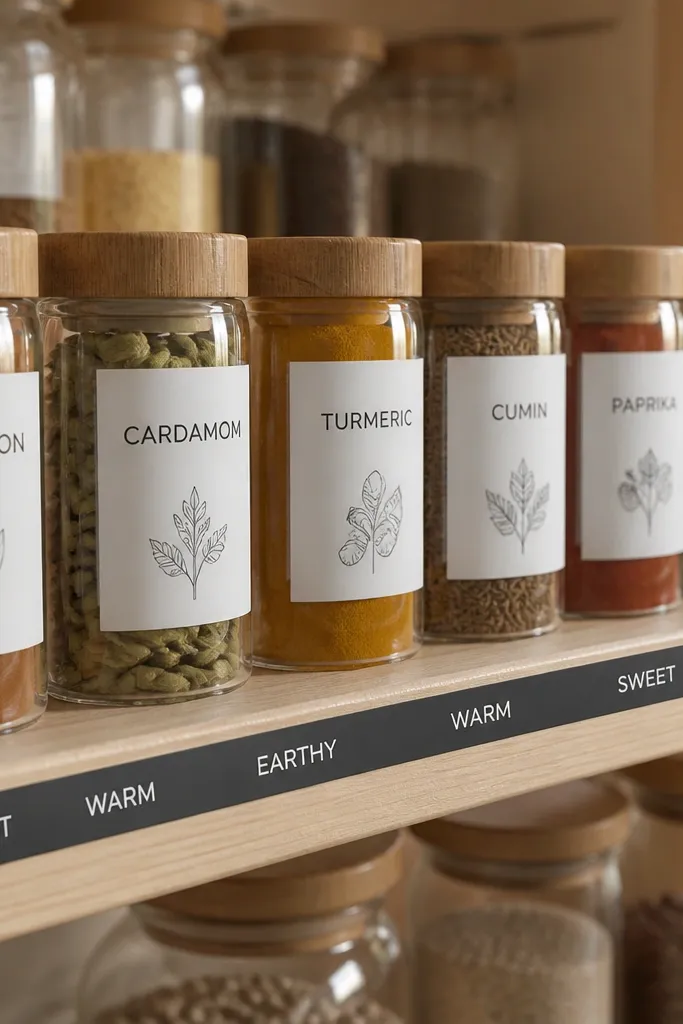
This is a smarter labeling approach for spices and small items you refill. Instead of sticking labels permanently, you use magnetic label strips that align at the shelf edge. The pantry stays photogenic because labels are always straight and readable, even after you swap jars. It also makes it easy to update categories like “cumin” to “cumin + smoked” without redoing everything. Visually, the shelf looks like a clean system, not a DIY experiment.
Buy magnetic label tape or thin magnetic sheets and cut strips to match your jar front width. Attach the magnetic strip to each jar lid or jar collar, then make labels on cardstock sealed with clear tape. Add a metal strip or small magnetic guide along the shelf edge so labels line up in the same spot. Arrange jars with consistent spacing so the shelf reads as a row. Test that labels don’t slide when you pull jars out.
Use a label color for each shelf zone so you can spot where things belong without scanning every jar.
Skip cheap paper labels without sealing — they peel from oil residue and look uneven.



