
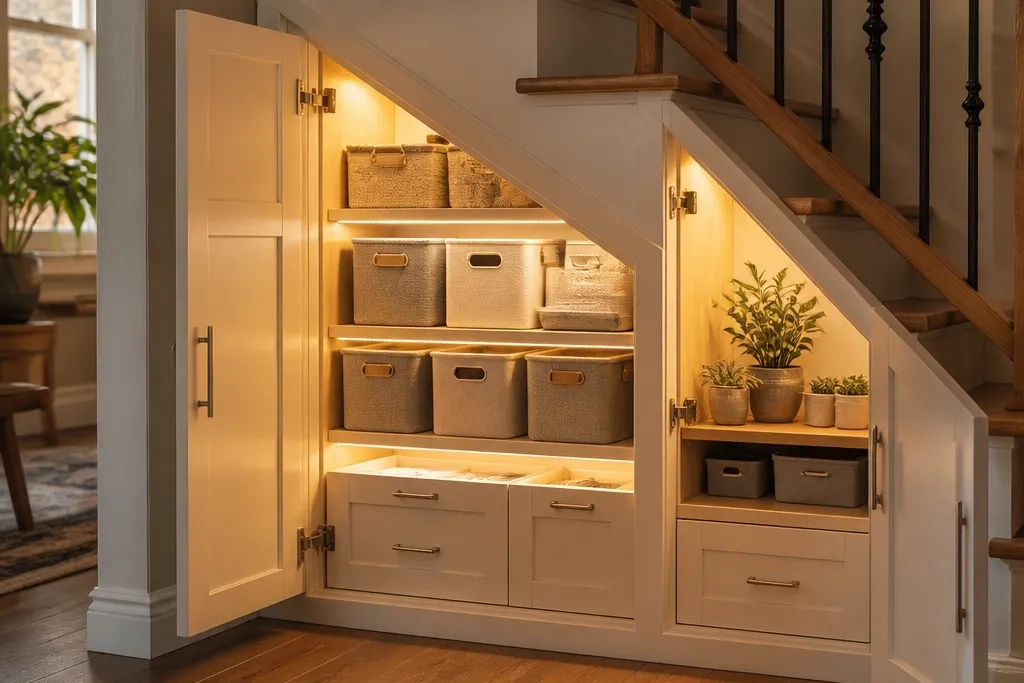
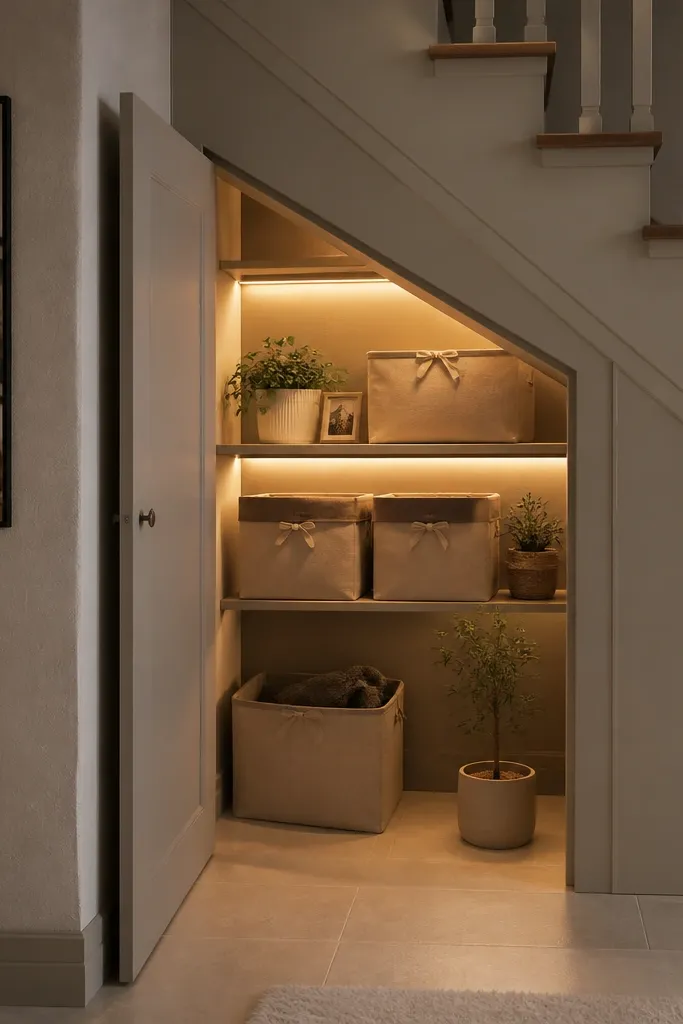
1. Shaker-style cupboard with warm light strip under the shelf
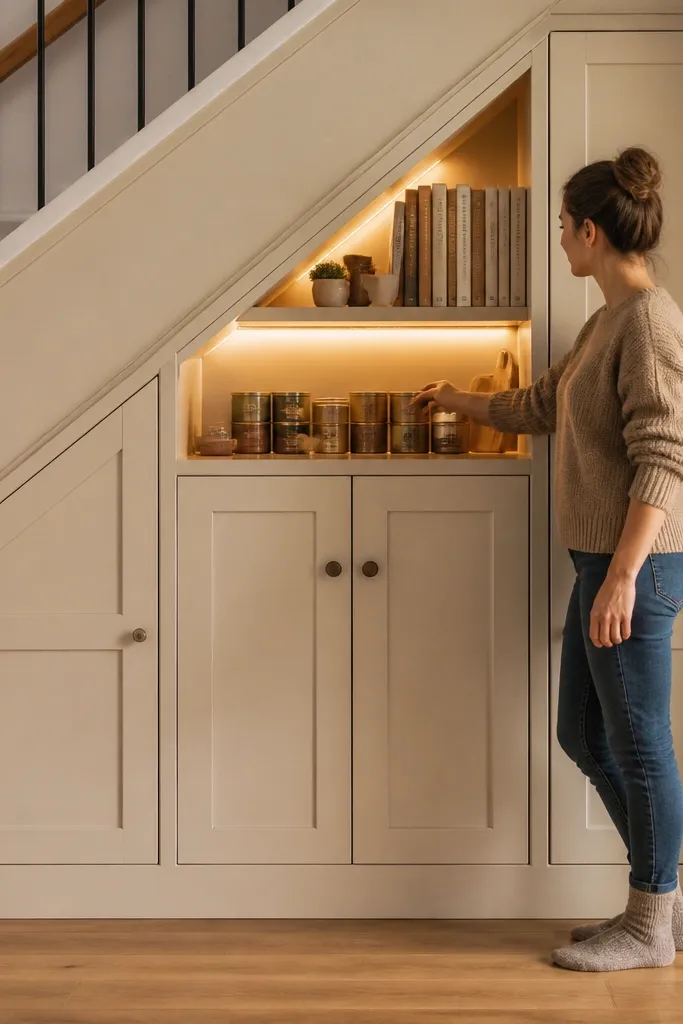
Start by building a simple carcass from 18mm plywood or MDF with a back panel and fixed side panels. Install a top shelf at the height that gives you at least 300mm of useful reach under the stairs, then mount a second shelf or a couple of adjustable shelf pin points if you store mixed sizes. Before closing the back, mount a warm LED strip (2700K-3000K) on the underside of the top shelf and route the wire to an accessible driver location at the side or top. Finish by fitting shaker-style door frames using pre-primed timber strips, then add the door hinges and a magnetic catch so the doors close flush.
A shaker-style front looks crisp even when the space is oddly shaped, and the panel lines help the lighting look like it’s part of the design. Go for a warm LED strip tucked under the top shelf so the glow fills the cupboard instead of shining straight at your eyes. You’ll get a clean, “built-in” look that photographs well because the door frame creates strong straight lines. This build suits hallways and landings where you want storage that looks like it belongs, not like an add-on. Skill level is mid — you’re cutting frame pieces accurately and installing door hardware, but you’re not doing fancy joinery.
Skip thisDon’t place the LED strip where it’s visible from the doorway — you want glow, not glare.
Editor's noteUse a diffuser cover for the LED strip so you don’t get bright hotspots on the inside face of the shelves.
2. Board-and-batten farmhouse front with fairy-tale warm LEDs
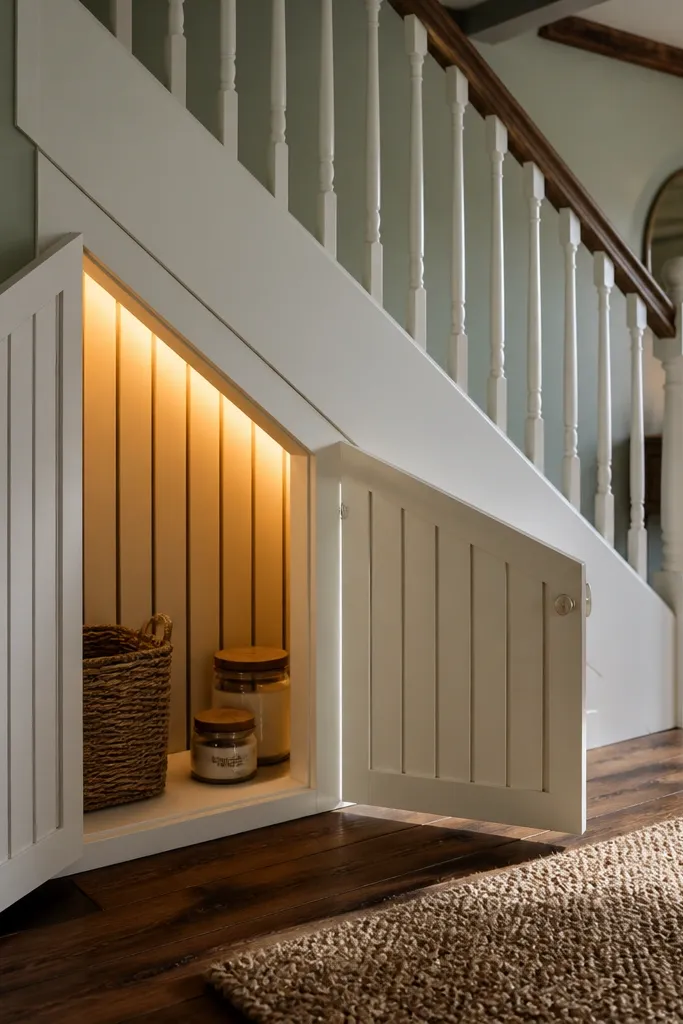
Build the cupboard carcass first, then sand and prime everything before you touch the doors. Make the door panels from 12-15mm plywood and attach battens using wood glue plus small brad nails, spacing battens so they’re centered on the door. Add a warm LED strip to the back panel or the top inside edge so light bounces across the interior and makes the space feel deeper. Wire the strip to a driver mounted on the inside side wall where you can reach it by removing one screw panel or access cover. Paint the doors with a satin finish so the battens catch light without turning glossy.
Board-and-batten fronts turn plain under-stairs storage into something with character, and the vertical battens make the light look cozy instead of flat. For the lighting, use a warm white strip and aim it to wash the back panel so the cupboard feels brighter without harsh shadows. This look works great in kitchens, breakfast nooks, and cottages where you want storage that feels like decor. The build is beginner-friendly if you use flat pack or pre-cut boards and focus on straight alignment. It’s also forgiving — slight gaps in the battens are easier to hide with caulk and paint.
Skip thisDon’t skip primer on MDF — without it, the paint can look patchy around edges and screw holes.
Editor's noteCaulk the battens where they meet the door panel, then sand the caulk lightly before painting for a smooth, gallery-like finish.
3. Modern slab doors with concealed LED edge lighting
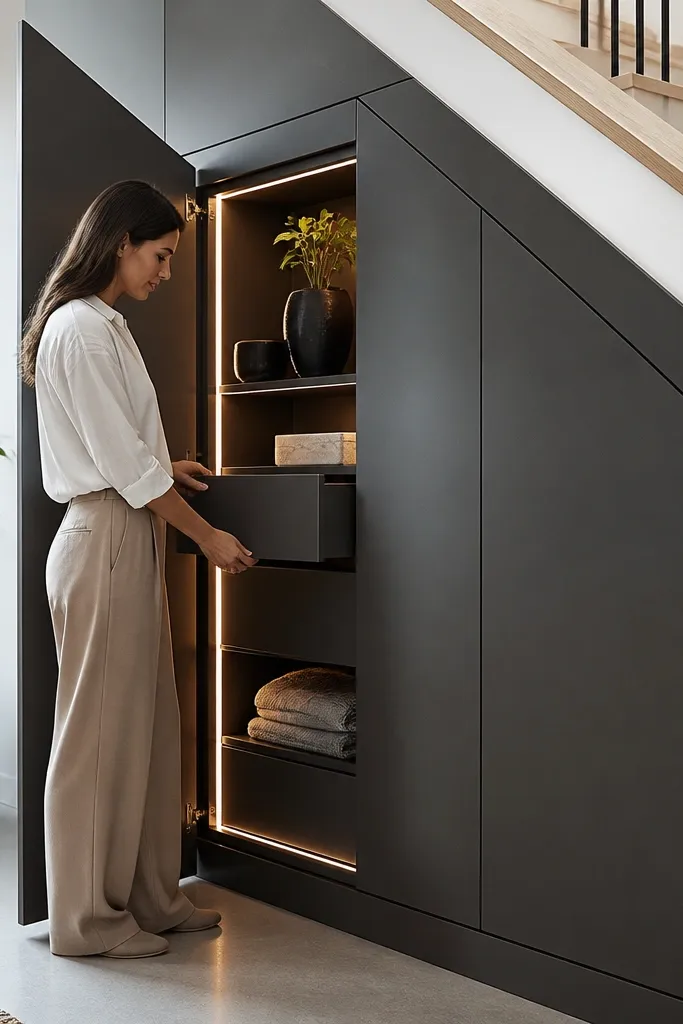
If you want the cupboard to look architectural, slab doors are the cleanest option. The aesthetic depends on the lighting being concealed — you’re aiming for a subtle edge glow that outlines the interior without showing the strip. This is a great fit for contemporary homes where you don’t want busy panel lines. Build this if you’re comfortable with accurate cutting and tidy finishing, because the smoother surfaces make mistakes more obvious. The payoff is a cupboard that looks like it was designed into the stairs from day one.
Use 18mm plywood carcass panels and keep everything square by clamping during assembly. Make slab doors from 18mm plywood or MDF with a thin frame around the perimeter so they align cleanly with the opening. Install an LED strip channel on the inside top rail or along the side edges, then cover it with a slim diffuser so the light appears as a soft line. Route the cable to a driver mounted on the back panel, then add a discreet cable exit hole with grommet. Finish with two coats of durable paint (semi-matte or satin) and a clear top coat if the cupboard gets heavy use.
Use a strip channel with a frosted diffuser — it turns a “tape light” into a designer edge glow.
Don’t use glossy paint on the inside — it shows every LED reflection and makes the glow look messy.
4. Kids' space theme cupboard with labeled drawers and RGB-safe lighting
Frame the interior with fixed side panels and install drawer slide rails at the right height so the drawers sit level even with the under-stairs slope. Use plywood drawer boxes with a front panel that matches your theme, like star decals, simple icons, or a patterned vinyl strip applied to the front faces. Add LED lighting at the top inside edge so it lights the drawer fronts without shining into faces. Mount the driver where you can access it by pulling out one drawer or removing an interior access panel. Finish the cupboard doors with a child-friendly paint and clear coat so labels stay readable.
This is the themed option that actually helps kids find things, not just the one that looks cute. Add drawers or pull-out bins inside the cupboard and label them on the outside of each drawer front so the theme stays organized. For lighting, stick to warm white or a color temperature that doesn’t overstimulate — the simplest route is a warm LED strip with a cover. This suits playrooms, homework nooks, and entryways where you need quick “put it away” behavior. It’s a mid skill build because drawer slides need alignment, but the result is functional and photogenic.
Skip thisDon’t place the LED strip where a kid can touch it — use a channel and diffuser so fingers stay away.
Editor's noteLabel the drawer fronts with vinyl that’s sealed under clear coat so it doesn’t peel when hands grab and wipe.
5. Library-themed cabinet with glass inserts and backlit book display
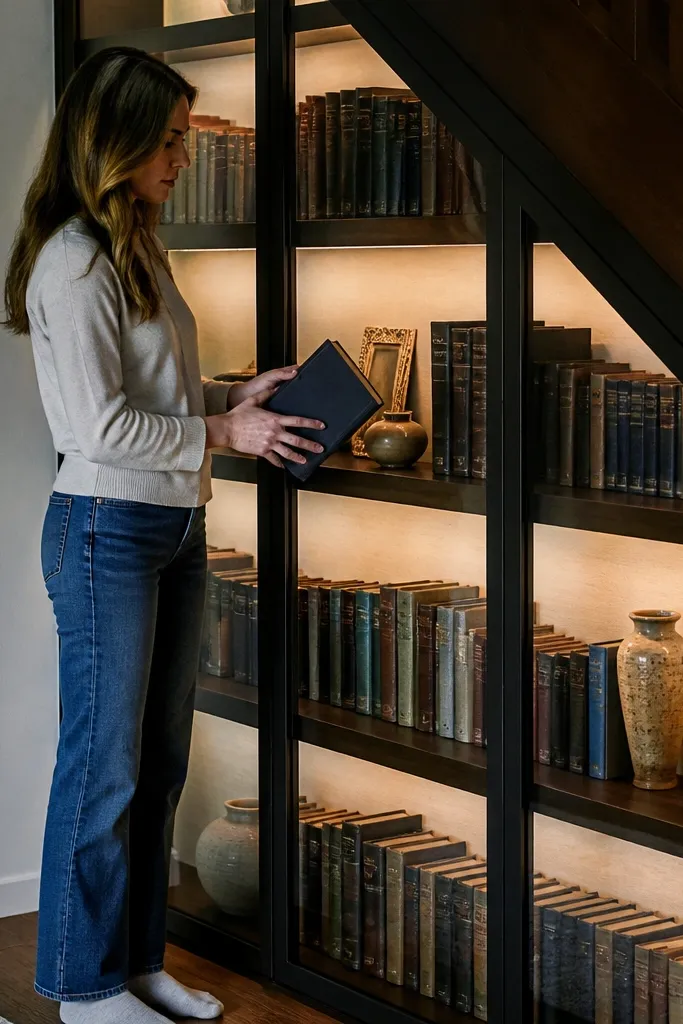
Build the cupboard carcass and door frames with 18mm plywood so the glass has a solid seat. Cut door openings for glass inserts and use a thin glazing bead or rubber glass gasket to hold the pane without cracking. Install the warm LED strip on the inside back panel at the top, then add a white acrylic sheet behind the LEDs so light spreads evenly. Route wiring to an accessible driver and use a low-profile switch mounted inside the cupboard or on the cabinet side. Finish the wood with a stain plus clear top coat or a paint finish, then add a slim dust cover strip at the bottom edge of the glass frame.
Glass inserts make under-stairs storage feel like a mini display, and the lighting turns it into a “book corner” even if you don’t have space for a full bookshelf. The trick is to light the back panel evenly so the inside looks calm, not spotlighted. This theme works best when you store books, photo frames, or decorative jars that look good in a row. You get a high-end look, but you need careful planning around door framing and glass mounting. If you’re okay with measuring and drilling clean holes, you’ll love how photogenic it is.
Skip thisDon’t use plain clear glass without a diffuser behind it, or you’ll see hot LED points.
Editor's noteUse white acrylic behind the LEDs — it makes the glow even and hides the LED strip line.
6. Laundry or mudroom theme with peg rail and lit tool zone
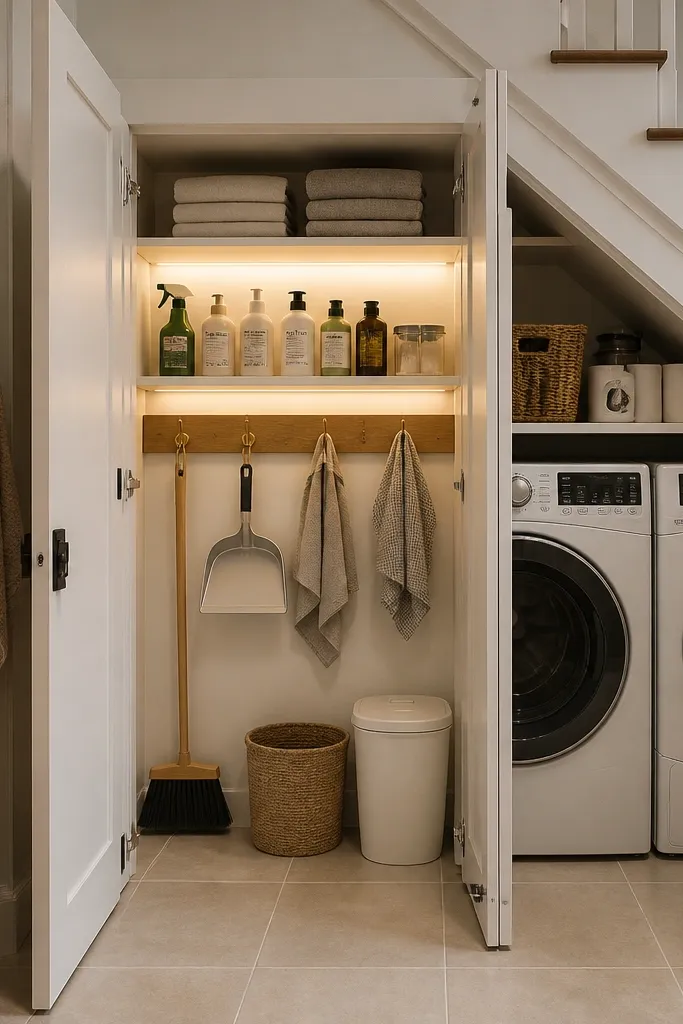
Install a back panel inside the cupboard and mount a peg rail or slotted rail to it at a height where hanging items clear the shelf below. Add a shelf above for larger items and include a lower bin space if you store gloves or small accessories. Fit a warm LED strip along the inside top edge so it lights the peg rail and the front of the shelf. Drill a cable pass-through hole near the top and add a grommet, then mount the driver on the side panel behind an access flap. Finish doors with a simple theme — painted panels, a labeled strip, or a fabric-backed interior panel.
If your under-stairs area is where coats, cleaning tools, or bags go, a lit peg rail turns the cupboard into a practical station. The look comes from creating a clear “zone” inside: hooks for tools, a shelf for bottles, and a warm light that makes labels readable. This is one of the most useful themed storage styles because it reduces rummaging and makes it easier to hang things right away. The build is straightforward if you use a pre-finished peg rail and focus on mounting it at the right height. It’s also great for entryways where you want the storage to look tidy, not chaotic.
Skip thisDon’t mount hooks too low — you’ll end up with items dragging on the shelf or door when you open it.
Editor's notePaint the interior back panel matte white if you want the lighting to look brighter without increasing LED brightness.
7. Gold-and-cream glam theme with mirror panel and warm strip glow
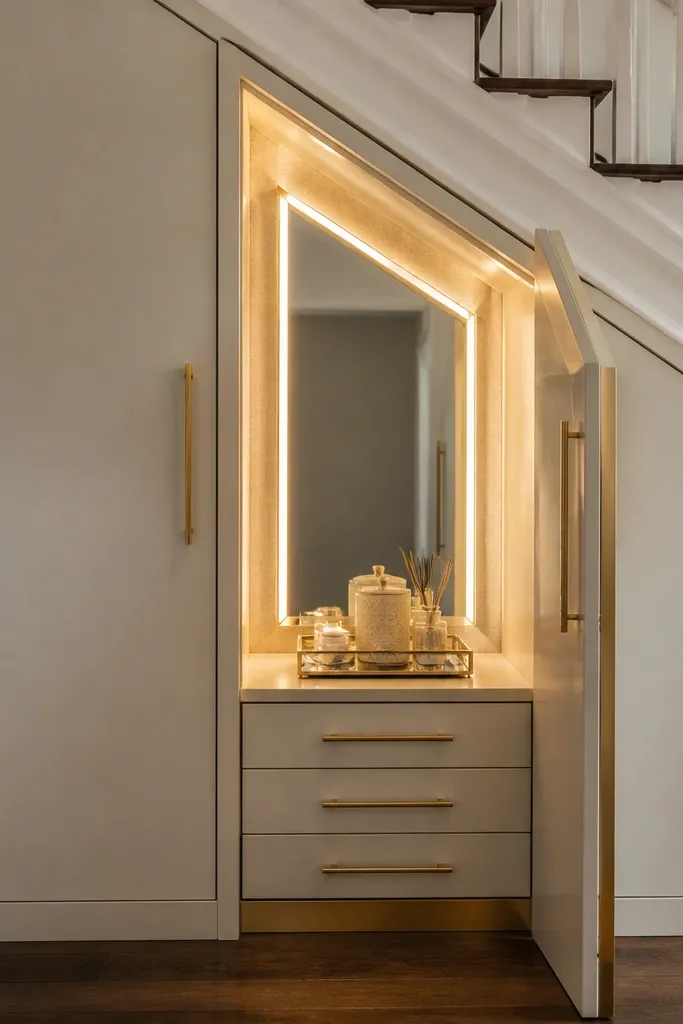
A mirror panel inside the cupboard makes the space feel bigger and instantly more styled. Pair it with warm LEDs so the mirror doesn’t throw harsh highlights, and add gold-toned handles or trim for a glam look. This theme is great in entries, bathrooms, and dressing areas where you want quick visual check-ins and a tidy home for hair tools or accessories. It’s a bit more advanced because mirror mounting needs care, but the result looks expensive in photos. The lighting also helps you see small items like clips and chargers.
Build the cupboard carcass and door frames, then plan the mirror size so it sits behind a safe frame opening. Use a mirror mounting kit or mirror adhesive pads designed for glass, and keep edges protected with a thin trim strip. Mount a warm LED strip on the inside top perimeter pointing toward the mirror so it lights evenly across the reflective surface. Route wiring to a driver mounted behind an access panel at the side and use a grommet for the cable. Finish with cream paint on the carcass front and gold handles that match your theme.
Choose mirror adhesive pads over liquid glue for cleaner alignment and easier replacement later.
Don’t mount a mirror directly against raw MDF — seal the MDF first so moisture and adhesive don’t stain the surface.
8. Coastal theme with slatted front and warm LED shelf glow
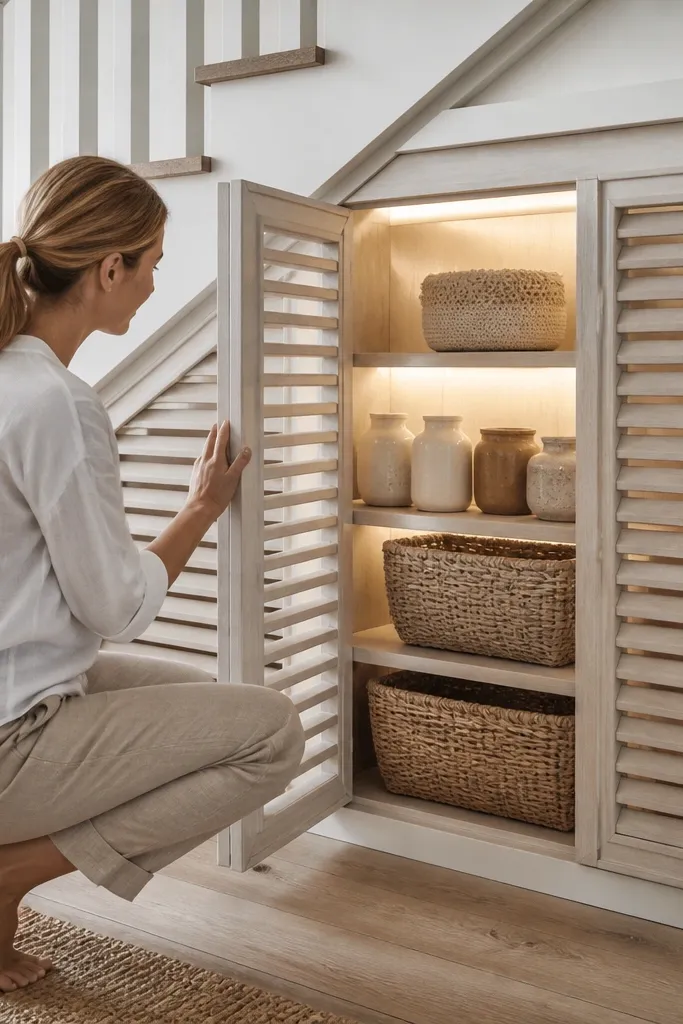
Create a door frame from 18mm plywood and attach evenly spaced slats with glue and small nails, keeping the slats centered and straight. Build the interior with fixed shelves and a back panel that’s painted matte white or a light neutral so it reflects the LEDs. Mount warm LED strips under the top shelf with a diffuser, then test the glow before you close any panels. Route cables to a driver behind a small removable panel on the side. Finish the slats with a light stain or white paint, then seal with a clear coat that won’t yellow quickly.
Slatted fronts give you that coastal, airy look, and they make the cupboard feel lighter even though it’s still storage. The theme works best with light wood tones or a white-washed finish. For lighting, use warm LEDs aimed at the shelf and back so the slats don’t cast ugly shadows across your items. This style fits beachy homes, sunrooms, and anyone who wants a softer look than shaker or slab. It’s buildable for DIYers who can cut straight strips and keep spacing consistent.
Skip thisDon’t leave slats raw — unfinished wood looks patchy once the lights hit it.
Editor's noteUse painter’s tape as a spacing guide while you glue slats — it keeps the gaps even and reduces rework.



