
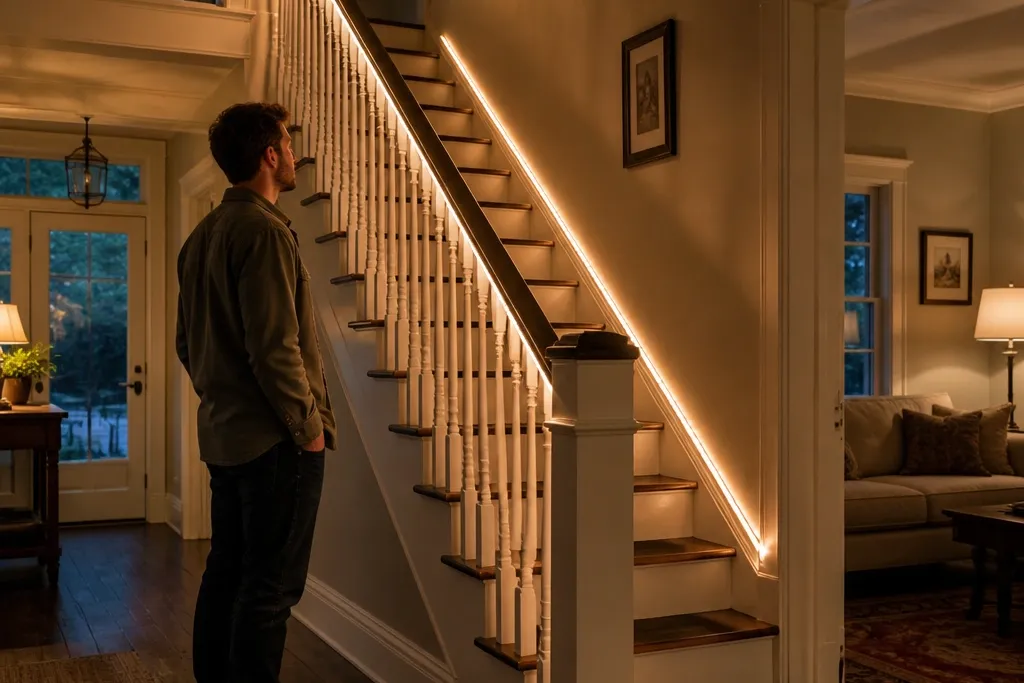
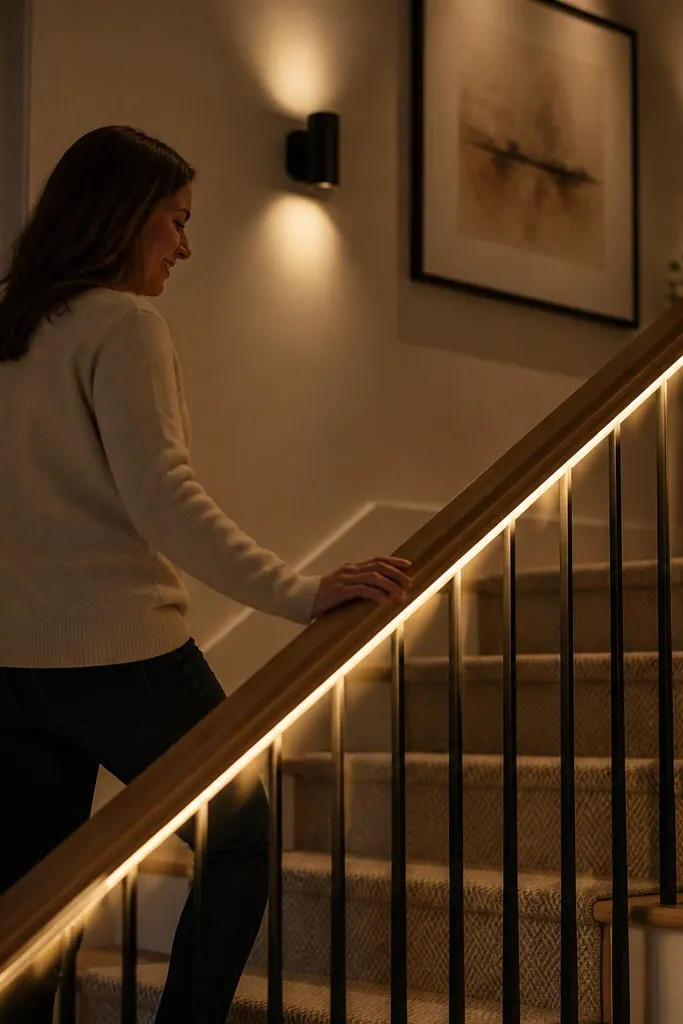
1. Rustic lantern glow with dark stained handrail and warm rope lights
This look turns a basic stair railing into something that feels like a porch at night. The glow comes from rope lighting that traces the stair line, so the steps look defined and the railing reads warmer without being flashy. Use a dark stain on the handrail and top cap so the warm light reflects softly instead of bouncing back harshly. It’s the easiest “themed” style because the theme is the lantern vibe, not a complicated pattern. Skill level is beginner-friendly, and the visual impact is high because you’re lighting the geometry, not just adding a light strip somewhere random.
Start by staining or painting the handrail and any top trim first, then let it dry fully (24 hours for most products). Run a warm white rope light along the underside of the stair edge or along the inside line where the wall meets the first step face, keeping the rope about 1/2 inch back from the edge. Secure it with low-profile clips so the rope stays straight, then route the cord to a plug-in outlet or a battery pack hidden in a small access box near the first newel post. Finish by adding a simple lantern-style switch cover or inline dimmer so the glow feels intentional, not like a gadget.
Use a rope light with a diffuser jacket so you don’t get bright dots on the wall.
Don’t install lighting before the finish cures — fresh paint stain can trap heat and mess with adhesion of clips.
2. Modern gallery line with aluminum channel LEDs under the handrail
If you want the railing to look sleek and “built,” this is the move. Aluminum LED channels under the handrail create a continuous line of light that follows the handrail’s path, which makes the staircase feel designed instead of DIY. The channel hides the LED points and reduces glare on your hand when you hold the rail. Choose a finish for the handrail that matches the channel color: black channel for modern contrast, clear or silver channel for a lighter, airy feel. This theme is clean and photogenic because the light has edges — you’re lighting a line, not scattering light everywhere.
Measure the handrail underside length and cut the LED channel to match, leaving a 1-inch gap at each end for wiring and end caps. Mount the channel using the manufacturer’s adhesive tape or small screws into the underside where you can hit solid wood; then slide in a warm white LED strip rated for low-voltage use. Wire the strip to a driver (plug-in for long runs, battery if the run is short) and test before closing anything. Finally, add end caps and a small cover strip where needed so the channel looks like part of the rail, not a separate accessory.
Dry-fit the channel with the strip in place, then check how it looks from the top landing — that’s where glare shows up first.
Don’t use a bright, un-diffused strip — you’ll see LED dots and it will look cheap in daylight.
3. Cozy farmhouse stars using puck lights behind baluster cutouts
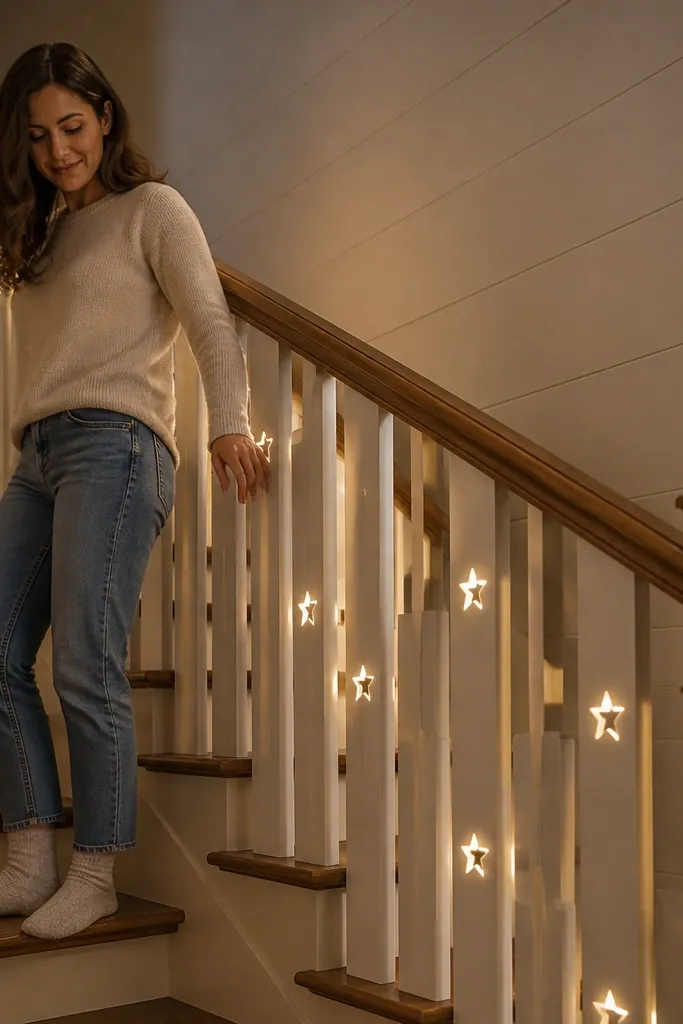
Farmhouse stair railings look best when the theme is subtle and repeatable. This idea uses small warm puck lights placed behind baluster openings so you get a starry sparkle along the rail line. It’s not “bright everywhere” — it’s a controlled glow that adds charm while staying safe and not blinding. You can pair it with white paint on the railing and a natural wood handrail for that classic country contrast. This project is best for railings with open space behind balusters or removable panels where you can reach the backside.
Pull measurements and mark where each puck light will sit behind the balusters, keeping consistent spacing so the stars line up. Drill access holes from the backside or remove a small section of trim panel if your railing allows it, then install puck lights with the included mounting ring or screws. Wire them to a central controller or use a battery puck set with an internal switch if you want zero wiring. Test the glow, then reinstall any panels and paint touch-ups so the backside access is hidden.
Use a foam-backed template when marking so you don’t scratch the front finish while positioning the holes.
Don’t place puck lights too close to the hand contact area — you want glow, not glare on skin.
4. Navy and brass nautical glow with step-edge LED strip and rope detail

Nautical themes look sharp when your colors are controlled: navy paint plus brass-colored hardware, then warm light that mimics a ship’s lantern. This setup uses a step-edge LED strip to define each riser line, plus a rope or braided cord accent to repeat the nautical feel without turning the stair into a costume. The warm glow makes navy look richer and prevents the theme from looking cold. It’s a strong choice for narrow hallways because the light helps the eye track each step. Skill level is intermediate mainly because of wiring neatness, not because the actual install is hard.
Editor's noteUse a dimmer so the glow looks cozy at night and not harsh in the daytime.
Paint or refinish the railing in navy and swap in brass-finish brackets, posts caps, or handrail hardware so the theme has a second anchor. Install a warm white LED strip in a thin aluminum channel along the underside of each step edge line, using clips so the strip follows the curve or straight run cleanly. Run the wiring to a driver mounted near the first newel post, then connect to a dimmer if you want adjustable glow. Add rope detail by wrapping a braided cord around a few visible railing posts or along a top trim line, securing with small hidden staples or zip ties behind trim.
Skip thisDon’t pick a blue LED color — it clashes with navy and makes the wood tones look off.
5. Hollywood glam marble vibe with mirrored backing and warm LED strips on the newel
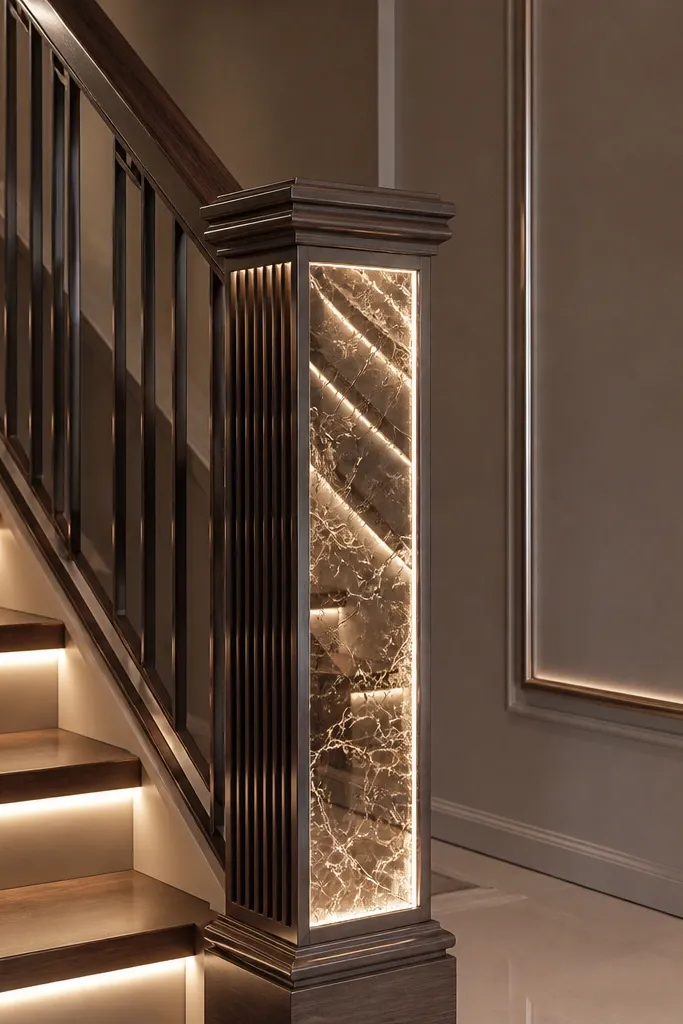
This one looks expensive because it uses reflection, not just brightness. By adding a mirrored or faux-marble backing panel on the newel post (the focal point), then placing warm LED strip lighting along the edges, you get a layered glow that looks like a boutique hotel. The reflection spreads light into the surrounding balusters, so even a simple railing turns dramatic. It’s photogenic from the bottom of the stairs because the light bounces and creates depth. Best for railings where the newel post is visible and you can attach a flat panel without blocking clearance.
Choose a panel material: mirrored acrylic or a peel-and-stick faux marble sheet on a rigid backing board for sturdiness. Measure the newel post face and cut the panel to fit with a 1/4 inch border so it doesn’t interfere with trims. Mount the panel using strong adhesive or screws into the backer, then attach a warm white LED strip in a slim channel or directly along the panel edges where it won’t show LED points. Wire to a small controller or plug-in driver, test, and then seal any exposed edges with clear trim or caulk so it looks built-in.
Add a small matte spacer behind the LED strip so the reflection looks soft instead of “hot spots.”
Don’t use real glass mirrors unless you’re set up for safe cutting and mounting — acrylic looks just as good here.
6. Scandi minimal with light oak handrail and concealed cable channel lighting
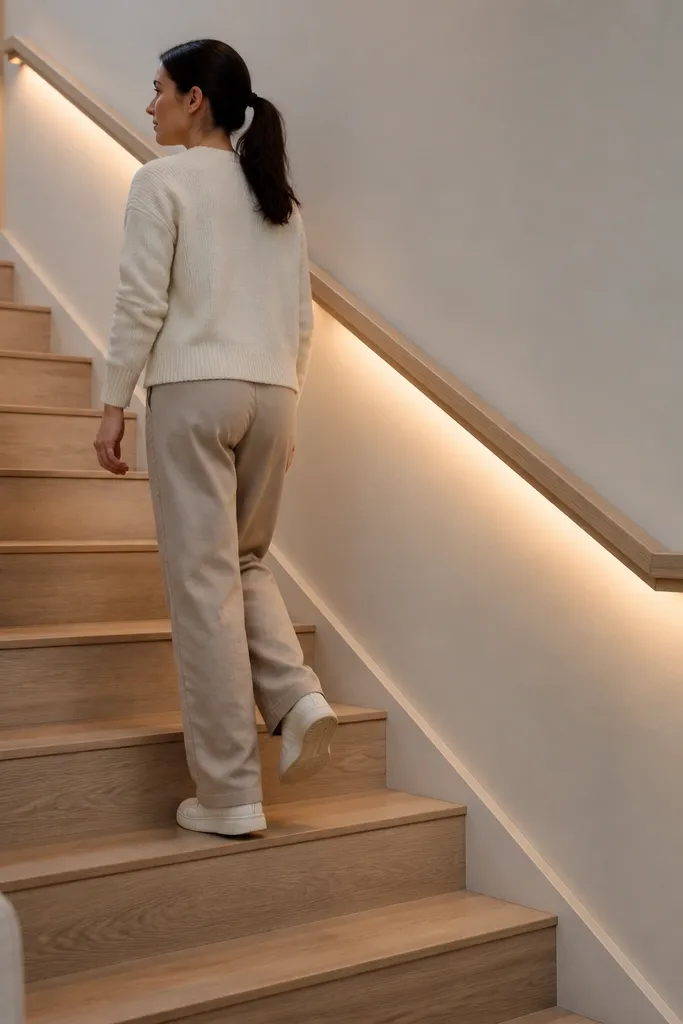
Scandi minimal works because it hides everything and lets material color do the talking. This is a clean version of “lights on the railing” where the light source is tucked into a slim cable channel that runs along the underside of the handrail. Pair it with a light oak handrail or light stain and keep the color palette to one warm wood tone plus black or white hardware. The result is calm, modern, and easy to photograph because there are no bright spots — just a gentle wash. It’s also realistic for most homes because it uses low-voltage LED strips and surface mounting.
Editor's noteUse a channel lid color that matches your handrail finish — it makes the line look intentional even when lights are off.
Sand and stain the handrail in a light oak tone, then seal it so the wood doesn’t absorb adhesive residue. Install a slim aluminum cable channel or LED channel under the handrail, then mount it with screws into the rail if possible for a rock-solid hold. Place a warm white LED strip inside and route the wire to a hidden power point near the top or bottom landing. Test the lighting, then cover the channel with its snap-on lid so you get a continuous line with no visible hardware.
Skip thisDon’t mount channels with only weak double-sided tape on textured or dusty wood.
7. Winter wonderland with icicle-style LED drops under stair landing rail
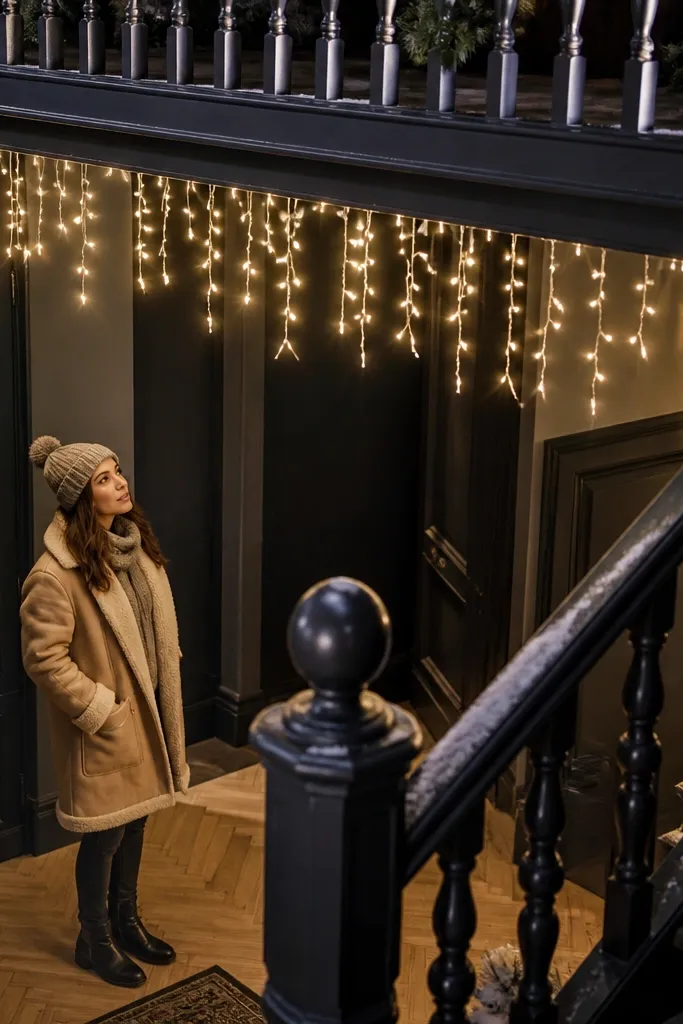
This is the theme you use when you want the staircase to look like a winter display without turning it into a seasonal mess every year. Icicle-style LED drops create a rhythmic, hanging glow under a landing rail or underside trim, so the effect reads instantly in photos. Keep it warm white so it feels cozy, not blue and hospital-like. The build is simple: you’re attaching short LED drops to a hidden track or channel so they don’t swing and don’t tangle. Great for homeowners who want a themed look that’s still clean and safe.
Editor's noteUse zip ties to bundle excess wire behind the trim — loose wire makes the look messy fast.
Pick an area under the handrail or landing trim where there’s at least 3 inches of vertical clearance so the icicles don’t hit elbows or guests. Install a thin mounting rail or cable line at the top of the drop area, then clip icicle LED strings onto it at even intervals (measure and mark spacing first). Route the power cord to a plug-in outlet with a cord cover, or use an outlet timer so it turns on automatically in the evening. Test for brightness and adjust spacing so the glow looks symmetrical from the bottom landing.
Skip thisDon’t hang icicles directly from the handrail — vibration makes them look uneven over time.
8. Desert modern with terracotta baluster inserts and amber-tinted light strips
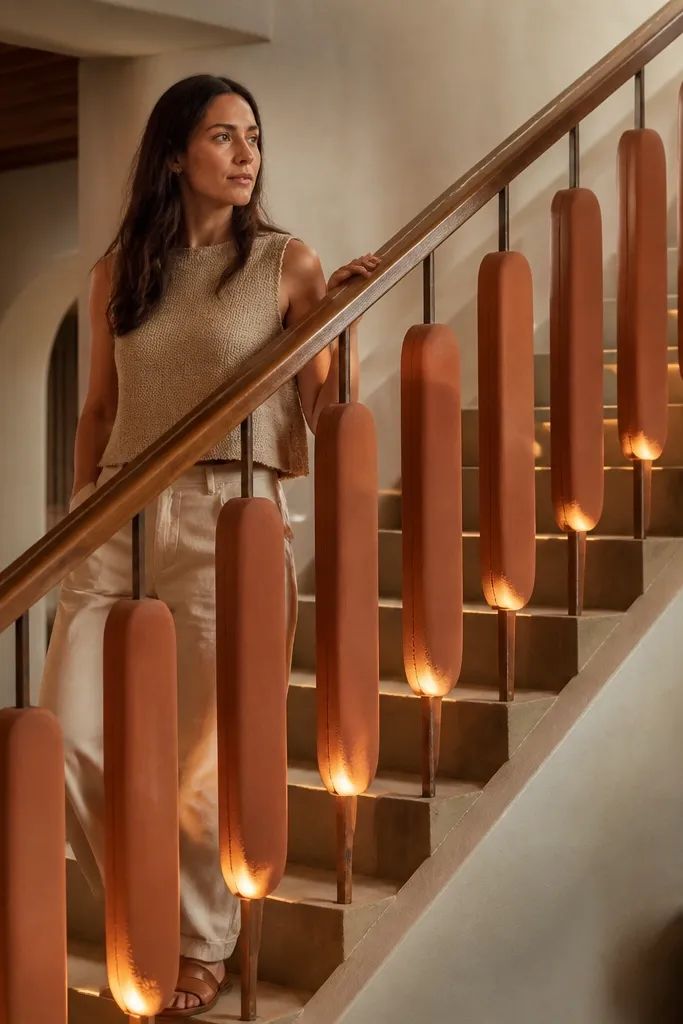
This theme is warm, earthy, and very photo-friendly because it mixes matte terracotta with amber-toned glow. You’re not just adding lights; you’re adding color temperature to the stair’s vibe. Use terracotta-painted baluster inserts or small terracotta tiles mounted behind open balusters, then pair with warm white LEDs plus an amber diffuser film over the strip channel. The amber tint makes the railing feel like it’s lit from within, especially in hallways with white walls. Skill level is intermediate because you’re doing small insert work, but the wiring is straightforward.
Editor's noteTest the amber tint by turning lights on for 5 minutes and checking from the bottom step — that angle shows color casts.
Paint terracotta inserts or cut small terracotta-look panels to fit behind balusters, then mount them with adhesive that won’t warp (thin application). Install an LED strip in an aluminum channel along the handrail underside, then test the glow on the wall before tinting. If the light feels too white, add amber diffuser film over the channel diffuser panel, not directly on the LED strip, so it stays even. Wire to a driver, secure all cables with clips, and finish by sealing any edges where inserts meet wood so dust doesn’t collect.
Skip thisDon’t tint the LEDs themselves with random gels — you’ll get uneven brightness and ugly hotspots.



