
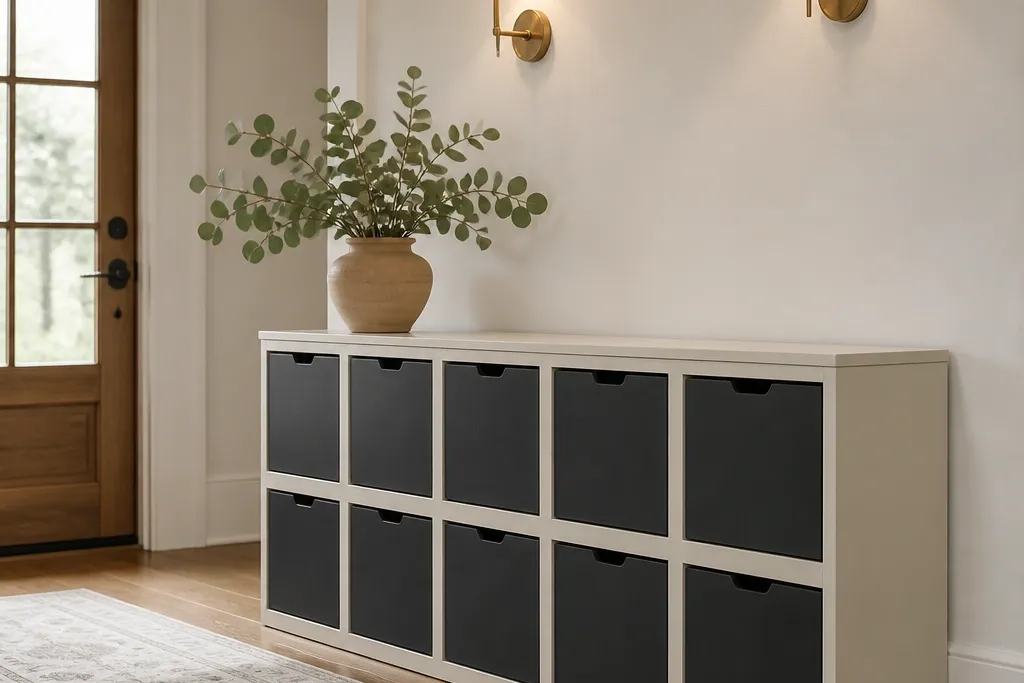
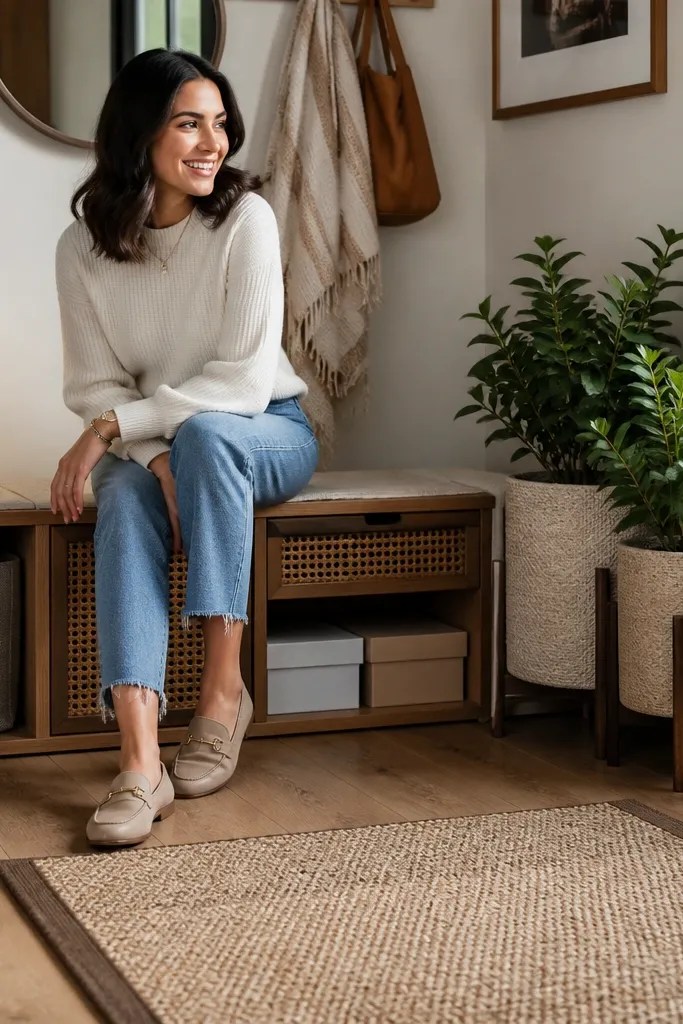
1. Painted Cube Shoe Cabinet with Chalkboard Fronts
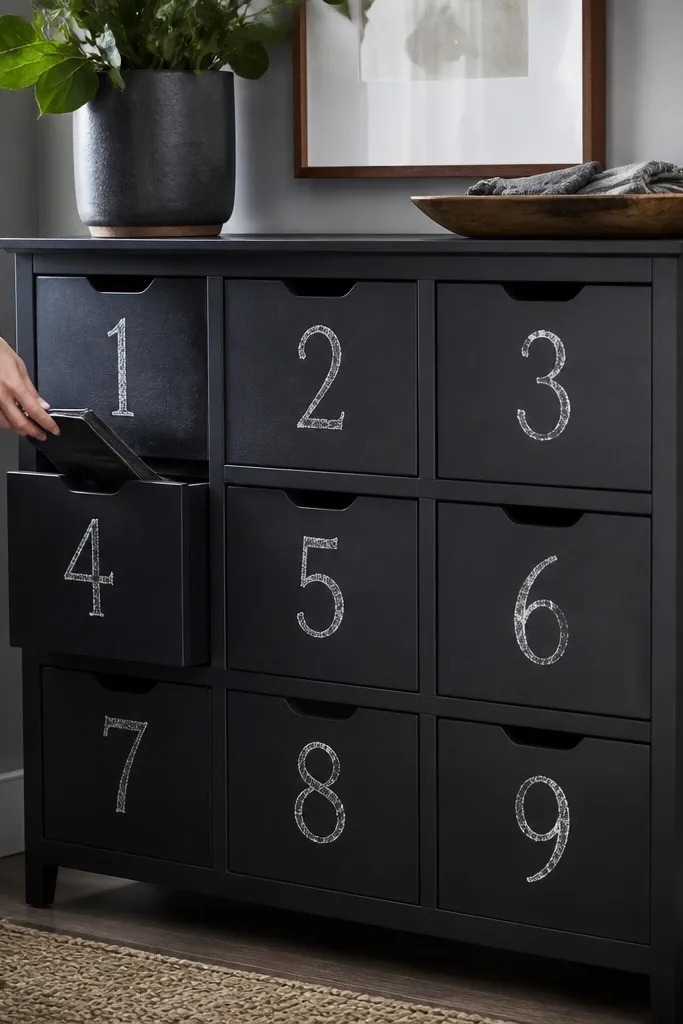
This is the easiest themed shoe storage idea that still looks styled. Cube storage hides pairs completely, and chalkboard fronts add a fun, usable surface without turning into clutter. Paint everything the same color, then add simple numbering so the hallway feels organized at a glance. Use cubes with open backs or add ventilation gaps so shoes don’t get musty. Skill level is beginner-friendly with basic carpentry, and the finished look fits modern, farmhouse, and kids' entryways.
Start with a ready-made cube organizer or build a frame from 3/4 in plywood with 12 in wide compartments. Paint the entire unit with a bonding primer and two coats of cabinet enamel; let cure fully. Install small chalkboard panels or chalkboard vinyl on each door front, then add stenciled numbers for each family member. Add ventilation by leaving a 1/2 in gap at the back or drilling 1/2 in holes in the side panels near the top of each cube. Finish by adding removable fabric bins or wire baskets inside each cube so shoes slide in cleanly.
Use cabinet enamel and don’t rush the cure time — soft paint scuffs when you pull bins.
Don’t seal the back panel tight if you’re storing damp shoes; they’ll smell fast.
2. Rattan-Front Shoe Bench with Lift-Top Tray
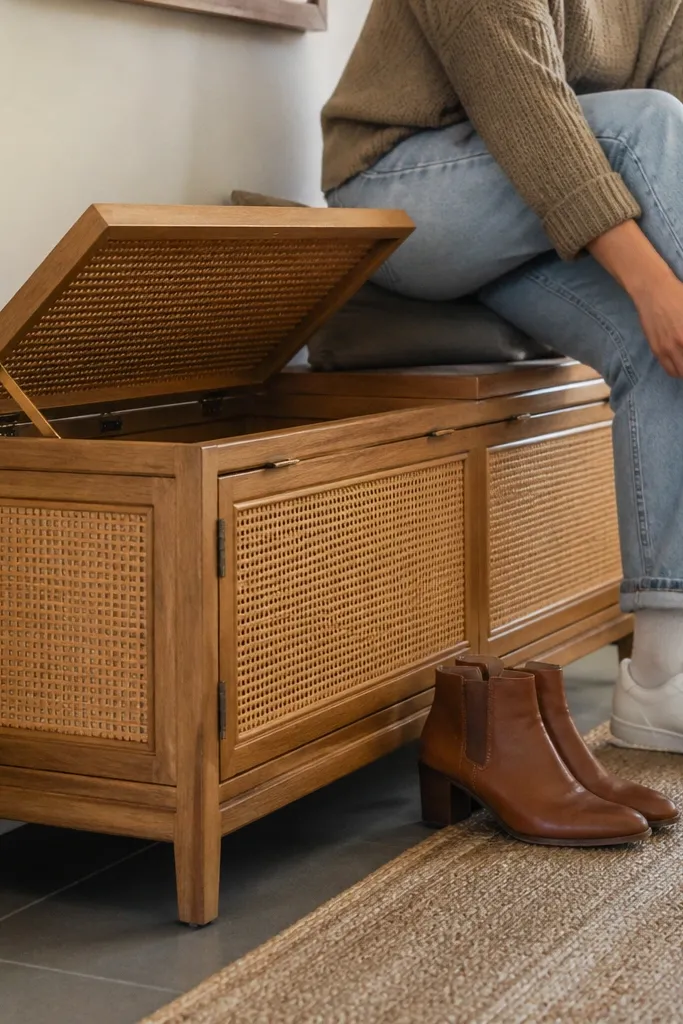
A bench is the most photogenic shoe storage choice because it frames the entryway and creates a focal point. Rattan fronts look warm and textured, so even a small hallway feels cozy. The lift-top keeps clutter out of sight while you still get quick access for grab-and-go shoes. Add a slatted tray inside so air moves around soles. This suits narrow spaces because you store vertically and keep seating in one piece.
Build a bench box from 3/4 in plywood, about 48 in long, 16-18 in deep, and 17-18 in tall. Add two rattan door panels on the front face with a simple frame, or buy rattan insert panels and mount them to plywood. For the top, hinge a lid and build a slatted interior tray that sits 3-4 in above the bottom panel. Use 1x2 slats spaced 1/2 in apart to create airflow. Install soft-close hinges on the lid if you want a cleaner feel, then finish with wood stain or paint.
Line the bottom with a removable tray so you can sweep sand and grit without disassembling the bench.
Don’t use solid plywood for the interior floor; closed storage traps moisture.
3. Wallpapered Backboard Shoe Nook with Matching Baskets
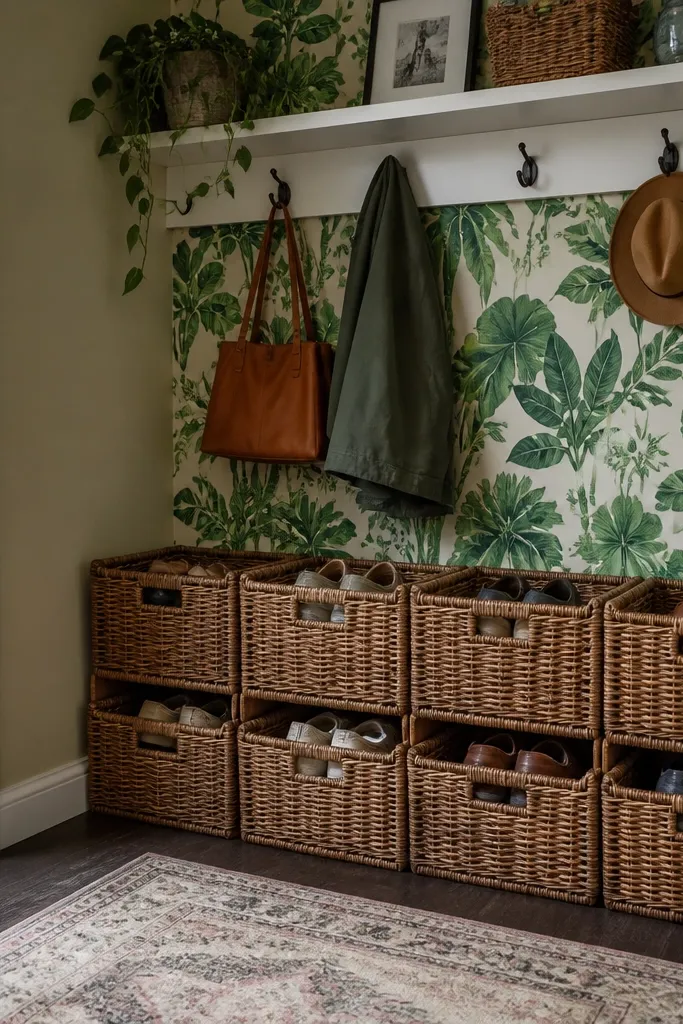
This is a themed shoe storage idea that looks designed even when it’s small. The trick is wallpaper on the backboard behind baskets, so the eye sees a finished wall instead of a pile of shoes. Matching baskets keep the front uniform. You get a clean look from any angle because the patterned backdrop frames everything. It’s best for tight hall corners or the space next to a closet where you can add shelving without blocking the path.
Measure the nook and build a simple shelf system using 3/4 in plywood boards and a back panel. Cut the back panel to fit the space and attach wallpaper to it first, then seal the wallpaper with a clear matte polyurethane so it’s wipeable. Install two or three shelves, leaving 8-10 in vertical spacing per shelf for shoes. Place matching baskets on each shelf and make sure basket fronts align so the look is tidy. Add a small baseboard or trim to hide the shelf edges and clean up the perimeter.
Editor's notePick one wallpaper pattern and repeat it on the baskets with the same color in the trim or handles.
Skip thisDon’t choose glossy wallpaper; glare makes scuffs and shoe marks show.
4. Sliding Barn Door Shoe Wall with Fabric Inner Pockets
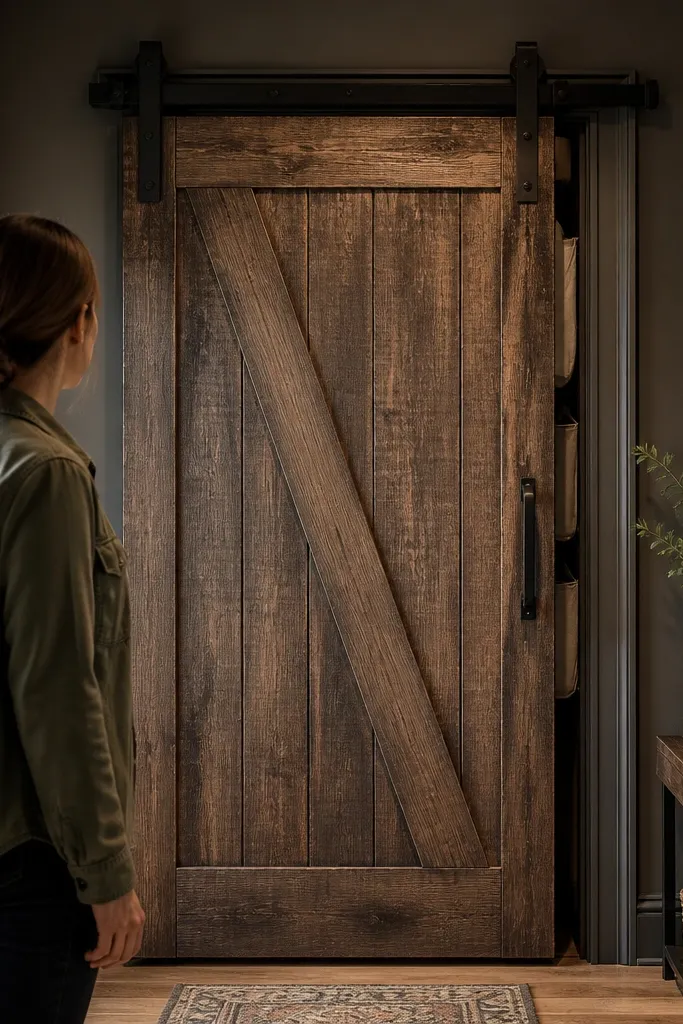
If you want the cleanest “everything disappears” effect, a sliding barn door is the move. The door hides the entire shoe area, so the hallway looks smooth and uncluttered. Inside, fabric pockets keep shoes from tipping and make it easy to grab the right pair. This theme reads rustic and cozy, and it works well for families because each person gets a pocket lane. It also handles seasonal overflow without turning into a floor pile.
Frame a storage wall opening with 2x2 studs, sized to your door width. Install a barn door track above the opening and hang a solid door panel, leaving 1/2 in clearance around edges. Inside, attach fabric shoe organizers with reinforced top seams to plywood backers; use screws and washers so the pockets stay flat. Add a bottom catch ledge with 1x2 trim to stop boots from sliding. Paint or stain the door to match your hallway hardware, then add a simple pull handle.
Use a door stop on the track so the door doesn’t slam and shake pockets loose.
Don’t skip a bottom ledge; tall shoes will slide out and show.
5. Stained Wood Slat Storage with Hidden Wire Racks
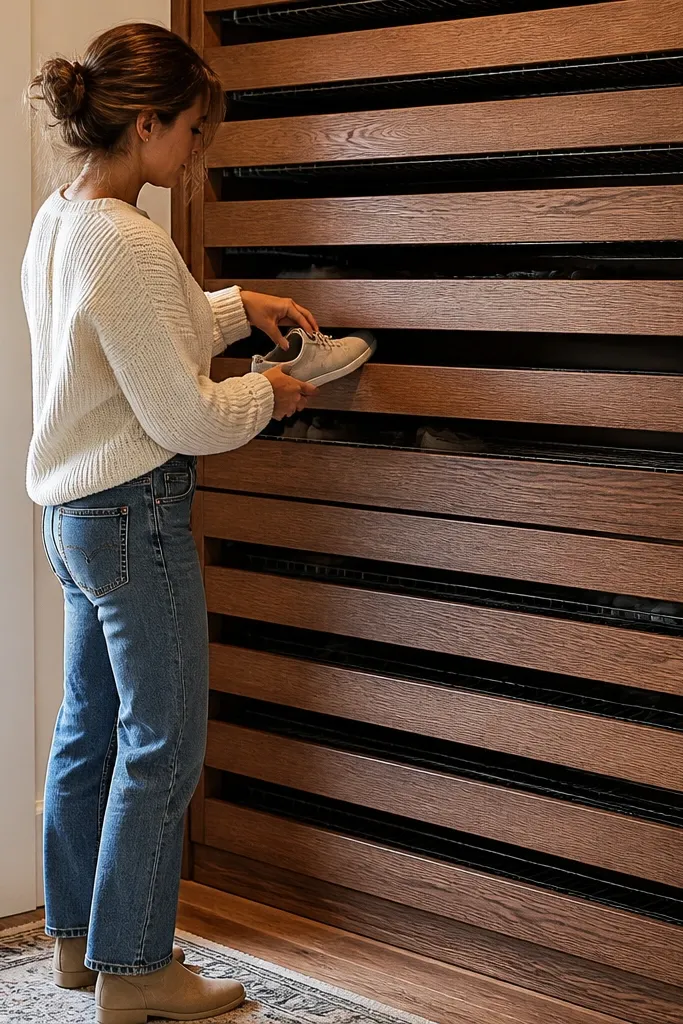
This option looks high-end because the front is all clean lines, but the inside is built for drying. Slats create a themed pattern and hide the mess behind a warm wood face. Wire racks let air circulate so shoes dry faster than in closed boxes. It’s ideal for entryways where shoes often come in damp. The build is mid-level because it needs careful measurements and rack mounting, but the end result looks intentional and not like basic storage.
Build a cabinet frame with a 3/4 in plywood box and a slatted front using 1x2 slats spaced 1/2 in apart. Mount wire shoe racks inside the cabinet so they sit 6-8 in above the bottom panel for airflow. Cut the back panel with a few ventilation slots or leave it open with a thin dust guard. Stain the cabinet and slats, then seal with a clear matte coat. Install a door or removable front if you want access, and add rubber bumpers at contact points to prevent chipping.
Buy wire racks sized for closet systems; matching the rack footprint makes assembly cleaner.
Don’t fully close the back panel; odor builds up even with wire racks.
6. Monochrome Drawer Tower with Shoe-Specific Dividers
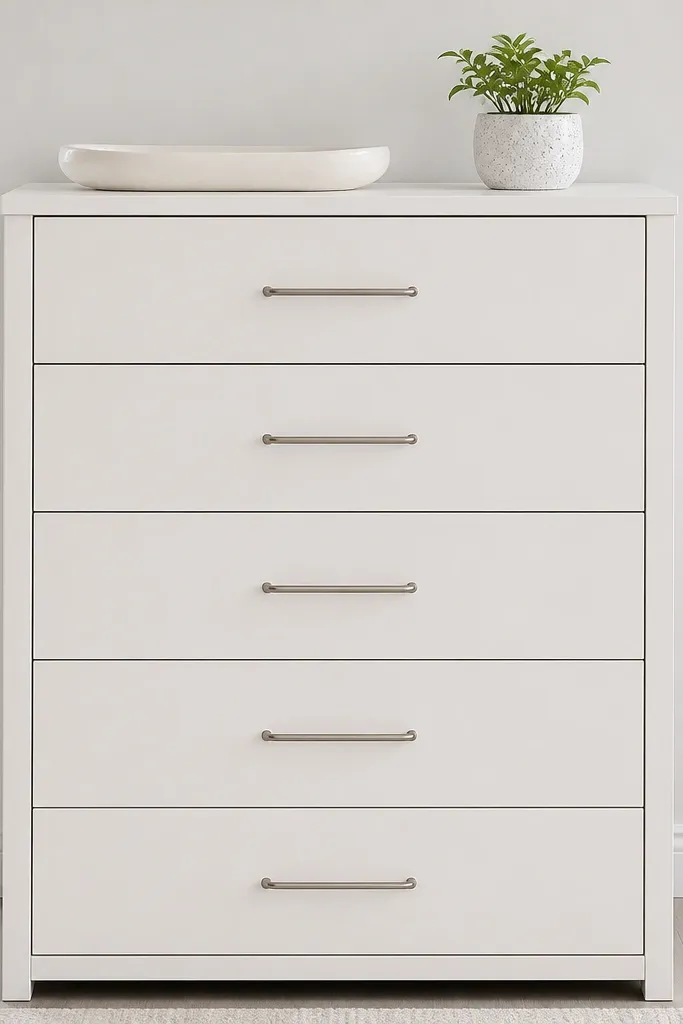
A drawer tower makes shoe storage look like furniture, not storage. When you pull drawers out, the inside stays organized; when you close them, the hallway looks spotless because there are no visible pairs. Choose one monochrome color (matte black, warm white, or charcoal) and match the hardware finish to your entryway. Shoe-specific dividers prevent the “jumbled drawer” look that ruins the theme. This works best in hallways with enough width for a tall unit.
Build or buy a 24-30 in wide drawer tower with 5-6 drawers. For build-your-own, use 1/2 in plywood sides and 3/4 in fronts; set drawer heights around 6-8 in for flats and sneakers, and 10-12 in for boots. Create dividers from 1/4 in plywood or thin MDF strips, shaped to fit shoe widths; attach with screws so you can adjust later. Install soft-close drawer slides and paint everything with a consistent enamel finish. Label the drawer fronts subtly with a small stencil or vinyl decal in the same color family.
Use felt strips on divider edges so leather and rubber don’t get scraped.
Don’t use one-size dividers for every shoe type; boots will wedge and ruin the system.
7. Hanging Pegboard Shoe Wall with Color-Coded Trays
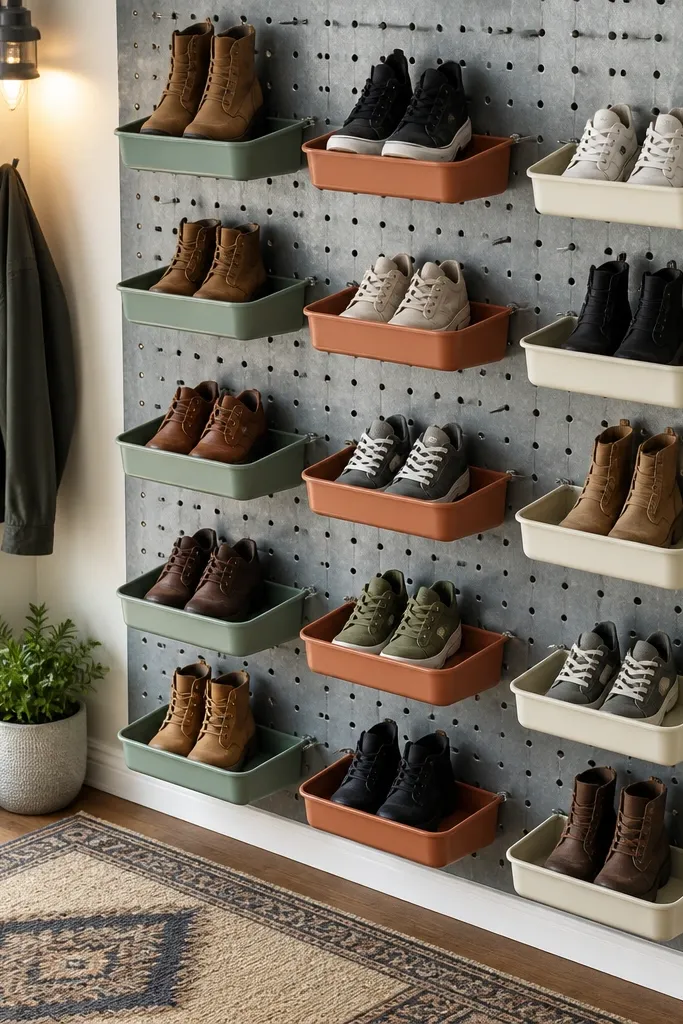
Pegboard is the best way to create a themed shoe storage look when you want it to feel playful and organized. The pegboard grid gives you a visible pattern, and color-coded trays make it look intentional instead of random hooks. Trays keep shoes from swinging, and the open design helps them dry. This works for entryways where the shoes are small-to-medium and you want quick access without bending.
Mount a pegboard sheet to the wall with 2x2 backing strips so you can screw directly into solid wood. Paint pegboard and trim in your theme color, then add hooks and install shallow wire trays for shoes. Use two to four tray sizes depending on shoe types and keep tray spacing consistent across the wall. Add vinyl labels on the trays with a matching color dot for each person or shoe category. Finish by adding a small shelf rail at the bottom for shoe care items so the wall stays styled.
Editor's noteUse powder-coated hooks and trays; bare metal rust marks will ruin the look.
Skip thisDon’t overload hooks; if the tray droops, shoes show messy angles.
8. Fabric Drawer Bins Under Console with Matching Tags
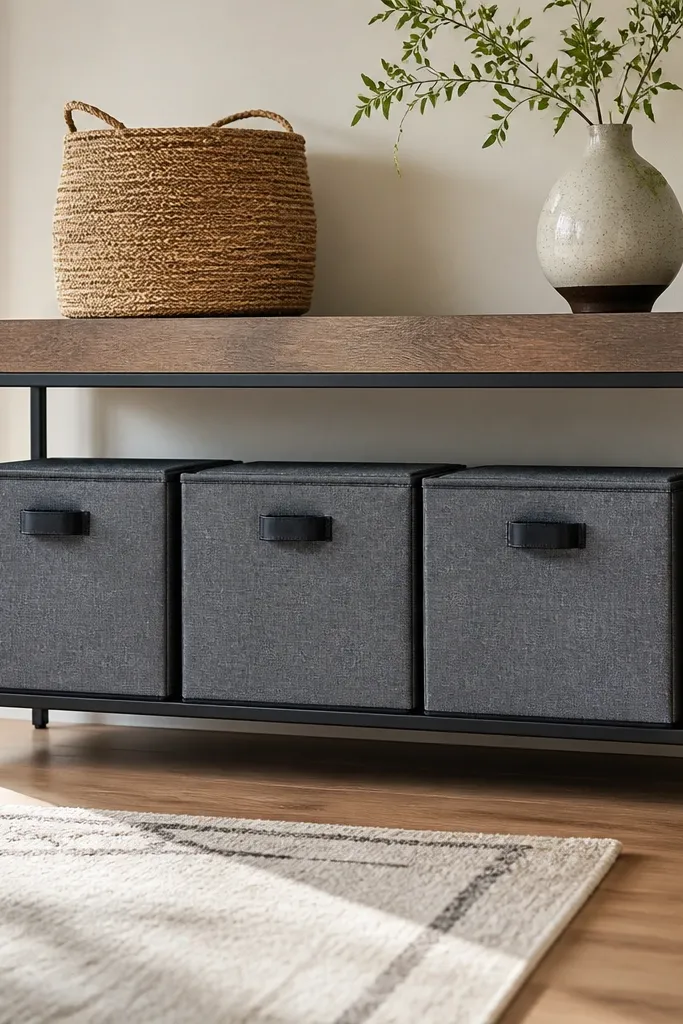
This is a clean, low-effort themed shoe storage idea that still looks good because the fronts match. A console gives you a ledge and a place to style decor, and fabric bins hide shoes completely underneath. Matching tags make the system easy for everyone, so shoes go back where they belong. It’s great for renters because you can use freestanding bins and straps instead of permanent carpentry. The look is soft and modern when you pick structured fabric bins.
Measure the space under your console and choose bin dimensions that leave 1-2 in clearance on all sides for easy pull-out. Use fabric bins with stiff fronts or insert cardboard panels to keep them looking crisp. Add a simple fabric divider panel or thin plywood rails to keep bins from sliding. Attach matching label tags to the front handles using grommets or Velcro. Place a small slatted tray or airflow mat at the bin base if shoes get damp.
Pick bins in one color and add the same hardware color on every tag clip for a consistent look.
Don’t use floppy bins; they collapse and show shoes from the sides.
9. Vintage Suitcase Stack Shoe Storage with Clear Top Cover
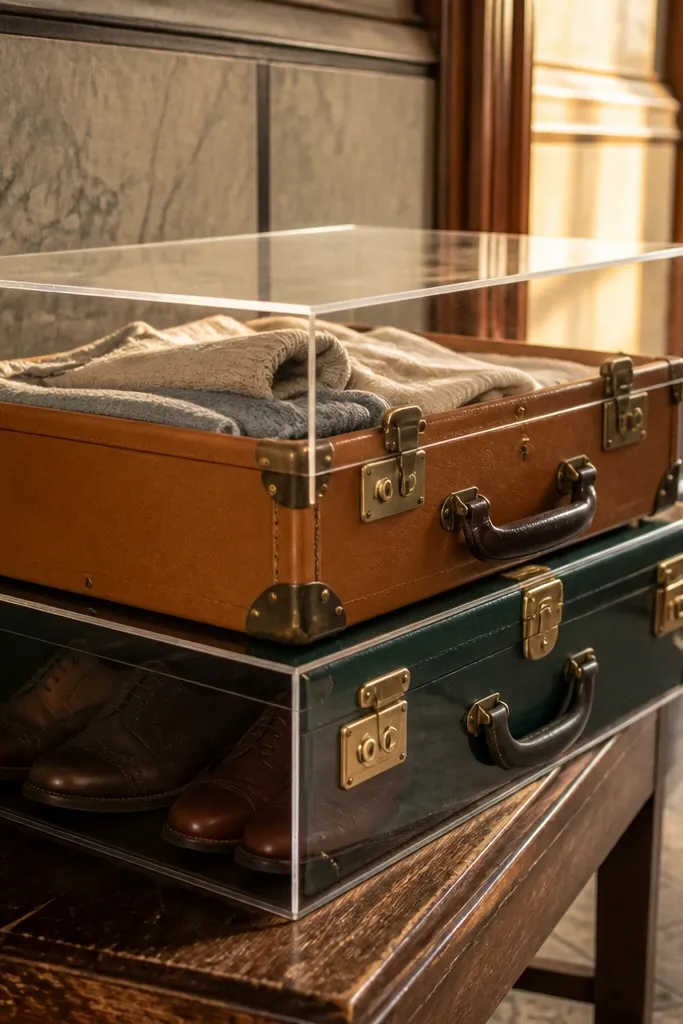
If you want a themed shoe storage idea that looks like decor, suitcases are hard to beat. Stack two or three suitcases and use the top as a display while the inside holds shoes. The theme is instantly cohesive if you keep the colors consistent (tan, black, or deep green). Add a clear top cover or glass sheet on the top suitcase so the stack looks polished and doesn’t collect dust. This works best in entryways where you can keep the stack visible and treat it like furniture.
Choose suitcases with similar sizes so the stack looks intentional; aim for 16-20 in wide and 10-12 in tall each. Reinforce the stack by placing a plywood board under the top suitcase and securing the bottom to a wall bracket if the hallway gets bumped. Line the inside with removable canvas shoe organizers or use fabric liners to keep pairs separated. Add a clear acrylic cover for the top suitcase to protect the exterior and keep the look clean. Seal any scuffed leather or vinyl with a compatible clear finish before stacking.
Use felt pads between suitcases so they don’t slide and scuff each other.
Don’t store wet shoes directly in bare suitcase fabric; line with breathable inserts.
10. Tile-Front Shoe Cubby Bench with Removable Tray Inserts
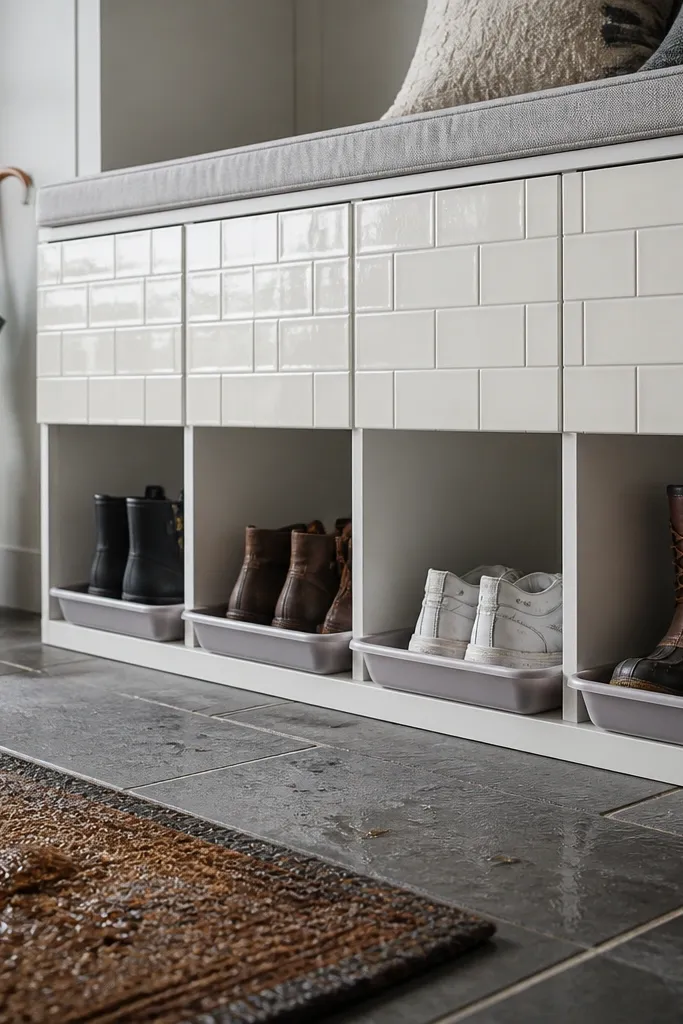
Tile-front cubbies look sharp because the face is finished and easy to wipe. Themed shoe storage ideas usually hide clutter, but tile adds style while still being practical for muddy shoes. Removable trays keep shoes in place and make it simple to swap out inserts when seasons change. This suits entryways that get tracked dirt. It’s mid-level because you’re building a bench and installing tile or tile-look panels, but the result looks like built-in storage.
Build a bench base from 3/4 in plywood and frame three or four cubbies with dividers. Create a tile-front look by using tile panels or ceramic tile adhered to cement board on the cubby faces. Install removable tray inserts inside each cubby from thin plywood or plastic-coated wire, sized to fit snugly. Leave a small gap at the back of each cubby so air can move. Seal tile with grout sealer and finish wood with a durable topcoat.
Editor's noteUse tray liners in washable fabric so muddy soles don’t stain the cubby interior.
Skip thisDon’t grout over raw wood; it cracks unless the substrate is right.
11. Curtain-Back Shoe Storage Cabinet with Linen Panels
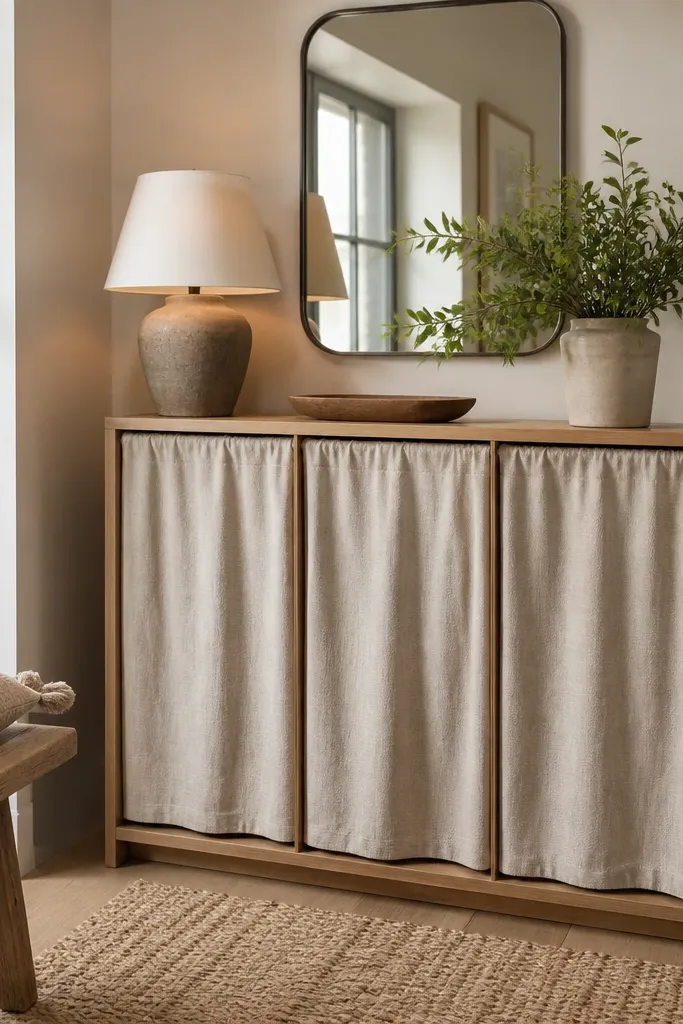
A curtain-front cabinet is one of the prettiest ways to hide clutter without building doors. Linen panels look soft and tailored, and they give you that themed look if you match the fabric color to your entryway textiles. The curtain also makes it easy to access shoes quickly while keeping the visual mess behind a clean plane. Airflow is built in because curtains are breathable, and you can add slatted shelves inside. This is best for hall closets or small cabinets you can retrofit.
Mount a basic cabinet frame with shelves from 3/4 in plywood or install a closet system. Add slatted shelf inserts or drill ventilation holes in the shelf bottoms. Attach a curtain rod inside the cabinet and hang linen panels cut to fully cover shelves when closed. Choose panel width so each side overlaps by 2-3 in and doesn’t leave gaps. Tie the curtain back with small fabric ties or magnetic hooks to keep the opening neat when you grab shoes.
Use linen with a thicker weave or add a backing layer so the curtain doesn’t cling to shoes.
Don’t use thin sheers; shoes will show through and defeat the whole point.
12. Color-Blocked Shoe Rack with Acrylic Number Labels
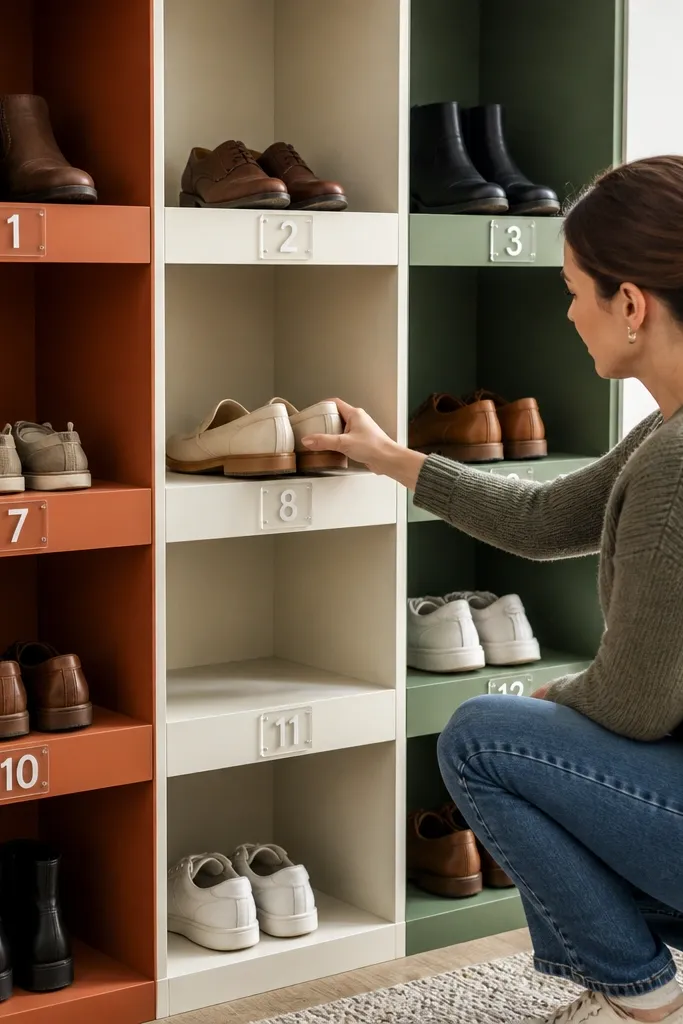
Color blocking makes themed shoe storage ideas feel graphic instead of hidden. You use one rack system, then paint sections in two to three matching colors, like terracotta, cream, and sage, so the hallway looks designed. Acrylic number labels keep it readable and neat. The rack can be open, but the color system and labeled bins make it look organized even when shoes go in quickly. This suits modern spaces and families who want fast sorting.
Build a simple shoe rack frame from 2x2 lumber or buy a metal rack with adjustable shelves. Segment the front by applying painter’s tape and paint the face panels in your chosen colors; use primer first for even coverage. Install small labeled bins or shallow baskets into each section so shoes don’t spill out. Add acrylic labels on each bin front with vinyl or adhesive standoffs. Seal painted wood with a clear matte topcoat so scuffs wipe off.
Editor's notePaint the face panels, not the rack interior; it keeps the paint from getting scratched by shoes.
Skip thisDon’t pick random colors; stick to one tight palette so it reads as a theme.
13. Glass-Front Display Cabinet with Hidden Shoe Trays
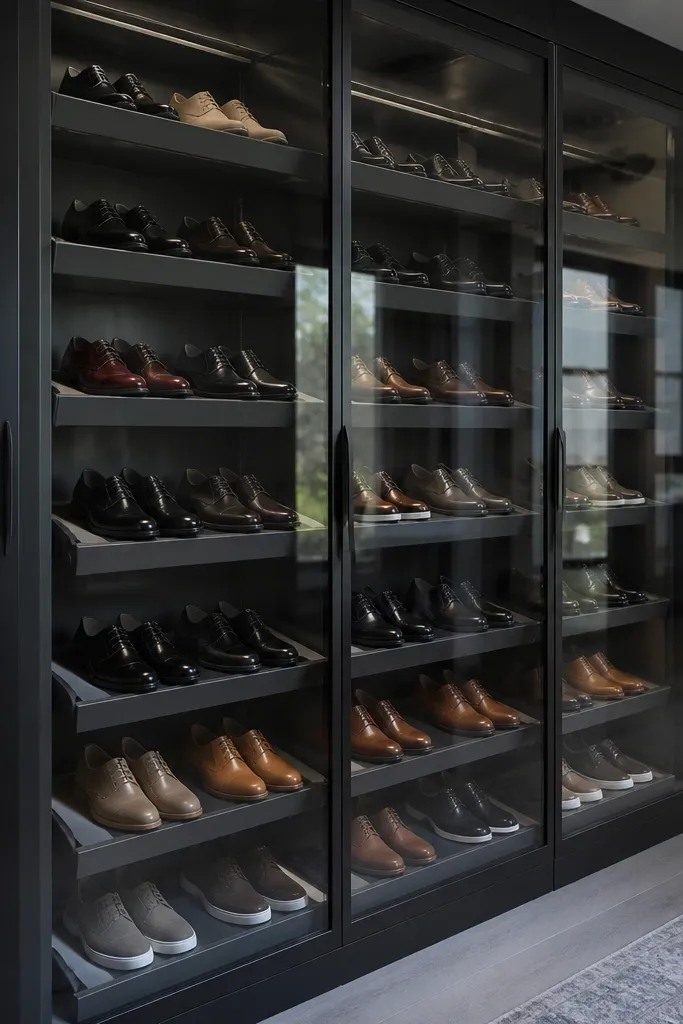
This one is for people who hate hiding everything. You get a clean, styled look because shoes sit on trays behind glass, and the hallway stays neat because nothing is on the floor. The themed effect comes from repeating tray spacing and keeping only a curated set visible. Pull-out trays make it easy to swap pairs without opening the whole cabinet. It’s best for entryways where you want the storage to look like furniture and you have a spot for a display cabinet.
Use a cabinet with glass doors or build a frame and install tempered glass panels. Inside, mount pull-out shelves or wire trays using full-extension slides. Set tray depth around 10-12 in for most sneakers and flats, and adjust height by tray position so shoes lie flat. Add a simple back panel in a single color to create a consistent background. Clean up edges with trim and seal any raw wood before filling with shoes.
Editor's noteKeep one category visible (like everyday shoes) and store the rest in a closed drawer nearby to avoid visual clutter.
Skip thisDon’t leave trays too deep; shoes slump and create a messy silhouette behind glass.
14. Woven Seagrass Drawer Inserts for Closet Shoe Shelves
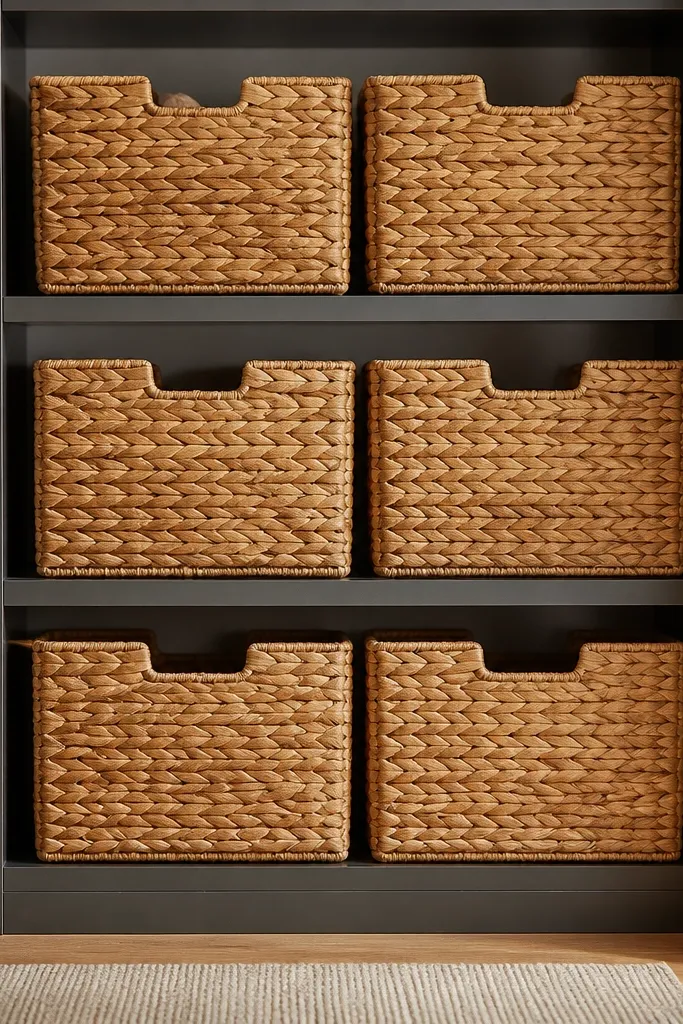
If you already have shelves, you can make them look themed fast with woven seagrass inserts. The uniform texture hides the chaos of mismatched shoes and creates a consistent front line. Seagrass looks warm and natural, which makes the hallway feel calmer. This is a good option for small spaces because you don’t need to build big furniture — you just upgrade the visible storage. It’s beginner-friendly and focuses on appearance and organization.
Measure your closet shelf openings and buy or cut seagrass baskets that fit with 1-2 in clearance on each side. If you can’t find exact sizes, use basket liners and add thin plywood strips to stop sagging. Put one basket category per shelf: everyday flats in one, sneakers in another. Add a small fabric strip label on the front edge so the look stays clean. For airflow, keep baskets slightly elevated on thin spacers or add ventilation holes in the shelf base.
Editor's noteMatch basket color to your entryway wood tone so everything looks intentional instead of random.
Skip thisDon’t pack baskets tight; leave space so shoes dry and don’t smell.
15. Peg Rail Boot Storage with Under-Shelf Slip Trays
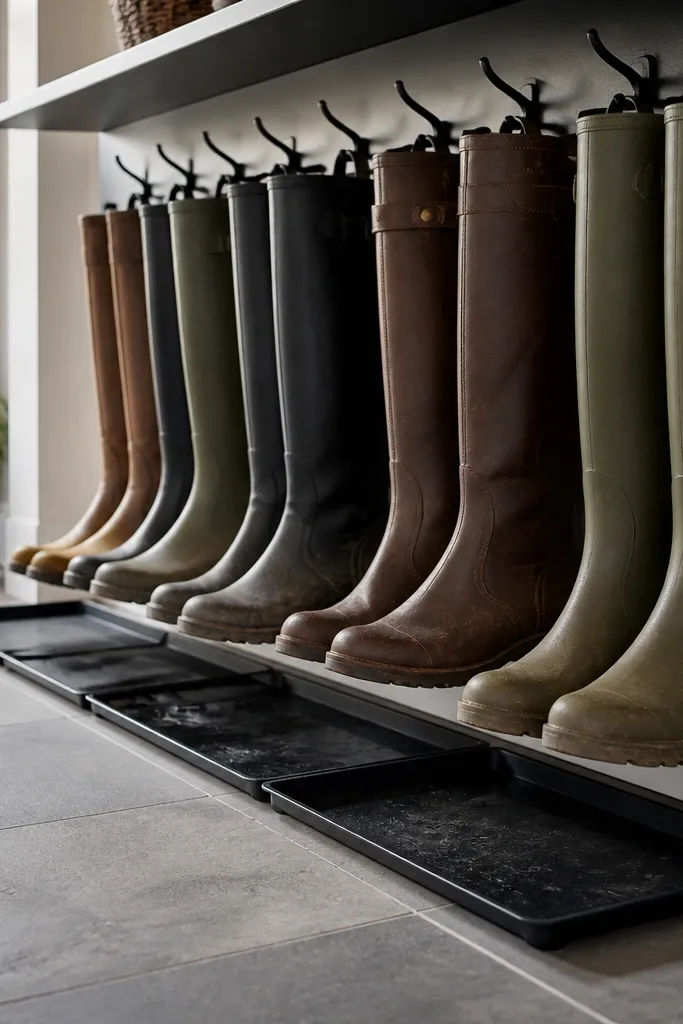
Boots are the hardest shoe storage problem because they take up space and flop. Peg rail storage solves that visually and structurally, and it looks good because the boots hang in a neat line. Add under-shelf slip trays so the soles don’t drip dirt onto the floor. The theme comes from matching the rail finish (black iron or brushed brass) and keeping the tray color consistent. This works best for entryways with wall space and a spot where boots can hang without blocking foot traffic.
Install a horizontal peg rail at a height that supports boot shafts without stretching them; start around 54-60 in from the floor. Use sturdy pegs or boot hooks with rubber caps to protect leather and prevent slipping. Mount an under-shelf ledge using 1x4 boards, then attach slip trays beneath it using L-brackets. Build slip trays from thin plywood with a removable liner so you can clean quickly. Finish the rail and ledge with the same paint or metal finish for a cohesive look.
Editor's noteUse one hook size for a whole boot family so the line stays uniform.
Skip thisDon’t hang boots by the toe; they warp and look messy over time.
16. Sliding Shoe Drawer Bench for Narrow Hallways
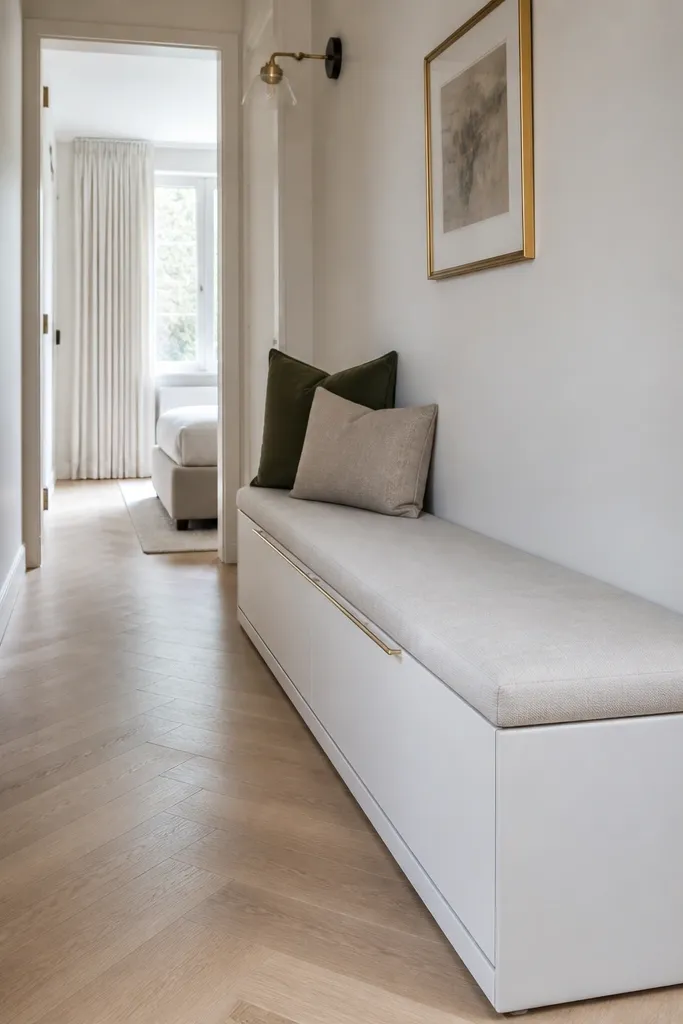
A sliding drawer bench hides shoes while keeping the hallway clear. It’s one of the cleanest themed shoe storage ideas for narrow spaces because the front looks like one piece of furniture, not multiple bins. Sliding drawers also prevent the “open bin mess” when you’re rushing. Choose a theme by matching the drawer pulls and the bench finish to your door trim or baseboards. This works for apartments and tight entryways where you can’t swing doors.
Build a bench carcass from 3/4 in plywood, about 60 in long and 14-16 in deep. Install 3-4 sliding drawers inside using full-extension drawer slides rated for the drawer weight. Make each drawer opening 9-10 in high so sneakers and flats fit flat; add a taller drawer section for boots if needed. Use a divider board inside each drawer to separate pairs and stop rubbing. Finish the outside with paint or stain, then add drawer pulls in a single metal finish.
Add rubber feet under the bench so it doesn’t creep and misalign drawers.
Don’t make drawers too shallow; shoes will tip forward and show from the gaps.
17. Magnetic Latch Cabinet with Patterned Side Panels
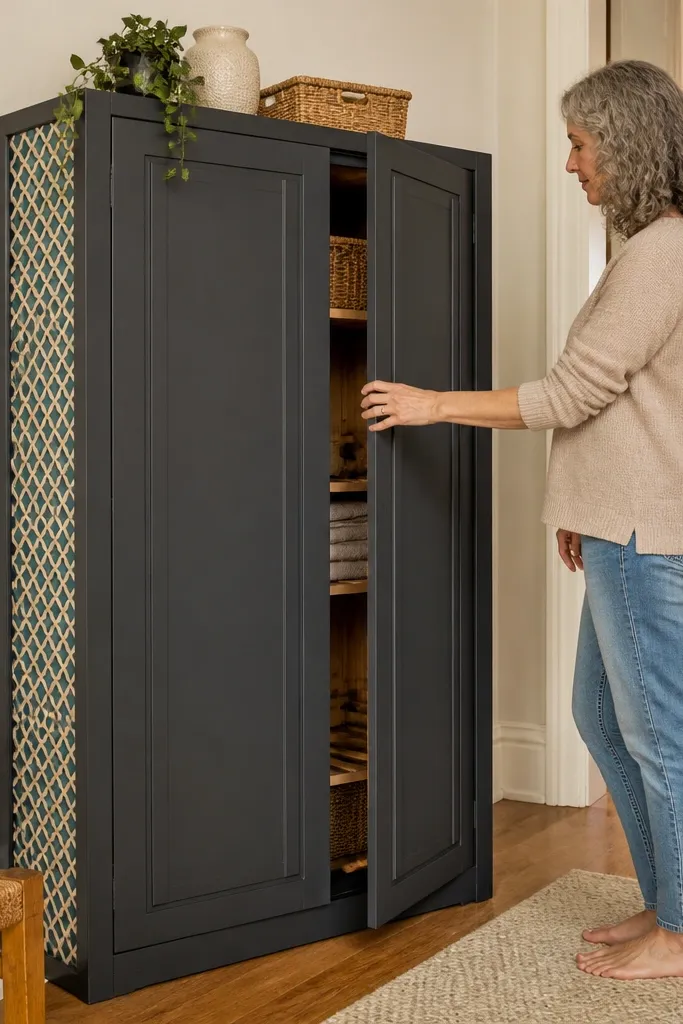
A magnetic latch cabinet gives you a crisp, clean front and makes the storage feel like furniture. The theme comes from patterned side panels or removable wraps on the cabinet exterior, so the hallway looks styled even when the cabinet is closed. Inside, use slatted shelves or wire trays for airflow. Magnetic latches are satisfying and quick, which matters because shoe storage only works if people actually close it. This suits entryways where you want a tidy, modern look without bulky doors.
Build a cabinet box from 3/4 in plywood, sized to fit your hallway gap, and install shelves spaced 8-10 in apart. Add slats or drilled ventilation holes on shelf bottoms. Cover the side panels with a pattern using removable wallpaper or vinyl wrap on smooth plywood. Install magnetic catches on the door so it closes flush and stays shut. Finish with a matte topcoat on the cabinet body so the exterior is wipeable.
Editor's noteUse vinyl wrap on removable side panels so you can change the theme later without rebuilding.
Skip thisDon’t rely on regular friction doors; they’ll stay slightly open and show shoes.
18. Steam-Bent Wood Shoe Shelf with Leather Straps
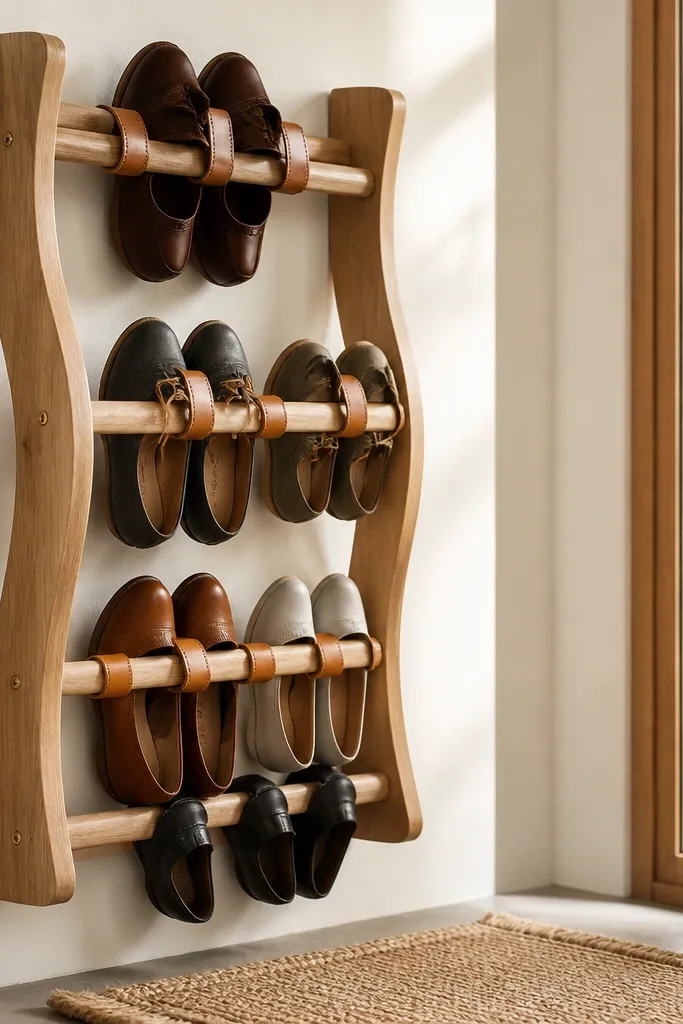
This is a sculptural themed shoe storage idea that looks like design, not storage. Steam-bent wood shelves curve slightly for a softer look, and leather straps hold shoes so they don’t slide. The straps also create a repeating pattern across the hallway, which reads as intentional. It’s best for entryways with lighter shoes like loafers, flats, and sneakers, because the straps keep everything lined up. Skill level is medium because bending wood takes care, but you can simplify by using pre-bent wood strips or a curved plywood panel.
Create a shallow shelf base from 3/4 in plywood and cut a slight curve into the front edge. Seal the wood and sand smooth so leather doesn’t snag. Attach two leather straps per shelf using brass screws and washers; space straps so shoes sit flat with a small gap between pairs. Install the shelf brackets to the wall so the shelf is about 18-24 in off the floor. Finish by adding a bottom dust lip so dirt doesn’t fall behind the shelf.
Use waxed leather or pre-sealed straps so they wipe clean and don’t absorb scuffs.
Don’t over-tighten straps; tight straps distort shoes and make the line look uneven.
19. Pegboard + Cabinet Combo with Closed Upper Storage
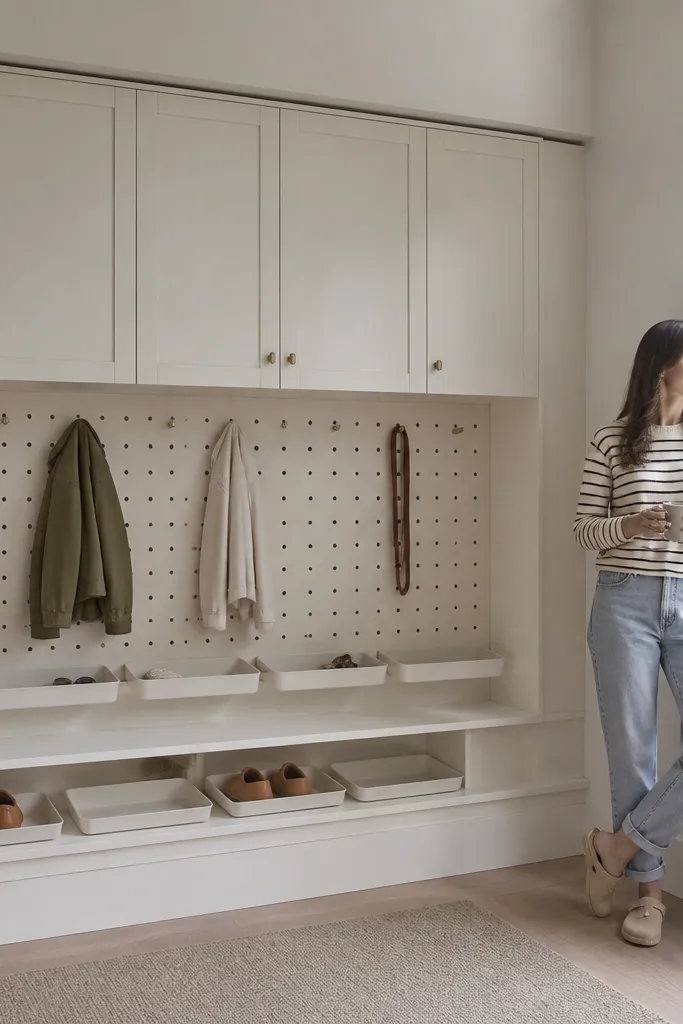
This hybrid approach is the cleanest way to manage shoes and hallway chaos at once. You keep the drop-off area on pegboard with trays for quick access, but you hide the extra pairs and seasonal gear in a closed upper cabinet. The theme is created by repeating finishes: same paint color, same hook style, same label system. It looks good because the closed cabinet creates a smooth visual block, while the pegboard grid adds structure below. Great for families and entryways where backpacks and shoes both pile up.
Mount pegboard on the lower wall section with a backing strip and paint it the theme color. Add shallow wire shoe trays on hooks or a rail so pairs sit flat. Above the pegboard, install a small cabinet with doors, and set shelves 10 in apart for shoes. Add slats or ventilation in the cabinet shelves so shoes dry. Use labels on both trays and cabinet bins so returning shoes takes seconds.
Keep tray fronts aligned with pegboard grid lines so the visual grid stays straight.
Don’t mix finishes on the hardware; mismatched hooks make the area look messy even if it’s organized.
20. Built-In Under-Stair Shoe Drawers with Vent Slots
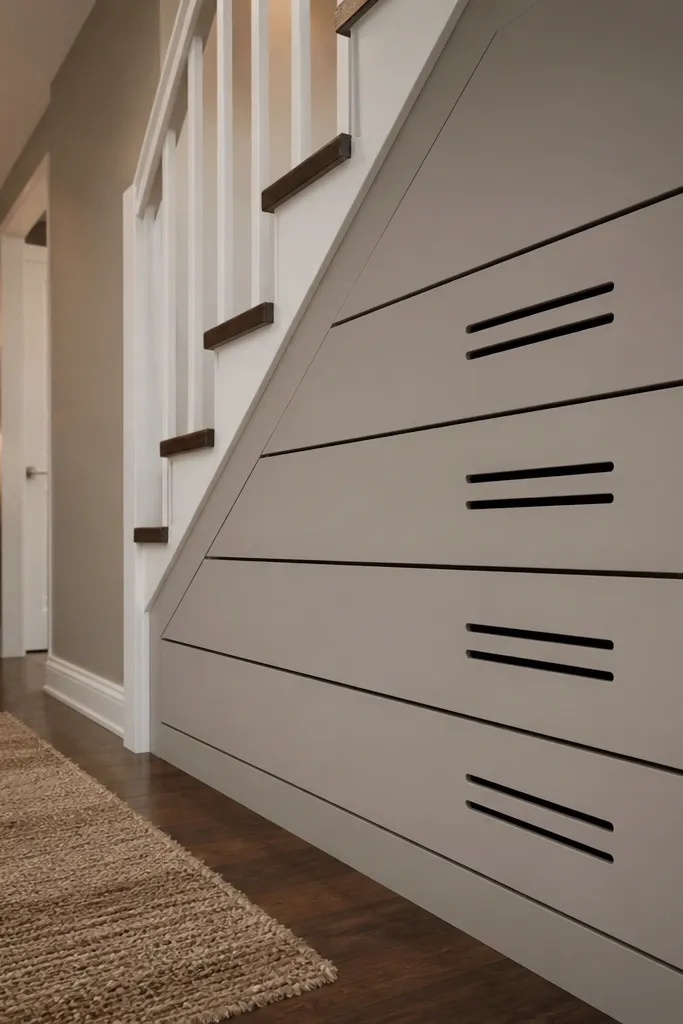
Under-stair space is the ultimate clutter trap, and drawers fix it fast. Themed shoe storage ideas work especially well here because the sloped ceiling hides the top of the system and you can make the fronts match the hallway. Pull-out drawers keep shoes contained and prevent floor piles. Add vent slots so shoes dry without the stink. This suits homes with stairs and awkward under-space where you want a built-in look.
Measure the under-stair footprint and frame a set of drawer openings using 3/4 in plywood and cleats. Install full-extension drawer slides and build drawers with fronts that align in a straight visual row. Add vent slots to the drawer sides or bottoms using a router or pre-made vent panels. Line drawer interiors with removable liners and add dividers for pair separation. Finish the drawer fronts with paint or stain that matches the entry trim, then add simple pulls.
Editor's noteUse a template for vent slot spacing so every drawer looks identical.
Skip thisDon’t make drawers airtight; shoes coming in wet will turn the space into an odor box.



