
1. Brass-Label Masala Shelf with Tiered Front Row
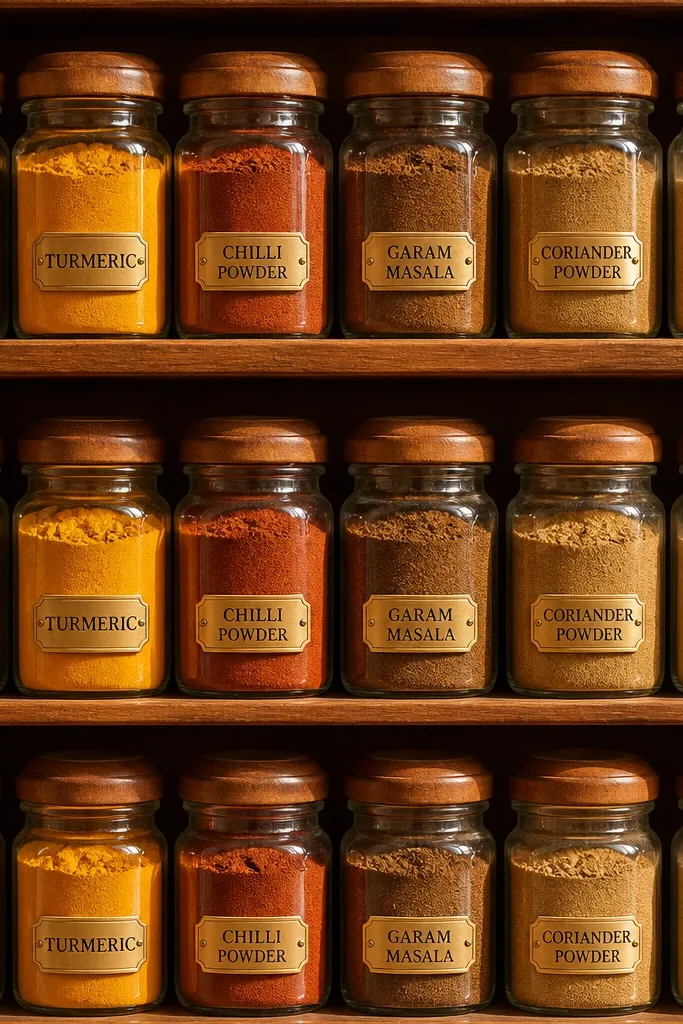
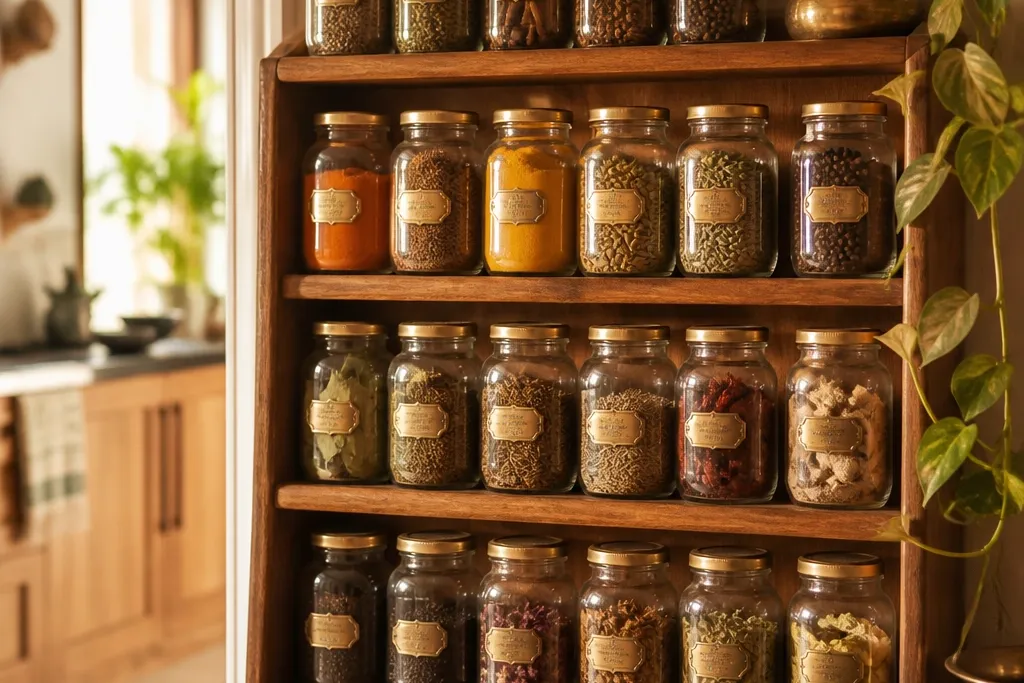
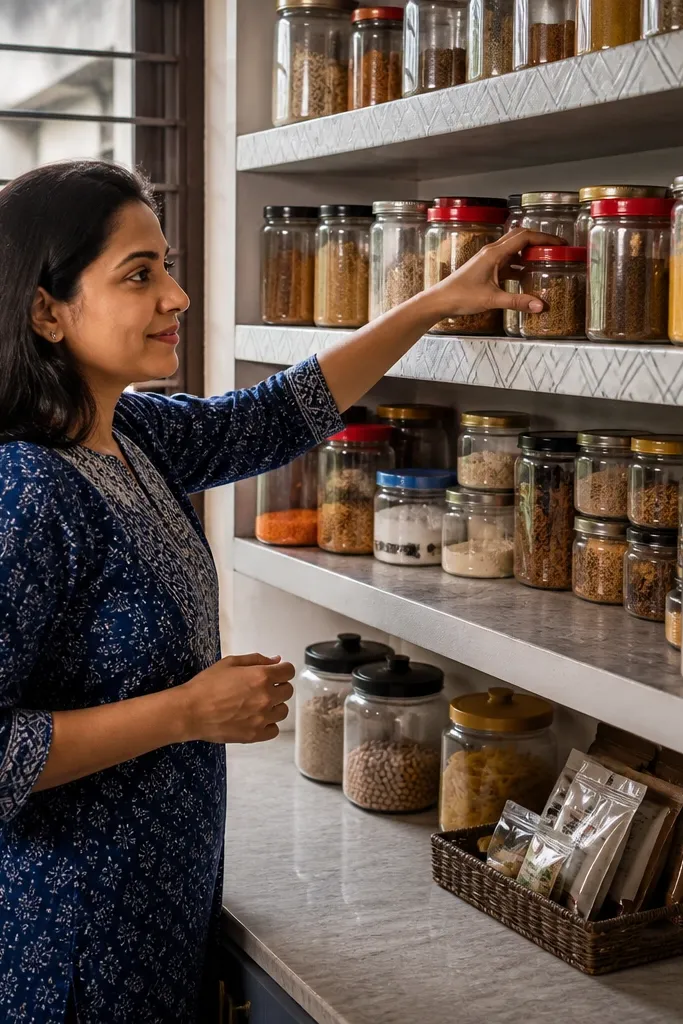
This is the cleanest “busy kitchen” look because it turns spices into a visual menu. Use a three-tier front row for the masalas you touch most — jeera, turmeric, chilli powder, garam masala, coriander, and hing — with matching jars so the shelf reads as one design. The brass-style labels add a warm, traditional touch without making the pantry feel cluttered. It also fixes the common problem of spice jars getting mixed up or rotated when refilling.
Start by choosing 3 shelf heights that match your jar size. Use 8 oz to 10 oz wide-mouth jars for powders so scooping is easy, then set your tiers so labels land at eye level when the pantry door is open. Apply a shelf liner in warm beige or light terracotta, then mount or place jars in a straight line with labels facing out. Finish by adding a small tray at the bottom tier for measuring spoons so you’re not hunting for them.
Print labels in two lines: spice name in English and a smaller line for the common Hindi/vernacular name you actually use.
Avoid mixing jar shapes across the shelf; one odd jar turns the whole row messy.
2. Terracotta & Kraft Snack Drawer with Color-Coded Bins
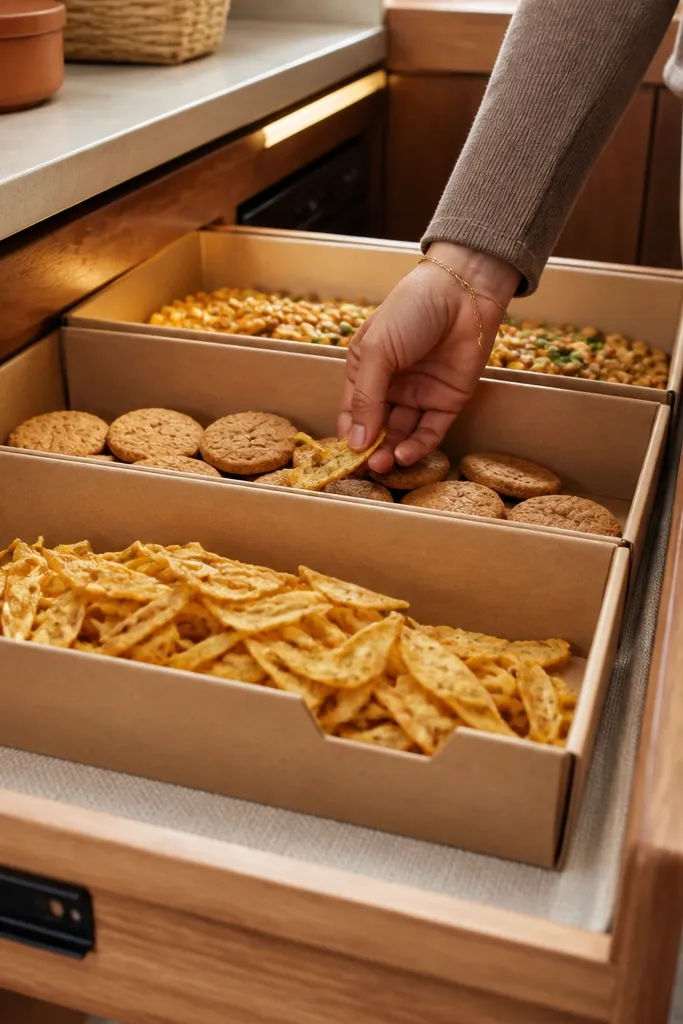
Snack drawers get chaotic fast because wrappers multiply. This setup looks intentional by using kraft bins with a terracotta theme, so the drawer still looks warm even when you’re replenishing. Put namkeen, biscuits, and roasted snacks in separate bins with a small label tab at the front. The photogenic part is the uniform kraft texture — it hides minor mess and makes the drawer feel designed, not temporary.
Measure your drawer width and depth, then cut or buy bins that fit with a 1/4 inch gap on each side for easy pull-out. Line the drawer with a thin kraft-look shelf paper or a textured mat in terracotta. Sort snacks into three categories: “grab now” (front bin), “weekend” (middle bin), and “backup” (back bin). Label each bin with a clear label style — black text on kraft or terracotta stickers — so you can restock without guessing.
Editor's noteUse a label color for each bin category so you can refill at a glance even in low light.
Skip thisDon’t leave snacks in original crinkly packaging; it ruins the clean drawer look.
3. Chili-Red Tadka Station Inside a Door Rack
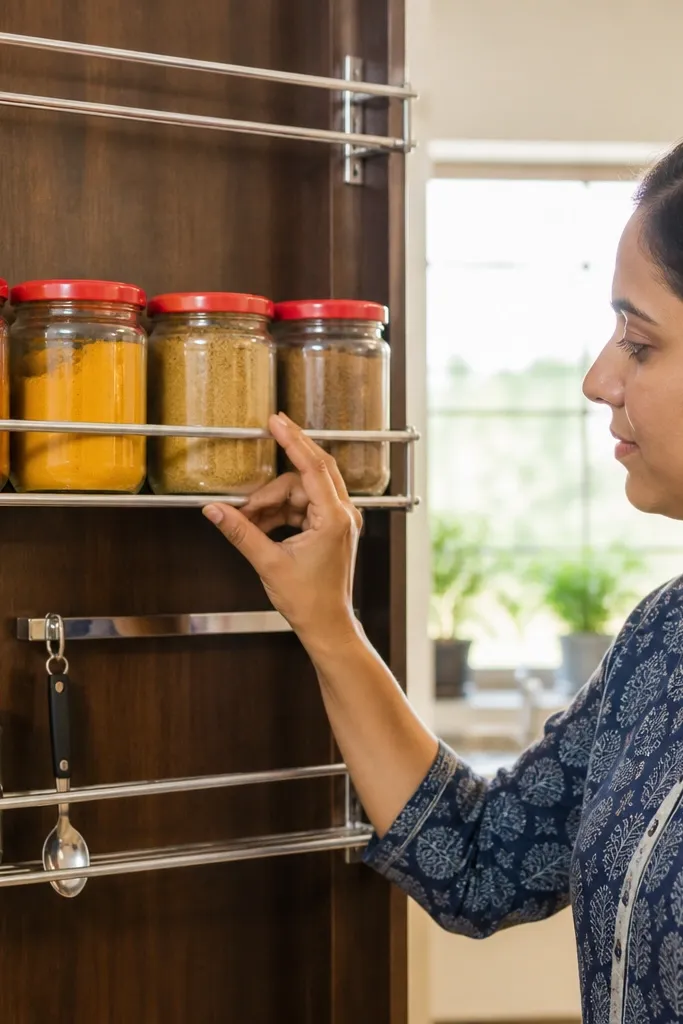
A door rack is one of the fastest ways to make a pantry look styled because it uses vertical space. This “tadka station” theme is built around red-lidded jars and a small utensil rail, so your tadka basics are always visible. Place chilli powder, turmeric, coriander, cumin, and a tiny jar for kasuri methi if you use it often. The look is bold, clean, and practical — you can cook without digging through shelves.
Install a door rack with two rails and one basket tray, making sure it clears your door swing. Choose jars with red lids (matte looks best) and keep jar labels consistent, facing outward. Add a small magnet strip or a hook rail under the top shelf for a spoon and a mini whisk. Finally, line the door-side shelf area with a thin red or cream mat so the rack looks finished rather than like added hardware.
Editor's noteKeep the chilli powder on the top shelf so you can spot it quickly and reduce the chance of spills on lower jars.
Skip thisAvoid overloading the door rack; if jars touch each other, labels get smudged and the theme looks messy.
4. White-Jar Atta & Rice Stack with Shelf Dividers
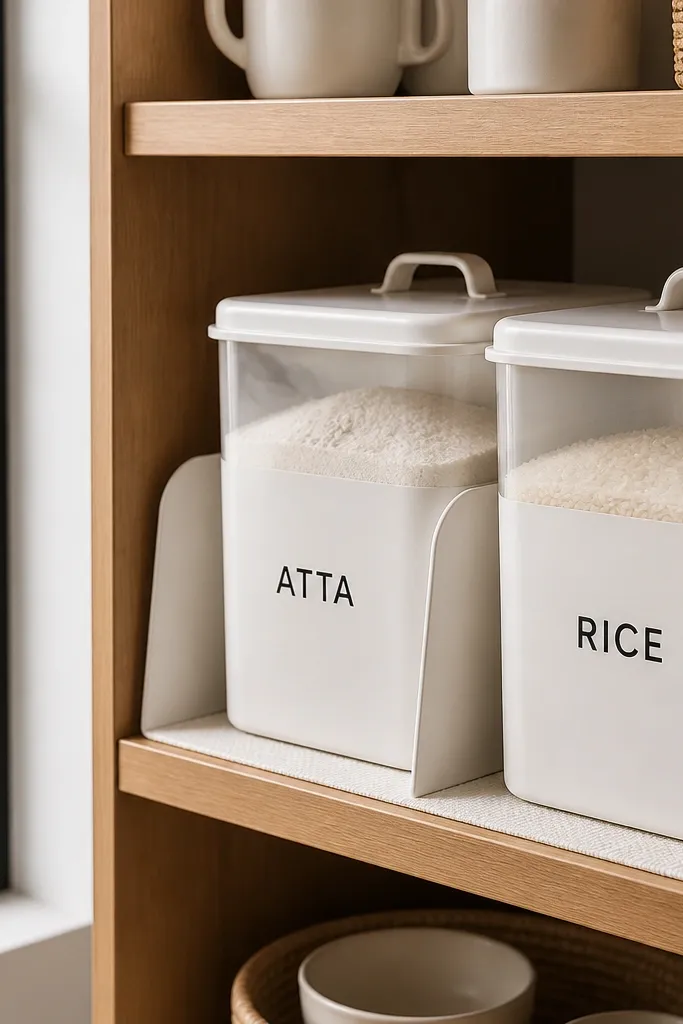
If your pantry has bags of atta and rice stacked unevenly, it looks stressful even when it’s organized. This version uses matching white jars or canisters with clear labels so your staples look calm and consistent. Shelf dividers keep bags or refills from leaning into each other, which is what usually ruins the look. It’s also practical: you can pour without moving multiple containers.
Pick two staple sizes: one set of tall jars for atta and rice and one set of medium jars for dals. Install a divider panel or use acrylic shelf dividers so each jar has a dedicated slot. Transfer only the amount you use in 2-4 weeks into jars if you’re worried about freshness; keep sealed backup bags behind the divider. Label the front with the product name and a “refill date” sticker so you know when to top up.
Use a funnel and wipe jar rims right after filling; dried powder on the lip makes everything look dirty.
Avoid putting flour and rice in open bowls; the look gets dusty fast.
5. Masala Jar Label Grid with Numbered Rotation
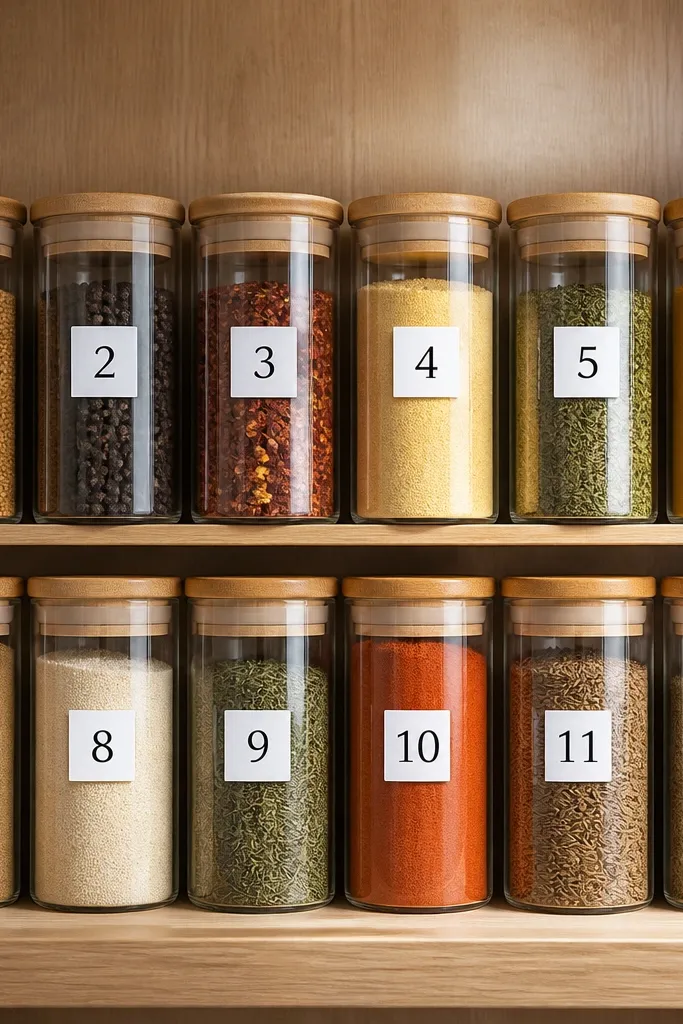
This is for people who forget what jar they just used. The aesthetic comes from a neat label grid: every jar has a number, and the shelf order matches the numbers. It looks clean even with a lot of spices because the system creates a visual pattern. It also reduces cross-use when you’re cooking — you grab the right jar without reading every label every time.
Choose 12-18 jars you use most, then decide a rotation order based on frequency. Print labels with a number and spice name, with the name in larger text and the number in a corner. Arrange jars in a straight line or a 2x6 layout so the numbers increase left to right. Add a small laminated shelf note at the bottom that shows the number-to-spice list.
Use a label font that’s bold at 2 feet away; spice labels get read mid-cook, not across the room.
Don’t number everything in the pantry; keep numbers for your top rotation spices only.
6. Green & Cream Tea, Coffee, and Chai Corner
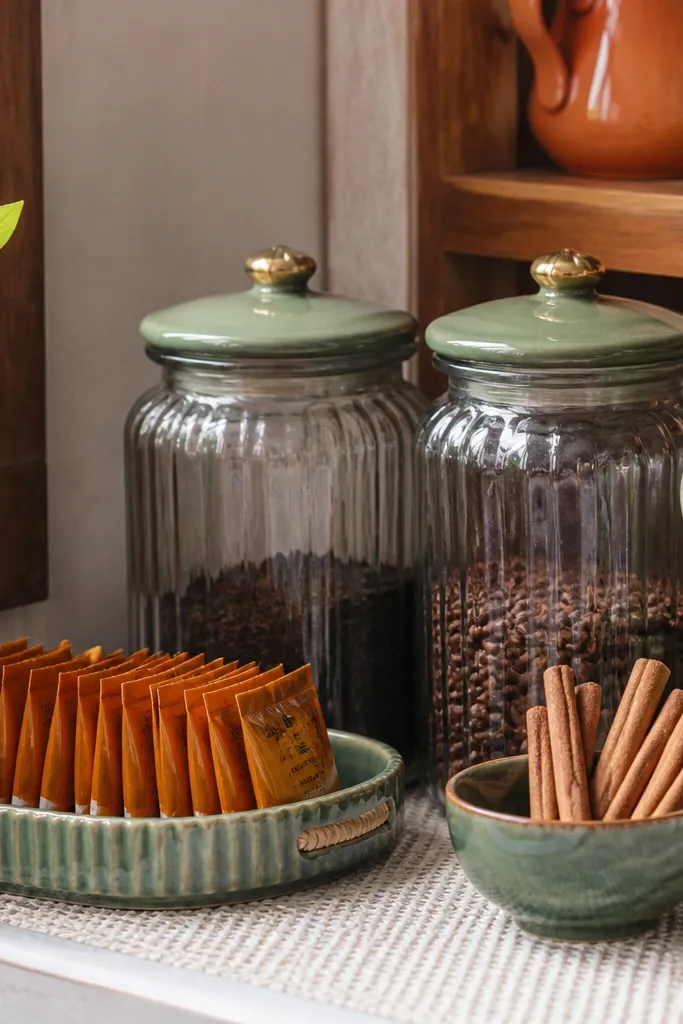
A dedicated chai corner makes the pantry look themed because it’s a small, controlled area. Use green-lidded jars for tea and coffee and a cream shelf mat so the colors stay cohesive. Add a shallow tray for chai masala packets or premade mixes so they don’t scatter. The look is warm and inviting, and it solves the daily chaos of packets living in random drawers.
Install a small shelf or use an existing corner shelf, then add a cream mat. Put tea and coffee in matching jars with green lids, keeping labels facing out. Use a shallow tray at the front for the packets you grab daily. Add a small bin for sweeteners (sugar, jaggery powder, or cardamom sugar) so it stays in the theme.
Editor's noteKeep one jar for “in use” tea and a backup jar behind it; it keeps the front looking full.
Skip thisAvoid mixing green lids with random metallic ones; the corner stops looking intentional.
7. Stacked Clear Container Wall for Lentils and Beans
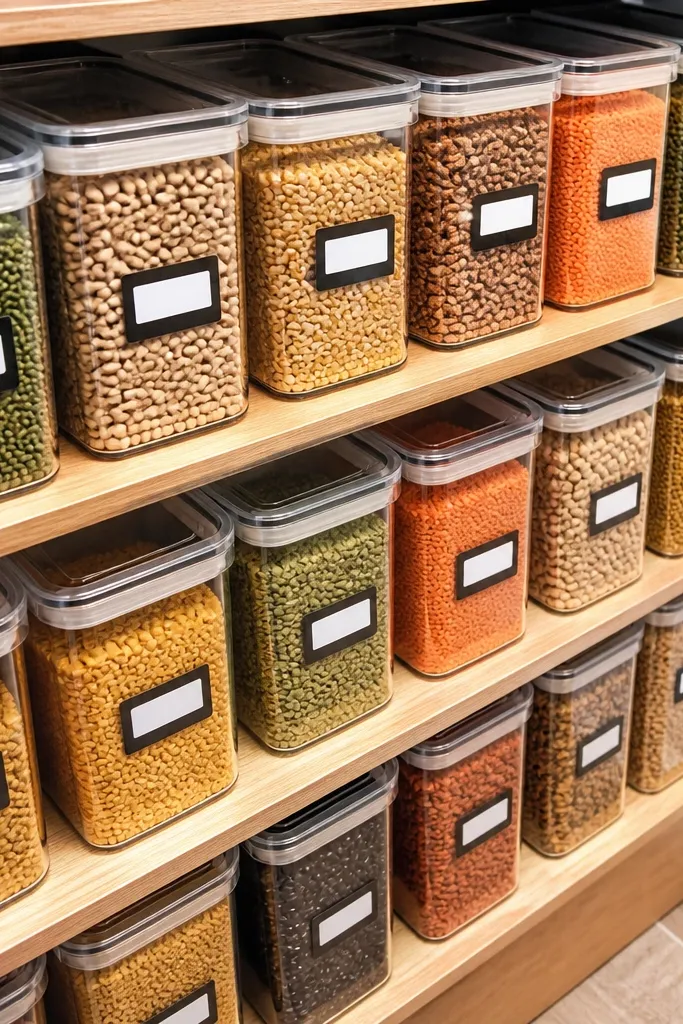
Clear containers create instant visual order because you can see the grains, which looks beautiful with Indian staples. This setup works best in a pantry with shelving depth — the containers stack cleanly and don’t hide the contents. Use a consistent label style so the wall looks like a designed system, not a storage experiment. It also helps you spot when a lentil is running low without opening bags.
Use stackable clear containers with locking lids for lentils and beans, and choose one height so stacks look even. Line the shelf with a neutral mat (light gray or warm beige) to reduce glare and make labels readable. Arrange by cooking type: dals in one section, beans in another, and a small row for chana and rajma. Add a label strip at the shelf edge so you can read names even when stacks are full.
Editor's noteWipe container bottoms before stacking; dust causes streaks that show under pantry light.
Skip thisDon’t use frosted labels on clear containers; the text gets hard to read quickly.
8. Jute-Banded Spice Canisters with Chalk Labels
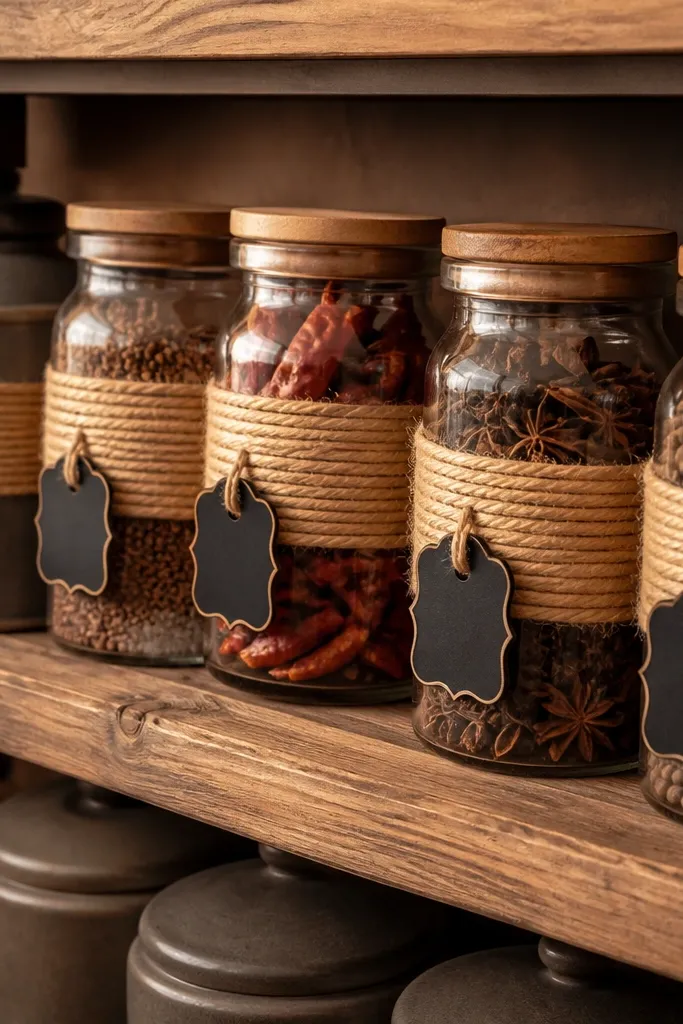
This theme is cozy and Indian at the same time because the jute band adds texture while the chalk label keeps everything flexible. It’s great when you buy spices in bulk and want to update names or batch notes. The look is photogenic because the jute wraps create consistent horizontal lines across the shelf. You also fix the problem of sticky label residue from refilling — you can wipe chalk clean.
Pick small canisters that match in height so the jute bands line up. Wrap jute twine around each canister near the middle, then tie a small bow or knot. Use chalkboard-style label stickers or a chalk marker directly on a chalk label strip. Arrange canisters in a straight row and add a matching tray beneath for spill control.
Use a matte clear sealer on the chalk label sticker edges so they don’t peel when you wipe them.
Avoid glossy chalk labels; they reflect pantry light and look washed out in photos.
9. Black-Lid Spice Drawer with Bamboo Dividers
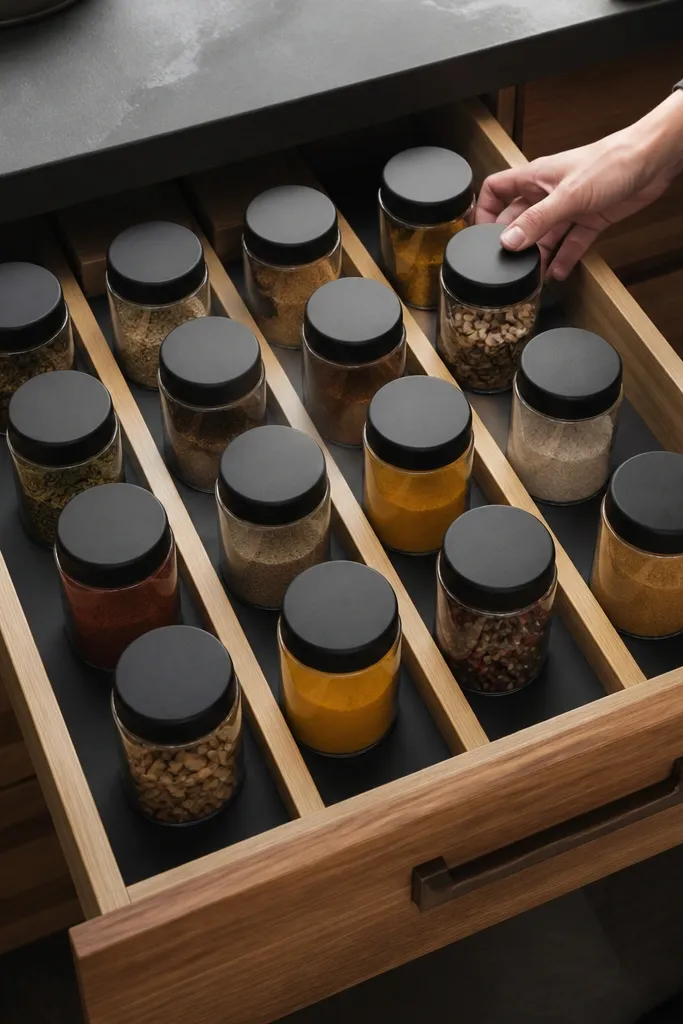
A drawer is where spices usually go to become a mess. This version looks sharp because the jars have uniform black lids and the dividers are bamboo, so everything reads like a designed tool. Use this when you want spices hidden but still organized — the drawer pulls out and you can see every label. It’s also easier to clean: you’re not scrubbing shelf corners.
Measure your drawer base and cut or buy bamboo dividers that create compartments about the width of your spice jars. Place a thin liner in the drawer first, then set dividers in a grid. Use 2-3 sizes of jars max so the drawer stays aligned; keep labels facing the same direction. Add a small “spoon pocket” at one end for measuring spoons and a tiny brush for spills.
Use felt pads under the jar bases so lids don’t clink and scratch when the drawer slides.
Avoid mixing tall and short jars in the same compartment; it forces jars to lean and labels get crooked.
10. White Tile Shelf Liner for a Clean Spice Look
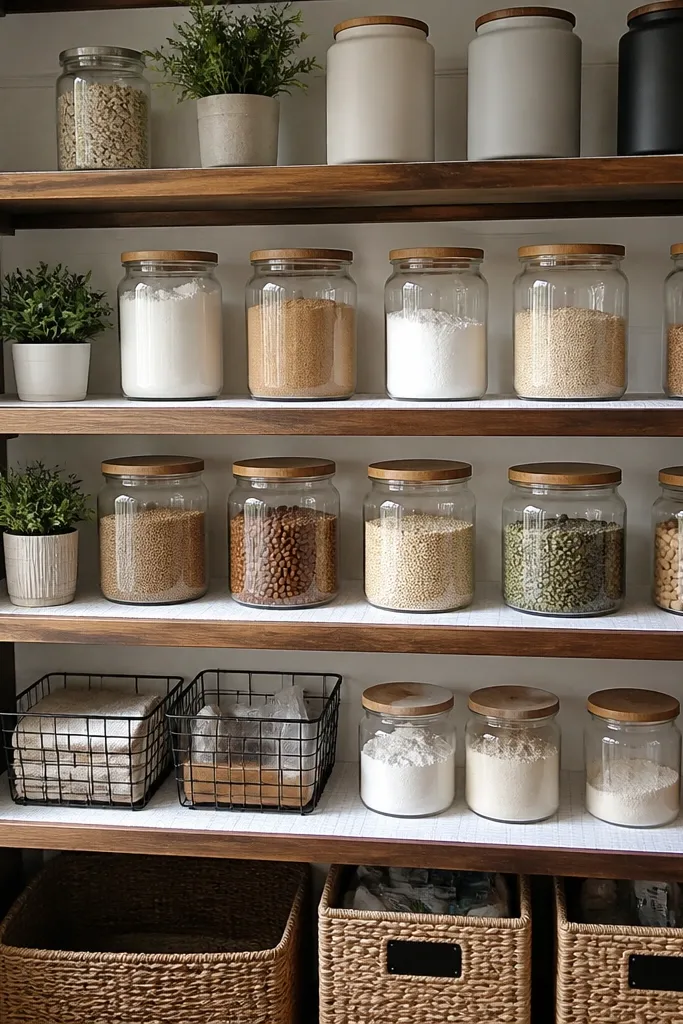
This is the “make it look expensive without changing everything” idea. A white tile-pattern liner under jars makes your pantry look crisp, especially when you use neutral jars and bright labels. It also hides minor shelf stains and makes powder spills less noticeable, which keeps the look photo-ready between deep cleans. Pair it with a simple jar set so the liner does the heavy lifting for the aesthetic.
Measure shelf length and depth, then cut a non-slip shelf liner with a white tile pattern to fit. Place your jars in rows, keeping jar labels facing out and aligned at the same height. Use a small tray at the front edge for any loose items like hing, whole spices, or tea bags. Finish by adding a label strip on the shelf front so you can find items without pulling everything out.
Trim the liner edges cleanly with a sharp utility knife — ragged edges look messy fast.
Don’t go with a busy liner pattern if your jars already have colorful labels; the shelf will feel loud.
11. Rope-Handle Basket System for Snacks and Dry Mixes
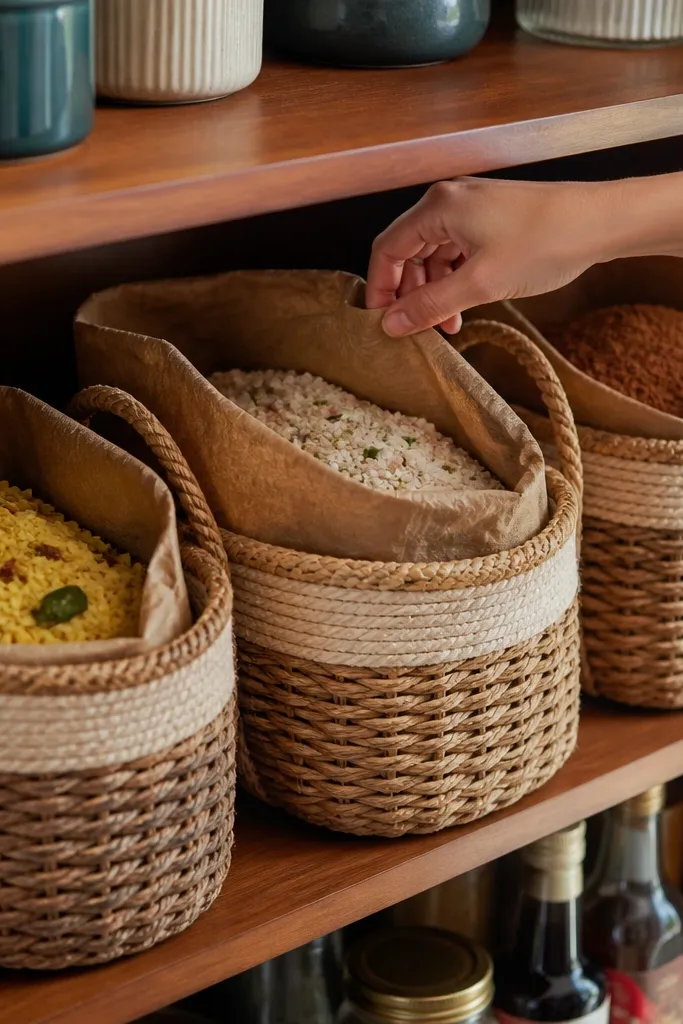
Woven baskets look great because they add texture and hide the chaos of bags. Rope handles make them easy to pull out one-handed while cooking, so the system is actually usable. This is ideal for dry mixes like poha, upma mix, and instant beverage powders. Keep baskets in a consistent size and place them in a staggered grid so the pantry looks styled, not random.
Choose baskets with rope handles that are the same height and width. Line the shelf with a neutral mat so baskets stand out. Sort items by meal type: breakfast mixes in one basket, snack packs in another, and dessert powders in a third. Label the basket fronts with simple tag labels and add a small “pull-first” label inside the front basket for the items you use most.
Use clear window labels on basket fronts so you can see the mix type without opening the basket.
Avoid baskets that vary in size; the staggered look breaks when one basket is noticeably shorter.
12. Clear Lid Pantry Bins for Poha, Suji, and Chana Flour
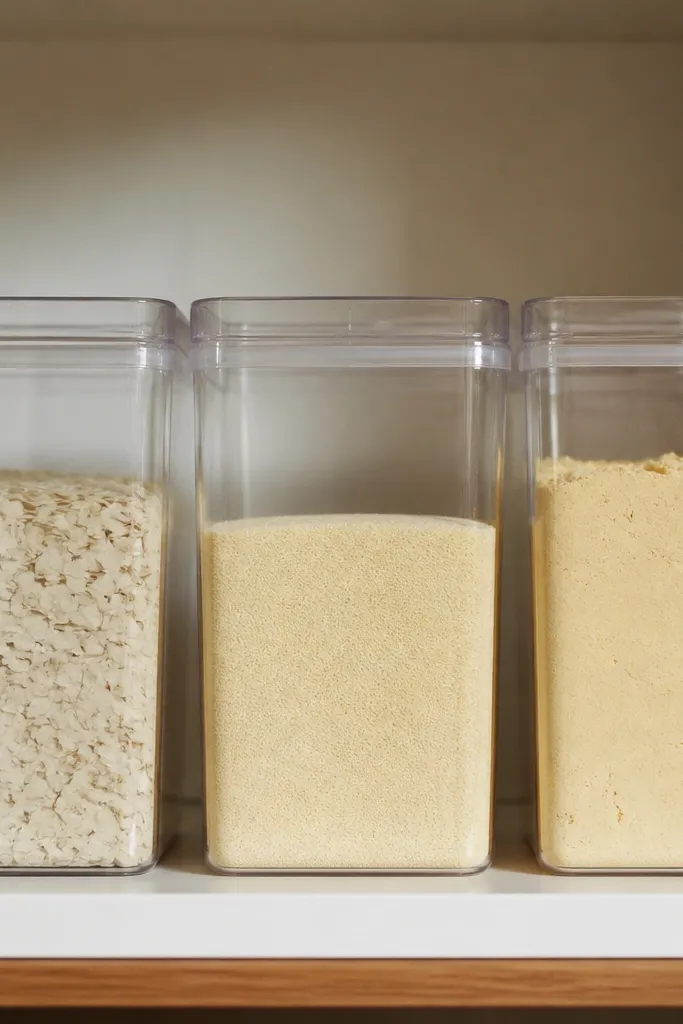
Clear-lid bins keep dry goods looking neat and also show you the exact level left. This theme is visual with a clean, modern feel that works well with Indian staples. Put poha, suji, besan, and other flours in separate bins so spills don’t spread across the shelf. It’s also good for busy kitchens because you can scoop quickly, then close the lid without rewrapping bags.
Buy bins with snap lids and consistent shape so the shelf looks uniform. Fill each bin with dry goods, leaving about 1 inch of headspace so you can scoop without spilling. Label the front with the product name and a small icon for what it is (poha, suji, besan) so you can find quickly. Place the bins in a single row, then add a small scoop hook or spoon rest on the side.
Editor's noteUse a thin silicone mat under each bin; it reduces sliding when you pull one out.
Skip thisAvoid using bins with different tint levels; amber versus clear makes the shelf look off.
13. Kesar-Yellow Label Theme for Baking and Sweets Supplies
If your pantry has baking and sweets items scattered, a kesar-yellow label theme creates instant order. Use yellow label stickers and match jars so the section looks like a dedicated sweets station. This works well for items like cardamom, nut powders, baking soda, sugar, and dry dessert mixes. The aesthetic is bright and warm, and it makes it easier to find ingredients when you’re cooking for guests.
Pick a jar style that has the same lid color across the section, then choose kesar-yellow label stickers. Group items into two shelves: one for dry baking ingredients and one for dessert mixes and toppings. Put small items like cardamom and baking soda in smaller jars so the shelf spacing looks balanced. Add a small tray for nuts or seeds so they don’t roll around and make the shelf look messy.
Write labels with a consistent format: ingredient name first, then measurement unit (g or tsp) if you use it that way.
Avoid mixing yellow labels with other label colors in the same shelf; it breaks the theme.
14. Magnetic Spice Labels on a Metal Rail
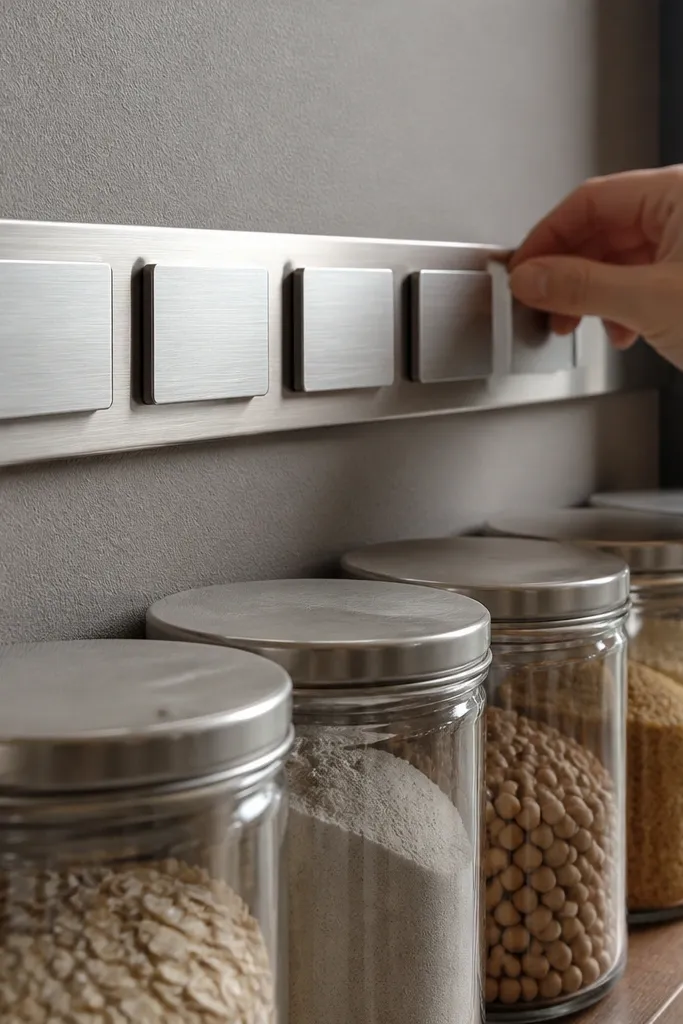
Metal rails look sharp and they solve one problem: labels peeling off or getting smudged from handling. With magnetic labels, you can swap labels when you refill or change brands, and the shelf stays clean. This is a good option if you like a modern look but still want Indian pantry practicality. The visual payoff is a consistent, straight line of jars with labels attached cleanly.
Install a metal rail on a pantry shelf or on the inside of a door, then choose jars that sit evenly along the rail. Attach magnetic label strips to the jar fronts, using the same height for every jar. Arrange spices in order by how you cook, and keep a small “refill” basket nearby. Add a laminated spice list at the end of the rail so kids or guests can put jars back correctly.
Use thin magnets for small jars and thicker magnets for heavier canisters so labels don’t slide.
Avoid sticking labels on uneven jar surfaces; magnetic labels need a flat front area.
15. Whole Spices in Glass Bottles with Cork Tops
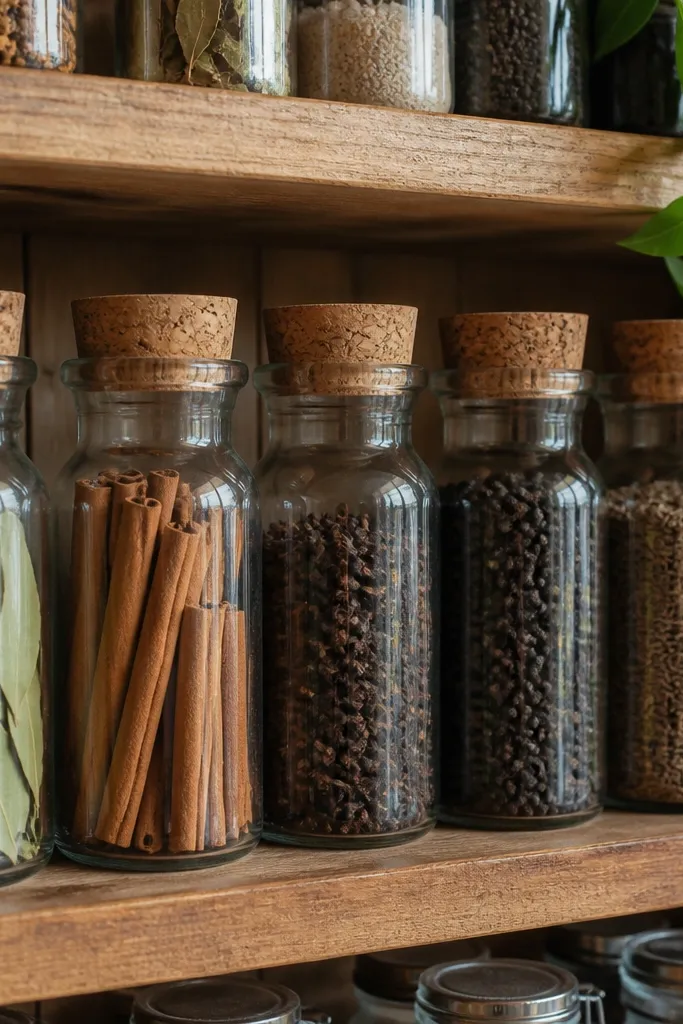
Whole spices look beautiful and they smell good, but they get messy when stored as mixed bags. Glass bottles with cork tops make the shelf look curated while keeping contents fresh. Use this for whole items like bay leaves, cinnamon sticks, cloves, peppercorns, and cumin seeds. The cork gives a warm, Indian pantry feel, and the glass keeps the shelf photogenic because the spices show through.
Choose small glass bottles with cork or cork-style lids, and clean them so the cork doesn’t trap old dust. Fill with whole spices only — no powders — and label each bottle on the front with a simple tag label. Arrange bottles in a row on a tray so cork tops don’t scratch the shelf. Add a separate section for powder spices so the two textures don’t fight visually.
Editor's noteStore bottles away from direct sunlight; it keeps spice color and aroma more consistent.
Skip thisAvoid using cork with oily spices; it can discolor and smell over time.
16. Two-Level Lentil Pour Station with Measuring Spoon Shelf
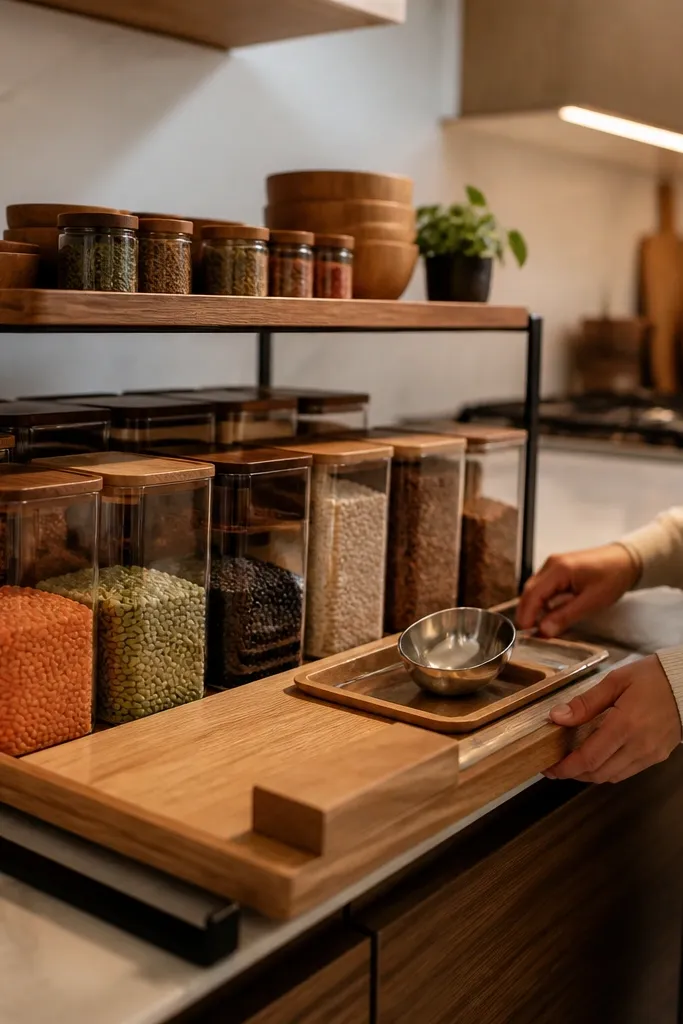
This setup makes refilling feel automatic. Keep lentils and beans in labeled bins on the lower shelf, then place a front measuring station with a spoon shelf so you scoop without searching. The look stays neat because the measuring area is contained — a tray, a spoon rest, and a single scoop. It’s perfect for busy kitchens where you cook daily and don’t want to open multiple containers to measure.
Pick two shelf heights: one for containers and one for a front tray. Use bins or jars with handles if you move them often, then label them on the front. Place a shallow tray at the top of the lower shelf or the bottom of the upper shelf, sized to hold 2-3 measuring spoons. Add a small scoop hook or a rubber spoon rest inside the tray so spoons don’t roll.
Use one spoon per family of ingredients (lentils vs rice) so you never mix measuring tools.
Avoid placing spoons loose on the shelf; they make the area look cluttered immediately.
17. Inside-Pantry Pegboard for Spatulas and Masala Tools
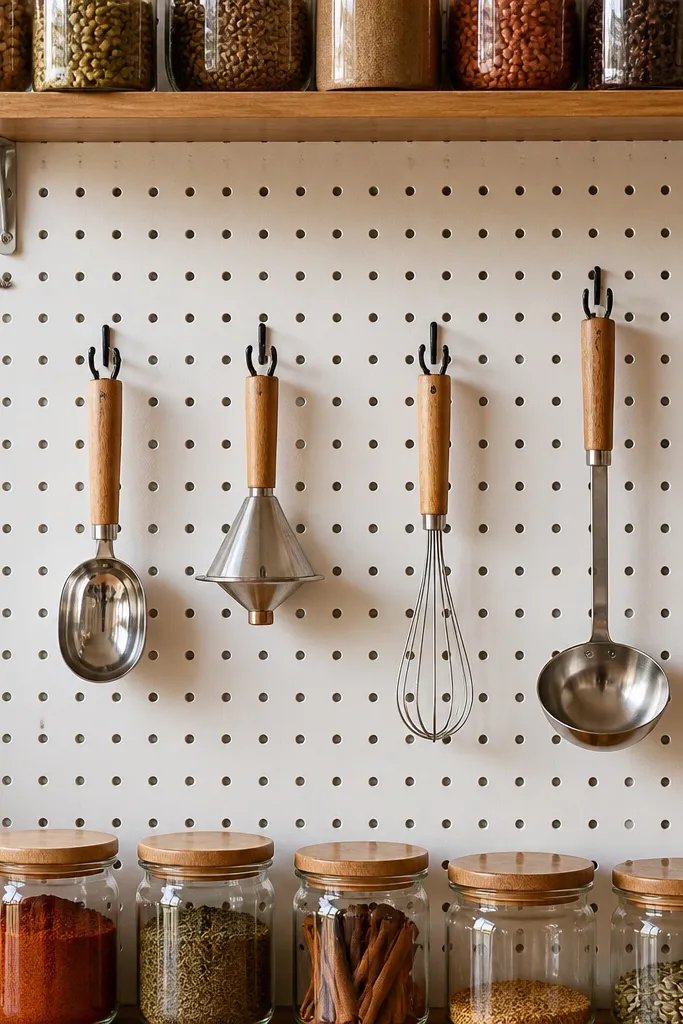
Pegboard turns “tools tossed in a corner” into a clean, themed wall. Use it for masala tools like a spice scoop, small funnel, mini whisk, and a ladle for chutneys or pickles. When tools hang in a straight pattern, the pantry looks intentional even if your shelves hold mixed jars. It also makes the pantry more usable — you reach for the right tool without dragging bins around.
Mount a pegboard inside the pantry wall or on the back of a door, then add hooks in a consistent grid. Paint or cover the pegboard in a matte neutral that matches your jar theme — cream or warm gray work well. Hang tools with one hook per item so spacing stays even. Add small labeled tags on the hooks and keep one shallow tray on a nearby shelf for any items that don’t hang.
Editor's noteUse color-coded hook tags for “spices,” “mixing,” and “serving” so the system stays fast for the whole household.
Skip thisAvoid hanging heavy tools without checking screw support; sagging pegboards look sloppy.
18. Atta to Aloo Theme Drawer with Shelf Labels and Dividers
This one is about visual storytelling: you organize dry pantry items around the meals you actually make. Use a drawer with dividers and themed labels that cover your most common cooking paths — atta and besan for everyday, and dry add-ins for snacks. The aesthetic comes from a consistent label layout and a calm drawer grid. It’s also practical because you can pull one drawer for a recipe without opening the whole pantry.
Measure the drawer and install dividers so you get 4-6 compartments of equal height. Use matching jars or boxes that fit each compartment without gaps. Label each compartment with the ingredient name and a small “meal cue” like chole, pakora, or paratha, written in the same style. Keep one compartment for bulk refills behind the front row so the drawer stays neat even when you store extras.
Use label tape on the drawer dividers, not on the jars, for items you restock frequently.
Avoid overcrowding compartments; a tight drawer looks good only when you can close it easily.
19. Pickle and Chutney Shelf with Tiered Lid Display
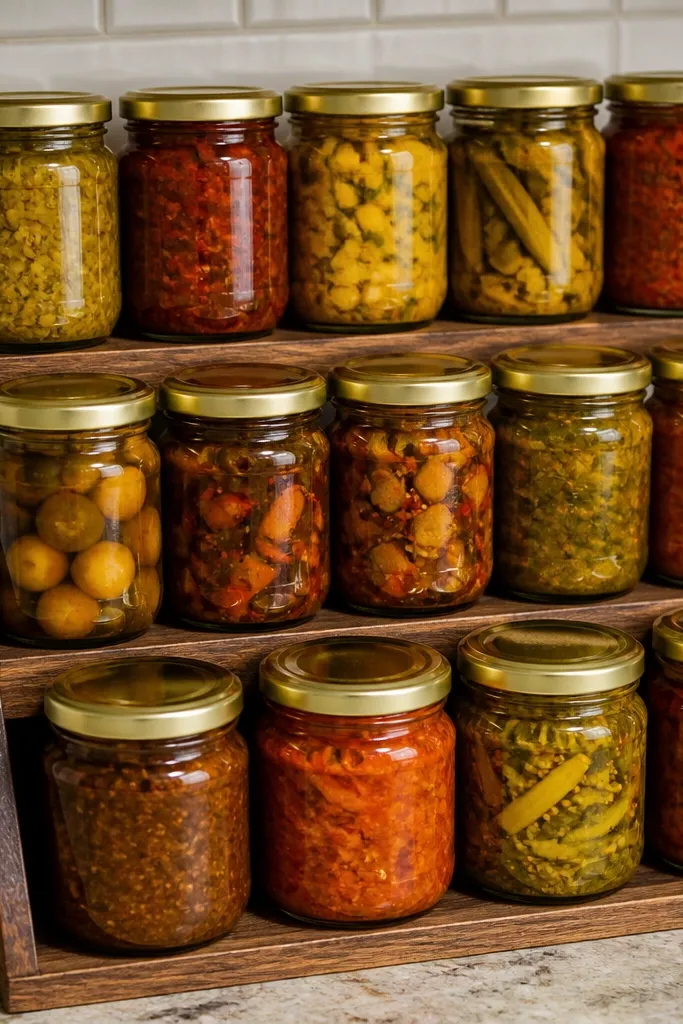
Pickles and chutneys are usually the messiest part of a pantry because jars multiply and lids get mixed. This theme fixes that by using tiered placement and lid-consistent jars so everything looks ordered. Keep the jars on a small tiered shelf so labels face out and you can see what’s inside immediately. It also prevents the “hot sauce jar fell behind everything” problem because the tier edges stop jars from sliding out of view.
Choose jars with consistent lid colors or at least consistent lid height. Use a tiered shelf insert or two-level risers so jars sit at a slight angle toward the front. Label the front with chutney type and spice level if you know it (mild/medium/spicy). Add a small drip tray or coaster under the area where you set jars down during refills.
Editor's noteWipe jar rims right after opening; chutney smears make the shelf look dirty fast.
Skip thisAvoid storing open jars loosely without a tray; leaks ruin the look and smell of the whole shelf.
20. Spice Packet Envelope Wall for Instant Mixes
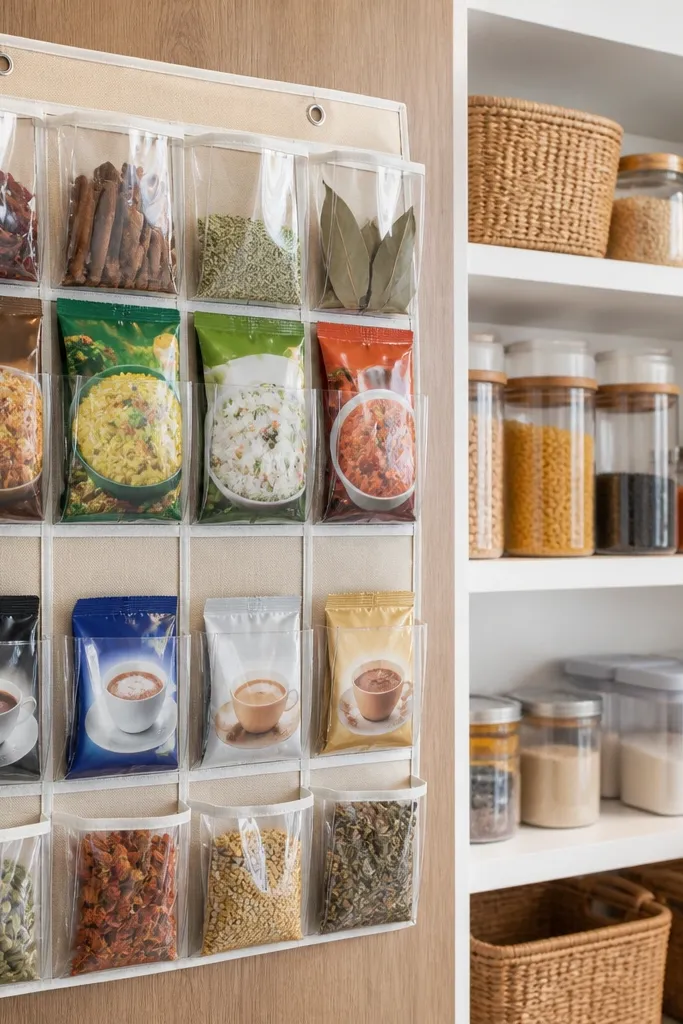
Instant mixes and spice packets look chaotic in drawers. A wall pocket organizer gives you that neat, magazine-like look while keeping packets protected from spills. This theme works especially well for items like biryani masala, poha masala, and instant beverage mixes. The pockets keep packets flat and aligned, so the pantry looks orderly even when you’re using these products regularly.
Use a clear pocket wall organizer made for pantry storage, or mount individual fabric pockets in a grid. Position it on the inside of a pantry door or on a side wall where you can see it when the door opens. Sort packets by meal type and keep the most-used packets at eye level. Add printed labels on the pockets, then place a small bin below for any packets you haven’t opened yet.
Editor's noteKeep only one brand per pocket when possible; mixed brands make the wall look busy.
Skip thisAvoid stuffing pockets; when pockets bulge, the wall stops looking clean.



