
1. Navy-Stripe Bin Row With Matching Label Cards
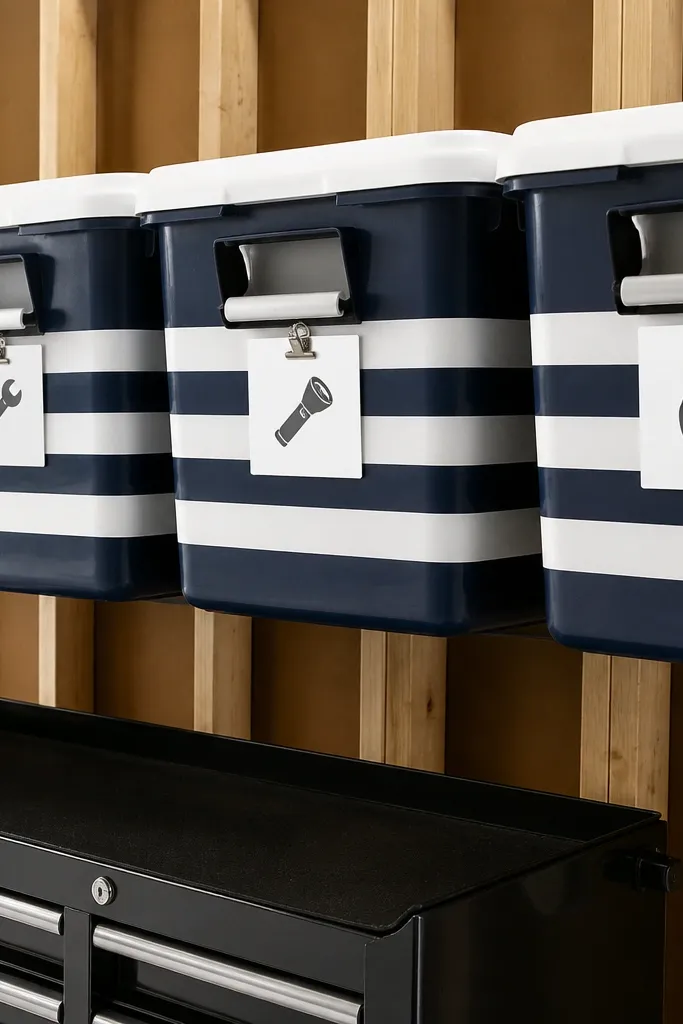
This is for garages where the mess is mostly small stuff in mixed containers. The navy-and-white stripes give you an instant theme cue, and the label cards keep categories readable without opening every bin. Use lidded bins so you don’t see dust and loose parts, then mount them at eye level so you grab what you need fast. The look stays clean because everything repeats the same stripe pattern and the same label placement. It’s a beginner-friendly build that still looks designed, not improvised.
Start by buying 6-10 identical lidded bins in one size (HDPE or rigid plastic). Cut label cards from thick card stock or thin foam board, then apply the same label tape style to every card. Mount two horizontal furring strips to the wall with a stud finder, then screw a bin lip or cleat along the strips so bins sit flush and don’t slide. Finish by adding a simple rail-mounted sign above the row that matches the stripe colors.
Use a label printer or consistent tape width (about 12 mm) so every label looks the same from a distance.
Don’t mix bin sizes in the same row; uneven heights ruin the themed look.
2. Pegboard Tool Gallery With Color-Coded Hook Heads
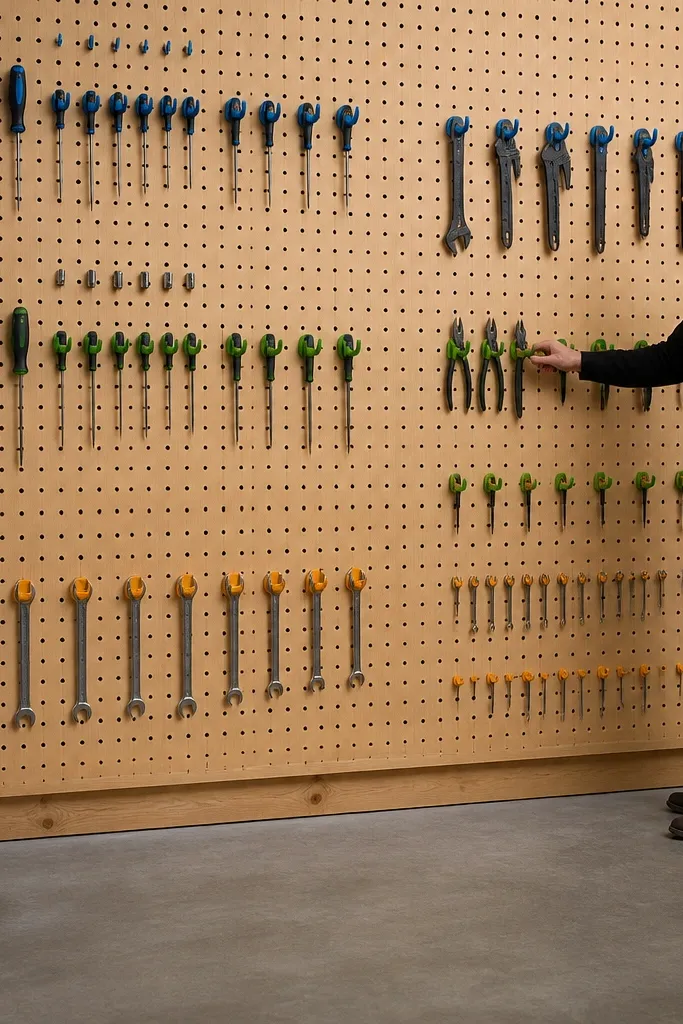
If your garage has tools hanging at random angles, this makes them look like a gallery wall. Pegboard gives you clean spacing, and color-coded hook heads act like a theme accent while keeping the tool layout readable. You get a strong “organized from across the garage” look because the tools sit in straight lines and repeat the same mounting hardware. It also solves the annoying problem of missing the exact tool because you can see the silhouette instantly. This build looks sharp even with basic tools because the structure does the heavy lifting.
Measure your pegboard area and plan a grid: mark a 2-inch spacing rhythm with a pencil line. Install pegboard over studs, then attach hooks with the same colored hook heads for each tool category. Group by handle length first, then by tool type, leaving at least 1 inch between hanging points for easy removal. Add a printed category strip under each row (paint marker or label tape) and finish by sealing the pegboard with a clear matte coat to handle dust.
Hang the heaviest tools on the lowest hooks and keep the top row for light accessories like measuring tapes.
Don’t place hooks too close; tight spacing makes the tools clank and chew up the theme.
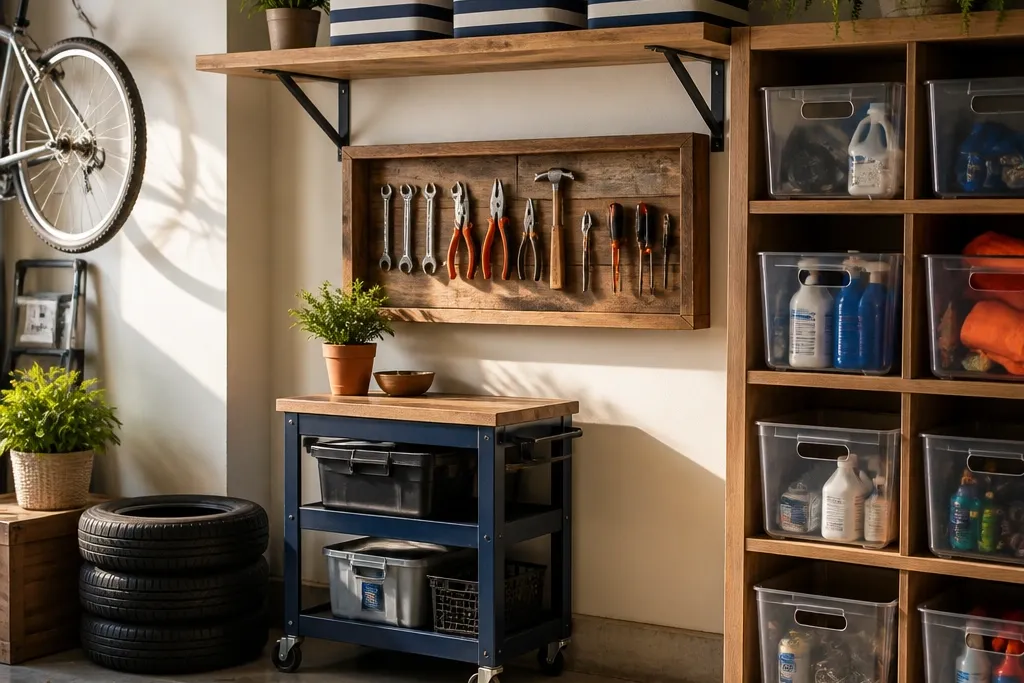
3. Reclaimed-Wood Shadow Box for Hand Tools
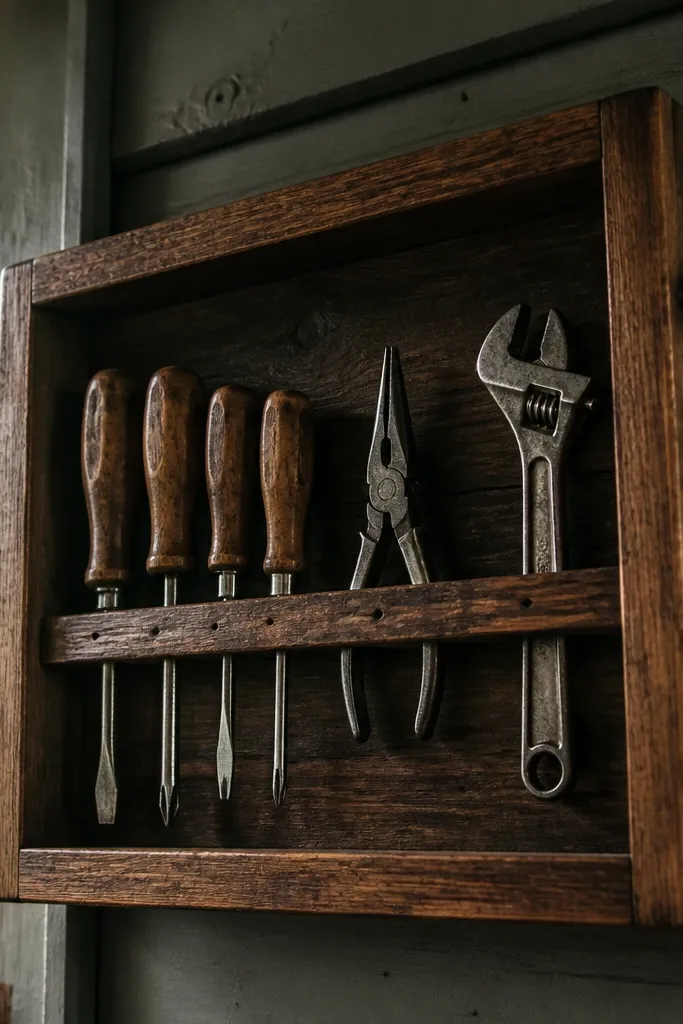
This turns frequently-used hand tools into wall art. A shadow box hides the fact that hand tools are messy, because the layout forces every item into a specific spot. The reclaimed-wood look gives warmth and makes the garage feel intentional instead of industrial. It’s great for screwdrivers, pliers, and small wrenches where you want fast grab-and-go without digging. The build also helps kids or visitors learn where tools go, because the outline and labels make it obvious.
Editor's noteUse clear matte sealant on the wood so the labels stay readable and don’t glare.
Cut a backing panel from 1/2-inch plywood, then build a shallow frame using reclaimed wood boards or furring strips cut to size. Use a pegboard-style mounting strip inside the box, or attach small tool holders with screws so tools sit flat against the backing. Place tools, trace the outline lightly, then mark exact mounting points before drilling. Add label tape strips under each tool position, then seal the wood with a clear varnish and mount the whole unit to studs.
Skip thisDon’t rely on hooks alone; tools need stable holders so they don’t swing and scratch.
4. Clear-Lid Pantry-Style Shelf for Car Supplies
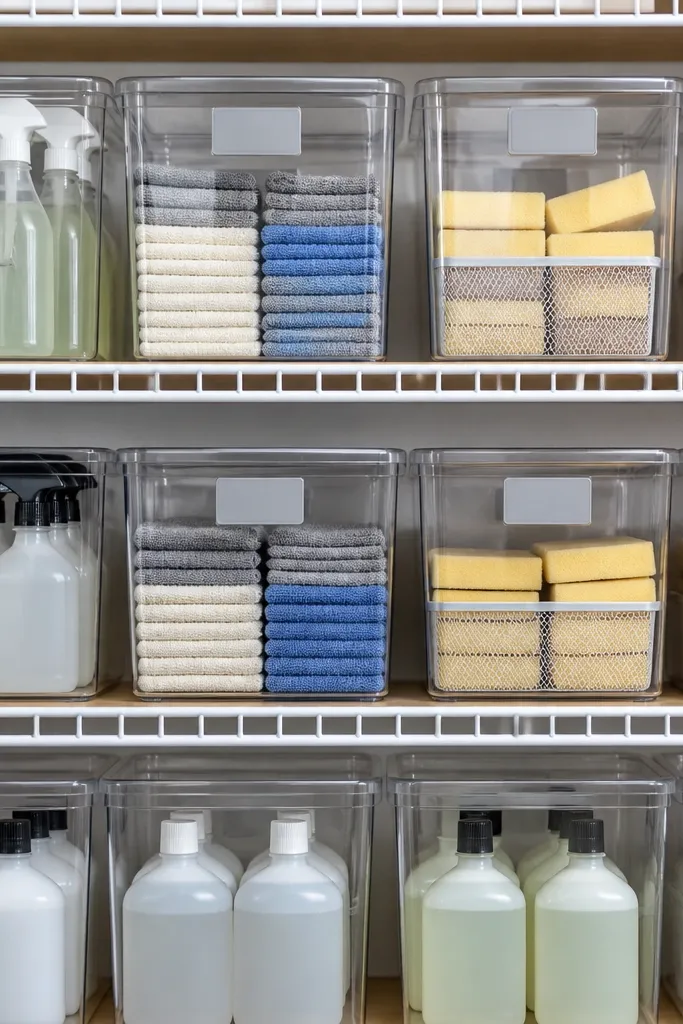
Car supplies are the kind of mess that spreads — spray bottles, sponges, microfiber cloths, and refills. A pantry-style shelf with clear lids keeps everything visible while still controlled, so you can see when you’re low without rummaging. The look is clean because the bins are uniform and the shelf has a repeated layout. This also makes the theme easy: keep all bottles in one color zone (for example, black labels or white labels) and match the bins. It’s a quick build with big visual impact.
Editor's noteIf you use spray bottles, keep caps up and store them in a bin with a small foam sheet base to prevent rolling.
Build a simple 24-inch wide shelf frame from 2x2 lumber or purchase a wall shelf kit. Add two levels using fixed shelf brackets so bins sit at the same height. Choose bins with clear lids and matching sizes, then add label tape to the front edge of each bin. Mount the shelf to studs, then add a small drip tray or absorbent mat on the bottom shelf so wet microfiber doesn’t make a mess.
Skip thisDon’t place loose bottles directly on a shelf; they tip and destroy the tidy look.
5. Tool-Box Drawer Wall With Magnetic Strips
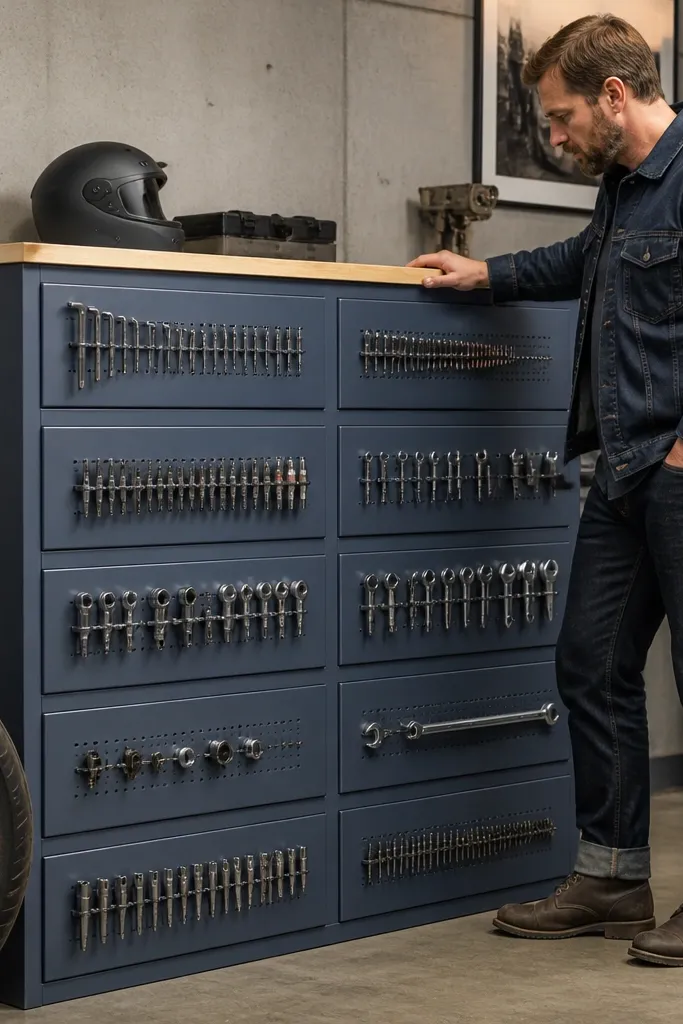
This is for garages where metal tools disappear into drawers. Magnetic strips keep bits, small wrenches, and metal accessories visible and easy to grab. The drawer fronts look themed because you can match the paint color and add consistent label placement. You get better organization because small parts don’t mix with larger tools, and the wall layout stops you from digging through piles. The look is crisp and modern without needing expensive cabinets.
Editor's noteUse a strip of felt or thin rubber between magnets and the drawer panel if tools clack or scratch.
Install a row of shallow drawers (or build a simple plywood drawer box) onto wall cleats anchored to studs. Paint drawer fronts one solid color and keep hardware consistent. Mount magnetic strips inside or on the drawer side panels using screws, then place small metal tools on the magnet locations. Add labels on the drawer face and keep each magnet grouping for one category.
Skip thisAvoid cheap magnets that are too weak; if tools fall off, the system fails.
6. Stackable Color-Block Tote Ladder
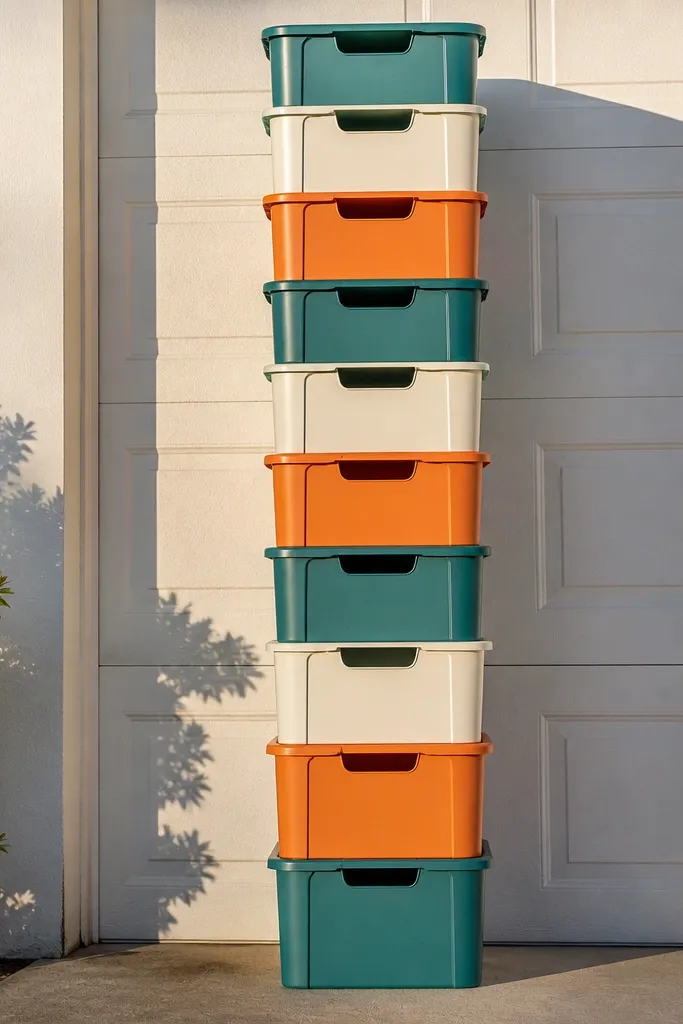
This makes storage look like a design feature instead of a pile. The color-block tote ladder uses stacked identical bins in a repeating order, so the theme reads instantly. It’s great for seasonal items, extension cords, and sports gear where you want vertical storage but also want it to look clean. The ladder layout also keeps heavy totes lower and lighter ones higher. It’s an affordable way to get that “organized wall” look without buying cabinets.
Pick one tote size with lids and a stackable shape (same footprint each time). Arrange 4-8 totes into a ladder layout and measure the total height you can fit. Build a simple frame from 2x2s or use a steel angle rack, anchoring the frame to studs. Add toe-kick rails so totes can’t slide, then paint or wrap the frame in the same color palette as the tote blocks. Label each tote front with a printed category label.
Keep the ladder height under 72 inches so it’s still easy to access bins without a step stool.
Don’t mix tote brands; different lid heights make the ladder look crooked.
7. Garden-Style Hanging Rack for Long Accessories
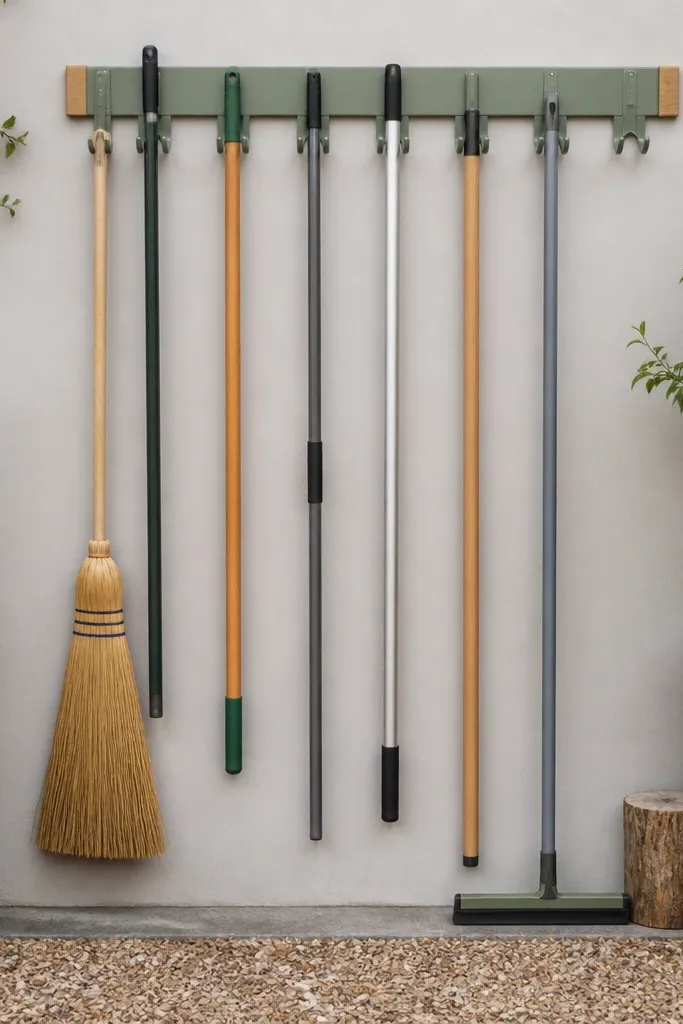
Long accessories are the garage eyesore because they lean, fall, and take up floor space. A hanging rack makes them vertical and shows off the theme through uniform holders. You’ll also stop the constant “where is the broom?” problem because every long item has a hook height. The garden-style look works because the hardware is visible and consistent, not hidden. This is a strong choice if your floor is cluttered and you want the garage to look wider.
Use a steel rail system or build a rail from 2x4 lumber, then attach row-mounted holders spaced 16-24 inches apart. Anchor rails to studs and add a bottom stop so long tools don’t swing. Fit holders for each tool type: broom hangers for brooms, loop hooks for rakes, and U-brackets for shovels. Add a matching label strip under the rack with category names and mount the whole setup so the bottom tool clearance stays at least 12 inches from the floor.
Hang the lightest items high and the heaviest items low to reduce strain on holders.
Don’t mount holders only into drywall; the rack will loosen and start wobbling.
8. Corner Pegboard With L-Shaped Tool Layout
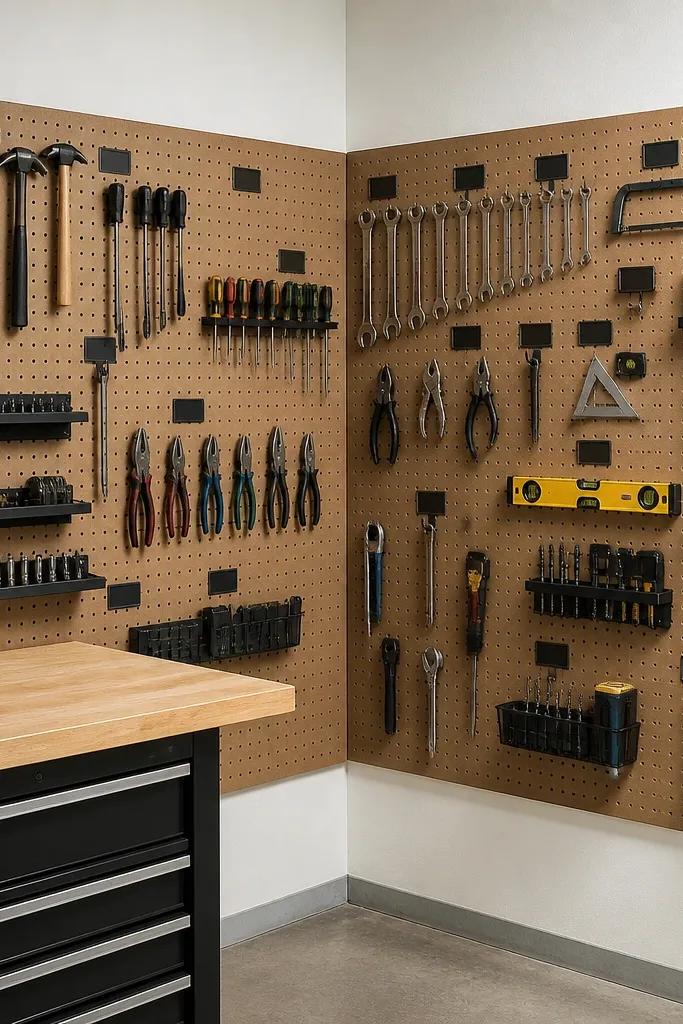
Corners are wasted space unless you build a real plan for them. An L-shaped pegboard layout makes the corner look deliberate and gives you two clean tool zones instead of one messy pile. The theme can be simple: same pegboard color, same hook color, same label format. This also fixes the “corner dumping” habit because there’s a clear place for each tool. It’s beginner-friendly and photogenic because the lines wrap around the corner cleanly.
Buy two pegboard panels sized for your corner and plan a 90-degree overlap seam. Mount the panels to studs with a small spacer so the pegboard sits flat and doesn’t rub on base trim. Mark the hook grid on both panels and keep spacing consistent across the seam. Add corner labels for the categories and finish with a matte clear coat to reduce glare and dust.
Use a single hook color across both panels so the corner looks unified in photos.
Avoid placing the pegboard too low; low pegboard forces tools to hang where you bump them.
9. All-Black Slatwall With Wood Shelf for Paint Supplies
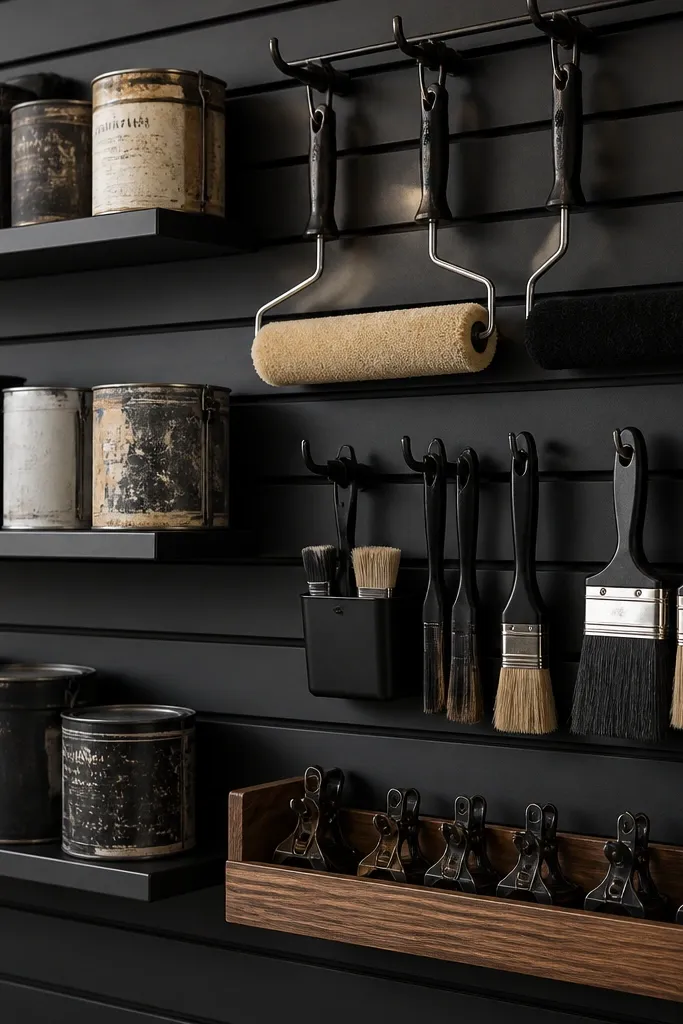
Paint supplies look chaos-fast because cans stack unevenly and labels fade. Slatwall in all-black creates a sleek theme, and a small wood shelf adds warmth and contrast. Use it for paint cans, rollers, brushes, and drop cloth clips so everything stays in one “paint zone.” The black slatwall hides dust better than light colors, and the shelves keep cans from rolling. It’s a clean aesthetic that still works in real garages.
Editor's noteSeal the shelf with polyurethane so drips wipe clean without staining.
Mount slatwall panels to studs and keep the top edge level — use a laser level if you have one. Add a small shelf bracket set, then screw a sealed wood shelf board on top. Use small bins for roller covers and label them with a consistent tape style. For can storage, add can holders or use adjustable hooks so cans hang upright and don’t tip.
Skip thisDon’t store paint on bare wood; drips will absorb and ruin the look.
10. Whiteboard-Label Station for Fast Fixes
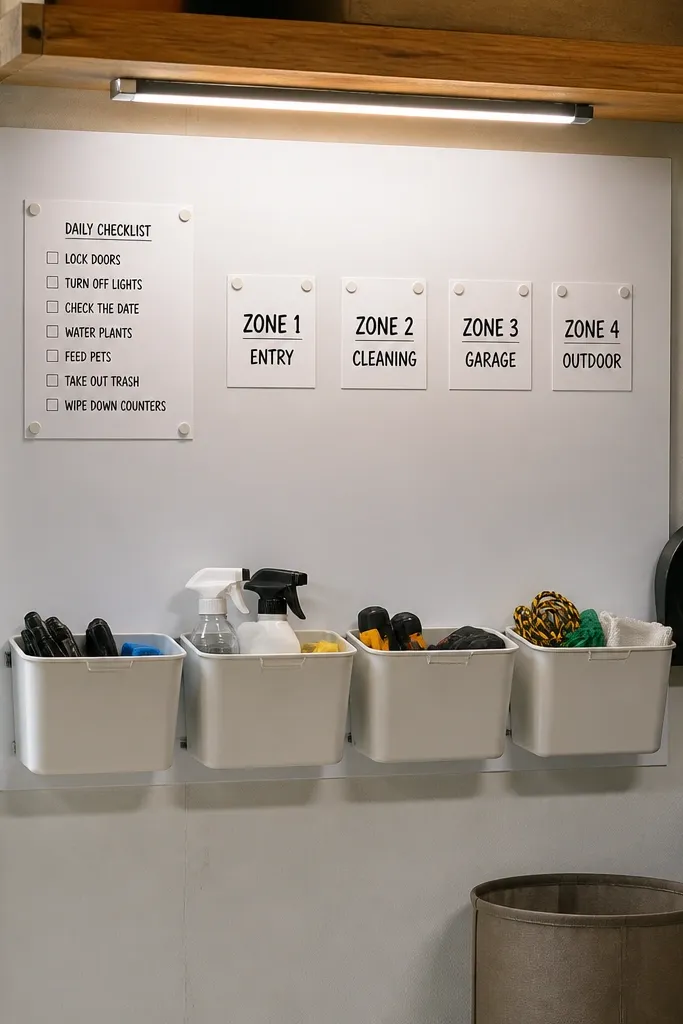
This is the themed fix for “I put it back and still can’t find it.” A whiteboard label station gives you a single place for daily items and a visible system for what belongs where. The clean look comes from consistent bins, tidy bottle placement, and a handwritten schedule or checklist. It’s especially good for garages used by multiple people because the board acts like a shared map. You get organization that looks good in photos because everything aligns to the station layout.
Mount a small whiteboard to the wall above a shelf or pegboard strip. Install two bins on the shelf and two on the wall using hooks or cleats, keeping spacing equal. Add label tape to each bin front and write matching category names on the board. Use a magnetic marker holder so markers don’t end up in a random drawer.
Use two marker colors: one for today’s list and one for “restock” items.
Don’t make the board a wall of scribbles; one checklist and four categories keep it clean.
11. Monochrome Rope and Hook Storage for Cords
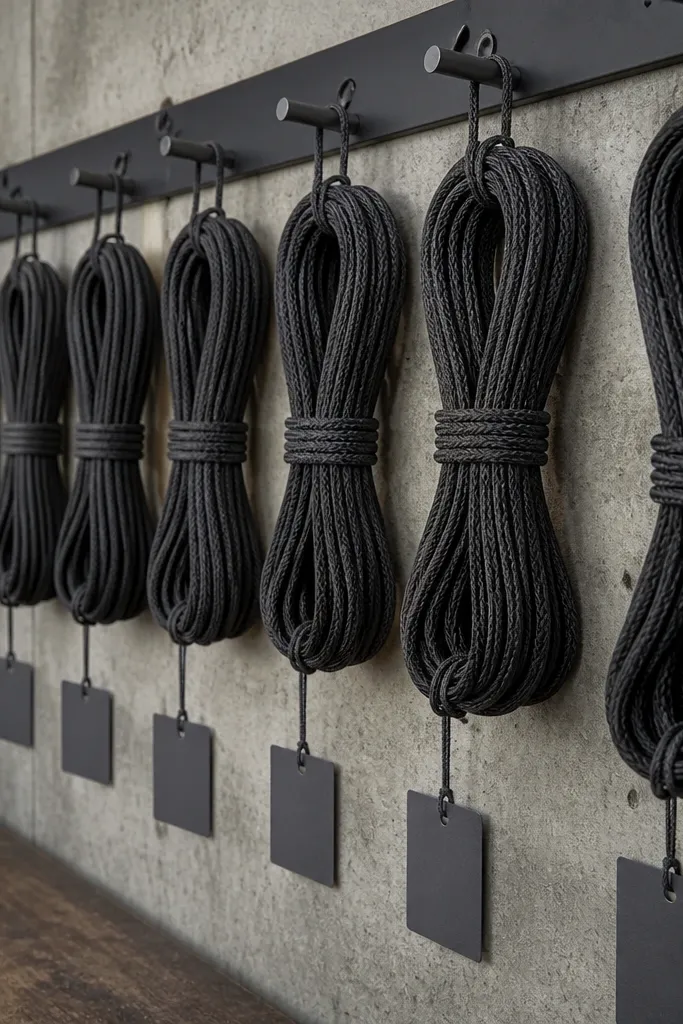
Cords destroy the look of an otherwise organized garage because they tangle and hang wherever they land. A monochrome cord system uses uniform cord wraps and consistent hooks so every coil looks the same. The theme cue can be simple: one rope color and one label color. This also makes it easier to grab the right cord because you can see the coil count and label without touching the tangles. It’s affordable and surprisingly photogenic when the coils line up.
Buy uniform cord wraps or use Velcro ties and cut them to the same length for consistency. Install a row of hooks on a rail at shoulder height and keep the spacing equal. Coil each cord using the same wrap pattern (start at the plug end, coil 10-12 loops, then secure). Add label tape on the wrap, not on the cord jacket, so the label stays readable.
Keep coils facing the same direction so the labels all sit at the front edge in photos.
Avoid mixing tie types; different closures make the system look messy.
12. Chrome-and-Wood Shelf for Bike Helmets and Gloves
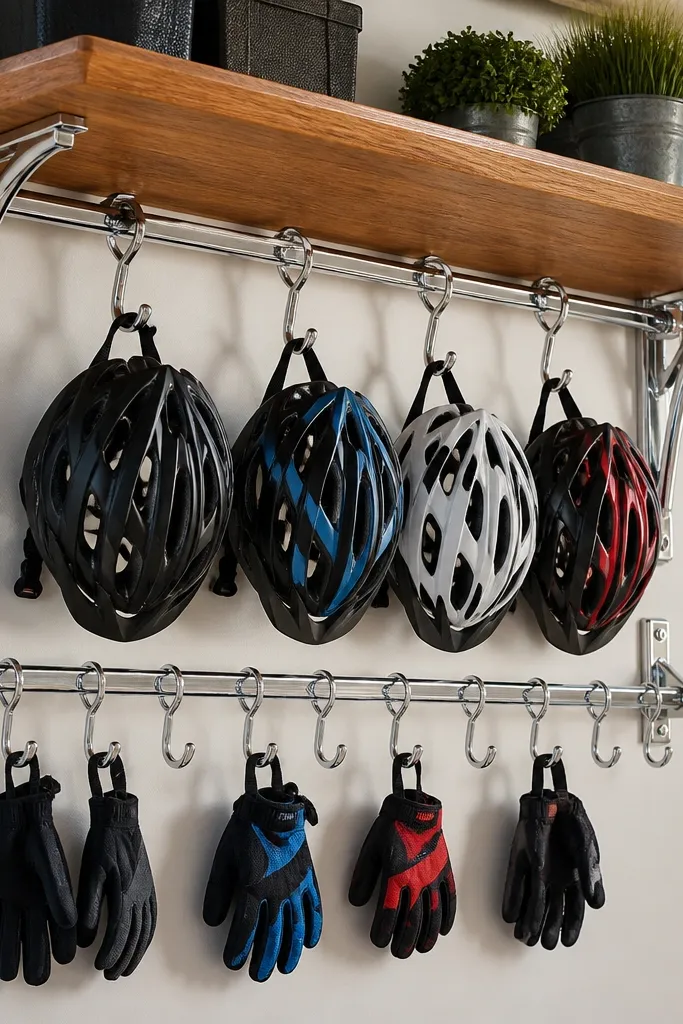
Bikes and helmets create a visual mess because they don’t store like tools. A chrome-and-wood shelf with hooks turns helmets into a clean wall display and keeps gloves from disappearing. The theme looks intentional because chrome hardware matches metal bike parts and the wood gives warmth. This setup is great for garages with bike storage where you want the entry area to look neat. It’s also easy to scale: one shelf can become two as you add gear.
Mount a wood shelf board to studs with metal brackets. Install a row of chrome hooks under the shelf for gloves and a separate hook height for helmets. Add small labeled baskets on the shelf for accessories like chain lube wipes and spare batteries. Seal the wood with matte clear coat so fingerprints wipe clean.
Use U-shaped hooks for gloves so they don’t fold and end up looking crumpled.
Don’t hang helmets by straps only; straps twist and make the whole display look chaotic.
13. Outdoor-Ready Shelf for Pool Chemicals With Color Alerts
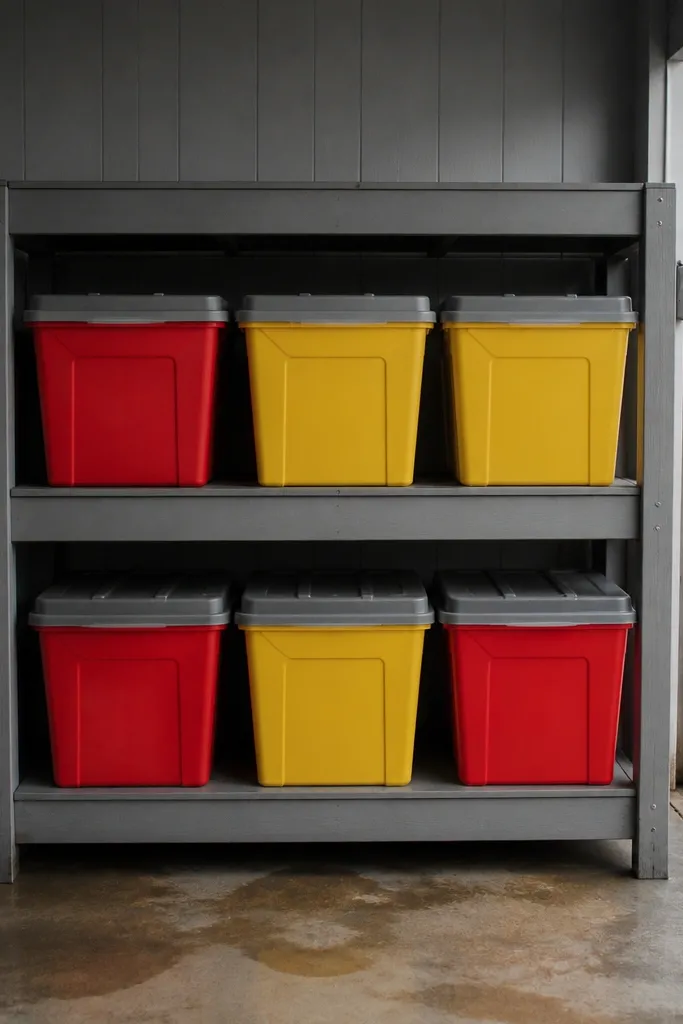
Pool chemicals are a “garage must look clean” category because the colors and labels are loud. Put them into lidded bins on a dedicated shelf and use color-alert labels so the theme is clear. This looks good because bins hide the messy packaging and the shelves keep everything upright. It also fixes the safety chaos of random bottles stacked on the floor. Build this if you want an organized garage that still respects separation and visibility.
Use a sturdy shelf or build one from sealed plywood and metal brackets anchored to studs. Store chemicals only in compatible, sealed containers inside lidded bins, keeping each chemical category in its own bin. Apply color-alert labels (for example, red for oxidizers, blue for cleaners) and put a simple safety sign above the shelf. Keep a drip tray or absorbent pad under the bins and add a small bin for gloves.
Keep labels on the bin front, not on the shelf, so you don’t lose the system when you move bins for cleaning.
Don’t stack chemicals on the floor; spills ruin the look and create risk.
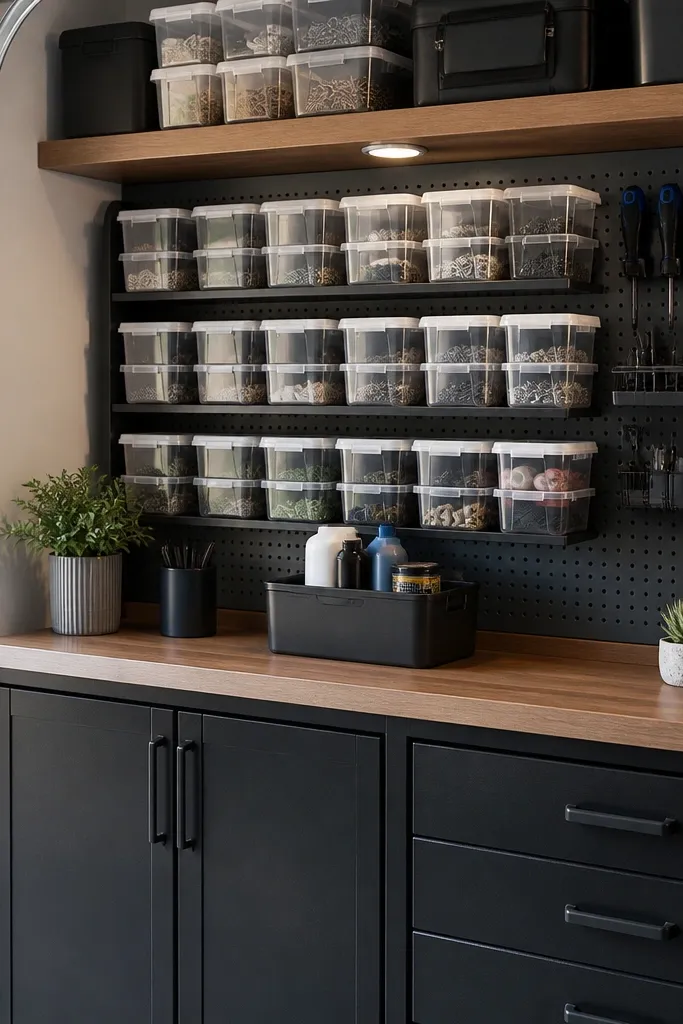
14. Workshop-Deli Layout for Screws, Bolts, and Nuts
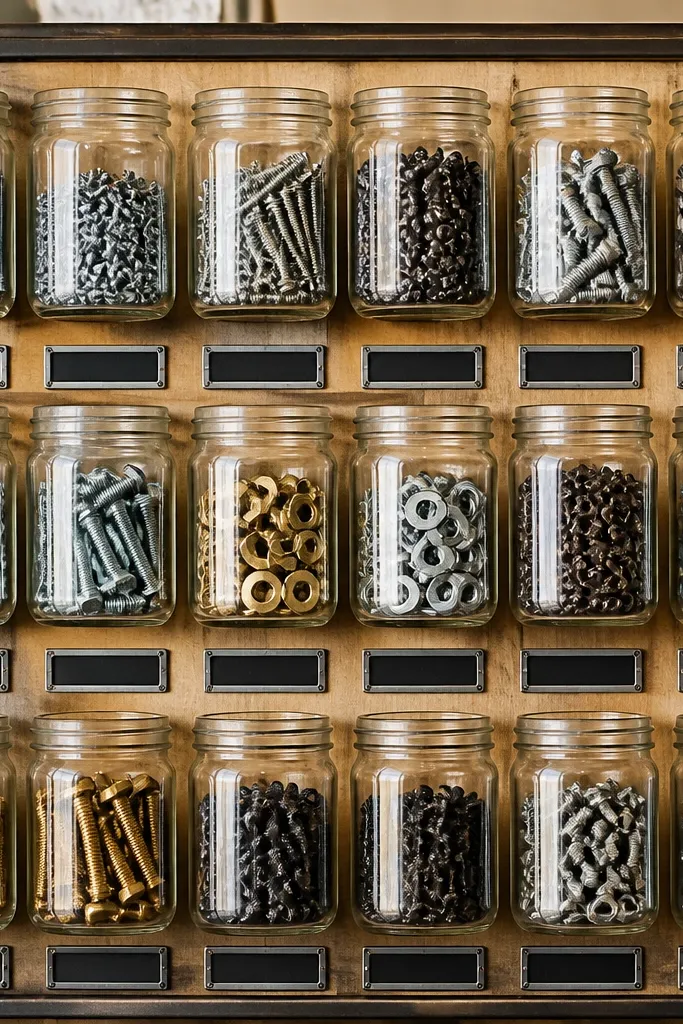
Hardware storage looks ugly fast unless you make it uniform. A deli-style layout uses small jars or identical bins in a grid with matching label strips, so the garage looks like a tidy shop counter. You also get fast sorting because every jar has a clear label and sits in a fixed spot. This is one of the most photogenic garage organization setups because the grid pattern reads clean in any lighting. It’s also practical for anyone who builds or repairs things on weekends.
Editor's noteUse labels that include both size and thread type so you don’t open jars to confirm.
Choose one jar size or one bin size and stick to it. Mount a shallow shelf and arrange jars in a grid with equal spacing, then label each jar using a consistent tape size. For extra durability, add a clear acrylic lip or small wooden trim at the front so jars don’t slide. Keep the grid for “frequent sizes” on the top shelf and store rarer sizes in a second shelf below.
Skip thisAvoid random jar shapes; different heights break the grid look.
15. Mat + Bin Landing Zone for Shoes and Boots
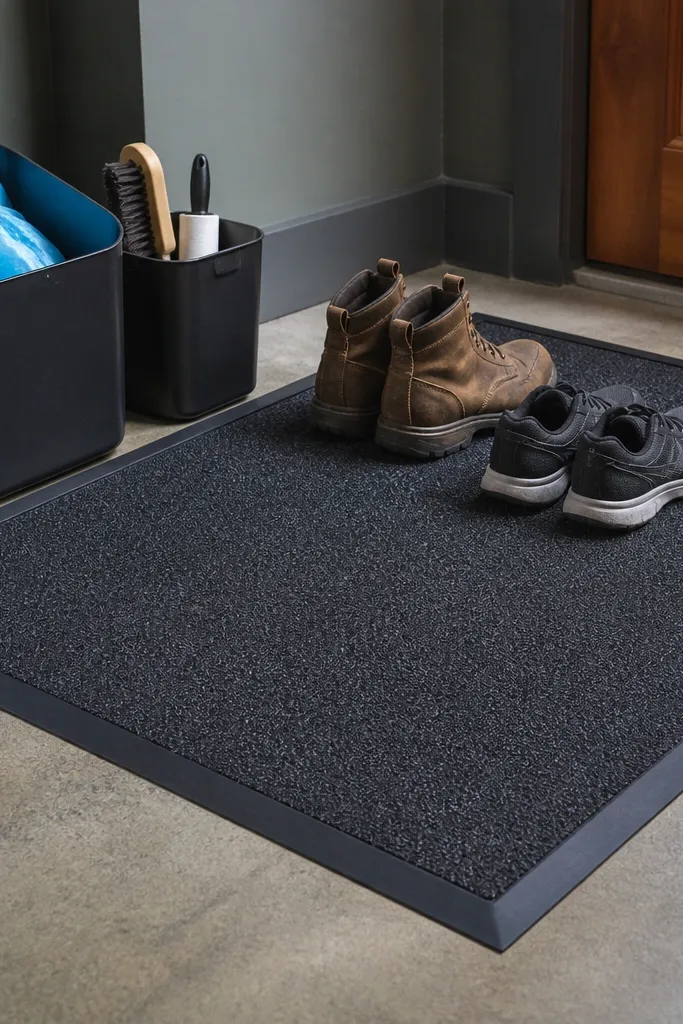
A garage looks messy when the floor is unpredictable. A landing zone with a mat and matching bins creates a visible boundary for boots, shoe covers, and quick grab cleaning tools. The look is clean because the mat defines the area and bins keep small items from spreading. This also helps people put items back without thinking because the zone is obvious. It’s affordable and one of the fastest ways to improve the garage’s photo look.
Editor's noteUse a bin with a wide opening so people don’t leave boots half in the bin.
Choose a mat size that fits your doorway area and cut it to sit flush with the floor edges. Place a pair of bins on the wall side or on a low shelf next to the mat, keeping one bin for boots and one for cleaning supplies. Use wall anchors into studs for the bins or build a small base shelf from sealed plywood. Add a label strip above the bins and keep the bin colors consistent with your other theme items.
Skip thisDon’t place the bins too far from the mat; it turns into an avoidable step.
16. Stainless-Look Peg Hooks for Sports Gear
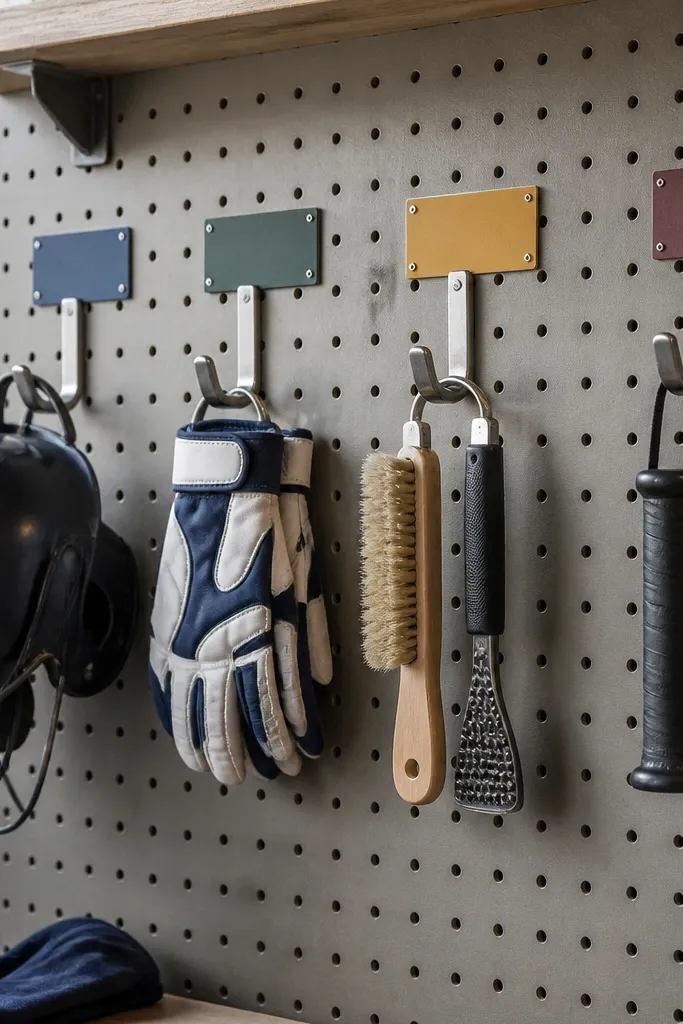
Sports gear is hard because it’s bulky, odd-shaped, and easy to stack poorly. Peg hooks with uniform spacing makes balls, helmets, and small sports tools look planned. The theme reads through consistent hardware finish and label style. This works especially well in garages used for year-round outdoor activities. You’ll stop the “pile that becomes a mountain” effect because everything has a hanger spot.
Editor's noteKeep ball hooks under the shelf line so they don’t block the label area.
Mount pegboard to studs and mark a consistent grid spacing across the entire sports area. Use heavy-duty pegs for balls and loop hooks for helmets and pads, keeping each category on its own vertical stripe. Add labels at the bottom edge of each hook row. For bulky items, use two hooks per item and hang them with the same orientation so they don’t swing.
Skip thisAvoid mixing hook sizes in the same row; it breaks the clean stripe effect.
17. Vertical Ladder Shelf for Paint Sticks and Rollers
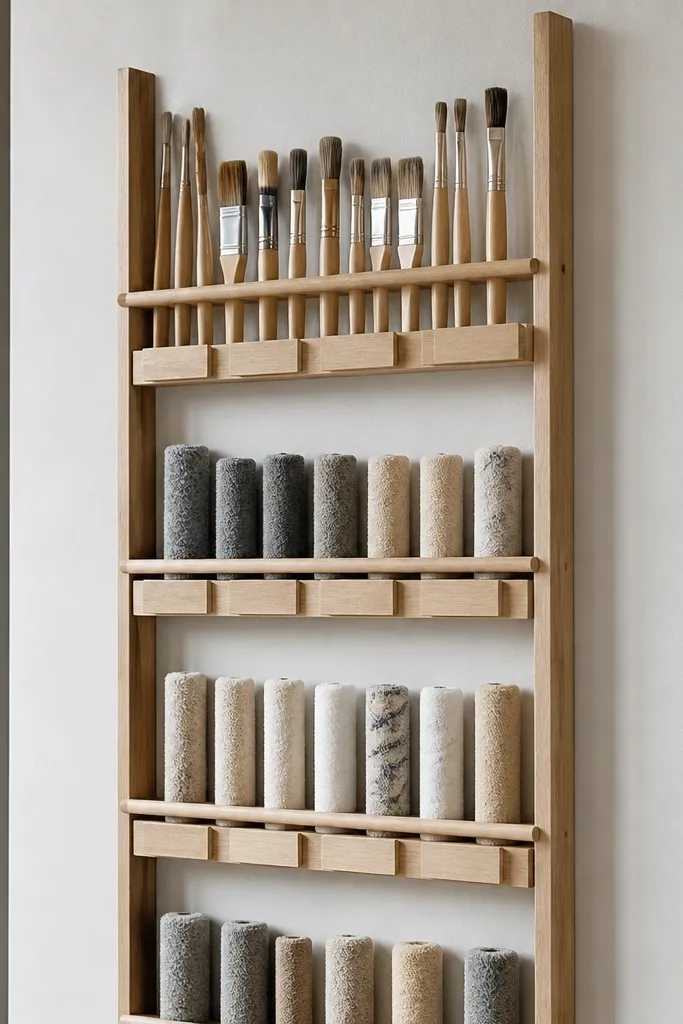
Paint tools take up weird lengths and they fall over if you store them flat. A vertical ladder shelf keeps rollers, paint sticks, and long brushes upright and visible. The theme is clean because the ladder creates repeating vertical lines, and the labels can sit on the same horizontal rail. This setup is great if you store paint supplies in the garage but want them to look tidy instead of scattered. It’s also easy to add more rungs as you collect more tools.
Editor's noteUse a clear matte sealant and keep a small microfiber cloth in a bin for quick drips.
Build a ladder frame from two side rails and add rungs cut from 1x2 lumber. Sand and seal the wood so drips wipe off. Install the ladder shelf to studs, then add roller holders using simple wooden blocks or adjustable hooks at each rung height. Label each level with tape strips and keep roller covers in lidded bins that slide behind the ladder frame.
Skip thisDon’t store roller frames on bare hooks; they chip and scuff the wood fast.
18. All-White Drawer Unit With Numbered Compartments
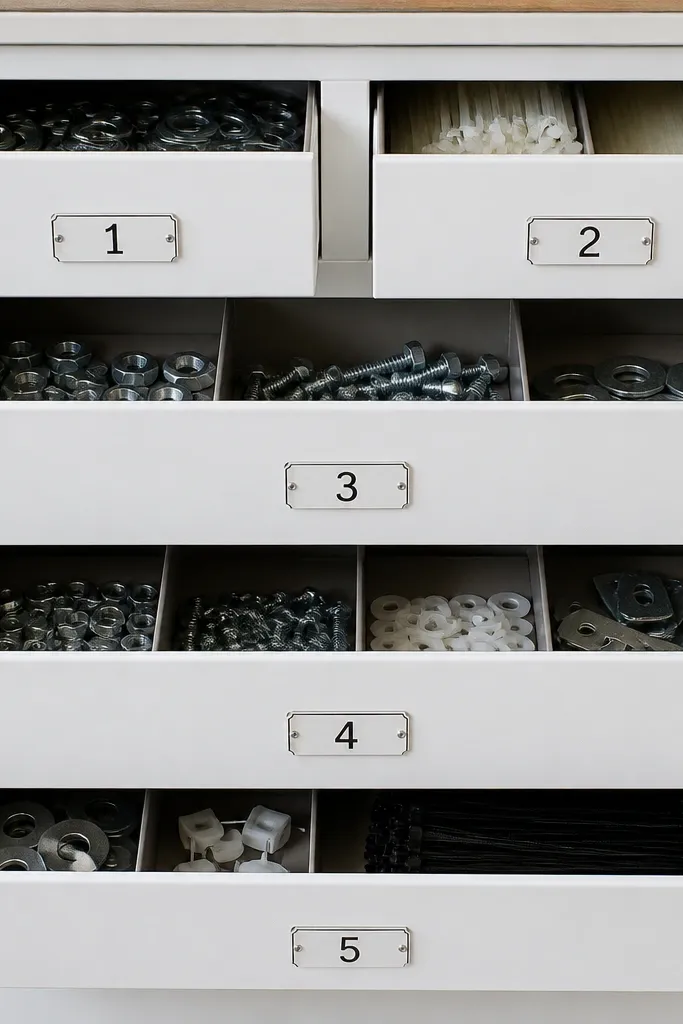
If you want the garage to look like a clean workshop, numbered drawers do it. The all-white drawers hide dust, and the numbers create a theme that looks crisp in photos. You also get a system for small parts like washers, zip ties, and fasteners without mixing categories. This is especially useful if multiple people use the garage because the drawer number is the instruction. It’s not fancy, but it’s extremely effective.
Editor's noteUse foam with a tight fit so parts don’t rattle and knock labels off.
Buy or build a drawer cabinet with multiple shallow drawers. Paint or finish the fronts white and add uniform labels that are either numbers or number-letter combos. Inside each drawer, install a foam insert or small dividers so parts don’t slide. Mount the cabinet to studs if it’s tall, then add a printed reference chart on the inside of the door or on the wall next to it.
Skip thisAvoid handwritten labels that vary in size; the theme depends on consistency.
19. Clear Storage Column for Seasonal Items With Color Caps
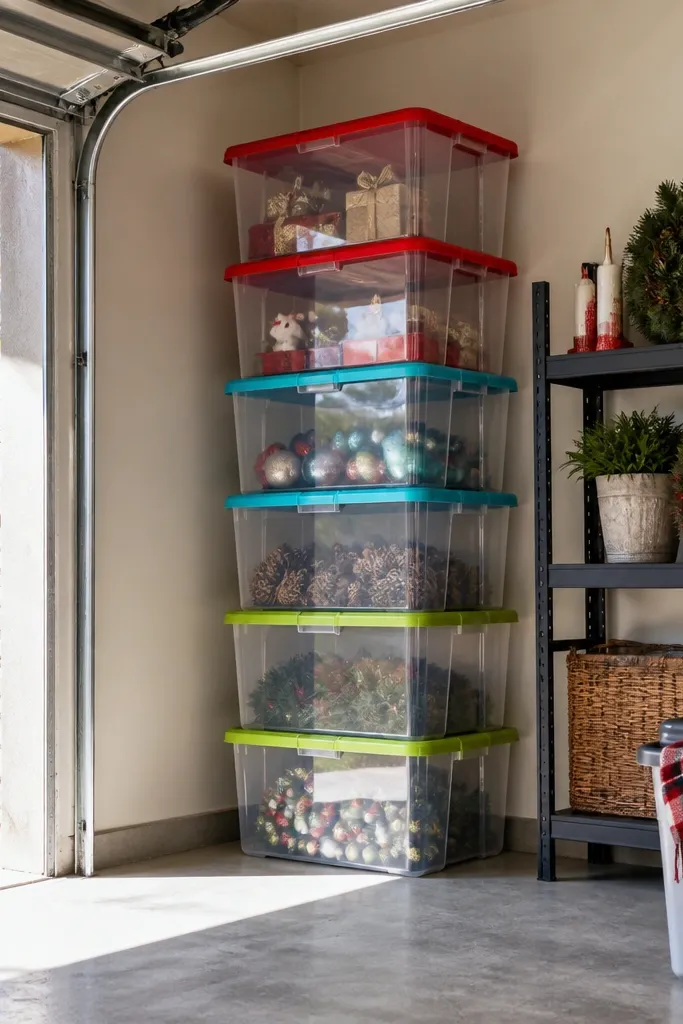
Seasonal items disappear into the garage and then reappear as a pile. A clear storage column keeps them visible while still organized, and the colored caps give you a theme cue so the column doesn’t look random. Use this for holiday decor, camping gear, and extension ladders accessories. It looks clean because everything is stacked in the same footprint and the labels align. You also reduce the time you spend moving bins around because you can see what’s inside from across the garage.
Editor's noteLabel lids too, so when you open the bin you still know what you’re grabbing.
Choose clear bins that stack and have removable lids, and pick a single color for lid accents (spray paint the lid tops if allowed or use bins with color lids). Build a vertical frame from 2x2s or use a metal rack and anchor it to studs. Place bins in the column with consistent spacing and secure with small stops so they don’t tip. Add a label strip at the front of each bin with category and season name.
Skip thisDon’t overfill bins; bulging lids destroy the clean column lines.
20. Brick-Look Tile Backing for a Cleaning Supply Caddy
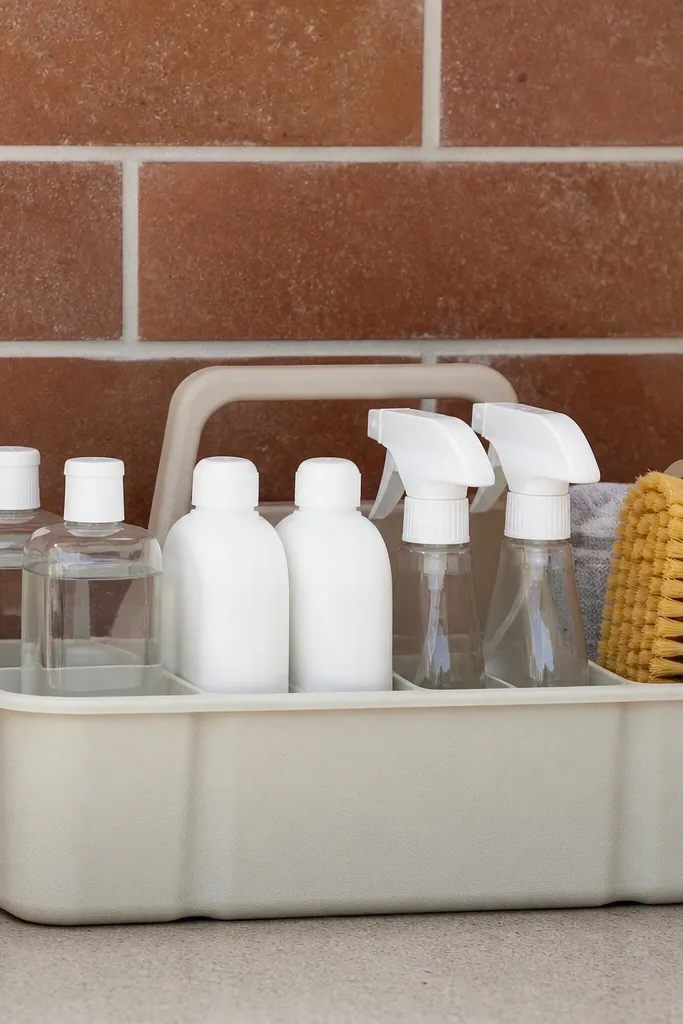
Cleaning supplies are the fastest way for a garage to look cluttered because bottles multiply. A caddy with a brick-look backing makes the station look like a designed product display. The theme is the pattern and the repeated container placement. You’ll also stop the “cloths in a bucket” mess because the caddy can have labeled slots for specific cloth types. This works well near the garage door or utility sink area where you need supplies ready to grab.
Cut a backing board from plywood or MDF and cover it with peel-and-stick tile or a printed vinyl sheet in a brick pattern. Mount a wall caddy frame using rails or a small shelf and hooks, then attach labeled holders for bottles and cloths. Use bins or small containers with consistent shapes so the station looks uniform. Seal edges with caulk and add a small drip tray at the bottom to catch leaks.
Put the most-used bottle at eye level and keep the rest in the caddy’s lower slots so the station stays neat.
Avoid placing the caddy where it gets direct spray; water spots kill the look.
21. Steel-Rail Shelf With Pegboard Side Panels for Workbench Tools
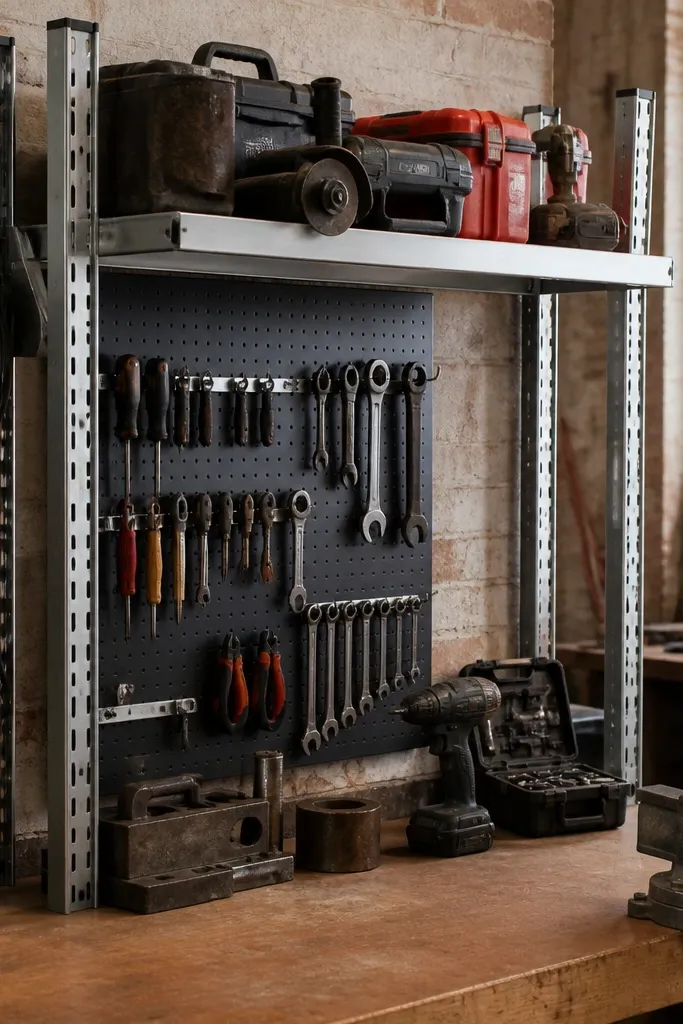
This is for people who use a workbench and end up with tools on the bench top. A steel-rail shelf plus pegboard side panels creates a vertical workspace that looks tidy and stays tidy. The shelf hides bulky items and the pegboard displays tools in a grid. The theme comes from the same rail finish across the whole station. It’s a practical build because it reduces clutter where you need to work. The look is clean because everything has a home and lines up.
Editor's notePre-drill pegboard holes and test one tool holder first so your tool hangs straight.
Mount steel rails horizontally on studs at a height that clears your workbench surface. Add a shelf board to the rails and attach pegboard panels to each side of the work zone. Put small bins under the shelf for parts and use hooks on the pegboard for hand tools. Label the pegboard rows by tool type and keep the shelf for larger items like sandpaper packs and spare blades.
Skip thisDon’t hang tools over your bench edge; you’ll bump them during work.
22. Bike-Repair Station With Color-Matched Mini Baskets
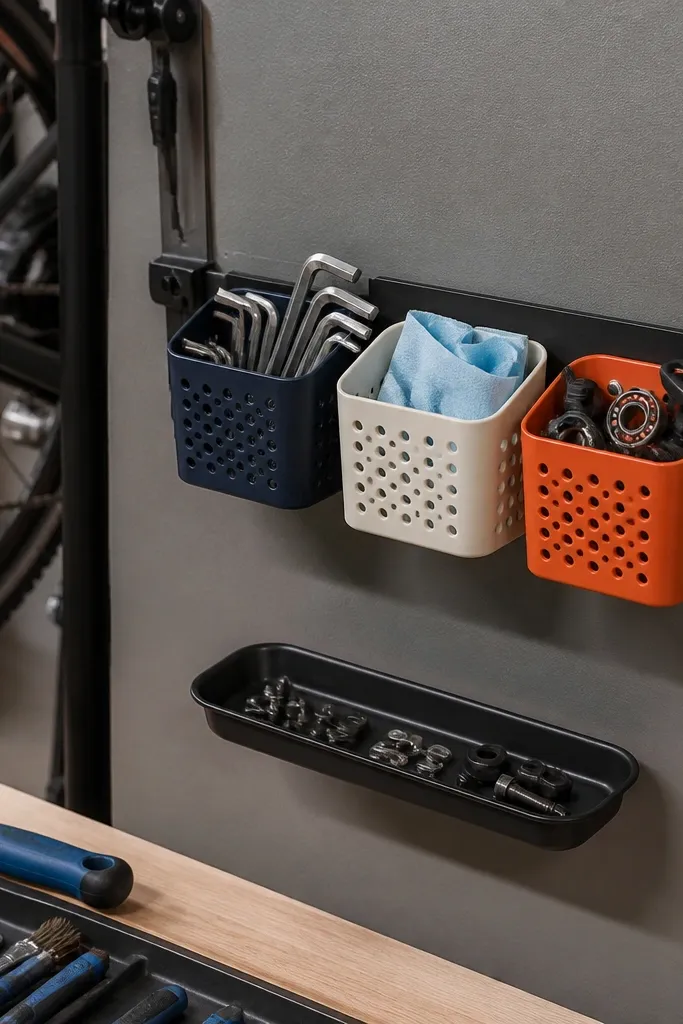
If your garage has bike repairs, the mess is always the same: tiny parts, wipes, and tools that end up in a drawer that never gets sorted. Mini baskets with matching colors make the repair zone look clean and themed. The wall arrangement also keeps tools visible so you don’t waste time searching for a hex key. This setup looks good in photos because the baskets line up and labels are consistent. It’s also easy to maintain because each basket is for one job.
Editor's noteUse two basket colors only: one for clean items and one for used/wet items.
Mount a pegboard or slat panel and attach a small shelf at chest height. Use mini baskets with identical sizes and attach them to the shelf with screws or hooks. Add label tape on each basket front for categories like chain tools, brake pads, and tire supplies. Hang the main tools on hooks next to the baskets and keep long items in a separate holder below.
Skip thisAvoid too many basket colors; the theme gets noisy fast.
23. Matte Black Corner Locker for Emergency Supplies
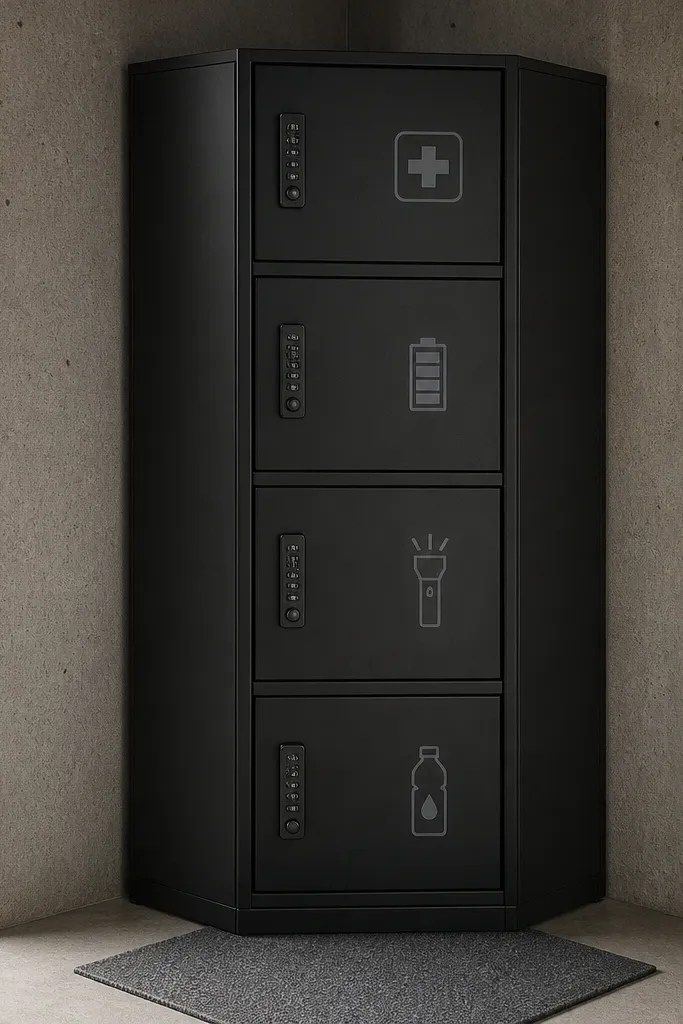
Emergency supplies are usually scattered: first aid, batteries, flashlights, and spare water. A matte black corner locker keeps it hidden but still themed because you can label everything inside with the same format. The black finish looks sharp against concrete and reduces how dirty the unit looks over time. When you need something, you open one door and the categories are obvious. It’s not just about storage — it’s about making the garage feel ready and clean.
Build a small cabinet from plywood with a face frame, or buy a basic locker-style cabinet and paint it matte black. Install an internal shelf and add lidded bins that fit snugly. Label each bin with a consistent label style and add a simple door label like EMERGENCY. Mount the cabinet in a corner to studs or use a proper floor anchor to prevent tipping.
Use a clear bin for flashlights and batteries so you can check charge status quickly.
Don’t store emergency items loose; dust and clutter inside ruins the clean look.
24. Garden Tool Color Bands for Lawn and Yard Zones
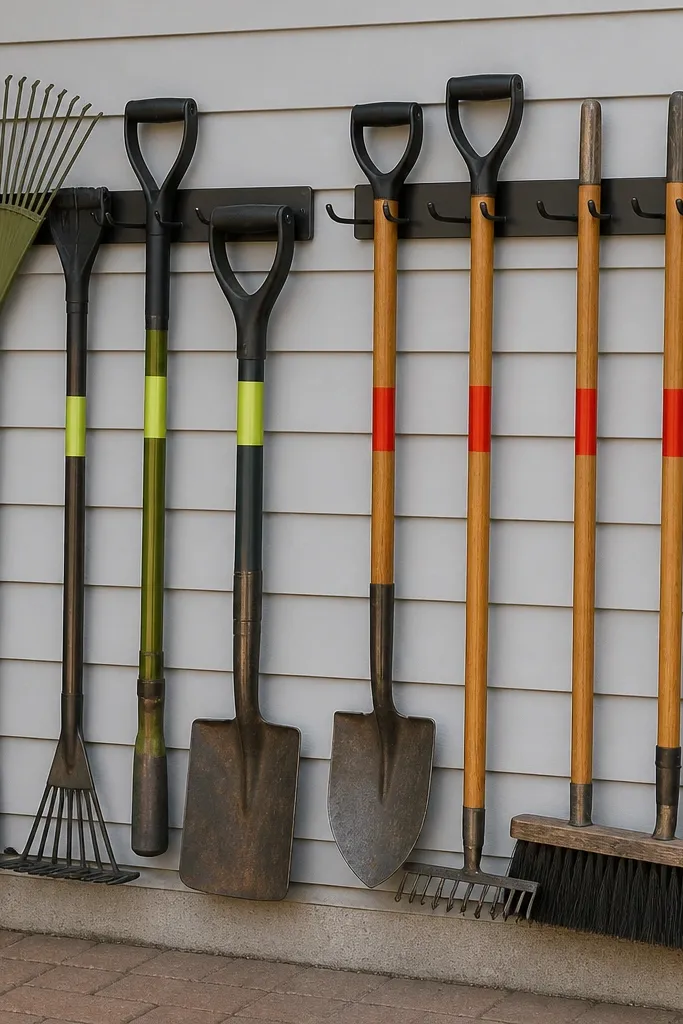
This is a theme that works because it matches how yard tools are actually used. Use color bands to separate lawn tools from yard tools, and the garage looks organized even before you read labels. The aesthetic is clean because you’re repeating one visual element across multiple tools. It also makes it harder to put tools back in the wrong place, because the color cue is obvious. This setup is ideal if your garage is also the yard staging area.
Hang a series of hooks on a rail or pegboard and assign each category a color band. Apply the band using colored heat-shrink on handles or paint marker bands on a small strip near the grip. Add matching label tape on the wall under each hook row. Keep spacing consistent so tools don’t overlap and the color blocks remain readable.
Use the same band position on every tool (for example, 2 inches from the grip) so the theme looks uniform.
Avoid using too many colors; four categories max keeps it clean.
25. White PVC Pipe Rack for Long Storage Accessories
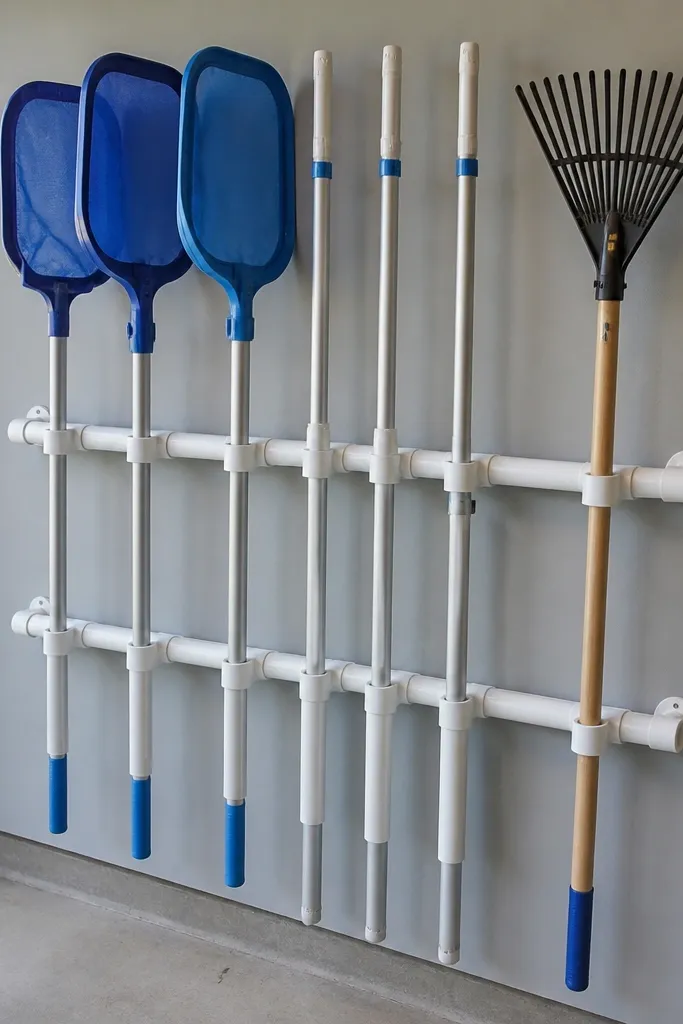
Long accessories are hard to store without bending or damaging them. A white PVC pipe rack creates neat, uniform holders that look clean and bright in a garage. Because it’s modular, you can add more holders as you buy new attachments. The theme is the consistent white color and the matching label system. It’s an affordable build that looks tidy because everything stands upright in identical tubes. Great for extension poles, window tools, and long brush handles.
Editor's noteRoughen the pipe lightly with sandpaper before gluing labels or mounting hardware for better adhesion.
Cut PVC pipe into sections (choose a diameter that matches your tools) and cap the bottom ends with PVC end caps or glue plugs. Mount the pipe sections to a sealed backing board using a template so spacing stays equal. Label each tube on the front with tape or printed labels. Secure the backing board to studs and add a small drip tray or absorbent mat below if you store wet tools.
Skip thisDon’t mount PVC only with hot glue; it loosens with heat cycles.
26. Clear Hose Reel With Spool Labels and Wall Landing
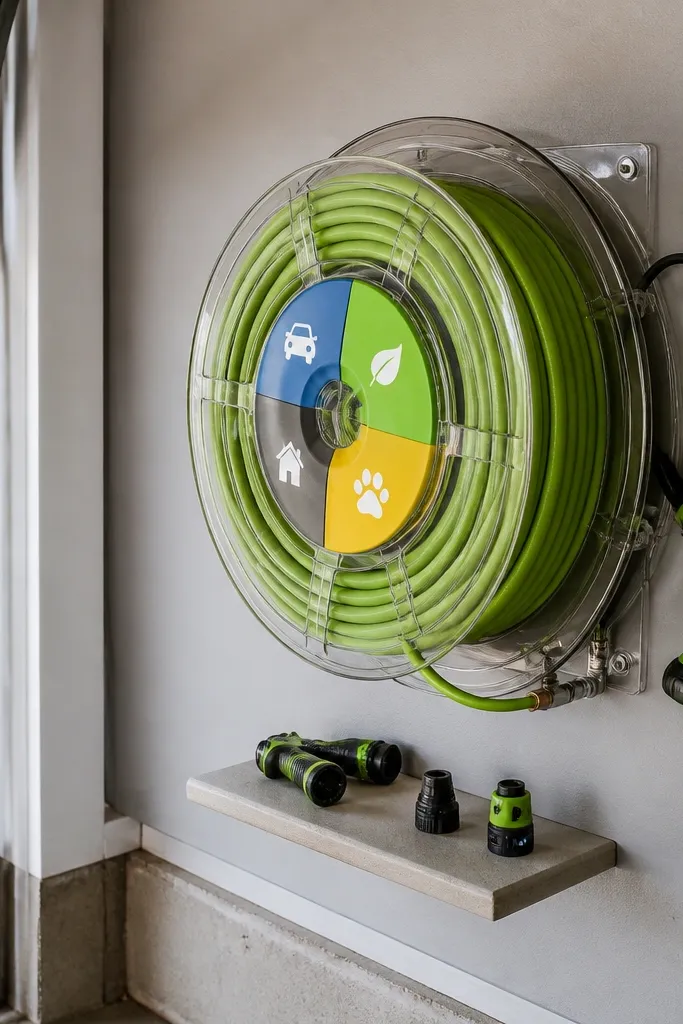
Hoses and cords can turn a garage into a tangled mess in one afternoon. A wall hose reel with labeled spool areas keeps the hose contained and visually neat. The theme looks good because the reel and the label placement are consistent and repeatable. This also stops the “kinked hose” problem because the hose is stored wound and supported. It’s a practical build for garages with outdoor cleaning routines.
Mount a hose reel or build a simple wall reel using a metal bracket system and a sturdy base board. Add a small landing tray under the reel for the nozzle and small accessories. Label the nozzle holder and the nearby bin for hose tools using printed labels. Keep the landing zone within arm reach so you don’t end up throwing the nozzle on the bench.
Use a small hook for the nozzle and keep it directly under the reel so the hose doesn’t twist.
Don’t let the hose hang loose between reel and nozzle; it creates tangles fast.
27. Laminated Word-Art Labels for Zones and Categories
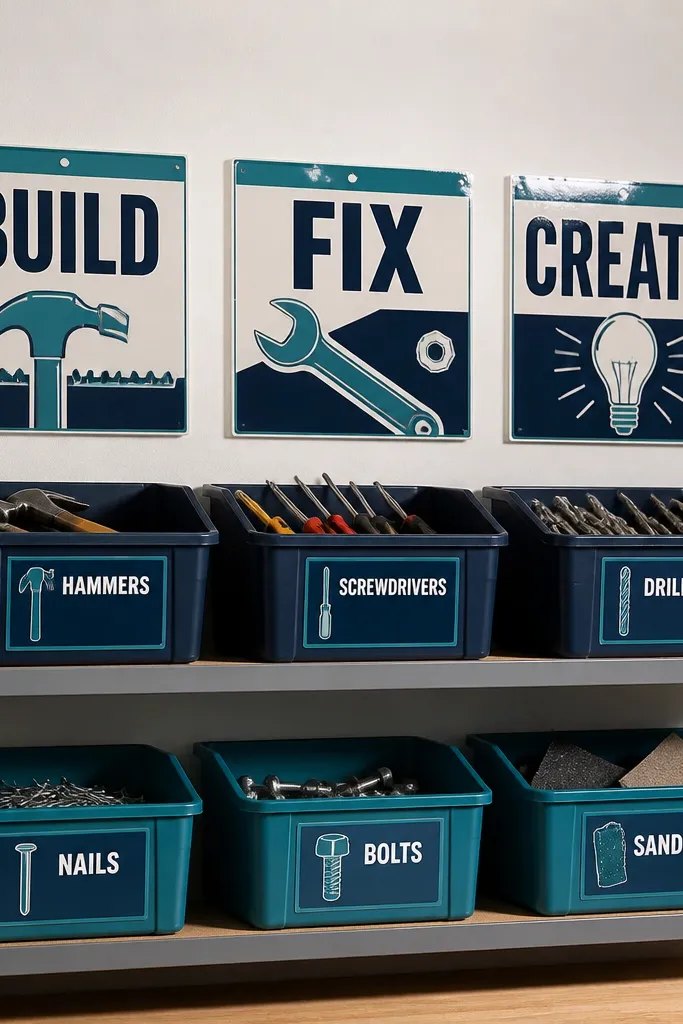
A theme needs signage, and garage signage usually looks terrible because it’s handwritten on scraps. Laminated word-art labels make the organization system look intentional and clean. You get a strong visual hierarchy: zone titles on the wall, category labels on bins, and matching label style everywhere. This makes the garage look good in photos because the text is consistent and aligned. It’s also a maintenance upgrade because people put items back correctly when labels are clear and durable.
Pick a label style: bold uppercase text on white tape or printed vinyl. Cut labels to consistent sizes and apply them with a straight edge so edges line up. Laminate the labels using self-laminating sheets or clear tape, then mount them with uniform placement (like top center of every bin). Add zone titles above each storage area and keep the same font across the garage.
Use two label sizes: one for zones and one for categories; it keeps the layout readable.
Avoid mixing label styles across bins; mismatched fonts look random.
28. Reversible Workshop Mat With Color-Coded Storage Trays
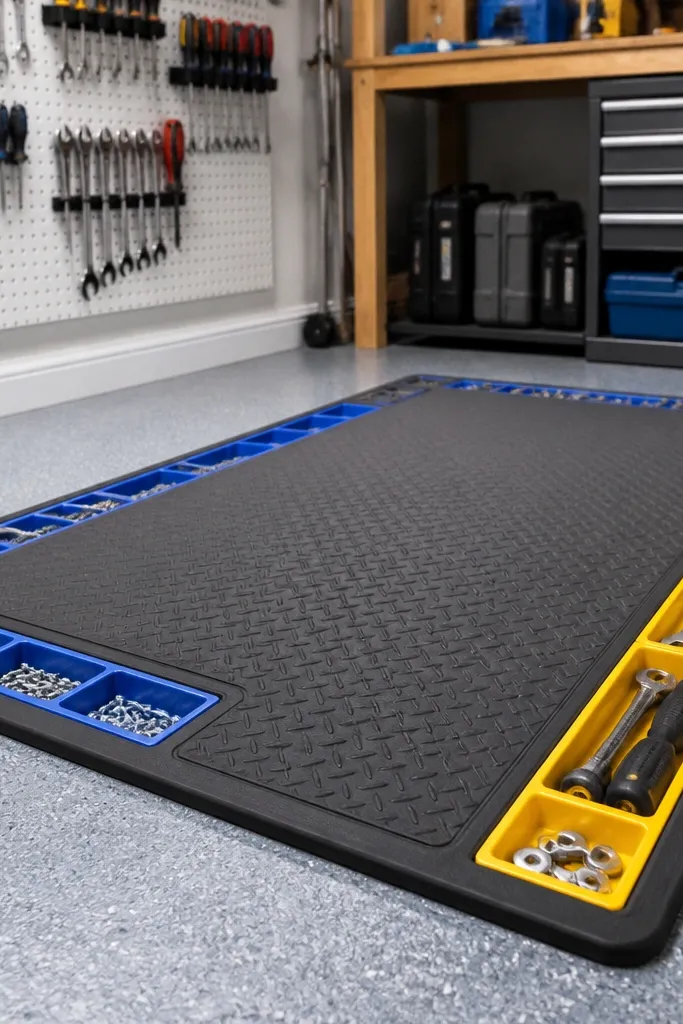
Some garages stay messy because work happens on the floor. A reversible workshop mat creates a clean surface for quick projects and a themed landing area for tools. Color-coded trays keep fasteners and small tools from rolling into the garage corners. The look is photogenic because the mat defines a rectangle and the trays line up like a set. This setup is great for small repairs and DIY tasks where you need order without building cabinets. It also protects the floor from drips and reduces the “everything ends up on the floor” spiral.
Editor's noteWipe the mat with a damp rag before labeling anything; grime ruins adhesive label tape.
Choose a garage mat with a stable non-slip underside and a size that fits your typical work area (about 24x36 inches is a good start). Place it in a fixed spot and add color-coded plastic trays on the edge using screws or brackets. Put small parts in the trays and use labels on the tray fronts. Store the trays themselves in a wall bin when not in use to keep the floor area clean.
Skip thisDon’t set trays too close to the mat edge; tools fall off and the system gets ignored.
29. Corner Shelves With Matching Bin Faces for Holiday Decor
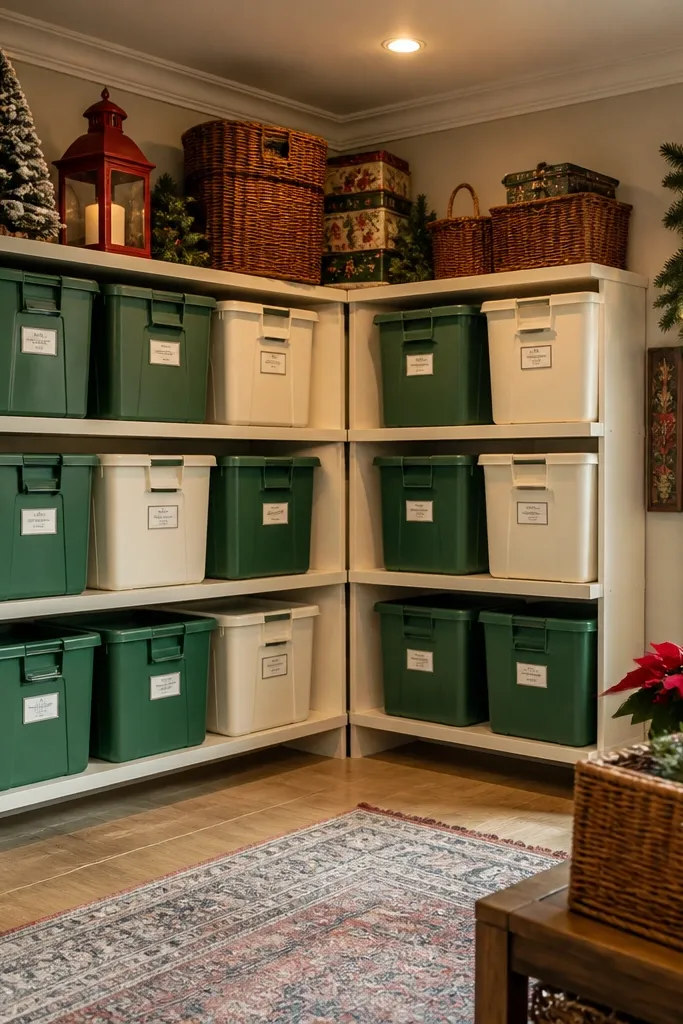
Holiday decor is bulky and ugly in storage because boxes stack unevenly. Corner shelves with matching bin faces make seasonal storage look tidy and themed. The corner location also keeps the items out of the main walking path, so the garage looks cleaner at a glance. This setup works because the bins are uniform and the label faces are consistent, even when items change year to year. It’s affordable and easy to expand next season.
Editor's noteUse bins with the same lid color so the theme stays consistent even when lids are closed.
Build two short corner shelves using sealed plywood and metal brackets anchored to studs. Use identical lidded bins sized to fit each shelf depth. Keep the bin faces aligned so label placement forms a clean row. Add a season label and a quick inventory list on each bin face so you don’t open everything searching.
Skip thisAvoid stacking cardboard boxes on shelves; they look messy and collapse over time.
30. Clear Box File for Manuals and Warranty Cards
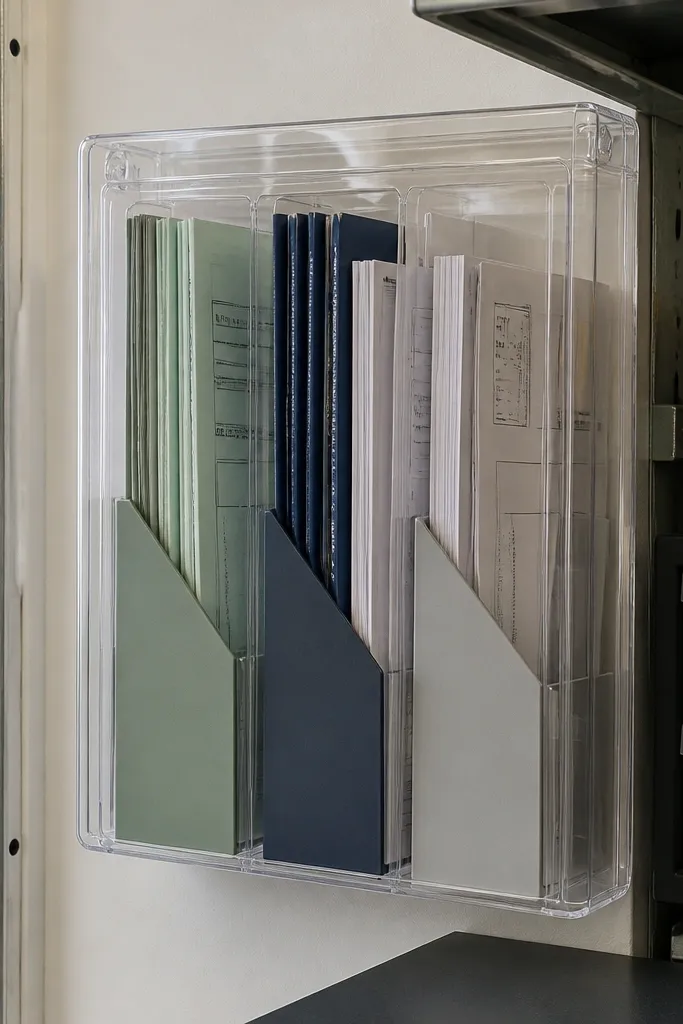
Paper clutter is the silent garage mess. A clear box file keeps manuals, warranty cards, and receipts organized and visible, and it’s easy to theme because you can match divider colors and label style. This looks clean because the box is compact and the dividers create tidy vertical lines. It also makes repairs faster because you can find the right manual without digging. Choose this if your garage has a “junk paper” drawer that never gets sorted.
Buy a clear document storage box with a lid or build one from clear acrylic sheet and a base. Add divider tabs for categories and label each divider with consistent tape. Place the box on a shelf at eye level and keep it near the tool zone. Use a small checklist card inside the lid so you know what’s in the box at a glance.
Use tab labels that match the zone labels you’ve already chosen so the system feels like one garage.
Don’t mix random paper sizes without dividers; it turns into a messy stack.



