
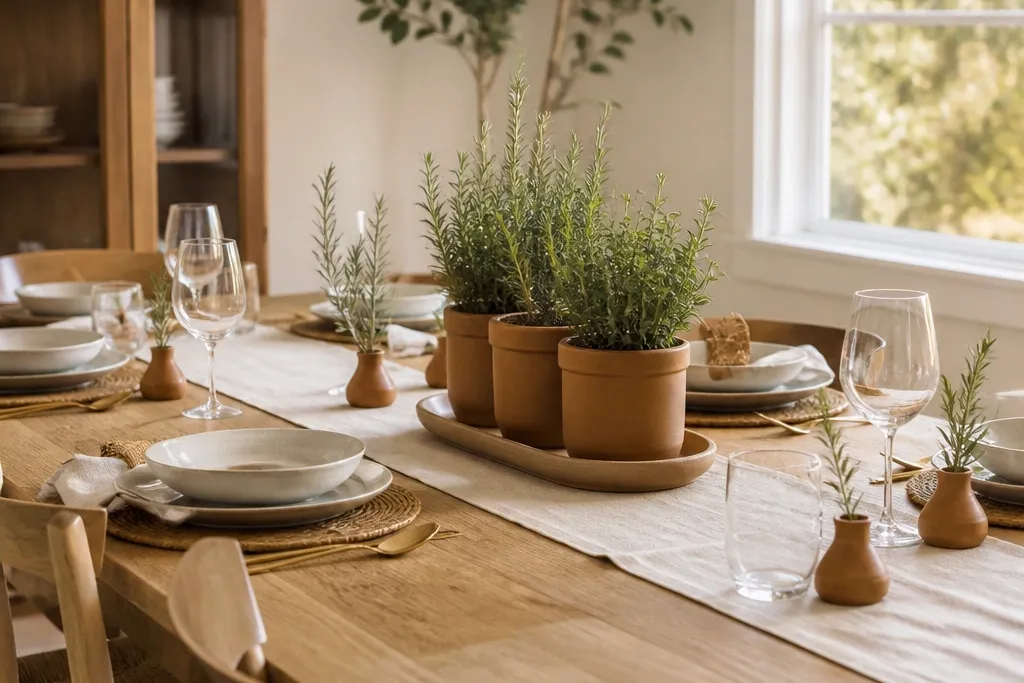
1. Terracotta + rosemary runner with a low tray base
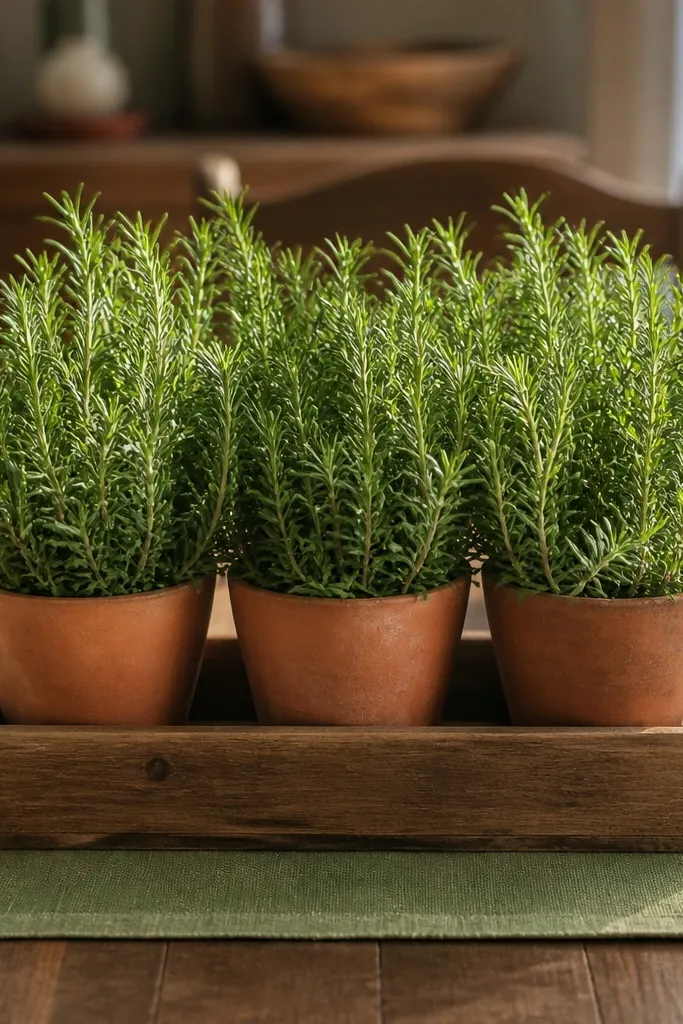
This setup fixes the common “green spill” problem where plants spread out and the table looks like a craft project. A low tray base keeps the plant mass grouped, and rosemary adds that easy, themed cue without needing flowers. Terracotta pots bring warmth and echo most wood tones, so the table looks calmer even with minimal other decor. It works best for everyday dinners and casual hosting because it stays low enough for conversation and still looks styled from across the room. Skill level is easy and the time is about 30-45 minutes if you already have a runner and small plants.
Editor's noteUse a damp paper towel to wipe rosemary leaves before you style; it makes the green look newer in seconds.
Start with a rectangular tray about 14-18 inches long that fits comfortably in the center of your dining table. Place a neutral runner or linen strip on top of the tray, then set two to three small terracotta pots along the length — rosemary in the center, a compact herb or small leafy plant on the sides. Add height by letting the rosemary lean slightly over the tray edge, then tuck in extra sprigs only where gaps show. Finish by adding one prop that matches the theme, like a small bundle of dried wheat or a terracotta-toned candle, but keep it low so it doesn’t compete with the plant.
Skip thisDon’t place loose stems directly on the table runner — they slide and ruin the shape.
2. Black ceramic tray with pothos cascading edges
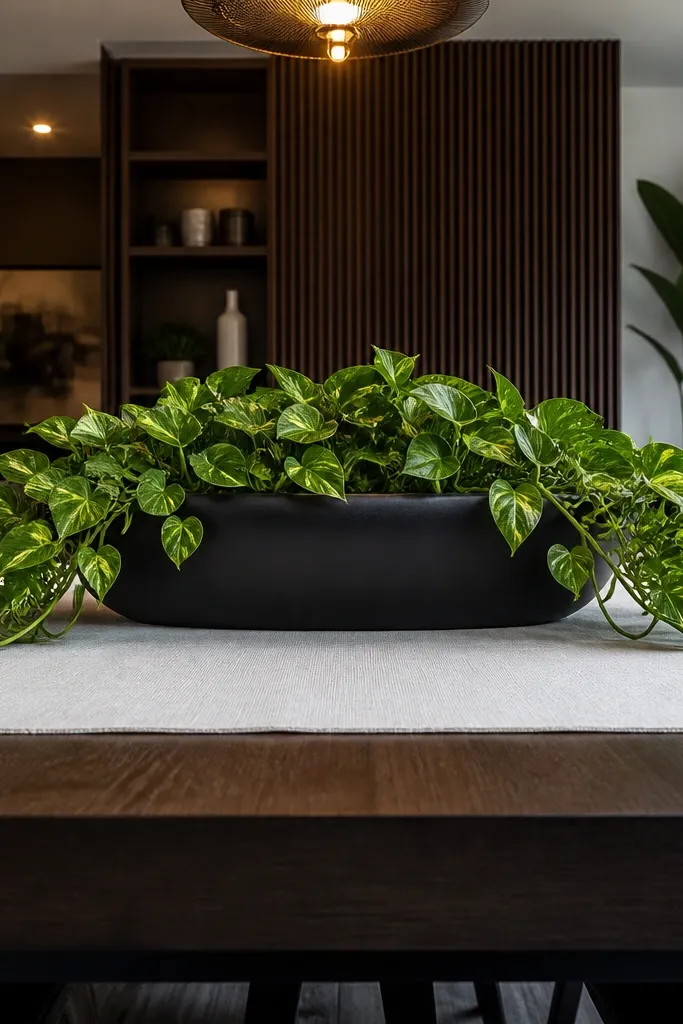
If your table decor always looks messy by the second meal, this is the fix. A black tray gives you a clean boundary, and pothos cascading over the tray edge creates “intentional movement” without adding more objects. It’s a strong themed dining table decor with plants option for modern or moody interiors because black containers make the green read crisp. You get a styled look that doesn’t require flowers, and the cascading effect helps the arrangement feel fuller even when your plant is small. This takes around 25-40 minutes and is beginner-friendly.
Choose a matte black tray with raised edges; aim for a size that’s about 2/3 the width of your table’s center section. Put one medium pothos in a black pot in the middle, then angle the pot slightly so vines fall toward one long side. Add one smaller plant pot on the opposite side for balance — a compact snake plant or small pilea works well. Tuck in a simple prop like a single black taper holder or a strip of faux eucalyptus only inside the tray boundary, then adjust vine length so the cascade looks even.
Cut vine ends clean with scissors after you position the pot, then press the ends into the tray edge for a steadier fall.
Don’t use shiny planters with a matte tray — the contrast can look accidental.
3. Blue-and-cream coastal look with silvery plant accents
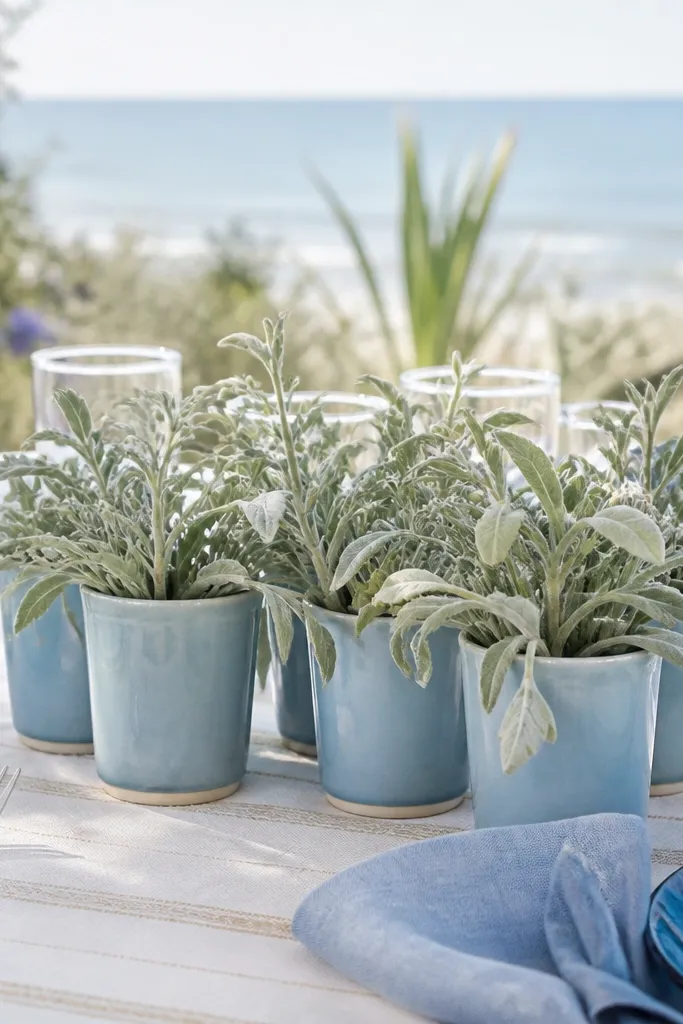
This is for when your theme is beachy but your plants look too tropical. Silvery greens read like sea mist, and pairing them with blue-and-cream decor keeps the table from looking loud. Use small plants and let them cluster instead of spreading everywhere, so the coastal vibe stays tidy. It’s great for spring and summer meals because it looks bright without being flashy. Build time is about 35-50 minutes depending on how many pots you already have.
Editor's noteKeep blue accents to one shade family — navy + powder blue together often looks like a craft store mix.
Lay a cream runner down the table center, then place a shallow tray on top. Use 3-5 small pots in light ceramic or weathered white finishes. Choose one silvery plant type as the anchor — dusty miller style (if you have it), or a plant with silver-toned leaves — and fill gaps with smaller green plants that don’t have huge fan leaves. Add one coastal prop like a small bowl with smooth stones or a thin rope-wrapped candle holder, but keep the total pieces under seven so the plants stay the focus.
Skip thisDon’t add seashells everywhere — one small cluster looks intentional, five scattered shells look messy.
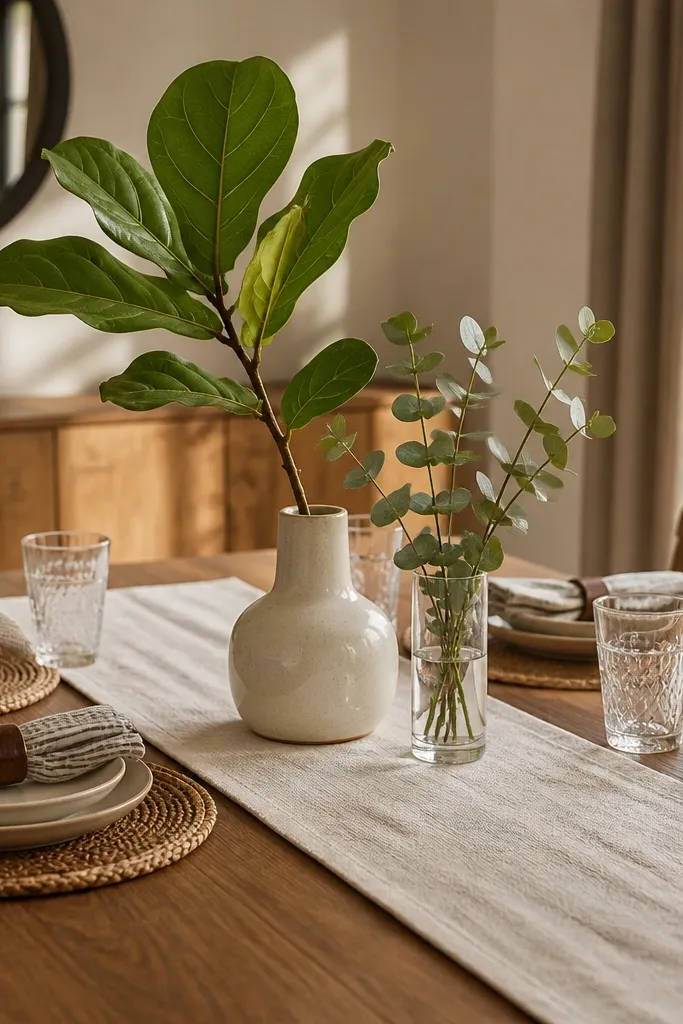
4. White linen runner with fiddle-leaf fig in a tall pot frame
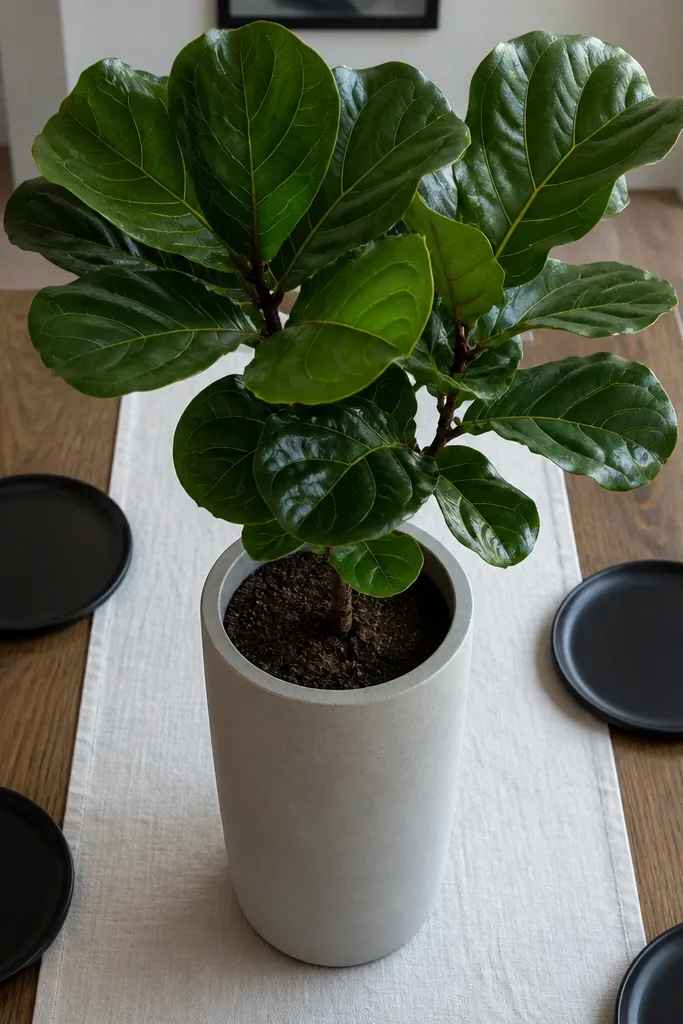
This fixes the “my centerpiece is too flat” problem. A tall plant in the center gives you instant vertical structure, while a crisp white linen runner softens the look and keeps it from feeling harsh. Fiddle-leaf fig reads sculptural, so you can keep the rest of the decor simple. It’s a strong choice for dinners where you want the table to feel a little more formal without adding many items. The skill level is easy, and the reset takes 30-60 minutes.
Editor's noteRotate the pot 10-15 degrees before you style anything else; the leaf shape usually needs that small correction.
Start with a white linen runner that hangs slightly off the table ends, then place a large neutral pot in the exact center. If your pot is wider than 10 inches, choose a smaller plant or rotate the pot so the leaves frame the runner instead of spreading past it. Add two small matching pots on each side at mid height, then use one low element like a shallow ceramic bowl with pebbles. Keep the total height spread controlled: the fig’s tallest leaves should sit around 10-14 inches above the runner, not higher.
Skip thisDon’t pile candles and books next to a tall plant — it makes the center feel crowded.
5. Spring green moss bowl with tiny succulents
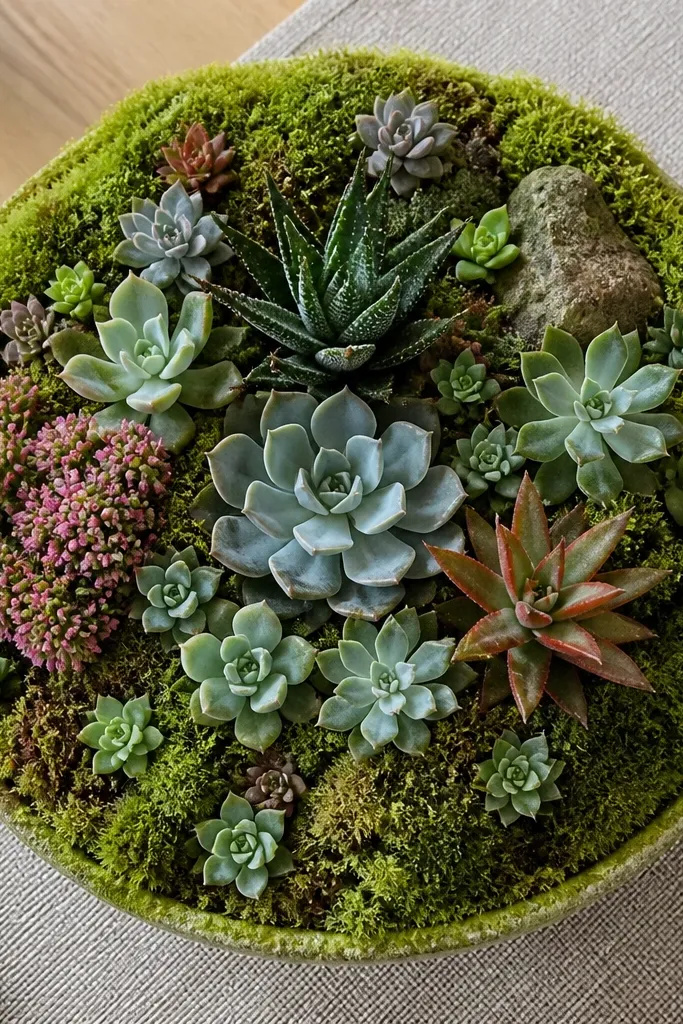
If your themed dining table decor with plants always looks like it needs flowers, this gives you a different kind of “fresh.” A moss bowl creates a base that looks styled even when the plants are small, and succulents add clean shapes that photograph well from any seat. This is also a practical choice because moss holds moisture visually, so it looks lush longer. It suits small tables or narrow dining spaces where a long runner feels too busy. Plan for 20-35 minutes if you’re working with ready-grown succulents.
Pick a shallow bowl about 8-12 inches wide and line it with a thin layer of sphagnum or florist foam made for plants. Layer moss on top so it covers the base evenly, then insert 5-7 tiny succulents around the center in a loose ring. Leave small gaps so each plant has breathing room; overcrowding makes it look like a clump. Add one color accent prop like a tiny pale ceramic egg or a light-colored candle holder, then mist moss lightly with a spray bottle.
Use a spray bottle instead of pouring water; pouring collapses the moss layer and creates dark patches.
Don’t use regular potting soil inside the bowl — it dries unevenly and shows through the moss.
6. Monochrome green glass bottles with one flowerless stem
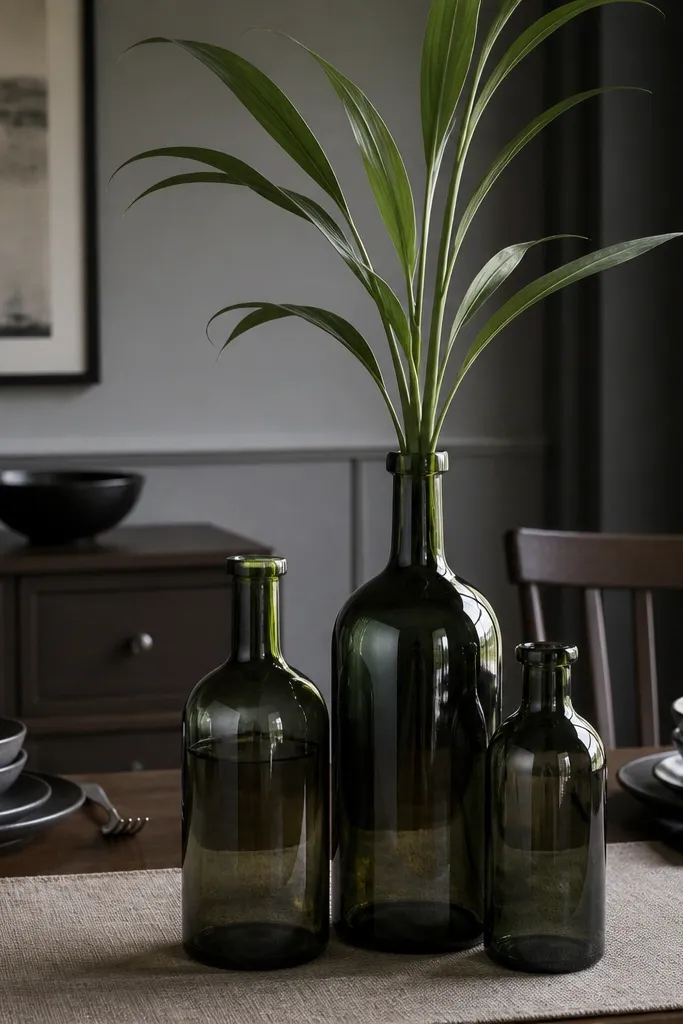
This one is for people who think themed decor has to be themed with words or prints. Monochrome glass bottles create a visual theme through shape and color, and you can pick plants that match the vibe without adding clutter. Add one taller, leaf-driven stem — like a single dracaena branch or a tall leafy cutting — to anchor the whole arrangement. It looks clean, modern, and intentional even when you keep it to three bottles. It takes about 25-45 minutes and works well for apartments or small dining rooms.
Set a dark runner or a black placemat strip across the table center. Arrange three to five clear or green-tinted glass bottles in a gentle arc, with the tallest bottle in the middle. Fill each bottle with water and plant cuttings that match the theme — keep leaves trimmed so they don’t tangle. Add a simple low filler like glass pebbles or one strip of decorative paper under the bottles, then adjust spacing so the bottles don’t touch each other.
Trim leaves below the waterline so you don’t get slimy bits; it keeps the look fresh longer.
Don’t mix bottle shapes without a color rule — it turns into random thrift finds.
7. Warm wood tray with cinnamon sticks and herb pots
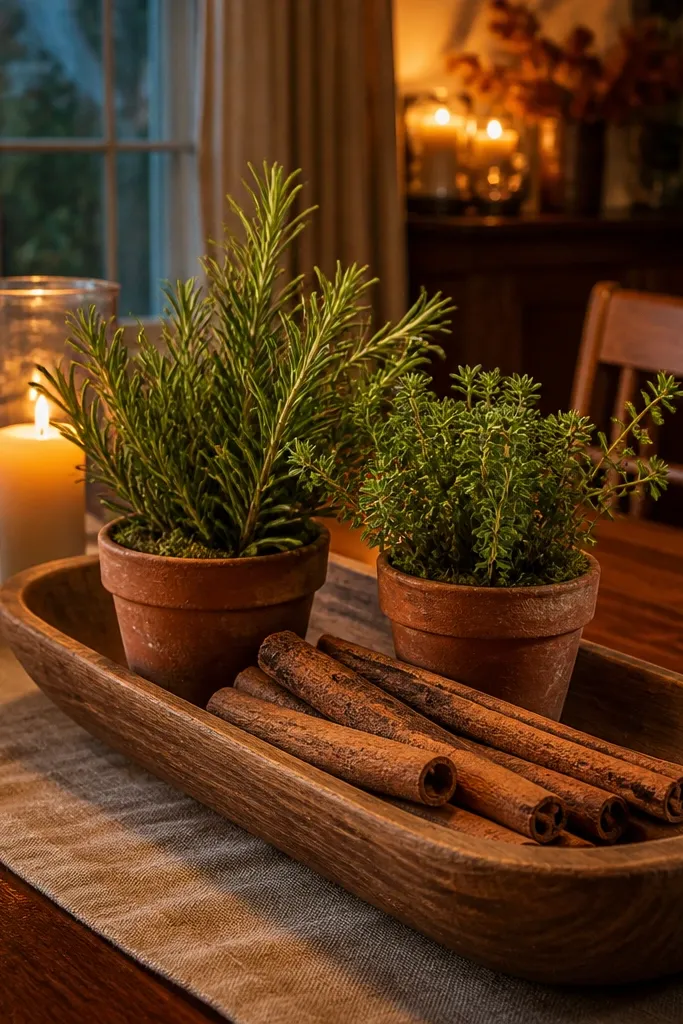
This is the cozy reset for fall and winter dining without going full holiday overload. Cinnamon sticks give you the themed cue immediately, and herb pots keep the plant element honest. The wood tray ties everything to warm interiors, so it looks cohesive even if your dining set is mixed materials. It’s also practical: herbs are useful, and the arrangement can shift from decor to cooking ingredients. Expect 30-50 minutes depending on how many herbs you want.
Choose a warm wood tray wide enough to hold 2-3 pots plus one prop row. Place two small herb pots in the back and one in front, then tuck cinnamon sticks along the tray edges like a frame. Add a low plant element in the center — thyme or a compact green — so there’s a focal point. Finish by spacing the cinnamon evenly so you don’t get random piles, then wipe pot rims so they look clean against the tray.
Break cinnamon sticks in half to match tray length; full-length sticks often look too long and awkward.
Don’t add too many props — cinnamon + candles + fruit can turn into clutter fast.
8. Terracotta wall-style planters with a table centerpiece line
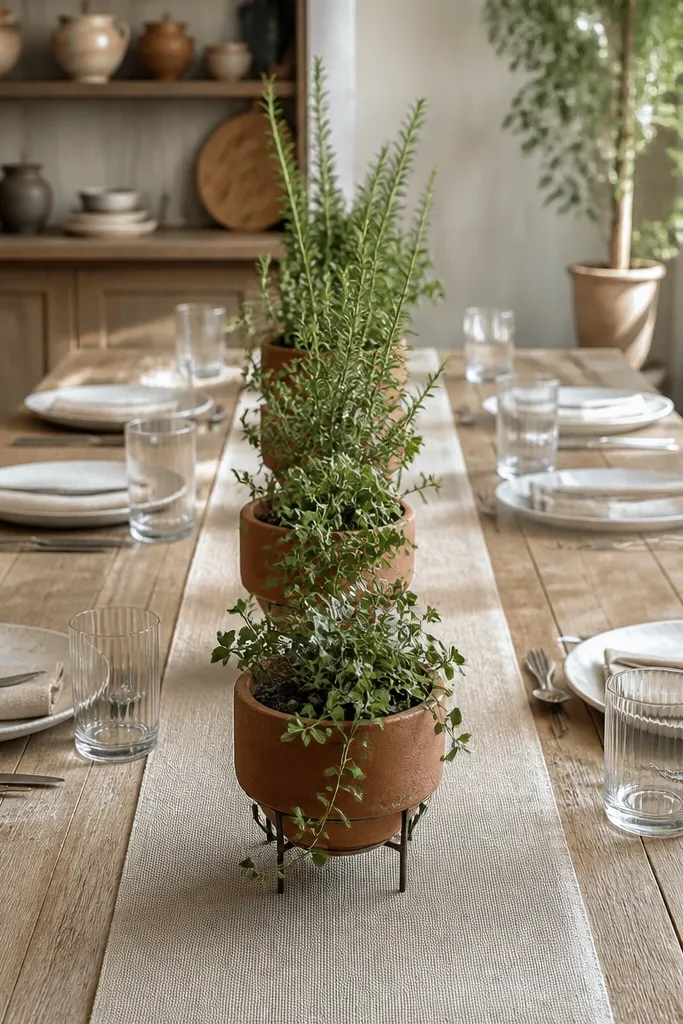
This solves the “my center looks flat from the side” issue. By using planters that sit upright and a line of greenery between them, the table reads styled from both front and side views. It also works when you want themed dining table decor with plants but your dining table is long and you need a center line instead of a big cluster. The terracotta finish keeps it warm and forgiving. Build time is about 40-60 minutes if you’re adjusting plant sizes and arranging stems.
Editor's noteUse florist wire or a small bundle tie to hold the middle stems together before placing them on the runner.
Set a long rectangular tray across the center of the table, then position two medium terracotta pots at the ends. Place a low runner or strip of burlap across the tray so the line looks intentional. Arrange cut greenery or low plants in the middle gap, using a few stems to create a continuous line rather than separate clumps. Keep the tallest leaves near the pots, and keep the middle low so you can see across the table.
Skip thisDon’t let the middle line grow taller than the pot sides — it breaks the framing effect.
9. Greenhouse vibe with clear acrylic risers and plant heights
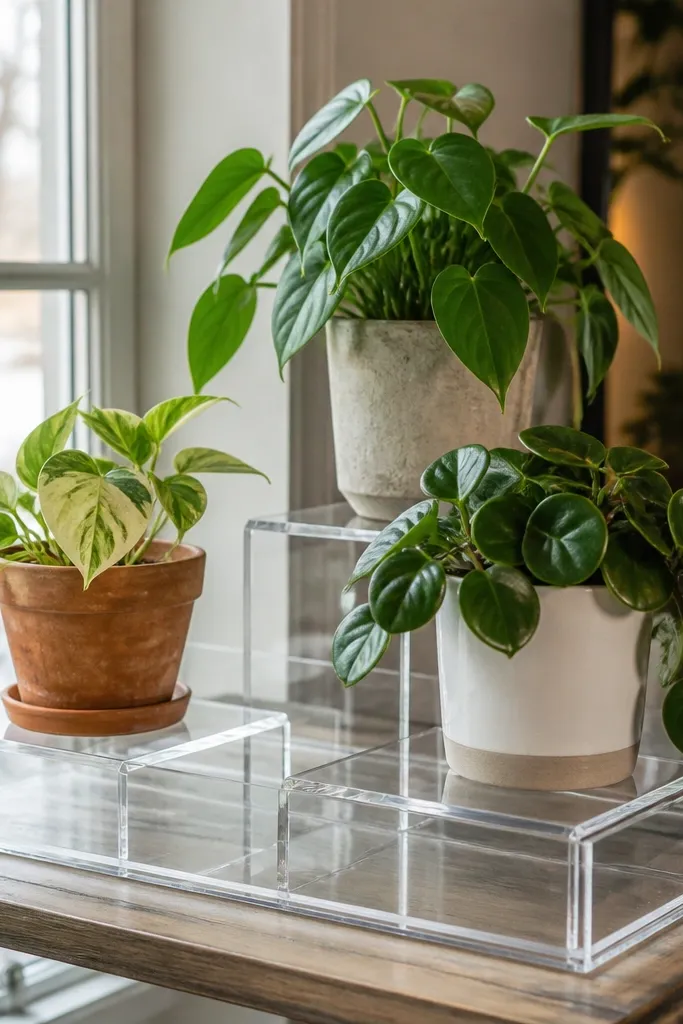
If your plant decor always looks like it’s sitting on the same plane, risers fix that instantly. Clear acrylic risers create a greenhouse vibe because they lift plants without adding visual weight. This is a smart move when you have a small plant collection but want a taller, more layered look. It also keeps leaves from touching the table surface or the runner, which reduces mess and makes the arrangement look cleaner. The build takes 30-60 minutes and is beginner-friendly.
Editor's noteWipe acrylic risers with glass cleaner; fingerprints make the whole setup look messy.
Pick a tray large enough to hold the risers and plants. Set one clear acrylic riser in the center and place your main plant on it, aiming for mid height around 8-12 inches above the tray. Add a second riser on one side for a smaller plant, then keep the remaining plant low on the tray surface. Add one low prop like a small bowl or pebble dish, then check height from the dining seats and remove any leaves that block sightlines.
Skip thisDon’t stack three risers — it looks like a display stand, not a dining table centerpiece.
10. Black-and-cream farmhouse with galvanized planter and hydrangea-style greens
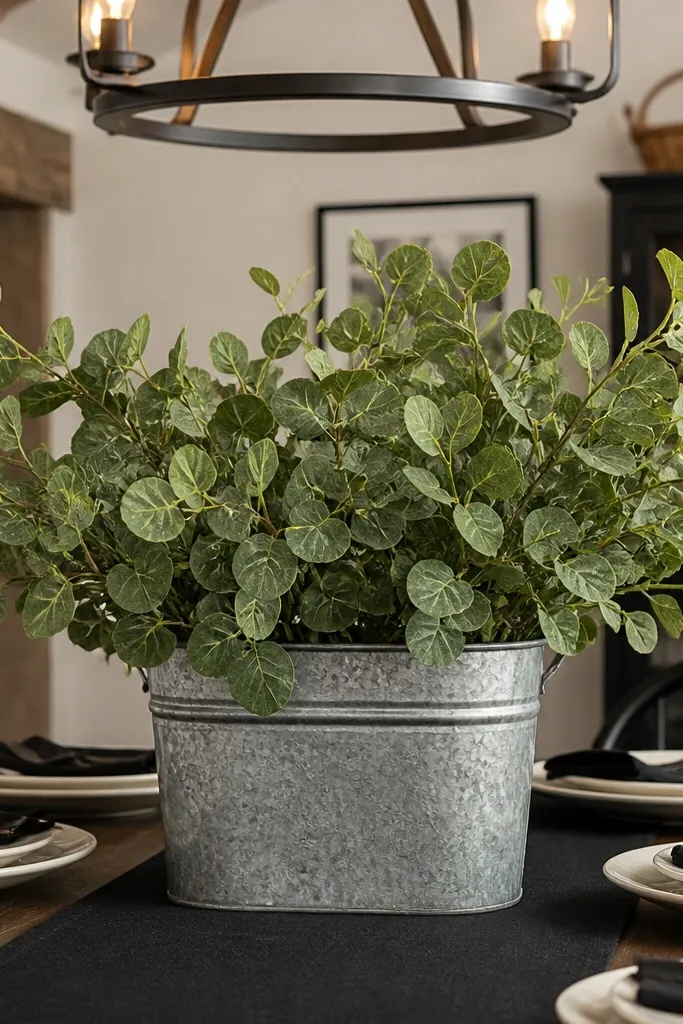
This is for a farmhouse look that still feels controlled. A galvanized planter brings texture and theme, while green stems that mimic hydrangea shape give you fullness without needing actual blooms. Keep the rest of the decor in black-and-cream so the galvanized finish doesn’t fight with random colors. It works for dinner parties because it looks abundant while staying neat and contained. Time is 35-55 minutes.
Place a cream runner on the table and set a galvanized planter in the center. Build the plant shape by starting with 3-5 stems as the base, then add more stems to fill the sides so it looks like a rounded cluster. Add two smaller pots on either side at lower height for balance. Finish with one black element like a matte black candle or a black ceramic bowl, keeping it inside the same width as the planter so the look stays tight.
Trim stems to stagger lengths by 1-2 inches; it stops the “all same height” flat look.
Don’t use too many stem types — five different leaf shapes turn the cluster into chaos.
11. Citrus theme with lemon-toned picks and leafy greens
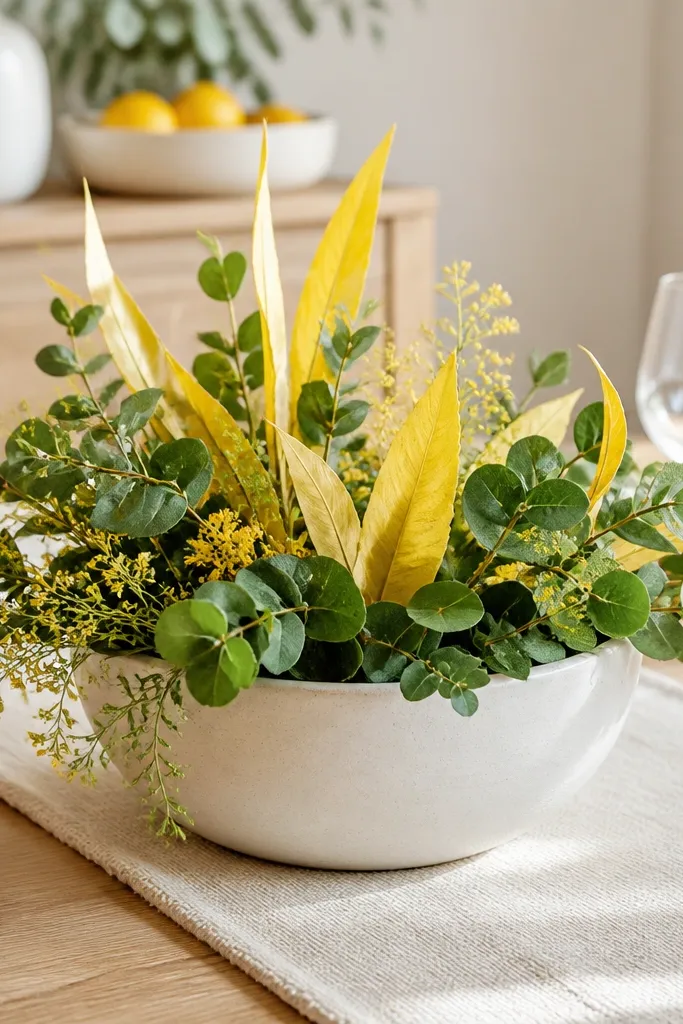
This makes themed dining table decor with plants feel seasonal without turning into a fruit bowl. Lemon-toned picks and citrusy accents give you that “bright” cue, while leafy greens keep it grounded. The key is to choose one citrus color — pale yellow or muted gold — and repeat it in small doses so it doesn’t look like a holiday party. It’s a great option for spring brunches and Sunday dinners because it reads fresh from across the table. Build time is 30-45 minutes.
Editor's noteUse pale yellow picks over neon — neon makes dining tables look like themed props, not decor.
Pick a tray and liner in cream, linen, or light wood tones. Place two small leafy plants in matching pots, then insert lemon-toned picks between them so the color appears in three spots across the arrangement. Add one low prop like a small ceramic dish with citrus slices or a lemon-shaped candle holder. Keep the tallest element no higher than the plant’s mid tier, then adjust pick angles so they fan outward instead of poking straight up.
Skip thisDon’t add real fruit on a centerpiece for more than a day — it sweats and stains liners fast.
12. Jewel-tone centerpiece with dark purple foliage and gold candle caps
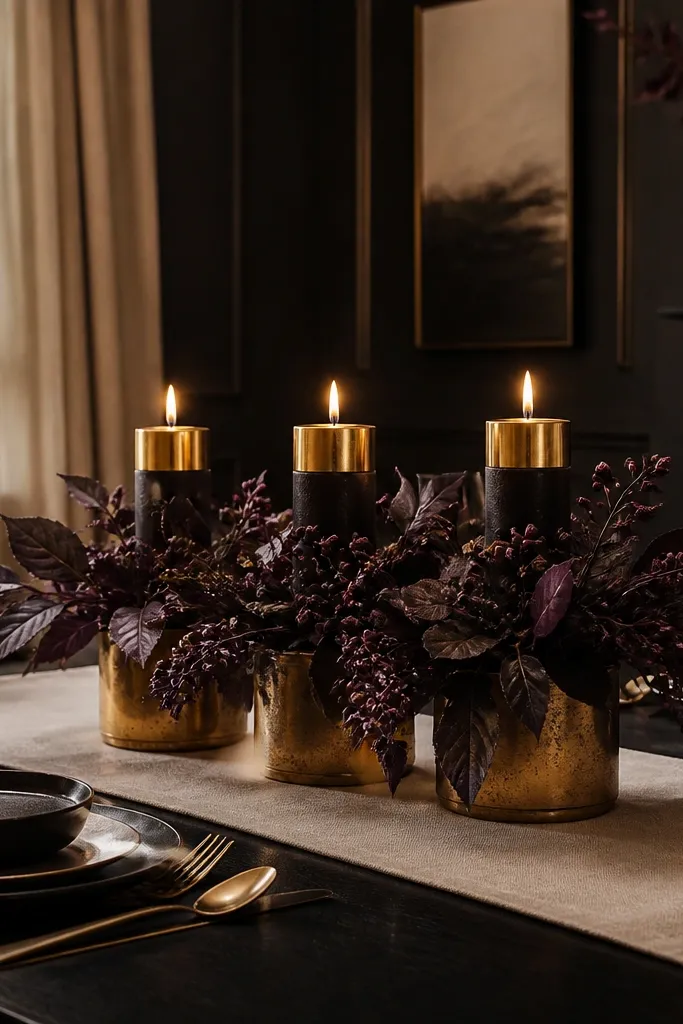
This is a strong option for people who want drama but hate clutter. Dark purple foliage reads themed on its own, and gold candle caps add a polished touch without adding more bulk. The arrangement looks “done” even with just three plant containers because the color contrast carries the design. It’s perfect for fall and winter dinners when you want mood lighting to match the decor. Plan for 30-55 minutes depending on candle holder setup.
Editor's noteUse matte gold, not shiny chrome; shiny metals look too harsh with deep foliage.
Lay a dark runner or place a tray on a neutral tablecloth so the jewel tones pop. Arrange three pots: one medium purple foliage plant in the center and two smaller plants angled outward. Add gold candle holders only if they fit within the height plan — keep candle tops below the tallest leaves. Place one small gold accent prop like a shallow dish for a cohesive sparkle, then step back and check symmetry from the dining seat height.
Skip thisDon’t mix purple plants with warm orange decor — it turns into a color tug-of-war.
13. Minimal white pot cluster with one mossy base dish
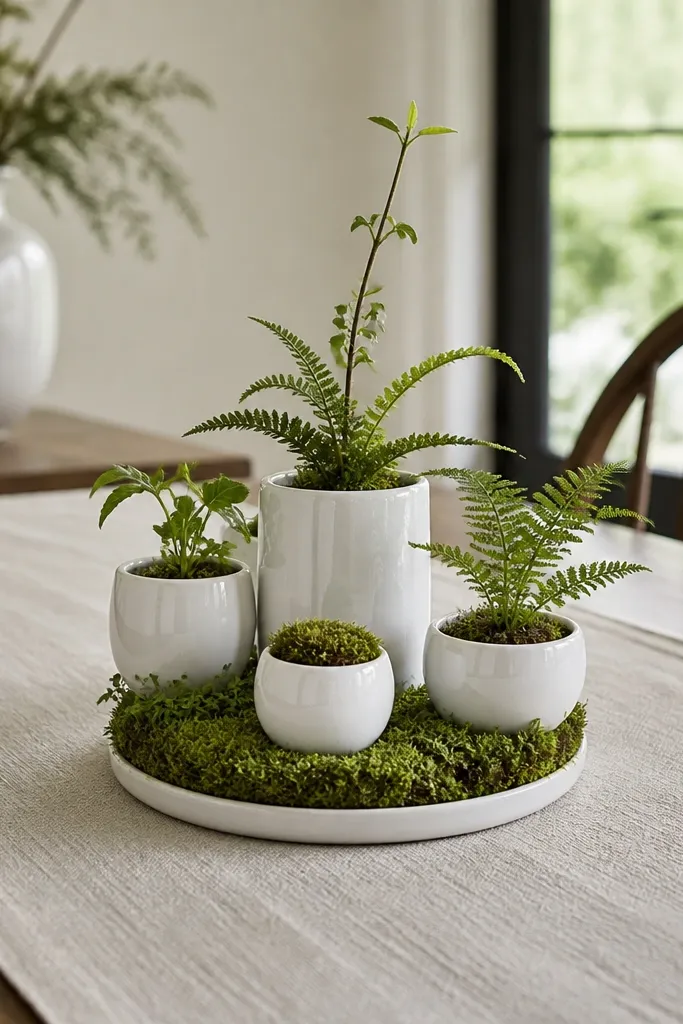
This fixes the “too many pieces” mistake where a table looks busy but not styled. White pots create a clean theme through repetition, and a mossy base dish adds texture so the center doesn’t look like empty space. You keep the plant element as the hero, while the minimal props make everything look intentional. This works in modern kitchens and dining rooms with light walls, and it’s great when you want decor that doesn’t compete with dinnerware patterns. Time is 20-35 minutes if you already have plants.
Choose a tray and place a small shallow dish of moss or moss-like material in the center. Add three white pots around it in a triangle pattern, keeping spacing even so nothing crowds the dish. Use plants with different leaf sizes for depth — one fine-leaf, one medium, one compact — but keep colors consistent (all green). Finish by adding one low prop item like a single white taper in a holder, then wipe pot exteriors so they look bright and clean.
If your plants are leggy, tuck stems behind the dish and rotate pots until the densest foliage faces forward.
Don’t add lace, ribbons, and extra trinkets — minimal styling needs fewer pieces, not more.
14. Monstera leaf fan with two small potted anchors
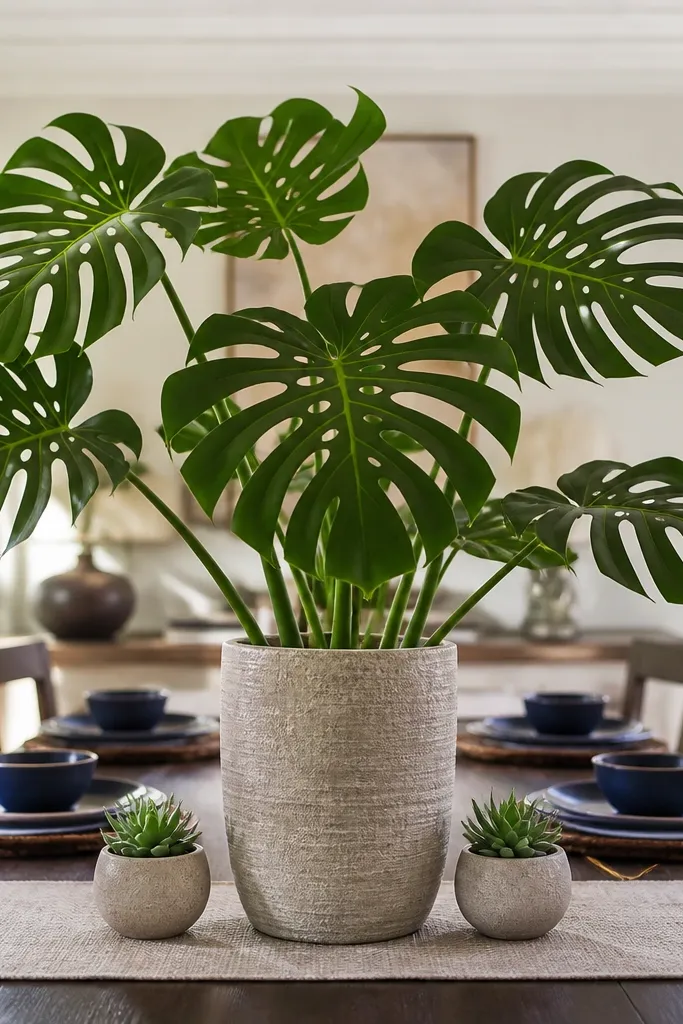
This is how you get a tropical look without turning your table into a jungle. Monstera leaves create a graphic shape, and two small potted anchors keep it from looking like a single cut-leaf arrangement. It’s also a good fix for the “my centerpiece is too low” complaint because the leaf fan creates height while staying controlled. Use it when you want themed dining table decor with plants to feel bold but still clean. Build time is about 30-50 minutes.
Editor's noteWipe monstera leaves with a slightly damp cloth; fingerprints show on the glossy surface immediately.
Place a tray in the center with a liner that matches your theme, like black paper, a neutral linen, or a light wood board. Set two small plants in matching pots on the left and right, then insert one or two monstera leaves so they fan upward in the middle. Trim leaf stems so the fan stays within 12-14 inches above the tray. Add one low filler like a small bowl of pebbles or a candle holder, then adjust the leaf angle so the fan looks even from both ends of the table.
Skip thisDon’t add more than two statement leaves — the fan effect disappears when you stack too many.
15. Scandi winter look with pine branches and a single evergreen pot
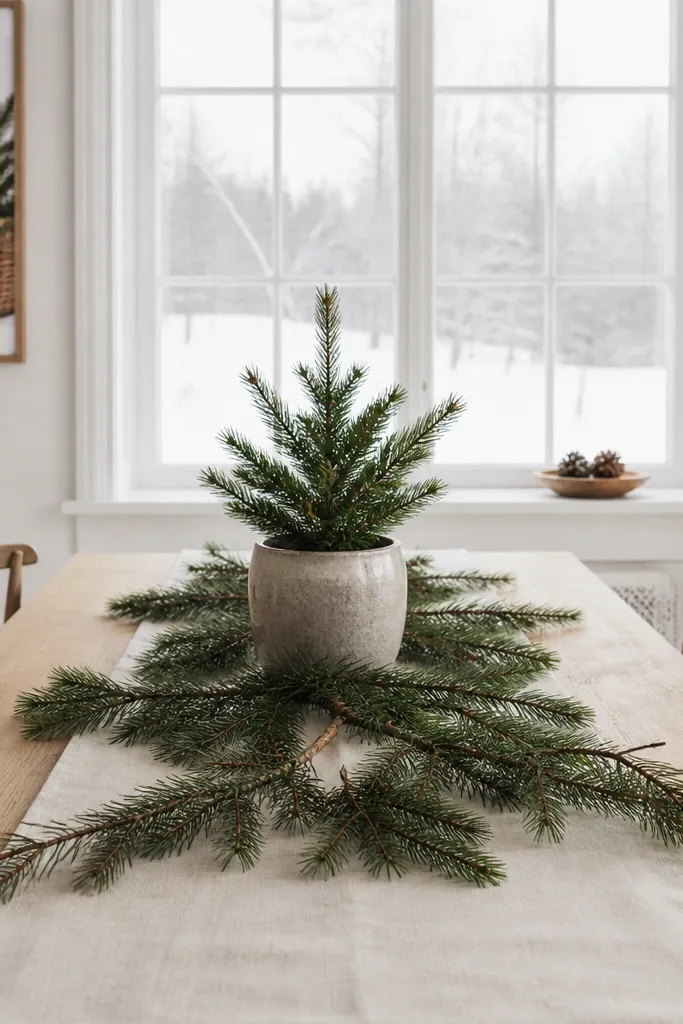
This setup gives winter texture without the holiday clutter spiral. Pine branches bring scent and movement, and one evergreen pot keeps the look grounded so it reads as a living arrangement, not a pile of cut greenery. The Scandi style works because everything is in similar tones — greens, whites, and natural wood. It’s ideal for long center runners where you want a clean line of decor instead of a big mound. Time is 40-70 minutes because you’re shaping the branch line.
Editor's noteUse floral tape to bundle the pine stems in two small “arms” before placing them; it makes the line symmetrical.
Lay a neutral runner down the center and place a long tray on top if your table is wide. Position one evergreen pot in the middle, then build a branch line on both sides by inserting pine stems in small clusters. Trim branches so the ends taper and don’t look blunt, aiming for a height that stays under 14 inches. Add one low white element like a small ceramic candle holder or a bowl of faux snow (or just white stones) and keep it to one spot so the arrangement doesn’t look busy.
Skip thisDon’t mix different green tones randomly — pine + bright lime greens clash.



