
1. White shaker built-ins with arched plant shelves
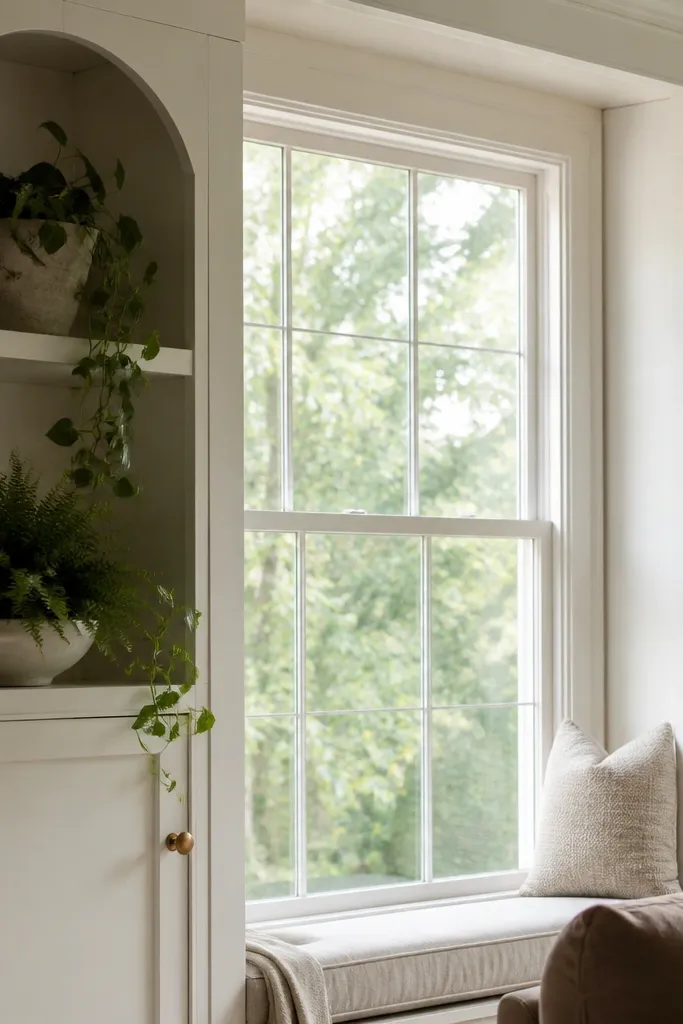
This look works because the window stays the hero while the shelves give it a soft frame. White shaker face frames make the built-ins feel built, not added-on, and the arched openings create a gentle rhythm around the window. Keep plant tiers shallow enough to prevent tall pots from blocking the light. Use off-white or cream ceramic pots so they match the painted wood and look crisp in daylight. The result is clean and airy, even with lots of greenery.
Start by building two matching shelf bays that sit flush to the window trim lines, using a face frame that matches your existing casing width. Cut shelf levels so the arches land at eye height: aim for the top shelf opening to sit about 6-8 inches below the window top casing. Install fixed shelves at 10-12 inch intervals, then add an arched template for the front openings using a 1/4-inch panel. Finish with primer plus a durable cabinet paint (spray or brush with foam rollers), then seal the shelf edges so soil doesn’t stain over time.
Add a thin backer behind each arched opening to hide shelf screws and make the plants look “placed” instead of attached.
Don’t make shelves deeper than 11 inches if your window gets direct sun — pots will cast harsh shadows and look messy.
2. Warm oak built-ins with a centered plant cathedral
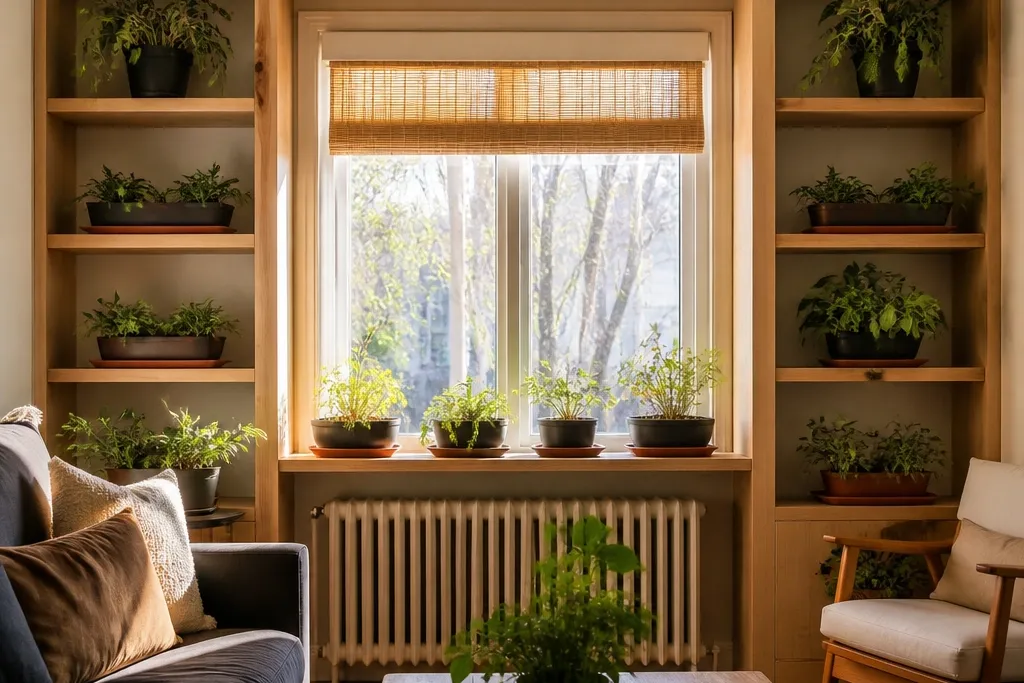
Warm oak reads architectural and makes plants look intentional. The key here is a cathedral effect: one centered tall plant stands in the middle while the side shelves stay slightly lower or less tall. That vertical hierarchy makes the window feel framed without turning into a jungle. Use oak shelves with a clear matte finish so the grain doesn’t look plasticky near the window’s brightness. Pair with black or dark brown pots for contrast and a more styled look.
Measure the window center and build the middle bay so it’s 1/2 to 3/4 inch wider than the side bays for a subtle “stage.” Use oak plywood for shelf surfaces and oak-faced plywood for the face frames, then cut a taller central opening where the plant will sit. Set the first tier around 12 inches above the sill, then place the next two tiers at 11-13 inches apart so side decor doesn’t compete with the tall plant. Sand to 180 grit, stain evenly, and finish with a matte poly (two coats) to protect from watering splashes.
Use saucers under every pot and wipe the shelf edge right after watering — matte finishes hide water spots until they don’t.
Avoid mixing too many pot colors; keep to two neutrals plus one dark tone.
3. Dark walnut built-ins with brass cup pulls and tiered planters
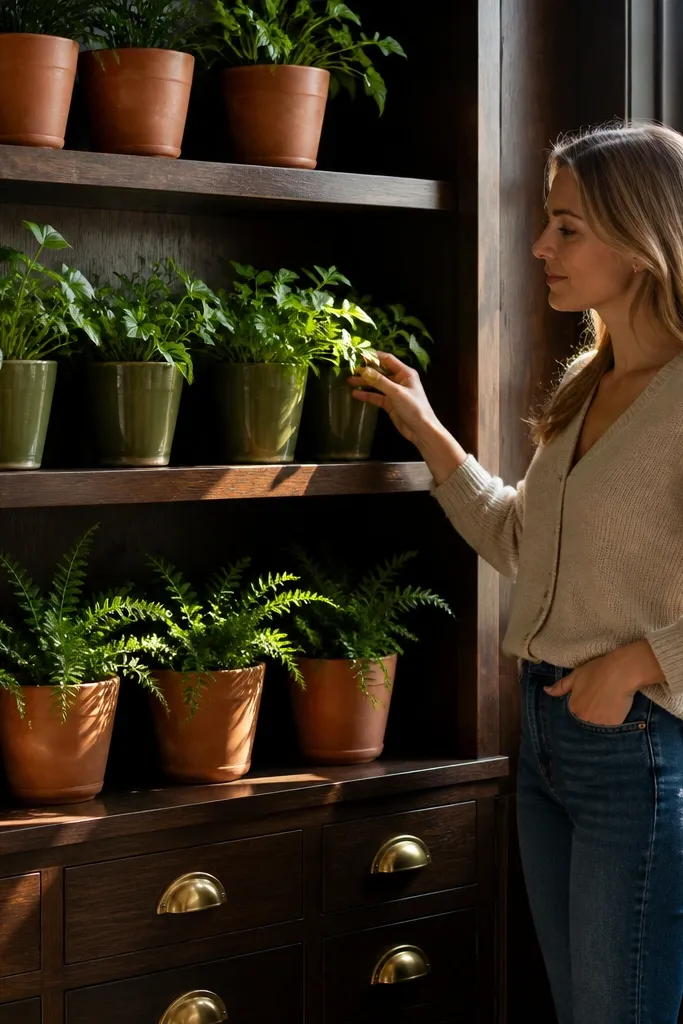
Dark walnut built-ins make the plants look like decor, not an afterthought. Brass cup pulls add a warm highlight that shows up nicely near window light, giving the whole wall a styled, furniture-grade feel. The tiered planter layout is photogenic because each shelf level creates a clean horizontal line for leaves to “hang” from. Keep planter openings consistent width so the plants form a repeating pattern. This theme is also practical: closed lower cabinets hide soil supplies and spare pots.
Build two tall side cabinets with a central window bay, then add fixed shelves above the window and open cubbies below. Use 3/4-inch plywood for the shelf platforms and add a 1x2 face frame for rigidity. Space the open cubbies at 10-12 inches high so medium plants fit without tilting. Install brass cup pulls on the cabinet doors, then add a back panel behind the open cubbies to prevent the wall behind from showing through. Finish with a walnut stain and a satin conversion varnish for durable protection.
Editor's noteChoose pots with matching rim styles (matte ceramic or tapered terracotta) so brass hardware doesn’t clash with random shapes.
Skip thisDon’t use glossy finish on dark wood near windows; it reflects light and looks greasy in photos.
4. Painted cottage built-ins with beadboard back panels
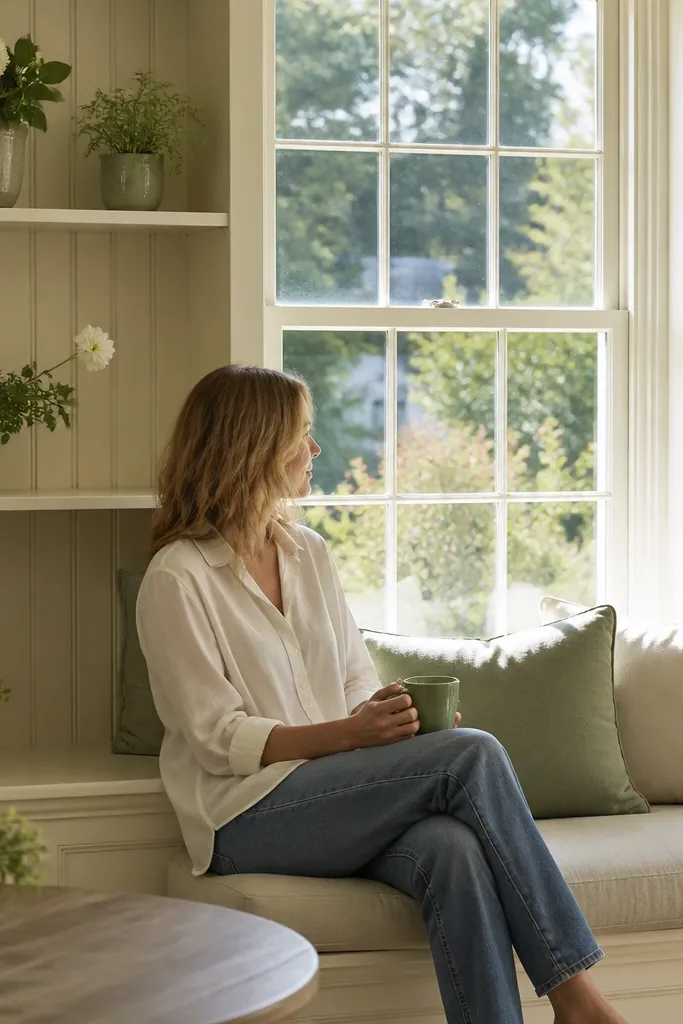
Beadboard backs give plants a soft, homespun backdrop without adding clutter. This is a great way to make a themed built in shelves living room with plants feel cohesive even when you swap plants seasonally. The window still dominates, but the beadboard adds texture that reads well in both morning and evening light. Go for a pastel paint like soft sage or warm buttercream so leaves look fresh instead of washed out. Use small trailing plants on the upper shelves and compact rosette plants on lower tiers.
Cut beadboard panels to fit the back of each open shelf bay, and leave a 1/4-inch gap around the window so trim can breathe. Build the frame first with 3/4-inch plywood for box sides and a face frame that matches your existing baseboards. Install shelves at 10-13 inch intervals, then set beadboard into place with brad nails or construction adhesive. Paint after assembly so edges seal cleanly, and use a cabinet-grade satin sheen to keep the texture from looking chalky.
Pre-paint beadboard before installation so the grooves get an even coat and you don’t miss spots near the window light.
Skip super glossy paint; beadboard texture plus glare looks harsh.
5. Black metal and wood grid shelves around the window
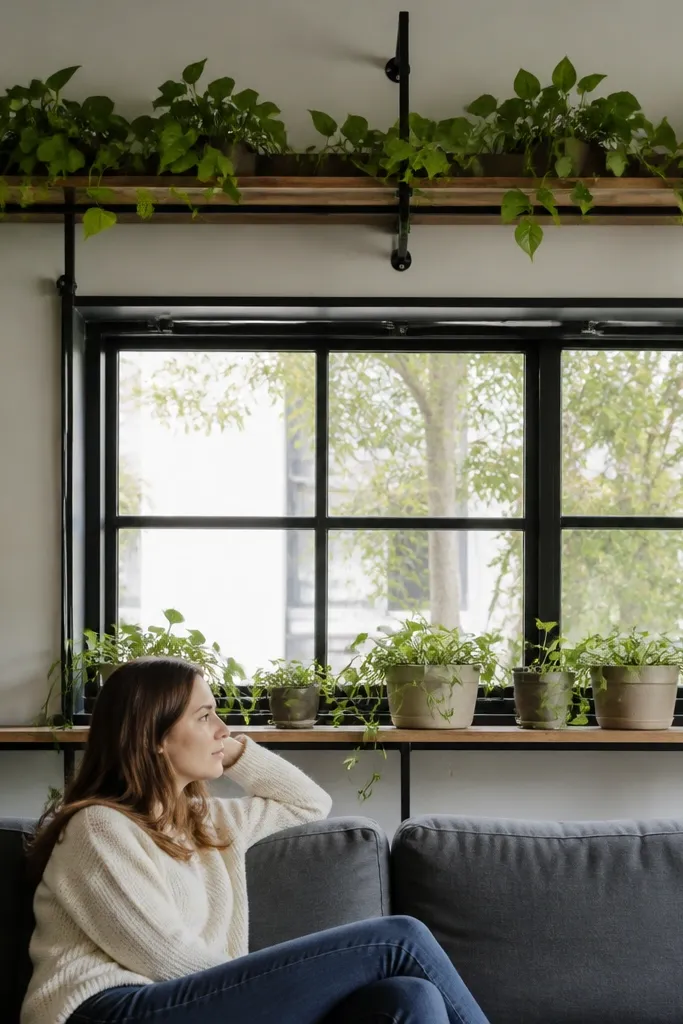
This is a modern built-in look that still feels warm because wood holds the plants. The black metal grid gives you clean lines that match window frames and makes the greenery look curated. You get flexibility too: shelves can be adjusted slightly if you plan the frame with removable brackets. For a photogenic result, keep plant sizes consistent on each tier and group them by height. This setup looks best in rooms with black hardware or dark window trim.
Build a boxed-in frame that matches the window width and sits 1-2 inches proud of the wall for a built-in look. Install black metal grid rails or a welded grid frame onto the wood backer, then mount wood shelf planks on the grid points. Use 10-inch deep shelves for plants and 12-inch for books if you include any. Seal the wood with a matte clear coat, then paint the metal with a high-heat black enamel so it holds up near windows.
Editor's noteHang your trailing plants on the top tier; gravity helps them look styled without extra stands.
Skip thisDon’t mix too many shelf depths; one depth makes the wall read as intentional.
6. Linen-painted built-ins with glass-front plant display
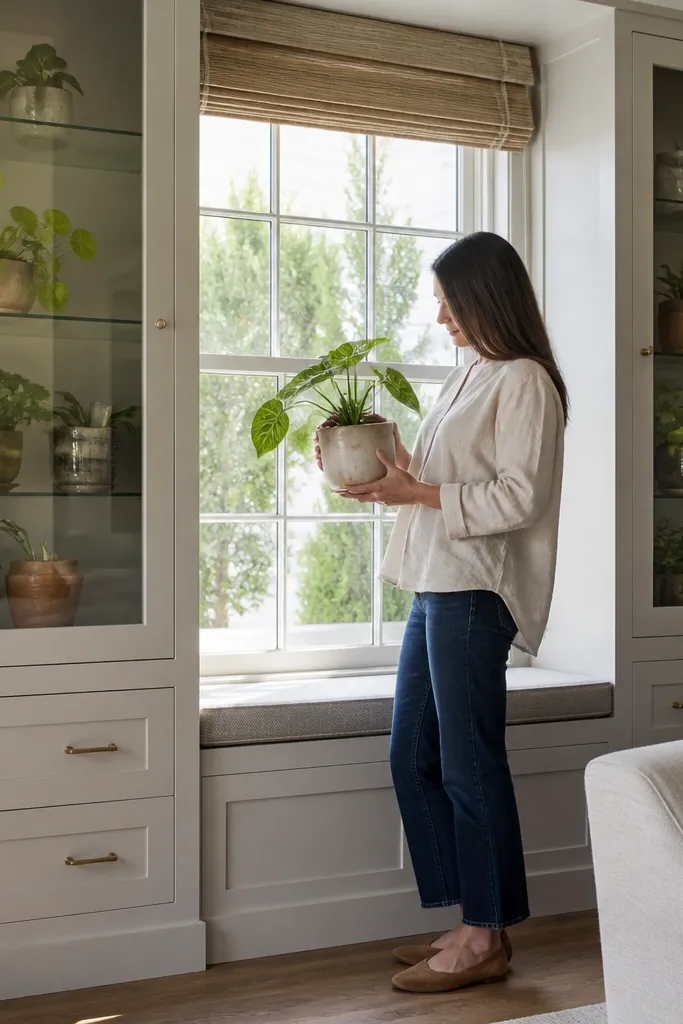
Glass-front sections make plants look like part of a display cabinet. Linen-painted built-ins keep the theme soft and neutral, while glass prevents the wall from feeling crowded when you have multiple plants. This setup is especially good if you want a themed built in shelves living room with plants that still looks tidy when plants aren’t “perfect.” Use clear glass with a slight tint or low-gloss finish so reflections don’t overpower the leaves. It also keeps dust off the shelves, which matters near window light.
Frame the window wall with a face frame, then build cabinet boxes for the sides with openings for glass doors. Use 1/2-inch shelves for light display and add a 1/2-inch toe-kick space so doors sit flush. Install glass doors with magnetic catches, then add a back panel and small LED strip lighting above or behind each glass section. Paint the interior edges the same linen color to hide hardware and keep the plants readable from across the room.
Editor's noteUse LED strips with a warm color temperature (2700-3000K) so leaves look natural instead of blue.
Skip thisDon’t use cheap clear acrylic doors; they scratch and distort plant shapes in photos.
7. Two-tone built-ins with light shelves and dark lower cabinets
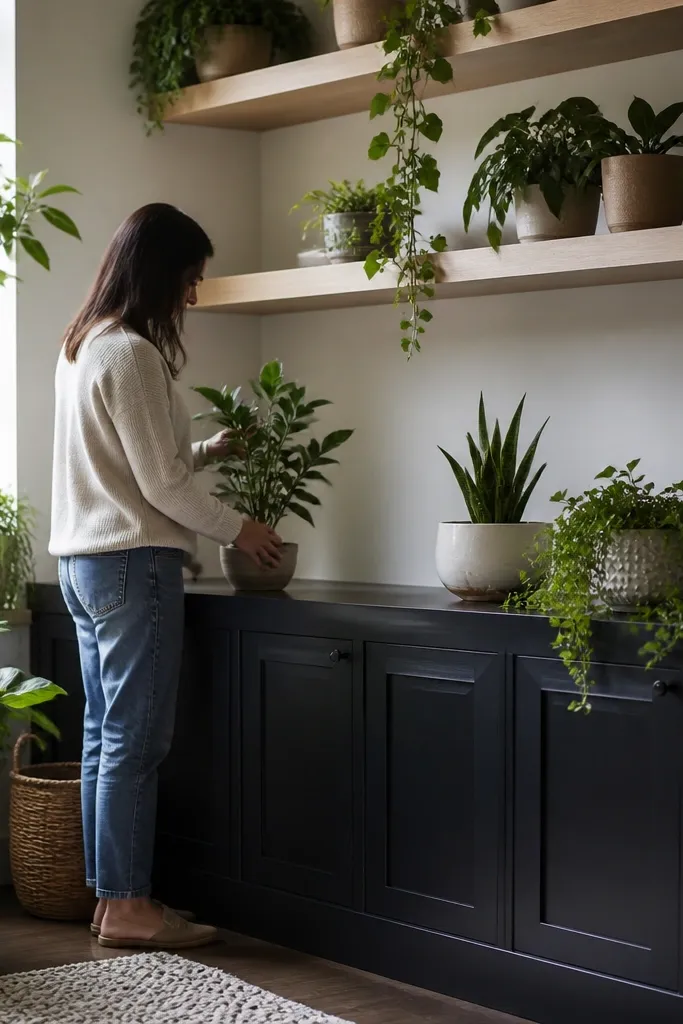
Two-tone built-ins look designer because they separate display from storage. Keep the upper shelf zone light (white or warm greige) so plants and small decor look bright by the window. Dark lower cabinets anchor the wall and hide the messy stuff that always accumulates with indoor plants — extra pots, ties, and soil. The theme becomes clear even when your plant collection changes. This layout also works when you’re building around a window that sits above a radiator.
Build the face frame in one consistent style, then paint the upper shelves and window surround in the light color and the lower cabinet doors in the dark color. Use 12-14 inch deep lower storage and 9-11 inch deep upper shelves. Install a fixed shelf directly under the window sill for a stable plant tier, then add open shelves above that at 10-12 inch spacing. Add a simple shaker door panel on the lower cabinets so the contrast reads clean.
Mask carefully at the shelf line; a straight paint edge makes the whole wall look expensive.
Don’t put plants on the lower cabinet doors; it ruins the clean contrast and makes watering harder.
8. Floating shelf built-in look with built-in planter trough
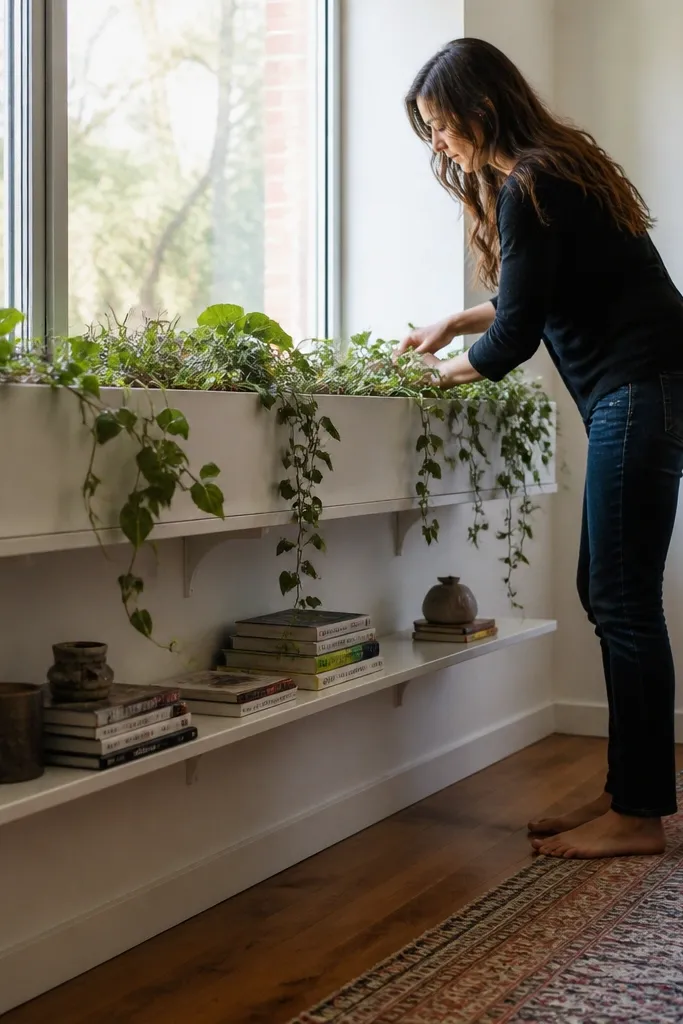
If you want a “designed” plant wall without lots of cabinet boxes, a planter trough is the move. It makes the window area feel intentional and gives you one long planting surface that looks great in photos. Floating shelves keep the visual weight light, so the window stays bright. This works best with trailing plants or mixed textures like pothos plus a low herb. Use a trough finish that matches your shelf tone so everything reads as one system.
Frame a trough base directly under the window line using 2x2 or 2x3 lumber and plywood skin, then seal it with a waterproof liner if it will hold soil. Install floating shelves with concealed brackets spaced every 16-24 inches across the wall studs. Keep shelves 9-10 inches deep for plant placement and set shelf heights so trailing plants hang over the trough line rather than clumping at the edge. Finish with paint or stain, then add a drainage layer and removable inner tray.
Editor's noteUse a removable inner tray so you can lift plants out without digging around in the trough liner.
Skip thisSkip hidden drainage — a planter trough without a drain turns into a slow mess.
9. Shallow bookcase built-ins with plant pockets above the window
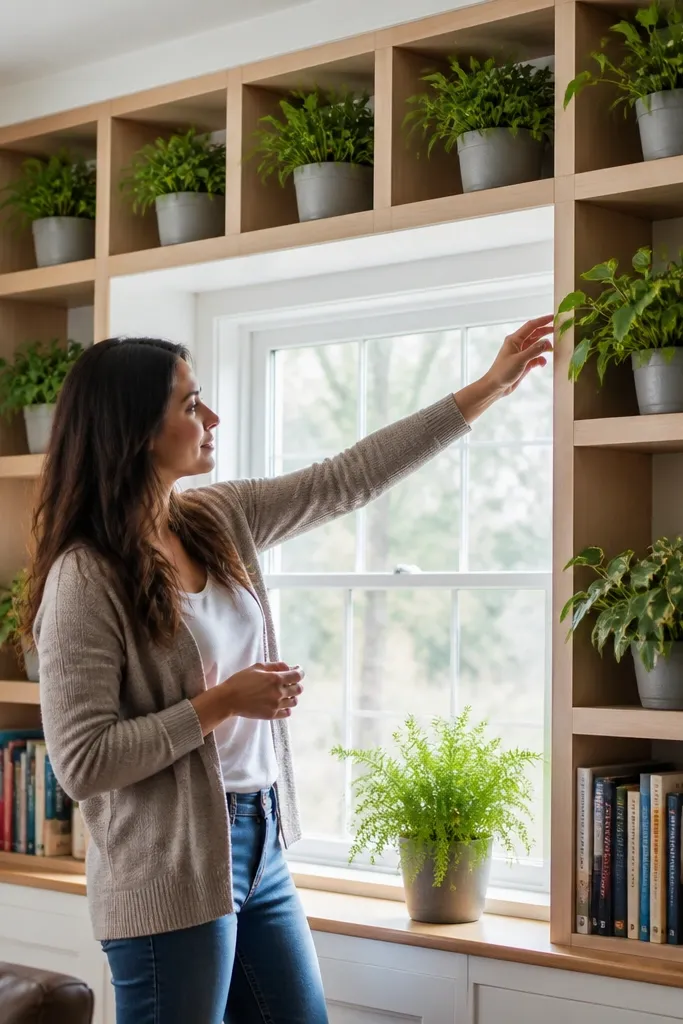
This is a smart option when your wall space is tight or your room needs more books than floor plants. The trick is plant pockets — small, built-in cubbies placed above and beside the window where leaves can sit without blocking light. The shallow shelf depth keeps everything tidy and reduces the “shelf sag” that happens with heavy books. It’s also an easy theme to maintain: keep a repeating pot size and swap plants without redesigning the wall.
Use 3/4-inch plywood shelves but keep depth to 8-10 inches for a clean profile. Build narrow cubby pockets (about 9-12 inches wide) on either side of the window and install at 10-12 inch increments. For books, use the lower run with a deeper shelf at 12-14 inches, then keep the upper plant pockets shallow. Reinforce shelf spans with cleats or a back rail so the shelves don’t bow.
Use one pot size for each pocket and rotate plant positions seasonally to keep the wall layout consistent.
Don’t place full-size planters on shallow shelves without a saucer; they tip and look sloppy.
10. Coastal white built-ins with rattan cabinet inserts
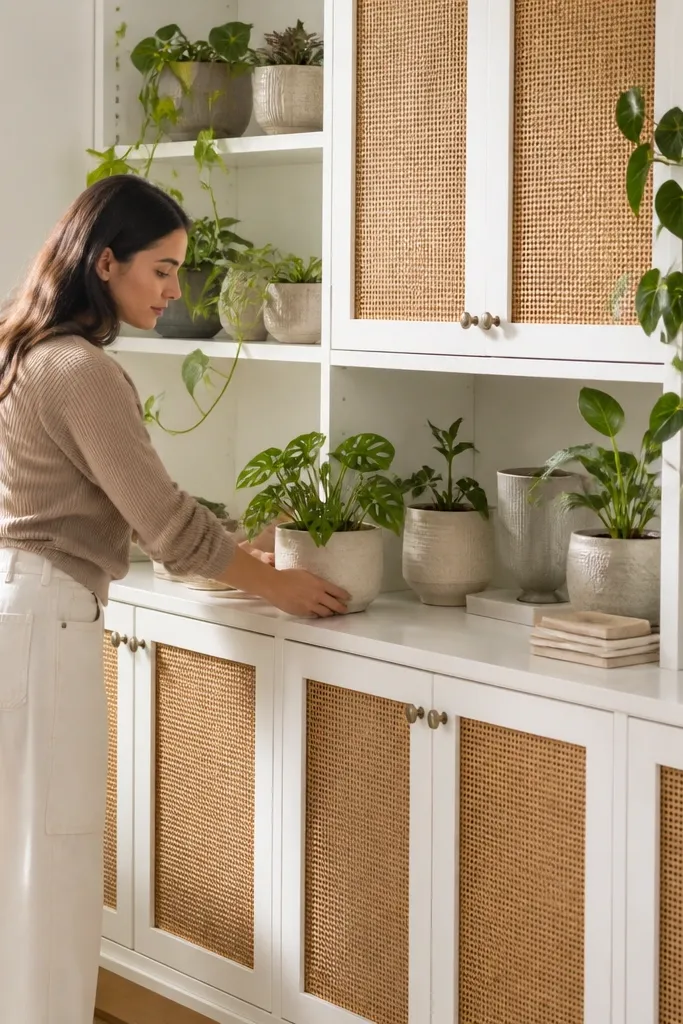
Rattan inserts add texture that looks great in window light and gives plants a natural, coastal vibe. The white built-ins keep everything bright, while the rattan breaks up the monotony of flat painted surfaces. This theme is photogenic because the rattan creates a subtle pattern behind leaves, making the plants look fuller. Use light wood or white-washed rattan so it doesn’t clash with warm ceramics. Keep plants to a mix of airy fronds and trailing types for that beachy movement.
Build the cabinet boxes and shelf bays around the window with a standard face frame. Install rattan panels inside the lower cabinet doors or side panels, leaving a small gap so rattan can expand. Use fixed shelves above with 10-11 inch depth, and add a top shelf that lines up with the window center for a clean focal point. Finish the wood in durable white paint and seal the rattan with a clear matte top coat that won’t turn yellow quickly.
Choose pots with woven or natural textures to echo the rattan without adding extra colors.
Don’t use dark, glossy rattan; it looks heavy next to bright windows.
11. Midcentury built-ins with angled shelf ends and geometric pots
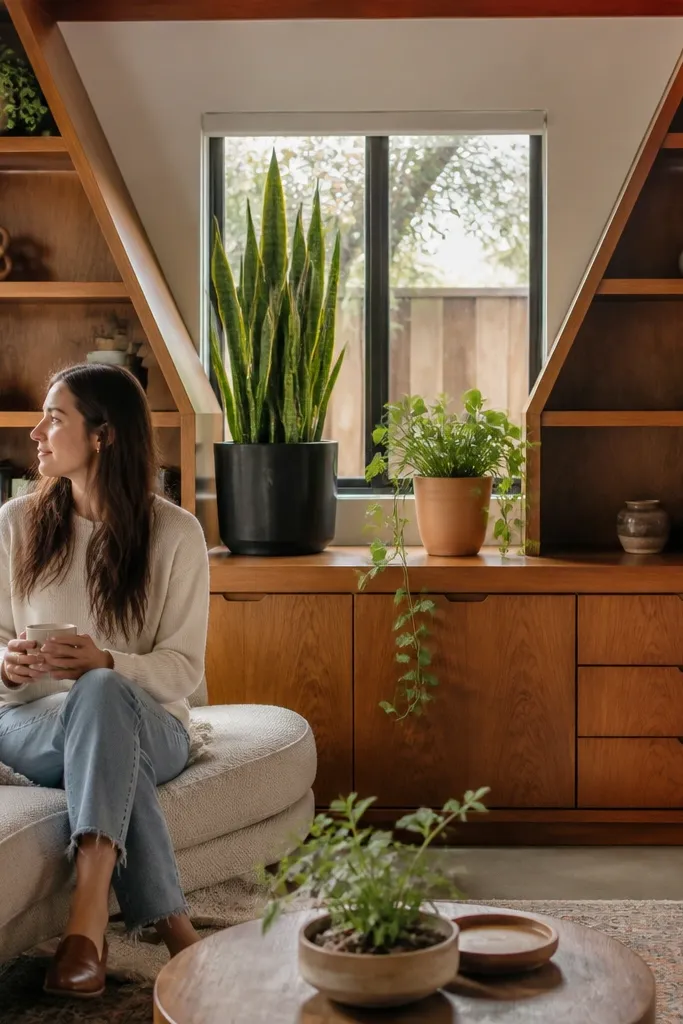
Midcentury built-ins look amazing around windows because the shapes guide the eye. Angled shelf ends create a geometric frame, and plants look sharper when they’re in clean-lined pots. This look works best with one or two plant types that have distinct leaf shapes, like a snake plant plus a trailing pothos. Choose geometric planters in matte black, off-white, or terracotta to match the era. Keep the decor minimal so the window frame and shelf angles stay readable.
Design your face frame with angled side panels so the shelf ends cut in toward the window. Use a consistent shelf depth of 10-11 inches and set shelf heights at 12-14 inches so pots don’t crowd. Build a central opening above the window for a tall plant and two side openings for smaller plants. Sand edges smooth where the angles meet, then apply a satin paint or stain finish that matches your room’s midcentury furniture.
Use a template for your angled ends so both sides match exactly — asymmetry kills the midcentury look.
Don’t add lots of knickknacks on the angled shelves; it makes the geometry feel messy.
12. Scandi light oak built-ins with simple slat backing
Slat backing gives plants a clean, airy backdrop and makes the whole window wall feel Scandinavian. Light oak keeps the room bright and lets the greens pop without turning everything contrasty. The slats also hide small gaps and wiring if you add LED strips, so the look stays tidy. Keep shelf styling tight: one medium plant per bay plus a small plant on the window ledge. This is a great choice for modern rooms with light walls and minimal decor.
Build the shelf bays first with light oak plywood and a simple face frame, then attach vertical slat backing behind each open shelf section. Use 1x2 slats spaced about 1/2 inch apart for a crisp look. Install shelves at 10-12 inch intervals and keep depth at 9-10 inches so pots sit flush. If you add lighting, mount LED strips along the top inside edge and hide the wire behind the face frame.
Editor's noteSeal slats with matte clear coat so watering splashes don’t soak in and darken the wood.
Skip thisDon’t paint slats — the texture disappears and you lose the Scandi read.
13. Farmhouse built-ins with repeating board-and-batten window surround
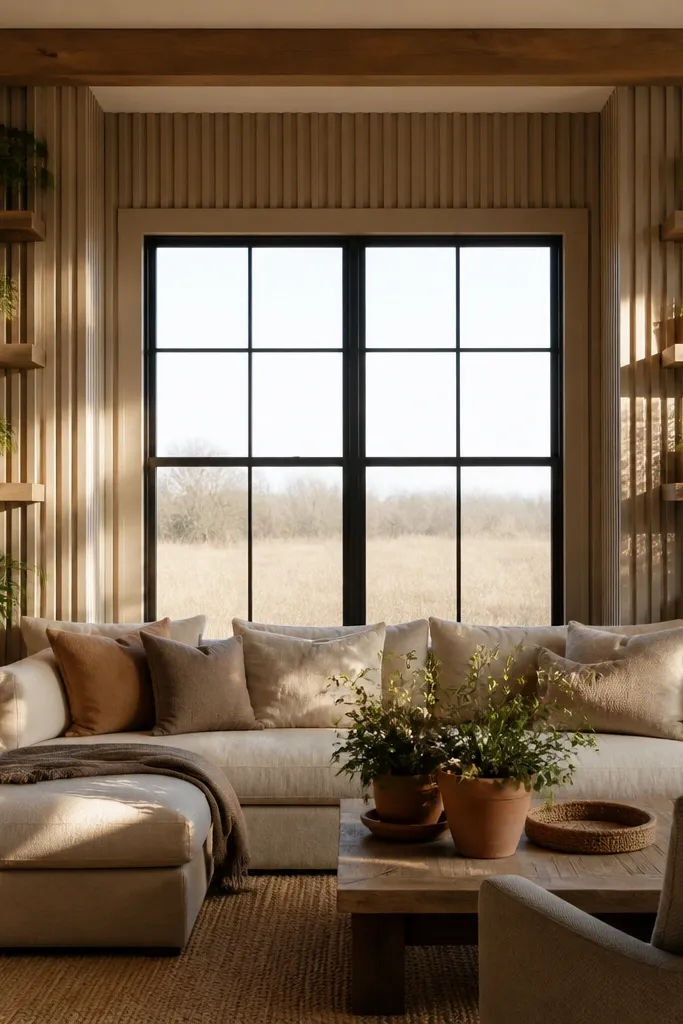
Board-and-batten adds texture that looks good from a distance, which matters because built-ins around windows are seen at multiple angles. The plants bring softness, and the board-and-batten keeps the theme from looking like generic shelving. This setup is especially photogenic when you keep plant pots in a consistent color family like white and natural terracotta. Use a mix of upright and trailing plants so the leaves fill the vertical lines created by the battens.
Frame the built-ins with standard plywood boxes, then add board-and-batten panels to the window surround and the outer side panels. Use 1x3 boards for the battens and keep spacing consistent at about 2-3 inches. Install shelf shelves around the window with 10-13 inch spacing, and keep the top shelf aligned so it frames the window center. Paint or stain the battens and shelves together so the texture doesn’t look like it was added later.
Editor's noteUse clamps when installing battens so the spacing stays even — crooked battens show up in daylight.
Skip thisDon’t overcrowd the shelves; let the board-and-batten texture do part of the styling.
14. Monochrome green theme with matching plant stand layers
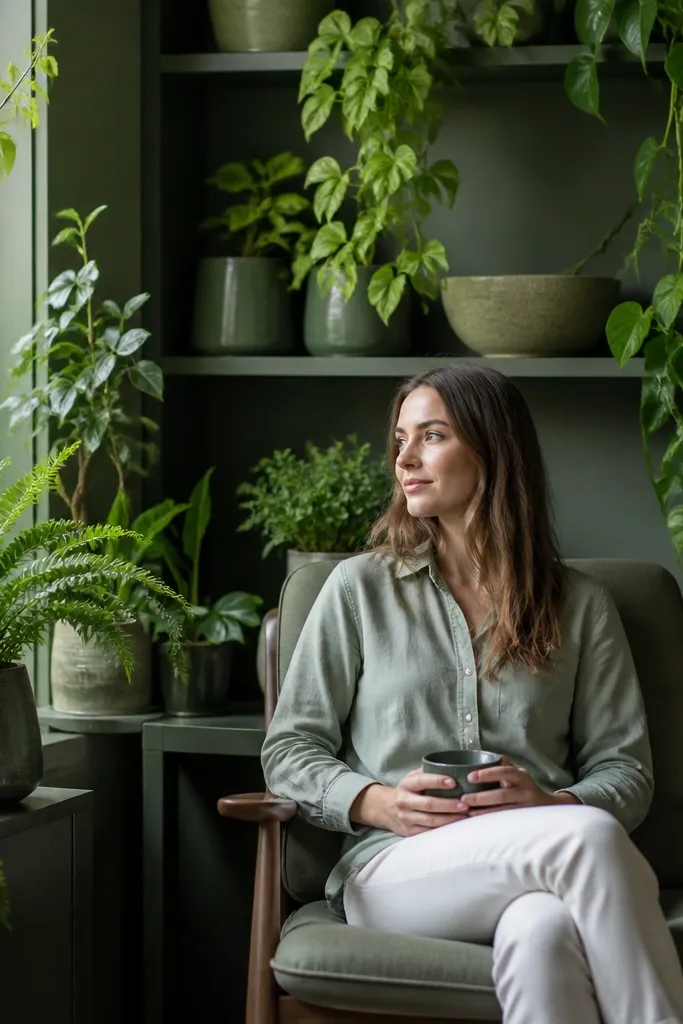
This is the “themed” part that actually works: you match the shelf color family to your plant palette. A monochrome green built-in makes leaves look like they belong to the wall, especially when you use planter stands that sit at consistent heights. The window becomes a light source for a gradient of greens, not a random backdrop. Choose two plant tones (cool green and yellow-green) and keep pot colors neutral so the leaves do the talking. This looks especially good in rooms with green accents or natural wood furniture.
Paint the built-in face frames and shelf interiors in the same green family, then use matte paint so leaves look soft instead of glossy. Build the shelving bays with 9-11 inch depth and set shelf tiers at 10-12 inches apart. Add a small plant stand layer on the window sill area so one plant sits higher and anchors the composition. Keep plant pot sizes consistent and add a backing panel behind each bay so the wall color stays uninterrupted.
Editor's noteUse a matte finish and light sanding between coats — green paint shows lap marks more than neutrals.
Skip thisAvoid mixing warm red terracotta with cool green shelves; it pulls attention away from the window.
15. Textured plaster built-ins with ceramic tile shelf fronts
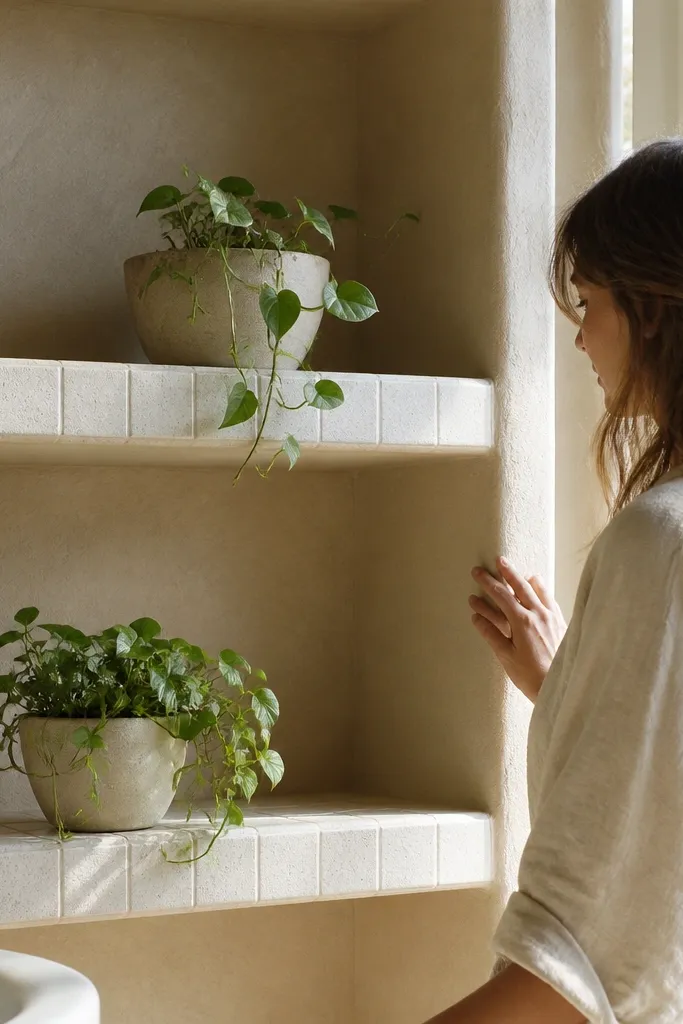
Tile shelf fronts make the built-ins feel architectural and protect the shelf edge where water inevitably lands. The textured plaster look gives you depth even when shelves are styled minimally. This theme is a strong photogenic choice because window light catches the tile in small highlights, and leaves add movement. You’ll also find it easier to keep the shelf area clean after watering since tile wipes down better than bare paint. Use plants with glossy leaves so they reflect light softly.
Build the shelf boxes with plywood, then apply a plaster-style finish over the face frame after everything is assembled and sanded. Install a ceramic tile strip along the front edge of each shelf using thinset and spacers so the grout lines stay even. Keep shelf depth around 10-11 inches for plant stability. Seal grout after curing and keep a small drip mat under each pot to protect the plaster finish.
Dry-fit tile pieces and mark grout lines with painter’s tape before you mix thinset — alignment saves hours.
Don’t tile the whole shelf surface; tile on top makes pots wobble and looks heavy.
16. Open-frame built-ins with living wall-style vertical planters
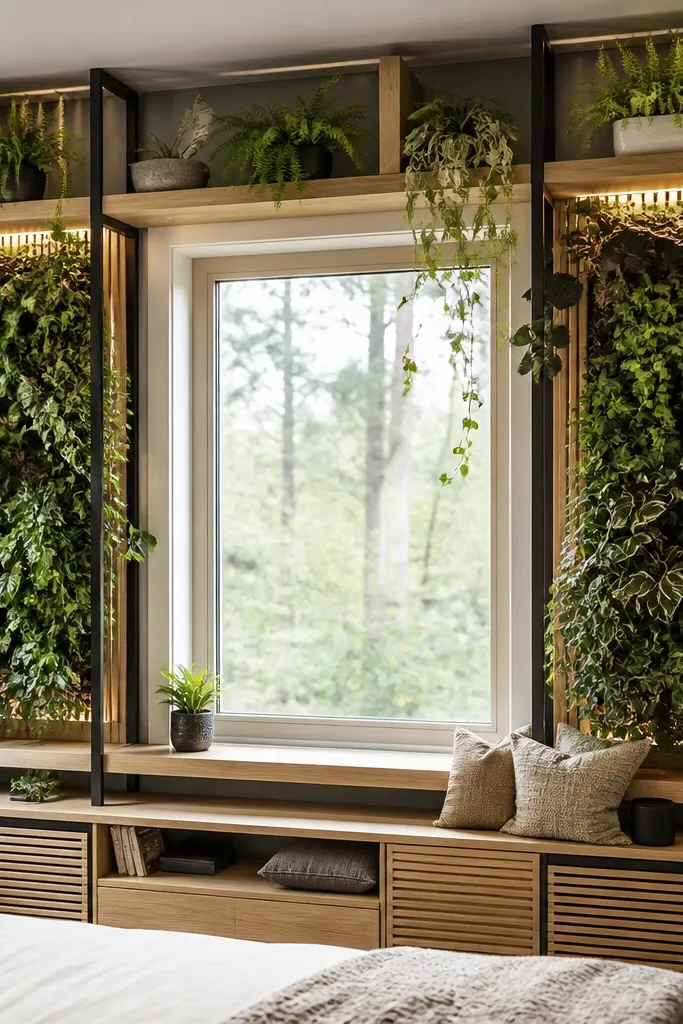
If you want maximum “wow” without complicated joinery, use an open-frame built-in and add vertical planter panels on the outer bays. The plants climb and spill over the shelf edges, so the window area looks full even with fewer pots. This style photographs well because the vertical plant texture fills the negative space around the window frame. Keep the frame simple — light wood or painted white — so the greenery remains the focal point. Use a controlled plant palette so the vertical wall doesn’t turn into random color spots.
Build an open frame around the window using 3/4-inch plywood sides and a face frame with 1x2 trim. Attach vertical planter panels to the outer bays using a mounting rail so you can remove them for watering. Add two to three horizontal shelves inside the frame at 10-12 inch intervals for smaller pots and decor. Use a waterproof backing behind the planters and route any watering access so it doesn’t drip behind the frame. Finish with paint or stain, then install plants after everything cures.
Plan your watering path first; a drip tray under the vertical planters makes the whole build easier to live with.
Skip low-visibility drip management — water damage behind built-ins is a nightmare.
17. Classic mantel-style built-ins with window-centered shelf
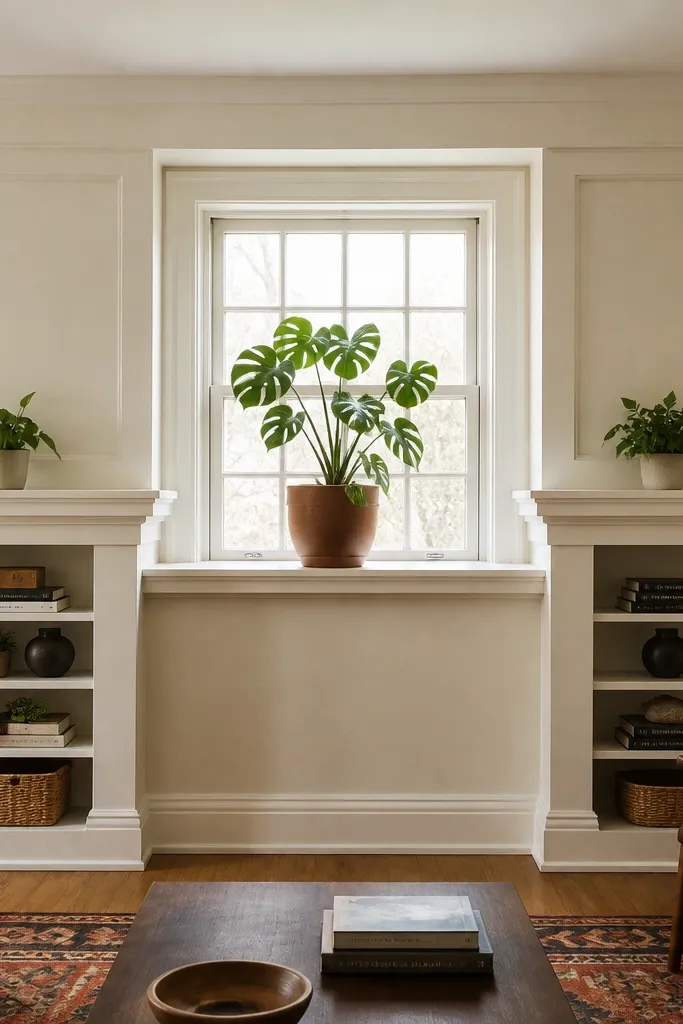
Mantel styling around a window looks instantly “finished” because it follows a familiar architecture pattern. The window-centered shelf becomes your stage for a medium plant or a tall plant with a clean silhouette. Side shelves stay slightly lower so the composition doesn’t block the window. Use warm white or soft cream paint with simple crown molding, and let the plants add contrast. This theme works for traditional rooms and also for modern rooms if you keep the moldings simple.
Build a wide mantel shelf above the window line with 3/4-inch thickness and secure it into studs. Create two side bays with shelves spaced at 10-13 inches for plant tiers, and add a lower cabinet run if you need storage. Keep shelf depth at 10-11 inches so pots sit stable and don’t stick out. Install simple crown molding along the top edge and caulk all seams before paint so the built-in looks seamless.
Editor's noteUse a plant stand that matches the mantel finish so the plant height looks intentional, not accidental.
Skip thisDon’t place tall plants on the side shelves; they compete with the window and make the wall feel top-heavy.
18. Sculptural corner built-ins that wrap the window wall
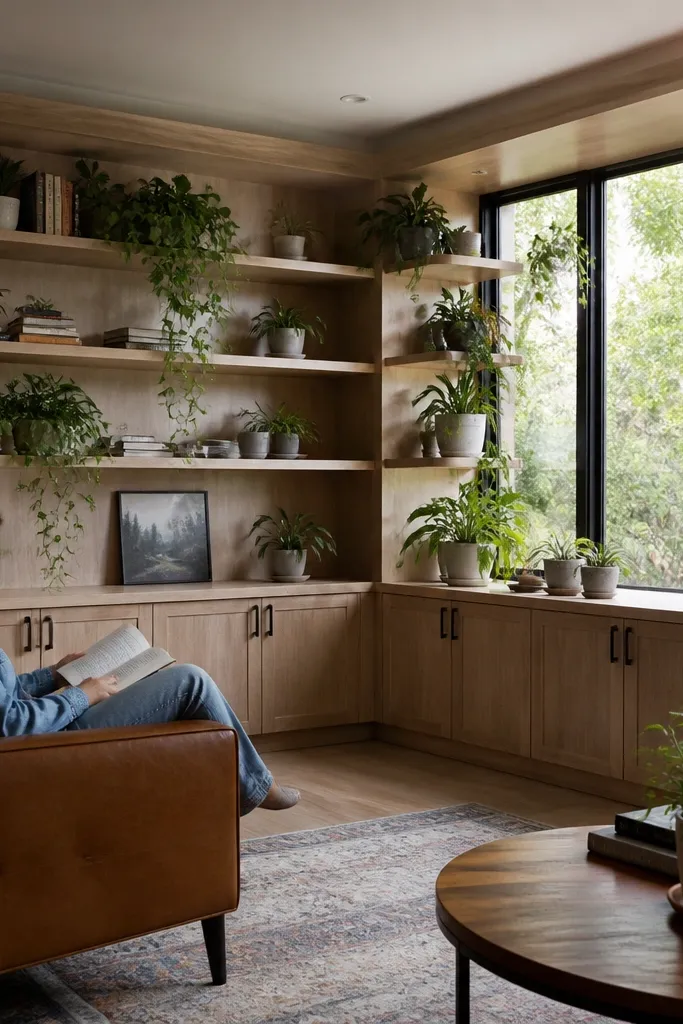
Wrapping the built-ins around the corner makes the window wall feel larger and more immersive, and it’s where the plant theme really sells. Angled shelves on the corner bay create a sculptural look, so plants appear from multiple angles as you walk around the room. This is ideal if your living room view includes the window at an angle, not straight on. Use a consistent material finish and keep pot shapes uniform so the corner angles don’t create visual chaos. The plants become a moving part of the decor as light shifts.
Measure the window wall and the adjacent wall to decide how much wrap you want — aim for 12-18 inches of shelf depth into the corner. Build the main bays flat, then add an angled corner shelf using a cut template for the angle (usually 30-45 degrees). Install shelf tiers at 10-12 inch intervals so plants sit at consistent heights. Finish the corner shelf edges cleanly and use a back panel to hide the seam where the walls meet.
Use one pot size in the corner bay so the angle reads clean instead of crowded.
Don’t choose wildly different pot heights in the corner; angles amplify uneven silhouettes.
19. Tall window-side ladder shelves with a living-room herb strip
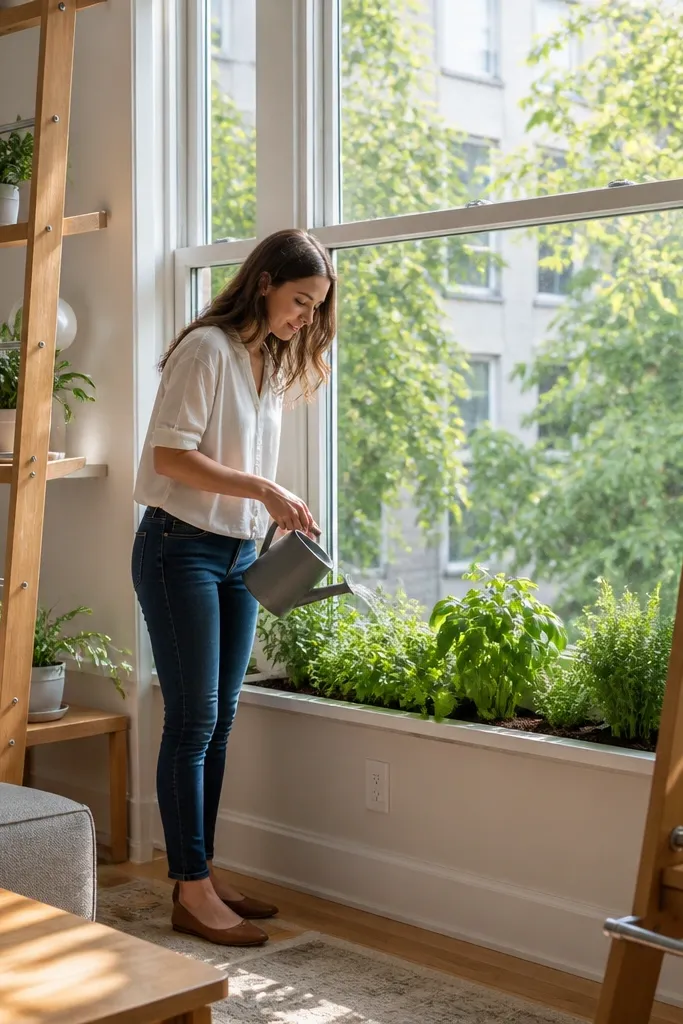
This setup frames the window with two tall, open ladder shelves and ties it to the plants with a long herb strip directly under the glass. The window becomes the center of the composition instead of the shelves competing with it. You get vertical rhythm for tall plants on the sides and a clean, photo-friendly row of small pots at eye level. It also fixes the common problem of “plants look messy” because the herb strip gives every pot a specific home. This is a great DIY for living rooms that need storage without closing the space in — think rental-friendly openness with a custom look.
Build two matching ladder shelf frames from 1x2 hardwood (or birch plywood ripped to 1-1/2 in) with 3/4 in shelves. Make each frame about 10-1/2 in deep and sized so there’s 1-1/2 in of clearance from the window trim on both sides; set shelf heights at 12 in, 24 in, 36 in, and 48 in from the finished floor. Install a 1x8 planter strip under the window with a 1-1/2 in back lip so pots don’t slide forward; keep the strip top about 34-36 in high for easy watering. Use construction adhesive plus 2-1/2 in wood screws into wall studs, then fill screw holes and sand smooth before painting or staining. Seal the inside of the planter strip with two coats of polyurethane or a waterproof clear epoxy, and add a drip tray or removable plastic liner before plants go in.
Pre-drill every ladder-shelf screw and clamp a straight 1x2 guide to keep the shelf faces aligned — it makes the whole thing look built-in instead of “assembled.”
Don’t mount shelves directly to drywall without finding studs — ladder frames pull loose faster than box cabinets.
20. Picture-frame built-ins with a window-height plant niche and hidden wiring
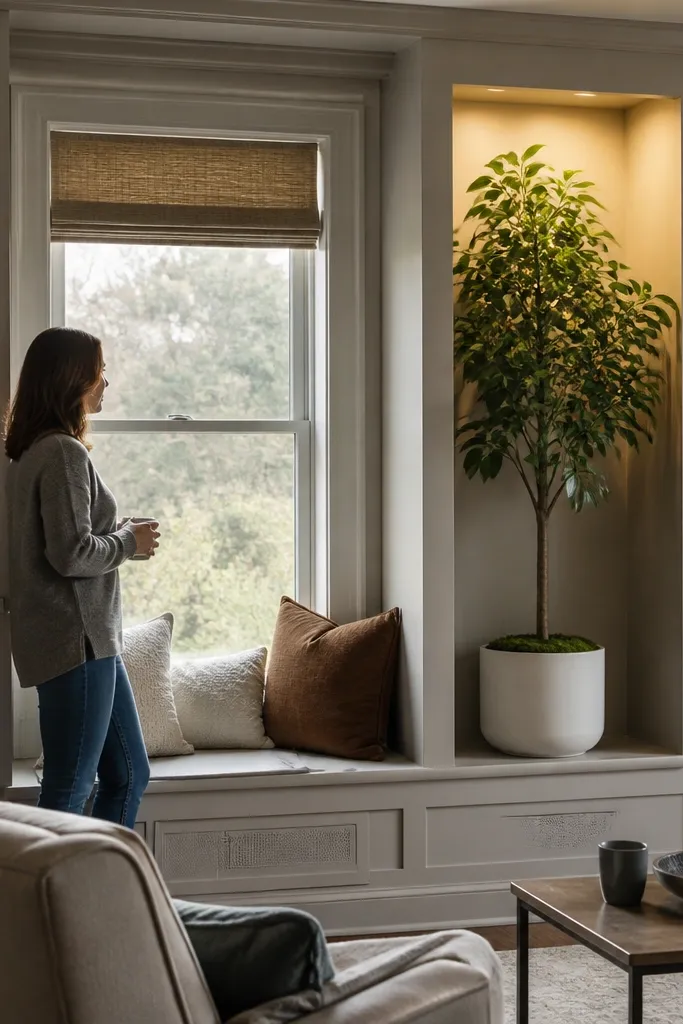
This design looks like custom trim work first, shelves second. You build picture-frame panels around the window and add one deep plant niche at window height, so the plants read like part of the architecture. The niche is where you can run a discreet LED grow light strip, keeping the whole scene bright for photos and for real plant health. It also solves the “my window plants always look dim and leggy” problem because the light is positioned at the same height as the leaves. This suits living rooms that already have strong trim or a more traditional vibe, and it’s a satisfying DIY because the carpentry is clean, repeatable, and very forgiving to finish.
Frame the built-ins with 3/4 in plywood boxes, then add 1x2 picture-frame rails and stiles to create the trim look; aim for a consistent reveal of 1/2 in around the niche opening. Cut the window-height niche as a fixed compartment about 6 in deep with an interior width that matches the window center — keep the niche bottom 6-8 in above the window sill so plants don’t block the view. Install the LED grow light channel on the top inside of the niche and route the cord to a nearby outlet through a shallow cable raceway behind the trim panel. Finish the frames with paint-grade primer, then two coats of cabinet enamel, sanding lightly between coats for a crisp edge. Seal the niche shelf (and any soil-contact surfaces) with waterproof clear coat, and add a removable drip mat so you can clean without pulling the whole setup apart.
Use a pocket-hole jig or confirm the backer panel is square with a tape-measure diagonal check (corner-to-corner) before you glue trim — crooked frames are what ruin the built-in illusion.
Don’t place the niche directly against the window without planning for heat and airflow — leave a small gap behind the backer so moisture and condensation don’t get trapped.



