
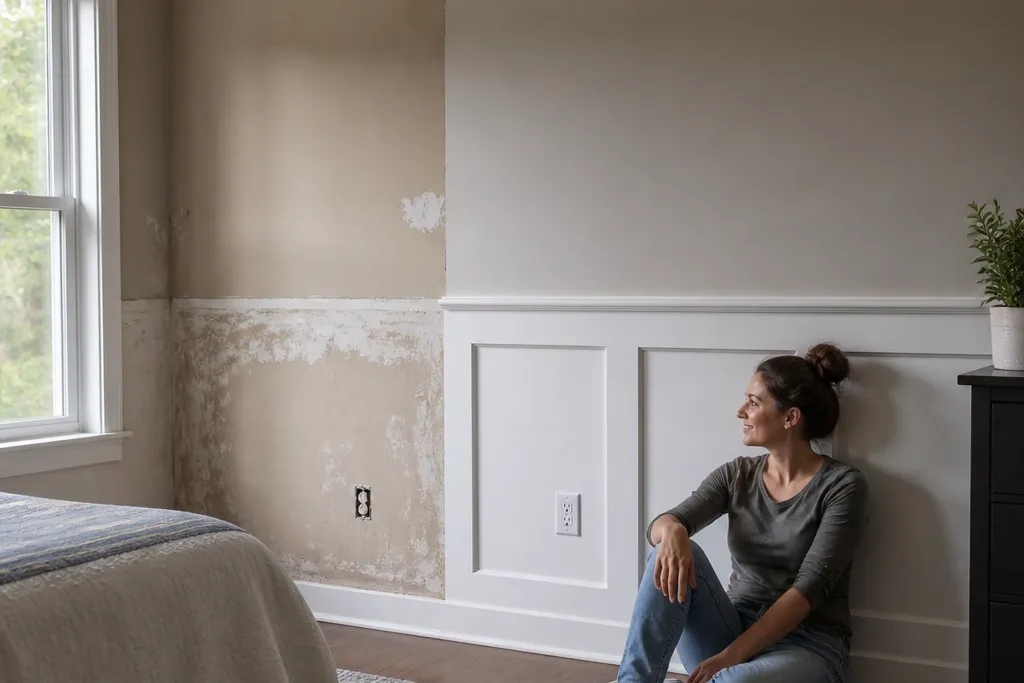
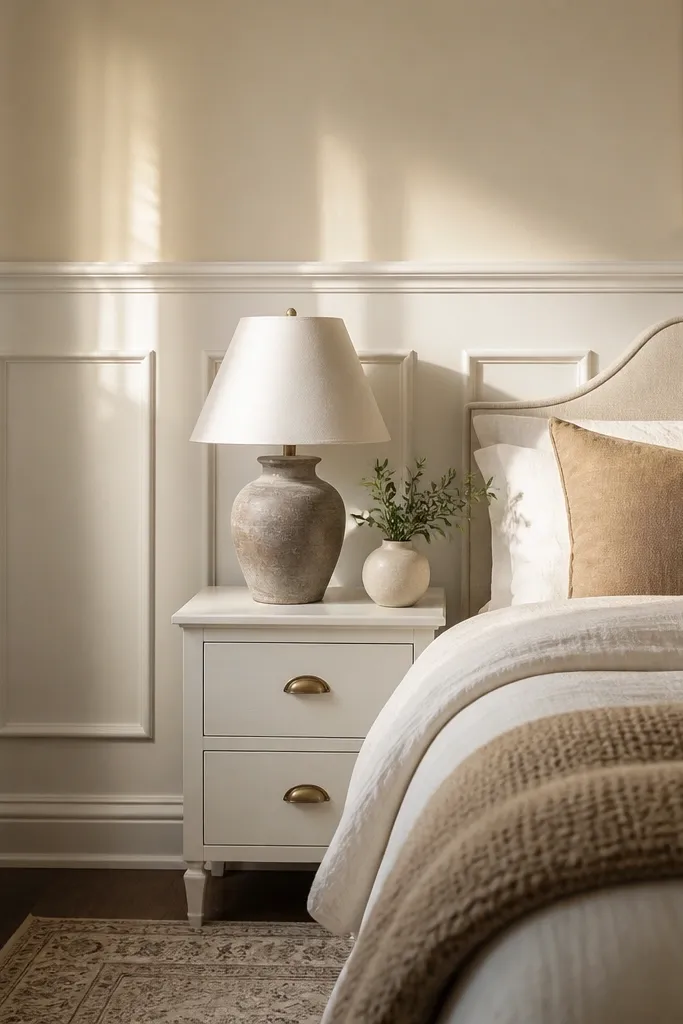
1. Coastal cottage with beadboard + a white rail

This is the safest way to make themed wainscoting ideas feel “on purpose” without getting busy. Beadboard creates a built-in texture that reads coastal even when you keep the rest simple. Paint the beadboard and rails in a clean white (semi-gloss or satin), then keep the wall color airy and light. This look works in bedrooms that already have rattan, light wood, or linen bedding because the texture adds depth without fighting your decor. Skill level is beginner-friendly if you use pre-primed beadboard sheets or strips and plan your panel widths.
Start by marking your wainscoting height and drawing a level line for the top rail. Install the top rail first using a level and shims where studs are out of line, then screw through the rail into studs. Next, attach beadboard panels or strips to the wall, staggering seams so they don’t all land in one spot. Finally, add vertical trim at the panel edges if you want a framed look, then caulk all corners and paint beadboard and rail together so the sheen matches.
Editor's noteUse a laser level for the rail line — beadboard shows every slope.
Skip thisDon’t paint beadboard a different sheen than the rail; the texture will look patchy.
2. French country with picture-frame panels and warm off-white
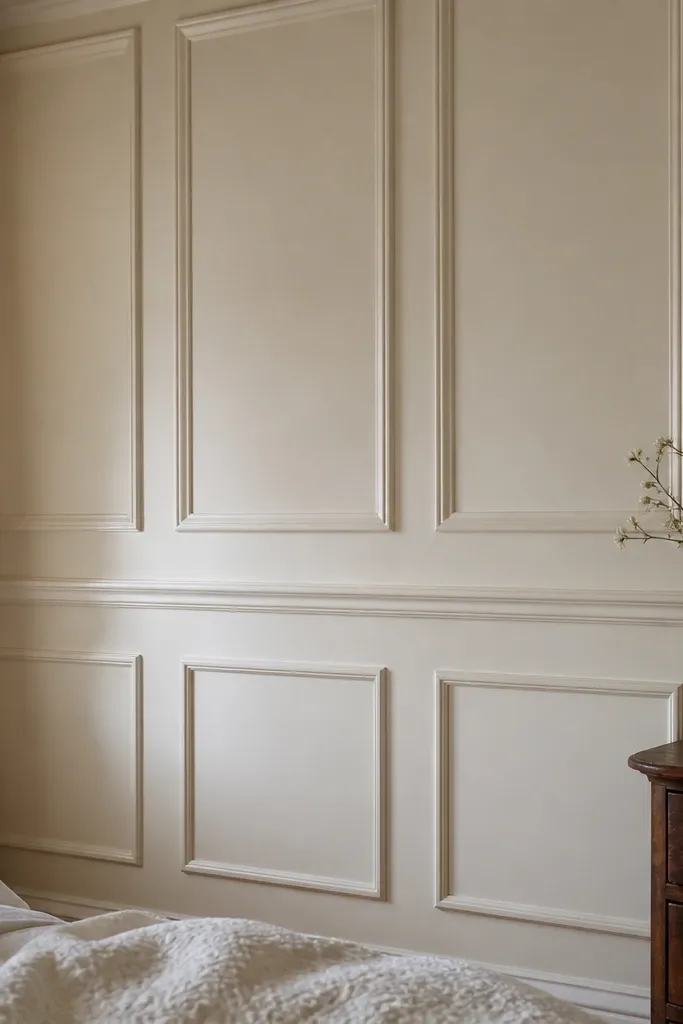
Picture-frame wainscoting turns themed wainscoting ideas into something architectural. The rectangles create structure, and French country reads from the warm off-white trim plus a slightly richer wall color above. Keep the panel grid consistent and avoid thick, chunky trim if you want it to feel French instead of farmhouse. This look suits bedrooms with upholstered headboards, soft neutrals, and antique-style lighting. The build is moderate because you need to keep the panel layout square and repeat it wall to wall.
Measure the wall width and choose a panel layout that avoids tiny slivers at the edges. Draw a grid on the wall using painter’s tape based on your chosen panel size and stile width, then locate studs. Install the perimeter rails first, then cut and install vertical stiles between the rails. Add the inner frame pieces to form rectangles, checking for square at each section. Caulk the frame edges, sand lightly on any ridges, then prime and paint in two coats for clean, even coverage.
Dry-fit the frame pieces on the floor and label them by location so you don’t mix sizes mid-install.
Skip the “eyeballing” of panel sizes; uneven rectangles kill the French look fast.
3. Modern farmhouse with board-and-batten stripes and matte white
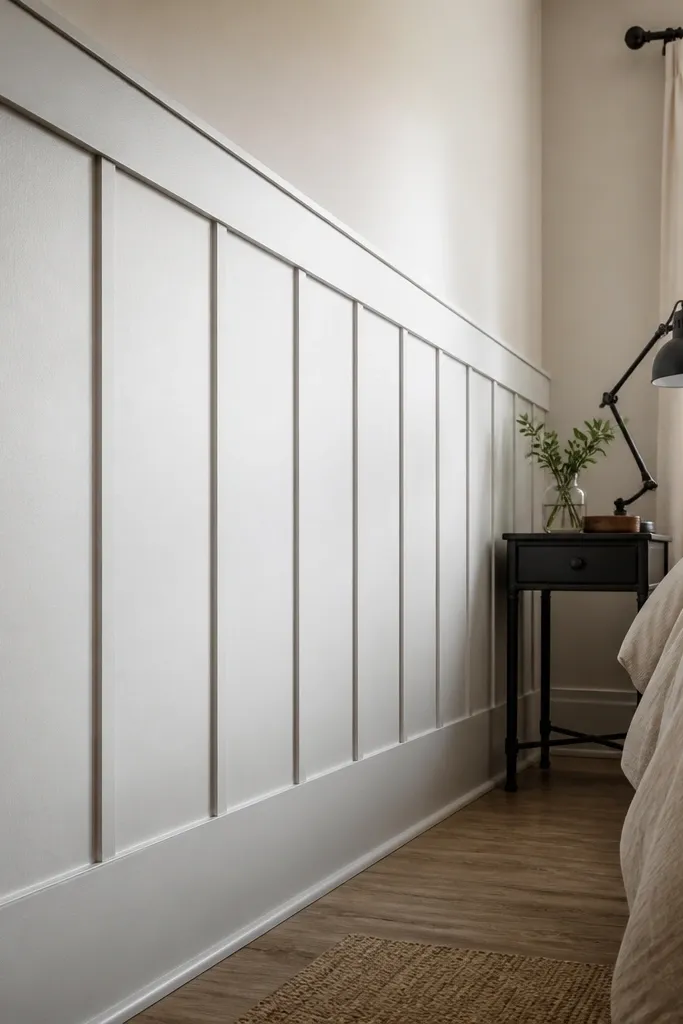
Board-and-batten is one of the easiest themed wainscoting ideas to make look crisp and intentional. The vertical rhythm reads farmhouse, and the matte finish keeps it modern instead of glossy cottage. You’ll get a strong visual “design line” even with plain bedding and simple furniture. This works best in bedrooms with tall ceilings or lots of negative space on the walls. It’s a medium project because you’re cutting multiple battens and keeping spacing consistent.
Mark your wainscoting height and install base and top rails so your battens have a clean boundary. Decide on your stripe width — a common setup is 6-inch boards with 1.5-inch battens, but match your room scale so edges don’t turn into skinny scraps. Attach the vertical boards to studs first, then install battens over the seams. Fill nail holes, caulk gaps, and sand any sharp edges. Paint with a primer that bonds well to trim, then finish with matte paint for the modern read.
Editor's noteSnap chalk lines for every batten line; measuring each batten by hand creates drift.
Skip thisDon’t install battens over uneven boards; the seams telegraph through paint.
4. Classic traditional with chair rail + shiplap lower wall
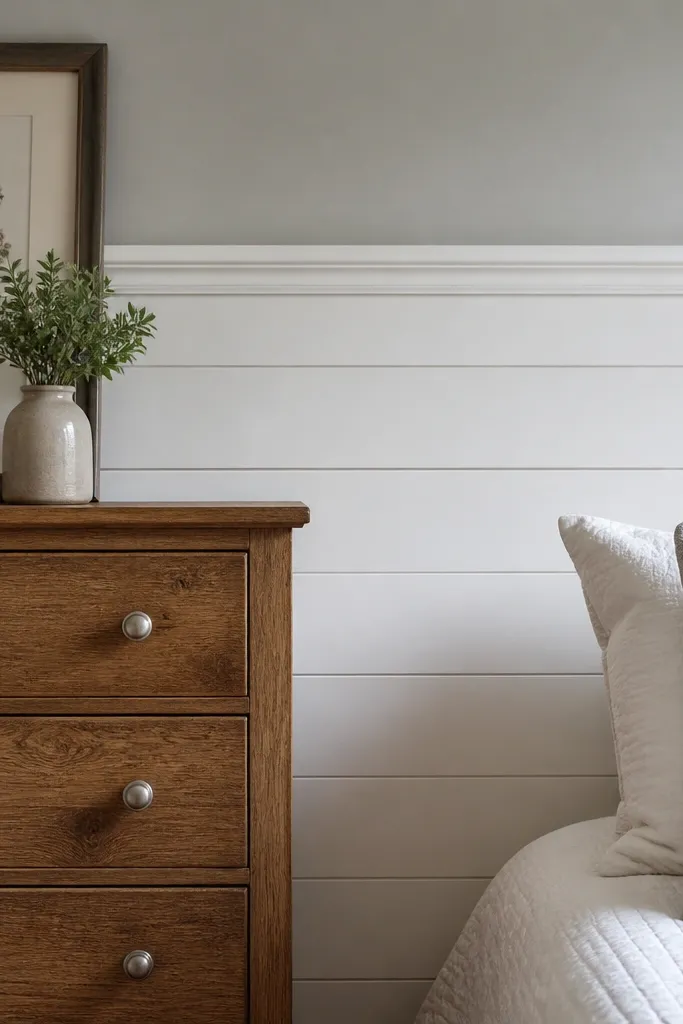
This is a theme approach that works when you want traditional without going full panel grid. Shiplap gives texture and warmth, while a simple chair rail keeps it classic. The themed effect comes from the contrast: finished, painted shiplap below and a calmer wall above. It’s great for bedrooms that already have trim details like crown molding or simple casework. The project is beginner to intermediate, especially if you use pre-primed shiplap boards and plan your course lengths.
Set your chair rail height first and mark a level line that wraps around the room. Install the chair rail securely into studs, then add a ledger board if needed so shiplap stays aligned while you screw it. Install shiplap boards horizontally from the bottom up, staggering joints so seams don’t align. Trim edges around outlets and corners using miter cuts for clean transitions. Fill fastener holes, caulk the rail/shiplap seam, then prime and paint the shiplap and rail in matching finishes.
Keep shiplap boards oriented the same way across the room so the grain direction doesn’t look random.
Don’t skip a ledger board; the first course decides whether the whole wall looks straight.
5. Scandi minimal with flat-panel wainscoting and one thin rail

If your bedroom already has strong textures like a boucle headboard or textured linen, Scandi wainscoting should stay quiet. Flat panels with a thin rail create subtle structure without adding a lot of visual noise. The theme comes from clean lines and a restrained color palette: pale gray, warm white, or greige on the trim. This look is best for small bedrooms because it gives definition without overwhelming the room. It’s intermediate because flat-panel fabrication needs accurate spacing and clean cuts.
Choose a flat-panel system using MDF panel sheets or pre-made flat panel trim kits so you don’t fight inconsistent profiles. Mark your wainscoting height and install a continuous top rail and bottom board, both level. Attach the flat panels between the rails using small brad nails into studs and glue for stability. Add a thin stile trim at panel edges if you want the grid to read clearly. Caulk the panel seams, sand flush, then paint trim with a satin finish so it catches light softly.
Editor's noteTest your paint sheen on a scrap panel; satin hides flaws better than matte on flat surfaces.
Skip thisDon’t use thick crown-style trim on a Scandi layout; it instantly reads traditional.
6. Kids' storybook with whimsical molded panels and a bright wall
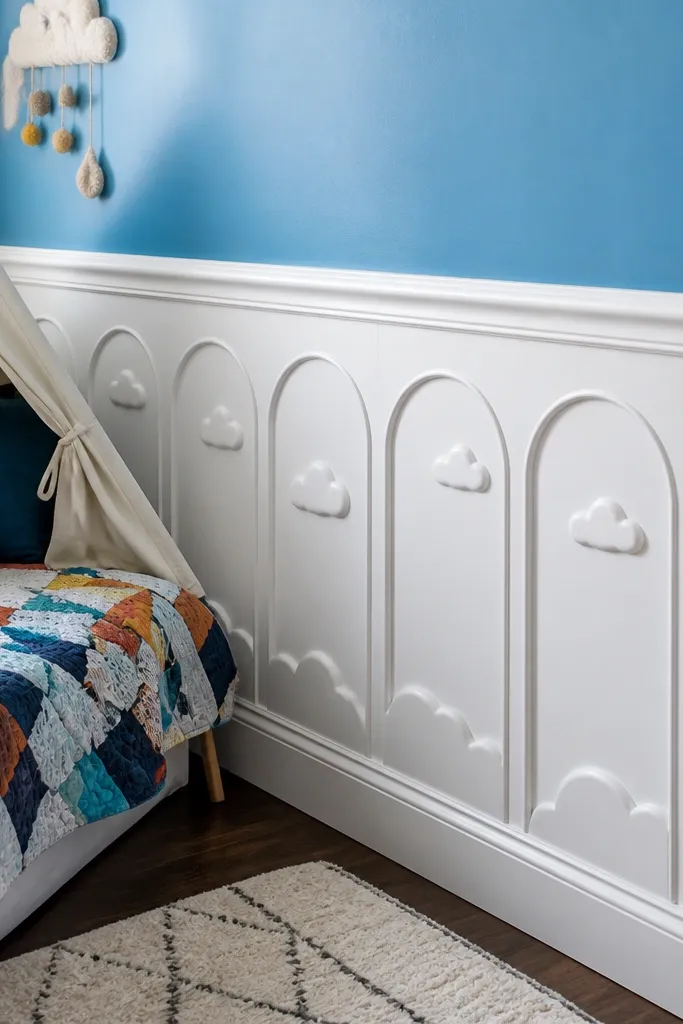
Themed wainscoting ideas for kids should be playful, not chaotic. Molded panels add character through shape, while a bright wall color above keeps the bedroom from feeling like a tiny hallway of trim. Stick to one trim color (white or a soft cream) so the wall color does the storytelling. This works well in nurseries and shared bedrooms where you want a “designed” look without wallpaper. Skill level is intermediate because molded trim profiles require careful cutting around corners and panel edges.
Pick a molded panel profile that repeats cleanly and doesn’t create a lot of tiny pieces. Mark your wainscoting height, then install the top rail and perimeter trim first so the molds have a boundary. Cut and fit the molded panels between the rails, checking that the profile lines stay consistent across the wall. Add corner blocks at inside corners if your trim system doesn’t hide seams well. Caulk, sand, and paint the trim first, then paint the upper wall so the color line is crisp.
Editor's noteUse painter’s tape to mask a perfectly straight paint line at the top rail before you paint the upper wall.
Skip thisDon’t mix two different molded profiles; it looks like a craft project.
7. Rustic lodge with faux beam frames and darker stain
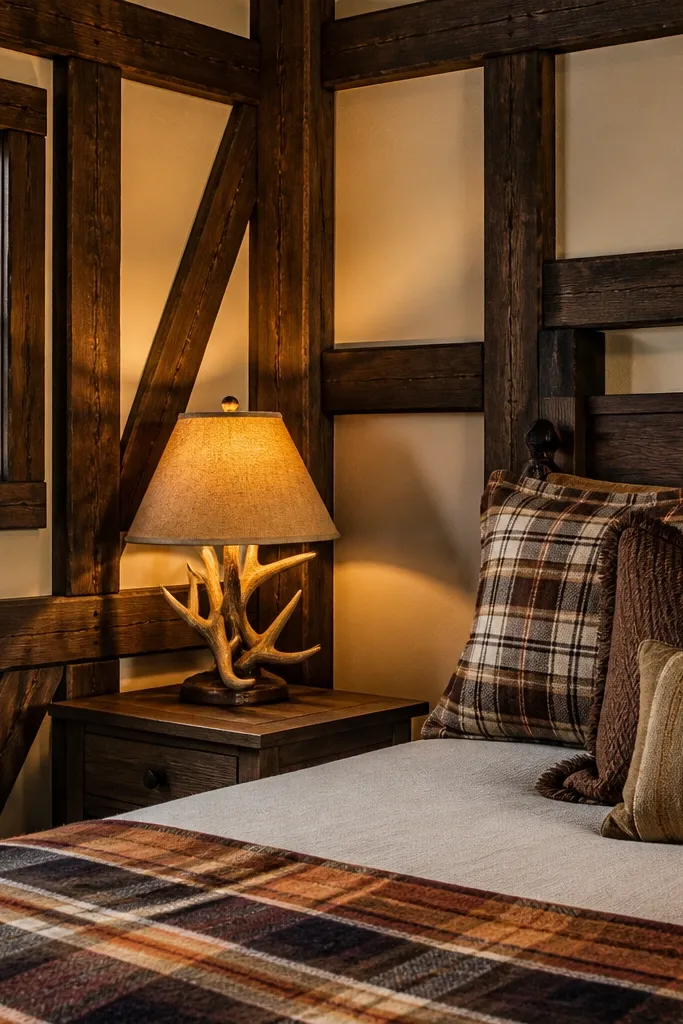
This look makes themed wainscoting ideas feel like built-in woodwork. The secret is the frame effect: darker stained trim around lighter backing creates depth and makes the room read lodge, not generic. Keep the backing neutral (a warm white or soft gray) and let the stained frames do the heavy lifting. It suits bedrooms with wood floors, leather accents, or cabin-style lighting. The build is intermediate because you’ll cut frame pieces carefully and stain with consistent technique.
Build a grid of frames using stained trim stock and keep your frame widths consistent, usually 2 to 3 inches depending on room size. Prepare the wall by installing a backing panel or drywall patch if needed, then attach the frame pieces to studs. Stain all frame pieces before installation if possible, and let them cure fully so you don’t get uneven blotching. After installation, touch up any cut ends and seams. Seal with a clear protective topcoat appropriate for trim so the finish doesn’t scuff during cleaning.
Stain test on scrap from the same batch of trim; wood tone shifts between lots.
Don’t leave raw MDF edges showing; they drink stain and look patchy.
8. Glam bedroom with mirrored panel frames on the lower wall
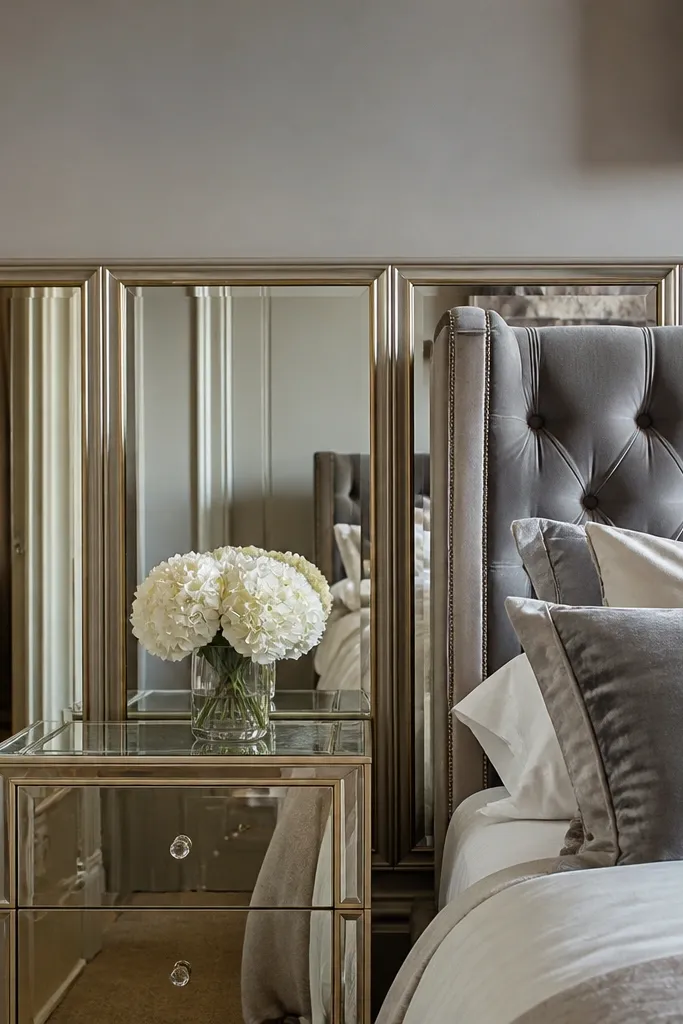
If you want the bedroom to feel bigger, reflective panels can make themed wainscoting ideas work fast. The frame keeps it structured and prevents the mirror look from becoming random wall decoration. Choose a mirror panel option that is safely mounted and framed so edges are protected. This suits smaller bedrooms, rooms with limited natural light, and anyone going for a glamorous vibe without adding clutter. It’s intermediate because you have to handle reflective materials carefully and keep the layout level.
Plan your panel sizes so you’re not trying to cut mirror sheet on-site. Install the perimeter rails and stiles first, then set the mirror panels inside the frames using a manufacturer-recommended mounting method (often clips or protective glazing). Leave a small clearance gap if the system calls for it so expansion doesn’t stress the glass. Seal the edges where the frame meets the mirror to keep it clean and prevent moisture issues. Paint the frame trim after installation so you don’t get paint on the reflective surface.
Use a template for each opening and mark the studs before you mount anything heavy.
Don’t rely on caulk alone to hold reflective panels; use the mounting hardware meant for the material.
9. Traditional coastal with vertical board wainscoting and rope trim
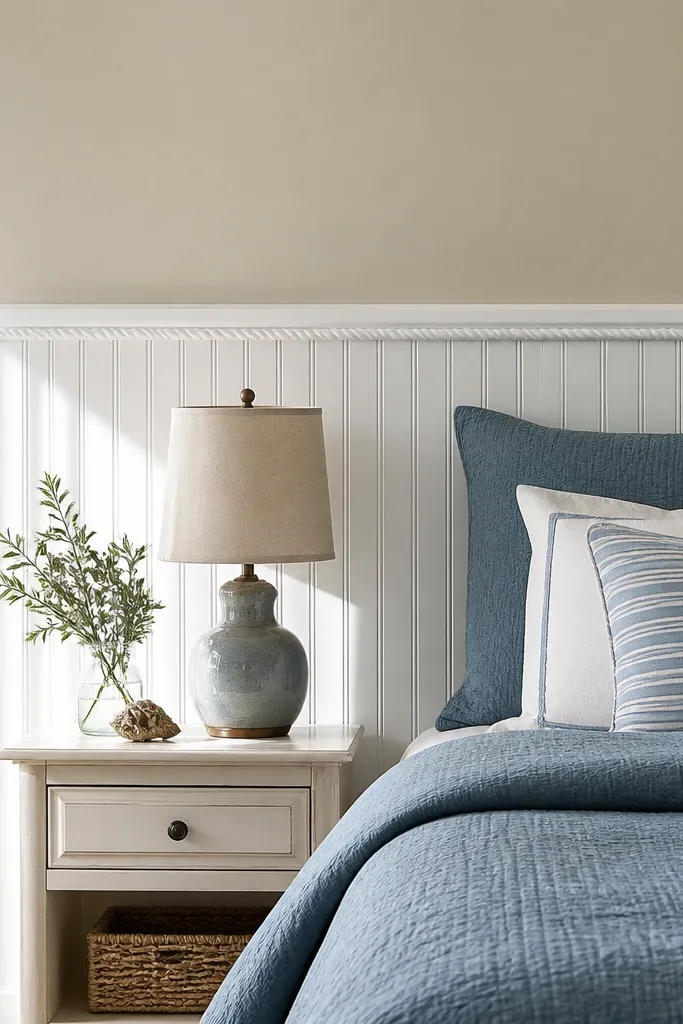
This is a more detailed take on coastal themed wainscoting ideas that reads “coastal traditional” instead of beach cottage. Vertical boards create a tall, tailored look, and a thin decorative trim detail adds the nautical nod without turning into theme wallpaper. Keep the trim color white or a soft cream and choose a calm upper wall color like pale sand. This works well with classic furniture shapes and traditional bed frames. The build is beginner to intermediate since vertical boards are straightforward, and the decorative trim is the only extra step.
Install the top rail at your chosen height, then attach vertical boards to studs with consistent spacing. Add a decorative trim detail along the board seams or at a rail line, but keep it one continuous line per wall so it looks intentional. Use miter corners for the decorative pieces where they meet, or use corner blocks if your trim system supports them. Fill nail holes, caulk the rail edges, and sand smooth. Paint the boards and trim together so the finish matches across textures.
Editor's notePre-cut corner pieces and dry-fit them before you glue or nail the decorative trim.
Skip thisDon’t add multiple nautical details; one trim line is enough.
10. Art deco with geometric panel grid and black trim
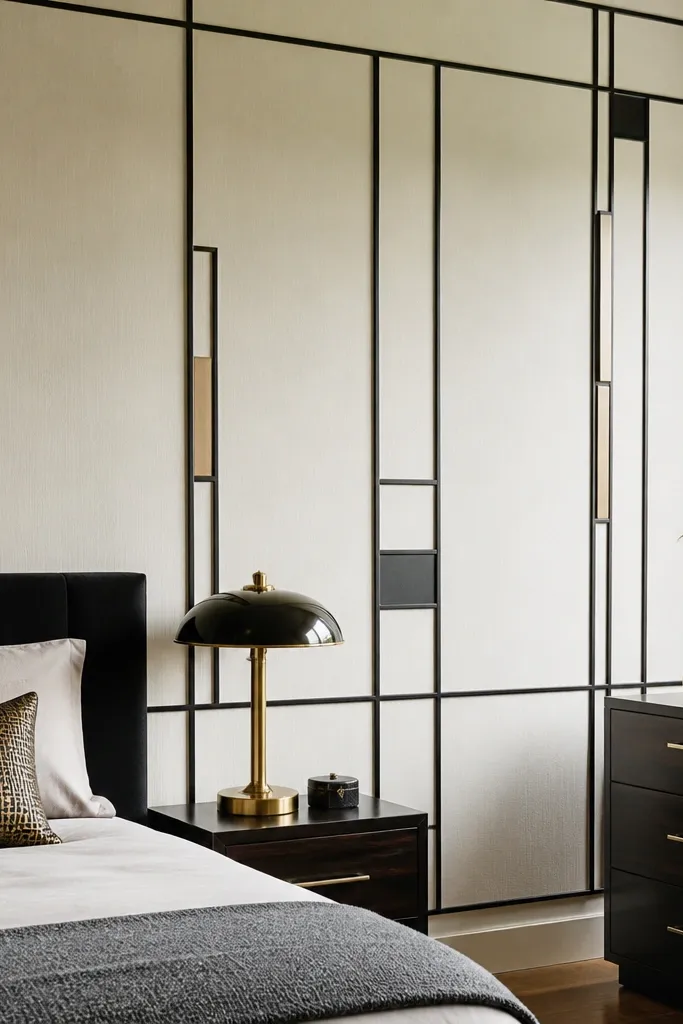
Art deco themed wainscoting ideas succeed when the geometry is sharp and the contrast is strong. Use black (or very dark bronze) trim against a light wall to make the pattern read like a graphic. The panel grid should be consistent, and the “design lines” should repeat across the wall so it feels designed, not accidental. This look suits bedrooms with brass lamps, velvet bedding, or bold rugs. It’s intermediate because you’re matching angles and keeping the grid aligned.
Pick a grid plan with squares and rectangles, then decide where the bold lines go. Install the light backing wall paint first (upper wall), then mount the perimeter rails and stiles in the correct order. Add inner geometric pieces using pre-cut trim and keep every joint tight with a miter saw setup. Use a level and a measuring tape to confirm that pattern edges align with the door casing. Paint the trim in black with a satin or semi-gloss finish for clean lines, then caulk only the necessary seams to avoid muddy edges.
Editor's noteUse painter’s tape to mask the edges of each black line before final paint for crisp geometry.
Skip thisDon’t choose a gray-black that’s too light; it won’t give you the deco punch.
11. Mediterranean with arched-top panel frames
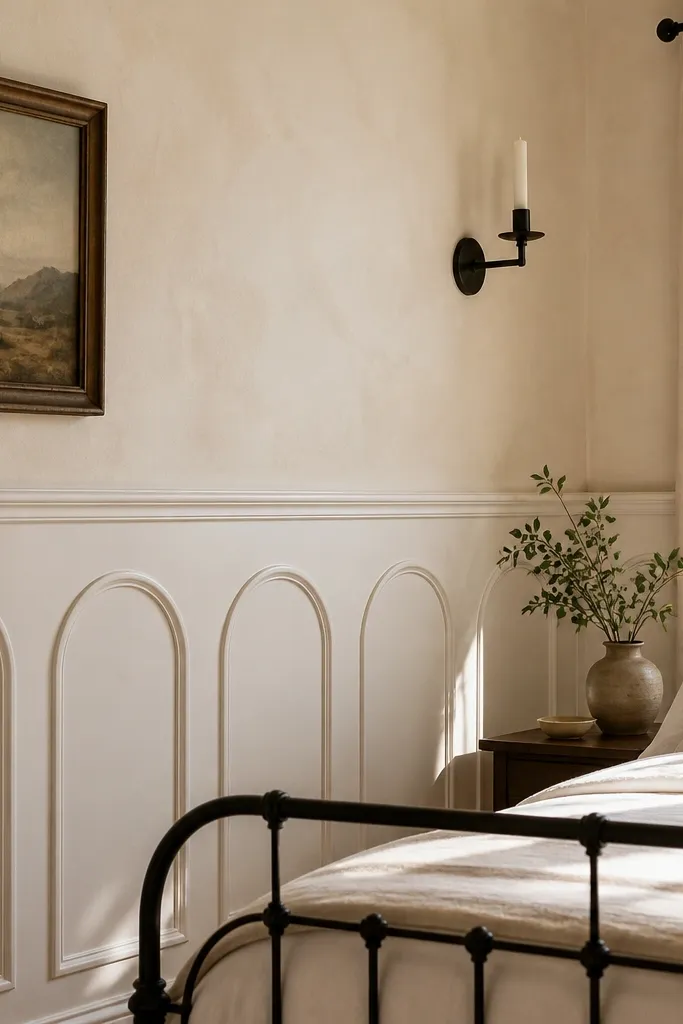
Arched-top frames make themed wainscoting ideas feel Mediterranean without needing tiles everywhere. The arch shape gives you that softened, old-world silhouette, especially when the trim is white and the upper wall is warm and slightly creamy. Keep the arches consistent — one arch style per wall section — so the theme reads cohesive. This works best in bedrooms with warm wood tones and wrought-iron style accents. It’s intermediate because arches require careful template work and repeated cuts.
Make an arch template out of cardboard using your desired radius and panel height. Mark your panel grid on the wall, install the bottom rail and side stiles first, then fit the arched top pieces. Use a jigsaw for arch cuts if you’re shaping trim boards, then sand edges smooth so paint doesn’t crack. Install the arch pieces with glue and brad nails into studs where possible. Caulk seams, prime, then paint trim in a high-coverage finish so the arch curves look clean.
Editor's noteCut all arches from the same template and label each piece by position to keep symmetry.
Skip thisDon’t vary arch size between panels; it looks like a mistake, not a design.
12. Scalloped coastal with soft curves and a light trim
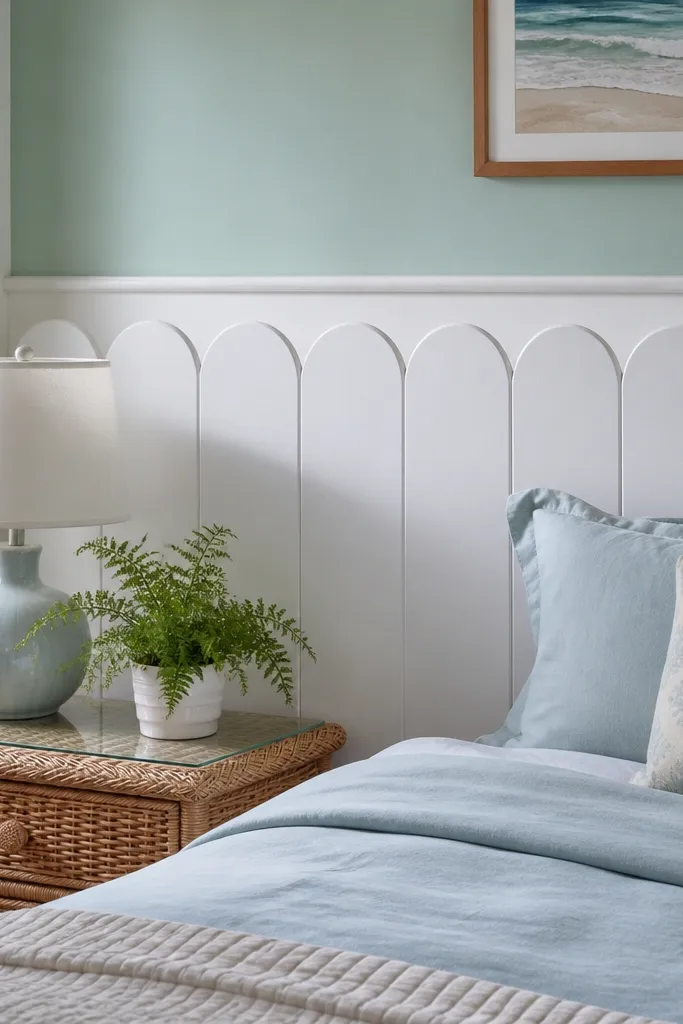
Scallops are one of the fastest ways to make themed wainscoting ideas feel playful and coastal, especially in guest rooms. The key is to keep the scallops subtle and repeat them consistently so the wall reads like a pattern, not a border. Use a light trim color and pair it with a calm upper wall so the curves don’t fight your bedding. This look works when you want “interest” without heavy furniture. It’s intermediate because scalloped edges need a template and careful spacing.
Choose scalloped trim pieces (prefabricated) or cut scallop shapes from MDF rails using a template. Mark your wainscoting height and install a flat perimeter rail so the scalloped section has a stable base. Attach the scalloped pieces so the pattern repeats at the same intervals across the wall, then add simple stiles if you need framed sections. Fill nail holes and caulk the scallop edges so paint lines stay crisp. Prime and paint in two coats, brushing the edges carefully to avoid lumps in the curves.
Editor's notePaint the scallop trim in small batches and keep a wet edge so the finish doesn’t show brush marks.
Skip thisDon’t put scallops on every surface; one scalloped rail line is enough.
13. Spanish revival with layered rails and stepped panel detailing

Spanish revival themed wainscoting ideas feel right when you add layers to the trim instead of relying on one flat profile. Layered rails and stepped detailing create shadows that read Spanish even with a simple wall color. Pair it with warm off-white trim and a warmer wall above like sand or light terracotta. This suits bedrooms with patterned textiles, terracotta pottery, and iron bed frames. The build is intermediate because you’re stacking trim pieces and need consistent spacing for shadow lines.
Install your main top rail at the chosen height, then add a secondary rail detail below it using the same level line. Build stepped panel borders by attaching a narrow trim piece first, then a wider trim piece over it to create the shadow step. Mark the panel layout so each step aligns across the wall. Use caulk to fill tiny gaps between stacked trim layers so the step edges stay sharp. Prime and paint the trim, then paint the upper wall last so the color break line is clean.
Editor's noteDry-fit the layered rails with painter’s tape before nailing to confirm the shadow depth looks right in daylight.
Skip thisDon’t stack layers with different widths in random spots; shadow lines must repeat.
14. Monochrome hotel vibe with paneled wall and bold contrast trim
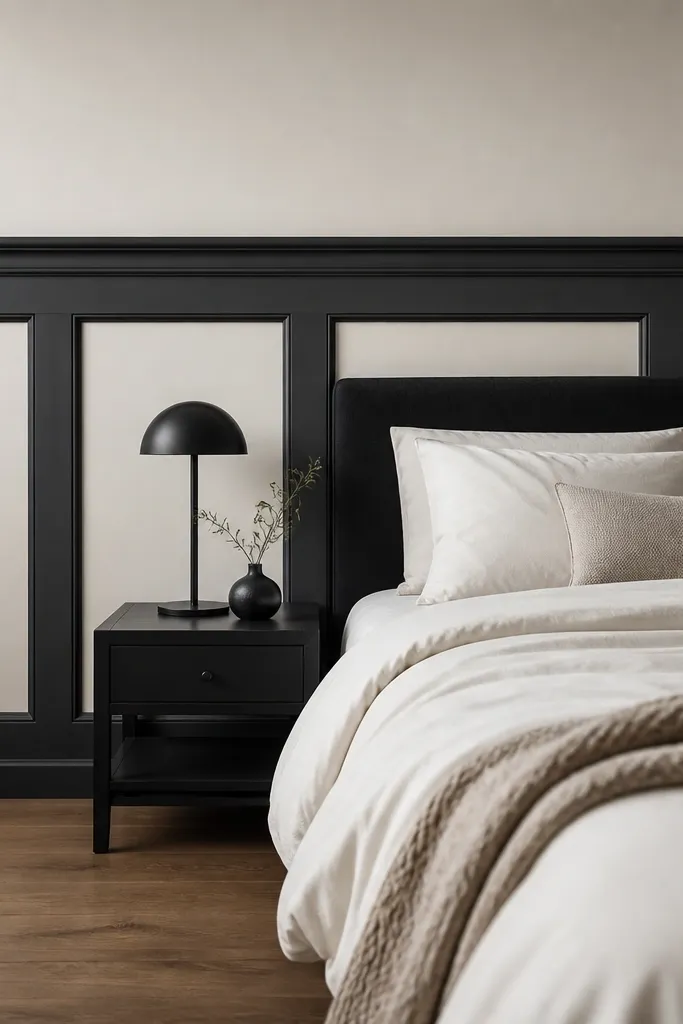
This is the “hotel room” look people chase with themed wainscoting ideas, and it’s mostly about contrast and proportion. Use a light panel field with darker trim rails and stiles, then keep the upper wall color simple so the wainscoting becomes the feature. It reads upscale because the grid is clean and the color separation is intentional. This works in bedrooms of any size and pairs with modern bedding, traditional furniture, or both. Skill level is intermediate because you’re painting two colors and keeping the edges crisp.
Choose two paint colors: one for the trim (dark) and one for the panel field (light). Install the perimeter rails and stiles first, then add panel backing or flat panel inserts. Use painter’s tape to mask the panel field edges before you paint the trim color, starting with the darkest first. Pull tape while paint is still slightly tacky for sharper lines. After both colors cure, caulk only the seams that need it and touch up any micro gaps with a small angled brush.
Editor's noteUse a small foam roller for panel fields and an angled brush for the trim edges so the finish stays consistent.
Skip thisDon’t paint the trim and panel colors in one pass; you’ll get bleed and fuzzy borders.
15. Kids-friendly growth chart look with wainscoting border and chalk rail

This turns themed wainscoting ideas into something functional, not just pretty. A wainscoting border frames the wall and gives you a clean place to add a removable chalkboard panel or a chalk paint strip. Keep the trim color simple (white or cream) and use the chalk area as the “theme.” It’s ideal for bedrooms where you want a daily activity spot without hanging posters everywhere. It’s beginner-friendly because you’re adding a functional surface, not carving complicated panels.
Install wainscoting up to a height that leaves room for the chalk area — a typical setup leaves about 12 to 18 inches of wall above the top rail for the chalk panel. Mount the top rail level, then build the lower panel section with your chosen style (beadboard or flat panels both work). For the chalk area, attach a small mounting board to the wall first, then mount a chalkboard panel or apply chalk paint to a primed surface. Seal the chalkboard properly with the manufacturer’s method so it doesn’t stain. Paint the trim and panel sections after the chalk surface is set so the color lines match.
Editor's noteUse a removable chalkboard panel if you want to change the theme later without repainting trim.
Skip thisDon’t place the chalk area directly over a seam in your wainscoting; you’ll see it every time you write.



