
1. Terracotta + black metal trailing line
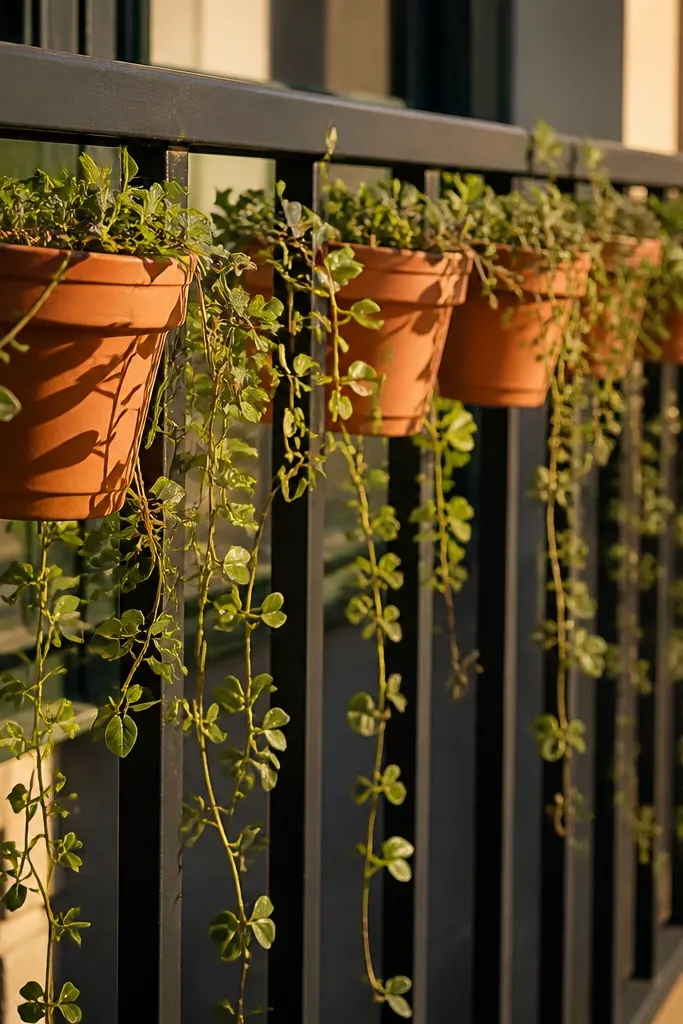
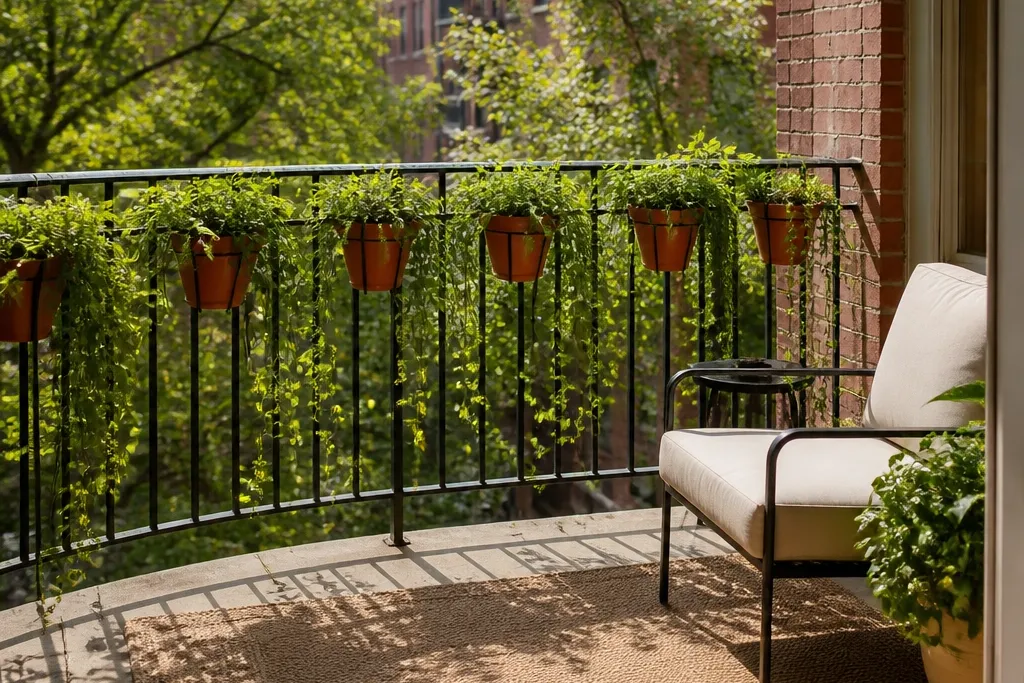
Start by choosing black-painted metal railing hardware or black metal brackets for a consistent frame. Install evenly spaced bracket rails (or U-bolts with backing plates) so each planter hangs level; keep about 2-3 inches of clearance between the planter lip and the rail. Use 8-10 inch deep containers for trailing varieties and add a saucer or drip tray so water doesn’t run down the metal. Then plant with a simple mix: one trailing filler per pot plus a low, compact base plant so the pot looks full at the start. Finish by stretching the first few stems outward and down so the trail direction is set early.
This design works because the black rail gives you a crisp outline and the terracotta brings warmth that reads well in photos. Trailing plants soften the straight bars and make the balcony look styled even when the plants are small. Use matching terracotta or terracotta-look pots so the repeating color pattern holds the theme. It’s a strong choice for narrow balconies because the plants hang down where you can see them without taking up floor space. The look is also forgiving — if one plant grows slower, the trailing effect still ties everything together.
Skip thisDon’t use tiny, shallow planters for trailing plants — they look sparse fast and they dry out too quickly.
Editor's noteUse a thin layer of gravel on top of the soil to reduce splashing when watering, and check bracket tightness after the first heavy rain.
2. Lime-green herb shelf board on the rail
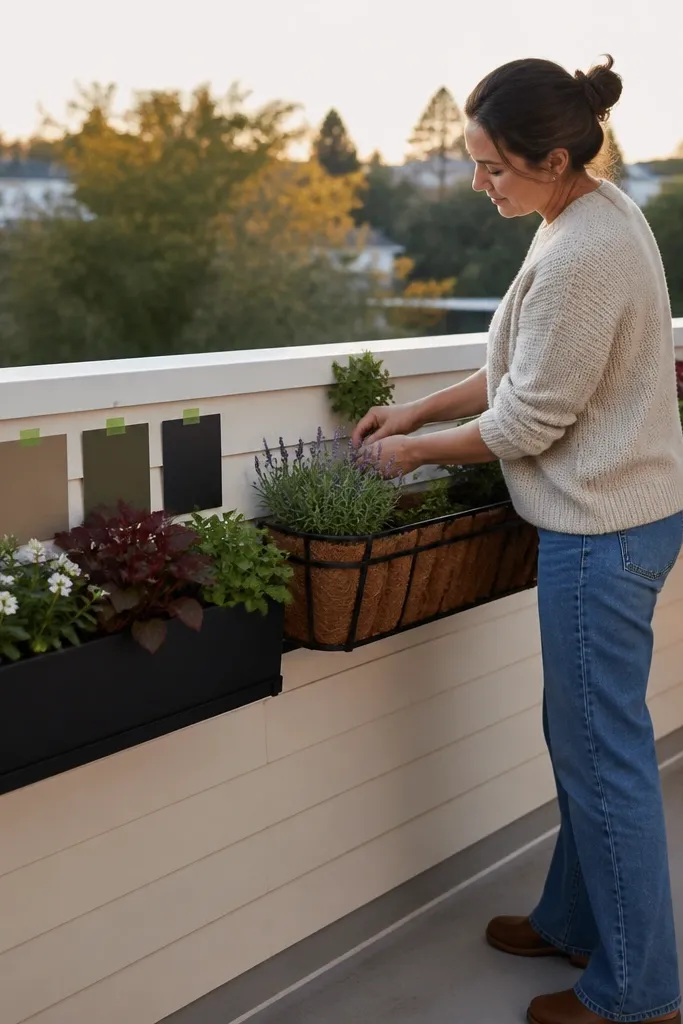
Pick a narrow board (about 3-4 inches wide) in outdoor-rated wood or composite so it doesn’t swell. Mount it along the top of the railing using stainless angle brackets spaced every 16-20 inches. Place small planters (typically 6-8 inch pots) on top of the shelf and secure them with non-slip feet or a thin strap so they don’t slide when you water. Plant with 2-3 herb types that share a foliage color — like basil plus thyme or parsley — so the theme stays cohesive. Water carefully at the base and use a tray under the pots to keep drips off the rail finish.
If you want a fresh, clean look that still feels full, a herb shelf theme is the move. The bright green foliage reads like a color pop against a neutral rail, and herbs give you tight growth that fills quickly. This works best when your railing has a flat top or you can add a narrow mounting shelf without blocking handrails. The aesthetic is “intentional kitchen garden” rather than random planters, and it photographs well because the leaves create a consistent texture line. It’s also practical — you get usable plants without changing your whole balcony layout.
Skip thisSkip indoor potting mixes that stay soggy — they make shelf planters look droopy and can stain the wood.
Editor's noteSeal the shelf underside and bracket contact points with exterior polyurethane to reduce moisture creep.
3. White-painted rail with pastel cube planters
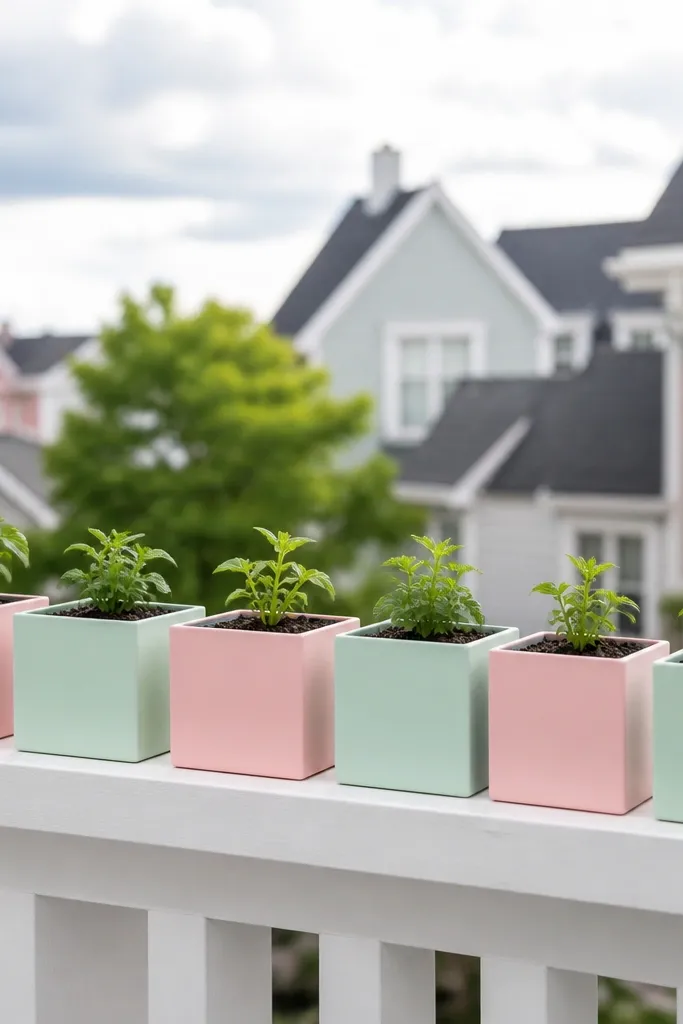
A white-painted rail is the cleanest backdrop for a pastel theme. Cube planters make the arrangement look graphic, and small plants keep lines sharp instead of turning into a messy jungle. This design looks best when you use a limited palette — two pastels max plus green — so the railing reads as a deliberate pattern. It’s ideal for balconies that are small or heavily detailed, because the planters add structure rather than volume. The result is crisp and bright, even on cloudy days.
Start by painting or choosing a white rail finish; use exterior-grade paint and let it cure fully before mounting planters. Install planter standoff brackets or a railing planter rail so cubes sit steady and level; keep spacing consistent at about 10-12 inches between centers. Use cube planters around 6-8 inches wide so they look proportional on a railing line. Plant with compact varieties that stay tidy, then thin the early growth so each cube keeps its shape. Add a drip tray or saucer under each planter to avoid water tracking on the railing.
Spray a light coat of matte clear over the rail after the paint cures to reduce scuffs from bracket installation.
Don’t pick tall, leggy plants for cubes — they break the graphic look and tip the theme into “overgrown.”
4. Navy rail with woven hanging planters
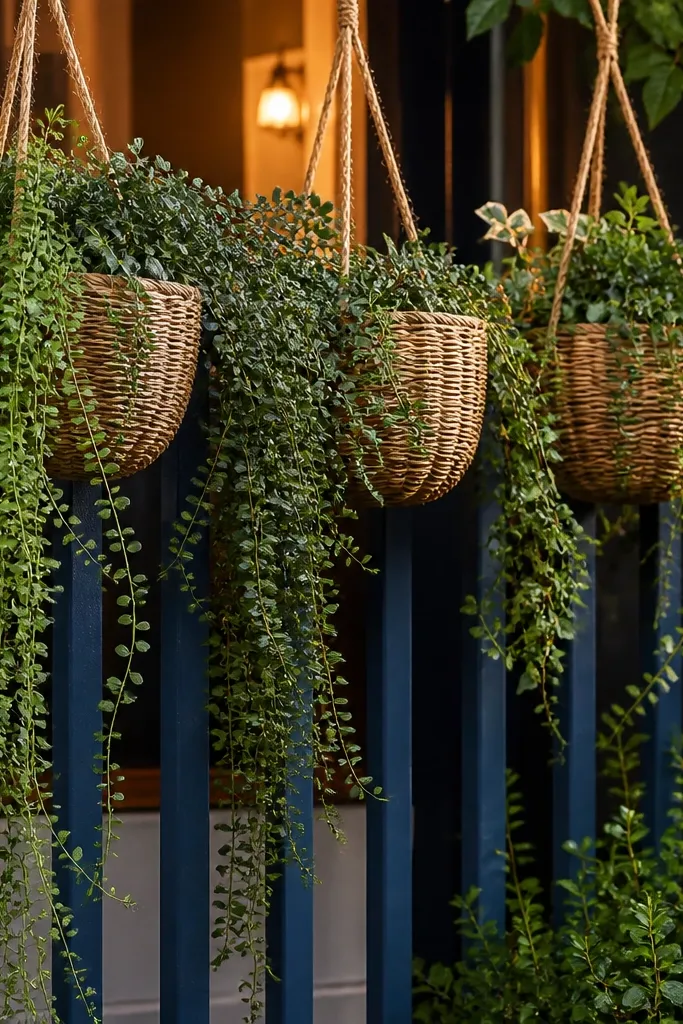
Navy rails plus woven hanging planters gives you that cozy, textured look that still feels modern. The woven texture adds depth in photos, and cascading greenery makes the setup look abundant without needing a lot of width. This is a great choice when you want plants to occupy the vertical space above the rail line. It also hides the mounting hardware because the woven baskets visually soften the edges. Go for a theme where the baskets are one color (natural or dark brown) and the plants are one foliage tone.
Choose hanging planters designed for outdoor use, with sturdy handles and drainage holes. Mount two parallel anchor points along the rail ends and midpoints using heavy-duty stainless hooks or straps rated for outdoor load. Hang planters so the bottom sits about 6-10 inches below the rail for a clean cascade line. Use a fast-draining potting mix and keep the plant crowns slightly above the rim so water doesn’t pool. Trim and shape early so the cascade falls in one direction instead of spreading randomly.
Line the basket top with a thin breathable liner to prevent soil from washing out during watering.
Don’t overload baskets — too much soil makes them heavy and droopy, and the cascade stops looking intentional.
5. Teak-look slats with vertical trellis planters
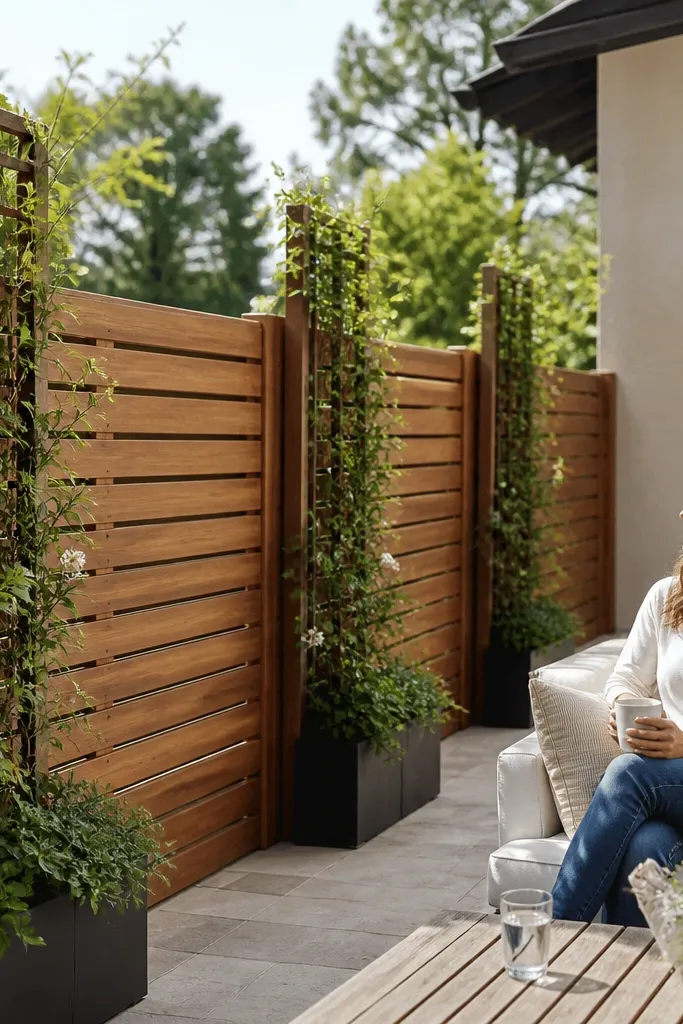
If you want a structured, architectural look, use a vertical trellis theme. Teak-look slats (or actual outdoor teak) bring warmth, and vertical planters keep plants upright so the railing line stays clean. This design is great for balconies with strong wind because vertical growth is less likely to tangle into a random mess. It also looks good from the street because the grid pattern reads clearly. Pick climbing or upright plants so the trellis stays the star and the greenery supports it.
Install teak-look slats on the rail face using stainless screws and pre-drill holes to prevent splitting. Add a narrow trellis panel behind the slats or attached to the slat framework, leaving a gap of about 1-2 inches so leaves can breathe. Use vertical planter pockets or individual planters mounted at the trellis base; keep pot sizes consistent, around 6-10 inches deep depending on the plant. Train vines upward with soft plant ties, then space ties every 6-8 inches to keep growth straight. Water at the base and check trellis screws after the first month of wind and rain.
Use UV-stable plant ties in a neutral color so they disappear once the vines cover the trellis.
Avoid flimsy trellis panels — they flex and the whole pattern looks wobbly in photos.
6. Monochrome black planters with silver foliage accents
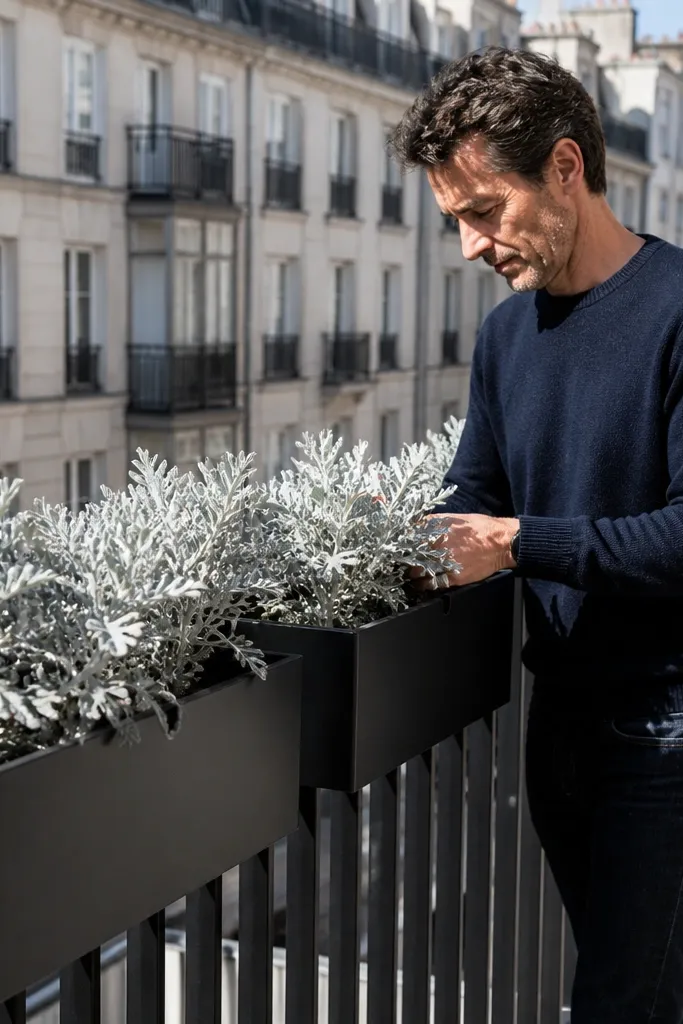
Choose black planters with drainage and an outdoor finish; aim for 8-12 inch diameter if you want the railing line to look full quickly. Mount them with metal brackets or a railing planter system so each pot sits flush and doesn’t rock. Space pots about 12-14 inches apart for a balanced line, then rotate planter positions so the silver plants face outward. Plant in layers: one upright filler per pot plus a trailing edge plant that spills slightly over the side. Water slowly until the soil drains, then empty any tray water so the silver foliage doesn’t get soggy.
Monochrome planters look expensive when the foliage has contrast. Black planters create a strong base, and silver-gray plants (like dusty miller-type foliage) add a crisp highlight that stands out in bright sun. This is a smart choice if your balcony gets lots of light and you want a high-contrast look that stays photogenic. It also hides soil mess because black containers hide staining better than light ones. Keep the theme tight: all planters black, foliage mostly silver-green, with only one small accent color if you want it.
Skip thisDon’t mix five different foliage textures — the theme collapses into “assorted plants.”
Editor's noteUse a slow-release fertilizer once at planting so the silver foliage stays dense instead of stretching.
7. Cream rail with strawberry pot clusters
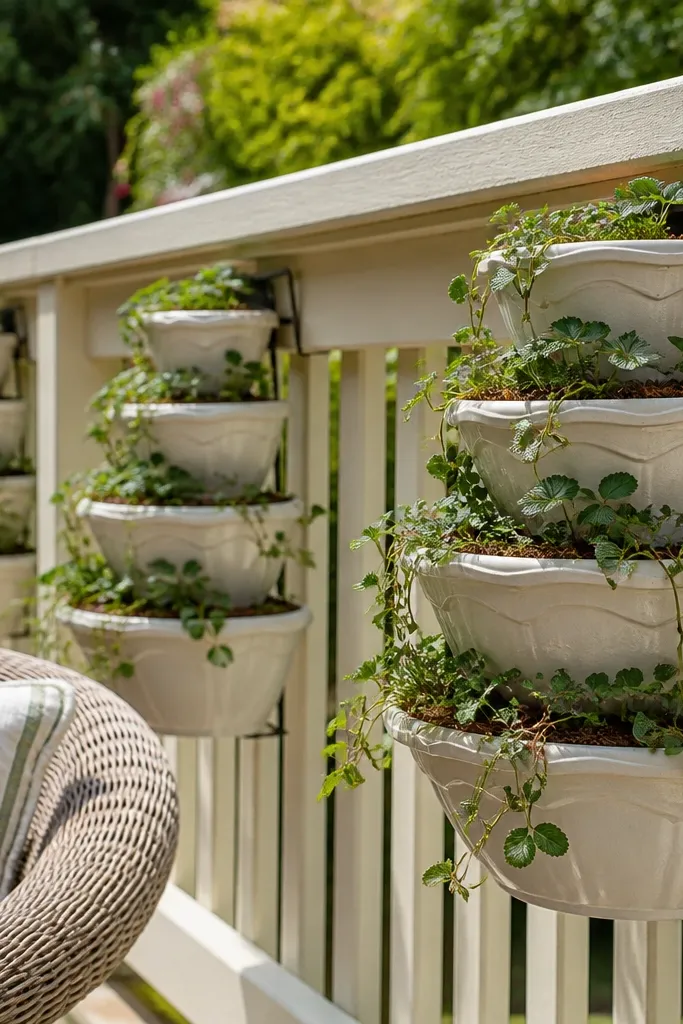
Pick a cream rail finish or paint, then choose one planter system style: either tiered strawberry planters or a set of shallow clustered pots. Mount the tier planter with a bracket rail or heavy-duty railing clamps so it sits level; keep it centered between rail posts. If you’re using multiple shallow pots, mount them in a row with consistent spacing of 8-10 inches and keep pot rims aligned. Plant with compact, trailing-edge varieties so the clusters look lush from the start. Add a thin mulch layer to reduce splash and keep soil from drying out too fast.
Cream rail + clustered planters gives you a soft, sunny look that reads well in daytime photos. Strawberry-style tier planters or clustered shallow pots create a layered effect, so the railing looks full even before everything grows in. This design is especially good if you like a playful theme without going loud on color. You can keep it cohesive by using one planter shape and one pot color, then varying plant types within the same green tone. It’s also practical: shallow clusters are easier to manage for watering and trimming.
Skip thisSkip tall, top-heavy planters on cream rails — they look awkward and can tip if wind hits.
Editor's noteLabel your pots with small plant tags on the underside — future you will thank you when you prune.
8. Bamboo privacy rail with matching planter boxes
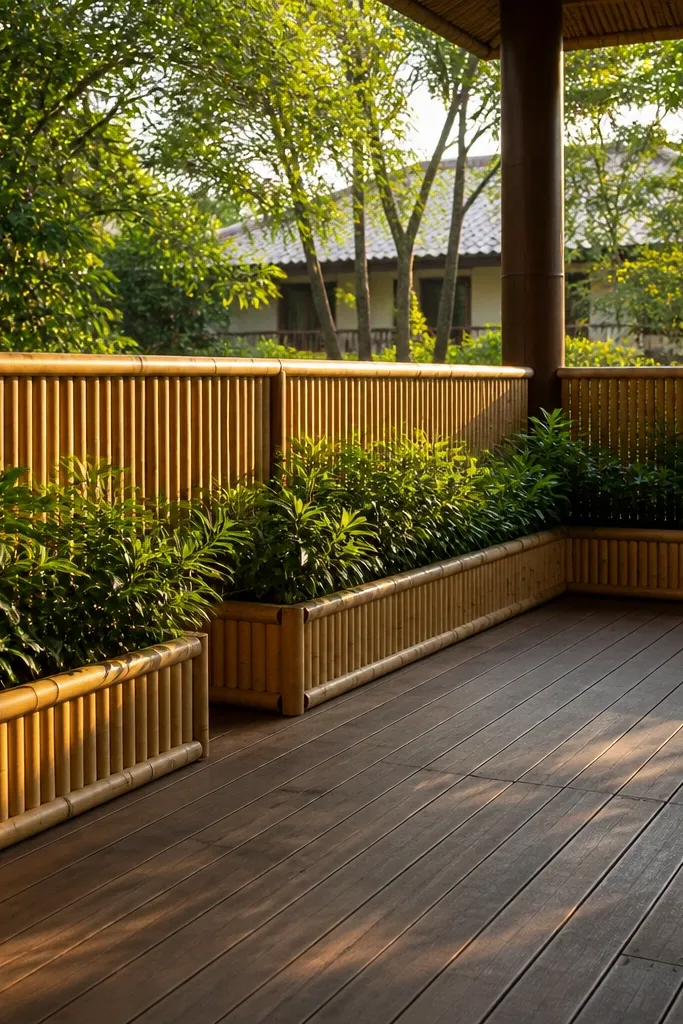
Bamboo privacy rail themes make the whole balcony feel like a little room. When you match planter boxes to the bamboo color, the plants look like part of the structure instead of attachments. This is the best option if you’re trying to block sightlines or create a calmer, more secluded look. The aesthetic is natural and textured, and it photographs well because the vertical bamboo pattern gives the greenery something to “stand on.” Choose plants that can handle sun and wind, since bamboo setups often sit in exposed spots.
Install bamboo privacy panels using adjustable brackets that attach to the railing posts, not the rail bars, so the weight distributes correctly. Add planter boxes below or integrated into the bamboo line; use planters that are long and shallow (about 6-8 inches deep) for a clean strip look. Mount boxes with outdoor-rated screws into a stable backing board so they don’t sag. Plant with a mix of upright fillers and small trailing accents to avoid a flat look. Water at the base and check that drainage stays open — clogged drainage makes the bamboo smell and discolor quickly.
Use a moisture barrier sheet between bamboo and planter mounting hardware to slow down rot.
Don’t wrap bamboo tightly around wet planter edges — trapped moisture stains and weakens the attachment points.



