
1. Two-Tone Ladder Rack with Open Toe Slots
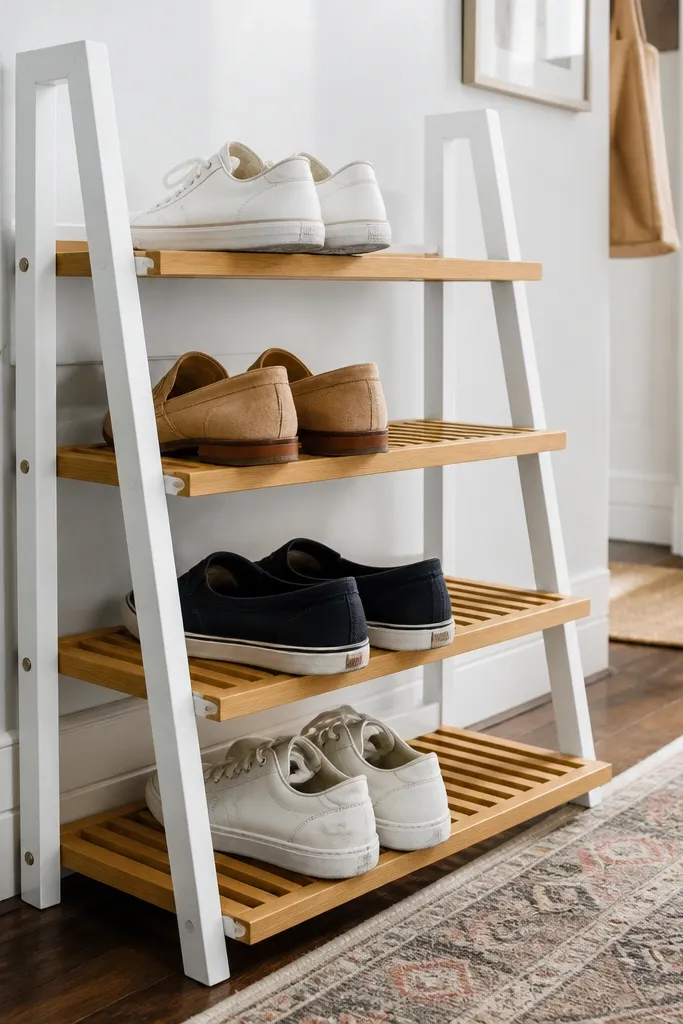
Start by cutting two side rails (for example, 1x2 boards at your chosen height) and enough slat pieces to create 5-7 rows. Lay the rails on a flat surface, then space slats using a scrap spacer equal to your target shelf gap (around 4-5 inches for low-top shoes). Pre-drill and countersink screw holes so the slats sit flush and don’t split. After assembly, sand 120 then 180 grit, then paint the frame and stain the slats separately so the two tones stay sharp. Finish with two coats of satin polyurethane on the slats, letting the last coat cure before you load shoes.
This quick and easy diy shoe rack looks like entryway decor because the face is simple and the lines are repeatable. The ladder-style sides give you a sturdy frame without bulky panels, and the open slots show shoes clearly so the rack never looks cluttered. Use a light stain on the slats and a crisp painted frame so it reads clean even in bright daylight. It’s a great fit for small hallways where you want quick grab-and-go access, and it works well with sneakers, flats, and low-top shoes. Skill level is beginner-friendly if you’re comfortable with straight cuts and consistent spacing.
Skip thisDon’t skip countersinking — protruding screw heads make the ladder face look messy fast.
Editor's noteUse masking tape along the seam where paint meets stain so the two-tone edge stays razor straight.
2. Modern Box-Frame Rack with Thick Shelves
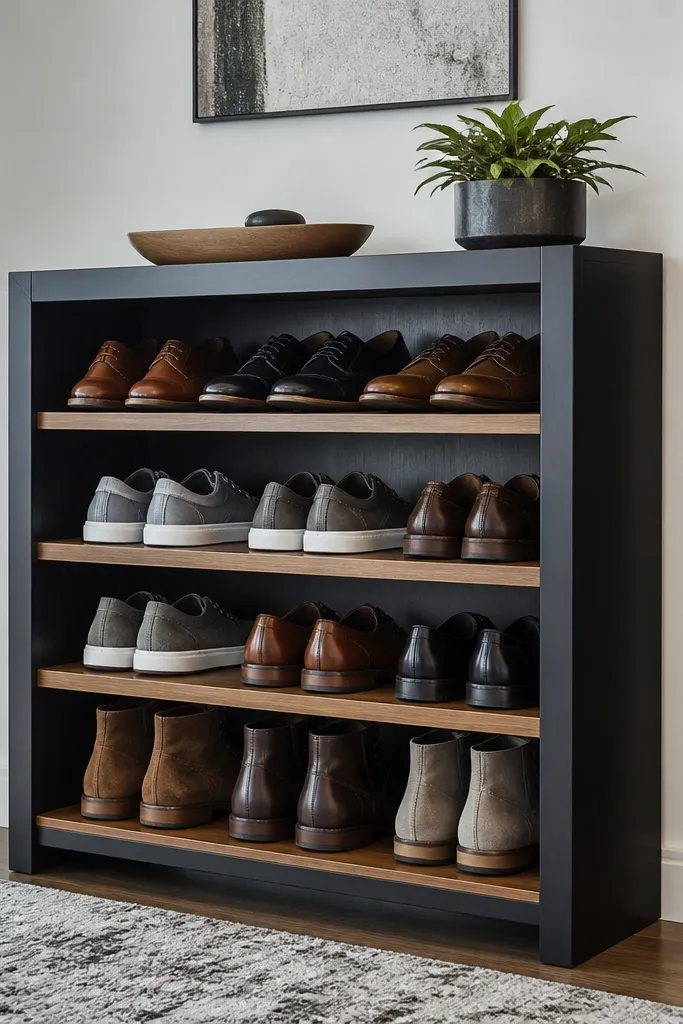
Cut a rectangular frame from 1x3 or 1x4 boards for the sides and top/bottom, then add internal vertical supports at the shelf positions. Cut shelf boards to the internal width so they rest fully on the supports, not half-floating. Dry-fit everything and mark shelf locations with a pencil line across both sides, then drill pilot holes and screw from the outside so the interior stays clean. Sand edges lightly, then apply a primer and paint the frame in matte or satin black; stain or paint shelves in a lighter tone if you want contrast. Seal shelves with polyurethane so scuffs wipe off and shoe soles don’t chew up raw wood.
If you want the rack to look like it belongs in a modern apartment, build it like a cabinet frame with thick shelves. Thick boards read heavier and more intentional, and the box frame keeps the whole structure rigid when you shove shoes in. This style also hides small imperfections because the shelves sit in a defined grid. It fits entryways with a lot of foot traffic because the open front rows make it easy to grab without lifting or bending. It’s also a good match for boots if you set the shelf spacing wider and keep the shelf depth around 14 inches.
Skip thisDon’t make shelves too thin — 3/4-inch stock is the sweet spot for a sturdy, furniture-like face.
Editor's noteClamp shelves in place while you drive screws — it prevents tiny “step” lines that ruin the straight-grid look.
3. Reclaimed Wood Slat Rack with Simple Herringbone Back
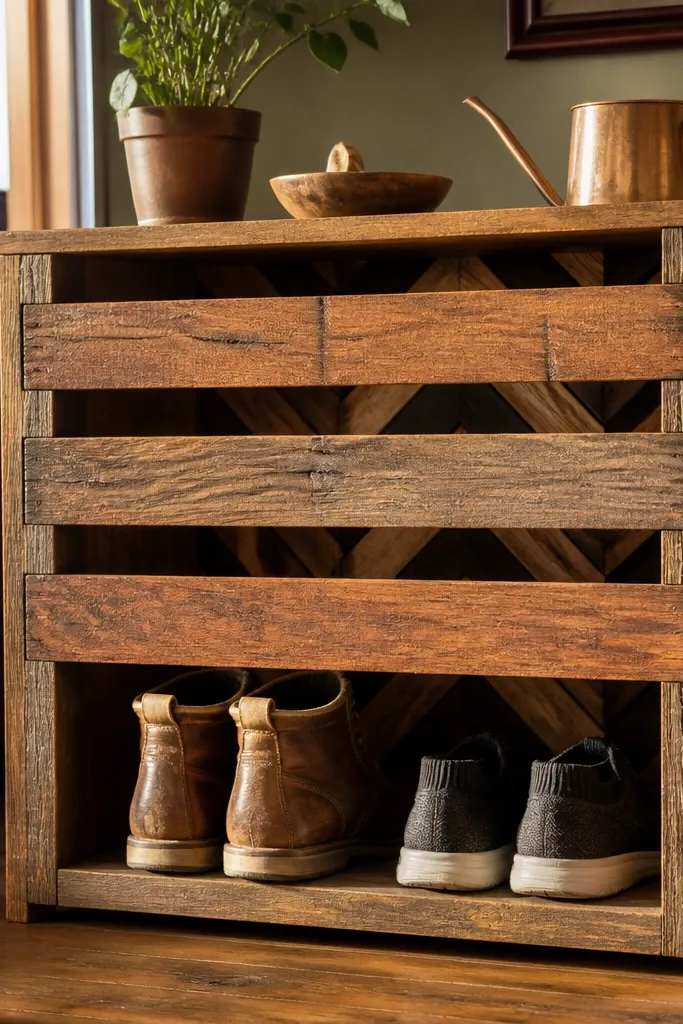
Cut your side frames from straight boards and cut shelf slats to the internal depth. Assemble the front first by screwing slats to the sides with equal spacing, using a spacer strip of scrap plywood. Then cut small back supports in a simple herringbone layout and screw them diagonally behind the shelves to lock the rack square. Sand the front face to knock down rough reclaimed grain, then seal with a stain-matching clear topcoat or a dark wax finish. Let the topcoat cure fully before loading shoes so the finish doesn’t feel tacky under weight.
This is the rack that looks like you found it at a vintage shop, but the build is still quick. The front face uses spaced reclaimed-style slats so shoes breathe and the whole thing looks light. The hidden win is the herringbone back support: it resists side-to-side movement without making the rack bulky. It’s photogenic because the slats create texture, and the back pattern gives depth even from across the room. Great for covered entryways, mudrooms, and laundry rooms where you want air circulation and easy cleaning.
Skip thisDon’t skip back bracing — slat-only fronts rack sideways when you hit the shelves in daily use.
Editor's noteBefore sealing, wipe dust with a damp rag and let it dry — sawdust under finish makes reclaimed-style slats look dull.
4. Wall-Mounted Rail Rack with Drop-Down Shoe Stops
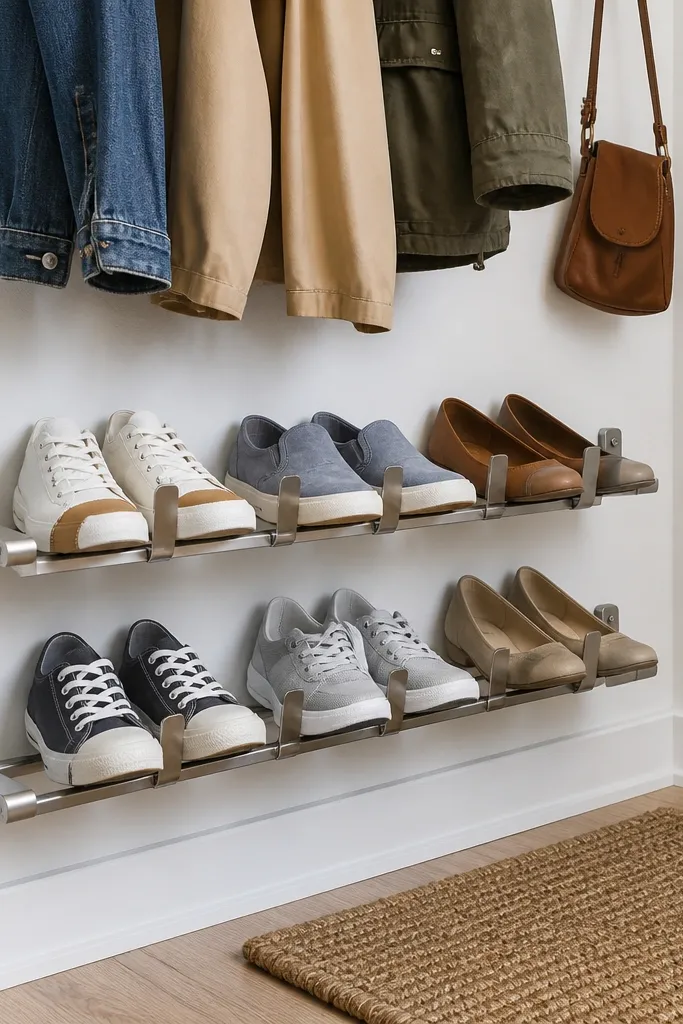
This is the cleanest-looking option for tight spaces: wall-mounted rails with small hinged stops that keep shoes from sliding forward. It’s “quick and easy” because you’re not building a floor-standing box, and it looks intentional because the wall hardware sits in a straight line. Use it for sneakers, flats, and low boots — not tall riding boots. It’s ideal for narrow hallways and apartments where floor space matters, and it keeps the entryway visually calm. Skill level is moderate only because you need to anchor into studs correctly and align the stops.
Find studs, mark a level line, and install two horizontal rails using 2.5-inch screws into studs. Cut stop pieces (around 2 inches tall) so they hinge or sit against the rail lip to prevent shoes from slipping out. Attach the stops with hinges or a simple screw-on stop bracket depending on your hardware — keep them consistent across rows. Finish the rails by sanding and painting to match your trim, then add felt pads where shoes touch to reduce scuffing. Test with one shoe per row first, then adjust stops so toes don’t hang out.
Pre-drill through the rail and use a level on every hole location — misalignment shows instantly on a wall-mounted rack.
Don’t anchor into drywall alone — a wall-mounted rack needs studs or proper anchors every time.
5. Rounded-Edge Entry Rack with Fabric Bin Rows
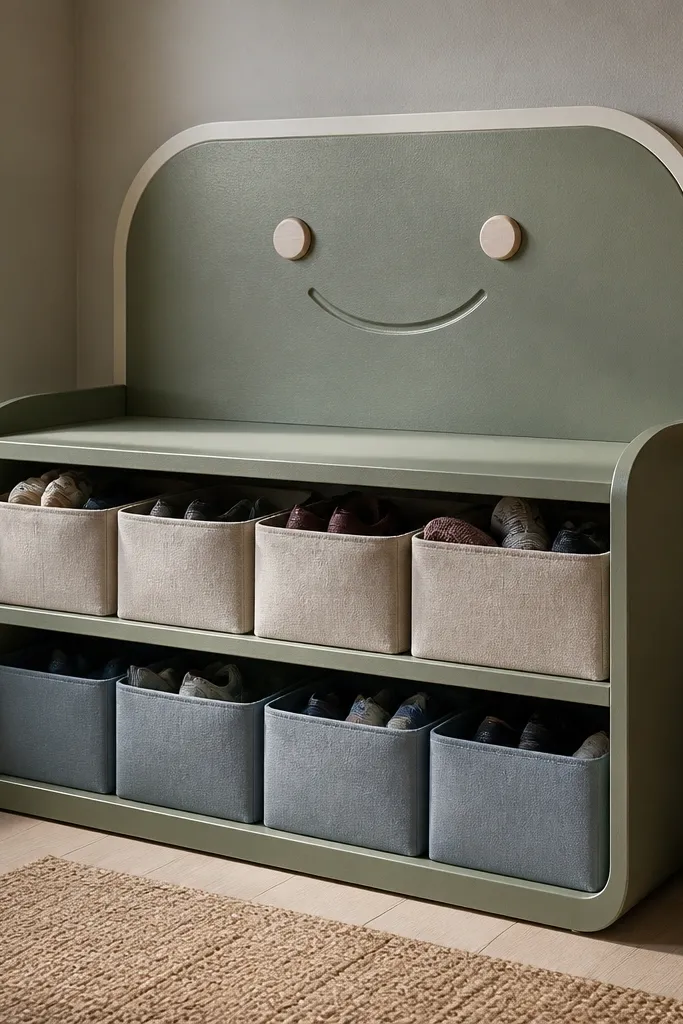
Build a simple rectangular frame from 1x3 lumber and add internal supports at your bin heights; keep shelf depth around 12-13 inches for most sneakers. Round over the front edges using a 1/4-inch roundover bit so the rack looks finished without extra trim. Screw supports in place, then attach bin rails or fabric mounting cleats so bins sit square. Sand and seal the frame, then attach the fabric bins using Velcro strips or stitched loops to the rails. Let everything dry and test with weight before you load multiple pairs.
This one looks soft and styled, not industrial. The front face uses rounded edges for a friendlier look, and the fabric bins hide the mess when you have mismatched shoes, small accessories, or seasonal pairs. It’s a win for people who want “quick and easy diy shoe rack” that doesn’t show every scuff and lace. Use it for kids' shoes, casual sneakers, and items you don’t want on display. The shelves still stay sturdy because the wood frame holds the load, while the bins keep everything organized and photogenic.
Skip thisDon’t use flimsy bins without a bottom insert — sagging bins make the whole rack look cheap.
Editor's noteChoose bins with stiff fabric or a thin plastic insert at the bottom so they don’t sag and look wrinkled.
6. Slim Corner Shoe Rack with Angled Back Panels
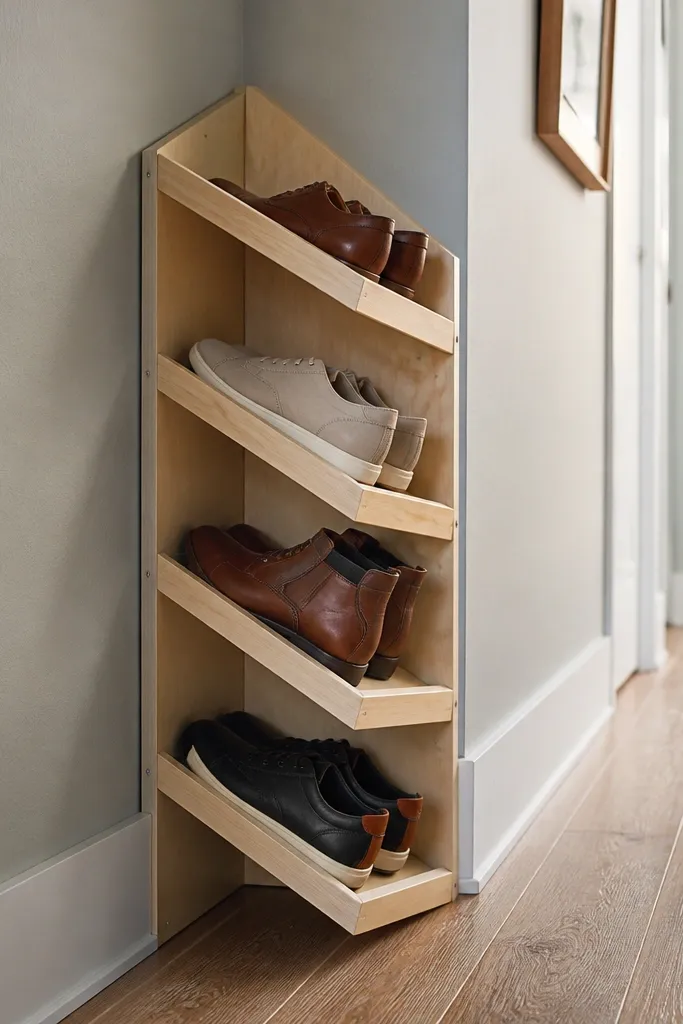
Corner racks look custom because the angles make them fit your room instead of fighting it. This design is sturdy because the angled back panels act like braces, so the rack resists wobble even with a narrow footprint. It’s a good choice for narrow entries where a standard shelf unit blocks the walkway. The angled layout also helps shoes sit neatly without constantly pushing them back. Build time stays in an afternoon because you’re doing simple cuts and repeating the same shelf dimensions for each row.
Measure the corner footprint and cut two side panels that match the corner angle, then add a back brace panel cut with the same angle so the rack sits tight. Cut shelves to fit between the angled sides, aiming for 11-12 inches depth and 5 inches between rows for sneakers. Assemble the frame on a flat surface and screw shelves in order from bottom to top, checking squareness after the second shelf. Sand, then apply satin paint or stain + polyurethane. Add rubber feet and consider a small anti-tip wall tie since corner units can get bumped.
Use a scrap board as a shelf spacing gauge so every row looks evenly spaced from the doorway angle.
Don’t rely on glue-only joints — angled panels need screws or you’ll see looseness after repeated use.
7. Rolling Shoe Rack with Drawer-Style Bottom Tray
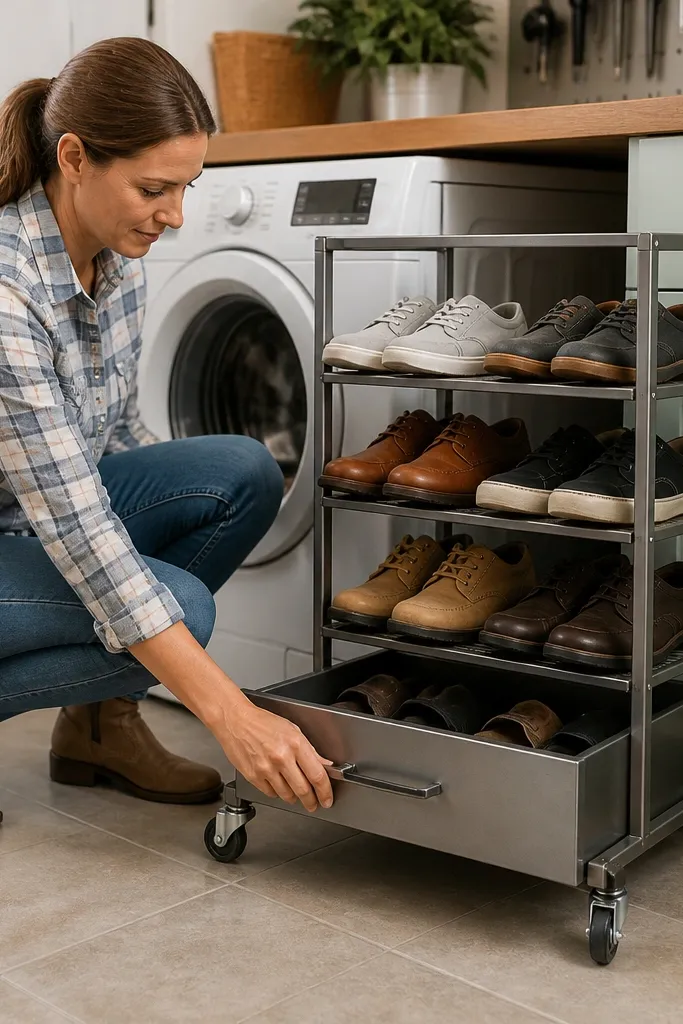
This looks like a small piece of furniture because the bottom tray creates a grounded base and the open shelves keep it airy. Add casters and you can pull the rack out to clean the floor, then roll it back without lifting shoes one by one. It’s a great fit for mudrooms and laundry rooms where you want mobility and easy maintenance. The rack stays sturdy because the frame is a full box, and the bottom tray adds stiffness. Skill level is beginner-friendly if you’re careful with caster alignment.
Build a rectangular frame with side panels and internal supports, then cut 3-5 shelves based on your tallest shoes. Add a bottom tray panel (for example, 1/2-inch plywood or thin board) and screw it to the frame so it acts like a brace. Sand and finish the exterior first so you don’t trap dust under hardware. Install casters on a level surface, then flip carefully and check that all wheels touch evenly. Finally, add a stop strip or lip at the front of shelves so shoes don’t slide out when you roll it.
Use locking casters — the rack should feel solid when parked, not like it wants to drift.
Don’t skip a front lip or stop strip — rolling racks make shoes slide if there’s no barrier.
8. Pegboard Back Shoe Rack with Matching Shelf Fronts
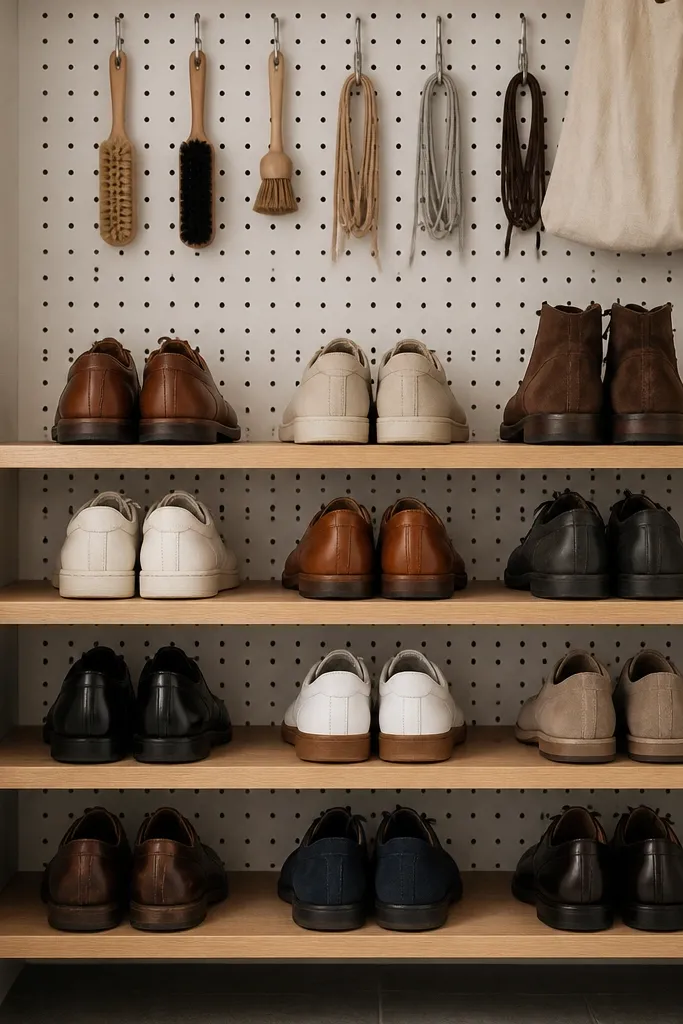
Cut a simple frame from 1x3 boards, then attach a pegboard sheet to the back using screws at the frame edges. Cut shelves to fit between the frame sides and screw them into the frame rails at equal spacing, using a spacer to keep rows straight. Sand the front frame, then paint the frame and shelves to match your wall color or trim. Seal the wood shelves, and add a small lip at the front edge so shoes don’t creep forward. Hang a few brush hooks on pegboard after the finish cures so you don’t scratch wet paint.
Pegboard adds a DIY look that still photographs well, because it creates a neat grid behind the shelves. It’s also functional: you can hang shoe brushes, laces, and small organizers without cluttering the shelf face. The pegboard back stabilizes the rack and prevents racking, as long as you screw it to a proper frame. This style works for sneakers and flats and also gives you flexibility if your shoe sizes change. It’s best for entryways where you want “organized on purpose,” not just stacked shoes.
Skip thisDon’t mount shelves directly into pegboard — shelves need the frame for strength.
Editor's notePaint the pegboard first before attaching shelves — it looks cleaner and you avoid overspray on finished wood.
9. Floating Shelf Shoe Rack with Hidden Side Supports
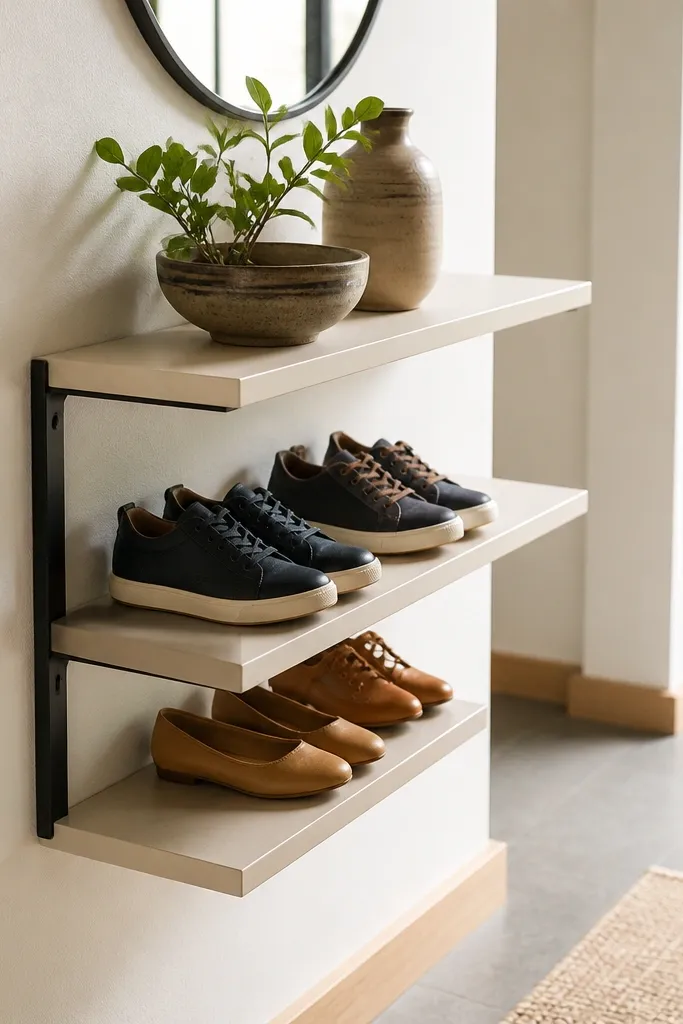
Find studs, then mark a level layout for each shelf height based on your shoe height plus 1 inch clearance. Install heavy-duty shelf brackets into studs, then cut shelf boards to the bracket spacing so the shelf sits flat without rocking. Add hidden side cleats behind the shelves for extra rigidity and to hide fasteners. Paint or stain the shelf fronts, then seal for scuff resistance. Test load with one pair per shelf first, then add the rest once you confirm no sag.
Floating shelves read expensive, and you can get that look with hidden side supports and a clean, painted face. This is a strong option for narrow entries because it doesn’t take up much floor space, and the open shelves keep the area from feeling crowded. Sturdiness comes from using proper brackets and side supports, not from relying on thin shelf boards. It’s best for sneakers, flats, and smaller pairs where the weight stays moderate. The build is quick if you already have a stud finder and you’re comfortable drilling straight.
Skip thisDon’t assume decorative brackets are strong enough — use rated brackets for the weight of shoes.
Editor's noteUse 3/4-inch shelf boards for the floating look — thinner boards flex and show through the finish.



