
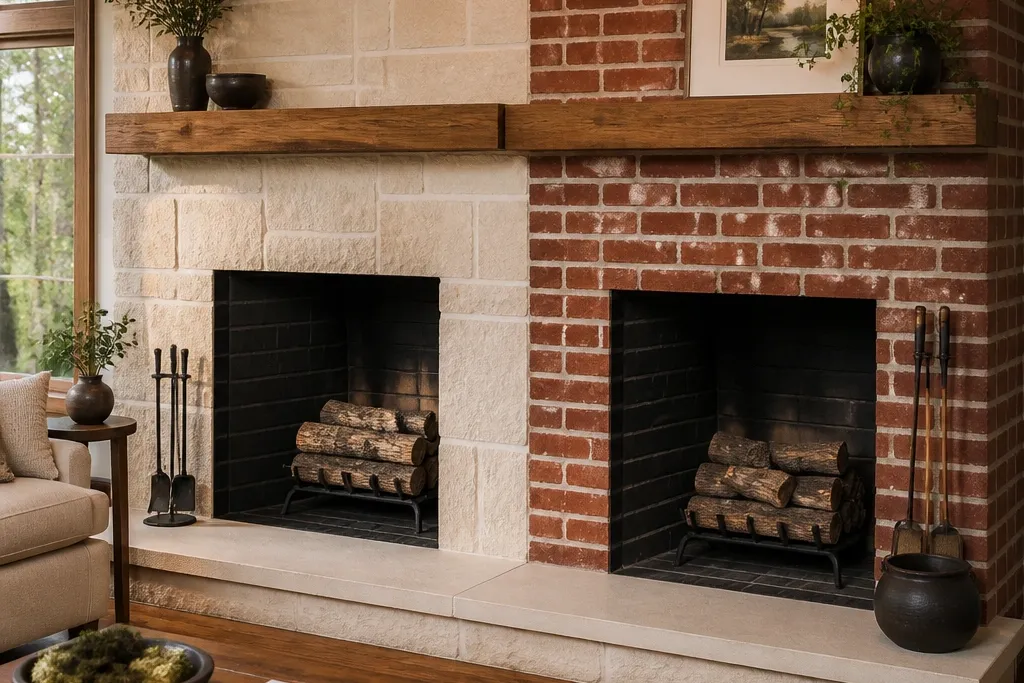
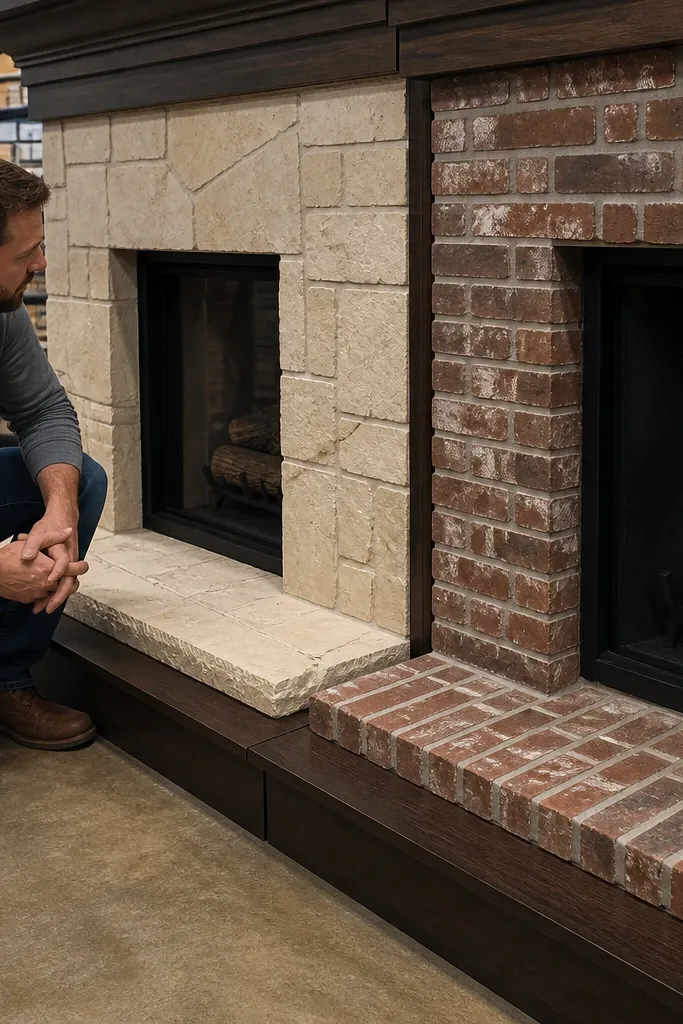
1. Limestone veneer with recessed mortar joints
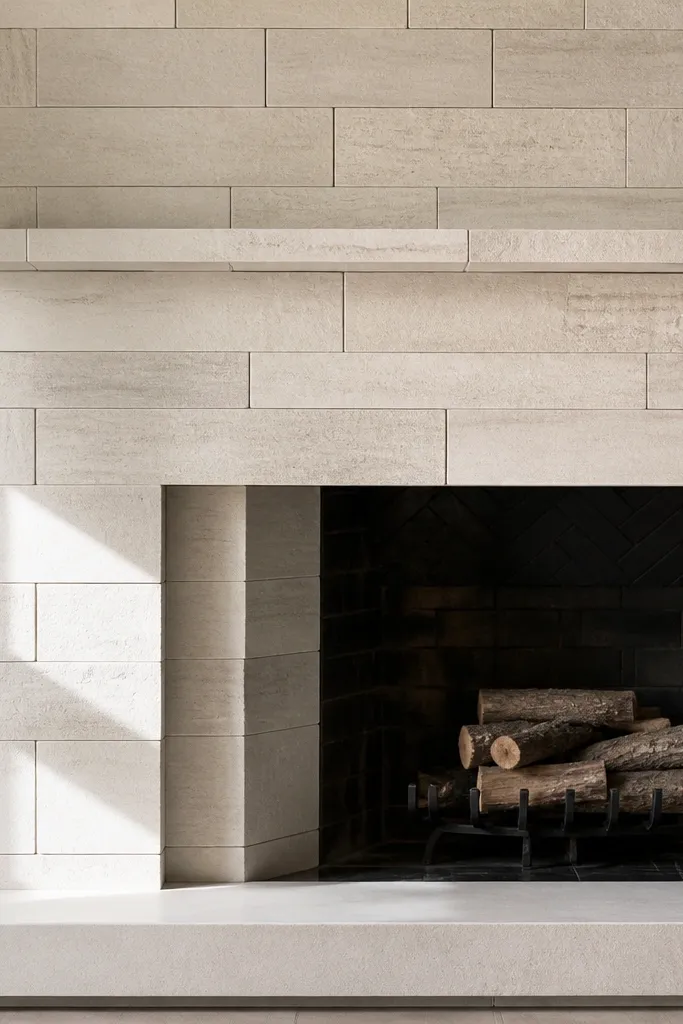
If you want a stone fireplace that looks intentionally finished instead of “covered,” recessed mortar joints are the move. Limestone’s light tone reads clean even with a busy grain, and the recessed joint keeps the face from getting muddy-looking when soot or dust settles. This option works best when your opening has a defined frame — a mantel and hearth that are already straight helps the stone stay crisp. Skill level is DIY-friendly if you’re comfortable dry-fitting and trimming, but it’s not a slap-on weekend project.
First, set your heat-safe backing and confirm your fireplace opening has a straight perimeter for a consistent reveal. Then dry-lay the first three rows and mark a level baseline line so your limestone courses don’t drift. Mix a polymer-modified thinset or the manufacturer’s recommended mortar for stone veneer, butter the back of each piece, and keep joints slightly recessed using a jointing tool or tape spacer. Finally, seal the stone after curing — do a small test spot first so you like the sheen level.
Dry-lay 10-15 pieces on the floor and pick a mix that avoids repeating the same color/edge shapes in a row.
Don’t use grout-like sanded mortar for stone veneer joints — it crumbles and stains at heat exposure.
2. Ledger stone veneer with a flat mantel shelf frame
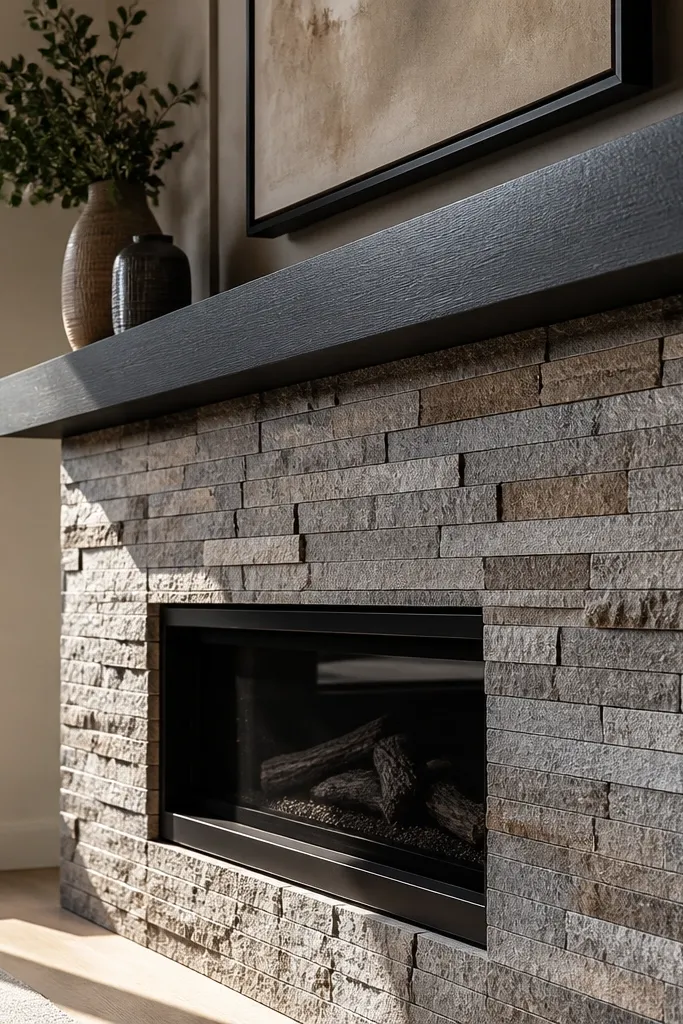
Ledger stone is the easiest stone style to make look intentional because it has a consistent shape language even when each piece varies. When you pair it with a flat mantel shelf, the fireplace reads modern and structured, not rustic-chaotic. It’s also forgiving if your wall isn’t laser-straight because stone edges can hide minor waviness, as long as your baseline is level. This is a medium-skill build: cutting angles for corners and keeping courses aligned takes patience.
Start by snapping a level line where the first course hits and plan your bottom row so it lands with a full piece or a narrow cut. Use a wet saw with a stone blade for clean cuts on the ledger pieces; dry-fit corner caps so the faces align without gaps. Apply mortar in a thin, even coat and press each piece with slight wiggle to collapse ridges, then use a consistent joint line spacer. Seal the ledger stone after installation and joint cure time, especially if your hearth gets soot.
Stagger vertical seams by at least half a piece so the pattern doesn’t create a “brick-wall stripe” look.
Don’t skip corner dry-fitting; ledger stone corners look wrong when you improvise after mortar hits.
3. Tumbled limestone for a softer, older look
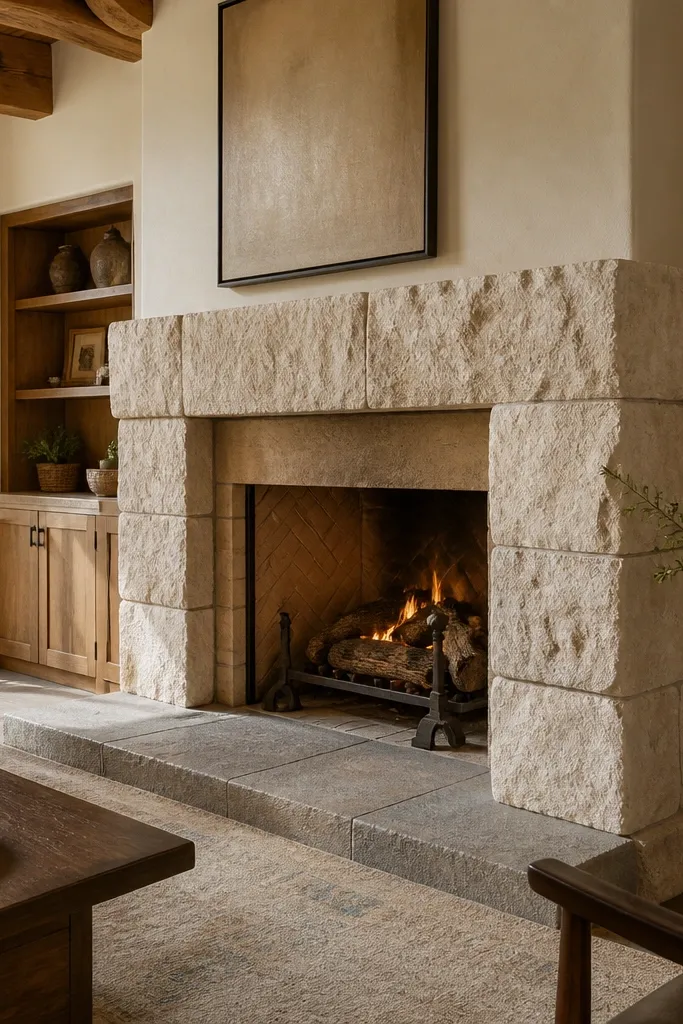
Tumbled limestone gives you that softened, worn texture without going full rustic with heavy chisel marks. It’s great for rooms that already have warm wood tones because it doesn’t look too sharp or too new. The irregular edges hide small installation imperfections, which makes it a good pick if you’re remodeling an older home with slightly out-of-square framing. Expect a medium build time because you’ll sort pieces and manage color variation intentionally.
First, sort your tumbled pieces by color range and edge thickness so you don’t end up with two very similar blocks next to each other. Then dry-lay the entire face area and assign where each piece goes — don’t rely on “whatever fits” once mortar starts. Use a polymer-modified mortar and keep joints consistent by using a thin spacer stick or tape guide. After the mortar cures, seal the stone and wipe off any haze with the recommended cleaner.
Use fewer full-size chunks in the center and more varied pieces near corners to make the face look naturally composed.
Avoid sealing before mortar fully cures — you trap moisture and can get blotchy spots.
4. Bluestone veneer with a dark hearth contrast
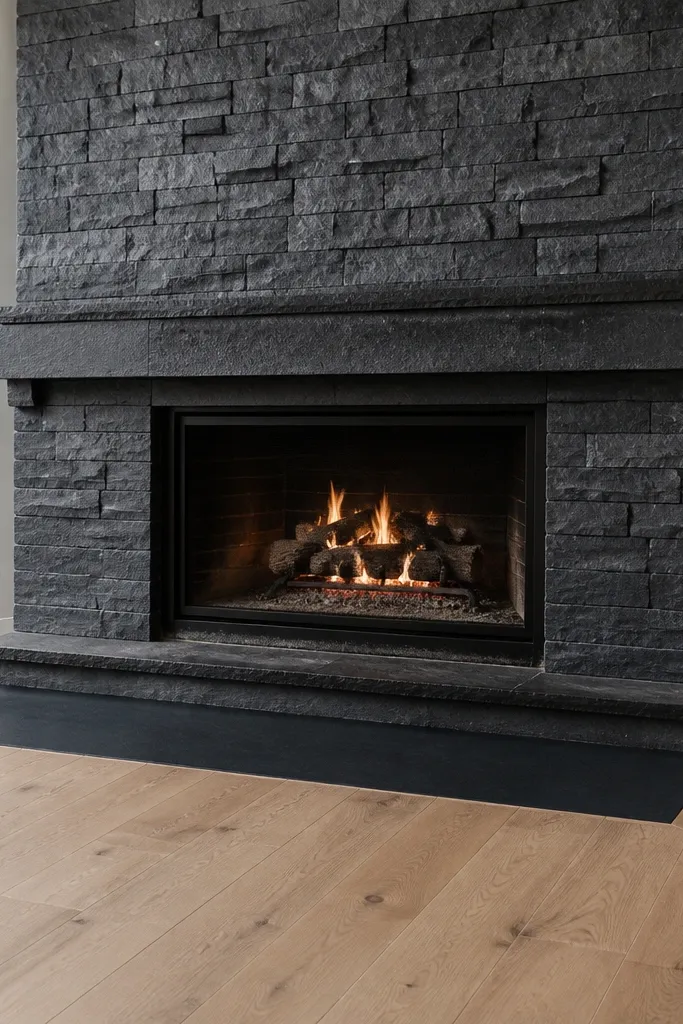
Bluestone veneer brings weight and contrast fast, especially when you keep the hearth and lower trim darker. It’s a strong choice for a fireplace that needs visual grounding — think high ceilings or rooms with light flooring. The downside is it shows soot and dust more clearly than pale stone, so you need a cleaning plan and a sealer that matches your stone’s absorption. Build difficulty is medium because random faces require careful layout and consistent spacing.
Start by selecting mortar color that doesn’t fight the stone — warm gray or charcoal tends to blend well with bluish tones. Dry-lay a section and decide your joint depth so you don’t end up with thick, heavy grout lines that make the face look flat. Cut thin pieces carefully and use the “back-butter” method so every piece has full contact. Seal the stone after cure and keep a small pH-neutral cleaner on hand for quick wipe-downs after heavy use.
Plan a slightly wider reveal around the firebox opening so the dark stone doesn’t look like it’s “leaking” into the metal trim.
Don’t use light, sandy mortar — it makes bluestone look chalky and uneven after a few cleanings.
5. Rough-cut random stone veneer with a tight perimeter reveal
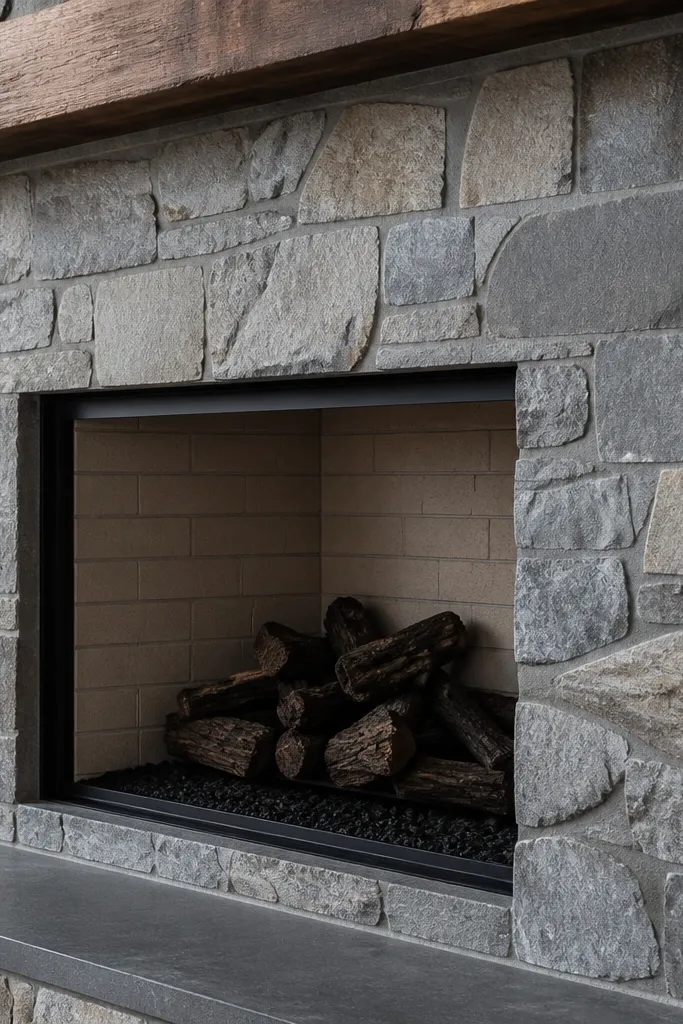
Random-cut stone looks best when the perimeter is disciplined. That means you keep a tight, straight reveal at the opening and control your outer edge with a trim strip or corner system, then let the face vary freely in the middle. This option is excellent for DIY remodels over imperfect walls because the random faces visually absorb small waves. It’s still medium skill: you must sort pieces and maintain joint spacing so it doesn’t turn into a patchwork blanket.
First, install your edge trim or corner system and mark a level baseline for the bottom row. Then dry-lay the center first, leaving the perimeter pieces for last so you can fine-tune edges and corner gaps. Use mortar with enough body to hold the irregular faces and press each piece until the mortar squeezes slightly at the edges. Finish by cleaning joints with a small brush and sealing once everything cures.
Keep the biggest, flattest stones on the center — they hide seam transitions better than small chips.
Don’t mix sizes without sorting; it creates “clumps” where the wall looks heavier in one spot.
6. Manufactured dry-stack look stone veneer with narrow joints
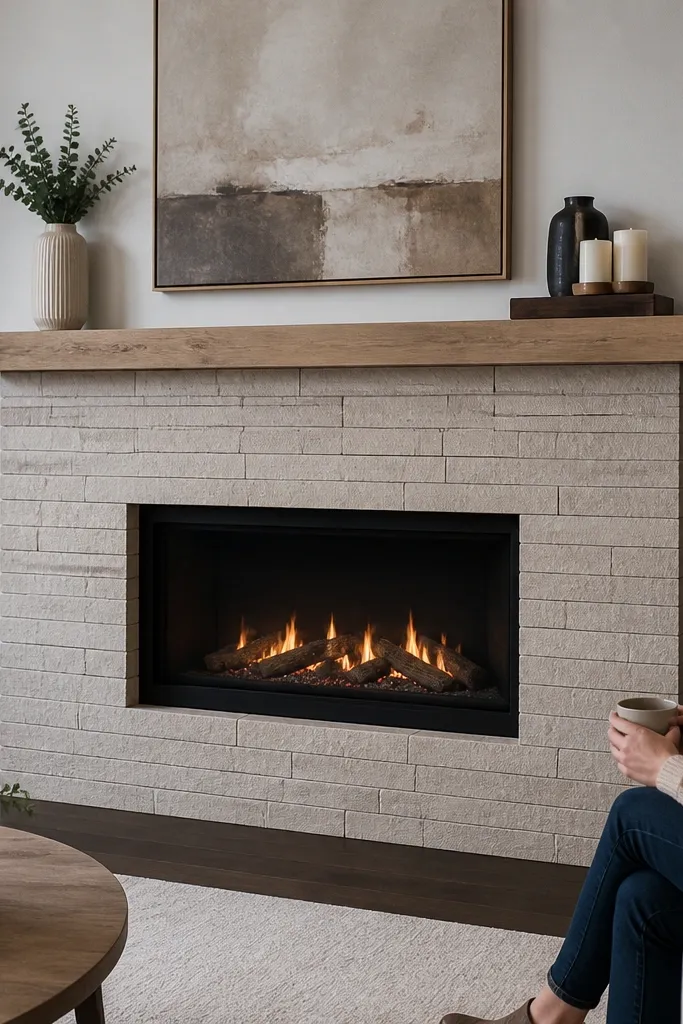
Dry-stack look veneer is the fastest way to get a modern stone face without learning heavy masonry skills. The narrow joints read like a clean, engineered system, and the stacked pattern makes it easier to keep symmetry around the opening. This is a good pick if your room is already modern — flat-panel cabinets, simple black hardware, neutral walls. It’s medium ease, because you still need careful layout; narrow joints show crooked lines immediately.
Start by confirming your substrate is flat enough for thin mortar — if the wall has waves, fix them first. Then dry-fit a row to confirm the interlocking seams line up and decide where you’ll start the pattern so the top course ends clean. Apply a skim coat where required, set each piece with the manufacturer’s recommended adhesive, and use the included joint spacers or a thin tape guide. After cure, clean any mortar haze and seal if the material calls for it.
Photograph your dry layout before you start; it’s the fastest way to catch a repeated seam mistake.
Avoid overfilling joints — dry-stack looks messy when mortar smears beyond the intended line.
7. Slate veneer with consistent direction and sealed edges
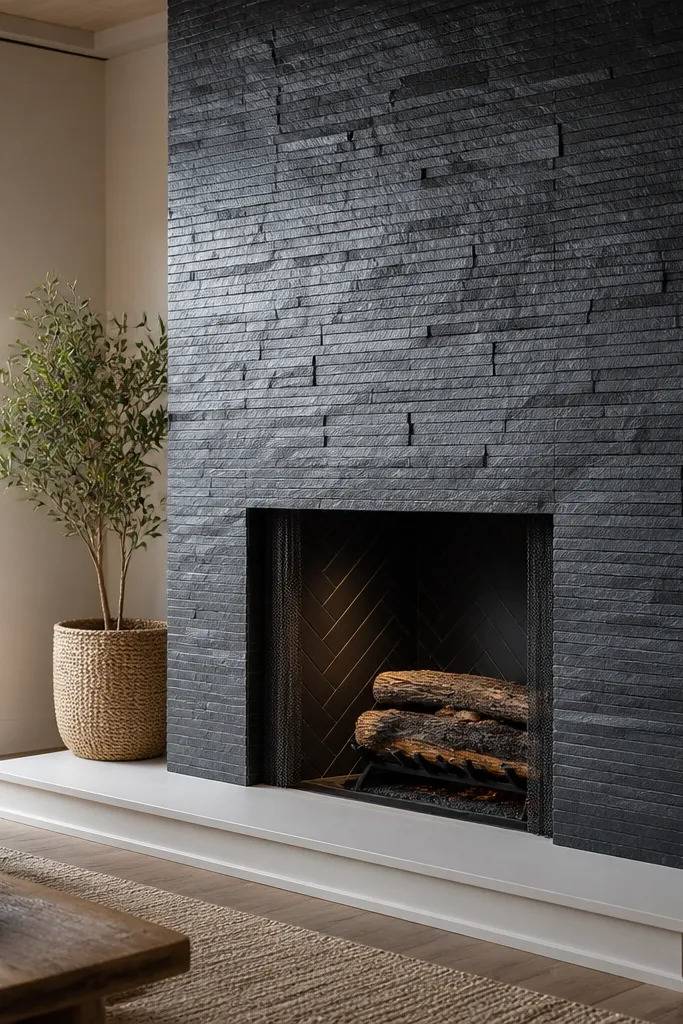
Slate veneer can look incredible because the color variation is natural, not painted. The key is consistency: if you rotate pieces randomly, the fireplace face can look chaotic and muddy. This option suits modern homes that can handle a cooler palette and want sharper visual contrast. It’s harder than limestone or ledger stone because slate chips easily and cuts need to be clean to prevent rough edges showing.
First, pick a direction for the slates and commit — mark your pieces so the long grain runs the same way on the face. Then use a wet saw for clean cuts and test fit around the opening to keep the perimeter reveal straight. Apply mortar thinly and press pieces with minimal squeeze-out so you don’t smear mortar into slate texture. After cure, seal the slate and do a gentle wipe-down so dust doesn’t dry in pores.
Sort slate by thickness before you start so you don’t have to compensate with thicker mortar at random spots.
Don’t skip sealing; unsealed slate absorbs soot and looks patchy after a few uses.
8. Traditional brick veneer in running bond with 3/8-inch joints
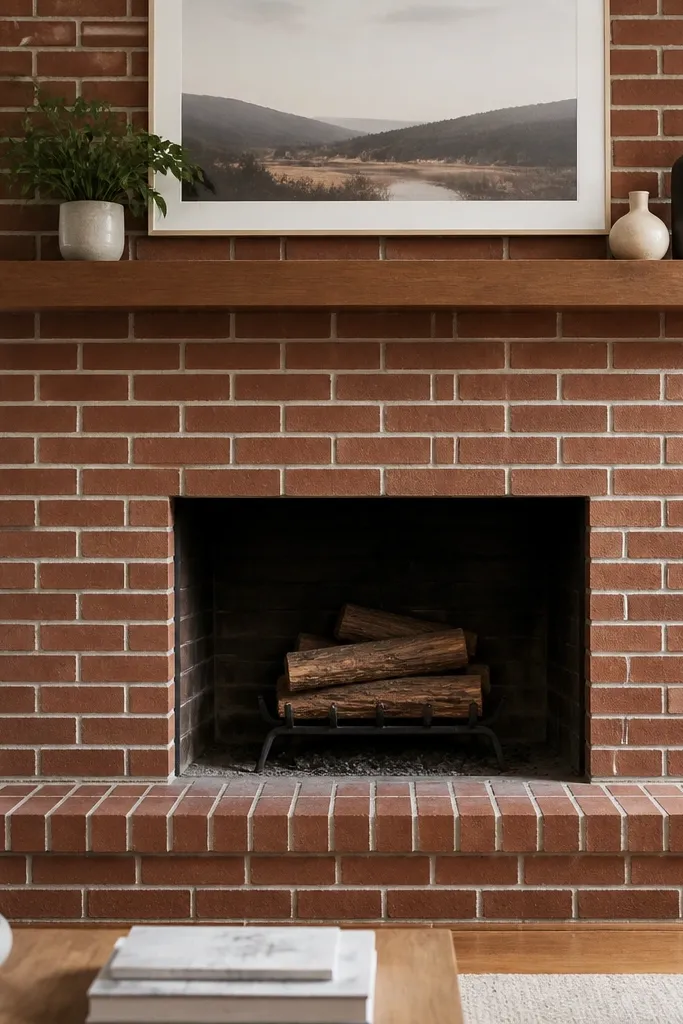
This is the most reliable DIY choice when you want a stone-vs-brick decision that’s low drama. Running bond gives you a familiar rhythm, and brick’s consistent shape makes it easier to keep the whole face level and square. The joint size is your control knob: 3/8-inch joints look classic and hide minor cutting imperfections better than thinner joints. Maintenance is straightforward — periodic dusting and quick soot wipe-downs keep it looking sharp.
Start by measuring the fireplace face width and planning your first row so you end with a full brick or a cut that’s wider than 1/2 brick. Snap a level baseline and use spacers set to 3/8-inch joint width. Mix thinset or brick veneer mortar per the product instructions, then butter the back of each brick veneer piece for full contact. Work from the center outward, check plumb every few rows, and finish by cleaning joints before mortar sets hard.
Use a chalk line for your vertical seam spacing — it keeps the pattern from drifting when you reach the corners.
Don’t rush grout cleanup; dried mortar on brick texture is a pain and can discolor the face.
9. Handmade-style brick veneer with slight color variation
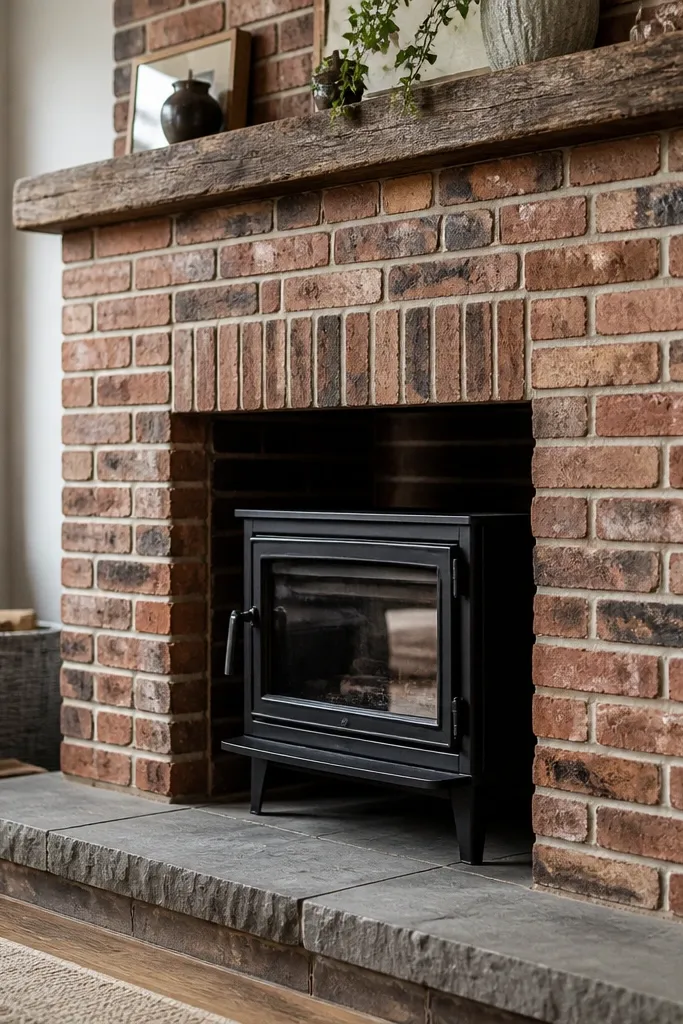
If you want brick’s clean lines but hate the “factory perfect” look, handmade-style veneer is the sweet spot. The slight face variation hides minor wall imperfections and makes the fireplace feel custom without needing full masonry. It’s also forgiving if you’re doing this over a remodel where the wall isn’t perfectly flat. Ease is easy to medium because you still need straight courses, but the brick’s irregular face makes tiny spacing differences less noticeable.
First, dry-lay a few rows and mix bricks from multiple boxes so color variation distributes instead of clustering. Then set your baseline and keep your joint width consistent with spacers. Apply mortar with a notched trowel and press each brick veneer so the edges align without smearing mortar across textured faces. Let cure fully before cleaning, then seal only if the brick veneer product recommends it.
Start your pattern so the color variation is strongest near the center, not stuck at one corner.
Avoid using one box for the whole face — you’ll get obvious banding as the colors shift.
10. Brick veneer with soldier course mantel border
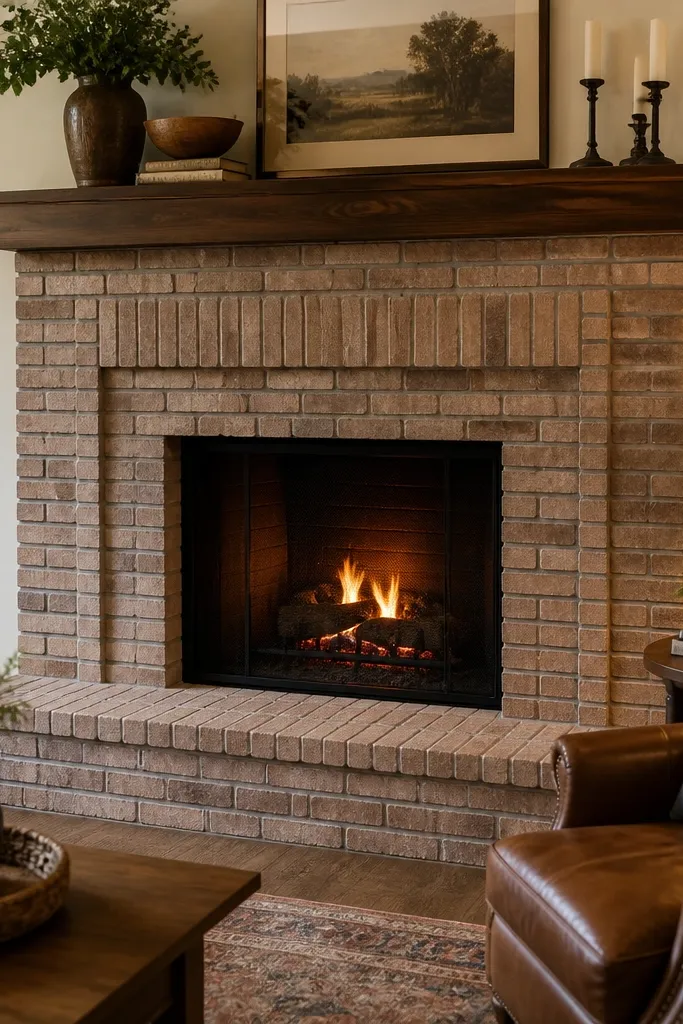
Soldier courses are the fastest way to make a brick fireplace look designed instead of accidental. You get a visual frame that pulls the eye up to the mantel, and brick’s rectangular shape makes soldier lines straight even for DIY. This option works best when your mantel is a separate shelf piece or a thick surround where a border helps it read as intentional. It’s medium ease because the soldier course needs tight alignment and consistent cutting at the ends.
First, measure the mantel opening and decide how much border you want — a 1-brick height soldier course is a clean default. Then establish your baseline and build the main running bond face up to where the soldier course sits. Install the soldier bricks with the same mortar joint width as the rest of the wall, and use a straightedge to keep the line perfectly level. Finish by cleaning mortar haze and checking the border for any lippage at the ends.
Editor's noteUse a rigid spacer block at the ends so your soldier course doesn’t creep when you set the last two bricks.
Skip thisDon’t make the soldier course with a different joint width than the field bricks — it looks like a border stuck on after.
11. Stacked vertical brick veneer for a modern frame

Stacked brick veneer looks sharp when you want a modern, graphic fireplace face. The vertical emphasis makes ceilings feel taller and gives a clean frame around the opening. It also shows wall imperfections more than running bond, so you need a flatter substrate and more careful measuring. Ease is medium because layout accuracy matters, but the build method stays simple.
Start by making the substrate flat — skim coat or patch high spots before you install any brick veneer. Then dry-fit the first column and mark your vertical seam positions so the stacked lines stay consistent. Mix mortar, set bricks in a tight stack pattern, and use spacers that control joint thickness the entire way up. When you reach corners, use corner pieces or cut bricks so the face stays flush and the seam looks straight.
Editor's noteCheck alignment with a long level across multiple bricks, not just row-by-row.
Skip thisAvoid starting with a corner cut; start with a full brick so your seam lines don’t drift toward the opening.
12. White-painted brick veneer with a masonry paint system
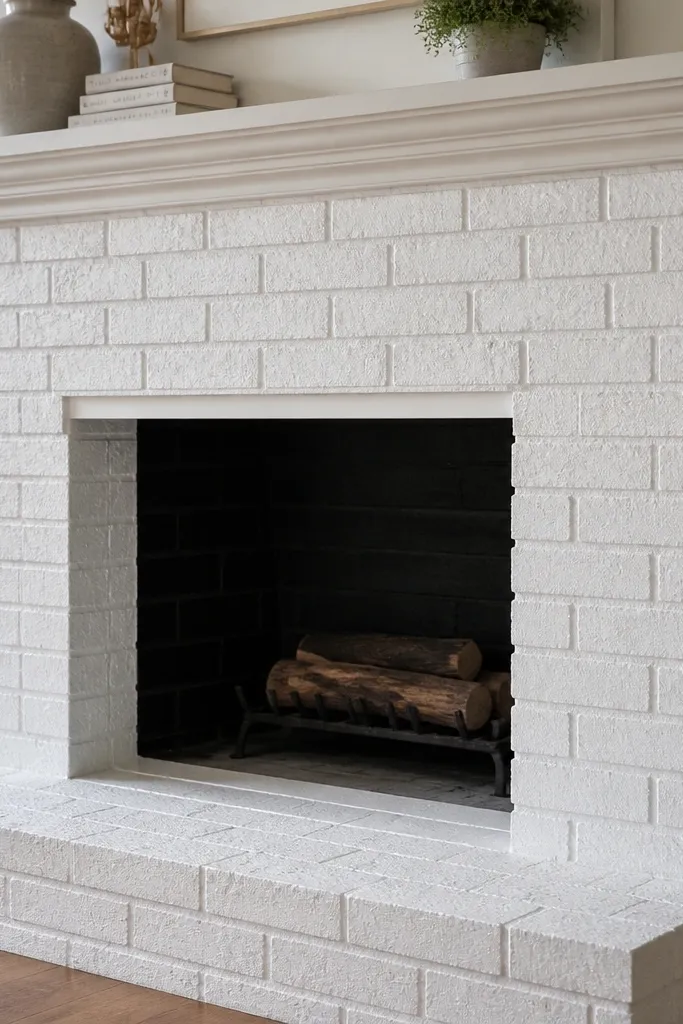
Painted brick is a smart choice when you want the look of bright stone or limewash without changing the whole fireplace shape. A proper masonry paint system keeps the brick texture visible while toning down red and brown undertones that clash with cool wall colors. This is easy because you can correct minor mortar color differences with paint coverage. The trade-off is maintenance: paint touch-ups are part of ownership, especially near the firebox where soot can dull the finish.
First, clean the brick and mortar joints thoroughly so the surface is dust-free. Then apply a masonry bonding primer made for brick, let it cure, and roll or brush on a topcoat masonry paint rated for exterior/interior masonry. Work in thin coats to keep drips out of the grooves, and use a small brush for mortar lines. After the paint cures, keep cleaning gentle — avoid harsh solvents that can strip the coating.
Do a small test panel to confirm coverage — some bricks need two coats for full white.
Don’t paint over un-cured mortar; it can cause peeling and a blotchy finish.



