
1. Chalky Whitewash over Natural Stone with Charcoal Grout Lines
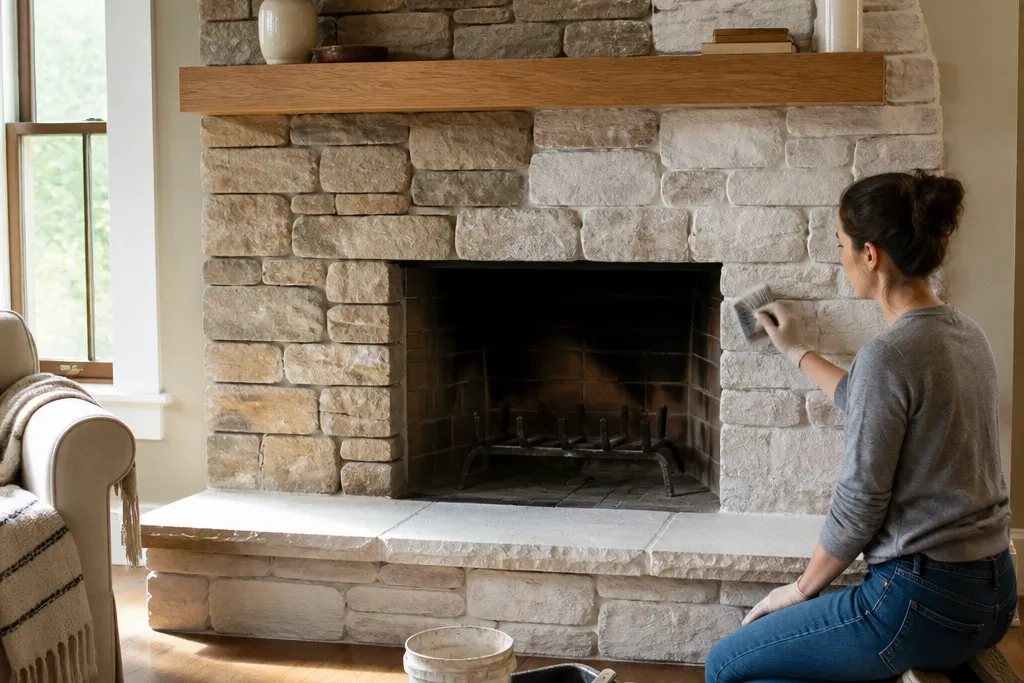
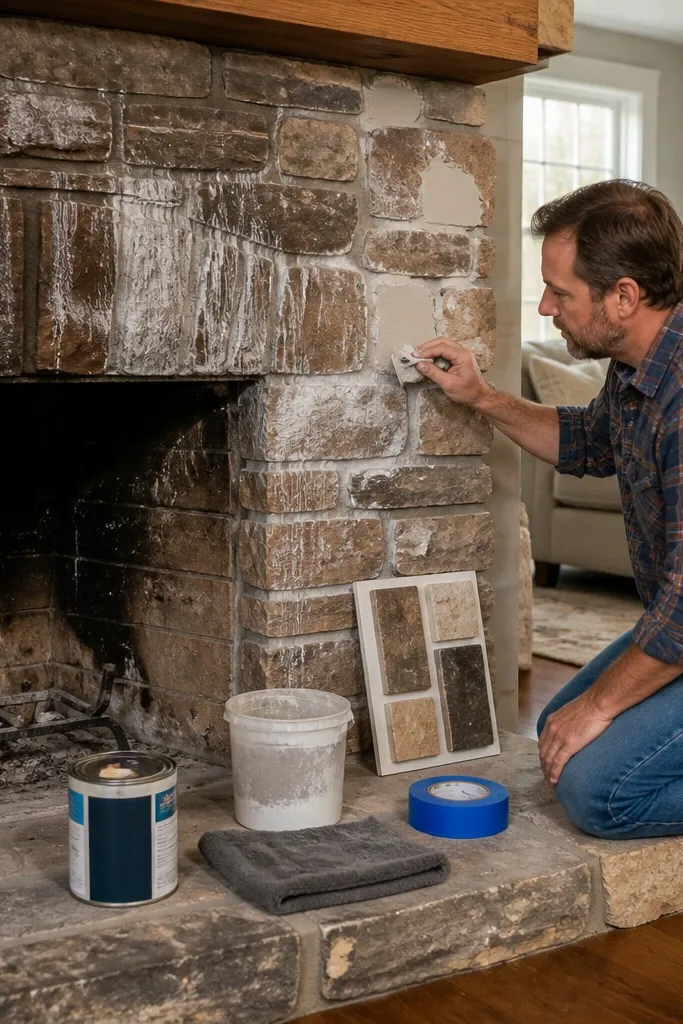
Start by cleaning the stone with a degreasing cleaner and a stiff nylon brush, then let it dry fully. Tape plastic along the firebox opening edge and hearth edges so you don’t get wash on metal or glass. Mix a whitewash (white paint cut with water) and apply with a wide brush, wiping back quickly so you don’t turn it into a flat block. After it dries, use a small angled brush to paint grout lines charcoal, then seal the whole surround with a stone-safe matte sealer.
This look keeps your stone’s texture but makes it look fresh and styled instead of heavy. The whitewash is thin enough that you still see the rock pattern, while the charcoal grout lines add crisp definition that reads clean in photos. It’s beginner-friendly because you’re not trying to level the stone — you’re enhancing it. Use it in rooms with warm wood, tan walls, or cream textiles where a bright fireplace will balance everything. Expect a matte finish that hides minor unevenness and looks intentional even from across the room.
Skip thisDon’t seal before everything is fully dry or you’ll trap moisture and get cloudy spots.
Editor's noteDo a test patch in a hidden corner and check it under the room light — whitewash can shift warmer or cooler after drying.
2. Soft Greige Paint Wash with a Clean Off-White Hearth Border
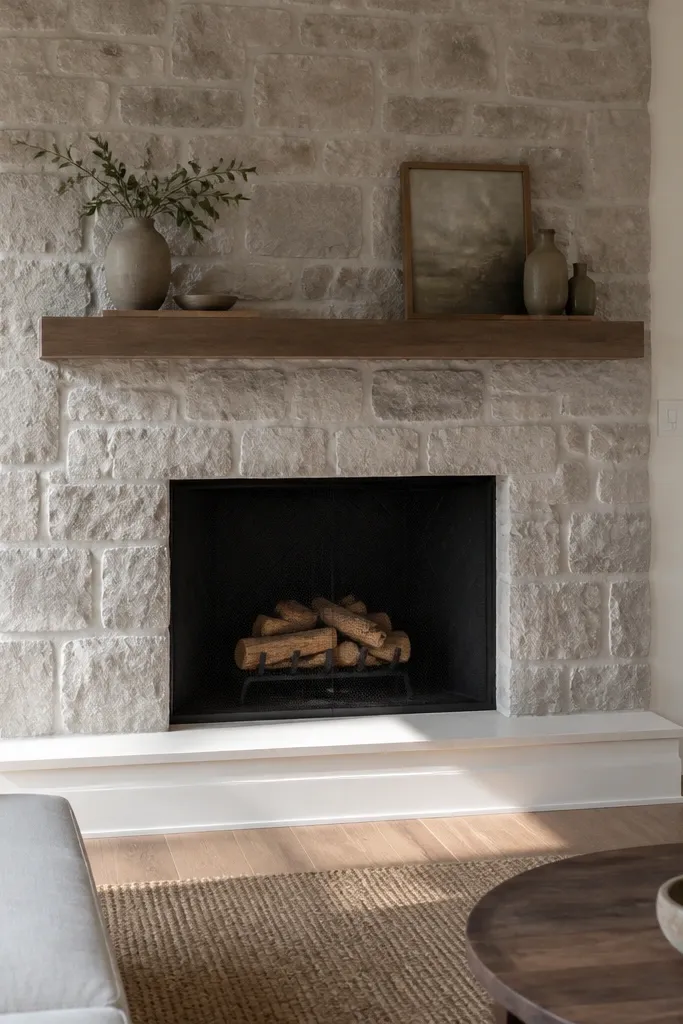
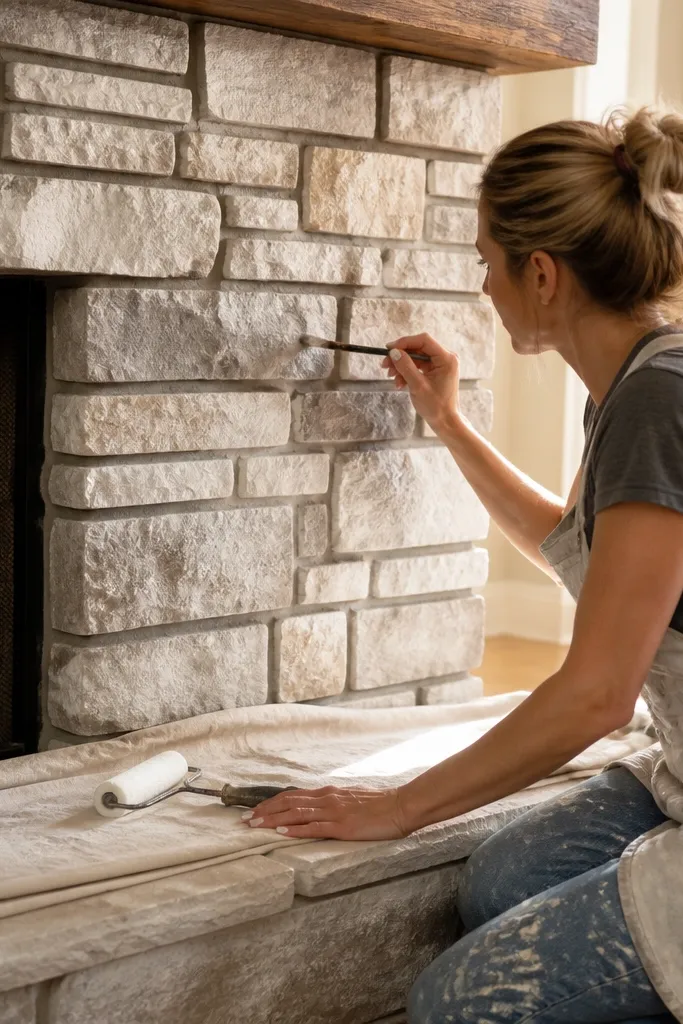
Clean and dry the stone thoroughly, then apply a bonding primer made for masonry or tile/stone surfaces. Mix greige paint with water or a glaze medium to create a translucent wash, and apply it in vertical passes so texture stays visible. Wipe lightly with a rag if you want more stone showing. Let it cure, then tape a narrow strip where the hearth meets the surround and paint that border off-white in a single clean coat. Finish with a satin or matte masonry sealer.
Greige is the “middle” tone that makes stone feel modern without turning cold. The key is keeping the stone texture visible with a thin wash rather than fully plastering it smooth. The off-white hearth border creates a straight line that makes the fireplace look trimmed and finished. This works great if your living room has beige walls, natural oak floors, or neutral rugs and you want the fireplace to blend but still look sharp. It’s also forgiving for beginners because you can clean up edges with paint once the border is taped.
Skip thisSkip glossy paint on stone — it catches uneven texture and makes the fireplace look messy.
Editor's noteUse painter’s tape pressed down with a plastic putty knife edge for crisp lines on bumpy stone.
3. Modern Blackened Surround with a Brushed Concrete Mantel Shelf
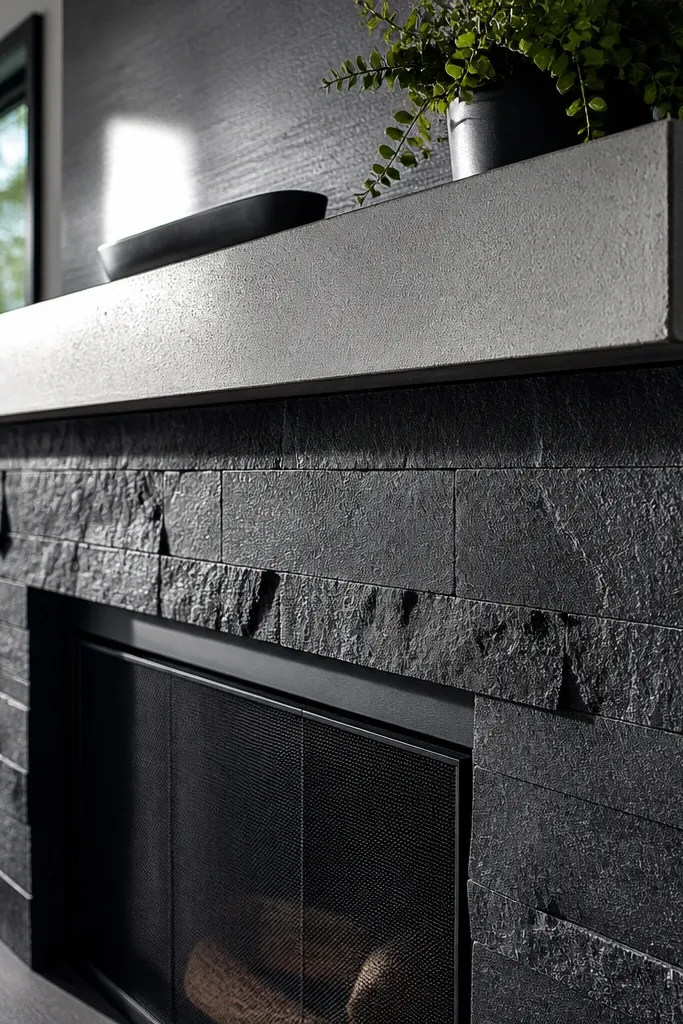
Degrease the stone, then sand any glossy patches lightly and prime with a masonry bonding primer. Paint the stone with a matte or satin black masonry paint using a foam roller for flatter areas and a brush for grooves. Remove tape early enough to prevent tearing, then touch up edges. For the mantel shelf, use a concrete look coating or paint system on a clean, sanded surface, following the product instructions for dry time. Seal the mantel top with a clear protective topcoat made for interior surfaces.
If you want a high-contrast, modern look, black paint on stone is the fastest route. Pairing it with a concrete-style mantel shelf makes the fireplace feel intentional and architectural rather than like a quick repaint. This option works best when your mantel is already a straight wood piece you can paint or cover. The black surround hides stains and age, while the lighter mantel shelf adds balance and keeps the whole thing from feeling too heavy. It’s a strong choice for rooms with black hardware, dark frames, or cool-toned decor.
Skip thisDon’t paint over soot or old smoke residue without degreasing first — black will show it.
Editor's noteTwo thin coats look better than one thick coat on stone because thick coats pool in pores.
4. White Tile Accent Frame around the Firebox Opening
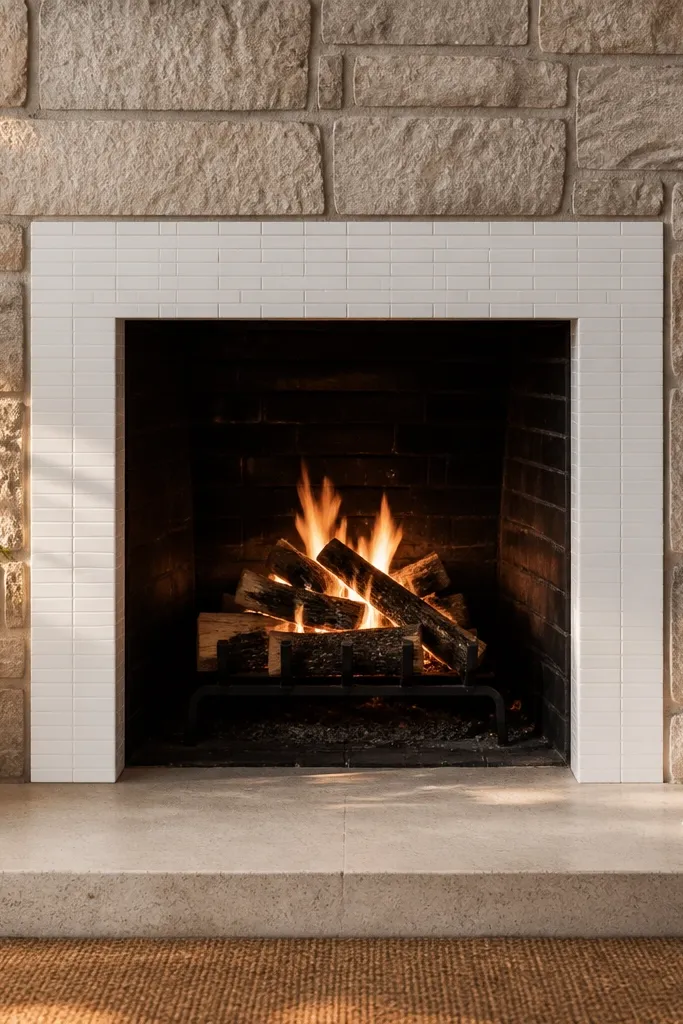
This is the “designer frame” move: you keep your stone but add a crisp tile border around the opening so the whole fireplace reads finished. White tile reflects light and makes the firebox area look clean and modern. It’s especially photogenic because the frame creates a strong rectangle in the center of a textured surround. This works well when your stone is already a decent color and you just need structure and contrast. Beginner-friendly versions use thin tile sheets or small-format tiles that are easier to cut than large slabs.
Measure the opening carefully and plan a border width of about 1.5 to 2 inches so it looks intentional, not skinny. Clean the stone, then apply a thin-set mortar designed for tile over masonry. Use tile spacers for consistent lines and cut tiles with a score-and-snap cutter for small pieces (or a wet saw if your cuts are complex). After the frame sets, grout with a white or light grey grout, wipe clean, then seal grout if the product recommends it. Finish by sealing the stone area if it’s porous and you changed its finish.
Dry-fit the frame pieces first and adjust for any uneven stone edges before you mix thinset.
Avoid wide grout lines on textured stone — they look sloppy unless your stone is very even.
5. Sage Green Stone Tint with Warm White Mantel Paint
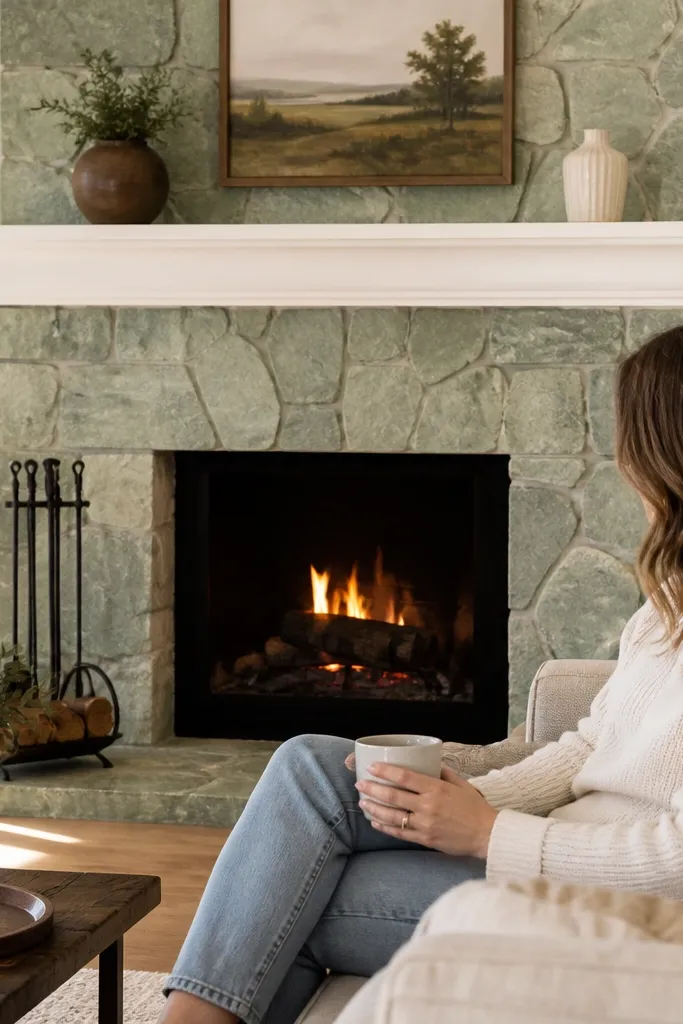
Clean the stone and prime with a bonding primer. Mix a sage tint using a green paint and a glaze medium so you can control how see-through it is. Apply with a brush and rag technique: brush on, then wipe back to leave more color in shadows. Let it dry and inspect under daylight. Paint the mantel with warm white in two coats, lightly sanding between coats for smoothness, then apply a clear protective topcoat.
Sage tint turns stone into a soft, modern background color. You get depth because the tint stays semi-transparent, so you still see the stone’s lumps and valleys. Painting the mantel warm white keeps the fireplace from looking flat and stops the green from taking over the room. This is a great fit for light wood floors, creamy walls, and neutral textiles where you want color without going bold. It also photographs well because greens read calmer than pure grey or stark white.
Skip thisDon’t use heavy tint like full paint — you’ll lose the stone texture that makes this look special.
Editor's noteChoose a sage with a touch of yellow (not blue-green) so it looks warm next to wood tones.
6. Terracotta Clay Wash for a Sunlit Mediterranean Feel
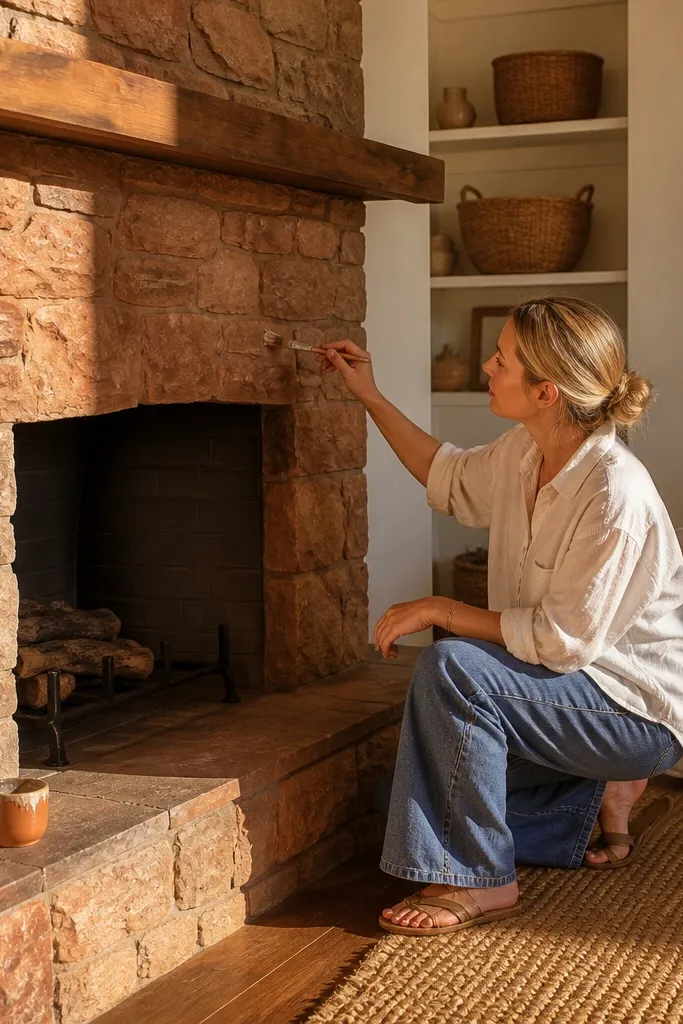
Clean thoroughly and prime with a masonry primer that bonds to stone. Mix a terracotta glaze using paint plus glaze medium so it spreads thin and doesn’t streak. Apply in small sections, working top to bottom, then wipe highlights with a damp rag so the base stays translucent. After curing, seal with a heat-safe stone sealer and use a matte finish so it looks like pigment rather than coating. Touch up any grout areas with a small brush if lines look too dark.
Terracotta wash makes stone feel sunlit and layered. The secret is using a clay-toned glaze that settles into crevices so the texture looks dimensional instead of uniformly colored. This look is perfect for rooms with white walls, woven textures, and natural materials like rattan or jute. It also hides minor discoloration because warmer washes camouflage uneven spots. If you want your fireplace to look like it belongs in a vacation home, this is the most direct route without replacing stone.
Skip thisSkip sealing — unsealed clay wash can rub off onto hands and textiles.
Editor's noteTest two strengths of terracotta glaze on scrap cardboard and compare after drying — the difference is huge.
7. Charcoal Limewash Look with Soft White Dry-Brushing
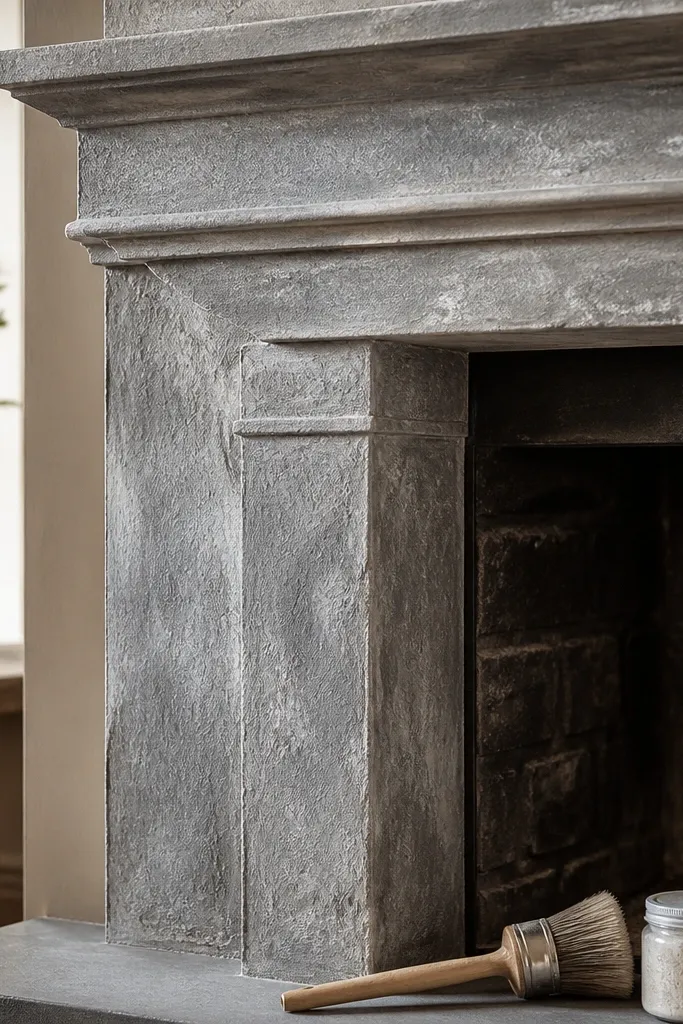
Prime the stone, then apply a charcoal base coat thinned to a limewash consistency. Let the base set until it feels tacky or dry to the touch per your paint instructions. Load a dry brush with off-white paint, wipe most off on a paper towel, then lightly sweep across raised stone areas only. Keep the motion quick and controlled so it doesn’t create obvious streaks. Seal with a matte masonry sealer to lock in the finish.
Limewash-style finishes look aged but clean, and charcoal makes it feel modern. Dry-brushing soft white over a charcoal base creates that “light hitting old plaster” effect that looks great in photos. You’re basically painting layers: a base tint for depth, then lighter highlights to make the stone pop. This is ideal for rooms with black accents, dark floors, or moody lighting where the fireplace becomes the focal point. It’s beginner-friendly if you keep the dry-brush light and consistent.
Skip thisDon’t overdo the white — too much makes it look like soot spots instead of highlight.
Editor's noteUse the smallest brush you can tolerate for control — dry-brushing needs precision more than coverage.
8. Stone Skim-Coat to Smooth the Face, Then Paint Satin White
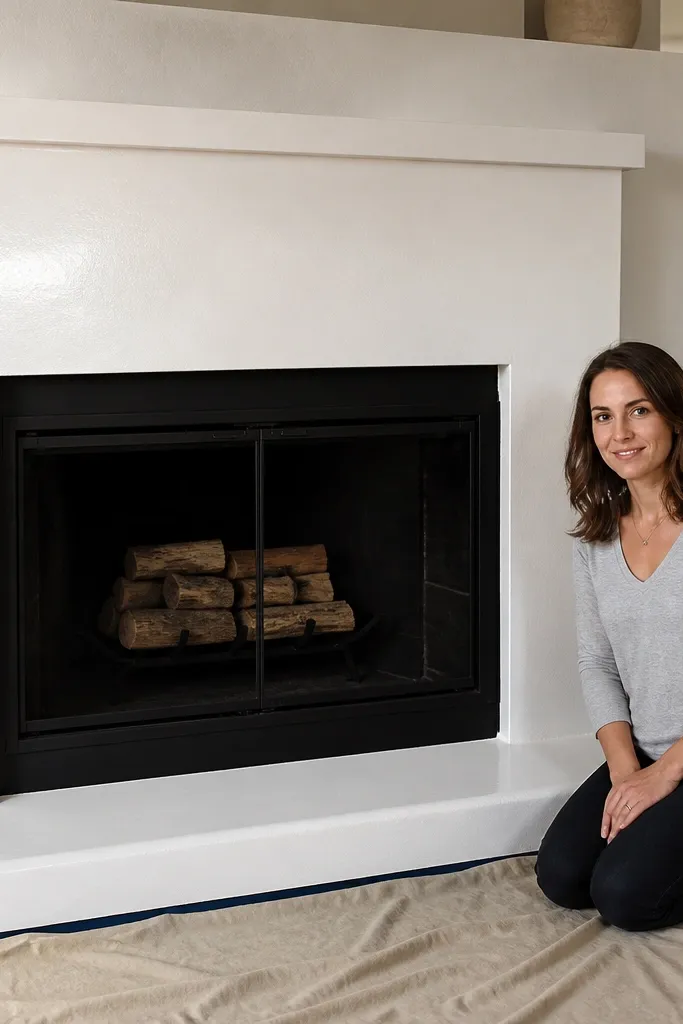
This one changes the texture completely. A skim coat covers uneven peaks and grout lumps so the fireplace becomes a smooth painted surface with crisp edges. Then satin white gives a gentle light reflection that looks high-end next to dark wood or black metal. It’s great when your existing stone is too rough for your style or your grout lines are messy. The tradeoff is that it’s more work than a wash, but it’s still beginner-friendly with the right patching compound and patience.
Clean and degrease, then apply a bonding primer made for masonry. Mix a thin skim-coat compound (cement-based patch) and spread a very thin layer using a flat trowel, working in one direction first then cross-smoothing. Let it cure, then sand with a pole sander and vacuum as you go. Wipe dust, then prime again and paint satin white in two coats. Seal if your product or climate suggests it; otherwise use the paint’s recommended protective finish.
Aim for a skim coat thickness you can still feel lightly with your fingers — too thick can crack.
Don’t skip sanding — brush marks and trowel lines show through satin paint.
9. Herringbone Peel-and-Stick Tile Accent on the Hearth Edge
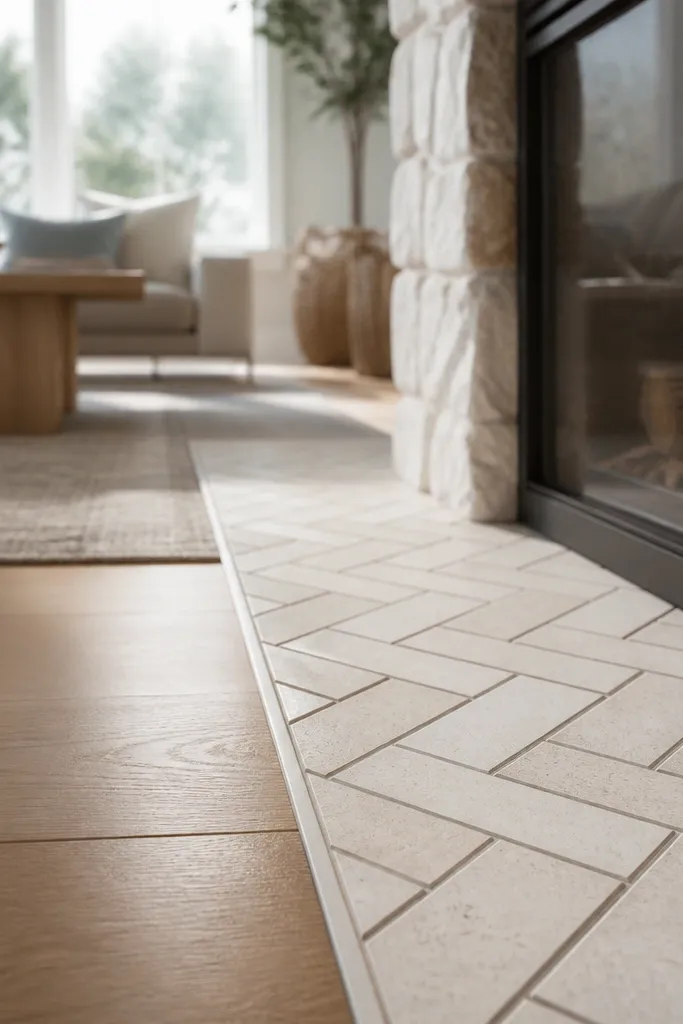
Clean the hearth edge and remove any loose paint or debris, then scuff-sand and wipe with a degreaser. Measure the edge length and plan a centered starting point so the herringbone lines match. Apply peel-and-stick tile starting at the center, pressing firmly and using a straightedge as you go. Trim edges with a utility knife and metal ruler. Seal the groutless surface if your tile system allows it, and keep the hearth dry until the adhesive cures.
This is a small project with a big photo payoff because it frames the bottom edge of the fireplace. A herringbone pattern looks crisp and intentional, and peel-and-stick tile is beginner-friendly if you prep properly. Keep it to the hearth edge or a narrow band so you don’t fight heat and heavy wear across the whole surface. Choose a light neutral tile for brightness or a soft grey for modern calm. This works in living rooms where the fireplace is already decent but the hearth area looks unfinished or dated.
Skip thisDon’t stick over glossy residue — tiles will lift at the edges.
Editor's noteWarm the tile sheets slightly with a hair dryer before sticking so corners lay flatter.
10. Beige Stone Paint with a Dark Bronze Firebox Trim
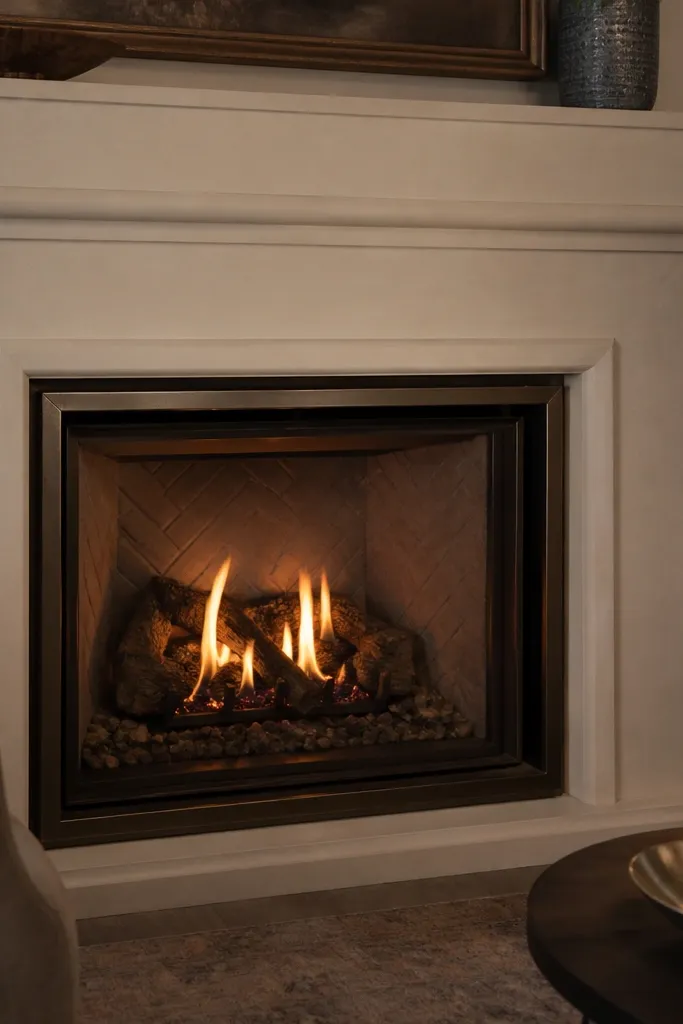
If your stone is the right shape but the wrong “vibe,” paint the stone a warm beige and upgrade the firebox trim. Dark bronze reads like hardware from a new build, and it frames the opening so it looks crafted instead of patched. This is a great choice if you have a metal insert or visible trim that can be repainted or covered. The beige keeps the room warm, and the bronze adds that subtle glow you see in the best fireplace photos. It’s beginner-friendly because most of the work is paint and careful masking.
Clean the stone and prime it with a masonry primer, then paint in warm beige with a brush and roller combo. Remove dust from the firebox trim area and mask the stone so paint lines are crisp. Use a heat-rated metal paint in dark bronze for the trim, applying thin coats to avoid drips. Let everything dry fully and check the edges under both daylight and lamp light. Seal the stone if your paint system requires it or if you used a wash-like finish.
Use high-quality masking tape and pull it back at a 45-degree angle while paint is still slightly tacky.
Avoid thick paint on metal trim — it will look uneven around the opening.
11. Two-Tone Look with Light Stone Surround and Charcoal Mantel Sides
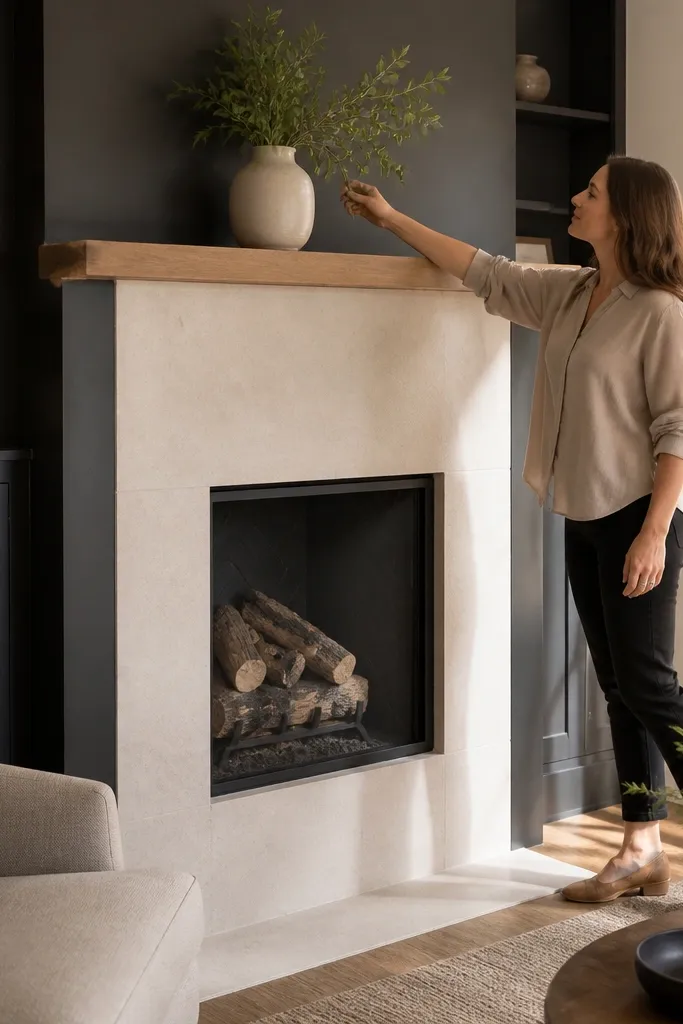
Prime the stone and paint it a light warm white or soft cream, using a brush for texture and a roller only on flatter zones. Let it cure, then sand and prime the mantel sides and any trim. Paint the mantel sides charcoal matte and keep the top surface a consistent finish so it doesn’t look patchy. Use painter’s tape to separate mantel from stone, and remove tape while paint is still workable. Finish with a clear topcoat on the mantel top if it gets handled or cleaned often.
Two-tone makes a fireplace look designed even when you only paint. Light stone on the surround opens the room, and charcoal on the mantel sides adds depth and frames the mantel like built-in cabinetry. This look works when your mantel is wood and has side panels or trim you can paint without complicated carpentry. The contrast also makes the fireplace silhouette sharper in photos. It’s beginner-friendly if you tape carefully and use a smooth foam roller for the flat areas.
Skip thisDon’t use glossy black — matte charcoal looks more expensive on wood.
Editor's notePaint the mantel sides first, then do the stone — you’ll avoid accidental charcoal specks on the surround.
12. Natural Limestone Color Stain with a Clear Matte Sealer
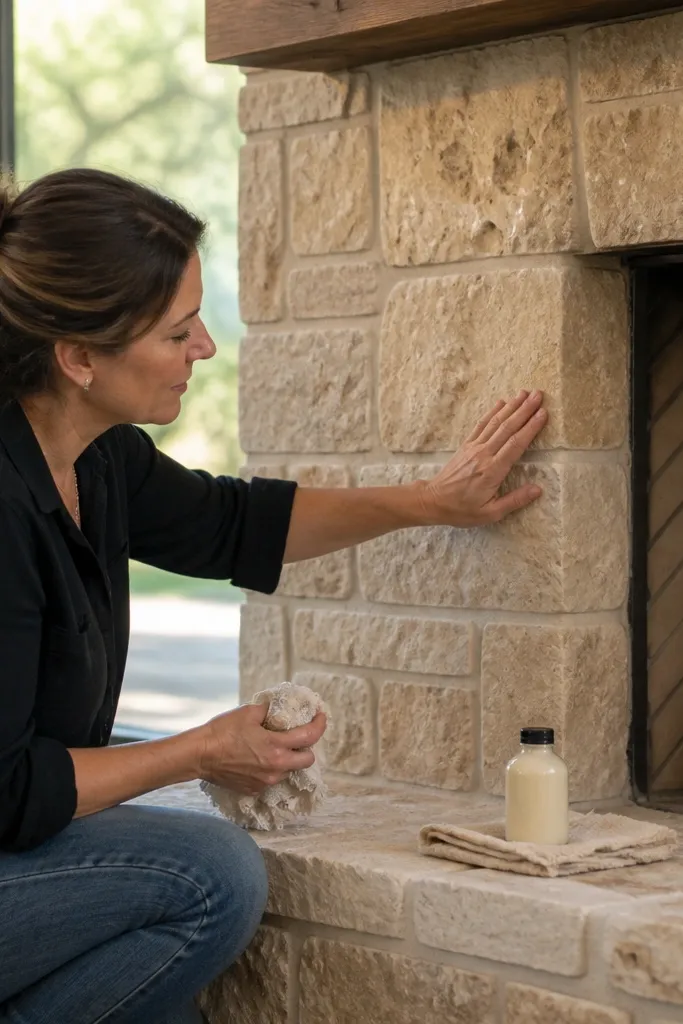
Clean the stone with a masonry cleaner and let it dry for a full day. If there are old sealers, test a small spot with water — if water beads, you’ll need to remove the old sealer before staining. Apply stain with a pump sprayer or brush, then spread evenly with a rag so it doesn’t pool. Work from top to bottom and keep a wet edge so you don’t get hard lines. After the stain cures, seal with a matte clear sealer designed for interior stone.
Staining keeps stone looking like stone instead of painted wall. A limestone-tone stain warms the rock and evens out discoloration while still letting texture show. The clear matte sealer prevents the color from fading and makes cleaning easier. This is the best option when your stone already has a nice shape but the color is too grey, too blotchy, or too smoky. It also suits rooms that feel natural and earthy. Beginners can do it if they’re careful about prep and apply stain evenly in sections.
Skip thisDon’t rush between coats — most staining failures are just uneven cure time.
Editor's noteUse a sponge applicator for control on rough fieldstone — it spreads stain without leaving heavy brush marks.
13. Rustic White Paint with Dark Waxed Highlights on High Points
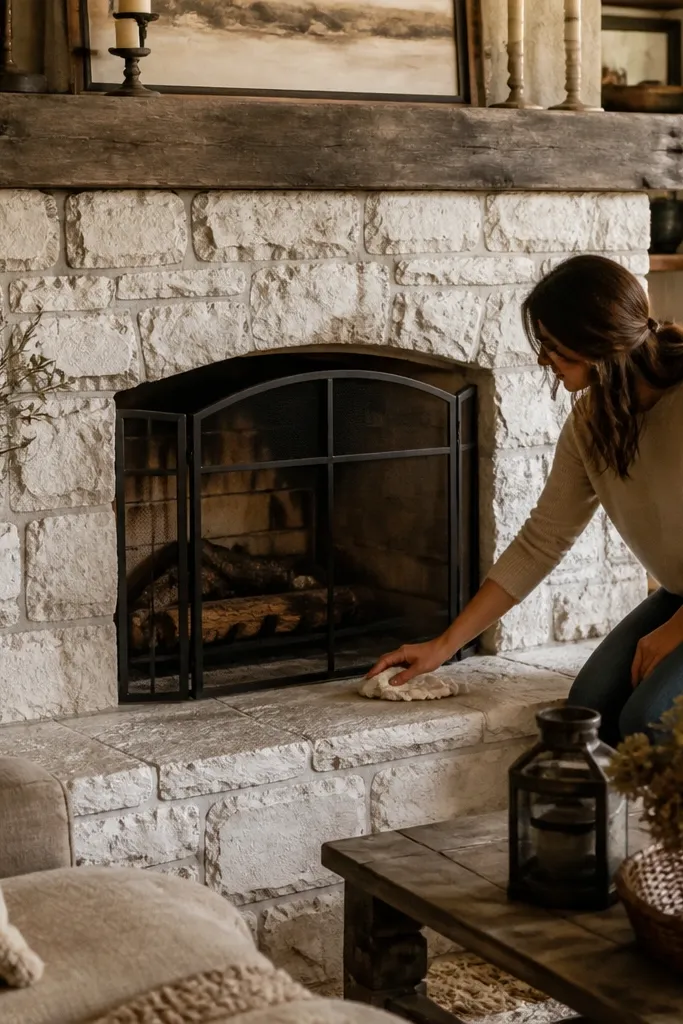
Prime the stone and paint it rustic white with a matte or eggshell finish. Let it dry fully. Then apply a dark wax glaze with a soft cloth to just the raised areas — wipe on, then remove quickly so it stays in crevices. Buff lightly with a clean rag for a consistent sheen. Seal only if your wax system instructs it; some waxes are the final finish.
This look is all about age and contrast. A base coat of rustic white makes the fireplace bright, while dark wax on raised stone points adds depth and “shadow” without repainting every nook. It looks great in cottages, farmhouse rooms, and transitional spaces where you want texture but not clutter. Wax also helps the stone feel more finished because it reduces chalkiness. It’s beginner-friendly if you treat it like a controlled highlight, not a full glaze.
Skip thisAvoid applying wax over dusty paint — dust makes grey specks that show up in photos.
Editor's noteWork in small sections and stop early — you can always add more wax later, but you can’t un-darken it easily.
14. Matte Pebble Grey Paint with Vertical Brush Streaks

Clean, prime, and paint the stone base coat in pebble grey matte. Once it’s tacky or after the first coat dries depending on your paint system, use a larger brush to create vertical passes in the same direction across the whole surround. Keep each pass light and avoid going back over the same area too much. Let it cure, then touch up any spots that look patchy. Seal with a matte masonry sealer if required for your paint.
A matte grey paint with controlled vertical streaks makes stone look modern and intentionally textured. The streaks mimic the natural movement of stone veins, so it doesn’t look like flat paint slapped over rock. This is a strong choice for rooms with white walls and black accents, where grey brings balance without turning dark. It also photographs well because matte finishes hold details without glare. Beginners can pull it off with the right tools and patience — the “streak” part needs consistency.
Skip thisDon’t use high gloss grey — it highlights every uneven ridge and looks cheap.
Editor's noteUse one brush type for the whole fireplace — different bristles create different streak widths.
15. Stone Fireplace with Thin Brick Veneer Surround in Whitewashed Hues
Inspect the stone for loose areas and clean thoroughly, then apply a bonding primer. Plan your veneer starting height so the top course lines up with the mantel or opening edge. Spread thin-set mortar with a notched trowel and press veneer sheets into place, using spacers if the kit includes them. Cut around the firebox opening carefully and keep joints consistent. After mortar cures, grout if needed, then apply a whitewash and seal with a breathable masonry sealer.
Thin brick veneer turns your fireplace into a more uniform, architectural surface without the weight of full brick. Whitewashed brick looks airy and bright, and it pairs well with mantels in oak, walnut, or painted wood. This works when you want to change the look completely but you still want a warm, textured material. Beginner-friendly veneer kits use mesh backing and thin-set mortar, which makes installation straightforward if your surface is solid. The result is photogenic because brick lines create a strong grid that reads clean.
Skip thisDon’t skip checking flatness — uneven stone makes veneer look wavy.
Editor's noteDry-lay the first row on the floor and snap a level line on the wall so your pattern stays straight.
16. Blackened Steel Look Panels on the Firebox Interior Border
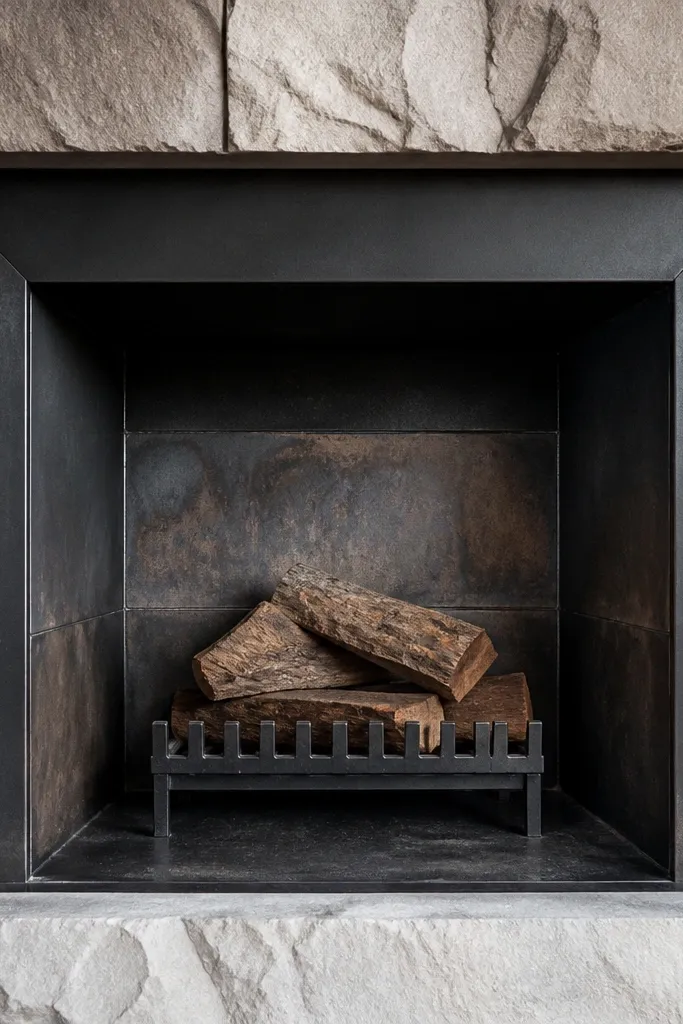
Measure the interior opening and choose a panel system sized to fit with a small reveal of about 1/4 inch around edges. Clean the mounting surface and remove loose caulk or old adhesive. Test fit and trim with the right tool for your panel material. Apply a heat-rated adhesive or mechanical fasteners as the product requires, then align the panel and press firmly for the recommended time. Paint or finish the surrounding metal trim if needed and keep sealant away from venting areas.
This is a high-impact detail that makes the fireplace feel modern. By adding a blackened steel look panel around the firebox opening, you create a clean frame that contrasts with textured stone. It’s especially photogenic because the center area reads crisp even if the surround is textured. This option suits fireplaces with accessible trim space where you can mount a panel or cover existing surfaces. It’s beginner-friendly if you use a lightweight metal panel or heat-rated composite and follow the mounting method carefully.
Skip thisDon’t cover vents or heat paths — panels must stay within the fireplace manufacturer’s clearance.
Editor's noteTake photos of your measurements before you cut — interior openings hide small misalignments.
17. White Tile Surround Over Stone with a Soft Greige Grout
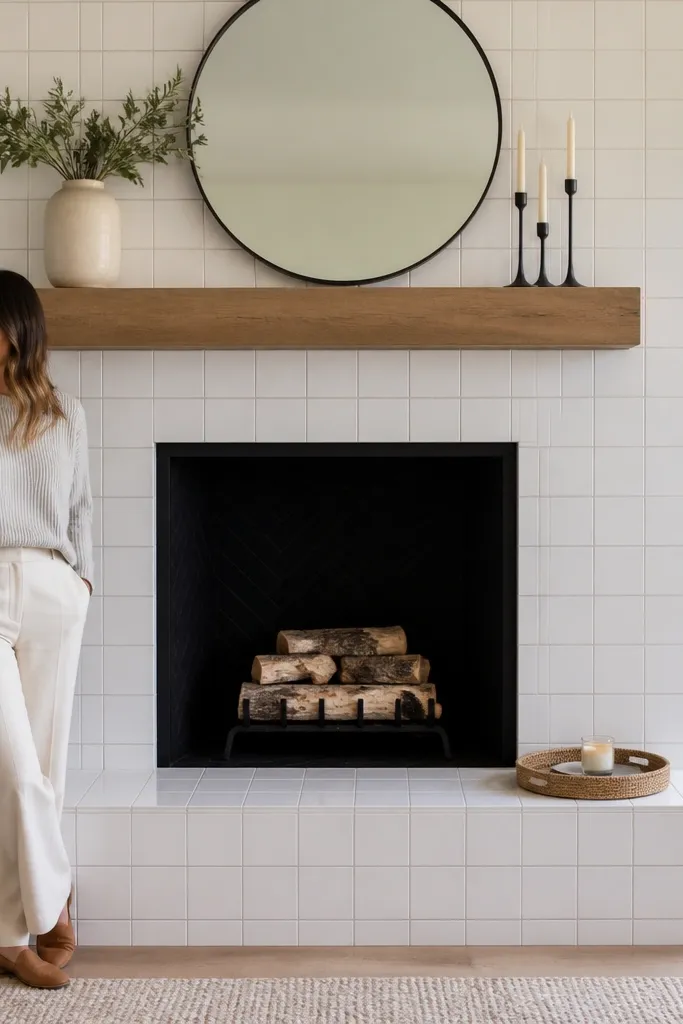
Covering the stone with white tile is the fastest way to make a fireplace look new. The texture disappears, but the look becomes clean, bright, and very photo-friendly. Soft greige grout keeps the tile from looking stark and helps hide small imperfections from uneven stone. This is ideal if your stone is dated in color and you want a crisp, architectural finish. Beginner-friendly tile projects work best with small-format tiles and a straightforward surround shape.
Clean and prime the stone for tile adhesion, then plan your layout so tile lines sit centered on the opening. Apply thin-set mortar with a notched trowel and press tiles in place, using spacers to keep grout lines consistent. Work from the bottom up and check level often. Let the mortar cure fully, then grout with soft greige, wiping clean before it dries. Seal grout if the grout product recommends it and apply a stone-safe sealer on any exposed masonry edges.
Use a grout release or keep a damp sponge ready — dried grout haze is a pain on textured tile faces.
Avoid rushing tile leveling — once thin-set skins over, adjustment gets harder.
18. Wood Mantel + Painted Stone Combo with Light Oak Shelf Top

This look pairs painted stone with a warm wood mantel top, so the fireplace feels cozy instead of sterile. Painting the stone a light neutral keeps it bright, while a light oak (or oak-toned) shelf adds warmth and depth in photos. It’s a great choice when you want the fireplace to blend with wood floors but still look updated. Beginners can do it by painting the stone and either refinishing or installing a new mantel shelf. The contrast between matte paint and wood grain reads premium fast.
Prime and paint the stone with a light neutral matte paint, keeping brushwork clean around the opening. If you’re keeping the existing mantel, sand it lightly and apply a clear or tinted wood finish in a light oak tone on the top surface only. Paint the mantel sides in a matching off-white or warm white. Protect the wood top with a durable interior clear coat and let it cure before heavy use. Seal the stone based on your paint system so it stays easy to wipe.
Mask the wood edges with painter’s tape and a thin foam strip so paint doesn’t creep under the tape.
Don’t paint over dusty wood — it will peel at the edges where you’ll see it.
19. Two-Tone Hearth and Surround with a Cement-Gray Hearth Cap
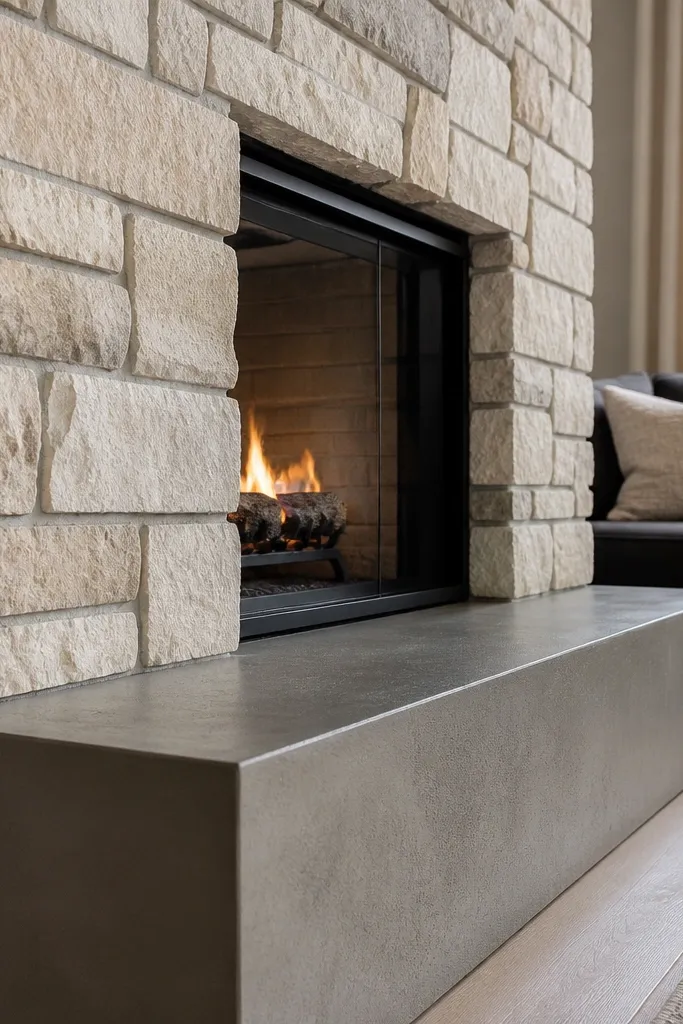
Changing only the hearth cap gives you a “built-in” feel without touching the whole fireplace. A cement-gray cap frames the bottom and makes the stone above look more intentional. Pick a cement tone with subtle warm undertones so it doesn’t feel cold next to wood. This option works in rooms where the surround is okay but the hearth looks plain, stained, or worn. It’s beginner-friendly because you’re working on a flatter area where paint and coatings behave predictably.
Clean and degrease the hearth, then sand lightly to help coatings grip. Apply a masonry bonding primer, then paint with a cement-gray masonry paint or a cement-look coating system designed for floors and hearth surfaces. Use a foam roller for even coverage and cut edges with a brush. If your hearth has chips or cracks, patch them first with a cement-based filler and sand smooth once cured. Seal with a protective topcoat rated for interior stone surfaces.
Keep the cap thickness visual consistent: a 1 to 2 inch painted band looks like design, not a random patch.
Avoid painting over loose mortar — the finish will lift in weeks.
20. Fireplace Makeover with Faux Plaster Skim and Limewash Finish
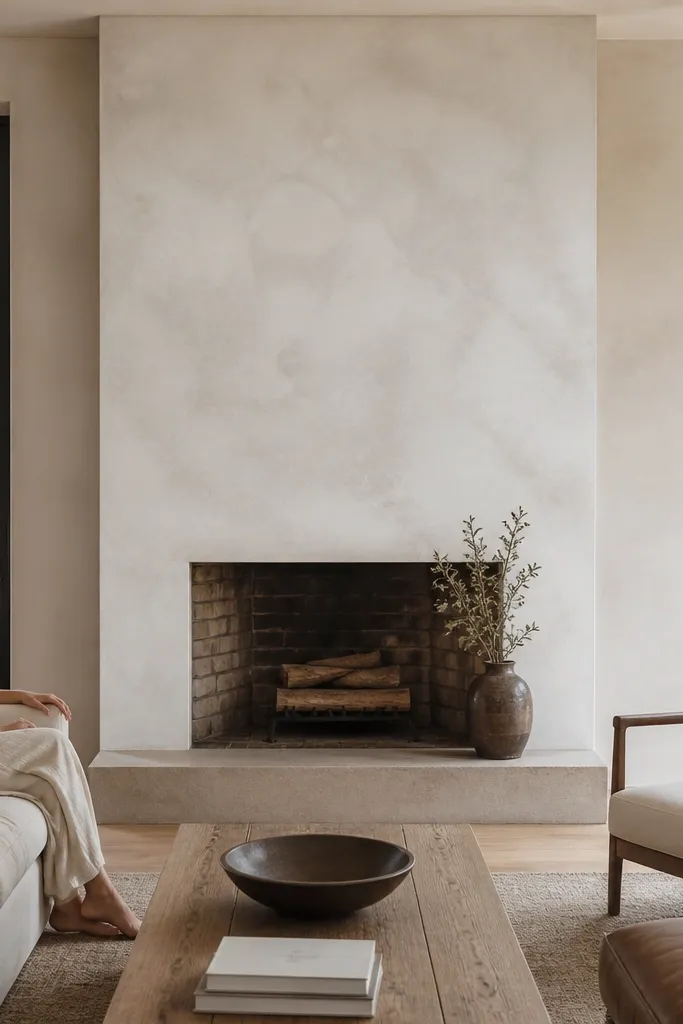
Prime the stone with a masonry bonding primer. Apply a thin plaster skim coat with a trowel, spreading thin and consistent, then scrape flat and feather edges. Let it cure, sand lightly, and wipe dust. Apply a limewash mix (paint + water + glaze medium) in thin coats, then use a sponge or brush to create subtle mottling. Seal lightly with a compatible matte sealer once the limewash is cured.
Faux plaster skim + limewash is the “old-world clean” look. You cover the rough stone texture enough to feel smooth, then apply a limewash that mottles and breathes visually. The mottling hides small surface flaws and makes the fireplace look like a renovation from the past, not a cover-up. This suits open, airy rooms where you want warmth and softness. It’s beginner-friendly because the process is mostly mixing, troweling thin layers, and letting time do the work.
Skip thisDon’t go too thick on the first skim coat — thick plaster cracks and telegraphs through the finish.
Editor's noteFeather the edges wider than you think — the transition looks natural in photos when it fades out.
21. Matte Terracotta Tile Insert for the Mantel Shelf Front
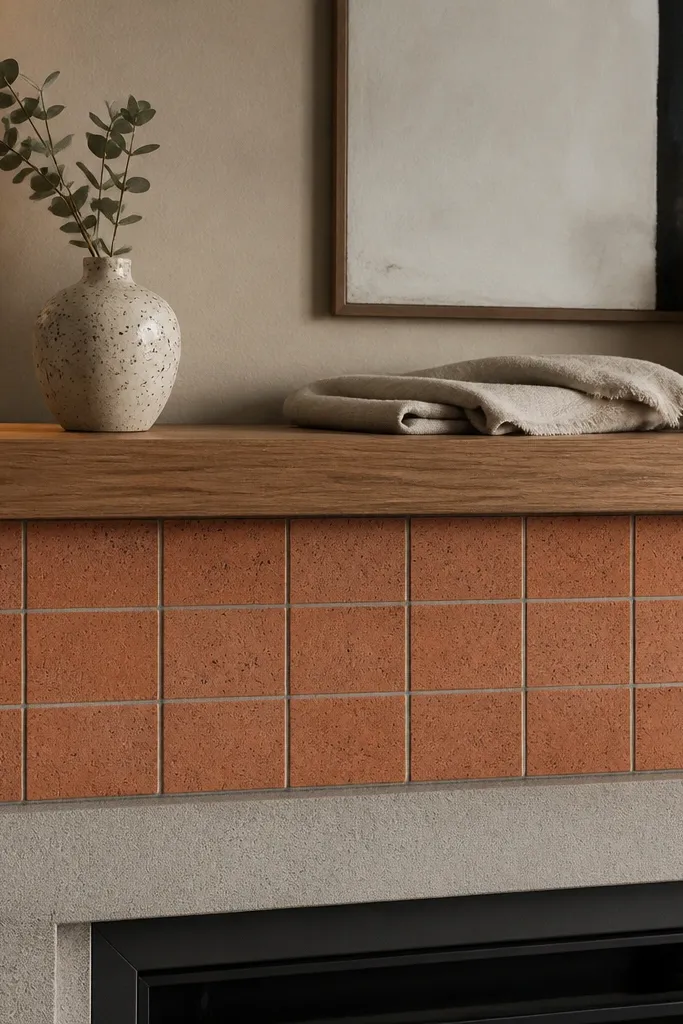
Measure the mantel front and plan a tile layout with a small border so it doesn’t look chopped. Clean the mantel front, sand smooth, and apply a bonding primer made for wood or existing paint. Apply thin-set mortar or a tile adhesive made for interior surfaces, then press tiles in place and use spacers if needed. Let it set, grout with a warm tone that matches the terracotta, and wipe clean. Seal the tile and grout if your tile is porous and the grout calls for it.
A tile insert on the mantel shelf front makes the fireplace look custom even if the stone stays the same. Terracotta tiles add warmth and pattern right where your eyes land when you use the mantel for decor. The matte finish keeps it from looking shiny or cheap under lamps. This is a great beginner project if you have a flat mantel front face you can measure and cover. It’s also a good fix when your mantel front is scratched, uneven, or painted over too many times.
Skip thisDon’t skip priming — tile adhesive fails on unsealed painted wood.
Editor's noteUse a tile edge trim along the outer border for a crisp look instead of messy caulk lines.
22. White Mantel with Micro-Textured Stone Paint and Soft Grey Wash
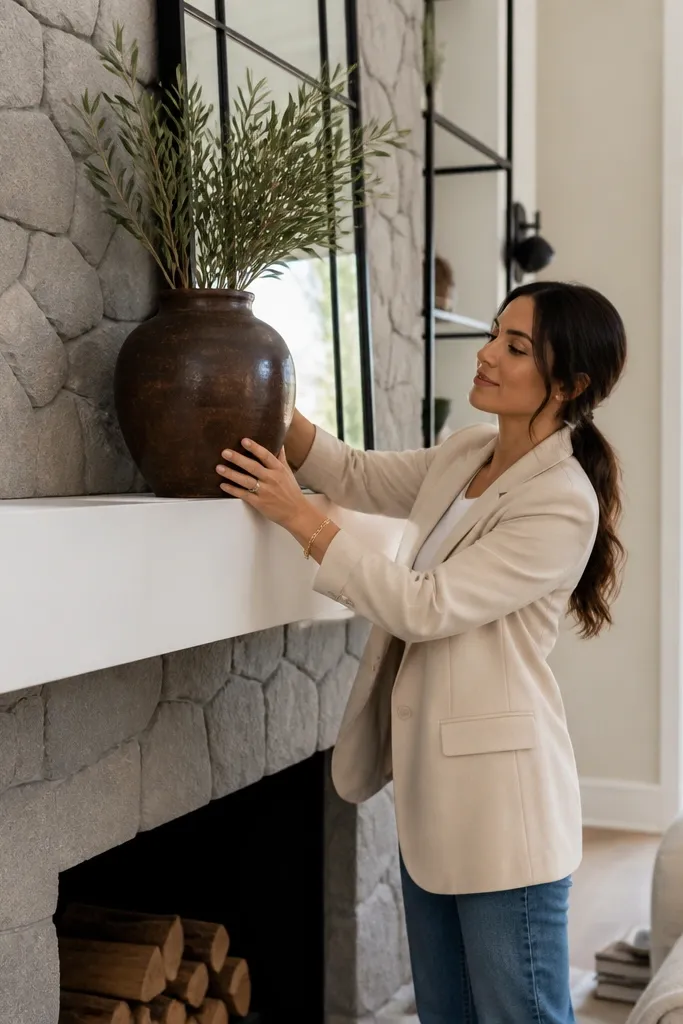
This look uses texture to make the fireplace read “designed,” not painted. The stone gets a micro-textured paint finish that holds shadows, then a soft grey wash adds depth so the texture doesn’t look flat. A clean white mantel keeps the palette bright and makes the fireplace feel lighter. It’s a strong fit for modern farmhouse and transitional rooms where you want texture without obvious plastering. Beginners benefit because you’re not trying to perfectly smooth anything — you’re enhancing what’s already there.
Clean and prime the stone, then apply micro-textured paint in thin coats, following the product’s recommended spread method. Once cured, apply a soft grey wash by brushing on lightly and wiping off highlights with a damp rag. Let the wash dry fully. Paint the mantel with a crisp white in two coats and lightly sand between coats for smoothness. Seal the stone finish if the paint system calls for sealer to prevent scuffs.
Apply the grey wash with a rag, not a brush, so it stays soft and doesn’t create streak lines.
Avoid thick wash — heavy grey pools and makes texture look dirty.
23. Dark Walnut Stained Mantel with Light Stone Surround
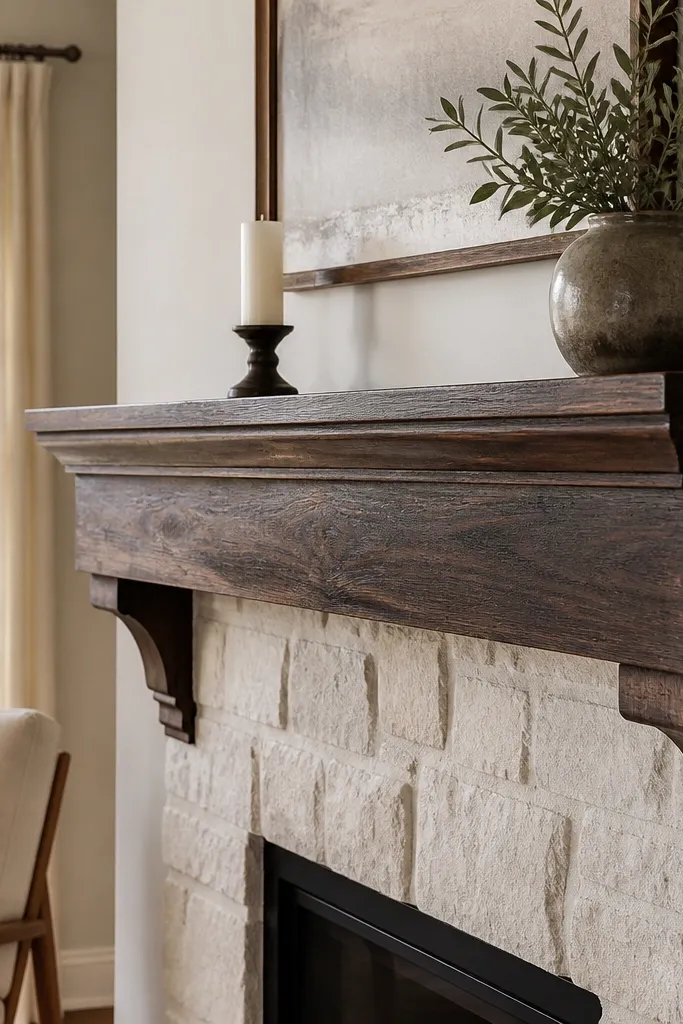
Prime and paint the stone a light neutral matte (soft cream or warm white). Sand the mantel to remove gloss and smooth rough spots, then wipe with a tack cloth. Apply dark walnut stain with a foam brush or rag, working with the grain and wiping off excess to control darkness. Let it dry and apply a clear protective topcoat suitable for interior wood. Touch up any stone paint edges around the mantel after the mantel is fully cured.
A dark walnut mantel makes the fireplace feel grounded and high-end while a light stone surround keeps it bright. This combo is great when you want a warm, classic look without going full traditional. The stone reads airy in photos, and the mantel adds depth through wood grain and rich stain color. It also hides small wood wear because walnut stain is forgiving on minor surface marks. Beginners can do it with paint for the stone and stain for the mantel top and face.
Skip thisDon’t stain over dust — grain texture traps particles and makes the finish look gritty.
Editor's noteTest the walnut stain on the underside edge of the mantel so you know the real darkness before committing.
24. Monochrome Charcoal Stone with White Dry Bricks on the Hearth
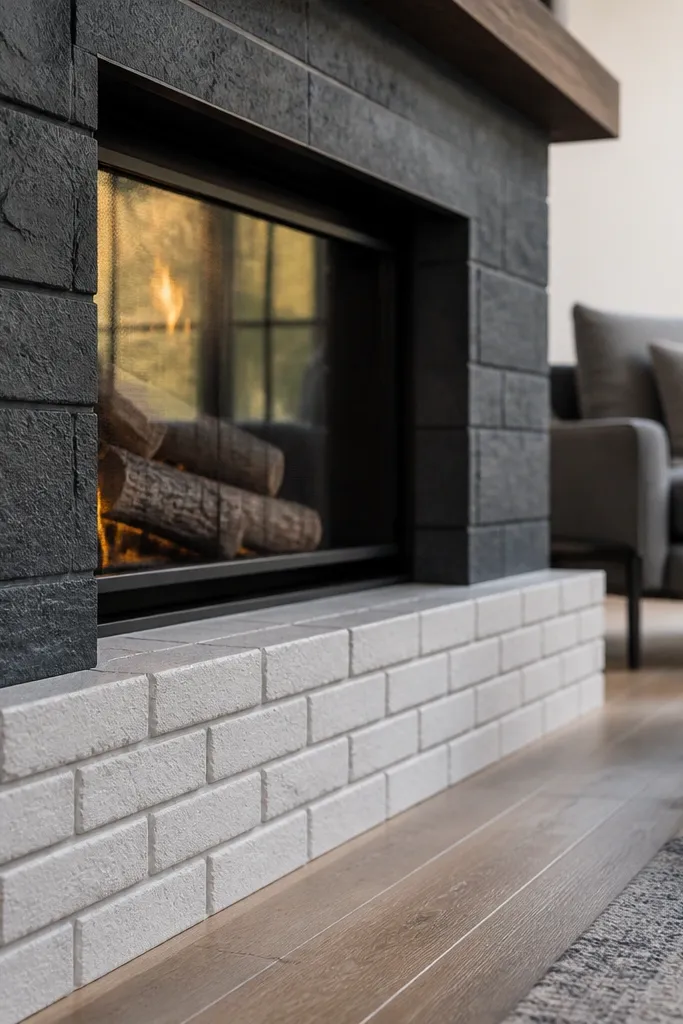
Monochrome charcoal on the stone makes the fireplace feel sleek, while a white brick-pattern band on the hearth adds a graphic hit near seating height. The contrast is what makes this “stunning” — it reads like a planned design element, not paint. This is a good fit for homes with grey sofas, black metal accents, or modern lighting. Beginner-friendly versions use brick-pattern peel-and-stick sheets on the hearth band, or thin veneer strips if you want it more permanent. The final look is photogenic because it creates a strong horizontal design line.
Prime and paint the stone with charcoal matte paint, using a brush for grooves and keeping coats thin. For the hearth band, measure a 4 to 8 inch height section and mark a straight line with a level. Apply peel-and-stick brick pattern tile or thin veneer strips, pressing firmly and trimming edges cleanly. Seal the hearth band only if the product system allows it and if the adhesive needs protection. Let it cure fully before placing decor that rubs the surface.
Use a straightedge and mark the line lightly with pencil — hearth edges are rarely perfectly level to the eye.
Skip trimming — crooked brick edges look worse than no band at all.
25. Oversized Sandstone Veneer Panels with a Lime Mortar Wash
This look is bold because the stone reads in big, calm blocks instead of busy small pieces. Oversized sandstone veneer panels break up the fireplace face and make the whole wall feel finished, even if your existing stone is uneven. The lime mortar wash ties everything together by softening grout lines and giving the stone that sun-faded, old-masonry vibe. You get a high-end photo look without needing to rebuild the fireplace. It’s beginner-friendly if you can measure straight and work in sections; plan a full weekend for prep and a second day for drying and touch-ups. It suits living rooms that need warmth and texture without going dark or high-contrast.
1) Clean the stone thoroughly, then remove loose mortar and dust. Fill any chips and dips with a polymer-modified patch, then let it cure fully; aim for a surface that’s flat within about 1/8 inch over a 2-foot span. 2) Install sandstone veneer panels with a polymer thinset or recommended veneer mortar, using a 1/4 inch notched trowel and starting from the center of the firebox opening so seams land evenly. Keep joints consistent by using 1/4 inch tile spacers or a thin shim strip, and cut edges with a wet saw or angle grinder with a diamond blade. 3) Mix a lime mortar wash by thinning lime putty or lime-based wall wash with water until it looks like thick milk, then brush it into joints and wipe the face back with damp sponges. Seal only after the wash cures — use a matte breathable masonry sealer so the stone stays soft-looking instead of glossy.
Dry-fit the panel layout on the floor and mark seam locations on painter’s tape before you spread mortar — it prevents “stair-step” joints around the opening.
Don’t seal before the wash fully dries; trapped moisture will make joints look blotchy and dull.



