
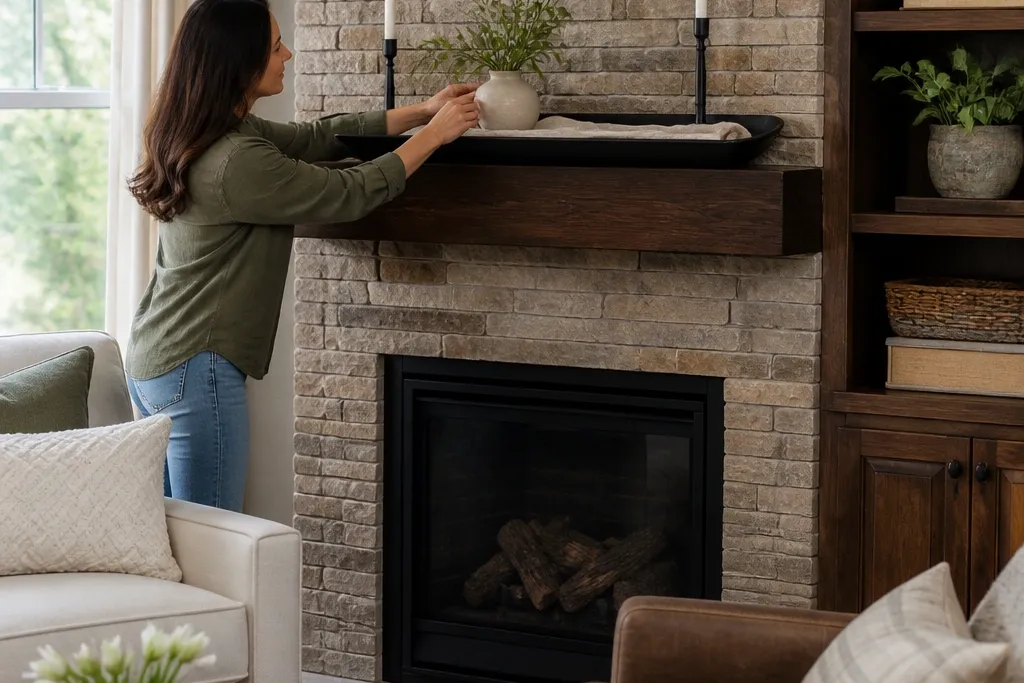
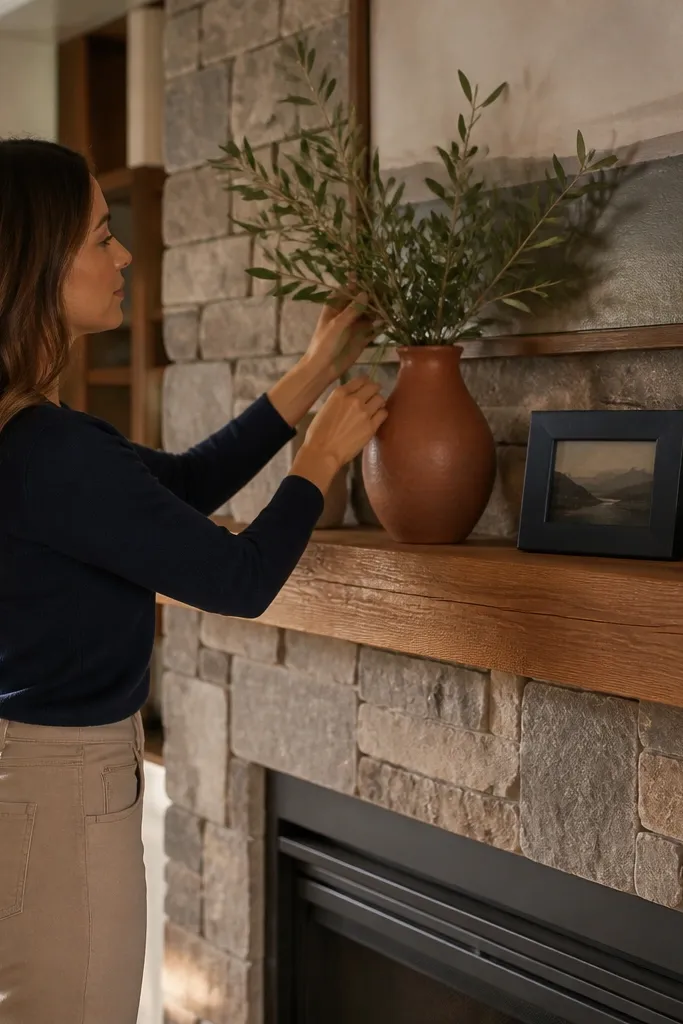
1. Blackwood Mantel Tray with Linen Runner
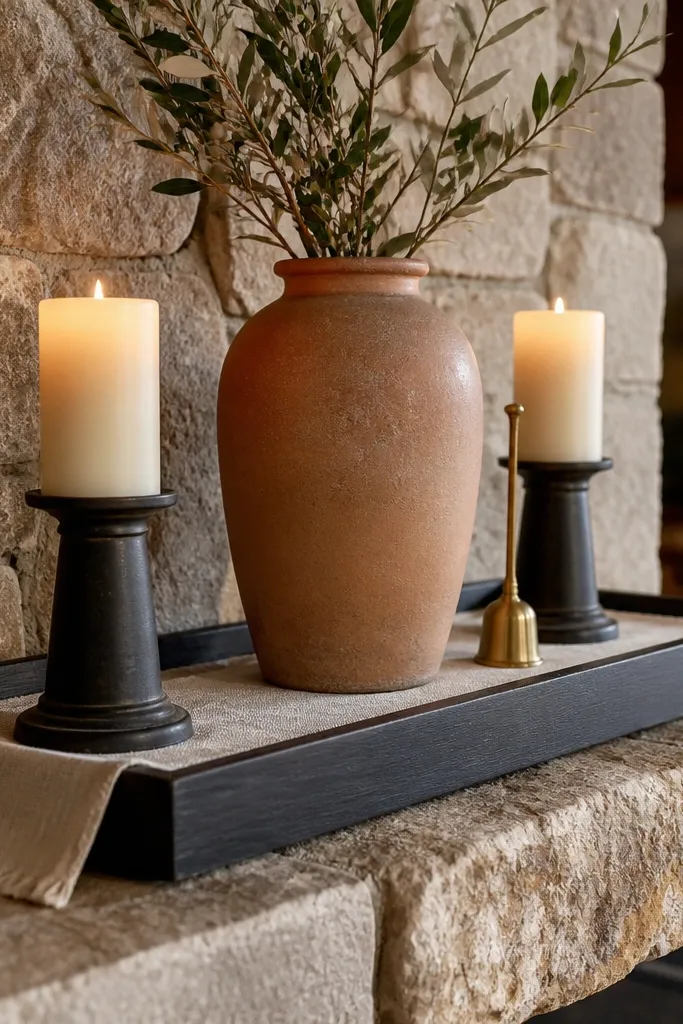
This look is clean, grounded, and easy to repeat year-round. A blackwood or dark-stained tray gives you a “stage” that visually ties the stone and the wood mantle together. The linen runner softens the contrast and keeps the mantel from looking too sharp against textured stone. Add two candle holders and one simple sculptural item in the center so the arrangement reads balanced even from across the room. It’s beginner-friendly because you’re styling what’s already there, and it photographs well because the tray creates a neat boundary.
Start by measuring your mantel depth and width so the tray leaves 1-2 inches of breathing room on each side. Lay a cream or oatmeal linen runner across the tray, then place the two matching candle holders at the left and right thirds. Set a single central piece between them, like a small ceramic vase or a wood bowl with a few branches. Finally, add two subtle fillers on the tray edges, like a thin bundle of dried grass or a small stack of books, so nothing looks floating.
Editor's noteUse a tray with a slightly raised lip so candle wax or spills don’t stain your mantel.
Skip thisAvoid tiny decor objects that scatter outside the tray — they make the stone look busier.
2. Two Tall Vases with Spring Greens and Winter Branches
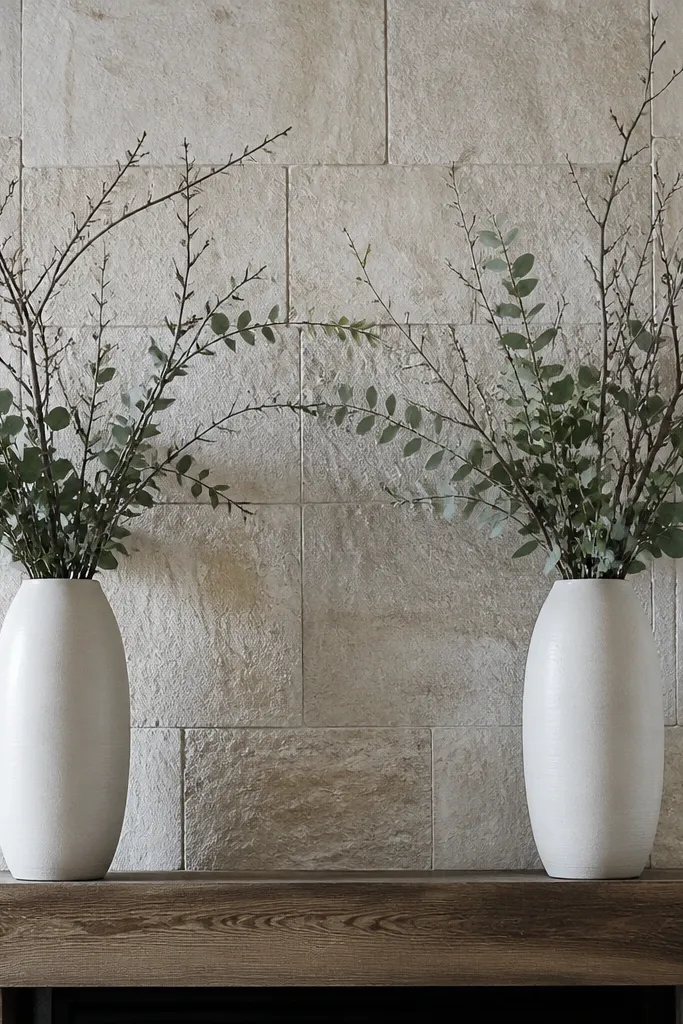
This is one of the most year-round looks because you’re not changing the structure, just the contents. Two tall vases create vertical rhythm that matches the height of many stone fireplaces. The stone behind them stays visually calm because the vases are smooth and consistent in shape. In spring and summer, use fresh-looking greens; in fall and winter, swap to darker branches. The result is a mantel that looks styled in every season without feeling like holiday decor.
Choose two matching vases that are 10-16 inches tall, with stable bases. Place the vases left and right of the center, leaving about 8-12 inches between them for a clean gap. Fill each vase with a floral foam block or weighted stones at the bottom so stems stand upright. For swapping seasons, keep the vase position the same, then replace stems every time with a new bundle trimmed to the same height.
Editor's noteTrim stems so the tallest tops land within 2-3 inches of the same height on both sides.
Skip thisDon’t use vases with narrow openings that force thin stems — they look flimsy on a wide mantel.
3. Oversized River Rock Bowl Centerpiece
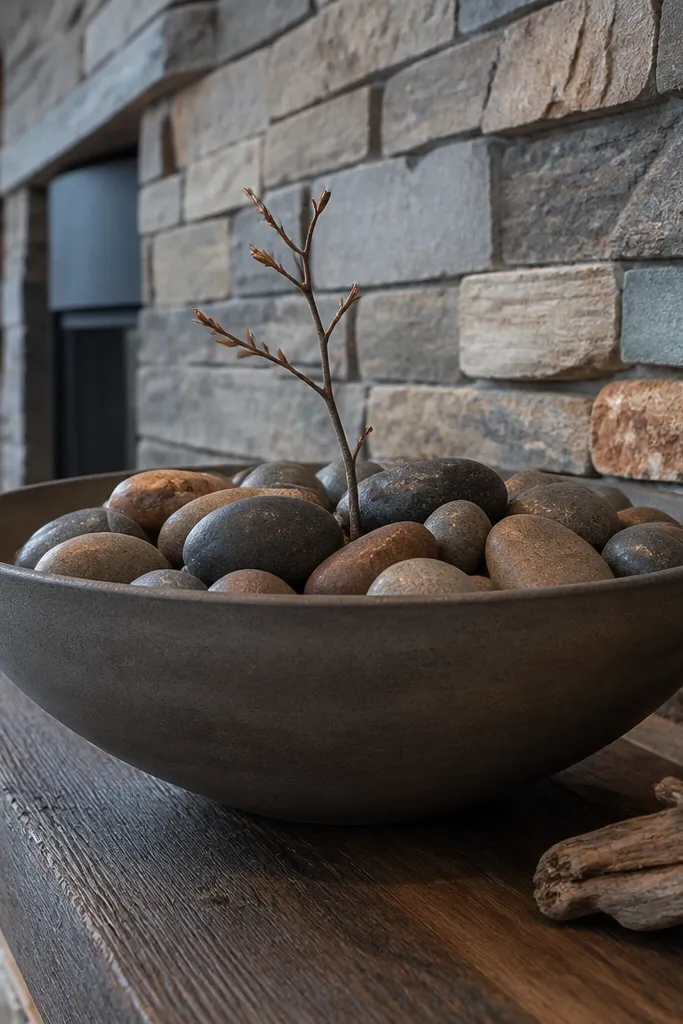
If your stone fireplace has busy color variation, you want decor that repeats stone tones without adding more textures. A large bowl filled with river rocks reads intentional and calm, especially when paired with matte ceramics. This centerpiece works year-round because the rocks don’t “season out.” Add one small bud vase or a single branch to give a focal point above the rock line. It’s beginner-friendly because it’s basically set-and-forget styling.
Pick a bowl that’s wide enough to cover the center of the mantel, usually 12-18 inches across. Place the bowl centered, then add river rocks until they sit 1-2 inches below the rim. Set a small bud vase inside the rocks and secure it with a little foam or by wedging stones around the base. Finish with one thin branch or a few dried stems trimmed to just reach the bowl’s top third.
Editor's noteWipe the rocks dry before styling so the bowl doesn’t look dusty or oily.
Skip thisAvoid bowl sizes that are too small — they look lost on stone fireplaces.
4. Stacked Wood Slices with a Small Brass Candle Holder
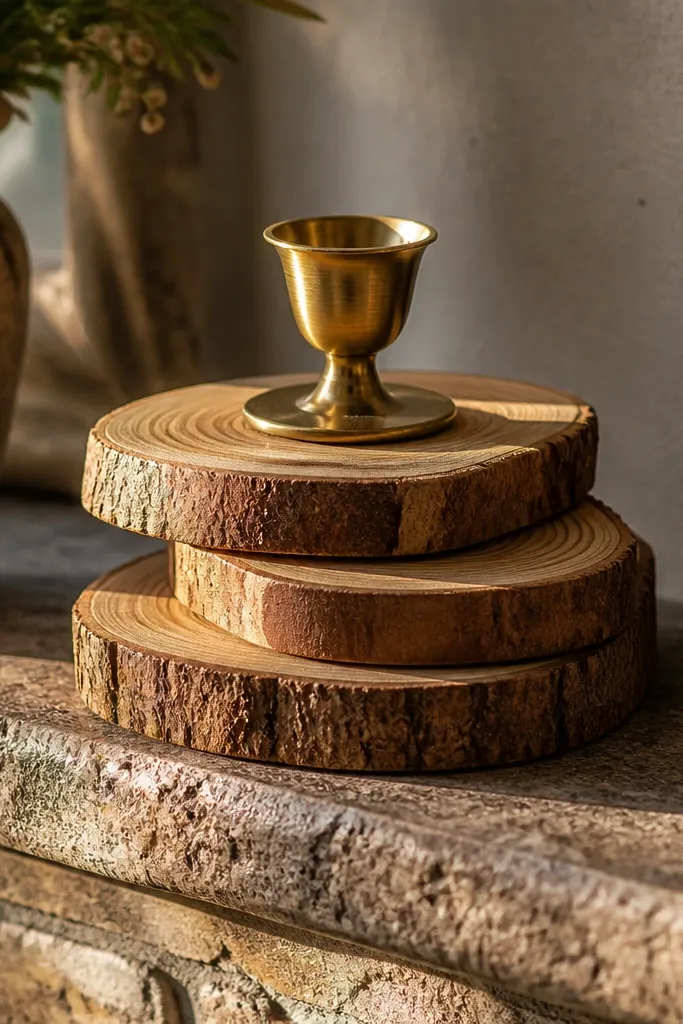
This look brings warmth to a stone fireplace without leaning into holiday clutter. Stacked wood slices add a natural texture that complements wood mantels and softens colder stone tones. A small brass candle holder adds a warm metallic highlight that catches light without being shiny everywhere. Keep the rest minimal: one candle pair and a simple base object. It’s photogenic because the wood grain shows clearly and the brass gives a crisp focal sparkle.
Use a shallow stack of wood slices or a pre-made wood slice riser, then place it centered on the mantel. Add a single brass candle holder slightly above the wood stack height, not directly centered — offset it by 2-4 inches for a more natural look. Place two matching candles at the far left and far right, keeping them lower than the brass piece. If your mantel is wide, add one slim wood tray or a small book stack under the candles for alignment.
Editor's noteSeal wood slices with a matte clear coat so they don’t shed dust onto the stone face.
Skip thisDon’t add too many wood textures at once — wood slices plus lots of carved decor makes it feel crowded.
5. Monochrome Ceramic Set with One Color Accent
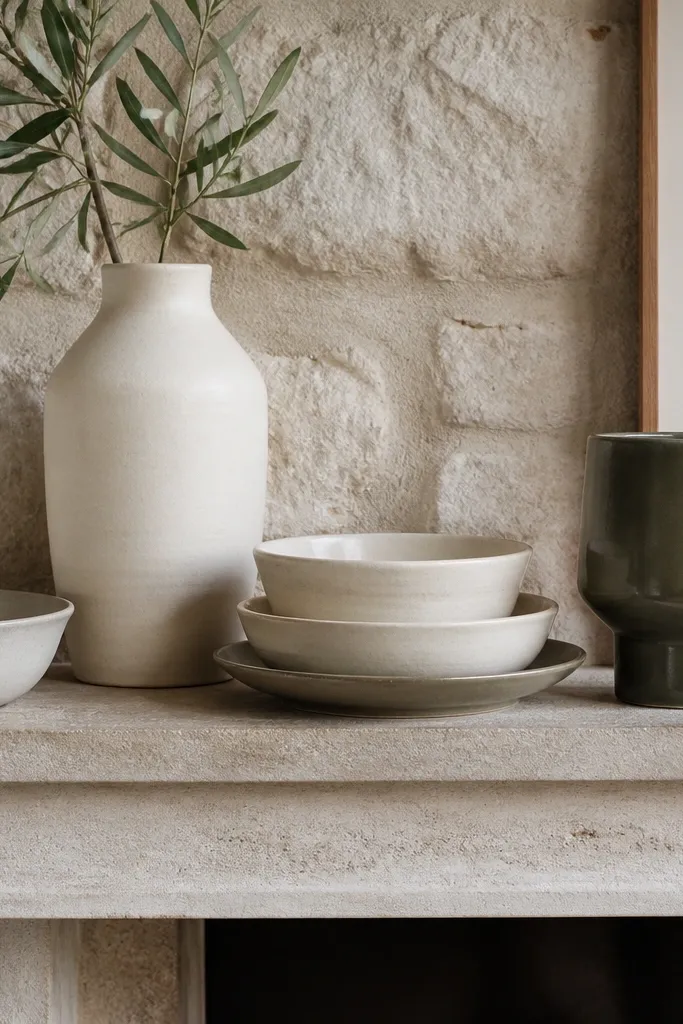
Stone fireplaces look best when the decor palette is controlled. A monochrome ceramic set keeps the look modern, clean, and readable against textured stone. Add one color accent — terracotta, olive, or deep blue — so the mantel doesn’t look flat in photos. This is a beginner-friendly styling method because you can buy or gather a few matching pieces and repeat the pattern each season. It also hides uneven mantel surfaces since ceramics sit neatly and don’t need perfect spacing.
Pick three ceramic pieces in the same finish family: matte white, oatmeal, or light gray. Arrange them in a triangle: one larger bowl in the center and two smaller vases or cups on the sides. Add one accent piece in a different color — keep it to a single item so the palette stays calm. Place a small tray under the ceramics if you want a tighter boundary and easier cleanup.
Choose ceramics with similar heights in each “arm” of the triangle for a more balanced look.
Avoid mixing glossy and matte ceramics — the reflections can fight with stone texture.
6. Framed Seasonal Art Leaned on the Mantel
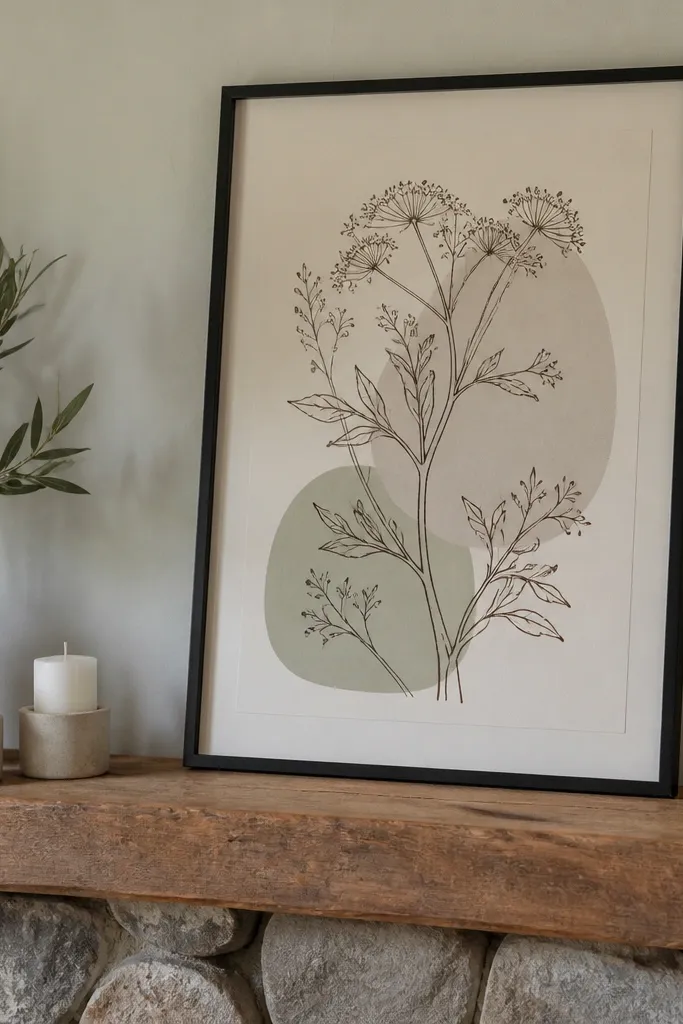
A mantel needs a focal point, and framed art does that without adding clutter. Leaning frames against the back edge of the mantel keeps the look secure and easy to swap. Use seasonal prints with the same color palette year-round, just changing the subject — think botanical line art, abstract neutrals, or soft landscapes. This is beginner-friendly because you don’t need to mount anything; it’s placement and balance. It looks great in photos because frames create clear edges against stone.
Choose two frames that match in size, ideally 10x14 or 11x14. Lean them on the back edge of the mantel, left and right, leaving 6-10 inches between them. Place a small vase or candle holder in the center to anchor the bottom line. For stability, add felt pads to the frame corners and use a small wedge or a non-slip mat under the frames.
Editor's noteUse museum glass or matte prints if you can — glossy art catches glare and ruins photos.
Skip thisDon’t stack frames too high — if the top hits the stone’s visual peak, it looks cramped.
7. Woven Basket Mantel Shelf with Candle Pair
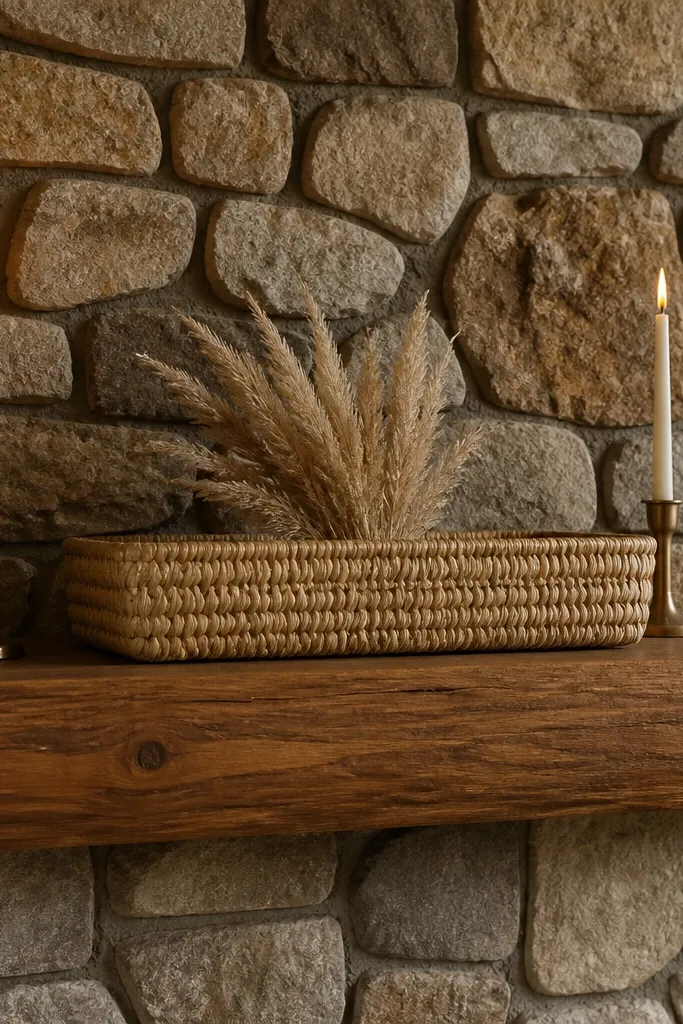
Woven baskets add texture that looks intentional next to stone, especially when the stone is cool-toned. This idea uses a single basket as the base, so you don’t have to fill every inch of the mantel. Put a candle pair on top and keep the styling tight with one small seasonal element. In summer it can hold dried grasses; in winter it can hold a pine sprig arrangement. The look is beginner-friendly because baskets hide minor styling mistakes and keep everything contained.
Choose a medium woven basket that fits the mantel center area, usually 10-14 inches wide. Place it centered on a non-slip mat. Arrange two taper candles inside or on the basket surface, then add one small seasonal sprig or a short bundle in the middle. If your mantel gets hot from the room, keep candles at least 6 inches away from any stone edges and use flameless candles for safer day-to-day setups.
Editor's notePick a basket weave pattern that’s tight — looser weaves shed fibers onto stone.
Skip thisAvoid overfilling the basket with lots of loose pieces — it looks messy fast.
8. Black-and-White Tile Coaster Wall Behind the Mantel
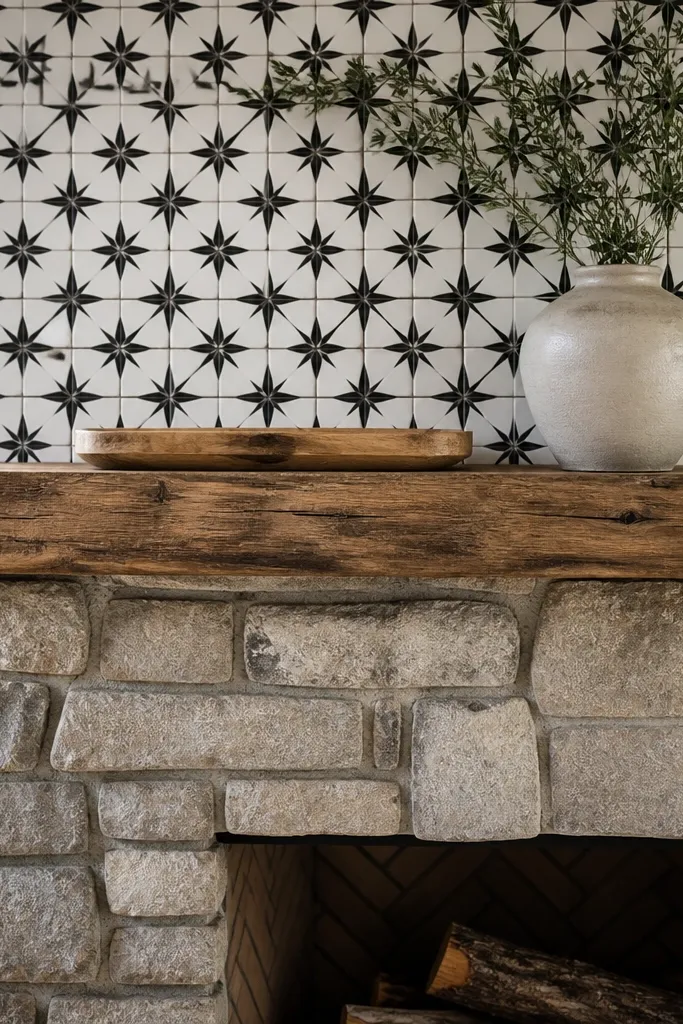
If your stone fireplace face is beautiful but the mantel area looks flat, a backdrop solves it. This setup uses a grid of black-and-white tile coasters or small tile squares behind the decor to create a graphic contrast. The stone stays the star, but the mantel gains a designed backdrop that looks crisp in photos. It’s beginner-friendly because you can lean or hang coasters without heavy hardware. Swap the mantel decor seasonally while keeping the backdrop constant for year-round style.
Lay out a grid behind the centerpiece on the mantel ledge, typically 4x3 or 5x3 depending on width. Use removable adhesive pads or thin command strips rated for the mantel surface to secure the coasters if you can’t just lean them. Center your main decor piece in front of the grid so it doesn’t cover the pattern. Add one candle pair or a small vase at the front corners to frame the centerpiece.
Editor's noteUse coasters with consistent thickness so the backdrop looks even, not wavy.
Skip thisDon’t choose patterns with too many colors — one strong monochrome print reads cleaner.
9. Linen-Wrapped Vase Pair with Dried Pampas-Style Feathers
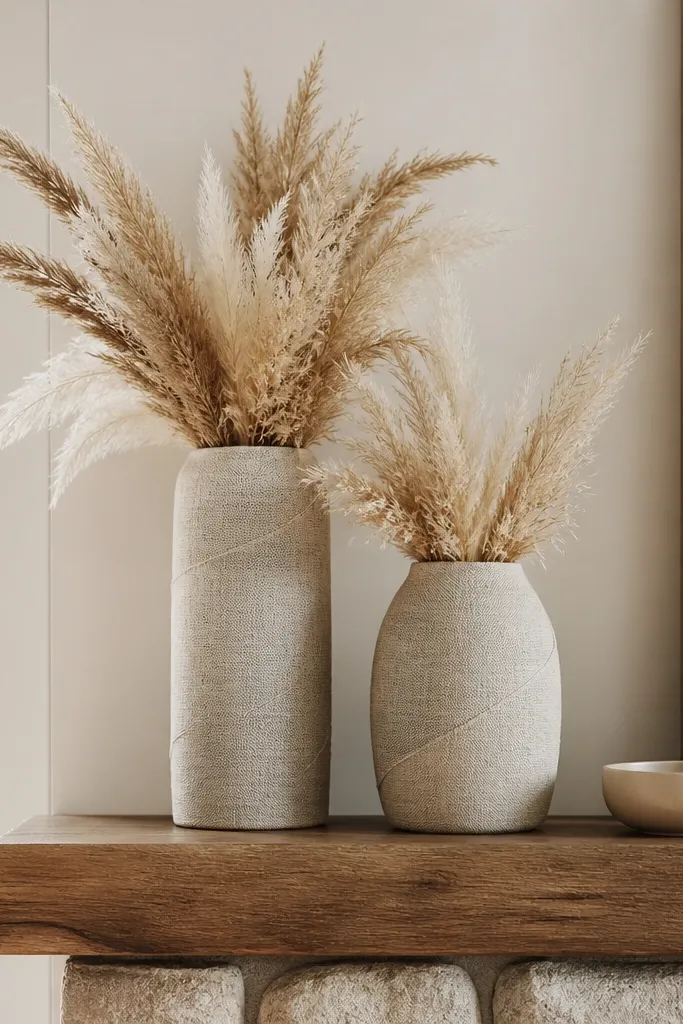
This is a soft, airy mantel look that still works against heavy stone. Linen-wrapped vases bring a fabric texture that feels cozy in winter and light in summer. The dried feathery stems add height and movement, giving the mantel a “finished” look even when the hearth is empty. It’s photogenic because the stems create negative space and the linen texture shows clearly. Beginner-friendly because you’re using lightweight materials and you can trim stems to fit your mantel height.
Pick two vases in similar shape, then wrap them in natural linen ribbon or use pre-wrapped vases. Place them left and right, with the taller vase on the side that matches your room’s main viewing angle. Insert dried stems and trim until the top reaches about 2-3 inches below the mantel’s highest visual line. Add a small clump of stems in the center of the arrangement for fullness, then adjust until the silhouettes match on both sides.
Editor's noteUse a little floral tape around the stem bases so they don’t shift after you place the vases.
Skip thisAvoid stems that shed heavily — they make a mess on stone floors and hearth rugs.
10. Monogram-Style Wood Sign with Two Matching Candles
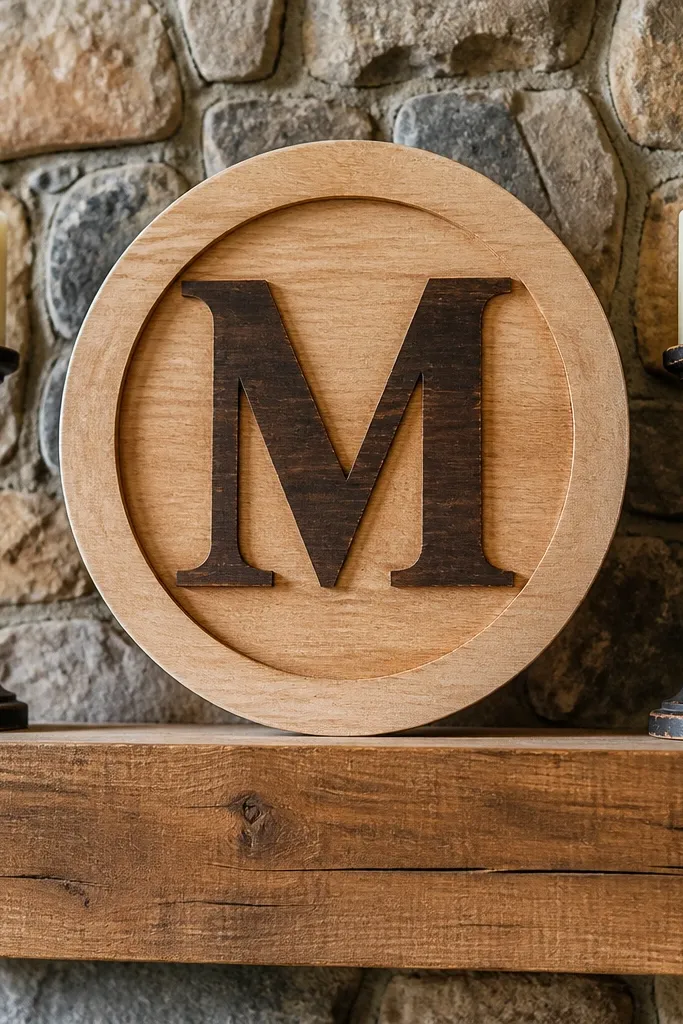
A wood sign gives you a clear focal point without needing to cover the stone fireplace. Keep the sign simple and readable from a distance, then pair it with two matching candles to balance the weight visually. This approach looks good year-round because the sign stays the same while you swap the small seasonal elements around it. Choose warm wood tones to match the mantle, and pick candle holders with a matte finish to avoid glare. Beginner-friendly because you’re placing three pieces with straightforward symmetry.
Choose a wood sign size that’s about 12-18 inches wide for most mantels. Center it on the mantel, then place two pillar candles at the left and right edges of the sign’s footprint, leaving 6-10 inches between each candle and the sign. If your mantel is wide, add a small tray under the candles for alignment. Finish with one small seasonal item in the negative space above the candles, like a mini evergreen bunch or a few spring stems.
Editor's noteUse felt pads under the sign so it doesn’t slide when you dust.
Skip thisAvoid oversized signs — they swallow the stone and make the mantel look crowded.
11. Hearthside Lantern Trio on a Black Tray
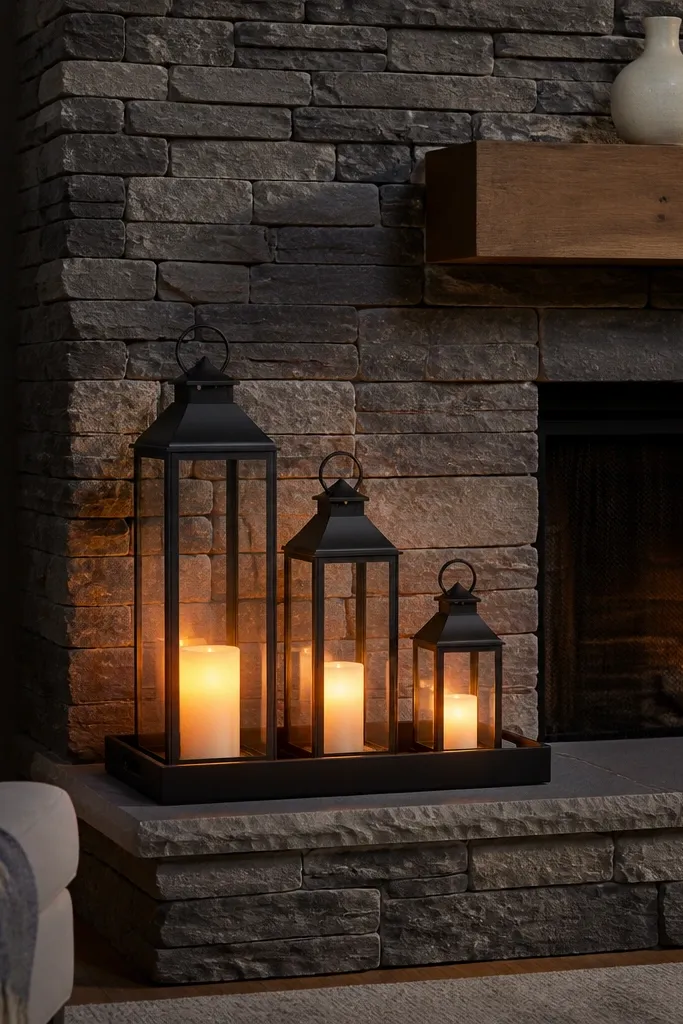
If you want the whole fireplace area to look styled, not only the mantel, this is the move. A black tray ties the hearth styling together and makes the lanterns look intentional rather than scattered. Lanterns give you warm light in winter and a cozy look in summer when used with faux candles. The trio of different heights creates depth that looks good in wide shots. Beginner-friendly because you set it down and adjust — no tools, no mounting.
Pick a black metal or matte tray that fits the hearth space without touching the stone edges too tightly. Place three lanterns on it in a staggered layout: one tall in the center, two shorter on the sides. Add faux taper candles inside or use battery candles for safety. Arrange the tray so the center lantern aligns with the mantel centerline, then step back and adjust until the lantern silhouettes feel balanced.
Choose lanterns with open tops and clear sides for easier light glow in photos.
Avoid lanterns that are all the same height — the arrangement looks flat.
12. Slim Floating Shelves for Minimal Decor Line
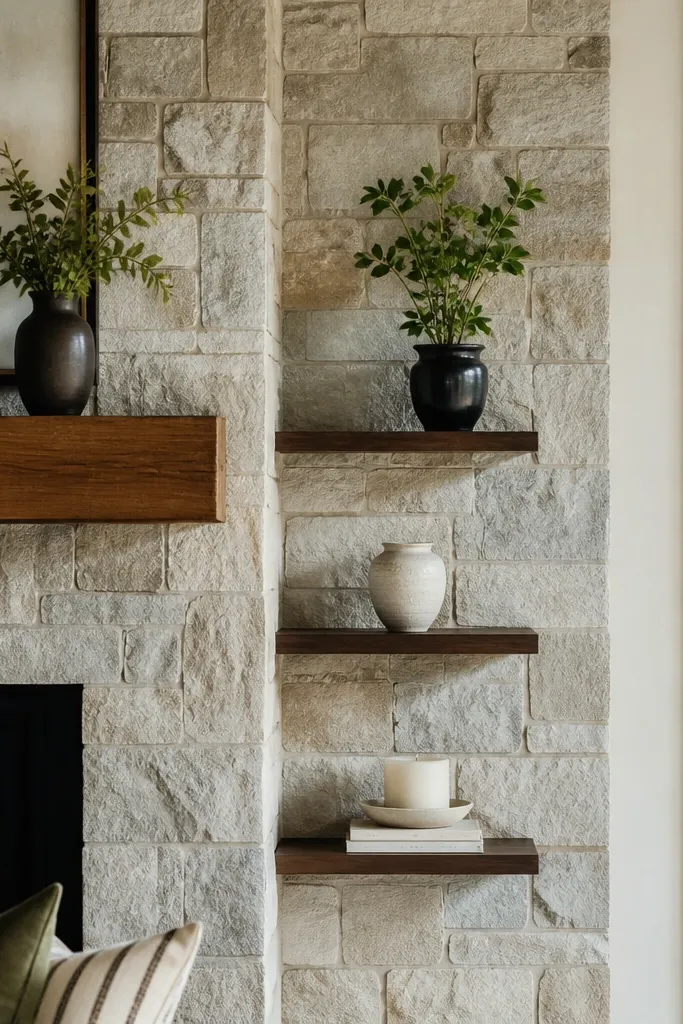
When your stone fireplace has a strong texture, minimal decor looks best. Adding two slim shelves above or around the mantel gives you a place to stack a few objects in a clean vertical line. Keep the decor consistent: one small plant, one ceramic vessel, one candle or small book stack. The look is beginner-friendly if you keep the shelf sizes small and use a stud finder for anchors. It’s also year-round because the shelf layout stays the same while you swap plants and seasonal pieces.
Measure the space above the mantel and choose shelves that are 10-14 inches long and 4-5 inches deep. Mark stud locations with a stud finder, then mount shelves with level alignment — use a level on the first shelf or everything will drift. Place decor in a deliberate pattern: one object on each shelf end, one in the center. For seasonal swaps, swap only the top object on the right shelf and keep the rest constant.
Editor's notePre-stage your items on the floor and pick the tallest one first so your shelf heights feel balanced.
Skip thisDon’t overload shelves — three objects per shelf is enough.
13. Seasonal Wreath on the Mantel Back Edge
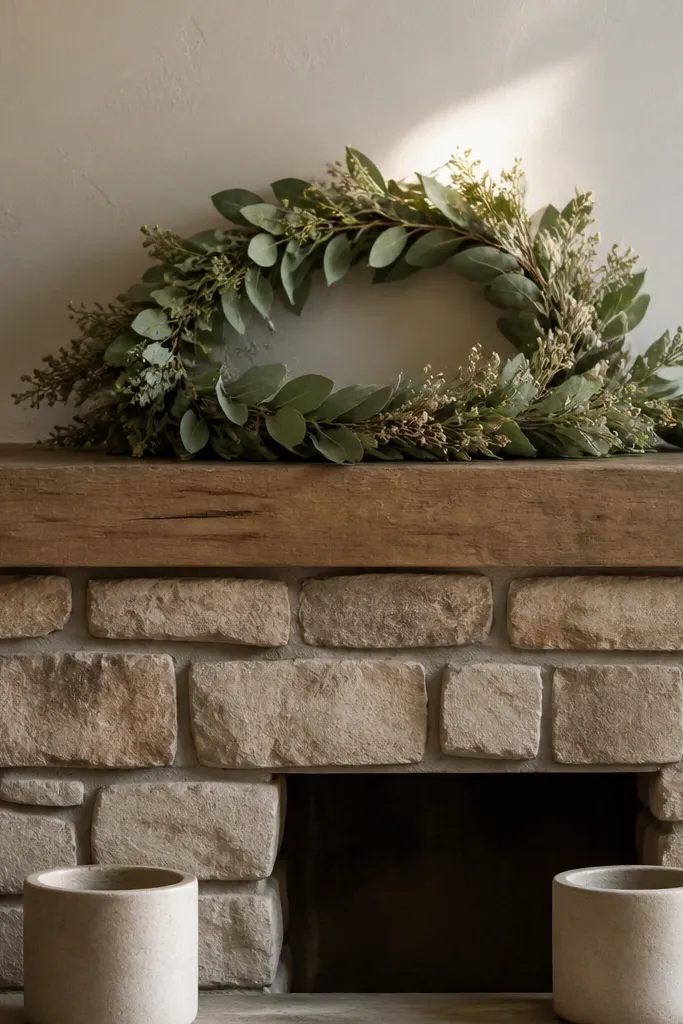
A wreath placed on the mantel back edge reads like a framed moment, even when the fireplace is off. It also solves a common problem: where to put seasonal greenery without crowding the stone face. Choose a wreath that’s flat enough to sit against the mantel and won’t block the stone texture. Pair it with two simple candle holders so the wreath doesn’t look alone. This is beginner-friendly because you can use adhesive hooks or a simple mantel stand.
Pick a wreath diameter that fits your mantel width — typically 12-18 inches for a small-to-medium mantle. Place it on the back edge, centered, and use felt strips or removable hooks so it doesn’t slide forward. Add two matching candle holders in front corners, keeping them lower than the wreath’s lowest point. For year-round use, swap the wreath’s greenery while keeping the candles and a small center vase consistent.
Choose wreaths with a matte finish — shiny leaves reflect light and look plastic in photos.
Avoid wreaths that are too thick — they push decor forward and make the mantel feel cramped.
14. Shelf-Safe Garland with Hidden Weight Line
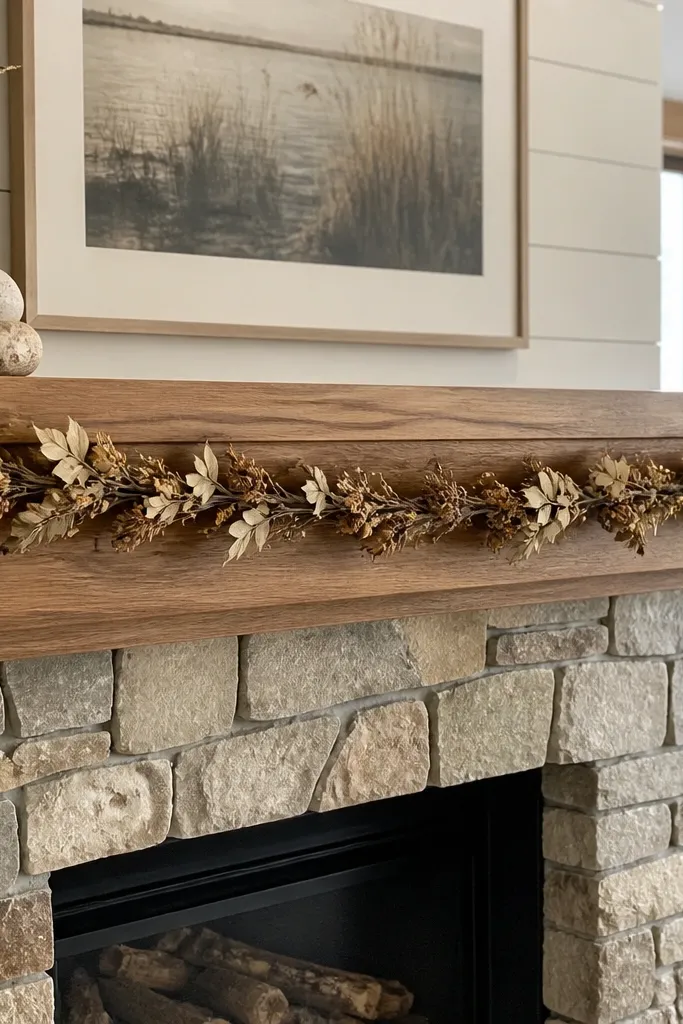
Garland is the fastest way to make a stone fireplace look dressed without buying a whole new set each season. The key is keeping it from curling or drooping — a hidden weight line makes it lie flat and look intentional. Use a garland that matches the mantle tone, like natural brown, olive, or neutral cream. Add a few pinecones or small ornaments, but keep them clustered so the garland still looks airy. Beginner-friendly because you can drape it and secure lightly with removable clips.
Choose a garland long enough to span most of the mantel, leaving 6-10 inches of space on each end. Drape it across the mantel and secure it with removable adhesive clips every 8-12 inches. If it doesn’t lie flat, add a thin weighted line inside the garland channel or use a hidden fishing line weight behind the greenery. Place two candles at the front left and front right, and add a small cluster of pinecones in the center for a focal point.
Editor's noteUse removable clips instead of tape — it keeps the mantel finish clean when you swap seasons.
Skip thisAvoid scattering ornaments all over — clustered accents look designed.
15. Stone-Matching Color Blocks with Paint Chips
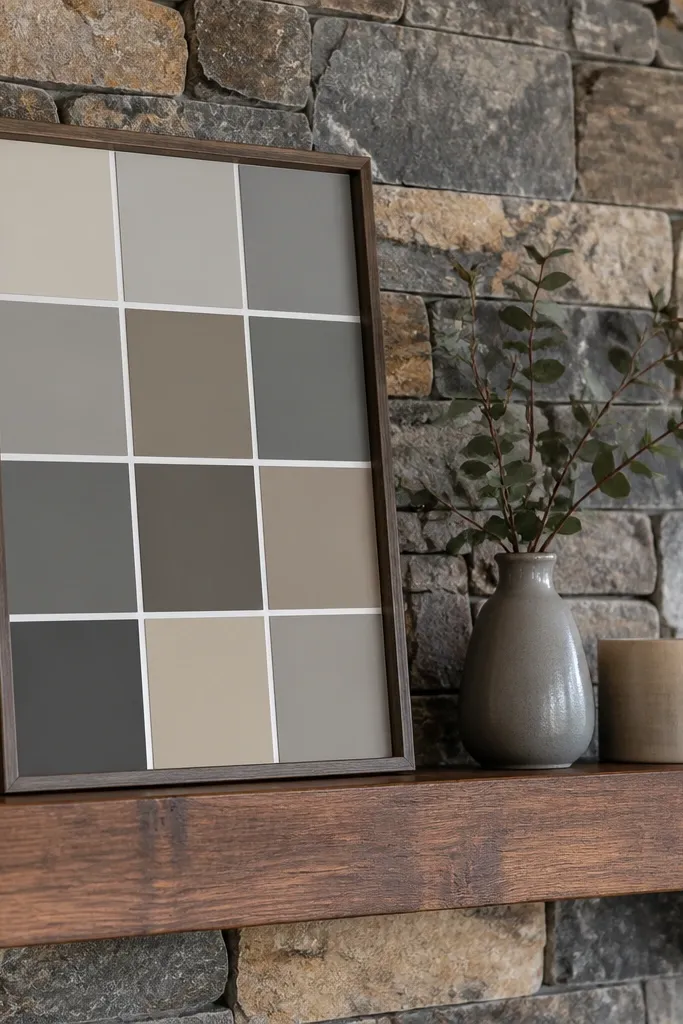
This is a designer trick for stone fireplaces: match your decor colors to the stone’s undertones. Create a small framed color block arrangement using paint chips or thick cardstock swatches in stone-related shades. It keeps the mantel palette cohesive, especially if your stone has gray-brown variation. Pair it with a neutral vase and one candle pair so the color block is the hero. It’s beginner-friendly because you’re making a simple, lightweight frame that you can swap if you change your room colors.
Choose 4 paint chip shades pulled from your stone — one light, one mid, one deep, and one accent. Cut the chips into equal rectangles and glue them onto thick cardstock or foam board, leaving 1/8 inch spacing. Place the board into a simple frame and hang or lean it centered on the mantel. Add a neutral vase and two candles flanking the frame, keeping the candles lower than the frame bottom edge.
Editor's noteUse matte cardstock so the swatches don’t glare under warm lighting.
Skip thisAvoid random colors that look good alone — they usually clash with stone undertones.
16. Over-Scale Mirror with a Candle-Lit Lower Shelf
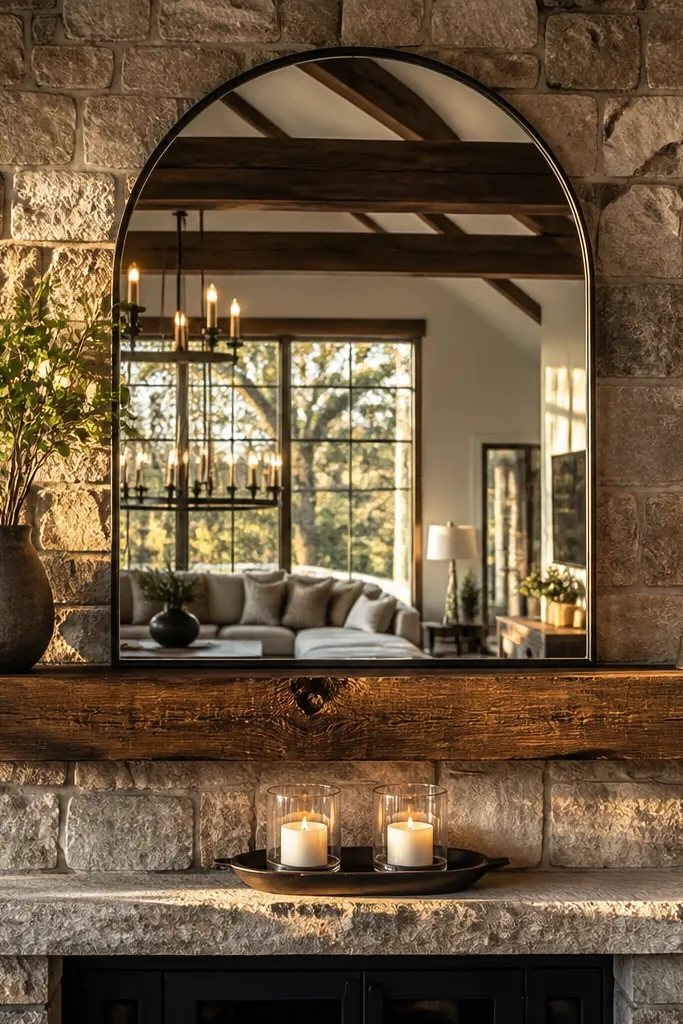
A large mirror makes a stone fireplace feel bigger and brighter, and it’s one of the most photogenic upgrades you can do without touching the stone. The mirror reflects the room and makes the fireplace area look styled even when you keep decor minimal. Pair it with a tray below holding two candle holders and one small centerpiece so the lower area doesn’t look empty. This works year-round because you’re not relying on seasonal items; you’re relying on reflective structure. Beginner-friendly because the main job is placement and secure mounting or safe leaning.
Choose a mirror that’s wide enough to cover most of the mantel width, typically 24-36 inches wide. Center it above the mantel and either mount it with proper hardware or lean it with a stable base on a non-slip pad. Place a black or wood tray on the mantel below it, then set two candle holders at left and right edges of the tray. Add a small centerpiece in the center of the tray, keeping it under candle height so it doesn’t crowd the mirror.
Editor's noteIf you’re leaning the mirror, add felt pads and test stability before styling candles.
Skip thisDon’t pick a mirror with heavy ornate gold detailing if your stone is already warm and textured.
17. Books and a Ceramic Urn with Seasonal Inserts
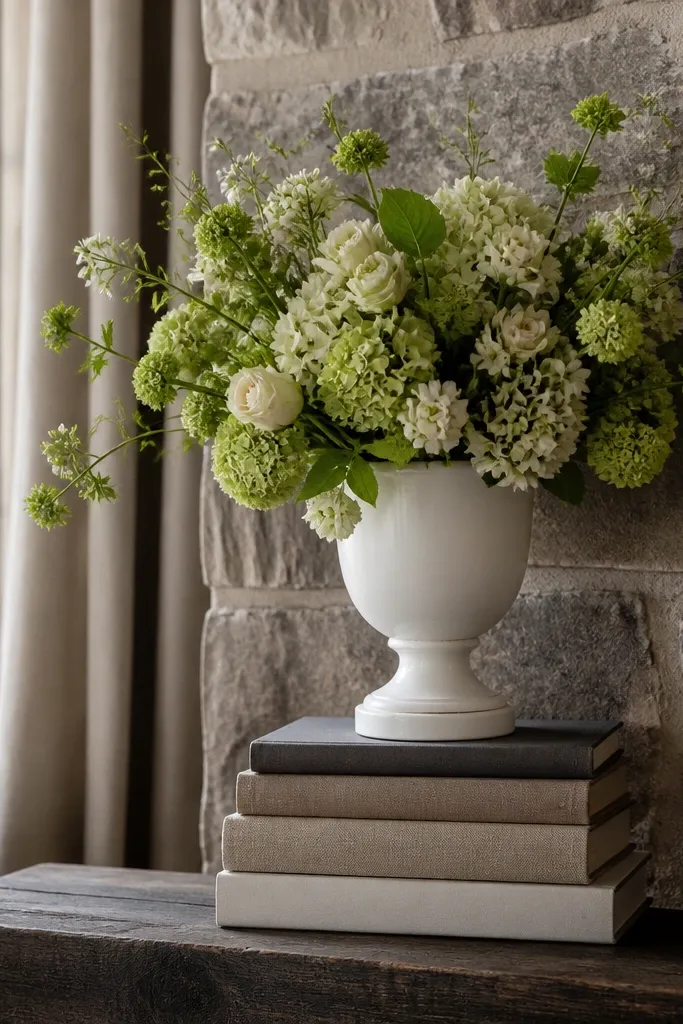
This look is smart because it uses everyday items — books — to create height and structure. The ceramic urn gives you a clean, classic shape that reads elegant next to stone, while the books add a solid base so everything sits at the right height. Seasonal inserts are easy: swap the stems or a small bouquet inside the urn. It’s beginner-friendly because you can build it with items you already own and you don’t need complicated installations. It looks styled in photos because the stacked books create crisp lines and the urn gives a smooth focal point.
Stack 2-4 books on the mantel center, then place a ceramic urn on top or just in front of the books. Keep the urn centered and tall enough to rise above the book stack by at least 2-3 inches. Insert one small seasonal bunch — dried stems, faux greenery, or a short branch bundle — trimmed to fit the urn opening. Finish by placing one smaller candle holder on each side of the urn or by adding two small objects that match the urn tone.
Editor's noteUse books with muted covers — white, gray, or tan — so the stone and ceramics stay the focus.
Skip thisAvoid mixing tall uneven stacks on both sides — the mantel will look lopsided.
18. Two-Frame Photo Ledges with a Center Vase
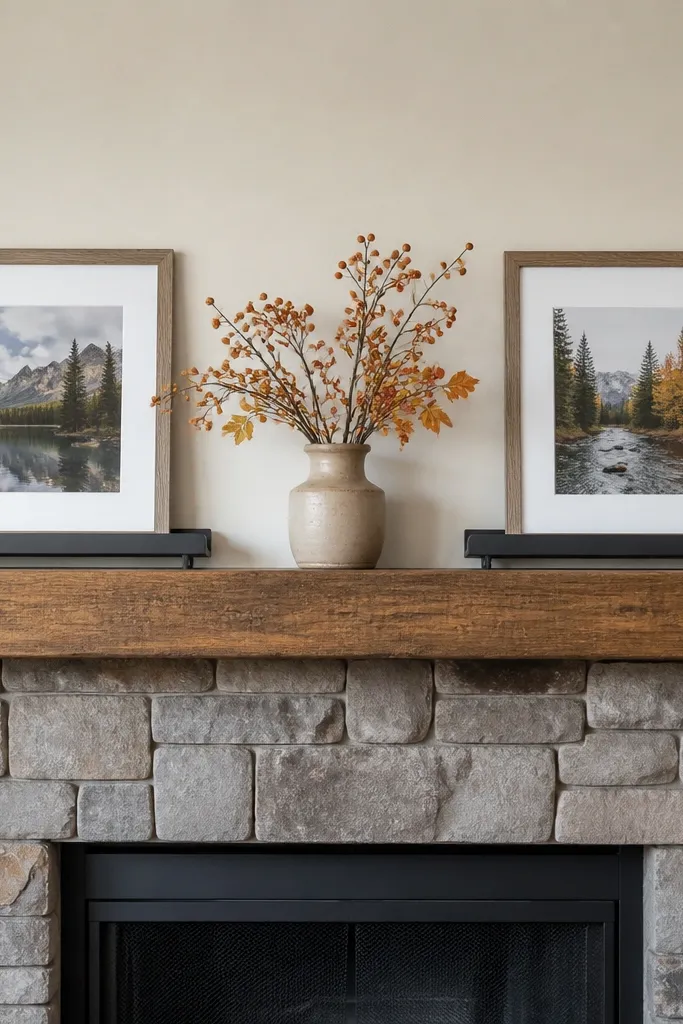
This is a clean, personal-looking mantel style without turning into a clutter wall. Two frames resting on the mantel create a horizontal rhythm that works with wood mantels and textured stone. The center vase keeps the arrangement cohesive and provides a place for seasonal stems. It’s beginner-friendly because you’re using simple lean placement and non-slip pads to keep it steady. It also photographs well because the frames create crisp edges and the center vase creates the focal point.
Choose two matching frames with simple matting, sized around 8x10 to 11x14. Lean them on the back edge of the mantel, left and right, and place a small vase centered between them. Add two small candles at the front corners, keeping them lower than the vase. Use non-slip drawer liner under the frame feet so they don’t creep when you dust.
Editor's noteMatch the frame mat color to your stone undertone — warm stone likes cream mats, cool stone likes light gray mats.
Skip thisAvoid frames that are too thick or too tall — they block the stone texture behind.
19. Textured Wall Hanging Rope Knot Above Mantel
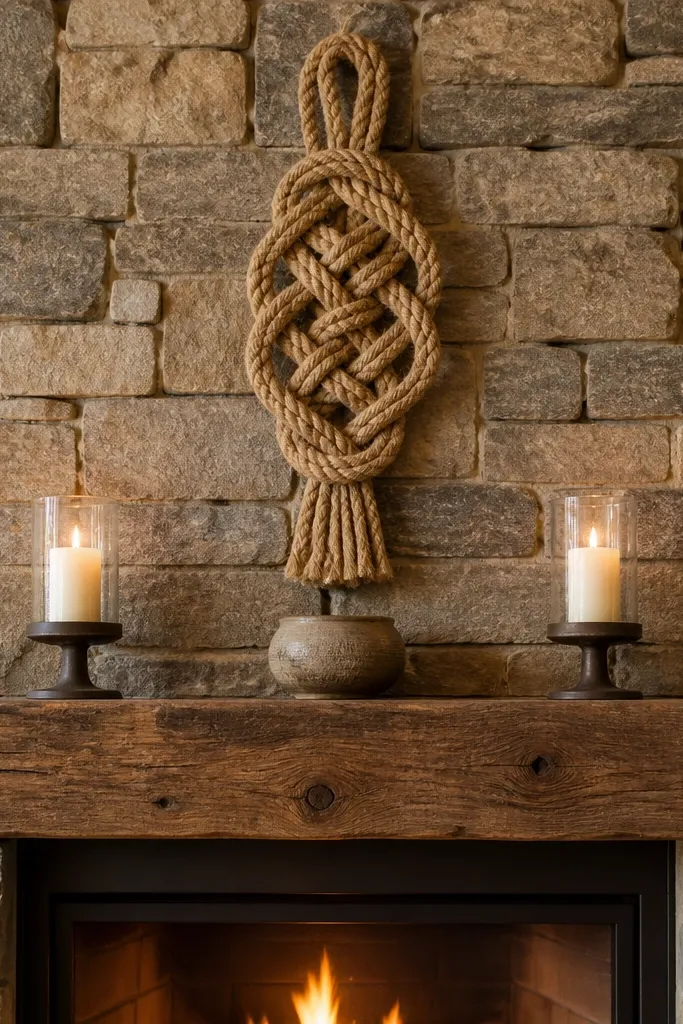
Stone fireplaces can feel heavy, so adding one strong, textured vertical element helps. A natural rope knot hanging above the mantel adds a handmade look that still reads clean and modern. Keep the rest minimal: two simple candle holders below and one neutral vase or bowl in the center. This works year-round because rope doesn’t scream any one season. Beginner-friendly because you can hang it with a single hook or a screw-in eyelet, then style everything else lightly.
Choose a rope wall hanging with a simple knot structure and a length that sits just above the mantel height, usually 18-30 inches long. Mark the center point above the mantel and install a single hook or screw eyelet with proper wall anchors. Tie the rope to hang straight and secure it with a small loop so it doesn’t twist. Place two candles on the mantel corners and a neutral centerpiece in the middle, keeping the colors warm and matte.
Choose a rope in a natural tan or light brown so it doesn’t fight gray stone.
Don’t use a thick rope with lots of tassels — it can look messy and crowd photos.
20. Hearth Rug Color Pull with Candles on a Slim Runner
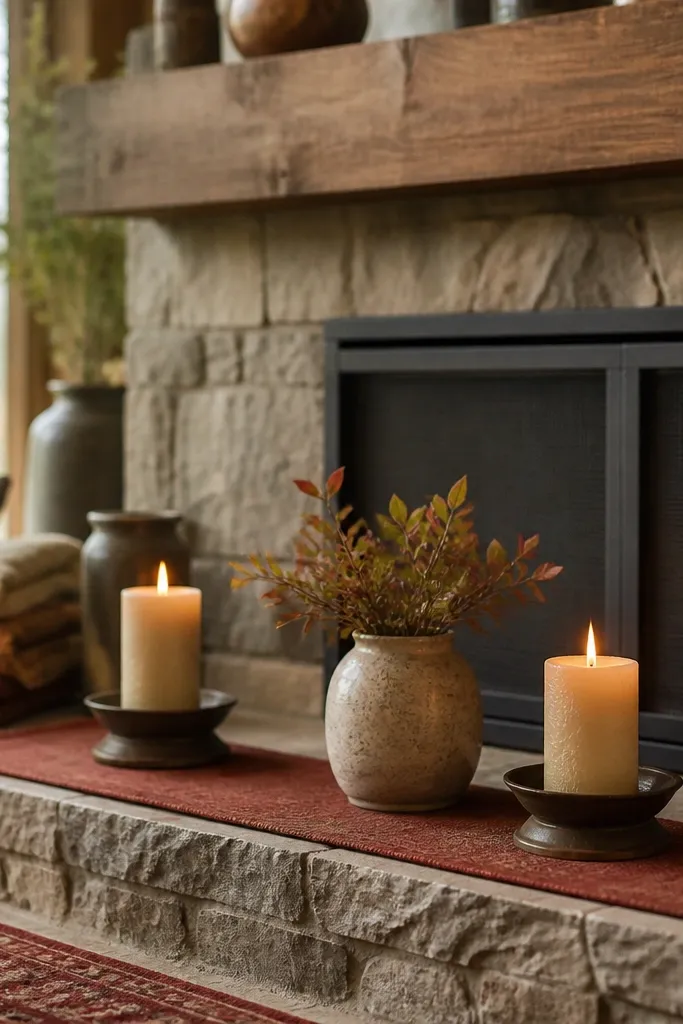
A lot of fireplace styling stops at the mantel, but the hearth area is what your eyes land on when the room is cozy. Pulling a color from your hearth rug and repeating it in a slim runner and decor makes the whole fireplace feel finished. This look uses a narrow fabric runner instead of a big bulky arrangement, so it stays photogenic and doesn’t fight the stone floor texture. It works year-round because fabric color stays constant while you swap small accents. Beginner-friendly because it’s mostly placement and fabric choice.
Pick a slim fabric runner that matches a color from your hearth rug — terracotta, olive, or charcoal are easy wins. Lay it centered on the hearth or just in front of the firebox opening. Place two candles at the left and right ends of the runner and a small vase in the center. Keep the vase low so it doesn’t block the stone opening, then swap only the vase contents seasonally.
Editor's noteUse cotton or linen for the runner so it looks crisp, not shiny.
Skip thisAvoid placing the runner too close to the firebox if you burn wood — keep fabric well away from heat.
21. Candle Cluster in a Clear Glass Tray
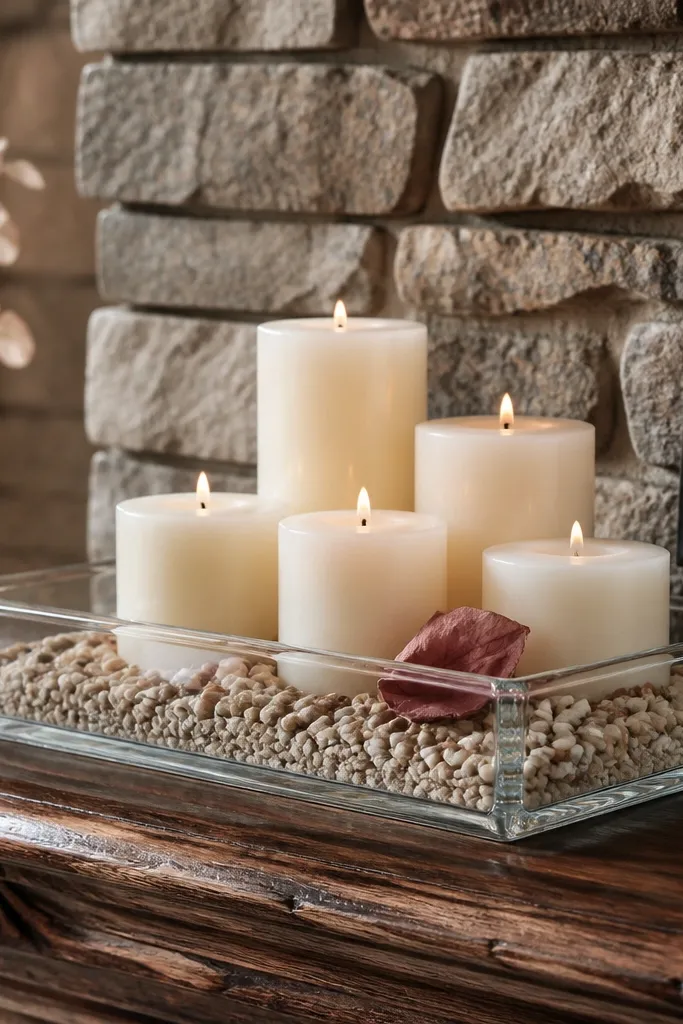
A clear glass tray is one of the best ways to make candles look styled, not random. It creates a defined boundary and lets you add small filler — pebbles, sand, or dried petals — without turning the mantel into clutter. This looks great with stone because glass reflects light and keeps the arrangement feeling airy. It’s year-round because you can keep the tray and filler base consistent while swapping the candle color or a few seasonal stems. Beginner-friendly because you’re just building a cluster and placing it centered.
Choose a clear glass tray sized so it fills about half the mantel width, usually 14-20 inches wide. Add a thin layer of pebbles or sand at the bottom to stabilize candles. Place three candles in a triangular layout — one center, two sides — with the center candle slightly taller. Add one small decorative element around the candles, like a few dried petals in spring tones or a mini evergreen sprig in winter.
Editor's noteWipe the glass tray clean before styling so fingerprints don’t show under warm lamps.
Skip thisAvoid using filler that sheds — loose glitter and thin dried leaves drift onto stone quickly.
22. Greenery Garland with Matte Black Candle Sticks
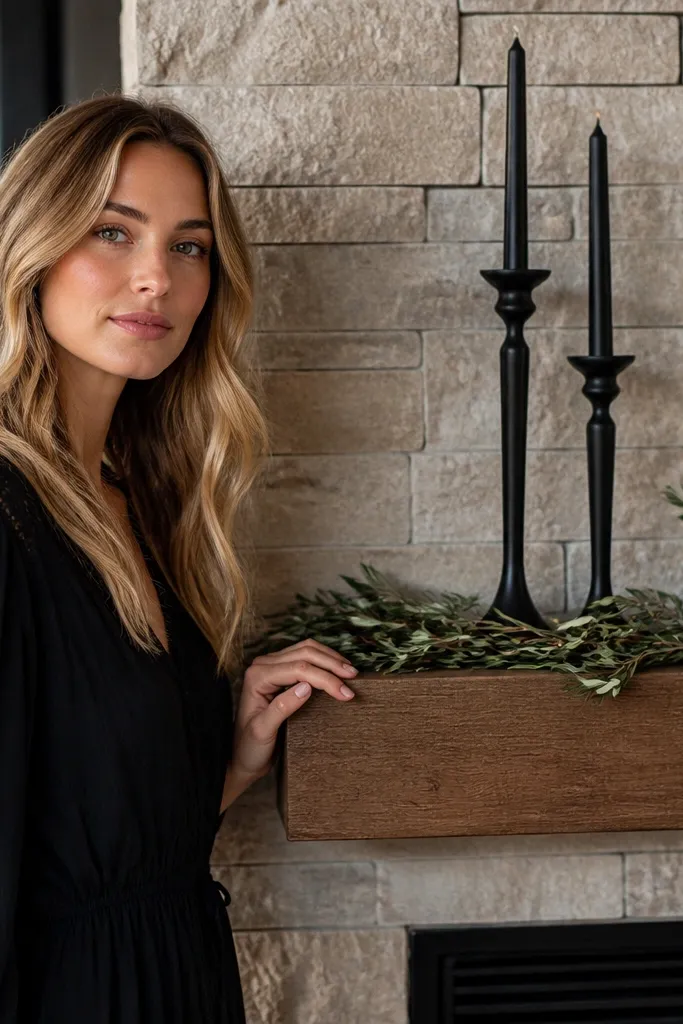
This is a high-contrast mantel look that makes stone feel intentional instead of bare. Olive or sage greenery adds softness without looking holiday-specific, and matte black candle sticks look sharp against lighter stone. Keep the greenery sparse enough to show the mantel surface and stone texture. Add one small vase in a light neutral so the black doesn’t dominate. It’s beginner-friendly because you’re using a drape garland and simple candle placement, not complicated arrangements.
Drape a sage or olive garland across the mantel, then secure it with removable clips every 10-12 inches. Place two matte black candle sticks at the left and right sides, keeping them lower than the garland’s highest point. Put a small light vase in the center, then tuck a few extra greenery tips into the center gap for fullness. Adjust spacing until the garland looks even from the room’s main viewing spot.
Choose garlands with a matte finish, not shiny — shiny leaves look cheap under indoor lighting.
Avoid full, dense greenery all the way to the edges — that hides the stone and makes the mantel look heavy.
23. Oversized Knit Throw Fold on Hearth Bench
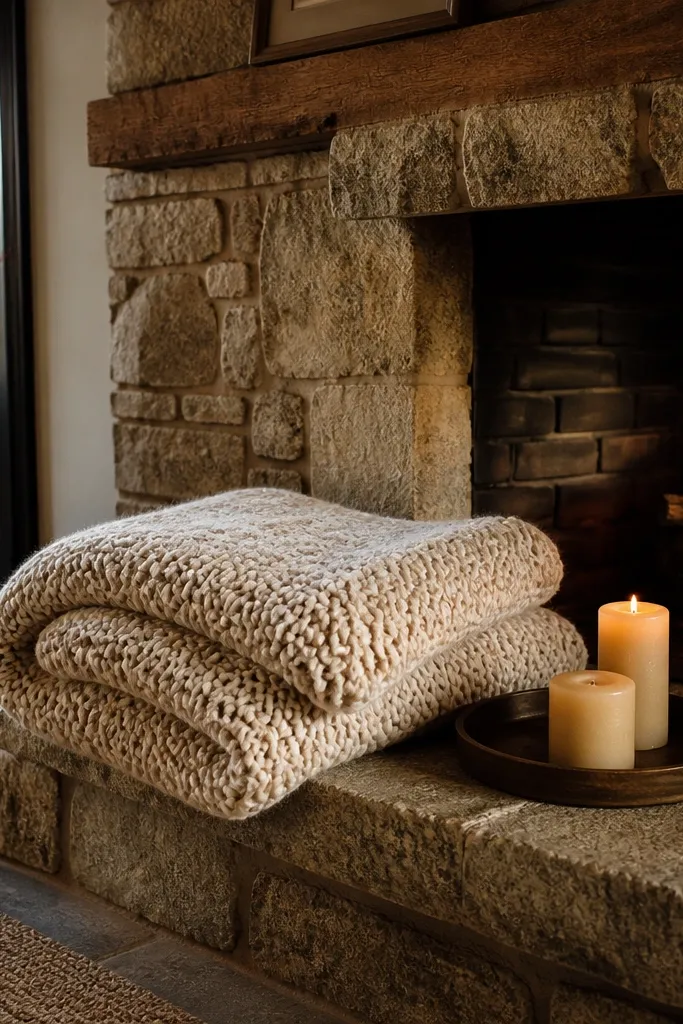
Stone fireplaces look best when you add softness in fabric, not more hard objects. A chunky knit throw folded neatly on a hearth bench or directly beside the firebox gives a cozy, photo-ready look. Keep it simple: one fold, one throw, and a small candle tray with two candles. This works year-round because knit fabric reads warm in winter and comfortable in spring evenings. Beginner-friendly because there’s no building, no drilling, and it’s easy to swap with the season’s colors.
Choose a knit throw in a neutral like cream, oat, or warm gray. Fold it into a thick rectangle and place it on a hearth bench or the floor beside the firebox where it won’t block foot traffic. Set a small tray with two candles near the front edge of the throw so the candles frame the fabric. For seasonal updates, swap only the throw color or add a single small evergreen sprig in winter.
Editor's noteUse a fabric lint roller before styling so the knit doesn’t look fuzzy in photos.
Skip thisAvoid messy folds — the throw should look deliberate, not tossed.
24. Stone-Color Candle Holders with Matching Trivet Base
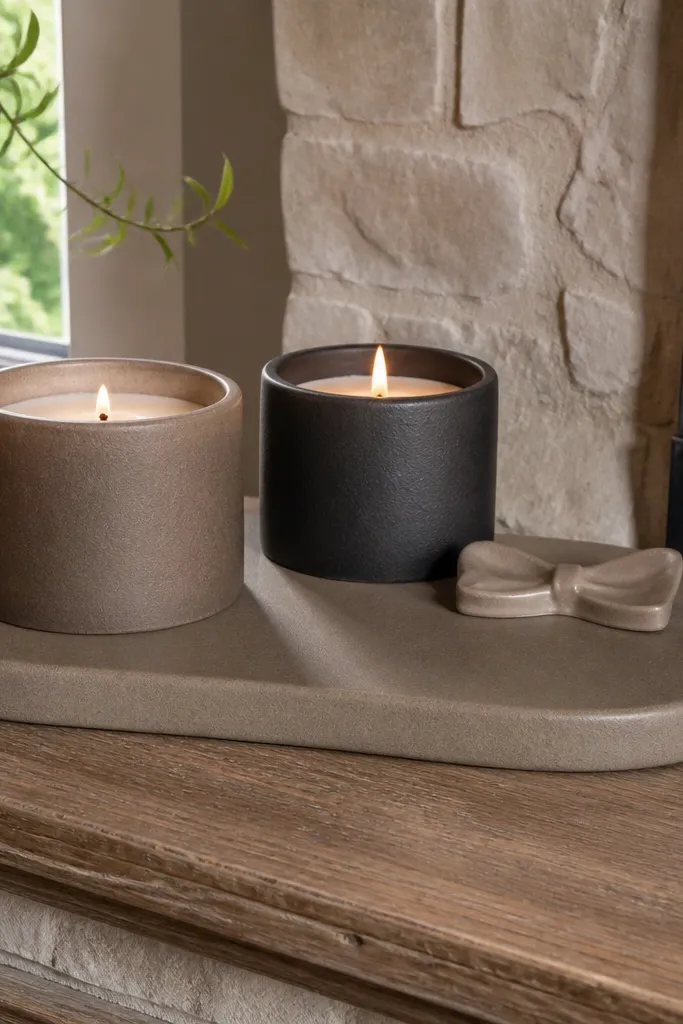
This idea makes your mantel feel like it belongs with the fireplace instead of sitting on top of it. A stone-colored trivet or flat ceramic base gives you a stable, cohesive foundation for candle holders. Choose candle holders in tones that echo the stone — warm taupe, charcoal, or light gray. Add one small ceramic bowl in the center so the arrangement has a bottom focal point. It’s beginner-friendly because the trivet keeps everything aligned and makes it harder to mess up spacing.
Pick a trivet or flat base that fits the mantel center, usually 10-16 inches across. Place the base centered, then set two candle holders at left and right edges of the base. Put a small ceramic bowl or bud vase in the center gap. Add filler like a few pebbles or a thin strip of dried grass, then adjust until the candle flames would sit evenly if you light them.
Use LED candles if your stone area runs warm, so you keep the look consistent without fire risk.
Avoid bases that are too glossy — they reflect the stone and look distracting.
25. Tall Floor Vase Behind Mantel with Front Candle Pair
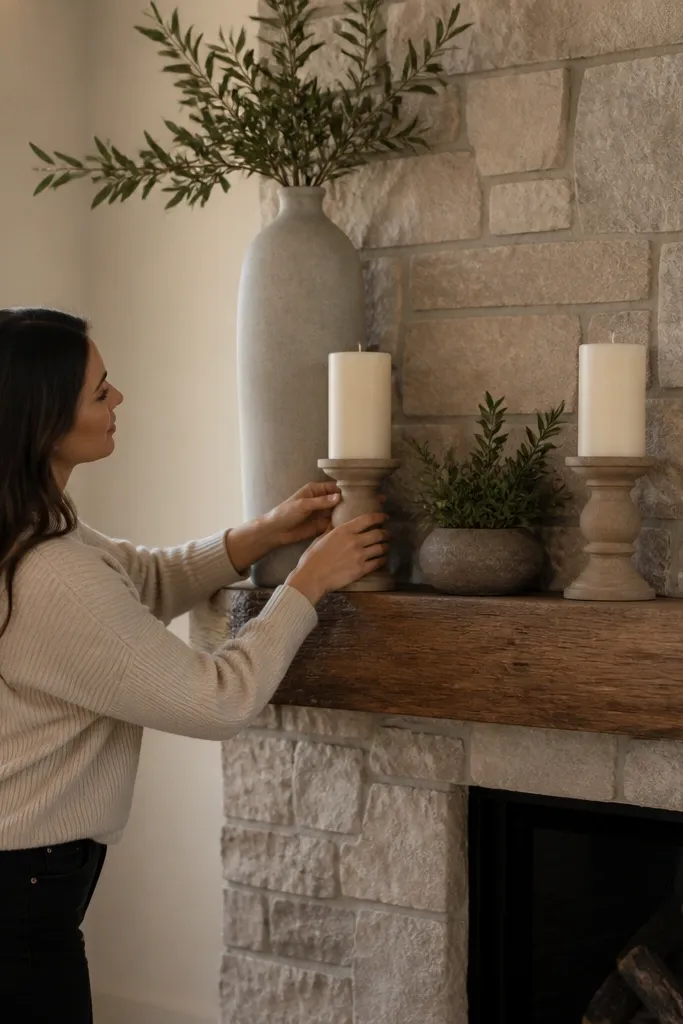
If your mantel is narrow, you need height elsewhere. A tall floor vase placed behind or to the side of the mantel adds vertical presence and balances the stone mass. Keep the mantel decor minimal: two front candle holders and one small centerpiece so you don’t overcrowd. This look stays year-round because the main element is a vase, not seasonal florals. It’s beginner-friendly because it relies on placing one large item and framing it with simple candles.
Choose a tall vase 24-40 inches high with a stable base. Place it slightly behind the mantel centerline so it reads as part of the fireplace styling. Set two matching candle holders at the front left and front right on the mantel, and add a small centerpiece in the middle. If you want seasonal change, swap only the stems inside the tall vase while keeping the mantel layout identical.
Editor's noteUse a non-slip mat under the floor vase to prevent sliding when you move around for cleaning.
Skip thisAvoid a vase that’s too narrow — it looks top-heavy next to stone.



