
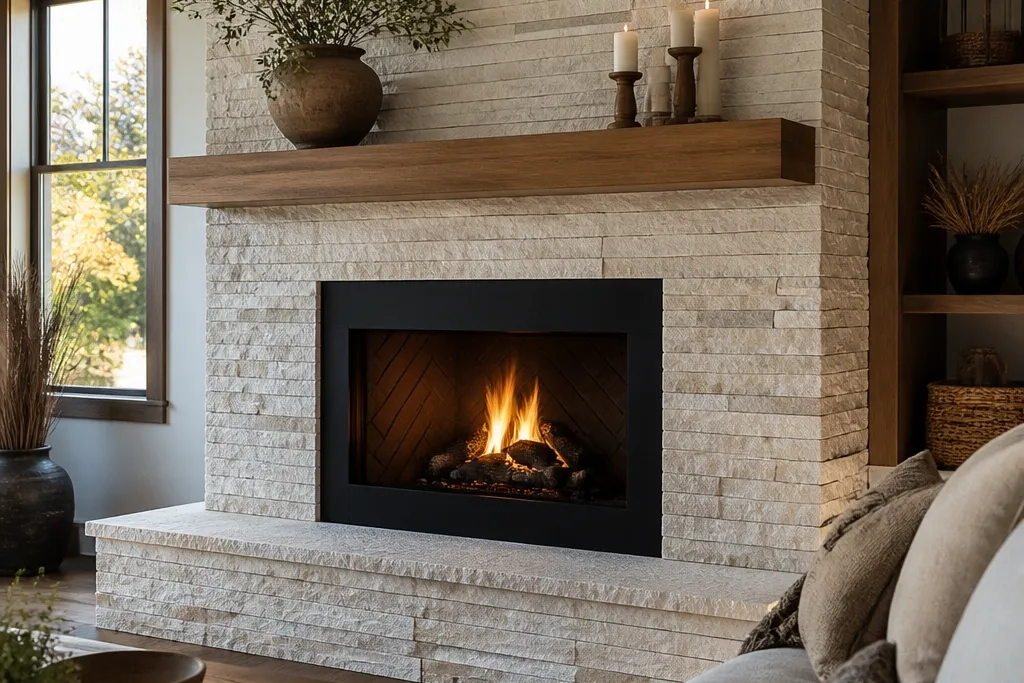

1. Warm white stacked stone with black metal firebox trim
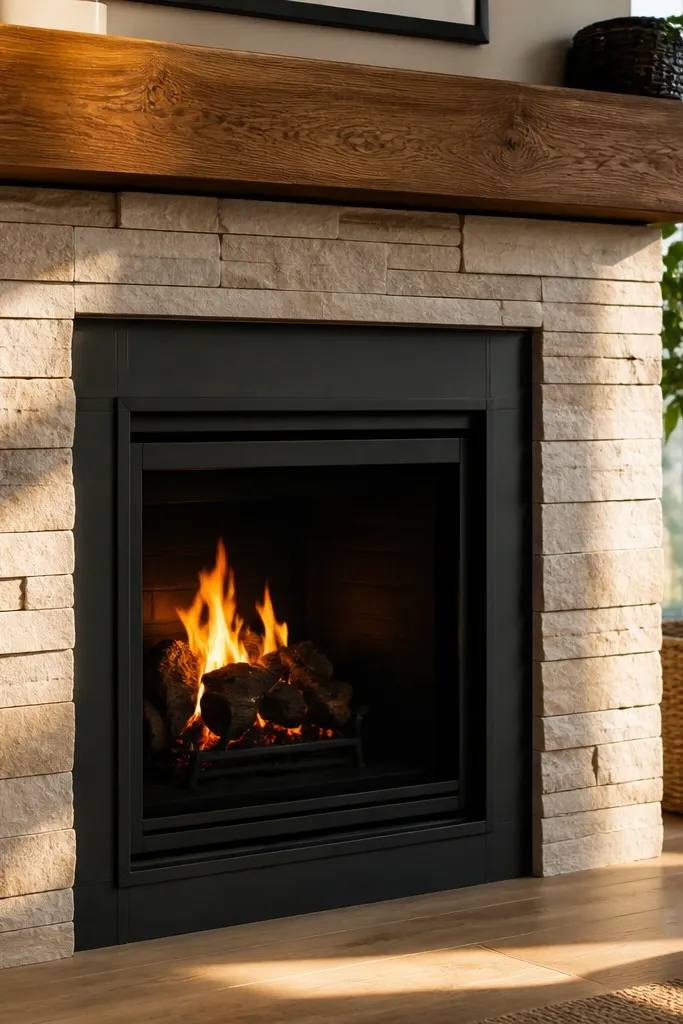
This look is clean, bright, and hard to mess up because stacked stone creates straight, calm lines around the opening. The warm white color keeps the room from feeling heavy, and the black metal trim around the firebox adds contrast that reads “high-end” in photos. Use a simple mantel — wood with a clear finish or a painted slab — so the stone stays the star. It’s budget-friendly because stacked veneer usually covers faster than highly irregular shapes, and you can keep cuts minimal with a careful start at the centerline. Good fit for living rooms with light walls, modern furniture, and people who want cozy without dark bulk.
Start by installing cement board or the correct veneer backer over the fireplace face, then tape and screw the seams. Dry-lay a row around the opening: begin at the centerline, set your first full stone, then alternate lengths so joints don’t line up vertically. Apply thinset to the back of each piece, press firmly, and keep a consistent joint width with spacers if your stone line calls for it. Finish with a warm gray mortar, then seal the veneer after it cures if the manufacturer recommends it for stain resistance.
Editor's noteUse painter’s tape to mark your centerline and mantel height before you spread thinset — it prevents crooked symmetry.
Skip thisDon’t use white mortar — it highlights uneven joints and makes the surround look like patchwork.
2. Smoky charcoal river rock surround with a slim oak mantel
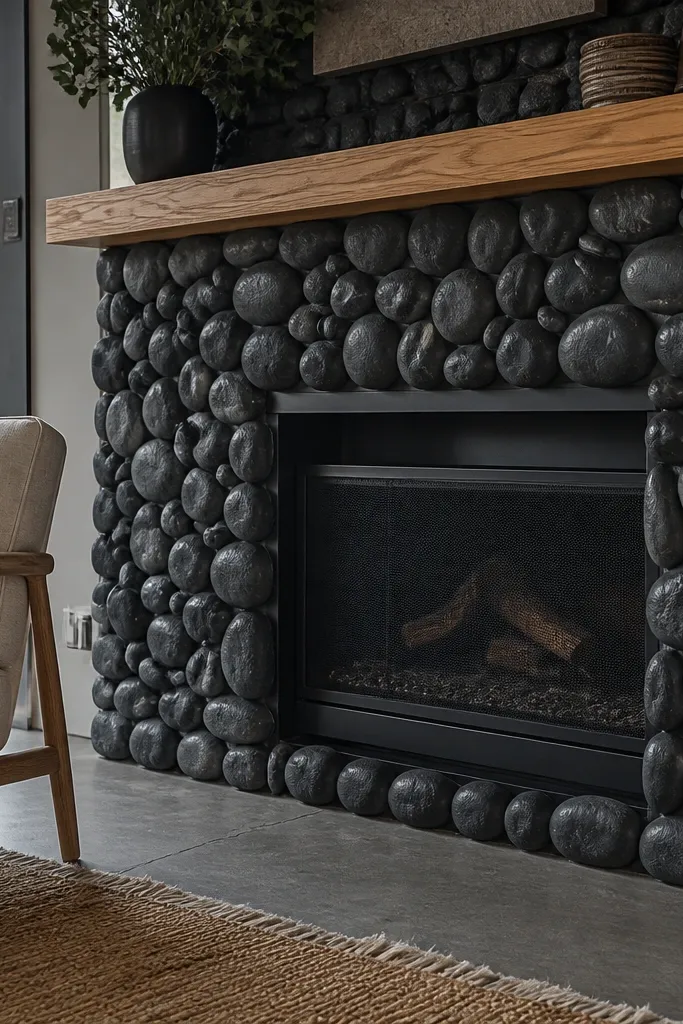
River rock looks cozy because it has movement — rounded faces catch light and hide small surface imperfections in a way flat stone doesn’t. The smoky charcoal tones keep it grounded, and a slim oak mantel stops the whole fireplace from feeling bulky. Choose a veneer system that has a flat backing and consistent thickness so it installs neatly without a “bumpy” mess. This is a smart budget play when you want maximum texture with fewer different stone shapes, because the look reads as intentional even if you’re working on a standard surround size. It suits modern farmhouse, moody living rooms, and spaces with neutral upholstery.
Cover the face with backer board and create a level reference line for the hearth top. Dry-lay the river rock pieces from the edges inward, mixing lengths so the larger rocks don’t all cluster in one spot. Spread thinset with a notched trowel, press each piece, and keep grout lines tight so the mortar doesn’t become the dominant texture. Once cured, grout with a charcoal or dark warm gray mortar and wipe with a damp sponge before it skins. Finish by sealing the stone if your river rock veneer is porous.
Plan your mantel supports before the veneer — drilling through cured stone is annoying and can crack edges.
Avoid long continuous grout lines; if your pieces don’t align, adjust the dry layout before you set anything.
3. Canyon beige ledger stone with limewashed mantel shelf
Ledger stone in canyon beige gives you a classic “cabin” vibe without the heavy look of full-size fieldstone. Pair it with a limewashed or off-white mantel shelf to create a soft, airy contrast that still feels warm. Ledger veneer is also forgiving: minor height variations look natural because the stone is supposed to be irregular. For budget-friendly results, keep the color palette tight — one stone color, one mortar shade, and one mantel finish — so the surround looks styled rather than assembled. This works great in rooms with warm whites, tan walls, or natural wood floors.
Install backer board and mark a horizontal ledger height guide using a level. Dry-lay the first vertical column of ledger pieces on both sides of the opening so the pattern direction stays consistent. Set stones starting at the guide line, using spacers or your veneer’s recommended joint width, and stagger seams so they don’t form a grid. Mortar with a sand-toned mix, then lightly brush the joints when the mortar is thumbprint-set so it doesn’t smear across the faces. Seal after cure for easier cleanup.
Editor's noteUse a wet saw or angle grinder with a diamond blade for clean ledger cuts around the opening — it keeps the edges sharp where the eye lands.
Skip thisDon’t start ledger rows at random heights; misaligned courses make the whole fireplace look DIY.
4. Classic stacked stone with a white-painted brick-style surround frame
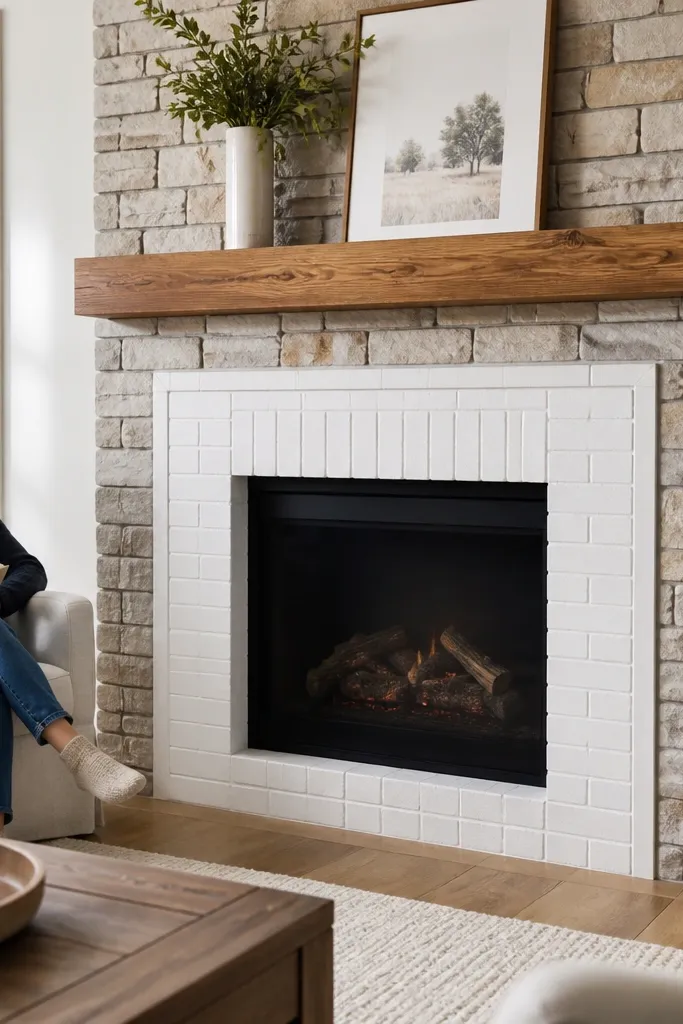
This design is all about framing. You keep the main surround in stacked stone, then add a painted “frame” look around the firebox opening that mimics traditional brick mantels without the cost. The contrast makes the opening feel built-in, and stacked stone keeps the installation faster than small-format shapes. Choose a white or slightly warm off-white frame paint so it doesn’t fight the stone color. It’s budget-friendly because you can create the frame using trim boards and joint compound over backer, then veneer only the main face. Great for farmhouse, transitional rooms, and anyone who wants a timeless look that still photographs well.
Build your opening frame first: install backer, then attach trim boards and tape seams with mesh tape. Skim coat with joint compound, sand smooth, and prime with a bonding primer before painting. After the frame is painted and cured, install stacked stone on the main face, using the frame edge as your clean border line. Mortar the veneer joints to match the stone tone, not the frame, and keep the mortar cleanup crisp so the border stays sharp. Seal the veneer if the stone is rated for it.
Mask the painted frame edges with painter’s tape before mortar — you’ll get a clean line without scrubbing.
Don’t mortar up to a freshly painted surface; mortar can discolor trim and create a messy halo.
5. Basalt gray irregular stone with a dark walnut mantel and black accents
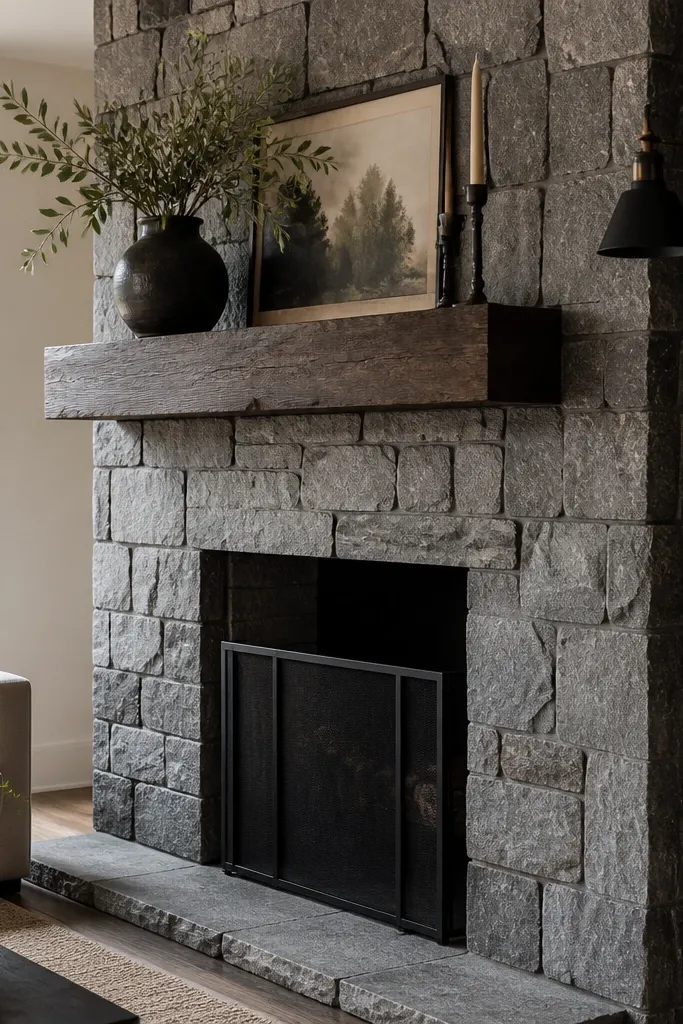
Irregular stone in basalt gray looks expensive because the tones vary, and the face texture hides minor unevenness in wall prep. A dark walnut mantel adds depth and makes the stone read more dimensional, while black accents (like a matte black screen or sconce) pull the look together. This is a strong option for budget-friendly installs because you can use one irregular pattern and let the variation do the “designer” work for you. Keep the hearth and mantel lines simple, and you’ll get a cozy, high-contrast fireplace that still feels modern. Works in rooms with darker floors, black window hardware, or warm gray walls.
Prep the wall with backer board and ensure it’s flat — irregular stone highlights bumps. Dry-lay a test section around the opening, paying attention to how the longest pieces wrap corners. Set pieces with thinset, starting at the center and working outward, and leave a consistent joint depth for mortar. Mortar with a medium gray that matches the stone’s undertone, then tool the joints with a small jointing tool for a slightly recessed look. Seal the stone after cure to reduce staining from fireplace soot and dust.
Editor's noteTool joints lightly; deep tooling can look harsh and show every DIY seam in flash photos.
Skip thisAvoid mixing a gray stone with a warm yellow mortar — the color shift makes the surround look off.
6. Light travertine-look stone with a floating mantel reveal
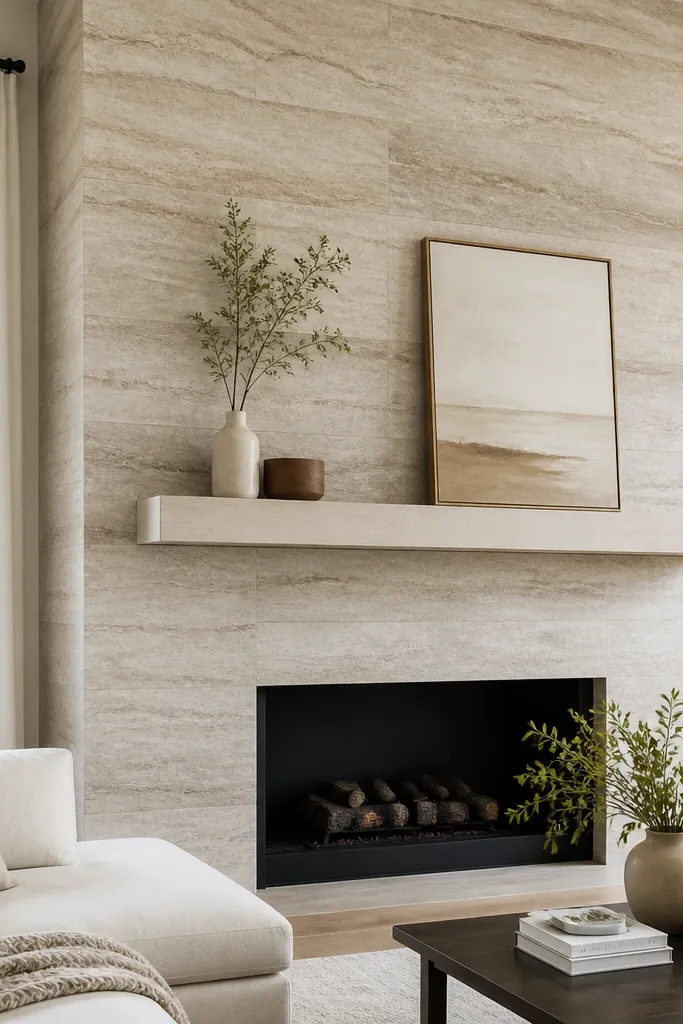
If you want “spa living room” vibes, go for a light travertine-look veneer with a floating mantel reveal. The key aesthetic is negative space: leaving a clean gap between the mantel underside and the stone face so the fireplace reads airy. This look photographs beautifully because the stone is bright and the reveal creates a crisp horizontal line. It also helps budget planning: you can reduce stone coverage under the mantel while keeping the design intentional. Pair with matte hardware like a simple black or brushed nickel shelf bracket to keep it modern.
Install backer board and mark your mantel support line, including the reveal gap you want (about 1 inch is a safe start). Build your mantel support using a ledger board or concealed cleats, then dry-fit the mantel so the reveal is even. Veneer the stone around the opening up to the mantel line, then install the mantel after the veneer cures and mortar is set. Mortar joints should be warm light gray to match the travertine tones. Seal the stone and then caulk the mantel edge with a paintable caulk for a clean finish.
Editor's noteLeave the reveal gap before you veneer — adjusting after stone is set is messy and uneven.
Skip thisDon’t press stone up into the mantel underside; leave the reveal gap so it stays crisp.
7. Rust and cream stacked stone with a brass firebox surround
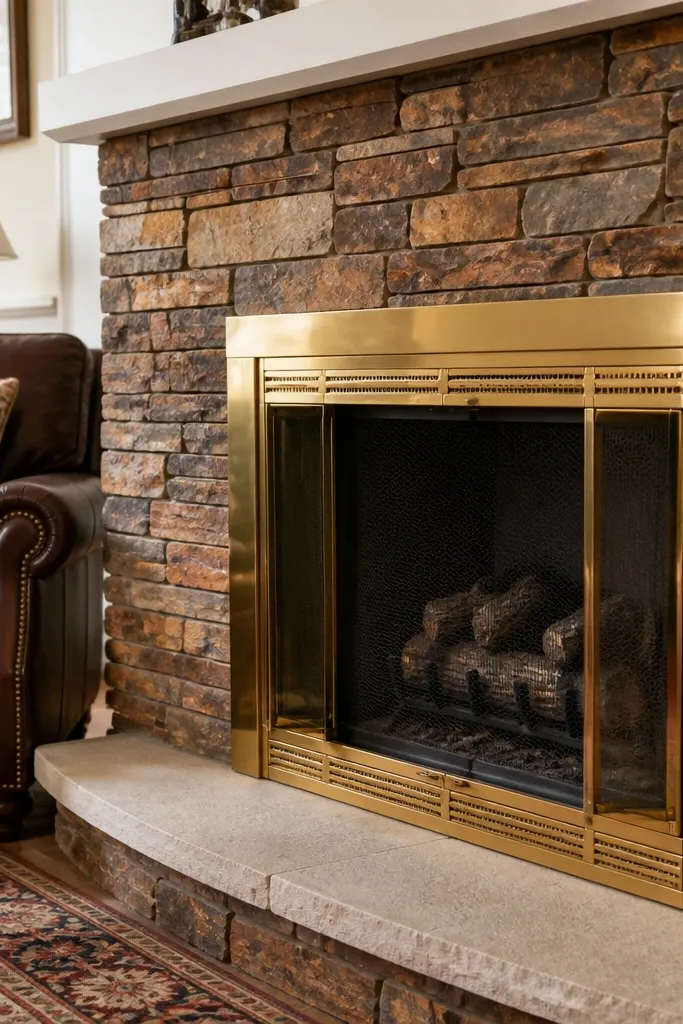
Warm rust-and-cream stacked stone makes the fireplace feel cozy without going dark. Brass around the firebox — even as a simple trim or screen frame — adds a golden accent that makes the stone color look richer. This design is budget-friendly because stacked stone is fast, and the brass accent can be a single piece or simple trim rather than a full custom metalwork job. It’s ideal for rooms with warm neutrals, tan rugs, and vintage-style lighting. The look is photogenic because the stone’s warm undertones and metal shine create a natural focal contrast.
Choose a stacked veneer with visible color variation (cream, tan, and light rust) so you don’t need to paint anything. Install backer board and set a level reference line for the first course. Dry-lay a row around the opening and adjust stone heights so the top edge looks straight even with natural variation. Install the veneer with thinset, then mortar with an earthy warm gray that doesn’t lean too cool. After cure, fit the brass-colored trim around the firebox opening and seal the stone to protect against soot staining.
Test the brass color under your room lighting; warm brass looks best with warm mortars.
Avoid blue-gray mortar with warm rust stone — it makes the color scheme look muddy.
8. Two-tone stone surround with a darker base band
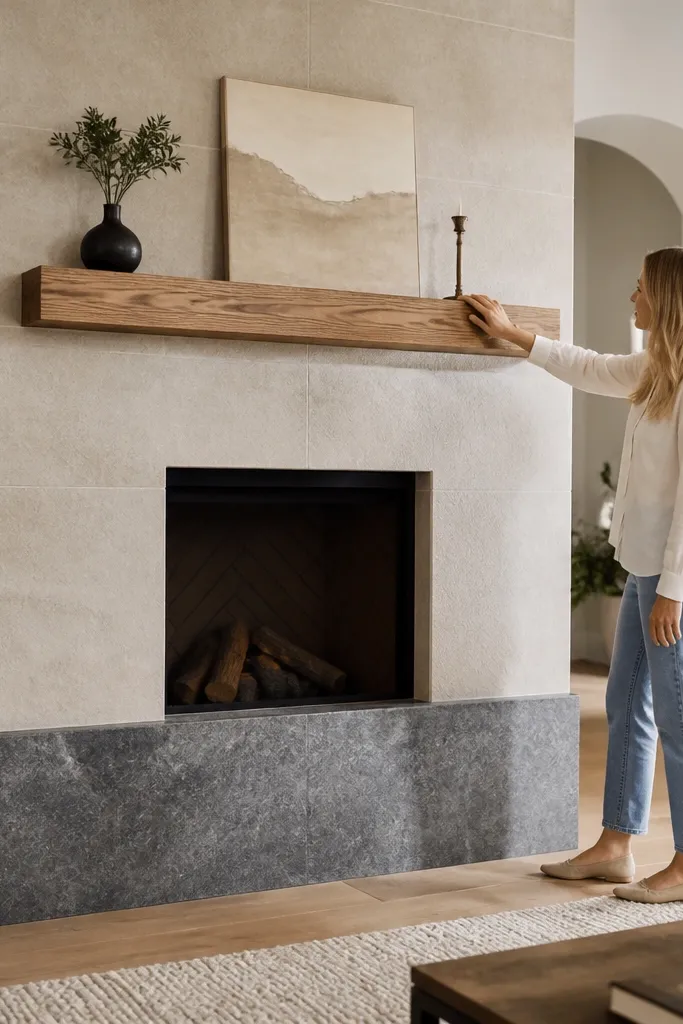
Two-tone stone is one of the easiest ways to make a budget fireplace look designed. Use a lighter stone on the main surround and a darker stone for a base band near the hearth, then keep the transition line straight and intentional. Your eye reads that as “architecture,” not random material choice. This also helps you manage cost: you can use the more expensive stone only for the band and save the rest with a similar-looking but cheaper veneer. It suits living rooms that need structure and depth, especially if the rest of the wall is neutral.
Pick two stones that share undertones so the color shift looks natural (for example, both warm gray-browns). Install backer and mark the exact height of the base band with painter’s tape. Dry-lay the lighter stone first, then place the darker band pieces with a crisp horizontal break line. Set with thinset, keep joint widths consistent across both materials, and mortar with a neutral warm gray that matches both stones. Seal after cure and touch up any edge chips with a small mortar tool.
Use a straight level tool for the band line; a slightly off band makes the whole design feel crooked.
Don’t use two completely unrelated textures; the mismatch looks accidental in close-up photos.
9. White mortar-forward stone with charcoal accents and simple mantel
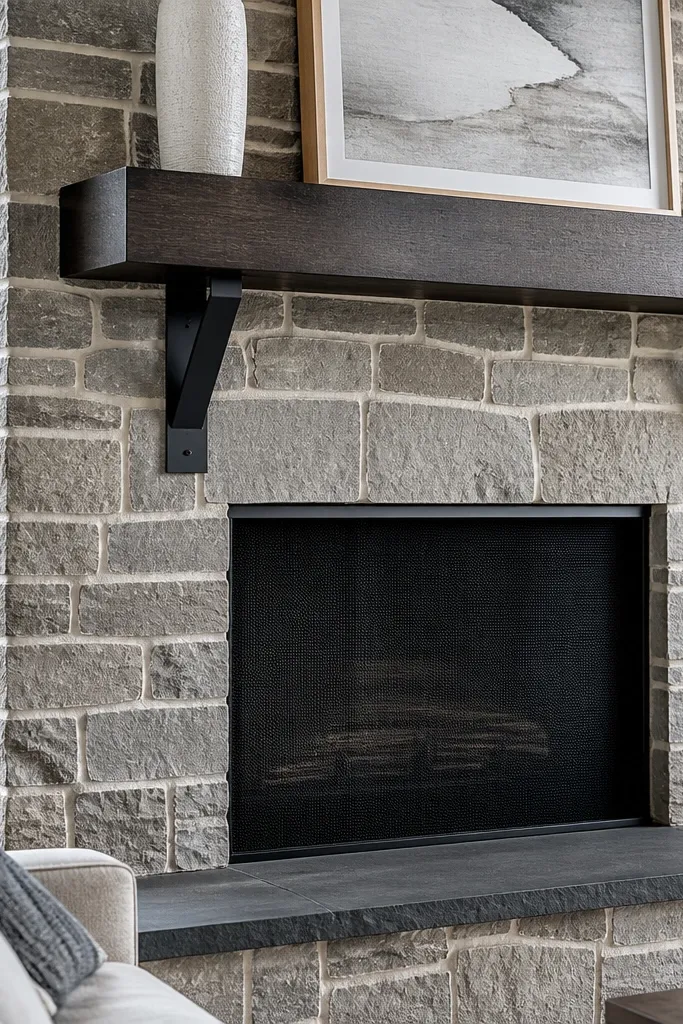
This is the look that reads “intentional” in photos: stone where the mortar joints stand out. Choose a medium-gray or taupe stone veneer, then use a clean white mortar joint so the grid-like pattern becomes part of the design. Add charcoal elements — a black screen, dark brackets, or a charcoal mantel stain — to keep the contrast from feeling sterile. Budget-friendly angle: white mortar makes small installation inconsistencies less noticeable because the joints visually unify the face. It’s best for modern farmhouse and contemporary rooms with simple decor.
Prep the wall with backer and ensure it’s smooth enough that mortar lines can be consistent. Dry-lay the veneer and decide your joint width; most white mortar-forward looks look best with a slightly tighter joint (about 1/4 inch). Mix white mortar to a creamy consistency and keep it from drying out before you tool. Set stones with thinset, then grout and tool immediately with a jointing tool so the lines stay crisp. Seal after cure to reduce staining and keep the white mortar from dulling.
Work in small sections and wash sponge residue quickly; white mortar shows haze if you wait too long.
Don’t choose a dirty off-white mortar; it looks gray and defeats the crisp photo look.
10. Stacked stone surround with a built-out hearth shelf and rounded corners
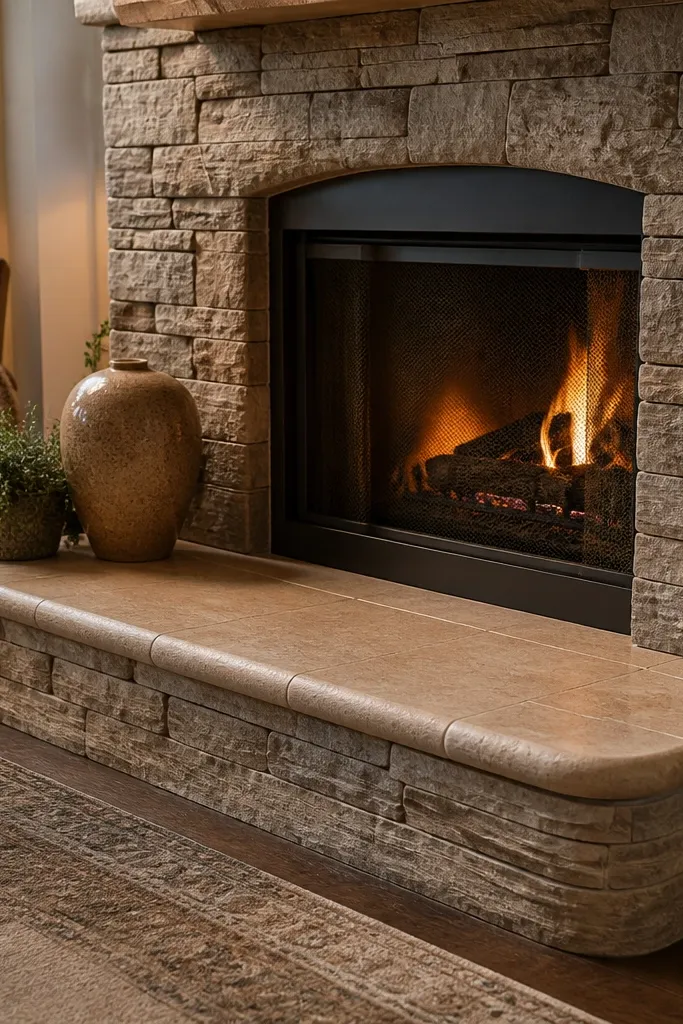
A built-out hearth shelf makes the fireplace feel finished, and rounded corners make it feel soft instead of blocky. Use stacked stone on the vertical face and a smoother stone or matching veneer on the hearth shelf, then wrap the edges with a rounded trim strip or a carefully cut corner return. This design is photogenic because it frames the firebox like a piece of furniture. It’s budget-friendly if you use a single stone line for the face and a simpler trim method for corners — no custom stone carving needed. Great for cozy rooms, family rooms, and homes where you want comfort over sharp angles.
Frame and level the hearth shelf first with plywood and cleats, then cover with cement board rated for thin veneer. Dry-lay your stacked stone on the vertical surround and plan how it meets the hearth shelf edge. For rounded corners, use a flexible corner bead system or a pre-made rounded veneer trim piece if your stone line offers it; otherwise, cut returns carefully and keep joints tight. Apply thinset, set stones in a staggered pattern, then mortar and tool the transitions where shelf meets surround. Seal the hearth and surround if the veneer requires it.
If you’re doing rounded corners, do a cardboard template for the corner return and cut from the template so both sides match.
Avoid sharp 90-degree corners with messy mortar; the eye catches it immediately.
11. Rustic fieldstone-look veneer with a thick wood mantel beam
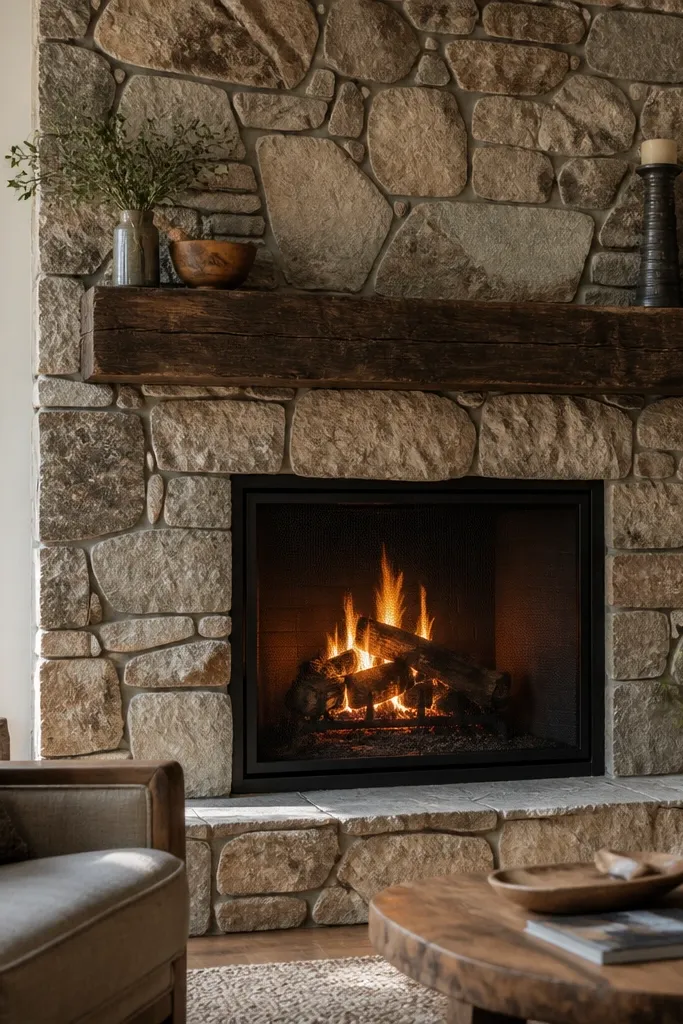
Fieldstone-look veneer gives you that true “old house” vibe, and it looks best when you pair it with a thick mantel beam. The heavier mantel visually balances the irregular stones so the fireplace reads grounded, not flimsy. Choose a veneer with varied browns and grays so it looks natural from across the room, and keep the mortar in a warm gray tone to avoid harsh contrast. Budget-friendly because veneer imitates fieldstone without the labor and weight of real stone. It fits rustic cabins, farmhouse kitchens, and living rooms with textured rugs and warm lighting.
Install backer board and build a straight mantel ledger at the correct height so the mantel beam sits level. Dry-lay stones across the face first, focusing on corner coverage and the opening border. Set the veneer in sections and stagger pieces so the face doesn’t look like a single repeating sheet. Mortar with a warm gray, then lightly brush the stone faces clean after the mortar firms up. Seal after cure and add a simple mantel finish like matte stain for wood contrast.
Editor's noteUse a laser level or long straightedge to check the mantle ledger; a slightly sagging mantel ruins the whole look.
Skip thisDon’t skip sealing if the stone is porous; soot and dust dull rustic veneers fast.
12. Gray stone with a herringbone accent band around the firebox
This one is for people who want stone but also want a designer detail. Keep the main surround in a simple stacked or irregular gray stone, then add a herringbone accent band that frames the firebox opening. The herringbone pattern creates a sharp focal ring without needing a full tile wall. It’s budget-friendly because the herringbone area is small, so you can use a nicer-looking stone or a different veneer for just the accent. Works well in modern homes with clean furniture lines and neutral walls.
Choose one base veneer for the surround and a second, smaller-format veneer for the herringbone band. Install backer and dry-lay the base stone first, leaving space for the accent around the opening. Mark the band perimeter with tape, then cut the herringbone pieces so the pattern lines stay centered on the opening. Set the base veneer with thinset, mortar the base joints, and then install the herringbone band right after so the mortar lines match. Tool the joints and seal the stone if required.
Dry-lay the herringbone on the floor and photograph it; matching the pattern direction is the difference between “wow” and “random.”
Avoid extending the herringbone past your planned border; the more area you add, the more obvious DIY mistakes become.
13. Beige stone with a black shiplap panel behind the opening
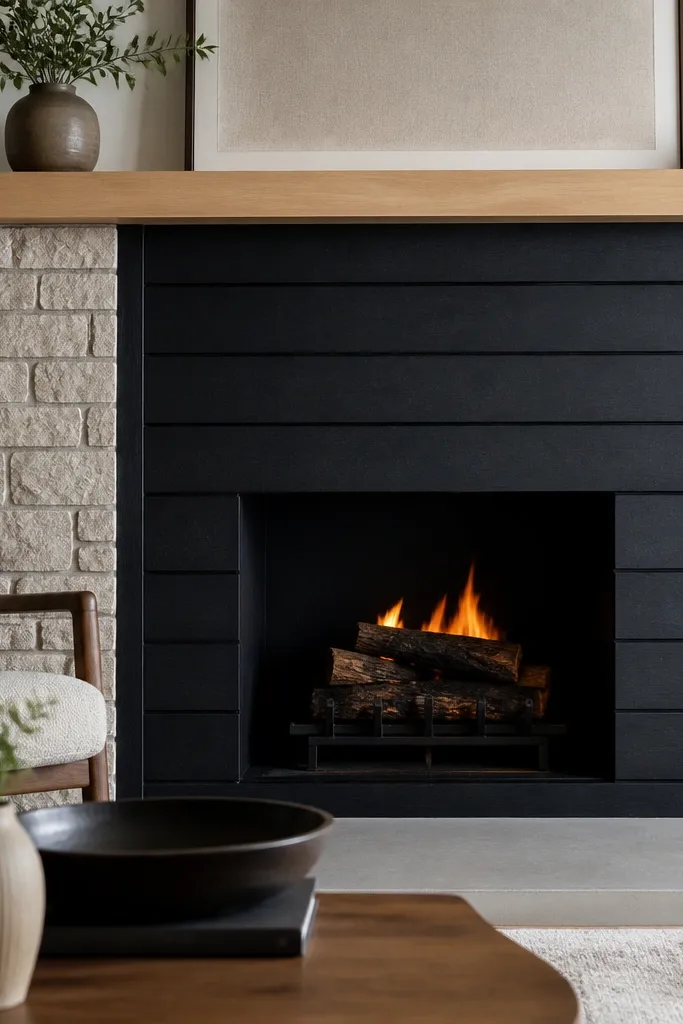
Stone + shiplap is cozy and photogenic because the texture contrast is obvious. The trick is keeping the shiplap behind the opening, painted matte black, while the stone stays light beige for brightness. That black panel makes the firebox area look intentional and gives you a focal “frame” even if your mantel is simple. Budget-friendly because shiplap panels are cheap, easy to cut, and you only need to cover the area behind the opening. Great for farmhouse-modern rooms and anyone who likes a dark accent without dark overall walls.
Install backer board on the fireplace surround face, then cut and fit a shiplap panel behind the opening area where the firebox insert will sit or where a decorative backer can be installed. Paint the shiplap matte black and let it cure fully. Veneer the stone around the opening, leaving a clean border so the black panel shows evenly. Mortar joints should be light warm gray, then seal the stone after cure. Finish by adding a mantel if you want, but keep the opening border clean so the shiplap stays visible.
Editor's noteUse a foam brush for black paint on shiplap grooves; it reduces streaks in the grooves.
Skip thisDon’t paint the shiplap glossy — sheen reflects flash and makes the background look patchy.
14. Tall vertical stone columns with a centered mantel opening
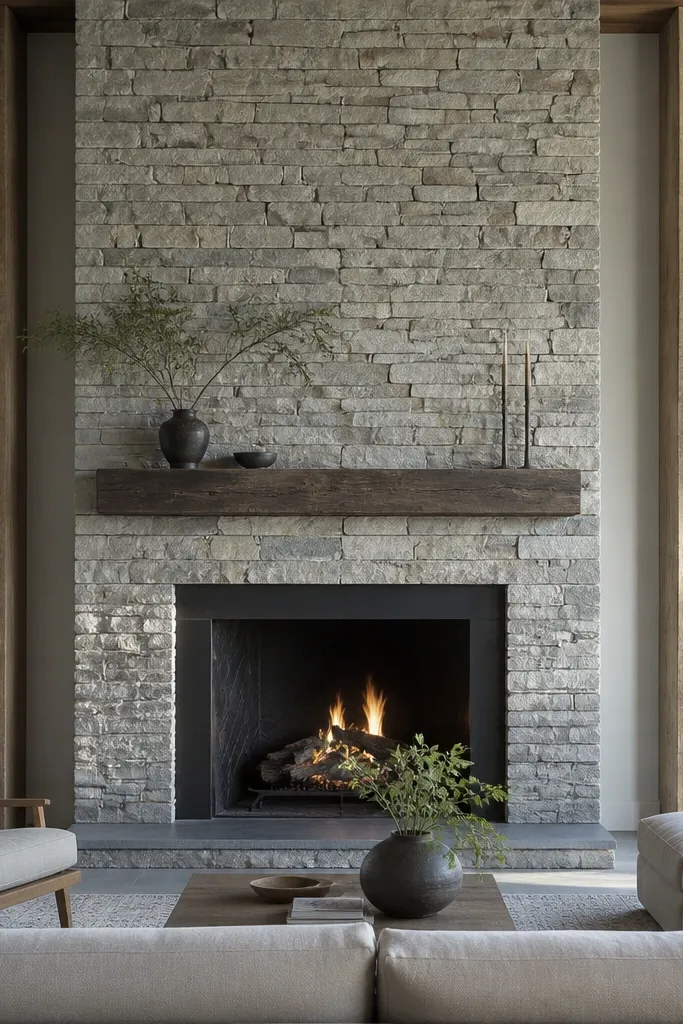
Instead of covering the whole face evenly, this design uses tall vertical stone columns to pull the eye upward. It looks sleek because the columns create long lines, and it feels budget-friendly because you can use fewer stone pieces than a full wrap surround. Choose a stone veneer that has long, rectangular shapes or cut ledger-style pieces so the vertical pattern stays crisp. Keep the mantel simple and centered, and let the columns frame the opening like pillars. This suits rooms with high ceilings or anyone who wants a fireplace that feels taller and more architectural.
Plan your column widths before you buy anything: measure the opening width and decide how much stone you want on each side, then mark two vertical guides on the wall. Install backer board and dry-lay the stone columns first, starting from the hearth level and working up. Set stones so the joints stay consistent within each column, and keep the gap area between columns clean and straight. Mortar the columns, then finish the opening surround with a simpler border piece or trim. Seal after cure and touch up edges around the mantel with paintable caulk if needed.
Use a chalk line for vertical guides; a slightly drifting column reads as crooked in photos.
Don’t add random stone to fill gaps between columns; leave the negative space and let it look intentional.
15. Chocolate brown stacked stone with light gray mortar and a white mantel
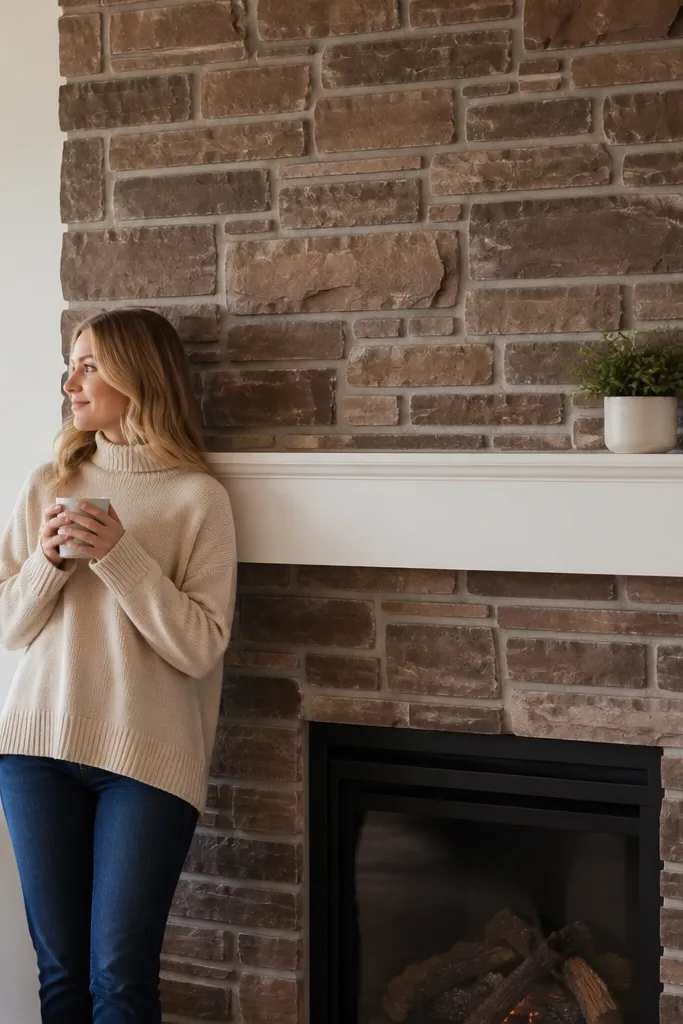
Chocolate brown stacked stone is the cozy pick when you want warmth but still want the surround to look structured. Light gray mortar keeps it from going too dark, and a white mantel adds contrast that makes the stone read cleaner. This is one of the best budget-friendly combinations because stacked stone is fast, and the lighter mortar hides minor cut gaps. It also works in rooms that already have warm brown accents like wood floors or tan leather. If your walls are warm beige, this color pairing keeps the fireplace from blending in.
Install backer board and mark a level line for the first course. Dry-lay stacked stone on both sides of the opening so the pattern alternates naturally and the seams don’t line up across the center. Set stones with thinset, press into place, and keep joint widths consistent with spacers or by matching the stone’s intended joint. Mortar with a light gray mix and tool the joints to a slightly recessed profile so it looks like masonry. Seal the veneer after cure, then paint the mantel or install a pre-painted mantel for a crisp finish.
Use a small angle trowel for mortar cleanup; it keeps mortar off the stone faces so the brown stays rich.
Avoid dark brown mortar — it absorbs light and makes the joints disappear in daylight.
16. Two-sided stone surround for an open-plan wall view
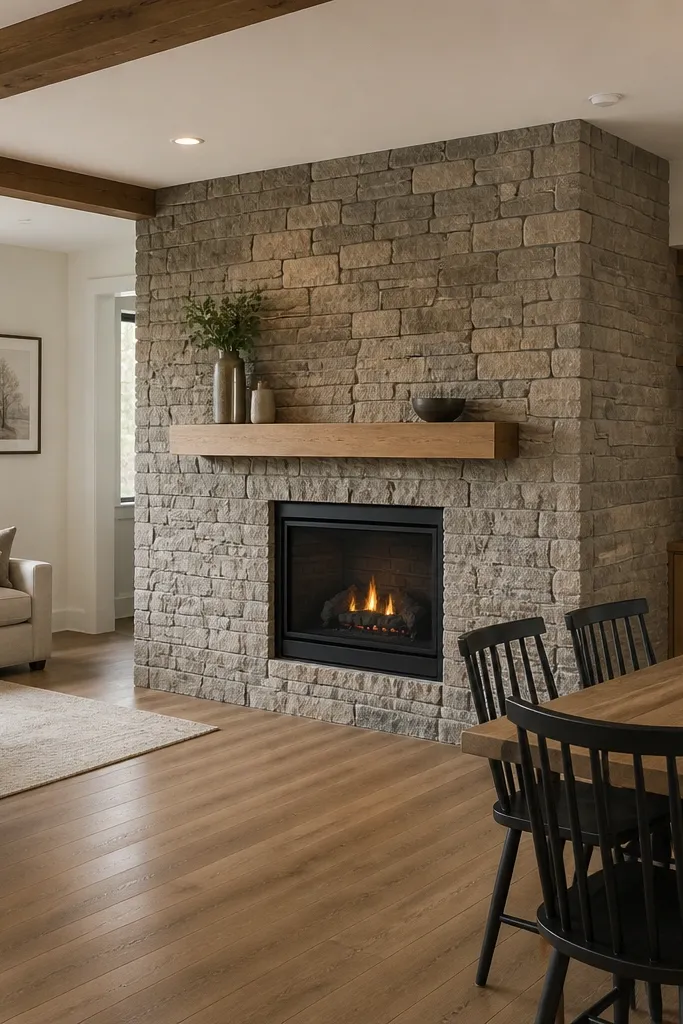
If your fireplace is visible from more than one room, do the surround on both faces and treat it like a single design object. Matching stone on both sides looks expensive because the edges don’t fade into the background. Keep the main surround pattern consistent, and use the same corner return width on both sides so the fireplace reads symmetrical. This can still be budget-friendly if you plan the coverage so you don’t over-wrap — focus on the visible planes only. It’s perfect for open-plan living rooms where your fireplace is a shared focal point.
Decide which sides are actually visible, then measure each face separately and calculate total square footage with 10-15% waste. Install backer board on both faces and check both planes are flat before veneer. Dry-lay the stone on one side first, then use the same reference lines to mirror the layout on the other side. Apply thinset and set stones, then mortar consistently across both faces and clean the joints carefully so the texture reads uniform. Seal both sides if recommended for stain resistance.
Use the same batch of veneer pieces for both sides when possible; shade variation is real and matching it improves the look.
Don’t treat the back side as “extra”; uneven patterns on the second face show up instantly when people walk by.
17. Mortar-wash stone effect with a white-gray blend
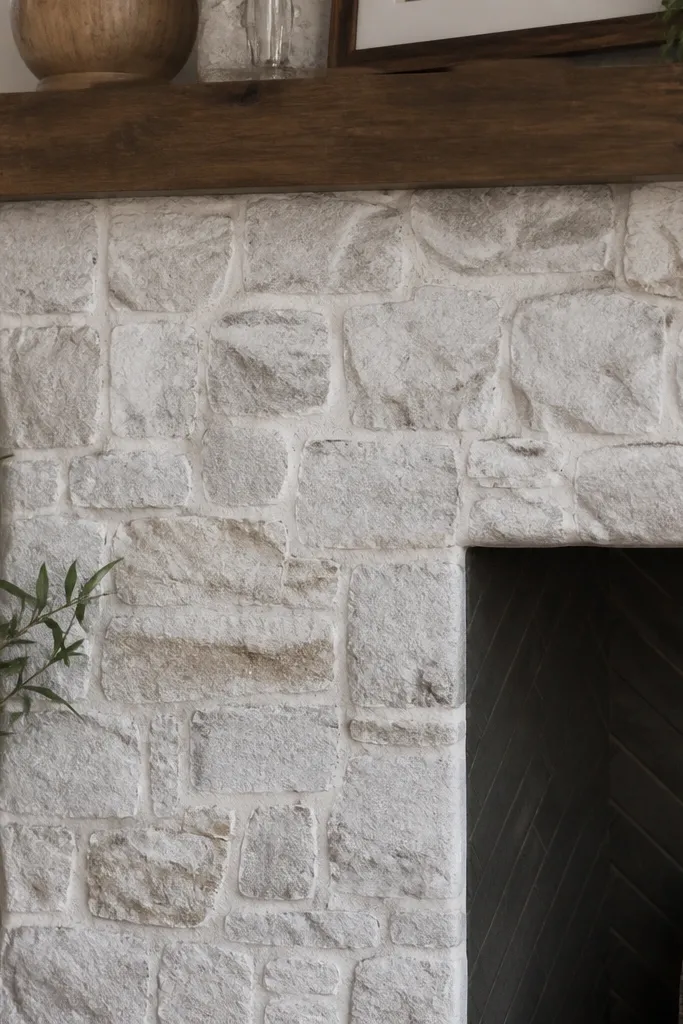
A mortar-wash effect is how you make stone look like old plastered masonry without using real lime. The idea is to apply a thin, watered mortar layer over the stone face, then wipe it back so it stays in the grooves and lightly tints the high points. This creates an aged, soft look that still feels clean when done lightly. Budget-friendly because you’re not buying multiple stone colors — you’re using one veneer and controlling the final tone with the wash. It’s especially good for beige, taupe, or light gray veneers and for rooms with warm lighting.
Install backer and set your veneer normally with thinset and basic mortar joints. Let the mortar cure until it’s firm, then mix a white-gray mortar wash thinner than grout (more like thick paint). Apply with a brush or sponge, then wipe quickly with a clean cloth so the faces stay mostly clean and the tint stays in the texture. Let it dry fully, then remove any haze with a damp rag. Seal after cure to lock the finish and reduce staining.
Test the wash on a spare piece and use the same wipe pressure; small changes shift the whole tone.
Don’t do a heavy wash; thick residue looks chalky and hides the stone texture in photos.
18. Sage green stone veneer with warm wood mantel and brass hooks
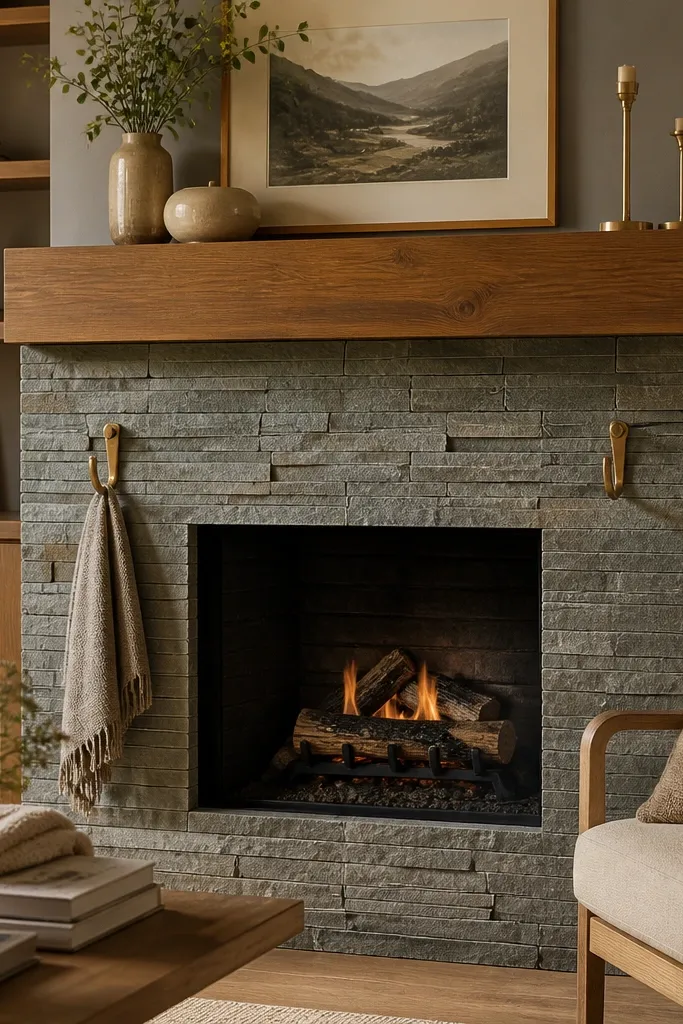
Sage green stone is a rare but gorgeous budget-friendly move because it makes the fireplace look like a design statement instead of a standard beige surround. Pair it with a warm wood mantel and small brass accents like hooks or a simple brass tool set for the firebox area. The stone color adds personality while still reading cozy because green works with warm neutrals. Choose mortar in a warm gray so it doesn’t fight the green undertone. This look is especially photogenic in daylight because green stones show soft variation across the face.
Pick a sage-toned veneer and verify the manufacturer recommends sealing; green pigments can show uneven staining if left unsealed. Install backer and mark the surround edges with painter’s tape. Dry-lay the stones to see how the green variation distributes; aim for balanced coverage so one side isn’t darker. Set pieces with thinset, mortar with warm gray, and wipe excess mortar immediately to avoid smears that look dull against green. Seal after cure and then install the mantel and brass accessories.
Editor's noteKeep your mantel finish matte; sheen makes green stone look uneven in flash photos.
Skip thisAvoid pairing sage stone with cool blue paints nearby; the undertones clash quickly.
19. Monochrome gray stone with a recessed firebox niche and minimal trim
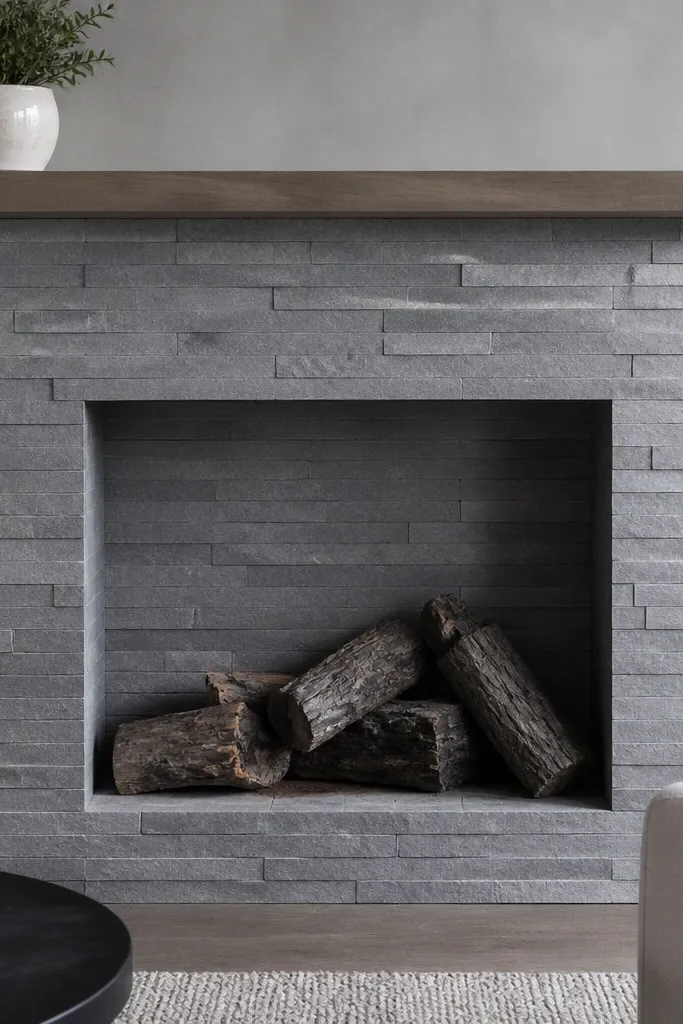
A recessed firebox niche with monochrome gray stone makes the fireplace look architectural and calm. Minimal trim is the point: you want the stone and the shadow line to do the work, not a bunch of decorative borders. This is budget-friendly because you can keep trim simple and use one stone color family throughout. It also hides DIY imperfections because the recessed shadow line covers tiny alignment issues at the opening. Works in modern homes, apartments, and anyone who wants “cozy” without a lot of visual noise.
Build or confirm the recessed niche framing before you veneer, then install backer inside the recess and on the outer face. Mark the perimeter of the niche so the stone stops cleanly at the recess edge. Dry-lay the stone starting from the top center of the niche, keeping the same joint width across the whole face. Set stones with thinset, mortar with a matching gray, and tool joints gently so they stay consistent. Seal and then add a minimal mantel or a floating shelf only if you need one for balance.
Use a consistent depth spacer when setting stones around the recess so the shadow line stays even.
Avoid thick decorative trim around the niche; it fights the clean shadow-line look.
20. Cream limestone-look veneer with a thick tumbled-stone hearth lip
This one is cozy in a very specific way: the cream limestone-look veneer reads soft and bright, while the thick, tumbled-stone hearth lip gives you that “cuddle up here” lower frame. The contrast is subtle — warm stone against a dark firebox — so it looks expensive without needing dramatic color changes. It also fixes a common problem with budget stone installs: thin veneers can look “stuck on,” but a heavier hearth edge makes the whole fireplace feel built-in. Use it in living rooms, dens, and open-plan spaces where you want warmth that still photographs cleanly in daylight. Skill level is DIY-friendly if you’re comfortable with backer board and basic tile/stone cutting, and it usually takes two long weekends for a single wall run.
1) Build your base first: install 1/2-in cement backer board over the firebox surround area, then add a hearth platform so the finished hearth lip projects 2-1/2 to 3 in past the stone face. Use a ledger board level line 48 in from the finished floor for the top of the firebox surround, and keep your first veneer course dead straight — everything locks to that. 2) Apply the veneer: use polymer-modified thinset rated for stone veneer, spread with a 1/4-in x 1/4-in square trowel, then press each sheet so the joints stay tight (aim for 1/4 in max). Start at the corners, cut around the opening with a grinder and diamond blade, and leave a 1/8 in gap at any expansion joints you have in the wall framing. 3) Finish the hearth lip: set a 1-1/4 to 1-1/2 in thick tumbled-stone cap or ledge on top of the hearth surface with thinset, then grout only the cap-to-veneer transitions. Seal the stone with a penetrating masonry sealer after it cures to keep soot and fireplace grime from staining the cream tones. Safety check: keep all veneer and mortar outside the manufacturer’s required clearance zone for your firebox and use the correct noncombustible materials behind the surround.
Editor's noteDry-lay the first two courses and mark your sheet cuts with painter’s tape — it keeps the cream tone consistent and prevents “patchy” looking seams. Use a grout bag or small tuck-pointing tool for the hearth lip joints so you don’t smear thinset onto the lighter stone.
Skip thisAvoid starting the veneer before your hearth platform is solid and level — a wobbly base makes the stone joints look crooked even if the opening is straight.



