
1. 38-Inch Ash Spiral With Central Oak Pole
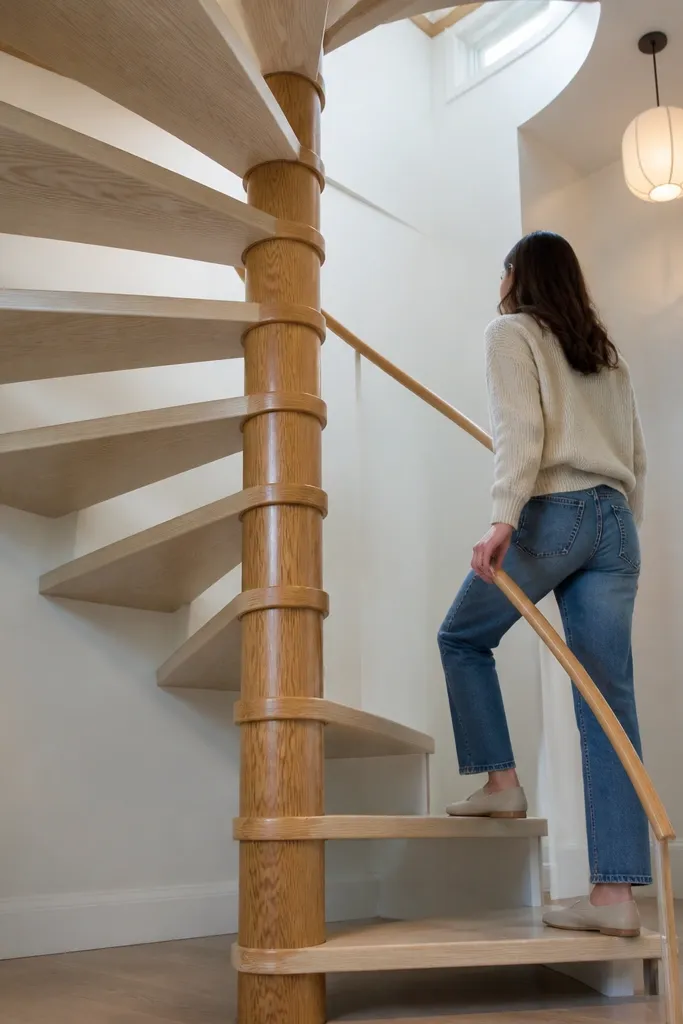
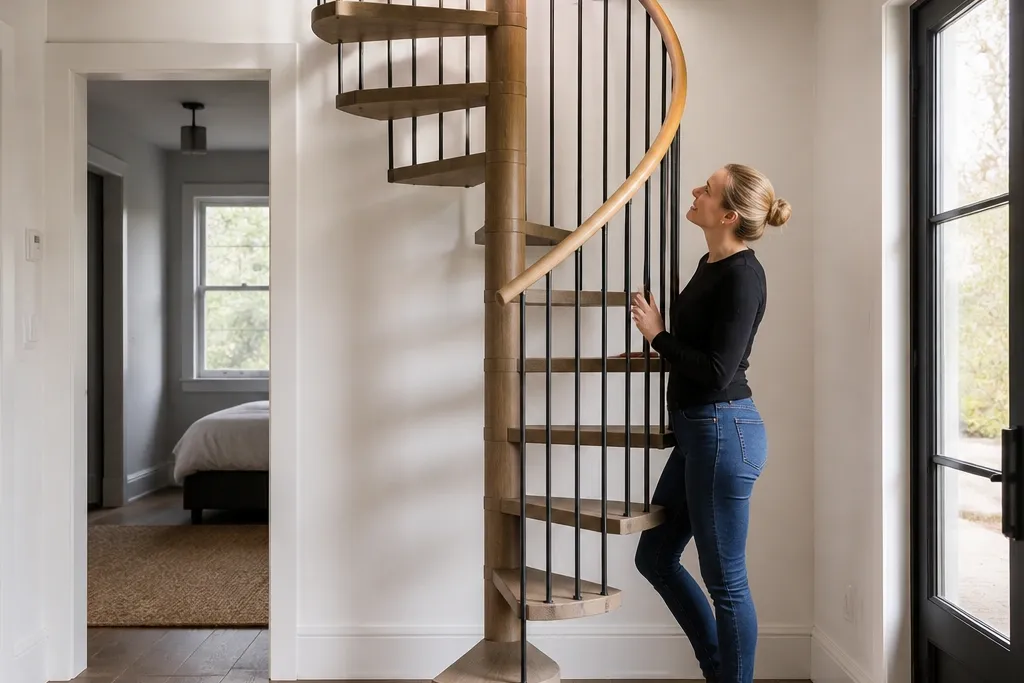
This design stays modern minimalist because the eye lands on two warm tones: ash steps and an oak center pole. The smaller 38-inch footprint keeps it sleek, and the light wood makes the stair feel airy instead of heavy. Choose ash for the treads if you want a smooth, pale look with visible grain that still feels soft. Keep the railing minimal — a thin handrail and simple connections — so it doesn’t compete with the wood texture. It looks best in light walls or near a window where the grain catches daylight.
Start by fixing your staircase footprint around an overall outer diameter near 38 inches and confirming headroom and landing clearance. Install the center pole first using a rigid base plate and level it precisely, then mark tread locations by measuring consistent rise and spacing along the pole. Cut ash treads to match your plan, then attach each tread with the same bracket method so the overhang stays uniform. Finish by sanding treads to at least 180 grit, staining to match oak warmth, and applying two thin coats of matte clear coat.
Dry-fit every tread on the pole before final fastening so you can correct uneven spacing early.
Don’t use a high-gloss clear coat — it makes pale ash look cold and plastic.
2. Stained Walnut Ribbon Steps With Glass Guard
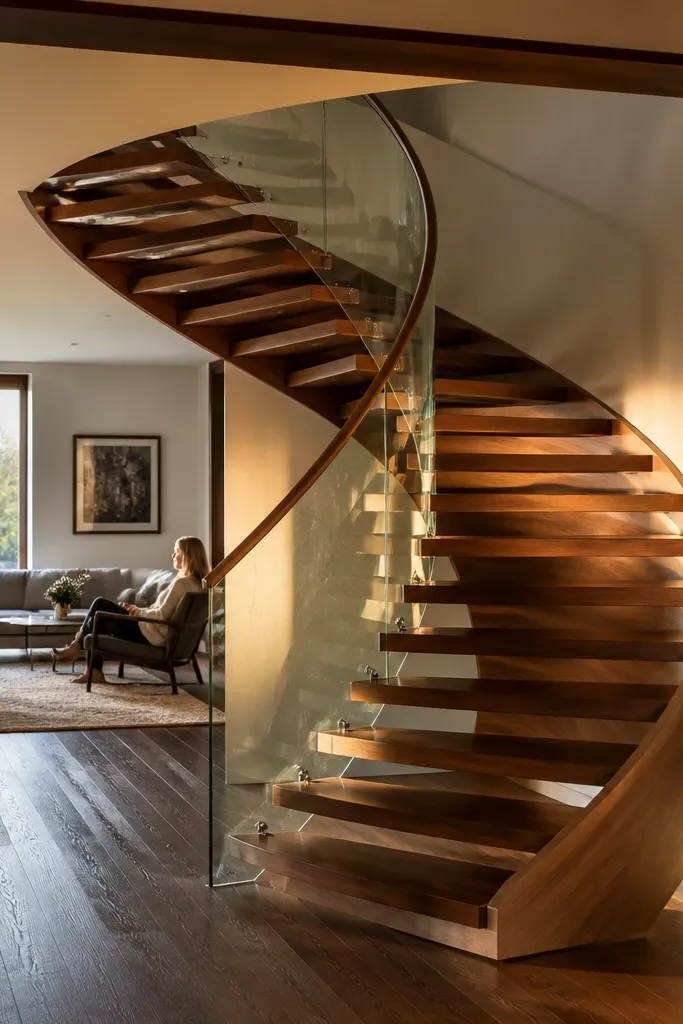
Walnut makes minimalist stairs feel warm because the color reads rich without needing ornate details. This version keeps the guard clean by using glass panels, which lets the wood grain stay the main visual. The “ribbon” look comes from using long, slightly curved treads with consistent overhang so the spiral feels like a continuous band. Pair it with a simple metal handrail in matte bronze or black to avoid visual clutter. This setup is great for open-plan rooms where you want safety without blocking sightlines.
Plan for glass guard anchors along the outer edge or near the center pole so the panels sit straight across the spiral curve. Build the wooden stair structure first, then add the walnut treads with consistent tread depth and equal rise. Stain the walnut after the treads are fitted so you can hide small gaps with the same finish schedule. Finally, install glass panels with proper standoffs and clamp points rated for guard use, then apply matte clear coat only to the wood tread surfaces.
Use a stain conditioner on walnut only if your wood looks blotchy after a test spot.
Don’t mount glass to bare wood without proper metal backing plates or you’ll get movement and squeaks.
3. White Oak Steps With Charcoal Steel Side Stringer
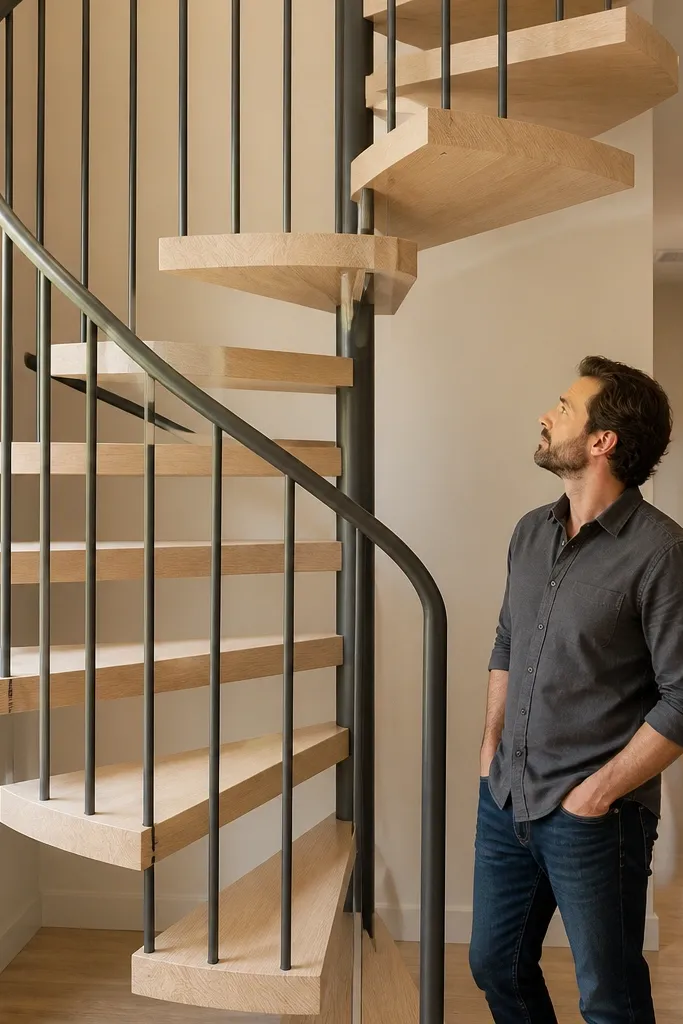
If you want modern minimalist without losing warmth, pair pale white oak treads with a charcoal steel stringer. The steel gives crisp lines and makes the staircase look architectural, while the oak keeps it cozy. This design also helps visually because the stringer frames the spiral and reduces the need for lots of railing components. Choose white oak with a straight grain pattern if you want a calmer look. It’s especially good in modern homes with black window frames or dark trim.
Start by aligning your side stringer along the wall or freestanding frame, then verify the spiral center point so tread spacing stays consistent. Cut and attach white oak treads to the stringer using identical brackets or mortise-and-bolt connections on each step. Sand treads evenly, then use a light stain like golden oak to unify tone across boards. Finish with a matte clear coat, and install a simple continuous handrail connected with slim brackets.
Paint the steel stringer with a matte primer and top coat before any wood finishing so you don’t get overspray on the treads.
Don’t let tread heights vary — even small differences make the spiral look messy.
4. Natural Beech Spiral With Rope-Style Handrail
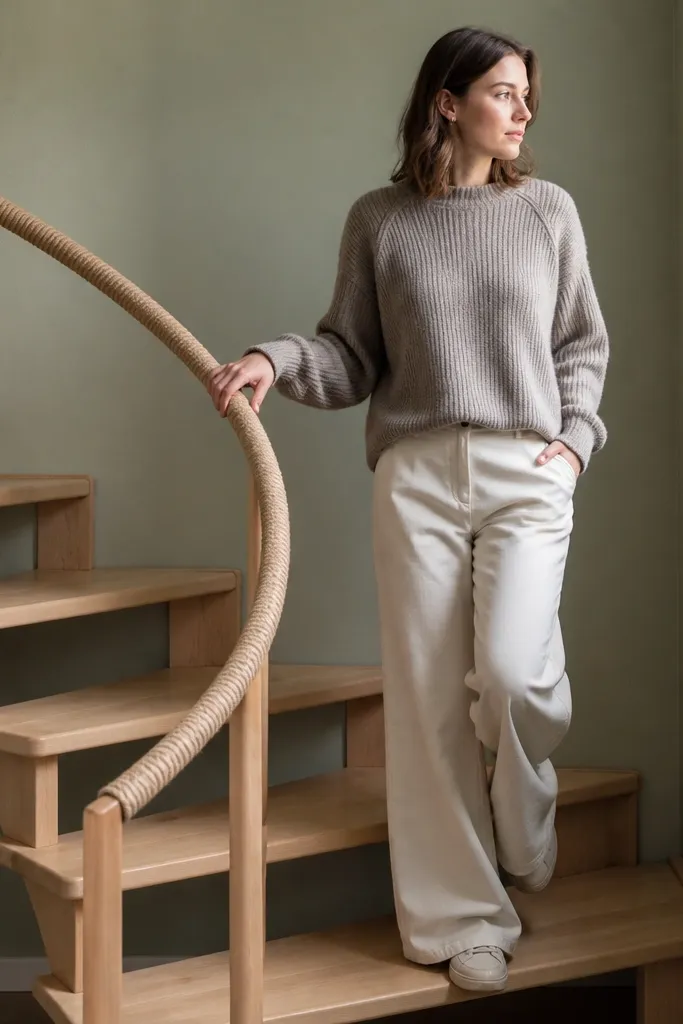
Beech reads warm and light, and it takes stain evenly when you prep it right. This design keeps the minimalist look by using simple balusters or a low guard, then adding a rope-style handrail line that visually softens the stair. The “rope” effect can be achieved with a wrapped or braided synthetic cover over a slim metal or wood handrail core. It looks great in homes that lean Scandinavian — lots of light wood and neutral textiles. The stair feels friendly because the handrail texture looks less industrial than plain metal.
Build the spiral frame with either a center pole or a simple outer ring, then install beech treads with uniform overhang. Sand all wood surfaces to 180-220 grit and apply a wood conditioner so beech stain doesn’t blotch. After staining and drying, install your handrail core and wrap it with the rope-style cover, keeping the wrap tight and even. Finish by checking the handrail height against comfortable grasp points and secure it with concealed brackets.
Wrap the handrail before the final clear coat on wood so you can adjust tension without worrying about finish damage.
Don’t pick a rope cover that frays quickly — test the grip and abrasion before committing.
5. Smoked Oak Steps With Blackened Steel Spindles
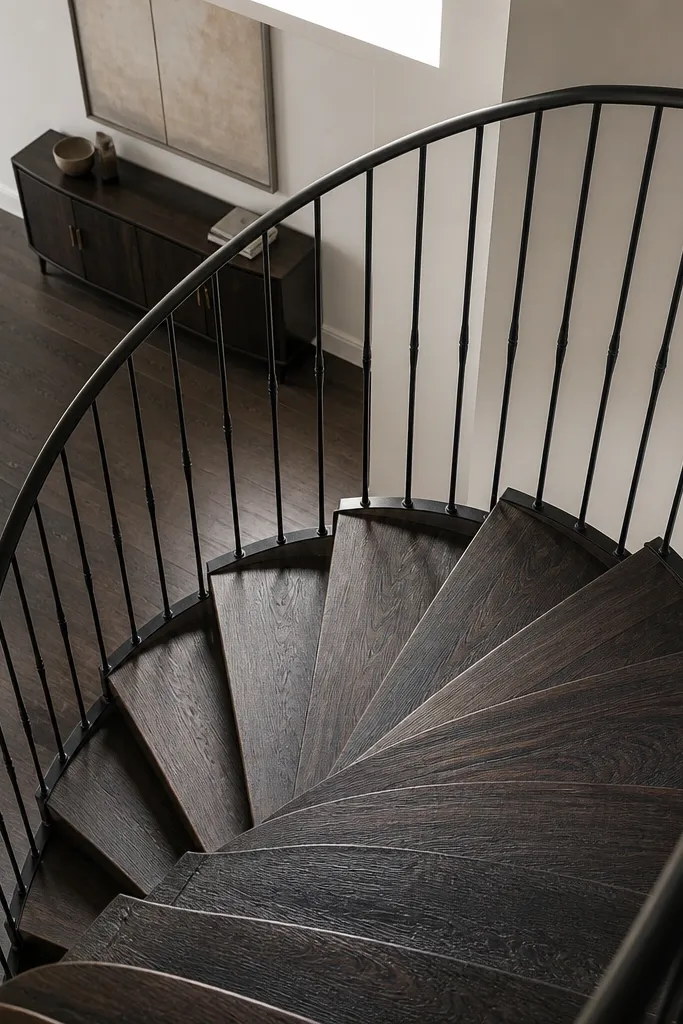
Smoked oak gives the warm effect of dark wood while still showing grain, which is exactly what minimalist stairs need. Blackened steel spindles add contrast without turning the design into a wrought-iron look. This staircase stays modern because the spindles are straight, evenly spaced, and the handrail is a simple continuous bar. If you want a cozy feel in a darker room, this is the move — the wood reads warm under shadows. It also photographs well because the grain and steel contrast pop.
Start by choosing a tread thickness that feels solid, then cut smoked oak treads to equal dimensions and bevel edges slightly for comfort. Install the structural center or outer frame and bolt in each tread with matching hardware so the spiral stays true. Add blackened steel spindles by drilling consistent holes in treads and using threaded inserts so the spindles sit straight. Finish the wood with matte clear coat and keep steel hardware dry and clean before assembling the rail.
Use threaded inserts in the treads so you can remove and re-seat spindles without chewing up the wood.
Skip thick paint coats on spindles — they look chalky and hide the crisp line.
6. Two-Tone Maple and Walnut Alternating Treads
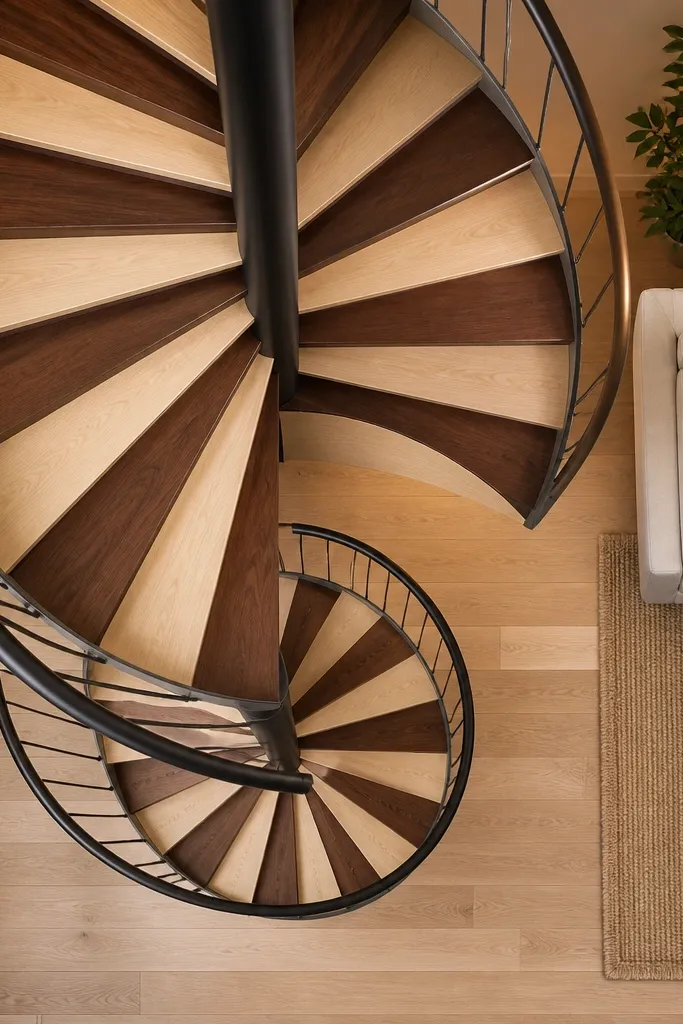
Alternating maple and walnut treads make the spiral feel like a design object, not a builder’s stair. The minimalist trick is restraint: keep the guard simple and use consistent tread geometry so the color alternation does the work. Maple adds a creamy warm light tone, while walnut adds depth and contrast. This is ideal for entry spaces where the staircase is visible from below — the alternating pattern reads clearly in one glance. Choose boards with tight grain so the color blocks look intentional, not random.
Plan your tread count and decide the alternating pattern starting point so the first tread at the landing matches your visual goal. Cut maple and walnut treads to identical dimensions, then label them by position before installation. Build the frame and install structural treads first, then fasten each tread in its planned sequence. Sand both woods to the same grit, stain maple to a warm honey if needed, and apply matte clear coat to both so the finish sheen matches across tones.
Stain and finish in batches to keep maple and walnut sheen consistent from step to step.
Don’t mix boards with wildly different grain patterns — it makes the alternation look accidental.
7. Vertical Slat Wood Guard With Matte Handrail
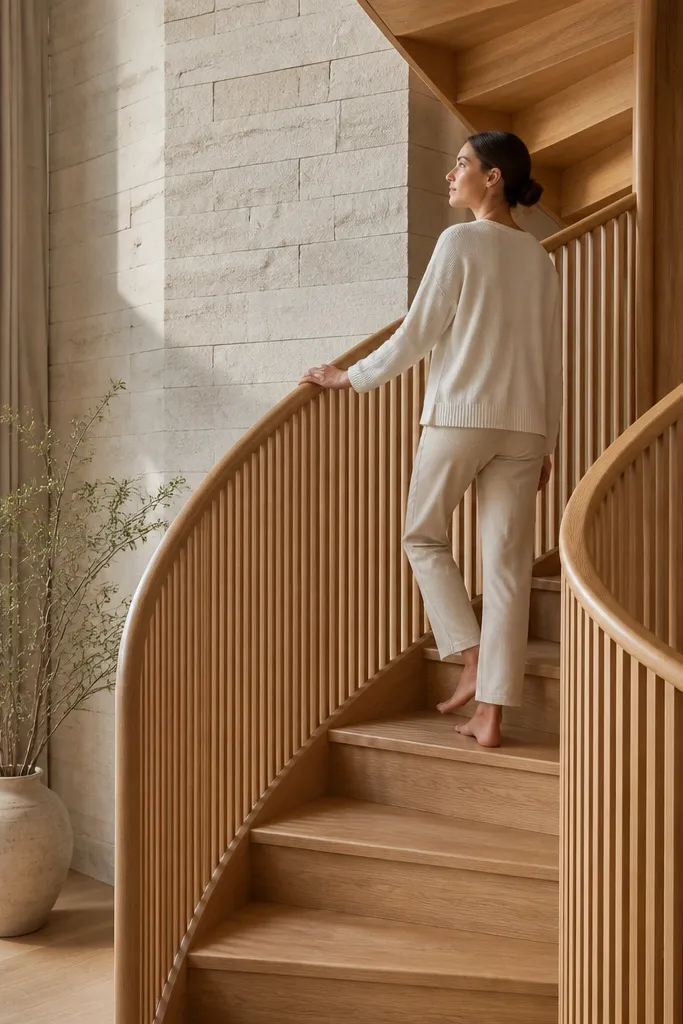
A vertical slat guard keeps the minimalist look while adding warmth through repeated wood lines. This design works because the slats echo the spiral’s rhythm and make the staircase feel integrated with the interior. Use matching wood for guard and treads, or pick a slightly darker species for contrast. Matte handrail finish is key — gloss makes the slats look plasticky. This is a great choice if you want safety coverage without the cost and complexity of glass.
Editor's noteUse a jig for slat spacing so every gap stays even — it’s what makes it look designed instead of assembled.
Build the spiral frame and install treads first, then measure the guard height and spacing along the curve. Cut vertical slats from the same wood species and slightly radius the ends so they sit flush against the support rails. Install a top rail and bottom rail for the slats, then attach slats with concealed screws or dowels. Sand and apply matte finish to the guard and handrail surfaces after assembly, so you get one uniform look.
Skip thisDon’t leave raw end grain exposed on slats — it soaks finish unevenly and looks patchy.
8. Walnut Center-Pole Spiral With No-Guard Open Look
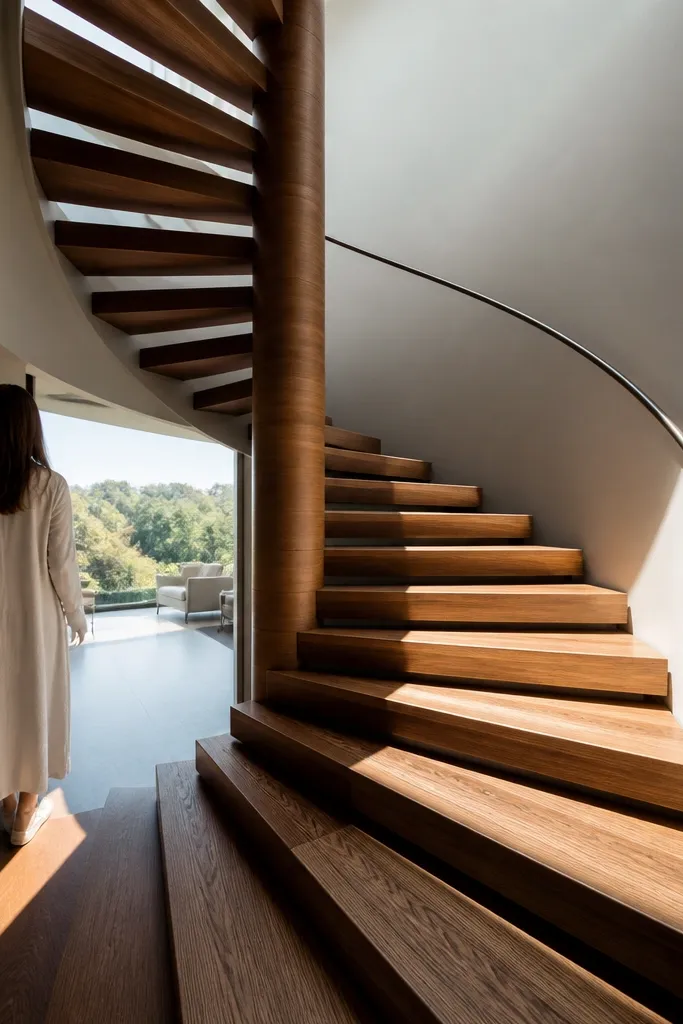
This is the cleanest modern minimalist look: center pole, warm walnut steps, and a minimal handrail that doesn’t create a fence around the stair. It feels warm because walnut is dark but still natural, and the open guard lets light and shadows move through. The tradeoff is safety and code compliance, so design it for your household needs and local requirements. Visually, the open look makes the spiral feel lighter and more sculptural. If your stair is in a space with good lighting, this design photographs beautifully.
Start with the center pole design and ensure the pole base is anchored to structural framing, not just subfloor. Install walnut treads with consistent rise and equal tread overhang, then align a slim handrail along the outer arc. Add any required minimal guard elements using simple brackets that don’t interrupt the silhouette. Sand to 220 grit, stain to your chosen walnut tone, and apply matte clear coat only to tread surfaces and handrail — keep the center pole finish consistent for a clean line.
Use a continuous handrail with smooth transitions at landings so the open look stays comfortable to hold.
Don’t skip structural checks — an open guard design depends on a rigid handrail and pole.
9. Cherry Spiral With Brass Trim and Soft Matte Finish
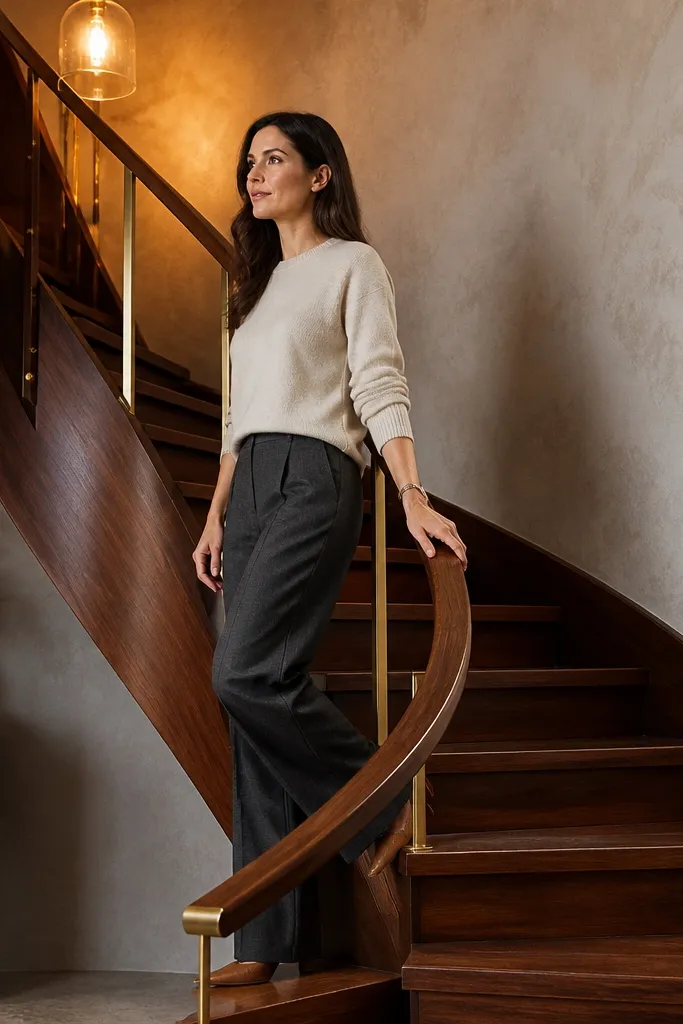
Cherry has that warm glow when it’s finished right, and it pairs perfectly with small brass accents. This minimalist design uses clean wood lines, then adds brass trim at key junctions like tread supports and handrail brackets. The warmth comes from cherry’s color shift and the matte finish that keeps it from looking glossy. It’s a strong choice for dining rooms or entryways where you want the stair to feel like furniture. Keep brass limited to small details so it stays modern, not decorative.
Editor's noteMask brass trim during clear coat so you don’t dull it — keep the brass slightly brighter than the wood.
Choose cherry treads and cut them to uniform dimensions, then install them to the structural support with consistent spacing. Polish and install brass trim pieces on bracket faces and handrail connections, keeping alignment tight across steps. Sand, stain, and apply a soft matte clear coat in thin coats so cherry color stays warm without looking sealed-glossy. Finally, mount the handrail with brass or brass-toned brackets and check handrail height along the full spiral arc.
Skip thisDon’t overuse brass — too many shiny parts ruins the minimalist calm.
10. Smaller 32-Inch Birch Spiral With Narrow Railing
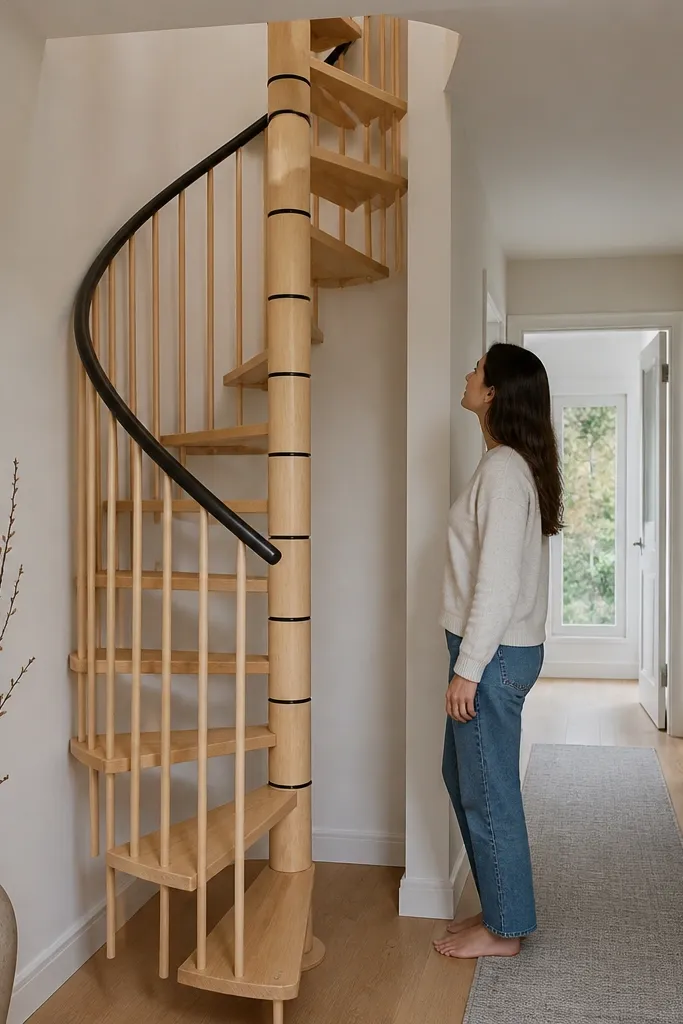
When space is tight, a 32-inch birch spiral can still look modern minimalist if the railing stays narrow and the steps are proportioned correctly. Birch is light and warm, and it takes a gentle stain that keeps it from turning yellow-gray. The design stays photogenic because the stair’s silhouette stays slim and the steps show a consistent grain. Use a simple handrail and minimal side guard so the stair doesn’t feel like a cage. This works well for compact townhomes and lofts where every inch matters.
Editor's notePre-fit the handrail brackets before you finish the wood so you can drill clean holes without rushing.
Confirm you can fit a 32-inch outer diameter while still meeting your opening and headroom needs. Build the structural frame with a center pole or compact outer ring, then cut birch treads to match your measured rise and tread depth for comfort. Install a narrow handrail and a minimal guard system that meets safety needs for your household. Sand to 180-220 grit, apply a light warm stain, and finish with matte clear coat on treads and handrail.
Skip thisDon’t make the guard too tall — it makes a small spiral look cramped visually.
11. Oak Treads With Hidden Fasteners and Continuous Outer Rail
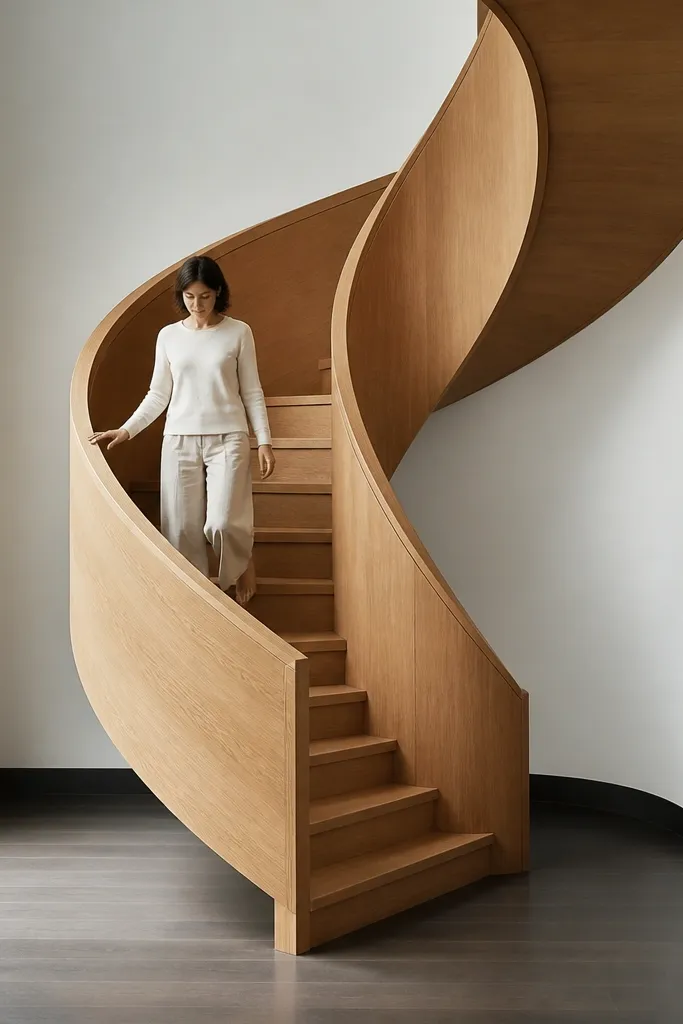
Hidden fasteners are what make this design feel truly modern minimalist. The oak treads look smooth and uninterrupted because screw heads are concealed, so the spiral reads as one continuous surface. A continuous outer rail frames the staircase and gives you a clean line from landing to landing. This is a great choice if you care about how it looks in photos and in person from the side. Pick oak with straight grain so the concealed hardware doesn’t compete with busy pattern.
Start by selecting tread thickness and plan for concealed brackets or dowel-and-bolt connections. Install the structural frame, then drill and route for hidden fasteners so the tread tops stay clean. Attach each tread with the same alignment method, checking that tread edges line up evenly around the spiral. Finish with matte clear coat and install a continuous outer rail using slim posts and concealed mounting blocks.
Use a consistent drill depth stop — hidden fasteners look best when depths match across every tread.
Don’t rely on filler to hide misaligned screw holes — it looks obvious on oak grain.
12. Live-Edge Walnut Treads With Minimal Steel Frame
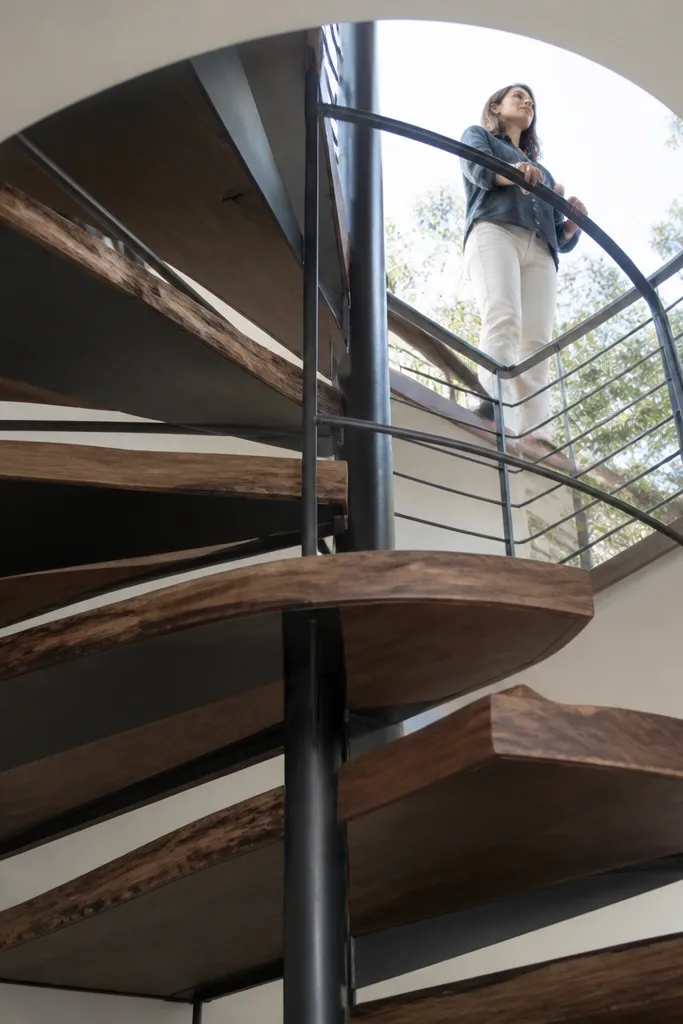
Live-edge walnut adds warmth and character without turning the stair into rustic chaos. The modern minimalist part comes from keeping the steel frame minimal and straight, then letting the organic edge do the visual work. Use live edges only on the tread outer rim so the underside stays clean and safe to step on. Matte finish keeps the wood from looking oily and makes the edge variations feel intentional. This design looks incredible in rooms with concrete, black metal, or neutral plaster walls.
Editor's noteSeal live-edge areas in thin coats so the edge doesn’t drink finish and turn blotchy.
Choose walnut boards with live edge on one side, then cut treads to match your spiral geometry while preserving the natural outer edge. Build the steel frame first so you can fit the treads accurately without guessing. Sand only the step surface smooth, leaving the live edge lightly finished for texture, then mount treads with concealed fasteners from below. Finish with a matte clear coat that won’t pool at the edge variations, then install a simple handrail aligned to the outer arc.
Skip thisDon’t leave sharp bark edges — knock down any corners that catch a shoe.
13. Two-Color Handrail and Outer Ring in Maple and Walnut
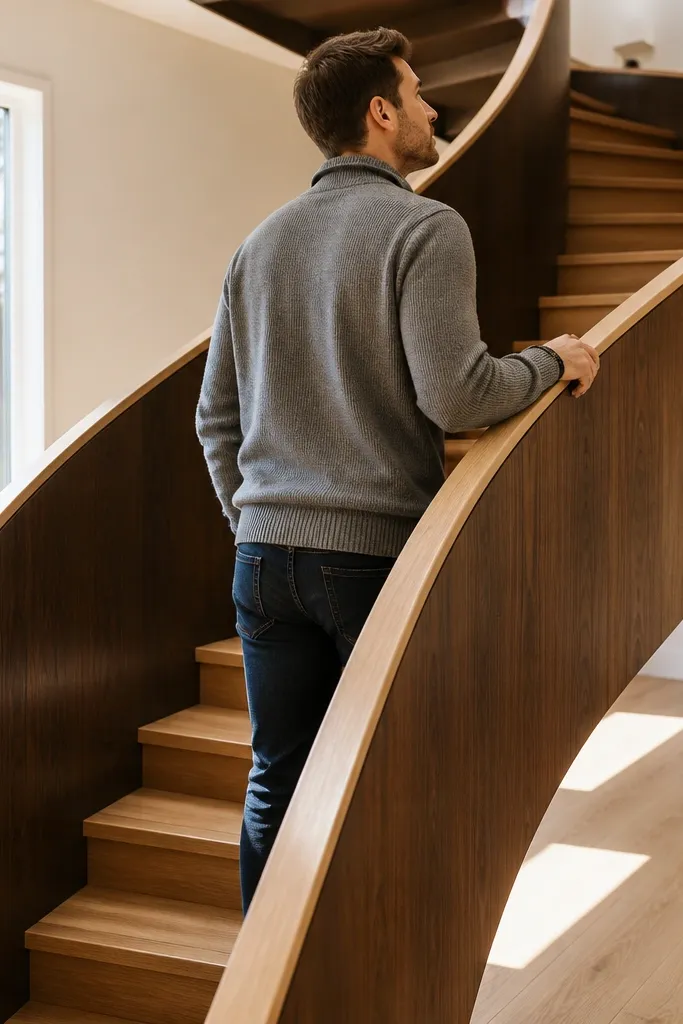
This one is subtle but looks designer: use maple where your hand touches and walnut where the structure frames the stair. The contrast reads warm because both woods are natural, and the handrail feels lighter and smoother against the skin. The minimalist silhouette stays clean because the outer ring and railing lines are simple and consistent. It’s also easier to keep looking good because maple shows wear differently than darker wood — you can refinish selectively. This design fits modern interiors with neutral walls and warm floors.
Editor's noteRound the handrail corners to at least a 1/4-inch radius so it feels comfortable at different grip angles.
Install the spiral frame and walnut treads first, then build the outer ring from walnut for a consistent visual frame. Cut and mount a maple handrail with a smooth rounded profile and secure it with slim concealed brackets. Sand, stain, and finish walnut and maple separately so the sheen matches but the tones stay distinct. Finish by checking handrail continuity along the landing and tighten all connections once the wood finish is dry.
Skip thisDon’t stain maple too dark — it kills the warm “handrail” contrast.
14. Quarter-Sawn White Oak With Chamfered Tread Edges
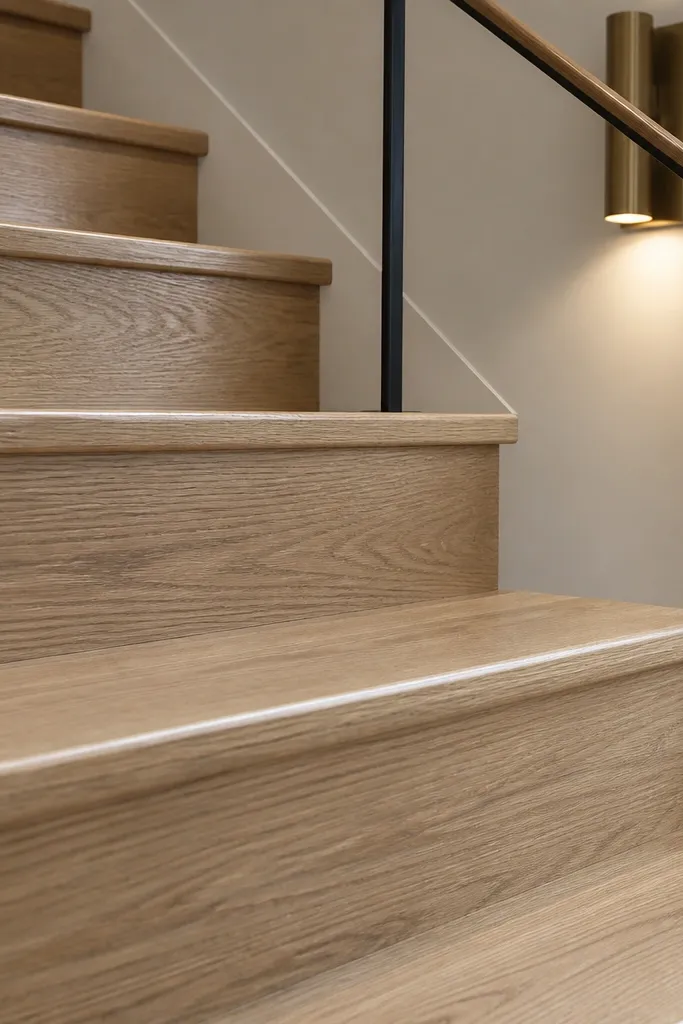
Quarter-sawn oak has a straight, calm grain that looks modern even when you keep it natural. Chamfered tread edges add a soft line that catches light instead of glare, which makes the staircase feel warm and intentional. This design is minimalist in shape but rich in texture because the grain patterns align better around the spiral. Choose a matte finish to keep the oak from looking overly sealed. It’s a strong choice for people who want warmth without dark staining.
Select quarter-sawn white oak boards and cut treads so the grain direction stays consistent and visually clean. Build the spiral frame and install each tread with equal overhang, then rout a small chamfer on the tread edges before assembly if you can. Sand to 180-220 grit, apply a light stain if needed for uniform color, and finish with matte clear coat. Install a simple handrail with slim posts so the chamfered edges remain the focus.
Rout chamfers before staining so the edges don’t absorb color differently than the tread tops.
Don’t skip edge sanding — rough chamfers snag shoes and look unfinished.
15. Walnut Spiral With Slim Wood Balusters in a Tight Grid
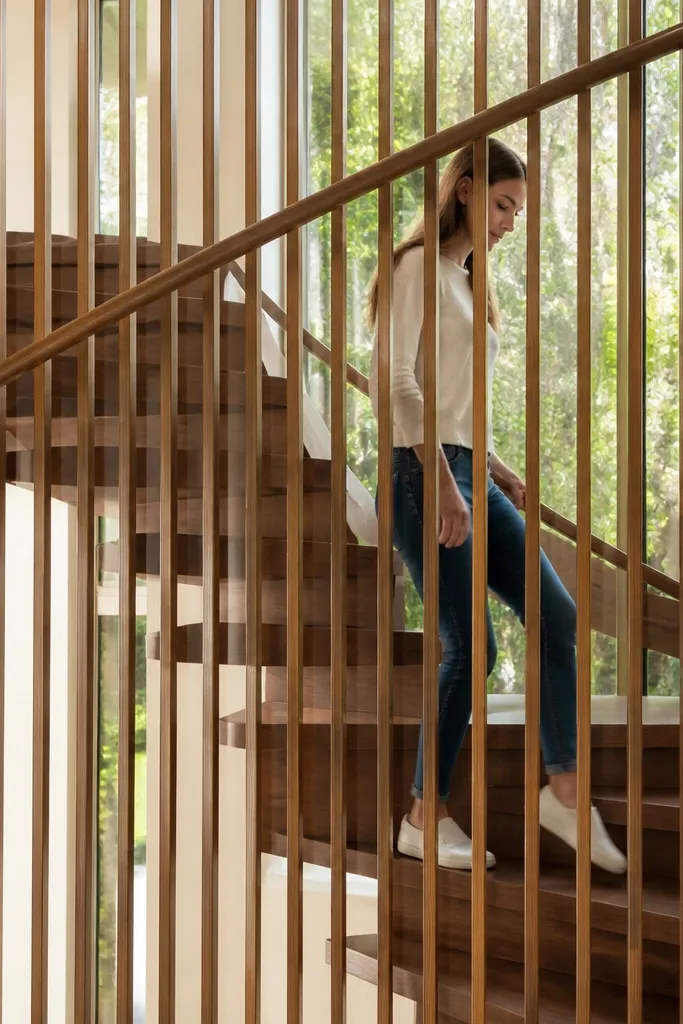
A tight grid of slim wood balusters keeps the staircase looking modern and safe without looking bulky. Walnut provides the warmth, while the balusters create a repeating pattern that reads clean from a distance. The minimalist look comes from consistent spacing and identical baluster profiles, not from removing everything. This design works well if you have kids or pets and you want wood-on-wood warmth rather than metal or glass. It’s also photogenic because the balusters form a spiral rhythm in photos.
Install the spiral frame and walnut treads first, then mark baluster attachment points at a consistent interval around the spiral. Cut slim balusters to identical length and profile, and use dowel or threaded inserts so each one sits plumb. Attach a top and bottom rail that follow the spiral curve, then mount balusters between them with concealed fasteners. Sand and finish after assembly so the balusters and rails share one matte sheen.
Use a simple spacing jig made from scrap wood so every gap stays identical around the curve.
Don’t mix baluster thickness — it breaks the grid and makes the whole stair look DIY.
16. Oak Spiral With Curved Wall-Mounted Stringer and Minimal Rail
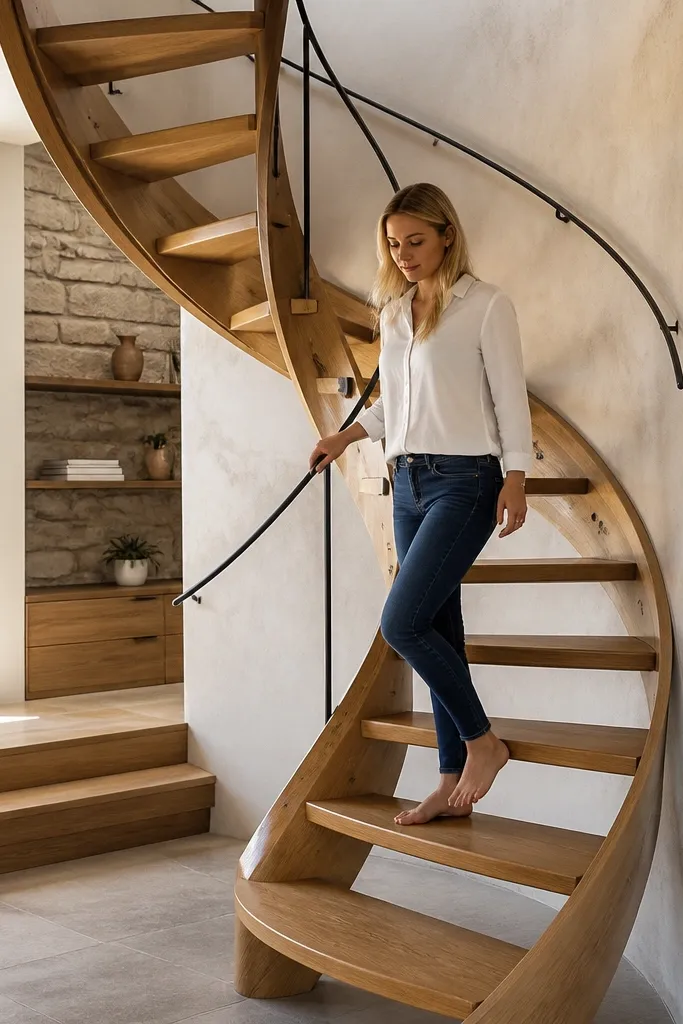
Wall-mounted stringers give you a cleaner minimalist look because the stair feels anchored and less like a freestanding sculpture. Oak treads add warmth, and the wall mount keeps the outer visual line tight. This design is best when you have a strong wall to anchor to, like a masonry or stud wall with proper reinforcement. The rail stays minimal because the wall already creates a visual boundary. It’s a good choice for narrow hallways where you want a stair that doesn’t eat floor space.
Start by locating structural studs or masonry and planning a stringer that follows the spiral curve accurately. Install the curved wall stringer with heavy-duty lag hardware into framing so it doesn’t flex. Then mount oak treads to the stringer using consistent bracket placements and verify each tread is level for safe footing. Finish with matte clear coat and add a slim handrail that runs smoothly from landing to landing.
Use a laser level or long straight level during stringer install; small misalignment becomes obvious once treads go on.
Don’t anchor into drywall — reinforce into studs or masonry or the stringer will shift.
17. Bamboo-Look Composite Treads With Real Wood Handrail
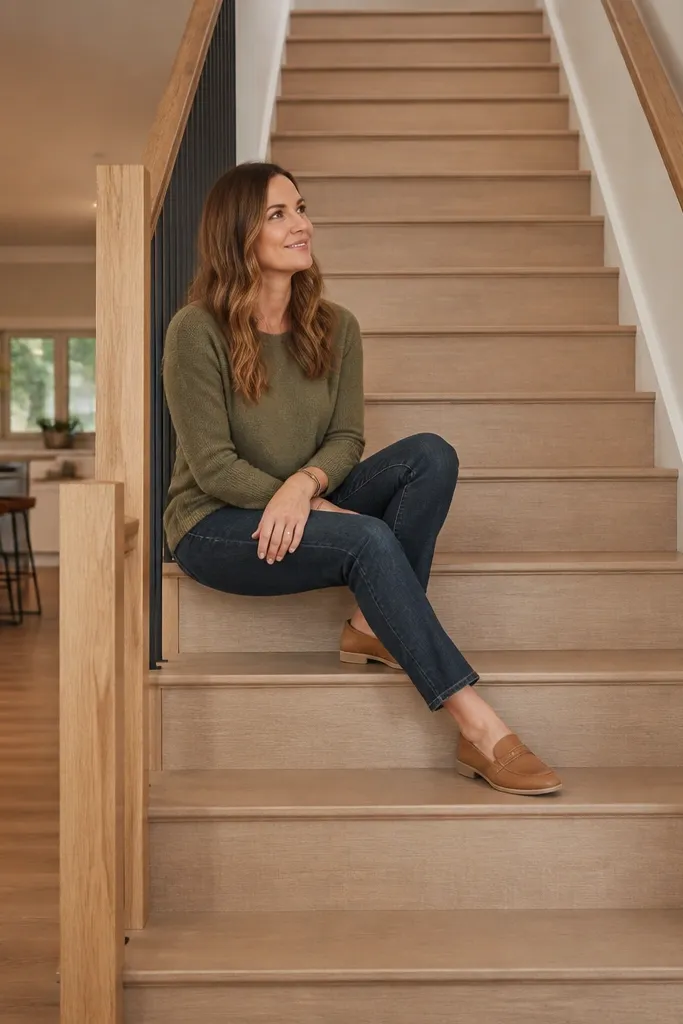
If you want the warm look of bamboo without babying the treads, use bamboo-toned composite treads paired with a real wood handrail. The minimalist look stays clean because the treads have a consistent color and the guard can be simple. The warmth is in the handrail and the matte surface feel, while the composite treads reduce maintenance and cupping risk. This design is good for areas with temperature swings or for people who want less sanding and refinishing. Keep the guard minimal so the color stays the focus.
Choose composite treads in a bamboo tone and cut them to your spiral tread dimensions, keeping the same overhang each step. Build your structural frame and install composite treads with the right screws or brackets for the composite material, following the manufacturer’s fastening guidance. Install a real wood handrail in a warm species like oak and finish it with matte clear coat. Add any needed minimal guard using slim posts so the staircase stays visually light.
Sand composite lightly only where required for fit — too much sanding can change the surface texture.
Don’t use a glossy clear coat on composite — it reflects light and kills the warm matte look.
18. Charred Oak Spiral With Brass Micro-Brackets
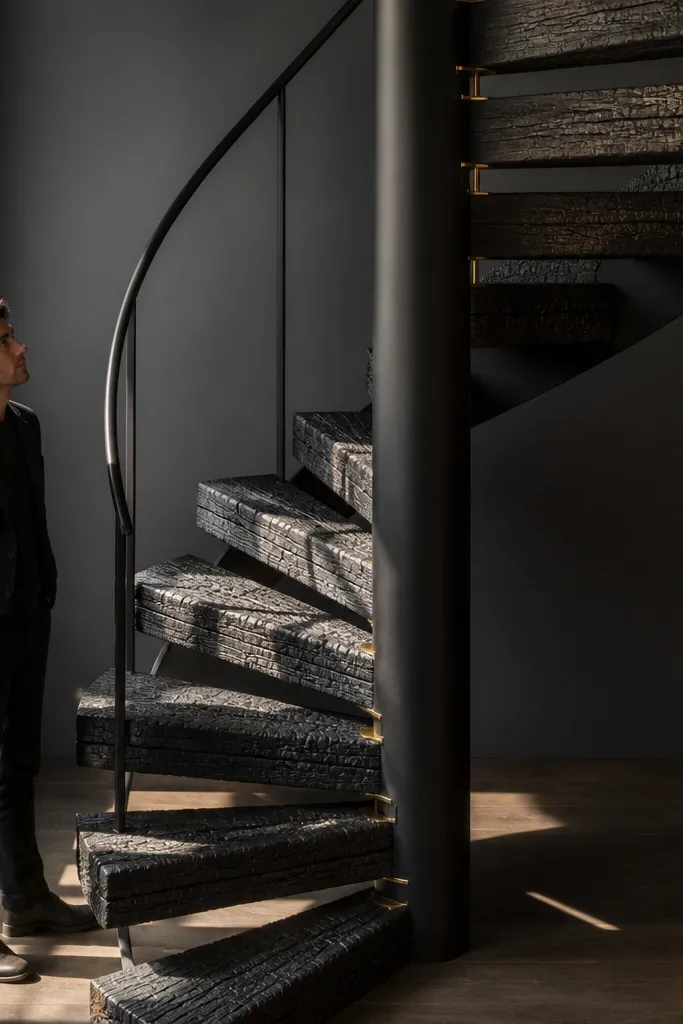
Charred oak (lightly burned with a controlled pattern) gives you warmth plus depth, and it looks especially good on minimalist stairs because it creates texture without ornament. Micro brass brackets at tread connections add warmth and a refined edge. Keep the char level consistent across treads so the spiral looks intentional rather than patchy. Finish matte so the charred surface stays matte and tactile. This is a strong option for modern interiors with black fixtures, stone counters, or dark floors.
Start by selecting oak boards and doing controlled char on the faces you want textured, then wire-brush to remove loose ash and reveal grain. Cut treads to size and route any comfort edges, then build the structural frame. Install treads with micro brass brackets using consistent placement so the hardware line stays neat. Finish with a matte clear coat designed for wood texture so it doesn’t seal the surface into gloss, then install a simple handrail with matching bracket tones.
Test your clear coat on a char sample first; some coatings turn char areas gray if applied too thick.
Don’t char the edges you’ll grip if they feel rough after brushing — it makes the handrail unpleasant.
19. Honeyed Oak Spiral With Rope-Twist Newel and Linen-Warm Guard
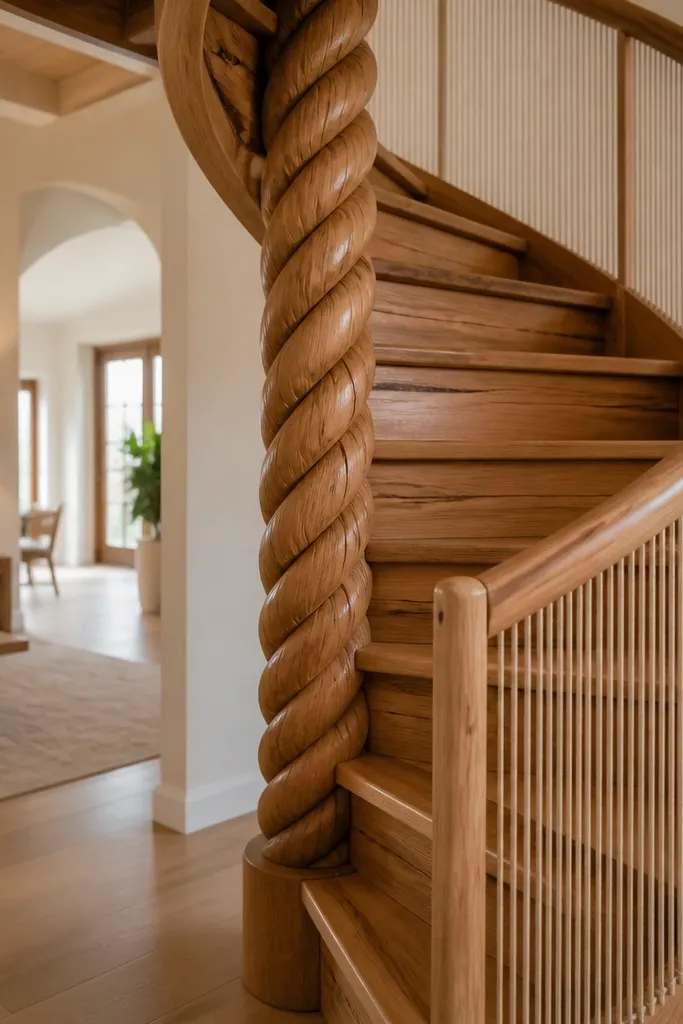
This build makes wood feel warm even before you touch it because the honeyed oak finish glows under daylight and soft interior lighting. The rope-twist newel adds a hand-made look that reads cozy, not fussy, and it frames the center like a picture. A linen-warm guard panel (thin slats or a stretched fabric screen behind a wood frame) keeps the open feeling of modern minimalist while still cutting glare. It works well in rooms with light walls, warm floors, or any space where you want the staircase to feel like furniture. Skill level is moderate: the stair parts need careful layout, but the guard is the easy win that makes the whole thing look finished. Plan around 2-3 weekends depending on whether you’re buying pre-cut steps or machining everything yourself.
Step 1: Choose or fabricate oak steps sized for your opening, aiming for a 36-38 inch diameter spiral and a 7-7.5 inch tread width where feet land. Cut the center post to the full stair height and add a rope-twist profile to the newel cap (wood lathe or a pre-made turned newel piece) so the twist starts just above the lowest tread. Step 2: Build the guard as a low-visual barrier: frame the opening with 1x2 or 2x2 oak rails, then mount thin vertical slats or a linen-warm screen behind a shallow wood frame so it reads like a soft panel in photos. Step 3: Stain with a honey oak tone (two coats, then a clear matte topcoat) and keep the metal minimal — use blackened or satin hardware so the warmth stays the focus. Finish everything before assembly if you can, then sand only edges and recoat after drilling so you don’t get bare spots at screw holes.
Spray the matte topcoat in light passes and keep a small foam brush for edges — it prevents shiny rings on tread edges where hands slide.
Avoid going too dark on the stain — oak looks muddy on spirals because the grain gets trapped in the curve and catches light unevenly.
20. Smoked Walnut Spiral With Brass Edge Banding and Hidden Stair Nose
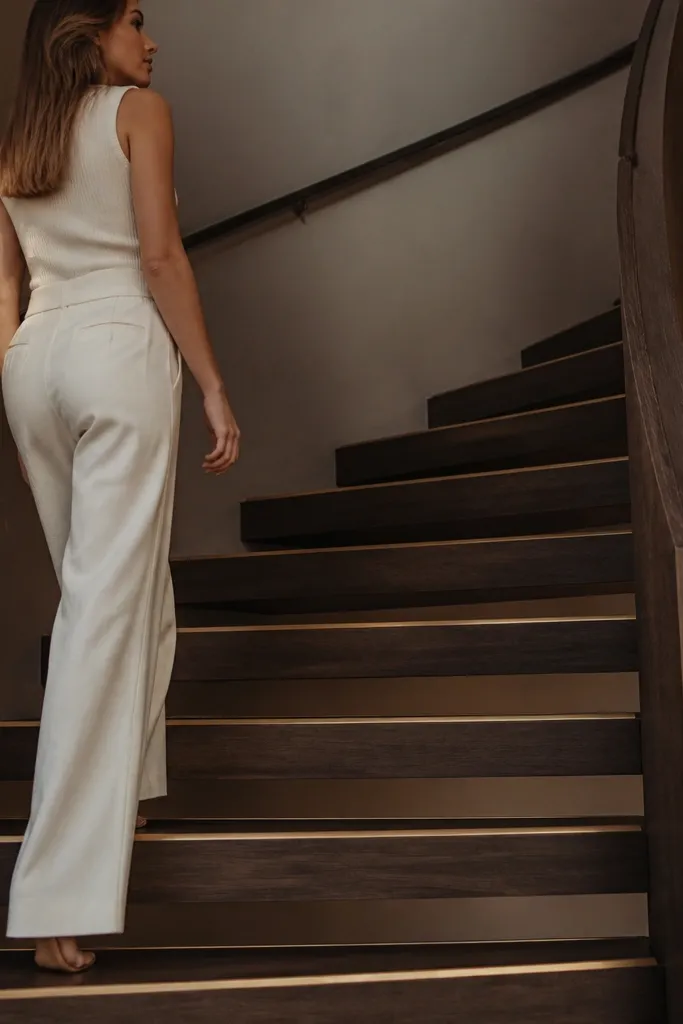
This one feels warm because smoked walnut has that deep, brown glow that looks good in shadow — perfect for a spiral where steps spend time in partial light. The thin brass edge banding catches highlights at the tread lip without turning the stairs into a “brass-heavy” look. The trick is the hidden stair nose: the tread face stays smooth and uninterrupted, so the staircase reads modern minimalist instead of chunky. You also get a safer edge profile because the banding defines the walking surface visually. This suits homes with dark trim, warm white walls, or a modern space that still wants something tactile and human. Skill level is higher because the tread edge needs precision, but the result is photogenic and clean.
Editor's noteDo a test tread: smoke color and brass reveal look different once the matte clear coat goes on, and you want the band line to stay sharp.
Step 1: Fabricate treads from walnut and smoke the wood first (smoke stain or controlled smoke method) until the color is evenly brown, then let it dry fully. Mill a shallow rabbet on the underside of each tread so the brass edge band sits tight and flush, targeting about a 1/16 inch reveal at the top — enough to show light, not enough to snag. Step 2: Install the center support and spiral structure, then attach treads so the stair nose is “built into” the tread assembly rather than sticking out as a separate piece. Step 3: Fit brass banding to each tread lip using countersunk screws from underneath or adhesive rated for wood-to-metal, then sand the top surface flat so the brass line is crisp. Finish with a matte clear coat over the walnut and a light wax-free clear over the brass so fingerprints don’t turn into dark smears.
Skip thisAvoid using glossy clear on smoked walnut — it makes the spiral look wet and highlights every ripple in the tread surface.



