
1. Matte Black Flat Bar with Rounded Handrail
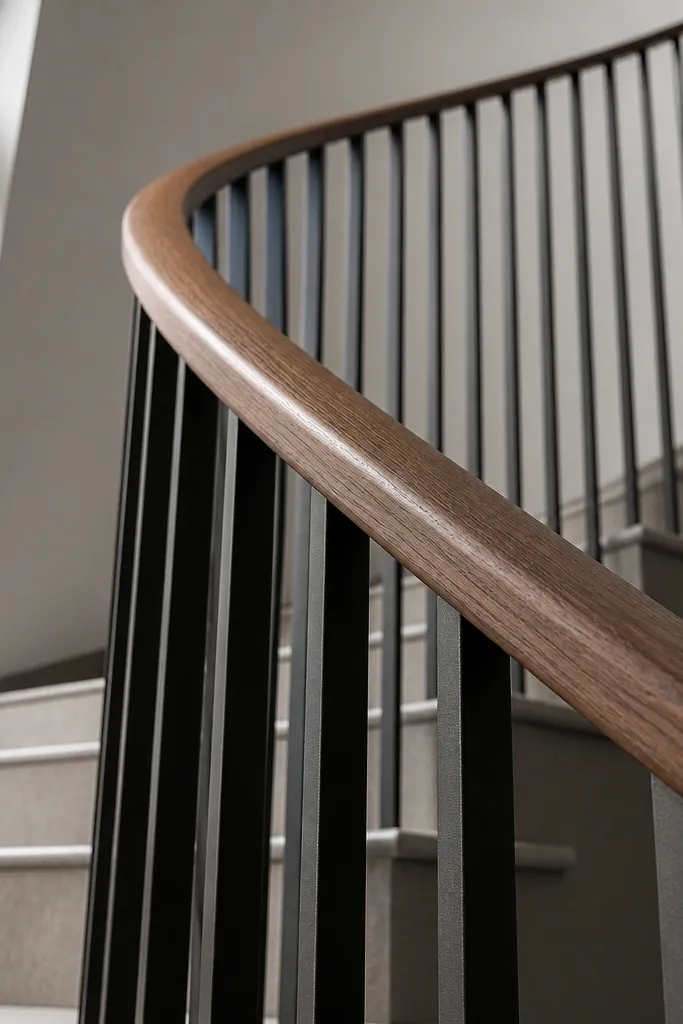
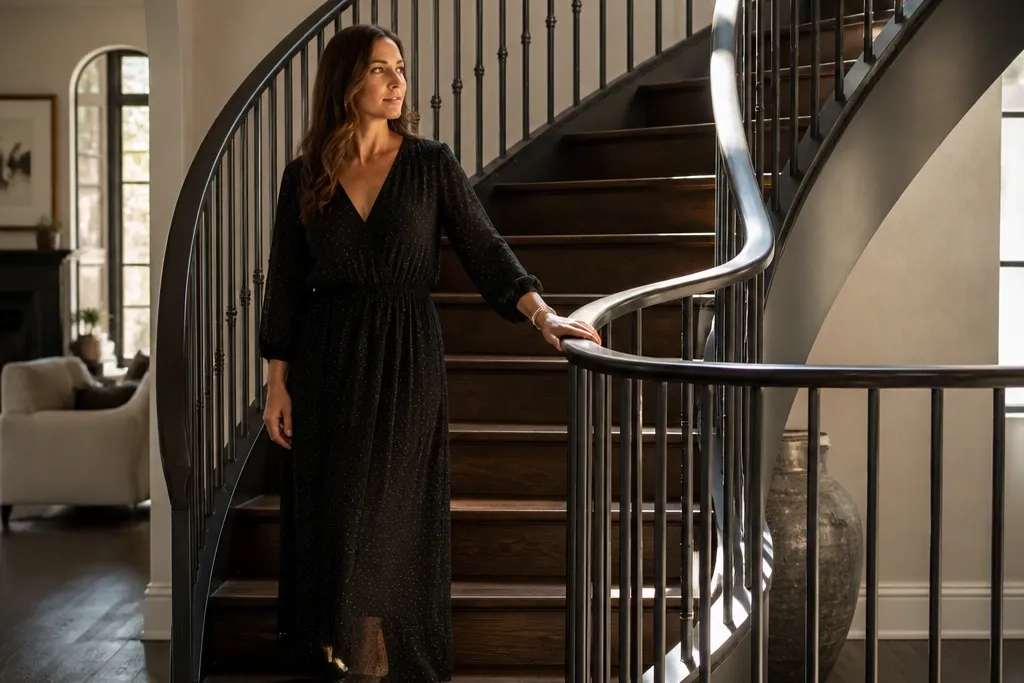
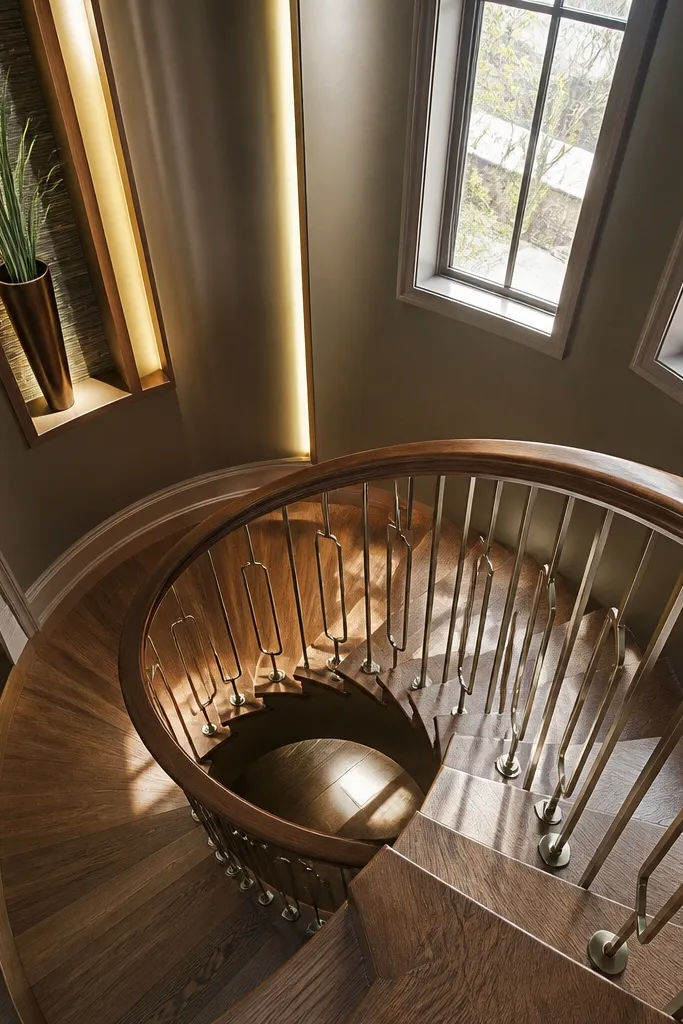
This is the “quiet expensive” option. Flat bar balusters look clean and graphic in a spiral because they create consistent vertical lines, and the rounded handrail softens the geometry so it doesn’t feel harsh. Use matte black powder coat on the metal for low glare, then pair it with a handrail in walnut or stained oak so the railing looks warm instead of sterile. The result reads high-end from a distance and still looks sharp when you’re close enough to see straight lines and crisp edges. Skill level is basic-to-intermediate because the design is simple; the time sink is getting the handrail miters dead tight.
Start by choosing balusters as 1/2 in x 1-1/4 in flat bar strips with rounded ends (or you can radius the ends with a grinder after cutting). Mount them to match your stair’s curvature using laser level marks at each post location, then tack-fit one baluster at a time before fully fastening. Install the handrail with a continuous run, then shape the ends with a template so the transition at the landing is clean. Finally, powder coat or prep and paint the metal for a true matte finish, then seal the wood handrail with a satin clear coat so it resists scuffs.
Editor's noteDo a dry fit with painter’s tape on the handrail first — it shows whether the curvature makes the spacing look off before you drill anything.
Skip thisAvoid glossy black; it highlights uneven gaps and makes DIY alignment obvious.
2. Brushed Brass Balusters with Clear Satin Glass Panels
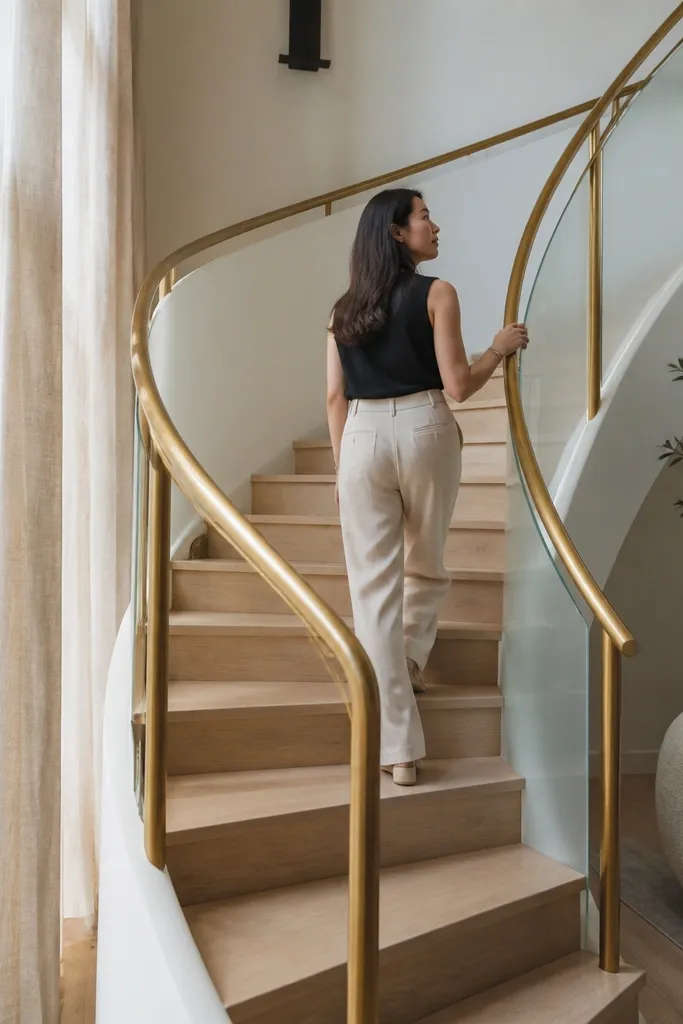
If you want a luxury look that photographs like a showroom, this is it. Brushed brass adds warmth and light reflection without going flashy, and satin-clear glass keeps the spiral feeling open. The brass verticals create structure, while the glass panels eliminate the “wire clutter” look you get from random small parts. This combination is especially good for homes with lots of natural light or white walls, because the glass stops the railing from visually swallowing the staircase. It’s a mid-skill build because glass mounting has to be precise and safe.
Start by ordering glass panels that match the stair’s chord lengths between posts, then choose tempered glass with satin finish on the edges (not the whole panel) so it looks crisp. Use brushed brass vertical stanchions or balusters spaced evenly, then align each stanchion with the same gap to the glass panel edges. Install the top and bottom glass rails or clamps first, then insert the glass and tighten clamp blocks evenly across each panel. Finish by sealing metal-to-glass contact points with manufacturer-approved gasket material so you get a tight, no-rattle fit.
Editor's noteUse two alignment marks per panel — one at the top clamp line and one at the bottom — so the glass doesn’t “walk” as you tighten.
Skip thisDon’t mount glass directly to bare metal; missing gaskets lead to squeaks and permanent scuffs.
3. Stainless Cable Railing with Walnut Handrail
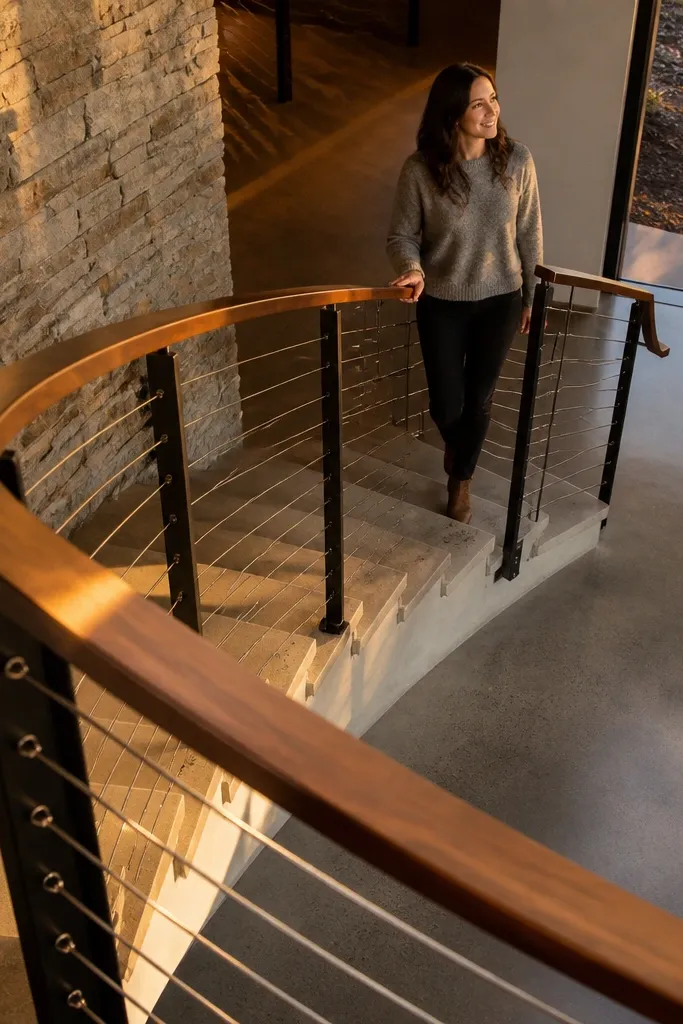
Cable railings look expensive because they reduce visual weight. In a spiral, the cables create clean diagonals that follow the curve, so the system looks custom even when the hardware is standard. Pair stainless cables with a walnut handrail for warmth, and keep the cable tension consistent so the lines stay straight and tight. This is the best choice if you want an airy, modern luxury look without glass panels that require lots of carpentry. Expect intermediate skill: cable systems are straightforward, but routing and tensioning must be careful.
Start by laying out anchor points at each post location so the cable spacing stays uniform along the spiral. Install end posts and intermediate posts, then drill anchor holes using a jig so the cable enters at the correct angle. Thread stainless cable through turnbuckles, tension each run to remove slack, then secure with proper cable fittings. Build the walnut handrail as a continuous piece with a smooth underside profile, then fasten it to posts so it doesn’t flex when you grip it.
Editor's noteTension cables in order from the center out; it keeps the spiral curve from pulling the system crooked.
Skip thisAvoid mixing cable tension levels; loose cables make the whole railing look cheap fast.
4. Oil-Rubbed Bronze Twist Balusters
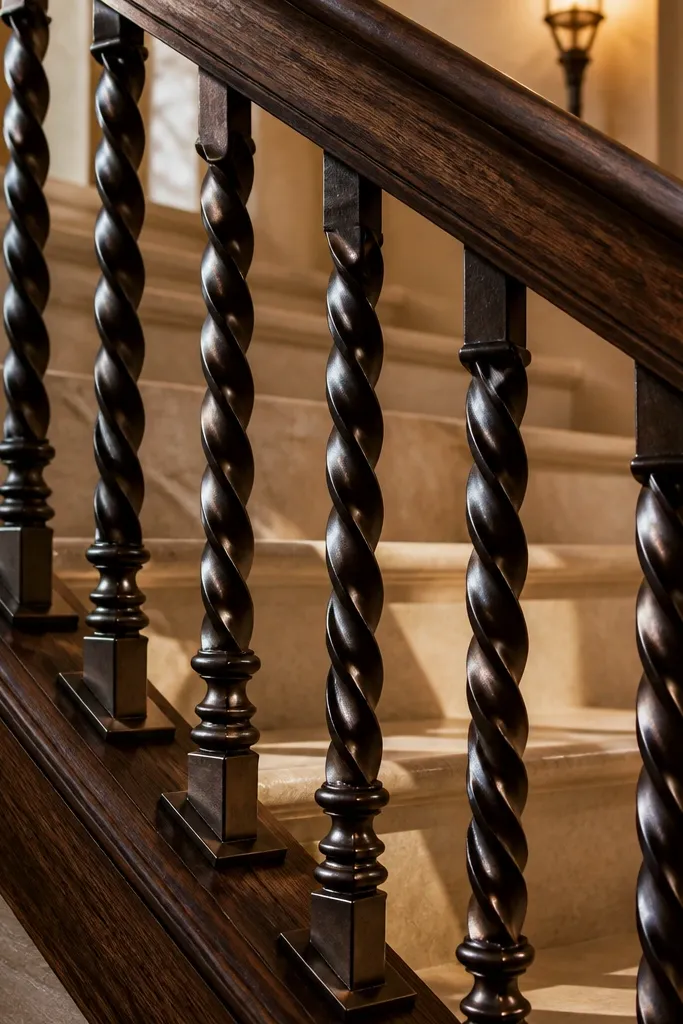
Twist balusters add motion to a spiral, and that motion is what reads as high-end. Oil-rubbed bronze looks deeper than standard brown metal because it has shadowing — it doesn’t glare, and it makes the railing look layered. Keep the handrail simple — dark stain on oak or walnut — so the twist detail stays the star. This option works great in traditional or transitional interiors where you want the staircase to feel like furniture, not a utility. Build difficulty is moderate because alignment and spacing must be consistent to avoid a “wavy” look.
Choose twist balusters sized for your stair rise spacing, then dry-fit them between posts before final fastening. Install the top handrail first using a continuous run, then mark where each twist baluster lands on the underside. Drill and attach balusters with consistent hardware depth so the twist pattern lines up visually along the spiral. Finish with an oil-rubbed bronze coating or compatible paint system, then seal the handrail with a satin clear coat to keep the wood from getting streaky.
Editor's noteUse a template board with evenly spaced marks for each baluster landing; it speeds up repeat alignment.
Skip thisDon’t over-spray bronze; thick coats fill the twist grooves and flatten the detail.
5. Clear Acrylic Rods with Brushed Steel Frame
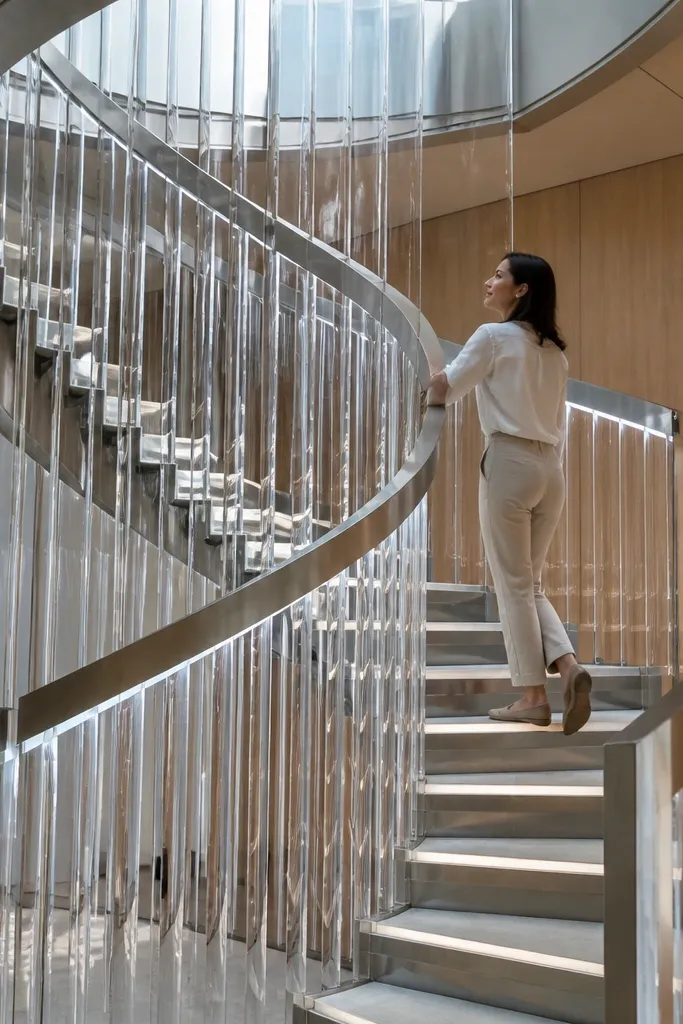
This is a modern luxury take that looks sharp without the cost and complexity of glass panels. Clear acrylic rods catch highlights like glass but are easier to handle during install, and the brushed steel frame gives you a crisp, metallic edge. The rods also keep the staircase feeling open, which matters because spiral stairs can otherwise look visually heavy. This works best if your posts are already solid and you want a railing system that reads clean in photos. Skill level is intermediate because you need straight cuts and secure spacing.
Start by selecting acrylic rods with consistent diameter, then cut them to length so they sit centered between posts without touching. Install a brushed steel top and bottom frame or brackets that hold the rods at each post bay. Drill mounting points for each rod and use clear gaskets or plastic-safe bushings so the acrylic doesn’t crack when you tighten hardware. Finish by polishing rod edges lightly and checking for wobble — you want tight, non-rattling fit before you call it done.
Editor's noteLabel each rod by its bay number during cutting; acrylic lengths that are off by even a few millimeters show up instantly in a spiral.
Skip thisAvoid dry-fitting without gaskets; hard metal contact can cause fine cracking lines.
6. Wood Balusters Turned on a Lathe with Satin Finish
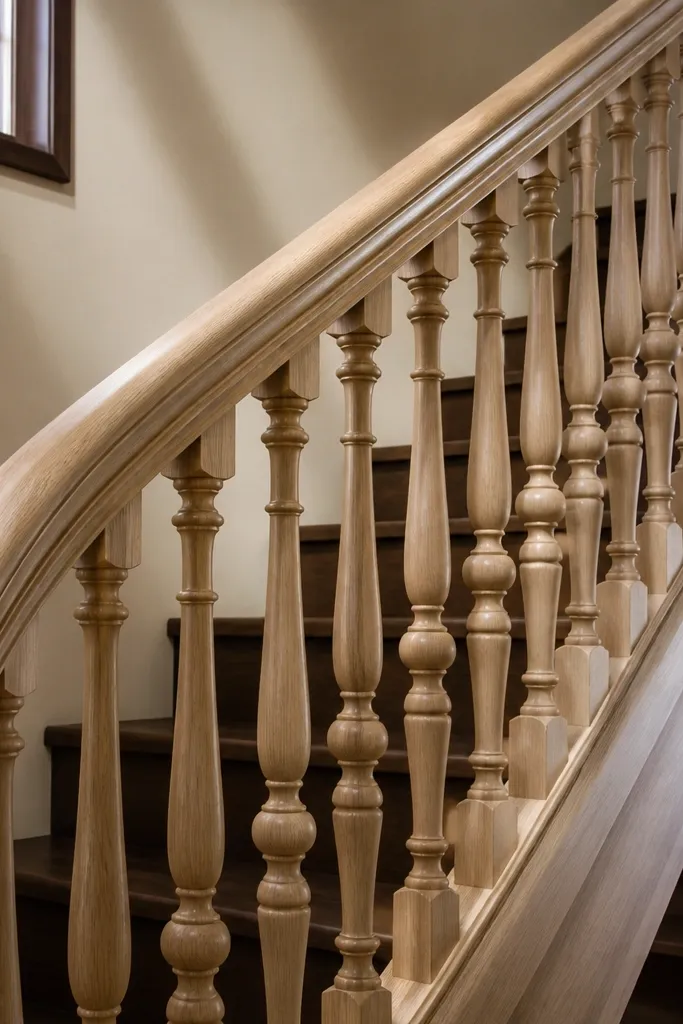
Turned wood balusters make a spiral staircase feel like built-in millwork. The luxury comes from the repetition — each baluster has the same profile and shadow line, so the railing looks custom even if the design is classic. Use satin finish rather than high gloss; high gloss highlights tool marks and uneven sanding. This is a great choice when you want warmth and softness, especially if the rest of the room has wood floors, paneling, or warm paint colors. It’s doable for a motivated DIYer with basic woodworking tools, but the turning and sanding time is real.
Start by deciding on a baluster profile that matches your handrail thickness, then turn blanks on a lathe with consistent diameters. Cut each baluster to length, then sand through to 180-220 grit and test stain on scrap so the tone matches your handrail. Install balusters using proper connectors or threaded inserts so you can remove one if needed without destroying the wood. Apply stain, then seal with a satin topcoat — two thin coats beat one thick coat for an even surface.
Keep baluster shoulders identical in diameter; that’s what keeps the shadow line consistent along the spiral.
Don’t rush sanding — rough spots show up as shiny patches under staircase lighting.
7. Two-Tone Handrail with Black Metal Posts and Light Wood Core
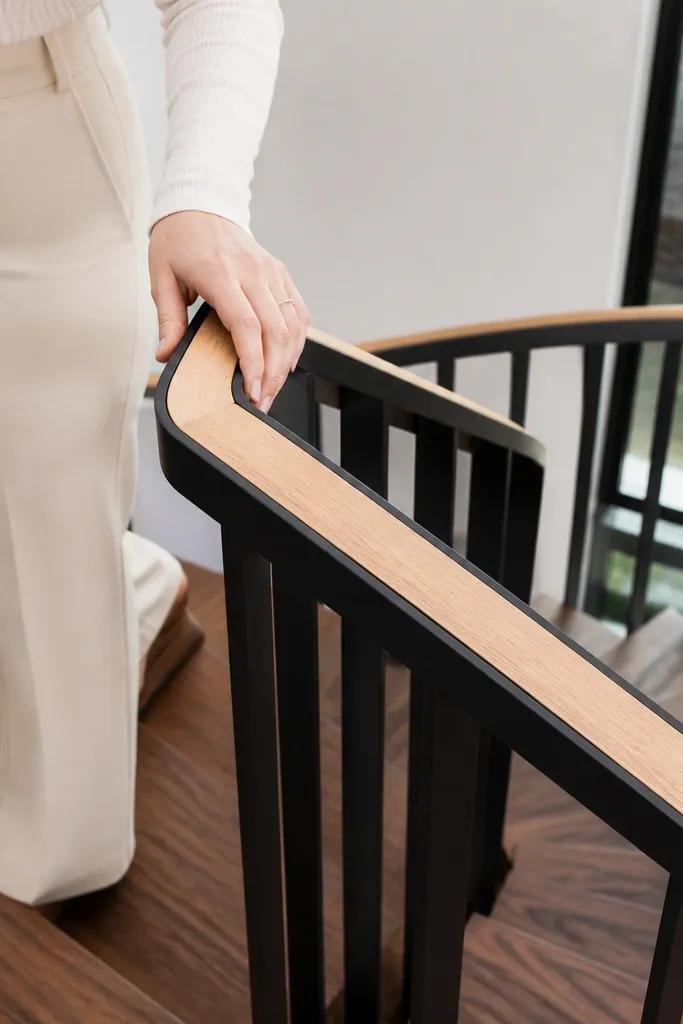
Two-tone railing looks high-end because it adds depth. The trick is to keep the metal posts dark and the handrail warm, then add a subtle contrast line in the handrail itself. This makes the spiral read more dimensional and less like a single-material system. Use light wood for the core (like maple) and wrap it with a darker top cap or stain layer so the edges catch light. It’s a strong choice when your space is mostly neutral and you want the staircase to look designed, not borrowed from a catalog.
Start by building the handrail as a laminated box or stacked profile so you can create a top cap and side contrast without looking painted on. Install black metal posts first, then attach the two-tone handrail using concealed brackets so the top stays smooth. Route or sand the handrail edges clean, then finish the light wood core with a matte clear coat and the top cap with a darker stain for contrast. Make sure the handrail transitions at the landing are flush — that’s where two-tone designs either look premium or messy.
Editor's noteUse edge banding on the handrail core if you’re worried about tear-out; it keeps the contrast line crisp.
Skip thisAvoid mismatched sheen between the two tones; gloss vs matte makes the contrast look accidental.
8. Matte White Plaster-Style Balusters with Brushed Nickel Rail
Matte white balusters paired with brushed nickel handrail look expensive because they mimic architectural plaster details. The railing becomes part of the wall language instead of a separate object. It’s a strong choice for modern interiors with white walls and light floors, because the matte surfaces absorb glare and keep the staircase clean. This design looks best when the balusters are smooth and consistent, not chunky and uneven. The build is mostly finishing and fit-up, not complicated metalwork.
Start with baluster forms or milled wood balusters shaped to a simple round profile, then prime them with a bonding primer. Apply a matte white finish that matches your wall paint tone, and spray in light passes so you don’t get orange peel. Install brushed nickel handrail brackets and posts, then mount the white balusters using hidden fasteners or threaded inserts. Finish by sealing the matte white so it withstands hand contact without turning patchy over time.
Match the baluster paint sheen to the wall — same matte look makes the whole railing feel intentional.
Avoid glossy white; it looks like cheap spray paint when it catches stair lighting.
9. Blackened Steel Vertical Slats with Oak Handrail
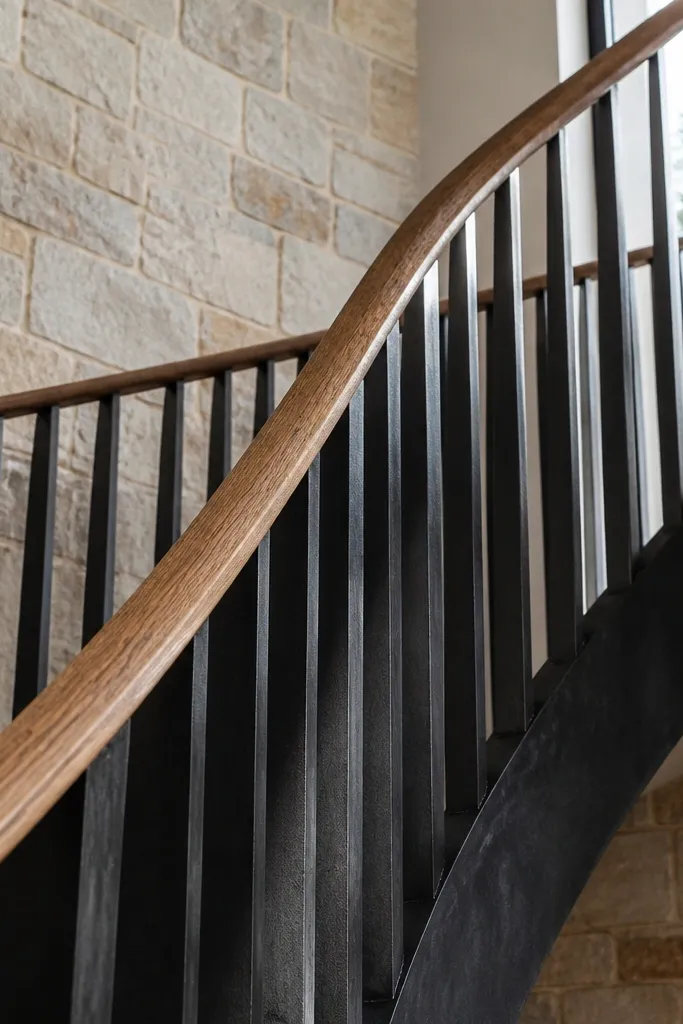
Vertical slats are a luxury move because they read like a single designed surface. Blackened steel has depth — it looks dark with subtle texture rather than flat black paint. Oak handrail adds warmth and gives the railing a natural tactile feel, which matters because you touch the handrail every day. This option is especially photogenic in rooms with wood beams, stone counters, or warm lighting. Skill level is intermediate because slat spacing and attachment must stay straight along the spiral.
Start by cutting slats to consistent width and rounding edges lightly so they don’t look sharp and industrial. Install posts first, then mark slat spacing with a jig that follows the spiral arc so each slat gap stays even. Fasten slats with hidden brackets or countersunk screws so the slat face stays clean. Finish steel with blackening solution or a compatible coating system, then stain and seal the oak handrail with satin clear to resist fingerprints.
Editor's noteEdge-round slats slightly; it makes the railing look more furniture-like than hardware-like.
Skip thisDon’t use thin slats without rigid backing — flex makes the spacing look sloppy.
10. Smoked Glass Panels with Champagne Bronze Hardware
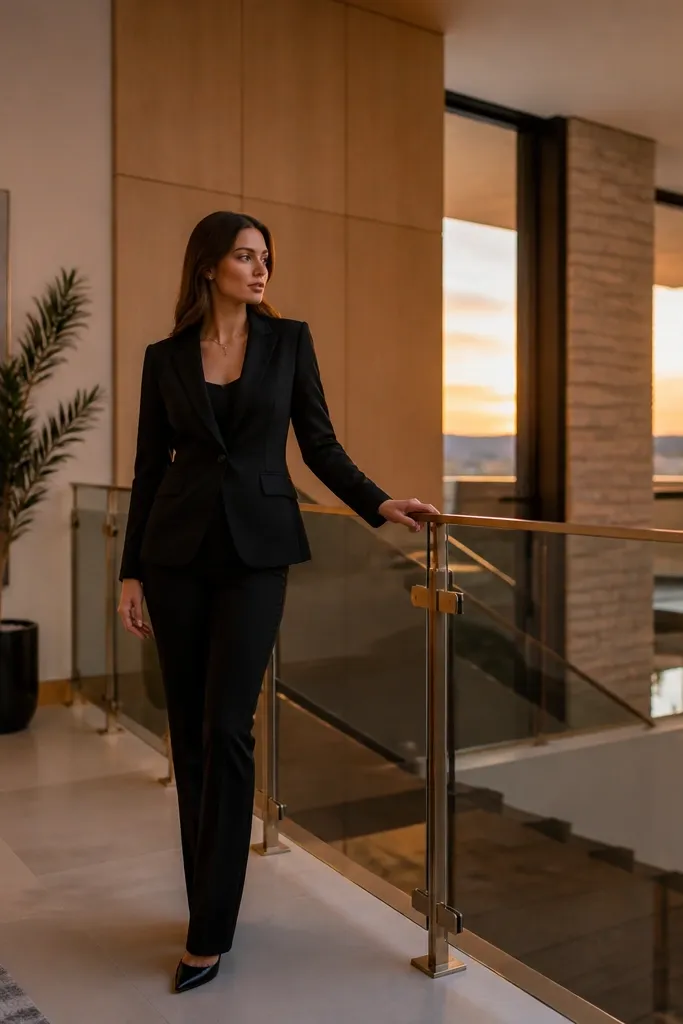
Smoked glass is the luxury version of clear glass. It adds contrast and hides minor installation imperfections, while still letting light through. Champagne bronze hardware gives a softer metallic tone than bright brass, so it looks expensive in warm interiors. This works best when your staircase sits near a feature wall — the railing becomes a dark, elegant line. Build difficulty is mid-level because you need proper glass thickness and secure clamps, but the design is straightforward once measurements are correct.
Start by measuring the bay openings between posts and order smoked tempered glass with polished or satin edges. Install champagne bronze clamp rails or standoff brackets at the top and bottom positions, keeping clamp spacing consistent across panels. Insert the glass with gaskets, then tighten clamps evenly so the glass doesn’t bind or tilt. Finish by adding a matching bronze handrail or top rail that visually ties the system together — that’s what makes the smoked glass look intentional, not accidental.
Editor's noteUse thicker glass if you can afford it; thinner panels can look tinny and cheap in photos.
Skip thisAvoid clear edge chips; even tiny chips show up as bright lines against smoked glass.
11. Brushed Nickel Round Balusters with Continuous Top Rail Cap
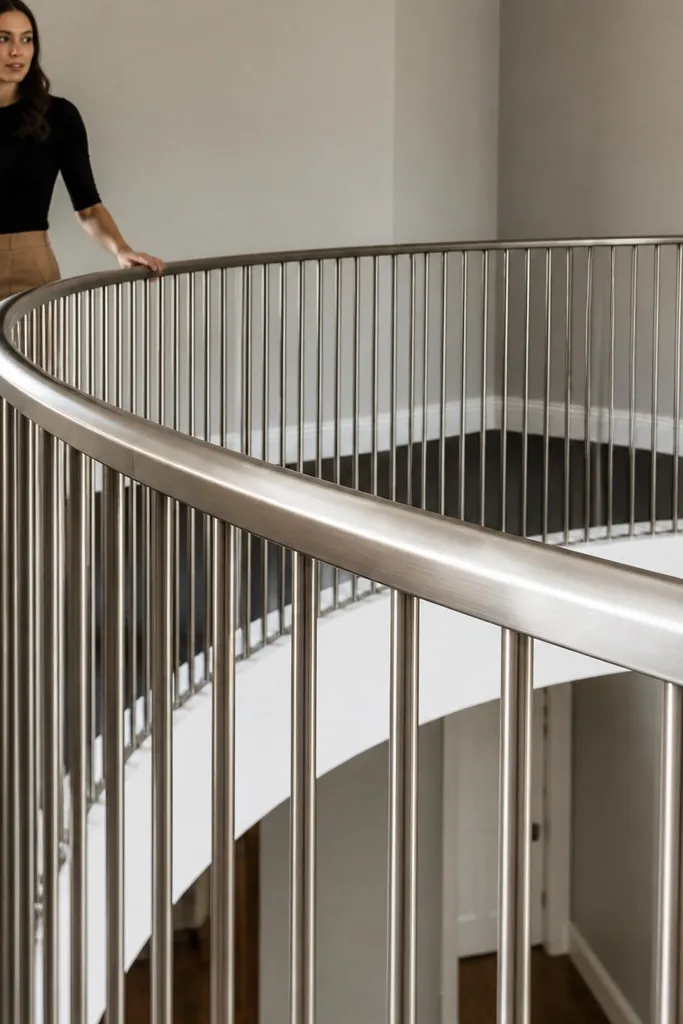
Round balusters with a continuous top rail cap look classic and high-end because they create a smooth silhouette. The cap rail hides the seams where balusters meet the handrail zone, so the staircase reads finished instead of assembled from parts. Brushed nickel gives a clean, modern metallic tone that works with most interiors. This design is good when you want the luxury look without glass or cable systems. Skill level is intermediate: you need tidy metal joints and consistent spacing.
Start by choosing round balusters sized so they don’t look spindly next to your handrail (a thicker diameter reads more premium). Install posts, then attach a continuous top rail cap along the spiral using pre-cut segments and tight joints. Mount balusters to the cap at marked intervals, then secure from behind so the front face stays clean. Finish by polishing or brushing the nickel surfaces to remove fingerprints and installing the handrail so it overlaps the cap cleanly.
Keep the cap rail joints aligned with post centers; misaligned joints show up instantly on a spiral.
Avoid baluster diameters that are too small; thin rounds make the staircase look temporary.
12. Oversized Rope Twist Balusters with Oil Finish Handrail
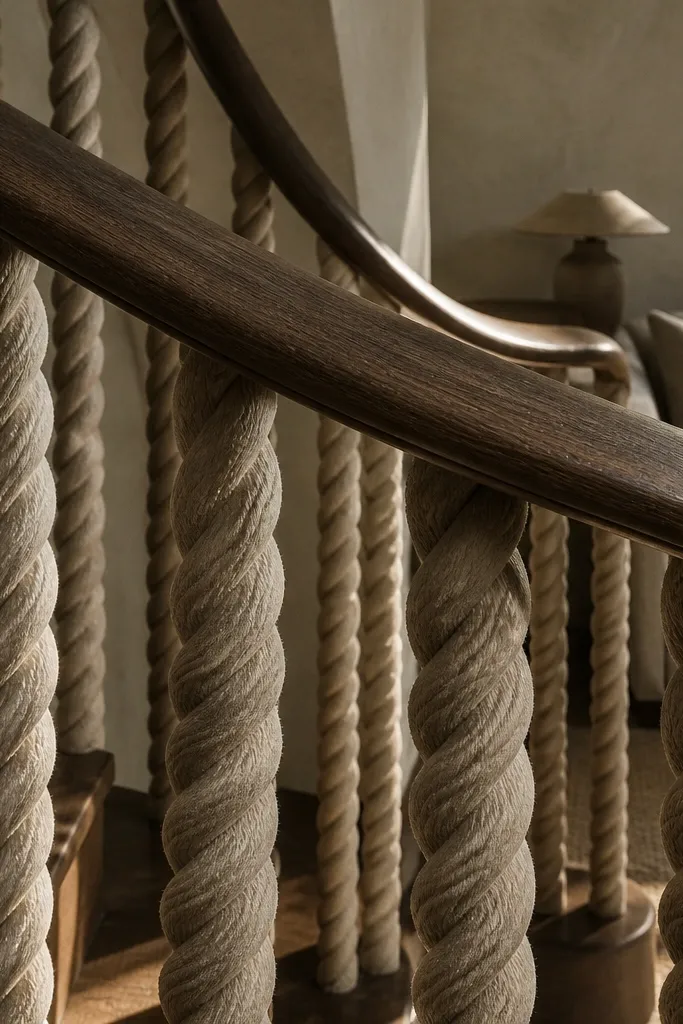
Rope twist balusters are a boutique look that reads luxury because they add texture and depth. The key is scale: the twist should be chunky enough to cast a shadow, not a tiny decorative detail. Pair them with an oiled handrail in walnut or dark oak so the wood looks tactile and slightly matte. This design works great for entryway spirals where the railing is a focal point. Build difficulty is higher than it looks because rope twists need careful alignment and secure mounting points.
Start by selecting rope twist balusters made for railing use, then measure spacing so the twist pattern doesn’t compress as it follows the spiral. Install posts at your layout points, then mount each twist baluster using metal brackets or threaded connectors that can handle the load. Build the handrail with an oil-finished wood surface and keep the underside smooth so the rope detail stays visually dominant. Finish by sealing the rope balusters with the manufacturer-approved finish so they resist scuffs and moisture.
Editor's noteUse a chalk line and test one baluster in place; if the twist orientation feels rotated, fix it before you mount the rest.
Skip thisAvoid super-shiny rope finishes; they look like costume hardware instead of luxury.
13. Sculpted Wood Handrail with Hidden Glass Clips
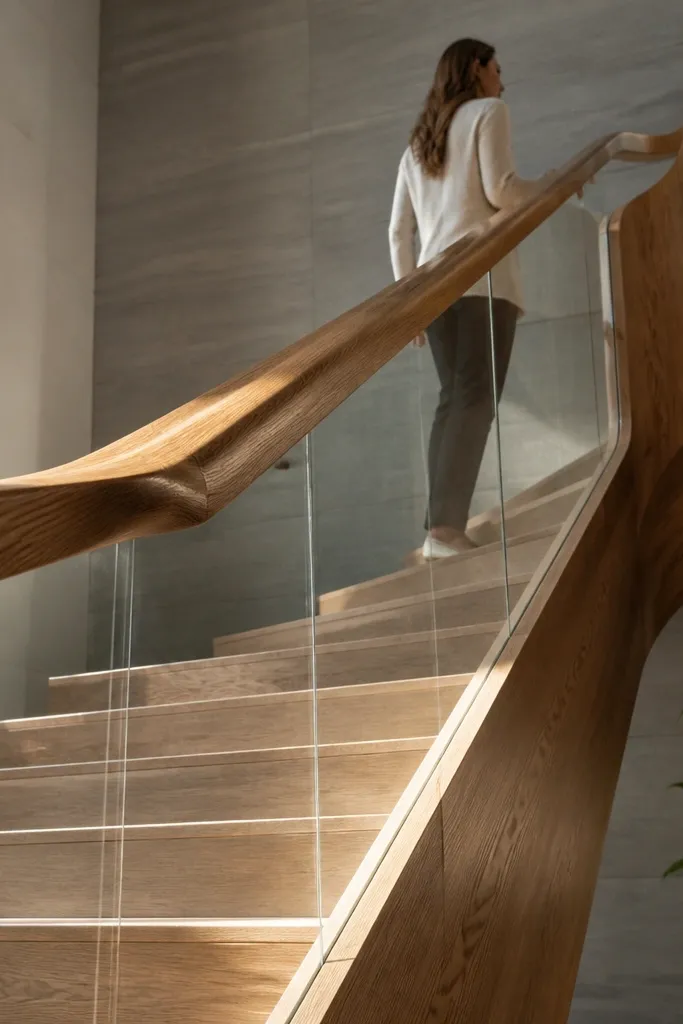
A sculpted wood handrail turns the whole railing into a centerpiece. Add glass panels held by hidden clips and you get a luxury look that feels architectural rather than decorative. The glass keeps sightlines open, and the sculpted handrail adds a strong horizontal element that balances the spiral curve. This is a great option when you want the “high-end luxury look” without heavy metalwork. Skill level is intermediate because hidden clips require careful drilling and alignment, but the result is clean and photo-friendly.
Start by machining or laminating a sculpted handrail profile with a comfortable grip radius and a smooth top edge. Install posts and a continuous base support for glass, then mark clip positions with a jig so the glass sits evenly. Drill holes for the hidden clips, attach clips, then insert tempered glass panels with gaskets. Finish by sanding the handrail transitions at landing points and applying a durable satin clear coat to resist hand oils.
Editor's noteDry-fit every glass panel with the clips loose first; you want to confirm alignment before tightening anything.
Skip thisDon’t rely on “eyeballing” glass height; small differences show up as wavy reflections.
14. Charcoal Powder-Coated Posts with Clear Acrylic Spindles
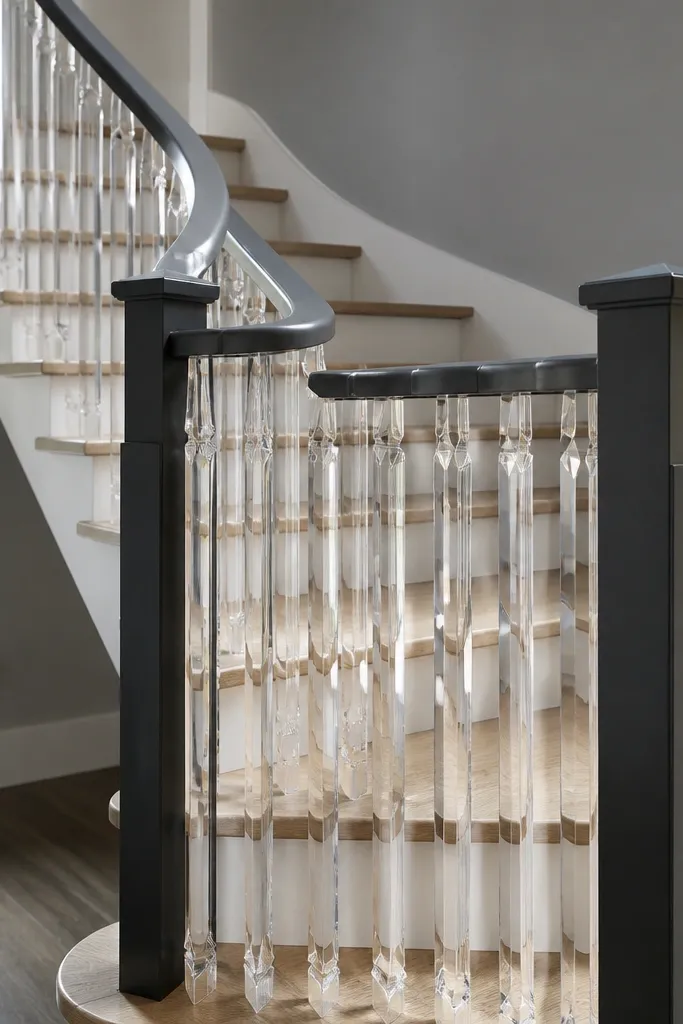
This one looks modern-luxury because it mixes heavy, matte structure with light, transparent details. Charcoal powder-coated posts anchor the staircase, and clear acrylic spindles keep the railing airy without the installation complexity of full glass panels. The transparent elements also help the spiral look less crowded, which matters in tight homes. Pair it with a light walnut or oak handrail so the transparent spindles don’t feel cold. Build difficulty is intermediate, mostly in measuring and secure mounting.
Start by powder-coating or painting charcoal posts and letting them cure fully. Install posts at your spiral layout points, then cut acrylic spindles to length with clean edges and slight chamfers. Mount spindles using acrylic-safe bushings and threaded inserts so they hold firm but don’t crack. Attach the handrail after all spindles are aligned, then check the railing for any twist along the spiral by sighting down the top edge.
Editor's noteChamfer acrylic edges lightly so it looks intentional and avoids sharp, scuffed-looking corners.
Skip thisAvoid acrylic spindles that are too thin; they look cheap and flex in photos.
15. Two-Layer Handrail with Walnut Top and Black Steel Underrail
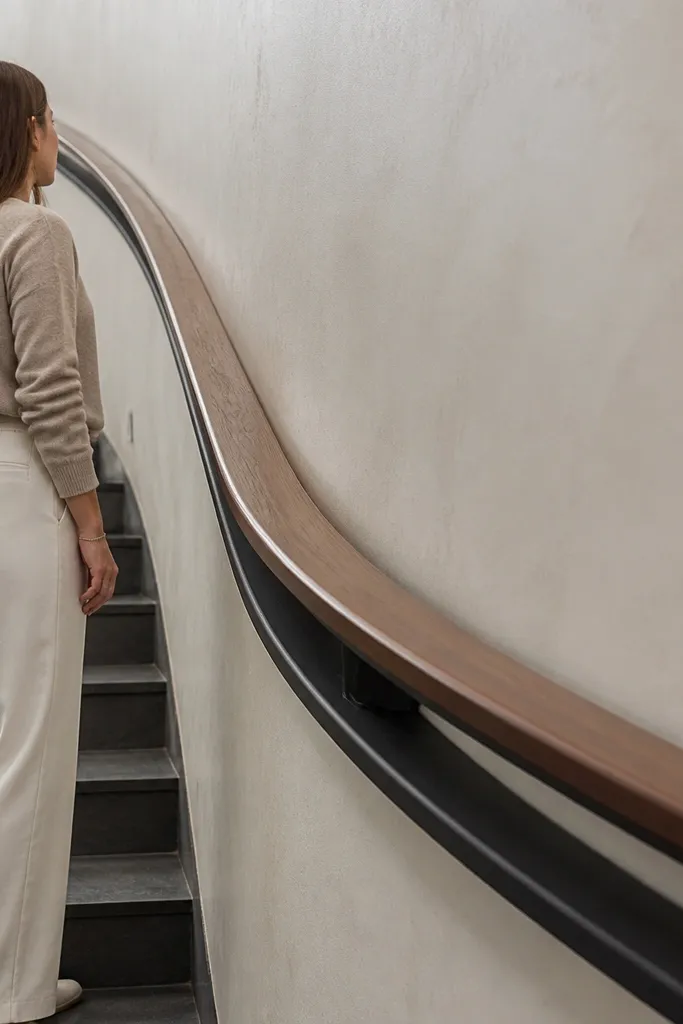
Two-layer handrails look custom because they create a “shadow gap” under the top rail. Walnut on top gives warmth, while a black steel underrail adds structure and a crisp edge that reads premium. This is a strong luxury look for spirals because the handrail is the most visible part while you climb, and the underrail adds depth even from a distance. It also hides mounting hardware, which keeps the front face clean. Skill level is intermediate because you’re building a layered profile and aligning it perfectly to posts.
Start by building the black steel underrail as a straight, rigid bar that follows the spiral arc in segments if needed. Attach the underrail to posts first with concealed brackets, then install the walnut top handrail over it so the seam stays hidden. Route the underside of the walnut to fit snugly and clamp it while you fasten through from underneath. Finish by sanding the walnut flush at joints and sealing with satin topcoat so the look stays smooth and doesn’t show shiny fingerprints.
Leave a tiny, even shadow gap (about 1/8 in) between wood and steel — it’s what makes it look expensive instead of bulky.
Avoid a tight seam with no gap; it looks like a single painted piece instead of a layered system.
16. White Oak Handrail with Brushed Copper Balusters
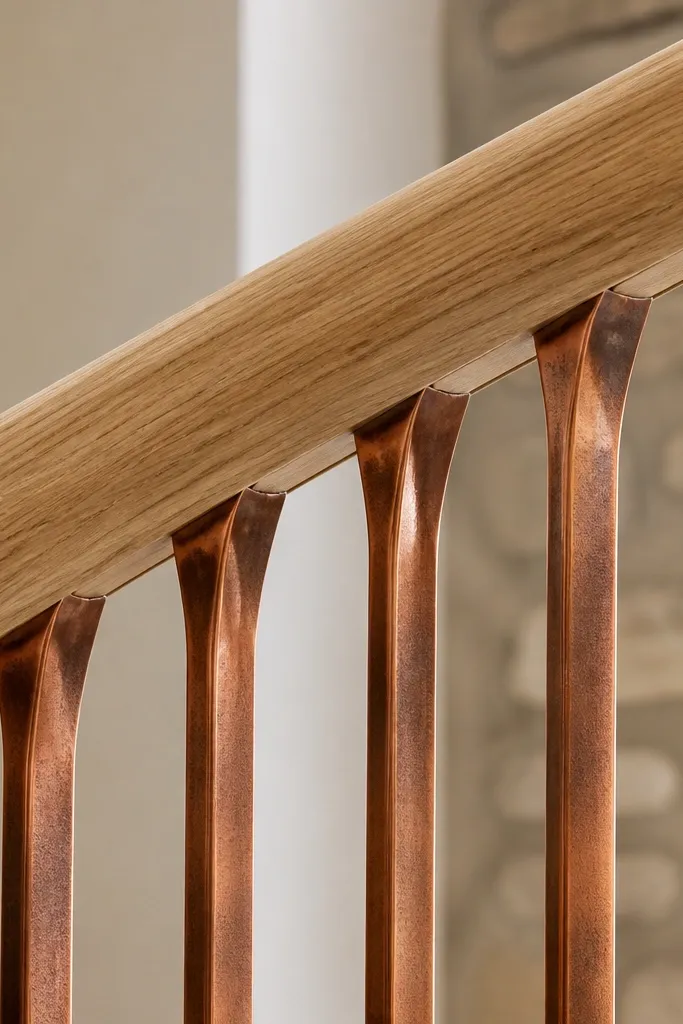
Brushed copper brings warmth and a soft glow that feels high-end, especially when paired with white oak. The luxury effect is in the patina path — copper develops subtle tonal shifts that look intentional instead of worn out. Keep the balusters simple and consistent so the copper reads like a designed material, not random decoration. This option is great for kitchens and open-plan living areas with warm stone or cream walls. Build difficulty is moderate: copper color needs proper prep and a clear protective finish.
Start by choosing copper balusters or fabricating from copper rod/flat stock and sanding to a uniform grain direction. Install white oak handrail and posts, then mount copper balusters with threaded inserts so they stay straight as the spiral curves. Apply a clear protective lacquer or wax system designed for copper so the finish doesn’t turn patchy. Seal the oak with satin clear and check that copper doesn’t contact wood bare — use thin protective tape or coatings at contact points.
Brush copper in one direction before sealing; random sanding patterns show up under stair lighting.
Avoid leaving copper unprotected; fingerprints and moisture cause uneven dark spots.
17. Matte Black + Clear Glass Top Rail Insert
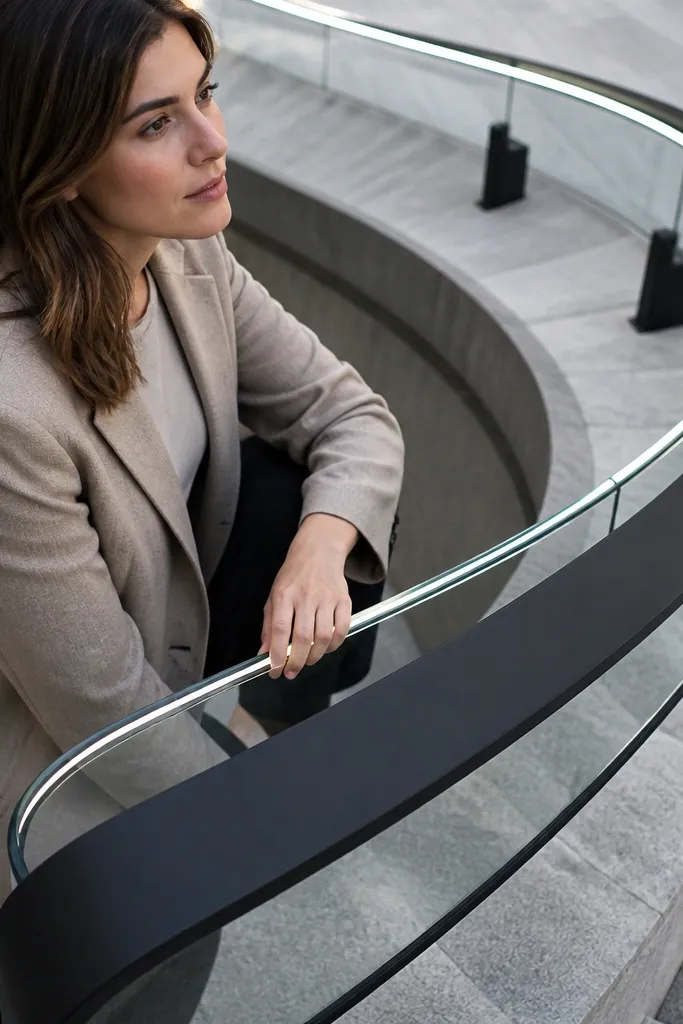
This idea gives you a luxury look with a small amount of glass. The matte black frame keeps the structure crisp, and the clear glass insert on the top rail creates a bright highlight line that makes the staircase look custom. It also hides joinery because the glass visually breaks up the top rail area. This design works best when the rest of the railing is simple — verticals or minimal balusters — so the insert is the focal point. Build difficulty is intermediate due to glass insert cutting and mounting, but it’s a controlled project.
Start by building a black top rail frame with an inset channel sized for tempered glass. Cut the glass to fit with polished edges and test fit dry so it seats evenly without stress points. Install the frame and vertical balusters first, then set the glass insert using gaskets and clamp strips so it can’t rattle. Finish by sealing the frame joints and cleaning the glass with a streak-free method before final inspection.
Use a gasket thickness that lets the glass sit centered; off-center inserts look sloppy immediately.
Avoid cutting glass too tight; stress can cause chips at the mounting points.
18. Raked Stainless Spindles with Brushed Steel Handrail
Raked spindles create a directional pattern that feels designer-made. Instead of straight verticals, the spindles lean slightly to match the stair’s rhythm, which adds motion and makes the spiral look more like an architectural piece. Stainless with a brushed finish keeps it clean and modern, and a matching brushed steel handrail ties the system together. This is a great choice for contemporary spaces with gray floors, steel appliances, or minimal trim. Skill level is higher because you need consistent angles and careful alignment.
Start by planning the rake angle — decide on a fixed tilt relative to vertical so all spindles match. Mark post mounting points, then drill spindle holes or brackets at the same angle using a jig. Install the brushed steel handrail first, then attach spindles one bay at a time and verify the rake visually from the landing. Finish by deburring edges and cleaning stainless thoroughly so it doesn’t show machining marks.
Make a cardboard angle template for the rake; it keeps drilling consistent across all bays.
Avoid changing the rake angle mid-spiral; it ruins the “designed” look.
19. Carved Wood Panel Infill with Minimal Metal Posts
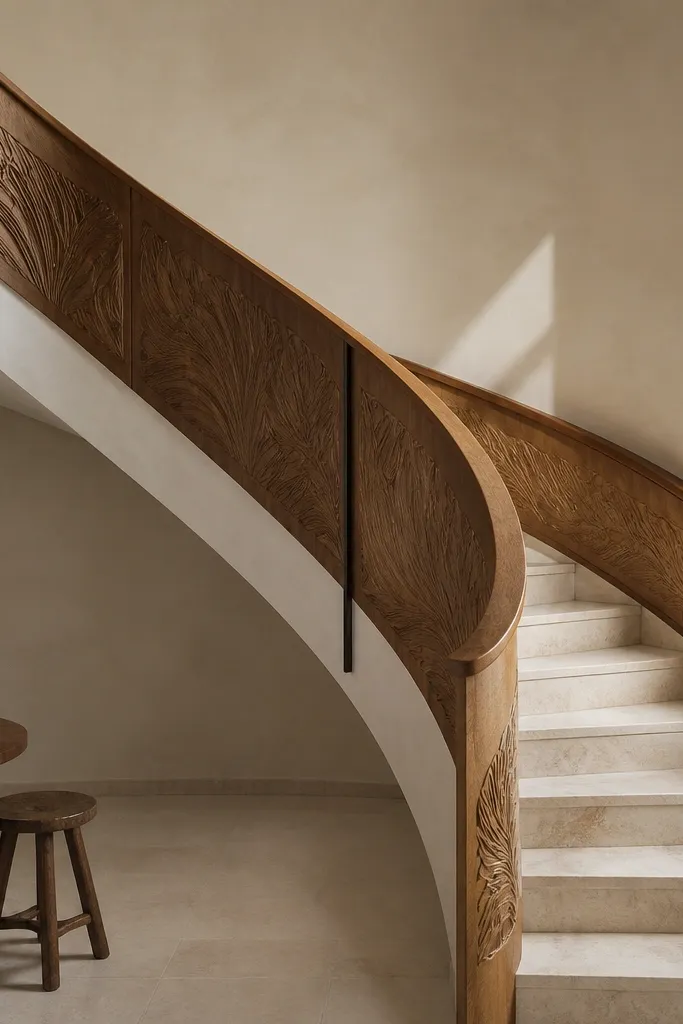
If you want the highest “built-in” look, use carved wood infill instead of individual balusters. The panel creates a continuous surface that reads custom, and the carving adds texture without looking like clutter. Minimal metal posts keep it from feeling heavy, and a matching wood handrail ties everything into one piece. This is ideal for spirals in living rooms where the railing is viewed from multiple distances. Build difficulty is high because panels need accurate fitting and carving depth, but the visual payoff is huge.
Start by designing infill panels that fit between posts along the spiral curve, then cut panel frames first to get a stable skeleton. Add carved inserts or routed patterns on the panel face, keeping the carving shallow enough to avoid weak points. Install minimal posts, then fasten panel frames into place using hidden screws or brackets so the front stays clean. Install the handrail last, ensuring the panel edges align under the rail for a tight, seamless look.
Use a consistent carving depth (like 1/4 in) so the shadows look uniform along the spiral.
Avoid oversized carvings; thick removal can cause chips and makes the panel look fragile.
20. Hammered Copper Mesh Infill with Blackened Steel Top Rail
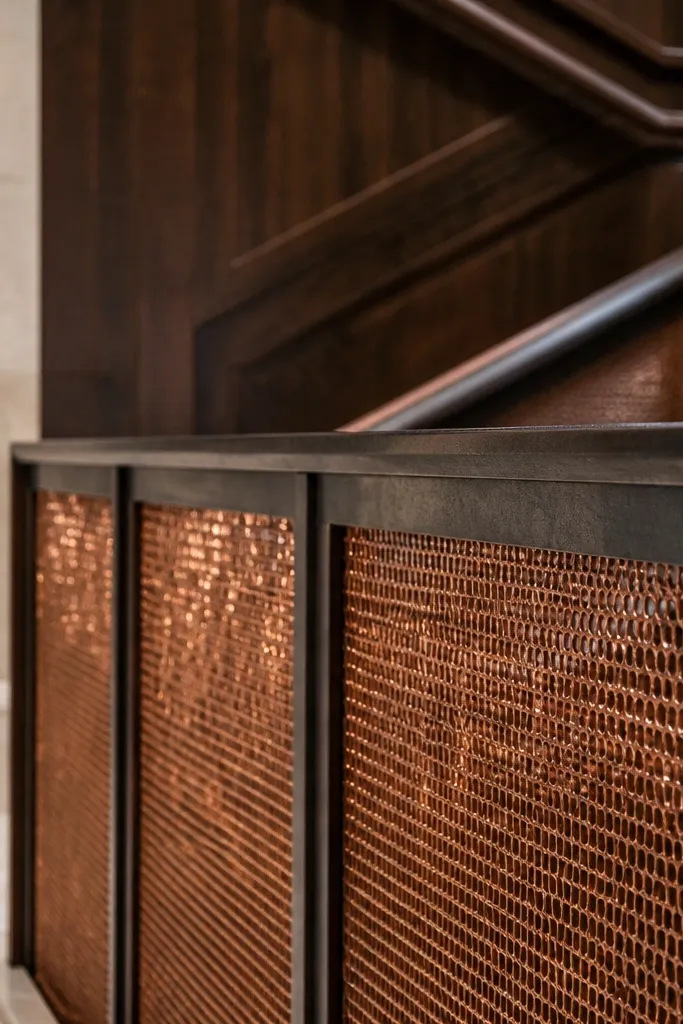
If you want a spiral staircase high-end luxury look without going full glass, copper mesh is the move. The hammered surface catches light in tiny highlights, so the railing looks expensive even from across the landing. Use a blackened steel top rail to ground the warmth of the copper — the contrast reads sharp, not rustic. This design also hides small gaps better than cables because mesh is visually continuous from angle to angle. It suits entry stairs, lofts, and homes with warm wood floors where you want the railing to look like a design object, not a safety barrier. Plan on moderate DIY skill: you’re cutting curved metal and aligning a repeating panel pattern, but you’re not doing ornate woodworking.
1) Build the frame first: install blackened steel posts at your stair’s baluster spacing and run a continuous top rail sized to match your handrail comfort (typically 1-3/4 in to 2-1/4 in outside diameter). Use a template made from cardboard to mark the stair curve on a sheet of copper mesh, then cut the mesh with tin snips or a metal shear so the edge stays tight. 2) Create the panel pockets: tack 1 in wide steel edge strips to the insides of each post line, leaving a 1/4 in recess for the copper mesh to sit in. 3) Attach copper mesh: wrap the mesh edge over the steel strip lip and fasten with small stainless screws through pre-drilled holes, then trim any sharp copper points with a file. Finish by checking hand clearance and smoothing all edges with a deburring wheel, then seal copper with a clear lacquer made for interior metal to slow darkening and prevent fingerprints from showing.
Cut a test panel first and hold it on the stair at three heights — copper mesh stretches slightly, so you want the pattern to sit flat before you commit to all sections.
Don’t skip edge deburring — copper burrs snag clothes and skin, and they’re hard to fix after the railing is installed.



