
1. Two-zone counter tray layout

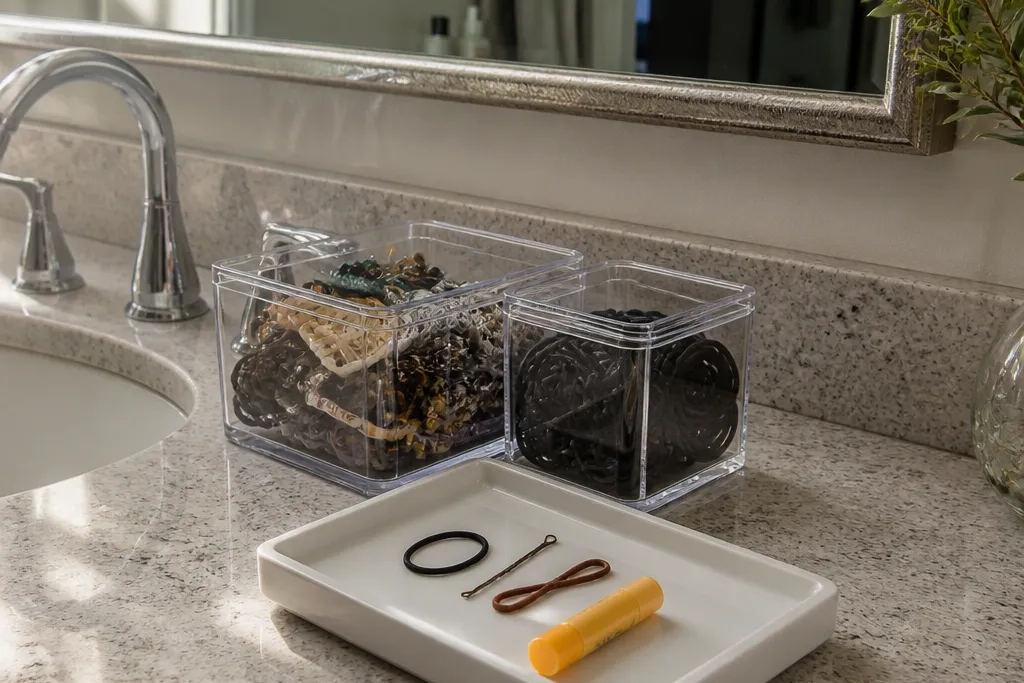
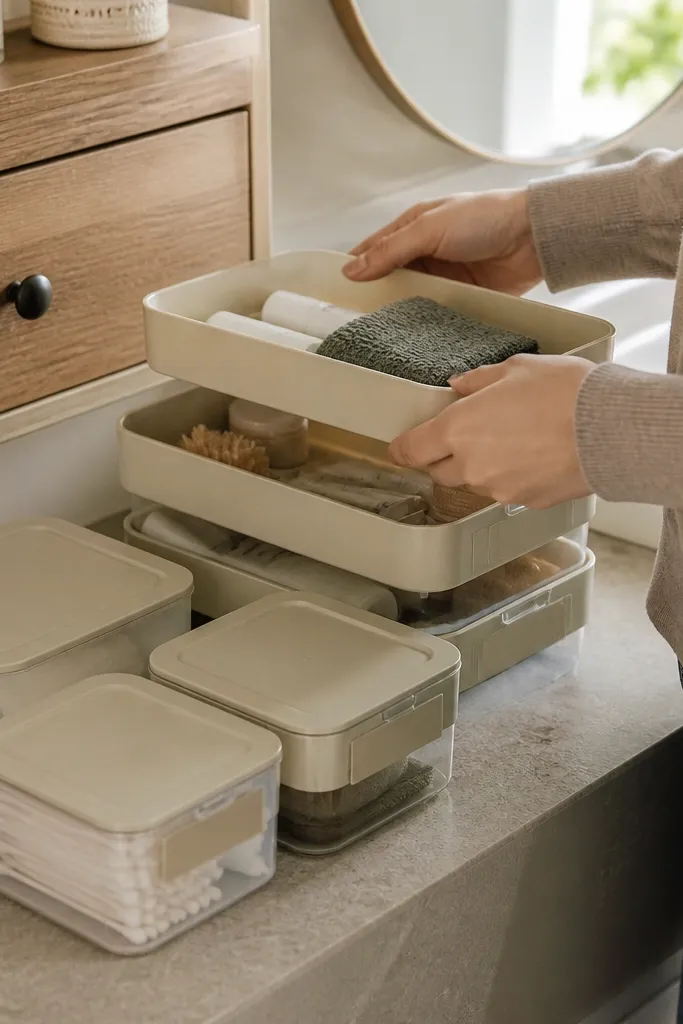
If your vanity counter looks busy but you still can’t find things fast, split it into two zones. Put a shallow tray for items you use every morning — cleanser, moisturizer, SPF, lip balm — so they stay visible. Then put a deeper tray or small bin for backups like extra sunscreen, travel sizes, and a spare lip liner. This setup reduces the “where did that go?” problem because daily items never move into the backup pile. It also keeps your counter from turning into a dumping ground when you’re in a rush.
Start by measuring your counter length and choose a tray set that fits side-by-side without overhang. Place the shallow tray on the side you reach first and the deeper tray/bin on the other side. Line both with a non-slip liner so bottles don’t slide when you bump the counter. Finally, add a label to the deeper bin front — even a simple masking tape label — so backups don’t quietly become clutter.
Editor's noteUse non-slip drawer liner under every organizer; it stops micro-sliding that makes trays look messy in a week.
Skip thisDon’t mix tall bottles and flat items in the same tray — tall items block visibility and force you to dig.
2. Drawer insert tray for "flat" makeup
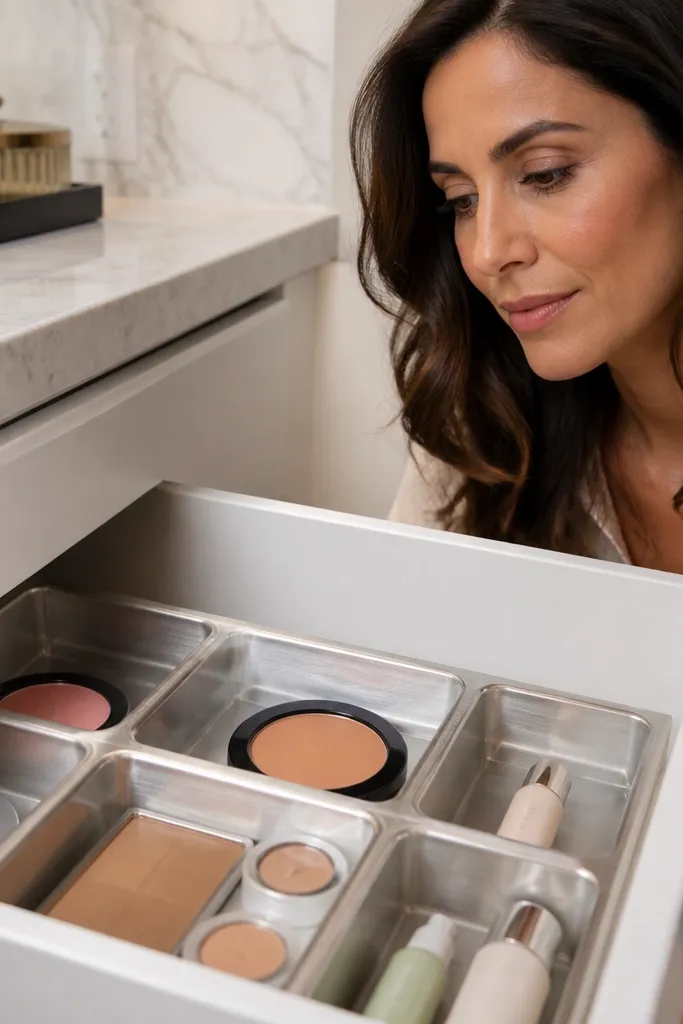
A drawer insert tray is the cleanest way to manage makeup that lies flat: palettes, compact powders, and small skincare bottles. Trays keep those items from drifting across the drawer when you open and close it. The result is a drawer that stays organized even if you’re not careful. This is the right choice when you want visibility without stacking and when the drawer is already deep enough to hold a tray without crowding. It also makes restocking easier because you can see what’s missing.
Measure the drawer interior width and depth, then buy or cut a tray insert to match. Choose a tray with removable dividers or compartments so you can fit your palette size. Place the tray on a thin anti-slip mat so it doesn’t slide. Then load flat items first, leaving the far edge clear for a small “daily grab” spot.
Editor's noteKeep the drawer dividers 1 inch away from the tray edges so you can lift items without snagging.
Skip thisSkip deep, tall dividers for compact makeup — they waste space and leave dead pockets.
3. Stackable bins for skincare backups
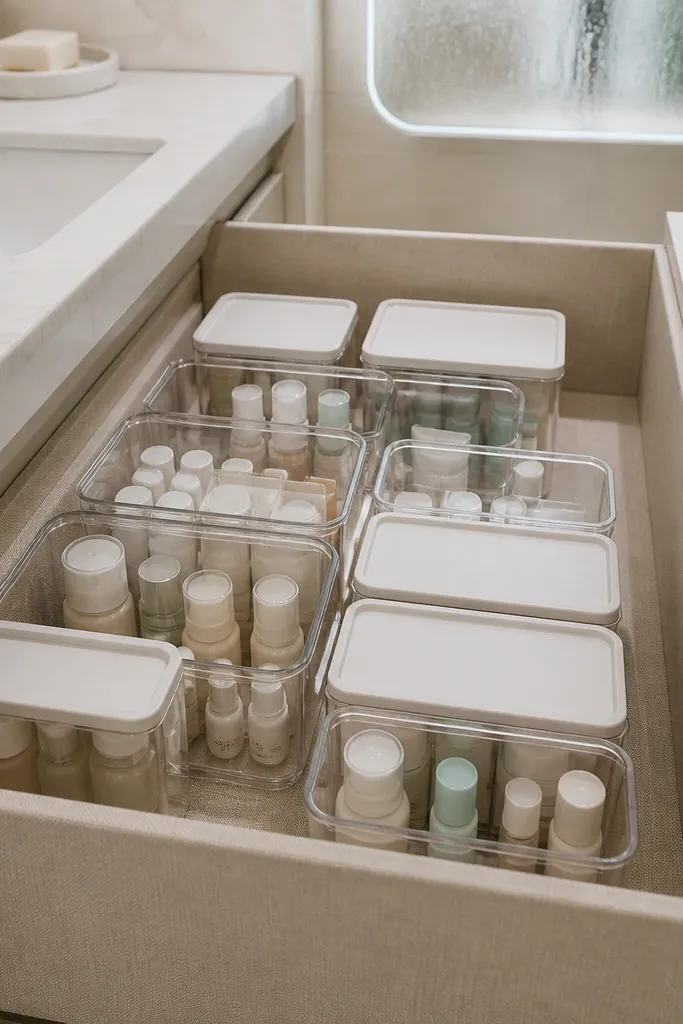
If your skincare drawer turns into a mix of open bottles and backups, stackable bins are the fix. Bins stop the spill-over and keep similar items together — travel sizes together, backups together, unopened minis together. Clear bins make it easy to see what you have without digging, and the stack height helps you use vertical space in small cabinets. This is a strong choice when you have more product volume than you have drawer real estate. It also keeps expiration chaos from happening because you can rotate by what’s visible.
Pick bins that stack without wobbling and that fit your cabinet width with a little clearance for door closure. Label the front with what’s inside and the date you started the batch if you rotate skincare. Group items by type and size: full-size bottles in one bin, travel minis in another, and open backups in a third. Store the most-used bin at eye level or the easiest height to reach, then stack the rest below.
Editor's noteWrite labels on matte tape, not glossy tape; glossy labels peel from condensation spots on bathroom cabinets.
Skip thisDon’t put everything in one big bin — you’ll dig and the bin becomes a trash can.
4. Lidded bin for cotton pads and Q-tips

Cotton pads and Q-tips create a weird kind of mess: they’re small, they shift, and they turn into dust collectors. A lidded bin solves the mess by containing the items and keeping them from scattering when you reach in. You can add a divider inside so pads don’t get mixed with Q-tips. The lid also reduces humidity exposure in bathrooms where steam shows up. This is a bins-first solution for tiny supplies that destroy a tray’s clean look.
Choose a bin with a lid that still lets you open with one hand. Add a simple divider: a thin acrylic sheet or plastic cutting board piece secured with adhesive-backed hook tape strips. Keep cotton pads upright in one side and Q-tips flat or upright in the other. Finally, place the bin on a stable surface or in a drawer corner where it won’t get knocked.
Use a divider that’s slightly shorter than the lid so you can lift it out without fighting the cover.
Don’t store cotton pads loosely in a tall bin — the pile compresses and you end up digging.
5. Adjustable acrylic divider tray in a drawer
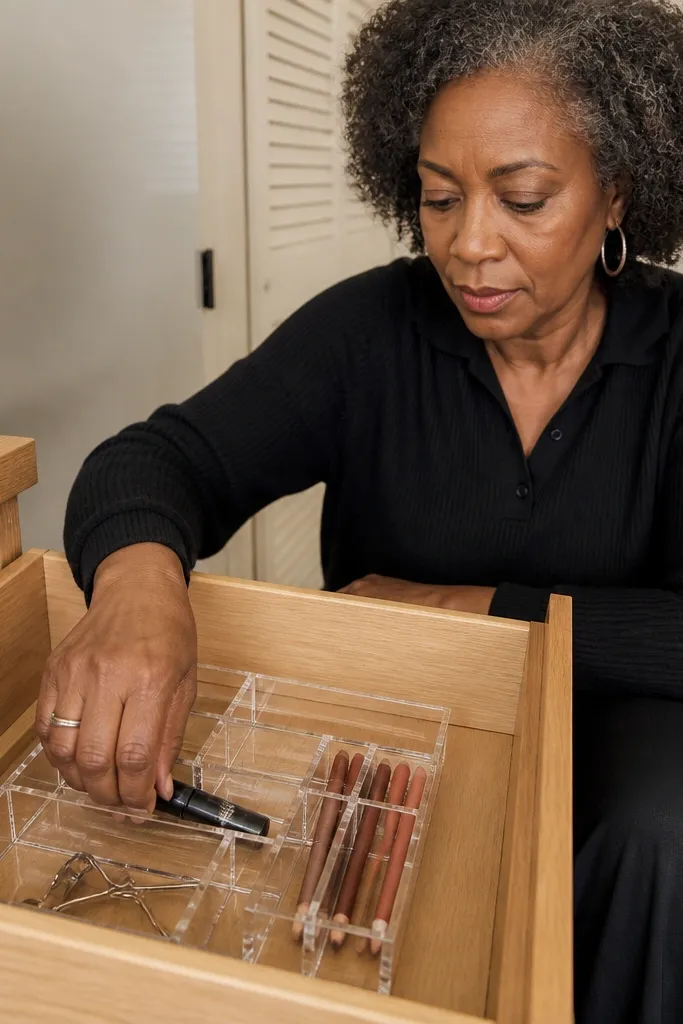
An adjustable divider tray is the best middle ground when your vanity items keep changing. Lip liners, mascara, brow products, and mini tools all have different footprints, so fixed compartments get annoying fast. Adjustable dividers let you reconfigure without replacing the whole organizer. This matters because small vanity organization fails when your system can’t keep up with your routine. Trays also keep daily items visible, so you stop re-buying the same backup because you forgot you had it.
Measure the drawer and choose a tray size that leaves at least 1/2 inch around the edges for easy removal. Set dividers first using cardboard cutouts that match your bottles and pencil shapes. Then transfer to the acrylic divider tray and load products by height: tallest items toward the back, shortest toward the front. Add a small “tools” compartment at one end for tweezers and scissors so they don’t disappear.
Store pens and pencils for makeup in a dedicated divider slot; they roll if you leave them loose.
Avoid dividers that are too thin — they flex and let bottles tip.
6. Pegboard with small bin cups for brushes

If your vanity countertop is cluttered with brushes, pegboard bin cups are a smarter swap than adding more trays. You move brushes off the surface and give them a dedicated spot. Bin cups also keep brush handles aligned so you don’t have to fish around. This is especially good for small bathrooms where counter space is the first thing to go. You get a tidy look without stacking products or digging in drawers.
Mount a pegboard inside a cabinet door or on the wall near the vanity, then choose small bin cups or cup-style holders that hook onto the board. Arrange brushes by frequency — daily brushes at hand height, backups lower. Use a small strip of painter’s tape to mark cup spacing before you drill or hook everything in. Finally, add a shallow tray on the counter edge only for items you use with your brushes, like a palette or cleaning spray.
Label bins by brush type with a small strip at the bottom so it doesn’t get smeared by wet hands.
Don’t hang wet brush cups — let brushes dry and keep any water control separate.
7. DIY wood tray with removable insert cells
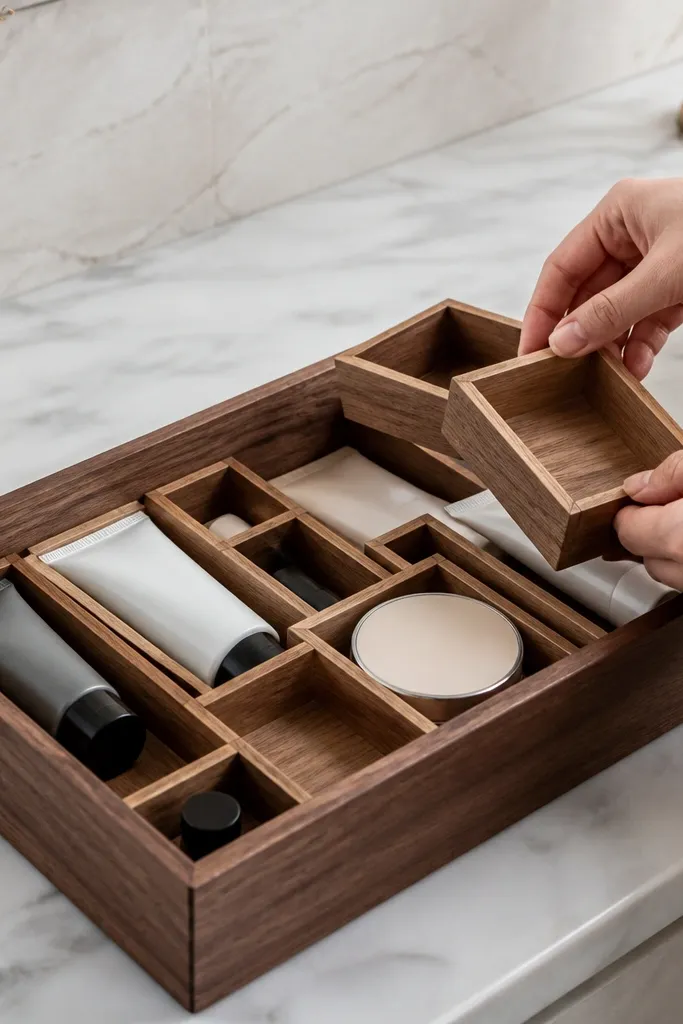
When the shapes of your products don’t match store-bought trays, build a wood tray with removable insert cells. Wood gives you a stable base and looks warm, but the real advantage is the insert system: you can remove cells when you swap products. This is ideal for small vanity organization where you have a mix of tube skincare, tiny bottles, and tools that don’t fit standard compartments. The tray also keeps items from sliding and creates a consistent “place to return everything.”
Cut a wood base to your measured tray footprint, then sand it smooth. Seal the wood with a wipe-on polyurethane or a matte sealant so bathroom moisture doesn’t ruin the finish. Build insert cells from thin wood strips or acrylic sheets sized to your products with about 1/8 inch clearance. Place the inserts after you dry-fit them, then line the tray with a thin non-slip mat.
Use removable inserts with a snug fit rather than glue — you’ll adjust them faster when you change brands or sizes.
Skip sealing if the tray sits near a sink — unfinished wood gets blotchy and sticky.
8. Metal wire tray for tall bottles in a corner
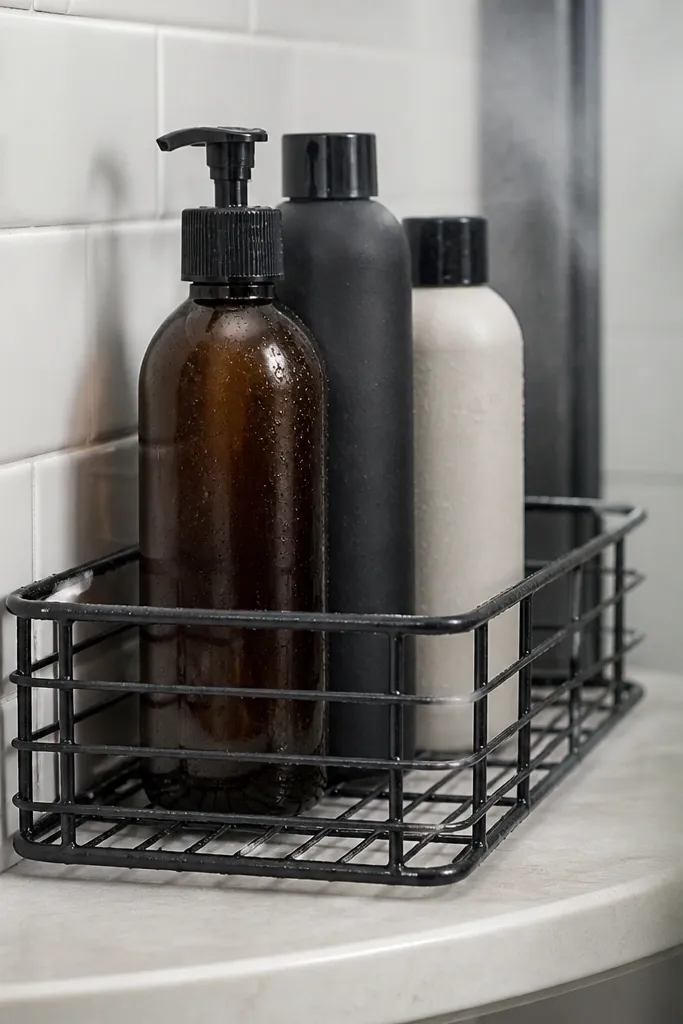
Tall bottles are the reason many trays fail. They tip, they block other items, and they make the tray look crowded fast. A metal wire tray designed for corners or vertical storage keeps bottles upright and visible. Wire also dries fast, which matters in bathrooms where steam is real. This is a great option when you want fewer items on the counter but still want quick access without digging. It’s also good for serums and toners that you grab multiple times a week.
Choose a wire tray that fits your vanity corner or cabinet side with at least 1/2 inch clearance. Place it so the front edge aligns with your reach zone — you should be able to grab a bottle without pulling the whole tray. Add small rubber feet or a mat beneath it to prevent scratching and slipping. Load bottles by size and keep similar heights together so you can scan quickly.
Editor's noteUse a rubber band around grouped pump bottles to keep them from drifting as you reach.
Skip thisDon’t overload a wire tray — if bottles touch each other, they tip when you pull one.
9. Fabric organizer bins with labeled windows
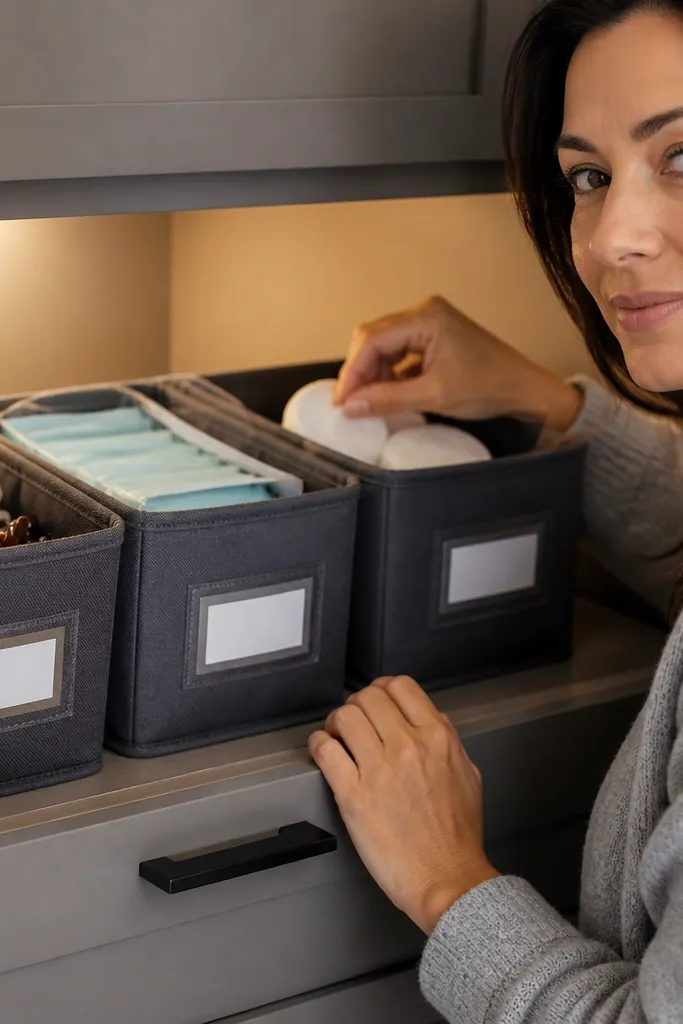
Fabric bins are a good choice when you want soft protection for delicate items like hair clips, face masks, and cotton rounds. They also look less bulky than plastic in small cabinets. The key is adding a label window or label strip so you don’t forget what’s inside. Without labels, fabric bins become mystery bags. This idea is for people who want the drawer or cabinet to look calm while still hiding backups and reducing visual clutter.
Buy fabric bins that fit your cabinet width and depth, then add label tape to the front with a clear label sleeve or stitched pocket. If the bin doesn’t have a window, create one by sewing a small clear vinyl panel onto the front opening. Sort items by category and keep each category to one bin so you can grab fast. Place the bins in a single row so you don’t have to lift the whole stack to find something.
Editor's noteStick to one label style across every bin so your brain reads the system instantly.
Skip thisAvoid stuffing fabric bins tight — compression makes the top layer hard to pull out.
10. Small tray for lip products with a 'cap catcher' lip

Lip products are tiny, and their caps roll away if you don’t stop them. A shallow tray with a raised lip or a custom cap catcher gives you a “no rolling” boundary. This is a tray-first solution that keeps daily lip products visible and prevents the annoying rattle mess. You also get clean edges because liners and gloss tubes stay aligned. This is ideal for small vanity organization when your lip drawer is a jumble but you want it to look tidy on the counter.
Use a shallow tray and add a raised edge by sticking a strip of acrylic or thin wood along the back and sides with strong adhesive. Line the tray with a non-slip mat so tubes don’t slide. Sort lip products by type and keep liners in one section, lipsticks in another, glosses in a third. Put the most-used shade at the front edge and keep backups behind it.
Run a strip of painter’s tape along the tray edge before gluing so your raised lip stays straight.
Don’t place a tall divider in this tray — it blocks visibility and makes you dig for the right shade.
11. Peg + mini bin for hair ties and scrunchies

Hair ties and scrunchies multiply fast. Trays collect them, but they still end up tangled unless you contain them. Mini bins on a pegboard stop the tangles because each bin holds one size or one color group. It also frees up drawer space for things that actually need compartments. This setup works best when you have a lot of small fabric items and you want them visible enough to grab without opening a drawer.
Mount a small pegboard strip near the vanity or inside a cabinet door. Attach mini bin cups or small plastic containers to the hooks. Sort hair accessories into groups like “everyday neutrals” and “colored elastics.” Place the bins so you can reach the front bin without bumping the others.
Use small binder clips to keep scrunchies from mixing with elastics when you refill.
Don’t mix sizes inside one mini bin — the smaller elastics disappear into the pile.
12. Under-sink small bin system for cleaning backups
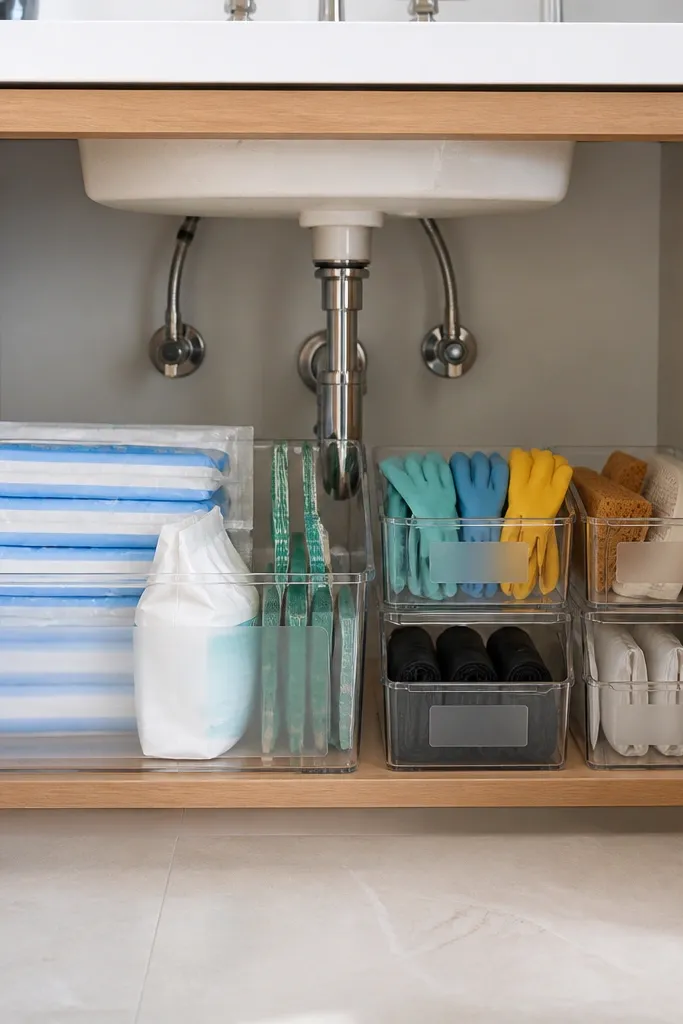
Under-sink vanity areas are where clutter hides because it’s out of sight. Small bins fix that by giving cleaning backups a home and stopping leaks from turning into a mess. Use bins for bulky bottles like refill packs and smaller bins for sponges, gloves, and extra trash bags. Trays alone won’t contain volume well, so this is a bins system. The benefit is you can pull the bin out, grab what you need, and slide it back without reorganizing every time.
Measure the cabinet shelf and choose bins that fit with a little clearance for door closure. Place one bin for frequently used items and one for backups. Add a waterproof liner inside the cabinet shelf if the area gets damp. Label each bin clearly and keep spill-prone items in a bin with a lip or cover.
Editor's notePut your most-used bin at the front edge of the shelf so you don’t dig under bottles.
Skip thisSkip stacking without a plan — stacked bins fall over when you pull the front one.
13. Latched tray for drawers you slam
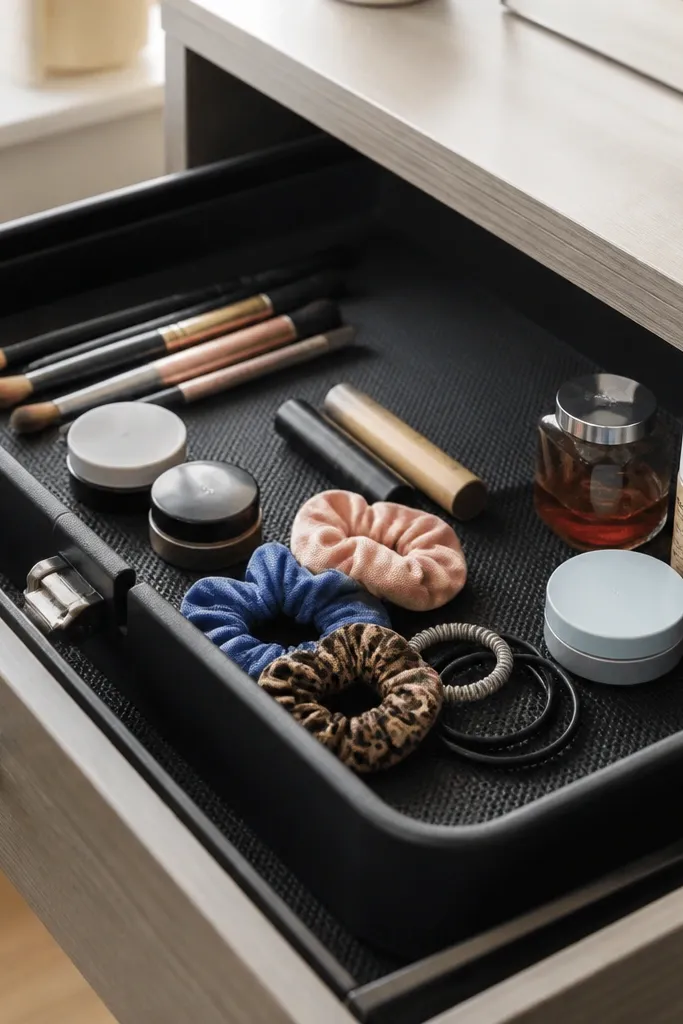
If your drawer movement is rough, regular trays shift and everything ends up in a corner. A tray with a lip plus non-slip liner solves that. This idea is for small vanity organization in drawers that get used hard — makeup tools, hair accessories, and everyday skincare sets. Instead of trying to make everything “perfectly placed,” you make it harder for items to migrate. It’s a practical upgrade that keeps your setup looking good longer than a standard tray.
Choose a tray that has low side lips or an integrated raised edge. Add a full-size non-slip liner under the tray, then test slide resistance with your hand. Load items by friction: heavier items go in the back and lighter items in the front. If the tray still shifts, add two small rubber dots on the bottom corners.
Keep a “return zone” — one section where items go back immediately so the rest stays undisturbed.
Don’t use a smooth silicone mat with a glossy tray bottom; it can get slippery when wet.
14. Modular organizer using shallow bins in a tray

This is the best hybrid for Small vanity organization bins vs trays because it gives you tray visibility plus bin containment. Put a shallow outer tray on the counter or in a drawer, then add smaller bins inside it for categories. The outer tray keeps the whole system from spreading, and the inner bins stop tiny items from mixing. This works when you want to see everything at once but still need separate spaces for different product types. It also makes restocking less annoying because you swap one inner bin instead of rebuilding the whole setup.
Pick an outer shallow tray that fits your space and has enough depth to hold small bins without wobbling. Choose inner bins with similar heights so the top edges align. Add a thin non-slip liner under both the outer tray and the inner bins. Fill each inner bin with one category, then place the system where you can grab it daily without opening multiple drawers.
Editor's noteUse the same bin color across categories so you can scan quickly even from a distance.
Skip thisAvoid inner bins that are too tall — they steal counter space and block the view of the front items.
15. Countertop rotating tray for skincare steps

A rotating tray is a tray idea that solves a specific frustration: you’re reaching across the vanity, bumping items, and knocking products out of place. A lazy susan style tray keeps items in a circle so each step is one reach away. This works best when you organize skincare by order — cleanser, serum, moisturizer, SPF. It’s less about storage capacity and more about motion control. If your routine is consistent, rotating storage makes the whole system feel effortless without adding more clutter.
Choose a small rotating tray that fits your counter area and has a stable base. Set items in order around the circle and keep backups in a separate bin so the rotating tray stays clean. Add a non-slip mat under the lazy susan so it doesn’t spin when you grab. Label the circle by step using small labels at each segment so you can reload without guessing.
Editor's notePlace pumps and droppers at the same height so you don’t have to reach over one product to get another.
Skip thisDon’t mix wet and dry items in the same rotating tray — water spots travel around as it spins.



