
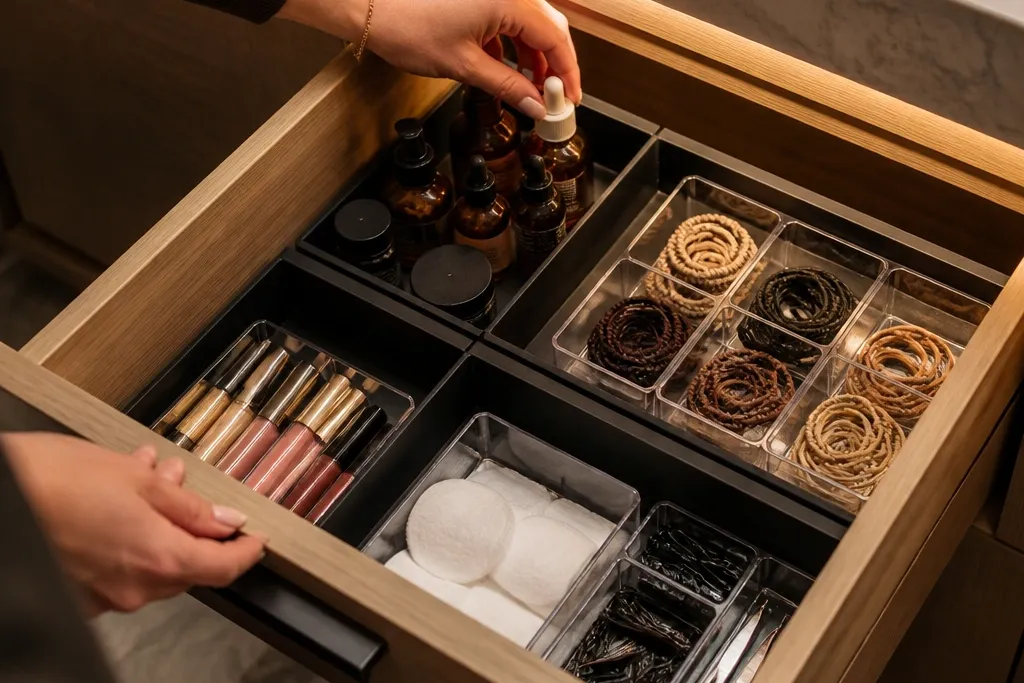
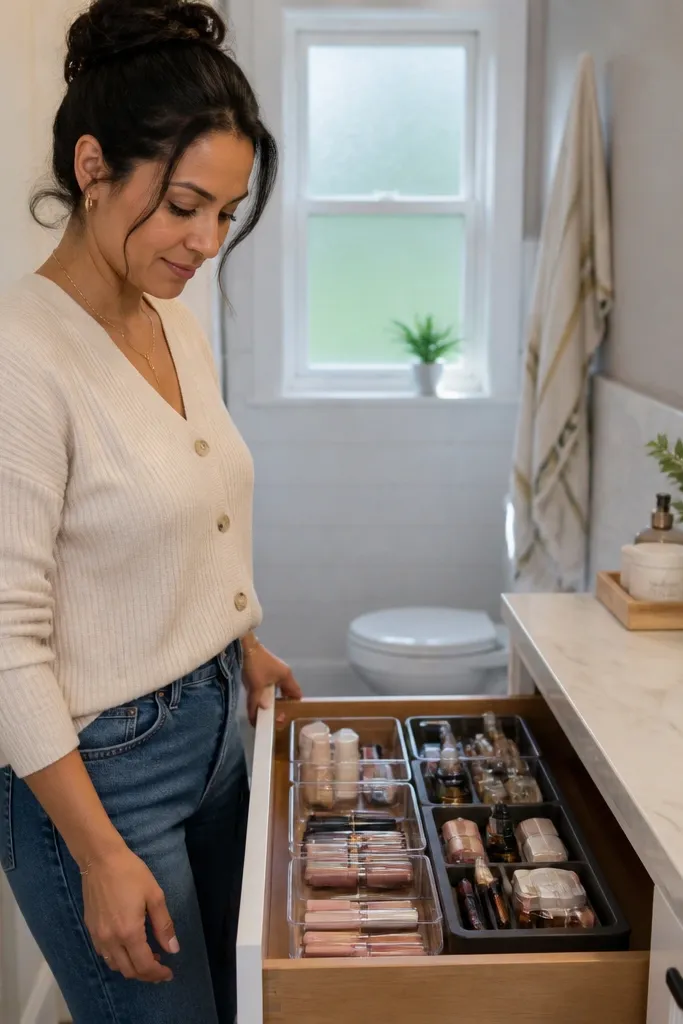
1. Matte Black Tray + Rubber Liner Zones
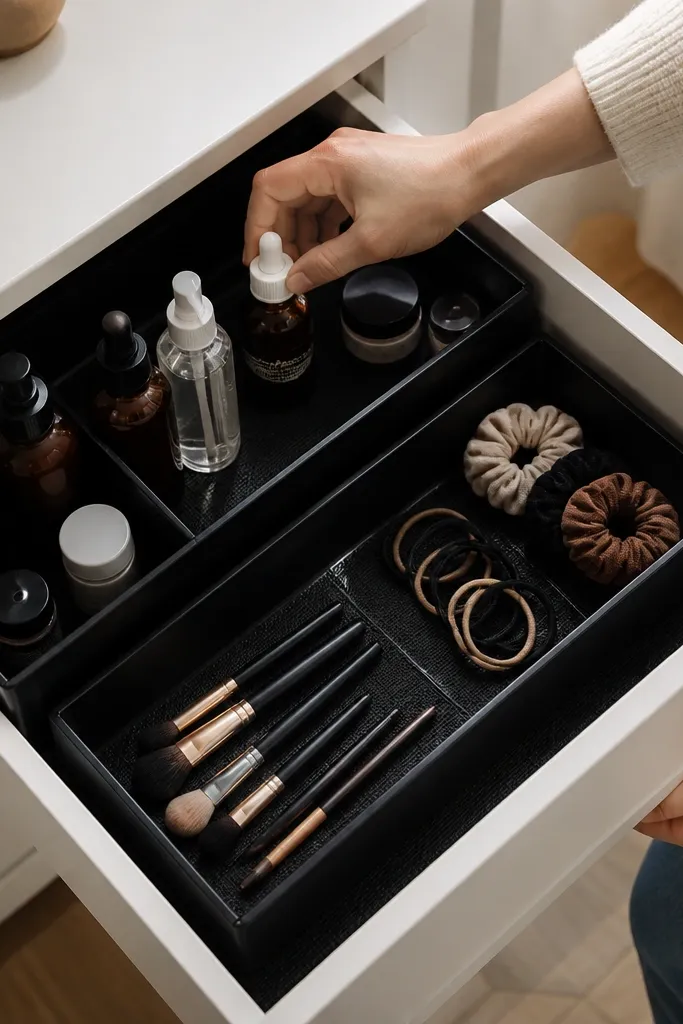
This setup makes the drawer look styled because it creates crisp boundaries around groups like skincare, hair ties, or makeup tools. The matte black tray hides minor scuffs and looks clean next to most vanity finishes, even if the drawer gets used hard. The rubber liner stops bottles from sliding when you pull the drawer, which is the main reason “pretty organizers” fail. It works best in shallow drawers where you need low-profile structure without raising everything too high. Skill level is beginner, because you’re assembling a tray and adding liner, not building furniture.
Start by cutting rubber shelf liner to the exact drawer base size, then press it down firmly with a flat hand. Place the matte tray where you want your main zone, and mark around it lightly with a pencil so you can reposition it accurately. Add a second liner strip under the tray if the drawer base is smooth so the tray doesn’t drift. Finally, group items by height: keep tall bottles toward the back of the tray and smaller tools toward the front so they stay visible. Wipe the tray and liner with a damp cloth before loading so the adhesive and liner grip better.
Use a craft knife with a fresh blade for clean liner edges so the corners don’t curl.
Don’t skip the rubber liner if your drawer base is glossy — trays will slide and ruin the layout.
2. Stacked Acrylic Mini Bins in a Color Grid
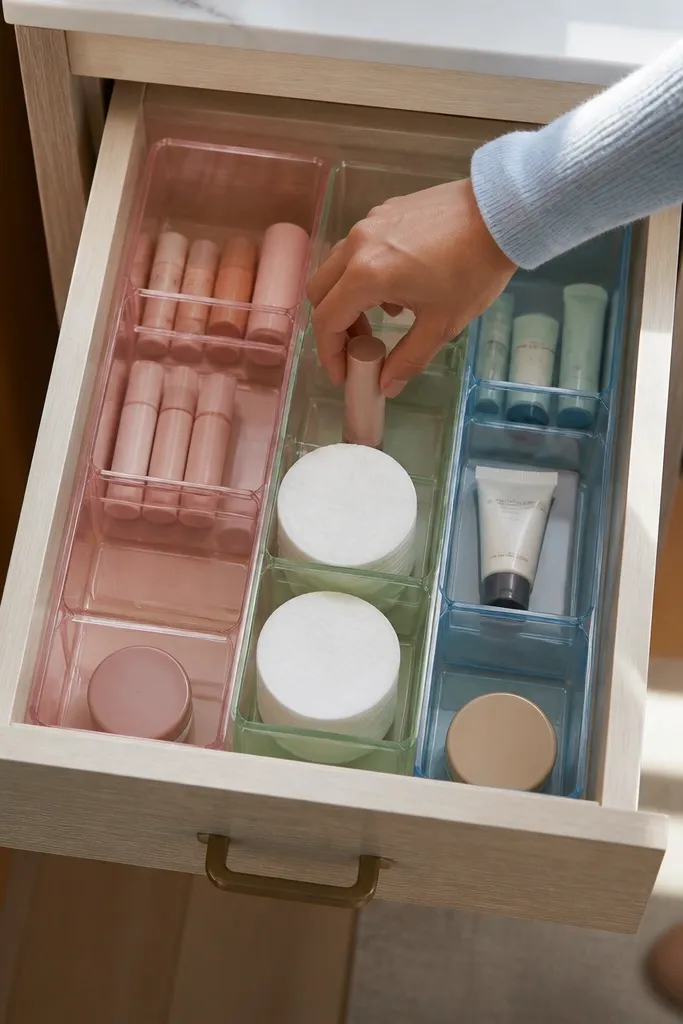
If your drawer looks chaotic because small items scatter, mini bins create a visible grid that makes the drawer read tidy instantly. Acrylic bins look sharp because the contents stay visible, so you don’t have to dig to find the right lip balm or cotton rounds. Use this when you want fast grabbing and you don’t want doors or covers cluttering the look. The color-grid trick is to keep one category per column — for example, hair tools in one column, makeup in another. This is a beginner-friendly install that takes about an hour and upgrades the drawer from “storage” to “organized display.”
Choose acrylic bins with straight sides and a low lip so they sit flush in the drawer. Measure the drawer interior width and divide by the bin width to plan how many bins fit without gaps. Place bins into the layout first, then mark their positions with painter’s tape. Pull them out, add thin double-sided tape strips or a non-slip liner under each location, and press the bins back down. Load items by category, using one bin for “daily grab” items and one for “backup” to keep the front row uncluttered.
Put heavier items in the bins closest to the center so the whole drawer stays balanced when you pull it.
Don’t mix categories inside the same bin — you’ll end up rummaging because visibility alone won’t fix the system.
3. Vertical File-Style Holder for Lip Gloss Tubes
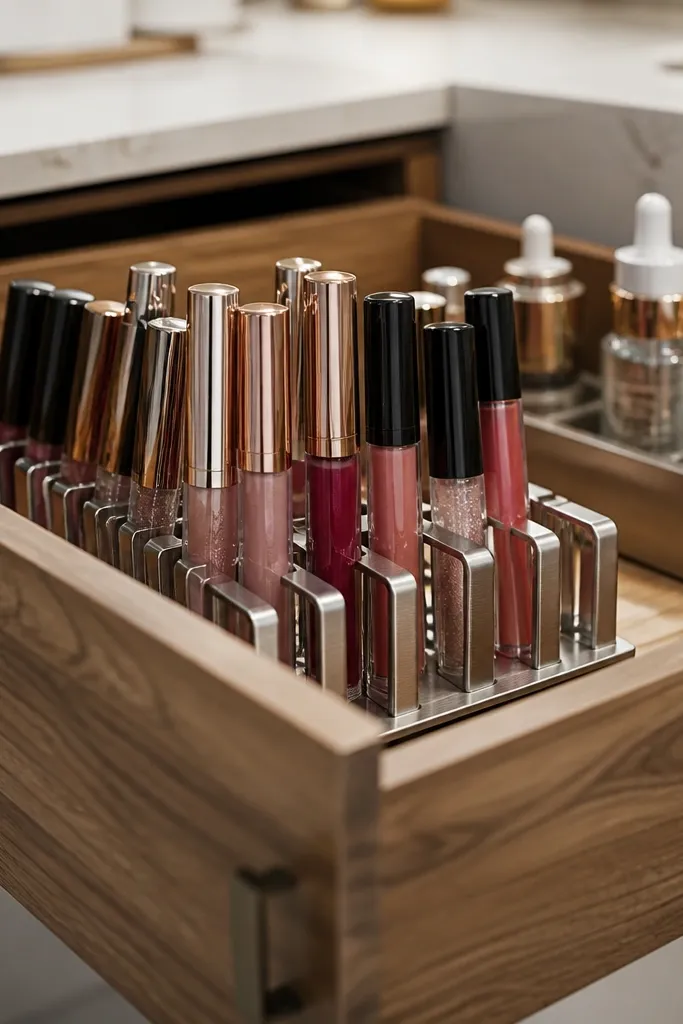
Rolling tubes make a drawer feel messy even when it’s “organized.” A vertical file-style holder stops rolling and makes every tube easy to see, which is why the drawer stays photogenic. This works especially well for lip gloss, deodorant sticks, and small serums where you can stand them upright. The look is clean because all the tube tops align, creating a neat row. It takes a little DIY cutting, but it’s straightforward and gives a custom fit to your drawer depth.
Editor's noteTest the first slot with one tube before cutting the whole row so you get the tightness right.
Cut a piece of thin plywood or foam board to the drawer’s usable width and depth, then sand or cover it with contact paper in a satin finish. Measure the diameter of the tube bases and mark slots with a pencil using a consistent spacing line. Cut slots slightly tighter than the tube thickness so they snap in with friction instead of falling out. Add a thin strip of rubber liner behind the slots so tubes can’t slide downward when you open the drawer. Place the holder toward the back of the drawer so the front space stays for brushes or cotton rounds.
Skip thisDon’t make slots too wide — loose tubes tip forward and ruin the aligned look.
4. Pegboard Drawer Insert with Small Clip Hooks
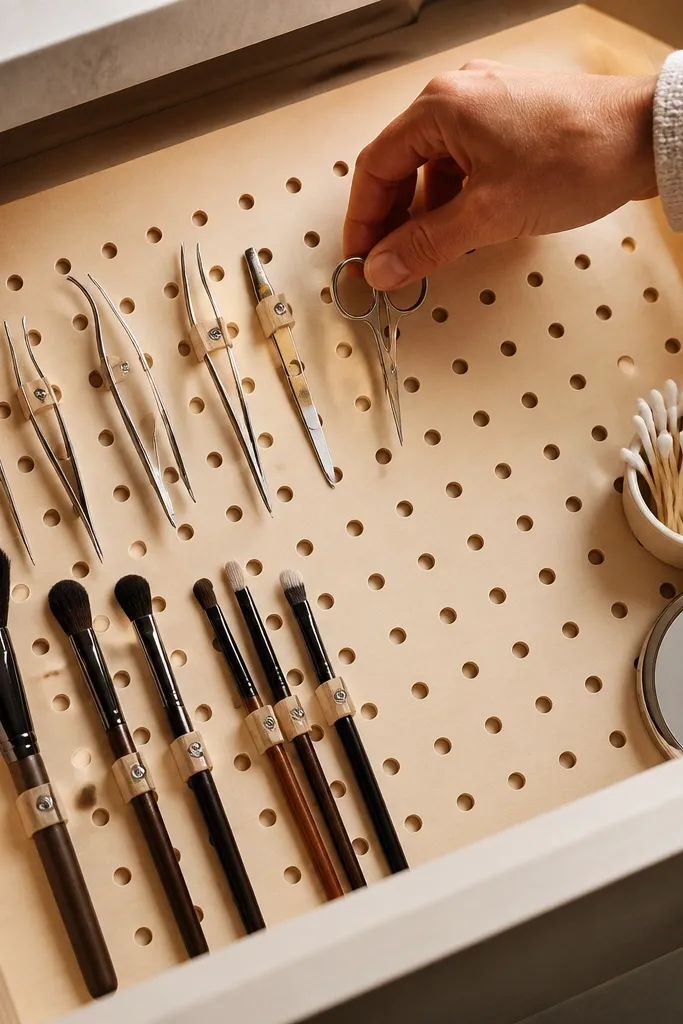
Pegboard inside a drawer looks architectural and it fixes the problem of small tools disappearing under bigger items. Clip hooks let you hang things like tweezers, mini scissors, and travel brushes so you don’t have to “stack and hope.” It also gives you layout flexibility when your routine changes, which is handy in a small space where you keep adjusting what fits. The aesthetic is clean if you use a light pegboard color and keep the clips consistent. This is a mid-level DIY because you’ll cut and mount the insert, but it’s still doable with common tools.
Editor's noteUse the smallest clip hooks that grip securely; bulky clips look messy and waste space.
Cut pegboard to fit the drawer bottom with a 1/4-inch gap on each side so it doesn’t scrape the rails. Sand the edges and paint or cover with a smooth finish contact paper so it doesn’t shed dust onto products. Drill or screw shallow mounting blocks to the drawer base so the pegboard stays put when you pull the drawer. Install clip hooks first, then hang items by weight — heavier tools lower and lighter tools higher. Add a thin rubber liner on the drawer bottom under the pegboard feet so it doesn’t shift.
Skip thisAvoid hanging liquids or anything that leaks — pegboard can pick up grime fast.
5. Felt + Non-Slip Backing for Makeup Brush Rows
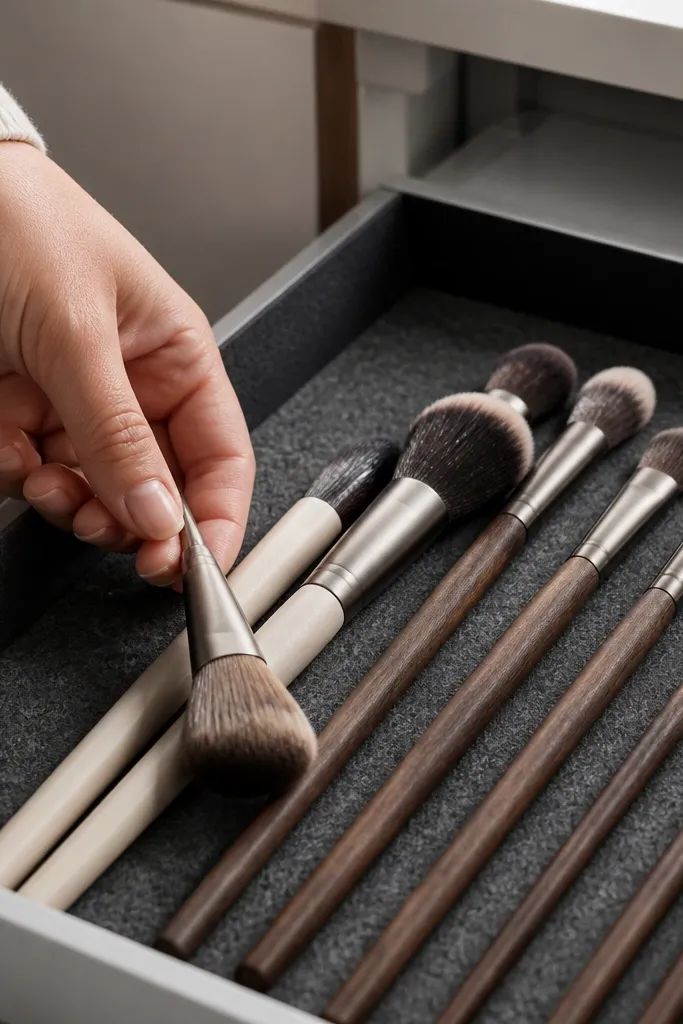
Felt is the drawer organizer’s best friend for makeup because it holds shape and reduces clatter. When you add non-slip backing, brushes stop sliding and the layout stays neat even after weeks of daily use. The look is soft and clean, especially if you pick a neutral felt color like gray, cream, or charcoal. This is the right move if your drawer has loose brushes, combs, or tools that bounce around. It’s beginner-friendly and takes about 30-45 minutes, because you’re cutting and sticking rather than building.
Cut felt strips to line the drawer base and the sides where brushes rest. Use a non-slip backing sheet under the felt so the liner doesn’t shift. Add a second layer of felt to form shallow “channels” by folding and gluing along a measured line, then trim to a tidy edge. Space channels so brush handles fit without forcing — leave about 1/8 inch of wiggle room. Place the brushes in rows and keep loose small tools like sponges in a separate tray so they don’t compress the felt over time.
Spray the felt with a light fabric-safe cleaner and let it dry fully before installing if it’s not new.
Don’t glue felt directly to glossy drawer bottoms without a backing — it peels and you lose the non-slip effect.
6. Shallow Cup Trays for Cotton Rounds and Q-Tips
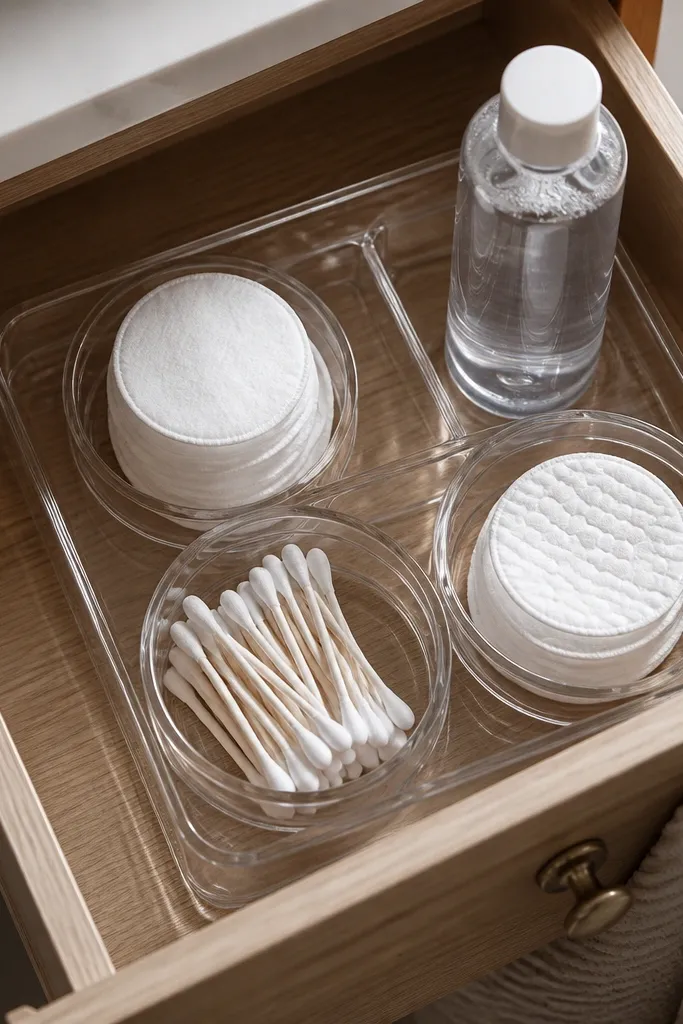
Cotton rounds and Q-tips get messy because they spread out and get mixed with other items. A shallow cup tray creates neat circles and keeps everything contained, so the drawer looks intentional. It also prevents the “half-used” stuff from mixing with backups, which makes restocking easier. Choose trays with slightly raised walls so nothing slides when you open the drawer. This works great for small drawers where you need low height and high visual order. It’s an easy upgrade that makes a drawer look photo-ready with almost no DIY.
Measure the drawer base and pick a tray that fits with 1/2-inch clearance around the edges. Place the tray on a grippy liner cut to match the drawer base. Add one cup for cotton rounds and a separate cup for Q-tips so you can see what’s running low. If you use cotton pads daily, keep that cup near the front; keep backups toward the back. Wipe the tray and liner dry before loading so friction stays strong.
If your drawer is deep, use two trays stacked by height — one for daily, one for backups.
Don’t use a tray with straight low sides; items slide out the moment you pull the drawer.
7. DIY Clear Label Tabs with Permanent Fine-Line Marker
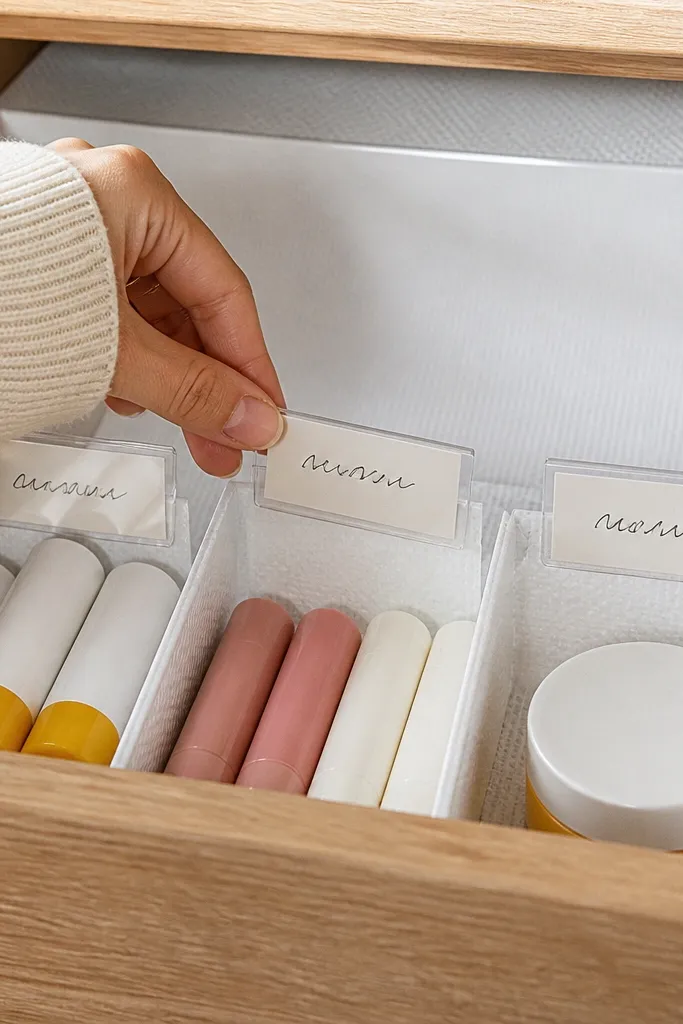
Labels make small-space organization stick because you stop guessing where things go. The visual payoff is real: neat label tabs look tidy and make the drawer read like a system, not a pile. Use clear tabs so the drawer still looks light and photogenic, not like a wall of paper labels. This works best when you already have dividers or bins and just need a repeatable layout. The DIY is quick and cheap, and the result lasts longer than removable stickers alone.
Editor's noteUse short labels like “Serums” and “Tools” instead of full sentences so they stay readable at a glance.
Cut clear adhesive label tape into small rectangles, about 1 inch wide, and round the corners with scissors. Write category names in a fine-line permanent marker, keeping letters the same height across tabs. Apply labels to the front edge of dividers or bin fronts so they’re visible when the drawer is open. Press firmly with a plastic card to avoid bubbles. Re-label once after a week of real use, then stop changing it so the system stays stable.
Skip thisDon’t place labels on curved surfaces; the edges lift and the drawer looks messy fast.
8. Wood Slat Divider Insert for Bottles That Don't Stand
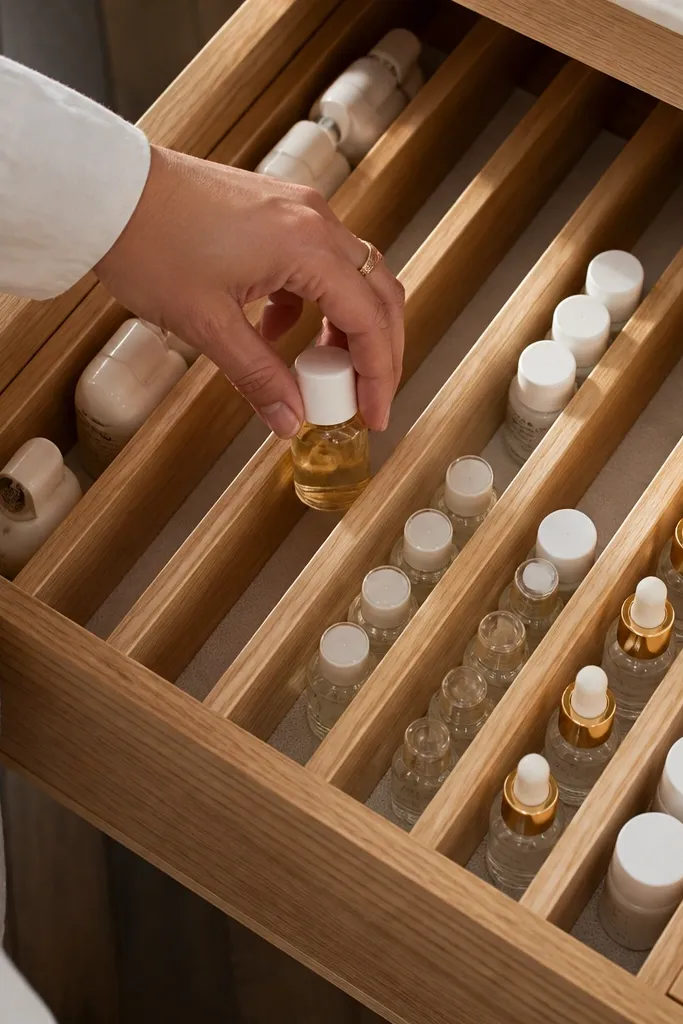
If your drawer has bottles that tip because they’re too smooth or too tall, slat dividers solve it while looking clean. Wood slats add a warm, organized feel and they visually separate categories without the bulk of plastic walls. This method is great for small serums, sunscreen, and mini skincare bottles where you want each bottle to sit upright. It also prevents the “domino effect” where one bottle falls and knocks others out of place. This is a beginner to intermediate DIY because you’ll cut slats and attach them securely.
Editor's noteSeal the wood with a water-resistant matte finish so a single spill doesn’t leave a permanent stain.
Cut slats from thin wood strips, like 1/4-inch thick, to the drawer’s usable depth minus a small clearance for the back. Sand the edges smooth and stain or seal with a matte clear coat so they resist spills. Arrange slats in a grid with gaps sized to your bottle diameters, usually leaving 1/8-inch clearance per bottle. Fix slats to a base board or directly to a thin backing panel so they don’t wobble. Place the insert on a grippy liner, then load bottles from back to front so you can check alignment before the drawer is fully packed.
Skip thisDon’t attach slats too close together; bottles need room for lids and you’ll fight the fit every morning.
9. Adjustable Expandable Dividers with Hidden Anchors
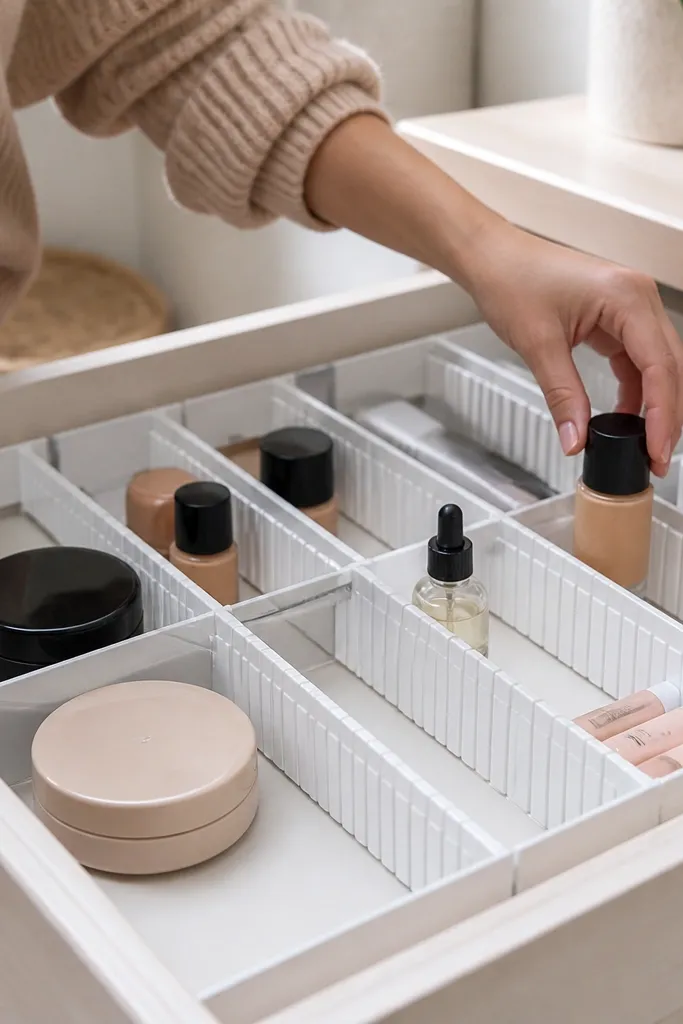
Expandable dividers are useful, but many slide or bow when the drawer gets heavy. The trick here is to anchor them discreetly so they stay straight and the drawer keeps its polished look. This setup is ideal for drawers that hold changing items — makeup one week, skincare the next. You get the benefit of adjustable spacing without the annoying drift. The visual result is clean because dividers stay aligned and create clear lanes. Skill level is beginner because you’re using hardware and tape, not carpentry.
Install the expandable dividers first, then press the base legs firmly into a rubber liner to add friction. Mark the divider base positions and remove them. Add two small strips of double-sided tape or adhesive velcro at each marked spot, then reinstall the dividers. Test by pushing sideways and pulling the drawer halfway to ensure nothing shifts. Adjust the lanes so tall items are in the back lane and small items are in the front lane.
Use a thin rubber liner under the dividers, not thick foam, so lanes stay level.
Skip anchoring if your drawer base is smooth — expandable dividers will slowly drift and look crooked.
10. Angled Tray Insert for Hair Tools and Flat Items
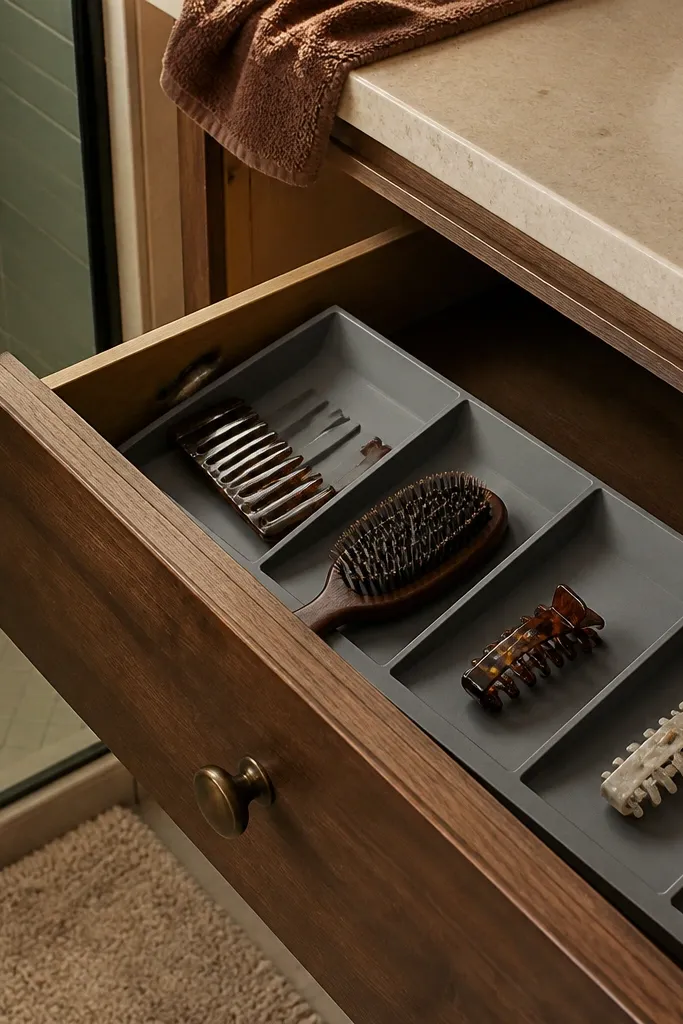
Flat tools like combs, hair clips, and mini brushes get messy because they slide into each other. An angled tray keeps them from migrating and makes the drawer look intentional because everything sits at the same tilt. The aesthetic is sleek when you choose a tray with a smooth finish and keep one category per tray. It’s especially good for drawers that are deep enough to allow a slight slope. This is intermediate DIY if you build the angle, but you can also buy an angled organizer tray and just anchor it with liner.
Editor's noteKeep the angle subtle; too steep and items can slide out when you pull the drawer.
If building, cut a base board to drawer width and add a wedge strip under one side to create a gentle angle, about 10-15 degrees. Cover the board with contact paper or paint and seal the top surface so it wipes clean. Place rubber liner on the drawer bottom, then set the angled insert so the higher side faces the front. Add a second, smaller tray on the lower side for tiny items like hair ties so they don’t get buried. Load tools standing upright or fanned so you can see each piece.
Skip thisDon’t use a tray with slick plastic if your tools have smooth handles — they will slide down the slope.
11. Magnetic Strip Inside Drawer for Tweezers and Metal Tools
Metal tools look tidy when they hang on a magnetic strip because they don’t scatter. It’s also easy to spot what’s missing, which helps a small-space drawer stay organized instead of turning into a mystery pile. Use this when you store tweezers, eyebrow razors, and small metal nail tools. The look is clean if the strip is matte and the tools line up with consistent spacing. This is beginner-friendly: mount a strip, add a liner backdrop, and you’re done.
Buy a magnetic strip with mounting holes or strong adhesive backing. Clean the drawer bottom thoroughly and dry it completely so adhesive bonds. Position the strip so it doesn’t interfere with drawer slides, then mark the location. If using adhesive, apply it, press firmly for a full minute, and let it cure as directed before loading. Add a thin felt or rubber liner around the strip so tools don’t scratch the drawer and so the surface looks soft and intentional.
Use small spacers or tape marks to keep tool spacing consistent across the strip.
Don’t mount the strip too close to the front edge; tools can catch on the drawer lip.
12. Pegboard Squares for Hair Ties and Small Elastics
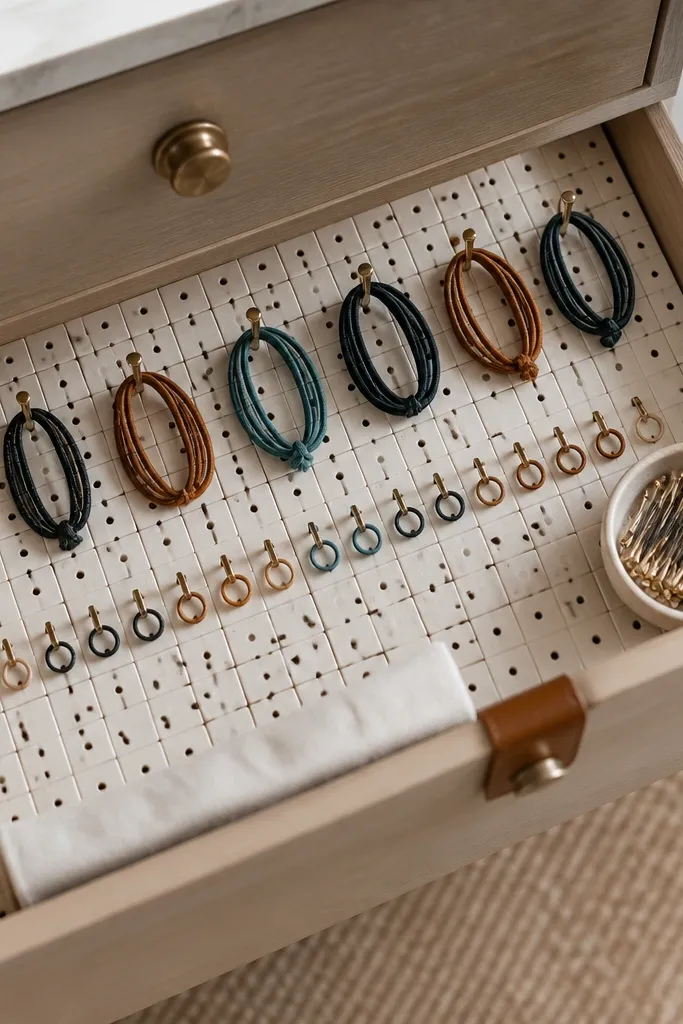
Hair ties are the fastest way to make a drawer look messy because they tangle and disappear. A small pegboard panel with hooks turns elastics into a neat row that’s easy to grab and easy to see. It also prevents the “one drawer of knots” problem that happens when ties are tossed in a cup. This looks great because the hooks create a repeating pattern, and the drawer stays visually light. It’s beginner-level DIY if you’re comfortable with measuring and mounting a small insert.
Editor's noteGroup by color with a simple rule: warm tones together, cool tones together. It looks better when the drawer is open.
Cut a small pegboard square to fit the drawer base, leaving clearance from the drawer walls. Cover the pegboard with contact paper in a matte finish so it looks clean and wipes easily. Mount it using small furniture pads or screws into the drawer bottom frame, then install hooks sized for elastic bands. Hang ties by color or type — thicker bands in one row, thin elastics in another. Keep the pegboard area for elastics only so other items don’t crowd it.
Skip thisAvoid oversized hooks; they stretch elastics and make the drawer look uneven.
13. Clear Organizer Drawer with Fabric Sleeve Dividers
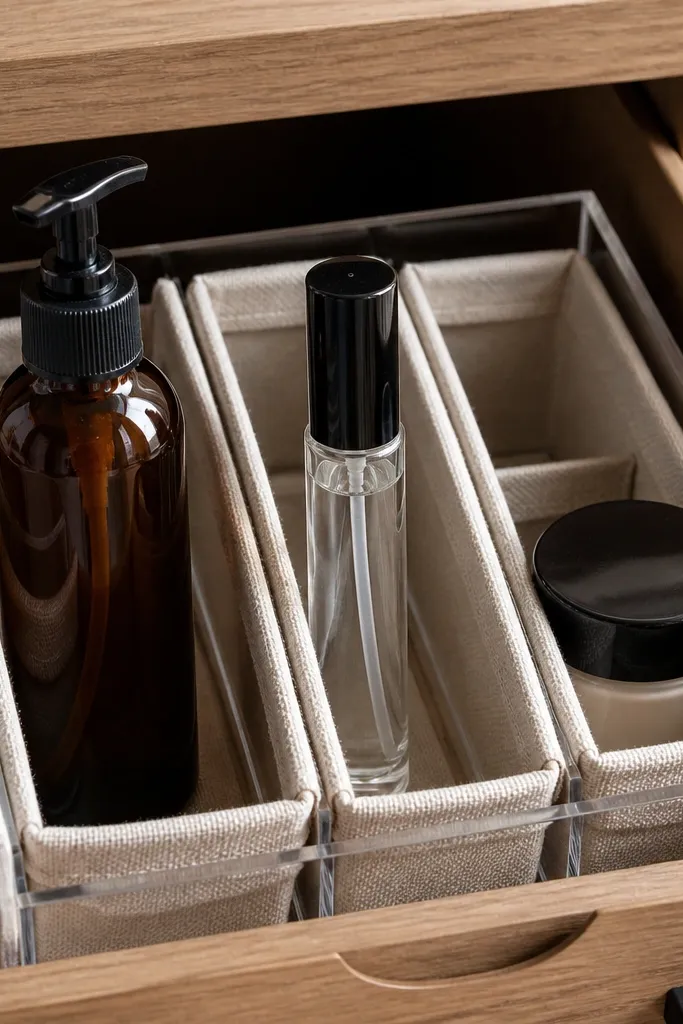
This is the “clean photo” approach: a clear organizer drawer keeps the layout visible, while fabric sleeves soften the look and protect bottles from scuffs. Fabric also gives grip so bottles don’t rattle and slide. Pick fabric in a neutral like oatmeal or charcoal and keep the sleeve height consistent. This is best for drawers where you want a curated look without complicated woodworking. It’s intermediate because you’re sewing or assembling sleeves, but you can avoid sewing by using iron-on hem tape.
Editor's noteUse thicker fabric like cotton canvas or faux suede so it holds shape against smooth bottles.
Measure the internal height of your clear organizer compartments and cut fabric sleeves to match, leaving 1/2-inch extra for seams or hem tape. Use iron-on hem tape to secure edges so the sleeves don’t fray, then press firmly. Insert sleeves onto the organizer’s divider walls or line the compartment edges with them to create cushioned lanes. Add a rubber liner at the base for extra stability. Place bottles upright and keep caps facing front so you can spot each product quickly.
Skip thisDon’t use thin, stretchy fabric — it collapses and the drawer looks sloppy.
14. Silicone Cup Inserts for Nail Polish, Vials, and Minis
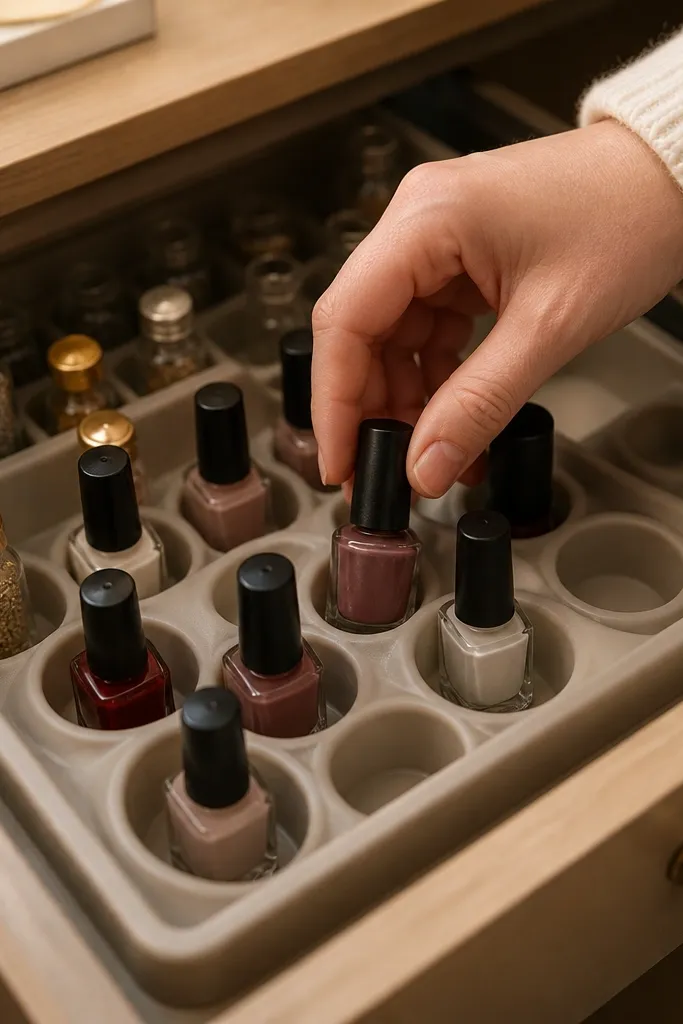
Silicone cups are one of the most underrated drawer organizers because they grip glass and prevent clinks. They look clean when the cups are uniform and the drawer base is lined in a matching neutral. Use this for nail polish minis, travel vials, and small serums that roll easily. The cups also help with spill control — if something leaks, the mess stays in one area. This is beginner-friendly: you cut or place the insert and then load items by size. It’s also easy to swap when your collection changes.
Choose silicone cup inserts sized to your drawer base or cuttable sections if the insert allows. Lay a rubber liner under the silicone so it doesn’t slide. Place cups first and test bottle fit without forcing — leave a small gap so lids aren’t crushed. Arrange bottles by height: tallest in the back row and smaller in the front row. When you’re happy, wipe the tops of bottles dry and load carefully so caps face the same direction.
Group by size, not by product type, if your drawer is too small for separate categories — it looks better and is faster to grab.
Skip silicone if you store very tall bottles that reach the drawer wall; they’ll tip out of the cups.
15. Drawer Shelf Divider with Brass-Color Edge Tape
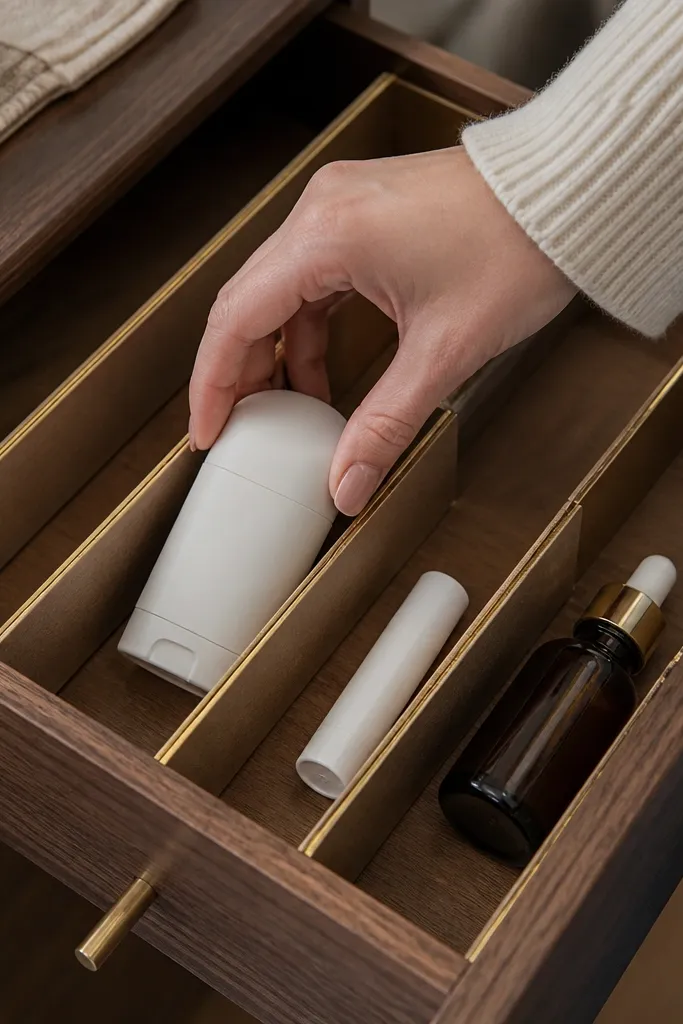
Edge tape turns plain cardboard or wood dividers into something that looks designed. The brass-color line gives a subtle contrast that looks good with almost any vanity finish, and it makes the lanes easier to see. This is a great option if you want custom compartments without buying a whole set of organizers. It also helps keep dividers from getting scuffed because the taped edges take the hit. Skill level is beginner because you’re building simple divider walls and sticking tape.
Cut divider pieces from thin plywood or sturdy foam board to match your lane height, usually 2-3 inches for small-space drawers. Sand edges and cover surfaces with contact paper in matte white or black, then apply brass-color edge tape to the front edges only. Install dividers using small pieces of double-sided tape and a rubber liner under the base. Set spacing so bottles aren’t wedged; leave about 1/8 inch clearance. Load items with the front labels or caps aligned so the drawer reads tidy from across the room.
Use a metal ruler and a sharp utility knife to keep divider edges straight so the brass line looks crisp.
Don’t tape every edge — too much shine makes the drawer look cluttered in photos.
16. Two-Tier Front Tray for Everyday vs Backup
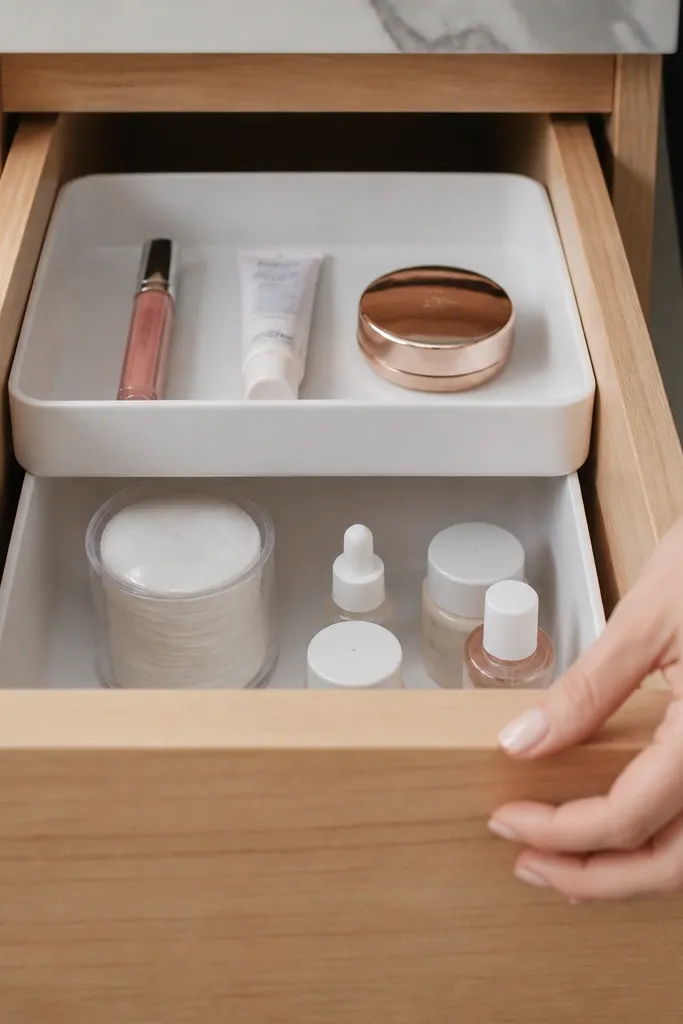
Two-tier organization fixes the most common small-space problem: drawers mix daily grab items with backups, so you lose time finding what you use. A top tray for daily items and a lower tray for backups keeps the drawer looking clean and makes the front edge look intentional. Choose trays with a consistent finish so the drawer looks cohesive, not like mismatched bins. This is ideal for drawers that are wide enough for one main zone but shallow enough that you can’t fit complicated dividers. It’s beginner-friendly and looks great because the top tier creates a staged, photo-ready row.
Pick a two-tier organizer or build one from a shallow tray plus a second tray on blocks. Anchor the organizer on a rubber liner so it doesn’t slide. Keep daily items on the upper tier: lip products, a compact brush, or your go-to toner. Put backups in the lower tier: extra cotton rounds, backup mascara, travel refills. Leave a clear lane near the back for tall bottles so the drawer doesn’t become front-only clutter.
Keep the top tier to 5-8 items max so it stays visually calm.
Don’t put bulky backups on the top tier; it makes the front look crowded and hard to reach.
17. Spill-Guard Drawer Liner with Raised Edge Ridges
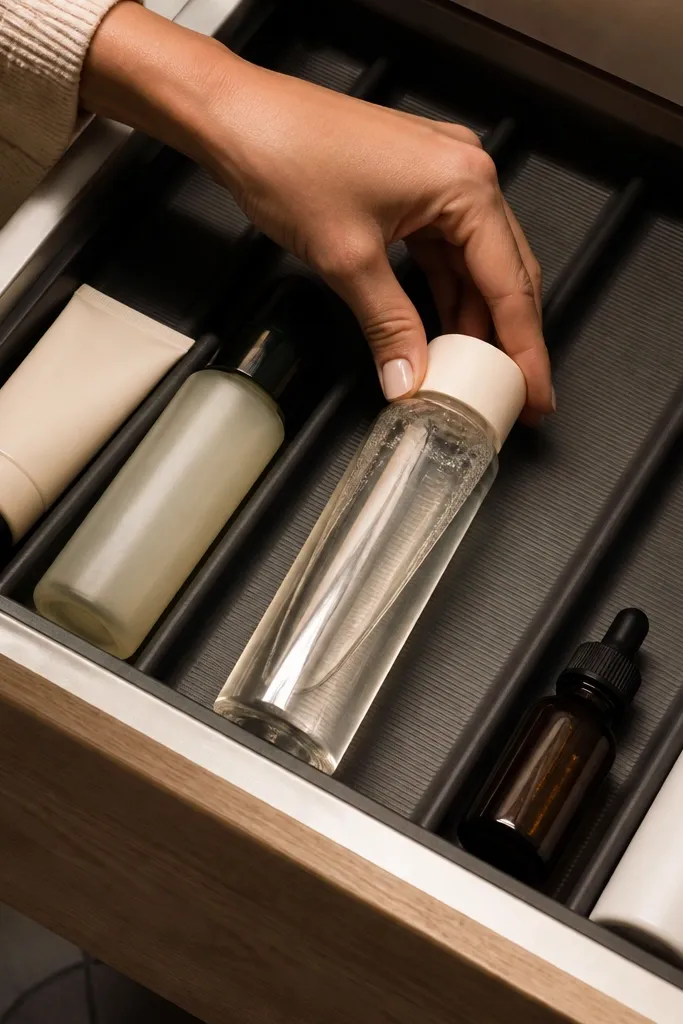
When products leak, small drawers look messy fast — even if everything was organized. A spill-guard liner with raised ridges keeps liquids contained and makes the drawer look clean even after an accident. The ridges also create subtle zones, so you can place items in lanes without adding extra dividers. Choose a liner in a matte neutral so it doesn’t look shiny or cheap. This is beginner-friendly and gives both function and photogenic structure. It’s a smart move for skincare drawers where oils and serums are part of the routine.
Editor's noteUse a damp microfiber cloth to wipe spills right away; spill-guard helps, but it isn’t a substitute for cleaning.
Remove everything and clean the drawer base with soap and water, then dry completely. Cut the spill-guard liner to fit with a small clearance around edges. Press it down and run your hand along the ridges so it bonds and stays flat. Place bins or trays on top to create lane categories, but let the liner ridges do most of the zoning work. After loading, wipe bottle bottoms so the liner stays clean and you don’t get sticky buildup.
Skip thisAvoid glossy liners — they show smudges and fingerprints immediately.
18. DIY Clear Acrylic Lid Organizer for Reusable Cotton Pads
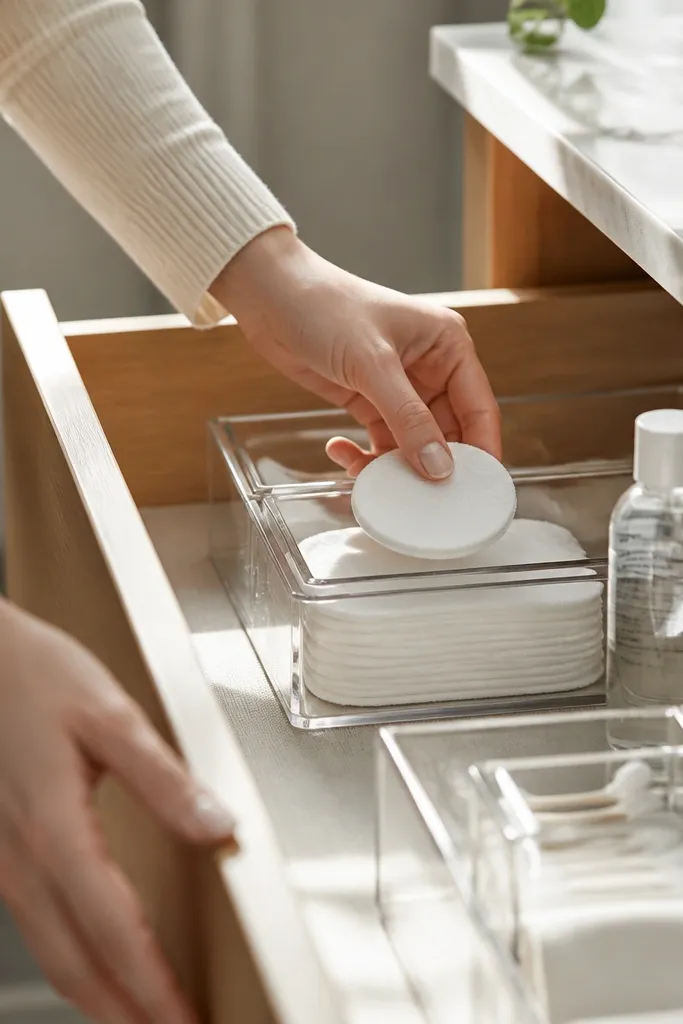
Cotton pads and reusable rounds look messy when they’re stacked loose because edges curl and everything shifts. A clear acrylic lid-style compartment keeps the stack flat and visible, which makes the drawer look tidy and intentional. It also makes it easy to grab one pad without disturbing the rest. This works well for small-space vanity drawer organization because it uses vertical space while keeping the top layer accessible. Skill level is intermediate if you build a custom insert, but if you buy a ready-made clear compartment, it becomes beginner-friendly. The look is clean because the clear cover frames the stack.
Editor's noteFold a small square of parchment paper under the stack if pads stick together — it keeps edges crisp.
Measure the drawer depth and select a clear compartment with a lid height that clears your tallest bottle. Place a thin rubber liner under it so the compartment doesn’t slide. Load cotton pads by stacking flat and aligning edges so the stack looks even from the drawer opening. If building, make a shallow base tray and add a clear cover panel that sits on small rails so it doesn’t scrape. Keep the compartment toward the front so daily use doesn’t force you to reach deep into the drawer.
Skip thisDon’t overfill; a tight stack is neat, but too many pads cause curling and uneven edges.
19. Monogrammed Fabric Roll for Hair Ties and Bands
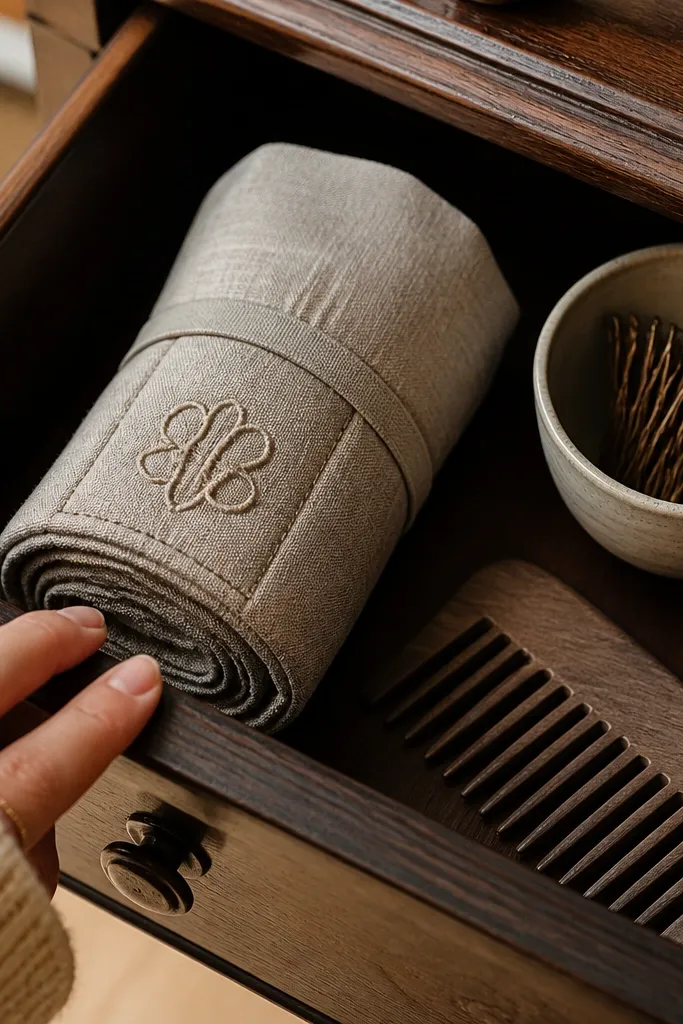
A fabric roll turns messy elastics into a controlled bundle that looks good even with the drawer open. The fabric hides tangles and keeps the drawer from looking like a random pile of bands. It also makes it easy to swap routines because you can roll and unroll quickly. Pick a neutral fabric and add a stitched or iron-on monogram label so it looks intentional, not like generic storage. This is beginner-friendly sewing-free if you use iron-on letters or skip the monogram and just choose a clean fabric. It’s best for drawers where you don’t want rigid dividers and you want a softer aesthetic.
Choose sturdy fabric like cotton canvas and cut a rectangle sized to your drawer width, usually about 10-14 inches wide. Roll it into a tight cylinder and mark where the roll should close, then secure with a fabric tie or Velcro strip. Add a simple internal divider by stitching or gluing a fabric strip so bands don’t slide into one blob. Line the drawer base with a grippy liner, then place the roll toward the side so it doesn’t compete with tall bottles. Load hair ties by type and roll tighter for thinner bands so everything stays neat.
Use Velcro dots instead of a single wide flap so you can open the roll quickly without wrinkling.
Don’t use slippery satin fabric — hair ties shift and the roll looks messy.
20. Matte White Contact Paper Drawer Backdrop for Contrast
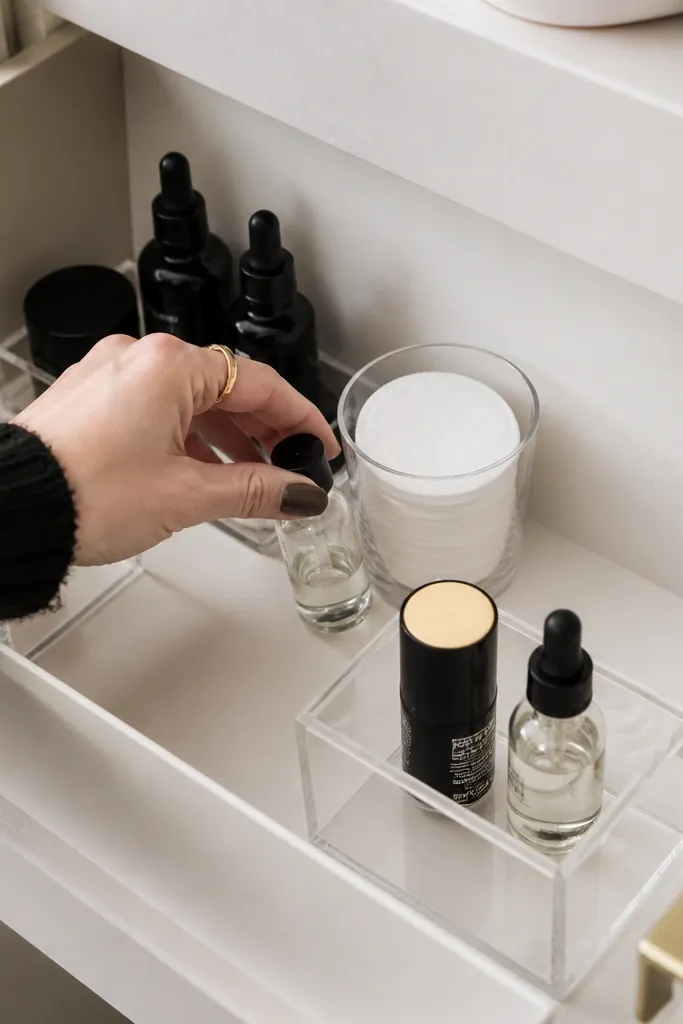
A drawer backdrop is the easiest way to make small-space vanity drawer organization look expensive. Matte white contact paper gives contrast, so black bottles, clear acrylic, and brass accents pop visually. It also hides scratches and makes the drawer feel clean even if the base gets worn. This works with almost any organizer setup because it improves the background, not just the containers. It’s beginner-friendly and fast, but do it correctly so edges don’t peel. Great for drawers that already have bins or dividers but look dull or scuffed.
Editor's noteWarm the contact paper slightly with a hair dryer for better adhesion and smoother corners.
Clean the drawer thoroughly with degreasing cleaner if you’ve stored lotions or oils. Measure the drawer base and cut matte contact paper with a little extra, then trim with a sharp knife for clean corners. Apply slowly from one side to avoid bubbles, smoothing with a plastic card as you go. Wrap the paper up the sides if the drawer sides are visible when open, but keep it flat so it doesn’t lift. Install your organizers on top after the contact paper is fully smoothed and dry.
Skip thisDon’t apply over dust or residue — the paper lifts and the drawer looks worse than before.



