
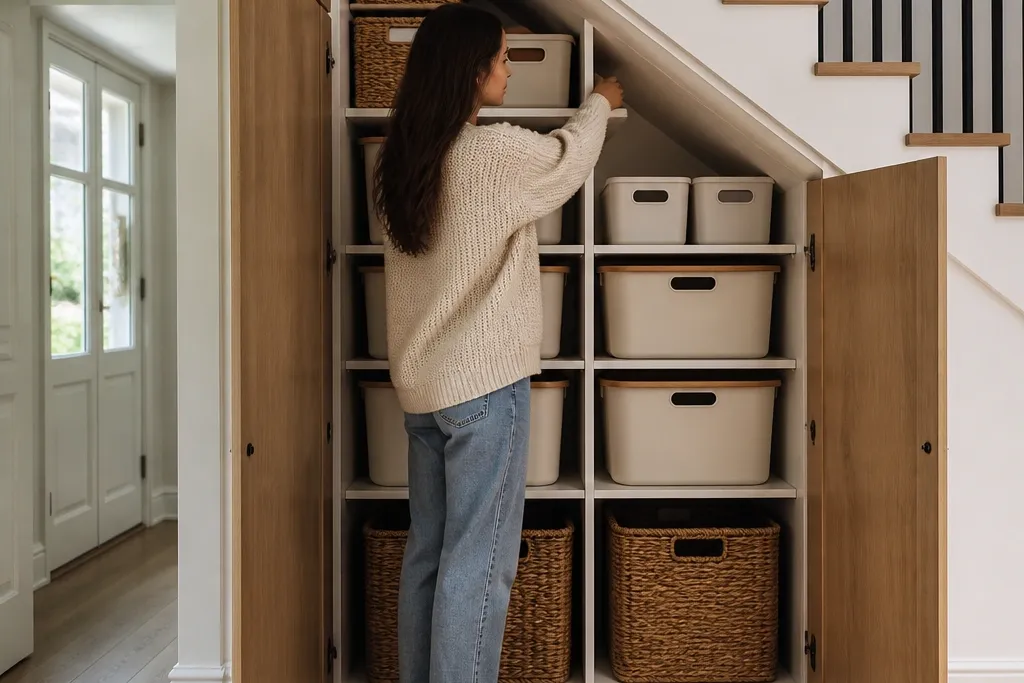
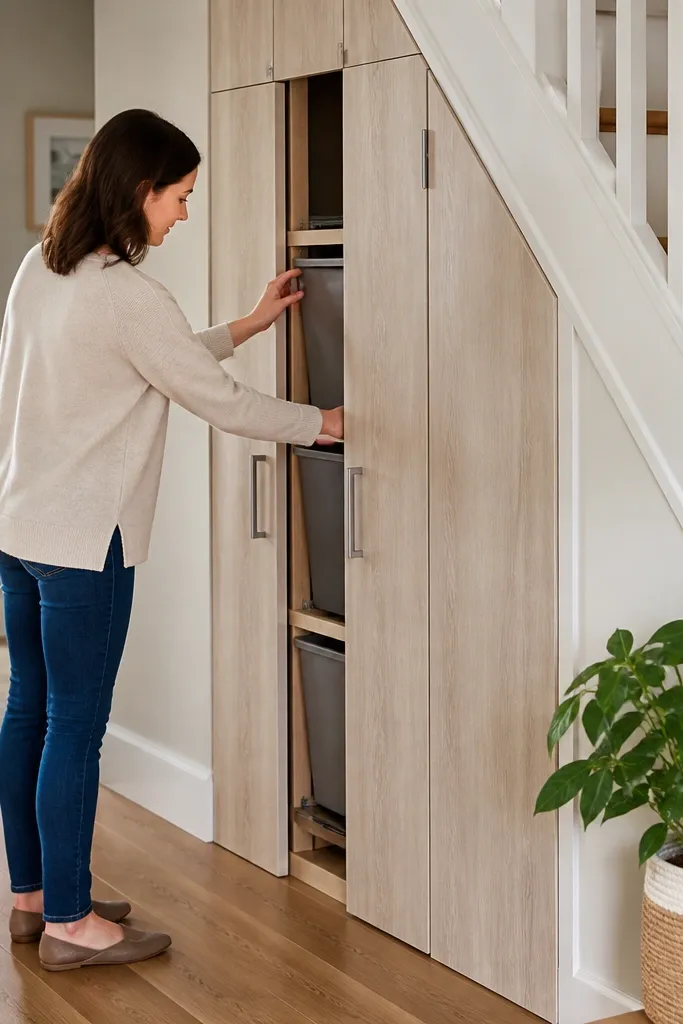
1. Shaker-front cupboard with a tall pull-out supply bin
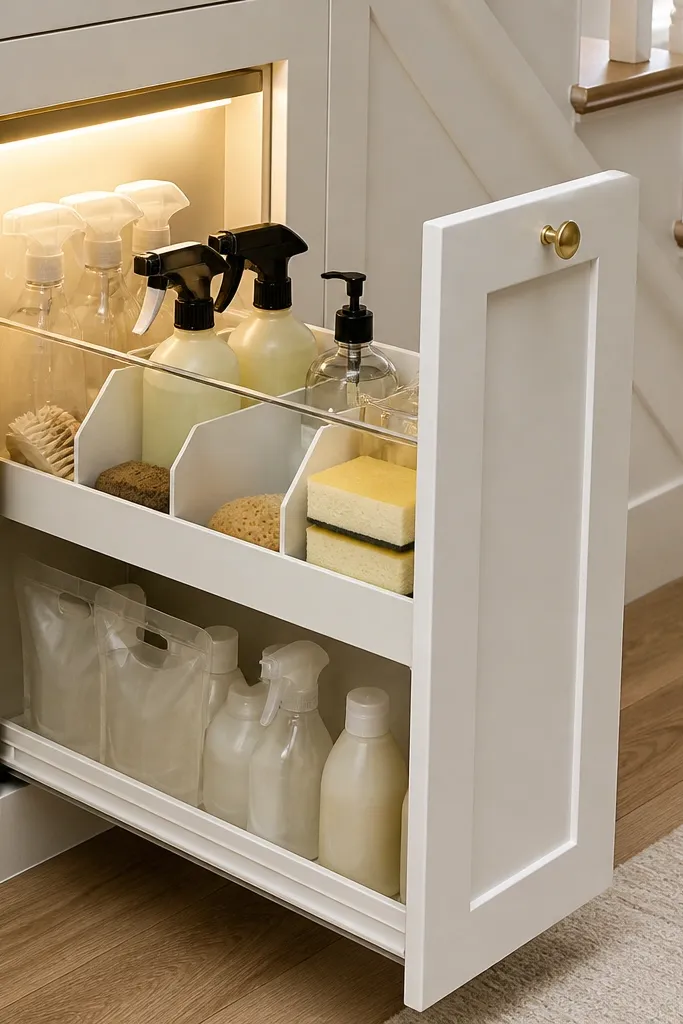
A Shaker-style front makes under-stairs storage look like it belongs in the house, not like an afterthought. Pair it with a tall pull-out bin for “messy liquids” like spray bottles, sponges, and refills. The pull-out matters because you can see everything without digging behind bottles at the back. Use a light finish inside so labels stay readable, and keep the bin rim slightly below the shelf edge so the door closes cleanly. This setup hides day-to-day clutter and keeps cleaning supplies from migrating into the hallway.
Start by building a simple carcass to the usable height under the stairs, leaving a 5-8 mm gap at the sides so doors don’t rub. Install two fixed shelves — one near the bottom for the bin and one higher for overflow — then mount a full-height metal drawer slide for the pull-out bin. Use a bin sized to fit the drawer opening with 10-15 mm clearance so it glides freely. Finally, fit Shaker doors with concealed hinges, then paint or veneer the carcass to match the hallway wall and add a soft-close mechanism if you can.
Use a removable bin liner or a wipe-clean tray so spills don’t become permanent stains.
Don’t mount the pull-out too high — if the handle hits the slope, you’ll stop using it and clutter will pile back up.
2. Full-width sliding door on a shallow under-stairs box
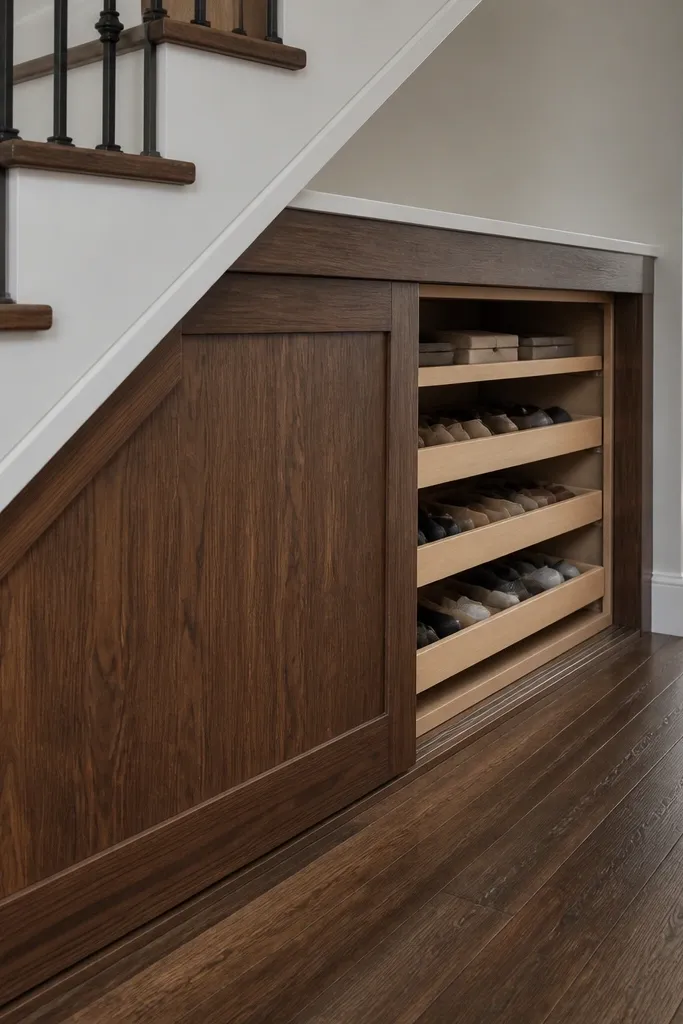
When the under-stairs space is shallow, a hinged door wastes clearance and looks awkward. A sliding door keeps the face clean and lets you access the contents without swinging into the hallway. This idea looks especially sharp when you use a matching wood veneer for the door and a simple rail-and-stile frame. Inside, use shallow wire baskets or low-front bins so you can see what you’re grabbing. It hides mess while keeping the storage practical for small items like cords, wrapping paper, and pet toys.
Measure the depth first — if you only have 250-350 mm, don’t plan deep shelves. Build a shallow carcass with a back panel and side panels, then add two or three fixed levels using 12-18 mm boards. Install a top-hung sliding track on a sturdy header at the door line, then hang the door panel with adjustable glides. Cut the bins to sit 5-10 mm below the shelf lip so nothing catches when you slide the door. Finish by aligning the door so it covers the opening evenly on both edges.
Editor's noteChoose a sliding kit with anti-jump rollers so the door doesn’t derail when the hallway is bumped.
Skip thisSkip deep shelving in a shallow space — you’ll end up with items you can’t reach and a messy back row.
3. Bi-fold doors with three labeled cubbies
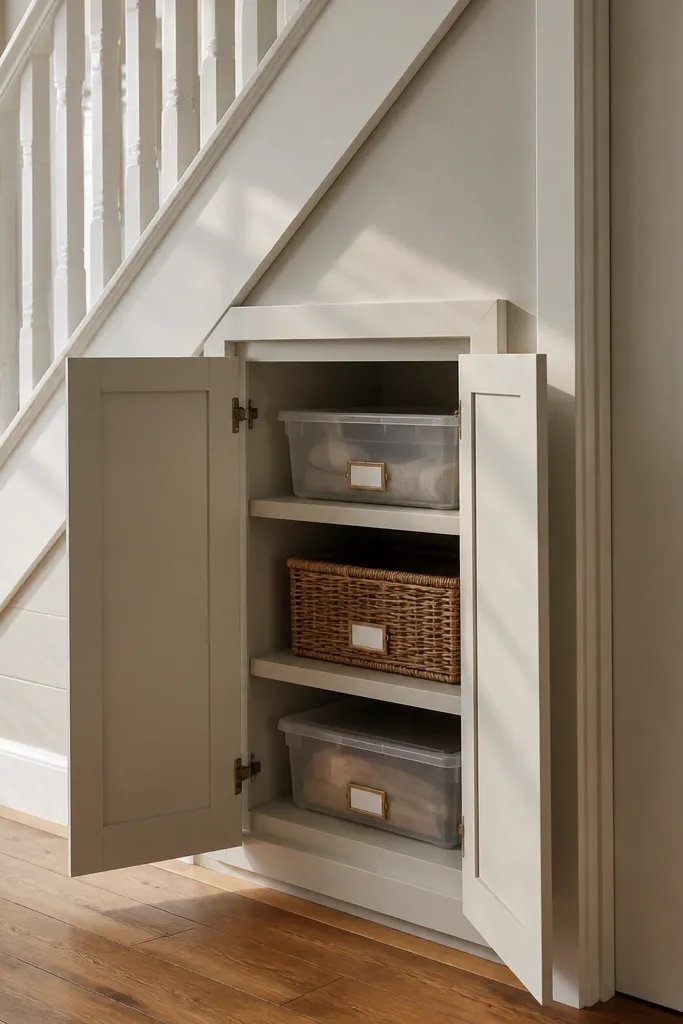
Bi-fold doors are perfect when you want quick access but the door swing would hit furniture. This setup uses three cubbies inside, each with a clear lid or basket so the mess stays sorted. The labeled look is part of the aesthetic — neat labels reduce rummaging, and neat rummaging keeps the cupboard from turning into a dumping ground. For a good-looking finish, use matching doors and a consistent color for the cubby bins. It’s ideal for seasonal items, board games, or kids' craft supplies that need tidy boundaries.
Build a carcass with two internal dividers so you get three equal cubbies across the width. Add a bottom shelf or base panel, then install cubby bins sized to each compartment. Fit bi-fold door hinges to a frame fixed to the opening, and make sure the door panels clear the cubbies when folded. Use a simple label system: printed labels on the bin fronts, and an optional small index card holder on the inside wall. Paint or seal all exposed timber surfaces before you add bins.
Editor's noteUse magnetic catches on the bi-fold doors so the panels close flush and stay quiet.
Skip thisDon’t use open cubbies with no bins — under-stairs dust and falling items makes the mess visible fast.
4. Door + toe-kick with hidden shoe shelves
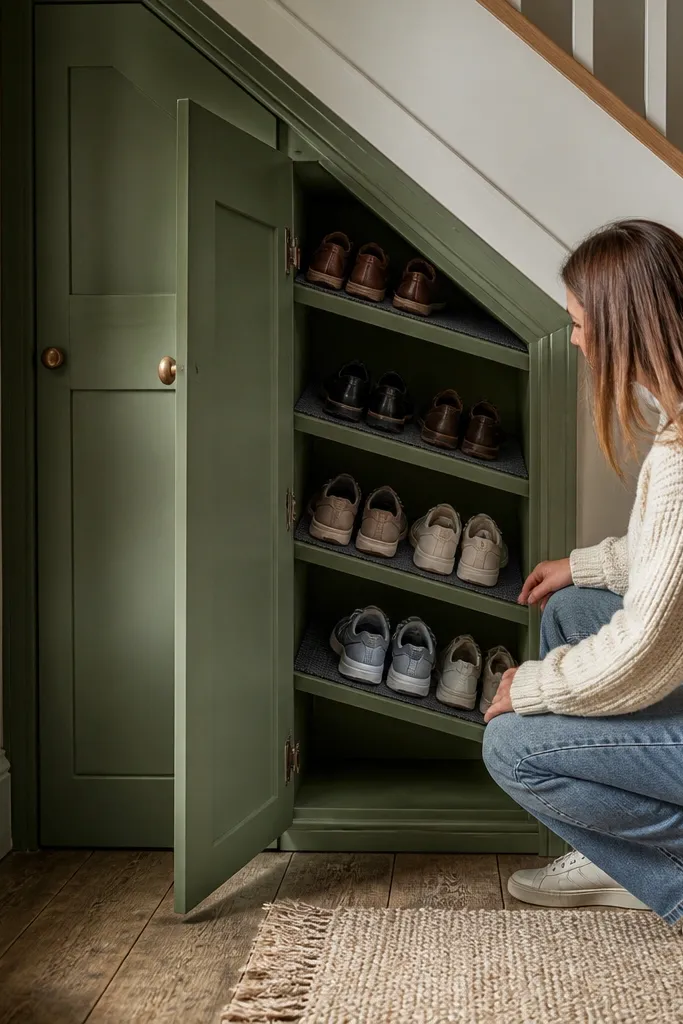
Shoes are the easiest way to ruin an under-stairs area visually, because they look cluttered even when stacked. This project hides them with angled shoe shelves tucked behind a door, plus a toe-kick that makes the front look built-in. The angled shelves keep pairs from tipping and let you see sizes at a glance. Add a slim ventilation gap behind the door by using a mesh strip on the inside panel so moisture can escape. It’s a clean-looking solution for hallways where shoes accumulate by the door.
Start by building a lower shoe zone sized for the height of your tallest shoes plus 20-30 mm clearance. Install angled shelf brackets so each shelf tilts slightly forward, then add a back lip to stop heel slip. Build a toe-kick panel to create that furniture-like base line, and leave a small ventilated gap behind it. Fit a full door with a soft-close hinge so it doesn’t slam when you’re juggling bags. Seal shelf surfaces with a wipeable finish so cleaning is quick.
Use a light-colored mat inside the door area so scuffs and dirt don’t blend into the wood grain.
Avoid flat shelves for shoes — they trap moisture and turn into a jumbled pile when you’re in a hurry.
5. Louvered pantry-style cabinet for cleaning tools
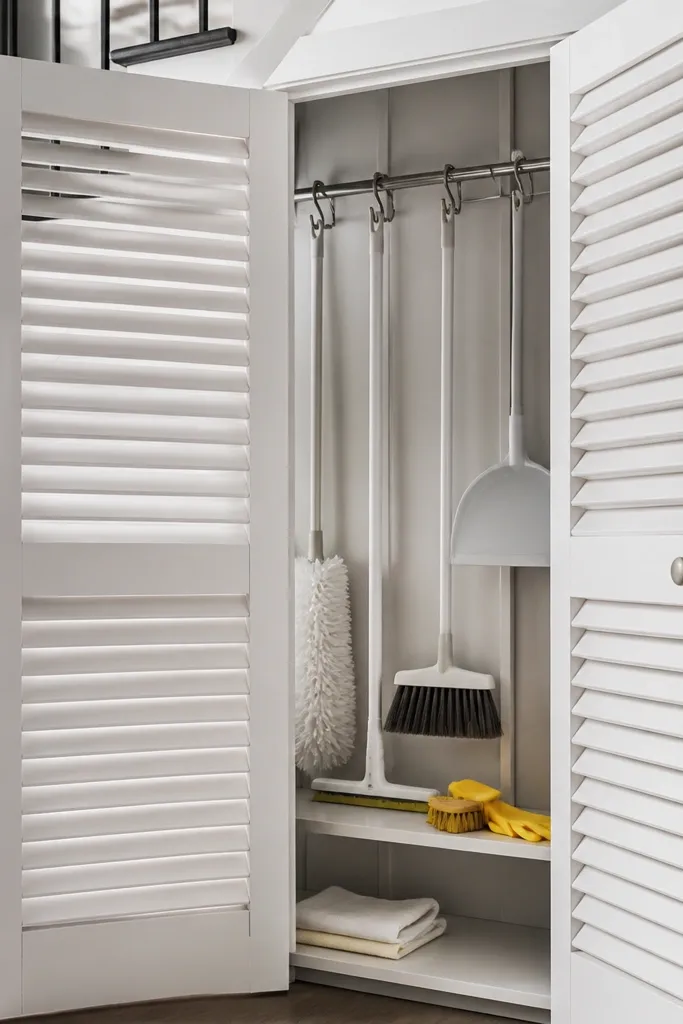
If you store cleaning tools, plain solid doors trap smells and make the inside look damp. Louvered doors give you airflow and still look intentional, like a small pantry cabinet. Inside, hang tools on a rail and add a shallow shelf for gloves and brushes. The louver pattern is visually interesting and hides clutter because you don’t see the entire interior at once. This is a strong choice for households that need quick access but hate the “stinky cupboard” effect.
Build the carcass to your opening, then install a hanging rail at about 900-1100 mm from the floor for brooms and long-handled tools. Add one fixed shelf above the rail for smaller items, and use hooks for gloves and scrub brushes. Install louvered doors with hinges that leave a small gap at the bottom for airflow. Finish the inside with a durable clear coat or paint that wipes clean. Check door clearance against the slope so the louvered panels close without scraping.
Put a drip tray under the hanging rail if you use mops or wet brushes.
Don’t use fully sealed doors for wet tools — smells build up and the mess becomes harder to clean.
6. Wallpaper-lined back panel with a hidden cable organizer
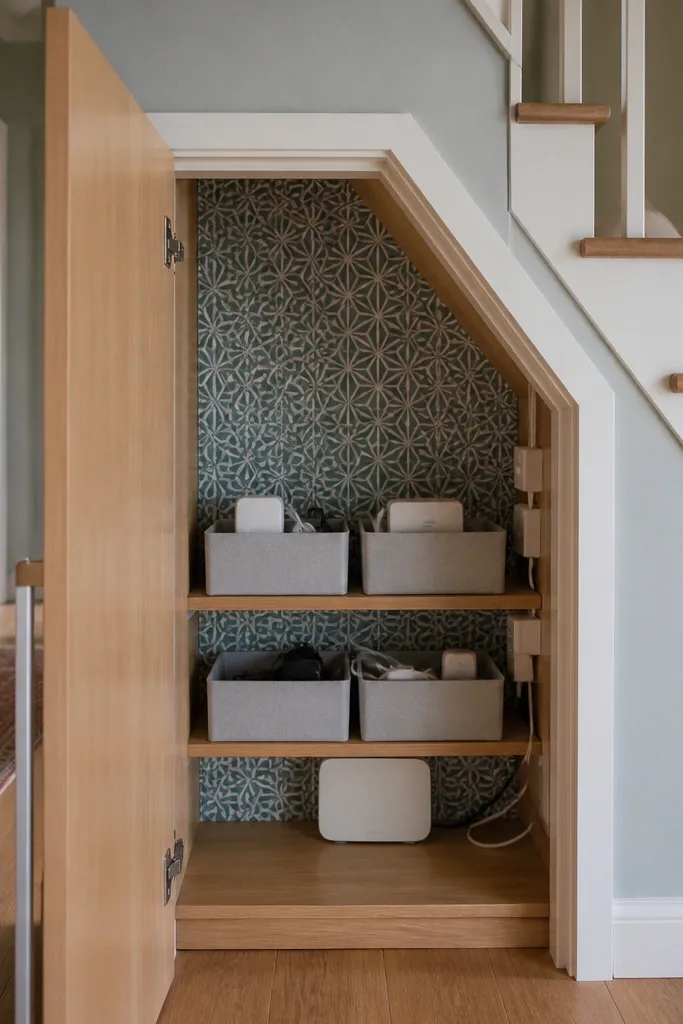
This idea uses a bold back panel so the cupboard looks good when it’s open, even if the front is simple. You hide cables, routers, and charging bricks in bins on the shelves, then cover the back wall with a removable wallpaper panel or painted panel with a small pattern. The contrast makes the storage feel designed, not utilitarian. For airflow, leave a 20-30 mm gap behind the bins and run cables through a cable grommet near the side panel. It’s perfect for under-stairs spots where you want to store tech gear without turning your hallway into a wiring mess.
Cut a back panel sized to the interior and attach it with removable screws or construction adhesive on the edges only. Install shelves or a single ladder frame with two levels, then mount cable bins or shallow organizers that sit flush to the shelf lip. Drill two cable holes with grommets so cords don’t rub on raw wood. Place a small ventilation spacer behind the bins so heat can move, then route cables toward a power strip mounted on the side wall. Finish by adding a simple door front and aligning it so the patterned back only shows when open.
Editor's noteUse label tags on the bins and a short wire map written on the inside of the door.
Skip thisSkip loose cable loops inside the cupboard — they tangle and you end up yanking at the back.
7. Framed glass-panel door for a tidy linen-and-basket look
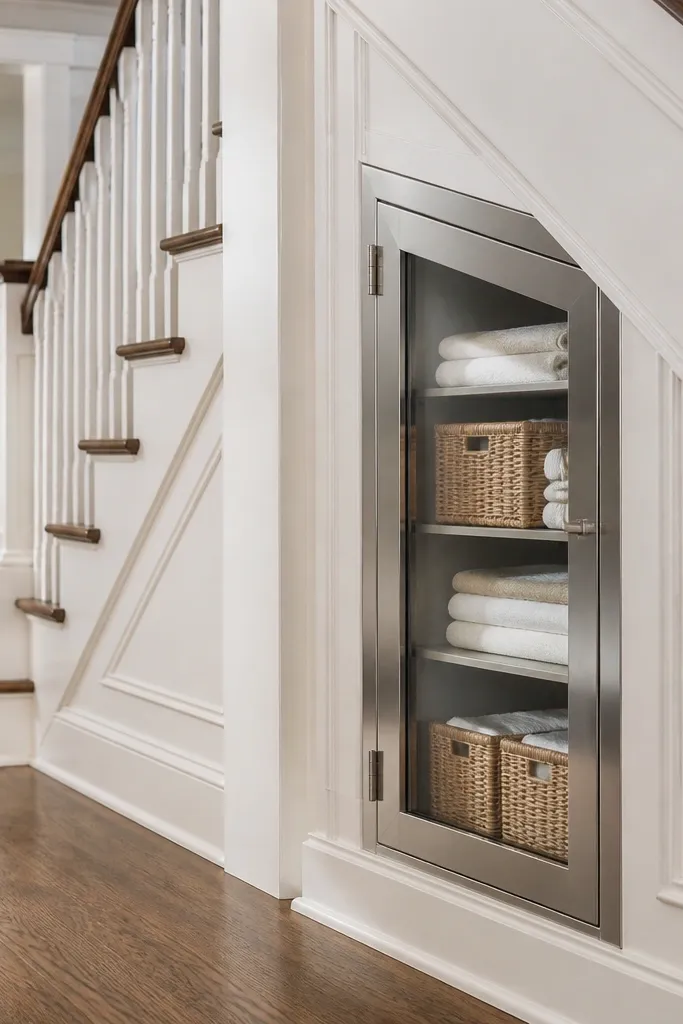
Glass can make under-stairs storage look lighter and more intentional, as long as you control what’s behind it. Use a framed glass door over a small section so you can see neatly stacked baskets or folded linen. The baskets keep the interior from looking chaotic, and the glass gives the hallway a “designed” feel instead of a dark hole. For the best look, choose frosted or lightly textured glass so it hides details while still adding brightness. This is ideal for small-batch storage like extra towels, blankets, or kids' throws.
Build the carcass and install two shelves with a basket-friendly spacing, usually 250-320 mm between levels. Add basket stops using 10 mm ledges so baskets sit straight and don’t slip. Use a door frame and fit frosted glass panels with rubber glazing strips for a clean edge. Mount hinges so the door opens without hitting the slope. Finish the interior in a warm neutral paint so baskets look cohesive through the glass.
Editor's noteChoose glass with a texture that breaks up light reflections so you don’t see every item edge.
Skip thisDon’t put random loose items behind glass — glass makes clutter look louder.
8. Tall cabinet with pull-out ironing board style panel
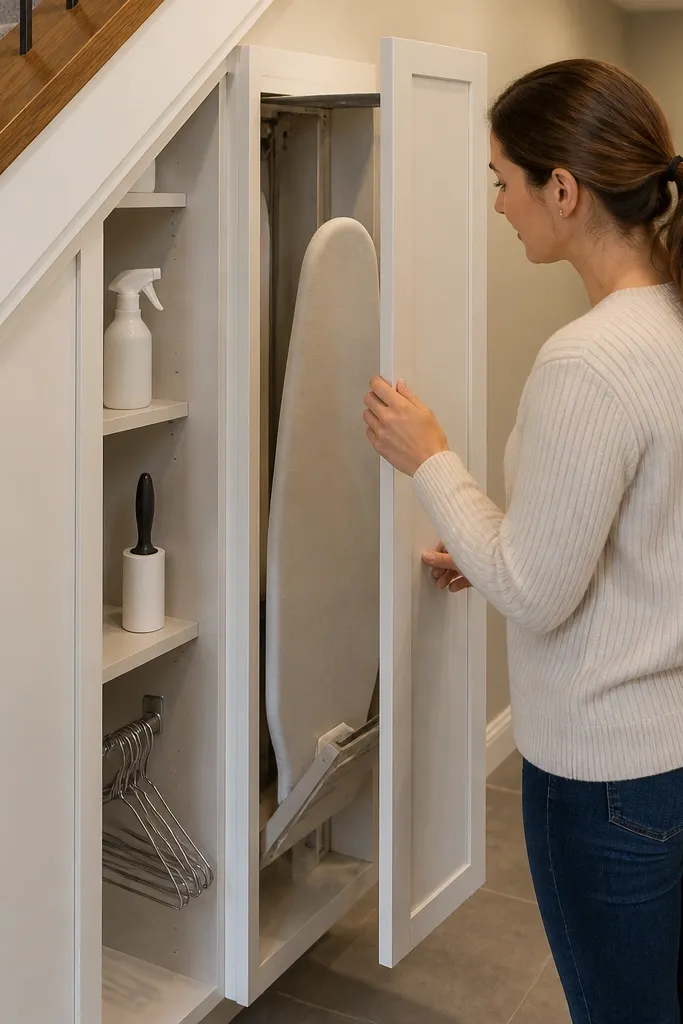
If your under-stairs cupboard sits in a utility hallway, a fold-out panel makes it feel like a real workstation. The look is clean because the board is hidden behind a full-height door, and it only appears when you need it. Pair it with storage for spray starch, lint rollers, and hangers in adjacent cubbies. This design hides “in-between” items that usually clutter counters. The board panel also prevents small items from falling into the back because it gives you a flat landing when open.
Build a tall carcass and plan the pull-out panel height so it sits above the toe-kick when retracted. Install a sturdy folding mechanism rated for the panel weight, and attach a plywood panel with a heat-resistant cover surface. Add two small side cubbies or one shelf above the panel for accessories, using dividers to keep them upright. Fit a full door with soft-close hinges so the panel doesn’t rattle. Sand and seal all timber surfaces and use a wipeable finish on the panel cover.
Editor's noteUse a magnetic catch for the door and a latch for the pull-out so it stays shut during daily hallway traffic.
Skip thisAvoid using thin plywood — it bows and makes the pull-out feel flimsy.
9. Painted architrave face with recessed bin shelves
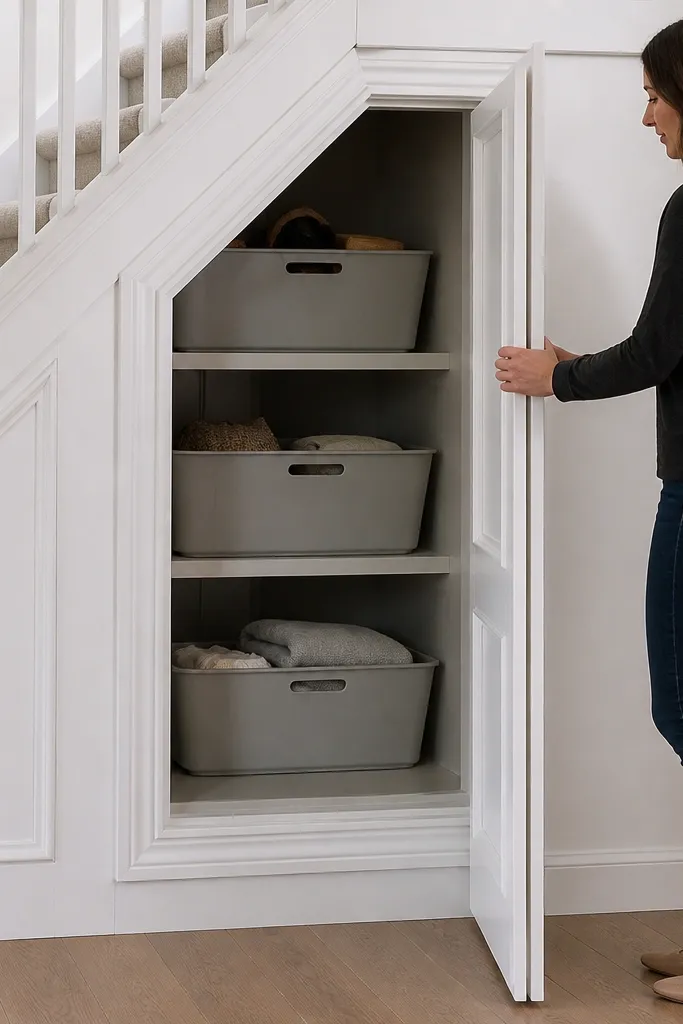
This is the “looks built-in” version of under-stairs storage. A painted architrave face around the opening creates a neat frame, and recessed bin shelves keep the interior tidy without bulky boxes. The bins are set back from the door line, so when you close the door, you don’t see gaps or messy edges. Choose two bin sizes and repeat them across the width so the inside looks organized at a glance. It’s great for hiding small clutter like kids' shoes, craft bits, and dog treats.
Frame the opening with 18-25 mm trim boards to create a shallow architrave profile. Build the carcass so bins sit recessed by 20-30 mm behind the door plane. Install shelf ledges that support bin lips and keep spacing consistent at 250-300 mm depending on bin height. Paint the face and interior in coordinated tones, then fit doors that sit flush to the trim. Add anti-slip pads under bins so they don’t shift when you pull them out.
Editor's noteUse the same bin brand or style across zones so the visual rhythm looks intentional.
Skip thisSkip random bin heights — it makes the cupboard look like storage thrown together.
10. Counter-depth cupboard with chalkboard door panel
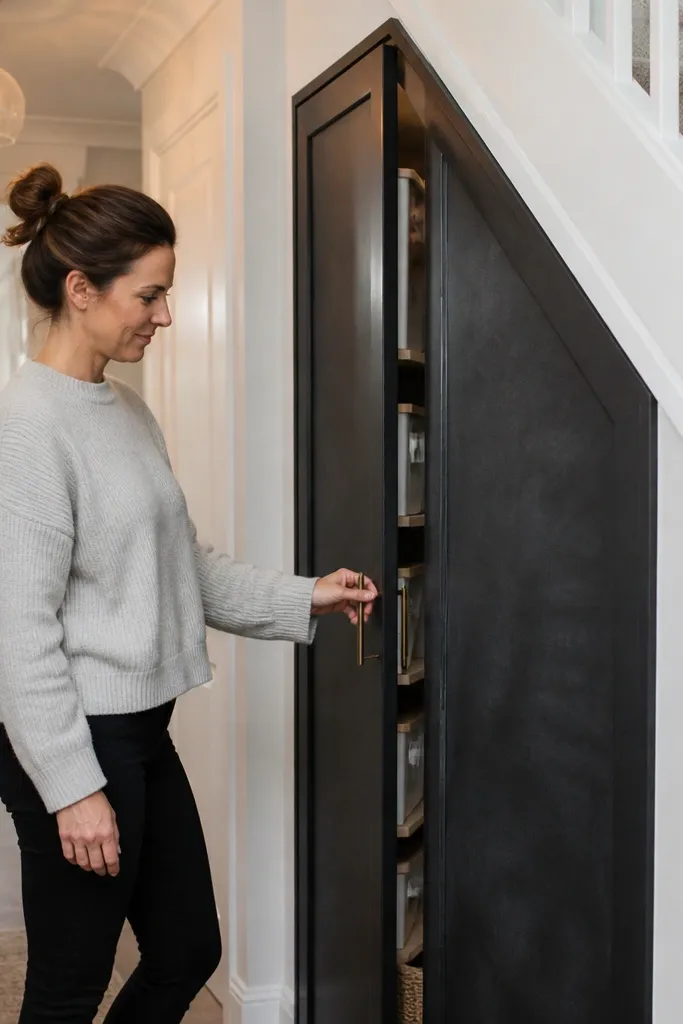
A chalkboard door panel turns under-stairs storage into something you can use daily without opening the cupboard every time. Keep the inside organized with labeled bins, then write quick notes like “batteries,” “wrapping,” or “after-school kit.” The look is graphic and modern, especially in hallways with neutral walls. Make the chalkboard panel the same width as the door so it looks like a design choice, not a patch. This hides mess while also preventing the “where is it?” scramble that leads to piles.
Build the carcass to your opening and install shelf bins with consistent heights. Choose a chalkboard door panel sized to the door face, then attach it over a plywood or MDF door skin for stability. Prime the panel surface properly and use chalkboard paint or pre-made board that you can sand and seal. Fit the door with hinges and add a soft-close if you want it to feel furniture-like. Label bins with removable labels so you can update the system when seasons change.
Editor's noteUse a piece of white tape on the inside of the door to list your most common items and chalk it in one color.
Skip thisDon’t write on a glossy surface — chalk smears and the door looks messy.
11. Vertical divider wall for board games and DVDs
Board games and DVDs look messy when they’re stacked flat or shoved into random piles. A vertical divider wall makes them stand like a tidy library, and it’s one of the fastest ways to keep the cupboard from becoming a jumble. The look is clean because you see straight edges and consistent spacing. Build dividers in a grid that matches your biggest box width so everything has a slot. This works best when the cupboard is wide enough to fit multiple columns and tall enough for your games to stand fully.
Measure the widest board game box or DVD case and build dividers to that width plus 3-5 mm clearance. Install a back panel and then fix vertical dividers using 12-18 mm boards, spacing them evenly across the cabinet width. Add a top and bottom rail so dividers stay square even if you pull items frequently. Use a door that opens fully enough to reach the back row without bending. Finish the inside with a wipeable paint and consider adding a thin felt strip on divider edges to reduce scuffing.
Pre-sort by thickness and set divider widths for two categories, not one — it keeps the grid from looking uneven.
Don’t make dividers too tight — forcing boxes in makes them jam and you’ll stop putting them back.
12. Corner-to-slope L-shaped shelves with hidden door
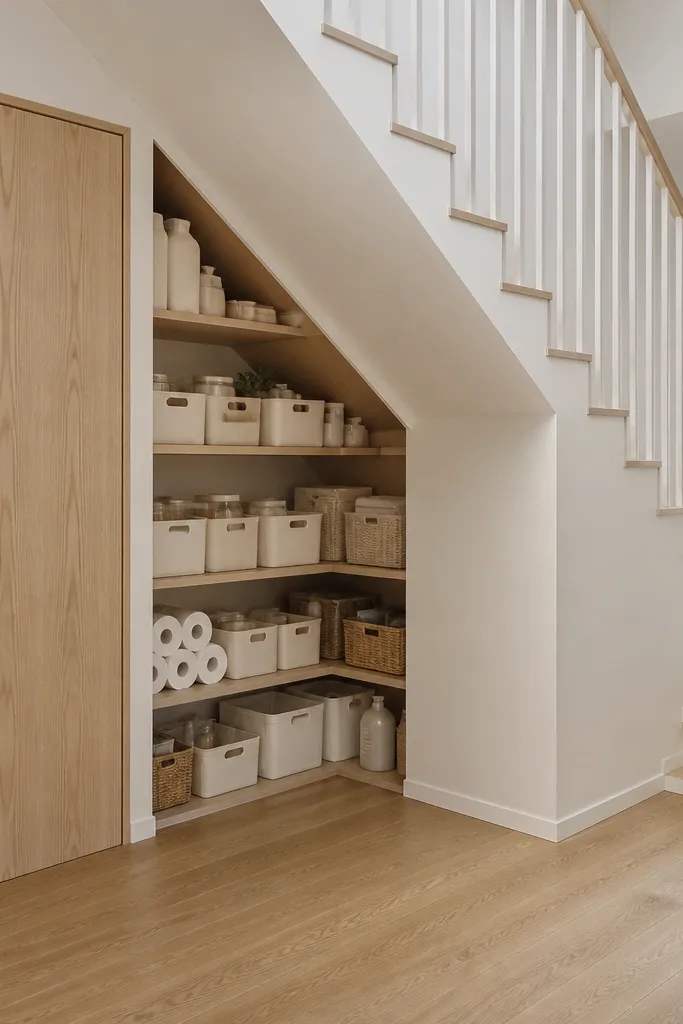
When the under-stairs area has an awkward corner and a slope, an L-shaped shelf plan uses dead space instead of fighting it. You get a shallow “front run” for everyday items and a deeper “side run” for bulk supplies. A hidden door keeps the interior from showing clutter when the hallway is in use. For the aesthetic, keep the shelf faces and door color consistent, and avoid mixing too many materials. This design is ideal for bulky-but-neat storage like vacuum accessories, spare bags, and seasonal kids' gear.
Sketch the slope line on paper and transfer it to the side panel so shelf tops follow the geometry. Build the carcass with an L-shaped internal frame, using one fixed shelf run along the wall and another shelf run across the corner. Install a door over the front opening area and leave the deeper side behind it so it stays hidden. Use cleats or ledger strips to support shelves, then cut shelf boards to the exact angle needed for the slope. Sand edges clean and seal with paint or varnish so the angled surfaces don’t look rough.
Editor's noteUse a template cut from cardboard for each shelf angle — it saves time and prevents small gaps that catch dust.
Skip thisAvoid guessing the slope angle — a few degrees off makes doors misalign and shelves won’t sit flat.
13. Open-lid bins with a closed front door and tidy fronts
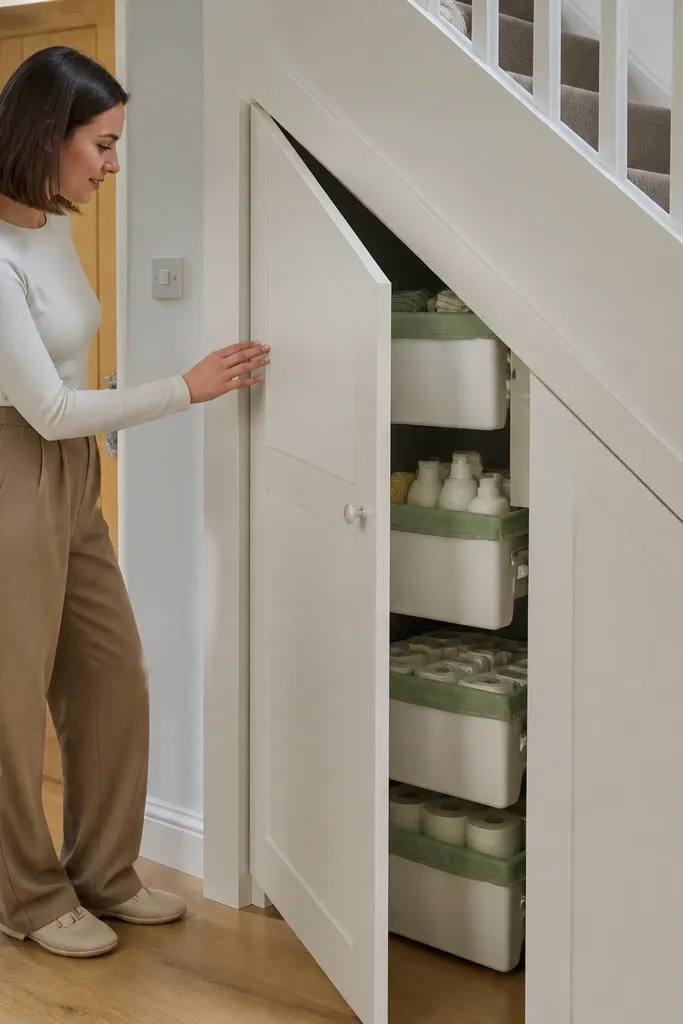
This is for people who hate digging through deep cupboards but still want the hallway to look calm. You install open-lid bins inside the cupboard and keep a door on the outside so the mess stays invisible when you’re not using it. The open lids let you grab fast without rummaging, which keeps the inside from turning into a pile. For a good-looking finish, choose bins in one color and align them to consistent shelf edges. It’s a smart fit for gloves, scarves, charging accessories, and small household supplies.
Build a carcass with two shelf levels and a base panel that gives you a clean bin landing. Install shelf ledges at heights that match your bin dimensions, leaving 10-15 mm clearance for lids to open. Fit the cupboard door so it opens wide enough to access the bins, and use concealed hinges so the front looks smooth. Add a small interior backstop strip so bins don’t slide forward when you pull them. Finish the interior with paint that wipes clean and install non-slip pads under each bin.
Use bin handles facing forward — it makes the cupboard feel organized without extra labels.
Don’t mix lid styles and sizes — the inside looks chaotic even if the outside is closed.
14. Wood slat front with concealed storage behind
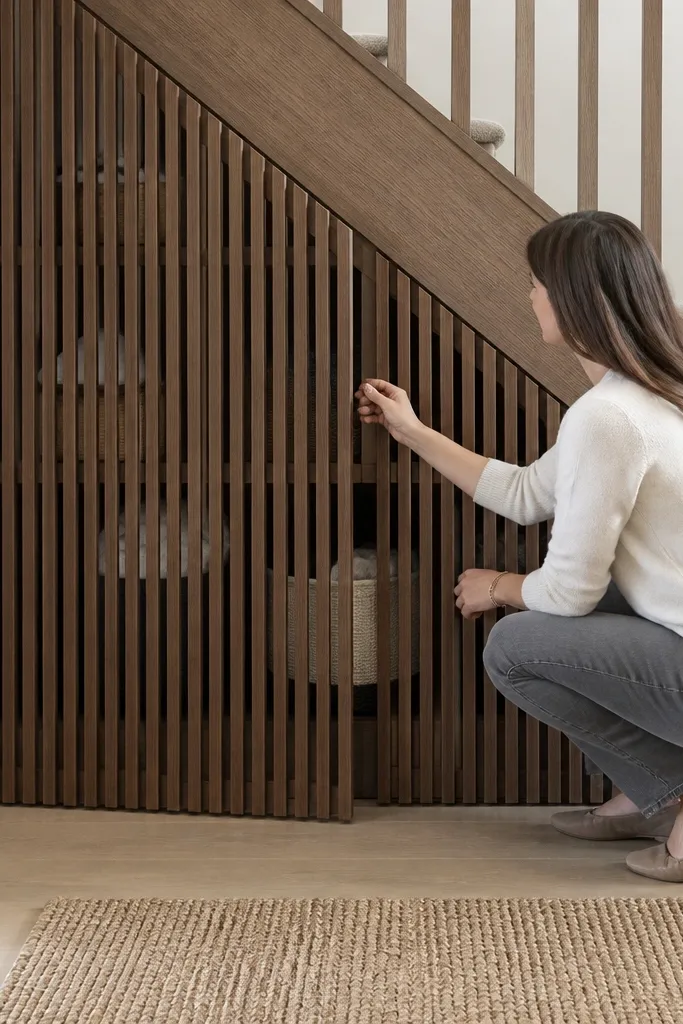
A wood slat front gives you the clean, architectural look of a feature screen while still hiding clutter. Because slats break up the view, you don’t see every item edge, even if the inside is a little busy. It also adds texture, which makes under-stairs storage look like design rather than storage. Keep the inside simple with bins or a single shelf system so it doesn’t look messy when the door opens. This is a good choice for hallways that already have warm wood tones or rattan-style accessories.
Build a standard carcass and add bins or shelves inside based on your categories. Create a door frame from 18-25 mm timber and attach slats with equal spacing, usually 20-30 mm gap depending on how much you want to hide. Mount the door on concealed hinges and add a magnetic latch. Sand slats smooth and finish with a matte clear coat so they don’t look plasticky. Test the door opening clearance against the slope before you finalize the frame thickness.
Match the slat thickness to the existing baseboards or trim so it looks intentional in the hallway.
Avoid wide slats if you store small clutter — it becomes visible through gaps.
15. Fabric-soft storage with a framed curtain panel
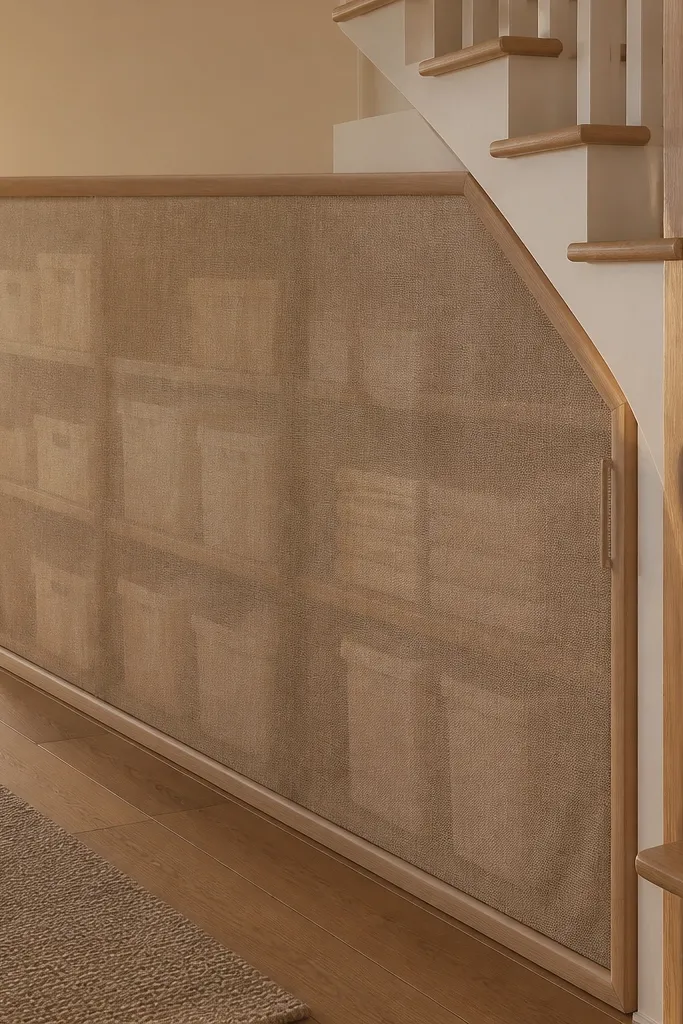
If your under-stairs area is more casual, a curtain-front storage looks warmer than rigid doors. Use a framed curtain panel with wipeable fabric and store everything in uniform bins behind it. The fabric hides visual clutter while still letting you see the general layout when the curtain shifts. This setup is great for craft supplies, kids' items, and seasonal accessories that you want easy access to. Keep the bins tidy and the curtain color consistent with your hallway textiles for the best look.
Build a carcass with shelves or a bin stack system, then attach a fixed frame at the opening. Use a curtain rod or track mounted to the top frame, and hang a wipeable fabric panel using curtain rings. Choose a fabric with a firm backing so it hangs straight and doesn’t bunch. Add magnets or a weighted hem so the curtain closes neatly against the frame. Seal the interior shelves and corners so fabric doesn’t catch dust.
Editor's noteUse a fabric with a tight weave — it hides bins better and wipes clean without fuzzing.
Skip thisSkip flimsy curtain fabric — it looks messy when it billows.
16. Mirror-backed door for brightness and hidden toiletries
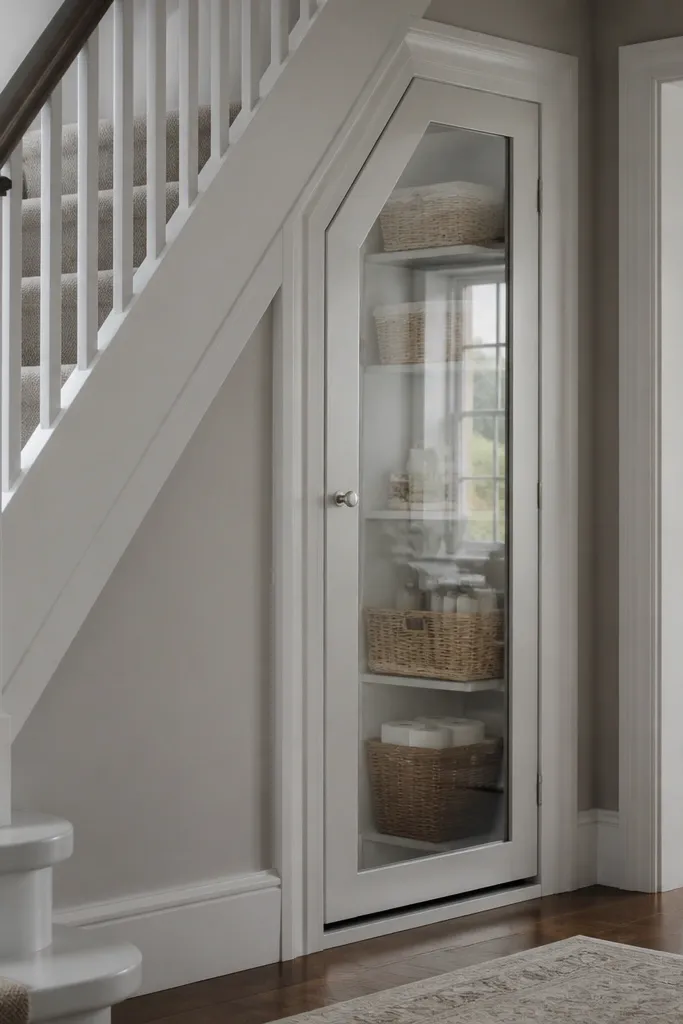
Under-stairs areas can feel dark and cramped. A mirrored door instantly brightens the hallway and makes the cupboard look less like a storage pit. Behind the mirror, keep toiletries, spare toiletries, and first-aid items in small baskets so the inside stays neat. Frosted or textured mirror portions help hide the details while still giving you light reflection. This idea looks especially good in entryways where you want a mirror anyway and you need a place for the practical stuff.
Build the carcass and install one or two shelves sized for baskets, usually 220-280 mm deep depending on your container height. Use a mirror door panel mounted onto a door frame with safety mirror film behind it. Fit hinges so the mirror doesn’t hit the slope and the door closes flush. Add a small latch and consider a soft-close hinge to keep the mirror from chipping. Finish baskets with matching colors and add a small tray on the bottom for items that leak.
Use safety film on the mirror — it reduces splinter risk if the door gets bumped.
Don’t store loose bottles without trays — spills show through the mirror and stain fast.
17. Two-tone painted doors with a recessed center panel
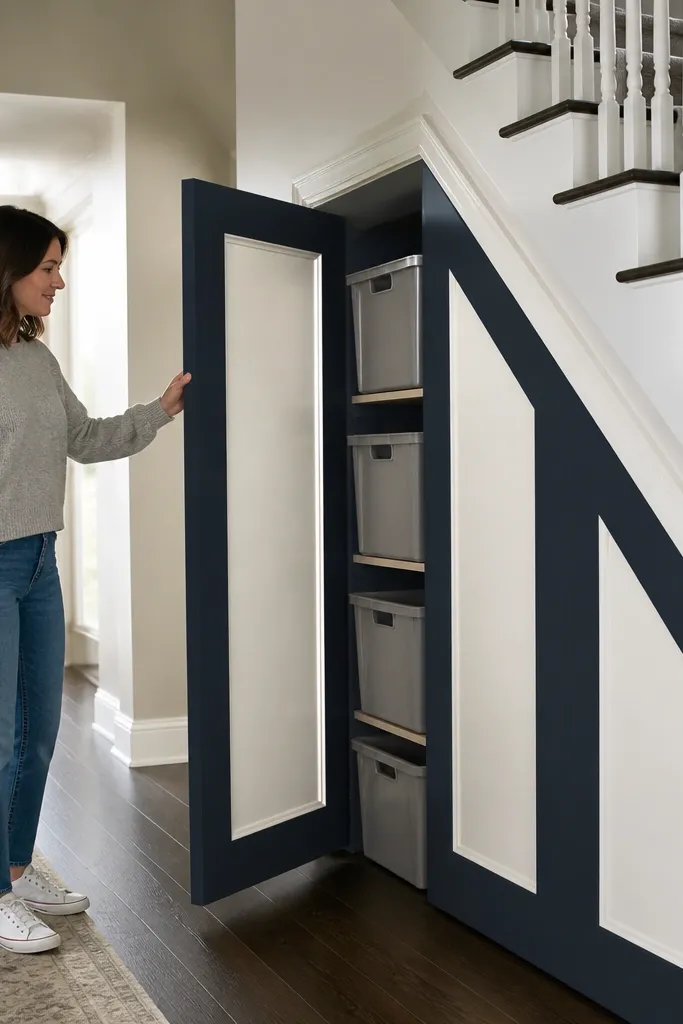
Two-tone doors make under-stairs storage look like furniture, not a utility cabinet. Recess the center panel so the door has depth, then paint the frame one tone and the recessed area another. Inside, use uniform bins so the color story stays calm when the door opens. This approach works great if your hallway has one strong wall color and you want the cupboard to look intentional without matching every detail. It hides mess and looks good even when people notice the door.
Build the carcass and install shelves at consistent spacing for your bins. Create door panels with a recessed center by framing a flat panel inside a door frame, usually with 10-20 mm reveal. Sand smooth and prime before painting; use two finish coats for clean edges. Mount doors with concealed hinges and align them so the reveals are even. Add a soft-close or magnetic catch to keep the doors from slamming.
Editor's noteMask edges carefully and paint in the same order for both door tones so the sheen matches.
Skip thisAvoid painting over dusty wood — uneven adhesion creates patchy areas that look cheap.
18. Sliding drawer stack for kids' shoes and small bags
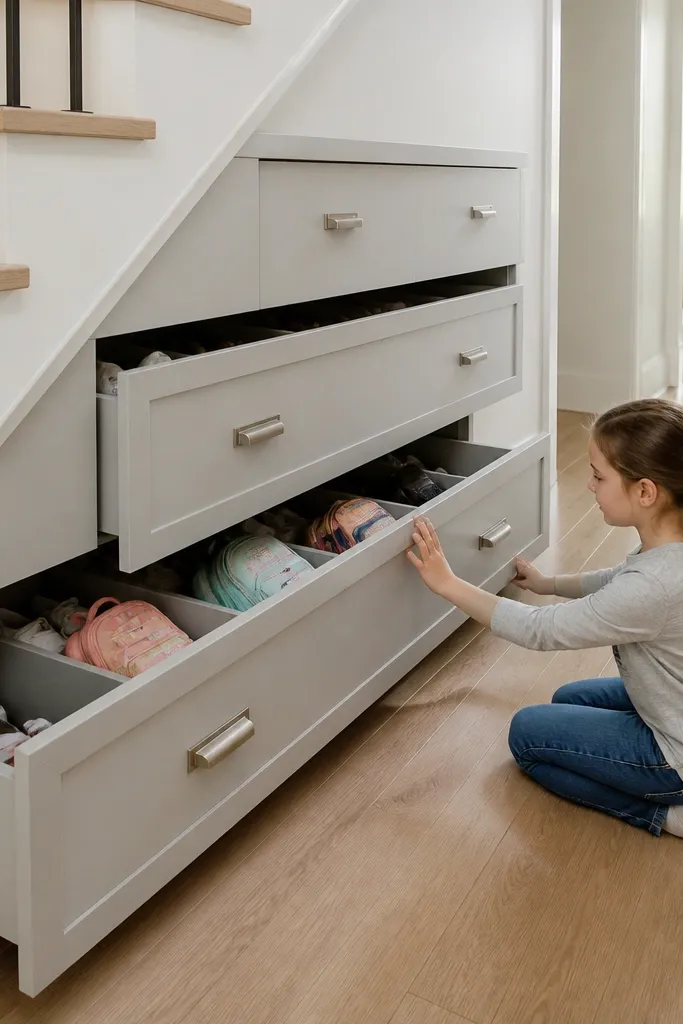
If the mess is mostly kids' stuff, drawers beat shelves because they close completely and hold shape. Stack shallow sliding drawers across the opening, each with a simple insert for shoes, small bags, or backpacks. The look is clean because drawer faces are uniform and the hallway stays calm when everything is closed. Use soft-close slides so drawers don’t slam and wake anyone. This is one of the most reliable ways to hide mess daily without asking anyone to “be careful.”
Build a carcass with side rails sized for drawer frames, then plan drawer heights around your items, like 120-160 mm for shoes and 180-220 mm for bags. Install full-extension drawer slides on both sides, keeping them level so drawers don’t bind. Construct drawer boxes with fronts aligned to the door opening and add drawer pulls or recessed handles. Add a simple insert material like felt or wipeable plastic for traction. Finish the drawer faces to match the hallway trim and test smooth travel before installing the front panel.
Editor's noteLabel the drawers with icons instead of words for kids — it keeps the system working.
Skip thisDon’t overload drawers — if they’re too deep, items shift and you end up with a mess at the back.
19. Hidden laundry hamper with a fold-down door shelf
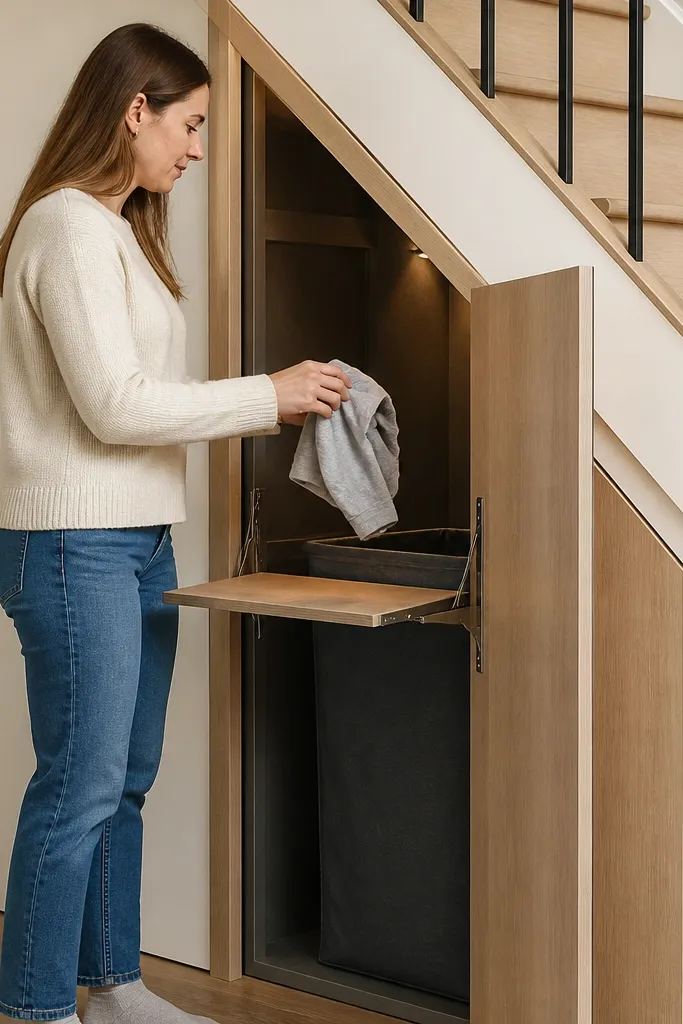
Laundry piles are messy because they spill out of the hamper area. This build hides a hamper inside the under-stairs cupboard and adds a fold-down shelf on the inside of the door for “drop stuff” moments like socks or a small laundry bag. The shelf keeps the flow tidy — you toss items onto the shelf, then close the door. It also makes the storage look intentional because the door becomes a functional surface. Great for apartments or hallways where a full laundry room isn’t an option.
Build the carcass with a lower compartment sized for your hamper, leaving a little air gap around the hamper sides. Add a fold-down shelf mechanism to the inside of the door at a comfortable height, usually around 250-350 mm from the bottom edge of the door. Install a guide rail or ledge so the shelf locks into place securely. Cut a top access opening or leave a front gap so laundry drops in without wrestling the hamper. Fit a ventilation strip on the inside panel and use wipeable paint on the compartment walls.
Editor's noteUse a removable hamper liner so you can wash it without disassembling the cupboard.
Skip thisAvoid hampering airflow — no vents means damp smell and the cupboard becomes unpleasant.
20. Pegboard back with labeled hooks behind a closed door
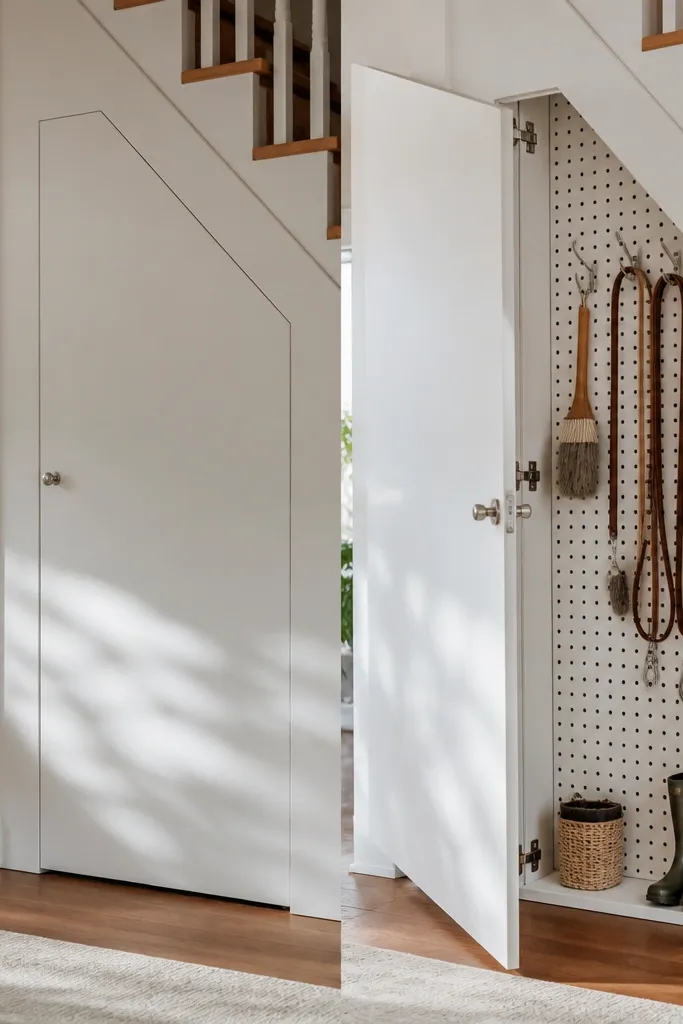
Pegboard behind a closed door is how you get “organized” without seeing clutter all the time. Hang items on hooks — leashes, jump ropes, cleaning brushes, or craft tools — and label the hooks so everything goes back in the same spot. The door hides the mess, while the pegboard keeps items from piling on shelves. It also looks clean when open because the hooks create a tidy grid. This is a smart pick for families who need quick grab-and-go storage with minimal sorting.
Build the carcass and install a pegboard sheet on the back panel using spacers so it sits a few millimeters off the wall. Add a shelf or two only for items that don’t hang, then install a door with clear internal clearance so hooks don’t snag. Mount hooks in a measured grid, using a small cardboard template to mark positions before screwing into the pegboard. Add labels on hook fronts or on a small strip of tape on the pegboard edge. Finish the pegboard with paint or a clear seal so it wipes clean and doesn’t absorb grime.
Editor's noteKeep hook sizes consistent — one type of hook looks neater and makes re-hanging faster.
Skip thisDon’t hang heavy items without proper anchors — pegboard can sag if you guess on mounting strength.



