
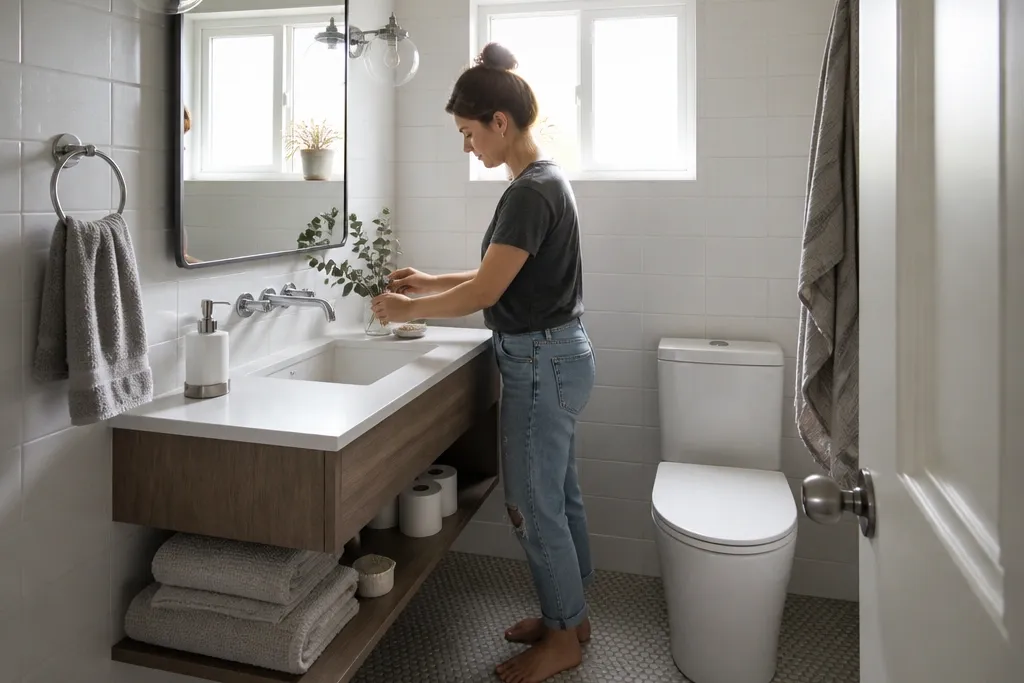
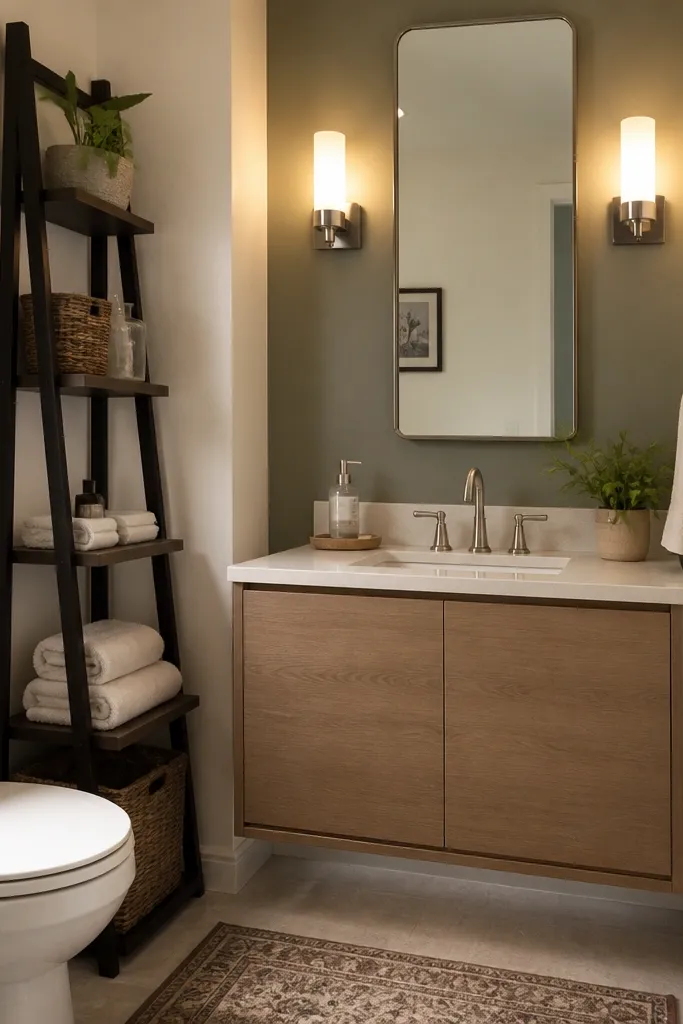
1. Oversized mirror with slim frame and wall-to-wall brightness
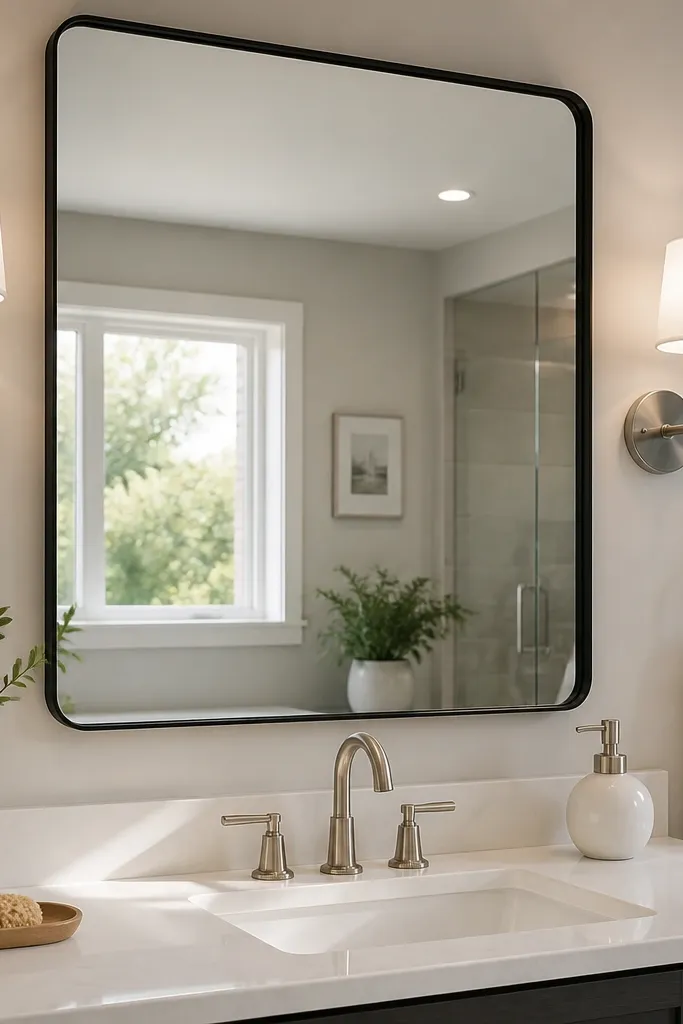
Start by measuring the vanity width and the wall space above it. Pick a mirror that’s about 2/3 to 3/4 the vanity width and mount the centerline about 65 inches from the floor, then add mirror lighting that sits roughly 4-6 inches above the top edge of the vanity. If you’re replacing an existing mirror, patch and sand the old mounting holes, then install using the manufacturer’s clips or a proper French cleat for heavy mirrors. Finish by caulking the mirror frame edges with paintable acrylic caulk where it meets tile or drywall to keep it clean and water-safe.
A bigger mirror makes a small bathroom feel wider because it gives your eye a larger reflective surface at face height. Go for a slim frame in a finish that matches your faucet and towel hardware — brushed nickel, matte black, or polished chrome. The real upgrade is how you light it: use two lights flanking the mirror or a single light bar mounted at mirror height so shadows disappear. This look is especially good in bathrooms with a narrow vanity run because it reduces the “boxed-in” feeling. Plan for a clean, built-in feel by aligning mirror edges with the tile joints or the vanity top line.
Skip thisDon’t center the mirror too high — if the bottom edge rises above the vanity rim, the room feels cramped.
Editor's noteUse a warm-neutral bulb around 2700K-3000K for flattering skin tones; cool bulbs make small spaces feel harsh.
2. Two-tone vanity paint with a floating look
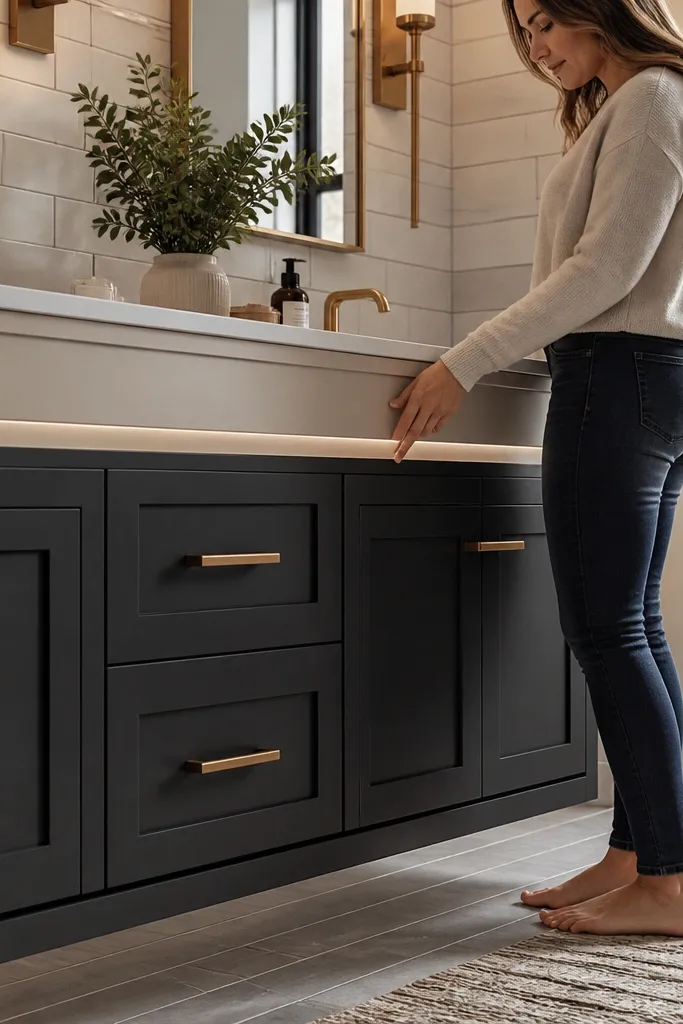
Remove doors and drawers and label the hardware positions. Sand the cabinet surfaces with 180-220 grit, then degrease with a bathroom-safe cleaner; prime with a bonding primer made for laminate or wood, then paint the base color and the top trim color using a foam roller for a smooth finish. Let it cure fully before reinstalling hardware. For the floating effect, paint the toe-kick area and the floor transition, then add a slim base board or leave a small visible gap if your current cabinet design allows it.
A two-tone vanity turns a plain bathroom into something that looks styled without changing the layout. Use a darker color on the base and a lighter tone on the top surround or side panels so the vanity visually anchors the room. The “floating” look happens when you create a shadow gap between the cabinet and the floor by removing toe-kick clutter and painting the underside cleanly. Pair it with a bright countertop color like white quartz, a warm white solid surface, or a matte light stone look. This works well when your current vanity is bulky or dated and you don’t want to rebuild plumbing.
Skip thisDon’t skip primer — moisture and bathroom grime kill topcoat adhesion fast.
Editor's noteSwap to cup pulls or slim bar pulls in the same finish as the faucet; it makes the paint job look intentional.
3. Shower niche with matching tile and a clean grout line
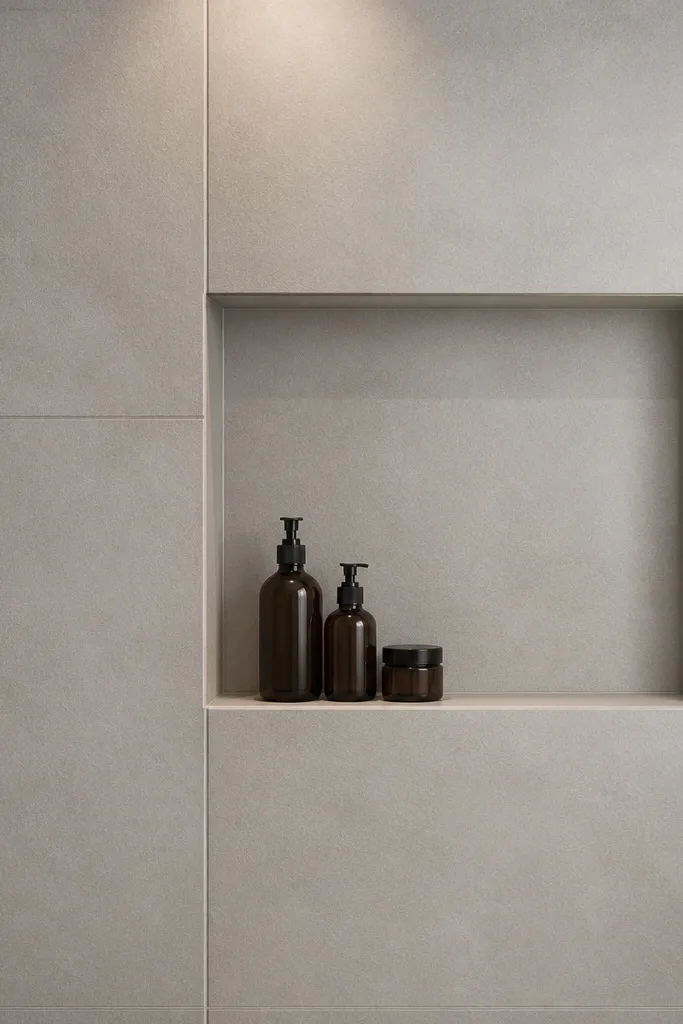
A recessed niche is one of the few remodel moves that improves daily life and looks good in photos. It keeps bottles off the shower floor and makes the shower wall look custom because the niche blends into the tile plane. Match the niche tile to the wall tile and use a grout color that’s close to the tile — the closer the match, the cleaner the lines. This is a great choice if your current shower has a messy caddy or suction shelves. The aesthetic payoff is high because niches create symmetry and reduce visual clutter.
Pick a niche size that fits your wall studs and tile layout — a common fit is about 12x12 inches for a small shower, or 10x16 if you want more height for tall bottles. Cut the opening carefully, install the niche box with waterproof backer boards, then set the niche flush with the surrounding wall plane. After waterproofing seams with a compatible membrane, tile the wall so the niche edges line up with tile joints. Grout after the thinset cures, then seal the grout if your grout type requires it.
Dry-fit tiles around the niche first so you don’t end up with a tiny sliver tile at the edges.
Don’t leave the niche unwaterproofed; grout alone is not waterproofing.
4. Large-format porcelain on bathroom walls with a staggered pattern
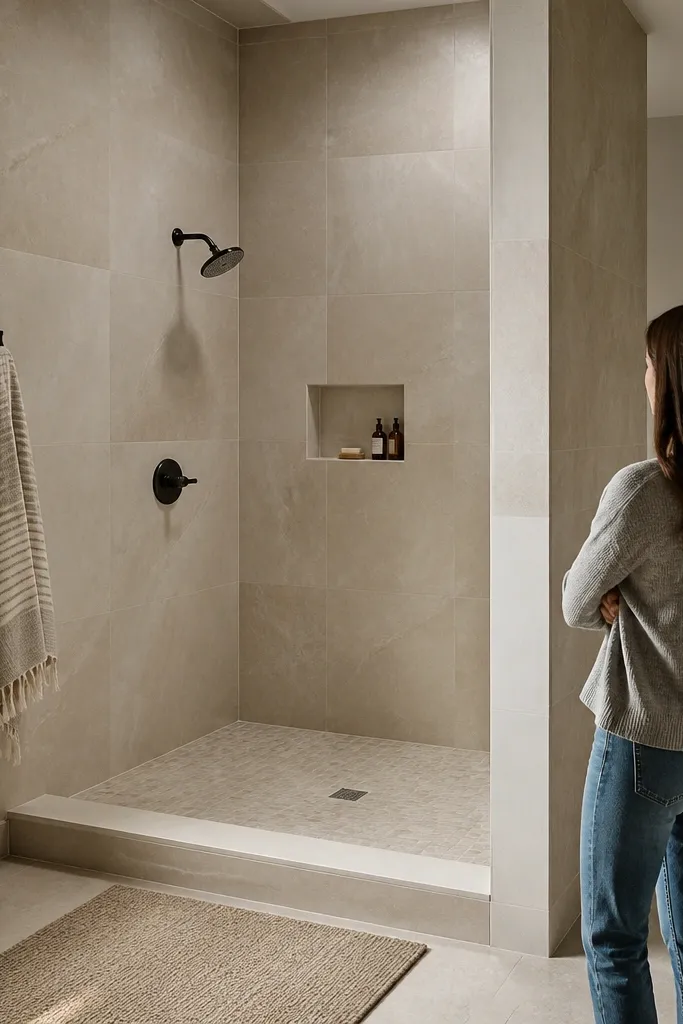
Plan the layout starting from the center of the wall so you end up with balanced cuts at both edges. Use a leveling system if your walls aren’t perfectly flat, and set tiles with the correct thinset for porcelain (often a polymer-modified thinset). Keep joint spacing consistent — aim for 1/16 to 1/8 inch for a clean, upscale look. Finish by matching grout color to the tile body and applying grout sealer if your grout needs it.
Small bathrooms look bigger when you reduce the number of grout lines. Large-format porcelain tiles (for example 12x24 inches or 24x24 inches) create long visual strokes that make the room feel taller and less chopped up. Choose a tile with subtle texture or a soft matte finish so light spreads evenly. A staggered pattern feels modern and hides minor wall irregularities better than a strict brick pattern. This look works for full wall coverage behind the vanity or across the whole bathroom if you want a high-impact refresh.
Skip thisDon’t pick a glossy tile without good lighting; glare can make small bathrooms look washed out.
Editor's noteUse a grout color that matches the tile’s dominant tone, not the brightest fleck — it reads cleaner in close-up photos.
5. Peel-and-stick penny tile floor in warm gray
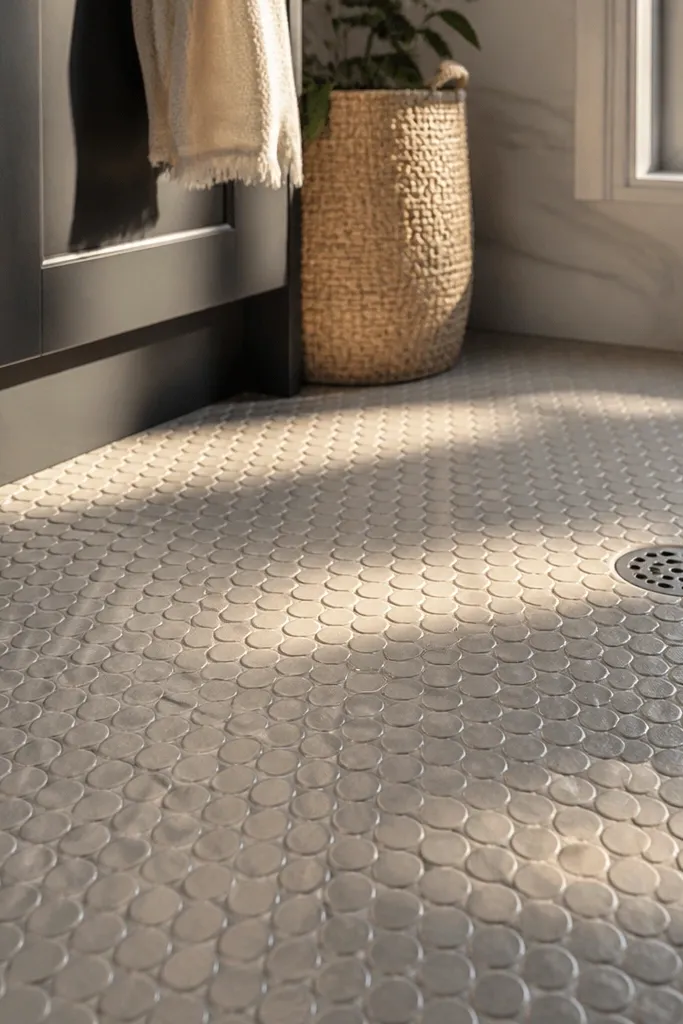
If you want a photogenic floor without a full tear-out, penny tile look peel-and-stick is the fastest way to add texture and style. Choose warm gray instead of cool gray so it doesn’t fight with warm wood tones or brass fixtures. Penny tile creates a “sparkle” effect under light, which makes the space feel lively and more expensive. This is ideal for small bathrooms where the floor is the biggest visual surface in the frame. It also hides minor subfloor issues better than perfectly smooth tile because the pattern breaks up imperfections.
Start by cleaning the floor thoroughly and smoothing any high spots; the adhesive needs flat contact. Dry-lay a small section to confirm direction and spacing, then peel back a few inches at a time while pressing firmly with a roller. Cut edges with a utility knife and straightedge, then seal seams if the product recommends it. Finish by reinstalling base trim or caulking the tile edges with mold-resistant bathroom caulk.
Use a primer or leveling patch if your floor is porous; it improves adhesion and reduces lifting at corners.
Don’t install over waxed or dusty floors — the tiles will lift within weeks.
6. Painted half-wall with beadboard and a matte finish
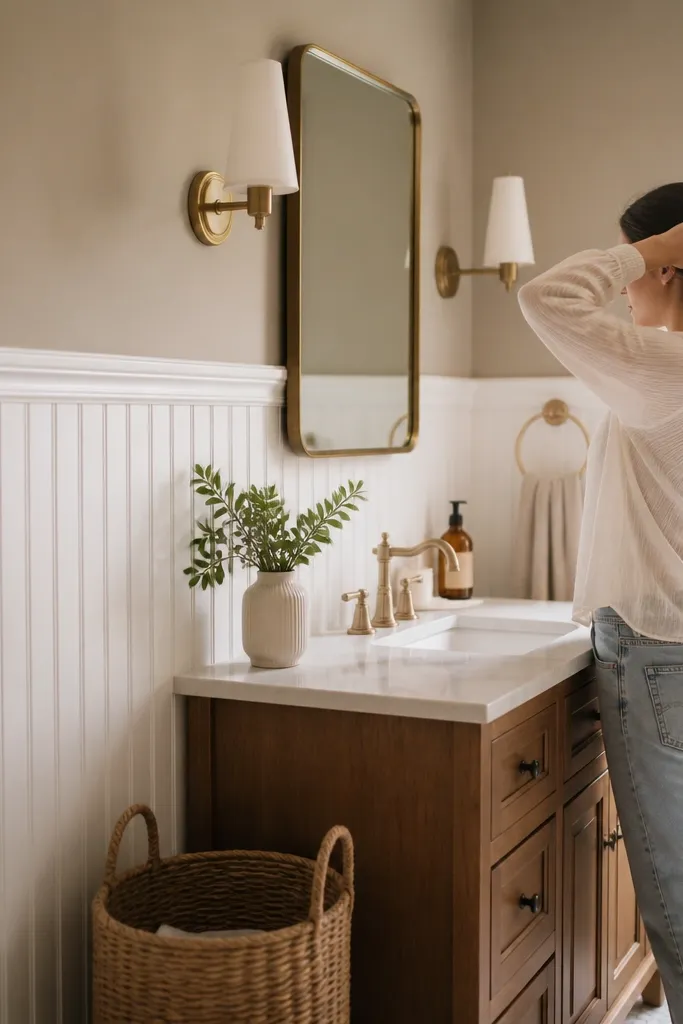
Half-wall beadboard is a classic move that looks intentional when you keep the paint finish matte and the colors tight. It adds texture without overwhelming the room, and it frames the mirror and vanity area in a way that photographs well. Pick a crisp white beadboard and a soft warm color for the upper wall, like greige-taupe or light greige with a beige undertone. The beadboard also gives you a natural place to mount towel hooks or a small shelf. This works best in bathrooms where you want a clean, cottage-leaning vibe but still want the room to feel bright.
Measure the height for the half-wall so it lands just under the mirror centerline when you view the room straight on. Install beadboard panels over clean, flat drywall, then caulk seams and nail edges if required by your panel system. Prime bare wood and cut edges, then paint with a bathroom-rated matte or satin finish on the walls and a semi-gloss or satin on the beadboard for durability. Caulk the top and bottom edges so water splashes don’t creep behind.
Use a semi-gloss paint on beadboard edges that get touched; it wipes clean without losing the matte look overall.
Don’t choose a glossy wall paint — it reflects light in small rooms and makes imperfections obvious.
7. Wallpaper only behind the mirror with a water-resistant topcoat
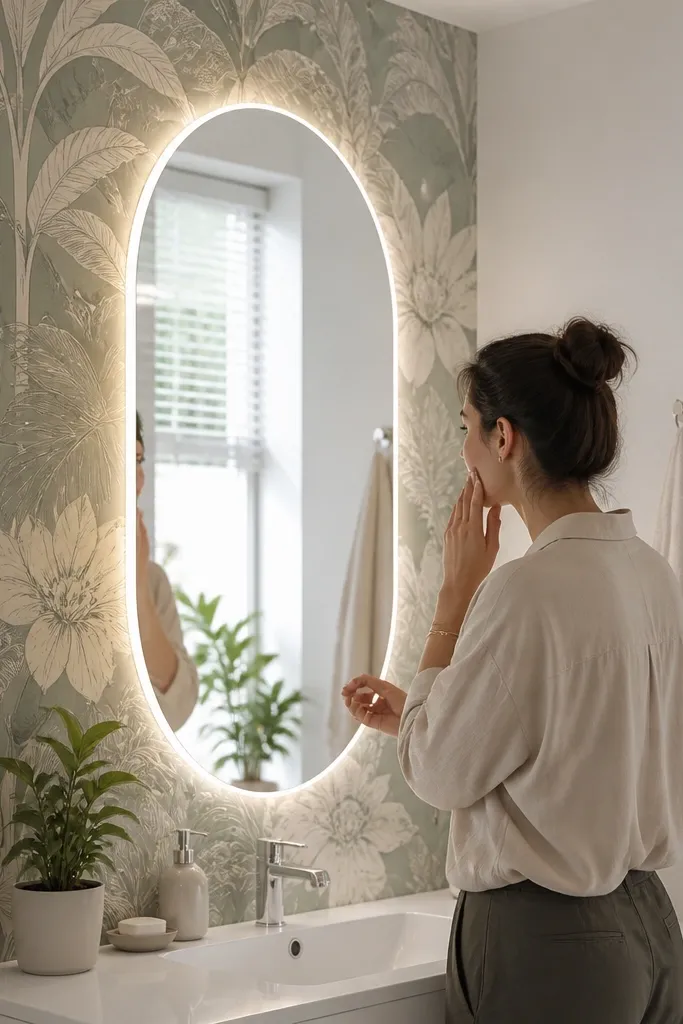
Clean and smooth the wall so the wallpaper lays flat. Cut the panel so it fits behind the mirror area with a 1/4 inch margin for trim, then apply paste or peel-and-stick according to the product instructions. Let it set fully, then apply a compatible clear sealer in thin coats, especially around seams. Finish by trimming edges cleanly and caulking the wallpaper-to-mirror gap with paintable acrylic caulk.
Wallpaper behind the mirror makes the bathroom feel custom while keeping the rest of the room calm. Pick a pattern with large motifs and a limited palette so it reads crisp at a distance; tiny busy patterns look noisy in small spaces. To keep it bathroom-safe, use a water-resistant wallpaper and seal it with a clear topcoat made for that surface. This is a great option when you want a high-style look without retiling. The mirror makes the wallpaper look like a design feature, not a risky experiment.
Skip thisDon’t wallpaper the entire bathroom if your ventilation is weak; do the mirror zone instead.
Editor's noteChoose a pattern that repeats cleanly — mismatched repeats show up fast in mirror light.
8. Matte black plumbing hardware swap with matching towel bar
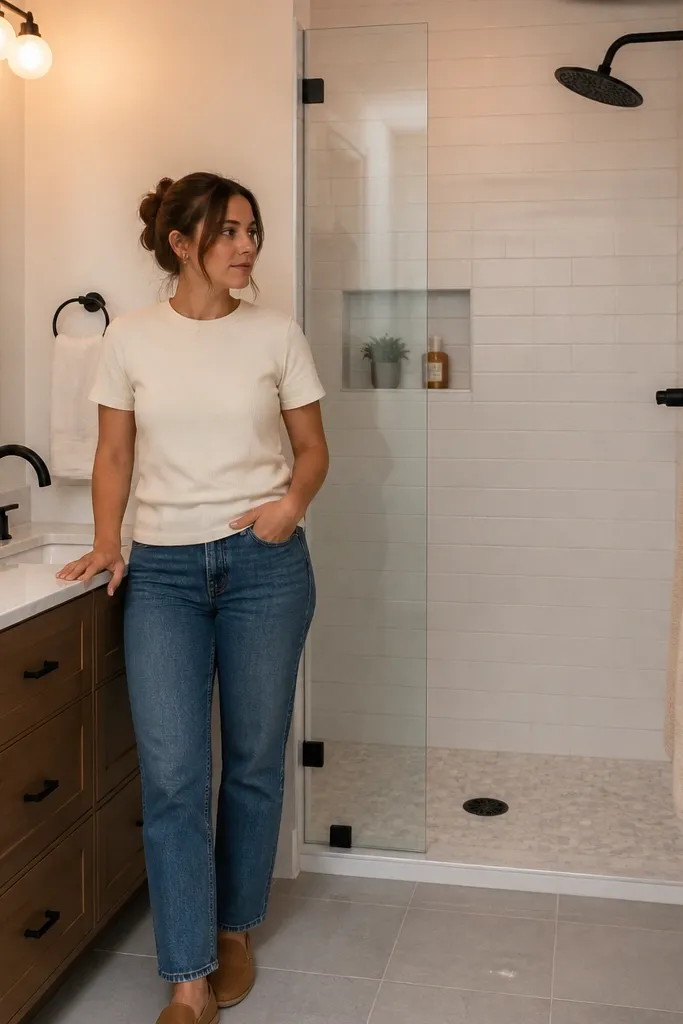
Hardware changes are the easiest way to make a small bathroom look upgraded in a single weekend. Matte black is especially good in small spaces because it creates strong contrast against light walls and bright tile. Replace the faucet, drain cover, shower head, and towel bar so the finish reads consistent. Add a matching toilet paper holder and ring for a clean, designed look. This is a smart move when your layout is fine but everything looks dated or mismatched.
Start by listing the exact parts you need: faucet model, drain type, and towel bar mounting spacing. Turn off water, remove old fixtures, and clean the mounting surfaces thoroughly. Install new fixtures using plumber’s tape where the manufacturer recommends it and use silicone rated for bath around penetrations. Mount the towel bar and accessories using a stud finder and wall anchors rated for the weight; then tighten everything evenly and check alignment before final tightening.
Bring a photo of your current hardware to the store so you match finishes and avoid “almost black” mismatches.
Don’t mix polished chrome and matte black — it looks accidental in small bathrooms.
9. LED mirror cabinet with hidden storage and frameless look
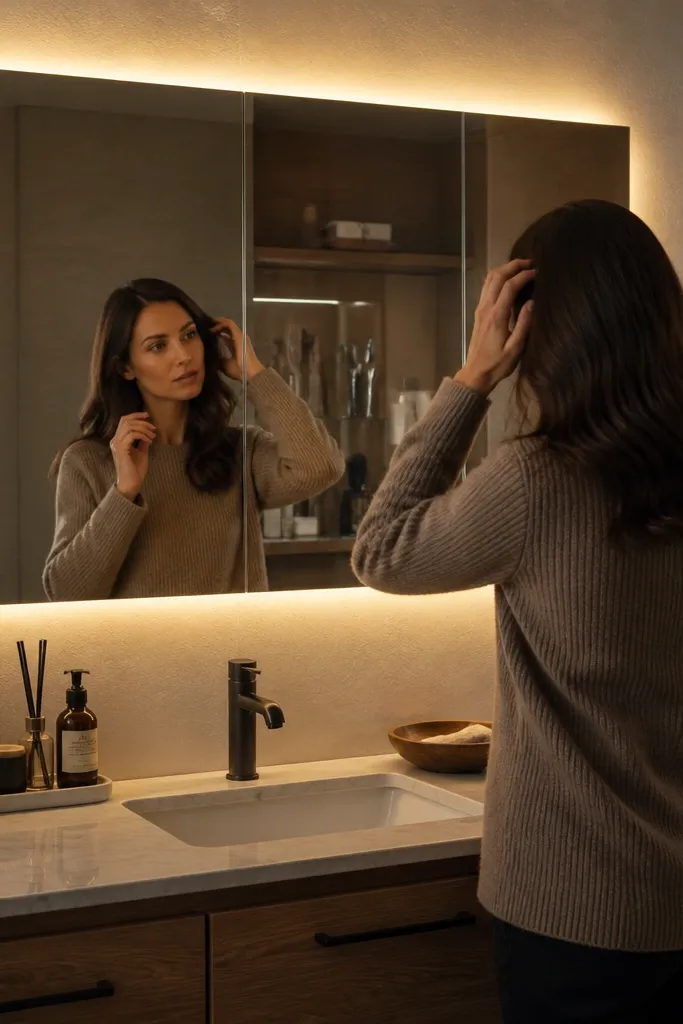
An LED mirror cabinet gives you storage without stealing floor space, and it looks sleek in small bathrooms. The frameless or thin-frame look keeps the wall feeling open, while the cabinet hides daily clutter like backup toothbrushes and hair tools. Choose a model with anti-fog heating and side or top lighting that doesn’t create harsh glare. This is a good choice when your vanity cabinet is small or when you keep pulling open drawers that don’t hold much. The best part is that it improves the look every day, not just after the remodel is done.
Measure the wall area and confirm you can run power to the cabinet location. If you’re replacing a simple mirror, check stud placement and wiring access; some cabinets need a junction box. Install mounting brackets, level the cabinet, then connect wiring through a proper junction box following the included diagram. Seal the perimeter if the unit calls for it, and adjust shelves after the cabinet is secured and powered on.
Pick a cabinet with a bright but diffused light, not a single exposed LED strip that creates glare streaks.
Don’t mount it over uneven tile edges; it will sit crooked and catch light unevenly.
10. Vanity top upgrade to a lighter stone-look with clean overhang
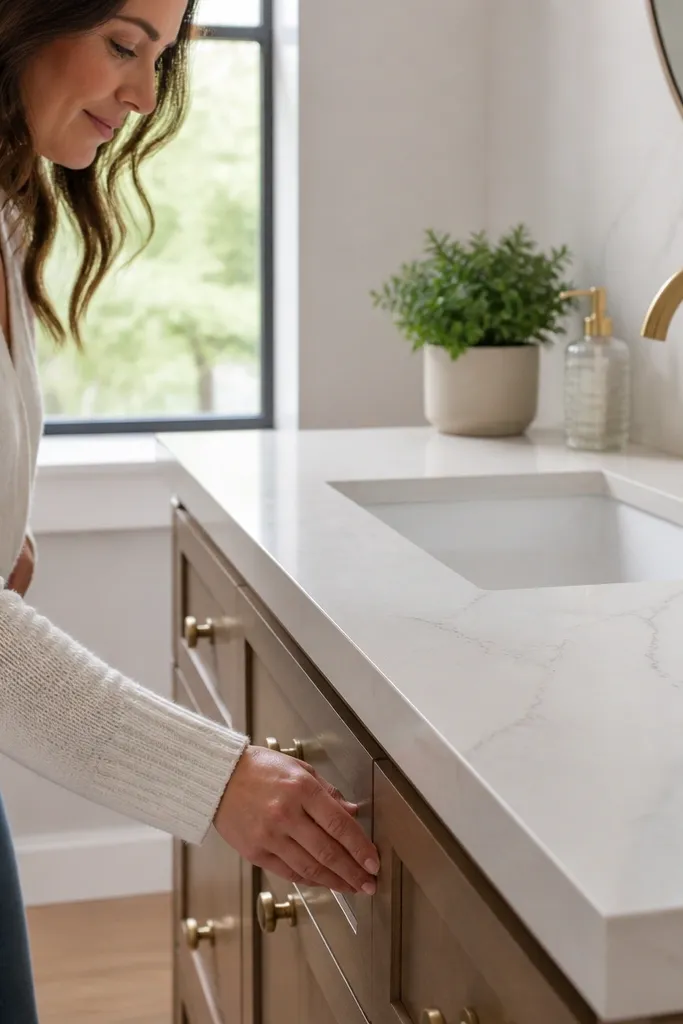
Measure the vanity opening and confirm the top thickness and overhang you want. Order a pre-fabricated top that matches your faucet spread and sink cutout dimensions, or use a local shop to template it. Remove the old top, clean the cabinet surface, then set the new top with a thin bead of silicone where it contacts the vanity. Install the faucet and sink, then run a continuous bead of silicone around the sink and along the backsplash edge if included.
A lighter vanity top makes the whole bathroom feel calmer and brighter because it reflects light instead of absorbing it. Stone-look quartz in a warm white, soft gray, or light greige reads clean in small spaces and pairs well with both black and brushed brass-style hardware. The “clean overhang” matters because it visually narrows the sink zone and reduces bulky edges. If you’re keeping your existing vanity cabinet, swapping the top is one of the highest visual-return upgrades. It also lets you refresh the sink shape for a more modern look.
Skip thisDon’t reuse old caulk — scrape it fully so the new top seals evenly.
Editor's noteChoose a sink with a narrower rim so the sink area looks lighter in photos.
11. Shower curtain to glass-look: install a simple inline panel
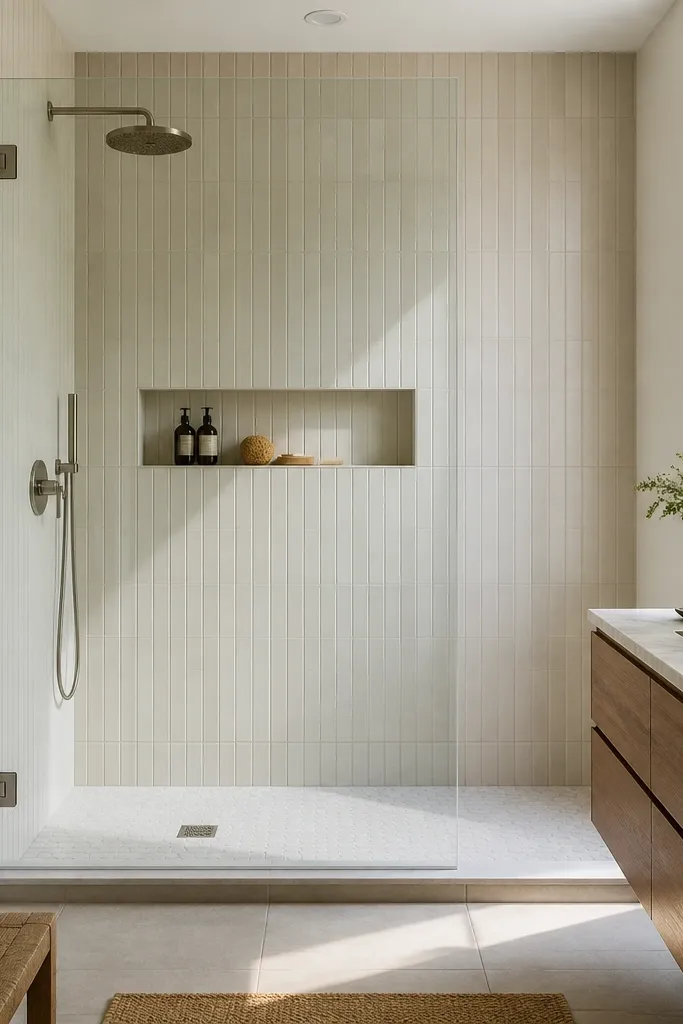
Measure the shower opening width and height, then choose an inline panel sized for your track or wall mounting. Install wall anchors into studs for stability, then mount the hinges or channel according to the hardware instructions. Set the panel using a level and tighten gradually so the seal sits evenly. Apply clear silicone at the contact points and let it cure before using the shower.
Replacing a bulky shower curtain setup with a clear inline glass panel makes the bathroom look bigger because it removes a fabric block from the center of the frame. The clear panel keeps lines crisp and lets tile and niche details show. Go for a simple, frameless look with minimal metal — it reads modern and clean. This works well in small bathrooms where the shower area is visible from the doorway. The aesthetic is brighter too because light passes through the clear panel instead of absorbing on dark curtains.
Skip thisDon’t mount into drywall without studs or proper anchors; the panel will wobble.
Editor's noteUse a squeegee after showers — a clear panel stays clear longer than you think if you wipe it right away.
12. Vertical subway tile in the shower with a matching bullnose
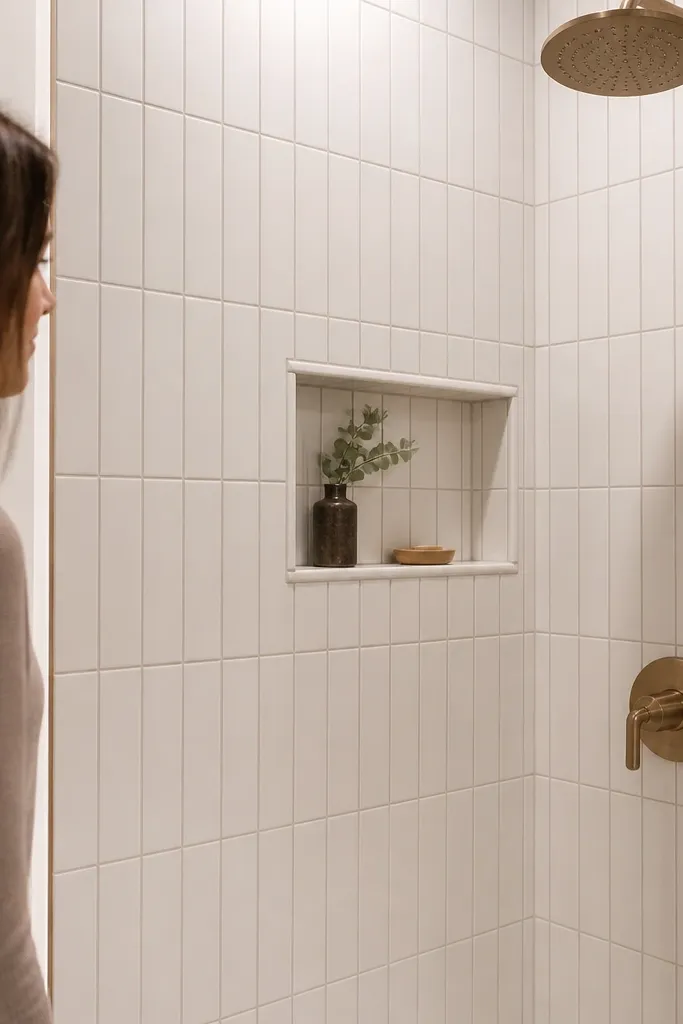
Vertical subway tile creates height, which is exactly what small bathrooms need. Instead of the classic horizontal subway look, go vertical and keep grout lines thin and consistent. Use a matching bullnose or a trim profile on the edge where the wall meets the niche or bench so the corners read finished. This style looks crisp and gives the shower a spa-like, photo-friendly geometry. It’s a solid choice when you have a standard tub/shower and want a clean upgrade without going full custom tile patterns.
Start by planning tile layout from the shower corners so you don’t end with a weird skinny cut at eye level. Use backer board or waterproof wall panels for the shower area, then set tiles with a thinset appropriate for wet areas. Keep a 1/16 to 1/8 inch grout joint and use spacers to maintain straight lines. Finish by installing bullnose trim at edges and waterproofing all seams before grouting.
Use a laser level if you want truly straight vertical lines; small bathroom tiles show crookedness fast.
Don’t mix tile sizes across the shower wall; it makes the grout lines look uneven.
13. Matte white wall tile with warm grout for the vanity zone
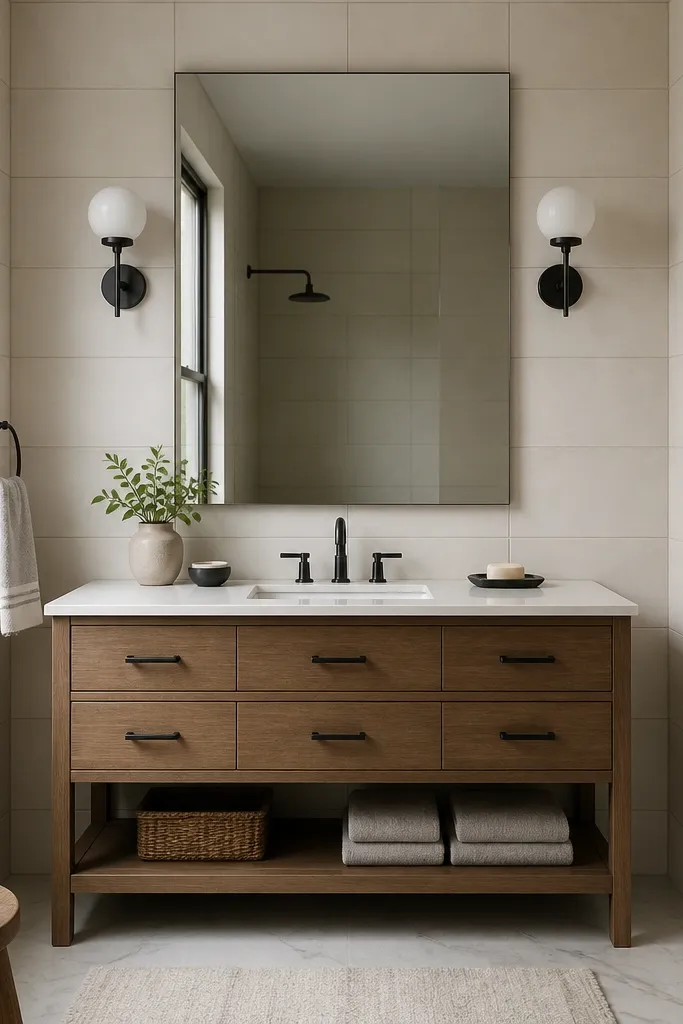
A matte white tile with warm grout is one of the cleanest ways to make a small bath feel brighter without looking sterile. Matte finishes hide micro-scratches and water spots better than glossy tile, which matters in bathrooms with frequent use. Warm grout — like light greige — keeps the room from reading icy. Keep the tile coverage focused behind the vanity and up around the mirror so you get a photogenic focal area, not a full room overhaul. This idea works when your walls are currently painted and you want a more durable, upscale look.
Remove old wall decor and patch any holes, then prime if you’re tiling on drywall. Use a moisture-resistant backer board if needed, especially behind a sink where splashes happen. Set matte tiles with a thinset, using consistent spacers, then grout after the thinset cures. Seal grout if your grout requires it, and caulk the changes of plane where tile meets sink trim or mirror trim.
Choose grout that’s 1-2 shades warmer than the tile so the tile edges look softer instead of harsh.
Don’t use bright white grout with warm fixtures; it reads stark and cheap-looking fast.
14. Floating shelf rail for towels and a tiny plant corner
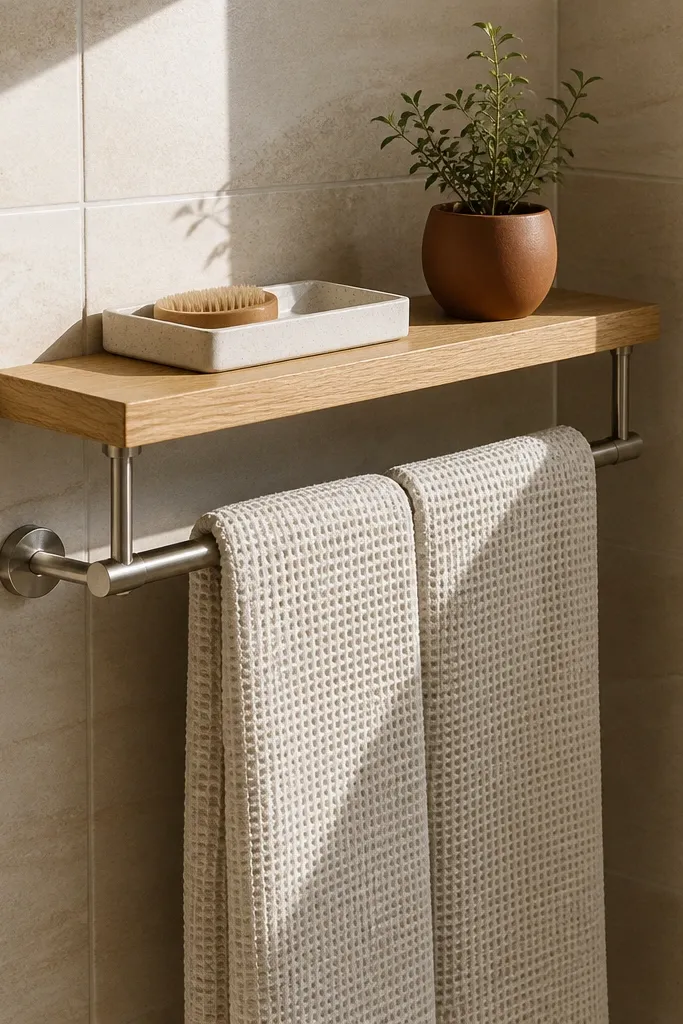
Find studs or plan for heavy-duty wall anchors rated for the shelf weight. Mark your shelf heights so the towel bar sits around 48-52 inches from the floor for easy grab, then mount the rail brackets level. Install shelves, then add a small backer or lip to keep items from sliding. Finish by mounting a towel bar or rail under one shelf and test load with a couple of folded towels before styling.
You can make a small bathroom look staged by adding vertical storage that also creates styling space. A floating shelf rail system lets you hang towels at one height and place a small tray or plant at another without cluttering the counter. Pick shelves in light oak or white laminate, then match towel hardware in the same finish as your faucet. This is a great choice when you have no linen closet and your counter gets crowded. It also photographs well because the shelves create tidy lines and a deliberate focal point near the mirror.
Skip thisDon’t mount shelves too high; if the shelf line rises above the mirror, it fights the layout instead of framing it.
Editor's noteUse a tension rod or a small tray for hair tools — the shelves look cleaner when everything has a home.
15. Recessed vanity lighting with a warm dimmable bulb option
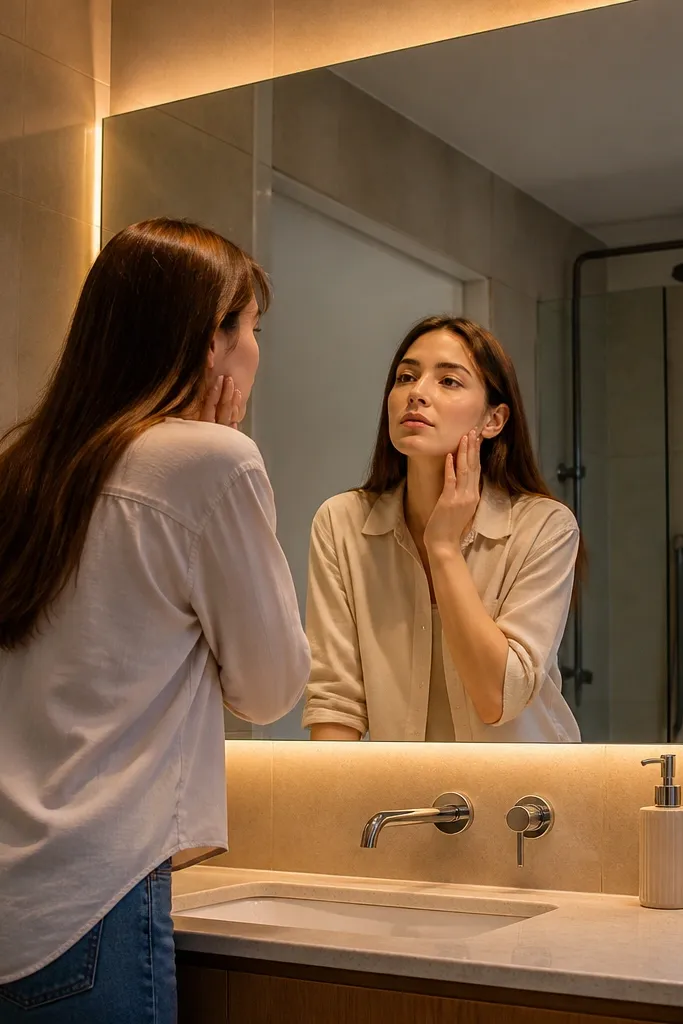
Turn off power at the breaker and confirm you can access wiring in the wall or ceiling. Decide on fixture placement so the light hits the mirror face area — generally the light should be centered around the mirror and not too far above it. If you’re adding recessed cans, cut holes with the template, install housings, and connect wiring with wire nuts and proper grounding. Test before finishing drywall, then paint or patch the ceiling and install trims. For a dimmer, choose a compatible dimmer switch rated for your fixture type.
Lighting is the difference between a small bathroom that looks flat and one that looks dimensional. Recessed lighting around the mirror or a low-profile vanity light gives even illumination across faces and reduces glare on tile. Choose warm lighting and use a dimmer if your wiring allows it; the room looks better at night, and photos look less harsh. This idea works when you already have a mirror but the current overhead light makes shadows under eyes. It also pairs well with any of the mirror and tile ideas on this list.
Skip thisDon’t use cool daylight bulbs; they make small bathrooms feel smaller and skin looks gray.
Editor's noteAim for even coverage across the mirror, not a hotspot; hotspots make small bathrooms look “spotlit.”
16. Toilet tank cover cabinet with open shelving and matching paint
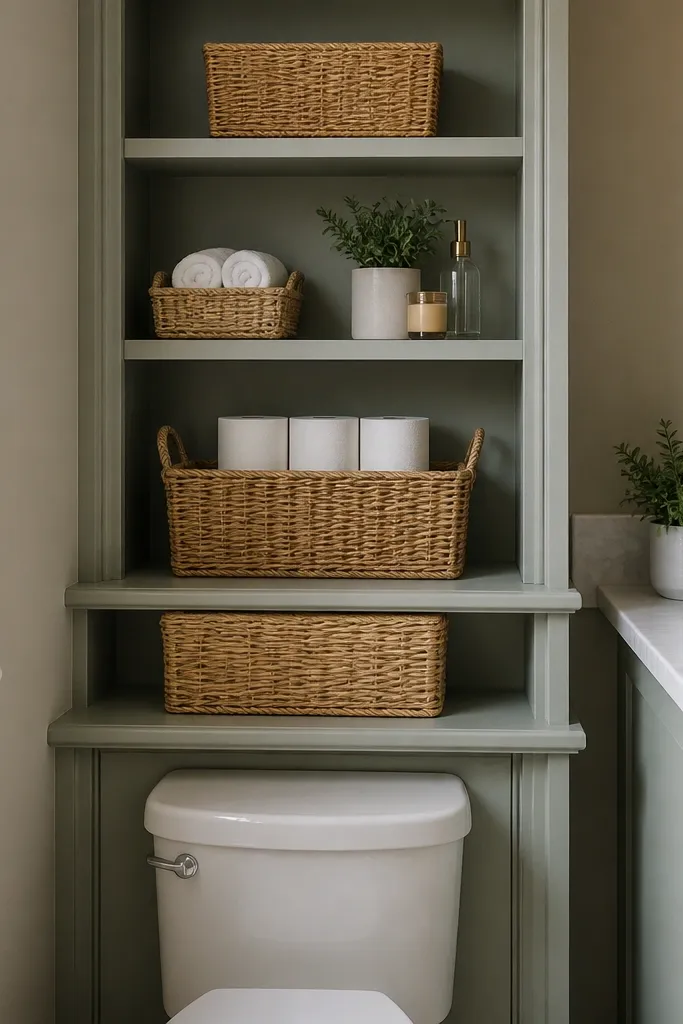
Measure the tank width and height, then choose a cabinet that fits without blocking the tank lid or access panel. If building from scratch, frame a box with a removable top panel and add a backer board or moisture-resistant plywood. Sand, prime, and paint with bathroom-rated paint, then add shelves using adjustable brackets. Install with screws into studs or into the wall anchors specified by your cabinet design, and caulk gaps at the base to keep it clean.
A toilet tank cover cabinet is the cleanest way to add storage without eating floor space. It hides the tank, gives you a flat surface for a basket or decor, and adds shelves for spare rolls and small toiletries. Make it look built-in by matching the paint color to your vanity or wall trim, and keep the top surface uncluttered. This idea is great for narrow bathrooms where there’s no room for a linen cabinet. It’s also photogenic because it turns an ugly necessity into a designed corner.
Skip thisDon’t block the access panel; you need a way to reach the fill valve and shutoff.
Editor's noteUse open shelves for baskets with matching liners so the storage still looks neat in photos.
17. Corner ladder shelf with a towel wrap and small baskets
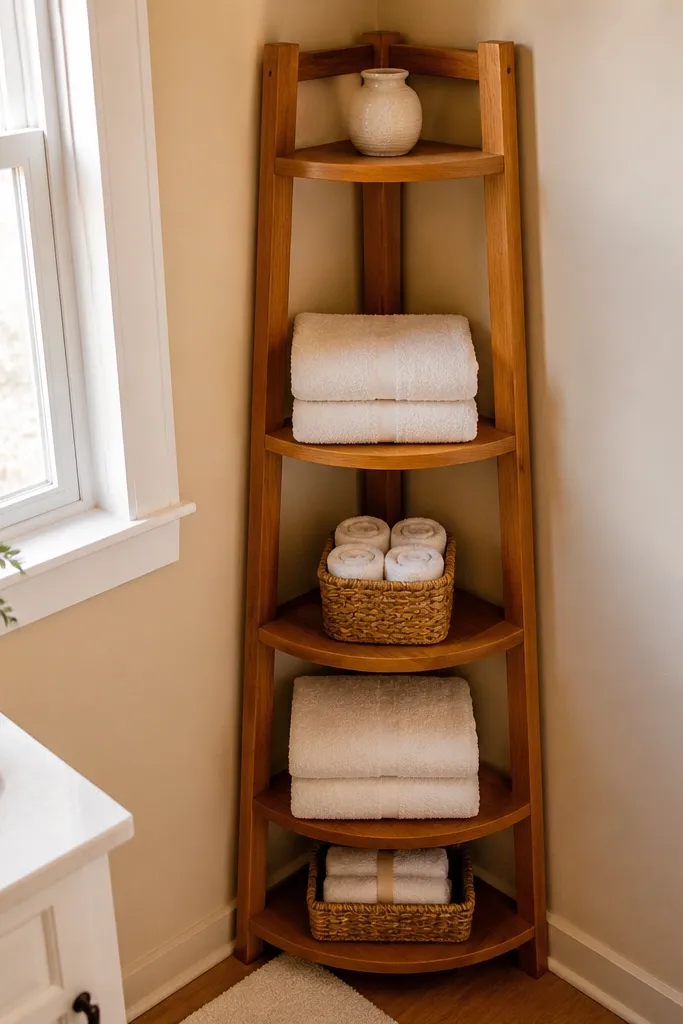
A slim corner ladder shelf looks airy because it uses vertical space and leaves the center of the room open. It’s a perfect small-bath move when your vanity is short and you need somewhere to stash backups. Choose a ladder with wide steps so towels fold neatly, then style it with two baskets and one small decor piece. This look is especially good in bathrooms with a narrow footprint because it adds height without filling the floor with bulky cabinets. The result reads intentional and organized, not cluttered.
Choose a ladder shelf width that fits the corner without colliding with the door swing, then check clearances around the toilet. Level the base and mount the top of the ladder to a stud or use heavy-duty anchors rated for the weight. Place baskets on the middle rungs and keep the top open for a small tray. Anchor baskets so they don’t slide, then wrap towels around a small rod or use a towel tie so they look tidy.
Stick to one basket color and one towel color family; it keeps the corner from looking chaotic.
Don’t overload the lower rungs; sagging shelves ruin the clean look fast.
18. Monochrome floor tile with micro pattern and matching trim
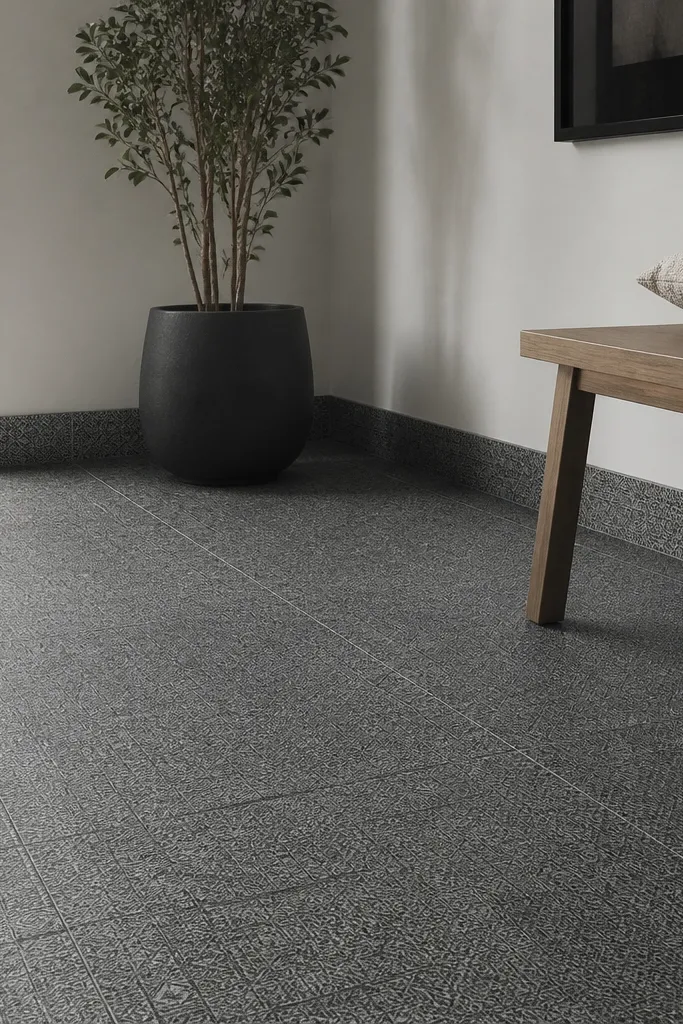
Remove existing flooring down to the subfloor and check flatness; tile needs a smooth plane. Install underlayment or backer board as required by your tile type, then layout dry to find the best center alignment. Set tile with the correct thinset and use spacers to keep joints consistent. Trim the edges neatly and finish with a matching baseboard or tile trim profile so the floor transitions look crisp.
Monochrome flooring is a cheat code for small spaces. When the floor and the wall trim share a similar tone, the room looks continuous and fewer edges show up in the frame. Choose a micro pattern — think tiny linear or subtle geometric — so the tile looks interesting up close but doesn’t overwhelm from a distance. Pair it with matching wall trim or a baseboard color that blends. This idea is best when you’re renovating the floor and want it to look high-end without adding loud colors.
Skip thisDon’t use thick contrasting grout if you want the room to feel bigger.
Editor's noteUse a grout color that matches the tile’s dominant tone for the most seamless look.
19. Single bold accent tile strip behind the vanity
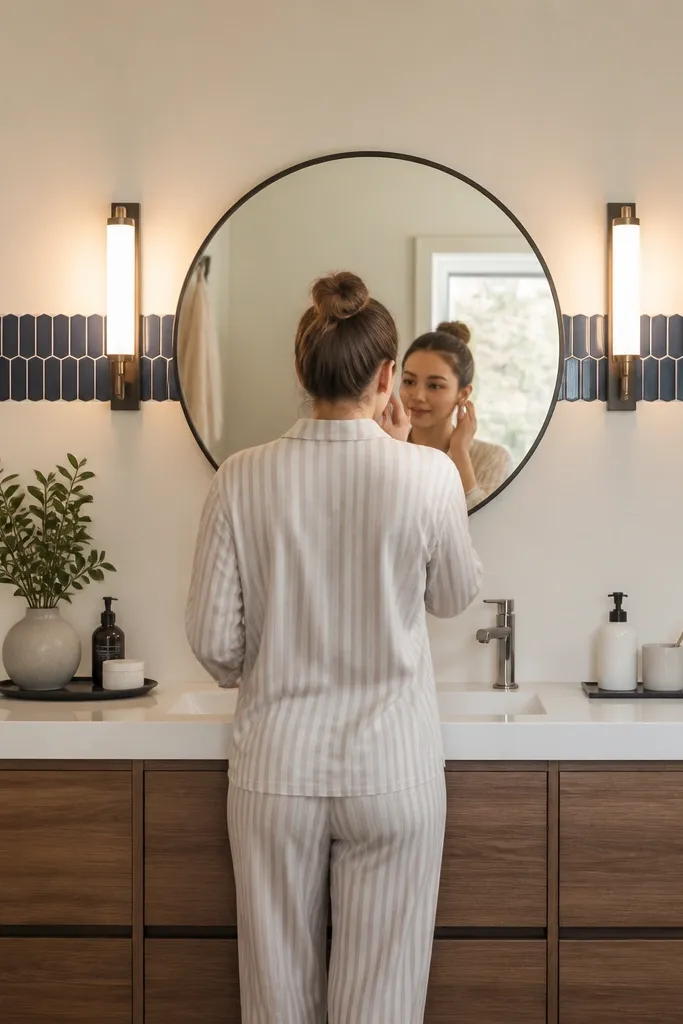
A single accent strip turns a plain wall into a focal point without shrinking the space. Put it at eye height behind the vanity, then keep the rest of the wall paint simple and smooth. Choose an accent tile with texture or a strong pattern but limit it to one horizontal band so it reads clean in photos. This is a smart choice if you want style but don’t want to tile the whole bathroom. The accent strip also helps visually anchor the mirror and makes the vanity area look designed.
Decide the height of the strip by measuring from the vanity counter to where your eye sits when standing in front of the sink. Mark a level line and install a straight ledger board if needed so tiles stay straight. Tile only the strip area, then paint the surrounding walls after the tile is set and cured. Seal grout and caulk the tile edges with a paintable bathroom caulk for a crisp finish.
Keep the accent tile thickness and lippage low; raised edges catch light and look messy in close-ups.
Don’t add a second accent zone elsewhere; two accents in a small bath looks busy.
20. Matte wall paint color in warm greige with crisp trim
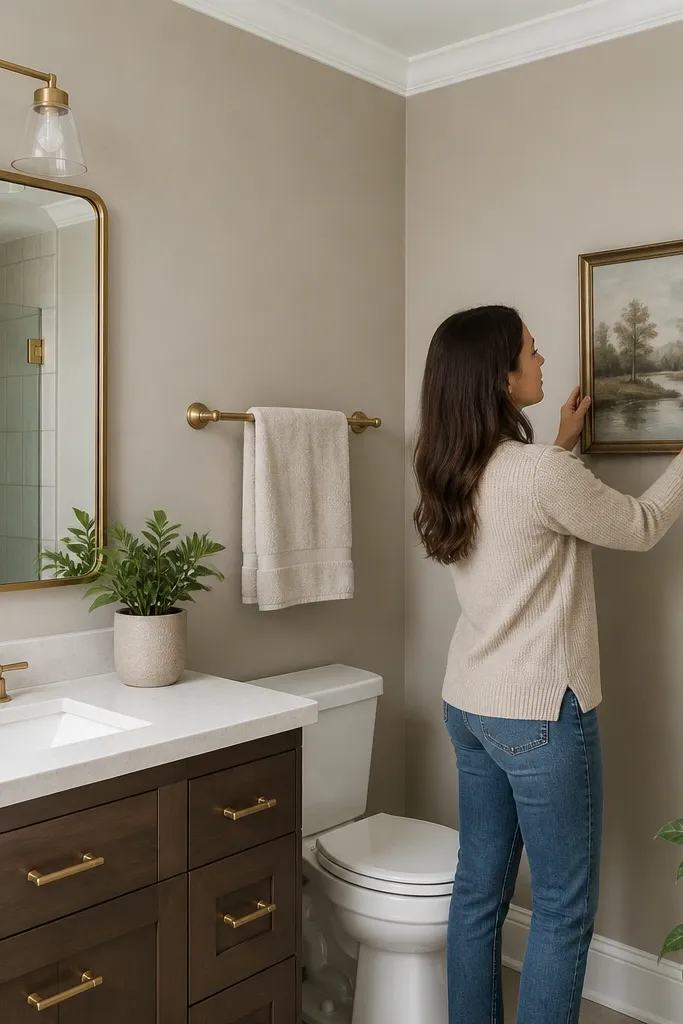
Patch and sand the walls, then clean with a degreaser so paint sticks. Prime stained or glossy areas with a stain-blocking primer. Roll on two coats of warm greige bathroom paint with a high-quality roller cover, letting it dry fully between coats. Cut trim with painter’s tape and paint trim in a satin or semi-gloss for wipeability. Finish by touching up caulk lines around the tub edge, window trim, and baseboards.
Paint is the fastest way to make a small bathroom look intentional, and warm greige is the most forgiving color when you have mixed metals or tile undertones. Use a bathroom-rated matte or eggshell on the walls so the finish looks smooth in photos. Keep trim and ceilings a crisp white in a semi-gloss or satin so the lines stay sharp. This approach makes the room feel clean and bright without needing a full tile overhaul. It also helps every other idea on this list look better because the paint stops fighting the fixtures.
Skip thisDon’t pick a gray that looks blue in daylight; it makes small bathrooms feel colder.
Editor's noteUse a small sample test card on the mirror wall and view it at night; warm greige can shift depending on bulb color.
21. Slim wall-mounted medicine cabinet with mirrored doors
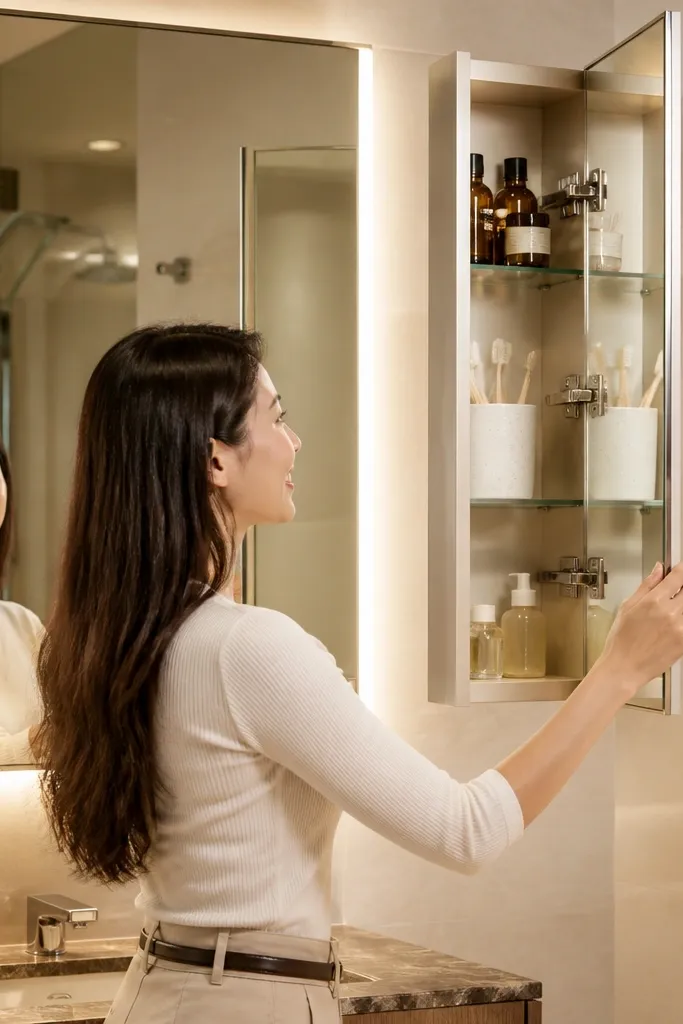
A slim mirrored medicine cabinet adds storage while doubling the mirror effect. In small bathrooms, you want storage that doesn’t eat counter space, and mirrored doors make the cabinet visually disappear. Choose a cabinet with soft-close hinges and a layout that holds toothbrushes, small bottles, and makeup without turning into a drawer mess. This idea works best when you already have a decent mirror or when the vanity is so small you can’t fit a large mirror plus storage. It also photographs well because it adds a vertical shine without clutter.
Measure the wall space above the vanity and confirm it won’t hit the faucet or light fixtures. Find studs and plan mounting height so the bottom edge lands around 55-60 inches from the floor. Install mounting brackets, then secure the cabinet and check the door swing. Fill any gaps with paintable caulk and wipe clean around the edges so it looks crisp against tile or drywall.
Pick a cabinet with adjustable interior shelves so you can fit irregular bottles without forcing them.
Don’t mount it too high; if the bottom edge climbs near the top of the vanity light, it looks cramped.
22. Matte black towel ladder hooks on a single wall panel
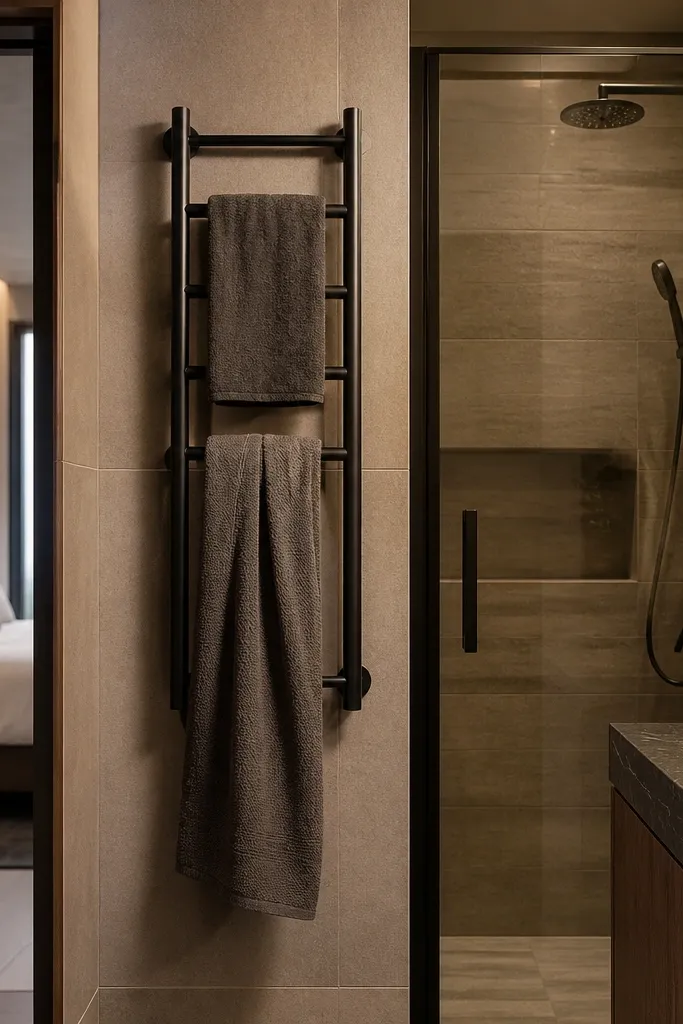
Choose a towel ladder hook bar sized for your wall — measure so the lowest hook clears the vanity top and the highest hook clears any cabinets or mirror edges. Locate studs and mount with screws directly into framing; if you must anchor to drywall, use heavy-duty anchors rated for the weight. Level the hardware, pre-drill pilot holes to prevent wall cracking, and tighten evenly. Hang towels with the same fold style so the visual stays consistent in photos.
Hooks and rails can look messy if they’re scattered, but a ladder-style hook bar creates a neat vertical rhythm that looks intentional. Matte black keeps it modern and ties into faucets and shower hardware. Put it on the wall closest to the shower or door so towels hang where you want them, and keep the rest of the wall simple. This works well in bathrooms with no linen closet because it gives you a “home base” for everyday towels. The look is clean and photogenic because the hardware line is strong and consistent.
Skip thisDon’t mount hooks where towels block the door swing; you lose floor and wall function immediately.
Editor's noteUse one towel fold style and keep the same towel color family; it makes the wall look styled instead of random.
23. Slim vanity with integrated sink and open toe-kick
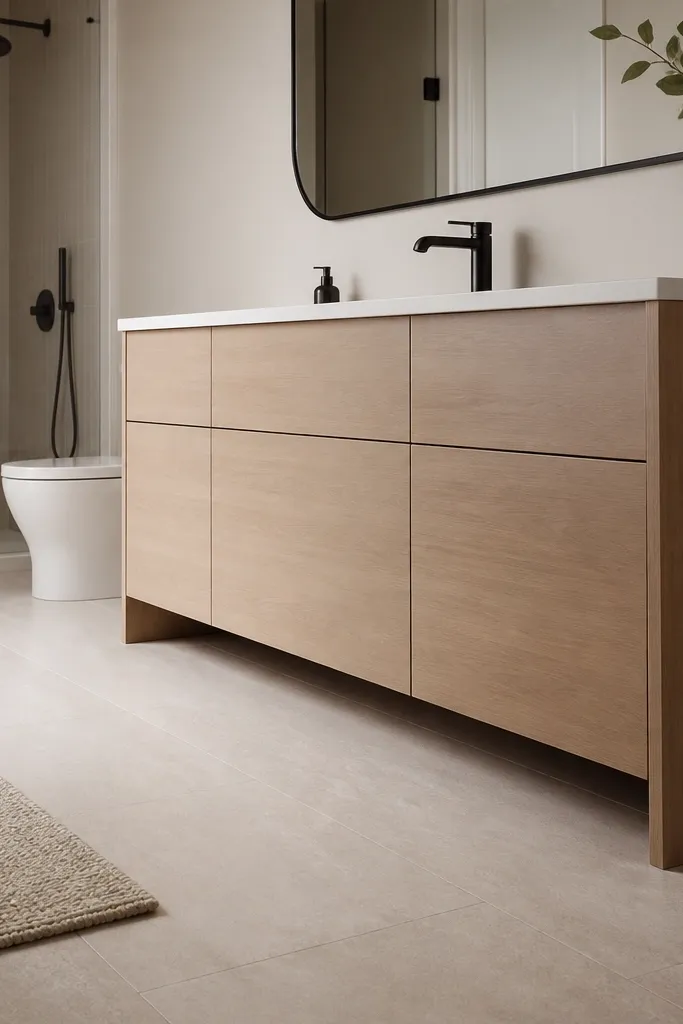
Measure the available wall width and account for the door swing and clearance to the toilet. Choose a vanity size that leaves at least 15-18 inches of clear walking space where you need it most. Install plumbing as required, then set the vanity level and secure it to studs or a proper mounting backer. Caulk around sink edges, connect supply lines, and test for leaks before finishing the trim.
A slim vanity with an integrated sink changes the whole bathroom’s silhouette. Less bulk around the toe-kick and a cleaner sink shape make the floor look more open, which is exactly what small bathrooms need. Choose a vanity width that fits your room — in small spaces, 18-24 inches is a common sweet spot for a single-person bathroom. The integrated sink also reduces grime lines and gives a smooth, modern look. This idea is great when your current vanity feels too wide and visually heavy.
Skip thisDon’t choose a vanity that’s too deep; deeper vanities block leg room and make the room feel tighter.
Editor's notePick a vanity with drawers instead of cabinet doors; drawers keep small items from turning into a clutter pile.
24. Tub surround paint refresh with tile-like finish
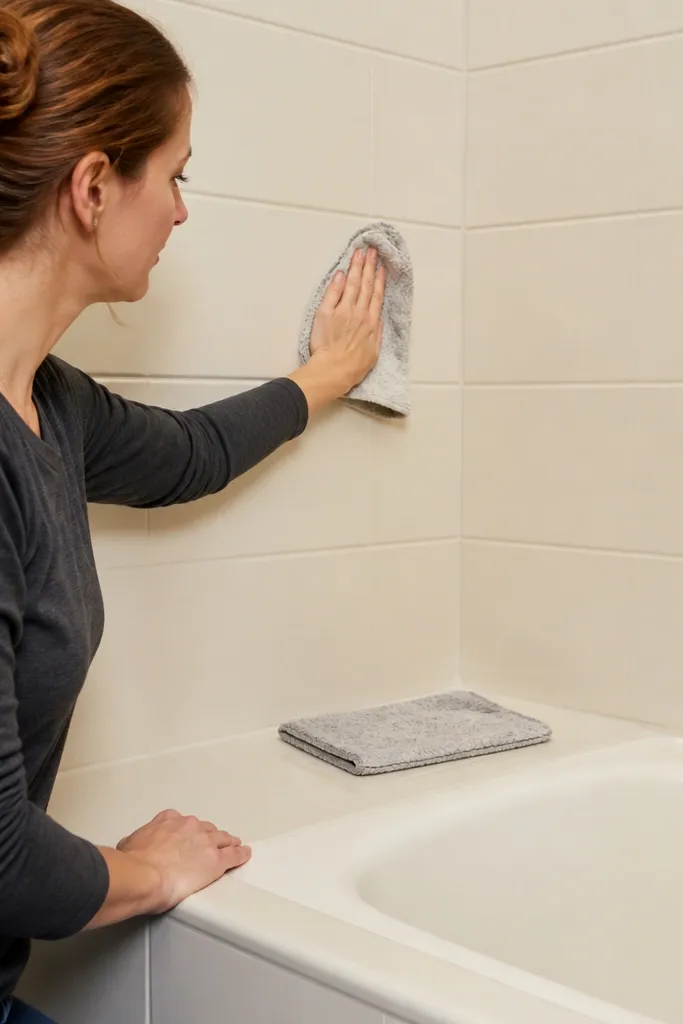
Clean and degloss the tub surround thoroughly, then repair chips and sand smooth. Mask off edges and protect the floor with plastic and tape. Apply the primer from the kit, then roll on thin coats of the topcoat using foam rollers to reduce brush marks. Allow the full cure time before heavy use, and avoid steam-heavy showers until it’s properly cured. Re-caulk around fixtures with bathroom-rated silicone after the paint cures if the system requires it.
If you have a tub surround that’s tired but solid, a paint system designed for glossy surfaces can make it look new without tearing everything out. The goal is a smooth, wipeable finish that reads like a clean tile surface in photos. Choose a bathroom paint system meant for tub and tile and match the color to your wall scheme — soft white, warm white, or light greige. This is a strong option when you need an aesthetic upgrade quickly and you don’t want to deal with full waterproofing tile demo. It also helps the bathroom feel brighter because the tub area looks crisp instead of stained.
Skip thisDon’t paint over soap scum or glossy finish; the coating will peel in wet spots.
Editor's noteUse the kit’s recommended roller and cure schedule — rushing cure is the #1 reason painted tub finishes fail.
25. Door mirror with full-length look and warm sconces nearby
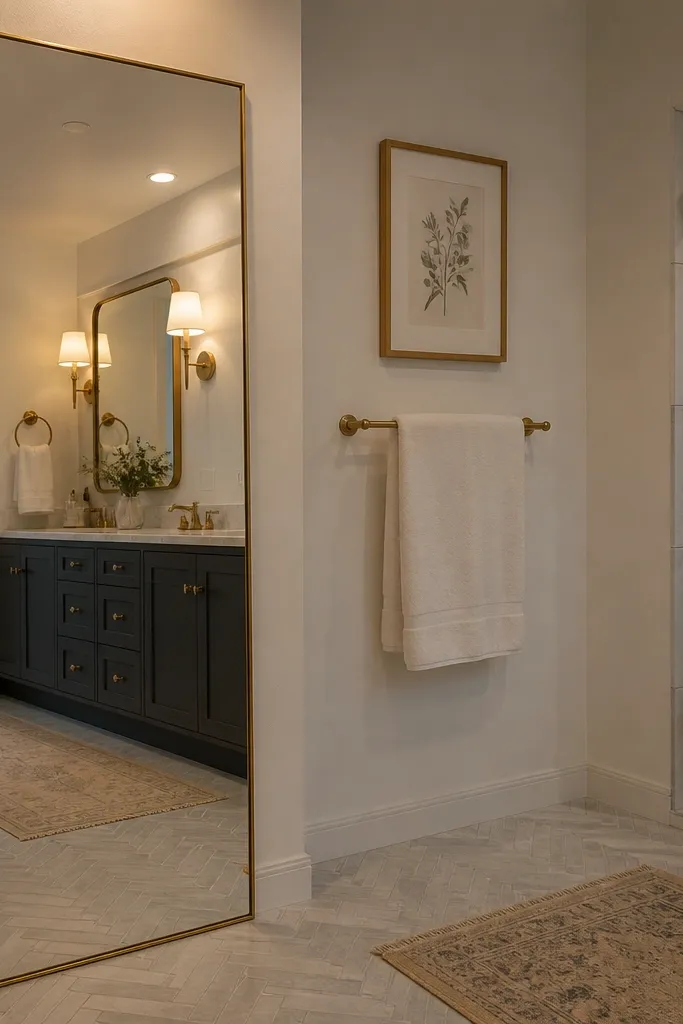
A door mirror is a sneaky way to add reflection without taking up wall space. It also makes the bathroom look larger because the reflection changes the frame — you get more “room” in the photo. Pair it with warm lighting near the vanity so the mirror reflection looks flattering, not dim. Choose a mirror with a thin frame and hang it so it doesn’t hit the towel bar or door hardware. This idea works in tight bathrooms where the wall already has plumbing and you can’t fit another large mirror. It also keeps the vanity area uncluttered.
Measure the door width and confirm you have clearance for hinges and any door swing. Use a mirror designed for door mounting and install with the manufacturer’s hardware, usually screws into the door. Align the mirror so it sits centered and level, then tighten and check the door swing clearance. If you’re adding wall sconces, mount them at eye level so the mirror reflection doesn’t create harsh glare.
Position the mirror so it reflects the brightest part of the bathroom — the tile wall or window — not the toilet.
Don’t mount a heavy mirror with only tape; use mechanical mounting hardware.



